
DMW608BL - Microwave DANBY - Free user manual and instructions
Find the device manual for free DMW608BL DANBY in PDF.


| Product Type | Microwave Oven |
| Brand | Danby |
| Model | DMW608BL |
| Capacity | 0.6 cu ft (estimated) |
| Power Output | 700 Watts (estimated) |
| Power Levels | 10 levels (PL1 to PL10, default PL10) |
| Control Type | Touchpad with LED display |
| Turntable | Removable glass turntable with roller ring |
| Door Safety Lock System | Yes |
| Child Lock | Yes (press and hold STOP/Clear for 3 seconds) |
| Clock | 12-hour display |
| Kitchen Timer | Countdown timer up to 99 minutes 99 seconds |
| Memory Function | Saves up to 2 cooking programs |
| Defrost | By weight (4-100 oz) or by time |
| Menu Cooking | Popcorn, Potato, Pizza, Beverage, Soup, Dinner Plate, Fresh Vegetables, Frozen Vegetables |
| Express Cooking | START/+30Sec adds 30 seconds at current power level |
| Cleaning Inside | Warm sudsy water; avoid abrasive cleaners |
| Cleaning Outside | Mild non-abrasive detergent; no ammonia or alcohol |
| Grounding | 3-prong grounded plug required |
| Warranty | Limited 1-year warranty on functional parts |
| FCC Compliance | ISM equipment, Part 18 |
| Service Contact | 1-800-26-Danby (1-800-263-2629) |
Frequently Asked Questions - DMW608BL DANBY
User questions about DMW608BL DANBY
0 question about this device. Answer the ones you know or ask your own.
Ask a new question about this device
Download the instructions for your Microwave in PDF format for free! Find your manual DMW608BL - DANBY and take your electronic device back in hand. On this page are published all the documents necessary for the use of your device. DMW608BL by DANBY.
USER MANUAL DMW608BL DANBY
Danby Products Limited, Guelph, Ontario, Canada N1H 6Z9 Danby Products Inc. Findlay, Ohio, U.S.A.45840
Printed in China (P.R.C.)
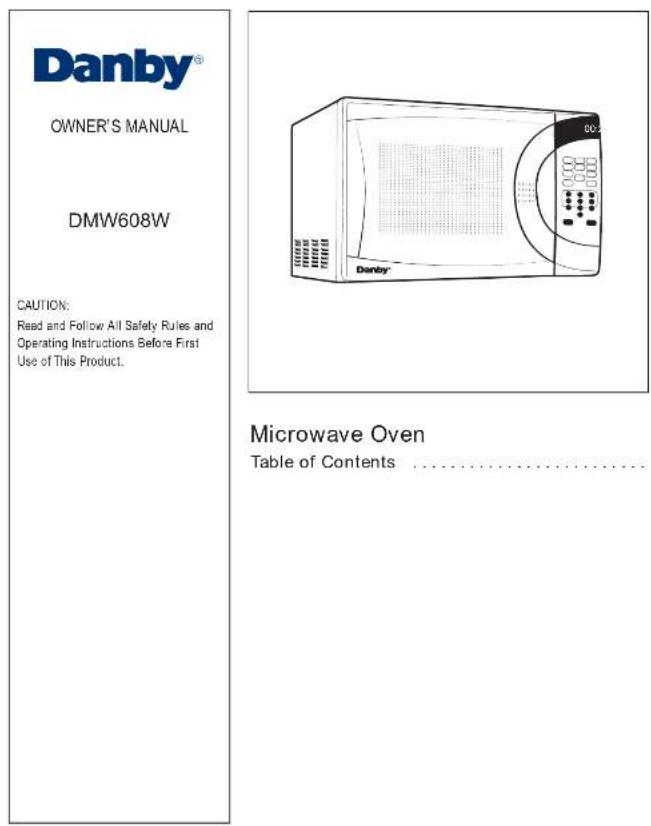
Danby Products Limited, Guelph, Ontario, Canada N1H 6Z9 Danby Products Inc. Findlay, Ohio, U.S.A.45840
Version 1.04.08rv
Notes
TABLE OF CONTENTS
Important Safety Information
Precautions to Avoid Possible Exposure
to Excessive Microwave Energy 3
Safety Precautions 4
Special Notes About Microwaving 6
Operating Instructions
Features of Your Microwave 10
The Controls on Your Microwave 11
Menu Cooking Guide 12
Start Cooking 14
Changing the Power Levels 15
Defrost Guide 16
Menu Cooking 17
Other Features 20
Helpful Information
Microwave Terms 23
Care and Cleaning 24
If Something Goes Wrong
Before Your Call For Service 25
3
10
23
25
WELCOME
Welcome to the Danby family. We're proud of our quality products and we believe in dependable service.
You'll see it in this easy-to-use manual and you'll hear it in the friendly voices of our consumer service department.
Tel: 1-800-26-Danby
Best of all, you'll experience these values each time you use your microwave. That's important, because your new microwave will be part of your family for a long time.
Start Here!...Before using your Microwave
Write down the model and serial numbers here. They are on a label located on the back of the oven.
Staple your receipt to the inside back cover of this manual. You will need it to obtain service under warranty.
Model number ____
Serial number ____
Date purchased ____
NEED HELP?
Before you call for service, there are a few things you can do to help us serve you better...
Read this manual
It contains instructions to help you use and maintain your microwave properly.
Save time and money
Check the section titled "If Something Goes wrong" before calling. This section helps you solve common problems that might occur. If you do need service, you can relax knowing help is only a phone call away.
If you received a
damaged oven Immediately contact the dealer (or builder) that sold you the oven.
Tel: 1-800-26- Danby
Notes

LIMITED APPLIANCE WARRANTY
This quality product is warranted to be fine from manufacture's defects in material and workmanship, provided that the unit is used under the normal operating conditions intended by the manufacturer.
This warranty is available only to the person to whom the unit was originally sold by Danby Products Limited (Canada) or Danby Products Inc. (U.S.A.) (hereafter "Danby") or by an authorized distributor of Danby, and is non-transferable.
TERMS OF WARRANTY
Plastic parts, are warranted for thirty (30) days only from purchase date, with no ceilings provided.
First Year
During the first twelve (12) months, any functional parts of this product found to be defective, will be repaired or replaced. at warrantor's option, at no change to the ORIGINAL purchaser.
To obtain
It will be the consumer's responsibility to transport the appliance (at their own enclose) to the original retailer (point of purchase) or a service depot for repair. Contact your dealer from whom your unit was purchased, or contact your nearest authorized Darby service depot, where service must be performed by a qualified service technician.
If service is performed on the units by anyone other than an authorized service depot, at the unit is used for commercial application, all obligations of Derby under this warranty shall be void.
Nothing within this warranty shall imply that Danby will be responsible or liable for any spoilage or damage to food or other contents of this appliance, whether due to any defect of the appliance, or its use, whether proper or improper.
EXCLUSIONS
Save as herein provided, Damby, there are no other warranties, conditions, representations or guarantees, express or implied, made or interested by Damby or its authorized distributors and all other warranties, conditions, representations or guarantees, including any warranties, conditions, representations or guarantees, unless any Sale of Goods Act or litigation or status in herdoty expressly excluded. Save as herein provided, Damby shall not be responsible for any damages to persons or property, including the unit itself, however caused or any consequential damages arising from the main line of the unit and by the purchase of the unit. The purchaser does hereby agree to indemnify and he did harm costs. Damby from any claim for damages to persons or property caused by the unit.
GENERAL PROVISIONS
No warranty or insurance herein contained or sell out shall apply when damage or repair is caused by any of the following:
1) Power failure.
2) Damage in transit or when moving the appliance.
3) Improper power supply such as low voltage, defective house wiring or inadequate fuses.
4) Accident, alteration, abuse or misuse of the appliances such as inadequate air circulation in the room or abnormal operating conditions
[cohomely high or low room temperature].
5) Use for commercial or industrial purposes (ic. If the appliance is not installed in a domestic residence).
6) Fire, water damage, theft, war, risk, hostile by a sola of God, such as hurricanes, floods etc.
7) Service calls resulting in customer education.
8). Improper installation use. Buildings-in of a free spreading appliance or using an appliance outlines that is not encraved for outdoor application.
Proof of purchase date will be required for warranty claims, so, please retain bills of sale. In the event warranty service is required, present this document to our AUTHORIZED SERVICE DEPOT.
Warranty Service
Carry-In
Danby Products Limited
PO Box 1778, Guilph. Ontario, Canada NTH 023 Telephone: (019) 573-0633 EAY: (019) 573-049
1-800-263-2629
Danby Products Inc.
PO Box 609. Findlay, Ohio, U.S.A. 45840 Telephone: (413) 426-8327 F&I: (413) 426-8329
[Unreadable]
IMPORTANT SAFETY INFORMATION
READ ALL SAFETY INFORMATION BEFORE USING
FOR YOUR SAFETY
PRECAUTIONS
TO AVOID
POSSIBLE
EXPOSURE
TO EXCESSIVE
MICROWAVE
ENERGY
For your safety the information in this manual must be followed to minimize the risk of fire or explosion or to prevent property damage, personal injury or loss of life.
Do Not Attempt to operate this oven with the door open since open-door operation can result in harmful exposure to microwave energy. It is important not to defeat or tamper with the safety interlocks.
Do Not Place any object between the oven front face and the door or allow soil or cleaner residue to accumulate on sealing surfaces. Do Not Operate the oven if it is damaged. It is particularly important
that the oven door close properly and that there is no damage to the:
1 door (ben1).
2 hinges and latches (broken or loosened).
3 door seals and sealing surfaces.
The Oven Should Not be adjusted or repaired by anyone except properly qualified service personnel.
FEDERAL COMMUNICATIONS COMMISSION RADIO FREQUENCY INTERFERENCE STATEMENT (U.S.A. ONLY)
This equipment generates and uses ISM frequencies and if not installed and used properly, that is in strict accordance with the manufacturer's instructions, may cause interference to radio and television reception. It has been type-tested and found to comply with limits for ISM Equipment pursuant to Part 18 of FCC Rules, which are designed to provide reasonable protection against such interference in a residential installation.
However, there is no guarantee that interference will not occur in particular installations. If this equipment does cause interference to radio or television reception, which can be determined by turning the equipment off and on, the user is encouraged to try to correct the interference by one or more of the following:
• Reorient the receiving antenna of radio or television.
- Relocate the microwave oven with respect to the receiver.
- Move the microwave oven away from the receiver.
- Plug the microwave into a different outlet so that microwave and receiver are on different branch circuits.
The Manufacturer is not responsible for any radio or TV interference caused by UNAUTHORIZED MODIFICATION to this microwave oven. It is the responsibility of the user to correct such interference.
SAVE THESE INSTRUCTIONS
IMPORTANT SAFETY INFORMATION
READ ALL SAFETY INFORMATION BEFORE USING
WARNING
To reduce the risk of fire, burns, electric shock, injury to persons or exposure of excessive microwave energy when using your appliance, follow basic precautions, including the following sections.
SAFETY PRECAUTIONS
- Read and follow the specific "Precautions to Avoid Possible Exposure to Excessive Microwave Energy" on page 3.
- This appliance must be grounded. Connect only to a properly grounded outlet. See "Grounding Instructions" section on page 9.
- Do not operate this appliance if it has a damaged power cord or plug, if it is not working properly, or if it has been damaged or dropped.
-
Do not cover or block any openings on the appliance.
-
Use this appliance only for its intended use as described in this manual. Do not use corrosive chemicals or vapors in this appliance.
- This microwave oven is specifically designed to heat, dry or cook food, and is not intended for laboratory or industrial use.
- Some products such as whole eggs and sealed containers – for example, closed glass jars- are able to explode and should not be heated in this oven.
- Do not store this appliance outdoors.
• Install or locate this appliance only in accordance with the provided installation instructions.
• As with any appliance, close supervision is necessary when the microwave oven is used by children.
- If material inside of the oven should ignite, the oven door should be kept closed, the appliance turned off, the power cord disconnected, or the power shut off at the fuse or circuit breaker panel.
If Something Goes Wrong
Before You Call For Service
Problem Possible Cause What to do
| Oven will not start. A fuse in your home may Replace fuse or reset circuit breaker.be blown or the circuitbreaker tripped. |
| Microwave door is not Ensure that the door is securely closed. closed correctly |
Power surge.
Unplug the microwave oven, then plug it back in.
Plug not fully inserted into wall outlet.
Make sure the 3-prong plug on the oven is fully inserted into wall outlet.
“[::]” appears on display.
The control has been locked.
Press and hold "STOP/Clear" for about 3 seconds to unlock the control.
Things That Are Normal
• Steam or vapor escaping from around the door.
• Light reflection around door or outer case.
• Dimming oven light and change in the blower sound at power levels other than high.
• Dull thumping sound while oven is operating.
- TV-radio interference might be noticed while using the microwave. Similar to the interference caused by other small appliances, it does not indicate a problem with the microwave. Plug the microwave into a different electrical circuit, move the radio or TV as far away from the microwave as possible, check the position and signal of the TV/radio antenna.
If none of the above rectify the situation please contact our customer care department at 1-800-26-Danby (1-800-263-2629)
Care and Cleaning
Helpful Hints
Open the over door a few minutes after cooking to air out the inside. An occasional thorough wiping with a solution of baking soda and water keeps the inside fresh.
NOTE: Be certain the power is off before cleaning any part of this oven.
How to clean the inside
Walls, Floor, Inside Window, Metal and Plastic Parts on the Door Some spatters can be removed with a paper towel, others may require a damp cloth. Remove greasy spatters with a sudsy cloth, then rinse with a damp cloth. Do not use abrasive cleaners or sharp utensils on oven walls. Never use a commercial over cleaner on any part of your microwave.
Removable Turntable and Turntable Support To prevent breakage, do not place the turntable into water just after cooking. Wash it carefully in warm, sudsy water or in the dishwasher. The turntable and support can be broken if dropped. Remember, do not operate the oven without the turntable and support in place.
How to Clean the outside
Do not use cleaners containing ammonia or alcohol on the microwave oven. Ammonia or alcohol can damage the appearance of the microwave.
Outer Case
Clean the outside of the microwave with a sudsy cloth. Rinse and then dry. Wipe the window clean with a damp cloth.
Control Panel and Door
Wipe with a damp cloth. Dry thoroughly. Do not use cleaning sprays, large amounts of soap and water, abrasive or sharp objects on the panel-they can damage it. Some paper towels can also scratch the control panel.
Door surface
It's important to keep the area clean where the door seals against the microwave. Use only mild, non-abrasive detergents applied with a clean sponge or soft cloth. Rinse well.
IMPORTANT SAFETY INFORMATION
SAFETY
SON
(Cont'd)
- Do not use this product near water-for example, in a wet basement, near a kitchen sink, in a wet basement, near a swimming pool, or similar location.
- Keep power cord away from heated surfaces.
- Do not immerse power cord or plug in water.
• See door surface cleaning Instructions in the Care and Cleaning section(s) of this manual. - This appliance should be serviced only by qualified service personnel. Contact nearest authorized service facility for examination, repair or adjustment.
• As with any appliance, close supervision is necessary when the microwave oven is used by children.
To reduce the risk of fire in the oven cavity:
- Do not overcock food.
-
Carefully attend appliance if paper, plastic or other combustible materials are placed inside the oven while cocking
-
Remove wire twist-ties and metal handles from paper or plastic containers before placing them in the oven.
- Do not use the oven for storage purposes. Do not leave paper products, cooking utensils or food in the oven when not in use.
- Do not use the microwave to dry newspapers.
- If materials inside oven should ignite, keep the oven door closed, turn the oven off and disconnect the power at the fuse or circuit breaker panel. If the door is opened.
- Do not let cord hang over edge of table or counter.
- Liquids such as water, coffee, or tee are able to be overheated beyond the boiling point without appearing to be boiling due to surface tension of the liquid. Visible bubbling or boiling when the container is removed from the microwave oven is not always present. THIS COULD RESULTINVERY HOT LIQUIDS SUDDENLY BOILING OVER WHERE A POON OR OTHER UTENSIL IS INSERTED INTO THE LIQUID. To reduce the risk of injury to persons;
1) Do not overheat the liquid.
2) Stir the liquid both before and halfway through heating it.
3) Do not use straight-sided containers with narrow necks.
4) After heating, allow the container to stand in the microwave oven for a short time before removing the container.
5) Use extreme care when inserting a spoon or other utensil into the container.
SAVE THESE INSTRUCTIONS
IMPORTANT SAFETY INFORMATION
SPECIAL NOTES ABOUT MICROWAVING
ARCING
If you see arcing, press the "STOP/Clear" button and correct the problem.
Arcing is the microwave term for sparks in the oven. Arcing is caused by:
• Metal or foil touching the side of the oven.
- Foll not molded to food (upturned edges act like antennas).
- Metal, such as twist-lies, poultry pins, or gold-rimmed dishes, in the microwave.
• Recycled paper towels containing small metal pieces being used in the microwave.
FOODS
- Only cook popcorn in your microwave oven using a special microwave popcorn accessory dish, unless you use popcorn labeled for use in microwave ovens.
- Some products such as whole eggs (with shell), sealed containers, and closed jars –will explode and should not be heated in this microwave oven. Heating these products in the microwave oven could result in injury.
- Do not boil eggs in a microwave oven. Pressure will build up inside egg yolk and will cause it to burst, possibly resulting in injury.
- Operating the microwave with no food inside for more than a minute or two may cause damage to the oven and could start a fire. It increases the heat around the magnetron and can shorten the life of the oven.
- Foods with unbroken outer "skin" such as potatoes, hot dogs, sausages, tomatoes, apples, chicken livers and other giblets, and egg yolks should be pierced to allow steam to escape before cooking.
Helpful Information
Microwave Terms
Term Definition
Arcing Arcing is the microwave term for sparks in the oven. Arcing is caused by :
• Metal or foil touching the side of the oven.
- Foil that is not molded to food (upturned edges act like antennas).
- Metal such as twist ties, poultry pins, gold-rimmed dishes.
• Recycled paper towels containing small metal pieces.
Covering Covers hold in moisture, allow for more even heating and reduce cooking
time. Venting plastic wrap or covering with wax paper allows excess steam to escape.
Shielding In a regular oven, you shield chicken breasts or baked foods to prevent
over-browning. When microwaving, you use small strips of foil to shield thin parts, such as the tips of wings and legs on poultry, which would cook before larger parts.
Standing Time When you cook with regular ovens, foods such as roasts or cakes are
allowed to stand to finish cooking or to set. Standing time is especially important in microwave cooking. Note that a microwaved cake is not placed on a cooling rack.
Venting After covering a dish with plastic wrap, you vent the plastic wrap by turning
back one corner so excess steam can escape.
Operating Instructions
MEMORY
SAVING ONE OR TWO-STAGE PROGRAMS 1 Touch "MEMORY".
2 Touch "POWER" and set the desired Power Level.
3 Enter time using number pad.
4 If finished, touch "MEMORY" to save the program; for two stages, repeat steps 2 to 3 and then touch "MEMORY".
The MEMORY program is useful for saving and storing the cooking requirements of your favorite meals that are not already programmed into the microwave, so you can recall them at the push of a button. You can save up to two programs by pressing "MEMORY". To activate a selected MEMORY program, touch "START/+30Sec.".
Saving a one or two-stage cooking program:
1 Touch "MEMORY". "1" appears on the display
( press "MEMORY" again (three total) and
"2" appears on the display).
2 Touch "POWER" and reduce the Power Level (if required) to the desired strength, or simply continue to step 3 to use the default (100%) power setting.
3 Enter the cooking time length using the number pad.
4 If a second cooking stage is required, repeat steps 2 to 3 and then continue to step 5; if only one stage is required, continue to step 5.
5 Touch "MEMORY" to save the program.
Saving a one or two-stage program including defrosting:
1 Touch "MEMORY". "1" appears on the display
( touch "MEMORY" again (three total) and
"2" appears on the display).
2 Touch "DEFROST" once for Defrost by Weight or twice for Defrost by Time (dFF1 and dFF2, respectively).
3 If you've chosen Defrost by Weight (dEF1), enter the weight (in ounces) using the number pad; if you've chosen Defrost by Time (dEF2), enter the time using the number pad. If nothing more is required, move on to step 6; however, if another stage is required continue to step 4.
4 Touch "POWER" and reduce the Power Level (if required) to the desired strength, or simply continue to step 5 to use the default (100%) power setting.
5 Enter the cooking time length using the number pad.
6 Touch "MEMORY" to save the program.
IMPORTANT SAFETY INFORMATION
SAFETY FACT
SUPERHEATED WATER
Microwaved water and other liquids do not always bubble when they reach the boiling point. They can actually get superheated and not bubble at all. Superheated liquid can bubble up when it is moved or when something like a spoon or tea bag is put into it. To prevent this from happening and causing injury, do not heat any liquid for more than 2 minutes per cup. After heating, let the cup stand in the microwave for 30 seconds before moving it or putting anything into it.
- Avoid heating baby food in glass jars, even with the lid off. Make sure all infant food is thoroughly cooked. Stir food to distribute the heat evenly. Be careful to prevent scalding when warming formula. The container may feel cooler than the milk really is. Always test the milk before feeding the baby.
-
Sponlankane boiling-Undar certain circumstances, liquids may start to boil during or shortly after removal from the microwave oven. To prevent burns from splashing liquid, we recommend the following: before removing the container from the oven, allow the container to stand in the oven for 30 to 40 seconds after the oven has shut off. Do not boil liquids in narrow-necked containers such as soft drink bottles, wine flasks and especially narrow-necked coffee cups. Even if the container is opened, excessive steam can build up and cause it to burst or overflow.
-
Don't defrost frozen beverages in narrow-necked bottles (especially carbonated beverages). Even if the container is opened, pressure can build up. This can cause the container to burst, possibly resulting in injury.
• Hot foods and steam can cause burns. Be careful when opening any containers of hot food, including popcorn bags, cooking pouches and boxes. To prevent possible injury, direct steam away from hands and face. - Do not overcook potatoes. They could dehydrate and catch fire, causing damage to your oven.
- Cook meat and poultry thoroughly-meat to at least an INTERNAL temperature of 160 F (71.1C), and poultry to at least an INTERNAL temperature of 180 F (82.2C). Cooking to these temperatures usually protects against food borne illness.
IMPORTANT SAFETY INFORMATION
SPECIAL NOTES ABOUT MICROWAVING
MICROWAVE-SAFE COOKWARE
Make sure all cookware used in your microwave oven is suitable for microwaving. Most glass casseroles, cooking dishes, measuring cups, custard cups, pottery or china dinnerware which do not have metallic trim or glaze with a metallic sheen can be used. Some cookware is labeled "suitable for microwaving."
- If you use a meat thermometer while cooking, make sure it is safe for use in microwave ovens.
- Do not use recycled paper products. Recycled paper towels, napkins and waxed paper can contain metal flecks which may cause arcing or ignite. Paper products containing nylon or nylon filament should be avoided, as they may also ignite.
- Not all plastic wrap is suitable for use in microwave ovens. Check the package for proper use.
- Some styrofoam trays (like those that meat is packaged on) have a thin strip of metal embedded in the bottom. When microwaved, the metal can burn the floor of the oven or ignite a paper towel.
- Cookware may become hot because of heat transferred from the heated food. Pot holders may be needed to handle the cookware.
• "Bollable" cooking pouches and tightly closed plastic bags should be slit, pierced or vented as directed by package. If they are not, plastic could burst during or immediately after cooking, possibly resulting in injury. Also, plastic storage containers should be at least partially uncovered because they form a tight seal. When cooking with containers tightly covered with plastic wrap, remove covering carefully and direct steam away from hands and face.
- Paper towels, waxed paper and plastic wrap can be used to cover dishes in order to retain moisture and prevent spattering. Be sure to vent plastic wrap so steam can escape.
How to test for a microwave-safe dish:
1 Place in the oven both the dish you are testing and a glass measuring cup filled with 1 cup of water
2 Set the measuring cup either in or next to the dish.
3 Microwave 1 minute at high.
If the dish heats, it should not be used for microwaving. If the dish remains cool and only the water in the cup heats, then the dish is microwave-safe.
Operating Instructions
"START/+30Sec."
If more cooking time is needed...
At any time and for any operation, even while the oven is cooking, touching the "START/+30Sec." pad adds 30 more seconds of cooking time each time the pad is pressed.
Note: The added cooking time will use the same power level that is currently being used by the microwave. For example, if the Power Level is currently set to 50% ("PL5" on the display), then the added cooking time will use a Power Level of 50%.
"STOP/Clear"
Clears any previous setting if the program has not started, and pauses the program if it has started. Once a program is complete, pressing the "STOP/Clear" button will stop the "reminder" tone.
This button is also used to (de)activate the Child Lock see below.
CHILD LOCK
You may lock the control panel to prevent the microwave from being accidentally started or used by children.
To lock or unlock the controls:
-
Touch and hold the "STOP/Clear" pad for about 3 seconds.
-
A long beep is heard and "C" appears on the display.
Operating Instructions
Other Features
CLOCK
1 Touch "0 /CLOCK" once to set the 12 hour clock.
2 Enter time of day using the number pad. For example, 9:12 is "0", "9", "1" and "2" in turn.
3 Touch "START/+30Sec." to confirm.
Pressing the CLOCK button while a program is running will temporarily display the current time.
NOTE: When the oven is first plugged in "0:00" will be shown in the LED display, prompting you to set the clock.
KITCHEN TIMER
1 Touch "9 /KITCHEN TIMER".
2 Enter countdown time on the number pad.
3 Touch "START/+30Sec."
The KITCHEN TIMER can be used as a timer for your convenience. To set the KITCHEN TIMER:
-
Touch the "9 /KITCHEN TIMER" number pad. "00:00" appears on the display.
-
Enter the desired countdown length using the number pad. Enter the time length by selecting minutes first and then seconds. For example, 5 minutes and 15 seconds would be entered "0", "5", "1" and then "5" in turn ("05:15" on the display).
- Touch the "Start/+30Sec." pad. The timer time will begin to countdown until it reaches zero ("0:00" on the display). The oven will then resume showing the time (if set) and sound five beeps.
To Cancel the KITCHEN TIMER:
- Touch "Stop/Clear". The display will resume showing the clock (if set).
NOTE: The KITCHEN TIMER program can not be used in conjunction with, or during the process of, any other programs.
IMPORTANT SAFETY INFORMATION
MICROWAVE-SAFE COOKWARE (CONT'D)
- Use foil only as directed in this manual. TV dinners may be microwaved in foil trays less than 3/4" high; remove the top foil cover and return the tray to the box. When using foil in the microwave oven, keep the foil at least 1 inch away from the sides of the oven.
- Plastic cookware designed for microwave cooking is very useful, but should be used carefully. Even microwave-safe plastic may not be as tolerant of overcooking conditions as are glass or ceramic materials and may soften or char if subjected to short periods of overcooking. In longer exposures to over-cooking, the food and cookware could ignite.
Follow these guidelines:
1 Use microwave-safe plastics only and use them in strict compliance with the cookware manufacturer's recommendations.
2 Do not microwave empty containers.
3 Do not permit children to use plastic cookware without complete supervision.
GROUNDING INSTRUCTIONS
WARNING
Improper use of the grounding plug can result in a risk of electric shock.
This appliance must be grounded. In the event of an electrical short circuit, grounding reduces the risk of electric shock by providing an escape wire for the electric current.
This appliance is equipped with a power cord having a grounding wire with a grounding plug. The plug must be plugged into an outlet that is properly installed and grounded.
Consult a qualified electrician or service technician if the grounding instructions are not completely understood, or if doubt exists as to whether the appliance is properly grounded.
If the outlet is a standard 2-prong wall outlet, it is your personal responsibility and obligation to have it replaced with a properly grounded 3-prong wall outlet.
Do not under any circumstances cut or remove the third (ground) prong from the power cord.
Do not use an adapter plug with this appliance.
Do not use an extension cord. If the power supply cord is too short, have a qualified electrician or service man install an outlet near the appliance.
If it is necessary to use an extension cord, use only a 3-wire extension cord that has a 3-blade grounded plug, and 3-slot receptacle that will accept the plug on the appliance. The marked rating of the extension cord shall be equal to or greater than the electrical rating of the appliance.
For best operation, plug this appliance into its own electrical
outlet to prevent flickering of lights, blowing of fuse or tripping of circuit breaker.
A short power-supply cord is provided to reduce the risks resulting from becoming entangled in or tripping over a longer cord.
Longer cord sets or extension cords are available and may be used if care is exercised in this use.
If long cord or extension cord is used:
a) The marked electrical rating of the cord set or extension cord should be at least as great as the electrical rating of the appliance.
b) The extension cord must be a grounding-type 3-wire cord, and The longer cord should be arranged so that it will not drape over the counter op or table top where it can be pulled on by children or tripped over unintentionally.
Operating Instructions
Features of Your Microwave
(Throughout this manual, features and appearance may vary from your model.)
FEATURES

1 Door Safety Lock System.
2 Oven Window. Screen allows cooking to be viewed while keeping microwave energy confined in the oven.
3 Turntable Shaft.
4 Roller Ring.
5 Removable Glass Turntable.
Turntable and support must be in place when using the oven. The turntable may be removed for cleaning.
6 Control Panel (see page 11)
7 Electronic Display.
MENU COOKING (Cont'd)
FRESH VEGETABLES
Follow package instructions using Timer cooking (see pg. 14) If the amount of vegetables to be cooked is less the 4 oz/113 grams or more than 16 oz/454 grams.
1 Touch "FRESH VEGETABLE" once, twice or three times for 4 oz/113 grams, 8 oz/227 grams or 16 oz/454 grams of vegetables, respectively.
2 Touch "START/+30Sec."
PIZZA
See "Menu Cooking Guide" on pgs. 12-13).
* Approx. weight of 1 slice = 3 oz. (85 grams)
1 Touch "PIZZA" once, twice or three times to cook one, two or three slices of pizza respectively.
2 Touch "START/+30Sec."
FROZEN VEGETABLES
Follow package instructions using Timer cocking (see pg. 14) if the package is less than 4 ounces/113 grams or larger than 16 ounces (454 grams).
1 Touch "FROZEN VEGETABLE" once, twice or three times for 4 oz/113 grams, 8 oz/227 grams or 16 oz/454 grams of frozen vegetables, respectively.
2 Touch "START/+30Sec."
MENU COOKING (Cont'd)
POPCORN
1 Touch "POPCORN" once, twice or three times for a 1.75 oz/50gram bag, 3.0 oz/85gram bag, or a 3.5 oz/100 gram bag respectively.
2 Touch "START/+30Sec."
Follow package instructions using Timer cooking (see pg. 14) If the package is less than 1.75 ounces, or larger than 3.5 ounces. Place the package of popcorn on the center of the turntable.
If more cooking time is needed, even while the oven is cooking, touching the "START/+30Sec" pad adds 30 more seconds of cooking time each time the pad is pressed.
WARNING
- Never leave the microwave oven unattended during the cooking of popcorn.
- Light Popcorn does not contain as much cooking ingredients (oil, butter, etc) as Regular type popcorn, so cooking time will be substantially reduced.
- When the popping action slows down or stops, stop the microwave oven immediately, otherwise the popcorn will overcook, bum and possibly catch on fire.
DINNER PLATE
1 Touch "DINNER PLATE" once, twice or three times for 9 oz/255gram, 12 oz/340 gram or 18 oz/510 gram dinner plates.
2 Touch "START/+30Sec."
Follow package instructions using Timer cooking (see pg. 14) If the package is less than 9 oz or larger than 18 oz.
The Controls on Your Microwave Oven

flowchart
graph TD
    A["Start"] --> B["Clock"]
    B --> C["Timer"]
    C --> D["Control"]
    D --> E["4"]
    E --> F["5"]
    F --> G["6"]
    G --> H["7"]
    H --> I["8"]
    I --> J["9"]
    J --> K["TIMER"]
    K --> L["0"]
    L --> M["1"]
    M --> N["2"]
    N --> O["3"]
    O --> P["4"]
    P --> Q["5"]
    Q --> R["6"]
    R --> S["7"]
    S --> T["8"]
    T --> U["9"]
    U --> V["10"]
    V --> W["1"]
    W --> X["2"]
    X --> Y["3"]
    Y --> Z["4"]
    Z --> AA["5"]
    AA --> AB["6"]
    AB --> AC["7"]
    AC --> AD["8"]
    AD --> AE["9"]
    AE --> AF["10"]
- Menu Cooking : Potato, Beverage, Soup, Popcorn, Dinner Plate, Pizza, Fresh Vegetables, Frozen Vegetables. (See "Menu Cooking" on pgs 17 to 19)
- POWER : Used to set the power level.
- DEFROST (by Weight or Time) : Touch to defrost food by weight or by time. The oven automatically sets the defrosting time (in By Weight setting) and power level.
- MEMORY : Set pre-programmed cooking times and power levels.
- EXPRESS COOKING :
- KITCHEN TIMER
- Number Pad : Set times and weights.
- Clock : Sets/Displays the current time.
- STOP/Clear: Clears/stops previous program or setting.
- START/+30Sec.: Starts, and resumes the program.
Menu Cooking Guide
| Touch Start | Program Information | |
| POPCORNOnceTwice3 times | 1.75 oz / 50 grams - 1 min. 10 sec.3.0 oz. / 85 grams - 2 min. 5 sec.3.5 oz. / 100 grams - 2 min. 15 sec. | Touch START/+30Sec |
| POTATOOnceTwice3 times | 1 Potato - 6 min. 30 sec.2 Potatoes - 11 min. 30 sec.3 Potatoes - 16 min.* Approx. weight of 1 potato = 8.3 oz. (230 grams) | Touch START/+30Sec |
| PIZZAOnceTwice3 times | 1 Slice - 40 sec.2 Slice - 1 min. 20 sec.3 Slice - 2 min.* Approx. weight of 1 slice = 3 oz. (85 grams) | Touch START/+30Sec |
| BEVERAGEOnceTwice3 times | 1 Beverage - 1 min. 40 sec.2 Beverages - 3 min. 10 sec.3 Beverages - 4 min. 50 sec.* Approx. volume of 1 beverage = 8.5 oz. (250ml) | Touch START/+30Sec |
| SOUPOnceTwice3 times4 times | 4.0 oz. (118 ml) - 1 min. 30 sec.8.0 oz. (236 ml) - 3 min. 30 sec.12.0 oz. (356 ml) - 5 min.16.0 oz (472 ml) - 6 min. | Touch START/+30Sec |
Operating Instructions
MENU COOKING
Allows you to cook or reheat food automatically without entering a time or selecting a power level. In addition to selecting the amount of servings, some MENU COOKING programs give you the option of specifying between two portion sizes.
POTATO
1 Touch "POTATO" once, twice or three times to cook one, two or three potatoes respectively.
2 Touch "START+30Sec.".
BEVERAGE
1 Touch "BEVERAGE" once, twice or three times for one, two or three beverages respectively.
2 Touch "START/+30Sec.".
See "Menu Cooking Guide" on pgs. 12-13).
WARNING
SOUP
1 Touch "SOUP" once, twice, three or four times for 4.0 oz/118ml, 8.0oz/236ml, 12.0oz/356ml or 16.0oz/472ml of soup respectively.
2 Touch "START/+30Sec.".
Operating Instructions
Defrost Guide
| DEFROST (By Weight) | The defrost time is deter- mined by the weight of the food. The weight to be defrosted must be entered in ounces. | Conversion Guide If the weight of food is shown only in pounds, the pounds must be converted to ounces. |
| 1 Touch the "DEFROST" pad. "DEF1" appears on the display. 2 Enter weight in ounces using the number pad. 3 Press "START/+30Sec." | NOTE: The defrost by weight (DEF1) program uses ounces only, and has a range of 4 up to 100 ounces (113 to 2,835 grams). | Food (lb) dz |
| Under:03 0 | ||
| 03 to .09 1 | ||
| 10 to .15 2 | ||
| .16 to .21 3 | ||
| .22 to .27 4 | ||
| .28 to .34 5 | ||
| .35 to .40 6 | ||
| .41 to .46 7 | ||
| .47 to .53 8 | ||
| .54 to .59 9 | ||
| .60 to .65 10 | ||
| .66 to .71 11 | ||
| .72 to .77 12 | ||
| .78 to .85 13 | ||
| .84 to .90 14 | ||
| .91 to .97 15 | ||
| .98 to 1.0 16 |
Defrosting Tips
- Foods frozen in paper or plastic can be defrosted in the package. Tightly closed packages should be slit, pierced or vented. AFTER food has partially been defrosted. Plastic storage containers should be at least partially uncovered.
- Family-size, prepackaged frozen dinners can be defrosted and microwaved. If the food is in a foil container, transfer it to a microwave-safe dish.
- Foods that spoil easily, such as milk, eggs, fish, stuffings, poultry and pork, should not be allowed to sit out for more than one hour after defrosting. Room temperature promotes the growth of harmful bacteria.
- When defrosted, food should be cool and softened in all areas. If still slightly icy, return to the microwave very briefly, or let it stand a few minutes.
DEFROST (By Time)
1 Touch "DEFROST" pad twice. "dEF2" appears on the display.
2 Enter defrosting time using the Number pad.
3 Touch "START/+30Sec."
- Allows you to defrost for the length of time you select.
- Depending on the time entered, during the defrost program the oven may stop and beep 3 times. At this time, turn the food over and break apart or rearrange pieces for more even defrosting.
Touch "START/+30Sec." to resume the program.
NOTE: During DEFROST BY TIME (dEF2) and DEFROST BY WEIGHT (dEF1) a dull thumping noise may be heard during defrosting. This sound is normal when the oven is not operating at High power.
Menu Cooking Guide (Cont'd)
| Press | Program Information | Start |
| DINNER PLATEOnceTwice3 times | 9.0 oz / 255 grams - 3 min.12.0 oz. / 340 grams - 5 min.18.0 oz. / 510 grams - 7 min. | Touch START/+30Sec |
| FRESH VEGETABLEOnceTwice3 times | 4.0 oz./ 113.4 grams - 2 min. 50sec.8.0 oz./ 227 grams - 5 min.16.0 oz./ 454 grams - 9 min. | Touch START/+30Sec |
| FROZEN VEGETABLEOnceTwice3 times | 4.0 oz./ 113.4 grams - 4 min.8.0 oz./ 227 grams - 7 min.16.0 oz./ 454 grams - 12 min. | Touch START/+30Sec |
Operating Instructions
Start Cooking
IMPORTANT
You can pause or cancel a cooking operation at any time by touching "STOP/Clear" or opening the microwave door.
To Pause: Touch "STOP/Clear", a single beep is heard, microwave countdown stops. To Cancel: Touch "STOP/Clear" twice (two beeps should be heard), the clock returns to the display ("0:00" if the clock is not set).
Quick Cooking
- Touch "START/+30Sec." pad for 30 seconds of cooking. Microwave instantly begins cooking.
If the cooking time is an interval of 30 seconds (e.g. 1 min., or 1 min. and 30 sec., 2 min., etc.) you can instantly start to cook using this method. See also "If more cooking time is needed..." below. If the recipe requires a lowered cooking power level, or the recommended cooking time is not an interval of 30 seconds, see One and Two-Stage Cooking below.
One and Two-Stage Cooking
This method is ideal for recipes that require a reduced cooking power level, or meals with special cooking times (i.e., not in intervals of 30 seconds as in "Quick Cooking").
1 Touch the "POWER" pad. PL10 appears on the display.
2 Each additional touch of the "POWER" pad will reduce the power by 10%. For more information on power levels see section 'Power Levels'. To use default power simply move on to step 3.
3 Enter the cooking time by touching the corresponding numbers on the number pad (e.g. touch "1", "0", "1" and "5" for 10 minutes and 15 seconds ("10:15" on the display))
4 For Two-Stage Cooking, repeat steps 1 to 3 and then continue to step 5.
5 Touch the "START/+30Sec." pad. Cooking time will begin to countdown until it reaches zero (":00" on the display). The oven will then resume showing the time (if set) and sound five beeps.
If more cooking time is needed...
At any time and for any operation, even while the oven is cooking, touching the "START/+30Sec." pad adds 30 more seconds of cooking time each time the pad is pressed. Note: The added cooking time will use the same power level that is currently being used by the microwave. For example, if the Power Level is currently set to 50% ("PL5" on the display), then the added cooking time will use a Power Level of 50% .
Operating Instructions
Changing the Power Levels
SINGLE STAGE Cooking:
-
Touch "POWER".
-
Continue to touch "POWER" to lower the power level until the desired power level is displayed (see table below)
-
Enter cooking time.
- Touch "START/+30Sec."
MULTI-STAGE Cooking:
- Repeat above steps 1-3 for up to 2 separate cooking stages.
- Touch "START/+30Sec."
How to Change the Power Level
The power level is lowered from the default 100% (PL10) by touching "POWER".
microwave cooking. The power level on the microwave oven can be compared to the surface units on a range. The power level of PL10 is 100% (or full) power, and this is the fastest way to cook. Each power level gives you microwave energy a certain percent of the time. PL7 (power level 7) is microwave energy 70% of the time. Power level 3 is energy 30% of the time. At the default setting (High) food will cook faster but it may need more frequent stirring, rotating or turning over. Most cooking will be done on default (High/PL10). A lower setting will cook more evenly and need less stirring or rotating of the food. Some foods may have better flavor, texture or appearance if one of the lower settings is used. Use a lower power level when cooking foods that have a tendency to boil over, such as scalloped potatoes. Rest periods (when the microwave energy cycles off) give time for the food to "equalize" or transfer heat to the inside of the food. An example of this is shown with power level 3-the defrost cycle. If microwave energy did not cycle off, the outside of the food would cook before the inside was defrosted.
microwave cooking. The power level on the microwave oven can be compared to the surface units on a range. The power level of PL10 is 100% (or full) power, and this is the
fastest way to cook. Each power level gives you microwave energy a certain percent of the time. PL7 (power level 7) is microwave energy 70% of the time. Power level 3 is energy 30% of the time. At the default setting (High) food will cook faster but it may need more frequent stirring, rotating or turning over. Most cooking will be done on default (High/PL10). A lower setting will cook more evenly and need less stirring or rotating of the food. Some foods may have better flavor, texture or appearance if one of the lower settings is used. Use a lower power level when cooking foods that have a tendency to boil over, such as scallopac potatoes. Rest periods (when the microwave energy cycles off) give time for the food to "equalize" or transfer heat to the inside of the food. An example of this is shown with power level 3-the defrost cycle. If microwave energy did not cycle off, the outside of the food would cook before the inside was defrosted.
Here are some examples of uses for various power levels:
Power Level Best Uses
Default (100%) Fish, bacon, (PL10) vegetables, boiling tie
Med-High 7-9 Gentle cooking (70-90%) of meat and
poultry; baking casseroles and reheating.
Medium 5-6 Slow cooking
(50-60%) and tenderizing such as stews and less tender cuts of meat.
Low 3-4 Defrosting (30-40%) without cooking; slimmering; delicate sauces.
Warm 1-2 Keeping food (10-20%) warm without overcooking; softening butter.

- Notes
- TABLE OF CONTENTS
- Important Safety Information
- Operating Instructions
- Helpful Information
- If Something Goes Wrong
- WELCOME
- Start Here!...Before using your Microwave
- NEED HELP?
- Read this manual
- Save time and money
- If you received a
- LIMITED APPLIANCE WARRANTY
- TERMS OF WARRANTY
- EXCLUSIONS
- GENERAL PROVISIONS
- Warranty Service
- READ ALL SAFETY INFORMATION BEFORE USING
- FOR YOUR SAFETY
- PRECAUTIONS
- TO AVOID
- POSSIBLE
- EXPOSURE
- TO EXCESSIVE
- MICROWAVE
- ENERGY
- FEDERAL COMMUNICATIONS COMMISSION RADIO FREQUENCY INTERFERENCE STATEMENT (U.S.A. ONLY)
- WARNING
- SAFETY PRECAUTIONS
- Before You Call For Service
- Things That Are Normal
- Care and Cleaning
- Helpful Hints
- How to clean the inside
- How to Clean the outside
- Outer Case
- Control Panel and Door
- Door surface
- SAFETY
- SON
- (Cont'd)
- SAVE THESE INSTRUCTIONS
- SPECIAL NOTES ABOUT MICROWAVING
- ARCING
- FOODS
- Microwave Terms
- Term Definition
- MEMORY
- SAFETY FACT
- SUPERHEATED WATER
- MICROWAVE-SAFE COOKWARE
- "START/+30Sec."
- "STOP/Clear"
- CHILD LOCK
- Other Features
- CLOCK
- KITCHEN TIMER
- To Cancel the KITCHEN TIMER:
- MICROWAVE-SAFE COOKWARE (CONT'D)
- GROUNDING INSTRUCTIONS
- Improper use of the grounding plug can result in a risk of electric shock.
- Features of Your Microwave
- FEATURES
- MENU COOKING (Cont'd)
- FRESH VEGETABLES
- PIZZA
- FROZEN VEGETABLES
- POPCORN
- DINNER PLATE
- The Controls on Your Microwave Oven
- MENU COOKING
- POTATO
- BEVERAGE
- SOUP
- Defrosting Tips
- DEFROST (By Time)
- Menu Cooking Guide (Cont'd)
- Start Cooking
- IMPORTANT
- Quick Cooking
- One and Two-Stage Cooking
- Changing the Power Levels
- SINGLE STAGE Cooking:
- MULTI-STAGE Cooking:
- How to Change the Power Level
- Power Level Best Uses
- Medium 5-6 Slow cooking
Brand : DANBY
Model : DMW608BL
Category : Microwave