the Light and Fluffy Omelette Maker BEG250 - Waffle Maker BREVILLE - Free user manual and instructions
Find the device manual for free the Light and Fluffy Omelette Maker BEG250 BREVILLE in PDF.

User questions about the Light and Fluffy Omelette Maker BEG250 BREVILLE
0 question about this device. Answer the ones you know or ask your own.
Ask a new question about this device
Download the instructions for your Waffle Maker in PDF format for free! Find your manual the Light and Fluffy Omelette Maker BEG250 - BREVILLE and take your electronic device back in hand. On this page are published all the documents necessary for the use of your device. the Light and Fluffy Omelette Maker BEG250 by BREVILLE.
USER MANUAL the Light and Fluffy Omelette Maker BEG250 BREVILLE
the Light and Fluffy™
Instruction Book - LEG250GRY
natural_image
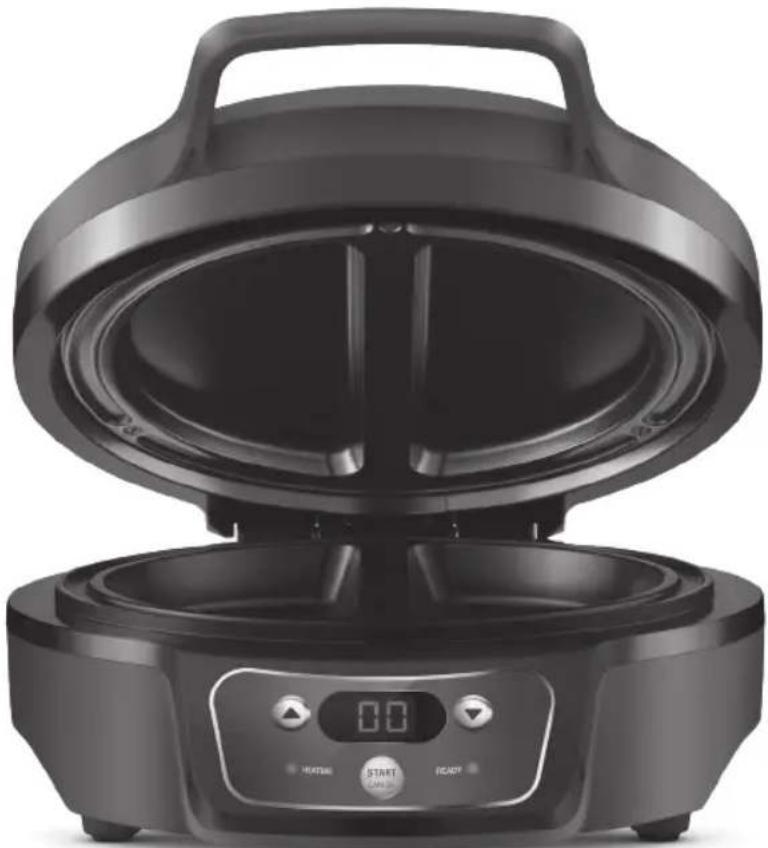
Exterior view of a modern black electric cooktop with open lid and digital display (no text or symbols visible)Breville®

Contents
2 Breville Recommends Safety First
7 Components
8 Functions
11 Care & Cleaning
12 Recipes
BREVILLE RECOMMENDS SAFETY FIRST
At Breville we are very safety conscious. We design and manufacture consumer products with the safety of you, our valued customer, foremost in mind. In addition we ask that you exercise a degree of care when using any electrical appliance and adhere to the following precautions.
IMPORTANT SAFEGUARDS
READ ALL INSTRUCTIONS BEFORE USE AND SAVE FOR FUTURE REFERENCE
- Carefully read all instructions before operation and save for future reference.
-
Remove any packaging material and promotional stickers before using the omelette maker for the first time.
• To eliminate a choking hazard for young children, remove and safely discard the protective cover fitted to the power plug of this appliance.
• Always ensure the omelette maker is properly assembled before use. Follow the instructions provided in this book. -
Do not place the omelette maker near the edge of a bench or table during operation. Ensure the surface is level, clean and free of water.
- Do not use on a sink drain board.
• Always operate the omelette maker on a stable and heat resistant surface. Do not use on a cloth-covered surface, near curtains or other flammable materials. - Keep the omelette maker clear of walls, curtains and other heat or steam sensitive materials
- Do not place the omelette maker on or near a hot gas or electric burner, or where it could touch a heated oven. Use the omelette maker well away from walls.
-
Do not touch hot surfaces. Use the handle to lift and open the top plate.
-
Do not leave the omelette maker unattended when in use.
- Do not place anything on top of the omelette maker when the lid is closed, when in use and when stored.
-
When operating the omelette maker, ensure the power cord is kept away from any heat source including the surface of the omelette maker. Ensure the power cord does not become trapped between the upper and lower hot plates of the omelette maker during use and storage.
• Always switch the omelette maker off at the power outlet, then unplug the power cord and allow to cool, if the appliance is not in use, before cleaning, before attempting to move the appliance, disassembling, assembling and when storing the appliance. -
Do not use chemicals, steel wool, metal scouring pad or abrasive cleaners to clean the omelette maker as these can damage the housing or the coating of the cooking plates.
• Always remove the food from the omelette maker with a heatproof plastic spatula or tongs. Never use your hands. - Do not use sharp objects or utensils inside the omelette maker as they may scratch or damage the interior surface of the hot cooking plate.
- The appliance is not intended to be operated by means of an external timer or separate remote control system.
- Keep the exterior housing and the non-stick cooking plates clean. Follow the cleaning instructions provided in this book (Page 11).
WARNING
Fully unwind power cord from cord storage facility before use.
IMPORTANT SAFEGUARDS FOR ALL ELECTRICAL APPLIANCES
- Fully unwind the power cord before use.
- Connect only to 230V or 240V power outlet.
- Do not let the power cord hang over the edge of a bench or table, touch hot surfaces or become knotted.
• To protect against electric shock, do not immerse the power cord, power plug or appliance in water or any other liquid, unless it is recommended in the cleaning instructions.
• The appliance is not intended for use by persons (including children) with reduced physical, sensory or mental capabilities, or lack of experience and knowledge, unless they have been given supervision or instruction concerning use of the appliance, by a person responsible for their safety.
• Children should be supervised to ensure that they do not play with the appliance.
- It is recommended to inspect the appliance regularly. Do not use the appliance if the power supply cord, plug, connector or appliance becomes damaged in any way. Return the entire appliance to the nearest authorised Breville Service Centre for examination and/or repair.
- Any maintenance other than cleaning should be performed at an authorised Breville Service Centre.
• This appliance is for household use only. Do not use this appliance for other than its intended use. Do not use in moving vehicles or boats. Do not use outdoors.
Misuse may cause injury.
- The installation of a residual current device (safety switch) is recommended to provide additional safety protection when using electrical appliances. It is advisable that a safety switch with a rated residual operating current not exceeding 30mA be installed in the electrical circuit supplying the appliance. See your electrician for professional advice.
• Always turn the appliance to the OFF position, switch off at the power outlet and unplug at the power outlet when the appliance is not in use.
- Before cleaning, always turn the appliance to the OFF position, switch off at the power outlet, unplug at the power outlet and remove the power cord, if detachable, from the appliance and allow all parts to cool.
- Do not place this appliance on or near a heat source, such as hot plate, oven or heaters.
- Position the appliance at a minimum distance of 20cm away from walls, curtains and other heat or steam sensitive materials and provide adequate space above and on all sides for air circulation.
FOR HOUSEHOLD USE ONLY SAVE THESE INSTRUCTIONS

Components
text_image
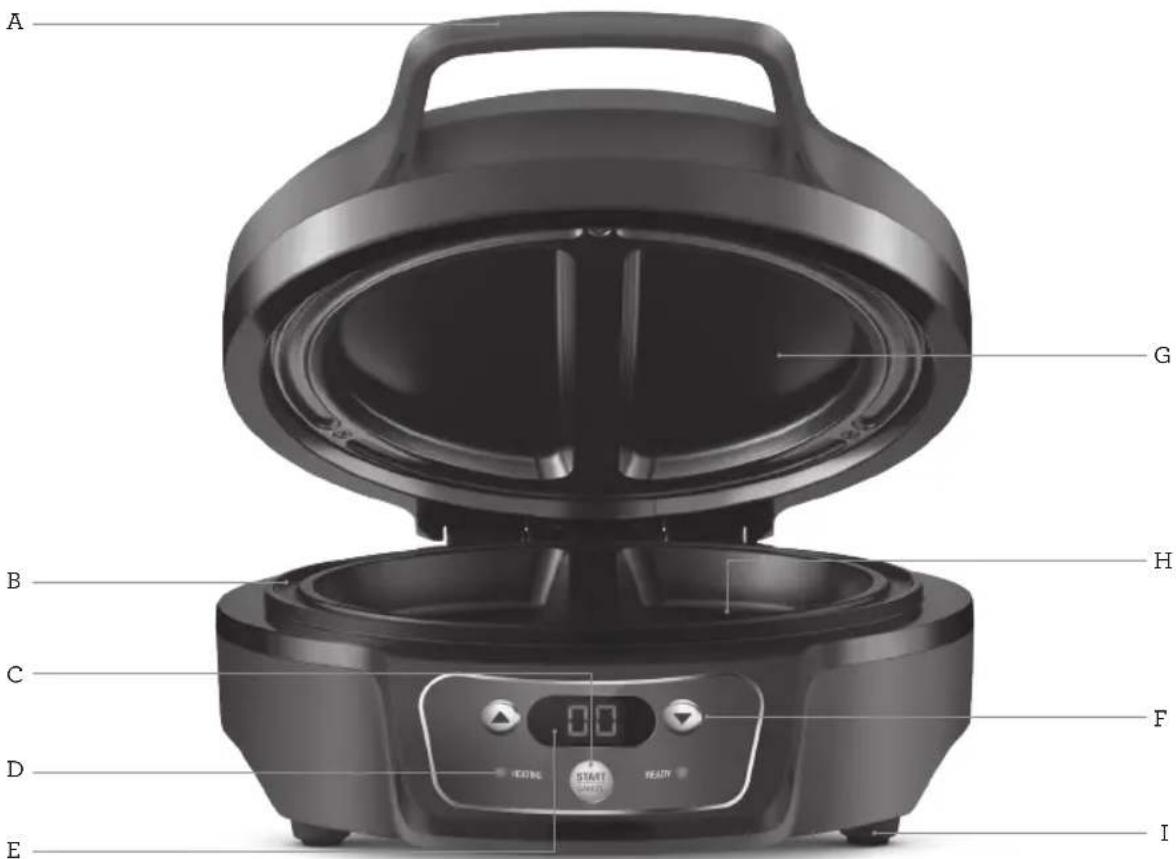
A G B H C F D E IA. Cool-touch handle
B. Wrap-around moat
C. START/CANCEL button
D. 'Heating' & 'Ready' indicator lights
E. LED Display with count-down timer
F. Timer Increase/Decrease buttons
G. PFOA-free non-stick coating For quick and easy cleaning.
H. Deep cooking plates
Cooks up to 2 large eggs per omelette and fits all your favourite fillings.
I. Non-slip feet For stability
Not Shown
• Auto off
Heating turns off after timer counts down to zero and the omelette maker will enter Standby mode.
• Cord storage integrated into base

Functions
OPERATING YOUR BREVILLE PRODUCT
Before first use, remove and safely discard any packing material, promotional labels and tape from the omelette maker.
BEFORE FIRST USE

WARNING
Fully unwind power cord from cord storage facility before use.
Check that cooking plates are clean and free of dust. Wipe over with a damp cloth. Place the omelette maker on a flat, level surface with the lid in the closed position.
Ensure there is a minimum distance of 20cm of space on all sides of the omelette maker. Ensure there are no items on top of the omelette maker.
- Insert power plug into a 230/240V power outlet and turn the power on. The omelette maker will enter standby mode and the screen will display ‘- -’.
- Press the START/CANCEL button to start pre-heating. The 'HEATING' light will illuminate red and the screen will show a rotating loop '[ ]' whilst pre-heating.

NOTE
If pre-heating is not required, press START/CANCEL button and use the timer increase or timer decrease to set a cooking time, then press START/CANCEL button to start immediately or wait 3 seconds for the timer countdown to commence. The 'HEATING' light will illuminate red. An additional 2 minutes will need to be added to the timer when the pre-heat is over-ridden.
- Once the omelette maker has finished preheating, the 'READY' light will illuminate green, the omelette maker will beep 3 times to alert that the pre-heat has finished and '00' will continuously flash on the screen.

NOTE
The omelette maker will remain ready for use for an additional 20 minutes with the screen continuously flashing '00'. The 'READY' light will continue to cycle on and off to indicate the omelette maker is maintaining the correct temperature. You can set a cooking time during this period. If a cooking time is not set after the additional 20 minutes, the auto-off safety feature will engage. The omelette maker will sound 5 beeps and the screen will display '- -'. Both the 'HEATING' and 'READY' lights will no longer be illuminated, indicating heating has stopped as the omelette maker returns to standby mode.
- Open the lid and place your ingredients evenly into the centre of each pocket. The total volume of ingredients should not exceed the rim of the bottom cooking pockets.
- Set your required cooking time using the Timer Increase/Decrease buttons.
- Press START/CANCEL button to start immediately or cooking will commence automatically after 3 seconds. The time will stop flashing indicating the time is counting down.

NOTE
During cooking, you can adjust the timer by pressing the Timer Increase/Decrease buttons.

NOTE
During cooking, the 'HEATING' and 'READY' lights will continue to cycle on and off to indicate that the omelette maker is maintaining the correct temperature.

NOTE
If the omelette maker has been filled as instructed, the upper lid will lift slightly during cooking as the omelettes approach the end of the cooking cycle. When the lid lifts slightly, continue cooking for around 30 seconds to achieve the best results.
- When the cooking time has counted down, the omelette maker will beep 5 times and return to standby mode. The LED screen will display ‘- -’. Both the ‘HEATING’ and ‘READY’ light will no longer illuminate indicating heating has stopped as the omelette maker returns to standby mode.
- Once cooking is complete, open the lid and carefully remove your omelette's with the help of a silicone spatula. Never use metal tongs or a knife as these can cause damage to the non-stick coating. Alternatively, to continue making omelette's repeat steps 2-3.
- You can press the START/CANCEL button at any time during cooking to cancel cooking. The LED screen will display ‘--’. The omelette maker will return to standby mode, switch the omelette maker off at the power outlet and remove the power plug from the power outlet.

NOTE
Making a standard omelette should take approximately six to seven minutes. Exact cooking time will depend on the type of filling used. To maintain even heat, keep the lid closed until you are ready to add your next batch of ingredients.

NOTE
At all times the lid must be closed. When using the omelette maker for the first time you may notice a fine smoke haze. This is caused by the heating of some of the components. There is no need for concern.

WARNING
Steam will be ejected from between the cooking plates when the lid is closed. Be careful not to make contact with the steam as it may cause burns.

WARNING
Fully unwind power cord from cord storage facility before use.

Hints & Tips
- Try to use canned or pre-cooked fruit as fresh fruit may give off excessive juices when heated.
- Be careful when biting into cooked items containing fillings such as cheese and tomato or jam as they retain heat and can burn if eaten too quickly. One cup of filling for each cooking pocket is sufficient. Do not overfill the cooking pockets.
- Fewer eggs will be required when using filling in an omelette.
- Eggs should be at room temperature (not from the refrigerator) for best results when making omelettes
- Whisk the eggs with a hand whisk in a large bowl to achieve a well aerated egg mixture.
- For best cooking results, we recommend to season the plates occasionally to prevent sticking and to make cleaning easier. To season, brush the cooking plates with a little vegetable oil and rub off the excess with absorbent paper. Do this after pre-heating the unit.
- Thawed ready-rolled pastry is the easiest to use, either in sheets or from a roll.
- To keep the omelette warm, place in an oven proof dish on a rack in a low oven, about 100°C. The omelette will keep warm for up to 20 minutes this way, but will then begin to dry out.
- You can cook more than just omelettes in your omelette maker. Make a combination of sweet and savoury snacks such as peach crumbles, brownies, cakes and chicken pies).
• See recipes in this booklet for great ideas.

Care & Cleaning
Before cleaning, ensure the power is switched off and then remove the power plug from the power outlet.
Allow your omelette maker to cool before cleaning however, the omelette maker is easier to clean when still slightly warm.
Always clean your omelette maker after each use to prevent a build-up of baked-on foods. Wipe cooking plates and overflow moat with a soft, damp cloth to remove food residue.

WARNING
Do not immerse any part of the Breville Omelette maker or the power cord in water or any other liquid.
PFOA-FREE NON-STICK COATING
Cooking on a non-stick surface minimises the need for oil as food does not stick and cleaning is easier.
Any discolouration that may occur will only detract from the appearance of the omelette maker and will not affect the cooking performance.
When cleaning the non-stick coating, do not use metal (or other abrasive) scourers. Wash with warm soapy water and dry thoroughly.
Remove stubborn residue using a damp cloth.

NOTE
The cooking plates, hinges and overflow moat are coated with a non-stick surface, do not use abrasives.
STORAGE
To store your omelette maker:
- Ensure the power is off and then unplug power cord from the power outlet.
- Allow the omelette maker to fully cool.
- Wrap the power cord in the cord wrap area below the omelette maker.
- Store on a flat, dry level surface. Do not place anything on top of the omelette maker.

WARNING
The handle is designed for opening and closing the omelette maker during cooking. It should not be used for moving or carrying the omelette maker.
When moving the omelette maker, allow the unit to fully cool down and carry the unit via the base.

Recipes
Potato, Goat's cheese and thyme omelette

Makes 2

Preparation time 5 minutes

Cooking time 11 minutes
2 large eggs
2 tbsp. fresh cream
2 sprigs fresh thyme
Salt and pepper
140g peeled and grated potato
60g Goat's cheese
60g spinach leaves
- Mix together the eggs, cream, thyme, salt and pepper and whisk to combine. Set aside.
- Pre-heat the omelette maker until the READY light is illuminated.
- Lightly spray the omelette maker with baking spray.
- Divide the grated potato between the omelette wells and then evenly crumble the Goat's cheese between the 2 wells. Divide the egg mix between the 2 wells and close the lid.
- Set the timer for 11 minutes.
- Remove using a silicon spatula.
- Serve with spinach leaves.
Turkey, spinach and brie egg white omelette

Makes 2

Preparation time 5 minutes

Cooking time 8 minutes
6 egg whites
40g brie cheese, diced
40g turkey, fine shreds
30g baby spinach, shredded
8 dried cranberries, finely diced
Salt and pepper
To serve
50g spinach leaves
4 cherry tomatoes, cut into 14 's
18 red onion, finely diced
^1/_2 avocado, diced
Drizzle caramelised balsamic dressing
- Pre-heat the omelette maker until the green READY light illuminates.
- Divide the ingredients into 2 bowls and stir to combine.
- When pre-heat is complete, gently pour the ingredients of each bowl into each well and close the lid.
- Adjust the timer to 8 minutes.
- Prepare spinach salad by mixing the salad ingredients together and dress with drizzle of caramelised balsamic dressing.
- Remove using a silicon spatula.
- Serve with spinach salad.
Asparagus, Goat's cheese and truffle omelette

Makes 2

Preparation time
3 minutes

Cooking time 7 minutes
2 eggs
2 tbsp. fresh cream
Fresh black pepper
Salt
^1/_2 tsp, butter
10 spears asparagus, but into 10cm lengths
40g bocconcini, sliced
40g Goat's cheese
^1/_4 bunch watercress, picked and washed
Drizzle truffle oil
- Mix together the eggs, cream, black pepper and salt and whisk together.
- Pre-heat the omelette maker. Add the butter and asparagus to the omelette maker and adjust the timer to 2 minutes, leaving the lid open.
- Divide the egg mix, Goat's cheese and bocconcini between the 2 wells and close the lid.
- Adjust the timer to 6 minutes.
- When cooked remove and place on a serving plate.
- Serve with watercress and truffle oil drizzle over the omelette and watercress salad. Season with sea salt and freshly ground black pepper.
Quiche Lorraine

Makes 2

Preparation time 5 minutes

Cooking time 11 minutes
1 sheet store bought shortcrust pastry
60g bacon, sliced
2 shallots, white part sliced - green discarded
60g spinach leaves
40g tasty cheese, grated
2 tbsp. fresh cream
2 eggs
- Line the omelette wells with pastry and trim off the excess pastry using the edge of a silicon scraper.
- Divide the ingredients into 2 bowls and mix to combine well. Add to the pastry lined wells and close the lid.
- Turn the omelette maker on and when pre-heat is complete adjust the timer to 9 minutes.
- Remove using a silicone scraper.
- Serve with spinach leaves.
Roast pumpkin and fetta omelette

Makes 2

Preparation time 25 minutes

Cooking time 10 minutes
150g pumpkin, 1cm dice
1 clove garlic, crushed
3 eggs
2 tbsp. fresh cream
40g fetta, small dice
Salt and pepper
To serve
1 tbsp. sunflower seeds, roasted
30g baby rocket
Olive oil drizzle
- Roast diced pumpkin and garlic for 12 minutes on 180^ C.
- Beat together the eggs, cream, fetta, salt and pepper. Add the roast pumpkin to the egg mix.
- Divide the mixture in 2 bowls and pour into each well. Close the lid. Adjust the timer to 10 minutes.
- When complete, serve with rocket, toasted sunflower seeds and olive oil drizzle.
Chocolate brownie

Makes 5

Preparation time 8 minutes

Cooking time 40 minutes
200g dark chocolate
140ml vegetable oil
200g light brown sugar
3 eggs
1 tsp vanilla essence
^1/2 cup plain flour
^1/4 cup cocoa powder
2 tsp baking powder
^1/_4 cup chocolate chips
Chocolate sauce
^1/_4 cup fresh cream
1 tsp butter
100g dark chocolate
- Cut a semi-circle shaped piece of baking paper and line the omelette maker wells and a small one for the top of the brownie.
- Place the chocolate and the oil into a heatproof bowl and place over boiling water and stir until the chocolate is melted. Stir to combine and remove from the heat to cool.
- Put the eggs, sugar and vanilla essence into a bowl and whisk to combine. Add the cooled chocolate and oil and stir through.
- Sift the dry ingredients together and fold through the egg and chocolate mix. Stir through the chocolate chips.
- Pre-heat the omelette maker until the green light is illuminated.
- Place the baking paper into the omelette well and pour 12 cup of brownie mixture into each of the lined wells. Place the smaller piece on top of the brownie mixture and close the lid.
- Adjust the time to 12 minutes on the timer and press start to begin cooking.
- When complete, carefully remove from the omelette wells and let cool.
- To make the sauce - place the cream and butter into a saucepan to heat. Take off the heat and stir in the chocolate until it is melted. Drizzle over the brownie and serve.
Lemon and ricotta cake Gluten free

Makes 4

Preparation time 10 minutes

Cooking time 20 minutes
65g unsalted butter, softened
12 cup caster sugar
1 egg
Zest of 12 lemon
1 tbsp. lemon juice
12 tsp. vanilla paste
14 cup smooth ricotta
^1/_2 cup gluten free self-raising flour
12 cup almond meal
Ricotta icing
^2/_3 cup smooth ricotta
1 tsp vanilla paste
1 tbsp. icing sugar
Lemon drizzle
2 tbsp. lemon juice
2 tbsp. caster sugar
1 tsp honey
-
Cut a semi-circle shaped piece of baking paper to line the omelette maker wells.
-
For the syrup - Place ingredients into a small saucepan and bring to the boil. Put aside to cool until cakes are ready.
-
In a bench mixer, cream the butter and sugar until pale. Add the egg, zest, lemon juice and vanilla and beat well. Add the ricotta and fold through the flour and almond meal until combined.
-
Pre-heat the omelette maker until the green light is illuminated.
-
Place the baking paper into the omelette well and spoon 12 cup of cake mixture into each of the lined wells and close the lid.
-
Adjust the time to 10 minutes on the timer and press start to begin cooking.
-
For the ricotta icing – Place the ingredients into a bowl and mix well together. Set aside.
-
When cakes are ready, remove from the omelette maker and let cool.
-
Spread the icing over the top of the cake and drizzle the cooled syrup over the top.
Peach crumble cake

Makes 4

Preparation time
15 minutes

Cooking time
20 minutes
(10minutes per 2)
Streusel top
^1/_3 cup self-raising flour
40g cold unsalted butter, diced
^1/_4 tsp vanilla paste
18 (25g) cup brown sugar
18 (25g) cup caster sugar
Pinch cinnamon
14 cup oats
Cake bottom
60g unsalted butter, at room temperature
60g caster sugar
1 egg
3 tsp milk
^1/_2 tsp vanilla paste
23 cup self-raising flour
Pinch cinnamon
200g tinned sliced peaches drained and liquid discarded
4 scoops vanilla ice-cream
- Cut a semi-circle shaped piece of baking paper to line the omelette maker wells.
- To make the crumble top - place the flour, butter, vanilla paste, brown sugar and cinnamon into the food processor and pulse until it resembles coarse crumbs. Add oats and pulse briefly, only to combine the oats, do not blend the oats. Place the crumble top in the refrigerator until required.
- To make the cake- place the butter and sugar into the mixing bowl of your bench mixer and beat until light and fluffy. Crack your egg into a cup and then slowly pour it into the sugar and butter mixture until combined. Switch your bench mixer onto a low speed and add milk, vanilla, flour and cinnamon.
- Pre-heat the omelette maker until the green light is illuminated.
- Place a small piece of greaseproof paper in the 2 omelette wells and spread 14 of the cake batter into the omelette maker wells. Place a layer of sliced peaches on the cake then sprinkle 14 of the crumble on the top of the peaches.
- Close the lid and adjust the timer to 10 minutes.
- Remove using a silicone spatula and serve with vanilla ice-cream.
Breville Customer Service Centre
Australian Customers
Phone: 1300 139 798
Web: www.breville.com.au
New Zealand Customers
Phone: 0800 273 845
Web: www.breville.co.nz
Breville®
Master Every Moment™
Breville is a registered trademark of Breville Pty. Ltd. A.B.N. 98 000 092 928.
Copyright Breville Pty. Ltd. 2022.
Due to continued product improvement, the products illustrated/photographed in this brochure may vary slightly from the actual product.
LEG250GRY H22