
VX16 - Air purifier VAX - Free user manual and instructions
Find the device manual for free VX16 VAX in PDF.


User questions about VX16 VAX
0 question about this device. Answer the ones you know or ask your own.
Ask a new question about this device
Download the instructions for your Air purifier in PDF format for free! Find your manual VX16 - VAX and take your electronic device back in hand. On this page are published all the documents necessary for the use of your device. VX16 by VAX.
USER MANUAL VX16 VAX
Performance is everything.
Air Purifiers
Let's get started.
User guide.
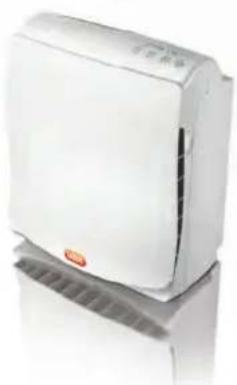
natural_image
White air purifier device with a red logo on the front panel, shown against a reflective surface (no text or symbols visible)VX15
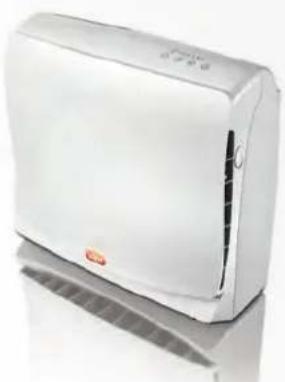
natural_image
White industrial air conditioner unit with visible cooling fan and ventilation slots (no text or symbols)VX16
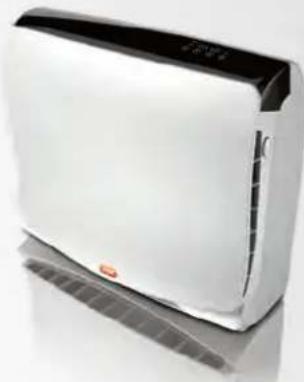
natural_image
White air conditioner unit with black trim and orange logo, partially reflective on white surface (no visible text or symbols)VX17
IMPORTANT: READ CAREFULLY BEFORE ASSEMBLY AND USE.
Contents:
Lets talk safety 1
Getting to know your machine 2
Getting started 3
Lising your machine 4
Taking care of your machine, replacing the filters 5
What to do if it goes wrong.
Getting in touch 7
Don't forget your accessories! 9
Technical specifications 9
Let's talk safety
Basic safety precautions
This air purifier is intended for household use only and NOT for commercial or industrial use.
- Only use the air purifier indoors and keep away from wet areas. - Keep fingers, hair and loose clothing away from moving parts and openings whilst using the air purifier.
- This appliance can be used by children aged from 8 years and above and persons with reduced physical, sensory or mental capabilities or lack of experience and knowledge if they have been given supervision or
* Don't place air purifier near sources of heat, such as stove tops, ovens, radiators or computers.
Don't use the air purifier if the power cord or plug is damaged. Please contact our Customer Care Line on AU 1300 361 505 / NZ 0800 800 900
X Don't use the air purifier if it has been dropped, damaged or left outdoors X Don't run the power cord under rugs, runners or carpets as it can be a trip hazard.
✗ Don't pull, carry or trap the power cord under doors or sharp edges.
√ Inspect the air purifier regularly and remove any dust/dirt build up as this may affect the airflow.
√ Keep all openings/grills clear and free from obstruction and sources of heat open flames including candles. Don't attempt to remove blockages with sharp objects as this may cause damage to the air purifier
√ Turn off all controls on the air purifier before disconnecting or connecting the power cord.
√ Always protect the power cable from heat.
instruction concerning use of the appliance in a safe way and understand the hazards given. Children shall not play with the appliance. Cleaning
and user maintenance shall not be made by children without supervision.
- Always position the air purifier on a flat, slable, solid surface and never over stretch the power cord.
- Position the air purifier where dirty air is not drawn across your body or head while sitting or sleeping.
Don'ts
X Don't handle the plug or air purifier with wet hands.
Y Don't handle the air purifier by pulling on the gravel
- Don't use the air purifier in an area with toxic/explosive vapours/liquids.
oxygen tanks or near to flammable, combustible materials lighter fluid,
petro, kerosene, chlorine, bleach and ammonia drain (cleaner etc). X Don't use without all filters in place.
Do's
√ Use only SAA approved 10cmp extension cords, non-approved extension cords may overheat.
√ Care should be taken to arrange the extension cord as it can be trip hazard.
√ Always switch off and unplug the air purifier before performing maintenance or troubleshooting checks.
√ Replace Filters as instructed in this user guide
PLEASE KEEP INSTRUCTIONS FOR FURTHER USE.
Getting to know your machine:
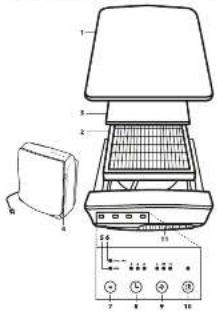
1 Air Purifier Door: Easily remove to gain access to the filter at front of machine.
2 Main Filter: Filter particles from the air that passes through the filter.
3 Odour Filter: Reduce odours from the air that passes through the
11.25
4 Side Intake Drink, White or Other Side Drink
5 Main Filter Light: Indicates the Main filter may need to be replaced when it
6 Odour Filter Light: indicates the odour filter may need to be replaced
when it
7 Light Reset Button: This button resets both the main filter and colour
8 Timer: Set the run time for two, four or eight hours, before
automatically turning OFF.
9 Fan Speed: The fan runs at three spaces. The lights indicate the
current fan speed
L: Law for the Sierra Technology ^®
M: Medium for typical use
H: High for maximum cleaning
10 Power: Turn the unit ON and OFF
11 Exhaust Grill; Direct the flow of air as it helps the unit.
* Incl used in your margins. Main filter and colour filter
Technical specifications see page 9.
Getting started:
BEFORE YOU BEGIN
Important. Remove air packaging covering the air purifier and filters. Make sure the filters are in place and correctly fitted before turning on. Stand the air purifier on a hard flat surface away from candles and flames. Never block the air grills, keep air grills free from any obstruction.
• IMPORTANT •
This unit is equipped with a smart panel that senses your touch. Heavy pushing of buttons is not recommended.
1
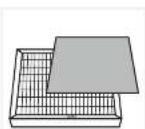
CHECK the air purifier for the filters. Be sure the supplied filters are properly in place and all plastic is removed before turning the unit on
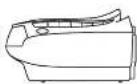
HORIZONTAL POSITION
2 PLACE the air purifier on a hard surface such as the floor, a table or desk. Be sure the grilles are not blocked by other objects, and there are no candles or flames near the unit. Note: The air purifier can be placed in a horizontal or vertical position.

3 PLUG IN into nearest standard electrical outlet
4 LIGHTLY TOUCH the power button to turn the air pumper on. Touch the power button again to turn the air pumper off.
5 SELECT THE FAN SPEED. To select the speed, lightly touch and release the fan speed button until the desired speed is reached. L = low (Silence Technology®), M = medium or H = high.
6 ADJUST THE TIMER feature. The time can be selected from two, four or eight hours. The unit will turn off once it runs for the selected hours.
Note: The unit will run continuously of all the timer lights are off.
7 THE CHECK FILTER LIGHTS will light up when the filters may need to be replaced. Touch and hold the button for several seconds until the filter indicator shuts off.
Using your machine:
▲WARNING▲
The air purifier will continuously turn when all indicator lights are off.
• IMPORTANT •
The control panel is touch sensitive, lightly press control.
Press on/off control to switch on/off.
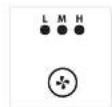
Press tan control. The tan speed indicator light will illuminate displaying selected speed
L = Low (Science Technology ^® )
M = Medium
H = High
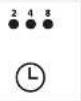
Press timer control. The timer light will illuminate showing time selected: 2 hours, 4 hours or 8 hours.
The air purifier will turn off once the selected time has completed.
Taking care of your machine: replacing the filters
Replace your main filter every 6 months and your colour filter every 3 months.
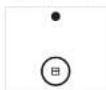
1 When the filter light is illuminated, turn the unit off and unplug it from the power outlet.

2 Press buttons on sides of unit to release front cover Rotate top down and remove.
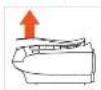
3 Lift and remove the used filter. Note: the odour filter is attached with hooks and loop closure to the main filter. The odour filter is an optional feature. The unit will continue to clean the air without it.

4 Line up odour filter, one odour filter is reversible and can be filled either side? press onto the Vectors labs to attach to main filter
WARNING
DO NOT WASH FILTERS.
CAUTION
To reduce the risk of
injury from moving
before servicing
• IMPORTANT •
Unplug and switch
off the air partner
before performing
publicshooting checks
TIP: The filters will
need replacing more
often when using
the air perintra in smoke filter or dust
instruments.
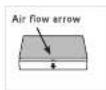
5 Re-fit main filter into air purifier following the direction of the air flow arrow.
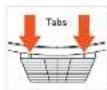
6 Line-up tabs on filter cover
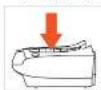
7 Lower until it closes into place on both sides.
What to do if it goes wrong...
Why does my air purifier have no power?
• The plug may not be fully pushed into the electrical socket
- Check the fuse in the plug if this needs replacing, always replace with a Samp fuse.
- The front cover may not be secure, check the front cover is securely fitted. Go to 'Taking care of your machine'
- The filter may not be filled correctly, check the filter. Go to 'Taking Care of your machine
- Timer may have finished, re-set the timer
My fan isn't turning?
- Fan speed is set to L = Low (Silence Technology ^10 ), indicator light will illuminate, change fan speed to desired setting.
Why is my air purifier making an excessive noise?
• The air grills may be blocked. Make sure the air grills are free from any obstruction.
- The filter may need replacing. Go to 'Taking Care of your machine'.
Should components need to be replaced which have not been described, please contact one of our authorised Vax warranty or service agents. For a list of authorised Vax warranty or service agents please call us on AU 1300 361 505 / NZ 0800 800-900 or visit AU www.vax.com.au / NZ www.vax.co.nz
Getting in touch...
We're here if you need us
Online AU: vax.com.au / NZ: vax.co.nz
Call: AU: 1300 361 505 / NZ: 0800 800 900
Monday-Friday 8:30am to 5:00pm
*Calls are charged at the standard local rate. Please make note of the serial number and mode, number of the air purifier before calling.
6
7
Don't forget your accessories!
| Order at: AU: 1300 361 505 or www.vax.com.au |
| NZ: 0800 800 900 or www.vax.co.nz |
| Air Purifier Model No. | Replacement Filter Model No. |
| VX15 | VX15F |
| VX16 | VX16F |
| VX17 | VX17F |
Note: Each filter pack contains
1 x Main Filter
2 x Odour Filters
Technical specifications:
VX15
| Input voltage | 220-240v |
| Rated frequency | 50Hz |
| Weight | 3.6kg |
| Noise level | ≥slant 42dBA |
VX16
| Input voltage | 220-240v |
| Rated frequency | 50Hz |
| Weight | 4.7kg |
| Noise level | ≥slant 40dBA |
VX17
| Input voltage | 220-240v |
| Rated frequency | 50Hz |
| Weight | 6.5kg |
| Noise level | ≥slant 49dBA |

Performance is everything.
Brand : VAX
Model : VX16
Category : Air purifier