VRN-624B - Browser Soundstream - Free user manual and instructions
Find the device manual for free VRN-624B Soundstream in PDF.


User questions about VRN-624B Soundstream
0 question about this device. Answer the ones you know or ask your own.
Ask a new question about this device
Download the instructions for your Browser in PDF format for free! Find your manual VRN-624B - Soundstream and take your electronic device back in hand. On this page are published all the documents necessary for the use of your device. VRN-624B by Soundstream.
USER MANUAL VRN-624B Soundstream
Take the time to read through this owner manual.
Familiarity with installation and operation procedures will help you obtain the best
Performance from your new DVD-receiver.
WARNING!
To promote safety, certain functions are disabled unless the parking brake is on. The Unit is designed to detect parked status and must be connected to the power supply side of the parking brake switch. Improper connection or use of his connection may violate applicable law and may result in serious injury or damage. To avoid the risk of damage and injury and the potential violation of applicable laws, this unit is not for use with a video screen that is visible to the driver.
■ To avoid the risk of accident and the potential violation of applicable laws, the front Video image feature should never be used while the vehicle is being driven. Also, other video displays should not be in a location where it is a visible distraction to the driver. In some countries or states the viewing of images on a display inside a vehicle even by persons other than the driver may be illegal. Where such regulations apply, they must be obeyed and this unit DVD features should not be used.
■ Please remember to wear your seat belt at all times while operating your vehicle. If you are ever in an accident, your injuries can be considerably more severe if your seat belt is not properly buckled.
■ The supplier waves any and all liability when these warnings are not followed.
OPERATION PRECAUTIONS
■ Only connect to a 12VDC battery and negative grounding.
■ Avoid placing the product in direct sunlight, in areas with high levels of dust, high temperatures (over 40) or high humidity (over 90%). In case of high temperatures, cool down the car interior by means of ventilation or air-conditioning.
■ Operate in well ventilated areas.
■ Do not turn on or off the product in short intervals. When turning the unit off, wait for at least 10 seconds prior to turning the unit on again. Do not operate the player with scratched, bended or broken discs and when a disc is not loaded properly, do not force it into the player.
■ Do not watch video playback while driving which will cause serious danger and risks of traffic accident. It may violate the laws and regulations.
(There may be exceptional case they, using rear view camera and navigation system)
■ Do not install the unit where the operation for safety driving is restrained.
■ Do not disassembly the unit by yourself, if need repairing, please take the unit to the after service center.
■ Do not open and close the monitor manually, it may damage the monitor tilt system.
■ Do not touch the LCD screen by hard objects, it may damage or give scratch to the LCD screen.
If the back of monitor touches dashboard or air-conditioner inlet etc after open the monitor, then setup TILT level in monitor TILT menu to prevent damage from repeat touching.
■ Car parking under direct sunlight may increase the temperature inside the car and the unit may not be in proper operation, please try it again after the temperature returns to normal.
■ Do not replace the fuse on the power cable without professional guidance, using improper fuse may cause damage to the unit or even cause burn the unit.
■ Do not use irregular shaped Disk.
■ IR remote control operation may be hindered by monitor when the monitor is opened, thus please use the remote control at the similar level of remote control receiver.
■ Do not install the unit where the cooling fan is blocked.
CONTENTS
WARNING! 2
OPERATION PRECAUTIONS 2
CONTENTS 3
ACCESSORIES....4
UNIT-INSTALLATION 5
WIRING CONNECTIONS 6
PANEL 8
REMOTE CONTROL....9
REMOVE BATTERY....10
MAIN MENU 11
◆ RADIO INTERFACE 11
◆ DISC/USB/ DISPLAY INTERFACE....12
♦ SETTING CONTROL 14
BLUETOOTH PHONE INTERFACE 18
AUX MODE 19
OTHER FUNCTIONS....19
NAVIGATION....20
NOTES ON DISC 21
TROUBLESHOOTING....22
TECHNICAL SPECIFICATIONS 24
Package contains the following accessories for installation and operation of the unit.
| (1) Bracket | 2 | 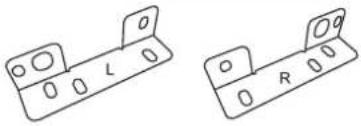 |
| (2) Screw | 4 | 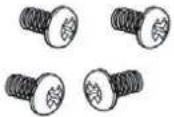 |
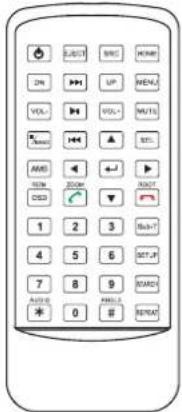
Remote Control
Warranty card
User Manual
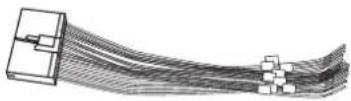
cable
Trim ring
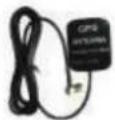
GPS ANT
Note:
Product image may vary from the actual delivery.
UNIT INSTALLATION
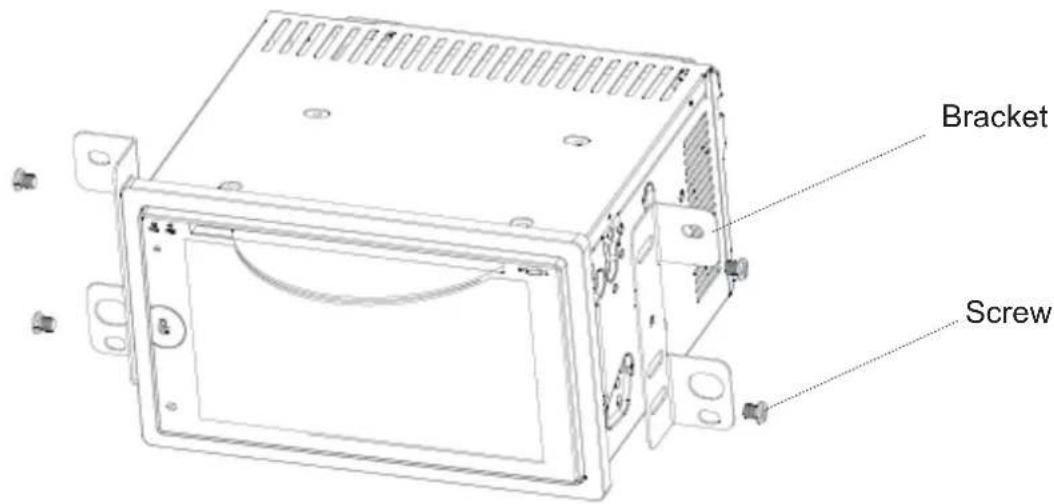
- Put the 2 brackets to the left and right side of the unit;
-
Use screws to fix the brackets to the unit.
-
make sure the ignition is turned off, and then disconnect the cable from the vehicle battery's negative (-) terminal. You never want electricity running while you install this double-DIN car receiver.
-
Before in stallation, remove the transport screws, disconnect the wire harness and the antenna
-
Attach the "L" brackets(2pcs) on the other sides of the car receiver with screws(M5*8BM) as shown as the below figure .The others fixing screws that fix the other terminal of the "L" metal bracket .please buy from your dealer according to the drilling of holes size.
-
Consult with you nearest dealer if installation requires the drilling of holes or other modification of the vehicle.
-
Install the car receiver in the dashboard.
-
Connect the wire harness & the antenna to the car receiver (see "Electrical Connection") being careful not to pinch any wires or cables.
-
Install the plastic outer trim ring onto the car receiver.
-
Reconnect the battery and run through all of the options on this car receiver to ensure that everything is working correctly.
-
Particulars will vary widely depending upon the kind of your car and the car you intend to install it in. Please choose the correct installation method according to the actual situation of your car. Always contact the car dealer or manufacturer if you have any questions.
Make sure you have good chassis ground. A good ground connection will eliminate most electrical noise problems. A good chassis ground requires a tight connection to the vehicle metal chassis. The area around the ground connection should be clean, bare metal without rust, paint, plastic, dust, or dirt for a good electrical connection.
Caution: Do not interchange the connection of the wiring!!!
For some car models you may need to modify wiring of the supplied power cord. Contact your authorized car dealer before installing this unit.
Using the ISO Connector
- If your car is equipped with the ISO connector, then connect the ISO connectors as illustrated.
- For connections without the ISO connectors, check the wiring in the vehicle carefully before connecting, incorrect connection may cause serious damage to this unit.
- Cut the connector; connect the colored leads of the power cord to the car battery as shown in the color code
table below for speaker and power cable connections
![SOUNDSTREAM DVD/CD,USB,MP3/MP4,Bluetooth,/Navigation AM/FM STEREO MODEL:VRN-624B Frequency range: FM:87.5-107.9MHz AM: 530-1710KHz FCC ID:2A19D-VRN624B GPS Antenna Blue Subwoofer Out1 White Line Out (RL) White Line Out (FL) Radio Antenna Yellow Video Output 1 Red Line Out(FR) Yellow Video Output 2 Red Line Out(RR) Yellow Rear View Camera Input Blue Subwoofer Out2 1.ILLUMI [Orange] 11.Antenna/amp+12VDC [Blue Black] 2. 3.Parking Brake [Pink] 12.ACC+12VDC [Red] 3.Steering Wheel Control IR [Green/White] 13.Reverse [Orange and black] 4.Steering Wheel Control 1 [blue] 14.Power 5V (Yellow and Green) 5.Steering Wheel Control 2 [brown] 15.GND [Black] 6.Steering Wheel Control 2 [brown] 16.Battery +[Yellow] 7.Rear Left-[Green and black] 17.Rear Right-[purple and black] 8.Rear Left+[Green] 18.Rear Right+[purple] 9.Front Left-[white and black] 19.Front Right-[gray and black] 10.Front Left+[White] 20.Front Right+[Gray]](/content/2026/05/942167/images/f0f9382612dad843bd95dcc01c810df143adebad25376684b68d6bbfa8e3fdf7.jpg)
NOTE: Never connect cable to the system while it is connected to the battery power. Whenever the unit is disconnected from the battery, the preset memory will be erased and the unit will go back to its factory defaults.
When the brown cable for steering wheel control connected to the steering wheel, we can use the steering wheel to control some unit
SWC Interface Connections
To use the built-in SWC function, connect SWC-1 (Blue) and SWC-2 (Brown) to the corresponding SWC wires of the vehicle. Follow the SWC settings described in the SWC Settings section
To use an external universal ASWC module, connect only SWC-IR (Green/White) to the output of the module.
Power supply 5V uses SWC when it is first activated
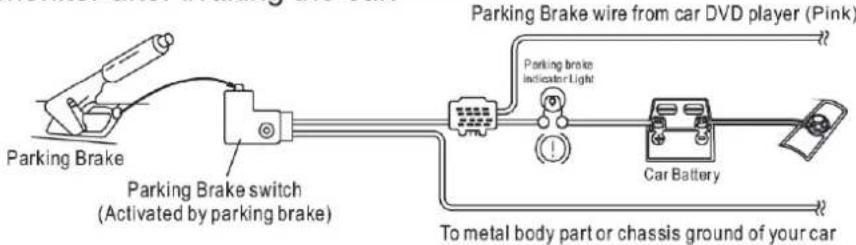
Note: To watch video the parking wire should be connected to break signal. 2 cables are connected to a Hands-Free device (not included).
Parking wire
Note: The parking wire is connected with brake signal; for safety, the programs can be seen on the monitor after braking the car.
Connecting the reversing line to taillight on the car
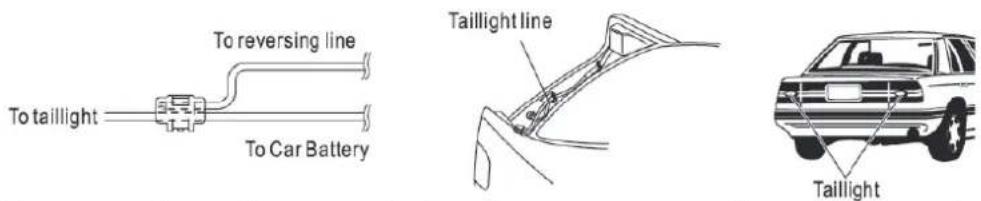
After connecting, when you start up the reverse gear, the unit will receive the picture from car rear view camera.
Note:
- Only use groundless loudspeakers.
- Use only loudspeakers of minimal 40Watt, using fewer watts may result in damaging your loudspeakers at higher volumes.
- Use 4\~8Ω (Ohm impedance) loudspeakers only; using higher or lesser impedance may damage the unit.
- Do not use 3-cable loudspeakers and do not connect the loudspeakers minus to the car body (GND). The unit is using a BTL circuit and each loudspeaker must be connected with insulated cables according to the diagram.
- Loudspeaker cables and/or optional external power amplifiers must always be about 30cm away from the antenna and/or antenna extension parts.
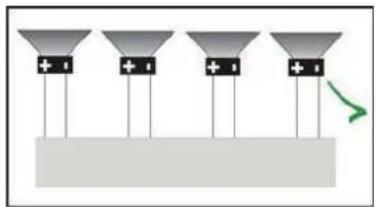
Connect the speakers according the following diagram, incorrect connections will damage the unit or your loudspeakers
Correct connection
Left front - Right front | Left rear - Right rear
natural_image
Diagram of four identical funnel-shaped objects with plus signs on each, above a gray base with a green arrow indicating direction (no text or symbols)Incorrect connections
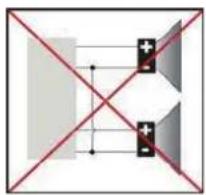
natural_image
Pure electrical circuit lines without any symbols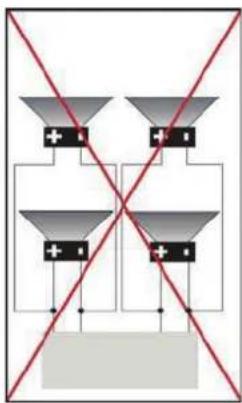
natural_image
Pure electrical circuit lines without any symbols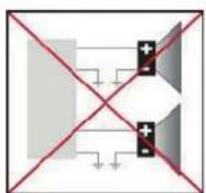
natural_image
Pure electrical circuit lines without any symbolsFRONT PANEL
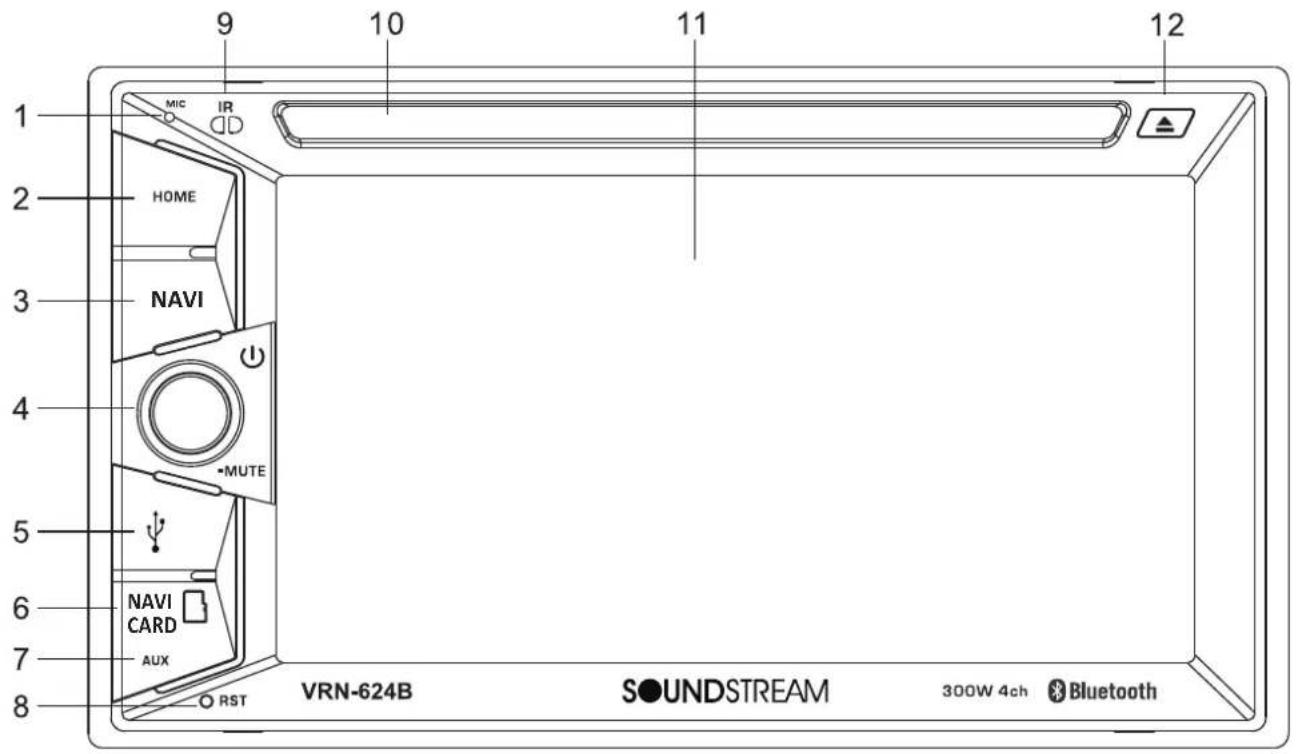
1.MIC
2.HOME
Change to Press menu button to go into home page
3. Navi
Press to change radio band in sequence of FM1-->FM2-->FM3-->AM1-->AM2
4. POWER/MUTE Button
When unit off, press to turn on the unit.
When unit on, press to mute, press it again to release mute.
Long press for unit power off.
5.USB Slot
USB slot, for multimedia playback files only. Insert a USB into this a USB into this slot and unit will automatically start reading and playback the card. Supported Music file format.
6. Navi card
To play Navigation card linsert the card into the card slot to use Navigation.
7.AUX
Put the audio plug into the AUDIO jack which was marked on front panel
8.RST
Press it with a thin, sharp object, the device will then be reset to factory default settings
9.IR Sensor
IR Remote control signal receiving window.
10.DISC Slot
11.Info Display
Information Display LCD when operation the unit
12.EJECT Button
Press to eject a disc. If the disc not removed for about 10 seconds after eject, the disc is reinserted automatically.
VII. Remote Control
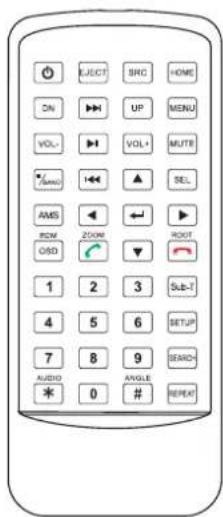
Precaution:
- Under normal conditions, the battery life of remote control is about 6 months. When remote control doesn't work well, check and replace with a new battery timely.
- When the remote control is not to be used for a long time, please remove the battery to avoid liquid leakage which may damage the remote control
- Prevent falling from a height to avoid damage.
- The battery is forbidden to be disassembled nor heated nor put into fire nor placed together with other metals.
- Place the battery in a safe place to prevent the kid from swallowing it. In case the kid swallowed the battery, immediately send him/her to see a doctor.
| Button Name | Button Function |
| ○ | Power ON/OFF |
| EJECT | Disc OUT/IN |
| SRC | Press it select the mode |
| HOME | Enter homepage |
| DN/UP | Screen angle adjustment |
| |◄◄/►► | In disc mode, select previous/next chapter/ track; in radio mode, seek lower/higher frequencies |
| VOL-/VOL+ | Decrease/increase volume |
| MENU | Enter main menu |
| MUTE | Mute key |
| ■/BAND | In radio mode, select bands; in other modes, stop playback |
| ►II | Play/pause |
| SEL | Enter EQ setup menu |
| AMS | Short press to preview / long press to search |
| ▲▼►◄ ENTER | Left/right/up/down keys and enter key |
| OSD/RDM | DVD USB SDshort press: Show Status Bar /touch functionLong press: random player function |
| ○ ZOOM | In Bluetooth mode, it is answer/dial/redial button;In DVD mode, use it to enlarge image |
| ● ROOT | In Bluetooth mode, hang up the calling;In DVD mode, it is button to enter disc main menu |
| 1、2、3、4、5、6、7、8、9、0 | Select current band, section or preset stations; Input phone numbers, etc. |
| Sub-T | Change DVD Subtitles in other languages |
| SETUP | Enter system setup menu |
| SEARCH | Search and play |
| *AUDIO | In Bluetooth mode, input *;In other modes, switch sound tracks |
| #ANGLE | In Bluetooth mode, input #:In DVD mode, switch angles( when supported by disc ) |
| REPEAT | Repeat key |
REMOVE BATTERY
Note:
■ The distance may vary according to the brightness of ambient light.
■ If the remote is not used for an extended period of time, remove the battery to prevent possible damage from battery leakage and corrosion.
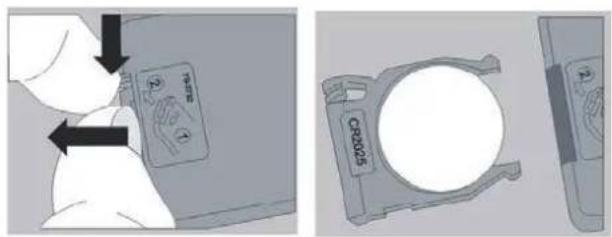
■ Do not place any objects between the remote control unit and the sensor on the unit.
■ Do not drop the remote control onto the floor; it will damage it beyond repair.
■ Do not use the remote control unit, while simultaneously operating the remote control unit of any other equipment; they may interfere resulting in improper operation.
■ The battery normally last for about one year although depending how often the remote control is used. If the remote control unit isn't working even when it is operated near the unit, replace the battery with a new battery of the same make and use only a lithium cell battery type: CR2025 (3V).
■ Dispose empty batteries in accordance with your local governmental regulations.
■ Do not short-circuit, disassemble, heat or dispose of fire or flames the battery.
- Keep the battery out of reach of children, should the battery be swallowed, immediately consult a doctor.
MAIN MENU
The best way to discover the program is to explore each screen in detail, and to find out how to move from one to another. Read this chapter for a guided tour.
Unit starts by displaying the Main menu. This is the root of the screen hierarchy, and you can simply access all features by tapping on the touch screen buttons.
Tap the icons to enter a desired mode.
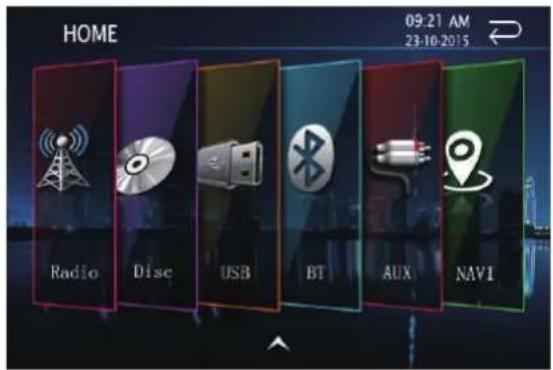
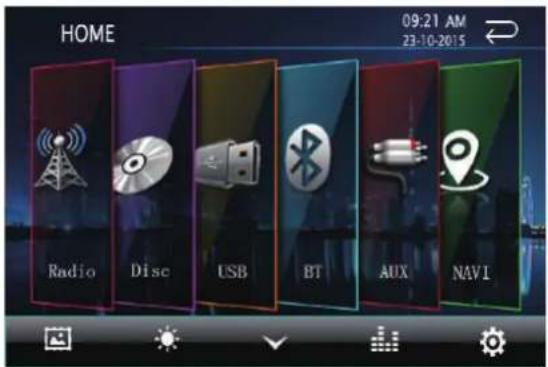
Wallpaper : Click to change to difference styles and backgrounds
Dimmer: All screen brightness will turn off when press this button, click other place on screen will restore.
Shortcut Menu Off
EQ: Touch this button adjust the EQ function.
EJECT:Disc out/in.
Back
Shortcut Menu On
♦ Radio Interface
To start Radio, tap Radio button on main menu screen.
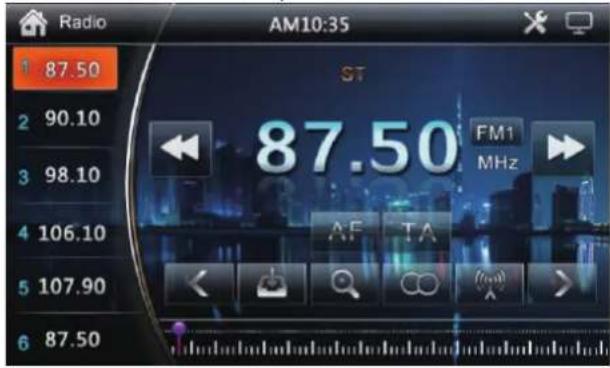
Home : Click to return to main interface.
Scan backward: Click to scan automatically from current frequency to lower frequency, when scanned a station, it stops at the frequency.
Adjustment: Touch this button can adjust the speaker, EQ Loudness, Equalizer, Field, Display.
TFT off : LCD will turn off when press this button, click any place on screen will restore.
FM1 Band switch: Click to switch different next band.
Scan forward: Click to scan automatically from current frequency to higher frequency,
when scanned a station, it stops at the frequency.
Radio control keys : Click to select different functions by dragging from left to right.

Backward fine tuning : Every click makes one step fine tuning from current frequency to a lower frequency.

Auto seek: Click to seek stations from beginning to end and save searched stations.

Save frequencies browse: Click to browse the save frequencies, it stops for 5s at stations with signal and listen, click again to cancel scanning.

Mono/Stereo switch: When listening to FM, Click to switch between mono and stereo.

LO/DX switch: When listening to FM, click to switch between LO and DX.

Forward fine tuning : Every click makes one step fine tuning from current frequency to a higher frequency.

AF function : The car from one area to another area be able to keep and receive the same radio signal, And real-time switch to the strongest on the transmission frequency of the same radio signal.

TA function : When play CD or listening to a Radio, can temporarily switch to broadcast traffic announcement in a timely manner to understand the traffic.
◆ Disc/USB/ display interface
natural_image
Video player interface showing a forest scene with green foliage and wooden posts (no readable text or symbols)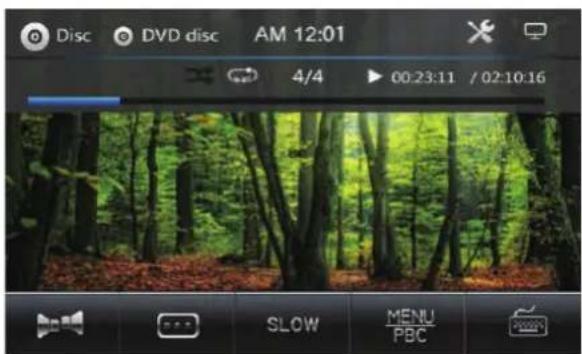
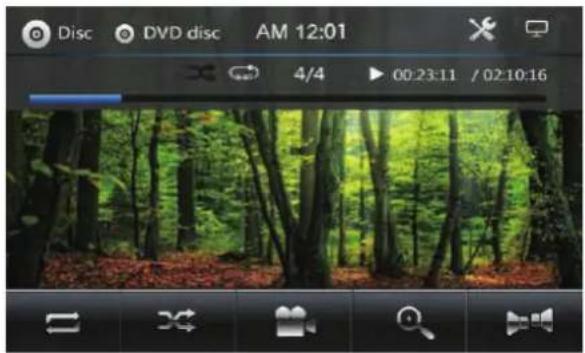
- Display control menu: Click to choose difference functions by dragging screen from left to right.

Menu Directory

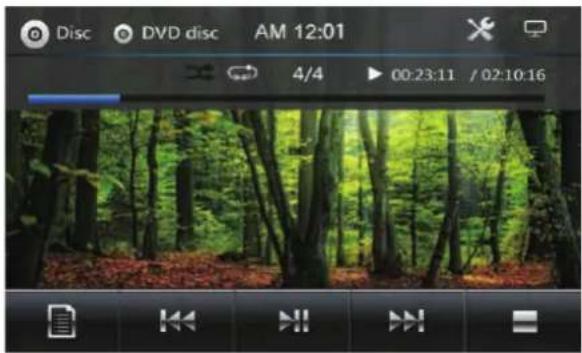
Previous : Click to play previous track.

Next: Click to play next track.

Play/pause: Click to pause, click again to play.

Repeat : Click to set repeat mode ----single repeat, all repeat etc.

Random : Click to set random on/off.

Angle : when playing DVD angle disc, click to select angle control.

Zoom : When playing videos, click to zoom in/zoom out current video.

Sound channels : Click to switch difference sound channels.

Sub-title on/off.

Slow: When playing video, click to slow down playback speed.

Menu/ PBC: When playing DVD, click to return to menu playback ; When playing VCB, Click to select PCB display.

Keyboard on-off :Click to turn up ( or switch ) the digital keyboard and SWC keyboard.
SETTING CONTROL
To start SETTING, tap SETUP icon on main menu.
◆ System
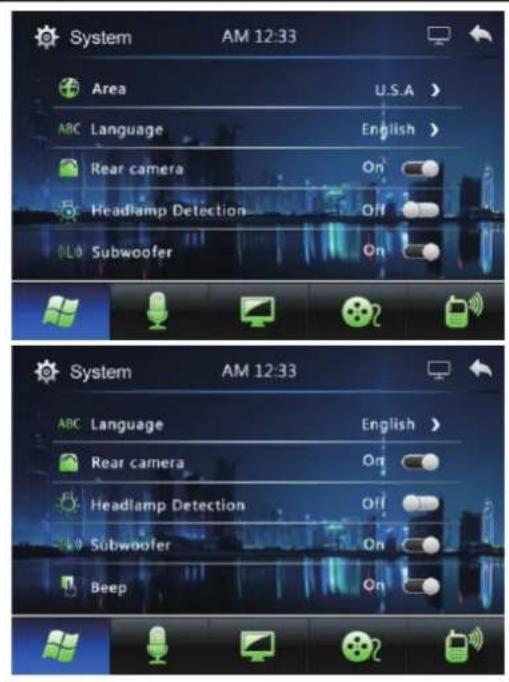
Area: Press it choose U.S.A or S.America
Language : Press it choose English, 中文, Indonesia...and act.
Rear Camera: Turn on or off.
Headlamp Detection: Turn on or off.
Subwoofer: Turn on or off.
Beep : Turn on or off.
◆ Audio
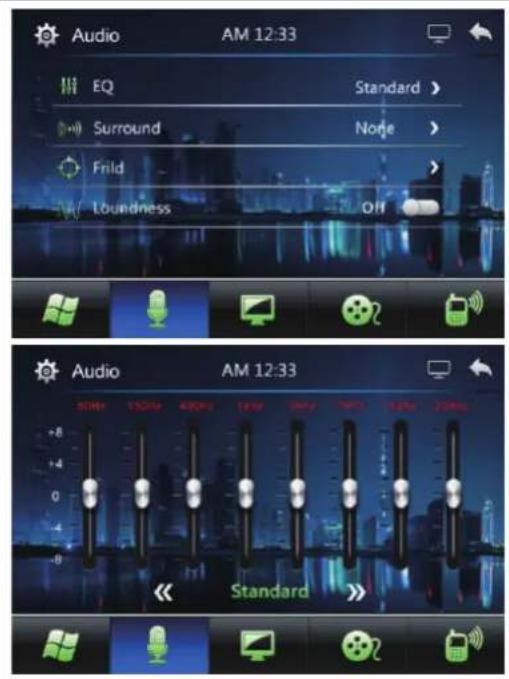
EQ: Press it choose Standard, Classic, Rock, Pop, Jazz Electric, Custom.
Surround: Press it choose None, Concert, Church, Passive, wide, live.
Field: All around sound adjustment
Loudness: Turn on or off
Touch balance button adjust balance surround and filed.
◆ Display
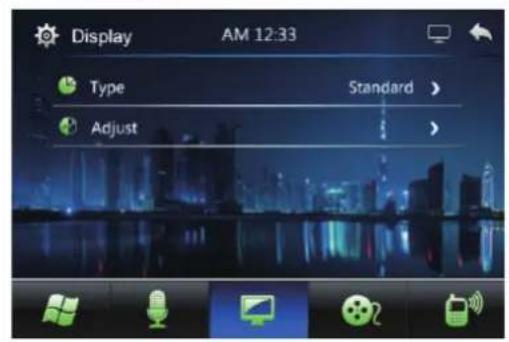
Type: you can choose Standard, light, soft, bright custom
Adjust: you can adjust brightness, contrast, color, saturability and sharpness.
SETTING CONTROL
◆ Media
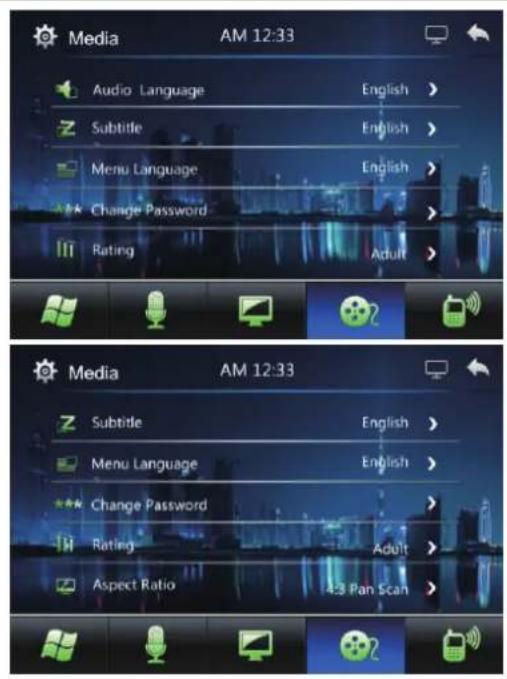
Audio Language: press it choose English, French, Spanish ... and act.
Subtitle: press it choose English, French, Spanish ... and act.
Menu Language: press it choose English, French, Spanish ... and act.
Change Password: 123456
Aspect Ratio : press it choose 4:3 Pan Scan or 16:9 wide Screen.
BT
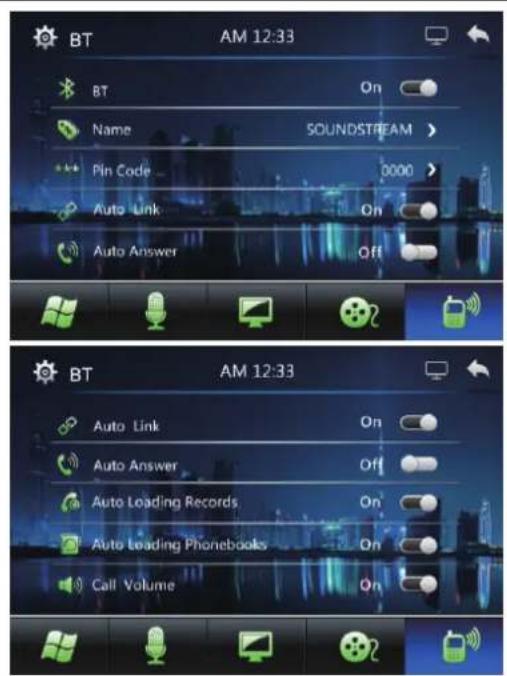
BT: Turn on or off.
Name: press it you can set up the BT name.
Pin Code :Default 0000 ( you can set up )
Auto Link: Turn on or off.
Auto Answer: Turn on or off.
Auto Loading Records: Turn on or off.
Auto Loading Phonebooks: Turn on or off.
Call Volume: Turn on or off.
◆ Time
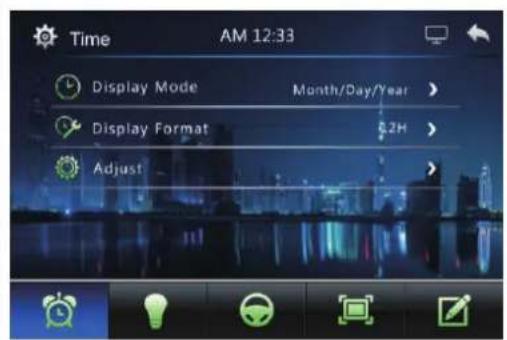
Display Mode: Month/Day/Year, Year/Month/Day, Day/Month/Year.
Display Format: you can choose 12H/24H.
Adjust: you can setting up the time and date.
SETTING CONTROL
◆ Backlight Adjust
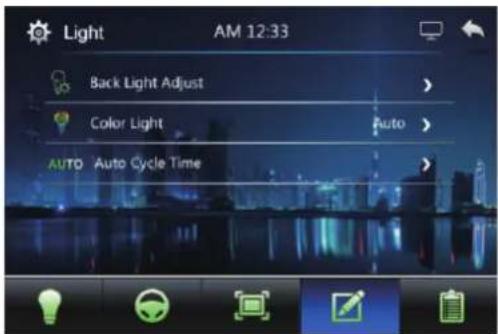
ILL Set : Touch or move drag bar setting the luminance. Touch color light set up, there have three mode can choose.
Auto: According to the fixed sequence and parameter Settings (15s/30s/45s/60s) to auto cycle.
Manual: you can choose three kind of color, Max 255*255*255.
Primary: seven kind of the color can choose one of the color.
◆ SWC
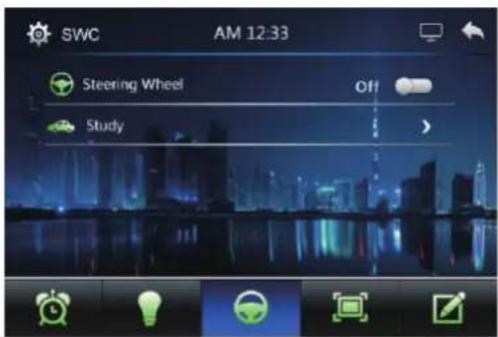
Steering Wheel: Turn it on or off.
Study : Universal external ASWC Box/SWC leaning setup:
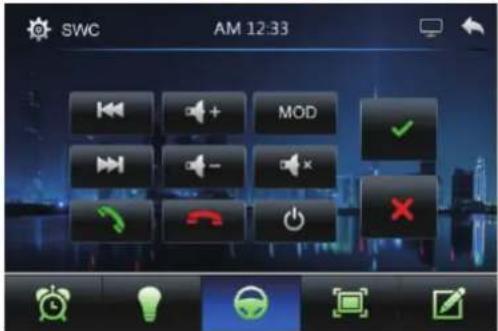
Please make sure unit connect SWC1 wire fist, and then press the wheel button, then press the corresponding button on screen
◆ Touch
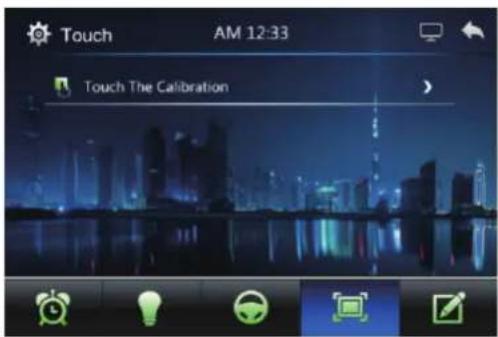
Touch for Calibration : Proofreading.
Long press home button in the panel over 5 seconds, enter Touch the proofreading mode.
SETTING CONTROL
◆ Factory setting
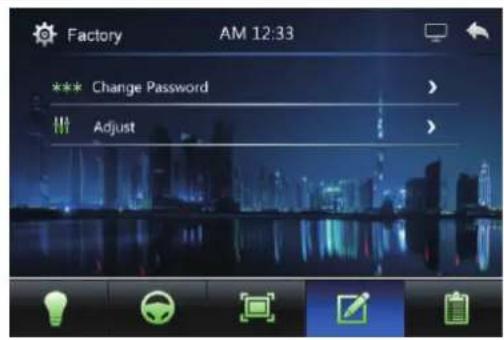
Factory setting
◆ Version information
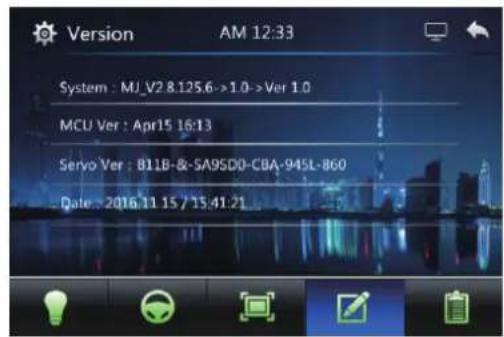
Version information.
BLUETOOTH SECTION
Warning: Driving and having a Telephone conversation at the same time is dangerous, please park your car before having a telephone conversation, The supplier waves any and all liability when this warning is not followed.
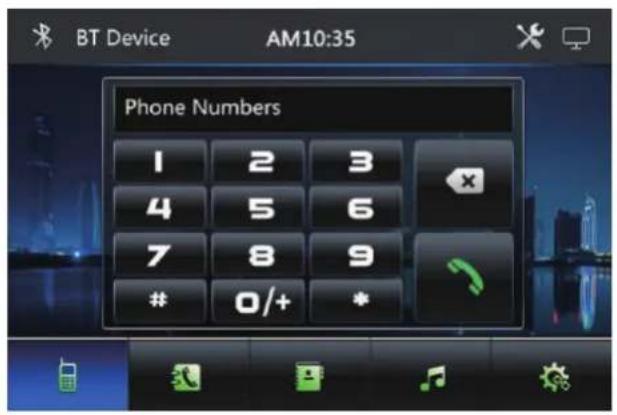
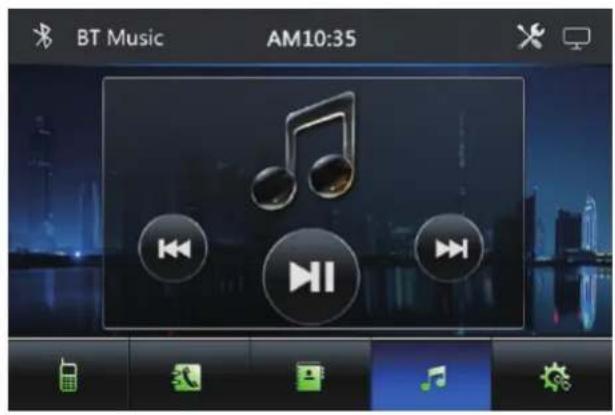
Calls control key : Click to switch to BT dial-up interface
Calls record : Click to switch BT calls record interface.
Phone book: Click to switch BT phone book interface.
BT A2DP: Click to enter Bluetooth music playback interface.
BT connect setup: Click to switch BT connect setup from calls.
Dial-up keyboard: Click ✗ to delete input number. Click 📋 to answer calls when incoming or after inputting phone number, click to dial up. Click 🏠 to hang up calls
Bluetooth Connection Instructions

- To enter Bluetooth mode, you can tap Bluetooth icon 📋 on Main menu or short press the " / SRC" button on the Remote Control.
- At the 1 st time when using BLUETOOTH, you need to pair the mobile phone with the bluetooth whose name is "Soundstream".
- Place your Bluetooth Enabled cell phone in pairing mode.
- Connect your phone to the Bluetooth, using the pass code 0000
(A2DP) Music Mode
Tap Music button listen in Bluetooth mode.
You can select the function with the key for previous, play or pause, stop and next.
A2DP (Advanced Audio Distribution Profile) Music Player A2DP is a function which can receive The audio frequency signal from the mobile phone, amplified by the car audio and played out by the car speakers.
Notice: your mobile phone need to support A2DP.
Tap the buttons on the screen as shown, or press corresponding buttons (PAUSE/PLAY, STOP, PREVIOUS/NEXT) on remote control to play, pause, play previous, or next music file.
AUX MODE
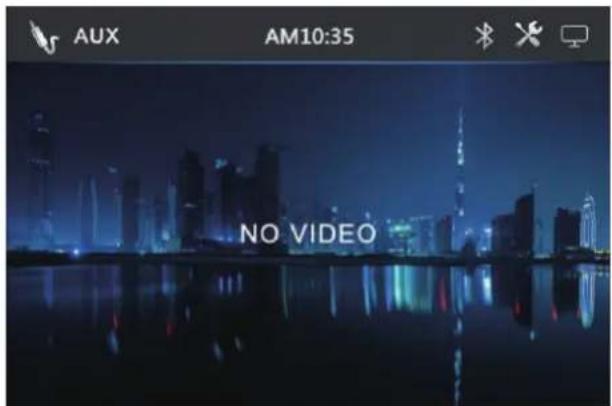
To start AUX Mode, tap on AUX button from main menu screen. Connect the external audio signal source to this unit. Select Aux mode in the main menu.
Note: If there is no external audio input, the TFT displays "Warning".
OTHER FUNCTIONS
Parking
When the car is stopped and the parking brake is working, the screen can display the video image, otherwise the screen can't display the video image
Back View Camera
This unit is equipped with back view camera output. The camera is used to observe the situation behind the vehicle when you are backing the car.
Please connect your back view camera with the back car video input. And connect the reverse wire for back a car with the rear gear light. Rear view camera picture will be enabled when you are backing the car.
NOTES ON DISC
✨ Only use groundless loudspeakers.
Use only loudspeakers of minimal 40Watt, using fewer watts may result in damaging your loud speakers at higher volumes.
Use 4\~8 Ω (Ohm impedance) loudspeakers only; using higher or lesser impedance may damage the unit.
Do not use 3-cable loudspeakers and do not connect the loudspeakers minus to the car body.
(GND). using a BTL circuit and each loudspeaker must be connected with insulated cables according to the diagram.
✿ Loudspeaker cables and/or optional external power amplifiers must always be about 30cm. away from the antenna and/or antenna extension parts.
If want to display for 7" TFT, parking wire must be connected to ground.
Handing discs
Handing
When holding With both hands
When holding with one hand
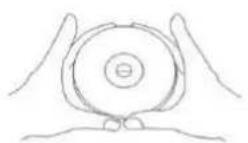
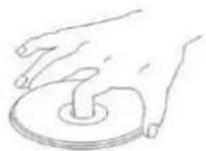
- Do not use damaged (cracked or warped) discs.
- Do not scratch the signal surface or let it get dirty.
- Do not attach paper or seals to discs. The player may be damaged if there is any exposed glue, etc., On discs. For rental discs in particular, extra labels are often attached to the discs. Check carefully for any exposed glue before using such discs.

natural_image
Illustration of a hand holding a CD or DVD with a prohibition symbol overlay (no text or symbols present)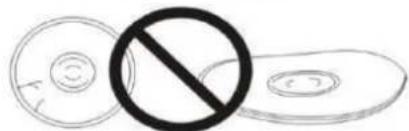
natural_image
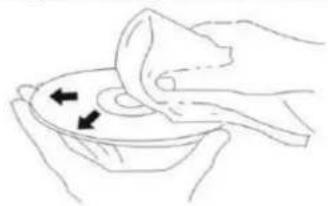
Simple line drawing of three abstract shapes with a prohibition symbol (no text or labels)Cleaning discs
● Fingerprints or dust on discs may reduce sound or picture quality. Remove them by gently wiping the disc from the center toward the edges using a soft cloth.
natural_image
Line drawing of hands cleaning a bowl with a cloth (no text or symbols)- Do not use benzene, thinner or other volatile chemicals. Do not use record spray or antistatic spray either.
- We recommend using the separately sold cleaning set to clean discs.
- For tough dirt, apply some water to a soft cloth, wring out thoroughly wipe off the dirt, then wipe the disc with a dry cloth.
Irregular shaped discs
Irregular shaped discs(heart-shaped discs, hexagonal discs, etc.)Cannot be played on this playeDoing so could damage the player.
Never use such discs.
Storing discs
- Always place discs in their case and store them vertically. Avoid storing discs in hot or humid places, places exposed to direct sunlight and places in which the temperature is extremely low.
- Read any cautions included with the discs carefully.

TROUBLESHOOTING
| Symptom | Cause | Remedy | |
| General | Power does not turn on.(No sound is produced.) | Fuse is blown | Replace with fuse of the same amperage.If the fuse blows again, consult your store of purchase |
| In correct wiring | Consult your local retailer. | ||
| No sound output when operating the unit with amplifiers or power antenna attached. | Power antennal lead is shorted to ground excessive current is required or remote on the amplifiers or power antenna. | 1. Turn off the unit.2. Remove all wires attached to the power antenna lead. Check each wire for a possible short to ground using an ohm meter.3. Turn on the unit.4. Reconnect each amplifier remote wire to the power antenna lead one by one. If the amplifiers turn off before all wires are attached, use an external replay to provide remote-on voltage (excessive current required). | |
| Nothing happens when buttons are pressed.Display is not Accurate | The microprocessor has malfunctioned due to noise, etc. | Turn off the power, Then press the [no open] button and remove the DCP. Press the reset button for about 2 seconds with a thin rod. | |
| Panel or main unit Connectors are dirty | Wipe the dirt off with a soft cloth moistened with cleaning alcohol. | ||
| CD | Sound is bad directly after power is turned on. | Compact disc is dirty | Clean the compact disc without scratches |
| Compact disc is heavily scratched or warped | Replace with a compact disc without scratches. | ||
| Sound is bad directly after power is turned on. | Water droplets may form on the internal lens when the car is parked in a humid place | Let it dry for about 1 hour with the power on. | |
| LCD | Small LCD display error massage | When deck mechanism error, show ERROR 1 | Reset the unit. |
| When disc or servo error, it show ERROR 2 | Change the disc or reset the unit. | ||
| When USB error, t show ERROR 3 | 1.Remove the USB and insert it again2. File errorK please check the file.3. Reset the unit. |
TROUBLESHOOTING
| SYMPTOM | CAUSE | SOLUTION |
| NO POWER | THE CAR IGNITION IS NOT ON. | IF THE POWER SUPPLY IS PROPERLY CONNECTED TO THE CAR ACCESSORY SWITCH THE IGNITION KEY TO CC? |
| THE FUSE IS BLOWN. | REPLACE THE FUSE. | |
| DISC CANNOT BE LOADED. | PRESENCE OF DISC INSIDE THE PLAYER | REMOVE THE DISC IN THE PLAYER THEN PUT A NEW UPWARD. |
| DISC CANNOT BE READ. | INSERTING THE DISC IN UPSIDE DOWN. | INSERT THE COMPACT DISC WITH THE LABEL FACING UPWARD. |
| COMPACT DISC IS EXTREMELY DIRTY OR DEFECTIVE. | CLEAN THE DISC OR TRY TO PLAY A NEW ONE. | |
| TEMPERATURE INSIDE THE CAR IS TOO HIGH. | COOL OFF UNTIL THE AMBIENT TEMPERATURE RETURNS TO NORMAL. | |
| NO SOUND | VOLUME IS IN MINIMUM. | ADJUST VOLUME TO A DESIRED LEVEL. |
| WIRING IS NOT PROPERLY CONNECTED. | CHECK WIRING CONNECTION. | |
| THE OPERATION KEYS DO NOT WORK. | THE BUILT-IN MICROCOMPUTER IS NOT OPERATING PROPERLY DUE TO NOISE. | PRESS THE POWER BUTTON FOR ABOUT 10 SECONDS TO RESET THE UNIT. |
| FRONT PANEL IS NOT PROPERLY FIX INTO ITS PLACE. | ||
| SOUND SKIPS. | THE INSTALLATION ANGLE IS MORE THAN 30 DEGREES. | ADJUST THE INSTALLATION ANGLE TO LESS THAN 30 DEGREES. |
| THE DISC IS EXTREMELY DIRTY OR DEFECTIVE. | CLEAN THE COMPACT DISC/TRY TO PLAY A NEW ONE. | |
| THE RADIO DOES NOT WORK, THE RADIO STATION AUTOMATIC SELECTION DOES NOT WORK. | THE ANTENNA CABLE IS NOT CONNECTED THE SIGNALS ARE TOO WEAK. | INSERT THE ANTENNA CABLE FIRMLY SELECT A STATION MANUALLY. |
TECHNICAL SPECIFICATIONS
| General | |
| Power supply: | 11~16V DC |
| Current consumption: | max. 10 A |
| Maximum power output: | 4 x 50W channels (max) |
| Compatible formats: | DVD/VCD//MP3/MP4/VIDEO/CDDA/PIC TURE CDCD-R/-RW/DVD/W PLAYBACK |
| Dimensions (W x D x H) / weight: | 178*165*100 mm/2 kg |
| Working temperature range: | -20°C - +60°C |
| ESP function: | 10 sec. for Audio CD, 120 sec. for MP3 |
| TFT display | |
| Screen size: | 6.2inch |
| Resolution: | 800*480 pixel |
| Aspect ratio: | 4:3/16:9 |
| Brightness: | 460 cd/m2 |
| Contrast ratio: | 500:1 |
| FM Stereo Radio | |
| Frequency range(U.S.A Area): | 87.5 - 107.9MHz(Step 200KHz) |
| Frequency range( South America Area): | 87.5 - 108MHz(Step 100KHz) |
| Preset memory stations: | 18 |
| AM/MW Radio | |
| Frequency range(U.S.A Area): | 530kHz - 1710 KHz(Step 10KHz) |
| Frequency range(South America Area): | 520kHz - 1710 KHz(Step 10KHz) |
| Preset memory stations: | 12 |
| Audio specification | |
| Frequency response: | 20 Hz-20 KHz |
| USB interface | |
| USB type | USB 2.0 full speed |
| Support format | mp3 , wma, mpeg1, mpeg2, avi |
Specifications are subject to change without notice. Mass and dimension are approximate.
Video File Conversion 101
File compression seems to be name of the game to see who can fit the most music and video onto today media deices. Unfortunately with so many compression formats and codecs, it becomes virtually impossibly for your head unit to support the multitude of song and video file types. To overcome the confusion of what video formats are compatible with this head unit, we suggest using a file converter to align the stars and change the many video file types you have to one standard.
Surely there are many file conversion apps available on the line, but CNet seems to be a reliable source and has a good file conversion app available. Check out:
download.cnet.com/Free-AVI-Video-Converter/3000-2194_4-75685273.html
Drop by our website for the link instead of typing a million letters and symbols into your web browser?
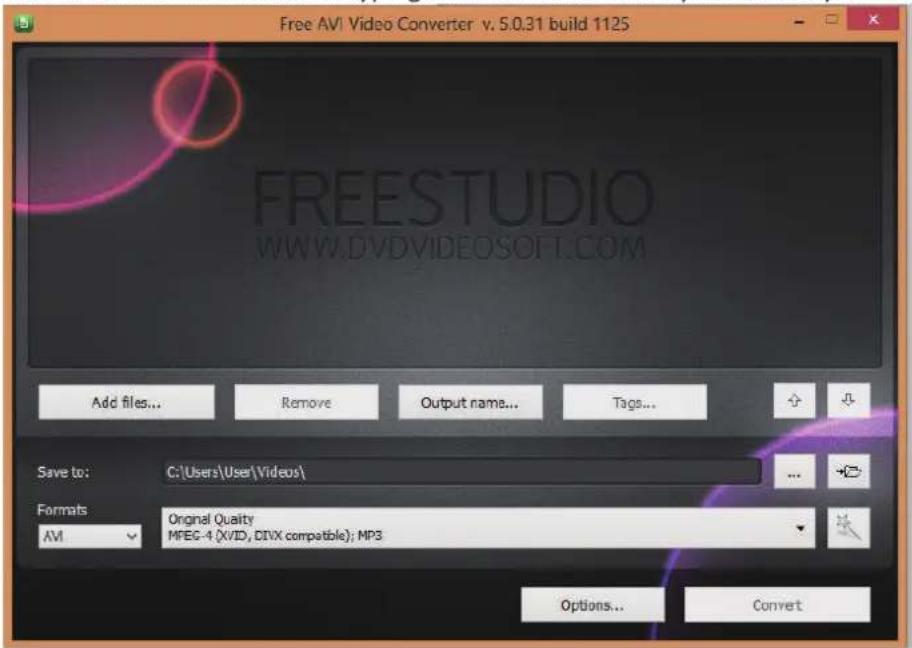
After the app downloads and installs, its pretty simple to convert your files. Select the Add File button and browse your computer to find the alien file type you need to convert. The file info should appear at the top:
![Free AVI Video Converter v.5.0.31 build 1125 D:\desktop\hi-res videos[480P MV]2NE1—Can't Nobody.mp4 00:03:33 FREESTUDIO](/content/2026/05/942167/images/a3fee75f0c4a06e61bde32cb7073ba9ac1f914a2c5abc0c64139c58e44d4efd2.jpg)
There are some optional choices after the file is selected, like changing the name to protect the innocent, or change the location the converted file is saved. If you feeling frisky go for it:

Video File Conversion 101
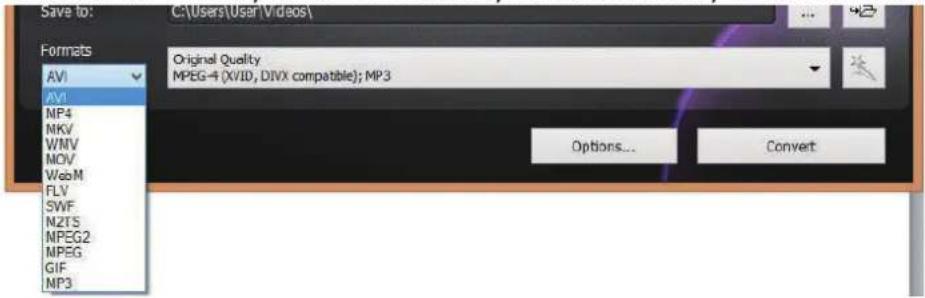
Otherwise, choose the file format you want to convert your movie to. May we recommend the AVI:
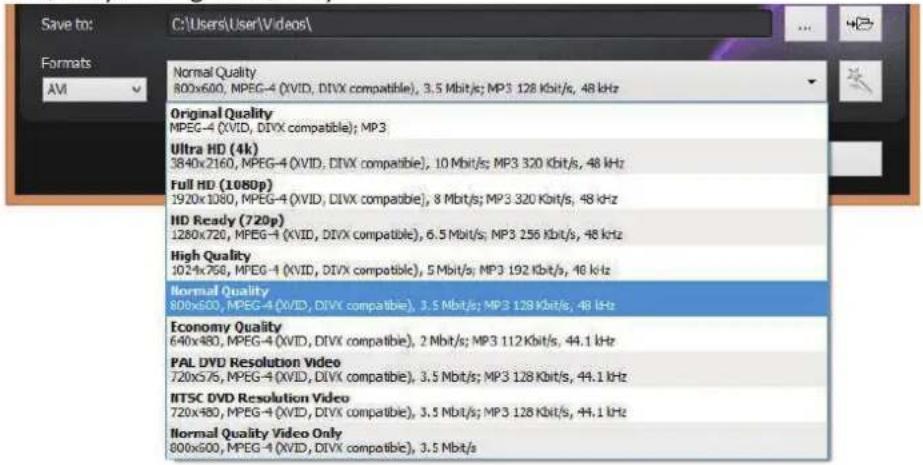
You can also choose the resolution for the screen size and type. If you are converting an original file that is super high quality resolution, you might consider the HD options, but most commonly you should choose Normal Quality or Original Quality.
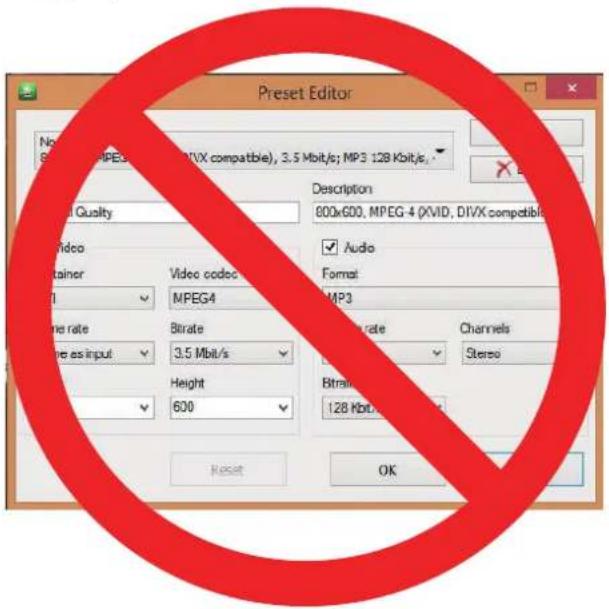
There are some fantastic options to change the standard codec, bit & frame rates, blood types, and so on, but we suggest keeping everything preset as the app recommends. It these crazy variables that brought you here in the first place.
Finally, click convert and wait for the bell:
![[480P MV]2NE1--Can't Nobody.mp4 ✓ Process is completed](/content/2026/05/942167/images/bd299985b319c259ccd2d3140088cd88532484c77cab878da305c27a3b3ed3f3.jpg)
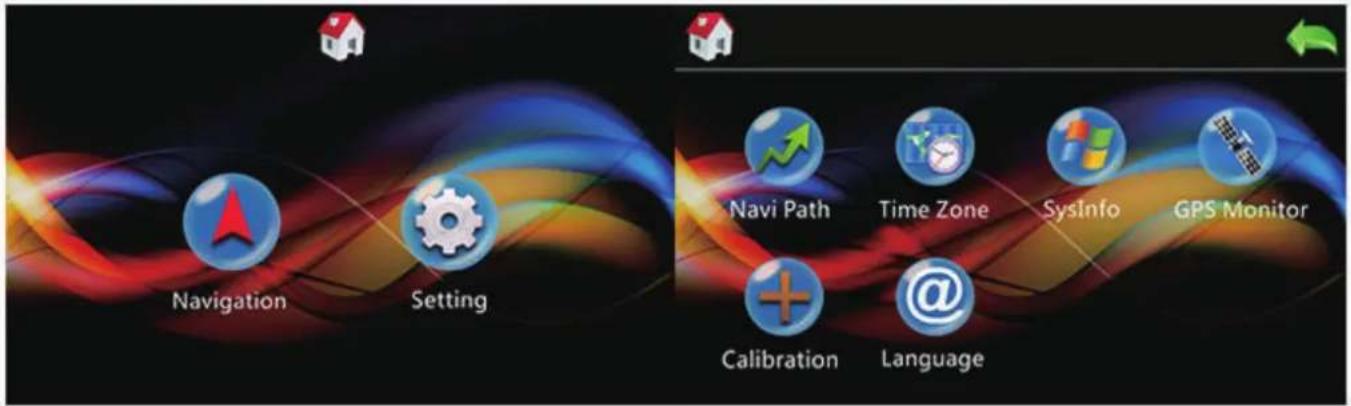
Navigation or set the navigation path
Navigation system setting button

Navigation path setting

Language and interface animation adjustment
GPS navigation system information adjustment
Navigation system volume adjustment and screen click adjustment
Touch effect

Time and national time zone adjustment
Insert the map TFT card with the support car to the GPS card slot, and then select the navigation path, select it and press Back. After confirming the save path, return to the navigation system
main interface and press the navigation button
and it will work.
- WARNING!
- OPERATION PRECAUTIONS
- CONTENTS
- UNIT INSTALLATION
- Using the ISO Connector
- SWC Interface Connections
- Parking wire
- Connecting the reversing line to taillight on the car
- Note:
- Correct connection
- Incorrect connections
- FRONT PANEL
- 1.MIC
- 2.HOME
- Navi
- POWER/MUTE Button
- 5.USB Slot
- Navi card
- 7.AUX
- 8.RST
- 9.IR Sensor
- 10.DISC Slot
- 11.Info Display
- 12.EJECT Button
- Remote Control
- REPEAT
- Precaution:
- REMOVE BATTERY
- MAIN MENU
- ♦ Radio Interface
- ◆ Disc/USB/ display interface
- SETTING CONTROL
- ◆ System
- ◆ Audio
- ◆ Display
- ◆ Media
- BT
- ◆ Time
- ◆ Backlight Adjust
- ◆ SWC
- ◆ Touch
- ◆ Factory setting
- ◆ Version information
- BLUETOOTH SECTION
- 0/+ *
- Bluetooth Connection Instructions
- (A2DP) Music Mode
- AUX MODE
- OTHER FUNCTIONS
- Parking
- Back View Camera
- NOTES ON DISC
- Handing discs
- Handing
- Cleaning discs
- Storing discs
- TROUBLESHOOTING
- TECHNICAL SPECIFICATIONS
- Video File Conversion 101
Brand : Soundstream
Model : VRN-624B
Category : Browser