MI-397 - Support pour écran plat Mount-It! - Free user manual and instructions
Find the device manual for free MI-397 Mount-It! in PDF.


User questions about MI-397 Mount-It!
0 question about this device. Answer the ones you know or ask your own.
Ask a new question about this device
Download the instructions for your Support pour écran plat in PDF format for free! Find your manual MI-397 - Mount-It! and take your electronic device back in hand. On this page are published all the documents necessary for the use of your device. MI-397 by Mount-It!.
USER MANUAL MI-397 Mount-It!
EN Read the entire instruction manual before you start installation and assembly. If you have any questions regarding any of the instructions or warnings, please contact us (Mount-It!) for assistance.
CAUTION: Use with products heavier than the rated weights indicated may result in instability causing possible injury.
- Mounts must be attached as specified in assembly instructions. Improper installation may result in damage or serious personal injury.
- Safety gear and proper tools must be used. We recommend using professional installation services if you are unable to follow the instructions provided in this manual.
• Make sure that the supporting surface will safely support the combined weight of the equipment and all attached hardware and components.
- Use the mounting screws provided and DO NOT OVER TIGHTEN mounting screws.
• This product contains small items that could be a choking hazard if swallowed. Keep these items away from children.
• This product is intended for indoor use only. Using this product outdoors could lead to product failure and personal inj
IMPORTANT: Ensure that you have received all parts according to the component checklist prior to installation. If any parts are missing or faulty, please contact us
(Mount-It!) for a replacement.
MAINTENANCE: Check that the bracket is secure and safe to use at regular intervals (at least every three months).
natural_image
Technical line drawing of two mechanical assembly components (no text or symbols)
Please scan this QR code
to visit the product page.
TV Wall Mount with Extra Long Extension

HAVE QUESTIONS?
Monday - Friday from 8:00am - 4:00pm PST

support@mount-it.com

(855) 925-5668

www.mount-it.com
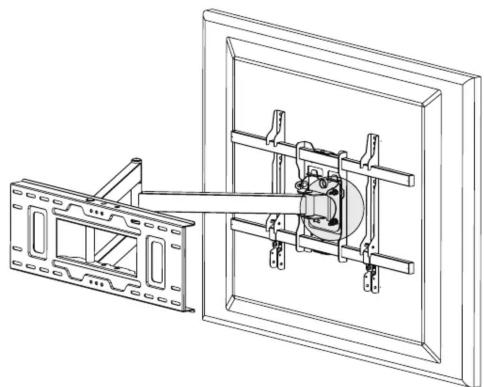
4 Tilt Adjustment 5 Levelling Adjustment
natural_image
Technical line drawing of a mechanical assembly with frame and housing (no text or symbols)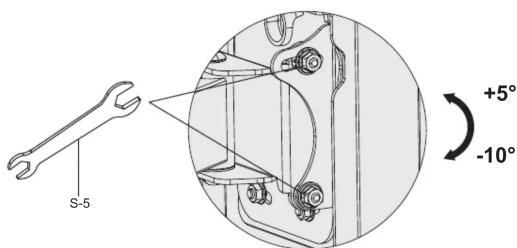
The angle of the screen can be adjusted down up to 10 degrees and up 5 degrees. To adjust the tilt angle of the TV, loosen the tilt adjustment nuts shown here then adjust the tilt to the desired angle then tighten the nuts back down.
Note: If the screen tilts down slowly over time adjust the screen back to the proper angle and ensure the tilt adjustment nuts are firmly tightened.
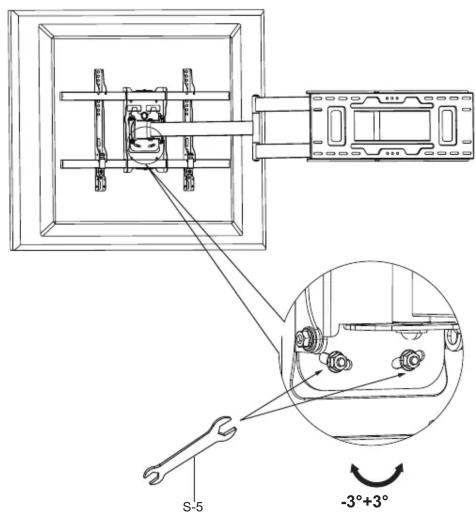
The mount allows up to 3 degrees of levelling adjustment post installation. To adjust the level of the TV loosen the 2 nuts located behind the rectangular VESA plate, level the TV then tighten the 2 nuts again to secure the TV in position.
Visit us at www.mount-it.com for product registration and warranty information.
Our US based customer service team is standing by to answer any questions you have about your Mount-It! product.
Available by phone Monday - Friday from 8:00am to 4:00pm PST.
Chat live with an agent on our website!

support@mount-it.com

(855)- 925-5668

www.mount-it.com
MI-397


WARNING: This installation manual is intended to provide guidance on how to install the TV mount and the TV on a suitable wall. Please contact a qualified professional if you are unsure of the steps described in the manual or have doubts about the safety of the installation. Improper installation may cause damage or serious injury. We cannot be held liable for damage or injury caused by improper mounting. Incorrect assembly, inappropriate use or for use cases not explicitly specified in this document. If unsure, please contact us at www.mount-it.com. Email at support@mount-it.com, or call us at 1 (855)-925-5668
CHOKING HAZARD. Package includes small parts. Not for children under 3 years. Adult supervision is required
TV Mounting Hardware

Square Washer
C (x4)

M4x14 (x4)
D

M6x14 (x4)
E

M6x30 (x4)
F

M8x20 (x4)
G
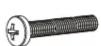
M8x45 (x4)
H

15mm Spacer
I (x4)

5mm Spacer
J (x4)
Wall Mounting Hardware
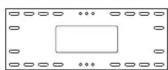
Wall Template
L(x1)
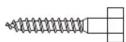
Lag Screw A(x5)

Lag Washer B (x5)

Concrete Anchor
K (5)
Mount and Accessories
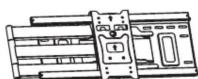
Wall Mount M (x1)

Security Clips
S-1 (x1) S-2 (x1)

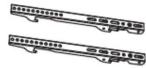
VESA Arms
N (x2)

Security Bolt S-3 (x2)

Hex Wrench
S-4 (x1)

S-5 (x1)
Check carefully to make sure there are no missing or defective parts. Some hardware provided may not be used. Use the correct monitor mounting hardware suitable for your installation.
1a
Wood Stud Installation Option

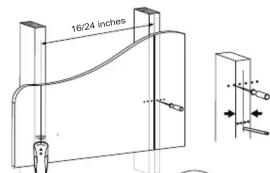
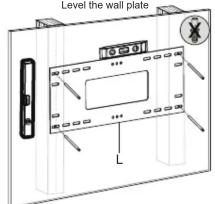
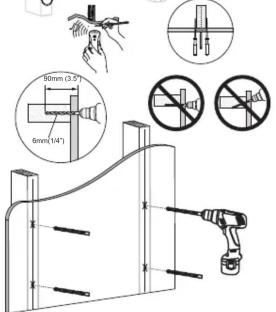
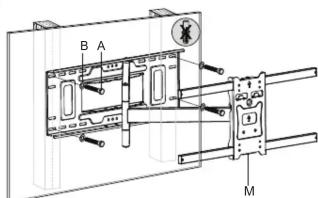
- Use a stud finder to locate the wall studs and mark their location with a pencil.
- Hold, tape or secure the Wall Template (#L) to the wall at the desired installation location. Use a bubble level to ensure the straightness of the Wall Template (#L) and on the center of the studs mark the locations
for the 4 Lag Screws as shown. Once marked, remove the Wall Template. - Use a 1/4" drill bit and drill on the marked locations to a depth of 3.5".
- Hold the Mount (#M) to the wall over the holes and secure to the wall using all 4 Lag Screws (#A) and Lag Washers (#B).

1b
Concrete/Stone Installation Option

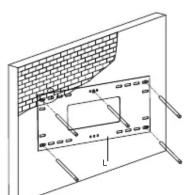
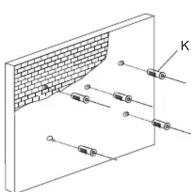
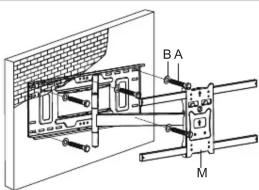
-
Hold, tape or secure the Wall Template (#L) to the wall at the desired installation location. Use a bubble level to ensure the straightness of the Wall Template and mark the locations for the 5 Lag Screws as shown, then remove the template.
-
Use a 2/5" drill bit and drill on the marked locations to a depth of 3.7". Note: Do not drill mounting holes into mortar (such as between bricks or stones) only drill and install into solid stone or concrete surfaces.
- Clear any dust and debris from the holes and insert the 5 Concrete Anchors (#K). Hold the Mount (#M) to the wall over the holes and secure to the wall using all 5 Lag Screws (#A) and Lag Washers (#B).

2a
Attach the TV to the VESA Arms (No Spacers)

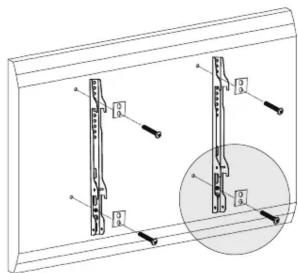
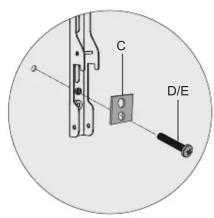
Select the appropriate size Mounting Bolt (Select one size #D, #E) and Square Washer (#C) for your display's mounting holes and verify the length of the VESA bolt is not too long. If you are unsure of the correct bolt size for your display refer to your TV user manual or contact the TV manufacturer for sizing information. Attach the 2 VESA Arms (#N) to the back of your TV using the selected bolts and washer.
2b
Attach the TV to the VESA Arms (With Spacers)


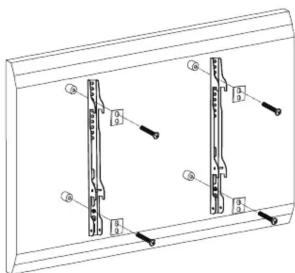
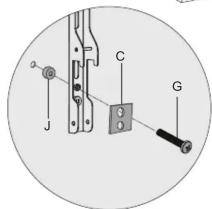
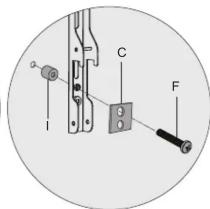
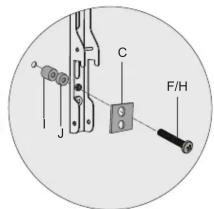
If necessary, use the included spacers (#1, J) between the mount and the screen as shown above to adjust the length of the mounting bolt. Multiple spacers can be used in combination to achieve the desired bolt depth.
Select the appropriate size Mounting Bolt (Select one size #F, #G,#H) and Square Washer (#C) for your display's mounting holes and verify the length of the VESA bolt is not too long. If you are unsure of the correct bolt size for your display refer to your TV user manual or contact the TV manufacturer for sizing information. Attach the 2 VESA Arms (#N) to the back of your TV using the selected bolts, washer and spacers.
3
Hang the TV on the Mount Arms


natural_image
Technical line drawing of a mechanical assembly with rotating components (no text or symbols)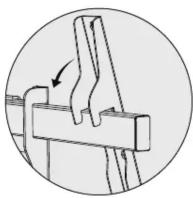
natural_image
Technical line drawing of a mechanical assembly with no visible text or symbols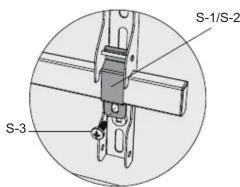
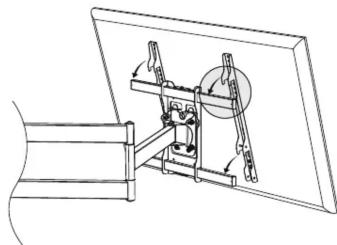
Hang the TV on the mount arms as shown in the diagram. Caution: Use the help of a second person for safe lifting and easier installation.
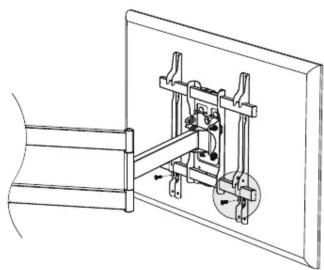
Attach the Safety Clips (#S-1 and #S-2) to the bottom of the VESA arms as shown here, and secure them in place using Safety Bolts (#S-3).
Brand : Mount-It!
Model : MI-397
Category : Support pour écran plat