P1-RX-TX - Baby monitor Peekyboo - Free user manual and instructions
Find the device manual for free P1-RX-TX Peekyboo in PDF.

User questions about P1-RX-TX Peekyboo
0 question about this device. Answer the ones you know or ask your own.
Ask a new question about this device
Download the instructions for your Baby monitor in PDF format for free! Find your manual P1-RX-TX - Peekyboo and take your electronic device back in hand. On this page are published all the documents necessary for the use of your device. P1-RX-TX by Peekyboo.
USER MANUAL P1-RX-TX Peekyboo
Baby Monitor & Camera
natural_image
Product image of a geekyboo-style remote control device and its digital display (no text or symbols visible)USER GUIDE
P1-RX-TX
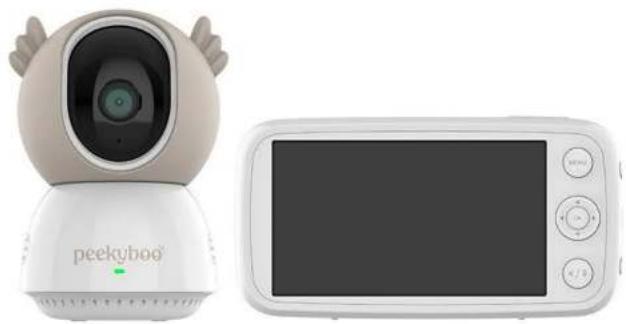
What's in the Box
Baby Monitor (P1-RX)
Baby Camera (P1-TX)
Wall Mount
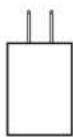
Monitor Adapter (5V 2A)

Camera Adapter (5V 1A)
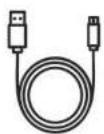
Monitor USB Type-C Cable (1M)
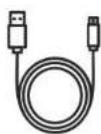
Camera Micro-USB Cable (2.6M)
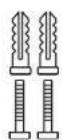
Mounting Screws

Manual
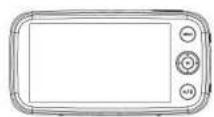
Device Features Monitor:
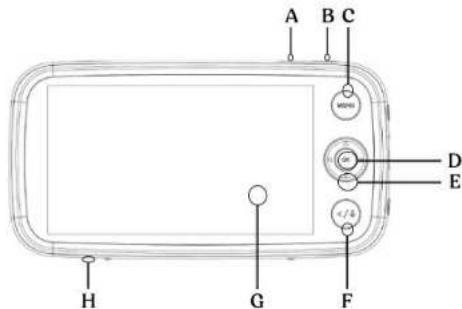
AB - Volume Up/Down
C - Menu Button
D - OK Button
E - Navigation Buttons
F - Return/Talk Button
G - Display Screen
H - Microphone
I - Power/Sleep Button
J - LED Indicator
K - USB Type-C Port
L - Zoom/Photo Capture Button
M - Reset Button (behind stand)
N - Support Stand
O - Speaker
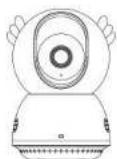
Device Features
Camera:
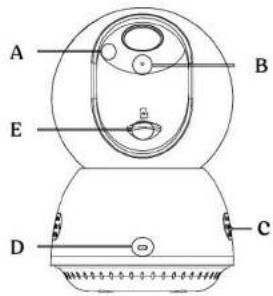
A - Wide-Angle Lens
B - Microphone
C - Speakers
D - LED Indicator
E - MicroSD Card Slot
F - Antenna
G - Temperature Sensor
H - Micro USB Port
I - Pairing Button
Device Set-Up
Monitor Installation
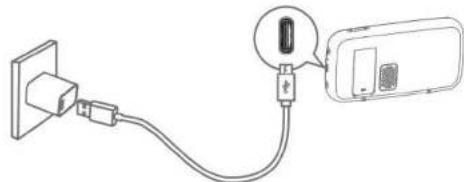
Please fully charge the monitor before using it. The LED indicator will appear red when the monitor is charging and turn green when the monitor is fully charged.
Charging method:
Connect the baby monitor to the monitor adapter (5V 2A) with the USB Type-C cable (1m), and then connect the adapter to a power outlet. Connect the other end of the baby monitor's USB Type-C cable to the USB Type-C port in the monitor to charge it. Press and hold the power button for 2 seconds to turn the baby monitor on.
natural_image
Simple line drawing of a plug connected to a device via cable (no text or symbols)Camera Installation
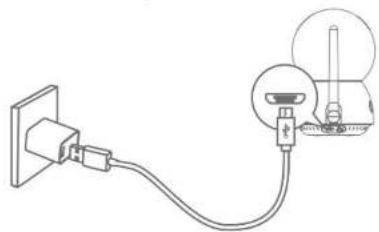
Connect the baby camera's Micro-USB power cable (2.6m) to the camera adapter (5V 1A), and then connect the adapter to a power outlet. Finally, connect the other end of the baby camera's micro USB power cable to the micro USB port in the camera.
natural_image
Simple line drawing of a plug connected to a bulb, with an inset showing the bulb's internal structure (no text or symbols)Pairing Instructions
The baby monitor and camera set are paired straight out of the box. Refer to the following steps when adding additional cameras or after resetting your device.
-
Enter menu settings, go to Camera Settings>Camera Pairing, and press [OK] to add a camera. Then follow the onscreen instructions to start pairing.
-
Press and hold the pairing button on the rear of the camera for 1 second until a notification prompt is heard.
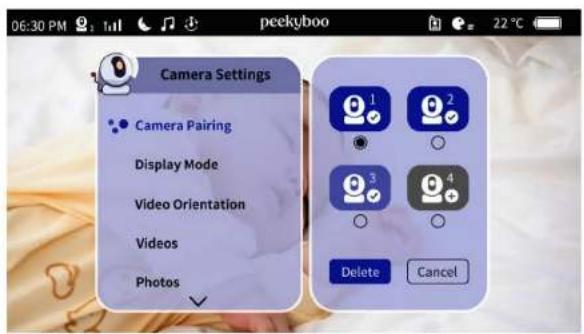
Note: If the volume is set to a high level, the monitor may produce a loud noise when placed in close proximity to the camera. This is normal and can be resolved by moving the camera further from the monitor.
Camera Mounting Instructions Corner/Wall Mount Installation
-
Use the monitor to assess the viewing angle from your desired mounting location. The mount can be used in a corner position (fig. 1), flat or inverted (fig. 2).
-
Use a pencil to mark the screw holes.
-
Drill 6mm holes into the wall and then insert the screw anchors into the holes.
-
Insert the screws through the mounting holes of the wall mount and securely fasten by tightening them into the anchors.

natural_image
Simple line drawing of a symmetrical mechanical or architectural component with no text or symbolsFig. 1

Fig. 2
- Place the camera on the wall mount and push it forward to lock it into place.
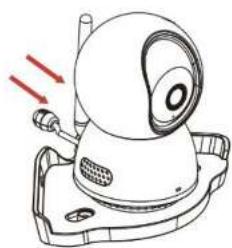
natural_image
Technical line drawing of a mechanical device with red arrows indicating motion or force (no text or symbols)Monitor Interface
Press the [MENU] button on the monitor to open the main menu.

Monitor Settings
| Menu Options | Description |
| VOX Mode | When the monitor is asleep, and a noise exceeds your pre-set VOX threshold the monitor will activate and the screen will automatically turn on. |
| VOX Threshold | Set the sensitivity level of VOX mode. The lower the sensitivity level the lower the sound level required to activate the monitor. |
| Audio only | Listen to the audio from the camera without video. |
| Video Channel | Try switching between Channel A and Channel B if you experience connectivity issues between the monitor and the camera. |
Alerts
| Menu Options | Description |
| Sound Alert | You can set the baby monitor to alert you when a specific noise level is detected.Set the sensitivity of the sound alert. The lower the sensitivity level the higher the sound level required to activate the sound alert. |
| High Temp Alert | Receive an alert on the monitor when the temperature goes above the set threshold. |
| Low Temp Alert | Receive an alert on the monitor when the temperature goes below the set threshold. |
| Alert Duration | Set sound alerts to last 5 secs, 10 secs, 20 secs or 30 secs. |
| Alert Volume | Set the alert volume. |
Lullaby
| Menu Options | Description |
| Camera | Select the desired lullaby or white noise track on the camera of your choice. |
| Adjust the volume by selecting the on-screen volume controls. | |
| Note: Alerts and VOX are automatically disabled when the lullaby function is enabled. | |
| Warning: The sound of lullabies may mask the baby's cry. |
Reminders
| Menu Options | Description |
| Feeding/DiaperChange/Other | Set a feeding, diaper change or other reminder at intervals of 1.5 hours, or a specific time. |
Camera Settings
| Menu Options | Description |
| Camera Pairing | Pair a camera with the baby monitor, up to 4 cameras per monitor. |
| Remove camera. | |
| Display Mode | Choose how you want to display multiple cameras on the baby monitor screen. |
| You can cycle through all connected cameras according to pre-set intervals. | |
| Video orientation | Adjust the orientation of the camera. |
| Video | Directory of videos recorded on the micro-SD card. |
| Select video to play back video on the baby monitor. | |
| Photos | Directory of photographs captured on the micro-SD card. |
| Select photo to view photograph on the baby monitor. | |
| Record Mode | The camera will not record when No Record is selected. |
| Motion Detection Recording: the camera will start recording when motion is detected and will record for a period of 1 minute. |
| Record Mode | Continuous Loop Recording: the camera will record continuously in loops of 1 minute. |
| Note: if the Micro SD card is full new recordings will replace earliest videos and photos. | |
| Time Stamp | Set the time stamp to “On” to display the time and date on video recordings and photographs. |
| Status of Micro SD Card | Provides details on the status of the Micro SD card. |
| Camera LED | The LED light on the front of the camera can be turned on or off. |
More Settings
| Screen Brightness | Set the brightness of the monitor screen. |
| Sleep Mode | Go into sleep mode on the monitor screen after 1, 3 or 5 mins. |
| Night Vision Mode | Auto activates night vision mode according to the light conditions. |
| When set to off, the camera will use daylight mode and will not change to night vision mode when the surrounding environment gets darker. | |
| Note: We recommend you set this function to auto for most situations. | |
| Time Setting | Change the time setting. |
| Language Setting | Change the language setting. |
| Temperature Unit | Set the temperature unit to Fahrenheit or Celsius. |
| Anti-Screen Flicker | If the baby monitor screen is flickering try switching between modes. |
| Default Setting | Restore the camera to its default settings. |
| Version Information | Version information of the baby monitor and camera. |
| Contact Us | Contact details for Peekyboo Pty Ltd. |
Multiple Cameras Monitor Display Modes
When more than one camera is paired to the monitor you can manually or automatically switch view between cameras, or you can display multiple cameras on the monitor at the same time.
-
Manual Switch: Long press the [OK] button and the view will switch to the next camera. The number of the selected camera will display in the icon bar.
-
Automatic Switch (Multi-Camera Cycling): select Camera Settings>Display Mode>Muti-Camera Cycling. The screen cycles through all the paired cameras according to pre-set intervals of 5, 10, 15 or 30 seconds.
-
Display Multiple Cameras On-Screen: select Camera Settings>Display Mode>Full Screen/Two or Three or Four Screen options to display multiple cameras.
Note: When displaying multiple cameras the camera highlighted in green serves as the audio source, and it is also the camera you can control, including pan/tilt/zoom and two-way communication. To switch the audio and controls to another paired camera, press and hold the [OK] button for two seconds.
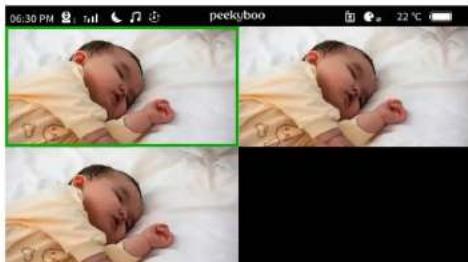
natural_image
Three-panel photo grid showing a sleeping baby on a white surface, with no visible text or symbols.Monitor Icons
| Icon | Description | Icon | Description | Icon | Description |
| Wireless signal strength | Camera is paired to baby monitor | Camera is playing a single lullaby or white noise track | |||
 |  | ||||
| Battery level of baby monitor | Cycling through the cameras and currently showing camera 3 | Current time | |||
 | 9:00PM | ||||
| Volume level in the room where the camera is located | Night vision mode is active | Current temperature in the room where the camera is located | |||
 | 28°C82°F | ||||
| Baby monitor is charging | Camera is cycling through lullabies and white noise | VOX mode is active |
Dedicated Monitor Buttons
E - Navigation Buttons: From the main screen, control the camera view by using these buttons to pan and tilt.
F - Return/Talk Button: Short press in a menu to return to the previous menu; From any interface, long press for push to talk intercom.
I - Power/Sleep Button: Long press to power device On/Off; Short press to switch the screen On/Off from sleep mode.
L - Zoom/Photo Capture Button: Short press to zoom 1.5X, 2X, 4X; Long press to capture a picture and save it to the micro-SD card.
Safety Information
Selecting an optimal location:
Choose a location for the camera that offers the best visibility of your baby in the crib.
Placement options:
Position the camera on a flat surface, such as a dresser or shelf.
Alternatively, securely mount the camera to a camera mount using the keyhole slots on the underside of the camera.
Avoiding hazards
NEVER place the camera, baby monitor or cables inside the crib to ensure a safe environment for your baby.
WARNING STRANGULATION HAZARD: Children can become entangled in cords and cables. Ensure the camera, monitor and mains adapter cables are kept out of reach of children at all times, and at least 6 feet (1.83 meters) away.
Important warnings
Read instructions: Always read the instructions in this user guide carefully before operating the device.
User guide retention: Keep this guide for future reference.
Adult assembly required: Adult assembly is required.
Functionality test: Before actual use, thoroughly test the device and familiarise yourself with its functions.
Handle with care: Do not handle roughly, drop or throw the device as it is a high-quality electronic device that requires careful handling.
Choking hazard: Keep small parts away from children before, during and after assembly.
Risk of suffocation: Keep packaging materials and protective foils out of reach of children to prevent the risk of suffocation.
Not a toy: This product is not a toy. Do not allow children to play with it.
Supervision reminder: This device is not a substitute for responsible adult supervision.
Operating environment: The device is intended for indoor use only and is not weatherproof. Do not submerge in water. Do not use the device in
damp areas or close to water.
Temperature consideration: Do not use the device in an environment where the temperature is too high or too low, and do not expose the device to strong sunlight or an environment that is too humid.
Temperature information: The suitable ambient temperature for monitor, camera and accessories is -10°C to +50°C.
Charging considerations: When charging, place the device in a well-ventilated environment with normal room temperature. It is recommended to charge the device within a temperature range of 0^ C - 40^ C.
Avoid covering: Do not cover the device with a towel or blanket.
Service and repairs: Seek service from qualified personnel only. Do not attempt to open or repair the product. Contact Peekyboo Support for assistance with any issues.
Safety information for AC power adapter
-
Avoid exposing the adapter to direct heat sources, such as candles, stoves, radiators, heat registers, or other heat-emitting appliances.
-
During prolonged use, it's normal for the power adapter to become warm. This should not be a cause for concern. However, regularly check the power cord and its plug for any signs of damage.
-
Handle the adapter with care: refrain from rough handling, dropping, or throwing. When removing the adapter from the wall outlet, grip and pull it from the receptacle—avoid pulling on the cable, as it may lead to damage. Never touch the power adapter with wet hands or allow liquids to spill on it. Do not touch the plug contacts with sharp or metal objects.
-
Keep mains adapter cables out of the reach of babies and young children to prevent accidents. Ensure power cords are securely fastened and not hung on or near the crib to avoid potential dangers.
-
Connect the power adapters to easily accessible electrical sockets.
-
Do not attempt to replace the plugs or cable on the power adapter. Only use the AC power adapter provided by the manufacturer in this package.
-
Never cut, damage, or bend the power cord. Avoid placing objects on top of the power cord, as this could result in overheating, damage, combustion, or electrocution. Disconnect the power adapter from the wall outlet when not plugged into the monitor or camera.
Safety guidelines for lithium-ion battery
The baby monitor is equipped with an integrated lithium-ion rechargeable battery pack, which is not accessible to users. Do not attempt to replace the battery yourself to avoid risk of fire, explosion or other hazards.
Charging safety
-
Monitor charging times of lithium-ion products and disconnect them from chargers once fully charged.
-
Consider using timers as reminders to unplug products to prevent overcharging.
Disposal and storage
-
Dispose of lithium-ion batteries responsibly by keeping them out of household garbage or recycling bins and curbside hard waste collections.
-
Charge lithium-ion batteries and products away from combustible materials such as beds, sofas or carpet.
-
Store batteries and lithium-ion products in cool, dry places and out of direct sunlight, even during charging.
Cautionary measures
-
Do not use batteries, products or chargers that exhibit signs of overheating or failure, such as swelling, leaking or venting gas.
-
Verify the charger you are using is suitable for the product being charged.
-
Allow time for batteries to cool after use and before initiating the charging process.
Emergency procedures
In the event of a fire call emergency services immediately.


This product is designed and manufactured with high quality materials and components, which can be recycled and reused.
This symbol means the product must not be discarded as household waste and should be delivered to an appropriate collection facility for recycling. Proper disposal and recycling helps protect natural resources, human health and the environment. For more information on disposal and recycling of this product, contact your local municipality or disposal service.

CUSTOMER SERVICE
Warranty: 12-month limited warranty
Manufacturer: Peekyboo Pty Ltd
Website: www.peekyboo.com.au
peekybəθ ^z