
MWPU4W - Water filter MIDEA - Free user manual and instructions
Find the device manual for free MWPU4W MIDEA in PDF.


| Product Type | Water Purifier / Dispenser |
| Model | MWPU4W |
| Brand | Midea |
| Dimensions (Product) | 360 mm (W) x 460 mm (D) x 1400 mm (H) |
| Dimensions (Packaging) | 480 mm (W) x 505 mm (D) x 1490 mm (H) |
| Weight | Approx. 30 kg (estimated) |
| Power Supply | 220-240 V~, 50/60 Hz |
| Rated Power | 994 W |
| Heating Power | 874 W |
| Cooling Current | 1.0 A |
| Rated Pure Water Flow | 1.2 L/min (at 0.3 MPa) |
| Hot Water Capacity | 7.5 L/h (≥85°C) |
| Cold Water Capacity | 4 L/h (≤10°C) |
| Filtration Stages | 4 stages: PP sediment, C1 active carbon, RO reverse osmosis, C2 active carbon |
| Water Pressure Range | 0.1 - 0.4 MPa |
| Operating Temperature | 4 - 43°C |
| Water Temperature Range | 5 - 38°C (inlet) |
| UV Sterilization | Built-in UV-LED in clean water tank |
| Display | Large screen showing heating, cooling, filtration, filter life, UV status |
| Safety Features | Leakage protection, anti-dry burning, child lock |
| Child Lock | Yes, for hot water dispensing |
| Filter Replacement Indicators | Yes, on display panel with percentage life |
Frequently Asked Questions - MWPU4W MIDEA
User questions about MWPU4W MIDEA
0 question about this device. Answer the ones you know or ask your own.
Ask a new question about this device
Download the instructions for your Water filter in PDF format for free! Find your manual MWPU4W - MIDEA and take your electronic device back in hand. On this page are published all the documents necessary for the use of your device. MWPU4W by MIDEA.
USER MANUAL MWPU4W MIDEA
natural_image
Line drawing of a three-tier refrigerator with front panel and side legs (no text or symbols)The diagram above is just for reference. Please take the appearance of the actual product as the standard.
WATER PURIFIER
Instruction Manual
Model: MWPU4W
DIRECTORY
- Precaution 1
1-1 Safety Issues 1
1-2 Packing List 2
- Your Direct Drinking Water Purifier 2
2-1. Part Name of Water Purifier 2
2-2. Model and Major Parameters 3
2-3. Product Features....3
2-4. Working Principle 4
- Use Guide and Maintenance 5
3-1. Guidance on Unpacking and Installation 5
3-2. Machine Installation 7
3-3. The display panel is shown as below: 7
3-4. Maintenance 8
3-5. Troubleshooting 9
1. Precaution
1-1 Safety Issues
Please note the following brief icons and rules for safe use of this product

Troubleshooting
When the machine falls, please disconnect the power and water source immediately

Accessories and filters
To maintain the normal operation of the machine, be sure to use accessories and filters supplied by original company

Maintenance
Never remove the parts on the machine to avoid leakage or damage

Emergency call
For any help, please call the local sale service center or the national service hotline

Avoid contact with children
Never have the machine operated by a child

Correct repair service
This machine can only be repaired by qualified personnel designated by this company

Temperature
Please use the product in a dry place with the temperature of 4-43°C

Avoid direct sunshine
Do not install the machine in a place exposed to direct sunshine

Electricity prevention
To avoid leakage of electricity.

Anti-freeze
Never store or expose the product dust in an environmentless than 0°C
- This appliance can be used by children aged from 8 years and above and persons with reduced physical, sensory or mental capabilities or lack of experience and knowledge if they have been given supervision or instruction concerning use of the appliance in a safe way and understand the hazards involved. Children shall not play with the appliance. Cleaning and user maintenance shall not be made by children without supervision.
- Children should be supervised to ensure that they do not play with the appliance.
-
If the supply cord is damaged, it must be replaced by the manufacturer, its service agent or similarly qualified persons in order to avoid a hazard.
-
WARNING: When positioning the appliance, ensure the supply cord is not trapped or damaged.
- WARNING: Do not locate multiple portable socket-outlets or portable power supplies at the rear of the appliance.
- To ensure the product using well, please make sure the product installation, testing and filter exchange are made by aftersales service person.
- In order to make sure the machine can be used normally, please keep it stand still for 24 hours before powering up.
1-2 Packing List
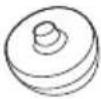
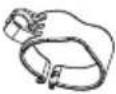
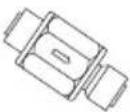
| Instruction Manual(1 copy) | Bracket(1PC) | Screws(2PC) | Crossover sub (1PC) | Filter connector (1PC) | 1/4 PE pipe(White)(2m)1/4 PE pipe(Blue)(2m)3/8 PE pipe(1m) |
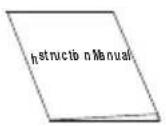 | 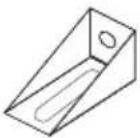 | 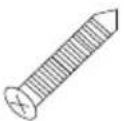 | 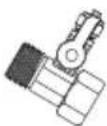 | 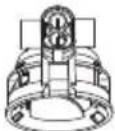 | 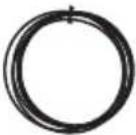 |
| Snap ring(4PC) | Sealing ring (1PC) | Small sealing plug(1PC) | Large sealing plug(1PC) | Pipe clamp (1PC) | reducing valve(1PC) |
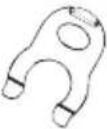 | 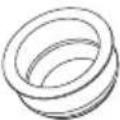 |  |  |  |  |
2. Your Direct Drinking Water Purifier
2-1. Part Name of Water Purifier
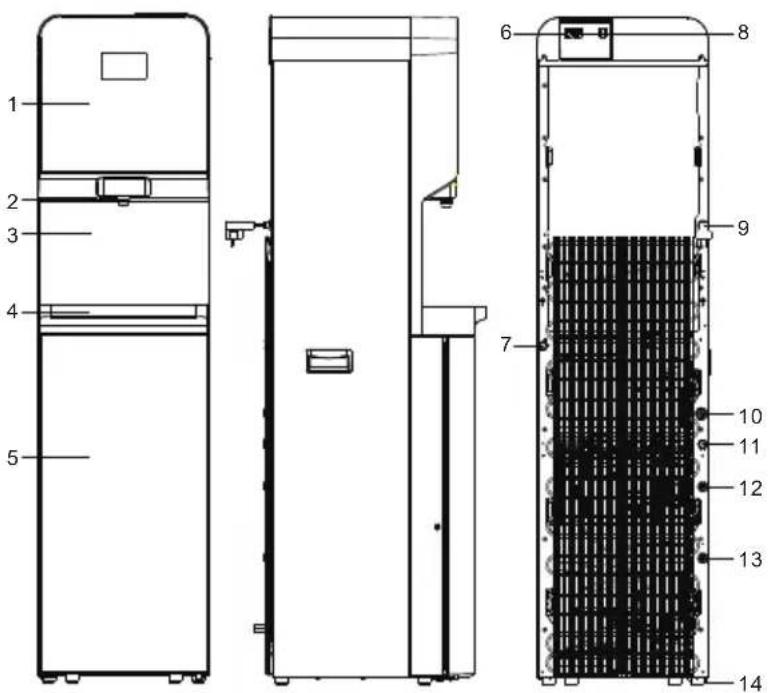
| NO. | PART NAME |
| 1 | Controls panel |
| 2 | Spout |
| 3 | Front carapace |
| 4 | Water collector |
| 5 | Door |
| 6 | Heating switch |
| 7 | Outlet of cold water |
| 8 | Cooling switch |
| 9 | Power cord |
| 10 | Outlet of the water collector |
| 11 | Outlet of hot water |
| 12 | Concentrated water connection |
| 13 | Water inlet |
| 14 | The base |
NOTE:
Please use the product in a place with temperature of 4-43°C and relative humidity less than 85%.
2-2. Model and Major Parameters
| Model | MWPU4W |
| Rated voltage | 220-240V~ |
| Rated frequency | 50/60Hz |
| Rated power | 994W |
| Heating power | 874W |
| Cooling current | 1.0A |
| Rated pure water flow | 1.2L/min(0.3MPa) |
| Hot water capacity | 7.5L/h(≥85°C) |
| Cold water capacity | 4L/h(≤10°C) |
| Applicable environment | 4-43°C humidity ≤85% |
| Applicable water pressure | 0.1-0.4MPa |
| Applicable water | Tap water |
| TDS≤350ppm | |
| Applicable water temperature | 5-38°C |
| Stage 1 | PP sediment filter-F1 |
| Stage 2 | C1 active carbon filter-F1 |
| Stage 3 | RO reverse osmosis filter-F1 |
| Stage 4 | C2 active carbon filter-F1 |
| Product size | 360(W)*460(D)*1400(H) mm |
| Packing size | 480(W)*505(D)*1490(H) mm |
2-3. Product Features
- Hot & Warm & Cold water, three types of water temperature.
- Full plate quality toughened glass design, elegant and beautiful.
- The latest leakage protection device, to ensure the safety of Public environmental.
- Water tank built-in UV-LED bacteriostatic, to ensure the safety and health of water.
- Large screen display, working status at a glance.(heating /cooling /filtrating /filter lifetime/UV)
2-4. Working Principle
1. Flowchart of water generation
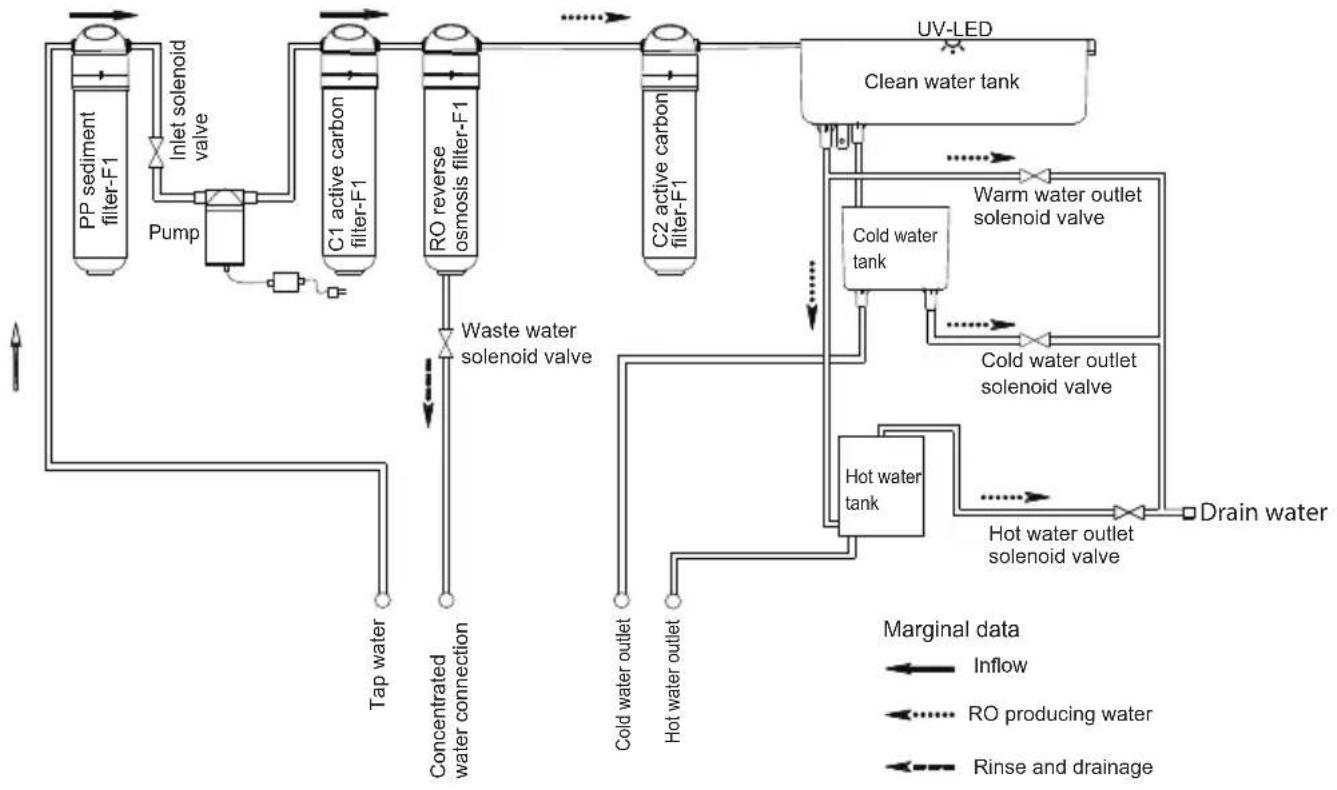
flowchart
graph TD
    A["PP sediment filter-F1"] --> B["Pump"]
    B --> C["C1 active carbon filter-F1"]
    C --> D["RO reverse osmosis filter-F1"]
    D --> E["C2 active carbon filter-F1"]
    E --> F["UV-LED Clean water tank"]
    F --> G["Cold water tank"]
    G --> H["Warm water outlet solenoid valve"]
    H --> I["Cold water outlet solenoid valve"]
    I --> J["Hot water tank"]
    J --> K["Drain water"]
    L["Tap water"] --> M["Concentrated water connection"]
    N["Hot water outlet"] --> O["Hot water outlet"]
    P["Inflow"] --> Q["Inflow"]
    R["RO producing water"] --> S["RO producing water"]
    T["Rinse and drainage"] --> U["Rinse and drainage"]
    V["Waste water solenoid valve"] --> W["Waste water solenoid valve"]
2. Circuit diagram
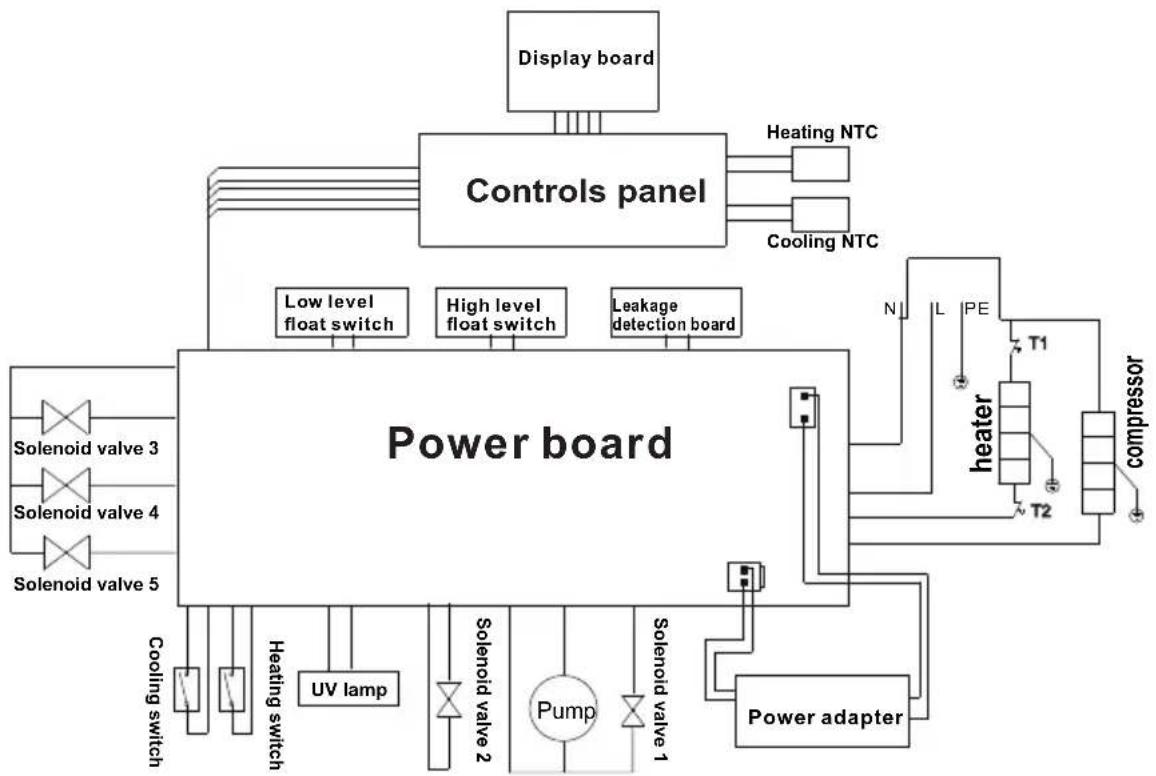
flowchart
graph TD
    A["Display board"] --> B["Controls panel"]
    B --> C["Heating NTC"]
    B --> D["Cooling NTC"]
    B --> E["Power board"]
    E --> F["Low level float switch"]
    E --> G["High level float switch"]
    E --> H["Leakage detection board"]
    E --> I["heater"]
    I --> J["T1"]
    I --> K["T2"]
    I --> L["compressor"]
    E --> M["Power adapter"]
    M --> N["Solenoid valve 1"]
    M --> O["Solenoid valve 2"]
    M --> P["Solenoid valve 3"]
    M --> Q["Solenoid valve 4"]
    M --> R["Solenoid valve 5"]
    E --> S["UV lamp"]
    E --> T["Heating switch"]
    E --> U["Cooling switch"]
- Filter Function Introduction and Replacement Cycle
| Stage | Filter | Function | Replacement Cycle |
| Stage 1 | PP sediment filter-F1 | Carry out coarse filtration of original water, and filter out mud, sand, impurity, iron rust and suspension, etc. | 3-6 months |
| Stage 2 | C1 active carbon filter-F1 | Absorb unusual colors and odors, Remove residual chlorine and organic substances in water. | 6-12 months |
| Stage 3 | RO reverse osmosis filter-F1 | Nonionic Absorbing: Organics, alcohol, ketone, aldehyde, phenol.Particulate retention: Solid suspended solids, Colloids. | 12-24 months |
| Stage 4 | C2 active carbon filter-F1 | Further absorb micro-molecules and organic substances in water. Make water taste better. | 6-12 months |
Notice: Filter life time is an expected value, due to different region, water quality, usage and season, the actual lifetime will be different, please follow the advise of the local service station.
3. Use Guide and Maintenance
WARNING: Please cut off water source before replacing filters. Never plug filters in water running state.
3-1. Guidance on Unpacking and Installation
- Unpack the product.
- Put the accessories aside.
- Take out the quick joint, and install it on the water pipe. Clamps should not be missed.
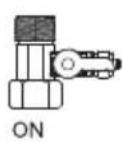
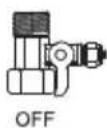
(1)
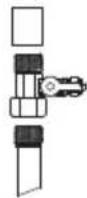
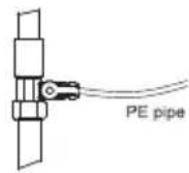
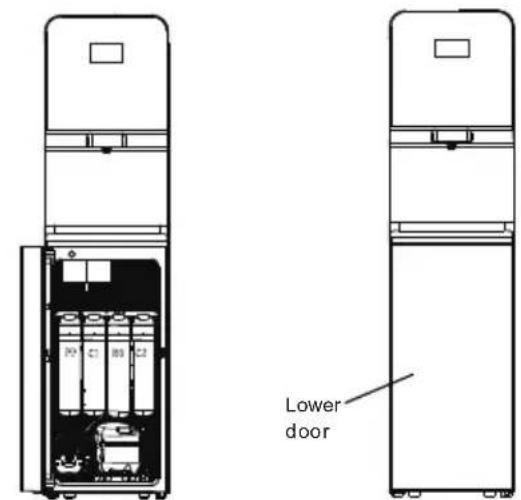
- Open the lower door.
- Use the after sale accessory—filter flushing tip, the arrow direction is the water flow direction, insert the PE pipe in the quick joint.
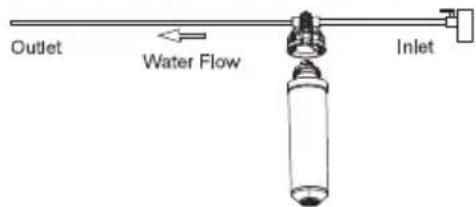
- Insert the C1 active carbon filter into the filter flushing tip, tighten it by turning anticlockwise, and open the water tap to flush the filter till it doesn't discharge black water, for about 10min; Take the same step to flush the C2 active carbon filter-F1.
- Install the clean filter in the product, hold the filter with the left hand and enclosure of filter with the right hand, and insert it upwards in the filter, tighten it by turning anticlockwise, the installation order is: PP sediment filter-F1→C1 active carbon filter-F1→RO reverse osmosis filter-F1→C2 active carbon filter-F1. After washing and installation of filters, the lower door must be fixed with original screws.
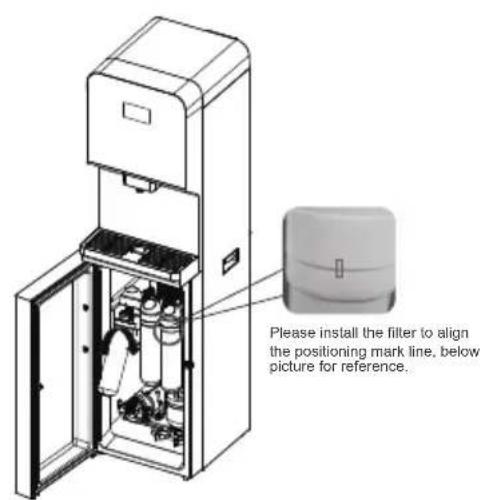
- Take out the pin of the quick joint at the rear of the products side plate's, and then take out the white plug.
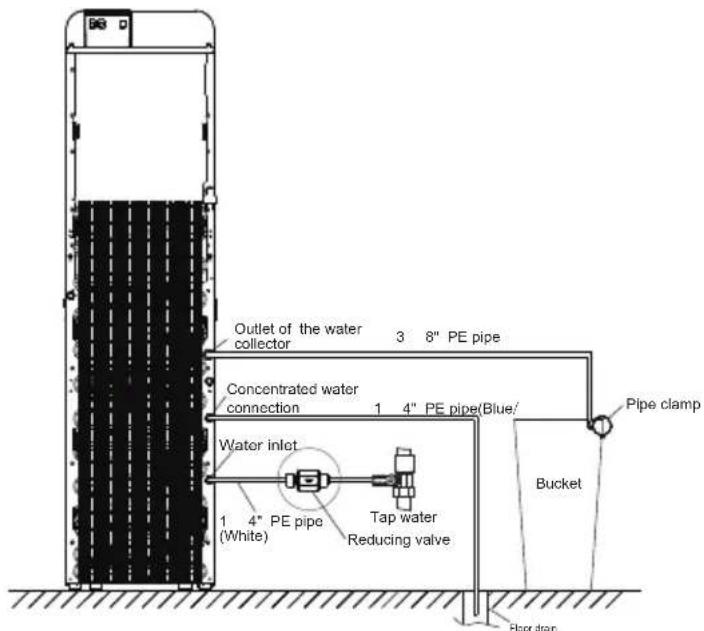
Note: When the tap water pressure exceeds 0.4MPa, it requires installing the pressure relief valve. Keep the water flowing arrow towards the water inlet interface of the machine.
-
Insert the water inlet PE pipe in the quick joint, and tighten the pin. The new hose-sets supplied with the appliance are to be used and that old hose-sets should not be reused.
-
The water cooler plug cord into a ground fault interrupter receptacle.
-
After installation, supply water and power. Discharge the first 3 tanks of purified water by pressing the button, press the Heating and Cooling buttons on the rear panel to purify water again, then the water output is drinkable.
-
When installing filter and replace filter please turn off the water and power supply before installation and replacement.
-
Concentrated water and the water drained from the water tray can be directly discharged into the sewer or the water drained from the water box can also be discharged to the bucket. (Note: Drainage pipe must be vertical and shall not be "U" or twisted at any section)
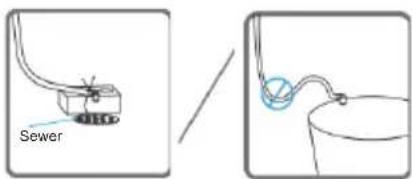
14 Water tray discharge treatment
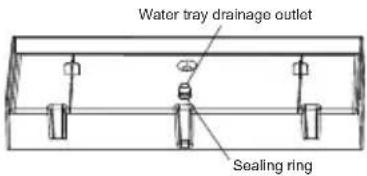
When the water can't be smoothly discharged from the water tray, please install the sealing ring on the drainage outlet slot of the water tray.
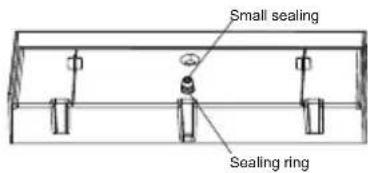
If the remaining water in the water tray won't be received with water tank, the big and small sealing plugs shall be adopted.
Step 1, install the small sealing plug in the drainage outlet of the water tray, and ensure installing in place.
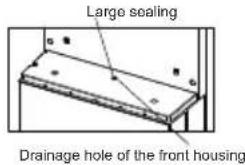
Step 2, install the big sealing plug in the drainage hole of the front housing, and then press it in place with the water tray.
3-2. Machine Installation
1-2. Loosen the screw of the left or right bottom angle just as the picture shown.
3. Use the screw to fix the bracket on the left or right bottom angle of the water purifier.
4. Make a hole on the floor's or the desk's surface where the water dispenser will be installed.
5. Fix the bracket on the floor by screw tightly.
6. Tighten the screw.

flowchart
graph LR
    A["Step ①: Initial pie chart"] --> B["Step ②: Pie slice with internal components"]
    B --> C["Step ③: Internal part with internal structure"]
    C --> D["Step ④: Shipped part with base"]
    D --> E["Step ⑤: Internal part with internal structure"]
    E --> F["Step ⑥: Internal part with internal structure"]
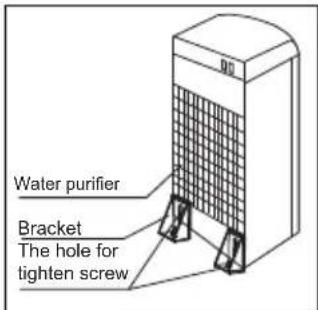
WARNING! To avoid a hazard due to instability of the appliance, it must be fixed in accordance with the instructions.
3-3. The display panel is shown as below:
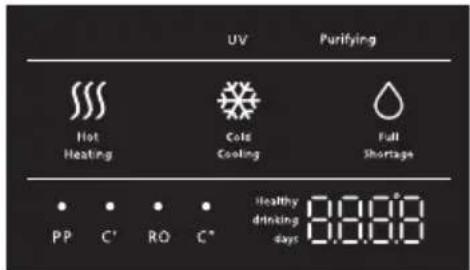
- “” When displays as this, it indicates that water heating is completed.
- " ""When displays as this, it indicates that water is heating.
- "When displays as this, it indicates that water cooling is completed."
- "When displays as this, it indicates that water is cooling.
- " It indicates that there's insufficient water in the machine.
- " 🔍 "It indicates that there's sufficient water in the machine.
- "Purifying" When it is on, it indicates that the machine is purifying water.
- "When indicator in this area flashes, it indicates that the filter of corresponding level expires, please replace the filter.
- “8888” It means the machine accumulated working days.
DISPENSING WATER

Child lock

Hot

Ambient

Cold
-
Touch the cold water button “❄️”, the device starts discharging cold water; Touch the cold water button “❄️” again, the device stops discharging water, finish getting water.
-
Touch the normal water button “ 🔍 ”, the device starts discharging normal water; Touch the normal water button “ 🔍 ” again, the device stops discharging water, finish getting water.
-
Touch the child lock button “💡”, then touch the hot water button “###”, the indicator turns on and the device starts discharging hot water. Touch the anyone button, the device stops discharging water, finish getting water.
-
Long press the cold water button “ + warm water button “ ” for 3 seconds to enter the filter reset mode. The indicator light and name of the first filter flash, and the remaining percentage of filter life displays in the bottom right corner of the screen.
Long press the cold water button “💡” for 3 seconds to reset the filter, and the life of the filter is restored to 100%. Press the cold water button “💡” to switch to the next filter display, and operate the same to reset and switch to the next filter. When it comes to the last filter, press the cold water button “💡” to exit the filter reset mode.
3-4. Maintenance
-
Keep this machine in a dry and cool place and avoid direct sunshine. Rearward of the machine shall be at least 25 cm away from the wall. Never put the machine on paper or foam, which may store water and then cause creepage. Never put anything flammable beside this machine. Do not use the machine outdoors or in a place that can be splashed by water.
-
For the water purifier, the installation and replacement of filters must be carried out by qualified personnel.
-
In case the machine is not in use for a long time, turn off the heating switch or the refrigerating switch to save power.
-
In case the machine is not needed for a long time, please take off the plug, turn off the copper chrome-plated ball valve and drain off the remaining water through the outlet. For another use, discharge water for 10 min. In the event that the machine is blocked by ice due to the environment below ice point, keep the refrigerating switch closed for 4 hours and then turn it on to continue the operation.
-
In case the water supply is cut off, please close the feed water ball valve and cut off the power, after water re-supply, please open the other faucets to discharge sediment and then turn on the feed water ball valve.
-
The machine must use an earthed three-pin socket and a reliable creepage protection switch.
-
Never use organic solvents such as gasoline to clean the machine: strictly prohibit washing the machine with water or splashing water to the machine.
-
Never turn on (off) the machine by inserting the plug into (pulling the plug out from) the socket. Never increase the length of the supply cord to avoid fire.
-
If the supply cord is damaged, it must be replaced by the manufacturer or qualified person so as to avoid a hazard.
-
The water source for the water purifier is civil tap water.
-
Never dismantle spare parts of the machine to avoid water leakage or damage.
-
Never turn the machine upside down or lean it more than 45^ " when moving it so as to avoid any damage to it or any accident.
-
Limited warranty: electrical components and water system are warranted for 12 months from date of purchasing.
3-5. Troubleshooting
In case of failure, please carry out inspection according to the requirements below. If unresolved, please contact the local service agency.
| Problem | Reason | Solution |
| Amount of produced water is reduced seriously | Filter is blocked or not replaced in time | Please contact the local service office to replace the filter in time. |
| Water inlet ball valve is not fully opened | Fully open the water inlet ball valve | |
| Water pressure is too low | Take measures for pressure boosting | |
| Output water quality is low | Filter failure | Please contact the local service office to replace the filter in time. |
| Long-term shutdown (over 3 days) | Continuously start and stop the product for 5 times at 40 seconds intervals to automatically flush the filtration system, and feed and discharge the water from the water storage system according to the first step of the Clean Maintenance; after that, the output water can be used normally | |
| Source water quality is low | Use municipal tap water | |
| No water output after replacing the filter | Water pipe is blocked by air | Please contact the local service office |
| Screen displays E0 | Water leakage | Please contact the local service office |
| Screen displays Ec, Ed | Water level switch failure | Please contact the local service office |
| Screen displays Fc, E7 | Heating function is abnormal | Please contact the local service office |
| Temperature sensor is abnormal | Please contact the local service office | |
| Screen displays E6 | Water inlet ball valve is not fully opened | Fully open the water inlet ball valve |
| Water pressure is too low | Take measures for pressure boosting | |
| Filter is blocked or not replaced in time | Please contact the local service office to replace the filter in time. |
It is a normal state that the following circumstances occur when the water purifier is used.
-
During the heating, the heating tube may generate slight noises. This is a normal state.
-
When the heating tank is being heated without water, the anti dry-burning device will disconnect automatically and can not reset by its own. The reset must be completed by a professional technician. The design is in accordance with the national safety requirements.
-
When an ambient temperature is higher, the cooling capacity may be slower, which is a normal state.
The product is subject to change without notice. Please keep this manual properly.
- WATER PURIFIER
- Instruction Manual
- Model: MWPU4W
- DIRECTORY
- Precaution
- 1-1 Safety Issues
- 1-2 Packing List
- Your Direct Drinking Water Purifier
- 2-1. Part Name of Water Purifier
- NOTE:
- 2-2. Model and Major Parameters
- 2-3. Product Features
- 2-4. Working Principle
- Flowchart of water generation
- Circuit diagram
- Use Guide and Maintenance
- 3-1. Guidance on Unpacking and Installation
- Water tray discharge treatment
- 3-2. Machine Installation
- 3-3. The display panel is shown as below:
- DISPENSING WATER
- 3-4. Maintenance
- 3-5. Troubleshooting
Brand : MIDEA
Model : MWPU4W
Category : Water filter