
CRW30 - Alarm Clock Lenoxx - Free user manual and instructions
Find the device manual for free CRW30 Lenoxx in PDF.


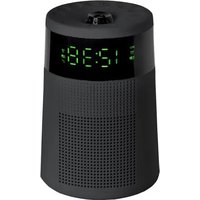
| Product Type | Alarm Clock Radio with Wireless Charging |
| Brand | Lenoxx |
| Model | CRW30 |
| Dimensions | 19.5 x 13.0 x 6.2 cm (L x W x H) |
| Power Supply | DC 9V 2A (included adapter) |
| Maximum Power Consumption | 10W |
| Battery Backup | 2 x AAA batteries (not included) |
| Sound Output Power | 8W |
| Frequency Range | 20 Hz - 18 kHz |
| Radio Frequency | 2.4 GHz (Bluetooth) |
| Bluetooth Version | 4.2 |
| Bluetooth Range | Up to 10 m |
| Wireless Charging | Qi-compatible (5W max) |
| USB Output | For charging external devices (5V, not for music playback) |
| Audio Inputs | AUX-IN (3.5mm), FM antenna (AUX/ANT port) |
| Modes | FM Radio, Bluetooth, AUX-In, Clock |
| Alarm | Dual alarms (Alarm 1 & Alarm 2) with choice of buzzer or FM radio |
| Snooze | Yes, via SNOOZE/DIMMER button |
| Sleep Timer | 15/30/45/60/90/120 minutes or off |
| Display Dimmer | 4 levels: bright, mid bright, dark, off |
| Voice Prompts | Spoken names for modes (cannot be disabled) |
| Date & Time Display | 12/24 hour format, year/month/day |
| Safety & Certifications | Indoor use only, temperate climate, ventilation required |
Frequently Asked Questions - CRW30 Lenoxx
User questions about CRW30 Lenoxx
0 question about this device. Answer the ones you know or ask your own.
Ask a new question about this device
Download the instructions for your Alarm Clock in PDF format for free! Find your manual CRW30 - Lenoxx and take your electronic device back in hand. On this page are published all the documents necessary for the use of your device. CRW30 by Lenoxx.
USER MANUAL CRW30 Lenoxx
Wireless Charging Bluetooth Alarm Clock

Model no: CRW30 | Batch no: PR4342
Please read and retain these instructions for future reference.
The illustrations used in this manual are to illustrate the operation method and product structure of the product. Where there is a small difference between the physical item and the illustrations, please take the physical as the standard.
Safety Precautions
Read these safety instructions before using your device and store them for possible future reference.
- The device is not intended for use by persons (including children) with reduced physical, sensory or mental capacity. Persons who have not read the manual, unless they have received explanations by a person responsible for their safety and supervision should not use this unit.
- Children should be monitored to ensure that they do not play with the device.
- The device should always be readily accessible.
- Use only on a flat surface.
- This device is designed for indoor use only.
- The device should not be exposed to dripping or splashing water.
- No objects filled with liquids such as vases shall be placed on the device.
- Always leave a minimum distance of 10 cm around the unit to ensure sufficient ventilation.
- Open flame sources, such as candles, should not be placed on top of the device.
- The device is intended for use only in a temperate climate.
- At full volume, prolonged listening to the portable audio device may damage the user's hearing and cause hearing troubles (temporary or permanent deafness, hearing drone, tinnitus, hyperacusis).
- The unit does not contain any serviceable parts inside. Do not attempt to open and repair the unit yourself. All components should only be serviced by a qualified technician.
- Do not use the device if the plug, the power cord or the device itself is damaged.
- If the power cord is damaged, you must have it replaced at a service centre with qualified persons in order to avoid a hazard.
- CAUTION: Danger of explosion if batteries are incorrectly replaced or not replaced by the same type or equivalent.
- The batteries should not be exposed to excessive heat such as sunshine, fire or similar.
- Different types of batteries new and used batteries should not be mixed.
- The batteries must be installed according to the polarity.
- If the battery is worn, it must be removed from the product. The batteries must be disposed of safely. Please dispose of them through an appropriate waste disposal centre.
SPECIFICATIONS:
Rated voltage: DC 9V = 2A
Max consumption: 10W
Radio frequency: 2.4GHz
Sound power: 8W
Frequency range: 20Hz-18KHz
Bluetooth compatible version: 4.2
Distance Bluetooth stays connected: 10m
Dimensions: L 19.5cm x W 13.0cm x H 6.2cm
CONSTRUCTION AND FEATURES:


Function buttons
- Power/M: Power on/off/mode button
- : Play/pause for music under Bluetooth or Aux in function
- : Next track/FM radio tuning
- : Last track/FM radio tuning
- VOL+: Press this button to increase volume step by step, press and hold this button to increase volume continuously
- VOL-: Press this button to decrease volume step by step, press and hold this button to decrease volume continuously
- SNOOZE/DIMMER: Alarm pausing/Display light/mid-dim. Default is mid-level bright.
- MEM-: press to change between memorised radio stations from high to low frequency
- MEM+: press to change between memorised radio stations from low to high frequency
- AL2: Set up alarm 2
- AL1: Set up alarm 1
- SET: Time adjustment
- SLEEP: Set up sleep function
ON / OFF / MODE
- When power is first connected, the display on the screen will show HI, and then will show 12:00 PM.
- Power on/mode change:
A. Press ① Power/M for FM radio mode.
B. Press ① Power/M again for Bluetooth mode.
C. Press ① Power/M again for AUX-in mode.
D. Press ① Power/M to alternate between the FM, Bluetooth and Aux-in modes.
E. The default mode is FM radio.
F. During operation, there has spoken voice naming the modes when they are changed. There is no way to remove this voice.
- Power off:
A. Press ① Power/M and hold it for 3 seconds to power off. The unit will go into clock mode and show the time on the display.
B. When this is done, the spoken voice will say clock mode. The unit will not play any sound, and will display the time.
Bluetooth pairing
- Ensure the phone or tablet has Bluetooth function turned on.
- Put the clock radio into Bluetooth mode.
- Search for the Bluetooth pairing name CRW30 on the phone or tablet and then pair.
- When the clock radio is in Bluetooth mode, if there is no pairing of a Bluetooth device and it has searched for 10 minutes, the unit will stop searching.
- After pairing successfully, BT is indicated next to the time display.
- Press buttons ③ ▶▶ and ④ ▶◀◀ at the same time to cut off Bluetooth function.
FM radio mode
- Ensure the FM antenna is connected into the AUX/ANT port on the rear of the unit.
- To increase radio reception, tape the antenna to a wall so it is extended above the unit.
- Put the clock radio into FM mode.
- The current radio station frequency will be shown on the screen.
- To manually tune to a certain radio station, press buttons ③ ▶▶ and ④ repeatedly until that radio station frequency is shown non the screen.
-
To scan in any available station automatically: press and hold button ② and the unit will search for stations automatically, saving them as pre-sets, numbered from CH01 to CH20. Radio stations can only be scanned in and saved which have a very good signal.
-
To playback one of the saved pre-set stations, press the ⑧ MEM- or ⑨ MEM+ buttons to change between the saved stations.
- Press and hold button③④ at same time to clear all saved stations.
Radio stations are unable to be manually saved into desired position numbers.
AUX-in mode
- Put the clock radio into AUX mode.
- Connect an AUX-in lead (not included) into the AUX/ANT port on the rear of the unit.
- Connect the other and of the AUX-in lead into the earphone socket of your device (e.g.: phone/tablet).
- Begin music playback on your device.
Clock / alarm mode
TO VIEW THE TIME AND DATE:
- When plugged into AC power, HI will be shown on the clocks display, then it will show the clock time on display.
- Press button ② to change between 12H or 24H clock.
- Press button ⑫ SET, the clocks display will show the year.
Press button ⑫ SET again, the clocks display will show the month and the date.
Press button ⑫ SET again, the clocks display will show the time.
This action will be circulated when button ⑫ SET is pressed continuously.
If nothing is pressed for 10 seconds, the time will be shown on the display.
TO SET THE TIME AND DATE:
-
Press button ② to change between 12H or 24H clock.
-
Press and hold button ⑫ SET for 2 seconds then release the button.
The hour number will be flashing, press buttons ③ ▶▶ or ④ ▶◀◀ to change the hour; press button ⑫ SET again, the number of the minutes will be flashing, press buttons ③ ▶▶ or ④
.◀◀◀ to change the minutes;
Press button ⑫ SET again, the number of the year will be flashing, press buttons ③ ▶▶ or ④
.◀◀ to change the year;
Press button ⑫ SET again, the number of the month will be flashing, press buttons ③.▶▶ or ④
.◀◀ to change the number of the month;
Press button ⑫ SET again, the number of the day will be flashing, press buttons ③ ▶▶ or ④
.◀◀ to change the number of the day;
When done, press ⑫ SET again, to show the time on the clocks display.
TO SET AN ALARM:
- ALARM 1: when the unit is in clock mode, press and hold button ⑪ AL1.
The unit must be in clock mode to set an alarm.
The default alarm type is buzzer, and the word BUZZ will be flashing on the display screen.
- When the word BUZZ is flashing on the screen, press buttons ③.▶▶ or ④.◀◀ to change between buzzer or FM radio (FM is shown on the display screen);
Press button ⑪ AL1, the hour for the alarm time will be flashing on the screen, press buttons ③
.▶▶| or ④.◀◀ to change the hour for the alarm time;
Press button ⑪ AL1, the minutes for the alarm time will be flashing on the screen, press buttons ③
or ④ to change the minutes for the alarm time;
Press button ⑪ AL1, the alarm volume level will be shown on the screen, press buttons ③ ▶▶▶ or ④ ▶◀◀ to change the volume level for the alarm;
Press button ⑪ AL1, you can set the alarm to sound on either: Monday to Friday, Saturday to Sunday, Monday to Sunday. Press buttons ③ ▶▶▶ or ④ ▶◀◀ to change between the options. Then press button ⑪ AL1 to save your selections.
-
To ensure the alarm will sound, press button ⑪ AL1 and ensure the alarm 1 icon 🔔 is shown on the display screen.
-
To turn an alarm off so that it will not sound, press button ⑪ AL1 twice and ensure the alarm 1 icon is not shown on the display screen.
ALARM 2: same set up as Alarm1, just use button ⑩ AL2 in place of the AL1 button.
Alarm snooze / sleep mode
- Alarm time duration is 30 minutes.
- When the alarm has sounded, press button ⑦ SNOOZE/DIMMER to use the snooze function.
- To turn off the alarm once it has sounded, press button ① POWER/M.
- To use SLEEP MODE:
When the unit is playing back music from either the FM radio mode, Bluetooth mode or Aux-in mode press button ⑬ SLEEP.
Press the sleep button repeatedly to change between the sleep times shown on the screen: 15 / 30 / 45 / 60 / 90 / 120 / OFF minutes.
The word OFF means that no sleep time will be set.
When your chosen sleep time is showing on the screen, after a few seconds the normal time display will be shown. Your music will play back for the sleep time, and then the unit will go back into clock mode.
To turn an alarm off after the wake time, press and hold the SNOOZE/DIMMER button.
The alarm will stop and remain set for the next day if applicable.
Dimmer display
At any mode, press button ⑦ SNOOZE/DIMMER to adjust brightness of display: bright—mid bright—dark—off; default is mid bright.
Charging a device through the USB port
Use a USB cable (not included) to charge a smart device using the USB port at the rear of the unit.
The USB port is not for music playback from a USB stick.
Battery back up
At bottom of the unit, there is a battery compartment, install 2 x AAA batteries (not included) inside the compartment.
In the instance of a power outage, the set time will be saved and will be shown on the screen again when power has resumed.
LENOXX
www.lenoxx.com.au

1300 666 848

LenoxxElectronics

LenoxxElectronics

@LenoxxAustralia

- Wireless Charging Bluetooth Alarm Clock
- Safety Precautions
- SPECIFICATIONS:
- Function buttons
- ON / OFF / MODE
- Bluetooth pairing
- FM radio mode
- AUX-in mode
- Clock / alarm mode
- TO VIEW THE TIME AND DATE:
- TO SET THE TIME AND DATE:
- TO SET AN ALARM:
- Alarm snooze / sleep mode
- Dimmer display
- Charging a device through the USB port
- Battery back up
- LENOXX
Brand : Lenoxx
Model : CRW30
Category : Alarm Clock