
AP1451 - Kitchen sink Oliveri - Free user manual and instructions
Find the device manual for free AP1451 Oliveri in PDF.


User questions about AP1451 Oliveri
0 question about this device. Answer the ones you know or ask your own.
Ask a new question about this device
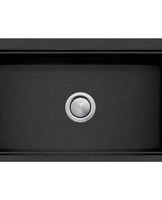
Download the instructions for your Kitchen sink in PDF format for free! Find your manual AP1451 - Oliveri and take your electronic device back in hand. On this page are published all the documents necessary for the use of your device. AP1451 by Oliveri.
USER MANUAL AP1451 Oliveri
SPECIAL INSTRUCTIONS FOR PARTICULAR TOP MOUNT SINK MODELS
CAUTION
Leave protective tape on the sink when inverting over a benchtop and tracing its shape.
The polished stainless steel will scratch if the sink slides across a hard surface.
Topmount sinks may also be known as "drop in" or "inset" sinks.
Sink models with prefix MO, PE, UF, DU, LR, EF, NP, MR, SI & RR.
These sinks will fit into standard 600mm bench tops.
Templates supplied are to assist in achieving the correct shape hole for top mounting the sink.
Careful use of the template is required to achieve the correct cutout shape. If the template is not available, the cut out shape may be created by carefully inverting the sink onto the counter/benchtop and tracing around the perimeter. Cut the hole 10mm inside the traced line.
Many Oliveri sinks have waste outlets positioned to the rear of the bowls. Ensure the sink is correctly positioned when fitting
Unequal bowl depth:
Sinks that combine different sized bowls may also have unequal bowl depth. Waste plumbing will need to accommodate this variance. MO, PE, NP, SI & RR sinks have a height adaptor included with the sink where needed.
Models UF03D & UF04D have a 60mm height difference in waste connections for the main and smaller bowl. Waste plumbing will need to accommodate this variance.
Models UF05D & UF06D have a 35mm height difference in waste connections for the main and smaller bowl. Waste plumbing will need to accommodate this variance.
EF models have a 35mm height difference in waste connections for the main and smaller bowl. Waste plumbing will need to accommodate this variance.
Solitaire models (LR) - Cut out templates are not supplied with these sinks.
LR510 & LR515 may be top mounted, each using a circular cut cut 466mm in diameter. LR515 comes with a 32mm diameter tap hole pre-cut in the tap landing. Mark the location of this tap hole when trial fitting the sink. Then, drill out the counter/benchtop in the appropriate location so that the mixer tap can be solidly installed through both the sink and the counter/benchtop.
For other topmount LR models that do not have a template, the cut out shape may be created by carefully inverting the sink onto the counter/benchtop and tracing around the perimeter. Cut the hole 10mm inside the traced line.
LR510 may also be under mounted in a solid-surface counter/benchtop using a circular cut out 454mm in diameter after edges are smoothed. Refer Oliveri undermount instructions for recommended installation methods.
MANHATTAN & DALLAS (MH or DA)
THESE SINKS WILL NOT FIT IN A STANDARD 600MM COUNTER/BENCH TOP.
Measure carefully to ensure sufficient room exists (including allowance for a splashback if required). The cutout shape may be created by carefully inverting the sink onto the counterbenchtop and tracing around the perimeter. Cut the hole 10mm inside the traced line.
AUSTRALIA
Head Office &
Manufacturing Plant
Tasman Sinkware Pty Ltd
Regency Park SA
Phone: +61 8 8348 6444
Fax: +61 8 8348 6495
Email: sinkware@tasbuildpro.com.au
Tasman Elinkware
is a division of
Fletcher Building

© Tasman Einkware 2006
AU Top Mount Installation Instructions
TF 08d.doc
NORTH AMERICA
Sales Office
Tasman Sinkware North America
Corona CA
Email: norhamerica@oliverisinks.com
UNITED KINGDOM DISTRIBUTOR
A.C. Toon Ltd
Phone: 01246 223900
Email: sales@acloon.co.uk
ASIA PACIFIC DISTRIBUTORS
New Zealand - Dux Industries
Ltd
Phone: 0800 367 369
Singapore - Sim Slang Choon
Phone: 6266 6632
Hong Kong - Deacon & Co Ltd
Phone: 2369 6111
INSTALLER - PLEASE READ & FOLLOW THESE INSTALLATION INSTRUCTIONS
FOR "TOP MOUNT" OR "DROP IN" SINKS
Please retain for consumer as care instructions are included

CHECK MODEL & TAP HOLES
The model number on the sink
packaging must match the mo
of sink the customer ordered.
Check the number and position of
tap holes is correct.
Do not install if incorrect

CHECK THE CONDITION
Inspect the sink for any visible
defects. Do not install the sink if
defects are found. Contact you sink retailer / point of purchase.

AVOID CUTS
The perimeter and punch-outs on the sink may contain sharp edges. Handle the sink carefully to avoid personal injury.

AVOID SCRATCHES
Polished stainless steel can be
scratched if proper care is not
taken during installation.
EQUIPMENT REQUIRED for installing your Oliveri top mount sink:
MATERIALS FOR CUTTING COUNTER/BENCHTOP:
- Template for your particular model sink and mounting method (may be inside or printed
on carton depending on model). If not available, the sink itself may be used. - Marker such as a pencil or similar for tracing the template onto the counter/benchtop
- Tape measure
- Drill with 12mm / 12 " diameter bit or larger (wood counter/benchtop)
• Cutting Device (such as a jigsaw) with suitable blade for counter/benchtop material
• Suitable protection such as gloves and goggles to be used while drilling or cutting
MATERIALS FOR FITTING THE TOP MOUNT SINK:
- Oliveri sink (with correct tap holes as ordered) - includes mounting clips, sealing gasket,
basket wastes and other accessories (depending on model).
• These Installation Instructions
• Level to check counter/benchtop & sink is installed level
• Phillips head screwdriver (#2 to tighten mounting clips) - Flat head screwdriver (large - to tighten basket wastes)
• Suitable sealant (neutral-cure silicone sealant or equivalent) - Masking material to protect counter/benchtop and sink from excess sealant
- Additional Mounting Hardware if fitting into thinner material. The clamps included
with the sink require a minimum counter/benchtop thickness of 25mm / 1".
Any advice, recommendation, information, assistance or service provided by Tasman Sinkware in relation to goods manufactured by it or their use and installation, is given in good faith and is believed by Tasman Sinkware to be appropriate and reliable. However, any advice, recommendation, information, assistance or service is provided by Tasman Sinkware without responsibility or liability.

www.oliverisinks.com

www.oliverisinks.com


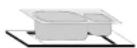


FOLLOW THESE STEPS TO INSTALL THE OLIVERI TOP MOUNT SINK
IF COUNTER / BENCHTOP IS SUPPLIED WITH SINK HOLE ALREADY CUT OUT, SKIP STEPS MARKED WITH *
CHECK SPACE & LEVEL
Use a level to check the counter/benchtop – if not level, have rectified. Ensure there is adequate space for tapware (including a splash back if specified). Check space for installation (underneath) and operation (above). Particular care must be taken when a thick splash back is used (it may interfere with tapware location and operation). Ensure the cabinet will not foul the sink mounting flange or basins.
TEMPLATE \*
A number of Oliveri sinks require a non-standard shape hole (not a rectangle or circle). Locate the template included in (or printed on) the packaging and place in the correct position on the counter/benchtop. Compare the template to the sink to check it is correct. Some sink templates apply to both left-hand and right-hand model sinks. Ensure the template is the correct way around for your model sink. (If no template is available, carefully invert the sink over the counter/benchtop and trace around it.)
MARK CUT OUT \*
Carefully mark around the cardboard template (or follow drawing instructions). Once the hole is marked out, use the template to conduct a final check before cutting. Note: The template is the exact finished cut-out size required. IMPORTANT If you have traced the sink itself to mark your cut out, the hole must be cut 10mm inside the marked line.
CUT & FINISH HOLE ^
Re-check the position and cut out shape you have traced before cutting. Ensure there are no obstacles below that might interfere with cutting. Drill pilot holes to accept an appropriate cutting tool for the counter/benchtop material (wear suitable personal protection equipment). Cut just inside the template mark (or 10mm inside the sink tracing).
TRIAL FIT THE SINK
Check that all clips are folded in so they will adequately clear the cut-out. Carefully position the sink into the cut-out to make sure it fits correctly. If the fit is not correct, remove the sink and proceed with remedial work. Perform another trial fit after corrections have been made.
MASKING
If using a sealant, masking is necessary to prevent sealant overrun. It is recommended that the edge of the sink and the edge of the cutout are both covered with a suitable masking tape. This tape should be removed within 2 days of application.
CHECK FOAM SEAL
Make sure the foam seal is intact and fits all the way around the sink with no gaps visible. This will ensure a watertight seal when the sink is properly tightened down to the counter/benchtop.

ADDITIONAL SEALANT
Apply additional sealant / caulking compound around the join where the counter/benchtop and the stainless steel sink meet. Check that the caulking product is mildew resistant and is suitable for use on the counter/benchtop material and also is suitable for use on stainless steel. Clean away any excess before it dries. Note: Additional sealant should always be used if gaps are apparent after the sink has been clamped to the counter/benchtop.

FITTING THE SINK
If you choose to mount the tap / faucet onto the sink prior to fitting, take extra care as it will change the weight and balance of the sink. Position and align the sink correctly in the cutout and lower it onto the counter/benchtop. From underneath, tighten the clips with a screwdriver (follow the sequence marked on the template) until the sink is secure and no gaps are visible. Take extra care if using power tools as over-tightening can damage clips.

FINAL CHECK OF FOAM SEAL
With the sink tightened down. Visually confirm the foam seal is not protruding anywhere underneath. If it does, undo all the clips, reposition the foam seal and tighten down again. If the foam seal has been damaged, replace the damaged section. If the tap/faucet was mounted prior to fitting – check that the position is correct.

PLUMBING & TAPWARE
IMPORTANT - Connections to plumbing should always be done by a licensed plumber. Fit supplied basket wastes to sink bowls. Some models do not include basket wastes for every bowl. Install tapware according to manufacturer's instructions. Care should be taken when fitting wastes to the sink. Follow the instructions provided with the wastes.
INSTRUCTIONS CONTINUE OVER PAGE
It is essential that the installation is waterproof and carried out in accordance with these instructions. Tasman Sinkware will not be held responsible for any damage caused by leakage or faulty installation.
CARE INSTRUCTIONS FOR YOUR OLIVERI STAINLESS STEEL SINK
AVOID CONTACT WITH ROUGH OR DIRTY SURFACES as new polished stainless steel will show scratches!

DO's
- Clean with soap & water (towel dry)
- Use a soft brush or sponge (old tooth brush) Polish with a metal polish paste (Autumn / Re
- Use a granulated stainless steel cleaner (Essfeele)
- Clean along the grain of the Stainless Steel - Wipe over with a glass cleaner (Windex is very good) - Use a Liquid cleaner (Bon-Ami or Jiff)

DO NOT's
- NEVER use Steel wool
- Beware of harsh liquid cleaners
· Beware of grit within cloths and mineral deposits within water - Avoid prolonged exposure to acids from Fruit, Fruit juices, Salts, Spirits, Bleach, Tea-bags
- Avoid prolonged contact with ordinary steel which can rust Tin Cans, Steelwood
- Do not keep harsh (acids or chlorine) chemicals under sink / laundry lub
- Do not leave chlorine/chloride chemicals on stainless steel surface
- Do not leave liquid soaps & cleaners to dry on stainless steel
- Do not use bleaches (White King, Domestos, Clorox)

- SPECIAL INSTRUCTIONS FOR PARTICULAR TOP MOUNT SINK MODELS
- CAUTION
- Sink models with prefix MO, PE, UF, DU, LR, EF, NP, MR, SI & RR.
- Unequal bowl depth:
- Solitaire models (LR) - Cut out templates are not supplied with these sinks.
- MANHATTAN & DALLAS (MH or DA)
- AUSTRALIA
- NORTH AMERICA
- ASIA PACIFIC DISTRIBUTORS
- INSTALLER - PLEASE READ & FOLLOW THESE INSTALLATION INSTRUCTIONS
- FOR "TOP MOUNT" OR "DROP IN" SINKS
- CHECK MODEL & TAP HOLES
- CHECK THE CONDITION
- AVOID CUTS
- AVOID SCRATCHES
- EQUIPMENT REQUIRED for installing your Oliveri top mount sink:
- MATERIALS FOR CUTTING COUNTER/BENCHTOP:
- MATERIALS FOR FITTING THE TOP MOUNT SINK:
- FOLLOW THESE STEPS TO INSTALL THE OLIVERI TOP MOUNT SINK
- CHECK SPACE & LEVEL
- TEMPLATE \*
- MARK CUT OUT \*
- CUT & FINISH HOLE ^
- TRIAL FIT THE SINK
- MASKING
- CHECK FOAM SEAL
- ADDITIONAL SEALANT
- FITTING THE SINK
- FINAL CHECK OF FOAM SEAL
- PLUMBING & TAPWARE
- INSTRUCTIONS CONTINUE OVER PAGE
- CARE INSTRUCTIONS FOR YOUR OLIVERI STAINLESS STEEL SINK
- DO's
- DO NOT's
Brand : Oliveri
Model : AP1451
Category : Kitchen sink