MP530 - Radio Emerson - Free user manual and instructions
Find the device manual for free MP530 Emerson in PDF.


| Product Type | Digital Audio Player |
| Playback Formats | MP3, WMA, WAV (voice recordings) |
| Memory Capacity | 495 MB total (approx. 478 MB free) |
| Display | Backlit LCD with contrast adjustment |
| Power Source | Built-in rechargeable lithium battery |
| Charging Method | USB connection to computer (approx. 2-3 hours for full charge) |
| Audio Output | Headphone jack (3.5mm) |
| FM Tuner | Yes (87.5 - 108 MHz) |
| Recording Capabilities | Voice, FM, Line-in recording (WAV or MP3 formats) |
| Playback Modes | Normal, Repeat One, Repeat All, Shuffle, Shuffle All |
| Equalizer Presets | Normal, Rock, Jazz, Classic, Pop, DDB, Soft |
| Special Features | A-B Repeat, Hold switch, Auto Power Off |
| Computer Connectivity | USB 2.0 (drag and drop file transfer) |
| Operating System Compatibility | Windows ME/2000/XP (driver for Win98SE only) |
| Included Accessories | Headphones with necklace/hangstrap, carrying pouch, USB cable, audio cable, installation CD |
| Safety Certifications | FCC Class B |
| Cleaning Instructions | Clean only with dry cloth; avoid water and moisture |
| Repair Policy | No user-serviceable parts; refer servicing to qualified personnel |
Frequently Asked Questions - MP530 Emerson
User questions about MP530 Emerson
0 question about this device. Answer the ones you know or ask your own.
Ask a new question about this device
Download the instructions for your Radio in PDF format for free! Find your manual MP530 - Emerson and take your electronic device back in hand. On this page are published all the documents necessary for the use of your device. MP530 by Emerson.
USER MANUAL MP530 Emerson
Visit our web site at www.emersonradio.com
WARNING
TO PREVENT FIRE OR SHOCK HAZARD, DO NOT USE THIS PLUG WITH AN EXTENSION CORD, RECEPTACLE OR OTHER OUTLET UNLESS THE BLADES CAN BE FULLY INSERTED TO PREVENT BLADE EXPOSURE. TO PREVENT FIRE OR SHOCK HAZARD, DO NOT EXPOSE THIS UNIT TO RAIN OR MOISTURE.

natural_image
Black triangular warning symbol with white lightning bolt symbol (no text)The lightning flash with arrowhead symbol within an equilateral triangle is intended to alert the user to the presence of uninsulated dangerous voltage within the product's enclosure that may be of sufficient magnitude to constitute a risk of electric shock to persons.
CAUTION
RISK OF ELECTRIC SHOCK DO NOT OPEN
CAUTION: TO REDUCE THE RISK OF ELECTRIC SHOCK DO NOT REMOVE COVER (OR BACK), NO USER SERVICEABLE PARTS INSIDE. REFER SERVICING TO QUALIFIED SERVICE PERSONNEL.

natural_image
Black triangular warning symbol with exclamation mark (no text or numbers)The exclamation point within an equilateral triangle is intended to alert the user to the presence of important operating and maintenance (servicing) instructions in the literature accompanying the appliance.
IMPORTANT SAFETY INFORMATION
- Read these instructions.
- Keep these instructions.
- Heed all warnings.
- Follow all instructions.
- Do not use this unit near water.
- Clean only with dry cloth.
- Do not block any ventilation openings. Install in accordance with the manufacturer's instructions.
- Do not install near any heat sources such as radiators, heat registers, stoves or other apparatus (including amplifiers) that produce heat.
- Do not defeat the safety purpose of the polarized or grounding-type plug. A polarized plug has two blades with one wider than the other. A grounding type plug has two blades and a third grounding prong. The wide blade or the third prong are provided for your safety. If the provided plug does not fit into your outlet, consult an electrician for replacement of the obsolete outlet.
-
Protect the power cord from being walked on or pinched particularly at plugs, convenience receptacles and the point where they exit from the unit.
-
Only use attachments/accessories specified by the manufacturer.
- Unplug this unit during lightning storms or when unused for long periods of time.
- Refer all servicing to qualified service personnel. Servicing is required when the unit has been damaged in any way such as the following: the power-supply cord or plug is damaged; liquid has been spilled or objects have fallen into the unit; the unit has been exposed to rain or moisture, does not operate normally, has changed its performance or has been dropped.
- This unit should not be exposed to dripping or splashing water and no object filled with liquids should be placed on or near the unit.
- Do not overload wall outlet. Use only power source as indicated.
- Use replacement parts as specified by the manufacturer.
- The unit may be mounted to a wall only if recommended by the manufacturer.
- Upon completion of any service or repairs to this unit, ask the service technician to perform safety checks.
PRECAUTIONS
COPYRIGHT:
- Distributing copies of MP3 or WMA tracks without permission is a violation of international copyright laws.
SAFETY:
- Vibration experienced during walking or exercising will not affect the player. However, dropping the player or dropping a heavy object on the player may result in damage or sound distortion.
- Avoid spilling any liquid onto or into the player.
- Do not leave the player in a location near heat sources; in a location subject to direct sunlight, excessive dust, sand, moisture, rain or mechanical shock; on an unlevel surface; or in a car with the windows closed during periods of excessive heat.
ROAD SAFETY:
- Do not use headphones while driving, cycling or operating any motorized vehicle. It may create a traffic hazard and it is illegal in some areas. It can be potentially dangerous to play your headset at a high volume while walking, especially at pedestrian crossings. You should exercise extreme caution or discontinue use in potentially hazardous situations.
PRECAUTIONS (CONTINUED)
FCC WARNING:
- This equipment may generate or use radio frequency energy. Changes or modifications to this equipment may cause harmful interference unless the modifications are expressly approved in the instruction manual. The user could lose the authority to operate this equipment if an unauthorized change or modification is made.
FCC DECLARATION
This device complies with Part 15 of the FCC rules. Operation is subject to the following two conditions: 1) This device may not cause interference, and 2) This device must accept any interference received, including interference that may cause undesired operation.
Warning: Changes or modifications to this unit not expressly approved by the party responsible for compliance could void the user's authority to operate the equipment.
NOTE: This equipment has been tested and found to comply with the limits for a Class B digital device, pursuant to Part 15 of the FCC Rules. These limits are designed to provide reasonable protection against harmful interference in a residential installation. This equipment generates, uses and can radiate radio frequency energy and, if not
PRECAUTIONS (CONTINUED)
installed and used in accordance with the instructions, may cause harmful interference to radio communications.
However, there is no guarantee that interference will not occur in a particular installation. If this equipment does cause harmful interference to radio or television reception, which can be determined by turning the equipment off and on, the user is encouraged to try to correct the interference by one or more of the following measures:
- Reorient or relocate the receiving antenna.
- Increase the separation between the equipment and receiver.
- Connect the equipment into an outlet on a circuit different from that to which the receiver is connected.
- Consult the dealer or an experienced radio/TV technician for help.
Shield cable must be used with this unit to ensure compliance with class B FCC limits.
Dear Customer:
Selecting fine audio equipment such as the unit you've just purchased is only the start of your musical enjoyment. Now it's time to consider how you can maximize the fun and excitement your equipment offers. This manufacturer and the Electronic Industries Association's Consumer Electronics Group want you to get the most out of your equipment by playing it at a safe level. One that lets the sound come through loud and clear without annoying blaring or distortion and, most importantly, without affecting your sensitive hearing.
Sound can be deceiving. Over time your hearing “comfort level” adapts to higher volumes of sound. So what sounds “normal” can actually be loud and harmful to your hearing. Guard against this by setting your equipment at a safe level BEFORE your hearing adapts.
To establish a safe level:
- Start your volume control at a low setting.
- Slowly increase the sound until you can hear it comfortably and clearly, and without distortion.
Once you have established a comfortable sound level:
- Set the dial and leave it there.
Taking a minute to do this now will help to prevent hearing damage or loss in the future. After all, we want you listening for a lifetime.
We Want You Listening For A Lifetime
Used wisely, your new sound equipment will provide a lifetime of fun and enjoyment. Since hearing damage from loud noise is often undetectable until it is too late, this manufacturer and the Electronic Industries Association's Consumer Electronics Group recommend you avoid prolonged exposure to excessive noise. This list of sound levels is included for your protection.
Decibel
Level Example
30 Quiet library, soft whispers
40 Living room, refrigerator, bedroom away from traffic
50 Light traffic, normal conversation, quiet office
60 Air conditioner at 20 feet, sewing machine
70 Vacuum cleaner, hair dryer, noisy restaurant
80 Average city traffic, garbage disposals, alarm clock at two feet
THE FOLLOWING NOISES CAN BE DANGEROUS UNDER CONSTANT EXPOSURE:
90 Subway, motorcycle, truck traffic, lawn mower
100 Garbage truck, chain saw, pneumatic drill
120 Rock band concert in front of speakers, thunderclap
140 Gunshot blast, jet engine
180 Rocket launching pad
Information courtesy of the Deafness Research Foundation.


INCLUDED ACCESSORIES

natural_image
3D rendering of a gray rectangular electronic device with a small screen and ports (no text or symbols visible)Main Unit
natural_image
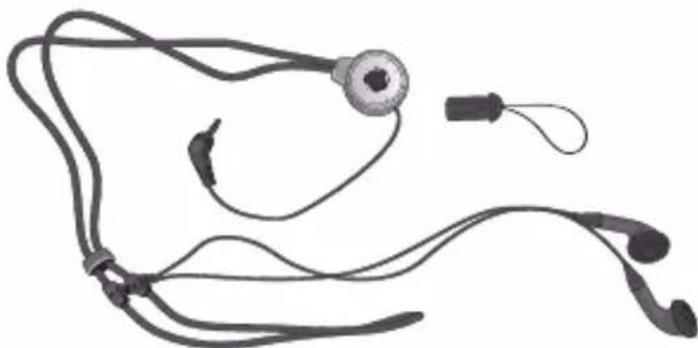
Illustration of a medical device with earbuds and a stethoscope (no text or symbols)Headphones with Necklace and Hangstrap

natural_image
Solid dark gray rectangle with rounded corners (no text or symbols)Carrying Pouch

natural_image
Coiled black cable with USB port, no visible text or symbolsUSB Cable Audio Cable

natural_image
Coiled black audio jack cable with two leads (no text or symbols visible)
natural_image
Simple 3D-rendered oval shape with a central dark spot and a lighter halo (no text or symbols)Installation CD
LOCATION OF CONTROLS
MAIN
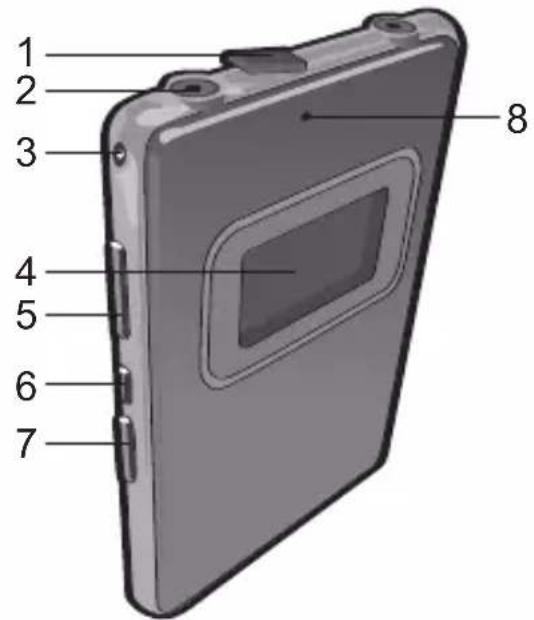
- USB Port
- PHONES Jack
- Wrist Strap Hole
- Display
- VOLUME +/- Buttons
-
REP A-B Button
-
HOLD Switch
- MIC (Microphone)
- LINE IN Jack
- PLAY/PAUSE/ON Button
- STOP/OFF Button

- REC (Record) Button
- RESET Button
- TUN ◀/MENU/TUNE ▶▶ Control
LOCATION OF CONTROLS (CONTINUED)
DISPLAY

- Folder Name
- Play Mode
- File Number
- Elapsed Time
- Memory Capacity
- Battery Status
- File/Song Title
- Play Mode
- File Kbps
- EQ Setting
- Volume
- Graphic EQ
POWER SOURCE
When the bars in the battery indicator (in the display) become low (see figure 1), recharge the battery as follows:


Batt Low Batt Full
Figure 1
Follow the instructions below to charge the built-in internal Lithium battery:

natural_image
Illustration of a USB flash drive with cable and connector (no text or symbols)With the power on or off, connect the USB cable to the unit and then to the computer; charging will automatically begin.

flowchart
graph TD
    Ver["Ver"] --> FS["FS"]
    FS --> Server["Server"]
    Server --> READY["READY"]
NOTES:
- When charging for the first time, charge overnight for a full charge.
• After the first charge, the battery should fully charge in two to three hours.
DOWNLOADING AND TRANSFERRING FILES
TO INSTALL THE "DIGITAL AUDIO PLAYER" CD SOFTWARE
For Windows ME, Windows2000 or Windows XP:
Windows will automatically detect the audio player without installing the CD software when the USB cable is connected.
For Windows98SE:
The USB mass storage function will not be activated without driver installation. To activate the USB mass storage function, please use the installation CD-Rom to install the driver.
For Windows 98SE, if you are connecting your player to your computer for the first time, please follow these instructions:
Procedure to Install Player Driver
-
Insert the Installation CD-Rom into the CD Drive, then double click SETUP.EXE to start the installation process.
-
At the Welcome screen, click NEXT.

DOWNLOADING AND TRANSFERRING FILES (CONTINUED)
- Read the License Agreement, then click YES.
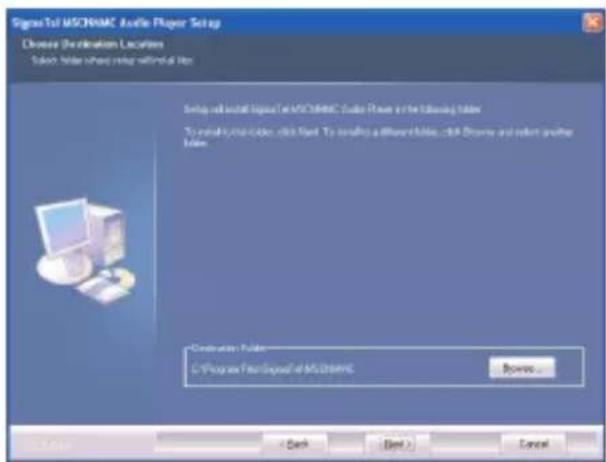
- At the Setup screen, click NEXT. It is recommended to leave the destination folder as it is.

DOWNLOADING AND TRANSFERRING FILES (CONTINUED)
- At the Program Folder screen, click NEXT. It is recommended to leave the program folder as it is.
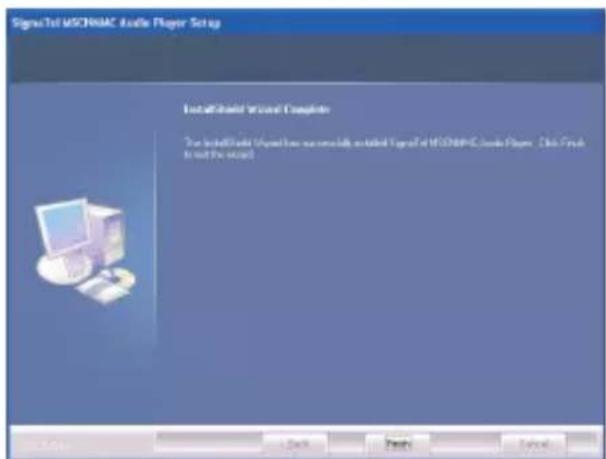
- The computer will check for previous installations, then install the software. When finished, the InstallShield Wizard Complete screen will appear. Click FINISH to exit the Install program.

DOWNLOADING AND TRANSFERRING FILES (CONTINUED)
- When the installation has completed, the new program, "SigmaTel MSCNMMC Audio Player", will be added to the PROGRAM menu on your computer.
TRANSFERRING FILES
You can download digital music files from the Internet or use encoding software to convert music that you have on an audio CD into MP3 or WMA format. Once these files are stored on your computer you can easily copy them to your player.
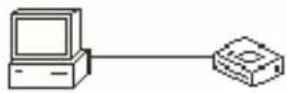
Connect the computer to your player using the supplied USB cable; the READY screen will appear.
A "Removable Disk" window will appear in your My Computer folder which is the player's internal memory. To add more files and songs to your player simply drag and drop MP3 or WMA files from anywhere on your computer into the "Removable Disk" window. When you are finished, see the Remove Hardware procedure on the next page before disconnecting the player.

DOWNLOADING AND TRANSFERRING FILES (CONTINUED)
REMOVING YOUR PLAYER FROM THE COMPUTER
When the Ready screen appears, simply disconnect the USB cable from the computer and the camera.

flowchart
graph TD
    A["FS"] --> B["Router"]
    style A fill:#f9f,stroke:#333
    style B fill:#ccf,stroke:#333
    note right of A "Ver"
    note right of B "READY"
BASIC OPERATION
To turn the unit on, press and hold the PLAY/PAUSE/ON button ① for five seconds until the start screens appears in the display temporarily. To turn the unit off, press and hold the STOP/OFF button ②; “Continue Holding To Power Off” will appear in the display. When the bars fill up the screen, then the unit turns off, release the STOP/OFF button ②.
USING THE HOLD SWITCH

natural_image
Close-up of a door with a scroll wheel and a double-headed arrow indicating direction (no text or symbols)Slide the HOLD switch to the HOLD (Down) position and no buttons will be able to be pressed. This is useful when you do not want the station/track changed by accidentally pressing a button. Slide the HOLD switch to the Unlock (Up) position to cancel the Hold function.
ADJUSTING THE VOLUME

Press the VOLUME + button ① to increase the volume or the VOLUME – button ② to decrease the volume.
BASIC OPERATION (CONTINUED)
SETTING THE BACKLIGHT TIME

This setting is used to preset the amount of time the backlight will light when a button is pressed. Press and hold the MENU control for three seconds until the Mode menu appears. Rotate the MENU control to select System, then press the MENU control; the System menu will appear. Rotate the MENU control to select Backlight, then press the MENU control. Rotate the MENU control to select the desired Backlight setting of 5 to 30 seconds. Select Off to turn the backlight off or “∞” to have the backlight always on when the unit is on. When finished, press the MENU control to exit the setting.
SETTING THE CONTRAST

This setting is used to set the contrast. Press and hold the MENU control for three seconds until the Mode menu appears. Rotate the MENU control to select System, then press the MENU control; the System menu will appear. Rotate the MENU control to select Contrast, then press the MENU control. Rotate the MENU control to select the desired Contrast setting of 00 (lightest) to 10 (darkest). When finished, press the MENU control to exit the setting.
BASIC OPERATION (CONTINUED)
SETTING THE AUTOPOWER TIME
1
AutoPower

natural_image
Diagram of a device with an arrow pointing to a component, no text or symbols presentThis setting is used to preset the amount of time the unit will wait before turning off if no buttons are pressed to save the battery. Press and hold the MENU control for three seconds until the Mode menu appears. Rotate the MENU control to select System, then press the MENU control; the System menu will appear. Rotate the MENU control to select AutoPower, then press the Menu button. Rotate the MENU control to select the desired Auto power setting of 1 to 10 minutes. Select Off to disable auto power off feature. When finished, press the MENU control to exit the setting.
VIEWING THE INFORMATION
1
About
Ver 1.002.025
Total 495MB
Free 478MB

natural_image
Simple line drawing of a device with an arrow pointing to a small object on the side (no text or symbols)This setting is used to view the information regarding the player, such as the version, total memory and total free memory. Press and hold the MENU control for three seconds until the Mode menu appears. Rotate the MENU control to select System, then press the MENU control; the System menu will appear. Rotate the MENU control to select About, then press the MENU control to view the information. When finished, press the MENU control to exit the setting.
TO EXIT THE Mode menu: To exit the Mode menu, rotate the MENU control to select EXIT, then press the MENU control again.
MUSIC FUNCTION
ACCESSING THE MUSIC MODE

Select the Music mode to play the files in the player's internal memory, including MP3, WAV, Voice recordings, FM recordings and Line In recordings. Select the Music mode as follows:
With the unit on, press and hold the MENU control for three seconds until the Mode menu appears. Rotate the MENU control to select Music, then press the MENU control.
EQUALIZER

Press the MENU button once; the Music Menu will appear in the display. Rotate the MENU control to select EQ, then press the MENU control. Rotate the MENU control to select the desired EQ setting (Normal, Rock, Jazz, Classic, Pop, DDB or Soft). When finished, press the MENU control to exit the EQ setting.
MUSIC FUNCTION (CONTINUED)
TO LISTEN TO MP3s/WMAs
1
natural_image
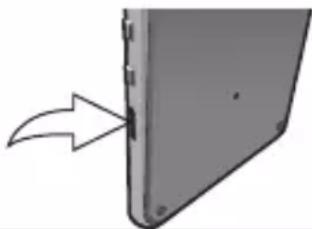
Close-up of a gray electronic device with a curved arrow pointing to its side (no text or symbols visible)Plug the headphones into the PHONES jack.
2
natural_image
Close-up of a gray mechanical component with a black bracket and mounting holes (no visible text or symbols)
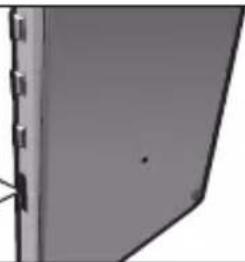
With the unit on, press and hold the MENU control for three seconds until the Mode menu appears. Rotate the MENU control to select Music, then press the MENU control.
3

natural_image
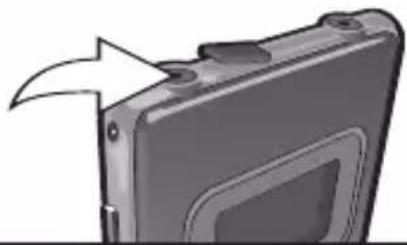
Close-up of a gray electronic device with a curved arrow pointing to a small component (no text or symbols visible)Press the PLAY/PAUSE/ON button to start playback. The MP3 information will appear on the display.
4


natural_image
Close-up of a device casing with a labeled arrow pointing to a panel (no text or symbols present)Adjust the volume by pressing the VOLUME + ① or - ② button. To turn the unit off, see page 17.
MUSIC FUNCTION (CONTINUED)
TO PAUSE PLAYBACK
1

natural_image
Close-up of a camera module with an arrow pointing to the side panel (no text or symbols visible)During playback, press the PLAY/PAUSE/ON button to temporarily pause playback; the timer will stop counting and the Pause (Ⅱ) indicator will appear. Press again to resume playback.
SELECTING A SONG/FILE USING THE MENU CONTROL
1

natural_image
Diagram of a device corner with an arrow indicating direction (no text or symbols present)During playback, rotate and release the MENU control downward ▶ to advance the player to the beginning of the next file. Repeat this step to advance the player to higher-numbered files.
2
natural_image
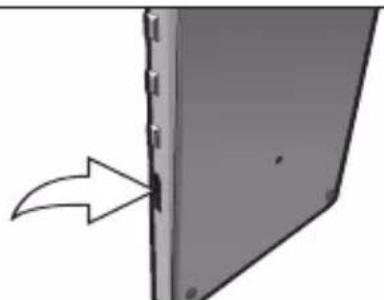
Diagram of a door corner with an arrow pointing to a small black object (no text or symbols present)During playback, rotate and release the MENU control upwards 🔊 to move the player back to the beginning of the currently playing file. Repeat this step to move the player back to lower-numbered files.
MUSIC FUNCTION (CONTINUED)
HIGH-SPEED MUSIC SEARCH
natural_image
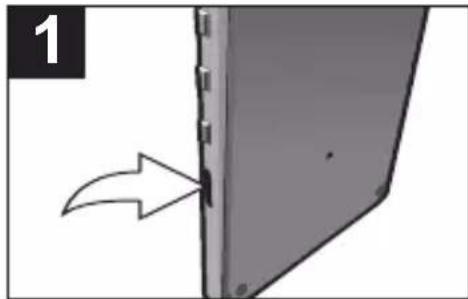
Diagram showing a door with a curved arrow pointing to a corner detail (no text or symbols)During playback, rotate and hold the MENU control to move the player forward ▶ or backward ◀ within a file to locate a specific musical passage. The player will move forward or backward at high speed as long as the control is held. When you release the control, normal playback will resume.
BROWSING THE SONGS/FILES
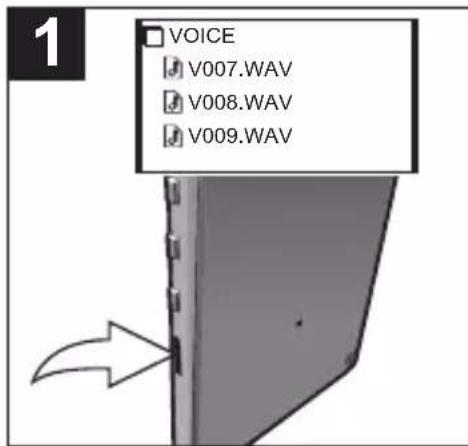
Press the MENU control once; the Music Menu will appear in the display. Rotate the MENU control to select Browse, then press the MENU control. Rotate the MENU control to select the desired folder/song/file to play, then press the MENU control again. If a song/file was selected, it will start playing. If a folder was selected, the folder's contents will then appear, so rotate the MENU control to select a file/song.
MUSIC FUNCTION (CONTINUED)
SELECTING A PLAY MODE

Press the MENU control ① once; the Music Menu will appear in the display. Rotate the MENU control ① to select Play Mode, then press the MENU control ①. Rotate the MENU control ① to select the desired Play mode:
NORMAL: Select for normal play
REPLAY ONE: Select to repeat the currently playing song over and over until the STOP/OFF button ② is pressed.
REPLAY ALL: Select to repeat all the tracks over and over until the STOP/OFF button ② is pressed.
SHUFFLE: Select to randomly play all the songs/files and then stop.
SHUFFLE ALL: Select to randomly play all the songs/files over and over until the STOP/OFF button ② is pressed.
After selecting the desired mode, press the MENU control ① to select it.
TO EXIT THE MAIN MENU: To exit the music menu, rotate the MENU control to select EXIT, then press the MENU control again.
MUSIC FUNCTION (CONTINUED)
REPEAT A-B PLAYBACK
natural_image
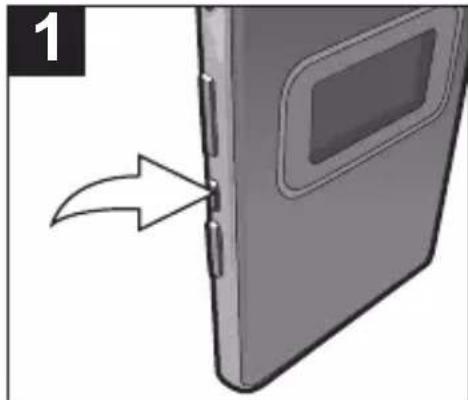
Diagram of a door with a scroll and arrow indicating direction (no text or symbols)While playing back a file, press the REP A-B button once at the beginning of the section you want to repeat; A will appear at the bottom left in the display. Press the REP A-B button again at the end of the section you want to repeat; A B will appear in the display. The selected section will then repeat continuously. To cancel Repeat A-B playback, press the REP A-B button again; the Repeat A-B indicator will disappear from the display.
RECORDING A VOICE MESSAGE (QUICK)

To quickly record a voice message in 8KHz format, press and hold the REC button ① for two seconds until the Record screen appears, then release the button. Speak into the MIC ② at a normal tone of voice. When finished, press the STOP/OFF button ③. The recorded voice file will be saved as a WAV file (for example "V001.WAV") in the voice folder. To record with different settings, see page 30.
MUSIC FUNCTION (CONTINUED)
DELETING A FILE

Press and hold the MENU control for three seconds until the Mode menu appears. Rotate the MENU control to select System, then press the MENU control; the System menu will appear. Rotate the MENU control to select DelFiles, then press the MENU control. The unit will then display the first recording/song/track and ask if you want to delete the file. Select Yes or No using the MENU control, then press the MENU control. Repeat as desired. When finished, press and hold the MENU button until the System menu appears.
FM FUNCTION
TO LISTEN TO THE RADIO
1

natural_image
Close-up of a gray electronic device with a curved arrow pointing to its side panel (no text or symbols visible)Plug the headphones into the PHONES jack.
2

natural_image
Side view of a gray electronic device with mounting holes and a small black mark (no text or symbols visible)
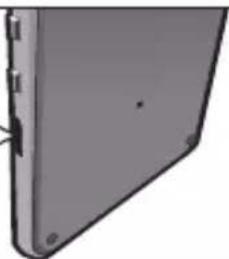
With the unit on, press and hold the MENU control for three seconds until the Mode menu appears. Rotate the MENU control to select FM Tuner, then press the MENU control.
3
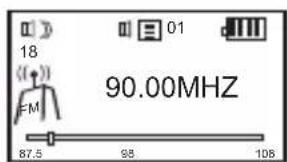

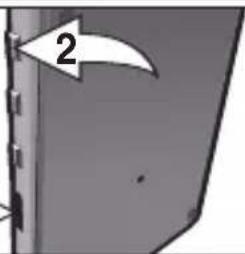
The unit will automatically scan through the stations and set the strongest ones into memory. When it is finished, select one of the memorized stations by rotating the MENU control ① up or down. To manually tune a station, press the PLAY/PAUSE/ON button ②, then adjust in 100KHz increments by rotating the MENU control ①. To return to the memorized tuning, press the PLAY/PAUSE/ON button ② again.
FM FUNCTION (CONTINUED)
5


natural_image
Pure geometric shape with no text, numbers, or symbols visibleTo listen to, save or delete a memorized station, press the MENU control once, then rotate the menu control to select Station List and press the MENU control. Select a desired Station by rotating the MENU control, then press the MENU control; a pop-up menu will appear. To listen to the station, select Listen Ch, to Save the currently playing station, select Save Current or to delete the station, select Delete Ch. Press the MENU control, then press and hold for one second to exit the Station list.
6

natural_image
Close-up of a device's front panel showing a door and a labeled component (no text or symbols visible)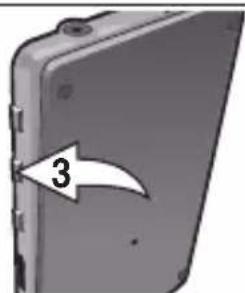
natural_image
Close-up of a device's front panel with a numbered arrow pointing to a section (no text or symbols visible)Adjust the volume by pressing the VOLUME + ① or - ② button. To turn the unit off, press and hold the STOP/OFF button ③; "Continue Holding To Power Off" will appear in the display. When the bars fill up the screen, then the unit turns off, release the STOP/OFF button ③.
ANTENNA
FM—The headphones act as an antenna for FM. Extend the headphone wire for best FM reception.
FM FUNCTION (CONTINUED)
AUTOSEEK

To auto scan the stations, press the MENU control once, then rotate the MENU control to select AutoSeek, then press the MENU control again; the unit will then automatically scan all the stations and then stop.
RECORDING AN FM STATION
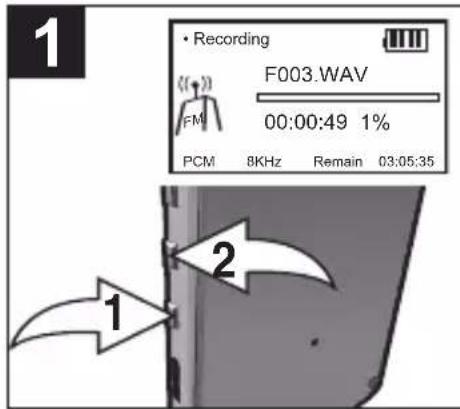
To quickly record an FM Station in 32KHz PCM WAV format, press and hold the REC button ① for two seconds until the Record screen appears, then release the button. When finished, press the STOP/OFF button ②. The recorded FM file will be saved as a WAV file (for example "F001.WAV") in the voice folder.
VOICE FUNCTION
1

natural_image
Side view of a gray rectangular electronic device with mounting holes (no visible text or symbols)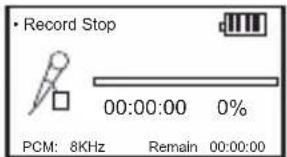
With the unit on, press and hold the MENU control for three seconds until the Mode menu appears. Rotate the MENU control to select Voice, then press the MENU control.
2

natural_image
Close-up of a gray electronic device with a curved arrow pointing to the edge (no text or symbols visible)Press the MENU control, then rotate it up or down to select the desired recording quality (WAV-8KHz, WAV-11KHz, WAV-16KHz, WAV-32KHz, MP3-64Kbps, MP3-96Kbps or MP3-128Kbps). Press the MENU control after selecting a setting.
3

Press the REC button ① to start voice recording. Speak into the MIC (microphone) at a normal tone of voice. When finished, press the STOP/OFF button ②. The recorded file will be saved in the VOICE folder.
Enter the Music mode as described on page 20 to hear the recorded files.
“DISK FULL” will appear in the display when the internal disk is full.
LINE IN FUNCTION

With the unit on, press and hold the MENU control for three seconds until the Mode menu appears. Rotate the MENU control to select Line In, then press the MENU control.

natural_image
Close-up of a tablet device with a curved arrow pointing to the edge (no text or symbols visible)Press the MENU control, then rotate it up or down to select the desired recording quality (WAV-8KHz, WAV-11KHz, WAV-16KHz, WAV-32KHz, MP3-96Kbps, MP3-128Kbps or MP3-192Kbps). Press the MENU control after selecting a setting.

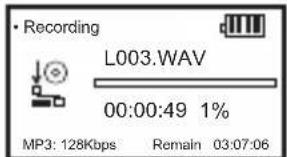

Start playing the external unit. Press the REC button ① to start recording the external unit's sound. When finished, press the STOP/OFF button ②. The recorded file will be saved in the LINE-IN folder.
Enter the Music mode as described on page 20 to hear the recorded files.
“DISK FULL” will appear in the display when the internal disk is full.
TROUBLESHOOTING GUIDE
If you experience a problem with this unit, check the chart below before calling for service.
| SYMPTOM CAUSE SOLUTION | ||
| Unit will not Weak battery turn on. | Rehcharge battery or u | Recharge battery. |
| HOLD switch is in the Slide switch to the Unlock posi-HOLD position. tion. | ||
| No sound. Headphones | are not Insert headphones inserted. | |
| Volume is set too low. Raise the volume. | ||
| The MP3 or WMA files are corrupted. files. | Download uncorrupted | |
| FM distorted. | Station not tuned. | Retune station and extend headphone wire. |
| Download Failure. | Damaged USB cable. Replace cable. | |
| The computer is not recognizing the player. | The player must be turned on. | Turn the player on. |
| The USB cable is not securely connected. | Make sure USB cable is securely connected. | |
| The computer installed be compatible with this unit. | This unit is not compatible with Macintosh computers. | |
RESETTING THE UNIT
To reset the unit due to erratic operation, press and hold the PLAY/PAUSE/ON button ①, then press the recessed RESET button ② with a paper clip or similar small object.


emerson Research™
TO FIND THE LOCATION AND PHONE NUMBER OF YOUR NEAREST SERVICE CENTER PERMITTED TO PERFORM WARRANTY SERVICE...
CALL TOLL FREE: 1-800-695-0098
FOR ADDITIONAL SET-UP OR OPERATING ASSISTANCE PLEASE CALL: 1-800-898-9020
FOR CUSTOMER SERVICE, PLEASE WRITE TO: Emerson Radio Corp. Consumer Affairs Dept. 1901 Diplomat Drive, Farmers Branch, TX 75234
The serial number of your unit is located on the back cabinet. Please take a moment to locate the serial number and to write it in the space provided below. You may be asked to provide this number when calling to request customer service.
Model Number: MP530
Serial Number
WARRANTY
EMERSON RADIO CORP. LIMITED WARRANTY
Emerson Radio Corp. warrants manufacturing defects in original material, including original parts and workmanship, under normal use and conditions, for a period of ninety (90) days from the date of original purchase in the U.S. With your dated proof of purchase, we will provide repair service at no charge for labor and parts at an authorized Depot Repair Facility, or replace the product in our discretion. For repair or replacement, pack your unit in a padded box, enclose your check or money order payable to Emerson Radio Corp. in the amount of \$9.00 (not required by California residents) to cover shipping and handling costs, and enclose a copy of your proof of purchase. Send your unit to:
Emerson Radio Corp.
1901 Diplomat Drive
Farmers Branch, TX 75234
This warranty does not cover damage from negligence, misuse, abuse, accident, failure to follow operating instructions, commercial use, rental, repairs by an unauthorized facility, or products purchased, used, serviced or damaged outside of the United States.
THIS WARRANTY GIVES YOU SPECIFIC LEGAL RIGHTS, AND YOU MAY ALSO HAVE OTHER RIGHTS WHICH VARY FROM STATE TO STATE.
AU898M
- WARNING
- CAUTION
- RISK OF ELECTRIC SHOCK DO NOT OPEN
- IMPORTANT SAFETY INFORMATION
- PRECAUTIONS
- COPYRIGHT:
- SAFETY:
- ROAD SAFETY:
- PRECAUTIONS (CONTINUED)
- FCC WARNING:
- FCC DECLARATION
- Dear Customer:
- To establish a safe level:
- Once you have established a comfortable sound level:
- We Want You Listening For A Lifetime
- Decibel
- Level Example
- THE FOLLOWING NOISES CAN BE DANGEROUS UNDER CONSTANT EXPOSURE:
- INCLUDED ACCESSORIES
- LOCATION OF CONTROLS
- LOCATION OF CONTROLS (CONTINUED)
- POWER SOURCE
- NOTES:
- DOWNLOADING AND TRANSFERRING FILES
- TO INSTALL THE "DIGITAL AUDIO PLAYER" CD SOFTWARE
- For Windows ME, Windows2000 or Windows XP:
- For Windows98SE:
- Procedure to Install Player Driver
- DOWNLOADING AND TRANSFERRING FILES (CONTINUED)
- TRANSFERRING FILES
- REMOVING YOUR PLAYER FROM THE COMPUTER
- BASIC OPERATION
- USING THE HOLD SWITCH
- ADJUSTING THE VOLUME
- BASIC OPERATION (CONTINUED)
- SETTING THE BACKLIGHT TIME
- SETTING THE CONTRAST
- SETTING THE AUTOPOWER TIME
- VIEWING THE INFORMATION
- MUSIC FUNCTION
- ACCESSING THE MUSIC MODE
- EQUALIZER
- MUSIC FUNCTION (CONTINUED)
- TO LISTEN TO MP3s/WMAs
- TO PAUSE PLAYBACK
- SELECTING A SONG/FILE USING THE MENU CONTROL
- HIGH-SPEED MUSIC SEARCH
- BROWSING THE SONGS/FILES
- SELECTING A PLAY MODE
- REPEAT A-B PLAYBACK
- RECORDING A VOICE MESSAGE (QUICK)
- DELETING A FILE
- FM FUNCTION
- TO LISTEN TO THE RADIO
- FM FUNCTION (CONTINUED)
- ANTENNA
- AUTOSEEK
- RECORDING AN FM STATION
- VOICE FUNCTION
- LINE IN FUNCTION
- TROUBLESHOOTING GUIDE
- RESETTING THE UNIT
- emerson Research™
- WARRANTY
- EMERSON RADIO CORP. LIMITED WARRANTY
Brand : Emerson
Model : MP530
Category : Radio