
StreamPower FX50 - Steam cleaner TESLA - Free user manual and instructions
Find the device manual for free StreamPower FX50 TESLA in PDF.


| Product Type | Steam Cleaner |
| Brand | Tesla |
| Model | StreamPower FX50 |
| Intended Use | Household only |
| Power Source | Mains powered (grounded socket) |
| Preheating Time | Approximately 20 seconds |
| Max Room Temperature for Use | 40 °C |
| Water Tank | Removable, side panel access |
| Cleaning Solution Container | Separate, for standard floor cleaners |
| Modes | Floor cleaning, handheld steam cleaning |
| Steam Release Button | Located on handle |
| Flexi Hose | Detachable, for handheld use |
| Limescale Filter | Replaceable, located in handheld unit |
| Included Accessories | Microfiber cleaning mop, cleaning brush, plastic carpet glider, flexi hose, limescale filter |
| Microfiber Mop Care | Wash in hot soapy water at 30-40°C, no bleach or fabric softener, air dry |
| Storage | Dry and clean place, drain water tank after use |
| Safety Features | Do not direct steam at people or animals, do not immerse in water, use on appropriate surfaces only |
| Certifications | CE, WEEE (crossed-out wheeled bin symbol) |
| Warranty | Contact dealer; not applicable for improper use, normal wear, unauthorized repairs |
Frequently Asked Questions - StreamPower FX50 TESLA
User questions about StreamPower FX50 TESLA
0 question about this device. Answer the ones you know or ask your own.
Ask a new question about this device
Download the instructions for your Steam cleaner in PDF format for free! Find your manual StreamPower FX50 - TESLA and take your electronic device back in hand. On this page are published all the documents necessary for the use of your device. StreamPower FX50 by TESLA.
USER MANUAL StreamPower FX50 TESLA
natural_image
Simple line drawing of a hand pressing down on a tray with arrows indicating flow or movement (no text or symbols)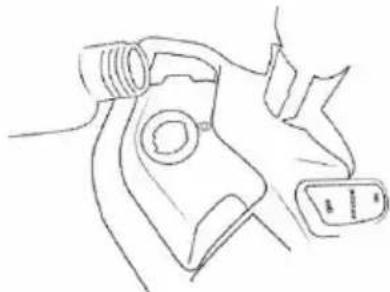
natural_image
Line drawing of a hand holding a device with a circular button and a rectangular button (no text or symbols)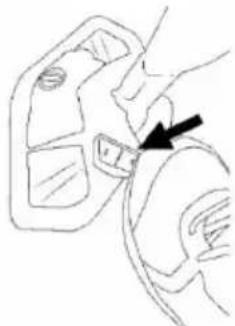
natural_image
Simple line drawing of a hand holding a device with an arrow pointing to the component (no text or symbols)natural_image
Diagram showing a mechanical assembly process: disassembly of parts into a curved pipe, followed by a valve-like component being inserted (no text or symbols present)natural_image
Four sequential illustrations of a mechanical device with curved arrows indicating motion or force direction (no text or symbols)natural_image
Simple line drawing of a hand pressing down on a tray with arrows indicating motion (no text or symbols)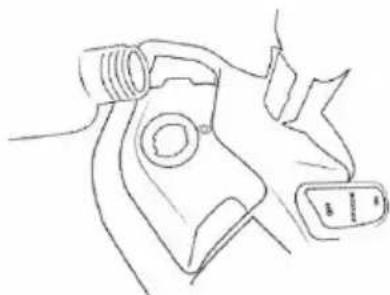
natural_image
Line drawing of a hand holding a device with a connector, next to a small electronic device (no text or symbols)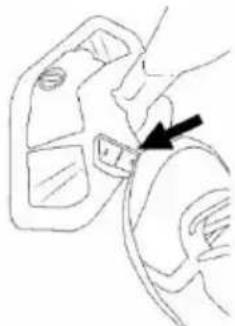
natural_image
Line drawing of a hand holding a small object with an arrow pointing to it (no text or symbols present)natural_image
Mechanical device diagram showing a lever mechanism with labeled component 1 and directional arrow (no text or symbols beyond labels)natural_image
Diagram showing a mechanical assembly process: disassembly of parts into a curved pipe, then fastening into a cylindrical component (no text or symbols present)natural_image
Four sequential illustrations of a mechanical device with curved arrows indicating motion or force direction (no text or symbols)natural_image
Simple line drawing of a hand pressing down on a rectangular tray with circular objects inside (no text or symbols)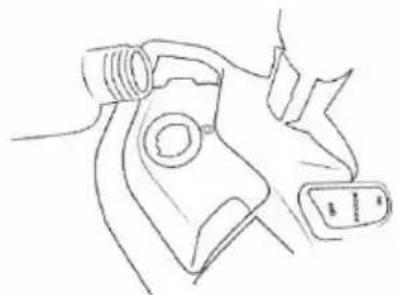
natural_image
Line drawing of a hand holding a device with a connector (no text or symbols)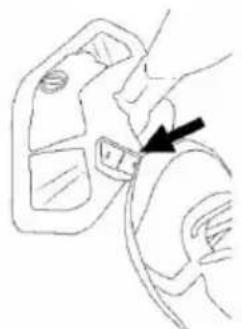
natural_image
Line drawing of a mechanical component with an arrow indicating a specific part (no text or symbols present)natural_image
Diagram showing a mechanical assembly process: disassembly of parts into a curved pipe, followed by a valve-like component being inserted (no text or symbols present)natural_image
Four sequential illustrations of a mechanical device with curved arrows indicating motion or force direction (no text or symbols)A TARTOZÉKOK FELHELYZÉSE
natural_image
Diagram showing a mechanical assembly process: disassembly of parts into a curved pipe, followed by assembly with arrows indicating motion (no text or symbols present)natural_image
Four sequential illustrations of a hand gripping a mechanical device, showing rotational and linear motion (no text or symbols)Če želite parno brisalo prepogniti, vstavite zgornji kovinski del (1) v ohišje naprave. Nato vstavite vanj spodnjo glavo brisala (2).
natural_image
Diagram showing a mechanical assembly process: disassembly of parts into a curved pipe, followed by assembly with arrows indicating rotation (no text or symbols present)natural_image
Four sequential diagrams showing a hand gripping a mechanical component, with arrows indicating motion direction (no text or symbols)VAŽNA SIGURNOSNA UPOZORENJA
OVAJ PROIZVOD NAMIJENJEN JE SAMO ZA UPORABU U KUĆANSTVU.
Za sklapanje parnog čistača, umetnite gornji metalni dio (1) u tijelo aparata. Zatim u njega umetnite i donju glavu čistača (2).
Za lakše kretanje parnog čistača po tepihu, preporučamo pričvršćivanje plastičnog klizača za tepih na donju glavu.
natural_image
Simple line drawing of a hand pressing down on a tray with arrows indicating motion (no text or symbols)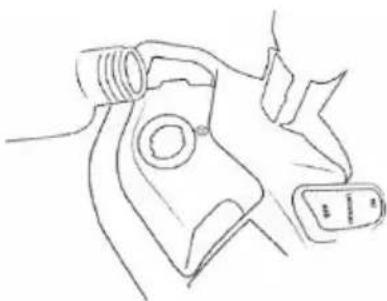
natural_image
Line drawing of a hand holding a device with a bulb, next to a small electronic device (no text or symbols)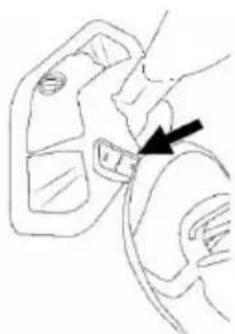
natural_image
Line drawing of a hand holding a device with an arrow pointing to a small component (no text or symbols present)Pri čišćenju površine onečišćene masnoćom, uljem itd., vreloj pari može se dodati i sredstvo za čišćenje. Otvorite čep spremnika otopine za čišćenje, ulijte otopinu za čišćenje i ponovno zatvorite čep. Pritisnite gumb za ispuštanje otopine za čišćenje u položaj ON (uključeno).
ČIŠĆENJE RUČNIM PARNIM ČISTAČEM
natural_image
Diagram showing a mechanical assembly process: disassembly of parts into a curved pipe, followed by assembly with arrows indicating motion (no text or symbols present)natural_image
Four sequential diagrams showing a hand holding a mechanical device with rotational arrows indicating motion (no text or symbols)Da biste zamijenili filtar za vodeni kamenac, otpustite plastični poklopac na ručnom čistaču, zamijenite filtar i ponovo zatvorite poklopac.
ČIŠĆENJE PODOVA
natural_image
Diagram showing a mechanical assembly process with exploded view and final assembled view (no text or symbols)natural_image
Four sequential diagrams showing a hand gripping a mechanical component with arrows indicating motion (no text or symbols)Thank you for choosing the TESLA SteamPower FX50.
Before using the device, please read the rules of safe use carefully and follow all common safety rules.
- Read the entire operating instructions carefully before use
- Keep this user manual
- Follow the rules in this manual to reduce the risk of equipment damage or personal injury
IMPORTANT SAFETY INSTRUCTIONS
THIS PRODUCT IS INTENDED FOR HOUSEHOLD USE ONLY.
This appliance is a complex electromechanical device, please pay attention to the following instructions:
- This appliance is intended for domestic use only; Importer is not responsible for improper use or use contrary to the instructions for use and is not covered by the warranty.
- The appliance is only intended for indoor use at room temperature (max. 40 °C).
- Do not direct the released steam at people, animals or objects that could be damaged by the high temperature.
- Do not immerse the appliance in water.
- Do not leave the appliance connected to an electrical outlet unattended.
- Never unplug the appliance by pulling on the power cord.
- Keep the appliance's power cord away from heat, oil and sharp edges.
- Connect the appliance to a grounded socket.
- Do not pull or carry the appliance by the power cord.
- Do not handle the appliance with wet hands.
- Do not use the appliance in an enclosed space filled with steam released from oil paints, paint thinner, certain substances that protect against moths, flammable dust or other explosive or toxic fumes.
- The appliance emits very hot steam to disinfect the area of use. This means that the steam head and the microfiber cleaning mop become very hot during use.
- Always wear suitable footwear when handling the appliance. Do not wear slippers or shoes with an open toe.
- Do not use the appliance if there is no water in the "Water tank".
- Never add additives to the water tank.
- Only use standard floor cleaners in the detergent dispenser. Do not use perfumes, stain removers or substances containing alcohol and chemicals.
- You should be careful when using this appliance. DO NOT touch any parts that may become hot during use.
• Before use, make sure that the water tank cap is completely screwed on. - Do not use without a properly installed microfiber cleaning mop.
-
Use only original accessories designed for this model.
-
Do not touch parts that are plugged in when your hands are wet.
- Do not open or repair the device, as this may result in electric shock or void the warranty.
- The manufacturer and importer into the European Union are not liable for damages caused by the operation of the device, such as injury, scalding, fire, injury, deterioration of other items, etc.

Do not use on leather, waxed polished furniture or floors, synthetic fabrics, velvet or other delicate steam-sensitive materials. Do not use on any unsealed hard floor surfaces. In addition, on surfaces that have been treated with wax or some wax-free floors, the gloss can be removed by heat and steam. It is always recommended to test the insulated area of the surface to be cleaned before cleaning. We also recommend checking the floor manufacturer's instructions for use and care.
PACKAGE CONTENTS
Carefully check that you have unpacked all the supplied accessories, we recommend that you keep the original paper box, user manual and packing material during the warranty period.
BEFORE FIRST USE
Remove all packaging material, appliance and accessories. Remove any transparencies, stickers, or paper. Check that the appliance and any part of it is not damaged.
WARNING: Before carrying out any of the following operations, make sure that the appliance is switched off, unplugged and contains little or no water.
DESCRIPTION
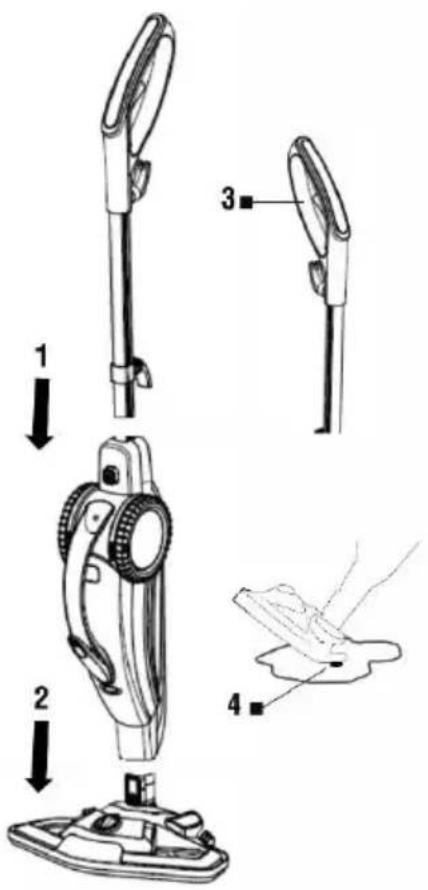
To fold the steam mop, insert the upper metal part (1) into the body of the appliance. Then also insert the lower mop head (2) into it.
For easier movement of the steam mop on the carpet, we recommend attaching a plastic glider on the carpet to the lower mop head.
3 Steam release button
4 Cleaning brush
FILLING THE WATER TANK
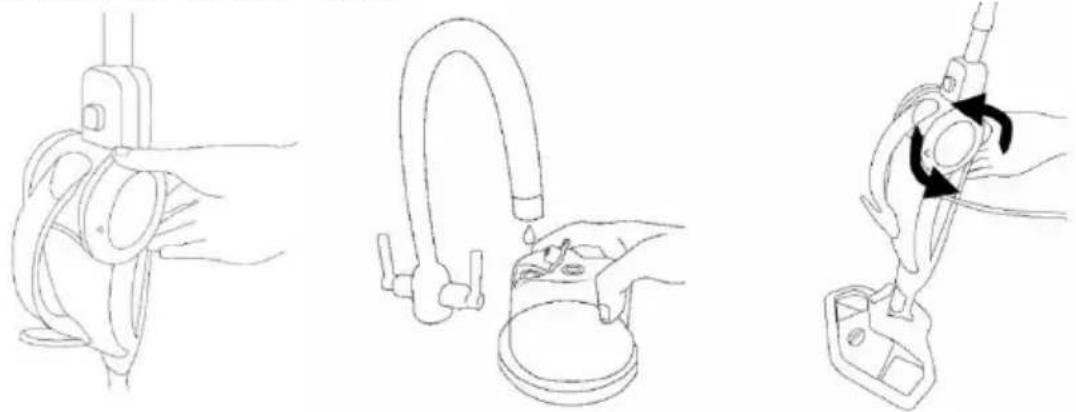
Remove the „Water tank“ from the main body by turning the side panel and pour water into it. Then carefully close the „Water tank“ and screw it back into the body of the steam mop.
Never add any cleaning agents, chemicals, alcohol or perfume to the „Water tank“. To significantly reduce the formation of limescale and prolong the life of your steam mop, we recommend using distilled water for cleaning. NEVER overfill the capacity of the „Water tank“.
If there is a small water leak when removing or inserting the „Water tank“, wipe these areas.
USE OF CLEANER
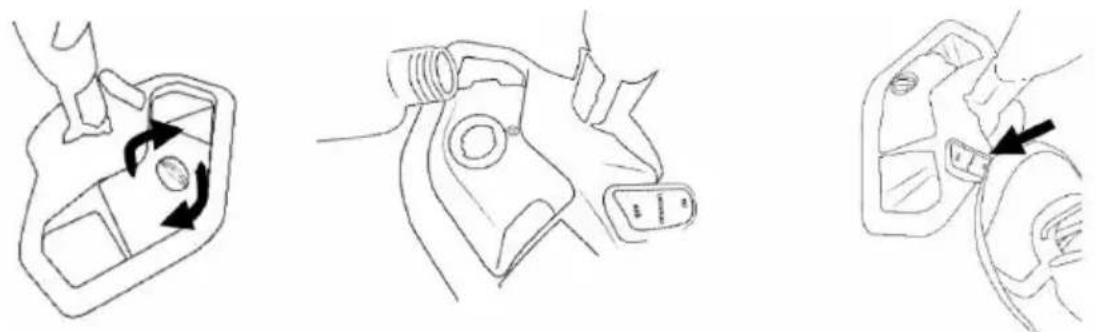
When cleaning a surface contaminated with grease, oil, etc., it is also possible to add the effect of a cleaning agent to the hot steam. Unscrew the „Cleaning solution container cap“, pour the cleaning solution into it, and then close the container again. Press the button to drain the cleaning solution to the ON position.
CLEANING WITH A MANUAL STEAM CLEANER
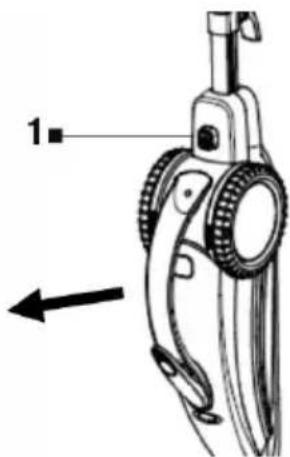
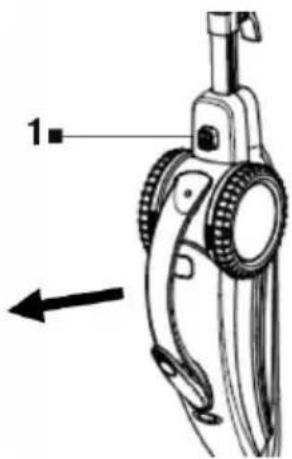
Press the release button (1) to slide it out of the main body steam mop „Handheld cleaner“ and connect the selected accessories..
REPLACING CLEANING ATTACHMENTS
natural_image
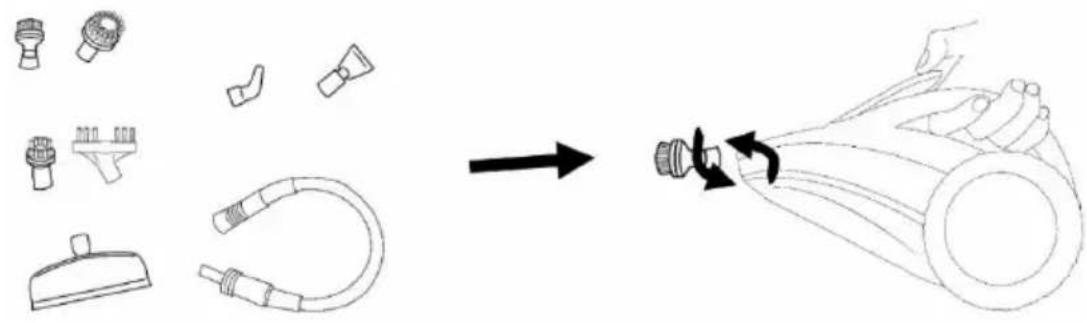
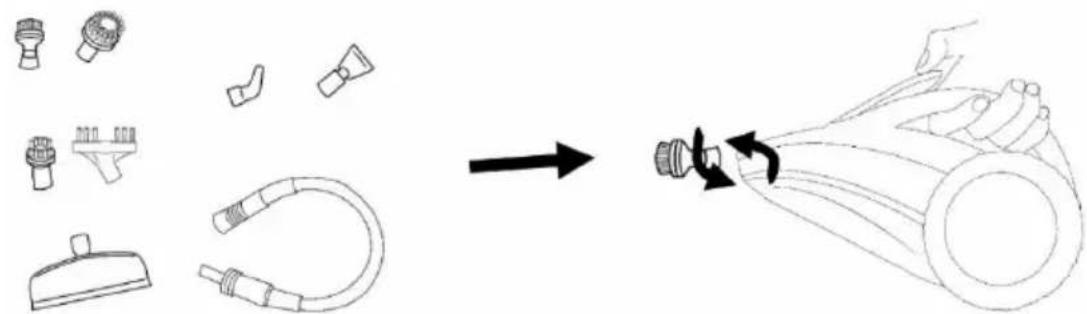
Diagram showing a mechanical assembly process with exploded view and final assembled view (no text or symbols)When using a flexi hose, connect it to the „Handheld cleaner“ until the button clicks. Choose a suitable cleaning attachment, place it on the „Handheld cleaner“ or flexi hose and turn it clockwise to firmly lock both parts.
LIMESCALE FILTER REPLACEMENT
natural_image
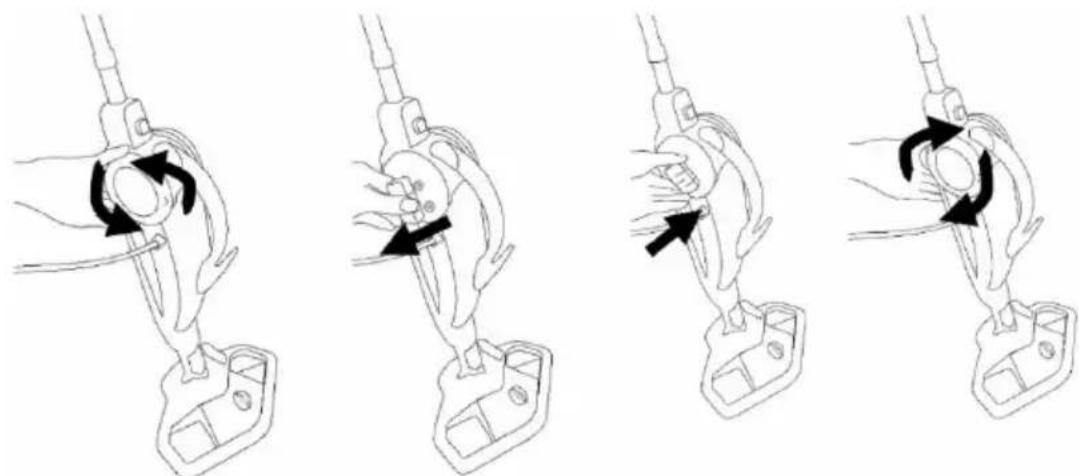
Four sequential illustrations showing a hand gripping a mechanical component with arrows indicating motion (no text or symbols)To replace the limescale filter, loosen the plastic cover on the „Handheld cleaner“, replace the filter and then close it again.
FLOOR CLEANING
- When the appliance is switched on, the light comes on, which means preheating.
- Preheating takes approximately 20 seconds. When the steam mop is ready for use, the light will turn blue. Pressing the „Steam release button“ on the steam mop handle will start the steam mop.
CLEANING AND MAINTENANCE
Make sure the steam mop is unplugged and completely cool.
- Drain the remaining water into the sink.
- The cleaning attachments can be washed in warm water with a small amount of soap if they are dirty.
ATTENTION!
WASH THE MICROFIBER MOP AT LEAST ONCE A MONTH IN HOT SOAP WATER, MAXIMUM AT 30 - 40°C, WITHOUT BLEACH OR FABRICATOR!
Then let it dry naturally, do not use the clothes dryer.
STORAGE
After use, turn off the power to the steam mop and unplug the power cord. Remove the „Water tank“, pour out the residual water and wipe the steam mop dry. Store the steam mop in a dry and clean place.
TROUBLESHOOTING
| Problem | Cause/Solution |
| Reduced amount of steam or no steam. | Check that the „Water tank“ is full. |
| The steam wand may be clogged or clogged with limescale. | |
| Check that the appliance is connected correctly. | |
| Steam release regulator not compressed. |
WARRANTY REPAIR
For warranty repair, contact the dealer where you purchased the TESLA product.
The warranty DOES NOT APPLY to:
• using the device for other purposes than it was designed to
• normal wear and tear
- failure to observe the „Important safety instructions“ stated in the user manual
• electrical or mechanical damage caused by improper use
- damage caused by natural elements such as water, fire, static electricity, power surges etcetera
- damage caused by an unauthorized repair or unreadable serial number
DECLARATION OF CONFORMITY
We, INTER-SAT LTD, org. složka, declare that this device complies with the essential requirements and other relevant provisions of the standards and regulations relevant to the type of equipment.

This product complies with the requirements of the European Community.
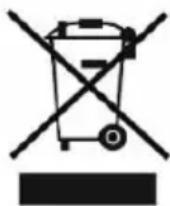
When this crossed-out wheeled bin symbol is attached to a product it means the product is covered by the European Directive 2002/96 / EC. Please inform yourself about the local separate collection system for electrical and electronic products. Please follow local regulations and do not dispose of old products with normal household waste. Proper disposal of your old product will help prevent potential negative consequences for the environment and human health.
As the product evolves and improves, we reserve the right to modify the user manual. You can always find the current version of this user manual at www.tesla-electronics.eu.
- A TARTOZÉKOK FELHELYZÉSE
- VAŽNA SIGURNOSNA UPOZORENJA
- ČIŠĆENJE RUČNIM PARNIM ČISTAČEM
- ČIŠĆENJE PODOVA
- IMPORTANT SAFETY INSTRUCTIONS
- PACKAGE CONTENTS
- BEFORE FIRST USE
- FILLING THE WATER TANK
- USE OF CLEANER
- CLEANING WITH A MANUAL STEAM CLEANER
- REPLACING CLEANING ATTACHMENTS
- LIMESCALE FILTER REPLACEMENT
- FLOOR CLEANING
- CLEANING AND MAINTENANCE
- ATTENTION!
- WASH THE MICROFIBER MOP AT LEAST ONCE A MONTH IN HOT SOAP WATER, MAXIMUM AT 30 - 40°C, WITHOUT BLEACH OR FABRICATOR!
- STORAGE
- WARRANTY REPAIR
- The warranty DOES NOT APPLY to:
- DECLARATION OF CONFORMITY
Brand : TESLA
Model : StreamPower FX50
Category : Steam cleaner