
MagicMount Pro2 Extendo - Phone accessory Scosche - Free user manual and instructions
Find the device manual for free MagicMount Pro2 Extendo Scosche in PDF.


| Brand | Scosche |
| Model | MagicMount Pro2 Extendo |
| Product Type | Phone Car Mount with Telescoping Arm |
| Mounting Options | Window mount (suction cup) and Dashboard mount (StickGrip adhesive base) |
| Arm Type | Telescoping arm with front knob for extension and rear knob for angle adjustment |
| Mount Head | Ball joint collar for 360° rotation and angle adjustment |
| Compatibility | iPhone 12 or later (MagSafe), wireless charging smartphones with case (iPhone 11/Pixel 4 and newer), smartphones without case (use protective film) |
| Included Accessories | StickGrip mounting base, MagicPlate, Protective Film, Cable Routing Clip, Cleaning Wipe |
| Material | Plastic, metal, silicone (StickGrip) |
| Power Source | None (passive mount) |
| Special Features | MagSafe compatible (for iPhone 12+), no tools required, easy adjustment, cable routing |
| Cleaning | StickGrip base can be rinsed with warm water and air dried to renew stickiness |
| Care | Test cleaning wipe on inconspicuous area first due to possible discoloration |
| Safety | Do not use sharp objects to remove MagicPlate to avoid device damage |
| Designed In | Oxnard, California, USA |
Frequently Asked Questions - MagicMount Pro2 Extendo Scosche
User questions about MagicMount Pro2 Extendo Scosche
0 question about this device. Answer the ones you know or ask your own.
Ask a new question about this device
Download the instructions for your Phone accessory in PDF format for free! Find your manual MagicMount Pro2 Extendo - Scosche and take your electronic device back in hand. On this page are published all the documents necessary for the use of your device. MagicMount Pro2 Extendo by Scosche.
USER MANUAL MagicMount Pro2 Extendo Scosche
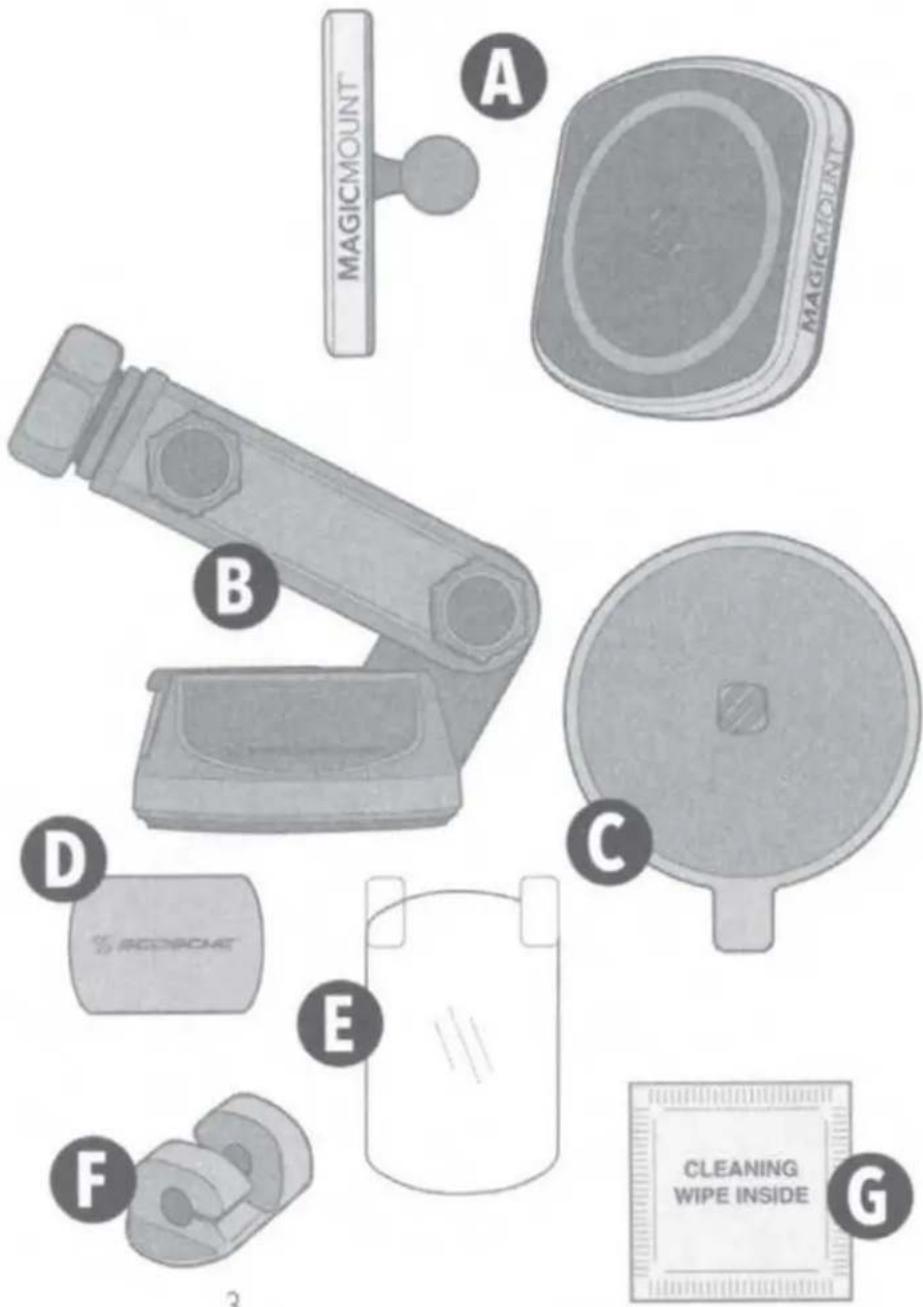
B. Telescoping Window/Dash Mount
C. StickGrip™ Mounting Base
D. MagicPlate ^TM
E. Protective Film
F. Cable Routing Clip* *For your phone's charge cable (cable not included)
G. Cleaning Wipe
(EN)
DEVICE SETUP
SECTION A - iPhone® 12 or Later (with optional MagSafe™ Case)
SECTION B - Wireless Charging Smartphones (with Case) iPhone® 11 / Pixel 4 & Newer (Case Required) Wireless Charging Smartphones (without Case)
SECTION C - Mount Head Assembly & Adjustment
SECTION D - Telescoping Arm Adjustment
SECTION E - Window/Dash Mount
SECTION A
(EN)
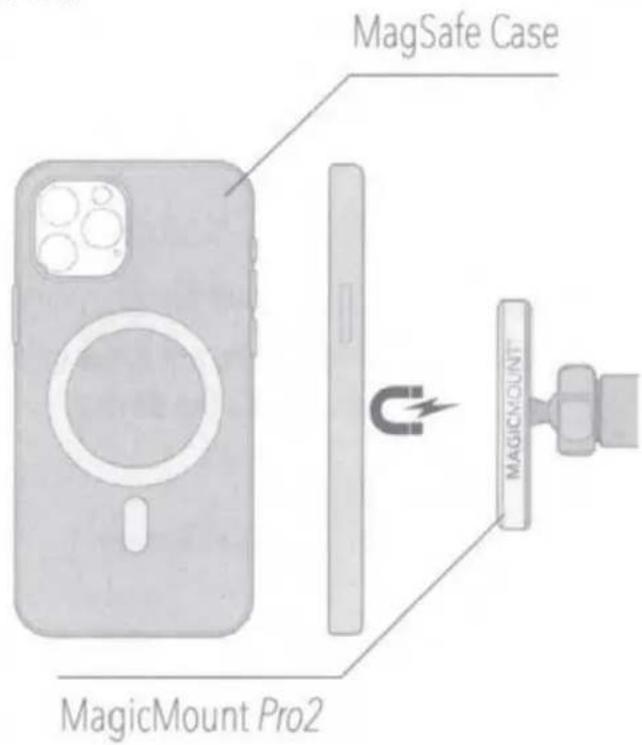
iPhone 12 or Later (with optional MagSafe Case) If using a case, it must be a MagSafe case (not included) for MagicMount Pro2 to function properly. Note: MagicPlate not required.
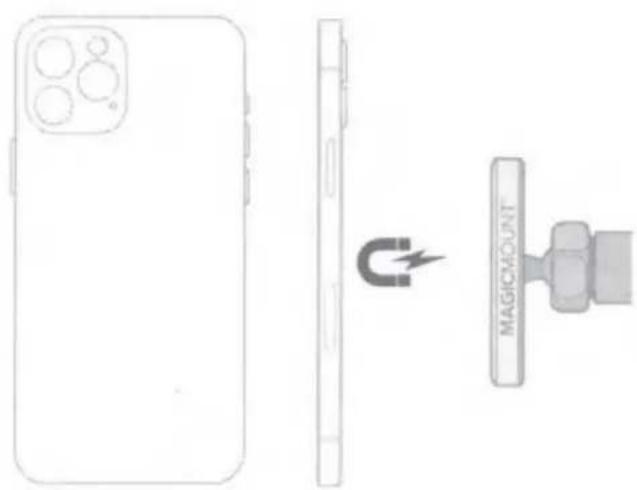
iPhone 12 or Later (without Case) Note: MagicPlate not required.
natural_image
Diagram showing a smartphone body, its side panel with a U-shaped magnet, and a labeled Magic Mount component (no text or symbols on the main elements)(EN)
SECTION B
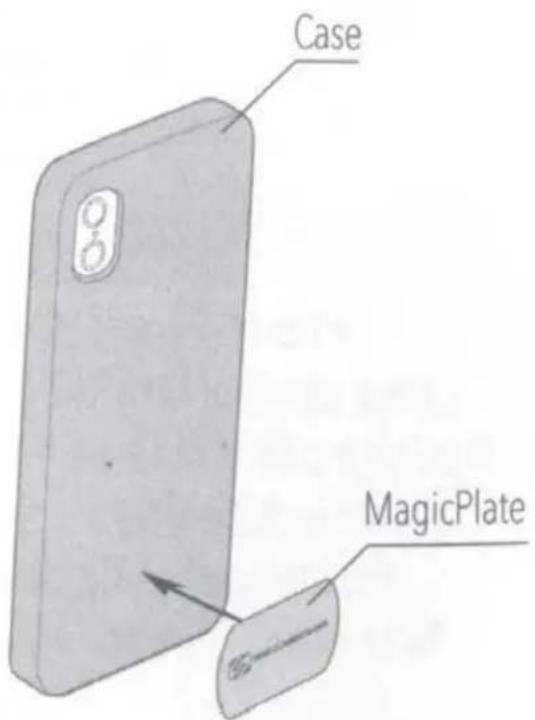
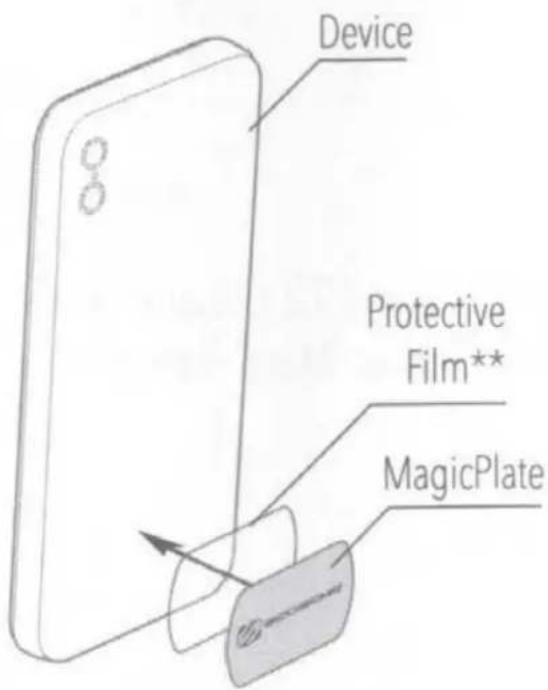
Wireless Charging Smartphones (with Case) iPhone 11/ Pixel 4 and Newer (Case required*) *Manufacturing materials do not allow adhesives to bond directly to the device.
Wireless Charging Smartphones (without Case**)
** It is recommended to use the Protective Film. If the MagicPlate needs to be removed, the film simplifies the process. To remove the MagicPlate use a credit card and slide in between the film and MagicPlate. Do NOT use anything sharp/hard as this can damage the device.
SECTION C
(EN)
Mount Head Assembly
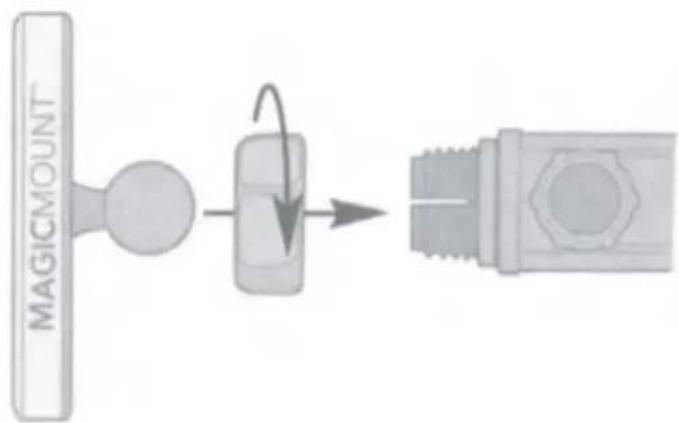
flowchart
graph LR
    A["MAGICMOUNT"] --> B["Valve with Arrow"]
    B --> C["Arrow to next step"]
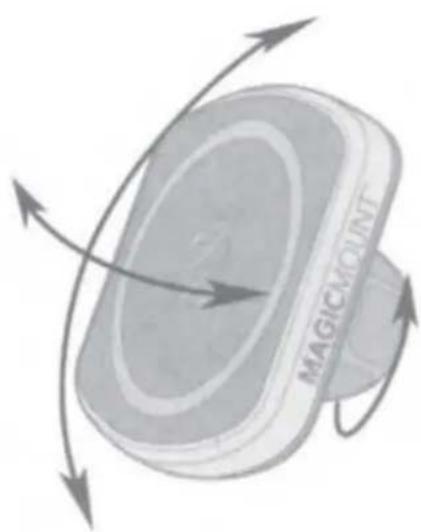
Mount Head Adjustment Loosen ball-joint collar to adjust angle or rotate mount 360°
natural_image
Illustration of a Magic Mount device with rotational arrows indicating motion (no text or symbols on the device itself)(EN)
SECTION D
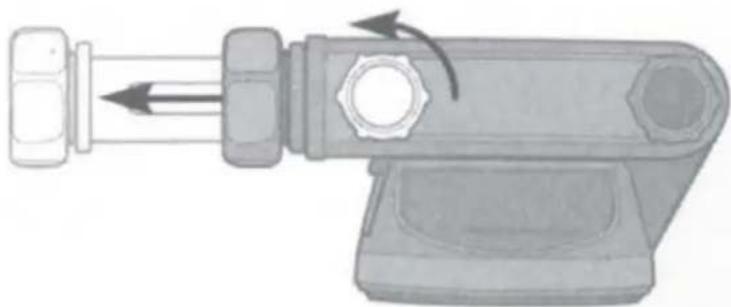
Telescoping Arm Adjustment
Loosen front knob to extend telescoping arm. Loosen rear knob to adjust angle of arm.
natural_image
Mechanical component diagram showing a lever mechanism with arrows indicating motion (no text or symbols)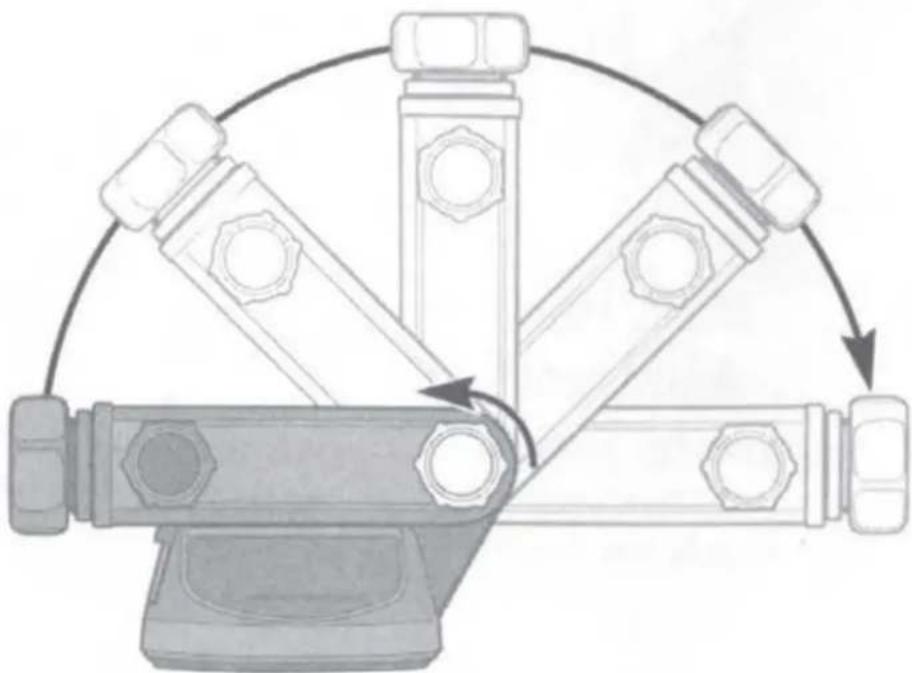
natural_image
Mechanical assembly diagram showing a rotating lever mechanism with four components and directional arrows (no text or labels)SECTION E
(EN)
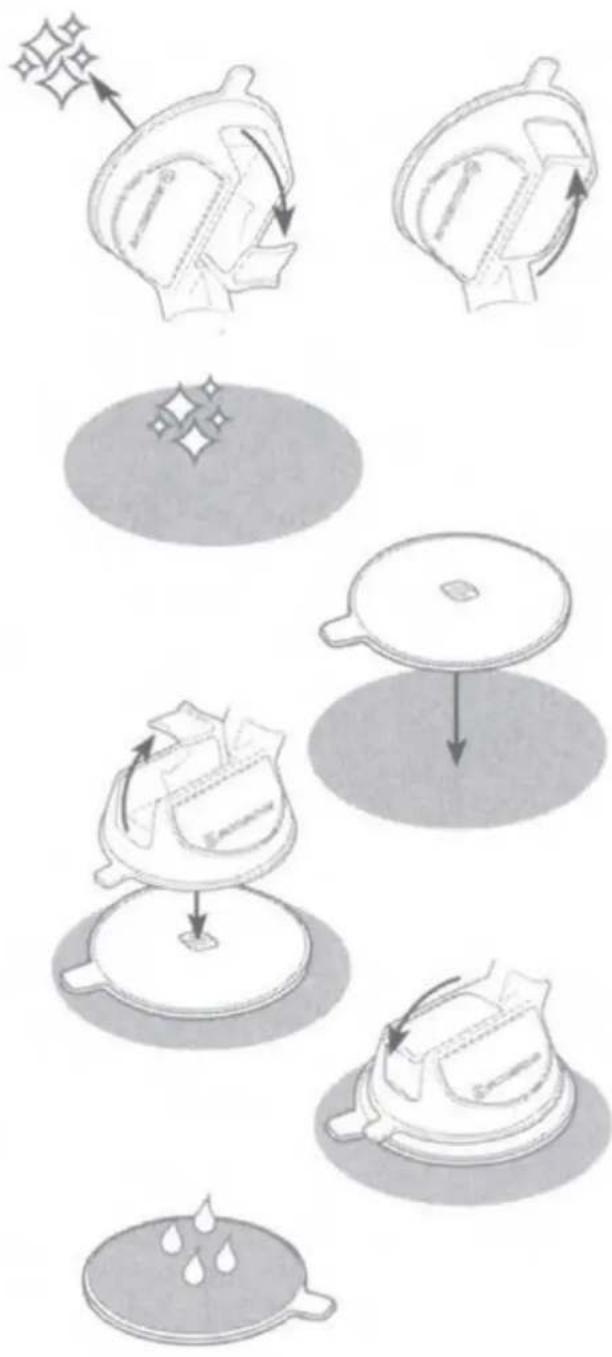
Window Mount
-
Clean the window surface.
-
With the lever in the UP position, place the mount on window and press lever down to lock in place.
StickGrip Dash Mount
-
Select a flat surface and clean using supplied wipe*.
-
Remove protective film from the StickGrip mounting base**. Place mounting base on surface and press firmly.
- With the lever in the UP position, place the mount on the mounting base, and press lever down to lock in place.
*Supplied cleaning wipe may cause discoloration of certain plastics, vinyls and painted surfaces. It is recommended to test in an inconspicuous area first.
**Note: StickGrip may leave residue or discoloration on some surfaces. It may also leave a ring of residue when mounted to the dash.
4. To renew and reuse StickGrip mounting base, rinse under warm water and allow to air dry.
flowchart
graph TD
    A["Raw Material"] --> B["Moving with Bag"]
    B --> C["Add Food to Cover"]
    C --> D["Packaging with Cover"]
    D --> E["Ordering with Bag"]
    E --> F["Product Packaging"]
(EN)
MagicMount Pro2

SCOSCHE
Scosche Industries
1550 Pacific Avenue
Oxnard, California 93033
Phone: 800-363-4490 x1 / 805-486-4450 x1
www.scosche.com
©2022 Scosche Industries
Scosche, MagicMount, MagicPlate, StickGrip are all trademarks of Scosche Industries.
Other marks or brands are the property of their respective owners.
Devices and or appearance may vary.
Designed in Oxnard, California
SI MP2WDEX2 4/22
Brand : Scosche
Model : MagicMount Pro2 Extendo
Category : Phone accessory