EVD700W - Tumble dryer Esatto - Free user manual and instructions
Find the device manual for free EVD700W Esatto in PDF.


| Product Type | Vented Tumble Dryer |
| Brand | Esatto |
| Model | EVD700W |
| Capacity | 7.0 kg (dry load) |
| Dimensions (W x D x H) | 595 mm x 555 mm x 840 mm |
| Net Weight | 33.5 kg |
| Power Supply | 220-240 V~, 50 Hz |
| Rated Input Power | 2000 W |
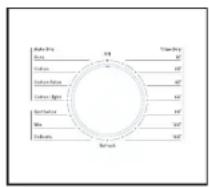
| Programs | Auto Dry, Cotton (Extra/Light), Synthetics, Mix, Delicate, Refresh, Time Dry (15, 30, 45, 60, 90, 120, 150 min) |
| Drying System | Vented (exhaust duct required) |
| Installation Options | Freestanding or wall-mounted (brackets included) |
| Exhaust Duct Length | 1.5 m flexible tube included |
| Door Filter | Cleanable lint filter (must be cleaned after each cycle) |
| Safety Features | Thermal overload protection (safety reset button), child safety (supervision recommended) |
| Energy Efficiency | Not specified (standard vented dryer) |
| Noise Level | Not specified (typical airflow noise) |
| Control Panel | Rotary dial for program selection, Start/Pause button |
| Accessories Included | Exhaust duct, wall mounting brackets, screws, positioning template, inverted control panel decal |
| Warranty | 2 years (Australia/NZ, subject to conditions) |
| Intended Use | Indoor household drying of water-washed textiles |
Frequently Asked Questions - EVD700W Esatto
User questions about EVD700W Esatto
0 question about this device. Answer the ones you know or ask your own.
Ask a new question about this device
Download the instructions for your Tumble dryer in PDF format for free! Find your manual EVD700W - Esatto and take your electronic device back in hand. On this page are published all the documents necessary for the use of your device. EVD700W by Esatto.
USER MANUAL EVD700W Esatto
Everything you need for your 7kg Vented Dryer is in this User Manual
esatto
everything you need
Contents
Page 4 Welcome
Page 5 Safety Instructions
Page 8 Your Vented Dryer
Page 9 Accessories
Page 10 Installation
Page 13 Operating Instructions
Page 16 Cleaning & Maintenance
Page 18 Troubleshooting
Page 19 Technical Specifications
Page 20 Warranty Information
Page 22 Purchase Details
Welcome
Residentia Group
Head Office
165 Barkly Avenue
Burnley, Victoria
Australia 3121
ACN
600 546 656
Online
residentia.group
www.Esatto.house
f @@Esatto.house
Postage
PO Box 5177
Burnley, Victoria
Australia 3121
Telephone
1300 11 4357
Congratulations on purchasing your new Esatto appliance. The Esatto brand is proudly distributed within Australia by Residentia Group Pty Ltd.
Please refer to the warranty card at the rear of this manual for information regarding your product's parts and labour warranty, or visit us online at: www.residentia.group
At Residentia Group, we are customer obsessed and our Support Team are there to ensure you get the most out of your appliance. Should you want to learn more about your vented dryer such as the various drying modes or importantly taking care of the appliance, our Support Team are here to help.
You can use our online Support Centre at anytime by visiting:
http://support.residentiagroup.com.au
Or you can contact us via phone by dialing: 1300 11 HELP (4357).
It is important that you read through the following use and care manual thoroughly to familiarise yourself with the installation and operation requirements of your appliance to ensure optimum performance.
Again, thank you for choosing an Esatto appliance and we look forward to being of service to you.
Kind Regards,
The Residentia Team
Safety Instructions
DRYER CARE SYMBOLS
Please pay attention to use the drying machine if the materials of your clothes can not be dried by it or contain the symbols as follows:
 Dry Dry |  Normal Normal |  Not tumble dry normal Not tumble dry normal |  Do not dry Do not dry |
 Line dry / hang to dry Line dry / hang to dry |  Drip dry Drip dry |  Dry flat Dry flat |  In the shade In the shade |
 Dry clean Dry clean |  Do not dry clean Do not dry clean |  Dry clean normal cycle with any solvent Dry clean normal cycle with any solvent |  Dry clean normal cycle petroleum solvent only Dry clean normal cycle petroleum solvent only |
IMPORTANT!
CAUTION: RISK OF FIRE!
To prevent any damages to your and others' life or property, you have to follow the safety notes.
- This product belongs to the category of electrical appliances, and only for drying textiles which have been washed with water in the household. Please pay attention to the safety of power use during the operation!
- The power source with reliable earthing must be used. Its earth wire must be buried under the ground and shall not be connected with the public utilities such as city water pipe or gas pipe etc. The earth wire and null wire shall be distinguished and shall not be connected together.
- The maximum mass of dry textile material is 7 kilograms to be used in the appliance.
- That the tumble dryer is not to be used if industrial chemicals have been used for cleaning.
- Do not dry unwashed items in the tumble dryer.
- The exhaust air must not be discharged into a flue which is used for exhausting fumes from appliance burning gas or other fuels.
- Adequate ventilation has to be provided to avoid the back flow of gases into the room from appliances burning other fuels, including open fires.
- The appliance must not be install behind a lockable door, a sliding door or a door with a hinge on the opposite side to that of the tumble dryer. In such a way that a full opening of the tumble dryer door is restricted.
- Keep pets away from this appliance.
- Oil-affected items can ignite spontaneously, especially when exposed to heat sources such as in a tumble dryer. The items become warm, causing an oxidation reaction in the oil. Oxidation creates heat. If the heat cannot escape, the items can become hot enough to catch fire. Piling, stacking or storing oil-affected items can prevent
heat from escaping and so create a fire hazard.
- If it is unavoidable that fabrics that contain vegetable or cooking oil or have been contaminated by hair care products be placed in a tumble dryer they should first be washed in hot water with extra detergent-this will reduce, but not eliminate, the hazard.
- The appliance should not be overturned during normal use or maintenance.
- If the power cable is damaged, it must be replaced by the manufacturer, its service agent or similarly qualified persons in order to avoid a hazard.
- This appliance is for indoor use only.
- The openings must not be obstructed by a carpet
- Children of less than 3 years should be kept away unless continuously supervised. If the appliance appear high temperature abnormally, please unplug the appliance immediately.
- The appliance is not intended for use by persons (including children) with reduced physical, sensory or mental capabilities, or lack of experience and knowledge, unless they have been given supervision or instruction concerning use of the appliance by a person responsible for their safety. Children should be supervised to ensure that they do not play with the appliance.
To ensure your and your family's safety, please make improvement immediately if any power use at your home does not meet the above-mentioned requirement.
WARNING: ELECTRIC SHOCK HAZARD!
- Do not draw the power cord forcefully to pull out the mains plug.
- Please do not plug/draw the mains plug with wet hands.
- Do not damage the power cord and the power plug.
- Plug must be accessible after installation.
- WARNING: The appliance must not be supplied through an external switching device, such as a timer, or connected to a circuit that is regularly switched on and off by a utility.
CAUTION: DAMAGE DANGER
- Do not dry over the rated capacity.
- Do not operate the dryer without the door filter.
- Do not dry the clothes before being spun.
- Do not expose the dryer directly under the sun, and indoor use only.
- Do not install the dryer in humid and wet environments.
- At cleaning and maintenance, please remember to pull out the power plug and do not directly wash the dryer with water.
Safety Instructions (Continued)
Power supply and grounding
- The dryer employs alternating current with the rated voltage and frequency.
- When the voltage fluctuates between 6% of rated voltage, the dryer can work normally.
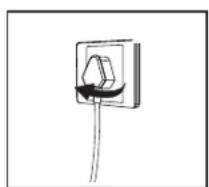
- A special power socket with a capacity 10A for the dryer had better be set beside the dryer for convenience and safety. The method of connection of the socket is as the figure below.
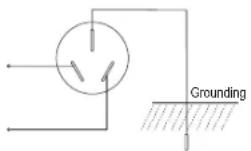
- To be safe, please make improvements as soon as possible according to the rules and suggestions mentioned above.
- The appliance corresponds to protection class I and may only be connected to a plug with a protective conductor that has been installed properly. When connecting the appliance to the mains, make sure that the mains voltage is correct. You can find more information about this on the rating plate.
- The electrical safety of this tumble dryer can only be guaranteed when correctly earthed. It is essential that this standard safety requirement is met. If in any doubt, please have the household wiring system tested by a qualified electrician. The manufacturer cannot be held liable for the consequences of an inadequate earthing system (e.g. electric shock).
- WARNING: The socket and the grounding wire must be installed by an electrician to prevent incorrect installation or use of the socket and to guarantee the safe use of electricity. No connection of the grounding wire and the neutral wire, otherwise the cabinet will be charged, which is likely to cause the danger of electric shock.
CAUTION: INJURY DANGER!
- Do not disassemble and install the dryer under no instruction or supervision.
- Do not stack this dryer on washing machine without stacking kits. Stacking kits are available to purchase from Esatto.
- Do not lean on the opened door of the dryer.
- Do not put any objects on the dryer, such as a candle or electric cooker.
WARNING: EXPLOSION & FIRE DANGER!
- Please do not dry the clothes with some flammable substances such as the coal oil, alcohol or there will be the explosion.
- Keep away from open flame And other sources of ignition.
- The tumble dryer is not to be used if industrial chemicals have been used for cleaning.
- Do not dry unwashed items in the tumble dryer.
- Items that have been soiled with substances such as cooking oil, acetone, alcohol, petrol, kerosene, spot removers, turpentine, waxes and wax removers should be washed in hot water with an extra amount of detergent before being dried in the tumble dryer.
- Items such as foam rubber (latex foam), shower caps, waterproof textiles, rubber backed articles and clothes or pillows fitted with foam rubber pads should not be dried in the tumble dryer.
- Oil-affected items can ignite spontaneously, especially when exposed to heat sources such as in a tumble dryer.
- The items become warm, causing an oxidation reaction in the oil. Oxidation creates heat. If the heat cannot escape, the items can become hot enough to catch fire. Piling, stacking or storing oil-affected items can prevent heat from escaping and so create a fire hazard.
- Remove all objects from pockets such as lighters and matches.
- If it is unavoidable that fabrics that contain vegetable or cooking oil or have been contaminated by hair care products be placed in a tumble dryer they should first be washed in hot water with extra detergent. This will reduce, but not eliminate, the hazard.
- WARNING: Never stop a tumble dryer before the end of the drying cycle unless all items are quickly removed and spread out so that the heat is dissipated.
- Openings must not be obstructed.
- The lint filter must be cleaned frequently.
- Lint must not to be allowed to accumulate around the dryer.
DISPOSAL OF PACKAGING
- The packaging is designed to protect the appliance from damage during transportation. The packaging materials are environmentally friendly and should be recycled. Recycling the packaging can reduce the use of raw materials in the manufacturing process and the amount of waste in landfill sites.
PRECAUTIONS
- Install or store the appliance where it will not be exposed to temperatures below freezing or exposed to water or weather, which could cause permanent damage and invalidate the warranty.
- Thoroughly spin the laundry in washing machine before placing into the dryer. High spin speed can reduce the drying time and save energy.
- Do not wash or dry articles that have been cleaned in, washed in, soaked in or spotted with flammable, combustible or explosive substances (such as wax, oil, paint, gasoline, degreasers, dry-cleaning solvents, kerosene, etc.).
- Keep area around the exhaust ventilation opening and adjacent surrounding areas free from the accumulation of lint, dust and dirt. An obstructed port might reduce the airflow.
- Make sure combustible sprays will not be close to the dryer when it is working, and once the gas leaks, do not touch plug or start/pause it.
- Never attempt to operate this appliance if it is damaged, malfunctioning, partially disassembled, or has missing or broken parts, including a damaged cord or plug.
- Do not allow children on or in the appliance. Close supervision of children is necessary when the appliance is used near children.
- Do not store plastic, paper or clothing that may burn or melt on top of the dryer during operation.
- Do not dry articles containing rubber, plastic or similar materials such as padded bras, tennis shoes, galoshes, bath mats, rugs, bibs, baby pants, raincoats, plastic bags or pillows that may melt or burn. Some rubber materials, when heated, can under certain circumstances produce fire by spontaneous combustion.
- Do not use the machine when your hands are wet.
- The exhaust air must not be discharged into a flue which is used for exhausting fumes from appliances burning gas or other fuels.
- The door shall be opened only after the program of the drying machine is completed. Do not open the door before the program finished to avoid burns by hot steam or the heated appliance.
Your Vented Dryer
PRODUCT OVERVIEW
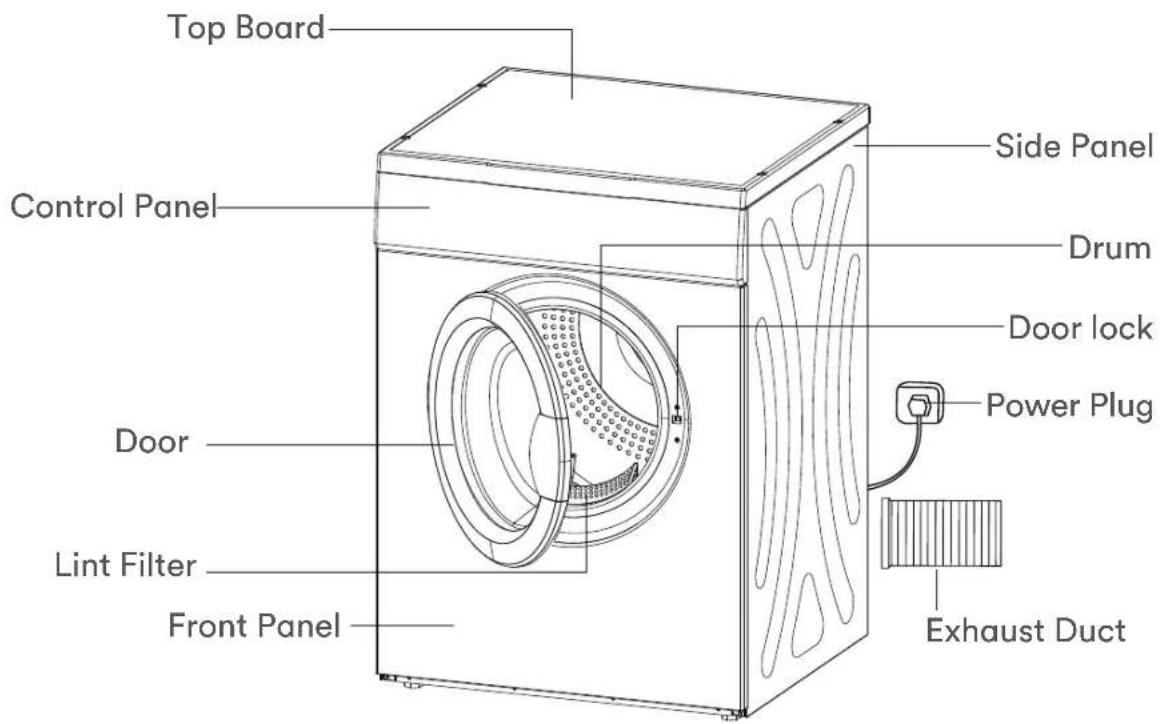
NOTE!
The diagrams in this user manual are for reference only. Your appliance may appear differently.
YOUR CONTROL PANEL
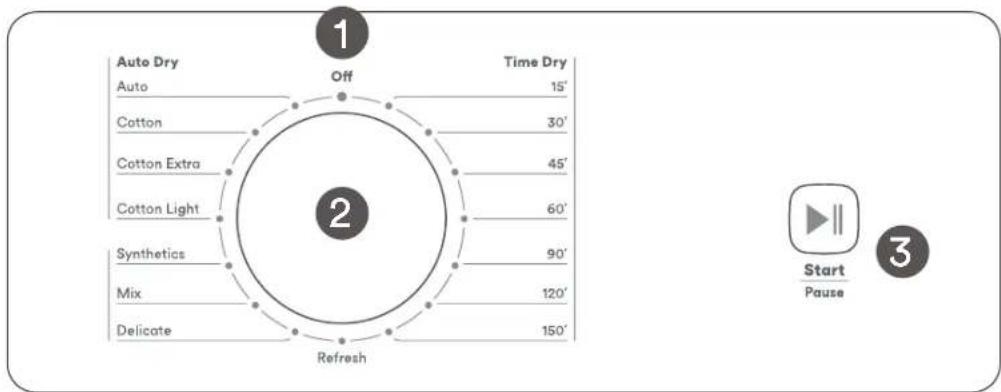
flowchart
graph TD
    A["1"] --> B["2"]
    B --> C["3"]
    style A fill:#f9f,stroke:#333
    style B fill:#ccf,stroke:#333
    style C fill:#cfc,stroke:#333
- Off position: Turn the program dial to power on your dryer by selecting any drying cycle.
- Program dial: Select the cycle most appropriate to your needs for effective drying results.
- Start/Pause: Press the button to start or pause the drying cycling.
Accessories
Below are the accessories included with your Esatto Vented Clothes Dryer.
| Part name Quantity Image/Diagram | ||
| Horizontal Screw Positioning Template 1 | 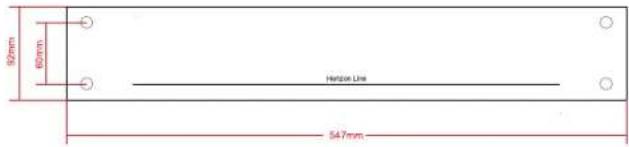 | |
| Expansion Screw Bolt 4 | 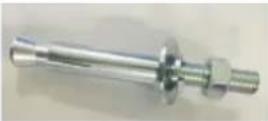 | |
| Hanging Bracket 2 | 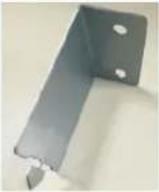 | |
| Plastic Cover 2 | 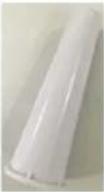 | |
| Inverted Control Panel Decal 1 | 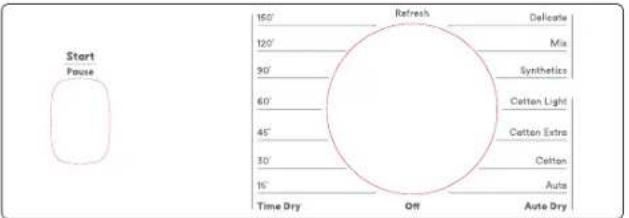 | |
| Exhaust Duct (1.5m Flex Tube) 1 |  |
NOTE: The diagrams & images in this user manual are for reference only. Your appliance may appear differently.
Installation
IMPORTANT!
If the power cord is damaged, it must be replaced by Esatto or one of its authorised service representatives. Please contact 1300 11 HELP (4357) and ensure the appliance is completely disconnected from the power supply.
TRANSPORT
Move cautiously. Do not grasp any salient parts of machine. The machine door cannot be used as the handle for transport.
CAUTION: DAMANGE & INJURY DANGER!
Improper handling of the appliance may result in injury.
- The appliance is very heavy. Never transport or carry the appliance alone; always with the assistance of another person.
- Remove all obstacles on the transport route and from the installation location, e.g. open doors and clear away objects lying on the floor.
- Do not use the open door as a handhold.
- Remove all package material before using the dryer.
- Before setting up the tumble dryer, check it for any externally visible damage.
Do not install or use a damaged tumble dryer. - Do not install the tumble dryer in a room where there is a risk of frost occurring. At temperatures around freezing point the tumble dryer may not be able to operate properly. There is a risk of damage if the condensed water is allowed to freeze in the pump and hoses.
INSTALLATION POSITIONING
- Children can become entangled in the packaging film or swallow small parts and suffocate. Do not allow children to play with the packaging.
- Dryer should be placed in a ventilated area with than 10cm distance from the wall. It is suggested there are no obstacles within 1.5m in front of dryer to assure ventilation.
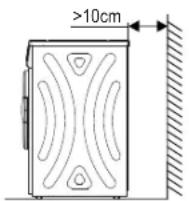
- The appliance must not be installed behind a lockable door, a sliding door or a door with a hinge on the opposite side to that of the tumble dryer, in such a way that a full opening of the tumble dryer door is restricted.
- Do not restrict the floor clearance through deep pile carpets, strips of wood or similar. This might cause heat built-up which would interfere
with the operation of the appliance.
- It is recommended that, for your convenience, the machine is positioned close to your washing machine.
- Do not stack this dryer on washing machine without a stacking kit. Stacking kits are available to purchase from Esatto. Installation shall be done by the manufacturer, its service agent or similarly qualified persons to avoid any hazards.
- The tumble dryer must be installed in a clean place, where dirt does not accumulate. Air must be able to circulate freely around the appliance. Do not obstruct the air inlet or the air intake grilles at the back of the machine.
- To keep vibration and noise within minimum level when the clothes dryer is in use, it must be placed on a firm and level surface.
- Do not remove the feet of the appliance.
Note when installing:
- Do not install the dryer in the open air or a place where it can be damaged easily by rain;
- Do not place the back of dryer near curtain or something that can be moved by wind;
- Do not place the dryer near gas or flammable materials.
LEVEL ADJUSTING
Once in its permanent operating position, check that the dryer is absolutely level with the aid of a spirit level. If it is not, adjust the feet by hand or using a tool.
Note: If the dryer is not placed horizontally (tilt angle more than 2^ ), the dryer may not operate correctly.
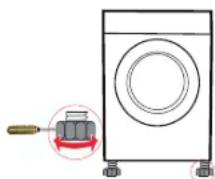
POWER SUPPLY CONNECTION
- Make sure that the voltage of the power supply is the same as the electric specification.
- Do not connect the dryer with the power connection board, a universal plug or socket, do not use multi-plug adapters and extension cables.
EXHAUST DUCT INSTALLATION
- Connect one end of the flex tube to the back vent, then fix it firmly until it's tight.
- The other end of flex tube can be extended externally outdoors, for the proper assembly please refer below.
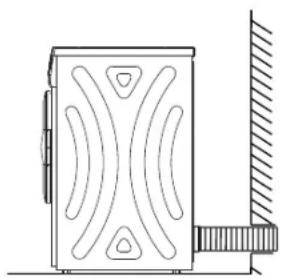
natural_image
Technical line drawing of a door with decorative patterns and a side-mounted bracket (no text or symbols)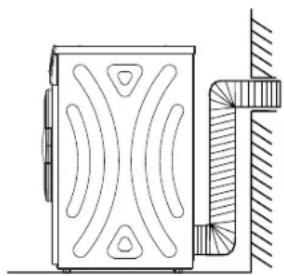
natural_image
Technical line drawing of a mechanical component with internal channels and a side wall (no text or symbols)WALL HANGING INSTALLATION
Step 1: Included Accessories
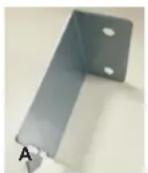
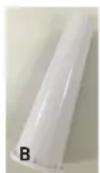
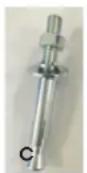
Confirm the following components are all within the included accessories:
A. 2 × Hooks
B. 2 × Holders
C. 4 × Expansion bolts
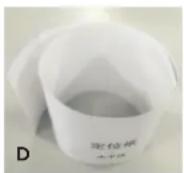
D. 1 × Horizontal Screw Positioning Template
Step 2: Hanging Procedure
1 Confirm the construction type of the wall and the suitable position for installation.
a. The wall must be solid concrete. Tip: Knock the wall with the shank end of a rubber hammer. If the wall is solid concrete, the sound will be crisp; if it is cavity wall, the sound will be muffled. For a cavity wall, talk to a professional builder before attempting installation.
b. Do not hang the dryer on the wall if the wall is not solid.
c. CAUTION: Ensure power cord and plug is accessible and reaches a power source.
2 The distance in front of the wall must be more than 150cm.
3 Paste the installation positioning paper to the solid concrete wall.
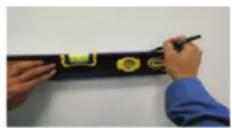
a. Draw a line with a level, and attach the positioning paper based on the line. Note: Ensure the screw holes do not overlap with power outlets or taps nearby.
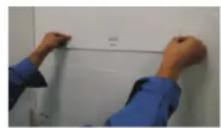
b. The bottom edge of the positioning paper must be 45cm+ higher than the floor. Remove the adhesive paper behind the positioning paper, and paste the positioning paper to the wall horizontally.
4 Fix the hook to wall and then fix the hook with an expansion bolt to the wall.
a. Take out the expansion bolt from the accessories. Insert the bolt and expansion tubular into the drilled holes. Insert one nut into the bolt. To prevent the thread being damaged, don't expose the end-thread of the bolt. Then hammer the 4 bolts into the holes orderly.
b. After the bolts are hammered into the wall, screw off the nuts and expose the bolts. Then insert one auxiliary tube to the bolt, and hammer the tube until the expansion tubular is flush with the wall surface. The expansion tubular should now be fully expanded.
natural_image
Close-up of a hand holding a small object against a plain white background (no text or symbols visible)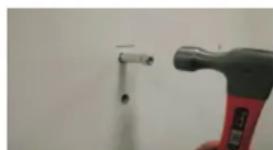
natural_image
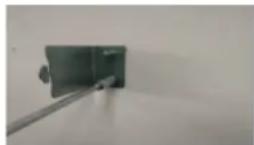
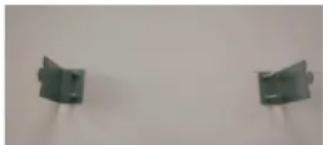
Close-up of a hand holding a red-handled tool next to a vertical pipe fitting (no text or symbols visible)c. Next, take out the hook and insert it to the bolt. Fasten the hook with a socket or a wrench.
natural_image
Two metallic mechanical components mounted on a plain wall (no text or symbols visible)Installation (Continued)
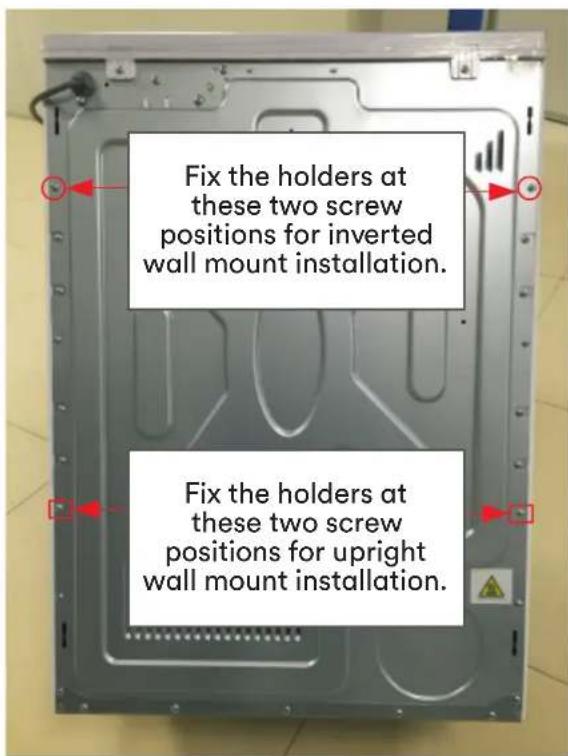
5 Fix the holder to the machine. Place the unpackaged dryer on the floor. Unscrew the two screws* at the back of the machine with a cross screwdriver. Take out the holder in the kit. Press the screws* into the holes on the holder and then fasten them into the original screw holes.
6 Transfer nozzle and air outlet extension pipe installation steps (when the machine is mounted upside down)
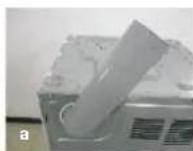
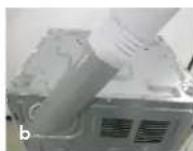
a. Take out the nozzle, aligning with the rear air outlet, and then push the nozzle into the air outlet.
b. Align one end of the air outlet extension pipe with the card slot of the rotary nozzle, and force the air outlet extension pipe into the rotary nozzle while rotating. Install the air outlet extension pipe correctly to prevent machine anomalies and hidden dangers caused by incorrect installation.
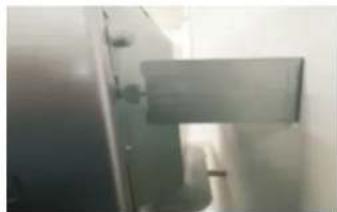
7 Lift the dryer (two people) and direct the slots at the back of the washing machine to the hooks. Lastly, insert the hooks with some force to the slots.
CAUTION: WEIGHT HAZARD!
Two or more people required to lift and install the dryer.
natural_image
Close-up of a metallic door with a partially visible lock or latch mechanism (no text or symbols)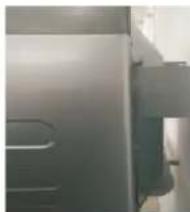
natural_image
Close-up of a metallic mechanical component with three slots and a side outlet (no visible text or symbols)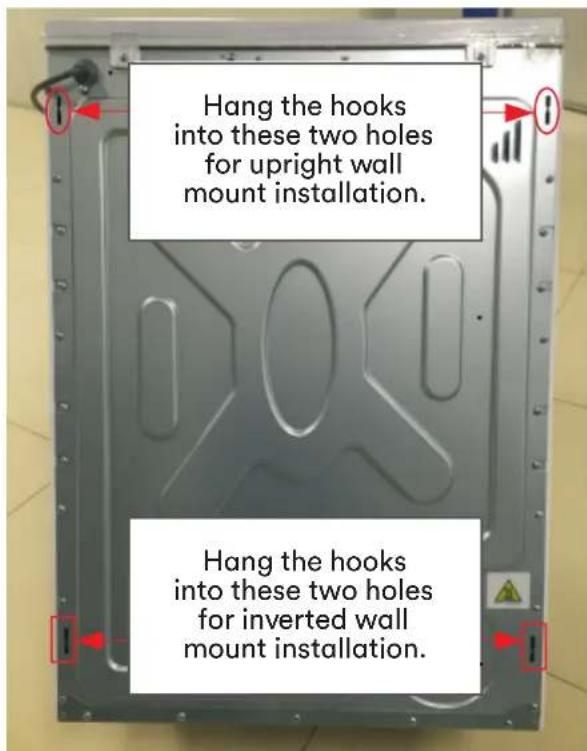
Step8: When all of the installation procedures are finished, test the machine by powering it on.
IMPORTANT!
Please ensure that the dyer is only ever installed in an internal environment only (and not outside), or an environment where the dryer could become wet. Never place the dryer near combustible surfaces (such as curtains) and ensure the dryer isn't operating near gas or other flammable materials. Refer to Safety Instructions within this user manual.
NOTE: The images in this user manual are for reference only. Your appliance may appear differently.
Operating Instructions
BEFORE FIRST USE
Before first use, please use some soft fabric to clean the inside drum.
-
Put some clean rags into the drum
-
Plug the power
-
Rotate the program dial to select the 15 minute drying cycle.
-
Press Start/Pause button
-
After finishing this program, please refer to the "Maintenance and Cleaning" section to clean the door filter.
BEFORE USING THE DRYER
-
Before drying, thoroughly spin the laundry in washing machine. High spin speed shortens the drying time and saves energy.
-
For uniform drying result, sort the laundry according to fabric type and select the appropriate drying program.
-
Before drying, please close zips, hooks and eyelets, button, tie fabric belts, etc.
-
Remove all objects from pockets such as lighters and matches.
-
Sew in or remove under wiring from bras.
-
Close duvet covers and pillow cases to prevent small items from being rolled up inside them.
-
Leave jackets open and undo any long zips so that textiles dry evenly.
-
Do not over dry the clothes, because over dried clothes can damage fabric or crease clothing.
-
Do not dry the articles containing rubber or similar elastic materials.
-
Keep the area around the tumble dryer clean. Coal dust or flour may cause an explosion.
-
The door shall be opened only after the program of the tumble dryer is finished to avoid burns.
-
Clean the lint filter after each use to avoid extension of drying time and increase of energy consumption.
-
Do not dry clothes after dry-clean process.
APPROXIMATE WEIGHTS OF DRY CLOTHES
 | Sweater(mixed 800g) |  | Jacket(cotton 800g) |  | Jeans(800g) |  | Bath Towel(cotton 900g) |
 | Single bedsheet(cotton 600g) |  | Work clothes(1120g) |  | Pyjamas(200g) |  | Shirt(cotton 300g) |
 | T-Shirt(cotton 180g) |  | Underwear(cotton 70g) |  | Socks(mixed-weave 50g) |
Note:
- Do not overload the dryer.
- Do not put more clothing in the dryer than the rated 7kg capacity.
- Do not dry dripping wet laundry, it may damage the dryer or laundry and may even cause a fire.
- Not suitable for silk or woolen textiles.
Only dry laundry suitable for tumble drying. Regard the laundry care labels:

Suitable for tumble drying

Normal drying process:
Drying in the tumbler is possible under normal load and temperature 80^ .

Mild drying process:
Caution is appropriate when tumble drying. Select mild process with reduced thermal action.

Do not tumble dry: Articles unsuitable for drying in the tumbler.
Operating Instructions (Continued)
QUICK START
CAUTION!
Prior to using the dryer, ensure that it is correctly installed according to the instruction in this user manual.
natural_image
Hand inserting a plug into an electrical outlet (no text or symbols visible)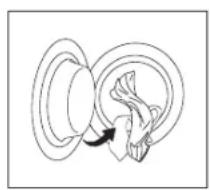
natural_image
Diagram of a biological or anatomical structure with curved arrows indicating direction (no text or labels)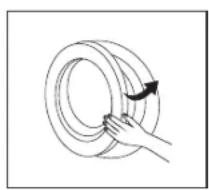
natural_image
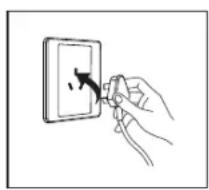
Simple line drawing of a hand holding a coiled ring with an arrow indicating rotation (no text or symbols)Plug in Load the laundry Close the door
other
| Company | Percentage (%) | | :--- | :--- | | Market Share | 48 | | Market Value | 60 | | Other | 60 | | Other (Market Share) | 60 | | Other (Market Value) | 60 | | Net Worth | 60 | | Net Worth (Market Share) | 60 | | Net Worth (Market Value) | 60 | | Other | 60 | | Other (Market Share) | 60 | | Other (Market Value) | 60 | | Other (Total) | 60 | | Other (Total) | 60 | The chart displays a single data point for each company's market share. The values are estimated based on percentages.Turn knob to desired program
Press Start
AFTER DRYING
The appliance will sound an alert after the drying cycle is complete.
natural_image
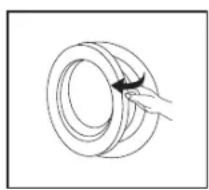
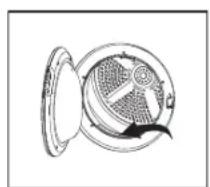
Diagram of a hand holding a coiled ring with an arrow indicating rotation (no text or symbols)Open the door and take out the laundry
Clean the filter
Unplug the machine
NOTE: The diagrams in this user manual are for reference only. Your appliance may appear differently.
DRYING PROGRAMS TABLE
| PROGRAM MAX LOAD | RECOMMENDED USE / PROPERTIES | ||
| Auto Dry | Auto 5.0kg | To automatically dry clothing of unknown material. | |
| Cotton | dry cloth of cotton | To dry clothing of cotton material at standard dry thermal process. | |
| Cotton Extra To | dry clothing of cotton | material at extra dry thermal process. | |
| Cotton Light To | dry clothing of cotton | material at light dry thermal process. | |
| Synthetics — | 3.0kg | To dry synthetic textiles such as synthetics, cotton and blended fabrics, that are not compatible for ironing, at standard dry thermal process. | |
| Mix — | To dry mixed fabrics from cotton and synthetics at extra dry thermal process. If you cannot determine what your laundry material is, we recommend this setting. | ||
| Delicate — 0.6kg | To dry delicate laundry that is suitable for drying or laundry advised to be hand washed at a low temperature at light dry thermal process. | ||
| Refresh — — | To air items without heating for 20 minutes. We recommend this setting for refreshing clothes kept in closed environment for a long periods time. | ||
| Time Dry | 15' | — | 15 minute drying cycle at standard dry thermal process. |
| 30' | — | 30 minute drying cycle at standard dry thermal process. | |
| 45' | — | 45 minute drying cycle at standard dry thermal process. | |
| 60' | — | 1 hour drying cycle at standard dry thermal process. | |
| 90' | — | 1.5 hour drying cycle at standard dry thermal process. | |
| 120' | — | 2 hour drying cycle at standard dry thermal process. Recommended setting for bed sheets, quilt covers and other bulky loads. | |
| 150' | — | 2.5 hour drying cycle at standard dry thermal process. | |
NOTE!
• The programs above are only recommendations.
You may choose the appropriate program according to your needs and lifestyle.
• The room temperature and humidity will affect the drying time.
- Check the clothes care label and choose the corresponding program accordingly.
Cleaning & Maintenance
CLEANING AND CARE
WARNING!
- Disconnect the power cord before cleaning.
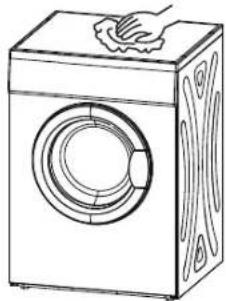
- Clean the dryer with a clean damp cloth only.
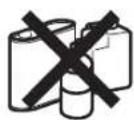
- Do not use solvents, abrasive cleaners, glass cleaners or all-purpose cleaners.
These could damage plastic surfaces and other parts.
- Do not rinse water over the machine directly.
CLEANING YOUR DRYER
• Prepare a clean damp cloth using clean water.
- Clean the door, especially the inside window.
- Clean the seal around the door opening.
• Take out the filter, clean the sealing and air flow openings.
- Before starting the dryer, dry all parts with a soft cloth.
natural_image
Line drawing of a washing machine with a hand cleaning the top panel (no text or symbols)CLEANING THE DOOR FILTER
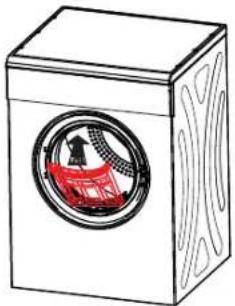
Make sure you clean the door filter after each cycle.
- Open the door.
- Take out the door filter by pulling it straight up.
-
Open the filter and remove the lint on the filter. You can use water, a cloth or your hands to help clean it.
-
If the filter is cleaned by a damp cloth or water, please ensure that the filter is thoroughly dried before reinstalling it.
natural_image
Illustration of a box with a circular window containing a red lantern design (no text or symbols)WARNING!
- The fluff accumulated on the filter will block the air circulation.
Not cleaning the filter regularly will increase drying time and energy consumption. - Disconnect the power cord before cleaning!
- Do not operate the dryer without the filter!
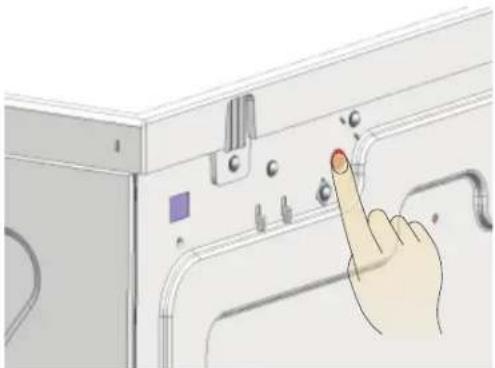
SAFETY RESET
- This dryer has a safety auto-off switch which is activated by high temperatures.
- If your dryer is not heating this button must be reset, before the dryer can heat again. You may need to wait 10 minutes for cooling down.
- The safety reset button is located on the backboard.
- The most common reason for the dryer to overheat is a blocked filter.
- Clean the lint filter after each cycle to prevent overheating of the dryer.
The auto-off switch may operate for the following reasons:
- Lint filter is blocked.
• Exhaust outlets blocked at the back of the dryer. - Open the windows or the door, if there is poor ventilation in the room.
• Lightweight garment (eg. handkerchief) is suck over the filter.
The Safety Reset button
Use your finger or a pencil to press the button in until you feel a click.
natural_image
Illustration of a hand pressing a button on a device panel (no text or symbols visible)Troubleshooting
OPERATION IN CASE OF EMERGENCY
In the event of an emergency you should:
- Switch off all controls.
- Switch the washing machine off at the power point or at the fuse box.
- Call the Residentia Support Team on 1300 11 HELP (4357).
Some minor faults can be fixed by referring to the instructions given in the Troubleshooting section
below. There is also a self-help section online at https://support.residentiagroup.com.au/
| DESCRIPTION POSSIBLE CAUSES SOLUTION | ||
| Dryer does not start | Power cut off.The power plug is not plugged tight.The dryer is overloaded.The temperature fuse is damaged. | Wait for electricity to be restored.Check the power socket, make sure the plug is inserted tightly.The clothes must be spun and drying load can not exceed the rated capacity.Restore the temperature fuse. |
| Dryer gets hot or produces a burnt smell | The lint filter is full.The exhaust duct is clogged. | Ensure that you clean the lint filter after each cycle.Clean the exhaust duct. |
| Clothes are too dry | The machine is overloadedClothes are not taken out in time after the cycle ended.Clothes are not sorted properly.The selected program temperature is too high. | Do not exceed the rated capacity.Take clothes out immediately after the cycle has ended.Observe the care labels on your clothing. |
| Clothes have shrunk | The selected program temperature is too high. | Observe the care labels on your clothing.If items are sensitive to shrinkage, examine the clothes when dry. Take our the clothes when damp and hang them up until they are completely dry. |
| Pilling on clothes • Laundry | is sensitive to rubbing. | Use a fabric softener to lubricate fibres.You can spray laundry starch on cuff and neckline when ironing clothes. Turn the laundry inside out to avoid pilling. |
NOTE!
- Heavy wet clothes turning and bumping will cause noise accordingly while to dryer runs.
- During the drying cycle, the machine will create airflow, which will cause noise when hitting the drum.
ERROR MESSAGES AND SOLUTIONS
WARNING! Never dismantle the dryer.
| INDICATION REASON | SOLUTION | |
| The indicator light flashes 4 times and turns of for 3 second intervals. | Temperature sensor is short circuited or brokenPCB failure. | Please contact the Residentia Group support term on 1300 11 HELP (4357). |
| The indicator light flashes 4 times and turns of for 5 second intervals. | PCB Fault. |
WARNING!
- Only authorised technicians can carry out repairs.
- Please call the Residentia Group support team if you are experiencing a fault.
Technical Specifications
Below outlines the technical specifications for your Esatto Vented Clothes Dryer.
| Model EVD700W | |
| Rated Capacity | 7.0kg |
| Size 595W × 555D × 840H (mm) | |
| Net Weight | 33.5kg |
| Rated Input Power | 2000W |
| Rated Voltage | 220-240V~ |
| Rated Frequency | 50Hz |
| Ambient temperature | +5°C - +35°C |
Note: The rated capacity is the maximum capacity to be dried at one time. Make sure that the dry clothes which are loaded into the appliance do not exceed the rated capacity.
Warranty Information
AUSTRALIA WARRANTY TERMS & CONDITIONS LAUNDRY APPLIANCES
This document sets out the terms and conditions of the product warranties for Residentia Group Appliances. It is an important document. Please keep it with your proof of purchase documents in a safe place for future reference should you require service for your Appliance.
1. IN THIS WARRANTY
(a) ‘acceptable quality’ as referred to in clause 10 of this warranty has the same meaning referred to in the ACL;
(b) ‘ACL’ means Trade Practices Amendment (Australian Consumer Law) Act (No.2) 2010;
(c) ‘Appliance’ means any Residentia Group product purchased by you accompanied by this document;
(d) 'ASR' means Residentia Group authorised service representative;
(e) ‘Residentia Group’ means Residentia Group Pty Ltd of 165 Barkly Ave, Burnley VIC 3121, ACN 600 546 656 in respect of Appliances purchased in Australia;
(f) ‘major failure’ as referred to in clause 10 of this warranty has the same meaning referred to in the ACL and includes a situation when an Appliance cannot be repaired or it is uneconomic for Residentia Group, at its discretion, to repair an Appliance during the Warranty Period;
(g) 'Warranty Period' means:
(i) where the Appliance is used for personal, domestic or household use (i.e. normal single family use) as set out in the instruction manual, the Appliance is warranted against manufacturing defects for 24 months, following the date of original purchase of the Appliance;
(h) ‘you’ means the purchaser of the Appliance not having purchased the Appliance for re-sale, and ‘your’ has a corresponding meaning.
2. This warranty only applies to Appliances purchased and used in Australia and is in addition to (and does not exclude, restrict, or modify in any way) any non-excludable statutory warranties in Australia.
3. During the Warranty Period Residentia Group or its ASR will, at no extra charge if your Appliance is readily accessible for service, without special equipment and subject to these terms and conditions, repair or replace any parts which it considers to be defective. Residentia Group or its ASR may use remanufactured parts to repair your Appliance. You agree that any replaced Appliances or parts become the property of Residentia Group. This warranty does not apply to light globes, batteries, filters, seals or similar perishable parts.
4. Parts and Appliances not supplied by Residentia Group are not covered by this warranty.
- You will bear the cost of transportation, travel and delivery of the Appliance to and from Residentia Group or its ASR. If you reside outside of the service area, you will bear the cost of:
(a) travel of an authorised representative;
(b) transportation and delivery of the Appliance to and from Residentia Group or its ASR, in all instances, unless the Appliance is transported by Residentia Group or its ASR, the Appliance is transported at the owner's cost and risk while in transit to and from Residentia Group or its ASR. - Proof of purchase is required before you can make a claim under this warranty.
- You may not make a claim under this warranty unless the defect claimed is due to faulty or defective parts or workmanship. Residentia Group is not liable in the following situations (which are not exhaustive):
(a) the Appliance is damaged by:
(i) accident
(ii) misuse or abuse, including failure to properly maintain or service
(iii) normal wear and tear
(iv) power surges, electrical storm damage or incorrect power supply
(v) incomplete or improper installation
(vi) incorrect, improper or inappropriate operation
(vii) insect or vermin infestation
(viii) failure to comply with any additional instructions supplied with the Appliance;
(b) the Appliance is modified without authority from Residentia Group in writing;
(c) the Appliance's serial number or warranty seal has been removed or defaced;
(d) the Appliance was serviced or repaired by anyone other than Residentia Group, an authorised repairer or ASR.
8. This warranty, the contract to which it relates and the relationship between you and Residentia Group are governed by the law applicable where the Appliance was purchased.
9. To the extent permitted by law, Residentia Group excludes all warranties and liabilities (other than as contained in this document) including liability for any loss or damage whether direct or indirect arising from your purchase, use or non use of the Appliance.
- For Appliances and services provided by Residentia Group in Australia, the Appliances come with a guarantee by Residentia Group that cannot be excluded under the Australian Consumer Law. You are entitled to a replacement or refund for a major failure and for compensation for any other reasonably foreseeable loss or damage. You are also entitled to have the Appliance repaired or replaced if the Appliance fails to be of acceptable quality and the failure does not amount to a major failure. The benefits to you given by this warranty are in addition to your other rights and remedies under a law in relation to the Appliances or services to which the warranty relates.
- At all times during the Warranty Period, Residentia Group shall, at its discretion, determine whether repair, replacement or refund will apply if an Appliance has a valid warranty claim applicable to it.
- Missing parts are not covered by warranty. Residential Group reserves the right to assess each request for missing parts in a case by case basis. Any parts that are not reported missing in the first week after purchase will not provide free of charge.
- To enquire about claiming under this warranty, please follow these steps:
(a) carefully check the operating instructions, user manual and the terms of this warranty;
(b) have the model and serial number of the Appliance available;
(c) have the proof of purchase (e.g. an invoice) available;
(d) telephone the numbers shown below. - You accept that if you make a warranty claim, Residentia Group and its ASR may exchange information in relation to you to enable Residentia Group to meet its obligations under this warranty.
IMPORTANT
Before calling for service, please ensure that the steps in point 13 have been followed.
→ Service: Please call 1300 11 HELP (4357)
→ Spare parts: Please call 1300 11 SPARE (7727)
Warranty (NZ)
AUSTRALIA WARRANTY TERMS & CONDITIONS LAUNDRY APPLIANCES
To help care for your investment, be sure to register your appliance online. Registration will help you if you need to arrange service in the future, and serves as a record of your purchase—including critical information like model number and serial number – that you can refer to at any time. Simply visit the below website, or ask your retailer for help: www.Esatto.house/nz/registration
WARRANTY
These products are covered by a warranty for a period of 24 months from the date of purchase, subject to the following conditions*. The warranty covers rectification free of charge of any fault arising from defective materials or components, or faulty workmanship or assembly.
* The conditions above mentioned are:
- That the purchaser carefully follows all instructions packed with the product;
-
That the purchaser and/or installer carefully follows the installation instructions provided and complies with electrical wiring regulations, gas and/or plumbing codes;
-
That the purchaser carefully follows instructions provided in the owner's handbook relating to the proper use and care of the product and does not use the product for any purpose other than the domestic use for which it has been designed;
- Commercial use of the product for professional or industrial purposes will void this warranty.;
- That the product was purchased and installed in New Zealand;
- That this warranty does not extend to:
a) optional glass lids for hobs apart from claims which relate to mechanical or physical damage thereof at the date of purchase;
b) 'consumable' parts such as light bulbs or filters;
c) damage to ceramic glass caused by liquid or solid spill-overs, lack of maintenance, or impact;
d) damage to surface coatings caused by cleaning or maintenance using products not recommended by the owner's handbook;
e) defects caused by normal wear and tear, accident, negligence, alteration, misuse or incorrect installations;
f) a product dismantled, repaired or serviced by any serviceman other than an authorised service agent;
g) a product not in possession of the original purchaser;
h) damage caused by power outages or surges
i) damage caused by pests (eg. rats, cockroaches etc.)
-
That if the product is a freestanding microwave oven or small appliance it must be returned to the dealer/retailer for servicing. These products, unless stated otherwise, have a 12 month warranty from original date of purchase with 24 months on the microwave magnetron; Waste disposers have a 12 month warranty.
-
The provision of service under this warranty is limited by a 25km boundary from the retailer where the product was purchased except for microwaves. Such travelling outside of these limits will incur commercial cost to be paid by you, regulated by the number of kilometres travelled beyond the 25km limit (50km return trip). Microwaves are to be delivered to the nearest authorised service agent by the customer.
Please refer to your user manual for any further conditions that may apply to your specific model.
Nothing herein contained shall be construed in any way as excluding or limiting your rights under the Consumer Guarantees Acts 1993.
For Service please visit www.applico.co.nz/service or contact the dealer/retailer from whom you purchased the product from or call the 0800 number listed below. If you are unable to establish the date of purchase, or the fault is not covered by this warranty, or if the product is found to be in working order, you will be required to bear all service call charges.
Registration of this warranty constitutes acceptance of the terms and conditions of this warranty.
Should you require any assistance, please call Customer Services on 0800 763 448.
Distributed by Applico Ltd. www.applico.co.nz July 2019
After registering your appliance online, we recommend you fill out the below information for your reference and keep this warranty card in a safe place.
Attach your receipt to this page
Purchase Details
For future reference, please record the following information which can be found on the rating plate and the date of purchase which can be found on your sales invoice.
STORE DETAILS
STORE NAME
ADDRESS
TELEPHONE
PURCHASE DATE
PRODUCT DETAILS
MODEL NO.
SERIAL NO.*
esatto
everything you need

- Everything you need for your 7kg Vented Dryer is in this User Manual
- esatto
- everything you need
- Contents
- Welcome
- Residentia Group
- Head Office
- ACN
- Online
- Postage
- Telephone
- Safety Instructions
- DRYER CARE SYMBOLS
- IMPORTANT!
- CAUTION: RISK OF FIRE!
- WARNING: ELECTRIC SHOCK HAZARD!
- CAUTION: DAMAGE DANGER
- Safety Instructions (Continued)
- Power supply and grounding
- CAUTION: INJURY DANGER!
- WARNING: EXPLOSION & FIRE DANGER!
- DISPOSAL OF PACKAGING
- PRECAUTIONS
- Your Vented Dryer
- NOTE!
- Accessories
- Installation
- TRANSPORT
- CAUTION: DAMANGE & INJURY DANGER!
- INSTALLATION POSITIONING
- Note when installing:
- LEVEL ADJUSTING
- POWER SUPPLY CONNECTION
- EXHAUST DUCT INSTALLATION
- WALL HANGING INSTALLATION
- Step 1: Included Accessories
- Step 2: Hanging Procedure
- Installation (Continued)
- CAUTION: WEIGHT HAZARD!
- Operating Instructions
- BEFORE FIRST USE
- BEFORE USING THE DRYER
- APPROXIMATE WEIGHTS OF DRY CLOTHES
- Note:
- Operating Instructions (Continued)
- CAUTION!
- AFTER DRYING
- Cleaning & Maintenance
- CLEANING AND CARE
- WARNING!
- CLEANING YOUR DRYER
- CLEANING THE DOOR FILTER
- SAFETY RESET
- The Safety Reset button
- Troubleshooting
- OPERATION IN CASE OF EMERGENCY
- ERROR MESSAGES AND SOLUTIONS
- Technical Specifications
- Warranty Information
- AUSTRALIA WARRANTY TERMS & CONDITIONS LAUNDRY APPLIANCES
- IN THIS WARRANTY
- IMPORTANT
- Warranty (NZ)
- WARRANTY
- Attach your receipt to this page
- Purchase Details
- STORE DETAILS
- PRODUCT DETAILS
Brand : Esatto
Model : EVD700W
Category : Tumble dryer