
HGPRO838 - Security Camera iGET - Free user manual and instructions
Find the device manual for free HGPRO838 iGET in PDF.


| Product Type | Security Camera |
| Brand | iGET |
| Model | HGPRO838 |
| Image Sensor | 1/2.7" Progressive Scan CMOS |
| Resolution | 2560 x 1440 (4MP) |
| Lens | 4mm, F2.0, Fixed |
| Night Vision | 30m IR Range |
| Field of View | 78° Horizontal, 42° Vertical |
| Dimensions | 185 x 80 x 70 mm |
| Weight | 520 g |
| Power Supply | DC 12V, 1A, External Power Adapter |
| Power Consumption | ≤10W |
| Motion Detection | Yes, with Push Notification |
| Two-Way Audio | Built-in Microphone and Speaker |
| Storage | Micro SD Card up to 128GB, Cloud Storage |
| Connectivity | Wi-Fi 802.11 b/g/n, 2.4GHz |
| IP Rating | IP65 (Weatherproof) |
| Operating Temperature | -20°C to 50°C |
| Compatibility | iOS, Android App |
| Mounting | Wall or Ceiling Mount Bracket Included |
| Cleaning | Wipe with a soft dry cloth; avoid solvents |
| Safety Certifications | CE, FCC, RoHS |
| Spare Parts & Repairability | Contact iGET support for genuine parts; repair by qualified technicians |
Frequently Asked Questions - HGPRO838 iGET
User questions about HGPRO838 iGET
0 question about this device. Answer the ones you know or ask your own.
Ask a new question about this device
Download the instructions for your Security Camera in PDF format for free! Find your manual HGPRO838 - iGET and take your electronic device back in hand. On this page are published all the documents necessary for the use of your device. HGPRO838 by iGET.
USER MANUAL HGPRO838 iGET
HOPF085 2M 07CS18 | © 2016 HOMEGUARD

natural_image
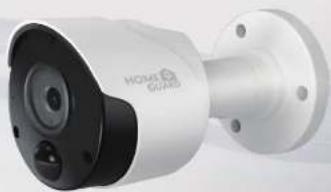
Exterior view of a white home security camera with black lens and mounting flange (no visible text or symbols)Heat-sensing Bullet CCTV Camera
Instruction Manual - HGPRO838 / EN

BE PROTECTED & HIGH-ACCURACY MOTION ALERT


Welcome
Thank you for choosing HOMEGUARD
Introduction Connecting the Camera
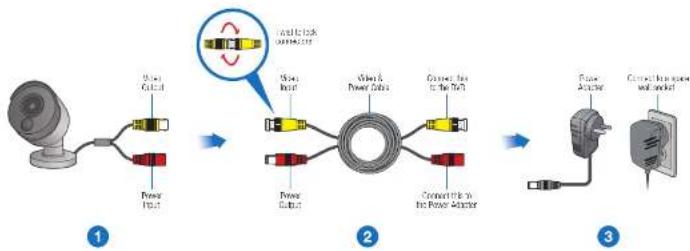
Each Homeguard Bulk camera is supplied with a mounting kit for attaching it to a wall or ceiling. Before you a fix the camera in position, please ensure the cable is of adequate length to reach the DVR. We also recommend you by the camera with the DVR before mounting it, to ensure it is in good working order, and help diagnose any problems created when installing it.
Be Protected & High-accuracy Motion Alert:
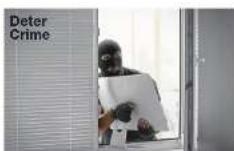
• Cutting edge full HD camera with 1080p video surveillance technology to deter thieves, safeguard loved ones, protect your property & cut the cost of crime.
- Seeing is believing from this 1080p full HD camera (2.0 Mogapixels) with a 92^ viewing angle to see high detail over a wider fold of view.
- Latest infrared cut filter & powerful LEDs producing night vision up to 10Cr / 30m, weatherproof IP65.
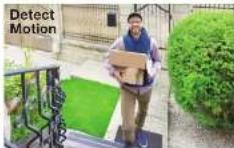
- State-of-the-art PIR motion sensor designed for security applications & optimized to reliably detect people but also cars, large pets and other large heat-generating objects.
- With more accurate motion detection you have more reliable notifications & activity-triggered recording, eliminating false triggers due to the wind, leaves falling, bugs, rain & more, saving you hard drive space & playback time (when combined with a DVD).
- The HGPRO 836 Camera is perfect addition to Homeguard's HGOVK 440C Series HD DVR Security Systems if you need extra surveillance.
flowchart
graph LR
    A["Input"] --> B["Power Input"]
    B --> C["Cable"]
    C --> D["Bus"]
    D --> E["Output"]

    subgraph Stage 1
        F["Input"] --> G["Power Input"]
        G --> H["Cable"]
        H --> I["Bus"]
        I --> J["Output"]

    subgraph Stage 2
        K["Input"] --> L["Cable"]
        L --> M["Bus"]
        M --> N["Output"]

    subgraph Stage 3
        O["Output"] --> P["Cable"]
        P --> Q["Bus"]
        Q --> R["Output"]
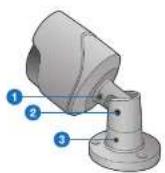
To adjust the camera's position, loosen the screws at the base of the camera and the pilot point on the arm, as well as the locking ring on the bracket. The camera is now free to be positioned at any angle. Once positioned, tighten both screws and locking ring again.
Mounting the Camera Camera Location Tips
The camera can be mounted only a flat surface using screws. The surface must have sufficient strength to hold the camera.
- Position the camera in the location you want to mount it, and mark the screw holes on the surface to position the screws. Then, using appropriate screws for the surface you're fixing the camera to, secure the camera in place.
- If you're mounting to a wooden surface, then screw the camera directly to the surface.
- if you're mounting to a masonry surface (pricks, concrete or similar), then you'll need to use wall plugs.
Aiming the camera
- Loosen the screw (uss an Allen key) to adjust the camera's orientation. This enables you to rotate the camera so no matter what direction it is facing, your images will be the right way up. Tighten the screw is secure in place.
- Losen the screw to sit the camera up and down. Tighten the screw to secure in place.
- To pan the camera left and right, loosen the screw and position accordingly. Tighten the screw to secure in space.
- What you want to monitor and where you'll get the best view of it.
- How you're going to connect the cameras to your monitoring system, remember that cables and connectors should be kept out of the weather.
- How to keep the cameras out of harm's way. It's recommended to mount your camera at an elevated position.
- Place your camera as close to the area of interest as practicable. The best position is from about 13ft/4m above looking slightly down, keeping in mind the details you are looking for.
- Think about the most likely way a potential offender may approach your home, use your cameras to give you the best coverage of these areas.
- Run cables inside a wall cavity or other protected enclosure, and ensure that all wiring and connectors are insulated and protected from moisture.
- Don't put your cable near five electrical wiring. AC electricity generates radio "noise" which can interfere with the signal from your camera.

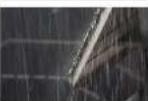
All movements, including objects that don't matter like falling leaves, bugs and rain, will trigger motion detection.


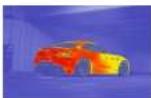
Moving heat-generating objects, such as people, large animals and vehicles will trigger motion detection.


Indicate visual, 40-50 images show an even the normal
What Can I Do with this CameraNew PIR Motion Technology


What's in the box Specifications

Bulal OCTV Camera

BNC C:1k
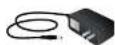
Power Adaplot

Instruction Manual

Warning Sticker

Fings
| Item Description | |
| Sensor | Colour 1/2, "2.0V" |
| Horizontal Resolution | PAL: 25fps @ 1050F, NTSC: 30fps @ 1060° |
| Viewing Angel | 92° |
| PIR Detection Angle | 120° |
| PIR Detection Distance | 7M/23ft |
| Minimum Illumination | 0-01LUX |
| Scanning System | Progressive |
| S/N Ratio | ± 40 dB (AGC Off) |
| AGC | Auto/Manual |
| White Balance | Auto |
| Exposure Mode | EE |
| Gamma Correction | 0-45 |
| IF LEDs | 45mm 16Pcs |
| Night Vision Range | 30m/100' |
| Weatherproof | IP66 |
Troubleshooting
No picture / signal
- 1080p cameras are compatible with 1090p HD DVR recorders. 720p cameras are compatible with 720p & 1080p HD DVR recorders.
- Ensure connections are properly connected,
- Ensure the camera power supply is plugged in.
Picture is too bright
- Ensure your camera isn't pointed directly at a source of light (e.g. sun or spot light).
• Move your camera to a different location.
Picture is too dark
- Check the brightness and contrast settings of the DVR or monitor.
Night vision is not working
- The night vision activates when light levels crop. The areas may have too much light
Picture is not clear
- Check the camera lens for dirt, dust, spiderwebs. Clean the lens with a soft, clean cloth.
• Make sure that the cable run is within the imitations specified in the section 'Cable Extension Options'.
Bright spot in video when viewing camera at night
- Night vision reflects when pointing a camera at a window. Move the camera to a different location.
Warranty & Support
All the products sold are covered by 24 months warranty from the date of invoice.
Warranty Instructions:
-
Please contact us when the product is caused by its own fault within 2 year warranty.
-
Please mail us your written warranty card as soon as possible after purchasing our products so that we can repair or replace the
product to its original operation condition. Or the company will not deal with it.
-
Please write the truth on the warranty card.
-
Paid for repairing sa follows:
A. Equipment failure caused by human operation
B. Equipment failure caused by not conforming to the using environment
C. No warranty card
D. Warranty expired
Product model
Product serial number: ____
Purchase date:
User name
Contact person:
Telephone:


CE FC 0 X O
Note: Please keep the warranty card for the better service.
For technical support, please contact us support@homeguardworld.com


- BE PROTECTED & HIGH-ACCURACY MOTION ALERT
- Introduction Connecting the Camera
- Be Protected & High-accuracy Motion Alert:
- Mounting the Camera Camera Location Tips
- Aiming the camera
- What Can I Do with this CameraNew PIR Motion Technology
- What's in the box Specifications
- Troubleshooting
- No picture / signal
- Picture is too bright
- Picture is too dark
- Night vision is not working
- Picture is not clear
- Bright spot in video when viewing camera at night
- Warranty & Support
- Warranty Instructions:
Brand : iGET
Model : HGPRO838
Category : Security Camera