
HGNVK68004 - Security Camera iGET - Free user manual and instructions
Find the device manual for free HGNVK68004 iGET in PDF.


| Product Type | Security Camera |
| Brand | iGET |
| Model | HGNVK68004 |
| Dimensions | Approx. 70 x 70 x 120 mm |
| Weight | Approx. 200 g |
| Power Supply | DC 5V/2A via USB |
| Night Vision | Infrared up to 10 m |
| Motion Detection | Yes, with alerts |
| Two-Way Audio | Yes |
| Resolution | 1080p Full HD |
| Field of View | 130° diagonal |
| Connectivity | Wi-Fi 2.4 GHz |
| Storage | MicroSD card up to 128 GB |
| Weather Resistance | IP65 (indoor/outdoor) |
| Mounting | Wall or ceiling mount included |
| Care and Cleaning | Wipe with a dry cloth; avoid liquids |
| Safety | CE, RoHS certified |
| Spare Parts and Repairability | Contact iGET support |
| General Information | User manual available online |
Frequently Asked Questions - HGNVK68004 iGET
User questions about HGNVK68004 iGET
0 question about this device. Answer the ones you know or ask your own.
Ask a new question about this device
Download the instructions for your Security Camera in PDF format for free! Find your manual HGNVK68004 - iGET and take your electronic device back in hand. On this page are published all the documents necessary for the use of your device. HGNVK68004 by iGET.
USER MANUAL HGNVK68004 iGET
Helpdesk / Technical Support
www.iget.eu/cs/helpdesk-centrum-cs
https://helpdesk.intelek.cz/
CE FC 📋 ✉️ 📄 Made in China

SMART HD SECURITY SYSTEM
Quick Installation Guide - EN


natural_image
Exterior view of a white home guard device with multiple camera modules and a circular logo (no readable text or symbols on main devices)Model: HGNVK-68002 / 68004 / 68006
Contents
Package Contents 2
STEP 1: Initial Setup 3
STEP 2: Setting Up the NVR 4
STEP 3: Connecting with Homeguardsafe 5
STEP 4: Installing the Cameras 7
Pairing the Camera 11
Charging the Power Pack 12
Troubleshooting 13
Package Contents
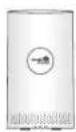
1080p Wireless NVR
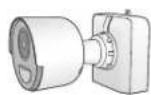
Wire-Free Cameras

Rechargeable Power Packs

Camera Antennas
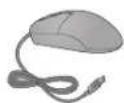
USB Mouse

12V 2A Adapter (Recorder)
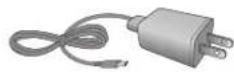
5V 2A Adapter (Power Pack)

Mounting Kit

1m Network Cable

CD with Software

User Manuals
Warning Stickers
STEP 1 initial Setup
Before you begin, you will need to prepare the wire-free cameras and power packs.
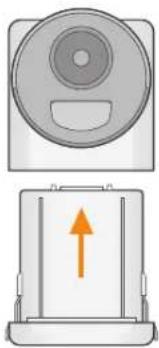
1 Peel off the PLEASE REMOVE label covering the contacts on each Power Pack. Insert the charged Power Packs into each camera base. Push up until the Power Pack 'clicks' into place.
Note: Power packs come fully charged with no need for initial charging.
natural_image
Diagram showing a circular device with an upward arrow inside a rectangular housing (no text or symbols)2 Twist the adjustment ring near the camera base counterclockwise to loosen and reposition each camera as shown to the below. Connect one of the white antennas to each camera.

STEP 2 Setting Up the NVR
Next, you must set up the NVR and connect it to your network.
1 Connect the NVR to your router using the included Ethernet cable.
2 Connect the included power adapter to the NVR. Wait a few minutes for the system to start up.

natural_image
Diagram showing a router connected to a device via an orange cable (no text or symbols present)
natural_image
Diagram showing a wall-mounted power outlet connected to an electrical socket (no text or symbols present)Optional: Full NVR Setup
- This guide describes basic setup of the NVR only. This installation is intended for users who wish to monitor their system using the free Homeguardsafe app on their smartphone or tablet.
- You may choose to use the NVR interface to control your wire-free security system. Connect the included USB mouse to one of the USB ports labelled Mouse/Backup, and connect a monitor using a HDMI cable (not included). See the included Quick Connection Guide for details.

natural_image
Diagram showing connections between a server, computer monitor, and mouse (no text or symbols present)STEP 3 Connecting with Homeguardsafe
For the best experience, download the Homeguardsafe app for your smartphone by scanning the QR code below or searching for Homeguardsafe in the App Store or Google play.

iOS - iPhone & iPad Android - Phone & Pad
2 Tap the Homeguardsafe icon to launch the app. Tap 🔒 to open the menu. Tap "Device List" → "4"
3 Scan the QR code on the back of your NVR using the camera on your smartphone or tablet.

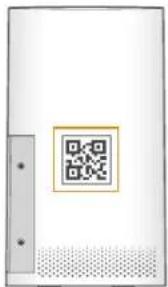
4 Enter your NVR's user name (default: admin) and password (default: empty). Tap "Save".
Note: Please remember to change the password, refer to Quick Connection Guide for details. If you have change the device password, you should also change the password on app and connect again.


5 Your system will appear on the homescreen of the app. Tap each channel with a camera connected then tap the play button to stream live video.
Note: If you do not see video from one or more cameras, ensure you have removed the PLEASE REMOVE label from the power pack. If the issue persists, see the "Troubleshooting" section on the back of this document.

STEP 4 Installing the Cameras
Installation Tips
The wire-free cameras use a Passive InfraRed (PIR) sensor to ensure video is only recorded when motion is detected. Follow the tips below for more accurate motion detection and to optimize battery life:
- See images to the right for ideal setup. It is recommended to place your camera at least 7ft/2.1m above the ground and angle it slightly downward toward the monitoring area, excluding any busy areas (e.g., sidewalks or roadways).
- Ensure the camera image is free of obstructions (i.e., tree branches).
- Position the camera no more than 20ft/6.1m away from the area you wish to monitor.
- See the "Optimizing Motion Detection" section in Quick Connection Guide to customize motion settings for each camera on your system.
- Ensure you have configured the active area for motion detection so that only areas of interest are selected. See the "Optimizing Motion Detection" section for details.
- For best performance, position the camera so that objects of interest will move from side-to-side across the camera image, rather than moving towards or away from the camera.
• Install the camera within range of the recorder. - This camera is weather resistant for outdoor use (IP66). Installation in a sheltered location is recommended.
- Battery life will vary based on temperature, settings and number of events.

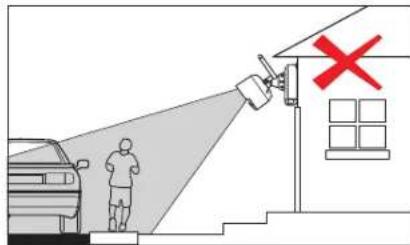
Follow the instructions below to secure the cameras. It is recommended that you refer to the "Installation Tips" section to help you select good mounting locations.
To install your cameras:
1 Set the mounting bracket in the desired mounting position. Mark holes through the mounting bracket (shown as orange X's on the below).
2 Drill holes where marked for the mounting screws using the included drill bit.

natural_image
Simple diagram of a square electrical socket with four corner holes and a top outlet (no text or symbols)Note:
To make camera installation easier, you can adhere included bracket location stickers to the place you would like to install your cameras.
3 Secure the bracket to the mounting surface with the included mounting screws (×4). Make sure all screws are fastened tightly.

natural_image
Diagram of a mechanical assembly with two components, showing alignment of pins and connectors (no text or symbols)Note:
- Insert the included drywall anchors if you are mounting the camera onto drywall.
- The hole at the top of the mounting bracket will be used in step 5, once the camera is attached to the mounting plate.
4 Lower the camera base onto the mounting bracket so the 2 tabs in the mounting bracket lock into the 2 slots in the camera base.

natural_image
Diagram of a mechanical assembly with an inset showing a close-up of a component (no text or symbols present)5 Insert the security screw through the fasteners on the top of the camera base and mounting bracket to secure the camera to the mounting bracket. Tighten using the included screwdriver.

natural_image
Diagram of a mechanical device with a screw and adjustment knob, no text or symbols present6 OPTIONAL: Tighten the pre-installed locking screw on the base of the Power Pack using the included screwdriver.
Note: You will need to loosen the locking screw to remove the Power Pack in the future.
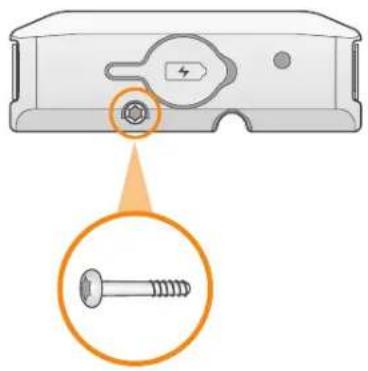
natural_image
Diagram showing a screw inserted into a housing component with an inset close-up of the screw detail (no text or symbols)7 Twist the adjustment ring near the camera base counterclockwise to loosen and reposition the camera. Hold the camera in the desired angle and tighten the adjustment ring completely to secure the camera in place.

natural_image
Technical illustration of a mechanical assembly with a cylindrical component and a rectangular housing (no text or symbols)Attention: This camera Includes an Auto Mechanical IR Cut Filter. When the camera changes between Day/Night viewing modes, an audible clicking noise may be heard from the camera. This clicking is normal, and indicates that the camera filter is working.
Pairing the Camera
Your cameras should be paired to the recorder and ready to use out of the package. If a camera becomes unpaired, or if you have purchased a wire-free add-on camera (max. 6 cameras per system), follow the instructions below.
From Live view, tap any free channel you would like to pair a camera to (marked with a 📋 icon). Tap "PAIR". A timer for 30 seconds appears.

2 Press and hold the pair button on the back of the camera for 3 seconds. Note: A "Pairing successful" message should appear on screen. If you do not see this message, repeat the steps above.

Charging the Power Pack
Use the included power adapter to charge the power pack. Connect the power adapter to the micro USB port on the power pack. The LED indicator on the power pack shows you the charging status (must be plugged in).

natural_image
Diagram showing two connected devices: one with a power outlet and cable, the other with a USB cable (no text or symbols)| Power Pack Charge Time | |
| 2-cell | Approx. 6 hours |
| 3-cell | Approx. 8 hours |
| LED Color Meaning | |
| ● Green | Fully charged |
| ● Red | Currently charging |
Note: The Power Pack LED flashes red while outside the safe charging temperature of 32-113°F (0-45°C). In this state, the camera remains powered up, but the Power Pack will not charge outside the safe temperature range.
Troubleshooting
| Problem Solution | |
| No picture / signal | ·Ensure the camera is connected to a compatible NVR.·Ensure the Power Pack is properly inserted into the camera base.·Ensure you have removed the PLEASE REMOVE label from the Power Pack.·Connect the power adapter to your Power Pack to ensure the Power Pack is charged. The LED indicator on the power pack glows green for full charge, red for less than full charge.·Remove obstructions between the NVR and camera. Materials such as brick, concrete and wood can significantly impact the wireless signal strength.·Try repositioning the camera, NVR, or both to improve the reception. |
| Battery life is too short | ·Ensure the camera is not pointing at a high-traffic area. Position the camera so it only captures areas of interest with no high-traffic areas (e.g., a busy sidewalk or roadway) visible in the image.·Live video is being viewed too frequently. Viewing live video often will impact battery performance.·Ensure you have set an active area and distance setting for motion detection to reduce false alarms. See “Optimizing Motion Detection” in Quick Connection Guide for details.·Battery life will vary based on temperature, settings and number of events. |
| Picture is dropping | ·Move the camera closer to the NVR.·Try repositioning the camera, NVR, or both to improve the reception. |
| Picture is or has become choppy | The picture may become choppy when experiencing a lower frame rate (e.g., 6 frames per second vs. a higher 15 frames per second). This may be related to signal strength or the camera's resolution.Ensure the camera resolution is set to 720p using the Homeguardsafe app or the NVR.Move the camera closer to the NVR.Remove obstructions between the NVR and camera. |
| Camera is not detecting motion | Your camera may be too far away from the area of interest. Try to keep the camera within 20ft/6.1 of the area you want to monitor.Review the "Installation Tips" and "Optimizing Motion Detection" sections to ensure your camera is installed in an optimal location and motion detection is properly configured. |
| Picture is too bright | Ensure your camera isn't pointed directly at a source of light (e.g., sun or spot light).Move your camera to a different location. |
| Night vision is not working | The night vision activates when light levels drop. The area may have too much light. |
| Picture is not clear | Check the camera lens for dirt, dust, spiderwebs. Clean the lens with a soft, clean cloth.Too much environmental interference will affect picture clarity. Move your camera to a different location. |
| Bright spot in video when viewing at night | Night vision reflects when pointing a camera through a window. Move the camera to a different location. |
Warranty & Support
All the products sold are covered by 24 months warranty from the date of invoice. Warranty instructions:
- Please contact us when the product is caused by its own fault within 2 year warranty.
- Please mail us your written warranty card as soon as possible after purchasing our products so that we can repair or replace this product to its original operation condition. Or the company will not deal with it.
- Please write the truth on the warranty card.
- Paid for repairing as follows:
A. Equipment failure caused by human operation
B. Equipment failure caused by not conforming to the using environment
C. No warranty card
D. Warranty expired
Product model:
Product serial number:
Purchase date:
User name:
Contact person:
Telephone:

Note: Please keep the warranty card for the better service.
For technical support, please contact us support@homeguardworld.com or https://helpdesk.intelek.cz


- Helpdesk / Technical Support
- SMART HD SECURITY SYSTEM
- Contents
- Package Contents
- STEP 1 initial Setup
- STEP 2 Setting Up the NVR
- Optional: Full NVR Setup
- STEP 3 Connecting with Homeguardsafe
- STEP 4 Installing the Cameras
- Installation Tips
- To install your cameras:
- Note:
- Pairing the Camera
- Charging the Power Pack
- Warranty & Support
Brand : iGET
Model : HGNVK68004
Category : Security Camera