
SD39010NR - Deep fryer SWAN - Free user manual and instructions
Find the device manual for free SD39010NR SWAN in PDF.


| Product Type | Air Fryer |
| Brand | Swan |
| Model | SD39010NR |
| Capacity | 4 Litres |
| Power Consumption | 1400 Watts |
| Input Voltage | 220-240V, 50/60Hz |
| Temperature Control | Adjustable knob (approx. 80-200°C) |
| Timer | Adjustable knob (up to 30 minutes), with bell |
| Indicator Light | Heating-up and working light |
| Basket | Detachable, non-stick coating, dishwasher safe |
| Pan | Detachable, dishwasher safe |
| Accessories Included | Tongs |
| Safety Features | Automatic shut-off when timer ends; hot surface warning |
| Cleaning | Wipe exterior; pan and basket removable for washing |
| Warranty | 2 years |
| Spare Parts Available | Cooking tray (SD39010N01), Basket (SD46010N02) |
| Disposal | Recycle via WEEE scheme |
Frequently Asked Questions - SD39010NR SWAN
User questions about SD39010NR SWAN
0 question about this device. Answer the ones you know or ask your own.
Ask a new question about this device
Download the instructions for your Deep fryer in PDF format for free! Find your manual SD39010NR - SWAN and take your electronic device back in hand. On this page are published all the documents necessary for the use of your device. SD39010NR by SWAN.
USER MANUAL SD39010NR SWAN
Swan designed for life
natural_image
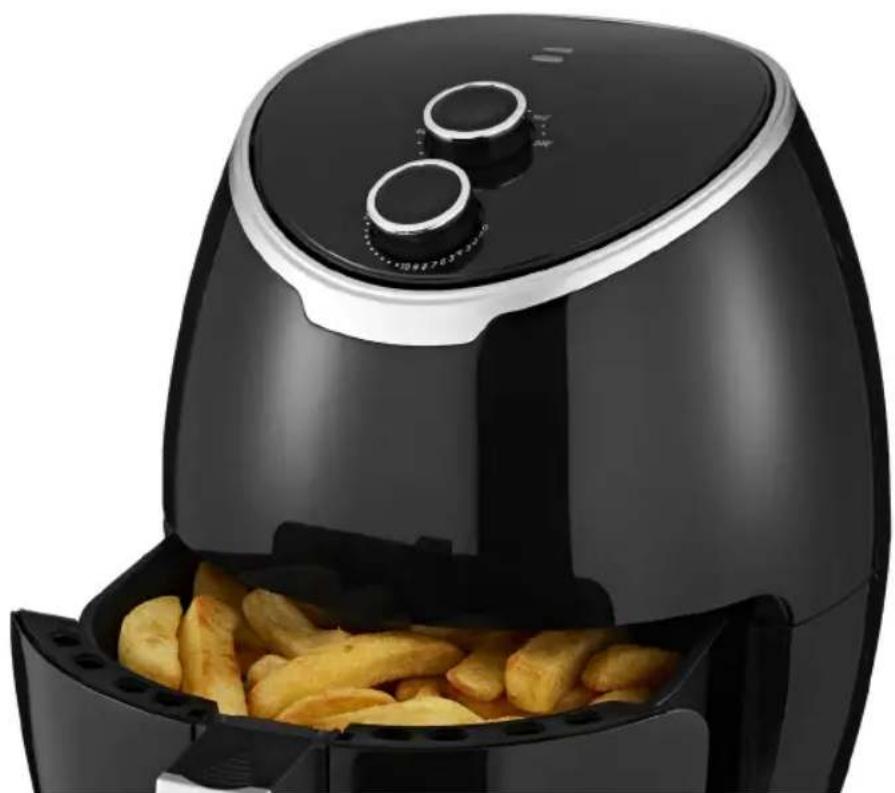
Black air fryer with two handles and open Bahamas pan containing fried food (no text or symbols visible)4 Litre Air Fryer
Model: SD3901ONR (all colours)
Help line: 0333 220 6050
v2.0
12/21

IMPORTANT INFORMATION - RETAIN FOR FUTURE USE
When using any electrical appliance, basic safety precautions should always be followed including the following:
• Always ensure that the voltage on the rating label corresponds to the mains voltage in your home
- Incorrect operation and improper use can damage the appliance and cause injury to the user.
- This appliance can be used by children aged from 8 years and above if they have been given supervision or instruction concerning use of the appliance in a safe way and if they understand the hazards involved. Cleaning and user maintenance shall not be made by children unless they are older than 8 and supervised. Keep the appliance and its cord out of reach of children aged less than 8 years. Check the power cord and plug regularly for any damage. If the cord or the plug is damaged, it must be replaced by the manufacturer or qualified person in order to avoid an electrical hazard.
- Do not use the appliance if it has been dropped or damaged in any way. In case of damage, take the unit in for examination and/or repair by an authorised service agent.
- Never immerse the unit in water or any other liquid for cleaning purposes.
- Remove the plug from the socket by gripping the plug. Do not pull on the cord to disconnect the appliance from

IMPORTANT INFORMATION - RETAIN FOR FUTURE USE
the mains. Always unplug the unit when not in use, before cleaning or when adding or removing parts.
- The use of accessory attachments that are not recommended or supplied by the manufacturer may result in injuries, fire or electric shock.
- Do not let the cord hang over the edge of a table or counter. Ensure that the cord is not in a position where it can be pulled on inadvertently.
- Do not allow the cord to touch hot surfaces and do not place on or near a hot gas or electric burner or in a heated oven.
- Do not use the appliance on a gas or electric cooking top or over or near an open flame.
- Use of an extension cord with this appliance is not recommended. However, if it is necessary to use an extension lead, ensure that the lead is suited to the power consumption of the appliance to avoid overheating of extension cord, appliance or plug point. Do not place the extension cord in a position where it can be pulled on by children or animals or tripped over.
- This appliance is not suitable for outdoor use. Do not use the appliance for anything other than its intended use.
- Do not carry the appliance by the power cord.
- Do not leave the appliance unattended during use. Always unplug the unit when not in use or before cleaning.
- Always operate the appliance on a smooth, even, stable surface. Do not place the unit on a hot surface.
- Ensure that the unit is switched off after use.
3 Swan


IMPORTANT INFORMATION - RETAIN FOR FUTURE USE
- The manufacturer does not accept responsibility for any damage or injury caused by improper or incorrect use, or for repairs carried out by unauthorised personnel.
- In case of technical problems, switch off the product and do not attempt to repair it yourself. Return the appliance to an authorised service facility for examination, adjustment or repair. Always insist on the use of original spare parts. Failure to comply with the above mentioned precautions and instructions, could affect the safe operation of this product.
- Your appliance must never be switched on through an external timer or any kind of separate remote control system.

CAUTION: SURFACES BECOME HOT DURING USE. ALWAYS USE TONGS WHENEVER POSSIBLE

CAUTION: PLEASE ENSURE YOUR WORK TOP IS ABLE TO WITHSTAND A TEMPERATURE OF AT LEAST 60 DEGREES CENTIGRADE FOR EXTENDED PERIODS. IF IN DOUBT, MOUNT THE PRODUCT ON A SUITABLE WOODEN PLINTH.

TECHNICAL DATA
Description: Air Fryer
Model: SD39010NR
Input Voltage: 220-240V
Frequency: 50/60Hz
Power consumption: 1400 Watts


PARTS & ASSEMBLY
- Before first use, carefully remove all packaging and familiarise yourself with the various parts of your product.
- Thoroughly clean the basket and pan with hot water, some washing-up liquid and a non-abrasive sponge.
• Wipe inside and outside of the appliance with a moist cloth. - This is an oil-free fryer that works on hot air, Do not fill the pan with oil or frying fat.


5

wan

HOW TO USE
Preparing For Use
- Place the appliance on a stable, horizontal and even surface that can withstand the weight and temperatures of 60C
- Place the basket in the pan (Fig.3).
- Do not fill the pan with oil or any other liquid.
- Do not put anything on top of the appliance, the airflow will be disrupted and affect the hot air frying result.
Hot Air Frying
- Connect the mains plug into an earthed wall socket.
- Carefully pull the pan out of the Hot-air fryer
- Put the ingredients in the basket.
- Slide the pan back into the Hot-air fryer
-
Noting to carefully align with the guides in the body of the fryer.
-
Never use the pan without the basket in it.
-
Caution: Do not touch the pan during use and only when it has completely cooled. Only hold the pan by the handle.
-
Determine the required preparation time for the ingredient (see section 'Settings' below).
-
To switch on the appliance, turn the timer knob to the required time
-
Turn the temperature control knob to the required temperature. See section 'Settings' below to determine the right temperature
-
Pre-heating is optional but better results are obtained if you add 3 minutes to the cooking time when the appliance is cold.
-
Note: If you want, you can also let the appliance preheat without any ingredients inside. In that case, turn the timer knob to more than 3 minutes and wait until the heating-up light goes out (after approx. 3 minutes). Then fill the basket and turn the timer knob to the required preparation time.
-
The timer starts counting down the set preparation time
- During the hot air frying process, the working light comes on and goes out from time to time. This indicates that the heating element is switching on and off to maintain the set temperature.
- Excess oil from the ingredients is collected on the bottom of the pan.
- Some ingredients require shaking halfway through the preparation time (see section "Settings" in this chapter). To shake the ingredients, pull the pan out of the appliance by the handle and shake it. Then slide the pan back into the fryer.


HOW TO USE
CAUTION: Do not press the button on the handle when shaking the pan. (Fig.3)
Tip: To reduce the weight, you can remove the basket from the pan and shake the basket only. To do so, pull the pan out of the appliance, place it on a heat-resistant surface and press the button of handle and lift the basket out of the pan
Tip: If you are cooking ingredients that need shaking part way through cooking, set the timer for half the cooking time. When bell sounds, remove basket and shake. Replace basket and set timer for remainder of cooking time.
- When you hear the timer bell, and cooking is complete, pull the pan out of the appliance and place it on a heat resistant surface.
Note: You can also switch off the appliance manually. To do this, turn the timer control knob to 0.
- Check if the ingredients are ready.
- If the ingredients are not ready yet, simply slide the pan back into the appliance and set the timer to a few extra minutes.
- To remove ingredients (e.g. fries), pull the pan out of the Air Fryer and place it on a heat resistant surface, and press the basket release button to lift the basket out of the pan.
- Do not turn the basket upside down with the pan still attached to it, as any excess oil that has collected on the bottom of the pan will leak onto the ingredients, and pose a scald hazard. Always remove the basket from the pan first.
- To remove large or fragile ingredients, lift the ingredients out of the basket by using the tongs provided.
- When a batch of cooked food is ready, the Air Fryer is instantly ready for preparing another batch.


SETTINGS
The table below will help you to select the basic settings for the ingredients.
Note: Keep in mind that these settings are indications. As ingredients differ in origin, size, shape as well as brand, we cannot guarantee the best setting for your ingredients. Always ensure food is cooked thoroughly regardless of the timing guide-line.
Tips
- Smaller ingredients usually require a slightly shorter cooking time than larger ingredients.
- A larger amount of ingredients sometimes requires a slightly longer cooking time and a lower temperature.
- Shaking smaller ingredients halfway through the cooking time optimises the end result, and can help prevent unevenly fried ingredients.
- Add some spray oil to fresh potatoes for a crispy result. Fry your ingredients in the Hot-air fryer within a few minutes after you added the oil.
- Snacks that can be prepared in a oven can also be prepared in the xc
• The optimal amount for preparing crispy fries is 500 grams. - Use pre-made dough to prepare filled snacks quickly and easily. Pre-made dough also requires a shorter cooking time than home-made dough.
- Place a baking tin or oven dish in the Hot-air fryer basket if you want to bake a cake or quiche or if you want to fry fragile ingredients or filled ingredients.
- You can also use the Hot-air fryer to reheat ingredients. To reheat ingredients, set the temperature to 150°C for up to 10 minutes.
| Temp (C) Food Amount Time (mins) | |||
| 200 Frozen chips th | in 100-400g 9 | ||
| 200 Frozen chips th | ick 100-400g 11-18 | ||
| 180 Fresh chips/ | wedges | 100-400 15-22 (spray with oil first) | |
| 180 Pork chop up to | 500g 10-15 | ||
| 180 Burger uo to | 500g 7-14 | ||
| 180 Chicken breast | up to 500g 10-15 | ||
| 200 Chicken nuggets | Up tp 400g | 6-10 | |
| 180 Sausage frozen | Up to 400g | 20 | |
| 180 Sausage fresh | Up to 400g | 15 | |
| 180 Pasties/pastry | top | Up to 500g | 8-12 mins |

CLEANING & MAINTENANCE
- Remove the mains plug from the wall socket and allow the appliance to cool down. Note: Remove the pan to let the Air Fryer cool down more quickly.
- Wipe the outside of the appliance with a moist cloth & dry with kitchen towel.
- Clean the pan and basket AFTER EVERY USE with hot water, some washing-up liquid and a non-abrasive sponge.
Note: The pan and basket are dishwasher-safe but the harsh detergents can reduce the life of the non stick coating.
Tips: If dirt is stuck to the basket or the bottom of the pan, fill the pan with hot water with some washing-up liquid. Put the basket in the pan and let the pan and the basket soak for about 10 minutes. Clean the inside of the appliance with a soft cloth or sponge dampened with a mild detergent solution.
Do not use abrasive cleaners (eg metal scouring pads), or strong chemical cleaners
NEVER immerse the main unit is water or run it under the tap.

SPARE PARTS
Replacements for lost parts can be obtained via our web site
www.swan-brand.co.uk
Use the following references when ordering:
SD39010N01 - Detachable cooking tray
SD46010N02 - Detachable basket

WARRANTY
This product is guaranteed for 2 years from the date of original purchase. If any defect arises due to faulty materials of workmanship the faulty products must be returned to the place of purchase. Refunds or replacement is at the discretion of the store.
The following conditions apply:
- The product must be returned to the retailer with proof of purchase.
- The product must be installed and used in accordance with the instructions contained in this instruction guide.
- It must be used only for domestic purposes.
- It does not cover wear and tear, damage, misuse or consumable parts.
- Swan Products Ltd has limited liability for incidental or consequential loss or damage.
• This guarantee is valid in the UK and Eire Only.

BS PLUG
The wires in the mains lead are coloured in accordance with the following code:
BLUE NEUTRAL
BROWN LIVE
GREEN/YELLOW EARTH
As the colours of the wire in the mains lead of this appliance may not correspond with the colour markings identifying the terminals on your plug, proceed as follows:
The wire which is coloured BLUE must be connected to the terminal which is marked with the letter N or coloured black. The wire which is coloured BROWN must be connected to the terminal which is marked with the letter L or coloured red. The wire which is coloured GREEN/YELLOW must be connected to the terminal which is marked with the letter E or (earth symbol) and is coloured GREEN or GREEN/YELLOW.
WARNING: THIS APPLIANCE MUST BE EARTHED

DISPOSAL OF UNIT

Appliances bearing the symbol shown here may not be disposed of in domestic rubbish. You are required to dispose of old electrical and electronic appliances like this separately. Please visit www.recycle-more.co.uk or www.recyclenow.co.uk for access to information about the recycling of electrical items. Please visit www.weeeireland.ie for access to information about the recycling of electrical items purchased in Ireland. The WEEE directive, introduced in August 2006, states that all electrical items must be recycled, rather than taken to landfill. Please arrange to take this appliance to your local Civic Amenity site for recycling, once it has reached the end of its life.



NOTES
11
Swan


natural_image
Stylized white and gray swan logo design on black background (no text or symbols)www.swan-brand.co.uk
Follow us online




www.swan-brand.co.uk
Copyright © Swan Products Ltd. PO Box 3117, Stoke-on-Trent ST4 9GD



- Swan designed for life
- Litre Air Fryer
- IMPORTANT INFORMATION - RETAIN FOR FUTURE USE
- When using any electrical appliance, basic safety precautions should always be followed including the following:
- Swan
- CAUTION: SURFACES BECOME HOT DURING USE. ALWAYS USE TONGS WHENEVER POSSIBLE
- CAUTION: PLEASE ENSURE YOUR WORK TOP IS ABLE TO WITHSTAND A TEMPERATURE OF AT LEAST 60 DEGREES CENTIGRADE FOR EXTENDED PERIODS. IF IN DOUBT, MOUNT THE PRODUCT ON A SUITABLE WOODEN PLINTH.
- TECHNICAL DATA
- PARTS & ASSEMBLY
- HOW TO USE
- Preparing For Use
- Hot Air Frying
- CAUTION: Do not press the button on the handle when shaking the pan. (Fig.3)
- SETTINGS
- Tips
- CLEANING & MAINTENANCE
- NEVER immerse the main unit is water or run it under the tap.
- SPARE PARTS
- WARRANTY
- The following conditions apply:
- BS PLUG
- DISPOSAL OF UNIT
Brand : SWAN
Model : SD39010NR
Category : Deep fryer