
CTR 6305 IX - Cooker VOX - Free user manual and instructions
Find the device manual for free CTR 6305 IX VOX in PDF.


| Product Type | Free Standing Electric Cooker |
| Brand | VOX |
| Model | CTR 6305 IX |
| Overall Dimensions (W x D x H) | 60 x 60 x 90 cm |
| Net Weight | 42.0 kg |
| Power Supply | 220-240 V~, 50/60 Hz |
| Power Cord | H05VV-F, length sufficient for connection |
| Hob Type | Ceramic glass hob with 4 radiant zones |
| Hob Zone Sizes | 2 zones Ø14.5 cm, 2 zones Ø18.0 cm |
| Oven Type | Electric oven, 69 L capacity |
| Oven Energy Class | A |
| Oven Energy Consumption (Conventional) | 0.87 kWh/cycle |
| Oven Energy Consumption (Fan Forced) | 0.80 kWh/cycle |
| Oven Functions | Static, Fan, Turbo, Grill, Grill+Fan, Defrost |
| Oven Temperature Range | Approx. 50-250 °C (thermostat controlled) |
| Oven Light | Replaceable E14 15-25W, 230V, heat resistant to 300°C |
| Timer | Mechanical minute minder (up to 100 minutes) |
| Accessories Included | Wire grid, shallow tray, deep tray, storage drawer, anti-tilting kit |
| Adjustable Feet | Yes, up to 30 mm height adjustment |
| Cleaning | Ceramic glass hob with glass spatula; oven door removable for cleaning |
| Safety Features | Anti-tilting bracket, residual heat indicators (hob), child safety warnings |
Frequently Asked Questions - CTR 6305 IX VOX
User questions about CTR 6305 IX VOX
0 question about this device. Answer the ones you know or ask your own.
Ask a new question about this device
Download the instructions for your Cooker in PDF format for free! Find your manual CTR 6305 IX - VOX and take your electronic device back in hand. On this page are published all the documents necessary for the use of your device. CTR 6305 IX by VOX.
USER MANUAL CTR 6305 IX VOX
natural_image
Line drawing of a simple kitchen oven with four handles and front panel (no text or symbols)CTR6305W
CTR6305IX
natural_image
Line drawing of a simple kitchen oven with four circular tops and a front panel (no text or symbols)CTR6305W
CTR6305IX
natural_image
Warning symbol depicting a person pulling a large block inside a triangle (no text or numbers)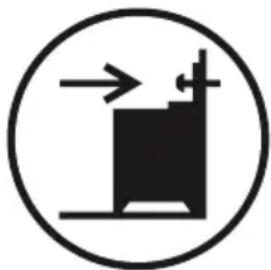
natural_image
Simple black-and-white icon of a building with arrows indicating direction, enclosed in a circle (no text or symbols)- Uređaj se zagreva tokom korišćenja. Budite pažljivi da biste izbegli dodirivanje grejnih elemenata unutar rerne.
- Ručke mogu postati vruće nakon kratkotrajne upotrebe.
- Ne koristite abrazivna sredstva ili čelične četke za čišćenje površina u rerni. Tako se mogu ogrebati površine i može doći do pucanja stakla na vratima ili do oštećenja površina.
natural_image
Diagram of a mechanical assembly with a spring-loaded component and directional arrow (no text or symbols)3. KARAKTERISTIKE PROIZVODA

Važno: Specifikacije proizvoda variraju i izgled vašeg uređaja može se razlikovati od uređaja na slikama.
Spisak komponenti
Okruglo dno posude
natural_image
Two identical diagrams showing a cooking pot with crossed x marks above and a cross below, both without any text or symbols.Posuda malog
prečnika
Neravno dno posude
natural_image
Pure electrical circuit symbol for a three-phase motor (no text or labels)Turbo Funkcija:
Termostat i svetiljka za upozorenje na rerni će se uključiti, kružni grejač i ventilator će početi da rade. Turbo funkcija podjednako
natural_image
Solid dark square with two horizontal white lines on top and bottom (no text or symbols)Funkcija statičko pečenje: Termostat i svetiljka za upozorenje na rerni će se uključiti, i donji i gornji grejači će početi da rade. Funkcija statičko pečenje emituje
natural_image
Simple icon of a four-blade propeller inside a dark square frame with horizontal lines (no text or symbols)Funkcija ventilatora:
Termostat i svetiljka za upozorenje na rerni će se uključiti, donji i gornji grejači i ventilator će početi da rade. Ova funkcija je
dobra za pečenje peciva. Pečenje se obavlja putem donjeg i gornjeg grejača u rerni i putem ventilatora koji omogućava cirkulaciju vazduha, što će omogućiti blagi efekat roštilja na hrani. Preporučuje se da prethodno zagrejete rernu oko 10 minuta.
natural_image
Simple line drawing of a zigzag line above a dark rectangular frame (no text or symbols)Funkcija roštilja:
Termostat i svetiljka za upozorenje na rerni će se uključiti, i gornji grejač će početi da radi. Ova funkcija se koristi za roštiljanje
natural_image
Abstract icon with a stylized propeller inside a wavy line on a dark background (no text or symbols)natural_image
Technical line drawing of a square frame with bolt holes, no text or symbols presentFioka rerne
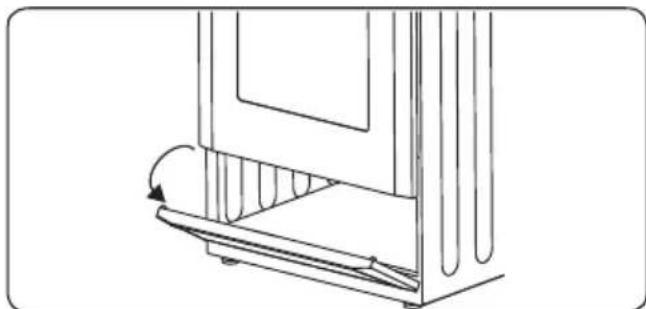
Vaš uređaj ima fioku za čuvanje dodatne opreme kako što su poslužavnici, police, rešetke ili manje šerpe i tiganje.

UPOZORENJE: Unutrašnja površina fioke može postati vruća tokom upotrebe. Ne ostavljajte nikakvu hranu, plastiku ili zapaljive materijale u fioku.
natural_image
Line drawing of a mechanical device with a curved arrow indicating rotation or movement (no text or symbols)Plitki poslužavnik
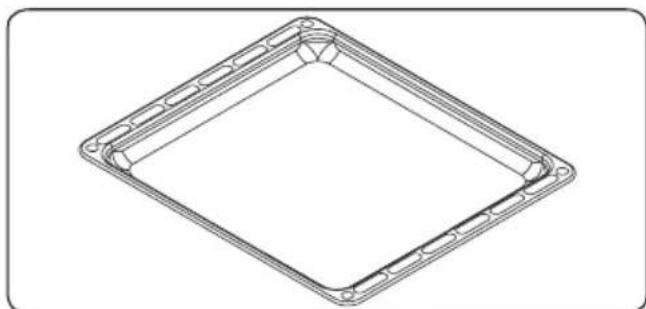
Plitki poslužavnik je najbolje koristiti za pečenje peciva.
Postavite poslužavnik na bilo koju policu i gurnite do kraja da budete sigurni da je pravilno postavljen.
natural_image
Technical line drawing of a square frame with rounded corners and internal cutouts (no text or symbols)Vitrokeramička staklena spatula
Uvek koristite staklenu spatulu da uklonite prosuto ili naslage sa ploče pre nego što isprobate rastvore za hemijsko čišćenje. Ovo je idealna metoda za uklanjanje čak i najmanjih naslaga sa ploče i za uklanjanje prosutog sa zoni vrućeg kuvanja pre nego što se upeku na ploči.
natural_image
Technical line drawing of a mechanical clamp or lever component (no text or symbols)Žičana rešetka
natural_image
Technical line drawing of a metal grate plate with slats and mounting brackets (no text or symbols)UPOZORENJE Stavite rešetku
natural_image
Technical line drawing of a metal rack with a curved cover and an arrow indicating rotation (no text or symbols)5. ČIŠĆENJE I ODRŽAVANJE
5.1 Čišćenje
UPOZORENJE: Isključite uređaj i ostavite da se ohladi pre čišćenja.
Opšta uputstva
- Pre nego što počnete da koristite sredstvo za čišćenje vašeg uređaja, proverite da li je prikladno i da li ga je preporučio proizvođač.
- Koristite kremasta ili tečna sredstva za čišćenje koja ne sadrže čestice. Ne koristite kaustične (korozivne) paste, abrazivna sredstva u prahu, čeličnu žicu ili tvrde alate za čišćenje jer mogu da oštete površine šporeta.

Ne koristite sredstva za čišćenje koja sadrže čestice zato što mogu oštetiti površine od stakla, emajla i/ili boju na m uređaju.
natural_image
Line drawing of a hand cleaning a car window with a circular object on the wall (no text or symbols)natural_image
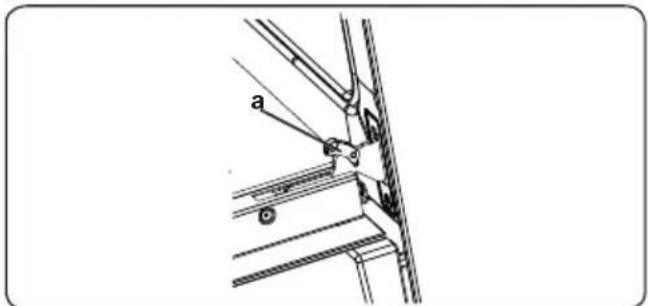
Technical line drawing of a mechanical assembly with no visible text or symbols- Otvorite šarku za zaključavanje (a) (uz pomoć šrafcigera) do krajnjeg položaja.
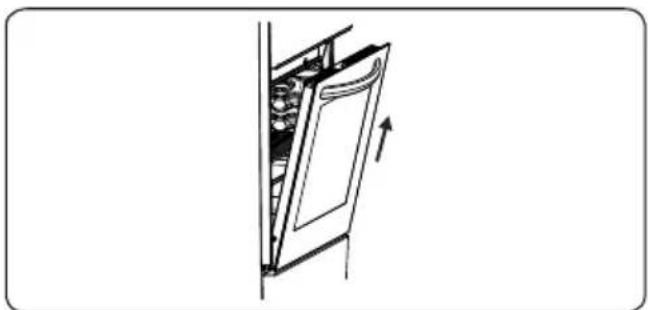
- Zatvarajte vrata dok ne dođu u položaj da su skoro zatvorena i povucite vrata prema sebi da ih izvadite.
natural_image
Diagram of a door opening with a cabinet and fan, showing an upward arrow (no text or symbols)Skidanje žičane police
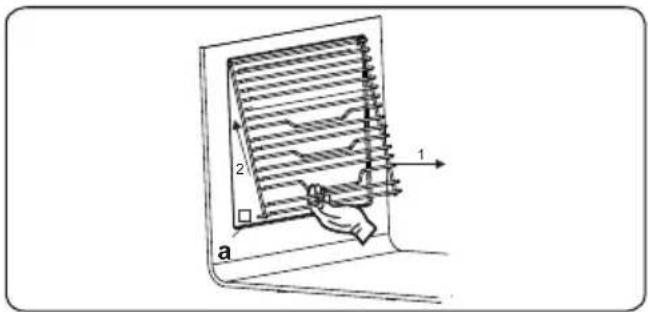
Za skidanje stalka za žicu, povucite stalak za žicu kao što je dato na prikazu. Nakon što ga oslobodite okvira (a), podignite ga prema gore.
5.2 Održavanje

UPOZORENJE: Održavanje ovog uređaja treba vršiti samo ovlašćeni serviser ili kvalifikovani električar.
Promena svetiljke rerne

UPOZORENJE: Isključite uređaj i ostavite da se ohladi pre čišćenja.
- Izvadite stakleni poklopac, zatim izvadite i sijalicu.
- Stavite novu sijalicu (otpornu na 300 °C) da zamenite sijalicu koju ste izvadili (230 V, 15-25 Watt, tip E14).
• Vratite stakleni poklopac na mesto i možete koristiti rernu.

Svetiljka je projektovana specijalno za
upotrebu u kuhinjskim aparatima. Nije pogodna za osvetljavanje prostorija u domaćinstvu.
6. REŠAVANJE PROBLEMA & TRANSPORT
6.1 Rešavanje problema

Ako i dalje imate problem nakon što pređete ove osnovne korake za rešavanje problema, molimo vas da stupite u kontakt sa ovlašćenim serviserom ili kvalifikovanim tehničarom.
| Problem Mogući uzrok Rešenje | ||
| Ne uključuje se ploča ili zona za kuvanje. | Nema napajanja. | Proverite osigurač uređaja u domaćinstvu.Proverite da li postoji prekid u napajanju zbog upotrebe drugih uređaja. |
| Rerna se ne uključuje. Isključeno je napajanje. | Proverite da li uređaj ima napajanje. Proverite da li drugi kuhinjski uređaji rade. | |
| Rerna se ne zagreva ili nedovoljno se zagreva, | Temperatura rerna nije pravilno podešena.Vrata rerne nisu zatvorena. | Proverite da li je kontrolno dugme za temperaturu rerne pravilno podešeno. |
| Hrana se ne peče ravnomerno u rerni. | Police rerne nisu pravilno postavljene. | Proverite da li koristite preporučenu temperaturu i položaj police.Ne otvarajte često vrata rerne osim ako pečete stvari koje treba okretati. Ako često otvarate vrata, unutrašnja temperatura može biti niža i ovo utiče na rezultate vašeg kuvanja. |
| Svetlo u rerni (ako ga ima) ne radi. | Pregorela je sijalica.Napajanje je prekinuto ili isključeno. | Zamenite sijalicu u skladu sa uputstvom.Proverite da li je napajanje uključeno u utičnicu. |
| Ventilator rerne (ako ga ima) bučno radi. | Vibriraju police u rerni. | Proverite da li je rerna ravna.Proverite da li police ili pribor za kuvanje vibriraju ili dodiruju zadnju ploču rerne. |
6.2 Transport
Ako je potrebno da izvršite transport proizvoda, koristite originalnu ambalažu i nosite je u originalnom pakovanju. Pratite oznake za transport na ambalaži. Zalepite trakom sve posebne delove za proizvod da ne bi došlo do oštećenja prilikom transporta.
Ako ne čuvate originalnu ambalažu, pripremite kutiju za transport tako što je uređaj, a posebno njegove spoljašnje površine, zaštićen od spoljašnjih oštećenja.
7. TEHNIČKE SPECIFIKACIJE
7.1 Energetska klasa
| Marka |  |  ELECTRONICS ELECTRONICS | |
| Model CTR6305IX | CTR6305W | ||
| Tip rerne ELEKTRIČNA | |||
| Težina kg 42,0 | |||
| Indeks energetske efikasnosti - standardna 103,6 | |||
| Indeks energetske efikasnosti - sa ventilatorom 95,3 | |||
| Energetska klasa A | |||
| Potrošnja energije (struje) - standardna kWh/ciklus 0,87 | |||
| Potrošnja energije (struje) - sa ventilatorom kWh/ciklus 0,80 | |||
| Broj otvora 1 | |||
| Izvor toplote ELEKTRIČNA | |||
| Zapremina I 69 | |||
| Ova rerna je u skladu sa EN 60350-1 | |||
| Saveti za uštedu energijeRerna- Jela spremajte zajedno, ako je moguće.- Održavajte kratko vreme predzagrevanja.- Nemojte da produžavte vreme pečenja.- Nemojte da zaboravite da isključite rernu na kraju kuvanja.- Nemojte da otvarate vrata rerne tokom perioda kuvanja. | |||
| Marka |  | |
| Model CTR6305IX | CTR6305W | |
| Tip ploče za kuvanje Električna | ||
| Broj zona za kuvanje 4 | ||
| Tehnologija grejanja 1 Radijantna | ||
| Veličina 1 cm ∅14,5 | ||
| Potrošnja energije 1 Wh/kg 192,0 | ||
| Tehnologija grejanja 2 Radijantna | ||
| Veličina 2 cm ∅14,5 | ||
| Potrošnja energije 2 Wh/kg 192,0 | ||
| Tehnologija grejanja 3 Radijantna | ||
| Veličina 3 cm ∅18,0 | ||
| Potrošnja energije 3 Wh/kg 192,0 | ||
| Tehnologija grejanja 4 Radijantna | ||
| Veličina 4 cm ∅18,0 | ||
| Potrošnja energije 4 Wh/kg 192,0 | ||
| Potrošnja energije kod ploče za kuvanje Wh/kg 192,0 | ||
| Ova ploča za kuvanje je u skladu sa EN 60350-2 | ||
| Saveti za uštedu energijePloča za kuvanje- Koristite posuđe za kuvanje sa ravnim dnom.- Koristite posuđe za kuvanje odgovarajućih dimenzija.- Koristite posuđe za kuvanje sa poklopcem.- Smanjite količinu tečnosti ili masti.- Kada tečnost počne da ključa, smanjite temperaturu. | ||
EN Free Standing Cooker / User Manual
natural_image
Line drawing of a simple kitchen oven with four circular tops and a front panel (no text or symbols)CTR6305W
CTR6305IX
Thank you for choosing this product.
This User Manual contains important safety information and instructions on the operation and maintenance of your appliance.
Please take the time to read this User Manual before using your appliance and keep this book for future reference.
| Icon Type Meaning | |
| WARNING Serious injury or death risk | |
| RISK OF ELECTRIC SHOCK Dangerous voltage risk | |
| FIRE Warning - Risk of fire / flammable materials | |
| CAUTION Injury or property damage risk | |
| IMPORTANT / NOTE Operating the system correctly |
CONTENTS
1.SAFETY INSTRUCTIONS ....3
1.1 General Safety Warnings ....3
1.2 Installation Warnings ....6
1.3 During Use 6
1.4 During Cleaning and Maintenance ....8
2.INSTALLATION AND PREPARATION FOR USE....10
2.1 Instructions for the Installer .... 10
2.2 Electrical Connection and Safety....11
2.3 Anti-tilting kit ....12
2.4 Adjusting the feet 12
3.PRODUCT FEATURES 13
4.USE OF PRODUCT 14
4.1 Hob controls 14
4.2 Oven Controls....15
4.3 Cooking Table 16
4.4 Use of the Mechanical Minute Minder Timer 16
4.5 Accessories 16
5.CLEANING AND MAINTENANCE....17
5.1 Cleaning 17
5.2 Maintenance 19
6.TROUBLESHOOTING&TRANSPORT 20
6.1 Troubleshooting ....20
6.2 Transport 20
7.TECHNICAL SPECIFICATIONS....22
7.1 Energy class....22
1. SAFETY INSTRUCTIONS
- Carefully read all instructions before using your appliance and keep them in a convenient place for reference when necessary.
- This manual has been prepared for more than one model therefore your appliance may not have some of the features described within. For this reason, it is important to pay particular attention to any figures whilst reading the operating manual.
1.1 General Safety Warnings
- This appliance can be used by children aged from 8 years and above and by persons with reduced physical, sensory or mental capabilities or lack of experience and knowledge if they have been given supervision or instruction concerning use of the appliance in a safe way and understand the hazards involved. Children should not play with the appliance. Cleaning and user maintenance should not be made by children without supervision.
WARNING: The appliance and its accessible parts become hot during use. Care should be taken to avoid touching heating elements. Keep children less than 8 years of age away unless they are continually supervised.
WARNING: Unattended cooking on a hob with fat or oil can be dangerous and may result in fire. NEVER try to extinguish such a fire with water, but switch off the appliance and cover the flame with a lid or a fire blanket.
⚠️ CAUTION: The cooking process has to be supervised. A short term cooking process has to be supervised continuously
WARNING: Danger of fire: Do not store items on the cooking surfaces.
⚠️ WARNING: If the surface is cracked, switch off the appliance to avoid the possibility of electric shock.
- For models which incorporate a hob lid, clean any spillages off the lid before use and allow the cooker to cool before closing the lid.
- Do not operate the appliance with an external timer or separate remote-control system.
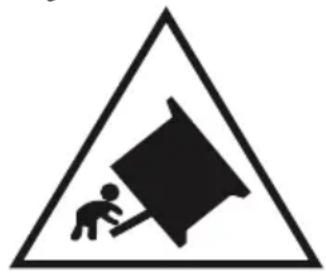
WARNING: To prevent the appliance tipping, the stabilising brackets must be installed. (For detailed information refer to the anti-tilting kit set guide.)
natural_image
Warning symbol depicting a person pulling a large block inside a triangle (no text or numbers)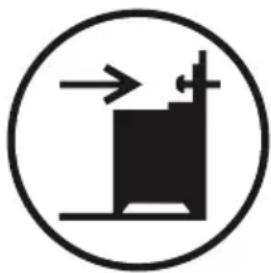
natural_image
Simple black-and-white icon of a machine with directional arrows, enclosed in a circle (no text or symbols)- During use the appliance will get hot. Care should be taken to avoid touching heating elements inside the oven.
- Handles may become hot after a short period of time during use.
- Do not use harsh abrasive cleaners or scourers to clean oven surfaces. They can scratch the surfaces which may result in shattering of the door glass or damage to surfaces.
- Do not use steam cleaners to clean the appliance.
⚠️ WARNING: To avoid the possibility of electric shocks, make sure that the appliance is switched off before replacing the lamp.
⚠️ CAUTION: Accessible parts may be hot when cooking or grilling. Keep young children away from the appliance when it is in use.
- Your appliance is produced in accordance with all
applicable local and international standards and regulations.
- Maintenance and repair work should only be carried out by authorised service technicians. Installation and repair work that is carried out by unauthorised technicians may be dangerous. Do not alter or modify the specifications of the appliance in any way. Inappropriate hob guards can cause accidents.
- Before connecting your appliance, make sure that the local distribution conditions (nature of the gas and gas pressure or electricity voltage and frequency) and the specifications of the appliance are compatible. The specifications for this appliance are stated on the label.
⚠️ CAUTION: This appliance is designed only for cooking food and is intended for indoor domestic household use only. It should not be used for any other purpose or in any other application, such as for non-domestic use, in a commercial environment or for heating a room.
- Do not use the oven door handles to lift or move the appliance.
- All possible measures have been taken to ensure your safety. Since the glass may break, care should be taken while cleaning to avoid scratching. Avoid hitting or knocking the glass with accessories.
- Make sure that the supply cord is not trapped or damaged during installation. If the supply cord is damaged, it must be replaced by the manufacturer, its service agent or similarly qualified persons in order to prevent a hazard.
- Do not let children climb on the oven door or sit on it while it is open.
- Please keep children and animals away from this
appliance.
1.2 Installation Warnings
- Do not operate the appliance before it is fully installed.
- The appliance must be installed by an authorised technician. The manufacturer is not responsible for any damage that might be caused by incorrect placement and installation by unauthorised people.
- When the appliance is unpacked, make sure that it has not been damaged during transportation. In the case of a defect, do not use the appliance and contact a qualified service agent immediately. The materials used for packaging (nylon, staplers, styrofoam, etc.) may be harmful to children and they should be collected and removed immediately.
- Protect your appliance from the atmosphere. Do not expose it to sun, rain, snow, dust or excessive humidity.
- Materials around the appliance (i.e. cabinets) must be able to withstand a minimum temperature of 100^ .
- The appliance must not be installed behind a decorative door, in order to avoid overheating.
1.3 During Use
- When you first use your oven you may notice a slight smell. This is perfectly normal and is caused by the insulation materials on the heater elements. We suggest that, before using your oven for the first time, you leave it empty and set it at maximum temperature for 45 minutes. Make sure that the environment in which the product is installed is well ventilated.
• Take care when opening the oven door during or after cooking. The hot steam from the oven may cause burns.
- Do not put flammable or combustible materials in or near the appliance when it is operating.
• Always use oven gloves to remove and replace food in the oven.
- Under no circumstances should the oven be lined with aluminium foil as overheating may occur.
- Do not place dishes or baking trays directly onto the base of the oven whilst cooking. The base becomes very hot and damage may be caused to the product.
Do not leave the cooker unattended when cooking with solid or liquid oils. They may catch fire under extreme heating conditions. Never pour water on to flames that are caused by oil, instead switch the cooker off and cover the pan with its lid or a fire blanket.
• Always position pans over the centre of the cooking zone, and turn the handles to a safe position so they cannot be knocked.
- If the product will not be used for a long period of time, turn the main control switch off. Turn the gas valve off when gas appliances are not in use.
- Make sure the appliance control knobs are always in the “0” (stop) position when the appliance is not in use.
- The trays incline when pulled out. Take care not to spill or drop hot food when removing it from the oven.
- Do not place anything on the oven door when it is open. This could unbalance the oven or damage the door.
- Do not place heavy or flammable items (e.g. nylon, plastic bags, paper, cloth, etc.) into the drawer. This includes cookware with plastic accessories (e.g. handles).
⚠️ CAUTION: The inside surface of the storage compartment may get hot when the appliance is in use. Avoid touching the inside surface.
- Do not hang towels, dishcloths or clothes from the appliance or its handles.
1.4 During Cleaning and Maintenance
- Make sure that your appliance is turned off at the mains before carrying out any cleaning or maintenance operations.
- Do not remove the control knobs to clean the control panel.
- To maintain the efficiency and safety of your appliance, we recommend you always use original spare parts and to call our authorised service agents when needed. CE Declaration of conformity
CE We declare that our products meet the applicable European Directives, Decisions and Regulations and the requirements listed in the standards referenced.
This appliance has been designed to be used only for home cooking. Any other use (such as heating a room) is improper and dangerous.
The operating instructions apply to several models. You may notice differences between these instructions and your model.
Disposal of your old machine
This symbol on the product or on its packaging indicates that this product should not be treated as household waste. Instead it should be handed over to the applicable collection point for the recycling of electrical and electronic equipment. By ensuring this product is disposed of correctly, you will help prevent potential negative consequences for the environment and human health, which could otherwise be caused by inappropriate waste handling of this product. For more detailed information about recycling of this product, please contact your local city office, your household waste disposal service or the retailer who you purchased this product from.
2. INSTALLATION AND PREPARATION FOR USE

WARNING : This appliance must be installed by an authorised service person or qualified technician, according to the instructions in this guide and in compliance with the current local regulations.
- Incorrect installation may cause harm and damage, for which the manufacturer accepts no responsibility and the warranty will not be valid.
- Prior to installation, ensure that the local distribution conditions (electricity voltage and frequency and/or nature of the gas and gas pressure) and the adjustments of the appliance are compatible. The adjustment conditions for this appliance are stated on the label.
- The laws, ordinances, directives and standards in force in the country of use are to be followed (safety regulations, proper recycling in accordance with the regulations, etc.).
2.1 Instructions for the Installer
General instructions
• After removing the packaging material from the appliance and its accessories, ensure that the appliance is not damaged. If you suspect any damage, do not use it and contact an authorised service person or qualified technician immediately.
- Make sure that there are no flammable or combustible materials in the close vicinity, such as curtains, oil, cloth etc. which may catch fire.
- The worktop and furniture surrounding the appliance must be made of materials resistant to temperatures above 100°C.
- The appliance should not be installed directly above a dishwasher, fridge, freezer, washing machine or clothes dryer.
- The appliance can be placed close to other furniture on condition that, in the area where the appliance is set up, the furniture's height does not exceed the height of the cooktop.
Installation of the Cooker
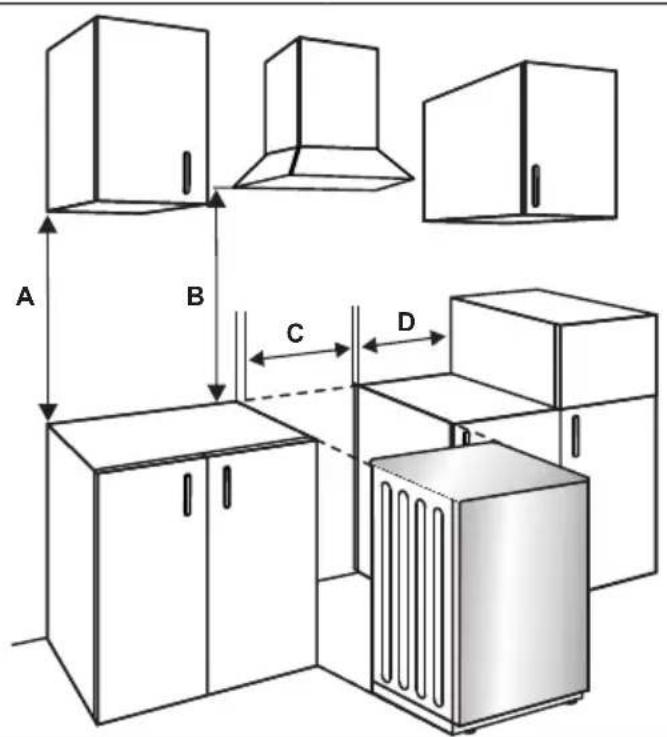
- If the kitchen furniture is higher than the cooktop, the kitchen furniture must be at least 10 cm away from the sides of appliance for air circulation.
- If a cooker hood or cupboard is to be installed above the appliance, the safety distance between cooktop and any cupboard/cooker hood should be as shown below.
| A (mm) Cupboard 420 | |
| B (mm) Cooker Hood 650/700 | |
| C (mm) Product Width | |
| D (mm) 50 |
2.2 Electrical Connection and Safety

WARNING: The electrical connection of this appliance should be carried out by an authorised service person or qualified electrician, according to the instructions in this guide and in compliance with the current local regulations.

WARNING: THE APPLIANCE MUST BE EARTHED.
- Before connecting the appliance to the power supply, the voltage rating of the appliance (stamped on the appliance identification plate) must be checked for correspondence to the available mains supply voltage, and the mains electric wiring should be capable of handling the appliance's power rating (also indicated on the identification plate).
- During installation, please ensure that isolated cables are used. An incorrect connection could damage your appliance. If the mains cable is damaged and needs to be replaced this should be done by a qualified personnel.
- Do not use adaptors, multiple sockets and/or extension leads.
- The supply cord should be kept away from hot parts of the appliance and must not be bent or compressed. Otherwise the cord may be damaged, causing a short circuit.
- If the appliance is not connected to the mains with a plug, a all-pole disconnector (with at least 3 mm contact spacing) must be used in order to meet the safety regulations.
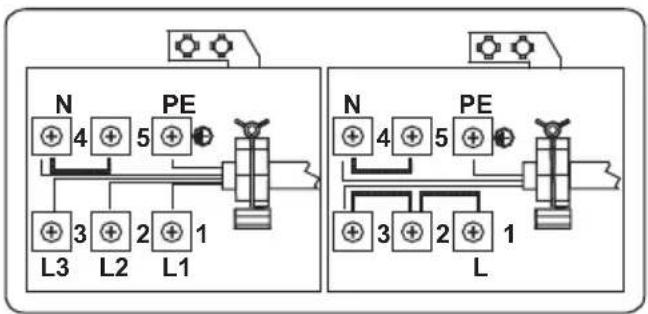
- The appliance is designed for a power supply of 220-240 V\~. If your supply is different, contact the authorized service personnel or qualified electrician.
- The power cable (H05VV-F) must be long enough to be connected to the appliance.
- The fused switch must be easily accessible once the appliance has been installed.
- Ensure all connections are adequately tightened.
- Fix the supply cable in the cable clamp and then close the cover.
- The terminal box connection is placed on the terminal box.
flowchart
graph TD
    subgraph Left_Circuit
        N1["+"] --> L3["+"]
        PE1["PE"] --> L2["+"]
        PE2["PE"] --> L1["+"]
        PE3["PE"] --> L1["+"]
        PE4["PE"] --> L1["+"]
        PE5["PE"] --> L1["+"]
    end
    subgraph Right_Circuit
        N2["+"] --> L4["+"]
        PE2["PE"] --> L5["+"]
        PE3["PE"] --> L5["+"]
        PE4["PE"] --> L5["+"]
        PE5["PE"] --> L5["+"]
        PE6["PE"] --> L5["+"]
    end
    style Left_Circuit fill:#f9f,stroke:#333
    style Right_Circuit fill:#bbf,stroke:#333
2.3 Anti-tilting kit
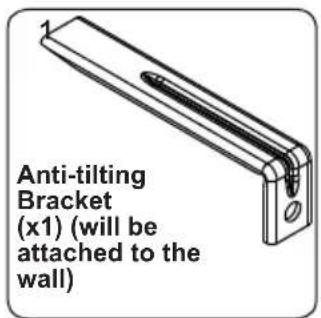
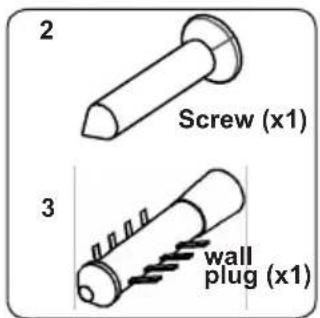
The document bag contains an anti-tilting kit. Loosely attach the anti-tilting bracket (1) to the wall using the screw (2) and wall plug (3), following the measurements shown in the figure and table below. Adjust the height of the anti-tilting bracket so that it lines up with the slot on the cooker and tighten the screw. Push the appliance towards the wall making sure that the anti-tilting bracket is inserted into the slot on the rear of the appliance.
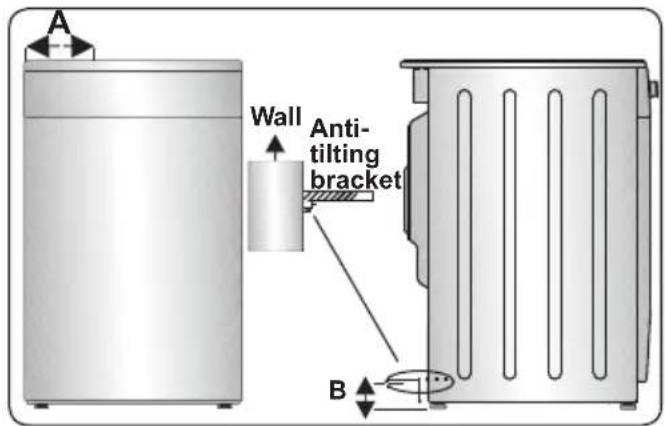
| Product Dimensions (Width X Depth X Height) (Cm) | A (mm) B (mm) |
| 60x60x90 (Double Oven) 297 | 5 52 |
| 50x60x90 (Double Oven) 247 | 5 52 |
| 90x60x85 430 107 | |
| 60x60x90 309.5 112 | |
| 60x60x85 309.5 64 | |
| 50x60x90 247.5 112 | |
| 50x60x85 247.5 64 | |
| 50x50x90 247.5 112 | |
| 50x50x85 247.5 64 |
2.4 Adjusting the feet
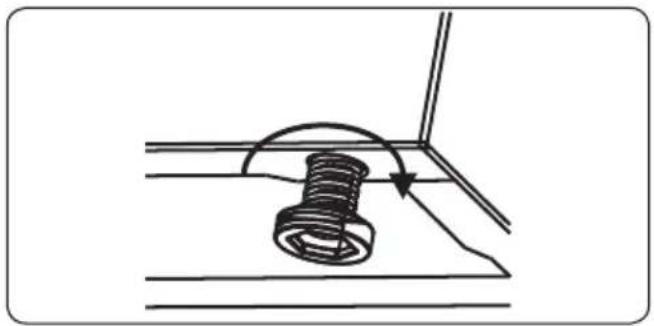
Your product stands on four adjustable feet. For safe operation, it is important that your appliance is correctly balanced. Make sure the appliance is level prior to cooking. To increase the height of the appliance,
turn the feet anti-clockwise. To decrease the height of the appliance, turn the feet clockwise.
It is possible to raise the height of the appliance up to 30 mm by adjusting the feet. The appliance is heavy and we recommend that a minimum of 2 people lift it. Never drag the appliance.
natural_image
Diagram of a mechanical assembly with a spring and rotating arrow (no text or symbols)3. PRODUCT FEATURES

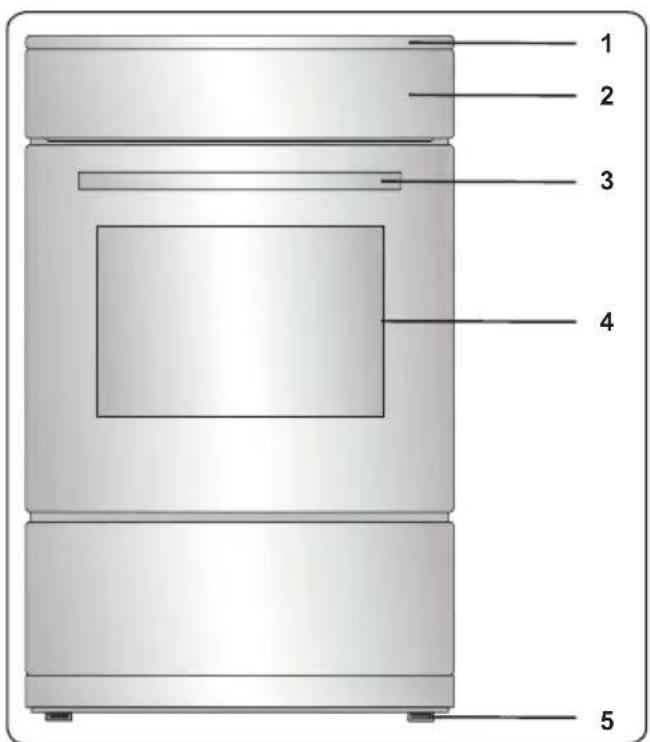
Important: Specifications for the product vary and the appearance of your appliance may differ from that shown in the figures below.
List of Components
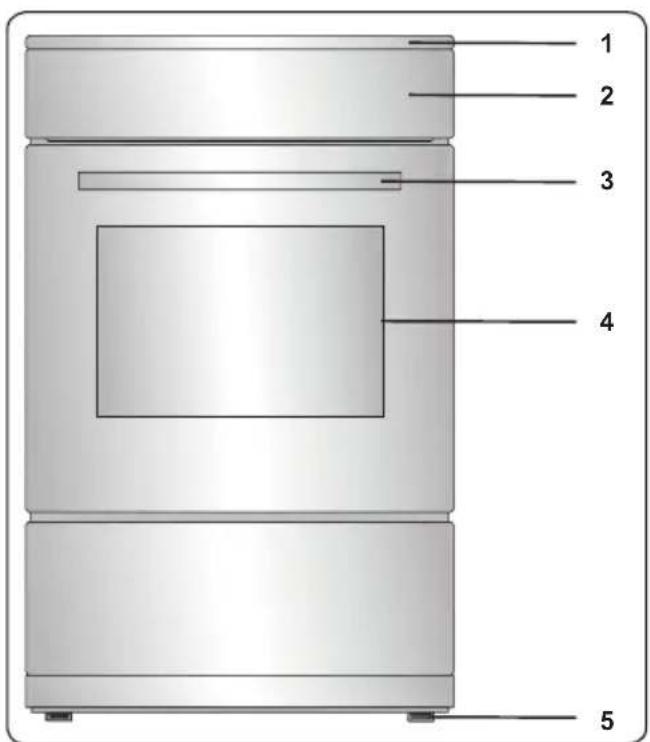
- Cooktop
- Control Panel
- Oven Door Handle
- Oven Door
- Adjustable Feet
Control Panel
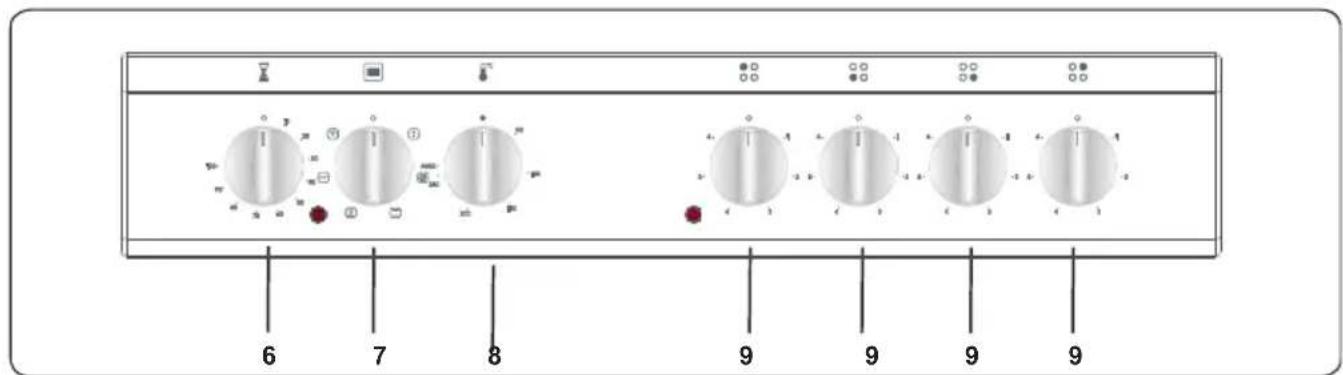
- Timer
- Oven Function Control Knob
- Oven Thermostat Knob
- Hob Control Knob
4. USE OF PRODUCT
4.1 Hob controls
Ceramic Heater
The ceramic heater is controlled by a 6 position knob.
The ceramic heater is operated by turning the control knob to the required setting. Near each control knob is a symbol which indicates the heater that is controlled by that knob. The on/off light on the control panel will show if any of the ceramic heaters are in use.
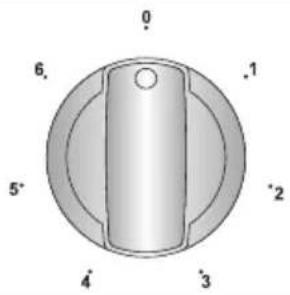
| Knob Position Function | |
| 0 Off position | |
| 1 Keep warm position | |
| 2-3 Heating position at low heat | |
| 4-5-6 Cooking, roasting and boiling position | |

Important: The knob rotation direction may differ according to the product specification.
Dual and Oval Heaters (if available)
Dual and oval heaters have two heating zones. To activate the outer zone of a dual/oval heater, turn the knob to Ⓞ position. Both outer zones will switch on.
To deactivate the outer zone of a dual/oval heater, turn the knob to the 'Off' position. Both outer zones will switch off.
Residual Heat Indicator (if available)
After using the hob there will be heat stored in the vitroceramic glass called residual heat. If the residual heat level is greater than +60°C, the residual heat indicator will be active for the cooking zone which is above this temperature.
If the power supply to the hob is disconnected while the residual heat indicator is on, the warning light will flash when the power is reconnected. The display will flash until the residual heat has
decreased or until one of the cooking zones is activated.
Hints and Tips

Important: When ceramic heaters are operated in higher heat settings, the heated areas may be seen switching on and off. This is due to a safety device which prevents the glass from overheating. This is normal at high temperatures, causing no damage to the hob and little delay in cooking times.

WARNING:
- Never operate the hob without pans on the cooking zone.
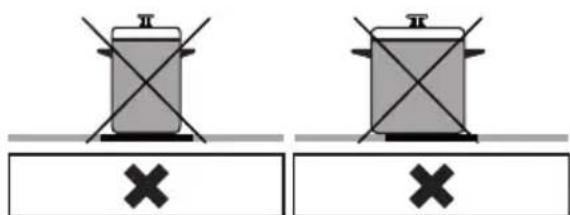
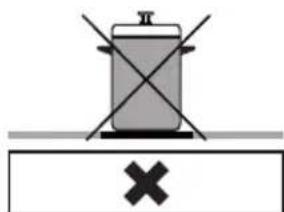
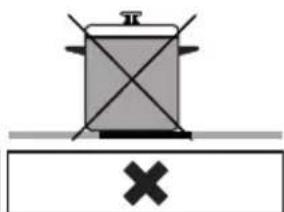
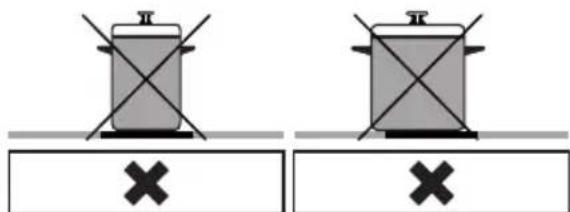
- Use only flat saucepans with a sufficiently thick base.
• Make sure the bottom of the pan is dry before placing it on the hob. - While the cooking zone is in operation, it is important to ensure that the pan is centred correctly above the zone.
- In order to conserve energy, never use a pan with a different diameter to the hotplate being used.
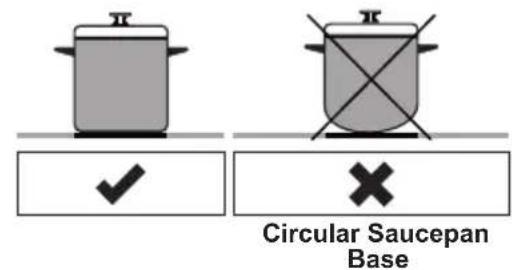
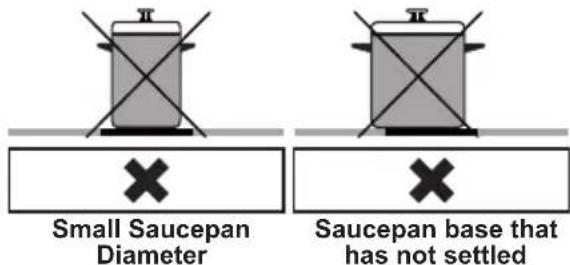
- Do not use pans with rough bottoms since these can scratch the glass ceramic surface.
- If possible, always place lids on the pans.
• The temperature of accessible parts may become high while the appliance is operating. Keep children and animals
well away from the hob during operation and until it has fully cooled after operation.
- If you notice a crack on the cooktop, it must be switched off immediately and replaced by authorised service personnel.
4.2 Oven Controls
Oven function control knob
Turn the knob to the corresponding symbol of the desired cooking function. For the details of different functions see 'Oven Functions'.
Oven thermostat knob
After selecting a cooking function, turn this knob to set the desired temperature. The oven thermostat light will illuminate whenever the thermostat is in operation to heat up the oven or maintain the temperature.
Oven Functions
* The functions of your oven may be different due to the model of your product.
natural_image
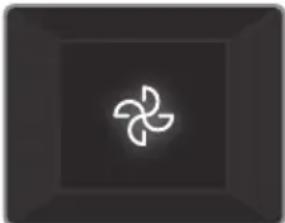
Abstract geometric symbol resembling a four-blade propeller or fan inside a dark square frame (no text or symbols)Defrost Function: The oven's warning lights will switch on and the fan will start to operate. To use the defrost function, place your frozen food in the oven
on a shelf in the third slot from the bottom. It is recommended that you place an oven tray under the defrosting food to catch the water accumulated due to melting ice. This function will not cook or bake your food, it will only help to defrost it.
natural_image
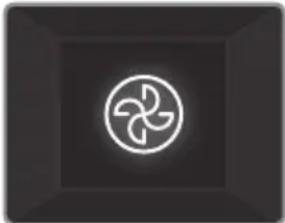
Abstract geometric symbol with a three-blade propeller inside a circle, set against a dark square background (no text or symbols)Turbo Function: The oven's thermostat and warning lights will switch on, and the ring heating element and fan will start operating. The turbo function
evenly disperses the heat in the oven so all food on all racks will cook evenly. It is recommended that you preheat the oven for about 10 minutes.
natural_image
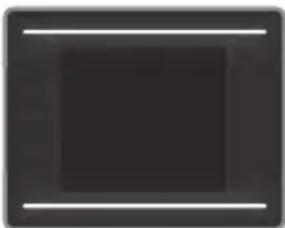
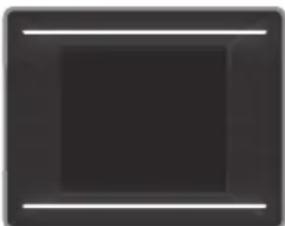
Solid dark square with two thin white horizontal lines on top and bottom (no text or symbols)Static Cooking
Function: The oven's thermostat and warning lights will switch on, and the lower and upper heating elements will start operating. The
static cooking function emits heat, ensuring even cooking of food. This is ideal for making pastries, cakes, baked pasta, lasagne and pizza. Preheating the oven for 10 minutes is recommended and it is best to use only one shelf at a time in this function.
natural_image
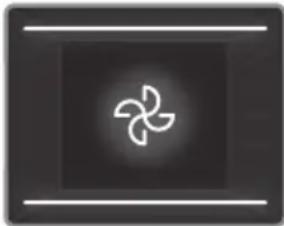
Abstract geometric symbol resembling a stylized flower or impeller inside a dark square frame (no text or symbols)Fan Function: The oven's thermostat and warning lights will switch on, and the upper and lower heating elements and fan will start operating.
This function is good for baking pastry. Cooking is carried out by the lower and upper heating elements within the oven and by the fan, which provides air circulation, giving a slightly grilled effect to the food. It is recommended that you preheat the oven for about 10 minutes.
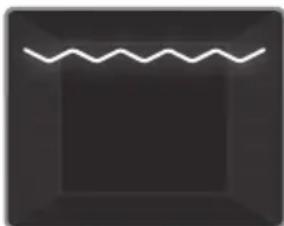
natural_image
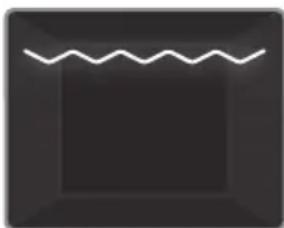
Simple line drawing of a zigzag line above a dark square (no text or symbols)Grilling Function: The oven's thermostat and warning lights will switch on, and the grill heating element will start operating. This function is used for
grilling and toasting foods on the upper shelves of the oven. Lightly brush the wire grid with oil to stop food sticking and place food in the centre of the grid. Always place a tray beneath the food to catch any drips of oil or fat. It is recommended that you preheat the oven for about 10 minutes.

Warning: When grilling, the oven door must be closed and the oven temperature should be adjusted to C.
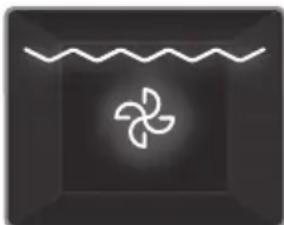
natural_image
Simple icon of a propeller inside a wavy line on a dark square background (no text or symbols)Grill and Fan
Function: The oven's thermostat and warning lights will switch on, and the grill heating element and fan will start operating. This function is ideal
for grilling thicker food. Use the upper shelves of oven, lightly brush the wire grid with oil to stop food sticking and place food in the centre of the grid. Always place a tray beneath the food to catch any drips of oil or fat.

Warning: When grilling, the oven door must be closed and the oven
temperature should be adjusted to 190^ C.
4.3 Cooking Table
| Function | Dishes | min. | ||
| Static | Puff Pastry 1 - | 2 170-190 | 35-45 | |
| Cake 1 - 2 | 170-190 | 30-40 | ||
| Cookie 1 - 2 | 170-190 | 30-40 | ||
| Stew 2 175 | 200 | 40-50 | ||
| Chicken 1 - 2 | 200 | 45-60 | ||
| Fan | Puff Pastry 1 - | 2 170-190 | 25-35 | |
| Cake 1 - 2 | 3 150-170 | 25-35 | ||
| Cookie 1 - 2 | 3 150-170 | 25-35 | ||
| Stew 2 175 | 200 | 40-50 | ||
| Chicken 1 - 2 | 200 | 45-60 | ||
| Turbo | Puff Pastry 1 - | 2 - 3 | 170-190 | 35-45 |
| Cake 1 - 2 | 3 150-170 | 30-40 | ||
| Cookie 1 - 2 | 3 150-170 | 25-35 | ||
| Stew 2 175 | 200 | 40-50 | ||
| Two-tray cake 1 | - 4 | 160-180 | 30-40 | |
| Two-tray pastry 1 | - 4 | 170-190 | 35-45 | |
| Grilling | Grilled meatballs | 4 200 | 10-15 | |
| Chicken | * | 190 | 50-60 | |
| Chop 3 - 4 | 200 | 15-25 | ||
| Beefsteak | 4 200 | 15-25 |
*If available cook with roast chicken skewer.
4.4 Use of the Mechanical Minute Minder Timer
| Function Description | |
| 0......100 | Operating by adjusting the timer |
Turn the Timer knob clockwise to set the desired cooking time. When the timer reaches zero, an audible warning will sound. The oven will remain switched on until the oven control is switched off.
4.5 Accessories
The EasyFix Wire Rack
Clean the accessories thoroughly with warm water, detergent and a soft clean cloth on first use.
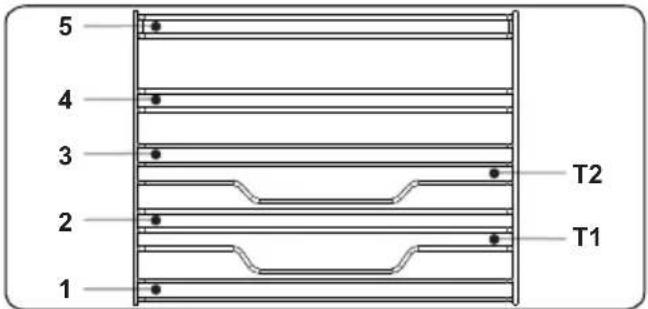
- Insert the accessory to the correct position inside the oven.
- Allow at least a 1 cm space between the fan cover and accessories.
• Take care removing cookware and/or accessories out of the oven. Hot meals or accessories can cause burns. - The accessories may deform with heat. Once they have cooled down, they will recover their original appearance and performance.
- Trays and wire grids can be positioned on any level from 1 to 5.
- Telescopic rails can be positioned on levels T1, T2, 3, 4, 5.
- Level 3 is recommended for single level cooking.
• Level T2 is recommended for single level cooking with the telescopic rails. - The turnspit wire grid must be positioned on Level 3.
• Level T2 is used for the turnspit wire grid positioning with telescopic rails.
****Accessories may vary depending on the model purchased.
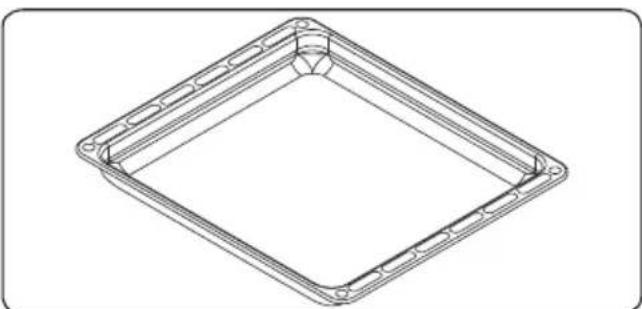
The Deep Tray
The deep tray is best used for cooking stews.
Put the tray into any rack and push it to the end to make sure it is placed correctly.
natural_image
Technical line drawing of a square frame with bolt holes and a central circular hole (no text or symbols)The Flap Drawer
Your appliance includes a drawer for storing accessories such as trays, shelves, grids, or small pots and pans.

WARNING: The inner surface of the drawer may become hot during use.
Do not store any food, plastic flammable materials in the drawer.
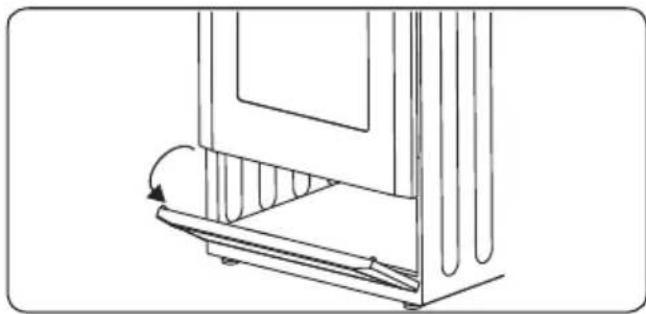
natural_image
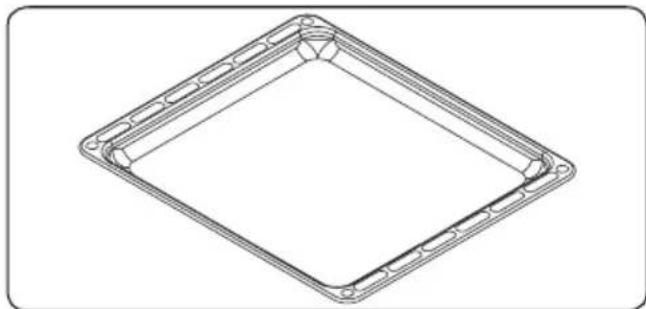
Technical line drawing of a mechanical component with a curved arrow indicating rotation (no text or symbols)The Shallow Tray
The shallow tray is best used for baking pastries.
Put the tray into any rack and push it to the end to make sure it is correctly placed.
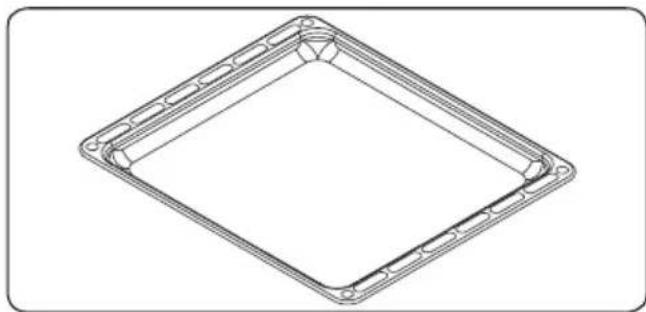
natural_image
Technical line drawing of a square frame with circular cutouts and mounting holes (no text or symbols)The Vitroceramic Glass Spatula
Always use the glass spatula to remove spillages or deposits from the hob before trying chemical cleaning agents. This is the ideal method for removing even the smallest deposits from the hob, and for removing spillages from hot cooking zones before they burn onto the hob.

Important: Always push the safety
cover back over the razor blade after use. Take care when using the spatula and keep it out of the reach of children.
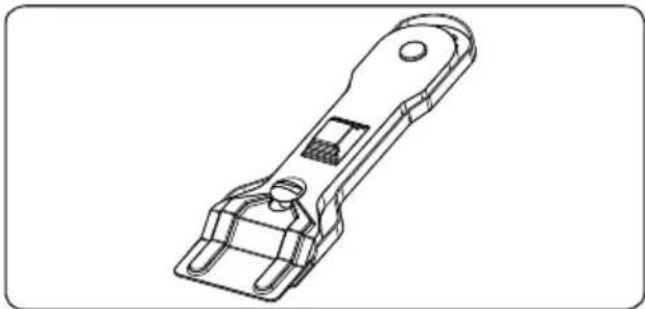
natural_image
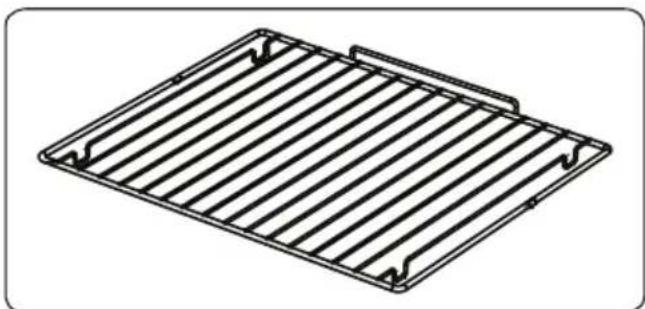
Technical line drawing of a mechanical clamp or bracket component (no text or symbols)The Wire Grid
The wire grid is best used for grilling or for processing food in oven-friendly containers.
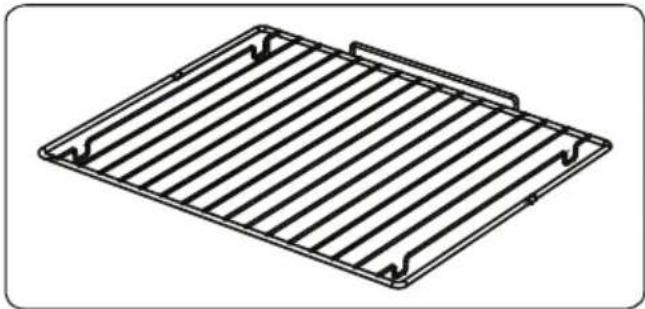
natural_image
Technical line drawing of a metal grate plate with slats and rivets (no text or symbols)
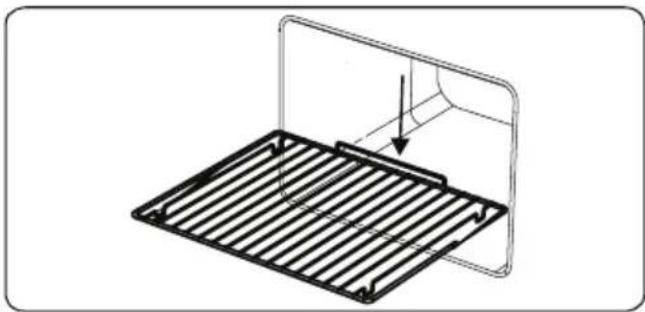
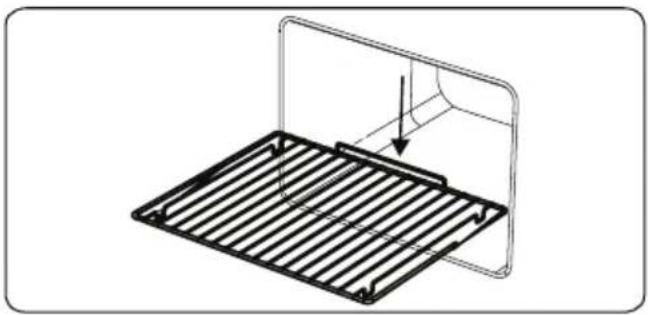
WARNING
Place the grid to any corresponding rack in the oven cavity correctly and push it to the end.
natural_image
Technical line drawing of a metal rack with an arrow indicating force or direction (no text or symbols)5. CLEANING AND MAINTENANCE
5.1 Cleaning

WARNING: Switch off the appliance and allow it to cool before cleaning is to be carried out.
General Instructions
- Check whether the cleaning materials are appropriate and recommended by the manufacturer before use on your appliance.
- Use cream cleaners or liquid cleaners which do not contain particles. Do not use caustic (corrosive) creams, abrasive
cleaning powders, rough wire wool or hard tools as they may damage the cooker surfaces.

Do not use cleaners that contain particles, as they may scratch the glass, enamelled and/or painted parts of our appliance.
- Should any liquids overflow, clean them immediately to avoid parts becoming damaged.

Do not use steam cleaners for cleaning any part of the appliance.
Cleaning the Inside of the Oven
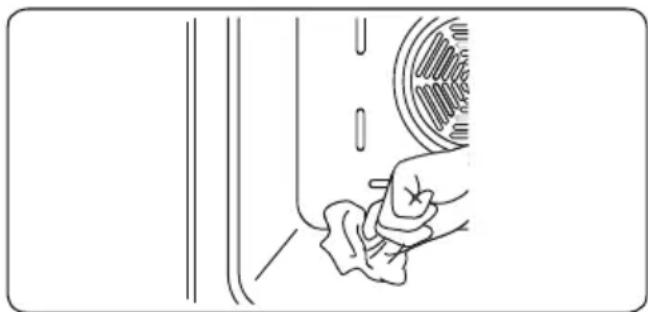
- The inside of enamelled ovens are best cleaned while the oven is warm.
- Wipe the oven with a soft cloth soaked in soapy water after each use. Then, wipe the oven over again with a wet cloth and dry it.
- You may need to use a liquid cleaning material occasionally to completely clean the oven.
natural_image
Line drawing of a hand cleaning a car window with a cloth (no text or symbols)Cleaning the Ceramic Glass
Ceramic glass can hold heavy utensils but may be broken if it is hit with a sharp object.

WARNING : Ceramic Cooktops - if the surface is cracked, to avoid the possibility of an electric shock, switch the appliance and call for service.
- Use a cream or liquid cleaner to clean the vitroceramic glass. Then, rinse and dry the glass thoroughly with a dry cloth.

Do not use cleaning materials meant for steel as they may damage the glass.
- If substances with a low melting point are used in the cookware's base or coatings, they can damage the glass-ceramic cooktop. If plastic, tin foil, sugar or sugary foods have fallen on the hot
glass-ceramic cooktop, please scrape it off the hot surface as quickly and as safely as possible. If these substances melt, they can damage the glass-ceramic cooktop. When you cook very sugary items like jam, apply a layer of a suitable protective agent beforehand if it is possible.
- Dust on the surface must be cleaned with a wet cloth.
- Any changes in colour to the ceramic glass will not affect the structure or durability of the ceramic and is not due to a change in the material.
Colour changes to the ceramic glass may be for a number of reasons:
- Spilt food has not been cleaned off the surface.
- Using incorrect dishes on the hob will erode the surface.
- Using the wrong cleaning materials.
Cleaning the Glass Parts
- Clean the glass parts of your appliance on a regular basis.
- Use a glass cleaner to clean the inside and outside of the glass parts. Then, rinse and dry them thoroughly with a dry cloth.
Cleaning the Enamelled Parts
- Clean the enamelled parts of your appliance on a regular basis.
- Wipe the enamelled parts with a soft cloth soaked in soapy water. Then, wipe them over again with a wet cloth and dry them.

Do not clean the enamelled parts while they are still hot from cooking.

Do not leave vinegar, coffee, milk, salt, water, lemon or tomato juice on the enamel for a long time.
Cleaning the Stainless Steel Parts (if available)
- Clean the stainless steel parts of your appliance on a regular basis.
- Wipe the stainless steel parts with a soft cloth soaked in only water. Then, dry them thoroughly with a dry cloth.

Do not clean the stainless steel parts while they are still hot from cooking.

Do not leave vinegar, coffee, milk, salt, water, lemon or tomato juice on the
stainless steel for a long time.
Cleaning Painted Surfaces (if available)
- Spots of tomato, tomato paste, ketchup, lemon, oil derivatives, milk, sugary foods, sugary drinks and coffee should be cleaned with a cloth dipped in warm water immediately. If these stains are not cleaned and allowed to dry on the surfaces they are on, they should NOT be rubbed with hard objects (pointed objects, steel and plastic scouring wires, surface-damaging dish sponge) or cleaning agents containing high levels of alcohol, stain removers, degreasers, surface abrasive chemicals. Otherwise, corrosion may occur on the powder painted surfaces, and stains may occur. The manufacturer will not be held responsible for any damage caused by the use of inappropriate cleaning products or methods.
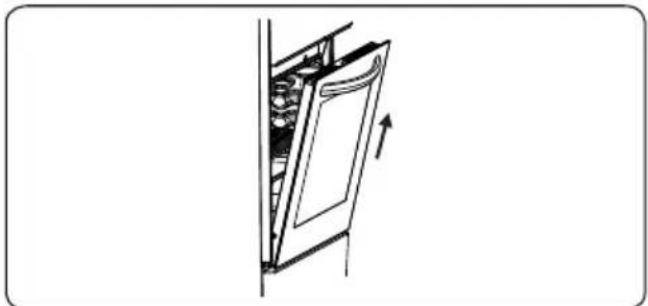
Removal of the Oven Door
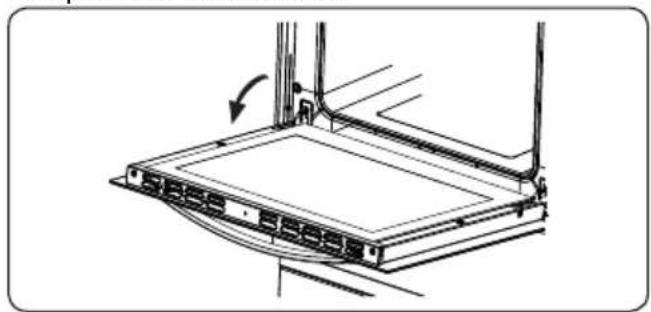
Before cleaning the oven door glass, you must remove the oven door, as shown below.
- Open the oven door.
natural_image
Technical line drawing of a mechanical assembly with a curved arrow indicating rotation (no text or symbols)- Open the locking catch (a) (with the aid of a screwdriver) up to the end position.
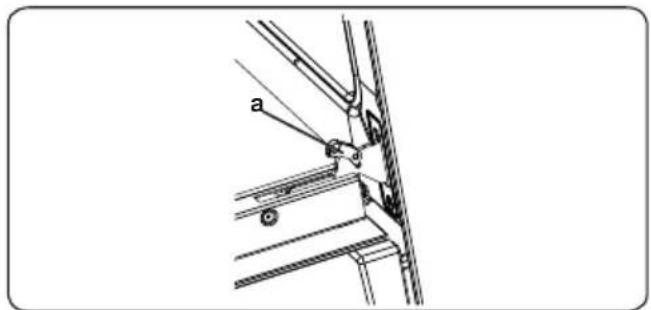
- Close the door until it almost reaches the fully closed position and remove the door by pulling it towards you.
natural_image
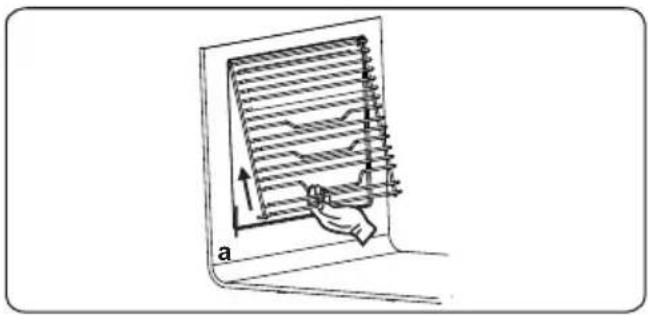
Diagram of a door opening with a wall-mounted shelf and an arrow indicating direction (no text or symbols)Removal of the Wire Shelf
To remove the wire rack, pull the wire rack as shown in the figure. After releasing it from the clips (a), lift it up.
natural_image
Diagram of a hand holding a grid-like object with arrows indicating direction (no text or symbols)5.2 Maintenance
WARNING: The maintenance of this appliance should be carried out by an authorised service person or qualified technician only.
Changing the Oven Lamp
WARNING: Switch off the appliance and allow it to cool before cleaning your appliance.
- Remove the glass lens, then remove the bulb.
- Insert the new bulb (resistant to 300 °C) to replace the bulb that you removed (230 V, 15-25 Watt, Type E14).
- Replace the glass lens, and your oven is ready for use.
The lamp is designed specifically for use in household cooking appliances. It is not suitable for household room illumination.
6. TROUBLESHOOTING&TRANSPORT
6.1 Troubleshooting

If you still have a problem with your appliance after checking these basic troubleshooting steps, please contact an authorised service person or qualified technician.
| Problem Possible Cause Solution | ||
| The hob or cooking zones cannot be switched on. | There is no power supply. | Check the household fuse for the appliance.Check whether there is a power cut by trying other electronic appliances. |
| Oven does not switch on. Power is switched off. | Check whether there is power supplied.Also check that other kitchen appliances are working. | |
| No heat or oven does not warm up. | Oven temperature control is incorrectly set.Oven door has been left open. | Check that the oven temperature control knob is set correctly. |
| Cooking is uneven within the oven. | Oven shelves are incorrectly positioned. | Check that the recommended temperatures and shelf positions are being used.Do not frequently open the door unless you are cooking things that need to be turned. If you open the door often, the interior temperature will be lower and this may affect the results of your cooking. |
| Oven light (if available) does not operate. | Lamp has failed.Electrical supply is disconnected or switched off. | Replace lamp according to the instructions.Make sure the electrical supply is switched on at the wall socket outlet. |
| The oven fan (if available) is noisy. | Oven shelves are vibrating. | Check that the oven is level.Check that the shelves and any bake ware are not vibrating or in contact with the oven back panel. |
6.2 Transport
If you need to transport the product, use the original product packaging and carry it using its original case. Follow the transport signs on the packaging. Tape all independent parts to the product to prevent damaging the product during transport.
If you do not have the original packaging, prepare a carriage box so that the appliance, especially the external surfaces of the product, is protected against external threats.
7.. TECHNICAL SPECIFICATIONS
7.1 Energy class
| Brand | VOXELECTRONICS | |
| Model | CTR6305IXCTR6305W | |
| Type of oven | ELECTRIC | |
| Mass kg | 42,0 | |
| Number of cavities | 1 | |
| Heat source | ELECTRIC | |
| Volume l | 69 | |
| Energy consumption (electricity) - conventional kWh/cycle | 0,87 | |
| Energy consumption (electricity) – fan forced kWh/cycle | 0,80 | |
| Energy Efficiency Index - conventional | 103,6 | |
| Energy Efficiency Index – fan forced | 95,3 | |
| Energy Class | A | |
| This oven complies with EN 60350-1 | ||
Energy Saving Tips
Oven
- Cook the meals together, if possible
- Keep the pre-heating time short.
- Do not elongate cooking time.
- Do not forget to turn-off the oven at the end of cooking.
- Do not open oven door during cooking period.
| Brand | VOXELECTRONICS | |
| Model | CTR6305IXCTR6305W | |
| Type of hob | ELECTRIC | |
| Number of cooking zones | 4 | |
| Heating Technology - 1 | Radiant | |
| Size - 1 cm | ∅14,5 | |
| Energy consumption - 1 Wh/kg | 192,0 | |
| Heating Technology - 2 | Radiant | |
| Size - 2 cm | ∅14,5 | |
| Energy consumption - 2 Wh/kg | 192,0 | |
| Heating Technology - 3 | Radiant | |
| Size - 3 cm | ∅18,0 | |
| Energy consumption - 3 Wh/kg | 192,0 | |
| Heating Technology - 4 | Radiant | |
| Size - 4 cm | ∅18,0 | |
| Energy consumption - 4 Wh/kg | 192,0 | |
| Energy consumption of hob Wh/kg | 192,0 | |
| This hob complies with EN 60350-2 | ||
Energy Saving Tips
Hob
- Use cookwares having flat base.
- Use cookwares with proper size.
- Use cookwares with lid.
- Minimize the amount of liquid or fat.
- When liquid starts boiling, reduce the setting.
natural_image
Line drawing of a simple kitchen oven with four circular tops and a front panel (no text or symbols)CTR6305W
CTR6305IX
natural_image
Warning sign depicting a person pushing a large block inside a triangle (no text or symbols)
natural_image
Simple black-and-white diagram of a building with directional arrows, enclosed in a circle (no text or symbols)natural_image
Diagram of a mechanical assembly with a spring and rotating arrow (no text or symbols)natural_image
Two identical diagrams showing a cooking pot with crossed handles and a 'X' symbol below, no text or labels present.natural_image
Abstract geometric symbol resembling a three-blade propeller or fan on a dark square background (no text or symbols)Размразяване:
natural_image
Abstract geometric symbol with a three-blade fan-like shape inside a circle on a dark background (no text or symbols)Функция Турбо:
natural_image
Solid dark square with two thin white horizontal lines on top and bottom (no text or symbols)Статично готвене:
natural_image
Abstract geometric symbol with a four-blade propeller inside a dark square (no text or symbols)Вентилатор:
natural_image
Simple line drawing of a zigzag line on a dark background (no text or symbols)Печене на грил:
natural_image
Abstract graphic with a stylized white propeller inside a dark square frame (no text or symbols)Грил и вентилатор:
natural_image
Technical line drawing of a square frame with bolt holes and a central circular hole (no text or symbols)Шарнирно чекмедже
natural_image
Line drawing of a mechanical device with a curved arrow indicating rotation or movement (no text or symbols)Плитка тава
natural_image
Technical line drawing of a square frame with bolt holes and a central circular hole (no text or symbols)Решетъчна скара
natural_image
Technical line drawing of a metal grate plate with slats and mounting brackets (no text or symbols)
ПРЕДУПРЕЖДЕНИЕ
natural_image
Technical line drawing of a metal grate with a curved panel and an arrow indicating direction (no text or symbols)natural_image
Line drawing of a hand cleaning a car window with a cloth (no text or symbols)natural_image
Technical line drawing of a mechanical assembly with no visible text or symbolsnatural_image
Diagram of a door with an open lid and internal compartments, showing an upward arrow (no text or symbols)natural_image
Diagram of a computer monitor with a hand interacting with the screen, showing no text or symbols.5.2 Поддръжка
natural_image
Line drawing of a simple kitchen oven with four circular tops and a front panel (no text or symbols)CTR6305W
CTR6305IX
Hvala, ker ste izbrali ta izdelek.
natural_image
Warning sign depicting a person pulling a large block inside a triangle (no text or symbols)
natural_image
Simple black-and-white icon of a building with arrows indicating direction, enclosed in a circle (no text or symbols)natural_image
Diagram of a screw fastening mechanism with rotational motion arrows (no text or labels)3. LASTNOSTI IZDELKA

natural_image
Simple line drawing of a cooking pot on a surface with a checkmark below (no text or symbols)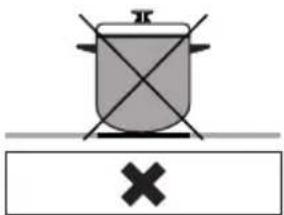
natural_image
Simple line drawing of a cooking pot with crossed lines and a cross symbol below (no text or labels)Posoda z okroglim dnom
natural_image
Simple diagram of a cooking pot with crossed lines and a cross symbol below (no text or labels)Majhen premer posode
natural_image
Simple line drawing of a cooking pot with crossed panes above a rectangular base marked with an 'X' symbol (no text or labels)Dno posode ni na sredini
natural_image
Simple icon of a three-blade fan inside a circle, no text or symbols presentFunkcija turbo: Termostat pečice in opozorilne lučke pečice se vklopijo, okrogli grelni element in ventilator začneta delovati. Funkcija turbo
natural_image
Solid dark square with two horizontal white lines on top and bottom (no text or symbols)natural_image
Simple icon of a propeller inside a dark square frame with horizontal lines (no text or symbols)natural_image
Simple line drawing of a zigzag line inside a dark square frame (no text or symbols)natural_image
Abstract icon with a stylized propeller inside a wavy line on a dark background (no text or symbols)natural_image
Technical line drawing of a square frame with bolt holes and a central circular hole (no text or symbols)Predal z loputo
natural_image
Technical line drawing of a mechanical component with a curved arrow indicating rotation (no text or symbols)Plitki pladenj
natural_image
Technical line drawing of a square frame with circular cutouts and a central hole (no text or symbols)Žična mreža
natural_image
Technical line drawing of a metal grate plate with slats and mounting brackets (no text or symbols)OPOZORILO Mrežo names
Mrežo namestite na katero koli polico v notranjosti pečice in jo pravilno potisnite do konca.
natural_image
Technical line drawing of a rack with a curved top and internal structure, showing no text or symbols5. ČIŠČENJE IN VZDRŽEVANJE
5.1 Čiščenje
natural_image
Line drawing of a hand cleaning a car window with a tire (no text or symbols)natural_image
Technical line drawing of a mechanical assembly with no visible text or symbolsnatural_image
Diagram of a door opening with a wall-mounted device, showing an upward arrow (no text or symbols)natural_image
Illustration of a hand holding a grid-like object with an arrow, no text or symbols present5.2 Vzdrževanje
natural_image
Line drawing of a simple kitchen oven with four top ovens (no text or symbols)CTR6305W
CTR6305IX
natural_image
Warning symbol depicting a person pulling a large block inside a triangle (no text or numbers)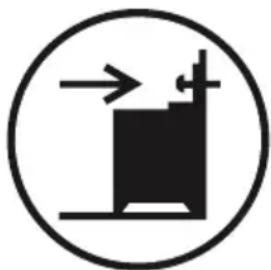
natural_image
Simple black-and-white diagram of a building with directional arrows, enclosed in a circle (no text or symbols)natural_image
Diagram of a mechanical assembly with a spring and rotating component (no text or symbols)3. CARACTERÍSTICAS DO PRODUTO

Base de Tacho Circular
natural_image
Two identical diagrams showing a cooking pot with crossed x marks above and a cross below, both without any text or symbols.natural_image
Abstract geometric symbol with a three-blade propeller inside a circle on a dark square background (no text or symbols)natural_image
Solid dark square with two thin white horizontal lines on top and bottom (no text or symbols)natural_image
Abstract geometric symbol with a three-blade propeller inside a dark square frame (no text or symbols)natural_image
Simple geometric shape with a zigzag line inside a square frame (no text or symbols)natural_image
Simple icon of a propeller inside a container with wavy lines above (no text or symbols)natural_image
Technical line drawing of a square frame with bolt holes and a central circular hole (no text or symbols)Gaveta de Aba
natural_image
Technical line drawing of a mechanical component with a curved arrow indicating rotation (no text or symbols)Tabuleiro Raso
natural_image
Technical line drawing of a square frame with bolt holes and a central hole (no text or symbols)Rede de Arame
natural_image
Technical line drawing of a metal grate plate with slats and mounting brackets (no text or symbols)AVISO Colagu
natural_image
Technical line drawing of a metal rack with a curved top panel and an arrow indicating direction (no text or symbols)natural_image
Line drawing of a hand cleaning a car window with a cloth (no text or symbols)Limpar as Partes de Vidro
Limpar as Partes Esmaltadas
natural_image
Technical line drawing of a mechanical assembly with a curved arrow indicating motion (no text or symbols)natural_image
Diagram of a door opening with an arrow indicating direction (no text or symbols)natural_image
Line drawing of a simple kitchen oven with four circular tops and a front panel (no text or symbols)CTR6305W
CTR6305IX
natural_image
Warning symbol depicting a person pulling a large object inside a triangle (no text or numbers)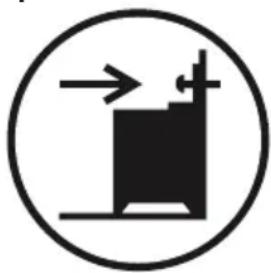
natural_image
Simple black-and-white diagram of a mechanical device inside a circle, with no text or symbols present.natural_image
Technical line drawing of a mechanical assembly with a bolt and curved arrow indicating motion (no text or symbols)natural_image
Abstract geometric design with a white three-blade propeller inside a dark square frame (no text or symbols)natural_image
Pure electrical circuit symbol for a three-blade fan or propeller, no text or labels presentТурбо функција:
natural_image
Solid dark gray square with two horizontal white lines on top and bottom (no text or symbols)natural_image
Abstract geometric symbol with a four-blade propeller inside a dark square frame (no text or symbols)natural_image
Simple line drawing of a zigzag line on a dark background (no text or symbols)Функција на грил:
natural_image
Abstract icon with a stylized propeller inside a dark square, no text or symbols present.natural_image
Technical line drawing of a square frame with bolt holes, no text or symbols presentФиока
natural_image
Technical line drawing of a mechanical component with a curved arrow indicating rotation (no text or symbols)Плитка тава
natural_image
Technical line drawing of a square frame with bolt holes and a central circular hole (no text or symbols)Решетка
natural_image
Technical line drawing of a metal grate or rack structure with slats and mounting brackets (no text or symbols)
ПРЕДУПРЕДУВАЊЕ
natural_image
Technical line drawing of a metal rack with a curved panel and directional arrow (no text or symbols)5. ЧИСТЕЊЕ И ОДРЖУВАНЬЕ
5.1 Чистење

natural_image
Line drawing of a hand cleaning a car window with a cloth (no text or symbols)natural_image
Technical line drawing of a mechanical assembly with a curved arrow indicating rotation (no text or symbols)natural_image
Diagram of a door with an arrow indicating direction, showing interior components without any text or symbols.Вадење на решетката
natural_image
Line drawing of a simple kitchen oven with four circular tops and a front panel (no text or symbols)CTR6305W
CTR6305IX
Hvala vam na odabiru ovog proizvoda.
Ovaj Priručnik za uporabu sadržava važne sigurnosne informacije i upute o radu i održavanju vašeg uređaja.
Molimo odvojite vremena za čitanje ovog Priručnika za uporabu prije uporabe vašeg uređaja i čuvajte ovu knjigu za buduće čitanje.
| Ikona Tip Značenje | ||
| UPOZORENJE Rizik od ozbiljne ozljede ili smrti | ||
| RIZIK OD STRUJNOG UDARA Rizik od opasnog napona | ||
| POŽAR Upozorenje; Rizik od požara / zapaljivih materijala | ||
| OPREZ Rizik od ozljede ili oštećenja imovine | ||
| VAŽNO / OPASKA Koristite sustav pravilno | ||
SADRŽAJ
1.SIGURNOSNE UPUTE 3
1.1 Opća sigurnosna upozorenja....3
1.2 Upozorenja za instalaciju....6
1.3 Tijekom uporabe ....6
1.4 Tijekom čišćenja i održavanja ....8
2.INSTALACIJA I PRIPREMA ZA UPORABU....10
2.1 Upute za instalatera....10
2.2 Električni priključak i Sigurnost 11
2.3 Protunagibna oprema 11
2.4 Podešavanje nogara....12
3.ZNAČAJKE PROIZVODA 13
4.UPORABA PROIZVODA....14
4.1 Kontrole ploče za kuhanje ....14
4.2 Kontrole pećnice 15
4.3 Tablica kuhanja....16
4.4 Upotreba mehaničkog tajmera sa potsjetnikom minuta....16
4.5 Pribor 16
5.ČIŠĆENJE I ODRŽAVANJE 17
5.1 Čišćenje 17
5.2 Održavanje 19
6.RJEŠAVANJE PROBLEMA I TRANSPORT....20
6.1 Rješavanje problema ....20
6.2 Transport 20
7. TEHNIČKE KARAKTERISTIKE....22
7.1 Energetska klasa....22
1. SIGURNOSNE UPUTE
- Pozorno pročitajte sve upute prije uporabe vašeg uređaja i držite ih na podesnom mjestu radi upućivanja na njih kada je potrebno.
- Priručnik je pripremljen za više od jednog modela zbog čega vaš uređaj možda neće imate neke značajke opisane u njemu, Iz tog razloga, važno je posvetiti osobitu pažnju svim prikazima dok čitate Priručnik za uporabu.
natural_image
Diagram of a mechanical assembly with a spring and rotating arrow (no text or symbols)3. ZNAČAJKE PROIZVODA

natural_image
Simple line drawing of a cooking pot with crossed x marks (no text or symbols)natural_image
Simple line drawing of a cooking pot with crossed x-bracing (no text or symbols)
pirjanje koja nije
staložena
- Nemojte koristiti posude s grubim dnom jer mogu izgrebati staklokeramičku površinu.
natural_image
Pure electrical circuit symbol for a three-blade propeller, no text or labels presentTurbo funkcija:
Termostat pečnice i upozoravajuća svjetla se pale i prstenasti grijući element i ventilator počinju raditi. Turbo funkcija jednako
raspršuje toplinu u pećnici tako da se sva hrana na svim gredama jednako kuha. Preporučamo da prije kuhanja ugrijete pećnicu 10 minuta.
natural_image
Solid dark square with two horizontal white lines on top and bottom (no text or symbols)natural_image
Simple line drawing of a zigzag line above a dark square (no text or symbols)Funkcija grilanja:
Termostat pećnice i upozoravajuća svjetla se pale i grijući element grila počinje raditi. Funkcija se koristi za grilanje i
natural_image
Simple icon of a propeller inside a square frame with wavy lines above (no text or symbols)Funkcija grilanja i ventiliranja: Termostat pećnice i upozoravajuća svjetla se pale i grijući element grila i ventilator počinju raditi. Funkcija je idealna za
grilanje krupnije hrane. Koristite gornje police pećnice, blago četkom premažite uljem žičanu rešetku da bi se spriječilo ljepljenje hrane i postavite hranu u središte rešetke Uvijek stavljajte pladanj ispod hrane za skupljanje kapljica ulja ili masti.

Upozorenje: Kada grilate vrata pećnice moraju biti zatvorena i operatura pećnice treba biti podešena na
190^ C .
4.3 Tablica kuhanja
| Funkcija | Jela |  |  |  |
| Statička | Lisnato tijesto 1 | -2 170-190 | 35-45 | |
| Torta 1 - 2 | 170-190 30-40 | |||
| Kolačić 1 - 2 | 170-190 30-40 | |||
| Paprikaš 2 17 | 5-200 40-50 | |||
| Piletina 1 - 2 | 200 45-60 | |||
| Ventilator | Lisnato tijesto 1 | -2 170-190 | 25-35 | |
| Torta 1 - 2 | -3 150-170 | 25-35 | ||
| Kolačić 1 - 2 | -3 150-170 | 25-35 | ||
| Paprikaš 2 17 | 5-200 40-50 | |||
| Piletina 1 - 2 | 200 45-60 | |||
| Turbo | Lisnato tijesto 1 | -2 - 3 170-1 | 90 35-45 | |
| Torta 1 - 2 | -3 150-170 | 30-40 | ||
| Kolačić 1 - 2 | -3 150-170 | 25-35 | ||
| Paprikaš 2 17 | 5-200 40-50 | |||
| Torta s dva pladnja | 1 - 4 160 | -180 30-40 | ||
| Tijesto s dva pladnja | 1 - 4 170 | -190 35-45 | ||
| Grilanje | Grilane mesne okruglice | 4 200 | 10-15 | |
| Piletina * 190 | 50-60 | |||
| Kotlet | 3 - 4 200 | 15-25 | ||
| Beefsteak 4 200 | 15-25 | |||
*Ako je dostupan kuhajte na ražnju za pečenje piletine.
natural_image
Technical line drawing of a square frame with bolt holes, no text or symbols presentPreklopna ladica
natural_image
Line drawing of a mechanical device with a curved arrow indicating rotation or movement (no text or symbols)Plitki pladanj
Plitki pladanj najbolje je koristiti za pečenje kolača.
Stavite pladanj na bilo koju gredu i pritisnite do kraja kako biste se osigurali da je postavljen pravilno.
natural_image
Technical line drawing of a square frame with bolt holes and concentric rings (no text or symbols)Žičana rešetka
Žičanu rešetku najbolje je koristiti za grilanje ili obradu hrane u posudama pogodnim za pećnice.
natural_image
Technical line drawing of a metal grate plate with slats and mounting brackets (no text or symbols)
UPOZORENJE
natural_image
Technical line drawing of a metal grate with a curved top and an arrow indicating force or movement (no text or symbols)5. ČIŠĆENJE I ODRŽAVANJE
5.1 Čišćenje

UPOZORENJE: Isključite uređaj i ostavite da se ohladi prije obavljanja čišćenja.
Opće upute
- Provjerite da li materijali za čišćenje odgovaraju i da li su preporučani od proizvođača prije njihove uporabe na vašem uređaju.
- Koristite kremasta ili tekuća sredstva za čišćenje koja ne sadržavaju čvrste čestice. Nemojte koristiti kaustične (korozivne) kreme, abrazivne praškove za čišćenje, hrapavu žičanu vunu ili čvrste alate jer mogu oštetiti površine kuhala.

Nemojte koristiti sredstva za čišćenje koja sadržavaju čvrste čestice, jer mogu izgrebati staklo, emajlirane i/iliene dijelove vašeg uređaja.
- Ako se bilo koja tekućina prelije, očistite je odmah da biste izbjegli oštećenje dijelova.

natural_image
Line drawing of a hand cleaning a car window with a cloth (no text or symbols)natural_image
Technical line drawing of a mechanical assembly with a curved arrow indicating motion (no text or symbols)natural_image
Diagram of a door opening with an arrow indicating direction (no text or symbols)Vađenje žičanih vodilica
natural_image
Diagram of a hand holding a ruler placed on a laptop screen, showing measurement or data flow (no text or symbols)5.2 Održavanje
UPOZORENJE: Održavanje ovog uređaja jedino treba provesti autoriziran serviser ili kvalificiran tehničar.
- KARAKTERISTIKE PROIZVODA
- Turbo Funkcija:
- Funkcija ventilatora:
- Funkcija roštilja:
- Fioka rerne
- Plitki poslužavnik
- Vitrokeramička staklena spatula
- Žičana rešetka
- UPOZORENJE Stavite rešetku
- ČIŠĆENJE I ODRŽAVANJE
- Čišćenje
- Opšta uputstva
- Skidanje žičane police
- Održavanje
- Promena svetiljke rerne
- REŠAVANJE PROBLEMA & TRANSPORT
- Rešavanje problema
- Transport
- TEHNIČKE SPECIFIKACIJE
- Energetska klasa
- Thank you for choosing this product.
- CONTENTS
- SAFETY INSTRUCTIONS
- General Safety Warnings
- Installation Warnings
- During Use
- During Cleaning and Maintenance
- Disposal of your old machine
- INSTALLATION AND PREPARATION FOR USE
- Instructions for the Installer
- General instructions
- Electrical Connection and Safety
- Anti-tilting kit
- Adjusting the feet
- PRODUCT FEATURES
- List of Components
- Control Panel
- USE OF PRODUCT
- Hob controls
- Ceramic Heater
- Dual and Oval Heaters (if available)
- Residual Heat Indicator (if available)
- Hints and Tips
- WARNING:
- Oven Controls
- Oven function control knob
- Oven thermostat knob
- Oven Functions
- Static Cooking
- Grill and Fan
- Cooking Table
- Use of the Mechanical Minute Minder Timer
- Accessories
- The EasyFix Wire Rack
- The Deep Tray
- The Shallow Tray
- The Vitroceramic Glass Spatula
- The Wire Grid
- WARNING
- CLEANING AND MAINTENANCE
- Cleaning
- Cleaning the Inside of the Oven
- Cleaning the Ceramic Glass
- Cleaning the Glass Parts
- Cleaning the Enamelled Parts
- Cleaning the Stainless Steel Parts (if available)
- Cleaning Painted Surfaces (if available)
- Removal of the Oven Door
- Removal of the Wire Shelf
- Maintenance
- Changing the Oven Lamp
- TROUBLESHOOTING&TRANSPORT
- Troubleshooting
- 7.. TECHNICAL SPECIFICATIONS
- Energy class
- Energy Saving Tips
- Oven
- Hob
- Размразяване:
- Функция Турбо:
- Статично готвене:
- Вентилатор:
- Печене на грил:
- Грил и вентилатор:
- Шарнирно чекмедже
- Плитка тава
- Решетъчна скара
- ПРЕДУПРЕЖДЕНИЕ
- Поддръжка
- Hvala, ker ste izbrali ta izdelek.
- LASTNOSTI IZDELKA
- Predal z loputo
- Plitki pladenj
- Žična mreža
- OPOZORILO Mrežo names
- ČIŠČENJE IN VZDRŽEVANJE
- Čiščenje
- Vzdrževanje
- CARACTERÍSTICAS DO PRODUTO
- Gaveta de Aba
- Rede de Arame
- AVISO Colagu
- Limpar as Partes de Vidro
- Limpar as Partes Esmaltadas
- Турбо функција:
- Функција на грил:
- Фиока
- Решетка
- ПРЕДУПРЕДУВАЊЕ
- ЧИСТЕЊЕ И ОДРЖУВАНЬЕ
- Чистење
- Вадење на решетката
- Hvala vam na odabiru ovog proizvoda.
- SADRŽAJ
- SIGURNOSNE UPUTE
- ZNAČAJKE PROIZVODA
- Funkcija grilanja:
- Tablica kuhanja
- Preklopna ladica
- Plitki pladanj
- UPOZORENJE
- Opće upute
- Vađenje žičanih vodilica
Brand : VOX
Model : CTR 6305 IX
Category : Cooker