
X308AU - Browser ALPINE - Free user manual and instructions
Find the device manual for free X308AU ALPINE in PDF.


| Product Type | Multimedia Navigation Receiver |
| Brand | Alpine |
| Model | X308AU |
| Category | Car Navigator |
| Power Supply | 12V DC Negative Ground |
| Display | 7-inch Touch Screen (approx) |
| GPS Navigation | Built-in GPS antenna, turn-by-turn directions |
| Bluetooth | Hands-free calling and audio streaming |
| Digital Radio | DAB/DAB+/DMB |
| USB Playback | MP3/WMA/AAC/FLAC, video support |
| Apple CarPlay | Supported (optional) |
| Android Auto | Supported (optional) |
| HDMI Input/Output | 1 Input, 1 Output |
| Camera Inputs | Rear, Front, Side (optional cameras) |
| Audio Features | Parametric EQ, Time Correction, Crossover, BASS ENGINE SQ |
| Dual Screen | Simultaneous Navigation and Audio display |
| Rear Seat Entertainment | Independent source for rear monitors |
| Steering Wheel Control | Compatible with interface box |
| Operating Temperature | 0°C to +45°C |
| Warranty | 1 year typical (check dealer) |
| Cleaning | Soft dry cloth, water only for stains |
| Repair | Return to authorized Alpine dealer |
Frequently Asked Questions - X308AU ALPINE
User questions about X308AU ALPINE
0 question about this device. Answer the ones you know or ask your own.
Ask a new question about this device
Download the instructions for your Browser in PDF format for free! Find your manual X308AU - ALPINE and take your electronic device back in hand. On this page are published all the documents necessary for the use of your device. X308AU by ALPINE.
USER MANUAL X308AU ALPINE
Please read before using this equipment.
ALPINE ELECTRONICS MARKETING, INC.
1-7, Yukigaya-Otsukamachi, Ota-ku,
Tokyo 145-0067, JAPAN
Phone: 03-5499-4531
ALPINE ELECTRONICS OF AMERICA, INC.
1500 Atlantic Blvd,
Auburn Hills, Michigan 48326 U.S.A
Phone 1-800-ALPINE-1 (1-800-257-4631)
ALPINE ELECTRONICS OF AUSTRALIA PTY. LIMITED
161-165 Princes Highway, Hallam
Victoria 3803, Australia
Phone 03-8787-1200
ALPINE ELECTRONICS GmbH
Ohmstraße 4
Fletchamstead Highway, Coventry CV4 9TW, U.K.
www.alpine.co.uk
ALPINE ELECTRONICS FRANCE S.A.R.L.
Operating Instructions
PRECAUTIONS
IMPORTANT INFORMATION, PLEASE READ CAREFULLY BEFORE USING THIS PRODUCT. 7
WARNING
Points to Observe for Safe Usage ....7
WARNING 7
CAUTION 9
NOTICE 9
Features
Favourite Function ....11
About Swiping the Touch Screen 11
Switching the Audio Sources Screen to a Dedicated Screen ....12
About Dual Screen .... 13 Dual Screen Display Position .... 13
Getting Started
Location of Controls ....14
Turning Power On or Off ....14
Turning the System On ....14
Initial System Start-Up ....15
Adjusting the Volume ....15
Lowering Volume Quickly ....15
Touch Screen Operation ....15
Switching Sources 16
Operating the Function Button on the Audio/Video Main Screen ....16
About Basic Operation for List Screen .....17
About the Shortcut Setup Screen ....17 Sound Setup Function ....18 Rear Seat Entertainment Function ....18
About the Menu Screen ....19 Edit Menu ....20
About the Shortcut Key ....20 About the Indicator Display ....20
Opening screen Customisation 21
How to Input Characters and Numbers (Keypad) 21
Favourite Function
Using the Favourite Function 22
Editing the Favourite Screen 22
Registering Items 22
Changing Item Names 23
Changing Icons (only the Shortcut Dialing and Navigation icons) 23
Changing the Layout 24
Deleting Items 24
Applying Alpine Tunelt App
Adjusting the sound via the Smartphone ..... 24
Setup
Setup Operation 25
Wireless (Bluetooth) Setup
Bluetooth Setup 26
Displaying Bluetooth Information ...... 26
Registering the Bluetooth Device 26
Hands-free Device Primary/Secondary Setting 27
iPhone Auto Pairing Setting 27
Phone Setup 27
Setting the Passcode 27
Changing the Character Code of the Phone Book 27
Selecting the Output Speaker 27
Setting the Microphone Select 27
General Setup
Sounds Setup 28
Setting the Balance/Fader/Rear Speaker/ Subwoofer 29
Setting the Media Xpander (MX HD) ..... 29
Equalizer Presets 30
Adjusting the Parametric Equalizer Curve (Dual HD EQ) 30
Adjusting the Crossover Settings (X-OVER) 31
Adjusting the Time Correction (TCR) ...... 31
Setting Defeat 31
Setting the Volume for Each Source .... 32
Adjusting the Caller Level 32
Adjusting the Microphone Level 32
Adjusting the Ring Tone Level 32
Key Sound Volume Setting 32
Auto Volume Setting 32
Setting Audio Mute On/Off while Backing up 32
Setting the Microphone Effect 32
Default Sound Settings 32
About the Crossover 33
About Time Correction 33
Language Setting 34
Visual Setup 34
Selecting the Visual EQ Mode (Factory's setting) 34
Adjusting Brightness 35
Adjusting Colour of Picture 35
Adjusting Tint of Picture 35
Adjusting Image Contrast 35
Adjusting Picture Quality 35
Saving and calling the adjusted picture quality 35
Screen Setup 35
Screen/Lighting Customise 35
Switching the Display Colour 36
Switching the Illumination Colour 36
Setting the Text Scroll 36
Switching the Artwork Position 36
General Setup 36
Format settings 36
Setting Security code 37
About X308AU/INE-W987A 37
Setting Demo mode to Off/On 37
Car Setup 38
Steering wheel Setting 38
Installation Setup 38
Sources Setup
Radio Setup 39
PI SEEK Setting 39
Receiving RDS Regional (Local) Stations .... 39
Switching the Display Language of PTY (Programme Type) 39
Setting PTY31 (Emergency Broadcast) Reception 39
Setting the TUNER (FM) Tone Quality (Tuner Condition) 39
DAB Setting 39
Setting Alarm (Emergency Broadcast) Reception 39
Setting Announcement Reception ...... 40
Setting the FM Linking ON/OFF (Service Following) 40
Setting the DAB Antenna ON/OFF 40
AUX Setup 40
Setting the Auxiliary (AUX) Name ...... 40
Setting Direct Touch Operation 40
Switching the Visual Input Signal System ... 41
HDMI Setup 41
Apple CarPlay Setup 41
System Setup
Camera Setup 42
Setting the Camera Input 42
Setting the Camera Signal Input 42
Switching Video Patterns for Multi View Camera 42
Adjusting the Rear/Front/Side Camera Guide 42
Camera Interrupt Setting (Power OFF Mode) (Rear Camera Only) 43
Setting Multi Camera to On/Off 43
CAN-I/F Setup 44
Setting the Default Vehicle Screen 44
Setting the Climate Interrupt Time 44
Setting the Parking Sensor Interrupt On/Off 44
Rear Seat Entertainment Setup 44
Remote Sensor Setting 45
Unit Setup 45
Setting the External AP 45
Setting the HDMI Selector On/Off ...... 45
Application Setup 45
Android Auto (Optional)
What is Android Auto 46
Activate Android Auto 46
Apple CarPlay (Optional)
Access to Apple CarPlay 46
Radio/RDS
Radio Basic Operation
Listening to the Radio 48
Presetting Stations Manually 48
Presetting Stations Automatically 48
Tuning to Preset Stations 48
Inputting Frequency Directly and Receiving the Radio Station 49
RDS Operation
Turning AF (Alternative Frequencies) On or Off 49
Interruption Function 49
Receiving Traffic Announcement .... 50
News Programme Interruption 50
Receiving Traffic Information Manually ..... 50
Selecting the Receivable PTY 50
Displaying Radio Text 50
DAB/DAB+/DMB
Listening to DAB/DAB+/DMB 51
Presetting Service 52
Tuning to Preset Service 52
Service Component/PTY Search Function ..... 52
Service Search Function 52
PTY Search Function 52
Interruption Function 53
Receiving Traffic Announcement .... 53
News Programme Interruption 53
Inputting Channel Number Directly and Receiving the Broadcasts 53
Switching to Secondary Service Components .... 53
Displaying DAB Text 54
About DAB/DAB+/DMB 54
USB Flash drive (Optional)
Playback 56
Fast-forwarding/Fast-reversing (USB Video only) 56
Stopping Playback (USB Video only) 56
Repeat Play 56
Random Play (USB Audio only) 56
Searching for a Desired Song 57
Switching Display Modes (During Video File Play Back) 57
About USB Video format 57
iPod/iPhone (Optional)
Playback 59
Searching for a Music File 59
Quick Search Mode 59
Full Search Mode 59
Alphabet Search Function 60
Repeat Play 60
Random Play (Shuffle) 60
HDMI Device (Optional)
About HDMI selector (Optional) 61
DVD Player Operation
DVD Player SETUP 61
CD/MP3/WMA/AAC/WAV
Playback 62
Stopping Playback 62
Repeat Play 62
MIX (Random Play) 62
File/Folder Name Search (Concerning MP3/WMA/AAC/WAV) 62
Selecting Folders (Concerning MP3/WMA/AAC/WAV) 62
Info Mode Function 62
DVD
Playing a Disc 64
If a Menu Screen Appears 64
Numeric Keypad Input Operations ...... 65
Displaying the Top Menu Screen 65
Displaying the Menu Screen 65
Playing Still Frames (Pausing) 65
Stopping Playback 65
Fast-forwarding/Fast-reversing 65
Finding the Beginnings of Chapters/Tracks/ Files 65
Forward/Reverse frame-by-frame Playback .... 66
Repeat Playback 66
Searching by Title Number 66
Searching Directly by Chapter Number ...... 66
Switching the Angle 66
Switching the Audio Tracks 67
Switching the Subtitles (Subtitle Language) .... 67
Info Mode Function 67
Switching Display Modes 67
HDMI Operation
Bluetooth Operation
Setup Before Using 69
About Bluetooth 69
About the Hands-free Phone 69
Before Using Bluetooth 69
Hands-free Phone Control
Answering a Call 70
Hanging up the Telephone 70
Call Waiting Function 70
Calling 71
Calling by Favourite Function 71
Making a phone call using the Phone Menu 71
Using Voice Recognition function 72
Using Siri 72
Voice Dial Function 72
Operations During a Conversation 73
Adjusting the Speech Volume 73
Changing the Voice Output 73
DTMF (Touch-Tone) Function 73
Phone Book Function 73
Synchronising the Phone Book 73
Adding the Phone Book 73
Deleting the Phone Book Entries 74
Searching in the Phone Book 74
Bluetooth Audio
Playback 75
Repeat Play 75
Random Play 75
Search Function 75
Connecting a Bluetooth Device 76
Disconnecting the Bluetooth Connection ... 76
Changing the connecting Bluetooth Device 76
Auxiliary Device (Optional)
Operating Auxiliary Devices (Optional) ..... 77
Operating an AUX, AUX DVD, GAME or USB Player 77
Operating an External DVD Player 77
Operating an External DVD Changer ..... 78
Operating the Mobile Digital TV Receiver (DVB-T) 78
Operating a TV 79
Camera Operation (Optional)
Rear Camera Operation 80
Displaying the Rear Camera Image from the Menu screen 80
Displaying the rear view video while the car is in reverse 80
Switching the Image Pattern for the Rear Camera 80
Guide Display ON/OFF Setting 80
Adjusting the Caution Display Location ..... 80
About the Rear Camera Guide 81
Front Camera Operation 82
Displaying the Front Camera image from the Menu screen. 82
Switching the Image Pattern for the Front Camera 82
About the adjustment of guide display ON/OFF setting and adjustment of Caution display location 82
Side Camera Operation 83
Displaying the Side Camera image from the Menu screen 83
Switching the Image Pattern for the Side Camera 83
About Vehicle Interlock Function
Vehicle Info mode 84
Function Screen Examples 84
Information
Product Software Update 85
About the Supported Formats 85
About MP3/WMA/AAC/FLAC 85
In Case of Difficulty 87
If this Message Appears 88
Specifications 89
END USER LICENCE AGREEMENT (HERE) 90
Installation and Connections
WARNING 92
CAUTION 92
Precautions 93
Accessory List 93
Installation 93
Caution concerning the installation location 93
Mounting the GPS Antenna inside the vehicle 94
Mounting the Microphone. 94
Installation example using the Original Mounting Bracket 94
Note on using HDMI Connection Cables ... 94
Connections 95
If an ACC power supply is not available ..... 98
System Example 99
Operating Instructions
PRECAUTIONS
IMPORTANT INFORMATION, PLEASE READ CAREFULLY BEFORE USING THIS PRODUCT.
This product is intended to safely provide turn-by-turn instructions to get you to a desired destination. Please read the following precautions to ensure that you use this navigation system correctly.
- This product is not a substitute for your personal judgement. Any route suggestions made by this navigation system should never supersede any local traffic regulations or your personal judgement and/or knowledge of safe driving practises. Do not follow route suggestions if the navigation system instructs you to perform an unsafe or illegal manoeuvre, places you in an unsafe situation, or routes you into an area which you consider unsafe.
- Glance at the screen only when necessary and safe to do so. If prolonged viewing of the screen is necessary, stop in a safe and legal manner and location.
- Do not input destinations, change settings, or access any functions requiring a prolonged view of the monitor while you are driving. Stop in a safe and legal manner and location before attempting to access the system.
- When using the navigation system to find/route to an emergency service, please contact the facility to validate and verify availability, prior to driving to it. Not all locations of emergency service providers such as police and fire stations, hospitals, and clinics are contained in the database. Please use your own judgement and your ability to ask for directions in these situations.
- The map database used in the navigation system is the most recent map data available at the time of production. Because of changes in streets and neighbourhoods, there may be situations where the navigation system may not be able to route you to your desired destination. In these cases, use your own personal judgement.
- The map database is designed to provide you with route suggestions, it does not take account of the relative safety of a suggested route, or of factors which may affect the time required to reach your destination. The system does not reflect road closures or construction, road characteristics (i.e. type of road surface, slope or grade, weight or height restrictions, etc.), traffic congestion, weather conditions, or any other factors which may affect the safety or timing of your driving experience. Use your personal judgement if the navigation system is unable to provide you with an alternate route.
- There may be situations where the navigation system may display the vehicle's location erroneously. Use your own driving judgement in this situation, taking into account current driving conditions. Please be aware that in this situation, the navigation system should correct the vehicle's position automatically; however, there may be times where you may have to correct the position yourself. If this is the case, stop in a safe and legal manner and location before attempting operation.
- Make certain that the volume level of the unit is set to a level which still allows you to hear outside traffic and emergency vehicles. Driving while unable to hear outside sounds could cause an accident.
- Please make certain that any other person who intends on using this navigation system reads these precautions and the following instructions carefully.
If there is anything in the manual about the operation of the navigation system which you are uncertain about, please contact your local Alpine authorised navigation dealer before using the navigation system.
WARNING
Points to Observe for Safe Usage
- Read this manual carefully before using this disc and the system components. They contain instructions on how to use this product in a safe and effective manner. Alpine cannot be responsible for problems resulting from failure to observe the instructions in this manual.
- This manual uses various pictorial displays to show you how to use this product safely and to alert you to potential dangers resulting from improper connections and operation. Following are the meanings of these pictorial displays. It is important to fully understand the meanings of these pictorial displays in order to use this manual and the system properly.

WARNING
- Operation of the system while driving is dangerous. Users should stop vehicle before operating the software.
- Road conditions and regulations take precedence over information contained on the map display: observe actual traffic restrictions and circumstances while driving.
- This software is designed for use exclusively in the unit. It cannot and may not be used in conjunction with other hardware.

WARNING
This symbol means important instructions. Failure to heed them can result in serious injury or death.
INSTALL THE PRODUCT CORRECTLY SO THAT THE DRIVER CANNOT WATCH TV/VIDEO UNLESS THE VEHICLE IS STOPPED AND THE EMERGENCY BRAKE IS APPLIED.
It is dangerous for the driver to watch TV/Video while driving a vehicle. Installing this product incorrectly enables the driver to watch TV/Video while driving. This may cause a distraction, preventing the driver from looking ahead, thus causing an accident. The driver or other people could be severely injured.
DO NOT WATCH VIDEO WHILE DRIVING.
Watching the video may distract the driver from looking ahead of the vehicle and cause an accident.
DO NOT OPERATE ANY FUNCTION THAT TAKES YOUR ATTENTION AWAY FROM SAFELY DRIVING YOUR VEHICLE.
Any function that requires your prolonged attention should only be performed after coming to a complete stop. Always stop the vehicle in a safe location before performing these functions. Failure to do so may result in an accident.
DO NOT FOLLOW ROUTE SUGGESTIONS IF THE NAVIGATION SYSTEM INSTRUCTS YOU TO PERFORM AN UNSAFE OR ILLEGAL MANEUVER, OR PLACES YOU IN AN UNSAFE SITUATION OR AREA.
This product is not a substitute for your personal judgment. Any route suggestions by this system should never supersede any local traffic regulations or your personal judgement or knowledge of safe driving practise.
KEEP THE VOLUME AT A LEVEL WHERE YOU CAN STILL HEAR OUTSIDE NOISES WHILE DRIVING.
Excessive volume levels that obscure sounds such as emergency vehicle sirens or road warning signals (train crossings, etc.) can be dangerous and may result in an accident. LISTENING AT LOUD VOLUME LEVELS IN A CAR MAY ALSO CAUSE HEARING DAMAGE.
MINIMIZE DISPLAY VIEWING WHILE DRIVING.
Viewing the display may distract the driver from looking ahead of the vehicle and cause an accident.
DO NOT DISASSEMBLE OR ALTER.
Doing so may result in an accident, fire or electric shock.
USE ONLY IN CARS WITH A 12 VOLT NEGATIVE GROUND.
(Check with your dealer if you are not sure.) Failure to do so may result in fire, etc.
KEEP SMALL OBJECTS SUCH AS SCREWS OUT OF THE REACH OF CHILDREN.
Swallowing them may result in serious injury. If swallowed, consult a physician immediately.
USE THE CORRECT AMPERE RATING WHEN REPLACING FUSES.
Failure to do so may result in fire or electric shock.
DO NOT BLOCK VENTS OR RADIATOR PANELS.
Doing so may cause heat to build up inside and may result in fire.
USE THIS PRODUCT FOR MOBILE 12V APPLICATIONS.
Use for other than its designed application may result in fire, electric shock or other injury.
MAKE THE CORRECT CONNECTIONS.
Failure to make the proper connections may result in fire or product damage.
BEFORE WIRING, DISCONNECT THE CABLE FROM THE NEGATIVE BATTERY TERMINAL.
Failure to do so may result in electric shock or injury due to electrical shorts.
DO NOT ALLOW CABLES TO BECOME ENTANGLED IN SURROUNDING OBJECTS.
Arrange wiring and cables in compliance with the manual to prevent obstructions when driving. Cables or wiring that obstruct or hang up on places such as the steering wheel, shift lever, brake pedals, etc. can be extremely hazardous.
DO NOT SPLICE INTO ELECTRICAL CABLES.
Never cut away cable insulation to supply power to other equipment. Doing so will exceed the current carrying capacity of the wire and result in fire or electric shock.
DO NOT DAMAGE PIPE OR WIRING WHEN DRILLING HOLES.
When drilling holes in the chassis for installation, take precautions so as not to contact, damage or obstruct pipes, fuel lines, tanks or electrical wiring. Failure to take such precautions may result in fire.
DO NOT USE BOLTS OR NUTS IN THE BRAKE OR STEERING SYSTEMS TO MAKE GROUND CONNECTIONS.
Bolts or nuts used for the brake or steering systems (or any other safety-related system), or tanks should NEVER be used for installations or ground connections. Using such parts could disable control of the vehicle and cause fire etc.
DO NOT INSTALL IN LOCATIONS WHICH MIGHT HINDER VEHICLE OPERATION, SUCH AS THE STEERING WHEEL OR SHIFT LEVER.
Doing so may obstruct forward vision or hamper movement etc. and results in serious accident.

CAUTION
This symbol means important instructions. Failure to heed them can result in injury or material property damage.
HALT USE IMMEDIATELY IF A PROBLEM APPEARS.
Failure to do so may cause personal injury or damage to the product. Return it to your authorized Alpine dealer or the nearest Alpine Service Centre for repairing.
HAVE THE WIRING AND INSTALLATION DONE BY EXPERTS.
The wiring and installation of this unit requires special technical skill and experience. To ensure safety, always contact the dealer where you purchased this product to have the work done.
USE SPECIFIED ACCESSORY PARTS AND INSTALL THEM SECURELY.
Be sure to use only the specified accessory parts. Use of other than designated parts may damage this unit internally or may not securely install the unit in place. This may cause parts to become loose resulting in hazards or product failure.
ARRANGE THE WIRING SO IT IS NOT CRIMPED OR PINCHED BY A SHARP METAL EDGE.
Route the cables and wiring away from moving parts (like the seat rails) or sharp or pointed edges. This will prevent crimping and damage to the wiring. If wiring passes through a hole in metal, use a rubber grommet to prevent the wire's insulation from being cut by the metal edge of the hole.
DO NOT INSTALL IN LOCATIONS WITH HIGH MOISTURE OR DUST.
Avoid installing the unit in locations with high incidence of moisture or dust. Moisture or dust that penetrates into this unit may result in product failure.

NOTICE
Security
1 This device saves some personal data, including destination data, routing information and phone book data (if your phone book is connected to the unit via Bluetooth).
2 Your personal data is not transmitted to any third parties. The only exception to this rule is if you provide the physical device to Alpine or some third party for repair purposes. If provided to Alpine, the personal data would only be used to the extent necessary to conduct the repairs.
3 If you wish to delete any and all personal data (for example prior to resale), please use the factory reset option.
Product Cleaning
Use a soft dry cloth for periodic cleaning of the product. For more severe stains, please dampen the cloth with water only. Anything else has the chance of dissolving the paint or damaging the plastic.
Temperature
Be sure the temperature inside the vehicle is between +45°C (+113°F) and 0°C (+32°F) before turning your unit on.
Maintenance
If you have problems, do not attempt to repair the unit yourself. Return it to your Alpine dealer or the nearest Alpine Service Station for servicing.
Protecting the USB connector
- Only an iPod/iPhone, Android™ smartphone or USB flash drive can be connected to the USB connector on this unit. Correct performance using other USB products cannot be guaranteed.
- If the USB connector is used, be sure to use only the supplied connector cable with the unit. A USB hub is not supported.
- Depending on the connected USB flash drive, the unit may not function or some functions may not be performed.
- The audio file format that can be played back on the unit is MP3/WMA/AAC/FLAC.
- Artist/song name, etc., can be displayed. Certain, special characters may not be correctly displayed.

CAUTION
Alpine accepts no responsibility for lost data, etc., even if data, etc., is lost while using this product.
On Handling USB Flash drive
- This unit can control a memory storage device that supports the USB Mass Storage Class (MSC) protocol. Playable audio file formats are MP3, WMA, AAC and FLAC.
- USB Flash drive function is not guaranteed. Use USB flash drive according to the terms of agreement. Read the USB flash drive Owner's Manual thoroughly.
- Avoid usage or storage in the following locations: Anywhere in the car exposed to direct sunlight or high temperatures. Anywhere the possibility of high humidity or corrosive substances are present.
- Fix the USB flash drive in a location where driver operation will not be hindered.
- USB Flash drive may not function correctly at high or low temperature.
- Use only certified USB flash drive. Note that even certified USB flash drive, may not function correctly depending on its type or state.
- Depending on the settings of the USB flash drive type, memory state or encoding software, the unit may not play back or display properly.
- USB Flash drive may take time to start playback. If there is a particular file other than audio in the USB flash drive, it may take considerable time before the file is played back or searched.
- The unit can play back "mp3," "wma" or "m4a" file extensions.
- Do not add the above extensions to a file other than audio data. This non-audio data will not be recognised. The resulting playback may contain noise that can damage speakers and/or amplifiers.
- It is recommended to back up important data on a personal computer.
-
Do not remove the USB device while playback is in progress. Change SOURCE to something other than USB, then remove the USB device to prevent possible damage to its memory.
-
Apple, iPhone, iPod, iPod nano, iPod touch, and Siri are trademarks of Apple Inc., registered in the U.S. and other countries. Apple CarPlay is a trademark of Apple Inc.
- Windows Media and the Windows logo are trademarks, or registered trademarks of Microsoft Corporation in the United States and/or other countries.
- Use of the Made for Apple and Works with Apple badges means that an accessory has been designed to connect specifically to the Apple product(s) identified in the Made for Apple badge and to work specifically with the technology identified in the Works with Apple badge, and has been certified by the developer to meet Apple performance standards. Apple is not responsible for the operation of this device or its compliance with safety and regulatory standards. Please note that the use of this accessory with an Apple product may affect wireless performance.
- Google, Android, Android Auto, Google Play and other marks are trademarks of Google LLC.
- The terms HDMI and HDMI High-Definition Multimedia Interface, and the HDMI Logo are trademarks or registered trademarks of HDMI Licensing LLC in the United States and other countries.
- The terms HDMI and HDMI High-Definition Multimedia Interface, and the HDMI Logo are trademarks or registered trademarks of HDMI Licensing LLC in the United States and other countries.
- MPEG Layer-3 audio coding technology licensed from Fraunhofer IIS and Thomson. Supply of this product only conveys a licence for private, non-commercial use and does not convey a licence nor imply any right to use this product in any commercial (i.e. revenue-generation) real time broadcasting (terrestrial, satellite, cable and/or any other media), broadcasting/streaming via internet, intranets and/or other networks or in other electronic content distribution systems, such as pay-audio or audio-on-demand applications. An independent licence for such use is required. For details, please visit http://www.mp3licensing.com
• ©1987-2018 HERE. All rights reserved.
Features
The following screen examples of X308AU/INE-W987A used in this manual are for reference only. They may differ from the actual screen displays.
Favourite Function
Frequently used functions such as the Audio source or Navigation are easily recalled. Register them to the Favourite screen. For details, see “Favourite Function” (page 22).
Favourite screen example
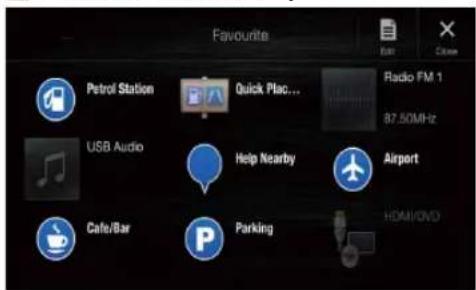
- Frequently used functions and useful functions can be customised for your convenience.
- You can register up to 54 functions.
- You cannot register a function more than once.
About Swiping the Touch Screen
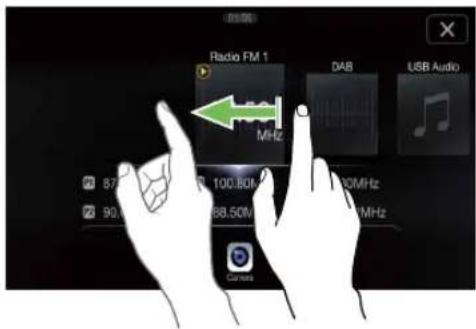
You can change a page by swiping the touch screen horizontally with your finger. For details, see "Touch Screen Operation" (page 15).
Swipe the display with your finger lightly.
Switching the Audio Sources Screen to a Dedicated Screen
You can switch the Audio Sources screen to a dedicated screen by touching the icon on one of the three edges of the screen.
Shortcut Setup Screen (page 17)
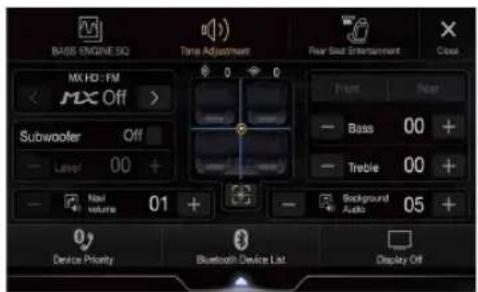
You can set the BASS ENGINE SQ, Tone Adjustment or Rear Seat Entertainment System.

natural_image
Simple gray curved arrow pointing downward (no text or symbols)Dual Screen (page 13)
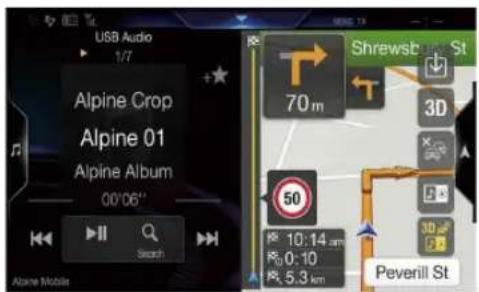
You can switch between the displayed screens on the Dual Screen.
natural_image
Gray curved arrow pointing downward (no text or symbols)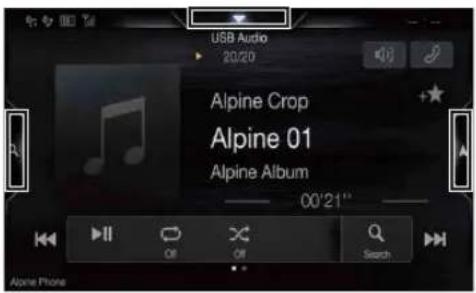

natural_image
Simple gray upward arrow graphic pointing right (no text or symbols)Preset button or Quick Search mode Screen *
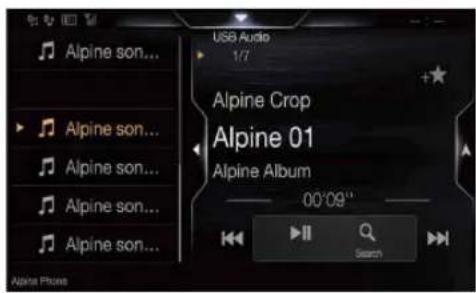
* The Search mode differs depending on the audio source. For details, see the operating instructions of the audio source.
About Dual Screen
Dual Screen allows you to display the Navigation and Audio/Visual screens simultaneously.
Audio full Screen
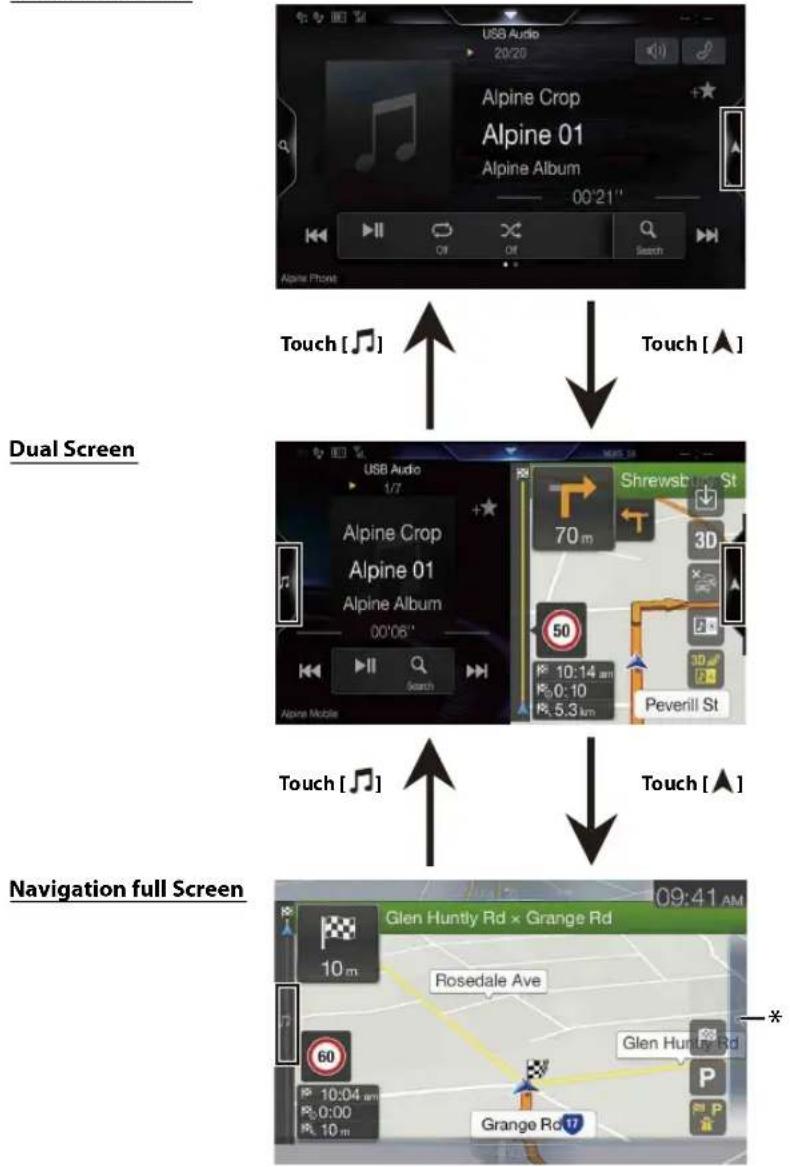
flowchart
graph TD
    A["Dual Screen"] --> B["Navigation full Screen"]
    B --> C["Touch [▶"]]
    C --> D["Touch [▶"]]
    D --> E["Touch [▶"]]
    E --> F["Touch [▶"]]
    F --> G["Touch [▶"]]
    G --> H["Touch [▶"]]
    H --> I["Touch [▶"]]
    I --> J["Touch [▶"]]
* Touch [Q] to switch to the Navigation menu screen. For details of navigation operations, refer to "Navigation System OM" in the CD-ROM.
Dual Screen Display Position
You can switch the left/right positions of the Audio/Visual screen and Navigation screen. Each time you touch the positions of Audio/Visual screen and Navigation screen switch.
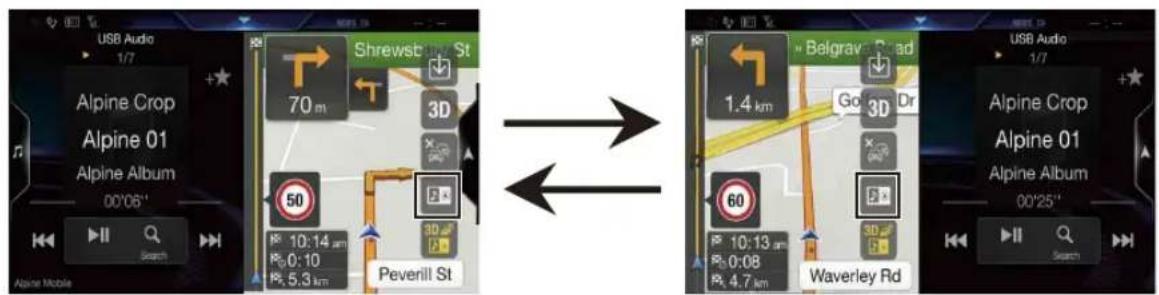
- When i not displayed, touch [ ]
Getting Started
Location of Controls
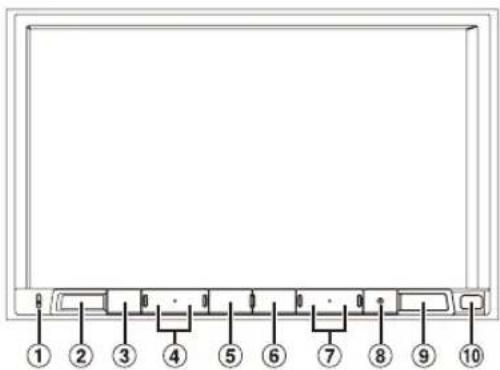
① Microphone
Used for Hands-free or Voice Control modes.
② (AUDIO)/(Favourite) button
Displays the Audio/Visual screen. If the Audio/Visual screen is already displayed, changes the source.
Press and hold for at least 2 seconds to recall the Favourite screen.
③ (MUTE) button
Press to activate/deactivate the mute mode.
④ ∧/∨
(UP/DOWN)
button
Press to adjust the volume.
⑤ VOICE button
Depending on the connected smartphone, press to recall Siri function or voice recognition mode.
⑥ MENU/ (Power Off) button
Recalls the Menu screen.
Press and hold this button for at least 5 seconds to turn the power off.
⑦

button
Press to seek up/down a station in radio mode or up/down a track, chapter, etc., in other audio/visual sources.
⑧ RESET switch
The system of this unit is reset.
⑨
(NAV)
button
Recalls the navigation map screen.
Press again to switch to Navigation menu screen.
Press and hold this button for at least 2 seconds to change to Go Home route screen. (If Home is not set yet, it will change to the Home setting screen.)
For details of navigation operations, refer to "Navigation System OM" in the CD-ROM.
⑩ Remote Sensor
Point the remote control transmitter towards the remote sensor within a range of 2 metres.
Controllable with Remote Control
This unit can be controlled with an optional Alpine remote control. For details, consult your Alpine dealer. Point the optional remote control transmitter at the remote control sensor.
About the button descriptions used in this Owner's Manual
The buttons found on the face of the unit are expressed in bold (e.g. MENU). The buttons found on the touch-screen display are shown in bold within brackets, [ ] (e.g. [×]).
Turning Power On or Off
Some of this unit's functions cannot be performed while the vehicle is in motion. Be sure to stop your vehicle in a safe location and apply the parking brake, before attempting these operations.
1 Turn the ignition key to the ACC or ON position.
The system turns on.
- When turned on, the system displays the last screen that was displayed before the ignition key was turned off. For example, if the unit is in radio mode when ignition is turned off, it will remain in radio mode when ignition is turned back on.
2 Press and hold the MENU/(Power Off) button for at least 5 seconds to turn the power off.
• The unit can be turned on by pressing any button.
- The unit is a precision device. Careful handling of the unit should provide you with years of trouble-free operation.
Turning the System On
With the Alpine system, when the ignition key is turned to ACC or ON, the opening screen will be automatically displayed.
When the system is used for the first time, the language selection menu is displayed. Swipe the Language list screen vertically, then touch your choice from the list of 23 languages.
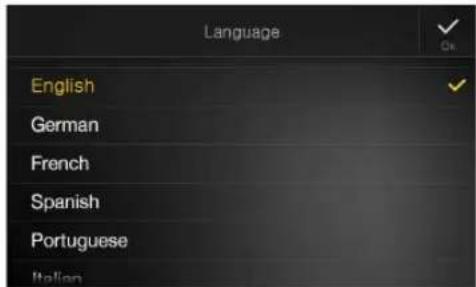
- For your driving safety, please read the warning prompt displayed on this unit carefully.
- Some of this unit's functions cannot be performed while the vehicle is in motion. Be sure to stop your vehicle in a safe location and apply the parking brake before attempting these operations.
Initial System Start-Up
Be sure to press the RESET switch when using the unit for the first time, after changing the car battery, etc.
1 Turn off the unit power.
2 Press the RESET switch with a ballpoint pen or similar pointed object.
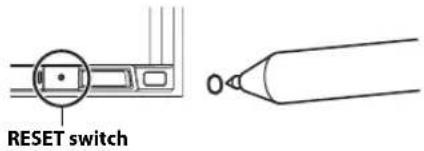
Adjusting the Volume
Adjust the volume by pressing ✗
Volume decreases/increases continuously by pressing and holding
V/A.
Volume: 0 - 35
Lowering Volume Quickly
Audio Mute function instantly lowers the volume level to 0.
1 Press the ⚡ (MUTE) button to activate the MUTE mode. The audio level will be 0.
2 Pressing the ✗ (MUTE) button again will bring the audio back to its previous level.
Touch Screen Operation
You can operate the system by using the touch panel on the screen.
- Be sure to touch the onscreen button lightly with the pad of your finger to avoid scratching the display.
Touch operation
Touch a button or list item on the screen lightly.
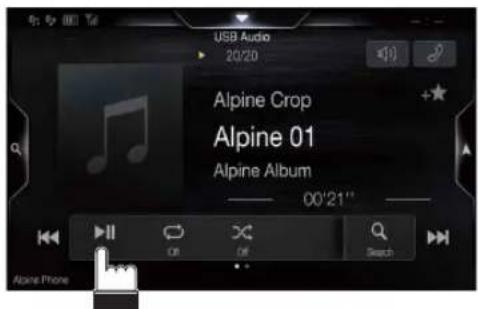
- If you touch a button and there is no reaction, remove your finger. - Onscreen buttons that cannot be operated are dimmed.
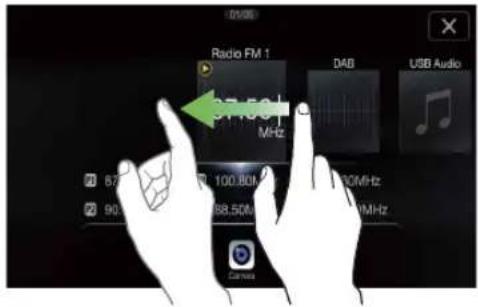
Swipe operation
Move your finger lightly with a swipe.
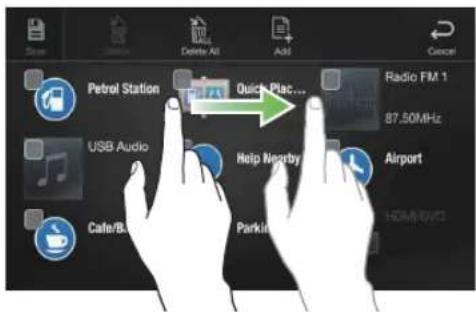
Drag & Drop operation
Touch and hold the desired item, then drag it to its new location by moving your finger, then release your finger to place the item.
- It is not possible to narrow the screen with two fingers (pinch in) or spread the screen (pinch out). (Except Navigation map screen)
Switching Sources
Press the (AUDIO) button to change the source.
Switching sources using the (AUDIO) button
During audio/visual playback, press the ⚠AUDIO) button repeatedly to switch to the desired source.
Radio → DAB USB/IPod* HDMl ^2 → AUX ^3 → Bluetooth Audio*1 Apple CarPlay Music/Google Play Music* 4 → Radio
*1 When no USB flash drive/iPod/HDMI device/Smartphone/Bluetooth compatible device is connected, this option is not available.
*2 The name set for "HDMI Setup (page 41)/AUX Setup" is displayed.
*3 When AUX is set to "Off," this option is not available. (page 40)
*4 Available when Apple CarPlay is used/Android smartphone which installed Android Auto App is connected.
To play Apple CarPlay music shall impact iPod source when an iPhone 5 or later is connected and vice versa. Refer to "Apple CarPlay Setup" (page 41).
Switching Sources from the Menu screen
1 Press the MENU button.
The menu screen is displayed.
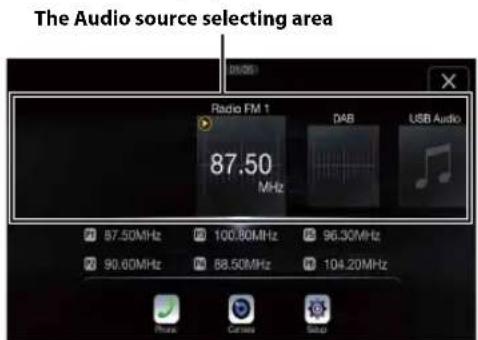
2 Touch your desired source in the Audio source selecting area.
Touch [X] will return to previous source screen.
- In the menu screen, you can change the Audio source directly or change the order in which sources change. For details, see "About the Menu Screen" (page 19).
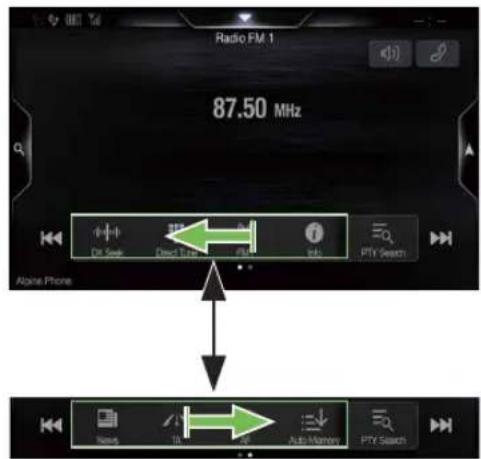
Operating the Function Button on the Audio/Video Main Screen
Using the Function button on the Audio/Visual main screen.
Swipe to the right or left to change to the Function mode.
Radio main screen example
About Basic Operation for List Screen
Basic operations on the Setup list screen and the Search list screen. How to display on the list screen differs depending on the selected item.
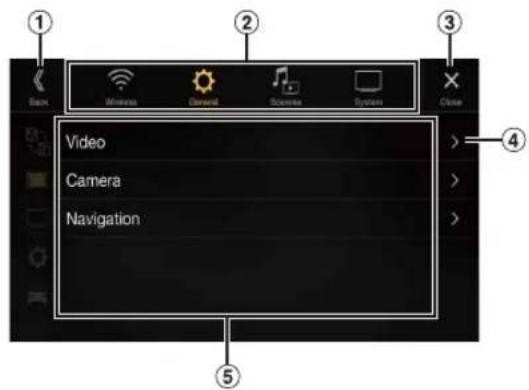
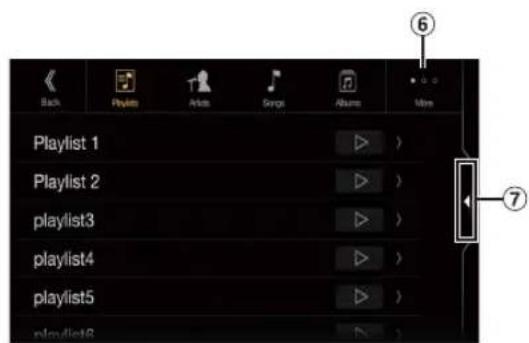
① Switches to the previous screen.
② Item select button
③ Closes the window.
④ Displays the next list page.
- When the next selection item does not exist, the list item is not displayed.
⑤ Lists items for selection
- When there are more than five list items, the page can be changed by swiping vertically.
⑥ Changes the page of the Item select button above.
- “” indicates the total number of pages, “” indicates the location of the current page.
⑦ List screen close button
- Touch or swipe to the left on the search screen, etc. to close the list screen.
About the Shortcut Setup Screen
Displaying the Sound Setup screen, or the Shortcut Setup screen of the Rear Seat Entertainment System screen.
Touch the upper central area of the Audio source screen.
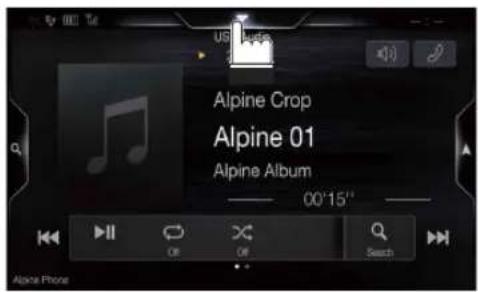
The Sound Setup screen or the Rear Seat Entertainment System Setup Screen is displayed.
Sound Setup screen (Tone Adjustment mode) example
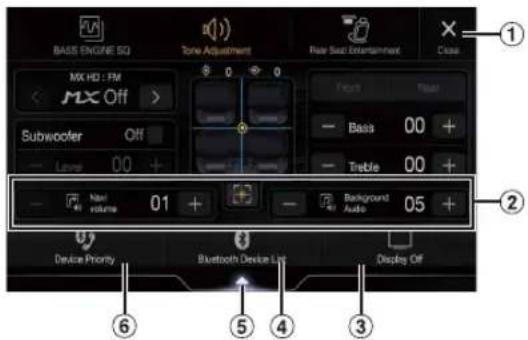
① Closes the window.
② You can adjust the Navi voice interrupt volume (Navi Guide) and the Background Audio volume during Navi Guide. Navi Volume: 1-35
Background Audio: 0-35
③ Button for Display Off *
④ Displays the registered Bluetooth Device List screen.
• See "Registering the Bluetooth Device" (page 26).
⑤ Touch this to change to the currently playing source screen.
⑥ Displays the Hands-free Device Primary/Secondary setting screen.
• See "Hands-free Device Primary/Secondary Setting" (page 27).
* Display Off mode
- To cancel Display Off mode, touch the screen or press any button (except ∧/∨ button).
- Display Off mode is cancelled when the power or ACC is turned off.
- When the gear lever is shifted to the reverse (R) position and the rear camera is connected, the rear camera image is displayed.
- When a call is received on a Bluetooth-connected phone, the incoming call screen is displayed.
Sound Setup Function
■ Tone Adjustment mode
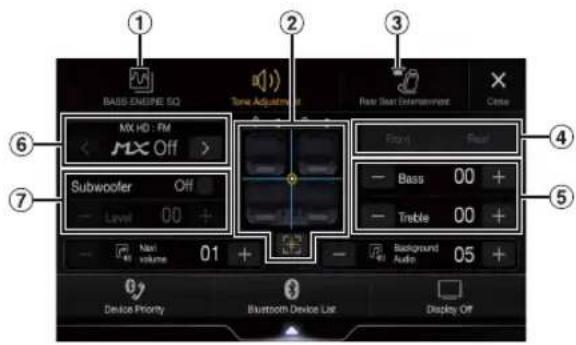
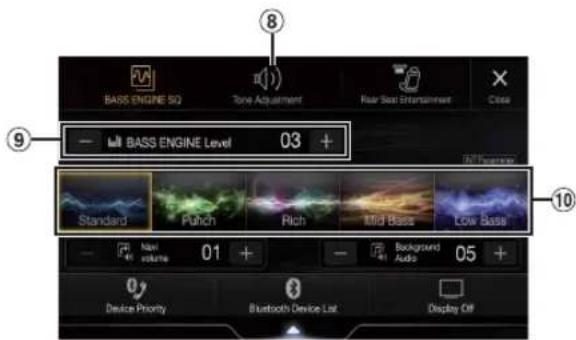
BASS ENGINE SQ mode
① Button for changing the BASS ENGINE SQ mode screen
② Balance/Fader Image area*1
• To reset to the initial settings (Balance: 0, Fader: 0), touch [◆].
③ Rear Seat Entertainment Function screen switch button
- When Setting the Rear Seat Entertainment is "Off," you cannot change the screen. For details on Rear Seat Entertainment setting, see "Rear Seat Entertainment Setup" (page 44).
④ Buttons for switching between Front/Rear when adjusting Bass/Treble ^2
⑤ Buttons for adjusting Bass Level/Treble Level* 3,4
⑥ Buttons for adjusting Media Xpander *1, 3
⑦ Buttons for adjusting Subwoofer On/Off and Subwoofer Level *1, 3
⑧ Button for changing the Tone Adjustment mode screen
- If changing to the Tone Adjustment mode, BASS ENGINE SQ mode will be disabled.
⑨ Buttons for adjusting the BASS ENGINE Level*4
⑩ Buttons for selecting the BASS ENGINE type *4
*1 You can perform a more detailed set up in "Sounds Setup" (page 28).
*2 You cannot switch when Front/Rear Sync in "Adjusting the Parametric Equalizer Curve (Dual HD EQ)" (page 30) is "On."
*3 When you switch to the BASS ENGINE SQ mode, the value you have set is ignored.
*4 When the Defeat setting is "On," you cannot perform the set up.
Adjusting Bass Level/Treble Level
Bass Level and Treble Level can be set for each front seat and for each rear seat by touching [Front] or [Rear].
Setting item:
Bass / Treble
Setting contents:
-14 to +14 (Initial setting: 0)
- When the Sound Setup of the Shortcut Setup is selected to "BASS ENGINE SQ," you cannot perform the set up.
- Adjustment cannot be performed when Defeat is set to "On."
- The Bass adjusted setting value is interlinked with Band2 of Dual HD EQ, and the Treble adjusted setting value is interlinked with Band8.
Setting the BASS ENGINE SQ
Setting the BASS ENGINE Type
Creating the ideal Bass impact for your musical taste using BASS ENGINE SQ.
Setting contents:
Standard (Initial setting) / Punch / Rich / Mid Bass / Low Bass
Standard: Mild low-end boost with mid-range focus for front-centre staging.
Punch: Mid-bass punched up with mid-range impact.
Rich: Accented highs and mid-bass giving outstanding balance for all types of music.
Mid Bass: Strong high frequency emphasis with mid-bass boost for more low-end attack.
Low Bass: Strong, low-bass boost with extended highs for a very dynamic sound.
Adjusting the BASS ENGINE Level
You can adjust the BASS ENGINE Level.
Setting item:
BASS ENGINE Level
Setting contents:
0 to 6 (Initial setting: 3)
- The BASS ENGINE Level of the BASS ENGINE SQ is common to all the types.
■ About setup when the external power amplifier is connected
In order to optimise the BASS ENGINE SQ mode, we recommend the following procedure to set up the power amplifier.
Use your favourite music to make the following amplifier adjustment.
1) Set GAIN of the power amplifier to "MIN."
2) Set the Crossover Mode Sector switch to "OFF."
- If the switch has no "OFF" position, set as near as possible to full range.
3) Set the BASS ENGINE Level to "03."
4) Play a song of the genre you frequently listen to, and adjust GAIN of the power amplifier.
Rear Seat Entertainment Function
The Rear Seat Entertainment function independently routes different sources to the front and the rear side of the car. For example, while listening to the radio or other audio sources in the front, HDMI can be enjoyed at the rear with optional rear monitors and headphones.
Rear Seat Entertainment System Setup screen
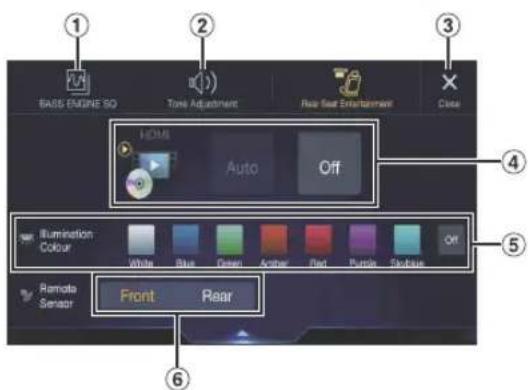
① Button for changing to the BASS ENGINE SQ screen.
② Button for changing to the Tone Adjustment screen.
③ Touch to return to previous source screen.
④ Visual source selection area that is displayed on the Rear monitor.*
Touch the source icon displayed on the Rear monitor. Auto: The image and sound of the same visual source as the unit are output. Off: Stops output to the Rear monitor.
⑤ Illumination Colour button*2
The colour coordination select button of the Rear monitor: White/Blue/Green/Amber/Red/Purple/Skyblue/Off (This function depends on Over Head Monitor)
⑥ Remote Sensor
You can set whether the sensor on Rear monitor receives remote control operation, or the unit receives it.
*1 The visual source that can be output to the Rear monitor is "HDMI/DVD," When the unit plays back the visual source, you can only select the same visual source as the unit.
*2 When the Illumination Colour in "Setting the Rear Seat Entertainment System" (page 44) is set to "Off," the Illumination Colour button is not displayed.
- During Apple CarPlay or Android Auto mode, visual source is not available for rear monitor.
About the Menu Screen
In the menu screen, you can select the audio source and perform various setups or operations on the unit.
Press the MENU button.
The menu screen is displayed.
■ Menu screen example
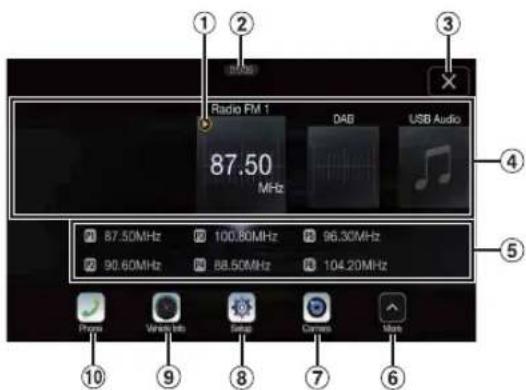
① Displays the currently playing audio source.
② Displays the total number of the audio sources that can be selected. Also displays the current position, counting from the leftmost audio source.
③ Touch to return to previous source screen.
④ Audio source select area
Touch your desired source icon to change the audio source.
- Swiping to the right or left in the Audio source select area, you can change the audio source.
- The source icon displayed in the Audio source select area is the one checked on the Edit menu screen. For details on how to display/ hide the source icon, see "Edit Menu" (page 20).
⑤ Displays Preset No, and information of the Search mode, etc., located in the middle of the Audio source select area.
- Touch the desired preset number or the Search mode to change the audio source directly. - The displayed information differs depending on the audio source. Some sources are not displayed.
⑥ Touch to display more icons. (Displayed only when icons' number over 5.)
⑦ Camera button*1
Displays camera images. (page 80)
⑧ Setup button
Displays the Setup screen. (page 25)
⑨ Vehicle Info button
Displays the Vehicle Info mode screen. (page 84)
⑩ Phone button*2
Displays the Phone menu screen. (page 69)
- Depending on the setting and connected devices, the displayed icons and orders may differ. Touch to display more icons such as, [Android Auto] ^3 and [Apple CarPlay] ^4 .
*1 Displays when the Camera Select is set to "Front," "Rear," or "Other." (page 42)
*2 Displays when the Bluetooth setting is set to "On." (page 26)
*3 Displays the Android Auto screen, displayed when an Android Smartphone installed Android Auto App is connected. (page 46)
*4 Displays the Apple CarPlay screen, displayed when Apple CarPlay is turned on and an iPhone 5 or later is connected. (page 46)
Edit Menu
In the Edit Menu screen, you can change the audio source order or set the display/hide settings.
1 Touch the desired source icon in the Menu screen for at least 2 seconds.
A checkbox (or) is displayed on the upper left area of the source icon and switches to the edit mode.
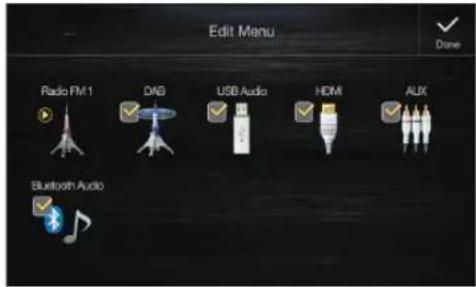
- The source icon displayed in the Edit Menu screen is displayed only when usable setup and conditions of each Audio source are fulfilled. For details on setup and conditions of each audio source, see "Switching Sources" (page 16).
■ Changing the order of Audio source
Drag and drop the source icon to the desired location.
Hiding/Displaying Audio source
Place a check in the checkbox (☐ to display the Audio source icon. Uncheck the checkbox (☐ to hide it.
- You cannot hide the icon of a source that is currently playing.
2 Touch [Done].
The editing content is confirmed, and returns to the menu screen.
- Editing here is reflected in the order of ♪ (AUDIO) button touching and change of the Audio source. (page 16)
About the Shortcut Key
There are two shortcut keys on Audio source screen (Radio, USB Audio, etc.). You can quickly switch to Sound Setup screen or Phone Menu screen by touching the shortcut key.
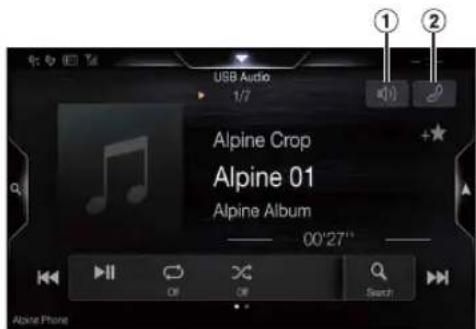
① Sound setup shortcut button
Touch to display Bal./Fad. Screen of Sound setup. Refer to "Setting the Balance/Fader/Rear Speaker/Subwoofer" (page 29).
② Phone shortcut button
Touch to display Phone Menu screen. Refer to "Hands-free Phone Control" (page 69).
About the Indicator Display
The Indicator Bar at the bottom of the screen displays various types of information, like the current time.
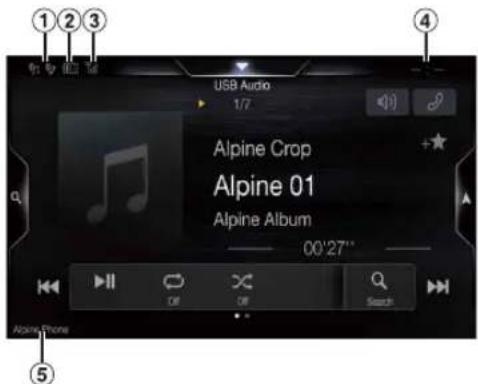
① Lights up when connected to a Bluetooth compatible device. (Does not display when connection is set to OFF.)
: Bluetooth connection to audio device
: Bluetooth connection to Hands Free Phone Blinks while reconnecting.
② Indicates the battery level of the connected Bluetooth device.
| Battery Level | Level 3 Level | Level 2 Level 1 | No Battery | |
| Icon |
This may not be displayed depending on the connected Bluetooth device. Whenever one battery level decreases, the alarm sounds.
③ Indicates the signal strength level of the connected Bluetooth compatible device.
Displayed when Bluetooth setting is ON.
| 0 | 1 | 2 | 3 | N |
| No Service |
④ The clock display
You can switch between the 12 hour display and 24 hour display options.
For details of the clock display settings, refer to "Navigation System OM" in the CD-ROM.
⑤ BLUETOOTH devices Name*
* When you connect two Hands-Free Phones, the information of the Bluetooth device set to Primary is displayed.
Opening screen Customisation
You can set a BMP image that is stored on a USB flash drive as the opening screen.
This setting requires the following image format, folder name and file name.
Usable file format:
- B M P i m a g e
- Image size: 800 × 480 pixels (RGB 24 bit or less/number of colour bit: 24, 8, 1 bit)
- Compression format: non-compressed
- F o l d e ^l : OPENINGFILE *
- F i l e 2:ropeningfile.bmp
1 Connect the USB flash drive to the USB extension cable.
A message confirming the opening screen change is displayed.
2 Touch [OK].
An update indicator " (Loading)" is displayed, and update for the opening screen starts.
3 After the update is complete, the following message is displayed. ^*3
"Customisation succeeded. Please remove USB memory and press OK."
4 After removing the USB flash drive, touch [OK].
The opening screen setting is complete.
*1 Be sure to save the folder to the first layer of the USB flash drive.
*2 Only one BMP image can be set as the opening screen.
*3 If "Customisation failed," is displayed, touch [OK] and then check that the folder name, file name and file format are correct.
- Do not perform the following actions during the update.
- Do not turn off the ACC to the car.
- Do not unplug the USB flash drive.
- Do not turn off or operate the unit.
- To return the opening screen to its original image, you must Clear All Settings. Be careful of this operation, as your other settings are also initialised. For details, see “Initializing the System” (page 37).
How to Input Characters and Numbers (Keypad)
The displayed screens and procedures may vary slightly depending on the function used, but the basic input method is the same.
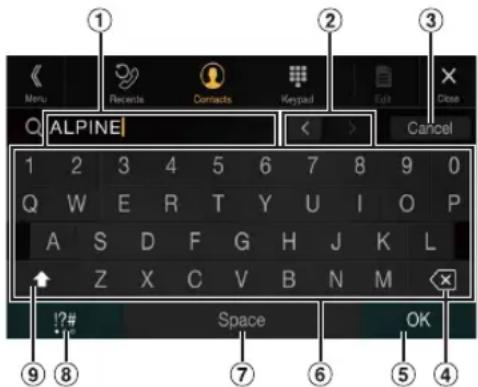
① Input screen area.
② Cursor position alteration switch
③ Cancel
Keypad mode finishes.
④ (Delete)
Returns to the previous character and erases it.
Touching here for more than 2 seconds will erase all input characters.
⑤ Input number is confirmed.
⑥ Character keypad
⑦ Space
⑧ Special character selector switch
Switches the Alphanumeric/Special characters/Symbols character type.
⑨ Uppercase letter switching key
Favourite Function
Using the Favourite Function
This unit enables you to recall functions easily by registering frequently used items such as the Audio source, the navigation search function, etc. to the Favourite screen. You can recall any of these items easily.
1 Press and hold the ♪/(Favourite) button for at least 2 seconds.
The Favourite screen is displayed.
Favourite screen example
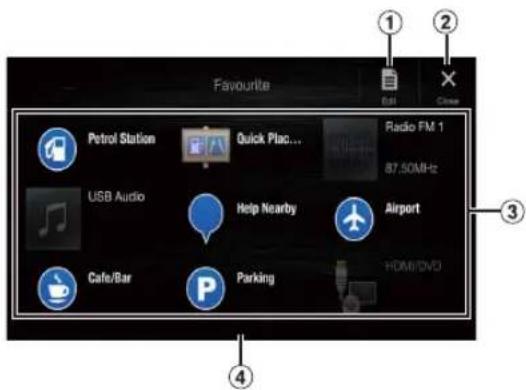
① Changes to the Edit screen used for registering items or changing names.
② Close the Favourite screen
③ Favourite registration item
Swipe to the left and right to change the pages. You can add up to 6 pages.
④ Indicates the location of the currently displayed Favourite screen.
2 Touch your desired Favourite registered item.
The desired item is displayed.
- When making a phone call by choosing shortcut dialing, after the message of confirmation of outgoing phone calls is displayed, touch [Call]. For details, see "Calling by Favourite Function" (page 71).
Editing the Favourite Screen
1 Touch [ ] (Edit).
A checkbox is displayed on the upper left area of the registration icon and it changes to Edit mode.
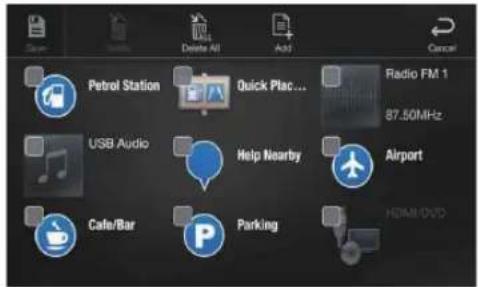
Setting item:
Item registration / Item name change / Icon change / Layout change / Item deletion
2 After editing is complete, touch [ ] (Save).
3 After the caption for the confirmation is displayed, touch [Yes].
4 Editing is complete and the screen switches to the Favourite screen.
- If you touch [←] (Cancel) while editing, a confirmation prompt will appear. Touch [Yes], the screen switches to the previous Favourite Edit screen.
Registering Items
1 Touch [ ] (Add).
The items to be added (categories) are displayed.
2 Touch the desired item to be added (category).
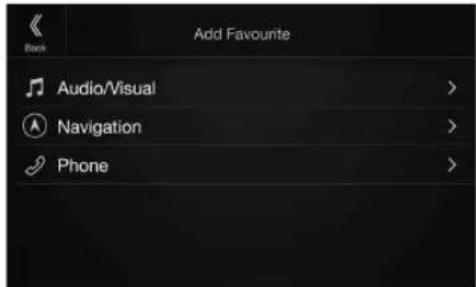
3 Choose the desired item to be added.
- You can add up to 54 items.
- You cannot register an item more than once.
Audio/Visual
[Radio]*1 / [DAB]*2 / [USB/iPod] / [HDMI/DVD] / [AUX] / [Bluetooth Audio] / [Apple CarPlay]*3 / [Android Auto]*3
*1 You can choose the frequency from Preset 1 - 12, registered into each FM1/FM2/MW/LW band of Radio.
*2 You can choose a channel registered to Presets 1 - 18.
*3 You can register now playing Apple CarPlay Music or Google Play Music depending on the connected Smartphone.
- You can also register directly by touching [+★] in the Audio source screen.
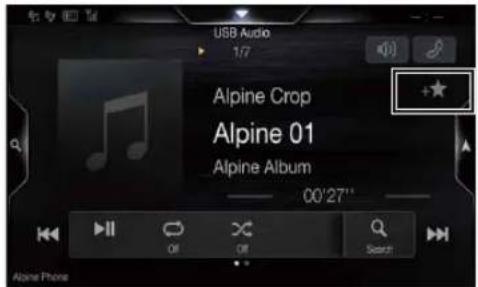
However, if it is already registered, [+★] is not displayed.
Navigation
[Specific Place]:
You can display places registered in Favourite and set your destination.
[Quick Place search]:
Displays the address search keypad.
[Help Nearby]:
Displays the nearby search screen.
[POI category]:
Displays the selected POI category list.
- For details on navigation operations, refer to "Navigation System OM" in the CD-ROM.
■ Phone (Shortcut Dialing)\* 4
You can register the user's shortcut dialing stored in the Phone Book.
- If multiple phone numbers are stored, select a number you want to register.
- You can register directly by touching [+★] of the Contacts list. (page 69)
- You can change the icon you registered. (page 23)
*4 You can only select Phone when a Smartphone is connected. For details on how to register a mobile phone and downloading Phone Book, see "Bluetooth Operation" (page 69).
Changing Item Names
1 Touch the text area of the registered item.
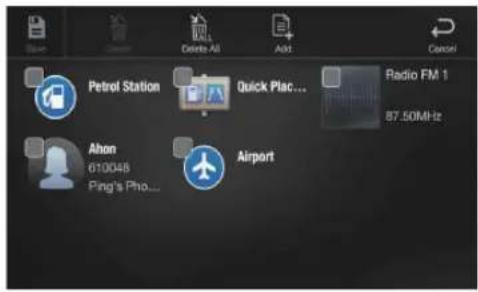
The Input User Name screen (Keypad) is displayed.
2 Input the name and touch [OK].
- For details on how to input characters using the keypad, see "How to Input Characters and Numbers (Keypad)" (page 21).
Changing Icons (only the Shortcut Dialing and Navigation icons)
You can change the icons of Shortcut Dialing and Navigation category. The following example explains how to change the Shortcut Dialing icon. Perform the same procedure to change the Navigation category icon.
1 Touch the icon that you want to change.
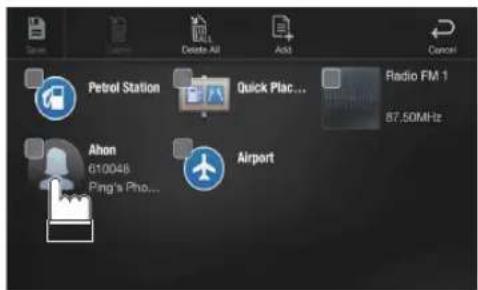
The icon list is displayed.
2 Touch the icon you want to change from the icon list.
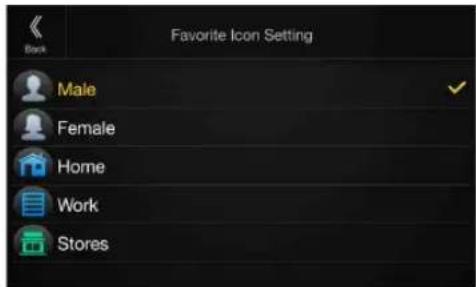
The icon is changed to the selected icon.
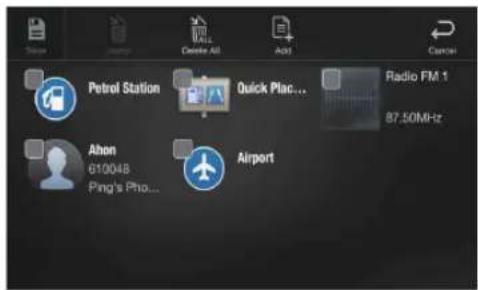
Changing the Layout
Drag and drop the item to the desired location.
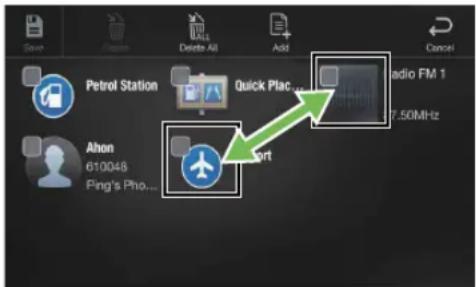
The item location is changed.
- When you move to other pages, switch pages, or when you make a new page and move to another, drag to the end of the screen, and lift your finger after the page changes.
Deleting Items
When deleting a selected item
1 Touch the checkbox at the left of the item you want to delete and place a check ( ) in it.
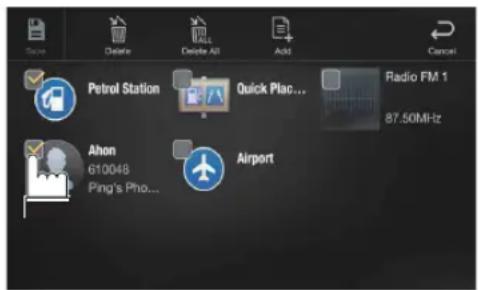
2 Touch [ ] (Delete).
The selected item will be deleted.
When deleting all items
Touch [ ] (Delete All).
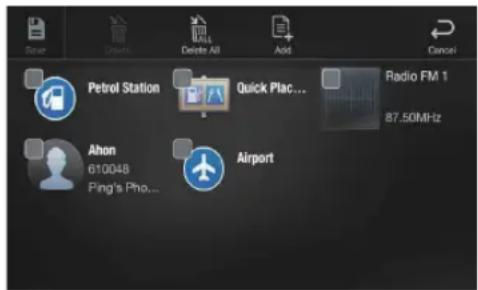
All items are deleted.
Applying Alpine Tunelt App
This unit's sound tuning is programmable from a connected
Smartphone. It is also possible to download specific parameters for certain vehicles from Alpine's TuneIt database stored in the Cloud. Using the Alpine TuneIt App, customised parameters can also be uploaded for others to share and rate.
Through this unit, it is also possible to receive and respond to information from Alpine's Social Network Service (SNS) available through the connected Smartphone.
The installed Alpine TuneIt App should be launched on the Smartphone before connection to the head unit.
Alpine TuneIt App, is downloadable from Apple's App Store; the Android user can download it from Google Play. For details, consult your Alpine dealer.
Before these operations, set TuneIt to USB (iPhone) or Bluetooth (Android) depending on the connected Smartphone. For details, see "Application Setup" (page 45).
- The application programme and related specifications and data may be deleted or terminated without notice.
- Some Alpine TuneIt App functions may not be available if the Smartphone is not in a service area or receives no signal.
- Turn Apple CarPlay to Off before using Alpine TuneIt App. Refer to "Apple CarPlay Setup" (page 41).
Adjusting the sound via the Smartphone
After setting the above procedure, you can adjust the unit's sound function on the Smartphone.
1 Make sure the unit is powered on.
2 Launch the Alpine Tunelt App on the Smartphone. Adjust the unit's sound accordingly on the Smartphone.
- The setting cannot be done on both the Smartphone and this unit at the same time. While the sound function of this unit is set via Smartphone, the sound function settings on the unit will be displayed as "Sound APP Connected."
- In some situations, such as the unit is powered off or during a call, etc., sound setting cannot be done via the Smartphone.
- This function may not be available depending on the paired Smartphone.
- Please obey all local traffic laws while using this function.
- When "Setting the External AP" (page 45) is "On," this function is not available.
Setup
Setup Operation
1 Press the MENU button.
The Menu screen is displayed.
![Radio FM 1 87.50 MHz DAB USB Audio [Setup] button](/content/2026/05/931913/images/358a5206fe9c8e113a8ccce36afea0a0c6206734b8363d33d774c88f10432452.jpg)
- Touch [ ] will return to previous source screen.
2 Touch [Setup].
The Setup main screen is displayed.
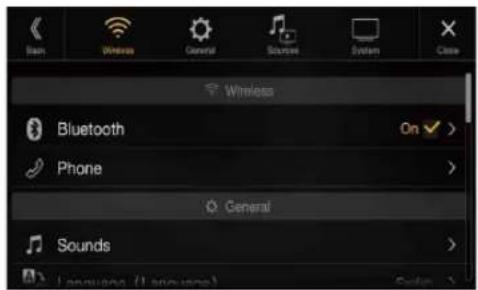
3 Touch the required setting icon on the upper part of the Setup main screen or swipe the list area vertically, then touch the setting item.
Setting items:
Wireless: See "Wireless (Bluetooth) Setup" (page 25).
General: See "General Setup" (page 28).
Sources: See "Sources Setup" (page 38).
System: See "System Setup" (page 41).
Wireless (Bluetooth) Setup
[Wireless] is selected on the Setup main screen in step 3. See "Setup Operation" (page 25).
Wireless Setup Menu screen
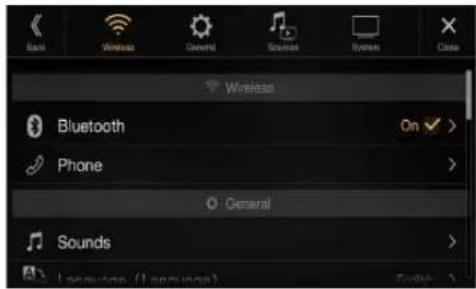
| Bluetooth | |
| Bluetooth Information*1,2 | |
| Set Bluetooth Device*1,2 | |
| Hands-free Device Priority*1,2 | |
| iPhone Auto Pairing*1,2 | |
| Phone | |
| Passcode Change | |
| Default Phonebook Encoding | |
| Phone Speaker | |
| Selection Microphone |
*1 This setting is only available when "Bluetooth" is set to "On" (☑)
*2 Cannot be adjusted when Apple CarPlay is used/Android smartphone which installed Android Auto App is connected.
The following steps 1 to 3 are common to each "Setting item" of Wireless Setup. See each section for details.
1 Select the desired item.
2 To switch the setting, touch [<], [>], [+], [-], or mark the checkboxes "Off" (or "On").
- If “” appears, there is a further hierarchy. Touch the desired item.
3 Touch [X] to return to the main source screen.
- To return to the previous List screen, touch [«]. For details, see "About Basic Operation for List Screen" (page 17).
Bluetooth Setup
[Bluetooth] is selected on the Wireless Setup Menu screen in step 1. See
"Wireless (Bluetooth) Setup" (page 25).
You can register and set up Bluetooth compatible devices.
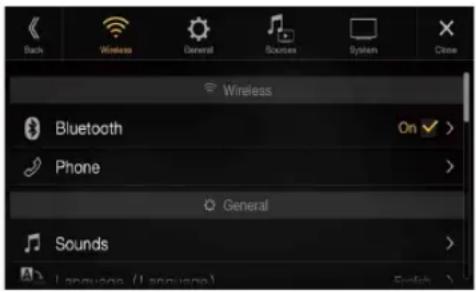
Setting item:
Bluetooth
Setting contents:
Off / On (Initial setting)
Off: Bluetooth function is not used.
On*: Select when you would like to pair your Bluetooth compatible phone with this unit.
* Turn this setting "On" to automatically connect a registered Bluetooth device whenever this unit is turned ON. See "Registering the Bluetooth Device" if no device is registered.
- Cannot be adjusted when Apple CarPlay is used/Android smartphone which installed Android Auto App is connected.
Displaying Bluetooth Information
Make sure the "Bluetooth" setting is "On" ☑ See "Bluetooth Setup" (page 26).
You can display the Bluetooth device name and device address of this unit.
Setting item:
Bluetooth Information
Registering the Bluetooth Device
Make sure the "Bluetooth" setting is "On" ☑ See "Bluetooth Setup" (page 26).
The Bluetooth device is used when a connectable Bluetooth compatible device is searched and connected from this unit, or a new Bluetooth compatible device is registered.
Setting item:
Set Bluetooth Device
1 Touch [Q] (Search) of "No Device."
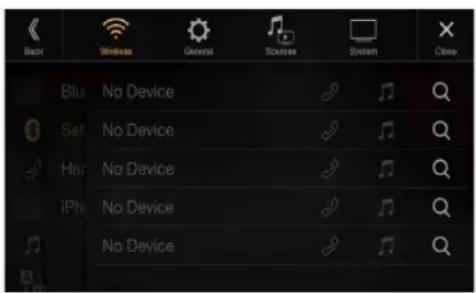
2 Touch [♪] (Audio), [♪] (Hands-free) or [♪/♪] (Both) of the device you want to connect from the list.
Audio: Sets for use as an Audio device.
Hands-free: Sets for use as a Hands Free Device.
Both: Sets for use as both an Audio device and Hands Free Device.
- You can register up to 5 Bluetooth compatible mobile phones.
- When you register a Hands-Free Phone for the first time, Primary is set automatically. When you connect two Hands-Free Phones, select "Hands-free" or "Both." You can then set the priority on the Primary/Secondary setting screen. For details, see "Hands-free Device Primary/Secondary Setting" (page 27).
3 When the device registration is complete, a message appears and the device returns to normal mode.
- The Bluetooth registration process differs depending on the device version and SSP (Simple Secure Pairing). If a 4 or 6 character Passcode appears on this device, enter the Passcode using the Bluetooth compatible device.
If a 6 character Passkey appears on this device, make sure the same passkey is displayed on the Bluetooth compatible device and touch "Yes." - If all 5 devices have been registered, you cannot register a 6th device. To register another device, you need to delete one of the other 5 devices first.
Setting the Bluetooth Device
Select one of 5 paired Bluetooth compatible devices that you previously registered.
Touch [♪] (Audio) or [♪] (Hands free) of the device you want to connect from the Paired Device list.
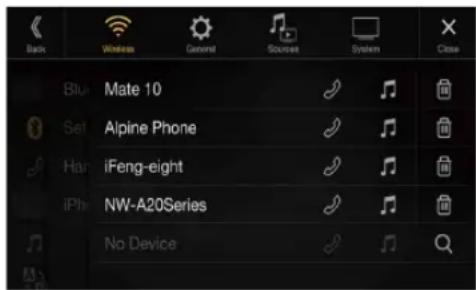
Deleting a Bluetooth Device from the list
You can delete the information of a previously connected Bluetooth compatible device.
1 Touch [💡] (Delete) of the Bluetooth compatible device to delete from the Paired Device list.
2 Touch [OK].
- Touching [Cancel] will cancel the setting.
Hands-free Device Primary/Secondary Setting
Make sure the "Bluetooth" setting is "On" ☑. See "Bluetooth Setup" (page 26).
When you connect two Hands-Free Phones, set the priority of the operation and the setting of incoming-outgoing calls.
Setting item:
Hands-free Device Priority
Setting contents:
Primary / Secondary
Touch the checkbox for Primary/Secondary of the device names that are registered to the unit to set them.
- When connected to two hands-free phones, operating restrictions apply to the hands-free phone registered to Secondary. For details, see "Hands-free Phone Control" (page 69).
iPhone Auto Pairing Setting
Make sure the "Bluetooth" setting is "On" ☑ See "Bluetooth Setup" (page 26).
When an iPhone is connected via USB and it is not on the Registered Device list, it will be paired automatically.
Setting item:
iPhone Auto Pairing
Setting contents:
On / Off (Initial setting)
On: Performs iPhone Auto Pairing setting.
Off: Does not perform iPhone Auto Pairing setting.
- This setting supports iPhones with iOS Ver.5.5 or later.
- When more than 5 Bluetooth devices are registered, Auto Pairing does not start.
Phone Setup
[Phone] is selected on the Wireless Setup Menu screen in step 1. See "Wireless (Bluetooth) Setup" (page 25).
You can make various settings for a Bluetooth compatible device.
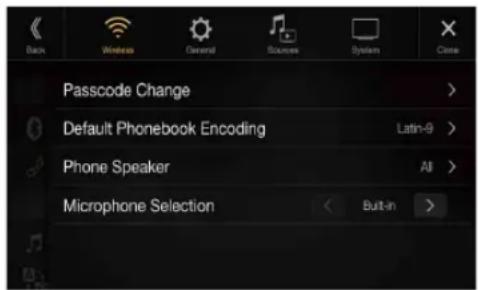
Setting the Passcode
You can set the code for connecting with a Bluetooth compatible device.
Setting item:
Passcode Change
1 Enter a 4-digit passcode (old), and then touch [OK].
• The initial number is 0000.
- For details on how to input the numeric keypad, see "Numeric Keypad Input Operations" (page 65).
2 Enter a 4-digit passcode (new), and then touch [OK].
3 Enter the passcode that you entered in step 2 again, and then touch [OK].
Changing the Character Code of the Phone Book
You can select the character code that is used when transferring the phone book or history from a mobile phone. If unreadable characters appear in the transferred data, select the correct character code.
Setting item:
Default Phonebook Encoding
Setting contents:
Latin-1 / Latin-9 (Initial setting) / Russian / Chinese / Thai / Arabic / UTF-8 / UTF-16LE / UTF-16BE
Latin-1: ISO 8859-1
Latin-9: ISO 8859-15
Russian: ISO 8859-5
Chinese: GB18030
Thai: CP874
Arabic: CP1256
UTF-8
UTF-16LE
UTF-16BE
Selecting the Output Speaker
You can select which speaker in the car will output the audio from the phone.
Setting item:
Phone Speaker
Setting contents:
All (Initial setting) / Front Left / Front Right / Front Left & Right
All: The sound is output from all speakers in car.
Front Left: The sound is only output from the front left speaker.
Front Right: The sound is only output from the front right speaker.
Front Left & Right: The sound is output from the front left and front right speakers.
- The setting cannot be adjusted during a phone call. Adjust the setting before placing a call.
- This option is not available when "External AP" (page 45) is set to On.
Setting the Microphone Select
You can select the built-in microphone or the supplied microphone as a Hands-Free Microphone.
Setting item:
Selection Microphone
Setting contents:
Built-in / Add-on (Initial setting)
Built-in: Use the built-in microphone.
Add-on: Use the supplied microphone.
General Setup
[General] is selected on the setup main screen in step 3. See "Setup Operation" (page 25).
■ General Setup Menu screen
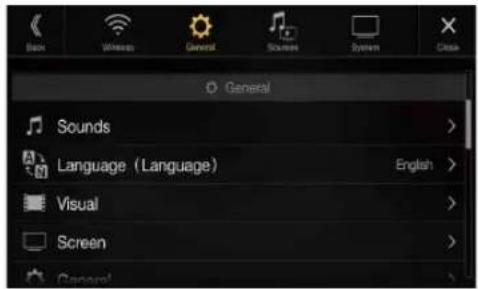
| Sounds | |
| Balance / Fader *1 | |
| Rear Speaker*2 | |
| Subwoofer*2 | |
| Subwoofer Level*1, 2, 3, 5 | |
| Subwoofer Phase*2, 3 | |
| MX HD*1, 4, 5 | |
| EQ Presets*4, 5 | |
| Dual HD EQ*4, 5 | |
| X-OVER*5 | |
| Time Correction (TCR) | |
| Defeat | |
| Source Volume Setup | |
| Caller Level*6 | |
| Microphone Level*6 | |
| Ring Tone Level*6 | |
| Key Sound | |
| Auto Volume | |
| Mute while backing up | |
| Microphone EC/NR | |
| Default Sound Settings | |
| Language (Language) | |
| Visual | |
| Video*7 | |
| Camera*8 | |
| Navigation | |
| Screen | |
| Screen/Lighting | |
| Screen Colour | |
| Illumination Colour | |
| Text Scroll | |
| Artwork Position | |
| Sounds | |
| Balance / Fader *1 | |
| Rear Speaker*2 | |
| Subwoofer*2 | |
| Subwoofer Level*1, 2, 3, 5 | |
| Subwoofer Phase*2, 3 | |
| MX HD*1, 4, 5 | |
| EQ Presets*4, 5 | |
| Dual HD EQ*4, 5 | |
| X-OVER*5 | |
| Time Correction (TCR) | |
| Defeat | |
| Source Volume Setup | |
| Caller Level*6 | |
| Microphone Level*6 | |
| Ring Tone Level*6 | |
| Key Sound | |
| Auto Volume | |
| Mute while backing up | |
| Microphone EC/NR | |
| Default Sound Settings | |
| Language (Language) | |
| Visual | |
| Video*7 | |
| Camera*8 | |
| Navigation | |
| Screen | |
| Screen/Lighting | |
| Screen Colour | |
| Illumination Colour | |
| Text Scroll | |
| Artwork Position | |
| General | |
| Format Sel. | |
| Security Code | |
| About | |
| Demo Mode | |
| Car | |
*1 You can make this setting in the Sound Setup screen of the Shortcut Setup. For details, see "Sound Setup Function" (page 18).
*2 You can also make the setting in the Bal./Fad. screen. For details on how to adjust, see "Setting the Balance/Fader/Rear Speaker/Subwoofer" (page 29).
*3 This setting is only available when "Subwoofer" is set to "On" (☑)
*4 When the Defeat setting is "On," you cannot perform the set up.
*5 When the Sound Setup of the Shortcut Setup is selected to "BASS ENGINE SQ," you cannot perform the set up.
*6 Not displayed when Apple CarPlay is used/Android smartphone which installed Android Auto App is connected.
*7 "Video" can be selected while a video is playing.
*8 The camera names are not displayed when Camera Select (page 42) is set to "Off."
The following steps 1 to 3 are common to each "Setting item" of General Setup. See each section for details.
1 Select the desired item.
2 To switch the setting, touch [<], [>], [+], [-], or mark the checkboxes "Off" (or "On").
- If “” appears, there is a further hierarchy. Touch the desired item.
3 Touch [X] to return to the main source screen.
- To return to the previous List screen, touch [«]. For details, see "About Basic Operation for List Screen" (page 17).
Sounds Setup
[Sounds] is selected on the General Setup Menu screen in step 1. See "General Setup" (page 28).
You can set up items related to the sound quality.
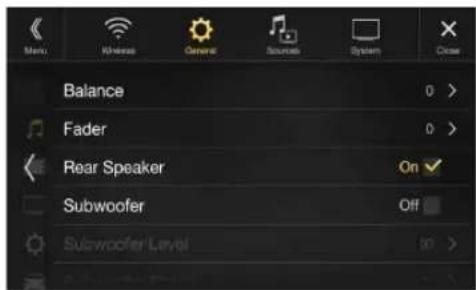
Setting the Balance/Fader/Rear Speaker/Subwoofer
Set Balance/Fader/Rear Speaker/Subwoofer/Subwoofer Level/Subwoofer Phase in the Bal./Fad. screen.
Setting item:
Balance*1 / Fader*1 / Rear Speaker / Subwoofer*2 / Subwoofer Level*1,2 / Subwoofer Phase*1
- This setting can also be activated by touching Sound Setup shortcut key on Audio source screen. Refer to "About the Shortcut Key" (page 20).
*1 When selecting either of the above setting items, the Bal./Fad. screen is displayed.
*2 When the Sound Setup of the Shortcut Setup is selected to "BASS ENGINE SQ," you cannot perform the set up.
Fad./Bal. screen
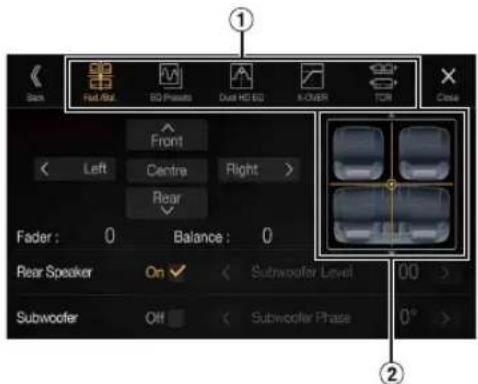
① Enables you to change to each setting screen.
② Balance/Fader Image area
Setting the Balance/Fader
Touch the desired point within the image area. Or touch [∧] [∨][⟨I⟩].
Balance:
L15 to R15
Fader:
F15 to R15
• To reset to the initial setting (Balance: 0, Fader: 0), touch [Centre].
Rear Speaker Setting
You can set the rear speaker output to "Off."
Setting item:
Rear Speaker
Setting contents:
On (Initial setting) / Off
Turning Subwoofer ON/OFF
If an optional subwoofer is connected to the unit, make the following setting.
Setting item:
Subwoofer
Setting contents:
On / Off (Initial setting)
Adjusting the Subwoofer Level
You can set the Subwoofer level when a Subwoofer is connected.
Setting item:
Subwoofer Level
Setting contents:
0 to 15 (Initial setting: 0)
- This setting is only available when "Subwoofer" is set to "On" ()
Setting the Subwoofer Phase
The subwoofer output phase is toggled Subwoofer Normal (0°) or Subwoofer Reverse (180°).
Setting item:
Subwoofer Phase
Setting contents:
0^ (Initial setting) / 180^
- This setting is only available when "Subwoofer" is set to "On" ()
Setting the Media Xpander (MX HD)
Media Xpander (MX HD) makes vocals or instruments sound distinct regardless of the music source. The Radio (FM)/DAB, USB Flash drive and iPod/iPhone, will be able to reproduce the music clearly even in cars with a lot of road noise.
Setting item:
MX HD
- When the Defeat setting is "On," you cannot perform the set up.
- When the Sound Setup of the Shortcut Setup is selected to "BASS ENGINE SQ," you cannot perform the set up.
- The MX HD setting can be performed only when a source is currently selected.
■ Adjustable source (media) and setting value
FM/DAB: Off (Initial setting) / Level1 / Level2 / Level3
The medium to high frequencies become more clear, and produces well balanced sound in all the bands.
Compressed Media: Off (Initial setting) / Level1 / Level2 / Level3
This corrects information that was omitted at the time of compression. This reproduces a well-balanced sound close to the original.
HDMI/AUX: Off (Initial setting) / Compressed Media / Movie / Music
Choose the MX HD mode (Compressed Media, Movie, or Music) that corresponds to the media connected.
(Movie)
The dialog portion of the video is reproduced more clearly
(Music)
This disc contains a large quantity of data such as music clip. MX uses this data to reproduce the sound accurately.
• The effectiveness increases as the MX HD setting value increases
Level1 → Level2 Level3.
- You can set this for each source.
- iPod/iPhone/USB Audio/Bluetooth Audio/Apple CarPlay Music/Google Play Music correspond to Compressed Media.
Equalizer Presets
10 typical equalizer settings are preset at the factory for a variety of musical source material.
Setting item:
EQ Presets
Setting contents:
FLAT (Initial setting) / POP / ROCK / NEWS / JAZZ / ELECTRONIC / HIP HOP / EASY LISTENING / COUNTRY / CLASSICAL
- Only one type can be set to ON.
- When Equalizer Presets is set, the linked Dual HD EQ settings are also changed. We recommend storing Dual HD EQ settings in a Preset in advance.
- The Equalizer Presets setting can be configured when Defeat is "Off."
Adjusting the Parametric Equalizer Curve (Dual HD EQ)
Parametric Equalizer (Dual HD EQ) can adjust the centre frequency/Q Adjustment (bandwidth)/level in the front seats and the rear seats, respectively.
You can adjust only to the approximate frequency zone, but can then compensate by performing advanced correction of the sound.
Setting item:
Dual HD EQ
- When the Defeat setting is "On," you cannot perform the set up.
- When the Sound Setup of the Shortcut Setup is selected to "BASS ENGINE SQ," you cannot perform the set up.
1 Adjust the Dual HD EQ to your preference.
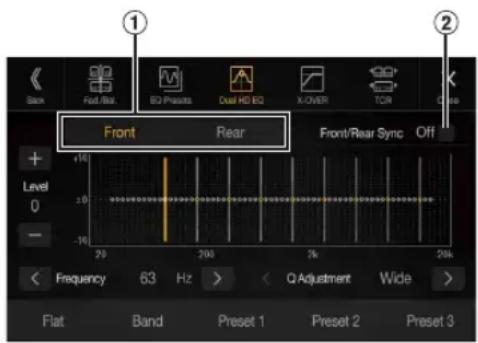
① Front/Rear speaker switching button Not displayed when Front/Rear Sync is "On" (☑)
② Front/Rear speaker interlock button
On: When you want the Front and Rear speakers to have the same setting, set to "On" (☑)
Off: When you want to set the Front and Rear speakers independently, set to "Off" (☐).
Adjusting the Band
Touch [Band] to select the band to be adjusted.
Band1 Band2 ... Band8 Band9 Band1 →
- You can select a band directly by touching the screen.
Adjusting the Frequency
Touch [<] or [>] of "Frequency" to adjust the frequency of the selected band.
Adjustable frequency bands:
20 Hz to 20 kHz (in 1/3 octave steps)
Band1: 20 Hz\~100 Hz (63 Hz)
Band2: 63 Hz\~315 Hz (125 Hz)
Band3: 125 Hz\~500 Hz (250 Hz)
Band4: 250 Hz\~1 kHz (500 Hz)
Band5: 500 Hz\~2 kHz (1 kHz)
Band6: 1 kHz\~4 kHz (2 kHz)
Band7: 2 kHz\~7.2 kHz (4 kHz)
Band8: 5.8 kHz\~12 kHz (8 kHz)
Band9: 9 kHz\~20 kHz (16 kHz)
Adjusting the Level
Touch [−] or [+] of "Level" to adjust the level of selected band.
Setting contents:
-14 to +14 (Initial setting: 0)
Setting the Bandwidth
Touch [<] or [>] of "Q Adjustment" to select the bandwidth.
Setting contents:
Wide (Initial setting) / Medium / Narrow
2 To adjust another band, repeat step 1, and adjust all bands.
3 To store the adjusted setting value, touch and hold [Preset 1], [Preset 2], or [Preset 3] for at least 2 seconds.
- Band2 and Band8 are the same as the Bass and Treble controls.
- For details on setting Bass and Treble, see “Adjusting Bass Level/Treble Level” (page 18).
- Settings exceeding the frequency of adjacent bands are not available.
- While adjusting the Dual HD EQ, you should consider the frequency response of the connected speakers.
- When the Dual HD EQ is adjusted, the Equalizer Presets are overridden.
- When Equalizer Presets is set, the linked Dual HD EQ settings are also changed. We recommend storing Dual HD EQ settings in a Preset in advance.
- T o u c h [Flat] to initialise all values.
Calling the Dual HD EQ adjusted value
Calling the pre-set Dual HD EQ adjusted value.
Touch [Preset 1], [Preset 2], or [Preset 3] on the Dual HD EQ screen.
The setting stored in the Preset will be recalled.
Adjusting the Crossover Settings (X-OVER)
Before performing the following procedures, see "About the Crossover" (page 33).
Setting item:
X-OVER
- When the Sound Setup of the Shortcut Setup is selected to "BASS ENGINE SQ," you cannot perform the set up.
1 Touch [Channel] to select the channel. Each time you touch, the channel switches.
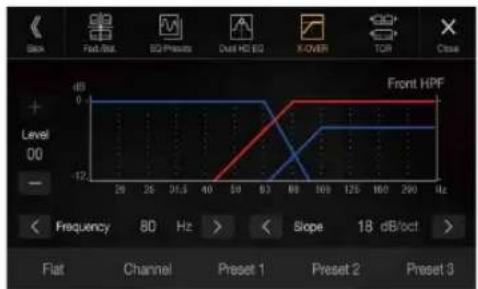
• The channel being adjusted is displayed in red. Front HPF Rear HPF Subw. LPF Front HPF →
2Adjust the crossover to your preference.
Selecting the Cut-Off Frequency
Touch [<<] or [>] of "Frequency," and then select the cut-off frequency.
Setting contents:
20/25/31.5/40/50/63/80 (Initial setting) / 100/125/160/200 Hz
Adjusting the Slope
Touch [<] or [>] of "Slope," and then adjust the HPF or LPF slope.
Setting contents:
0 (Initial setting) / 6 / 12 / 18 / 24 dB/oct.
Adjusting the Level
Touch [−] or [+] of "Level," and then adjust the HPF or LPF level.
Setting contents:
-12 to 0 dB (Initial setting: 0)
3 Repeat steps 1 to 2 to make adjustment to the other channels.
4To store the adjusted setting value, touch and hold [Preset 1], [Preset 2], or [Preset 3] for at least 2 seconds.
- T o u c h [Flat] to initialise all values.
- If the Rear Speaker setting is "Off," the Rear Speaker setting cannot be edited (page 29).
- If the Subwoofer setting is "Off," the Subwoofer setting cannot be edited (page 29).
- While adjusting the X-OVER you should consider the frequency response of the connected speakers.
Calling the X-OVER adjusted value
Calling the pre-set X-OVER adjusted value.
Touch [Preset 1], [Preset 2], or [Preset 3] on the X-OVER screen.
The setting stored in the Preset will be recalled.
Adjusting the Time Correction (TCR)
Before performing the following procedures, see "About Time Correction" (page 33).
Setting item:
Time Correction
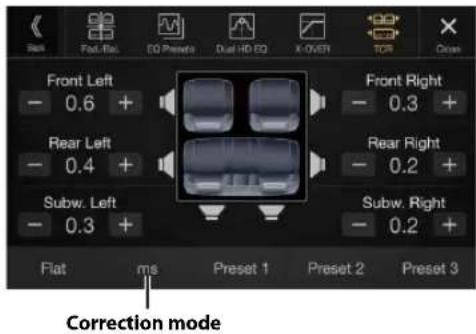
1 Touch the Correction mode button.
The pop up screen for selecting the correction mode is displayed.
2 Touch [ms], [cm] or [inch] to select the mode for making adjustments.
The selected mode is displayed on the Correction mode button.
3 Touch [−] or [+] for each speaker to adjust the time or distance.
0.0 msec to 9.9 msec (0.1 msec/step)
0.0 cm (0.0 inch) to 336.6 cm (132.7 inch) (3.4 cm/step)
All speaker setting values are adjustable in the range of 15 ms or 510 cm.
4 To store the adjusted setting value, touch and hold [Preset 1], [Preset 2], or [Preset 3] for at least 2 seconds.
- T o u c h [Flat] to set all values to 0.0.
- If the Rear Speaker setting is "Off," the Rear Speaker setting cannot be edited (page 29).
- If the Subwoofer setting is "Off," the Subwoofer setting cannot be edited (page 29).
Calling the Time Correction Value
Calling the pre-set time correction value.
Touch [Preset 1], [Preset 2], or [Preset 3] on the time correction screen.
The setting stored in the Preset will be recalled.
Setting Defeat
If Defeat is "On," MX HD, Equalizer Presets and Dual HD EQ functions are turned Off. This disables any settings made for these functions.
Setting item:
Defeat
Setting contents:
Off (Initial setting) / On
Setting the Volume for Each Source
Setting item:
Source Volume Setup - Radio / DAB / Compressed Media* 1/
iPod Music / AUX / HDMI*2 / Bluetooth Audio / Apple CarPlay /
Android Auto
Setting contents ^*3 :
-14 to +14 (Initial setting: 0)
Setting the Volume for Apple CarPlay
When an iPhone 5 or later is connected, after touching [Apple CarPlay], you can adjust Media, Phone Calls, Ringtones & Alerts level, Notifications & Guidance level, Siri and Microphone Level for Apple CarPlay mode.
Setting item:
Media / Phone Calls / Ringtones & Alerts / Notifications & Guidance / Siri /
Microphone Level
Setting contents for Media:
-14 to +14 (Initial setting: 0)
Setting contents for Ringtones & Alerts:
1 to 6 (Initial setting: 3)
Setting contents for other items:
1 to 11 (Initial setting: 5)
Setting the Volume for Android Auto
When an Android Smartphone is connected, after touching [Android Auto], you can adjust Media, Phone Calls, Ringtones & Alerts level, Notifications & Guidance level, Voice Recognition and Microphone Level for Android Auto mode.
Setting item:
Media / Phone Calls / Ringtones & Alerts / Notifications & Guidance / Voice
Recognition / Microphone Level
Setting contents for Media:
-14 to +14 (Initial setting: 0)
Setting contents for Phone Calls:
1 to 35 (Initial setting: 10)
Setting contents for Ringtones & Alerts:
1 to 6 (Initial setting: 3)
Setting contents for other items:
1 to 11 (Initial setting: 5)
*1 Compressed Media is the music data in a USB flash drive (MP3/WMA/AAC/FLAC).
*2 The source name set in "HDMI Setup" (page 41) is displayed.
*3 Except for Apple CarPlay/Android Auto mode.
- Settable source differs depending on the connected device and settings.
Adjusting the Caller Level
You can adjust the volume of the incoming call.
Setting item:
Caller Level
Setting contents:
1 to 35 (Initial setting: 10)
Adjusting the Microphone Level
You can adjust the transmit volume, during the call.
Setting item:
Microphone Level
Setting contents:
1 to 11 (Initial setting: 5)
Adjusting the Ring Tone Level
You can adjust the receive volume, during the call.
Setting item:
Ring Tone Level
Setting contents:
1 to 6 (Initial setting: 3)
Key Sound Volume Setting
You can change the volume of the sound heard when a button is touched.
Setting item:
Key Sound
Setting contents:
0 to 6 (Initial setting: 3)
Auto Volume Setting
The volume of the sound heard is raised automatically according to the noise level by detecting engine noise and road noise.
Setting item:
Auto Volume
Setting contents:
Off (Initial setting) / Low / Middle / High
- The increasing rate of volume becomes large in this order: Low → Middle → High.
Setting Audio Mute On/Off while Backing up
The sound can be muted when the shift gear lever is set to the reverse (R) position enabling you to easily hear sensors, etc., while reversing your car.
Setting item:
Mute while backing up
Setting contents:
Off / On (Initial setting)
Off: Does not mute.
On: Mutes when the shift gear lever is set to the reverse (R) position.
Setting the Microphone Effect
Set this item when Apple CarPlay is used/Android smartphone which installed Android Auto App is connected.
You can turn on or off the Microphone Effect.
This setting influences Apple CarPlay/Android Auto mode.
Setting item:
Microphone EC / NR
Setting contents:
On (Initial setting) / Off
Default Sound Settings
You can restore the Dual HD EQ*/X-OVER*/Time Correction*/MX HD Level/Rear Speaker/Subwoofer/Subwoofer Level/Subwoofer Phase to factory settings.
Setting item:
Default Sound Settings
Touch [Set], and the confirmation message appears.
To initialise, touch [OK].
* The setting values that are stored in Preset 1 to Preset 3 cannot be initialised.
About the Crossover
Crossover (X-OVER):
This unit is equipped with an active crossover. The crossover limits the frequencies delivered to the outputs. Each channel is controlled independently. Thus, each speaker pair can be driven by the frequencies for which they have been optimally designed.
The crossover adjusts the HPF (high pass filter) or LPF (low pass filter) of each band, and also the slope (how fast the filter rolls off the highs or lows).
Adjustments should be made according to the reproduction characteristics of the speakers. Depending on the speakers, a passive network may not be necessary. If you are unsure about this point, please consult your authorized Alpine dealer.
| Cut-off frequency(1/3 octave steps) | Slope | Level | |||
| HPF LPF | HPF LPF | ||||
| Subwoofer(LPF) | ---- | 20 Hz -200 Hz | ---- | 0, 6, 12, 18,24 dB/oct. | 0 to-12 dB |
| Rearspeaker(HPF) | 20 Hz -200 Hz | ---- | 0, 6, 12, 18,24 dB/oct. | ---- | 0 to-12 dB |
| Frontspeaker(HPF) | 20 Hz -200 Hz | ---- | 0, 6, 12, 18,24 dB/oct. | ---- | 0 to-12 dB |
Low range High range
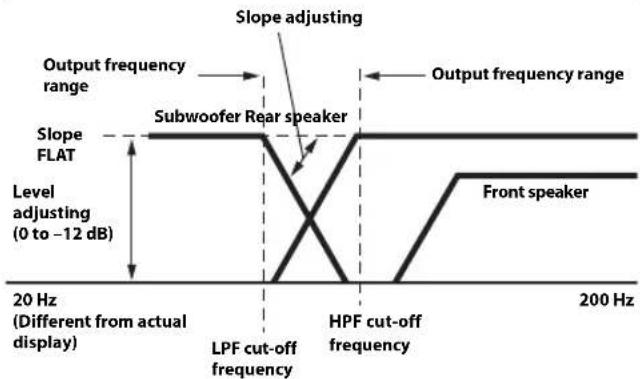
- HPF (high pass filter): Cuts the lower frequencies and allows the higher frequencies to pass.
- LPF (low pass filter): Cuts the higher frequencies and allows the lower frequencies to pass.
- Slope: The level change (in dB) for a frequency change of one octave.
• The higher the slope value, the steeper the slope becomes. - Adjust the slope to FLAT to bypass the HP or LP filters.
- Do not use a tweeter without the HPF on or set to a low frequency, as it may cause damage to the speaker due to the low frequency content.
- Adjustment should be made according to the recommended crossover frequency of the connected speakers. Determine the recommended crossover frequency of the speakers. Adjusting to a frequency range outside that recommended may cause damage to the speakers.
For the recommended crossover frequencies of Alpine speakers, refer to the respective Owner's Manual.
We are not responsible for damage or malfunction of speakers caused by using the crossover outside the recommended value.
About Time Correction
The distance between the listener and the speakers in a car vary widely due to the complex speaker placement. This difference in the distances from the speakers to the listener creates a shift in the sounds image and frequency characteristics. This is caused by the time delay between the sound reaching the listener's right versus the left ear.
To correct this, this unit is able to delay the audio signal to the speakers closest to the listener. This effectively creates a perception of increased distance for those speakers. The listener can be placed at an equal distance between the left and right speakers for optimum staging.
The adjustment will be made for each speaker in 3.4 cm steps.
Example 1. Listening Position: Front Left Seat
Adjust the time correction level of the front left speaker to a high value and the rear right to zero or a low value.
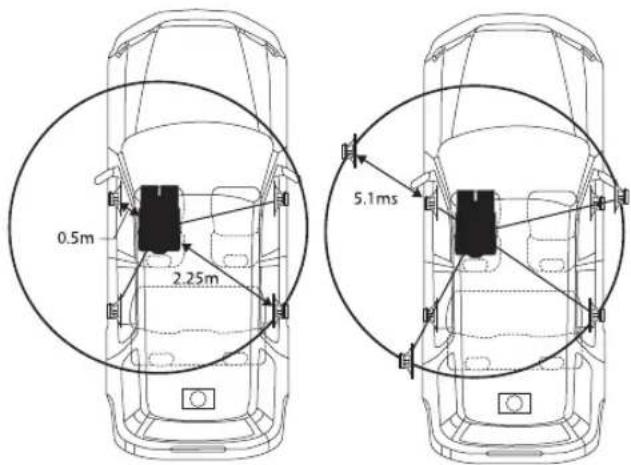
The sound is not balanced because the distance between the listening position and the various speakers is different.
The difference in distance between the front left speaker and the rear right speaker is 1.75 m (68-7/8").
Here we calculate the time correction value for the front left speaker in the diagram on the above.
Conditions:
Farthest Speaker – listening position : 2.25 m (88-9/16")
Front left speaker – listening position : 0.5 m (19-11/16")
Calculation: L = 2.25 m - 0.5 m = 1.75 m (68-7/8")
Time correction = 1.75 ÷ 343* × 1,000 = 5.1 (ms)
* Speed of sound: 343 m/s (765 mph) at 20°C
In other words, giving the front left speaker a time correction value of 5.1 ms makes it seem as if its distance from the listener is the same as the distance to the farthest speaker.
Time correction eliminates the differences in the time required for the sound to reach the listening position.
The time of the front left speaker is corrected by 5.1 ms so that its sound reaches the listening position at the same time as the sound of other speakers.
Example 2. Listening Position: All Seats
Adjust the time correction level of each speaker to almost the same level.
1 Sit in the listening position (driver's seat, etc.) and measure the distance (in meters) between your head and the various speakers.
2 Calculate the difference between the distance correction value to the farthest speaker and the other speakers.
L = (distance to farthest speaker) - (distance to other speakers)
These values are the time correction values for the different speakers. Setting these values to make each sound reach the listening position at the same time as the sound of other speakers.
Time Correction Value List
| Time Difference (msec) | Distance (cm) | Distance (inch) | Time Difference (msec) | Distance (cm) | Distance (inch) |
| 0.0 0.0 0 | 0 5.1 173.4 68 | 3 | |||
| 0.1 3.4 1 | 3 5.2 176.8 69 | 7 | |||
| 0.2 6.8 2 | 7 5.3 180.2 71 | 0 | |||
| 0.3 10.2 4 | 0 5.4 183.6 72 | 4 | |||
| 0.4 13.6 5 | 4 5.5 187.0 73 | 7 | |||
| 0.5 17.0 6 | 7 5.6 190.4 75 | 0 | |||
| 0.6 20.4 8 | 0 5.7 193.8 76 | 4 | |||
| 0.7 23.8 9 | 4 5.8 197.2 77 | 7 | |||
| 0.8 27.2 | 10.7 5.9 200.6 | 79.1 | |||
| 0.9 30.6 | 12.1 6.0 204.0 | 80.4 | |||
| 1.0 34.0 | 13.4 6.1 207.4 | 81.7 | |||
| 1.1 37.4 | 14.7 6.2 210.8 | 83.1 | |||
| 1.2 40.8 | 16.1 6.3 214.2 | 84.4 | |||
| 1.3 44.2 | 17.4 6.4 217.6 | 85.8 | |||
| 1.4 47.6 | 18.8 6.5 221.0 | 87.1 | |||
| 1.5 51.0 | 20.1 6.6 224.4 | 88.4 | |||
| 1.6 54.4 | 21.4 6.7 227.8 | 89.8 | |||
| 1.7 57.8 | 22.8 6.8 231.2 | 91.1 | |||
| 1.8 61.2 | 24.1 6.9 234.6 | 92.5 | |||
| 1.9 64.6 | 25.5 7.0 238.0 | 93.8 | |||
| 2.0 68.0 | 26.8 7.1 241.4 | 95.1 | |||
| 2.1 71.4 | 28.1 7.2 244.8 | 96.5 | |||
| 2.2 74.8 | 29.5 7.3 248.2 | 97.8 | |||
| 2.3 78.2 | 30.8 7.4 251.6 | 99.2 | |||
| 2.4 81.6 | 32.2 7.5 255.0 | 100.5 | |||
| 2.5 85.0 | 33.5 7.6 258.4 | 101.8 | |||
| 2.6 88.4 | 34.8 7.7 261.8 | 103.2 | |||
| 2.7 91.8 | 36.2 7.8 265.2 | 104.5 | |||
| 2.8 95.2 | 37.5 7.9 268.6 | 105.9 | |||
| 2.9 98.6 | 38.9 8.0 272.0 | 107.2 | |||
| 3.0 102.0 | 40.2 8.1 275.4 | 108.5 | |||
| 3.1 105.4 | 41.5 8.2 278.8 | 109.9 | |||
| 3.2 108.8 | 42.9 8.3 282.2 | 111.2 | |||
| 3.3 112.2 | 44.2 8.4 285.6 | 112.6 | |||
| 3.4 115.6 | 45.6 8.5 289.0 | 113.9 | |||
| 3.5 119.0 | 46.9 8.6 292.4 | 115.2 | |||
| 3.6 122.4 | 48.2 8.7 295.8 | 116.6 | |||
| 3.7 125.8 | 49.6 8.8 299.2 | 117.9 | |||
| 3.8 129.2 | 50.9 8.9 302.6 | 119.3 | |||
| 3.9 132.6 | 52.3 9.0 306.0 | 120.6 | |||
| 4.0 136.0 | 53.6 9.1 309.4 | 121.9 | |||
| 4.1 139.4 | 54.9 9.2 312.8 | 123.3 | |||
| 4.2 142.8 | 56.3 9.3 316.2 | 124.6 | |||
| 4.3 146.2 | 57.6 9.4 319.6 | 126.0 | |||
| 4.4 149.6 | 59.0 9.5 323.0 | 127.3 | |||
| 4.5 153.0 | 60.3 9.6 326.4 | 128.6 | |||
| 4.6 156.4 | 61.6 9.7 329.8 | 130.0 | |||
| 4.7 159.8 | 63.0 9.8 333.2 | 131.3 | |||
| 4.8 163.2 | 64.3 9.9 336.6 | 132.7 | |||
| 4.9 166.6 | 65.7 | ||||
| 5.0 170.0 | 67.0 | ||||
Language Setting
The Setup menu, feedback information, etc. for this unit can be changed to appear in the selected language.
Setting item:
Language ^1 (Language ^2 )
Setting contents:
English / Deutsch / Français / Español /
Português / Italiano / Nederlands / Suomi /
Norsk / Svenska / Dansk / русский язык /
Slovenčina / Polski / Český / Magyar / 'Ελληνικά /
من ---------- / Türkçe / 中文 / العربية /
Bahasa Indonesia
*1 Display in the currently selected language.
*2 Always display in English.
Visual Setup
[Visual] is selected on the General Setup Menu screen in step 1. See "General Setup" (page 28).
You can set up items related to an image.
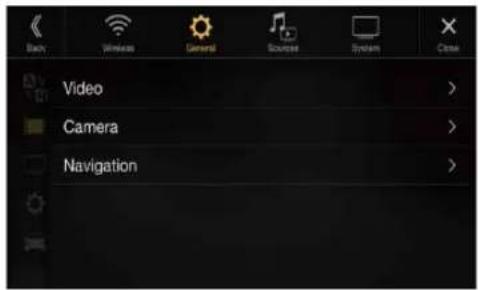
Settable items differ depending on the application.
[Video] (Video media) ^4 :
Visual EQ / Brightness / Colour / Tint / Contrast / Sharpness
[Camera]\*2:
Brightness / Colour / Contrast
[Navigation]:
Brightness / Contrast
*1 "Video" can be selected while a video is playing.
*2 The camera names are not displayed when "Off" is set (page 42).
Selecting the Visual EQ Mode (Factory's setting)
You can select a mode suitable for the subject image.
Setting item:
Visual EQ
Setting contents:
Off (Initial setting) / Night / Soft / Sharp / Contrast
Off: Initial Setting
Night: Suitable for movies in which dark scenes frequently appear.
Soft: Suitable for CGs and animated films.
Sharp: Suitable for old movies where images are not clearly shown.
Contrast: Suitable for recent movies.
- To return to the default video settings, set this function to Off. Any Visual EQ selection or changes made are reset their initial settings.
Adjusting Brightness
Setting item:
Brightness
Setting content:
-15 to +15 (Initial setting: 0)
You can adjust the brightness between MIN (-15) and MAX (+15).
When it reaches the minimum or maximum point, the display shows "MIN" or "MAX" respectively.
Adjusting Colour of Picture
Setting item:
Colour
Setting content:
-15 to +15 (Initial setting: 0)
You can adjust the colour between MIN (-15) and MAX (+15). When it reaches the minimum or maximum point, the display shows "MIN" or "MAX" respectively.
Adjusting Tint of Picture
Setting item:
Tint
Setting content:
R15 to G15 (Initial setting: 0)
Adjust the Colour from R15 to G15.
Adjusting Image Contrast
Setting item:
Contrast
Setting content:
-15 to +15 (Initial setting: 0)
You can adjust the contrast between MIN (-15) and MAX (+15). When it reaches the minimum or maximum point, the display shows "MIN" or "MAX" respectively.
Adjusting Picture Quality
Setting item:
Sharpness
Setting content:
-5 to +5 (Initial setting: 0)
Picture quality adjustment range is -5 to +5. "SOFT" and "HARD" appear as the minimum and maximum values specified.
Saving and calling the adjusted picture quality
When adjusting audio (video media), you can store the settings made for "Adjusting Brightness, Colour, Tint, Contrast and Sharpness."
Setting item:
Preset 1 / Preset 2
1 After completing "Adjusting Brightness, Colour, Tint, Contrast and Sharpness" (page 35), touch and hold [Preset 1] or [Preset 2] to save the settings.
2 Touch [Preset 1] or [Preset 2] to call the saved settings.
Screen Setup
[Screen] is selected on the General Setup Menu screen in step 2. See "General Setup" (page 28).
You can set up the brightness, colour, display, etc., of the screen.
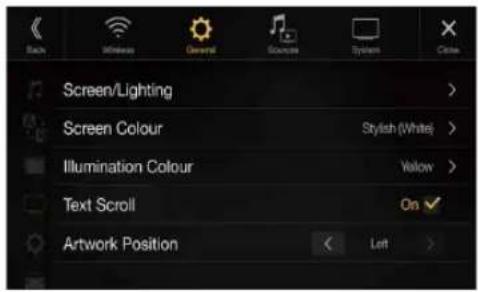
Screen/Lighting Customise
1 Touch [Screen/Lighting] in the Display/Key Setup Menu screen.
The Screen/Lighting setup screen appears.
Setting item:
Dimmer / Key Illumination Level / Screen Dimmer Level
Setting the Brightness of the Backlighting
Backlighting is provided by LEDs light built into the liquid crystal panel. The illumination control adjusts the brightness of the backlighting based on the car ambient lighting for easier viewing.
Setting item:
Dimmer
Setting contents:
Auto (Initial setting) / On / Off
Auto: Adjust the brightness of the background illumination of the monitor automatically to the brightness of the car interior.
On: Keep the background illumination of the monitor dark.
Off: Deactivate Auto Dimmer mode to keep the background illumination of the monitor bright.
- When "On" is set, the setting is also applied for the button lighting in "Adjusting the Dimmer of Button Lighting at Night" (page 35), and "Adjusting the Minimum Level of Backlight" (page 36).
Adjusting the Dimmer of Button Lighting at Night
You can adjust the brightness of the button lighting at night with the dimmer.
Setting item:
Key Illumination Level
Setting level:
-2 to +2 (Initial setting: 0)
- This setting is only available when "Dimmer" is set to "On."
Adjusting the Minimum Level of Backlight
You can adjust the brightness of the backlight. This function could be used, for instance, to change the screen brightness while travelling at night.
Setting item:
Screen Dimmer Level
Setting content:
-15 to +15 (Initial setting: 0)
You can adjust the level between MIN (-15) and MAX (+15). When it reaches the minimum or maximum point, the display shows "MIN" or "MAX" respectively.
- This setting is only available when "Dimmer" is set to "On" or "Auto."
Switching the Display Colour
You can choose from 8 different display colours.
Setting item:
Screen Colour
Setting contents:
Blue (Initial setting) / Light blue / Aqua blue / Red / Green / Amber / Yellow / White
Switching the Illumination Colour
You can choose the colour of the Front Panel button from one of 7 colours.
Setting item:
Illumination Colour
Setting contents:
Blue (Initial setting) / Light blue / Aqua blue / Red / Green / Amber / Yellow
Setting the Text Scroll
Scroll display is available if folder name, file name or tag information is entered.
Setting item:
Text Scroll
Setting contents:
Off / On (Initial setting)
Off: Turns off the scroll mode.
On: Turns on the Auto scroll mode. Scroll display is repeated as long as the mode is turned on.
Switching the Artwork Position
You can set the artwork position to the centre or the left.
Setting item:
Artwork Position
Setting contents:
Centre / Left (Initial setting)
General Setup
[General] is selected on the General Setup Menu screen in step 1. See "General Setup" (page 28).
You can set up items related to the language, etc.
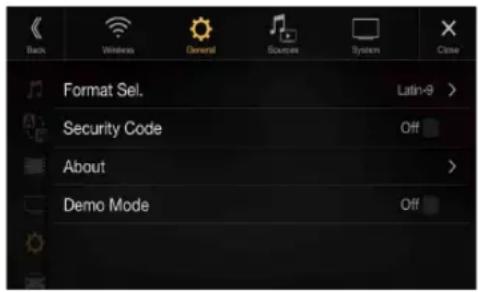
Format settings
The character code to be used for tag text information displayed on the screen can be selected from 7 character codes.
Setting item:
Format Sel.
Setting contents:
Latin-1 / Latin-9 (Initial setting) / Russian / Chinese / Thai / Arabic / Hebrew
Latin-1: ISO 8859-1
Latin-9: ISO 8859-15
Russian: ISO 8859-5
Setting Security code About X308AU/INE-W987A
You can set the system to be unusable without entering a password. When you turn this setting to "On" and set a password, password input is required when the system is connected to a battery and turned on for the first time.
Setting item:
Security Code
Setting contents:
Off (Initial setting) / On
Setting the password
1 Touch the checkbox "Off" () of the Security Code.
2 After the confirmation message appears, touch [OK].
The password setting screen is displayed.
3 Enter a password, then touch [OK].
- Enter the 6-digit number.
- Input numbers are displayed as “*”.
• T o u x h [ ] to delete an entered number.
4 Enter the same password again, then touch [OK].
The password is set and the system returns to the General Setup Menu screen, then the checkbox of the Security Code is set to "On" (☑)
- If you forget a registered password, you can not use this unit. In this case, service will be required.
Clearing the password
1 Touch the checkbox "On" () of the Security Code.
The password setting screen is displayed.
2 Enter the password you have set, then touch [OK].
The password is cleared and the system returns to the General Setup Menu screen, then the checkbox of the Security Code is set to "Off" (☐)
- Input numbers are displayed as “*”.
[About] enables you to check the Serial Number, Firmware Version, Model Name, and to initialise various settings.
Displaying the Product Information
You can view the version information of this product. Make note of this information and refer to it whenever you contact Alpine Tech Support or an Alpine-authorized dealer.
Setting contents:
Serial Number / Firmware Version / Model Name
Initializing the System
You can initialise all data, to restore the factory settings. Remove the USB flash drive, etc. from the system before operation
Setting item:
Clear All Settings
1 Touch [Reset] of "Clear All Settings."
2 After the confirmation message appears, touch [OK].
The confirmation screen appears again.
3 Touch [OK].
The system starts initialisation.
- Do not turn on/off the power, change the ignition key position or remove the screen panel until system restart is completed.
Setting Demo mode to Off/On
This unit has a Demonstration feature for the display. When you install and use the unit for the first time, the unit will enter demo mode automatically. To quit demo mode, set Demo mode to Off.
Setting item:
Demo mode
Setting contents:
Off / On (Initial setting)
- If you perform an operation during the Demo mode, the demonstration is temporarily stopped.
Car Setup
[Car] is selected on the General Setup Menu screen in step 1. See "General Setup" (page 28).
Steering wheel Setting
Set this item when Apple CarPlay is used/Android smartphone which installed Android Auto App is connected.
This setting influences Apple CarPlay/Android Auto mode.
Setting item:
Steering wheel
Setting contents:
Left (Initial setting) / Right
Installation Setup
Vehicle Setup enables you to check the installation status of Reverse Lead/Parking Brake Lead/Speed Signal/GPS Status/GPS Reception/VP Learning/Sensor Diagnosis, etc.
Setting item:
Installation Status
The Installation check screen is displayed.
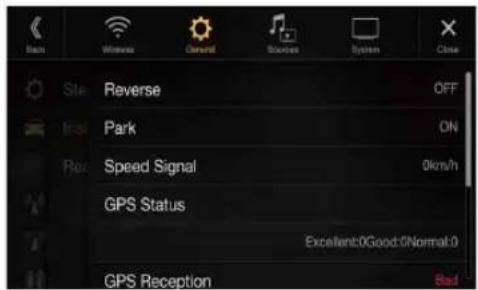
- Depending on your vehicle, some installation status may not be checked via this function.
Sources Setup
[Sources] is selected on the Setup main screen in step 3. See "Setup Operation" (page 25).
Sources Setup Menu screen
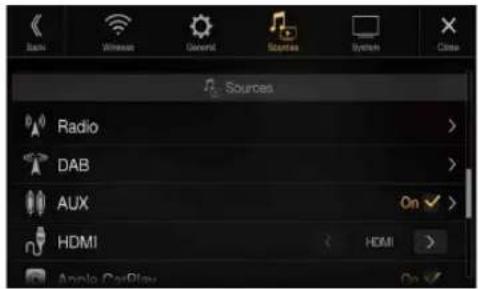
| Radio | |
| PI Seek | |
| RDS Regional | |
| PTY Language | |
| PTY31 | |
| FM Tuner Setting | |
| DAB | |
| Emergency Announcement | |
| Announcement Mode | |
| FM Linking | |
| DAB Antenna Power | |
| AUX*1 | |
| AUX Name*2 | |
| Direct Touch*2 | |
| Signal*2 | |
| HDMI*3 | |
| Apple CarPlay*4 | |
*1 This setting cannot be changed while the AUX source is being selected.
*2 This setting is only available when "AUX" is set to "On" (☑)
*3 This setting cannot be changed while the HDMI source is being selected.
*4 This setting cannot be adjusted when an iPod/iPhone is connected or Apple CarPlay/iPod source is being selected.
The following steps 1 to 3 are common to each "Setting item" of Audio Setup. See each section for details.
1 Select the desired item.
2 To switch the setting, touch [<], [>], [+], [-], or mark the checkboxes "Off" (☐ or "On" (). √
- If “” appears, there is a further hierarchy. Touch the desired item.
3 Touch [×] to return to the main source screen.
- To return to the previous List screen, touch [«]. For details, see "About Basic Operation for List Screen" (page 17).
Radio Setup
[Radio] is selected on the Sources Setup Menu screen in step 1. See "Sources Setup" (page 38).
You can set up the items related to the radio reception sensitivity, etc.
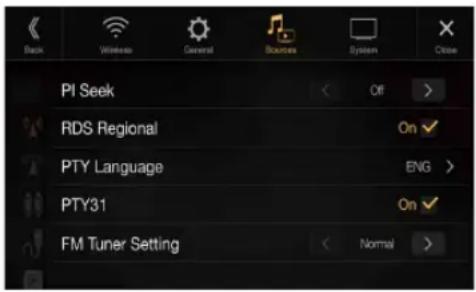
PI SEEK Setting
Setting item:
PI Seek
Setting contents:
Auto / Off (Initial setting)
Receiving RDS Regional (Local) Stations
When Off is selected, the unit automatically keeps receiving the local RDS station.
Setting item:
RDS Regional
Setting contents:
On (Initial setting) / Off
Switching the Display Language of PTY (Programme Type)
Setting item:
PTY Language
Setting contents:
ENG (Initial setting) / GER / FRE / SPA / POR / ITA / DUT / DAN / FIN / NOR / SWE / RUS
ENG: English
GER: German
FRE: French
SPA: Spanish
POR: Portuguese
ITA: Italian
DUT: Dutch
DAN: Danish
FIN: Finnish
NOR: Norwegian
SWE: Swedish
RUS: Russian
Setting PTY31 (Emergency Broadcast) Reception
PTY31 (Emergency Broadcast) reception can be set to On/Off.
Setting item:
PTY31
Setting contents:
On (Initial setting) / Off
- The unit automatically gives priority to an emergency broadcast whenever it begins, and interrupts the programme you are currently listening to when PTY31 is set to "On".
- The unit will show "Alarm" in the display during PTY31 reception.
- This setting works with the Alarm (Emergency Broadcast) of DAB.
Setting the TUNER (FM) Tone Quality (Tuner Condition)
This unit can set your preferred tone quality for FM radio source.
Setting item:
FM Tuner Setting
Setting contents:
Normal (Initial setting) / HiFi / Stable
Normal: Standard setting
HiFi: High-quality setting
Stable: Control noise
- Noise may be more noticeable when HiFi is set, depending on the reception status. In this case, the Normal setting is recommended.
DAB Setting
[DAB] is selected on the Sources setup menu in step 1. Refer to “Sources Setup” (page 38).
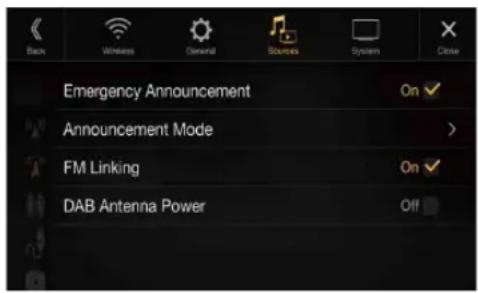
Setting Alarm (Emergency Broadcast) Reception
Turn Alarm (Emergency Broadcast) reception On/Off.
Setting item:
Emergency Announcement
Setting contents:
Off / On (Initial setting)
Off: Emergency Broadcasts will not be received.
On: Emergency broadcasts are received regardless of source.
• This setting works with PTY31 (Emergency Broadcast) of RDS.
- When an emergency broadcast is received, the volume level will be automatically changed to the memorised level in the traffic information mode. For details, see “Receiving Traffic Announcement” (page 53).
Setting Announcement Reception
You can select your desired station from 8 announcement types.
If “On” is set, when the selected announcement is received, the unit will switch to the DAB source screen automatically and will receive the broadcast.
Setting item:
Announcement Mode Transport News / Warning/Service / Area
Weather News / Event Announcement / Special Event / Program Information / Sport News / Financial News
Setting contents:
Off (Initial setting) / On
Setting the FM Linking ON/OFF (Service Following)
This unit provides FM Linking function which can switch the source from DAB+/DMB to FM radio when the digital signal is weak.
Setting item:
FM Linking
Setting contents:
Off / On (Initial setting)
Off: Keep receiving the digital signal, even when the digital signal is weak.
On: If the digital signal is weak, this unit will automatically switch to the analogue FM station with the same PI code. When receiving an analogue FM radio signal, the "FM Linking" indicator is displayed.
Setting the DAB Antenna ON/OFF
You can choose whether to supply power to DAB Antenna Connector by this setting. Confirm the type of DAB Antenna (sold separately) before installing the DAB antenna. If an active antenna that needs power supply from this unit is used, set DAB Antenna Power to On; if a passive antenna that does not need power supply from this unit is used, make sure to set DAB Antenna Power to Off, otherwise, a malfunction may occur.
Setting item:
DAB Antenna Power
Setting contents:
Off (Initial setting) / On
Off: When no DAB Antenna is connected or the connected DAB Antenna does not need power supply from this unit.
On: When the connected DAB Antenna needs power supply from this unit.
- If the "DAB Antenna error." message is displayed on the unit, this setting becomes invalid. For details on what to do if "DAB Antenna error," is displayed, see "If this Message Appears" (page 88).
AUX Setup
[AUX] is selected on the Sources Setup Menu screen in step 1. See "Sources Setup" (page 38).
You can set up the items related to the Auxiliary device.
- The items related to AUX cannot be changed while the AUX source is being selected.
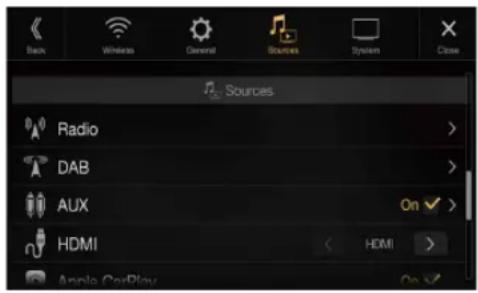
Setting item:
AUX
Setting contents:
Off / On (Initial setting)
Off: AUX source is not displayed.
On: AUX source is displayed.

The unit accepts the following 4-pole mini AV plug pin-out:
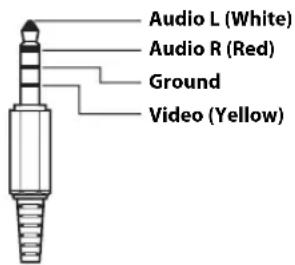
- Please check pin-out carefully before use of this product. Depending on the cable, there may be no picture and/or sound.
Setting the Auxiliary (AUX) Name
Make sure the AUX is set to "On" (See "AUX Setup" (page 40).
Setting item:
AUX Name
Setting contents:
AUX (Initial setting) / AUX DVD / GAME / External DVD / DVD Changer / DVB-T / TV / USB Player
Setting Direct Touch Operation
If DVB-T is set as the AUX Name, this setting is available.
Setting item:
Direct Touch
Setting contents:
On (Initial setting) / Off
On: Direct Touch operation is available on the DVB-T screen.
Off: Direct Touch operation is not available on the DVB-T screen.
Switching the Visual Input Signal System
You can make this setting only when AUX is set to "On" ☑. See "AUX Setup" (page 40).
Setting item:
Signal
Setting contents:
Auto (Initial setting) / NTSC/PAL
Auto: The video input signal type (NTSC or PAL) will be automatically selected.
NTSC/PAL: Choose the video input signal type manually.
HDMI Setup
[HDMI] is selected on the Sources Setup Menu screen in step 1. See "Sources Setup" (page 38).
You can set the name of an external device connected via HDMI.
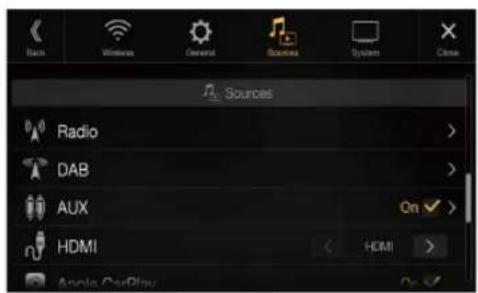
Setting item:
HDMI
Setting contents:
HDMI (Initial setting) / DVD
HDMI: Set when a smartphone is connected via HDMI.
DVD: Set when an external DVD player is connected.
Apple CarPlay Setup
[Apple CarPlay] is selected on the Sources Setup Menu in step 1. See "Sources Setup" (page 38).
Before connecting an iPhone 5 or later, turn on this item to use the Apple CarPlay function.
Setting item:
Apple CarPlay
Setting contents:
On (Initial setting) / Off
On: Set before an iPhone 5 or later is connected, the Apple CarPlay can be used, but the iPod source is not available at this time. Alpine Tunelt App is not available normally also.
Off: Set when you want to use the iPod source, etc., of the connected iPhone 5 or later.
• This setting is invalid for music playing of iPhone 4S and iPod.
System Setup
[System] is selected on the Setup main screen in step 3. See "Setup Operation" (page 25).
System Setup Menu screen
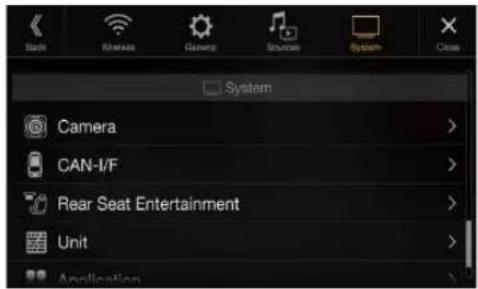
| Camera*1 | |
| Camera Select | |
| Camera Signal*2 | |
| Guide Adjustment*3 | |
| Interrupt (Power OFF)*4 | |
| CAN-I/F | |
| Default Vehicle Screen | |
| Climate screen interrupt time | |
| Parking sensor interrupt | |
| Rear Seat Entertainment | |
| Rear Seat Entertainment | |
| Remote Sensor | |
| Unit | |
| External AP | |
| HDMI selector | |
| Application | |
| Alpine Tunelt App*5 | |
*1 When you select "Camera Selector" in "Camera Select", the setting item is different. For details, see "Setting Multi Camera to On/Off" (page 43).
*2 When Camera Select is set to "Off," you cannot select this item.
*3 You can select this item only when Camera Select is "Front" or "Rear."
*4 You can select this item only when Camera Select is "Rear."
*5 Set this setting after closing the Alpine TuneIt App.
The following steps 1 to 3 are common to each "Setting item" of System Setup. See each section for details.
1 Select the desired item.
2 To switch the setting, touch [<], [>], [+], [-], or mark the checkboxes "Off" (or "On" (). √
- If “” appears, there is a further hierarchy. Touch the desired item.
3 Touch [X] to return to the main source screen.
- To return to the previous List screen, touch [«]. For details, see "About Basic Operation for List Screen" (page 17).
Camera Setup
[Camera] is selected on the System Setup Menu screen in step 1. See
"System Setup" (page 41).
You can set up items related to the Camera.
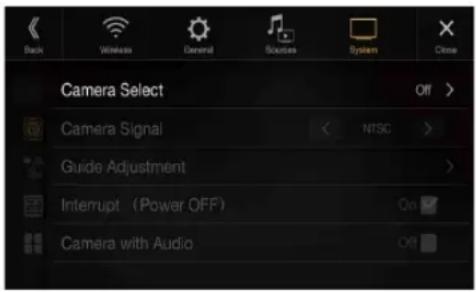
Setting the Camera Input
Setting item:
Camera Select
Setting contents:
Off (Initial setting) / Front / Rear / Other / Camera Selector
Front: Front camera
Rear: Rear camera
Other: Side camera, Room camera, etc.
Camera Front Camera/Rear Camera/Side Camera connected to
Selector*: the optional Multi Camera Interface module.
* When selecting Camera Selector, you can set the Front Camera/Rear Camera/Side Camera to On/Off. For details, see "Setting Multi Camera to On/Off" (page 43).
Setting the Camera Signal Input
When the camera is connected, the video input signal type can be chosen.
Further setting item:
Camera Signal
Setting contents:
NTSC (Initial setting) / PAL
Switching Video Patterns for Multi View Camera
The video pattern can be changed when connected to Multi View Camera.
When Camera Select is set to "Off" or "Other," you cannot select this item.
Setting item:
Guide Adjustment
1 Touch [Guide Adjustment].
The camera guide adjustment screen is displayed.
Multi View compatible Side Camera
2 Touch [Front] or [Rear].
The view will change to the selected view.
Multi View compatible Front Camera/Rear Camera
2 Touch [Back], [Panorama], [Corner], or [Top].
The view will change to the selected view.
- [Back] will not appear for the Front camera.
- For an explanation of video patterns, see the camera Owner's Manual.
Adjusting the Rear/Front/Side Camera Guide
You can adjust the camera guide position.
Setting item:
Guide Adjustment
1 Touch [Guide Adjustment].
The camera guide adjustment screen is displayed.
- If the video pattern is set to "Corner (Rear/Front Camera only)," the camera guide will not be displayed.
- When you connect a Multi View compatible camera, select a Video Pattern to make a guide adjustment.
- When you connect a Multi View compatible Side Camera, after selecting the Video Pattern, touch [ ] (Left steering) or [ ] (Right steering) to make the guide adjustment that matches the position of the steering wheel in your vehicle.
2 Touch [Adjust].
• I f [Adjust] does not appear, proceed to step 3.
3 Touch the guide you intend to adjust.
Guide line can also be selected by touching [▼] [▲].
■ Rear Camera screen example
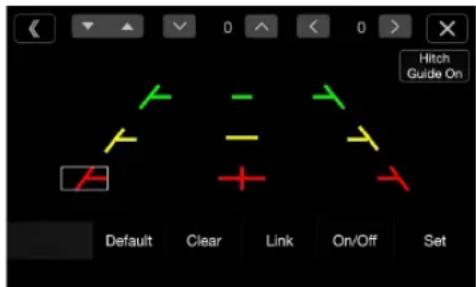
- You cannot adjust the position of the yellow guide line “” in the centre independently.
It is controlled by a system to be the centre of the two yellow guide lines “” and “____” on the left and right, or the central green line “—” and red guide line “+”.
Front Camera screen example
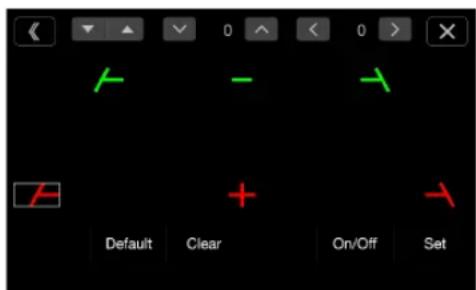
Side Camera screen example
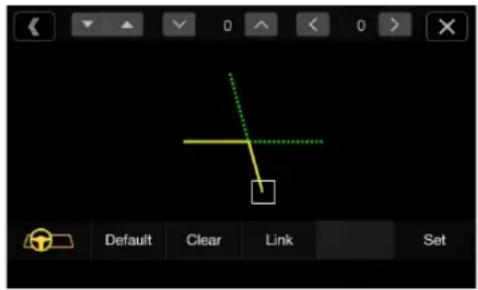
4 Touch [∨], [∧], [〈] or [〉] to adjust the position of the guide.
- Touching [Clear] clears adjustments and returns to the setting before guide line alteration.
5 After the adjustment is completed, touch [Set].
Adjusting Guides Simultaneously (for Rear/Side Camera only)
1 Touch [Link].
The 3 vertical guides of the currently-selected guide link together, allowing them to be adjusted simultaneously.
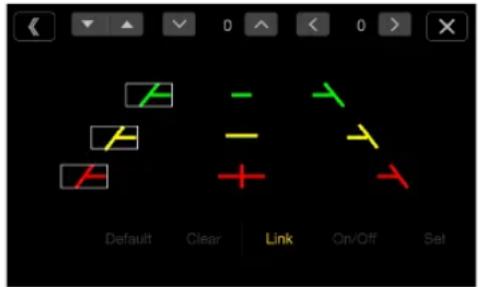
- Note on the yellow guide line " " in the centre
The yellow guide line “” in the centre is controlled by a system that locates it in the centre of the two yellow guide lines, “” and “” on the left and right, or the green line “” on the top and red guide line “” below. Therefore you cannot move it manually.
1 Touch [Link].
The 2 vertical guides of the currently-selected guide link together, allowing them to be adjusted simultaneously.
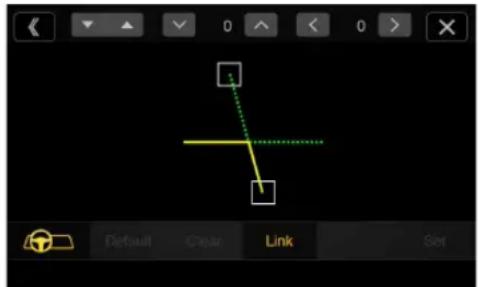
Turning Guide Display On/Off (Rear/Front Camera only)
Turning the selected guide off.
1 Touch [On/Off].
The currently selected guide will turn off.
2 To turn the guide on, touch [On/Off] again.
• Guides that are turned off are still adjustable.
Returning Guides to Default
1 Touch [Default].
A message window will appear.
2 Touch [OK].
Adjusted values will return to default settings.
Camera Interrupt Setting (Power OFF Mode) (Rear Camera Only)
You can set whether to display the rear camera image when the gear lever is moved to the reverse (R) position while the unit is turned off. You can select this item only when Camera Select is "Rear."
Setting item:
Interrupt (Power OFF)
Setting contents:
On (Initial setting) / Off
On:
The rear camera image is displayed
Off:
The rear camera image is not displayed
Setting Multi Camera to On/Off
When connecting the optional Multi Camera Interface module, you can connect up to 3 cameras as Front Camera/Rear Camera/Side Camera.
- When using the optional Multi Camera Interface module, select "Camera Selector" to set the "Front Camera /Rear Camera/Side Camera" to "On"/"Off" (☐).
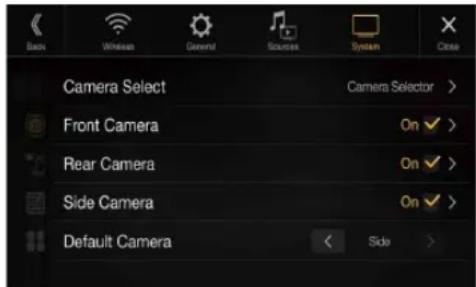
Setting item:
Front Camera / Rear Camera / Side Camera / Default Camera*
Setting contents:
Off (Initial setting) / On
Camera
See "Setting the Camera Input" (page 42)
Signal:
Guide
See "Adjusting the Rear/Front/Side Camera Guide"
Adjustment:
(page 42)
Camera
See "Camera Interrupt Setting (Power OFF Mode) (Rear
Interrupt
Camera Only)" (page 43)
(Power Mode):
* You can change the Default Camera only when you set more than one camera for Front Camera/Rear Camera/Side Camera to "On." For details, see "Setting a Default Camera" (page 44).
Setting a Default Camera
When connecting an optional Multi View Camera, you can set which camera image is displayed when you touch the Camera button on the Menu screen.
Setting item:
Default Camera
Setting contents:
Front / Rear / Side
- The initial setting differs depending on the cameras set to "On" in "Setting Multi Camera to On/Off."
CAN-I/F Setup
[CAN-I/F] is selected on the System Setup Menu screen in step 1. See "System Setup" (page 41).
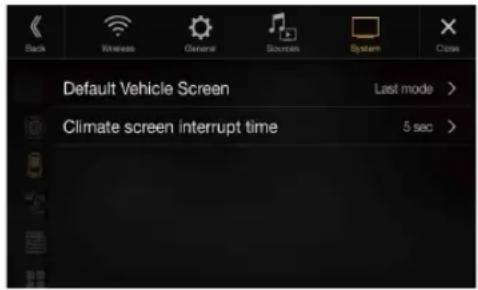
• CAN I/F BOX should be connected before this operation.
Setting the Default Vehicle Screen
Touch the Menu screen (page 19) to display the Info mode screen, and then set the following.
Setting item:
Default Vehicle Screen
Setting contents:
Climate / Park sensor / Last mode (Initial setting)
- For details on the Vehicle Info mode screen, see “About Vehicle Interlock Function” (page 84).
Setting the Climate Interrupt Time
You can set the time displayed in the Climate screen.
Setting item:
Climate screen interrupt time
Setting contents:
None / 5 sec (Initial setting) / 10 sec / Continuous display
None: The Climate screen is not displayed when you adjust the air conditioner, etc.
5 sec/10 sec*: The screen is displayed for 5 seconds/10 seconds, then returns to the previous screen.
Continuous display: The Climate screen is continuously displayed.
* If you set the air conditioner, etc., while the Climate screen is displayed, the screen will continuously be displayed.
- For details, see "About Vehicle Interlock Function" (page 84).
Setting the Parking Sensor Interrupt On/Off
Set to "On" to display the Parking Assist screen if a vehicle detects an obstacle.
Setting item:
Parking sensor interrupt
Setting contents:
Off / On (Initial setting)
- For details, see "About Vehicle Interlock Function" (page 84).
Rear Seat Entertainment Setup
[Rear Seat Entertainment] is selected on the System Setup Menu screen in step 1. See "System Setup" (page 41).
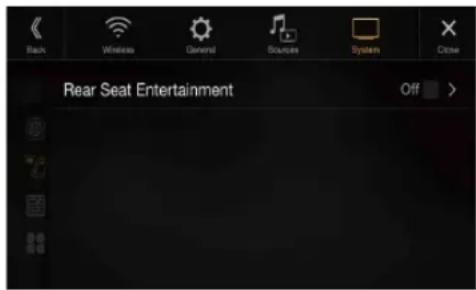
When a Rear monitor equipped with HDMI input is connected to this unit, change this setting to "On." You can output images to the Rear monitor. For details, see "Rear Seat Entertainment Function" (page 18).
Setting item:
Rear Seat Entertainment
Setting contents:
Off (Initial setting) / On
- When this setting is "On," you can use this unit to switch the Illumination of a Rear monitor with the Illumination function.
Setting the Rear Seat Entertainment System
Make sure the Rear Seat Entertainment is set to "On" (See "Rear Seat Entertainment Setup" (page 44).
Setting item:
Illumination Colour
Setting contents:
Off (Initial setting) / On
- For details on adjusting Illumination, see "Rear Seat Entertainment Function" (page 18).
- When the Rear Seat Entertainment setting is set to "Off," you cannot select this item.
- Set the coordination colour controls on the Rear monitor to "Navi." When set to "Rear monitor," you cannot operate them from this unit.
Remote Sensor Setting
Make sure the Rear Seat Entertainment is set to "On" (See "Rear Seat Entertainment Setup" (page 44).
For remote control operation, the remote sensor of the external device (Rear monitor, etc.) can be switched, as you prefer.
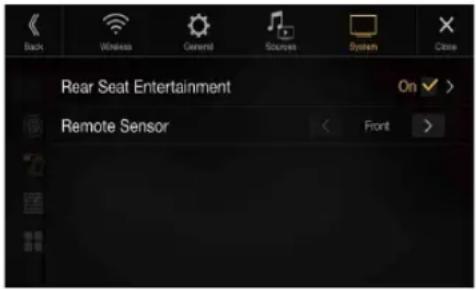
Setting item:
Remote Sensor
Setting contents:
Front (Initial setting) / Rear
Front: The remote sensor of this unit is effective.
Rear: The remote sensor of Rear monitor is effective.
- You can also control this setting from the Rear Seat Entertainment System Setup screen. For details, see “Rear Seat Entertainment Function” (page 18).
Unit Setup
[Unit] is selected on the System Setup Menu screen in step 1. See "System Setup" (page 41).
Make this setting when you use an external audio processor.
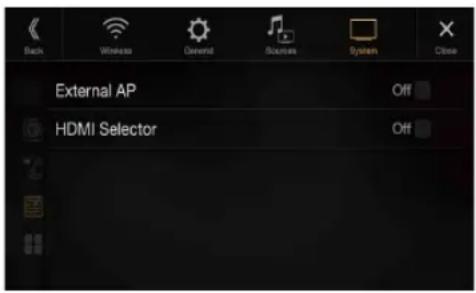
Setting the External AP
When using an external audio processor, set to "On" (✗)
Setting item:
External AP
Setting contents:
Off (Initial setting) / On
- When this setting is "On," the Volume level is fixed at 10. Also, Balance/Fader/Subwoofer Level/Subwoofer Phase/Bass/Treble/MX HD/EQ Presets/Dual HD EQ/X-OVER/Time Correction/Defeat/Phone Speaker/Default Sound Settings are set to "Off" or "Flat" and cannot be adjusted.
- Use the external AP to adjust volume.
Setting the HDMI Selector On/Off
If you connect an HDMI selector, you can connect two HDMI devices. When using an HDMI selector, set to "On" (☑)
Setting item:
HDMI selector
Setting contents:
Off (Initial setting) / On
- For details on switching the HDMI source when two HDMI devices are connected, see "HDMI Operation" (page 68).
Application Setup
[Application] is selected on the System Setup Menu screen in step 1. See "System Setup" (page 41).
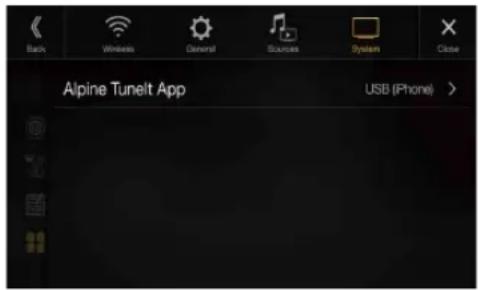
Set Alpine TuneIt App to USB (iPhone) when an iPhone is connected, or set to Bluetooth (Android) when an Android Smartphone is paired.
Setting item:
Alpine Tunelt App ^*1
Setting contents:
Off / USB (iPhone) (Initial setting) / Bluetooth (Android)*2
Off: No Smartphone is connected.
USB (iPhone): When an iPhone is connected to the unit's USB port, you can programme the unit's sound tuning parameters, or communicate with SNS.
Bluetooth Set this when an Android Smartphone is paired with this
(Android): unit via Bluetooth technology. And after Bluetooth Audio is connected, you can programme the unit's sound tuning parameters, or communicate with SNS.
- For this function to work properly, specific applications must be installed on your Smartphone before connection. Consult your Alpine dealer or the Alpine website for details.
- Only the iPhone and certain Android Smartphones support this function.
*1 Set this setting after closing the Alpine TuneIt App.
*2 Not displayed when Bluetooth is set to Off. For details, see "Bluetooth Setup" (page 26).
Android Auto (Optional)
What is Android Auto
Android Auto is designed to make it easier to use apps from your phone while you're on the road. Navigate with Google Maps, listen to playlists or podcasts from your favourite apps, and more.
Activate Android Auto
Download the Android Auto App from the Google Play store before continuing.
Just plug in your smartphone to the unit's USB connector, then follow the prompt to pair your smartphone with the unit.
- The connected smartphone with Android Auto will disconnect other phone's Bluetooth connection and pair to the unit.
1 Press the MENU button.
The Menu screen is displayed.
2 Touch [Android Auto].
The Android Auto screen is displayed.
- When a used smartphone is reconnected, touch the pop-up message-"Android Auto connected" within 5 seconds to access to Android Auto screen, or you can ignore prompt by touching [X] on the top right.
- You can make a call, use voice recognition function and Android Auto's compatible navigation app, etc.,
- Only Google approved apps with necessary driver-safety measures in place can be used.
Apple CarPlay (Optional)
Apple CarPlay is a smarter, safer way to use your iPhone in the car. Apple CarPlay takes the things you want to do with your iPhone while driving and puts them right on the unit. You can get directions, make calls, send and receive messages, and listen to music, all in a way that allows you to stay focused on the road. Just plug in your iPhone to the unit and go.
- Before using this function, turn Apple CarPlay to On (page 41) and plug in your iPhone using Lightning to USB Cable (Supplied with iPhone) to the unit.
- Some functions may not be available while driving.
- About iPhone models usable with this unit, see "iPod/iPhone (Optional)" (page 58). Only an iPhone 5 or later compatible with Apple CarPlay function.
Access to Apple CarPlay
1 Press the MENU button.
The Menu screen is displayed.
2 Touch [Apple CarPlay].
The Apple CarPlay mode is activated. Touch the desired App icon on the unit, or use Siri function by pressing VOICE button.
- When a used iPhone 5 or later is reconnected, touch the pop-up message-"Apple CarPlay connected." within 5 seconds to access to Apple CarPlay screen, or you can ignore prompt by touching [×] on the top right.
- The App must be Apple CarPlay compatible in order to appear in the Home screen.
Radio/RDS
■ RDS (FM1/FM2) main screen example
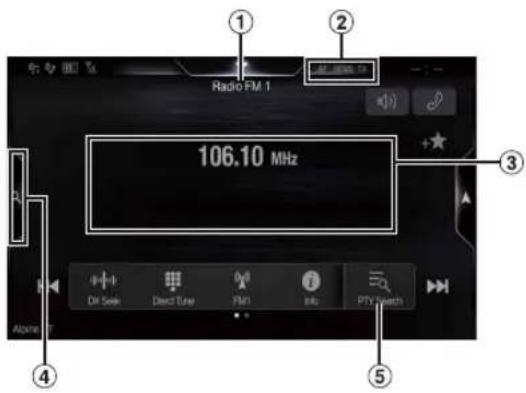
Function mode
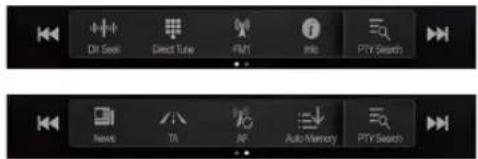
① Source Title/Band display
Displays the band of the signal currently being received.
② RDS indicator
③ Info area
Station Info. Mode: PTY / Frequency or PS / Artist Name / Song Name / Album Name
Radio Text Mode: Frequency / Radio Text
- For details on switching the display of the Radio text, see "Displaying Radio Text" (page 50).
④ Preset mode button
Touch when you use the Preset mode screen.
⑤ PTY list button
Touch when you use the PTY list screen.
■ Preset mode screen example
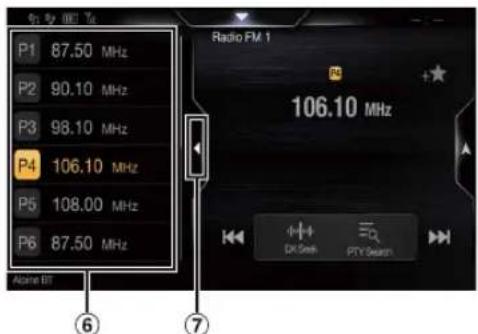
⑥ Preset button
Swipe vertically in the list to change pages.
⑦ Touch to close the Preset mode screen
MW/LW band main screen example
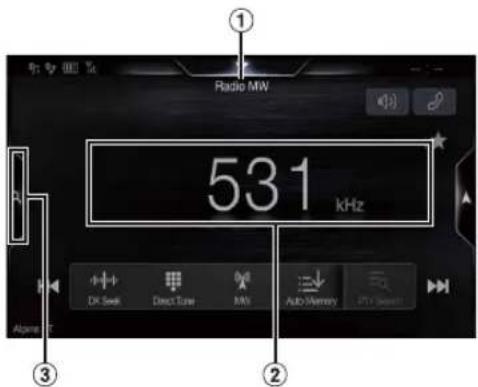
① Band display
Displays the band of the signal currently being received.
② Frequency display
③ Preset mode button
Touch when you use the Preset mode screen.
■ Preset mode screen example
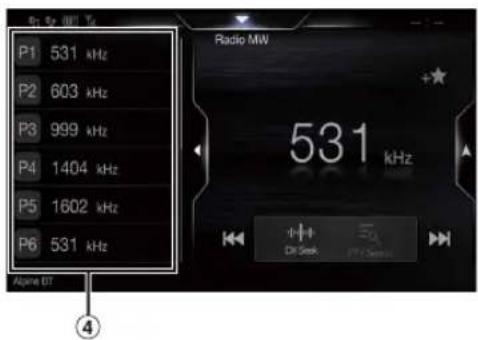
④ Preset button
Swipe vertically in the list to change pages.
Listening to the Radio
1 Press the ♪ (AUDIO) button to select radio mode.
The display shows the radio mode screen.
- You can select and change the source from the Menu screen (page 19) or the Favourite screen (page 22).
2 Touch [icon].
The radio band select pop up screen is displayed.
- [^(0)A] button displays the current selected band. (e.g. [FM1])
3 Select the desired band from FM1/FM2/MW/LW.
4 Touch [||||].
The tuning mode selection popup is displayed.
• [||||] button displays the current selected mode. (e.g. [DX Seek])
5 Touch the desired tuning mode.
The radio frequency up or down button changes depending on the tuning mode.
DX Seek
Local Seek
Manual



PTY
Preset


- There are two modes you can select for auto tuning, DX and Local:
- DX Seek (Distance) mode; Both strong and weak stations will be tuned in.
- L o c a l S e e k m o d e ; Only strong stations will be tuned in. The initial setting is DX.
- M a n u a l m o d e ; The frequency is manually tuned in steps
- PTY Seek mode (RDS FM Radio Mode only); The currently selected programme type station will be tuned.
- Preset (Preset UP/DN) mode; You can directly switch preset stations.
6 Touch [|◀◀], [▶▶] or [◀◀], [▶▶] to change the radio frequency up or down respectively.
In manual mode, touch and hold to change the frequency continuously.
• The ◀◀◀ ▶▶buttons provide the same functions above.
Presetting Stations Manually
1 Tune in a desired radio station you wish to store in the preset memory by manual or automatic seek tuning.
2 Touch the Preset number you want to store, for at least 2 seconds.
The selected station is stored.
3 Repeat the procedure to store up to 11 other stations onto the same band.
To use this procedure for other bands, simply select the desired band and repeat the procedure.
A total of 48 stations can be stored in the preset memory (12 stations for each band; FM1, FM2, MW or LW).
- For details on switching to the Preset mode screen, see ③ in "MW/LW band main screen example" (page 47).
- If a preset memory has already been set in the same preset number, it will be cleared and the new station will be memorised.
Presetting Stations Automatically
The tuner can automatically seek and store 12 strong stations in the selected band in ascending order of frequency.
Select the desired band then touch and hold [≡↓] (Auto Memory).
The tuner automatically seeks and stores 12 strong stations into the preset buttons in ascending order of frequency.
When automatic storing has completed, the station stored in the preset 1 is selected.
- If no stations are stored, the tuner will return to the original station you were listening to before the automatic storing procedure began.
- You can cancel this process by touching [≡↓] (Auto Memory) while the tuner is automatically seeking stations. Canceling will return the tuner preset to the previous setting.
Tuning to Preset Stations
You can tune in the preset stations in memory on either band using its preset number.
1 Touch [ ]
The radio band select pop up screen is displayed.
• [☐] button displays the current selected band. (e.g. [FM1])
2 Select the desired band from FM1/FM2/MW/LW.
3 Touch any one of the Preset numbers you have already stored in the Preset mode screen.
The preset station is received.
- For details on switching to the Preset mode screen, see ③in "MW/LW band main screen example" (page 47).
- You can also switch the preset station by touching [] or [] when the tuning mode of "Preset" is chosen.
Inputting Frequency Directly and Receiving the Radio Station
You can input a frequency of the same band directly and receive the radio station.
1 Touch [■] (Direct Tune).
The numeric keypad input mode screen appears.
2 Touch a desired number.
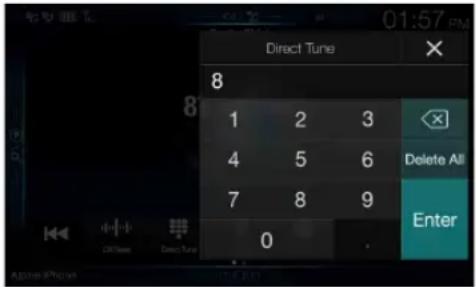
Touch[✗] to delete an entered number. Touch[Delete All] to delete all entered numbers
3 Touch [Enter] on the numeric keypad mode screen to confirm your selection.
Touch[×] to hide the keypad display.
RDS Operation
Turning AF (Alternative Frequencies) On or Off
The RDS (Radio Data System) is a radio information system using the 57 kHz subcarrier of regular FM broadcasts. The RDS allows you to receive a variety of information such as traffic information, station names, and to automatically re-tune to a stronger transmitter that is broadcasting the same programme.
Touch [95] (AF) to select the AF (Alternative Frequency) ON or OFF mode.
In AF ON mode, the "AF" Indicator lights up.
- RDS mode is not be displayed for the MW or LW band.
- When the AF ON mode is selected, the unit automatically tunes to a strong signal station in the AF list.
- Use the AF OFF mode when automatic re-tuning is not required.
Tips
• The RDS digital data includes the following:
PI Programme Identification
PS Programme Service Name
AF List of Alternative Frequencies
TP Traffic Programme
TA Traffic Announcement
PTY Programme Type
EON Enhanced Other Networks
- Refer to page 39 about "PI SEEK Setting," "Receiving RDS Regional (Local) Stations," "Switching the Display Language of PTY (Programme Type)" and "Setting PTY31 (Emergency Broadcast) Reception."
Interruption Function
If the Interruption Function is enabled, when the following broadcast is received, the unit switches to the Radio source screen automatically, and will receive broadcasts.
- P T Y 3 1 ( E m e r,2g e n c y B r o a d c a s t
- T A ( Tr a f fi c  n n o u n c e m e n t ) *
- N e w s p r ^2 o g r a m m e *
*1 Set PTY31 to "On" in "Setting PTY31 (Emergency Broadcast) Reception" (page 39).
*2 Not interrupted during the DAB broadcast reception.
*3 The Interruption Function for Traffic Announcements works with DAB broadcasts. Therefore, even if the current source is RDS, a Traffic Announcement by DAB broadcast may interrupt.
- "RDS Alarm"/"RDS T.Info"/"RDS News" is displayed in the Band display section during each respective broadcast reception.
- To cancel the Interruption function, touch the RDS main screen or press any of the following buttons.
♪/(Favourite)/MENU/◄◄◄/►►►/@NAV)
- When the interruption broadcast is over, the unit returns to the previous screen.
- Does not interrupt during Hands-free phone talk. During camera image display, only the sound may be interrupted.
- The volume level will be memorised if the volume is adjusted during interruption broadcast reception. When an interruption broadcast is received the next time, the volume level is automatically adjusted to the memorised level.
Receiving Traffic Announcement
Touch [ /i\ ] (TA).
The "TA" indicator lights up and the unit switches to standby mode for the traffic announcement.
When the traffic announcement is received, the "TP" indicator lights up and the unit switches to the radio source screen to receive it.
- The "TP" indicator lights up during standby mode off in a condition other than radio source to indicate that the unit is receiving the traffic announcement.
- If the traffic announcement broadcast signal falls below a certain level, the unit remains in the receiving mode for 1 minute. If the signal remains below a certain level for over 70 seconds, “TA” will blink in the display.
News Programme Interruption
Touch [ ] (News).
The "NEWS" indicator lights up and the unit switches to standby mode for the News programme. When the News programme is received, the unit switches to the radio source screen to receive it.
Receiving Traffic Information Manually
1 Touch [A] (TA) to turn on the Traffic Information mode.
The "TA" indicator lights up.
2 Touch [◀◀] or [▶▶].
Seeks the broadcast station which is broadcasting the traffic information.
- You can seek the traffic information in DX Seek mode or Local Seek mode.
Selecting the Receivable PTY
You can select and receive the currently receivable stations in the PTY list screen.
1 Touch the PTY list button.
The Select PTY list screen is displayed.
- For details on switching to the PTY list screen, see "Preset mode screen example" (page 47).
■ PTY list screen example
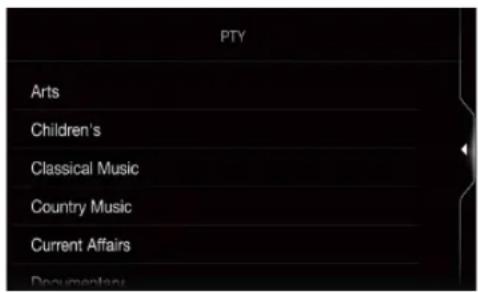
2 Select the desired programme type in the PTY list screen.
PTY Seek starts and the receivable programme type is received. If no PTY station is found, "No PTY." will be displayed.
- Touch [◀] or [▶] to select the same programme type station as the currently selected programme type after switching the tuning mode to PTY (PTY Seek) mode.
Displaying Radio Text
Text messages from a radio station can be displayed.
1 Tune in a radio station that transmits text messages.
2 Touch [i] (Info) in the FM radio mode repeatedly to switch to the desired display.
Station Info.Mode → Radio Text Mode → Station Info.Mode
Station Info. Mode
PTY/Frequency or PS/Artist Name/Song Name/Album Name
Radio Text Mode
Frequency/Radio Text
DAB/DAB+/DMB
DAB main screen example
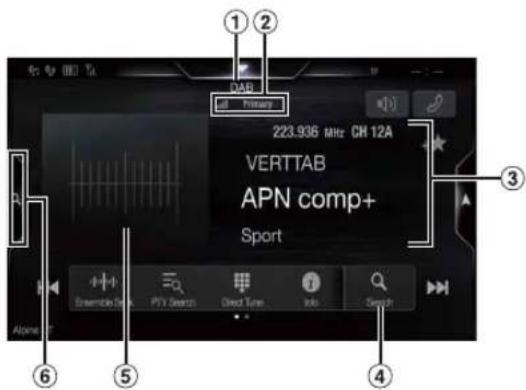
Function mode
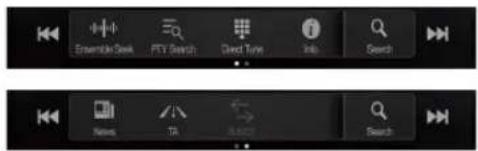
① Source Title/Announcement
② DAB indicator (Signal Strength/Service Component/FM Linking)
③ Info area
Station Info Mode
Frequency, Channel No./Ensemble Label/Service Label/PTY Name
Dynamic Label Mode
Dynamic Label (Displaying the information related to the current receiving station)
- For details on switching the display, see "Displaying DAB Text" (page 54).
④ Full Search mode button (All Service list, Current Ensemble list or PTY list is displayed)
Touch when you use the Full Search mode screen.
⑤ Slide Show
- Displays the program information, artist photos, and advertisements that are synchronised with the Service component currently being received.*
- You can change the artwork position. For details, see "Switching the Artwork Position" (page 36).
⑥ Preset mode button
Touch when you use the Preset mode screen.
* They may not be displayed, depending on the Service component currently being received.
Preset mode screen example
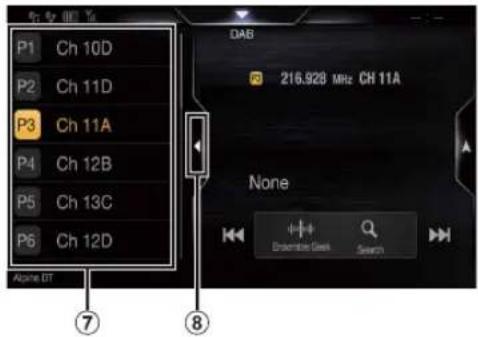
⑦ Preset button
Swipe vertically in the list to change pages.
⑧ Touch to close the Preset mode screen
- Confirm the type of DAB antenna (sold separately) before using the DAB/DAB+/DMB function. If an active antenna that needs power supply from this unit is used, set DAB Antenna Power to On; if a passive antenna that does not need power supply from this unit is used, make sure to set DAB Antenna Power to Off, otherwise, a malfunction may occur. See "Setting the DAB Antenna ON/OFF" (page 40).
- When FM Linking is set to On, if the digital signal is weak, this unit will automatically switch to the analogue FM station with the same PI code, and the source icon for Radio displays as FM Linking. For details, see "Setting the FM Linking ON/OFF (Service Following)" (page 40).
- This product does only support the "Receiver Profile 1 - Standard Audio Receiver" according to the official classification of WorldDMB Forum.
Listening to DAB/DAB+/DMB
1 Press the ♪ (AUDIO) button to select DAB mode.
The display shows the DAB mode screen.
- You can select and change the source from the Menu screen (page 19) or the Favourite screen (page 22).
2 Touch [....].
The tuning mode selection popup is displayed.
- [||||] button displays the current selected mode. (e.g. [Ensemble Seek])
3 Touch the desired tuning mode.
- Ensemble Seek mode;
Receivable ensembles will be tuned in automatically.
- Ensemble Manual mode;
Each ensemble is tuned in one step at a time manually.
- PTY Seek mode;
Service (Primary Component) of the selected PTY will be tuned in.
- Service (Service Up/Down) mode;
Service Components in the All Service list will be switched.
- Preset (Preset UP/DN) mode;
The Preset station will be tuned in directly.
4 Touch [◀]/[▶], [|◀◀]/[▶▶] or [◀◀]/[▶▶] to change the Service or Ensemble up or down respectively.
Touch and hold to change the Service or Ensemble continuously.
• The , | function provide the same functions above.
Presetting Service
1 Select the band and ensemble, and then tune in a desired service you wish to store in the preset memory.
2 Touch the preset number you want to store, for at least 2 seconds.
The selected station is stored.
The display shows the service label or channel number memorised.
3 Repeat the procedure to store up to 17 other stations onto the same band.
To use this procedure for other bands, simply select the desired band and repeat the procedure.
- A total of 18 services can be stored in the preset memory.
- If you store a service in a preset memory which already has a service, the current service will be cleared and replaced with the new service.
- For details on switching to the Preset mode screen, see i5 "DAB main screen example" (page 51).
Tuning to Preset Service
You can tune in the preset stations in memory on either band using its preset number.
Touch any one of the preset buttons that has a service stored to it.
The preset service is received.
- For details on switching to the Preset mode screen, see iñ“DAB main screen example” (page 51).
Service Component/PTY Search Function
You can select your favourite Service Component from the All Service list, Current Ensemble Service list or PTY Search list.
Service Search Function
1 Touch [Q] (Search).
2 Touch [≡ALL] (All) or [≡] (Current Ensemble).
The All Service list or Current Ensemble list in the Full Search mode screen is displayed.
ALL: All the currently available Service Component (Primary/Secondary) lists are displayed.
Current Selectable Service Component (Primary/Secondary) lists
Ensemble: from the Ensemble currently being received are displayed.
3 Touch the desired Service component.
The Selected service component is received.
- A Secondary Service list that was derived from the Primary Services is displayed in the Service Component list.
- The TP indicator is displayed in the Service Component (Primary) list currently being received.
- The PTY is displayed in the Service Component (Primary) list currently being received.
- You can also narrow down the options and search the Service name using the alphabet search function. (Primary Component only) For details, see “Alphabet Search Function” (page 60).
PTY Search Function
1 Touch [≡] (PTY Search).
A programme type list that was derived from the Primary Services currently being received as Service components is displayed.
- When the All Service list or Current Ensemble list screen is being displayed, touch [∅] ( P T Y ) .
2 Touch the desired programme type.
The Service Component list that corresponds with the selected programme type is displayed.
3 Touch the desired Service Component.
The selected Service Component is received.
List Update Function
You can update each list while it is being displayed.
Touch [ ] (List Update).
The list is updated to the currently available list.
Interruption Function
If Interruption Function is enabled, when the following broadcast is received, the unit switches to the DAB source screen automatically, and will receive broadcasts.
- A l a r m ( E m e r ^1,2 g e n c y B r o a d c a
- TA(Traffic Announcement)* 4
- Announcement* 2,3
N e w s A n n² o u n c e m e n t *
*1 Set Alarm to "On" in "Setting Alarm (Emergency Broadcast) Reception" (page 39).
*2 Not interrupted during the RDS broadcast reception.
*3 Select the Announcement type received in "Setting Announcement Reception" (page 40), then set the Announcement setting to "On."
*4 The Interruption Function for Traffic Announcements works with RDS broadcasts. Therefore, even if the current source is DAB, a Traffic Announcement by RDS broadcast may interrupt.
- "DAB Alarm"/"DAB T.Info"/"DAB News" is displayed respectively on the Source title section during each broadcast reception. The display differs during announcement reception depending on the announcement type set in "Setting Announcement Reception" (page 40).
- To cancel the Interruption function, touch the DAB main screen or press any of the following buttons.
♪/(Favourite)/MENU/▶(N▶)
- When the interruption broadcast is over, the unit returns to the previous screen.
- Does not interrupted during Hands-free phone talk. During camera image display, only the sound may be interrupted.
- The volume level will be memorised if the volume is adjusted during interruption broadcast reception. When an interruption broadcast is received the next time, the volume level is automatically adjusted to the memorised level.
Receiving Traffic Announcement
Touch [ / ] (TA).
The "TA" indicator lights up and the unit switches to standby mode for the traffic announcement.
When the traffic announcement is received, the "TP" indicator lights up and the unit switches to the DAB source screen to receive it.
- The "TP" indicator lights up during standby mode off in a condition other than the DAB source to indicate that the unit is receiving the traffic announcement.
- This setting works interlocked with the traffic announcement (Emergency Broadcast) of RDS.
News Programme Interruption
Touch [ ] (News).
The "NEWS" indicator lights up and the unit switches to standby mode for the News announcement. When the News announcement is received, the unit switches to the DAB source screen to receive it.
- This setting works interlocked with the News announcement (Emergency Broadcast) of RDS.
Inputting Channel Number Directly and Receiving the Broadcasts
You can receive your desired station by inputting the channel number directly.
1 Touch [■] (Direct Tune).
The numeric keypad input mode screen appears.
2 Input the desired channel number.
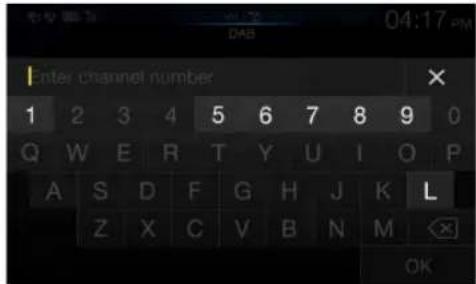
You can enter channel numbers of up to three digits. Each time you enter a number, receivable channels will be narrowed down.
- Touch [✗] to delete an entered number. To delete all the numbers you have entered, touch [✗] for at least 2 seconds.
3 Touch [OK].
Switching to Secondary Service Components
When the current Service Component includes Secondary Service components, the Function mode switch [] (Sub.Ch) becomes available.
Touch [←] (Sub.Ch).
The Primary indicator switches to the Secondary indicator, and the Secondary Service Component is received.
- When the Secondary Service Component finishes, the unit automatically switches to the Primary Service Component.
- Touch [←] (Sub.Ch) again to switch to the Primary Service Component while receiving the Secondary Service Component.
- If there are more than one Secondary Service Component, each time you touch [] (Sub.Ch) the indicator changes in the order of Secondary1 -Secondary2 ... Primary.
Displaying DAB Text
Text messages from a DAB station can be displayed.
1 Tune in a DAB station that transmits text messages.
2 Touch [i] (Info) in the DAB mode repeatedly to switch to the desired display.
Station Info Mode Dynamic Label Mode Station Info Mode
Station Info Mode
Frequency, Channel No./Ensemble Label/Service Label/PTY Name
Dynamic Label Mode
Dynamic Label (Displays the information related to the current receiving station)
About DAB/DAB+/DMB
What is DAB?
DAB (Digital Audio Broadcasting) is the third generation broadcasting technology following the traditional analogue technologies such as FM. The advantages of DAB include being more robust with regard to noise, interference, instability, etc., during radio signal transmission. Also, it can provide stereo CD-quality sound and digital information, and it can resist multipath interference guaranteeing high-quality reception for fixed, portable and mobile devices.
What is DAB+?
WorldDMB, the organisation in charge of the DAB standards, announced DAB+, a major upgrade to the DAB standard in 2006, when the HE-AAC v2 audio codec (also known as eAAC+) was adopted. The new standard, which is called DAB+, has also adopted the MPEG Surround audio format and stronger error correction coding in the form of Reed-Solomon coding. DAB+ has been standardised as ETSI TS 102 563.
What is DMB?
DMB (Digital Multimedia Broadcasting) is a future-orientated, new generation broadcasting system based on DAB (Digital Audio Broadcasting). Where DAB upgraded the traditional analogue sound of FM to a CD-quality level, DMB advances simple sound broadcasting to the multimedia arena, striving to provide a visual service while transmitting high-quality sound. Users include entertainment programmes, intellectual traffic navigation, electronic newspapers and magazines, information provided by financial markets, the Internet, and integrated city information. It can be widely used by mobile carriers such as buses, taxis, light railways, underground railways, trains, ferries, airports, and by all kinds of people in the home and office.
USB Flash drive (Optional)
You can play back music files (MP3/WMA/AAC/FLAC) and video files (AVI/MKV/MP4) stored in a USB flash drive on the internal player of this system.

WARNING
It is dangerous (and illegal in many states) for the driver to watch TV/video while driving the vehicle. The driver may be distracted from looking ahead and an accident could occur.
Install the unit correctly so that the driver cannot watch TV/video unless the vehicle is stopped and the emergency brake is applied.
If the unit is not installed correctly, the driver will be able to watch TV/video while driving the vehicle and may be distracted from looking ahead and cause an accident. The driver or other people could be severely injured.
USB Audio main screen example
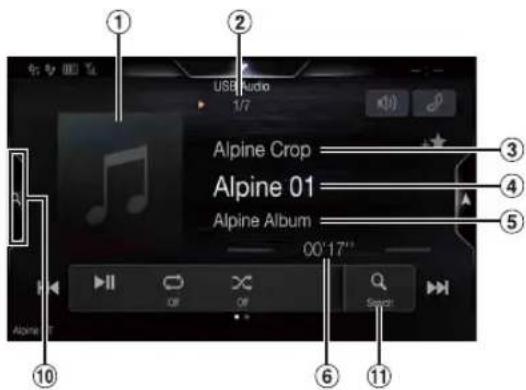
Function mode
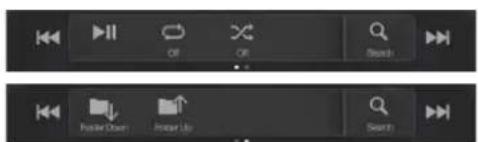
USB Video main screen example
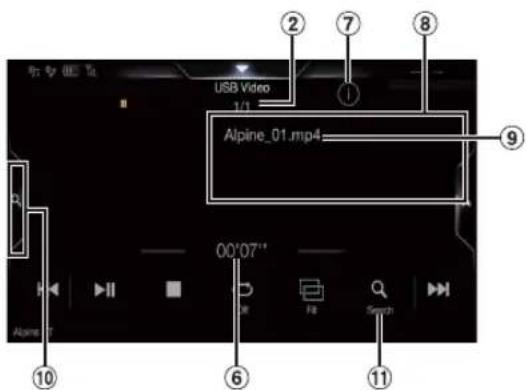
① Artwork display
- You can change the artwork position. For details, see "Switching the Artwork Position" (page 36).
② Current track no./Total song no.
③ Artist title
④ Song title
⑤ Album title
⑥ Elapsed time
⑦ Info mode switching button
⑧ Info mode display
⑨ File Name
⑩ Quick Search button
Touch to use the Quick Search mode.
⑪ Full Search mode button
Touch when you use the Full Search mode screen.
■ Quick Search mode screen example
Swipe vertically in the list to change pages.
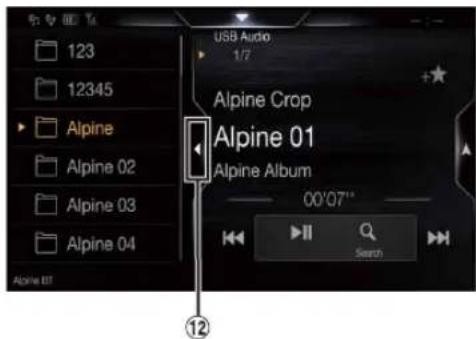
⑫ Touch to close the Quick Search mode
The USB Video operation screen display during video file playback
Touch the screen while the USB Video playback screen is displayed.
The USB Video operation screen is displayed.
- The operation screen changes to the visual screen in the USB Video mode for 5 seconds after an operation has been performed.
- For your safety, video is not displayed and only audio can be heard while driving.
Playback
1 Press the ♪ (AUDIO) button to select USB mode.
The display shows the USB mode screen.
- You can select and change the source in the Menu screen (page 19) or Favourite screen (page 22).
2 Touch [◀◀] or [▶▶] or to select the desired track (file).
Returning to the beginning of the current (or previous) track (file): Touch[ ◀◀◀ ▶ .
Fast reverse*:
Touch and hold [ ]
Advancing to the beginning of the next track (file):
Touch[▶▶]
Fast forward*:
Touch and hold [▶]
- The , buttons provide the same functions above.
3 To pause playback, touch [▶/III].
Touching [▶/Ⅲ] again will resume playback. During playback, the [▶] indicator is displayed in Audio main screen. During a pause, the [Ⅲ] indicator is displayed in the Audio main screen.
* For details on Fast-forwarding/Fast-reversing during USB video playback, see "Fast-forwarding/Fast-reversing (USB Video only)" (page 56).
- The playback time may not be correctly displayed when a VBR (Variable Bit Rate) recorded file is played back.
- If there is tag information, artist name/album name/track name is displayed.
- ID3 tag/WMA tag
If an MP3/WMA/AAC/FLAC file contains ID3 tag/WMA tag information, the ID3 tag/WMA tag information is displayed. (e.g., song name, artist name, and album name)
Fast-forwarding/Fast-reversing (USB Video only)
1 During playback, touch and hold [|◀◀] (Fast-reverse) or touch and hold [▶▶] (Fast-forward).
Touch and hold for more than 1 second to forward/reverse at 8x speed. Keep touching to switch the speed to 16x and 32x.
2 Release [◀◀] or [▶▶] to return to normal playback.
- No sound is played back during fast-forwarding/fast-reversing.
Stopping Playback (USB Video only)
Touch [■] during playback.
"STOP" indicator is displayed, and playback stops.
- Playback starts from the beginning when [▶/■] is touched while playback is stopped.
Repeat Play
1 Touch [ ⟹ ].
The Repeat mode select pop up screen is displayed.
• The [☐] button displays the currently selected mode.
2Select your desired Repeat mode.
Folder ☐: Only files in a folder are repeatedly played back. File ☐: Only the file currently playing is repeatedly played back. OFF ☐: Repeat mode Off.
Random Play (USB Audio only)
1 Touch [×].
The Random Play mode select pop up screen is displayed.
- The [×] button displays the currently selected mode.
2 Select your desired Random Play mode.
ALL: All songs in the USB flash drive are played back in random sequence. Any one song does not play back again until all songs have been played back.
Folder ☐: A Folder is selected randomly and songs in the Folder are played back in order. After all songs are played in a Folder, the next Folder is selected randomly.
File ⌘: Only files in a folder are played back in random sequence.
OFF ✗: Random mode Off.
- If you select a track by using the search mode, the Random Play mode will be cancelled.
Searching for a Desired Song
You can search for your desired song by using one of two modes; the Quick Search mode and the Full Search mode.
Quick Search mode
Touch your desired Folder name or File name.
The selected Folder ^*1 or File is played.
*1 The first file in the selected folder is played back.
- For details on switching to the Quick Search mode, see i40"USB Audio main screen example" (page 55).
Full Search mode
1 Touch [Audio] or [Video] to switch whether the search list displays music files or video files.
2 Touch your desired Folder name\* 2 or File name.
When you select a File name, the selected song is played.
When you select a Folder name, repeat the same procedure to select another Folder name or File name.
*2 When you touch the [▶] by a Folder name, the unit plays from the first song in the Folder.
- For details on switching to the Full Search mode, see in USB Audio main screen example" (page 55).
- To switch the displayed list or return to the previous page in the Full Search mode, see "About Basic Operation for List Screen" (page 17).
Switching Display Modes (During Video File Play Back)
You can switch the Display Mode while playing a Video File.
Touch [ ]
Each time you touch, the Display Mode is switched.
Fit → Fill Fit
• The [☐] button displays the currently selected mode. (e.g. [Fit])
- You cannot operate them while driving.
Fit mode
natural_image
Line drawing of a rural village with houses, trees, and hills (no text or symbols)The mode displays a picture while holding its aspect ratio.
- Black bands appear at the top/bottom or right/left side of the screen depending on the picture.
Fill mode
natural_image
Simple line drawing of a rural village with houses, trees, and hills (no text or symbols)The mode displays a picture to fit its size vertically and horizontally with the monitor size.
About USB Video format
The video formats (USB Flash drive) supported by the unit are as follows.
- Supported Container: AVI, MKV, MP4
- Supported Video Coding: H.264/MPEG-4 AVC
- Supported Audio Coding: MP3, ACC, MPEG2 audio
- MAX File Size: 4GB
iPod/iPhone (Optional)
A separately sold Lightning to USB cable (KCU-471i), etc., is required. When the unit is connected by the above cable, the controls on the iPo are disabled.
- This unit does not support video playback from iPod/iPhone which connected to this unit via USB Connector.
- Internet or telephone functions, etc., of the iPhone or iPod touch are not controllable from the unit, but these functions can be controlled using the iPhone or iPod touch itself.
- Before an iPhone 5 or later is connected, turn Apple CarPlay to Off, then play iPod music. (page 41)
About iPod/iPhone models usable with this unit
- The following devices have been tested and shown to work with this unit. Correct function of earlier versions cannot be guaranteed.
iPhone XS: Ver.12.1
iPhone XS Max: Ver.12.1
iPhone XR: Ver.12.1
iPhone X: Ver.12.1
iPhone 8: Ver.12.1
iPhone 8 Plus: Ver.12.1
iPhone 7: Ver.12.1
iPhone 7 Plus: Ver.12.1
iPhone SE: Ver.12.1
iPhone 6s Plus: Ver.12.1
iPhone 6s: Ver.12.1
iPhone 6 Plus: Ver.12.1
iPhone 6: Ver.12.1
iPhone 5s: Ver.12.1
iPhone 5c: Ver.10.1.1
iPhone 5: Ver.10.1.1
iPhone 4s: Ver.9.3.5
iPod touch (6th generation): Ver.12.1
iPod touch (5th generation): Ver.9.3.5
iPod nano (7th generation): Ver.1.0.4
■ iPod/iPhone main screen example
Audio mode
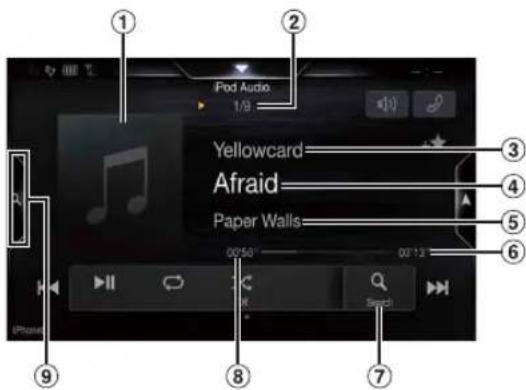
Function mode
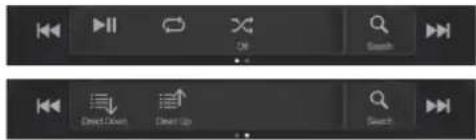
① Artwork display • You can change the artwork position. For details, see "Switching the Artwork Position" (page 36).
② Current song no./Total song no.
③ Artist title/Release Date*1
④ Song title/Episode title*1
⑤ Album title/Podcast title*1
⑥ Total time for playing
⑦ Full Search button Touch when using Full Search mode.
⑧ Elapsed time
⑨ Quick Search button*2 Touch when using Quick Search mode.
*1 Podcast mode.
*2 If you have never used Search mode with the currently connected iPod/ iPhone, pressing the Quick Search button switches the screen to the Full Search mode screen.
■ Quick Search mode screen example
Swipe vertically in the list to change pages.
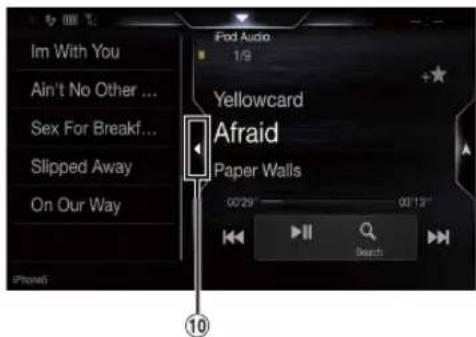
⑩ Touch to close the Quick Search mode
Playback
1 Press the ♪ (AUDIO) button to select iPod mode.
The display shows the iPod mode screen.
- You can select and change the source in the Menu screen (page 19) or Favourite screen (page 22).
2 Touch [|◀◀] or [▶▶] or to select the desired track (file).
Returning to the beginning of the current (or previous) track (file):
Touch[◀] .
Fast reverse the current track :
Touch and hold [ ◀] .
Advancing to the beginning of the next track (file):
Touch[▶▶]
Fast forward the current track :
Touch and hold [▶]
- The , functions provide the same functions above.
3 To pause playback, touch [▶/III].
- If a song is playing on the iPod/iPhone before it is connected to the unit, it will continue playing when it is connected.
- An episode may have several chapters. The chapter can be changed by touching [◀◀] or [▶▶].
- If the artist, album or song name, created in iTunes, has too many characters, songs may not be played back when connected to the unit. Therefore, a maximum of 64 characters is recommended. The maximum number of characters for the unit is 64.
- Some characters may not be correctly displayed.
Searching for a Music File
An iPod/iPhone can contain thousands of songs. For this reason, this unit can make various searches using the search function as shown below.
Using the Playlist/Artist/Album/Podcast/Audiobook/Genre/Composer/Song/iTunes Radio search mode's individual hierarchy, you can narrow down your search as shown in the table below.
| Hierarchy 1 | Hierarchy 2 | Hierarchy 3 | Hierarchy 4 |
| Playlists | Songs | — | — |
| Artists | Albums | Songs | — |
| Albums | Songs | — | — |
| Songs | — | — | — |
| Podcasts | Episodes | — | — |
| Genres | Artists | Albums | Songs |
| Composers | Albums | Songs | — |
| Audiobooks | — | — | — |
| iTunes Radio | — | — | — |
Quick Search Mode
In Quick Search mode, the list from the previous search mode is displayed. For example, if the last time you searched for songs was in Albums, the Album list is displayed. If you have not used the search mode, the list is not displayed in the Quick Search mode. In this case, go to the Full Search mode.
In Quick Search mode, touch the desired list (for example, Album list).
The selected Album is played.
- To switch into Quick Search mode, see i8 "iPod/iPhone main screen example" (page 58).
• To search within an Album, go to the Full Search mode.
Full Search Mode
For example: Searching by Artist name
The following example explains how an Artists search is performed. Another search mode can be used for the same operation, although the hierarchy differs.
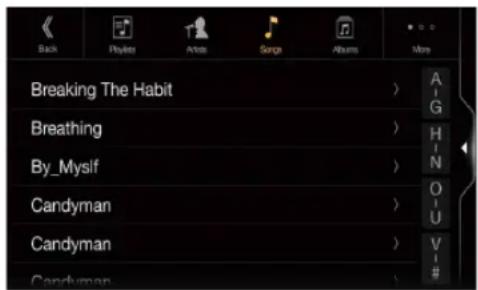
1 Touch [Artists] in the Full Search mode screen.
The Artists search screen is displayed.
- To switch into Full Search mode, see in7iPod/iPhone main screen example" (page 58).
2 Select the desired artist.
To play back the Artist directly
1 Touch [▶] of the artist's name.
All songs of the selected artist are played back.
To search for the Album of the Artist
1 Touch the selected artist name. The Albums search screen of the selected artist is displayed.
2 Touch [▶] of the desired album's name. All songs of the selected album are played back.
To search for a Song in the Album of the Artist
1 Touch the desired artist's name. All albums of the selected artist are displayed.
3 Touch the desired album's name.
All songs of the selected album are displayed.
4 Touch the desired song's name.
The selected song is played back.
- An alphabet skip function is available. See "Alphabet Search Function" (page 60).
- To switch the displayed list or return to the previous page in the Full Search mode, see "About Basic Operation for List Screen" (page 17).
Alphabet Search Function
The unit is provided with an alphabet search function for effective searching. When you use this function in the search mode, you can quickly search an artist or a song, etc.
This is an example of how to search Artist Name for names beginning with "R".
1 Touch "O-U" of the alphabet group.
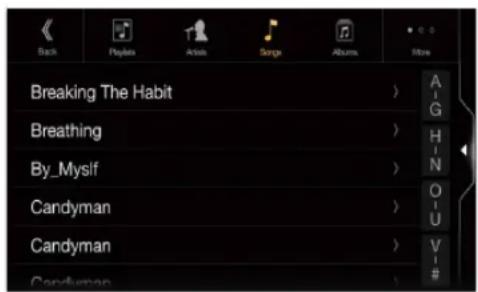
"O P Q R S T U" of the alphabet group "O - U" is displayed.
2 Touch "R" you want to search.
Artist names beginning with "R" are displayed.
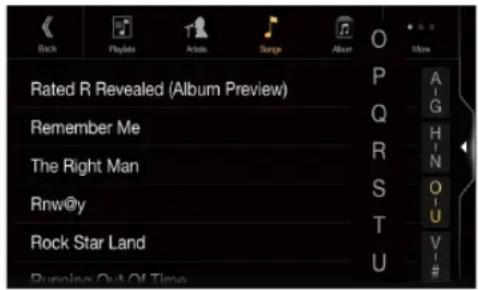
3 Touch your desired artist name.
- If there are no names in the list beginning with that letter, the next letter of the alphabet is searched.
For example: If there are no names beginning with "R," the search list begins with "S.".
Repeat Play
1 Touch [ ⟹ ].
The Repeat mode select pop up screen is displayed.
• [ ↻] displays the currently selected mode.
2Select your desired Repeat mode.
The selected Repeat mode changes the button.
Repeat All / Track Repeat / OFF

Random Play (Shuffle)
1 Touch [×].
The Random Play mode select pop up screen is displayed.
• T h e [ ] button displays the currently selected mode.
2Select your desired Random Play mode.
The selected Random Play mode changes the button.
Album The songs on each album are played back in proper order. Upon completing of all the songs on the album, the next album is selected randomly. This continues until all albums have been played.
Songs : Song shuffle randomly plays back songs within a selected category (playlist, album, etc.). The songs within the category are played just once until all songs have been played.
OFF ✗: Random mode Off.
• The action depends on the connected iPod.
HDMI Device (Optional)
Devices supporting HDMI can connect and play back through this unit (for example, an optional DVE-5300 (DVD Player), iPhone or other Smartphones). When making HDMI connections, you need to set HDMI on the unit suitable for the connected device. For details, see "HDMI Setup" (page 41).
- The HDMI/MHL connecting cable differs depending on the connected device corresponding to HDMI. Prepare optional HDMI/MHL connecting cable sets suitable for your device.
When you connect an optional DVE-5300 (DVD Player), you can operate it from the unit. For details on how to operate the DVD player, see "DVD Player Operation" (page 61).
For details on how to operate iPhones and Smartphones, see "HDMI Operation" (page 68).
About HDMI selector (Optional)
HDMI selector is used when you add HDMI devices (iPhone or other Smartphones).
- Set "Setting the HDMI Selector On/Off" (page 45) to "On" when using the HDMI selector.
- For details on how to switch the HDMI source by using the HDMI selector, see "Switching the source when two HDMI devices are connected" (page 68).
DVD Player Operation
You can operate discs using the Remote Control unit supplied with the DVE-5300 (DVD Player). For details on operating the Remote Control unit, refer to the Owner's Manual of the DVE-5300.
- For details on the types of playable discs and formats, refer to the Owner's Manual of the DVE-5300.
DVD Player SETUP
You can setup only when a disc is not inserted or playback pauses.
- For details on the setting items, refer to the Owner's Manual of the DVE-5300.
1 Touch [💡] (Setup).
The Setup main screen is displayed.
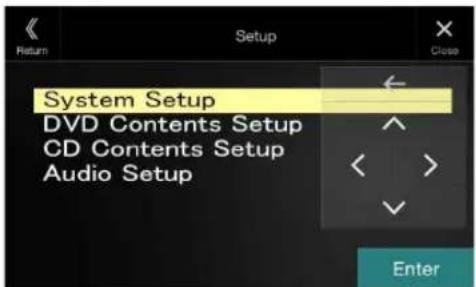
Setting items:
System Setup / DVD Contents Setup / CD Contents Setup / Audio Setup
2 Touch [∧] or [∨] to select the setting item.
3 Touch [Enter], then touch [<], [>], [^] or [∨] to change the setting item.
4 Touch [X] to return to the main source screen.
- Touch [ « ] (Return) to return to the previous display.
- For details on the [ ] (Setup) button, see Function mode in "CD/MP3/WMA/AAC/WAV" (page 61) or "DVD" (page 63).
CD/MP3/WMA/AAC/WAV
MP3/WMA/AAC main screen example
Info mode
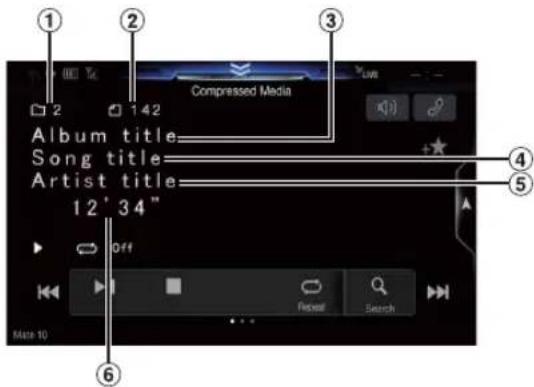
Function mode (MP3/WMA/AAC)
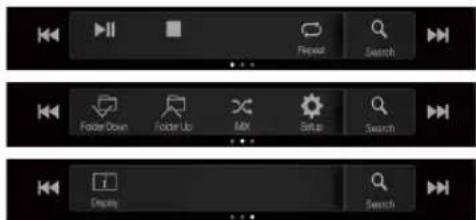
① Current song no.
② Total song no.
③ Album title
④ Song title
⑤ Artist title
⑥ Elapsed time
Function mode (CD)
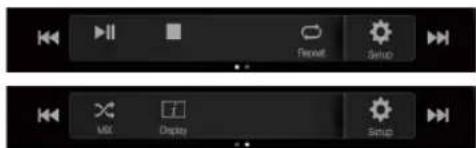
- If there is no CD text, the message "No Text" appears.
Playback
1 Press the ♪ (AUDIO) button to select DVD (CD) mode. The display shows the DVD (CD) mode screen.
- You can also select and change from the Menu screen (page 19) or Favourite screen (page 22).
When a disc is inserted into the disc slot of the DVD Player, with the label side facing up, the unit starts playback of the disc.
2 Touch [|◀◀] or [▶▶] to select the desired track (file).
Returning to the beginning of the current (or previous) track (file): Touch[ ◄◀◀ ▶ .
Fast reverse :
Touch and hold [ ◀]
Advancing to the beginning of the next track (file):
Touch[▶▶]
Fast forward :
Touch and hold [ ]
- The , buttons provide the same functions above.
3 To pause playback, touch [▶/III].
- Any file protected by DRM (Digital Rights Management) copy protection, cannot be played back on this unit.
- If a disc contains both audio data and MP3/WMA/AAC/WAV data, this unit plays back only the audio data.
- The track display for CD audio data playback shows the track numbers recorded on the disc.
- If an MP3/WMA/AAC/WAV disc with many files and folders is played, it may take longer than normal to start playback.
- The playback time may not be correctly displayed when a VBR (Variable Bit Rate) recorded file is played back.
Stopping Playback
Touch [■] during playback.
"STOP" indicator is displayed, and playback stops.
- Playback starts from the beginning when [▶/■] is touched while playback is stopped.
Repeat Play
Touch [ ⟶ ] to repeatedly play back.
The tracks (files) will be played repeatedly.
The repeat mode switches every time the button is touched.
CD:
Track Repeat → Off → Track Repeat
MP3/WMA/AAC:
Repeat File → Repeat Folder* → Off → Repeat File
* Only files in a folder are repeatedly played back.
- If the Repeat Play mode is activated during MIX playback, the MIX mode will be cancelled.
MIX (Random Play)
Touch [✗] during playback.
The tracks (files) on the disc will be played back in a random sequence.
The MIX mode switches every time [✗] is touched.
CD:
MIX → Off → MIX
MP3/WMA/AAC:
MIX Folder*1 → MIX (Disc)*2 → Off → MIX Folder*4
*1 Only files in a folder are played back in random sequence.
*2 All files on the disc will be played back in a random sequence.
- If the MIX mode is activated during Repeat playback, the Repeat Play mode will be cancelled.
- If you select a track by using the search mode, the MIX play mode will be cancelled.
File/Folder Name Search (Concerning MP3/WMA/AAC/WAV)
1 Touch [Q] (Search) during playback.
The search mode is activated.
The mode is changed to the search mode, and the list select panel appears.
2 Touch [∧] or [∨] in the list select panel to select Folder or File, then touch [Enter].
When selecting Folder, select File following same procedure, then touch [Enter].
- When there are 9 or more names on the list, a page number is displayed. Touch [<] or [>] to change the page.
- Touch [←] or [→] to change the list select panel location from right to left or vice-versa.
• To return to the previous hierarchy, touch [ « ].
Selecting Folders (Concerning MP3/WMA/AAC/WAV)
Touch [ ] (Folder Down) or [ ] (Folder Up) to select the folder.
Info Mode Function
You can display the DISC information.
1 During playback, touch [i] (Display). The playback status is displayed.
2 The playback status display closes when [i] (Display) is touched.
- For details on the display example, see Info mode in "MP3/WMA/AAC main screen example" (page 61).
DVD
■ DVD Video main screen example
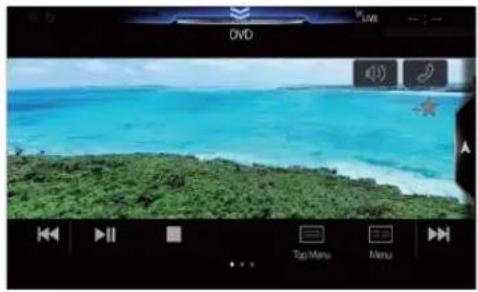
natural_image
Digital camera interface displaying a coastal scene with turquoise water, green shoreline, and play controls (no readable text or symbols)Function mode
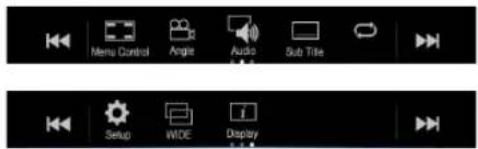
Info mode
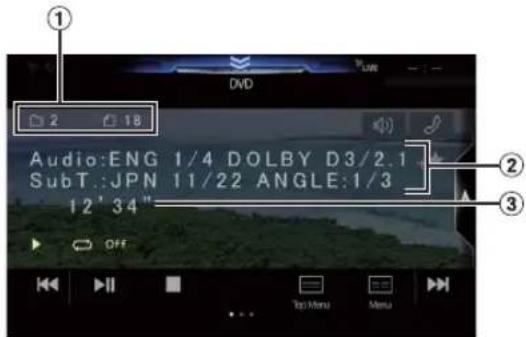
① Title no./Chapter no.
② Audio signal output/Subtitle/Angle
③ Elapsed time
■ Video CD main screen example
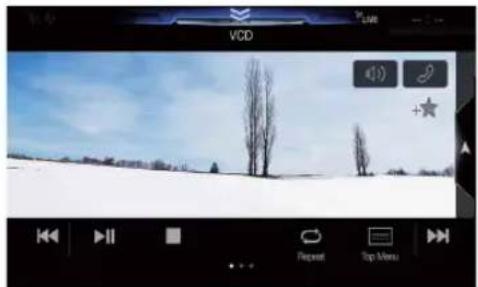
natural_image
Snowy landscape with bare trees under a blue sky, displayed within a video player interface (no readable text or symbols on the landscape itself)Function mode
Info mode
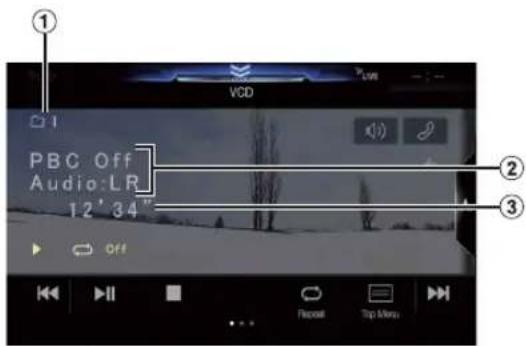
① Current track no.
② Playback control (PBC)/Current audio status
③ Elapsed time
Disc types that can be used for each heading are represented by the following marks.

DVD Commercial Video discs (used for the distribution of movies, etc.) or a DVD-R/DVD-RW, DVD+R/DVD+RW recorded in a video mode can be used.

Video-CD discs can be used.
The DVD operation screen display
Touch the screen while the DVD playback screen is displayed.
To display the operation screen, touch [Control].
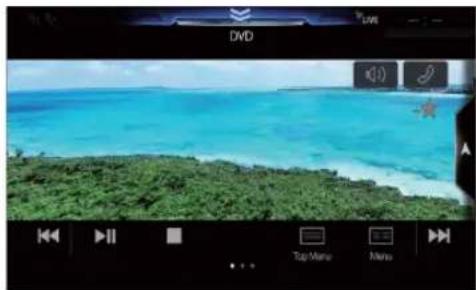
natural_image
Digital video player interface showing a tropical beach scene with ocean and greenery, no readable text or symbols in the main image area.- The operation screen changes to the visual screen in the DVD mode for 5 seconds after an operation has been performed.
- If you try to activate the DVD while driving, the display will show the warning-Picture off for your safety.
- Some operations cannot be carried out depending on the disc or playback screen.
Playing a Disc DVD-V V CD

WARNING
It is dangerous for the driver to watch the DVD while driving the vehicle. The driver may be distracted from looking ahead and an accident could occur.
Install the unit correctly so that the driver cannot watch DVD unless the vehicle is stopped and the emergency brake is applied.
If the unit is not installed correctly, the driver will be able to watch DVDs while driving the vehicle and may be distracted and could cause an accident. The driver or other people could be severely injured.

CAUTION
- Not all functions will operate for every DVD. See the individual DVD's instructions for details on the features supported.
- Fingerprints on a disc may adversely affect playback. If a problem occurs, remove the disc and check for fingerprints on the playback side. Clean the disc if necessary.
- If you switch the power or Ignition key OFF or change sources during playback, playback will continue where you left off when you resume playback.
- If you try to perform an invalid operation (based on the type of disc being played), the following mark is displayed on the monitor screen:
- Play Position Memory Function Even if you turn power off or switch the Ignition key to OFF during playback or change the source, playback will continue from the point where playback stopped when the power is turned ON again.
1
Press the ♪ (AUDIO) button to select DVD (CD) mode.
The display shows the DVD (CD) mode screen. When a disc is inserted into the disc slot of the DVD Player, with the label side facing up, the unit starts playback of the disc.
- The reverse side of a double-sided DVD will not be played automatically.
Remove the disc, turn it over, and reinsert it. - DO NOT insert discs containing maps for the navigation system. Doing so could result in damage.
- For your safety, video is not displayed and only audio can be heard while driving.
If a Menu Screen Appears
On DVD mode, menu screens may appear automatically. If this happens, perform the operation described below to start playback.
Direct Menu Operations DVD-V
1 Touch the screen while the DVD menu is being displayed.
Directly touch operation switches displayed on the screen to operate.
• To display the operation screen, touch [Control].
2 Touch the DVD menu directly.
• Some operations cannot be performed depending on the disc.
Menu Operations DVD-V V CD
1 Touch [☐] (Menu Control).
The menu operation mode will be displayed.
- You cannot operate them while driving.
2 Touch [Key].
The Key panel is displayed.
Touch [Return] to return to the previous display.
3 Select a desired menu item by touching [ ∨ ], [ ∧ ], [ ⟨ ] or [ ⟩ ] .
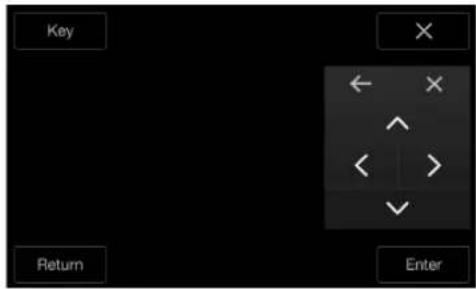
- Touch [←] or [→] to change the Key panel location from right to left or vice-versa.
- Touching [×] in the operation panel returns to the screen in step 1.
- Touching [Key] displays the numeric keypad input mode screen. For details of the numeric keypad input mode screen, see "Numeric Keypad Input Operations" (page 65).
4 Touch [Enter] to confirm the selected item.
Numeric Keypad Input Operations DVD-V
1 Touch [key] again in the menu operation mode. The numeric keypad input mode screen appears.
2 Touch a desired number.
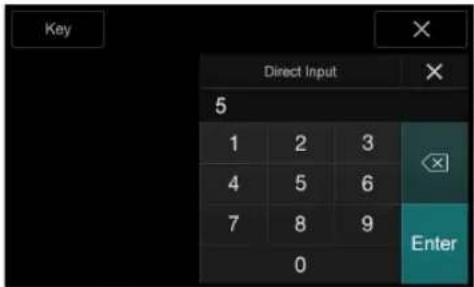
Touch[✗] to delete an entered number. To delete all the numbers you have entered, touch [✗] for at least 2 seconds.
3 Touch [Enter] on the numeric keypad input mode screen to confirm your selection.
Touch[×] to hide the keypad display.
- You cannot operate them while driving.
Displaying the Top Menu Screen
DVD-V VCD
When a DVD contains two or more titles, the top menu screen appears.
Touch [≡] (Top Menu).
The top menu screen appears.
- To perform necessary operations, see "If a Menu Screen Appears" (page 64).
Displaying the Menu Screen DVD-V V CD
With a DVD having two or more menus, a menu screen will appear for the programmes available, in addition to the main programmes.
Touch [≡≡] (Menu).
The Root menu screen appears.
- To perform necessary operations, see "If a Menu Screen Appears" (page 64).
Playing Still Frames (Pausing) DVD-V V CD
1 During playback, touch [▶/III].
2 Touch [▶/Ⅲ] to resume playback.
- No sound is played during the still frame mode. - The image or sound may stop temporarily when playback starts from the pause mode. This is not a malfunction.
Stopping Playback DVD-V VCD
Touch [■] during playback.
"Indicator is displayed, and playback stops.
- Playback starts from the beginning when [▶/■] is touched while playback is stopped.
Fast-forwarding/Fast-reversing DVD-V V CD
1 During playback, touch and hold [|◀◀] (Fast-reverse) or touch and hold [▶▶] (Fast-forward).
When pressed for more than 1 second, the disc is forwarded/reversed at double speed. When held for 5 more seconds, the disc is forwarded/reversed at 8 times the normal speed. When held for 10 more seconds, the disc is forwarded/reversed at 32 times the normal speed.
2 Release [◀◀] or [▶▶] to return to normal playback.
- No sound is played back during fast-forwarding/fast-reversing.
- On DVD mode, the menu screen may reappear during fast-forwarding/fast-reversing.
- This operation may not be possible on certain discs.
Finding the Beginnings of Chapters/Tracks/Files
DVD-V VCD
During playback, touch [◀◀] or [▶▶].
The chapter/track/file switches each time the button is touched, and playback of the selected chapter/track/file starts.
▶▶|: Touch this to start playback from the beginning of the following chapter, track or file.
: Touch this to start playback from the beginning of the current chapter, track or file.
• Some DVDs do not have chapters.
Supplementary explanations
"Chapters" are divisions of movies or musical selections on DVDs. "Tracks" are divisions of movies or musical selections on Video CD.
Forward/Reverse frame-by-frame Playback

1 In the pause mode, touch [◀◀] or [▶▶].
The picture advances by one frame each time the button is touched.
2 Touch [▶/Ⅲ] to return to normal mode.
- No sound is output during forward frame-by-frame playback.
- You can only execute reverse frame-by frame playback when playing DVD-V.
Repeat Playback

Use this function to play the disc's titles, chapters or tracks, etc., repeatedly.
Touch [ ⟶ ] to repeatedly play back.
The repeat mode switches every time the button is touched.
DVD Video
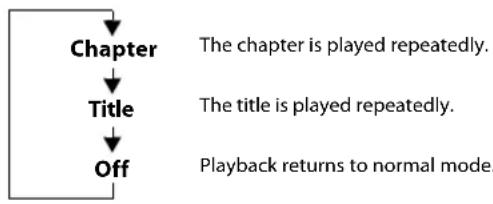
flowchart
graph TD
    A["Chapter"] --> B["Title"]
    B --> C["Off"]
    D["The chapter is played repeatedly."] --> E["The title is played repeatedly."]
    E --> F["Playback returns to normal mode."]
- The Repeat mode is always turned off when [☐] is touched and held for at least 2 seconds.
- Only discs containing a Playlist can be displayed.
Video CD
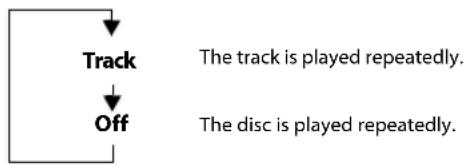
flowchart
graph TD
    A["Track"] --> B["Off"]
    style A fill:#fff,stroke:#000
    style B fill:#fff,stroke:#000
    note1["The track is played repeatedly."]
    note2["The disc is played repeatedly."]
- Display may vary depending on the connected devices.
- For some discs it is not possible to switch the repeat mode.
Searching by Title Number DVD-V
Use this function to easily find positions on the DVD using the DVD's titles. Perform operations while playback is stopped.
1 Touch [☐] (Menu Control).
The menu operation mode screen appears.
2 Touch [Key] again in the menu operation mode.
3 Enter a desired title by touching its number.
See page 65 for operation of the numeric keypad.
4 Touch [Enter].
Playback will start from the number selected.
5 Touch [×].
- This function cannot be used on discs on which no title numbers are recorded.
- Some disc may not accept any operation.
- You cannot operate them while driving.
Searching Directly by Chapter Number

Use this function to easily move to the beginnings of the chapters on the disc. Perform operations during playback, during PRE-STOP or while playback is paused.
1 Touch [☐] (Menu Control).
The menu operation mode screen appears.
2 Touch [Key] again in the menu operation mode.
3 Touch and enter the chapter number you want to play.
See page 65 for operation of the numeric keypad.
4 Touch [Enter] to confirm your selection.
Playback will start from the selected chapter.
5 Touch [X].
- This function is not available for a disc on which chapters are not stored.
- You cannot operate them while driving.
Switching the Angle

On DVDs in which scenes have been filmed from multiple angles, the angle can be switched during playback.
Touch [ ] (Angle).
The angle switches between the angles recorded on the disc every time the button is touched.
- Some time may be required for the angle to change.
- Depending on the disc, the angle may switch in one of two ways.
- Seamless: The angle switches smoothly.
- Non-seamless: When the angle is switched, a still picture is displayed first, after which the angle switches.
Switching the Audio Tracks DVD-V VCD
DVDs with multiple audio tracks or languages allow switching the sound during playback.
Touch [ ] (Audio).
The sound switches between the alternate audio tracks recorded on the disc every time the button is touched.
- The alternate track selected becomes the default setting every time the power is turned on or the disc is replaced. If the disc does not include that track, the disc's default language is selected instead.
- Not all discs will allow changing the alternate audio tracks during playback. In these cases, select audio tracks from the DVDs menu.
- There may be a delay before the selected alternate track begins to play.
Video CDs with multiplex audio
Touch [ ] (Audio).
The left and right channels will be output as shown below, each time the button is touched.
Audio: LL -Audio: RR Audio: LR Audio: LL
Switching the Subtitles (Subtitle Language)
DVD-V
With DVDs on which multiple subtitle languages are recorded, the subtitle language can be switched during playback; moreover, subtitles can be hidden.
Touch [☐] (Sub Title).
Touching this button repeatedly selects sequentially the subtitle languages recorded on the disc, and then turns the subtitles OFF.
• There may be a delay before the selected subtitle appears.
- Not all discs will allow changing the subtitles during playback. In these cases, select subtitles from the DVDs menu.
- The subtitle language selected becomes the default setting every time the power is turned on or the disc is replaced. If the disc does not include that language, the disc's default language is selected instead. However, the subtitle language may differ depending on the disc.
- For some discs, the subtitles will be displayed even when this is set to OFF. However, the subtitle language may differ depending on the disc.
Info Mode Function
You can display the DISC information.
1 During playback, touch [i] (Display).
The playback status is displayed.
2 The playback status display closes when [i] (Display) is touched.
- For details on the display example, see Info mode in "DVD Video main screen example" (page 63) or "Video CD main screen example" (page 63).
Switching Display Modes
While your vehicle is parked, touch [WIDE] to display a popup list of Display Mode.
Select the desired mode from the list.
WIDE / CINEMA / NORMAL
(Mode 1) (Mode 2) (Mode 3)
![ALPINE X308AU - While your vehicle is parked, touch [WIDE] to display a popup list of Display Mode. - 1](/content/2026/05/931913/images/76425e71fdc164bf3432730d18ab44c05a0b6f58d80c7c9aff3786e8f0c3e50d.jpg)
natural_image
Simple line drawing of a rural village with houses, trees, and a church (no text or symbols)In Mode 1 (Wide), the monitor displays a normal picture wider to fit in a wide-screen monitor by evenly stretching out the picture horizontally.
![ALPINE X308AU - While your vehicle is parked, touch [WIDE] to display a popup list of Display Mode. - 2](/content/2026/05/931913/images/51742de4d4cf29ac6a7c01af16c9a0cf76abfcd9f4e4af656cb4e9fc3761c908.jpg)
natural_image
Line drawing of a rural landscape with houses, trees, and a church tower under a cloudy sky (no text or symbols)In Mode 2 (Cinema), the monitor displays a normal picture by stretching out the picture horizontally and vertically. This mode is good for displaying a cinema type picture at the 16:9 ratio.
![ALPINE X308AU - While your vehicle is parked, touch [WIDE] to display a popup list of Display Mode. - 3](/content/2026/05/931913/images/9c3290776083aa9c60ae4e2d86704c9a4be3d03b9e025ef29f15aefa7d1a4fad.jpg)
natural_image
Illustration of a village scene with houses, trees, and hills under a cloudy sky (no text or symbols)In Mode 3 (Normal), the monitor displays a normal picture at the centre of the screen with a vertical black band at each side.
HDMI Operation
iPhone, Smartphone, etc.
The output of your electronic device will be mirrored on this unit through the HDMI connector. Control from this unit is not possible.
• The electronic device must possess an HDMI output interface.
- Not all devices with an HDMI output interface can be recognised by this unit.
- Use only the Alpine Special HDMI connection cable.
1 Press the ♪ (AUDIO) button to select HDMI mode.
The display shows the HDMI mode screen.
- You can select and change the source in the Menu screen (page 19) or Favourite screen (page 22).
- For your safety, video is not displayed and only audio can be heard while driving.
2In HDMI player mode, the screen of the device displays the content of electronic equipment by mirror image.
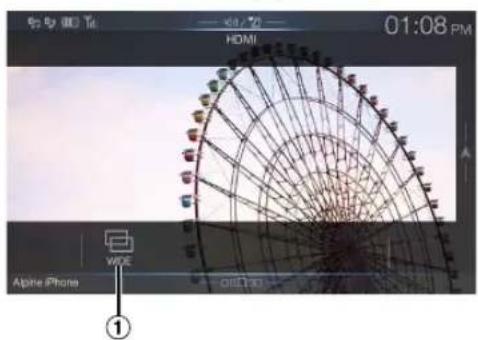
① You can select Display Mode.
For details, see "Switching Display Modes" (page 67).
- You cannot operate them while driving.
Switching the source when two HDMI devices are connected
You can switch the source only when you have connected the HDMI selector and "Setting the HDMI Selector On/Off" (page 45) is set to "On."
Screen example when the HDMI Setup is "HDMI 1"
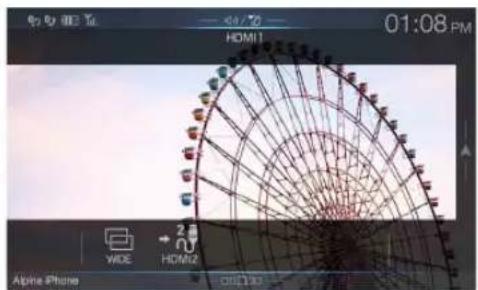
natural_image
Photo of a Ferris wheel on a beach at 01:08 PM, captured in an image editing interface (no readable text or symbols on the scene itself)Touch [→25] (HDMI 2).
The HDMI source changes to HDMI 2, and the Function button changes to [+1] (H D M I 1). Each time you touch [+1] (HDMI 1)* or [+1] (HDMI 2), the HDMI source changes.
* When HDMI Setup is "DVD," the Function button is changed to [→] (DVD).
Bluetooth Operation
Setup Before Using
About Bluetooth
Bluetooth is a wireless technology allowing communication between a mobile device or personal computer over short distances. This enables a hands-free call or data transmission between Bluetooth compatible devices. Bluetooth transmission is available in the unlicensed 2.4 GHz spectrum if the distance between devices is within 10 metres. For details, refer to the Bluetooth website (http://www.bluetooth.com/).
- Depending on the Bluetooth version, a Bluetooth compatible device may not be able to communicate with this unit.
- Proper function of this unit with all Bluetooth compatible devices is not guaranteed. For handling of the Bluetooth compatible device, consult your Alpine dealer or Alpine website.
- Depending on the surroundings, Bluetooth wireless connection may be unstable.
- When you place a call, or perform setup operations, be sure to stop your car in a safe place.
- Depending on the connected Bluetooth compatible device(s), the function may differ. Also refer to the Owner's Manual of the connected device(s).
About the Hands-free Phone
Hands-free calls are possible when using a HFP (Hands-Free Profile) compatible mobile phone with this unit.
- Avoid performing a hands-free call in heavy traffic or on narrow or winding streets.
- Close the windows while calling to reduce background noise.
- If both calling parties are using hands-free devices, or the call is made in a noisy location, difficulty hearing the other person's voice is normal.
- Depending on telephone line conditions or certain mobile devices used, voices may sound unnatural.
- When using a microphone, speak as directly as you can into the microphone to obtain the best sound quality.
- Certain mobile phone features are dependent on the capabilities and settings of your service provider's network. Additionally, certain features may not be activated by your service provider, and/or the provider's network settings may limit the feature's functionality. Always contact your service provider about feature availability and functionality.
All features, functionality, and other product specifications, as well as the information contained in the Owner's Manual are based upon the latest available information and are believed to be accurate at the time of printing.
Alpine reserves the right to change or modify any information or specifications without notice or obligation. - Notice that when you connect an iPhone 5 or later/Android smartphone which installed Android Auto App, the operation screen may differ from this section.
Before Using Bluetooth
Before using the hands-free phone/audio function, the following settings need to be made.
1 Set "Bluetooth" to "On" (). √
2Register a Bluetooth device in this unit (page 26).
• See "Bluetooth Setup" (page 26).
- You can search for this unit using a Bluetooth compatible device, and then connect that Bluetooth compatible device to this unit. The unit name such X308AU, etc., is displayed on your phone and the initial number of the passcode is "0000." Also refer to the Owner's Manual of the connected device(s).
Hands-free Phone Control
Touch [Phone] in the Menu screen to display the Phone menu screen (page 69).
![Radio FM 1 87.50 MHz DAB USB Audio [Phone] button](/content/2026/05/931913/images/164b09739cf7ae4367400524ee1e0e6fe1ad2c9f3c8d4d8407290fb11755f5db.jpg)
- You can also recall Phone menu screen by touching the Sound setup shortcut key on Audio source screen. Refer to "About the Shortcut Key" (page 20).
■ Phone menu screen example
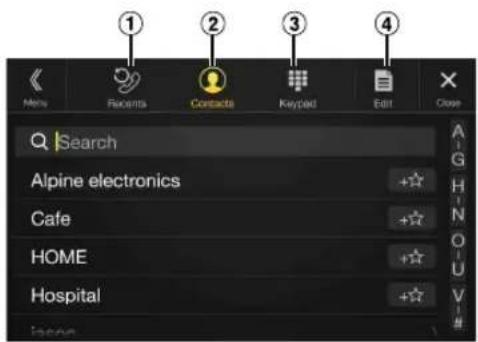
① Recent Events list* You can display up to 60 items, such as phone numbers of the most recent incoming calls, missed calls and outgoing calls, and contact names that are registered in the Phone Book. When 60 items exist in the list, the oldest item is deleted when a further item is to be added.
② Contacts list* You can make a phone call from the Phone Book, or edit the Phone book.
③ Keypad screen
Use to type a phone number.
④ Edit* Use to edit the Contacts list.
* When you connect two Hands-Free Phones, the information of the Bluetooth device set to Primary is displayed.
Answering a Call
Incoming calls are announced by the received call ring tone and a displayed message (PHONE No., etc.).
1 An incoming call triggers the ringtone and an incoming call display.
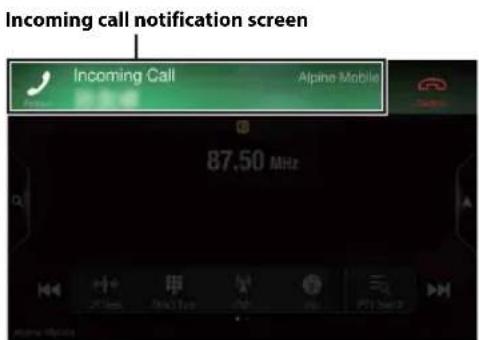
2 Touch incoming call notification screen. The call starts.
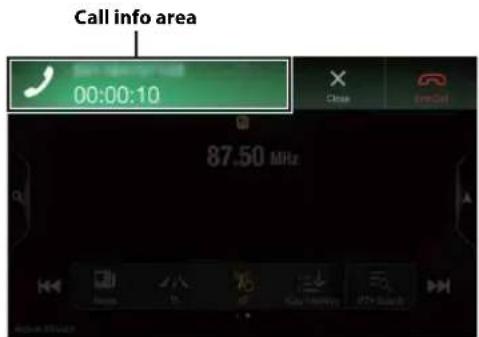
- You can also start the call by pressing the ↗ (PHONE) button.
- During a call, the audio for the current mode on the unit is muted. After calling, playback will resume.
- When the caller's number is transmitted to the system, if the caller's name is stored in the phone book, the name is displayed. If the name is not stored, the number is displayed. When neither the name or the number is unavailable, "Unknown" is displayed.
- Touch [icon] (Decline) to reject an incoming call.
- Touch the call info area or press the 🚗 (PHONE) button during a phone call to switch to the Phone Operation screen. Then you can adjust the speech volume, etc. For details, see “Operations During a Conversation” (page 73).
- Touch [×] during a conversation to hide the call info area. To display it again, Touch or swipe downward on [ ] on the upper part of the screen.
- During an incoming call or a conversation on the Primary (Secondary) Hands-Free Phone, if there is an incoming call on the Secondary (Primary) Hands-Free Phone, you cannot answer the call on the Secondary (Primary) Hands-Free Phone without first ending the call on the Primary (Secondary) Hands-Free Phone.
Hanging up the Telephone
1 Touch [ ] (End Call). The call finishes.
Call Waiting Function
If a call comes in from another phone during a call, a notice is displayed on the screen. This function can only be used if the connected mobile phone has a call waiting function service included.
Second incoming call during a conversation in the call info area
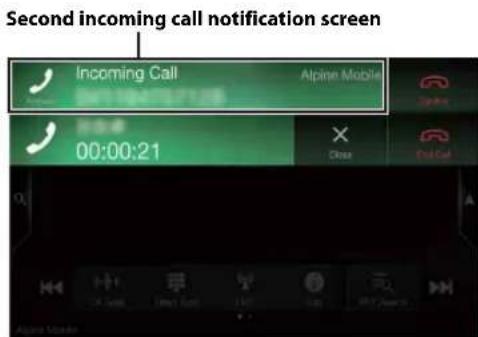
By touching the second incoming call notification screen, you can put the current call on hold and answer the second call.
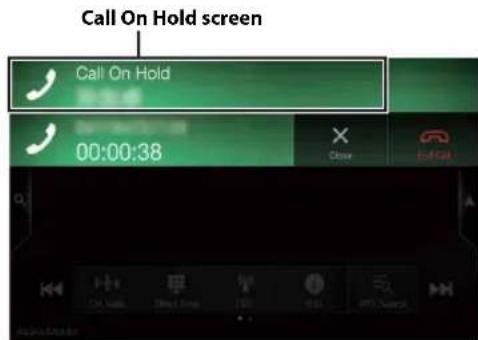
- To switch between calling parties, touch the on-hold screen, or press the 🍷 (PHONE) button.
• To finish call, touch [ ] ( E
Second incoming call during a conversation in the Phone Operation screen
- The display or operation may differ depending on the connected mobile phone or the caller's mobile phone.
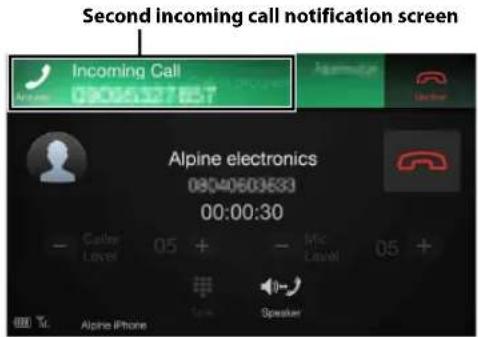
By touching the second incoming call notification screen, you can put the current call on hold and answer the second call.
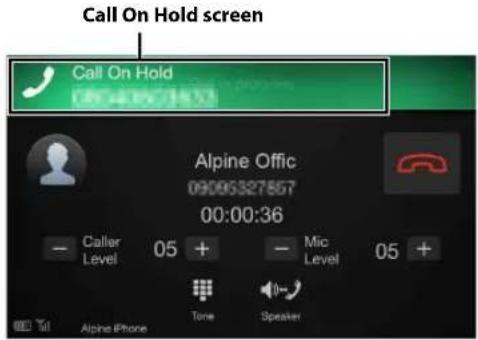
- To switch between calling parties, touch the on-hold screen, or press the ↗ (PHONE) button.
- To finish a call, touch [ ]
- This unit supports only the Call Waiting function of a mobile phone. The second call function and three-way calling function of a mobile phone cannot be operated from this unit. Also the screen display may malfunction.
Calling
Calling by Favourite Function
You can make a phone call using the Short Cut function of numbers that have been registered in Favourite. For details, see "Favourite Function" (page 22).
1 Press and hold the ♪ (Favourite) button for at least 2 seconds.
The Favourite screen is displayed.
Favourite screen
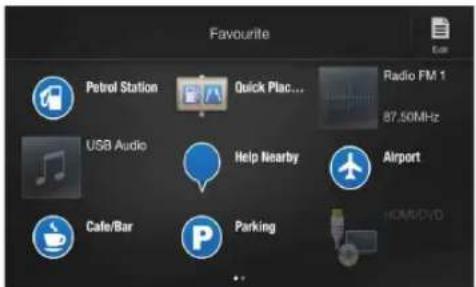
2 Touch the Short Cut icon.
A contact's name, phone number, and a confirmation message of the phone number are displayed.
3 Touch [Call].
The phone call is started.
Making a phone call using the Phone Menu
Making a phone call from the Recent Events list
1 Touch [?] (Recents) to change to the Recent Events list screen.
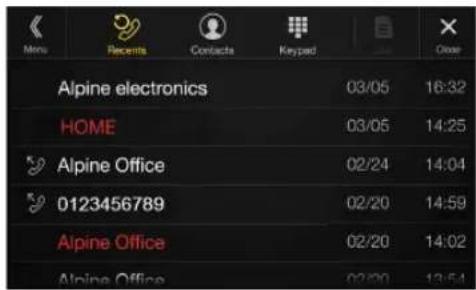
Dialled history:
Names or Numbers/Date
Received history:
Names or Numbers/Date
Missed Incoming history:
Names or Numbers/Date
2 Touch the name of the contact you want to call.
The Detail info screen is displayed.
3 ^E Touch [d]. C a l l ) .
The phone call is started.
Calling from the Contacts list (Phone Book)
1 Touch [icon] (Contacts) to change to the Contacts list screen.
2 Touch the name of the contact you want to call.
The Phone Operation screen is displayed.
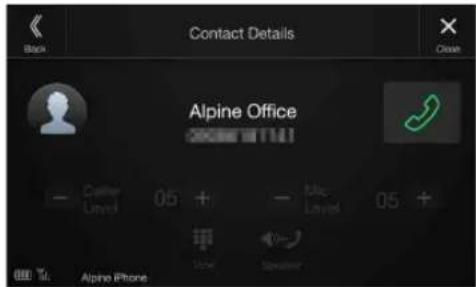
3 Touch [ ] .
The phone call is started.
Entering a Phone Number to Make a Call
1 Touch [icon] (Keypad).
The number input screen (Keypad) appears.
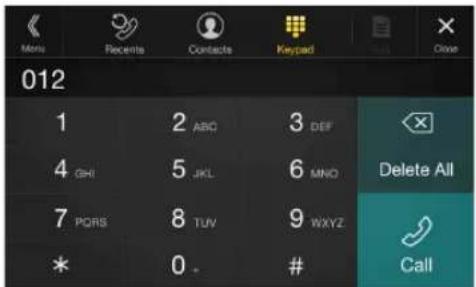
Touch[
![ALPINE X308AU - Touch [icon] (Keypad). - 2](/content/2026/05/931913/images/6b84ac02e3c455a2a9ecf036159102f4441319aada6fd736c014a45e3fdd209d.jpg)
to delete an entered number.
Touch [Delete All] to delete all entered numbers.
2 Enter the phone number you wish to call.
• You can enter up to 31 digits.
A confirmation message of the phone number appears.
4 Touch [Call].
The phone call is started.
Using Voice Recognition function
You can use Siri function of your iPhone or make a telephone call by using voice operation of your smartphone.
Using Siri
You can use the Siri function of your iPhone. To use this function, set the Siri setting of your iPhone to ON.
- Connect your iPhone to the unit via Bluetooth, then set to "Hands-free" or "Both" (page 26).
- The available functions differ depending on the connected iPhone.
- Siri and other streaming services are enabled by connecting to compatible smartphones that are able to receive data. Please ensure that cellular data and/or Wi-Fi is turned on in the smartphone to enjoy these features.
- Extensive use of Siri or other streaming services may increase your phone's data usage. Please check with your phone company to ensure you have an appropriate Data plan.
1 Press the VOICE button.
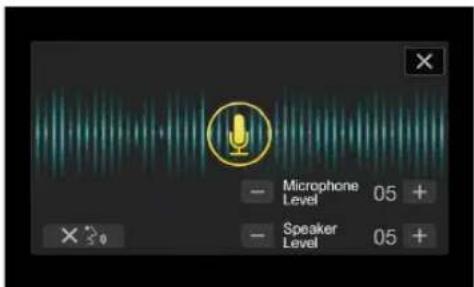
The Voice Control mode screen is displayed.
2 Speak into the microphone supplied with this unit.
- If no speech is detected, the unit may pause depending on version of the connected iPhone. In that case, touch the microphone icon [①] in the centre of the Voice Control mode screen. You can continue to use the Voice Control mode.
3 To finish the Voice Control mode, touch [] o xpress the VOICE button.
- Depending on the iPhone, the Siri function may finish automatically.
Adjusting the volume
Adjust the speaker/microphone volumes in Voice Control mode. Perform the same procedure to adjust the speaker/microphone volumes of hands-free phone.
Touch [−] or [+].
Adjust the speaker and microphone volumes.
Stopping input to the microphone
If the surrounding sound (road noise, etc.) is loud, you may wish to cut input to the microphone for 3 seconds.
Touch [ ]. X 3
Voice Dial Function
You can make a telephone call by using voice operation.
- Connect your smartphone to the unit via Bluetooth, then set to "Hands-free" or "Both" (page 26).
1 Press the VOICE button.
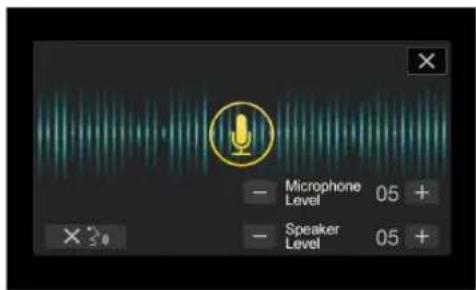
The Voice Dial mode screen is activated.
2 Say the telephone number\* or name\* you want to call, into the microphone.
* The number and name depend on the voice dial information stored in the smartphone.
3 To finish the Voice Dial mode, touch [] or press the VOICE button.
- You can perform this operation only when a voice dial compatible smartphone is connected.
- The Voice Dial function performance depends on the recognition range of the smartphone and mounting location of the microphone. Note when the microphone is mounted.
- Voice dial operation depends on the function being available on the smartphone. For details, refer to the owner's manual of the smartphone.
- Depending on the smartphone, the Voice Dial operation may finish automatically.
Adjusting the volume
Adjust the speaker/microphone volume in Voice Dial mode. Perform the same procedure to adjust the speaker/microphone volume of hands-free phone.
Touch [−] or [+].
Adjust the speaker and microphone volumes.
Stopping input to the microphone
If the surrounding sound (road noise, etc.) is loud, you may wish to cut input to the microphone for 3 seconds.
Touch [ ]. ✗ 3
Operations During a Conversation
Phone Operation screen
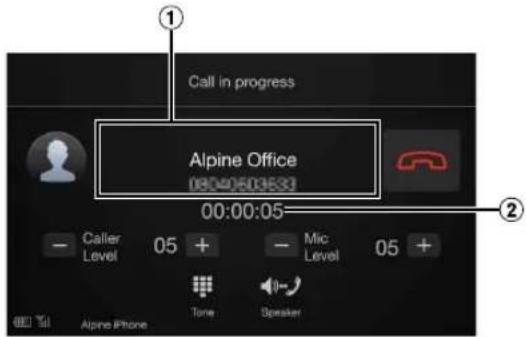
① Name and phone number
- If registered with a Group, the Group Name is also displayed. Although, depending on the connected mobile phone, it may not be displayed.
② Conversation time
Adjusting the Speech Volume
You can adjust Caller Level and Mic. Level (Microphone Level) during a phone call.
Touch [−] or [+].
You can adjust the Caller volume in 35 levels and Microphone volume in 11 levels.
Changing the Voice Output
The voice output for calls is switchable between car speakers and the mobile phone speaker.
Touch [ speaker ] (Speaker).
- Depending on the mobile phone, this operation may not be possible.
DTMF (Touch-Tone) Function
Transmits a DTMF (Touch-Tone) during a call.
1 Touch [■] (Tone).
The number input screen (Keypad) appears.
2Input number.
- You can transmit a Touch-Tone signal during a call.
Phone Book Function
Phone Book screen example
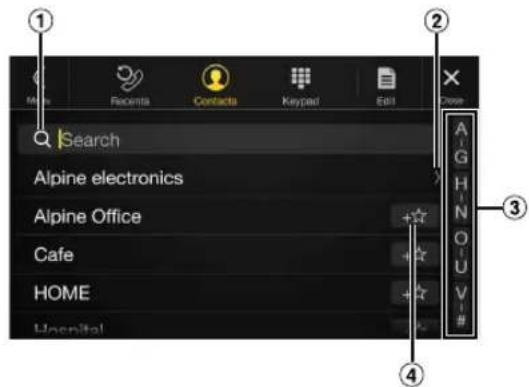
① Use to search by directly inputting a name or phone number with the Keypad.
For details, see "How to Input Characters and Numbers (Keypad)" (page 21).
② Displayed when multiple phone numbers are registered. Touch[ ] to display the registered phone number list.
③ Use to narrow down your search for names, etc. For details, see "Alphabet Search Function" (page 60).
④ Touch[ +★] to register as Favourite.
Synchronising the Phone Book
You can synchronise the system's phone book with the mobile phone's phone book.
1 Touch [ ] (Edit).
2 Touch [Download].
3 Touch [SYNC]. Synchronisation of the phone books starts.
- You can store up to 1,000 registered name in the phone book.
- You can store up to 5 phone numbers by one person's name.
Adding the Phone Book
1 Touch [ ] (Edit).
2 Touch [Download].
3 Touch [Add].
Stays on standby for connection of the mobile phone.
• Touch [Cancel] to cancel the standby mode.
4The mobile phone accesses this unit and then transfers the phone book from the mobile phone to this unit.
- Mobile phone connection is cancelled while the phone book is being transferred.
Deleting the Phone Book Entries
Deleting One Entry from the Phone Book
1 Touch [Edit].
2 Touch the checkbox [☐] of the contact name (or phone number) you want to delete. A tick (appears in the checkbox.
- You can choose up to 10 names and numbers at a time.
3 Touch [ ] (Delete).
The confirmation screen is displayed. If multiple phone numbers are registered, they are all deleted.
4 Touch [OK]. The selected number is deleted.
Deleting All Entries from the Phone Book
1 Touch [ ] (Edit).
2 Touch [ ] (Delete All). The confirmation screen is displayed.
3 Touch [OK]. All entries of the phone book are deleted.
Searching in the Phone Book
You can make a call using the phone book search function.
1 Touch [Q] (Search). The Input User Name screen (Keypad) is displayed.
2Input the string of letters of the name that you want to search, then touch [OK]. A list of names beginning with the string of letters you entered is displayed.
3 Touch the name you want to call. The Phone Operation screen is displayed.
4 Touch [icon]. The phone call is started.
- For details of how to input characters using the keypad, see "How to Input Characters and Numbers (Keypad)" (page 21).
- If there are fewer than five registered items in the phone book, you cannot use the phone book search function.
Bluetooth Audio
If a Bluetooth compatible mobile phone, portable player, etc. is connected by wireless, you can play back a song (operation is controllable from the unit).
• Operation may vary, depending on the Bluetooth compatible device.
Bluetooth Audio main screen example
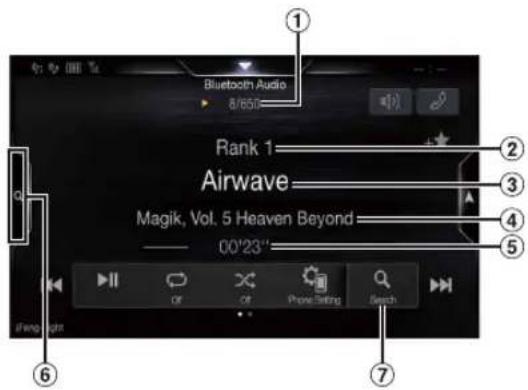
Function mode

① Current track no./Total song no.
② Artist title
③ Song title
④ Album title
⑤ Elapsed time
⑥ Touch to use the Quick Search mode and Full Search mode.
⑦ Full Search button
Touch when using Full Search mode.
■ Quick Search mode screen example
Swipe vertically in the list to change pages.
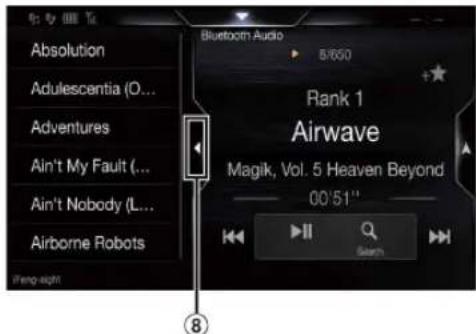
⑧ Touch to close the Quick Search mode
- The displayed onscreen buttons may differ depending on the AVRCP version.
- Song title/Artist title/Album title/Elapsed time do not display for AVRCP Ver. 1.0.
- To play back audio, a mobile phone or a portable player conforming to A2DP (Advanced Audio Distribution Profile) or AVRCP (Audio/Video Remote Control Profile) is required. Not all functions work with all devices.
- During a call, sound on the Bluetooth audio source is paused.
Compatible AVRCP versions: 1.0, 1.3, 1.4, 1.5
• Available functions may differ depending on the AVRCP version.
Playback
1 Press the ♪ (AUDIO) button to select Bluetooth Audio mode.
The display shows the Bluetooth Audio mode screen.
- You can also select and change the source in the Menu screen (page 19) or the Favourite screen (page 22).
2 Touch [|◀◀] or [▶▶] to select the desired track (file).
Returning to the beginning of the current file:
Touch[◀] .
Fast backward the current file:
Touch and hold [◀◀]
Advance to the beginning of the next file:
Touch[▶▶] .
Fast forward the current file:
Touch and hold [▶▶]
- The , buttons provide the same functions above.
3To pause playback, touch [/]▶ II
- Operations may differ depending on the connected Bluetooth compatible device.
Repeat Play
Available for AVRCP Ver. 1.3, 1.4 and 1.5 only.
1 Touch [∅].
The Repeat mode select pop up screen is displayed.
• [ ↻] displays the currently selected mode.
2Select your desired Repeat mode.
The selected Repeat mode changes the button.
All Track ALL: Once all of the songs have finished playing, play back is repeated, starting with the first song.
Group GRP : Only files in a group are repeatedly played back.
Single Track 🔍: Only the track currently playing is repeatedly played back.
Off : Repeat mode Off.
- Operations may differ depending on the connected Bluetooth compatible device.
Random Play
Available for AVRCP Ver. 1.3, 1.4 and 1.5 only.
1 Touch [×].
The Random Play mode select pop up screen is displayed.
- T h e [ ] button displays the currently selected mode.
2 Select your desired Random Play mode.
The selected Random Play mode changes the button.
All Track ALL: All songs in the BLUETOOTH compatible devices are played back in random sequence. Any one song does not play back again until all songs have been played back.
Group GRP: A Group is selected randomly and songs in the Group are played back in order. After all songs are played in the Group, the next Group is selected randomly.
Off ✗: Random mode Off.
- Operations may differ depending on the connected Bluetooth compatible device.
Search Function
Available for AVRCP Ver. 1.4 and 1.5 only.
The displayed list differs with the connected Bluetooth device.
You can search for your desired song by using one of two modes; the
Quick Search mode and the Full Search mode.
Quick Search mode
Touch your desired Group name or File name.
The selected Group ^*1 or file is played back.
*1 The first file in the selected Group is played back.
- To switch into Quick Search mode, see ⑥ in "Bluetooth Audio main screen example" (page 74).
Full Search mode
Touch your desired Group name\*2 or File name.
When you select a File name, the selected song is played.
When you select a Group name, repeat the same procedure to select another Group name or File name.
*2 When you touch the [▶] by a Group name, the unit plays from the first song in the Group.
- To switch into Full Search mode, see ⑦in "Bluetooth Audio main screen example" (page 74).
- To switch the displayed list or return to the previous page in the List screen, see "About Basic Operation for List Screen" (page 17).
Connecting a Bluetooth Device
Registering a Bluetooth device in the unit enables automatic connection.
If it does not connect automatically, run through the connection procedure again.
1 Touch [icon] (Phone Setting).
The Device Setting select pop up screen is displayed.
2 Touch [Reconnect].
Bluetooth connection will start.
Disconnecting the Bluetooth Connection
1 Touch [icon] (Phone Setting).
The Device Setting select pop up screen is displayed.
2 Touch [Disconnect].
The Bluetooth connection is disconnected.
Changing the connecting Bluetooth Device
If multiple Bluetooth devices are registered in this device, you can change the connection among the registered devices.
1 Touch [icon] (Phone Setting).
2 Touch [Change Phone].
3 Touch [♪] (Audio) or [♪] (Hands-free) of the selected device.
The connection will transfer to the selected device.
Auxiliary Device (Optional)
Operating Auxiliary Devices (Optional)
To operate devices connected to the AUX terminals of the unit, follow the procedure described below.
- Set AUX to "On." See "AUX Setup" (page 40).
- Depending on the connected unit, the onscreen buttons may not work, or their operation may differ.

WARNING
It is dangerous (and illegal in many states) for the driver to watch TV/video while driving the vehicle. The driver may be distracted from looking ahead and an accident could occur.
Install the unit correctly so that the driver cannot watch TV/video unless the car is stopped and the parking brake is applied.
If the unit is not installed correctly, the driver will be able to watch TV/video while driving and may be distracted from looking ahead and cause an accident. The driver or other people could be severely injured.
Press the ♪ (AUDIO) button to select Auxiliary (AUX)\* mode.
The display shows the Auxiliary (AUX) mode screen.
* The name which is given as the mode name in "Setting the Auxiliary (AUX) Name" (page 40) is displayed.
- For your safety, video is not displayed and only audio can be heard while driving.
- You can select and change the source in the Menu screen (page 19) or Favourite screen (page 22).
- For details on the connected auxiliary device, refer to its owner's manual.
AUX Operation Screen Display During Video File Playback
Touch the screen.
The Auxiliary (AUX) operation screen is displayed.
- The operation screen changes to the visual screen in the Auxiliary (AUX) mode for 5 seconds after an operation has been performed. To hide the Auxiliary (AUX) operation screen, touch the video display area.
Operating an AUX, AUX DVD, GAME or USB Player
Example for AUX, AUX DVD, GAME, USB Player mode display
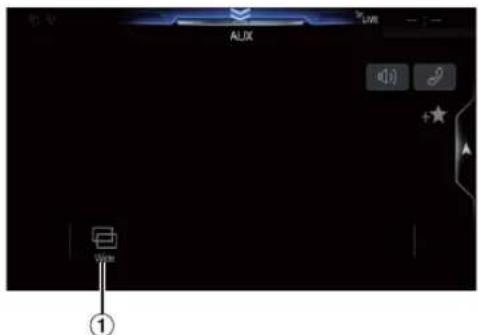
① [☐] ( D i s p l a y M o d e
For details, see "Switching Display Modes" (page 67).
- You cannot operate them while driving.
Operating an External DVD Player
■ External DVD player display example
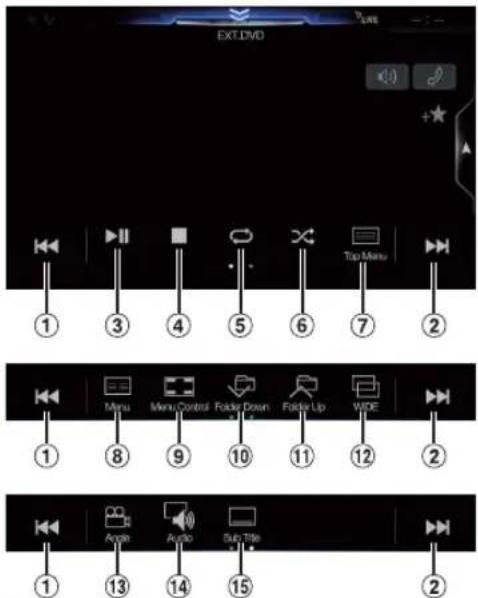
① [◀◀◀]
Touch the switch to go back to the beginning of the current chapter/track/file. Touch the switch once more to find the beginning of the previous chapter/track/file. Touch and hold to fast reverse.
② [▶▶▶]
Touch the switch to advance to the beginning of the next chapter/track/file. Touch and hold to fast forward.
③ [▶/■] Switches between play and pause.
④ [■]
Touching during play initiates a pre stop. Touching again stops play.
⑤ [←]
Starts/Stop repeat play.
⑥ [×]
Starts/Stop M.I.X. play.
⑦ [≡] ( T o p M e n u )
Calls up the Top Menu screen.
⑧ [≡≡] ( M e n u )
Calls up the Menu screen.
⑨ [☐☐] ( M e n u C o n t r o
Calls up the menu operation mode.
⑩ [ ] ( F o l d e r D o w n )
Switches the programme/playlist/folder down.
⑪ [ ] ( F o l d e r U p )
Switches the programme/playlist/folder up.
⑫ [ ] (Display Mode)*
You can set the Display Mode. For details, see "Switching Display Modes" (page 67).
⑬ [图标] ( A n g l e )
Switches angle.
⑭ [ ] ( A u d i o )
Switches audio.
⑮ [□] ( S u b T i t l e )
Switches sub titles.
■ Menu operation mode screen example
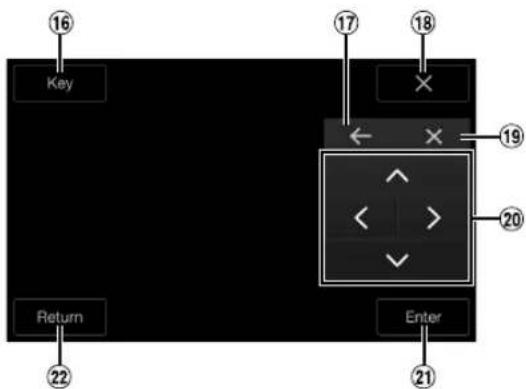
16 [Key] The menu operation mode will be displayed.
⑰ [←] → [ ]
Moves key panel location.
⑱ [×] Closes menu operation mode.
⑲ [×] Closes key panel.
20 [λ,[],k],[ ] > Moves menu cursor.
②1 [Enter] Determines the selected item.
②2 [Return] Returns to the previous item/screen.
* You cannot operate them while driving.
Operating an External DVD Changer
The DVD-CHG operation mode screen and the Menu operation mode screen are the same as the external DVD player operation screen. See "Operating an External DVD Player."
■ External DVD changer screen example
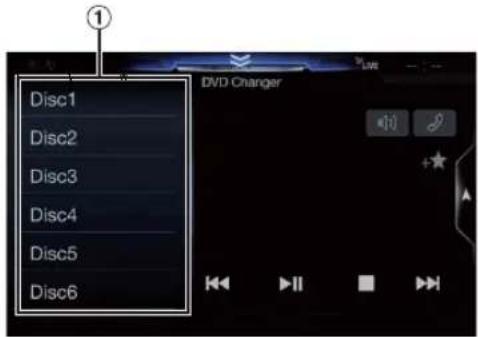
① [Disc1]-[Disc6]
Selects a Disc.
- Touch the left side of the operation screen or swipe the operation screen to the right to display the Disc selection screen.
Operating the Mobile Digital TV Receiver (DVB-T)
■ Menu operation mode screen example
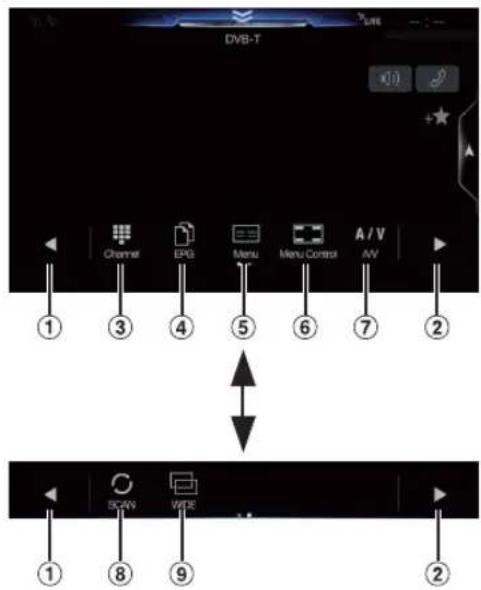
① [◀] Switches the Channel number / Favourite channel number down.
② [▶] Switches the Channel number / Favourite channel number up.
③ [■] (Channel or Favourite) Switches between the Channel mode and the Favourite channel mode.
④ [ ] (EPG)* Call up the Electronic Programme Guide (EPG).
⑤ [≡≡] ( M e n u ) * Call up the menu screen.
⑥ [☐] ( M e n u C o n t r o Call up the menu operation mode.
⑦ [A/V] ( A / V) Switches the source.
⑧ [○] (Scan) Touch the switch to start the scan procedure.
⑨ [1] (Display Mode)* You can set the Display Mode. For details, see "Switching Display Modes" (page 67).
* You cannot operate them while driving.
- If the setting for "Setting Direct Touch Operation" (page 40) is set to "On", the direct touch operation is possible. Directly touch operation switches displayed on the screen to operate. To display the operation screen, touch [Control].
Operating a TV
■ Menu operation mode screen example
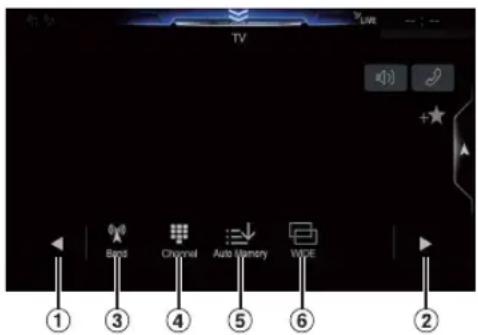
① [◀] ◀◀[ ] Switches the Channel number / Preset channel down.
② [▶] ▶▶[ ] Switches the Channel number / Preset channel up.
③ [A] (Band) Switches the band.
④ [Tune] (Channel or Preset or Manual) Switches amongst Channel mode, Preset mode, and Manual mode.
⑤ [≡↓] ( A u t o M e m o r y ) The tuner automatically seeks and stores stations.
⑥ [T(Display Mode)* You can set the Display Mode. For details, see "Switching Display Modes" (page 67).
* You cannot operate them while driving.
Camera Operation (Optional)
When an optional camera is connected, the view video of camera can be output to the monitor.
Front camera or Rear camera can be connected to this unit.
Make the Camera Select setting (Front, Rear or Other) according to your connected camera. For details, see "Setting the Camera Input" (page 42).
Front camera:
When the HCE-C212FD is connected, conditions in front of the vehicle, such as objects, people and other hazards, can be seen.
Rear camera:
If an HCE-C127D/HCE-C157D, etc., camera is connected, when the vehicle is reversed, the rear camera view (guide marks for vehicle width and available distance) is displayed automatically on the screen of this unit.
Other camera:
Set when connecting to a camera other than the Front camera or Rear camera, such as a room camera and side camera.
You can adjust the quality of the camera image. Setting items: Brightness / Colour / Contrast See "Visual Setup" (page 34).
Rear Camera Operation
Displaying the Rear Camera Image from the Menu screen
1 Press the MENU button.
The menu screen is displayed.
![Radio FM 1 87.50 MHz DAB USB Audio [Camera] button](/content/2026/05/931913/images/d5f784abe13b56a2a6853cff59a3a142651df5dcf4d1690640a9c5a59dbd4ef5.jpg)
2 Touch [Camera].
The Rear Camera view is displayed.
- Touch the screen while the camera image is being displayed, and touch [×] or [«] to return to the main source screen or previous screen.
- You can perform a Guide Adjustment. For details, see "Adjusting the Rear/Front/Side Camera Guide" (page 42).
Displaying the rear view video while the car is in reverse
Shift the gear lever to the reverse (R) position.
The rear view image is displayed while the car remains in reverse.
- Never depend solely on the camera when backing up. Always turn and look and only use the camera for additional assistance.
- This function is effective when the reverse wire is properly connected.
- You can perform a Guide Adjustment. For details, see "Adjusting the Rear/Front/Side Camera Guide" (page 42).
Switching the Image Pattern for the Rear Camera
If the camera has a view switch function, the Direct Change switch is displayed.
1 Touch the screen when the image from the rear camera is displayed.
The operation screen is displayed on the screen.
• After a 5-second time-out, the operation screen returns to the camera display screen.
2 Touch [Back], [Panorama], [Corner] or [Top].
The image pattern changes.
[Back]: Rear View
[Panorama]: Panorama View
[Corner]: Corner View
[Top]: Ground View
- For detailed information about image patterns, see the camera Owner's Manual.
- You can perform a Guide Adjustment. For details, see "Adjusting the Rear/Front/Side Camera Guide" (page 42).
Guide Display ON/OFF Setting
1 Touch the screen when the image from the camera is displayed.
The operation screen is displayed on the screen.
• After a 5-second time-out, the operation screen returns to the camera display screen.
2 Touch [Guide Off] on the Rear camera display screen.
The guide disappears, and then the [Guide Off] switch changes to [Guide On].
3 Touch [Guide On] to turn on the guide.
Adjusting the Caution Display Location
1 Touch the screen when the image from the camera is displayed.
The operation screen is displayed on the screen.
• After a 5-second time-out, the operation screen returns to the camera display screen.
2 Touch [♦ Caution].
- For each touch, the caution location moves to the top or bottom of the screen.
About the Rear Camera Guide
To display the guide, set "Guide Display ON/OFF Setting" (page 80) to On. Also, to adjust the guide, see "Adjusting the Rear/Front/Side Camera Guide" (page 42). You can also turn off the guide in the Rear camera display screen.
■ Indication mark meaning
When the car is put into reverse gear, the monitor switches to the rear view camera image. Guides appear to help visualise the car's width and distance from the rear bumper.
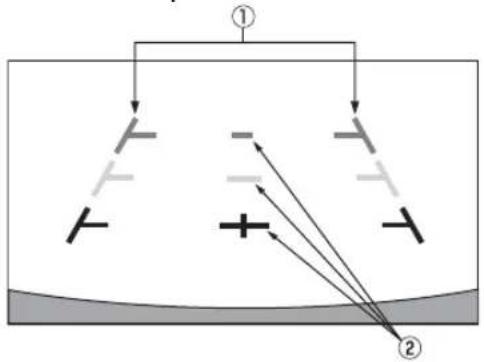
① Car width extension marks (red, yellow and green in order of distance)
If properly calibrated, the marks indicate the car's width. This helps guide the car's path when backing up in a straight line.
The marks represent the distance from the rear of the car (from the rear end of the bumper).
• The marks do not move in synchronisation with the steering wheel.
- Set the marks to suit the car's width.
② Distance guidance marks
The marks represent the distance from the rear of the car (from the rear end of the bumper).
- The marks do not move in synchronisation with the steering wheel.
- We recommend that you measure the actual distance to the marks when parked on a level surface.
- Depending on the condition of the car or road surface, the range of vision may vary.
- The camera has a limited range of vision. Objects at extreme angles to the camera (e.g. under the bumper or at opposite ends of the bumper) may not be in the its field-of-vision.
- The rear camera image may have a tint which is different from the actual surroundings.
- Depending on the car, the guidance may deviate to the right or left. This is not a malfunction.
Distance guidance mark
The distance guides represent the ground level distance from the rear bumper. It is difficult to accurately estimate the distance to objects above ground level.
In the following example, the distance to A is 0.5 m and the distance to B is 1 m.
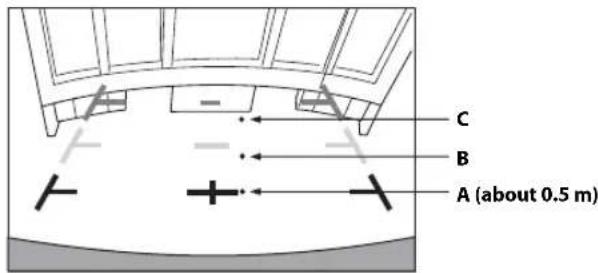
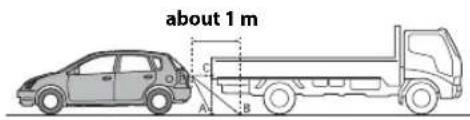
In the screen, according to the distance guidance marks, the truck seems to be parked about 1 m away (at the position B). In actual fact, however, if you reversed to position A, you would collide with the truck.
In the screen, positions A, B and C seem to be located in order of proximity. However, in actual fact, the position A and C are the same distance, and B is farther away than positions A and C.
- The car width extension mark represents the distance to the road surface. The distance to an object on the road is not accurately represented by the guides.
Error between the screen and the actual road surface
In the following conditions, errors are produced between the screen guidance and the actual road surface. (The illustrations represent a case when the camera is installed in the standard position.)
When there is a steep upward slope behind the car (example)
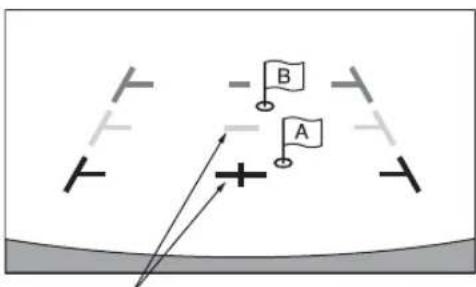
Distance guidance marks
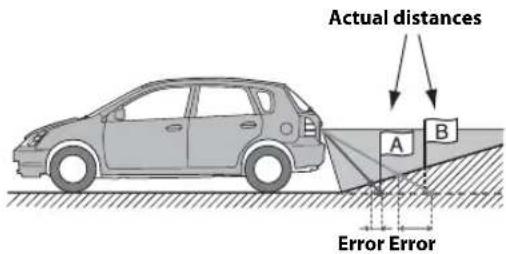
The distance guidance mark represents the distance to a flat road surface. Therefore in the case of an upward slope behind the car, the distance guides are displayed closer to the rear bumper than the actual distance. For example, if there is an obstacle on the upward slope, it may appear farther away than its actual position.
Also, an error may occur between the guidance and the actual path of the car on the road surface.
When there is a steep downward slope behind the car (example)
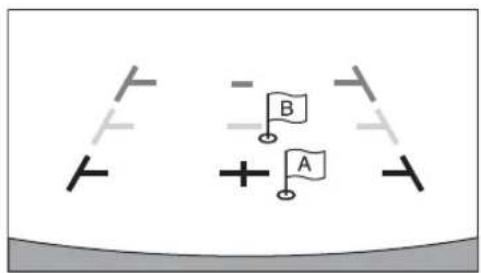
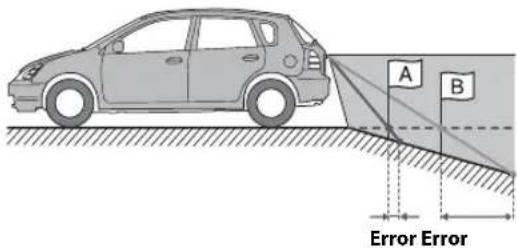
In the case of a downward slope behind the car, the distance guides are displayed farther from the rear bumper than the actual distance.
If there is an obstacle on the downward slope, it seems closer than its actual position.
Also, an error may occur between the guidance and the actual path of the car on the road surface.
Front Camera Operation
Displaying the Front Camera image from the Menu screen.
1 Press the MENU button.
The menu screen is displayed.
![Radio FM 1 87.50 MHz DAB USB Audio [Camera] button](/content/2026/05/931913/images/3989cec80dace599635cbe0f320de0484557f73b6d00455b564e0fadb67235c9.jpg)
2 Touch [Camera].
The Front Camera view is displayed.
- Touch the screen while the camera image is being displayed, and touch [×] or [«] to return to the main source screen or previous screen.
- You can perform a Guide Adjustment. For details, see "Adjusting the Rear/Front/Side Camera Guide" (page 42).
Switching the Image Pattern for the Front Camera
If the camera has a view switch function, the Direct Change switch is displayed.
1 Touch the screen when the image from the front camera is displayed.
The operation screen is displayed on the screen.
• After a 5-second time-out, the operation screen returns to the camera display screen.
2 Touch [Panorama], [Corner] or [Top].
The image pattern changes.
[Panorama]: Panorama View
[Corner]: Corner View
[Top]: Ground View
- For detailed information about image patterns, see the camera Owner's Manual.
- You can perform a Guide Adjustment. For details, see "Adjusting the Rear/Front/Side Camera Guide" (page 42).
About the adjustment of guide display ON/OFF setting and adjustment of Caution display location
As with the rear camera, the front camera guide display ON/OFF setting and Caution display location can be adjusted. See "Guide Display ON/OFF Setting" (page 80) and "Adjusting the Caution Display Location" (page 80) for the operations.
Side Camera Operation
Displaying the Side Camera image from the Menu screen
1 Press the MENU button.
The menu screen is displayed.
![Radio FM 1 87.50 MHz DAB USB Audio [Camera] button](/content/2026/05/931913/images/242fb36f3776256ed42082b42ed7e1ceb83f980de7bbb4ce2aaf184f0763eac3.jpg)
2 Touch [Camera].
The Side Camera view is displayed.
- Touch the screen while the camera image is being displayed, and touch [X] or [«] to return to the main source screen or previous screen.
- You can perform a Guide Adjustment. For details, see "Adjusting the Rear/Front/Side Camera Guide" (page 42).
- If you connect a Side Camera using the optional Multi Camera Interface module, you can display the Side camera image using the [Camera] button only when you set "Setting a Default Camera" (page 44) to "Side". If you connect a Rear Camera and Front Camera at the same time, touch [Rear] or [Front] in the Rear Camera image to switch the Camera image.
Switching the Image Pattern for the Side Camera
If the camera has a view switch function, the Direct Change switch is displayed.
1 Touch the screen when the image from the side camera is displayed.
The operation screen is displayed on the screen.
• After a 5-second time-out, the operation screen returns to the camera display screen.
2 Touch [Rear] or [Front].
The image pattern changes.
Rear: Vehicle Rear view
Front: Vehicle Front view
- For detailed information about image patterns, see the camera Owner's Manual.
- You can perform a Guide Adjustment. For details, see "Adjusting the Rear/Front/Side Camera Guide" (page 42).
About Vehicle Interlock Function
Communication between your vehicle and the unit allows you to set and display various functions of your vehicle.
Available functions differ depending on your vehicle. For details, refer to your vehicle's instruction manual.
Available Main Functions
- You can check the air conditioner settings on the Climate screen.*
- You can check for obstacles on the Parking Sensor screen.*
- You can adjust various settings for your vehicle from the unit.
* When the Interruption function is set to "On," the screen changes automatically when you adjust the air conditioner or the unit detects an obstacle. For details on the Interruption setup, see "CAN-I/F Setup" (page 44).
Vehicle Info mode
You can check the Climate screen and Park sensor screen from the Menu screen of the unit. For how to display the Menu screen, see "About the Menu Screen" (page 19).
1 Touch [icon] (Vehicle Info) on the Menu screen. The Vehicle Info mode screen is displayed.
2 Touch the desired tab on the upper part of the screen. The Climate screen or Park sensor screen is displayed.
- By touching [Car Setting] (Car Setting) on the Vehicle Info mode screen, you can use the unit to turn various settings related to your vehicle On/Off, set display formats, etc. For details on what functions you can set, refer to your vehicle's instruction manual.
Function Screen Examples
The screens that can be displayed on this unit differ, depending on the type of vehicle.
Climate screen example
The Climate screen turns on when you adjust the air conditioning in your vehicle. The icons of adjusted items are high lighted.
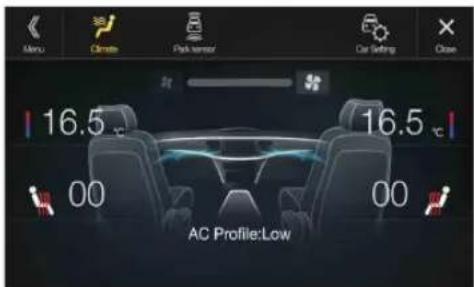
Parking Sensor screen
The Parking sensor screen turns on when the front or rear sensor on your vehicle detects an obstacle within a certain distance.
Parking Sensor Full screen example
When the front or rear sensor detects an obstacle within a certain distance, the Parking Sensor screen is displayed, and the indicator (①⑧) that corresponds with that area lights up.
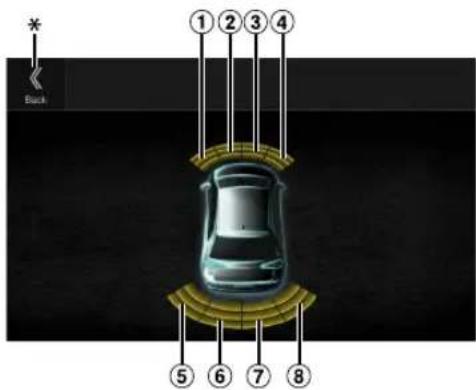
Indicator colours when an obstacle is detected.
Red: close distance Orange: medium distance Yellow: long distance
- Depending on the speed of the vehicle, when moving faster than a certain speed, the Parking Sensor screen may not be displayed.
- Vehicles that do not have the obstacle detection sensor cannot use this function.
* [<<] is displayed only when the Front camera or Rear camera is interlocked.
Parking Sensor Camera interlock screen example (Rear camera)
You can check for obstacles through an interlocked camera image by connecting a Front or Rear Camera.
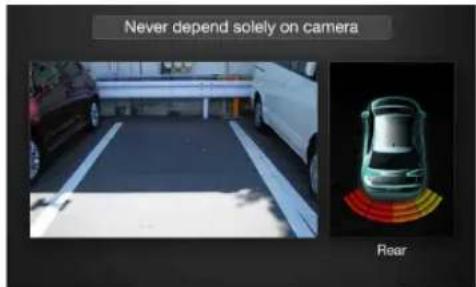
- Touch the Camera image area to switch to the Camera full screen. (While displaying the Camera full screen, touch the Camera screen, then touch [Sensor] to return to the Parking Sensor Camera interlock screen.)
- Touch the car icon to switch to the Parking sensor full screen. (Touch [«] on the Parking Sensor full screen to return to the Parking Sensor Camera interlock display.)
- To use this function, set the Camera Select setting to "Front/Other" or "Rear." For details, see "Setting the Camera Input" (page 42).
Information
Product Software Update
This product use software that can be updated through a USB flash drive. Download the software from the Alpine website and update the product using the USB flash drive.
Updating this product
Check the Alpine website for details on updating.
http://www.alpine-asia.com
http://www.alpine.com.au
Important information on the software
About the software licence of the product
The software installed in the product contains open-source software. See the following Alpine website for details on the open source software.
http://www.alpine.com/e/oss/download
About the Supported Formats
- For the list of video formats supported from a USB flash drive, see "About USB Video format" (page 57).
About MP3/WMA/AAC/FLAC

CAUTION
Except for private use, duplicating audio data (including MP3/WMA/AAC/FLAC data) or distributing, transferring, or copying it, whether for free or for a fee, without permission of the copyright holder is strictly prohibited by the Copyright Act and by international treaty.
What is MP3?
MP3, whose official name is "MPEG Audio Layer 3," is a compression standard prescribed by the ISO, the International Standardisation Organisation and MPEG which is a joint activity institution of the IEC.
MP3 files contain compressed audio data. MP3 encoding is capable of compressing audio data at extremely high ratios, reducing the size of music files to as much as one-tenth their original size. This is achieved while still maintaining near CD quality. The MP3 format realises such high compression ratios by eliminating the sounds that are either inaudible to the human ear or masked by other sounds.
What is WMA?
WMA, or "Windows Media™ Audio," is compressed audio data. WMA is similar to MP3 audio data.
What is AAC?
AAC is the abbreviation for "Advanced Audio Coding," and is a basic format of audio compression used by MPEG2 or MPEG4.
What is FLAC?
FLAC (Free Lossless Audio Codec) is an audio file codec for lossless compression, developed and offered as open source software. Codecs with lossy compression forms, such as MP3 and AAC, reduce part of the data to improve compression efficiency. However, FLAC can reconstruct compressed data to be an identical copy of the original data by performing lossless compression. The compression ratio of FLAC is about 50%.
Method for creating MP3/WMA/AAC/FLAC (USB Flash drive) files
Audio data is compressed using software with MP3/WMA/AAC/FLAC (USB Flash drive) codecs. For details on creating MP3/WMA/AAC/FLAC (USB Flash drive) files, refer to the user's manual for that software. MP3/WMA/AAC/FLAC (USB Flash drive) files that are playable on this device have the file extensions.
MP3: "mp3"
WMA: "wma"
AAC: "m4a"
FLAC: "flac"/"fla"
WMA is not supported for the following files, Windows Media Audio Professional, Windows Media Audio 10 std or Windows Media Audio 10 Pro Lossless.
There are many different versions of the AAC format. Confirm that the software being used conforms to the acceptable formats listed above. It's possible that the format may be unplayable even though the extension is valid.
Playback of AAC files encoded by iTunes is supported.
Supported playback sampling rates and bit rates
MP3 (USB Flash drive)
Sampling rates: 48 kHz, 44.1 kHz, 32 kHz, 24 kHz, 22.05 kHz, 16 kHz, 12 kHz, 11.025 kHz, 8 kHz
Bit rates: 8 - 320 kbps
WMA (USB Flash drive)
Sampling rates: 48 kHz, 44.1 kHz, 32 kHz, 22.05 kHz, 16 kHz, 11.025 kHz, 8 kHz
Bit rates: 5 - 384 kbps
AAC (USB Flash drive)
Sampling rates: 48 kHz, 44.1 kHz, 32 kHz, 24 kHz, 22.05 kHz, 16 kHz, 12 kHz, 11.025 kHz, 8 kHz
Bit rates: 16 - 320 kbps
FLAC (USB Flash drive)
Sampling rates: 96kHz, 88.2kHz, 48kHz, 44.1kHz, 32kHz, 24kHz, 22.05kHz, 16kHz, 8kHz
Channel number: 1ch, 2ch
This device may not play back correctly depending on sampling rates.
ID3 tags/WMA tags
This device supports ID3 tag v1.0, v1.1, v2.2, v2.3, v2.4, and WMA tag Ver.1.x. If tag data is in an MP3/WMA/AAC file, this device can display the title (track title), artist name, and album name ID3 tag/WMA tag data.
For non-supported characters, “?” is displayed.
The number of characters may be limited, or not correctly displayed, depending on the tag information.
Playing back MP3/WMA/AAC/FLAC
MP3/WMA/AAC files are prepared, then written to a USB flash drive.
• Maximum numbers of playable files/folders
USB Flash drive: 10,000 files/folders (including Root Folder)
• Largest playable file size: 512 MB
Playback may not be performed if a disc exceeds the limitations described above.
If a file/folder name is long, the maximum possible number of files may decrease.
- Both Audio and Video files are counted if their formats are playable on this unit.
Media supported
The media that this device can play back a USB flash drive.
Corresponding File Systems
This device supports FAT 16/32.
The maximum nested folder depth is 8 (including the root directory). File names are limited to 256 characters (including the extension).
Valid characters for folder/file names are letters A-Z (all caps), numbers 0-9, and '-' (underscore).
Order of files
Files are played back in the order that the writing software writes them to the disc. Therefore, the playback order may not be what's expected. Verity the writing order in the software's documentation. The playback order of the folders and files is as follows. (The following numbers may differ from actually displayed numbers.)
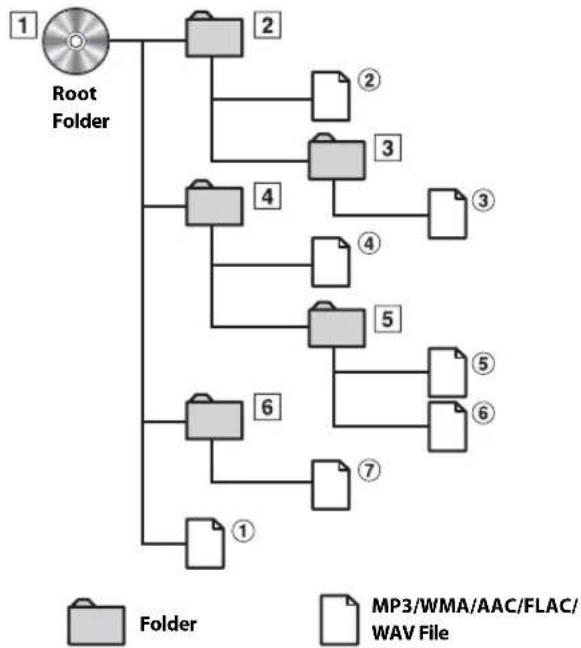
flowchart
graph TD
    A["Root Folder"] --> B["2"]
    A --> C["4"]
    A --> D["6"]
    A --> E["1"]
    B --> F["2"]
    B --> G["3"]
    C --> H["4"]
    C --> I["5"]
    D --> J["7"]
    D --> K["6"]
    E --> L["1"]
    F --> M["3"]
    G --> N["4"]
    H --> O["5"]
    I --> P["6"]
    J --> Q["7"]
    K --> R["6"]
    style A fill:#f9f,stroke:#333
    style B fill:#ccc,stroke:#333
    style C fill:#ccc,stroke:#333
    style D fill:#ccc,stroke:#333
    style E fill:#ccc,stroke:#333
    style F fill:#ccc,stroke:#333
    style G fill:#ccc,stroke:#333
    style H fill:#ccc,stroke:#333
    style I fill:#ccc,stroke:#333
    style J fill:#ccc,stroke:#333
    style K fill:#ccc,stroke:#333
    style L fill:#ccc,stroke:#333
    style M fill:#ccc,stroke:#333
    style N fill:#ccc,stroke:#333
    style O fill:#ccc,stroke:#333
    style P fill:#ccc,stroke:#333
    style Q fill:#ccc,stroke:#333
    style R fill:#ccc,stroke:#333
Terminology
Bit rate
This is the "sound" compression rate specified for encoding. The higher the bit rate, the higher the sound quality, but also the larger the files.
Sampling rate
This value shows how many times per second the data is sampled (recorded). For example, music CDs use a sampling rate of 44.1 kHz, so the sound is sampled (recorded) 44,100 times per second. The higher the sampling rate, the higher the sound quality, but also the larger the volume of data.
Encoding
Converting music CDs, WAVE (AIFF) files, and other sound files into the specified audio compression format.
Tag
Song information such as track titles, artist names, album names, etc., written into MP3/WMA/AAC/FLAC (USB flash drive) files.
Root folder
The root folder (or root directory) is found at the top of the file system. The root folder contains all folders and files. It is created automatically for all burned discs.
In Case of Difficulty
If you encounter a problem, please turn the power off, then on again. If the unit is still not functioning normally, please review the items in the following checklist. This guide will help you isolate the problem if the unit is at fault. Otherwise, make sure the rest of your system is properly connected, or then consult your authorized Alpine dealer.
Basic
No function or display.
- Vehicle's ignition is off.
If connected according to the instructions, the unit will not operate with the vehicle's ignition off. - Improper power lead connections.
- Check power lead connections.
- Blown fuse.
- Check the fuse on the battery lead of the unit; replace with the proper value if necessary.
- Internal micro-computer malfunctioned due to interference noise, etc.
- Press the RESET switch with a ballpoint pen or other pointed article.
No sound or unnatural sound.
- Incorrect setting of volume/balance/fader controls.
Readjust the controls. - Connections are not properly or securely made.
- Check the connections and firmly connect.
Screen not displayed.
- Brightness/Contrast control is set at the minimum position.
- Adjust the Brightness/Contrast control.
• Temperature in the vehicle is too low. - Increase the vehicle's interior temperature to operation temperature range.
Connections to the Auxiliary Device are not securely made. - Check the connections and firmly connect.
• The Parking Brake Lead is not connected.
• The Parking Brake is not engaged. - Connect the Parking Brake Lead, then engage the Parking Brake.
Movement of displayed picture is abnormal.
• Temperature in the vehicle is too high.
- Allow the vehicle's interior temperature to cool.
The optional remote control is inoperative.
- The remote control sensor setting of "Remote Sensor Setting" (page 45) is not set to this unit ("Front").
- Set for "Front".
Radio
Unable to receive stations.
- No antenna, or open connection in the antenna cable.
- Make sure the antenna is properly connected; replace the antenna or cable if necessary.
Unable to tune stations in the seek mode.
- You are in a weak signal area.
Make sure the tuner is in DX mode.
- If the area you are in is a primary signal area, the antenna may not be grounded and connected properly.
- Check your antenna connections; make sure the antenna is properly grounded at its mounting location.
- The antenna may not be the proper length.
- Make sure the antenna is fully extended; if broken, replace the antenna with a new one.
Broadcast is noisy.
• The antenna is not the proper length.
Extend the antenna fully; replace it if it is broken.
• The antenna is poorly grounded.
Make sure the antenna is grounded properly at its mounting location.
• The station signal is weak and noisy.
- If above solution does not work, tune in another station.
USB Audio
Unit does not operate.
- Condensation.
- Wait a while (about 1 hour) for the condensation to dry.
Picture is unclear or noisy.
- Vehicle's battery power is weak.
- Check the battery power and wiring. (The unit may malfunction if the battery power is under 11 volts with a load applied.)
Rear Seat Entertainment System
DVD sound is not being output from the rear monitor headphones.
- The external audio processor and DVD Player (DVE-5300) are optically connected.
- Set the Audio Out of the DVD Player to "LPCM."
Navigation
The Navigation cannot work properly.
- Reset Navigation system.
- Turn the ignition key off, and then set to ON again.
If this Message Appears
Various messages are displayed on the screen during operation. In addition to the messages telling you the current status or providing guidance for the next operation, there are also the following error messages. If one of these error messages is displayed, carefully follow the instructions in the solution column.
System
If you are driving, please pull over before using this function.
- A setup operation, etc., was carried out while the vehicle was running.
- Move the vehicle to a safe location, stop, and engage the parking brake, then carry out this operation.
USB current error.
- Abnormal current is run to the USB connector device.
- Turn the ignition key off, and then set to ON again.
- Attempt to connect another iPod/iPhone/USB Flash drive.
USB HUB is not supported.
- A USB flash drive with a hub is connected.
You cannot play back from a USB flash drive with a hub. USB hub connections are also not supported.
File Format not supported.
- A USB Video file that is not supported by this unit is selected.
- Check if the video file is playable by seeing “About USB Video format” (page 57).
Audio/Visual
Connected USB device is not supported.
- An iPod/iPhone that is not supported by the unit is connected.
- Connect an iPod/iPhone that is supported by the unit.
- Reset the iPod.
- A USB device that is not supported by the unit is connected.
- Attempt to connect another USB flash drive.
- Communication error.
- Turn the ignition key off, and then set to ON again.
- Check the display by reconnecting between the iPod/iPhone and the unit, using the iPod/iPhone cable.
- Check the display by reconnecting between the USB flash drive and the unit.
- Caused by the iPod/iPhone Software Version not being compatible with this unit.
- Update the iPod/iPhone Software Version to be compatible with this unit.
• The iPod/iPhone is not verified. - Change to another iPod/iPhone.
No data.
• There are no data in the iPod/iPhone.
Download data to the iPod/iPhone and connect to the unit.
- There are no data in the USB flash drive.
Download data to the USB flash drive and connect to this unit.
Un-readable song was skipped.
- A copy-protected WMA file has been detected.
- You can only play back non-copy-protected files.
- A sampling rate/bit rate not supported by the unit is used.
- Use a sampling rate/bit rate supported by the unit.
DAB Antenna error
- The DAB antenna cable is either damaged or not connected correctly to the product.
- Check that the antenna cable is not kinked or otherwise damaged. Replace the antenna if necessary.
- Abnormal current is run to the DAB Antenna.
- Connect the antenna properly to a car with a 12 volt negative ground.
Bluetooth
Please connect Bluetooth audio device.
- The Bluetooth audio device was not connected correctly.
- Check the settings for the unit and the Bluetooth audio device and reconnect.
Unable to download phonebook.
- Phonebook failed to read due to mobile phone disconnection, etc.
- Check the mobile phone connection, and then conduct synchronising and adding again. (See page 73)
- The connected mobile phone does not support synchronising of its phone book.
- Connect the mobile phone that supports synchronising the phone book, then synchronise again. (See page 73)
HDMI
HDMI communication error,
Please check your device and operate it again.
- Communication error.
- Turn the ignition key off, and then set to ON again.
- Check the display by reconnecting between the HDMI and the unit, using the HDMI cable.
- Check the display by reconnecting between the HDMI device and the unit.
HDMI current error,
Please Connect your device again.
- Abnormal current is run to the HDMI connector device.
- Turn the ignition key off, and then set to ON again.
- Disconnect the HDMI device from the unit, and then reconnect it.
Monitor connect via HDMI has been exceeded.
Please check the connection.
- More than 4 HDMI monitors are connected.
- A cascade connection using more than 2 distributors is made.
- Use one distributor and less than 4 HDMI monitors when connecting.
CAN Interface
CAN Communication Error
- Communication error.
- Check the CAN Interface box connection.
Applying Alpine Tunelt App
You can not use Sound App
Because External AP is on.
- "Setting the External AP" (page 45) is "On."
- When “External AP” (page 45) is set to “On,” you cannot perform Sound Tuning from the Alpine TuneIt App. Set “External AP” to “Off” to perform Sound Tuning from the Alpine TuneIt App.
Navigation
The vehicle's position is erroneous.
• The GPS reception is poor.
- Drive the vehicle in an area of good GPS reception to allow the unit to recalibrate itself. Move to a location where strong GPS reception is possible.
No operation
- Moisture condensation
- Allow enough time for the condensation to evaporate (about 1 hour).
• Ambient Temperature
- Make sure the temperature inside the vehicle is between 0^ C and 45^ C ( 32^ F and 113^ F).
Specifications
MONITOR SECTION
Screen Size 8" (X308AU)
7" (INE-W987A)
LCD Type Transparent type TN LCD
Operation System TFT active matrix
Number of Picture Elements 1,152,000 pcs. (800 × 480 × 3 (RGB))
Effective Number of Picture Elements
99% or more
Illumination System LED
FM TUNER SECTION
Tuning Range 87.5 - 108.0 MHz
Mono Usable Sensitivity 8.1 dBf (0.7 μV/75 ohms)
50 dB Quieting Sensitivity 12 dBf (1.1 μV/75 ohms)
Alternate Channel Selectivity 80 dB
Signal-to-Noise Ratio 65 dB
Stereo Separation 35 dB
Capture Ratio 2.0 dB
MW TUNER SECTION
Tuning Range 531 - 1,602 kHz
Usable Sensitivity 25.1 μV/28 dBf
LW TUNER SECTION
Tuning Range 153 - 281 kHz
Sensitivity (IEC Standard) 31.6 μV/30 dBf
DAB SECTION
Tuning Range BAND III 174.93 - 239.2 MHz
Tuning Range L-BAND 1,452.96 - 1,490.6 MHz
Usable Sensitivity -103 dBm
Signal-to-Noise Ratio 95 dB
Stereo Separation 85 dB
USB SECTION
USB requirements USB 2.0
Max. Power Consumption 1,500 mA (CDP Support)
USB Class USB (Mass Storage Class)
File System FAT16/32
Number of Channels 2-Channels (Stereo)
Frequency Response ^* 1 5 - 20,000 Hz (±1 dB)
Total Harmonic Distortion 0.008% (at 1 kHz)
Dynamic Range 95 dB (at 1 kHz)
Signal-to-Noise Ratio 100 dB
Channel Separation 85 dB (at 1 kHz)
*1 Frequency response may differ depending on the encoder software/bit rate.
HDMI SECTION
Input Format 480p/VGA
Output Format 480p
GPS SECTION
GPS Reception frequency 1,575.42 ±1 MHz
GPS Reception sensitivity -136 dB max.
GLONASS SECTION
GLONASS Reception frequency
1,597.807 MHz - 1,605.6305 MHz
GLONASS Reception sensitivity
-137 dB max.
Bluetooth SECTION
Bluetooth Specification Bluetooth V3.0
Frequency band 2,402 - 2,480 MHz
Output Power +4 dBm Max. (Power class 2)
Profile HFP (Hands-Free Profile)
OPP (Object Push Profile)
PBAP (Phone Book Access Profile)
A2DP (Advanced Audio
Distribution Profile)
AVRCP (Audio/Video Remote
Control Profile)
SPP (Serial Port Profile)
GENERAL
Power Requirement 14.4 V DC
(11–16 V allowable)
Operating temperature -4^ to +140^
(-20^ to +60^)
Maximum Power Output 50 W × 4
Audio output level
Preout (Front, Rear): 4V/10k ohms (max.)
Preout (Subwoofer): 4V/10k ohms (max.)
Weight 1.51 kg (3 lbs. 5 oz) (X308AU)
1.41 kg (3 lbs. 2 oz) (INE-W987A)
CHASSIS SIZE
Width 198 mm (7-13/16") (X308AU)
178 mm (7") (INE-W987A)
Height 125 mm (4-15/16") (X308AU)
100 mm (3-15/16") (INE-W987A)
Depth 147 mm (5-3/4")
NOSE SIZE
Width 191 mm (7-1/2") (X308AU)
171 mm (6-3/4") (INE-W987A)
Height 121 mm (4-3/4") (X308AU)
96 mm (3-3/4") (INE-W987A)
Depth 19 mm (3/4")
- Due to continuous product improvement, specifications and design are subject to change without notice.
- The LCD panel is manufactured using an extremely high precision manufacturing technology. Its effective pixel ratio is over 99.99% . This means that there is a possibility that 0.01% of the pixels could be either always ON or OFF.
END USER LICENCE AGREEMENT (HERE)
PLEASE READ THIS END USER LICENCE AGREEMENT CAREFUL BEFORE USING THE HERE DATABASE
NOTICE TO THE USER
THIS IS A LICENCE AGREEMENT - AND NOT AN AGREEMENT FOR SALE - BETWEEN YOU AND HERE B.V. FOR YOUR COPY OF THE HERE NAVIGABLE MAP DATABASE, INCLUDING ASSOCIATED COMPUTER SOFTWARE, MEDIA AND EXPLANATORY PRINTED DOCUMENTATION PUBLISHED BY HERE (JOINTLY "THE DATABASE"). BY USING THE DATABASE, YOU ACCEPT AND AGREE TO ALL TERMS AND CONDITIONS OF THIS END USER LICENCE AGREEMENT ("AGREEMENT"). IF YOU DO NOT AGREE TO THE TERMS OF THIS AGREEMENT, PROMPTLY RETURN THE DATABASE, ALONG WITH ALL OTHER ACCOMPANYING ITEMS, TO YOUR SUPPLIER FOR A REFUND.
OWNERSHIP
The Database and the copyrights and intellectual property or neighboring rights therein are owned by HERE or its licensors. Ownership of the media on which the Database is contained is retained by HERE and/or your supplier until after you have paid in full any amounts due to HERE and/or your supplier pursuant to this Agreement or similar agreement(s) under which goods are provided to you.
LICENCE GRANT
HERE grants you a non-exclusive licence to use the Database for your personal use or, if applicable, for use in your business' internal operations. This licence does not include the right to grant sub-licences.
LIMITATIONS ON USE
The Database is restricted for use in the specific system for which it was created. Except to the extent explicitly permitted by mandatory laws (e.g. national laws based on the European Software Directive (91/250) and the Database Directive (96/9)), you may not extract or reutilize substantial parts of the contents of the Database nor reproduce, copy, modify, adapt, translate, disassemble, decompile, reverse engineer any portion of the Database. If you wish to obtain interoperability information as meant in (the national laws based on) the European Software Directive, you shall grant HERE reasonable opportunity to provide said information on reasonable terms, including costs, to be determined by HERE.
TRANSFER OF LICENCE
You may not transfer the Database to third parties, except when installed in the system for which it was created or when you do not retain any copy of the Database, and provided that the transferee agrees to all terms and conditions of this Agreement and confirms this in writing to HERE. Multi-disc sets may only be transferred or sold as a complete set as provided by HERE and not as subset thereof.
LIMITED WARRANTY
HERE warrants that, subject to the warnings set out below, for a period of 12 months after acquisition of your copy of the Database, it will perform substantially in accordance with HERE's Criteria for Accuracy and Completeness existing on the date you acquired the Database; these criteria are available from HERE at your request. If the Database does not perform in accordance with this limited warranty, HERE will use reasonable efforts to repair or replace your non-conforming copy of the Database. If these efforts do not lead to performance of the Database in accordance with the warranties set out herein, you will have the option to either receive a reasonable refund of the price you paid for the Database or to rescind this Agreement. This shall be HERE's entire liability and your sole remedy against HERE. Except as expressly provided in this section, HERE does not warrant nor make any representations regarding the use of results of the use of the Database in terms of its correctness, accuracy, reliability, or otherwise. HERE does not warrant that the Database is or will be error free. No oral or written information or advice provided by HERE, your supplier or any other person shall create a warranty or in any way increase the scope of the limited warranty described above. The limited warranty set forth in this Agreement does not affect or prejudice any statutory legal rights that you may have under the legal warranty against hidden defects.
If you did not acquire the Database from HERE directly, you may have statutory rights against the person from whom you have acquired the Database in addition to the rights granted by HERE hereunder according to the law of your jurisdiction. The above warranty of HERE shall not affect such statutory rights and you may assert such rights in addition to the warranty rights granted herein.
LIMITATION OF LIABILITY
The price of the Database does not include any consideration for assumption of risk of consequential, indirect or unlimited direct damages which may arise in connection with your use of the Database. Accordingly, in no event shall HERE be liable for any consequential or indirect damages, including without limitation, loss of revenue, data, or use, incurred by you or any third party arising out of your use of the Database, whether in an action in contract or tort or based on a warranty, even if HERE has been advised of the possibility of such damages. In any event HERE's liability for direct damages is limited to the price of your copy of the Database.
THE LIMITED WARRANTY AND LIMITATION OF LIABILITY, SET FORTH IN THIS AGREEMENT, DO NOT AFFECT OR PREJUDICE YOUR STATUTORY RIGHTS WHERE YOU HAVE ACQUIRED THE DATABASE OTHERWISE THAN IN THE COURSE OF A BUSINESS.
WARNINGS
The Database may contain inaccurate or incomplete information due to the passage of time, changing circumstances, sources used and the nature of collecting comprehensive geographic data, any of which may lead to incorrect results. The Database does not include or reflect information on - inter alia - neighborhood safety; law enforcement; emergency assistance; construction work; road or lane closures; vehicle or speed restrictions; road slope or grade; bridge height, weight or other limits; road or traffic conditions; special events; traffic congestion; or travel time.
GOVERNING LAW
This Agreement shall be governed by the laws of the jurisdiction, in which you reside at the date of acquisition of the Database. Should you at that moment reside outside the European Union or Switzerland, the law of the jurisdiction within the European Union or Switzerland where you acquired the Database shall apply. In all other cases, or if the jurisdiction where you acquired the Database cannot be defined, the laws of the Netherlands shall apply. The courts competent at your place of residence at the time you acquired the Database shall have jurisdiction over any dispute arising out of, or relating to this Agreement, without prejudice to HERE's right to bring claims at your then current place of residence.
Installation and Connections
Before installing or connecting the unit, please read the following and pages 7 to 10 of this manual thoroughly for proper use.

WARNING
This symbol means important instructions. Failure to heed them can result in serious injury or death.
DO NOT DISASSEMBLE OR ALTER.
Doing so may result in an accident, fire or electric shock.
KEEP SMALL OBJECTS SUCH AS SCREWS OUT OF THE REACH OF CHILDREN.
Swallowing them may result in serious injury. If swallowed, consult a physician immediately.
USE THE CORRECT AMPERE RATING WHEN REPLACING FUSES.
Failure to do so may result in fire or electric shock.
DO NOT BLOCK VENTS OR RADIATOR PANELS.
Doing so may cause heat to build up inside and may result in fire.
USE THIS PRODUCT FOR MOBILE 12V APPLICATIONS.
Use for other than its designed application may result in fire, electric shock or other injury.
MAKE THE CORRECT CONNECTIONS.
Failure to make the proper connections may result in fire or product damage.
USE ONLY IN CARS WITH A 12 VOLT NEGATIVE GROUND.
(Check with your dealer if you are not sure.) Failure to do so may result in fire, etc.
BEFORE WIRING, DISCONNECT THE CABLE FROM THE NEGATIVE BATTERY TERMINAL.
Failure to do so may result in electric shock or injury due to electrical shorts.
DO NOT ALLOW CABLES TO BECOME ENTANGLED IN SURROUNDING OBJECTS.
Arrange wiring and cables in compliance with the manual to prevent obstructions when driving. Cables or wiring that obstruct or hang up on places such as the steering wheel, shift lever, brake pedals, etc. can be extremely hazardous.
DO NOT SPLICE INTO ELECTRICAL CABLES.
Never cut away cable insulation to supply power to other equipment. Doing so will exceed the current carrying capacity of the wire and result in fire or electric shock.
DO NOT DAMAGE PIPE OR WIRING WHEN DRILLING HOLES.
When drilling holes in the chassis for installation, take precautions so as not to contact, damage or obstruct pipes, fuel lines, tanks or electrical wiring. Failure to take such precautions may result in fire.
DO NOT USE BOLTS OR NUTS IN THE BRAKE OR STEERING SYSTEMS TO MAKE GROUND CONNECTIONS.
Bolts or nuts used for the brake or steering systems (or any other safety-related system), or tanks should NEVER be used for installations or ground connections. Using such parts could disable control of the vehicle and cause fire etc.
DO NOT INSTALL IN LOCATIONS WHICH MIGHT HINDER VEHICLE OPERATION, SUCH AS THE STEERING WHEEL OR SHIFT LEVER.
Doing so may obstruct forward vision or hamper movement etc. and results in serious accident.
DO NOT INSTALL THE MONITOR NEAR THE PASSENGER SEAT AIR BAG.
If the unit is not installed correctly the air bag may not function correctly and when triggered the air bag may cause the monitor to spring upwards causing an accident and injuries.

CAUTION
This symbol means important instructions. Failure to heed them can result in injury or material property damage.
HAVE THE WIRING AND INSTALLATION DONE BY EXPERTS.
The wiring and installation of this unit requires special technical skill and experience. To ensure safety, always contact the dealer where you purchased this product to have the work done.
USE SPECIFIED ACCESSORY PARTS AND INSTALL THEM SECURELY.
Be sure to use only the specified accessory parts. Use of other than designated parts may damage this unit internally or may not securely install the unit in place. This may cause parts to become loose resulting in hazards or product failure.
IMPORTANT
Please record the serial number of your unit in the space provided on the right and keep it as a permanent record. The serial number plate is located on the bottom of the unit.
SERIAL NUMBER:
INSTALLATION DATE:
INSTALLATION TECHNICIAN:
PLACE OF PURCHASE: ____
ARRANGE THE WIRING SO IT IS NOT CRIMPED OR PINCHED BY A SHARP METAL EDGE.
Route the cables and wiring away from moving parts (like the seat rails) or sharp or pointed edges. This will prevent crimping and damage to the wiring. If wiring passes through a hole in metal, use a rubber grommet to prevent the wire's insulation from being cut by the metal edge of the hole.
DO NOT INSTALL IN LOCATIONS WITH HIGH MOISTURE OR DUST.
Avoid installing the unit in locations with high incidence of moisture or dust. Moisture or dust that penetrates into this unit may result in product failure.
Precautions
- Be sure to disconnect the cable from the (-) battery post before installing your unit. This will reduce any chance of damage to the unit in case of a short-circuit.
- Be sure to connect the colour coded leads according to the diagram. Incorrect connections may cause the unit to malfunction or damage to the vehicle's electrical system.
- When making connections to the vehicle's electrical system, be aware of the factory installed components (e.g. on-board computer). Do not tap into these leads to provide power for this unit. When connecting the unit to the fuse box, make sure the fuse for the intended circuit of the unit has the appropriate amperage. When in doubt, consult your Alpine dealer.
- The unit uses female RCA-type jacks for connection to other units (e.g. amplifier) having RCA connectors. You may need an adaptor to connect other units. If so, please contact your authorized Alpine dealer for assistance.
- Be sure to connect the speaker (−) leads to the speaker (−) terminal. Never connect left and right channel speaker cables to each other or to the vehicle body.
Accessory List
• X308AU/INE-W987A....1
• Power cable....1
• GPS Antenna....1
- Antenna mounting plate....1
- Cable clamp for antenna .... 1set
- USB extension cable....1
- Microphone....1
- PRE OUT cable 1
- Face plate (INE-W987A only)....1
• CAN I/F cable 1
• W.REMOTE cable....1
• HDMI Fixation Bracket....1
- Flush head screw (M5×8) 4
- Screw (M5×8) 4
- Owner's Manual....1set
Installation
To install the X308AU, refer to the manual in the separately purchased installation kit for each car type.
Caution
Do not block the unit's fan, thus preventing air circulation. If blocked, heat will accumulate inside the unit and may cause a fire.
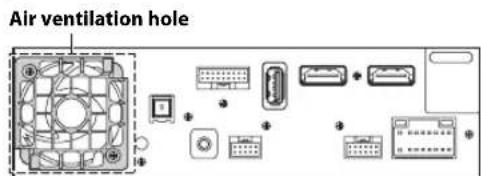
Rear of the Unit
Caution concerning the installation location
Angle of installation
Install at an angle between horizontal and 30^ . Note that installing at an angle outside of this range will result in a loss of performance and possibly damage.
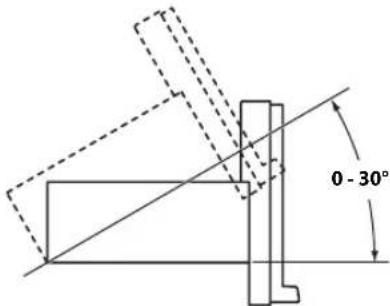
Mounting the GPS Antenna inside the vehicle
1 Clean the mounting location.
2Put on the GPS Antenna mounting plate.
3Mount the GPS Antenna.
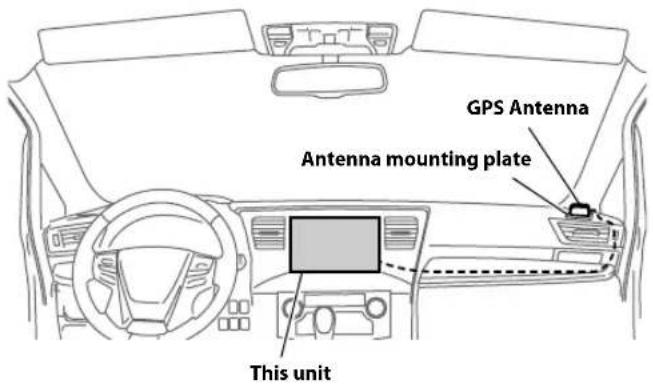
- Do not mount the GPS Antenna inside the centre console.
- Mount the GPS Antenna on a flat plane of the dash board or rear tray.
- Make sure the GPS Antenna is not covered (obstructed) by any metallic surface or object.
- If the GPS Antenna is mounted near the unit, the reception becomes poor, and the location of your vehicle may not be displayed correctly.
- Mount the GPS Antenna far away enough from the unit.
- Bundle the GPS Antenna cable away from the rear of the unit.
- Some thermal reflection type or thermal absorption type glass may interrupt high frequency waves. If reception is poor with the antenna installed inside the car, try to mount the antenna outside the car.
Mounting the Microphone.
For safe use, make sure of the following:
- Location is stable and firm.
- Driver's view and operations are not obstructed.
- Microphone is located where the driver's voice can be easily picked up (for example, on the sun visor).
When you speak into the microphone, you should not have to change your driving posture. This may cause a distraction, taking your attention away from safely driving your vehicle. Carefully consider direction and distance while mounting the microphone. Confirm that the driver's voice can be easily picked up at the selected location.
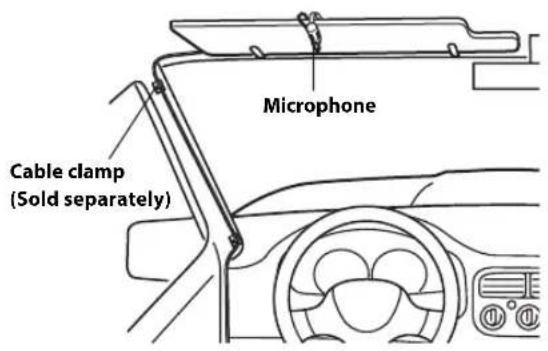
Installation example using the Original Mounting Bracket
1 Mount the original mounting bracket to the unit using the supplied screws.
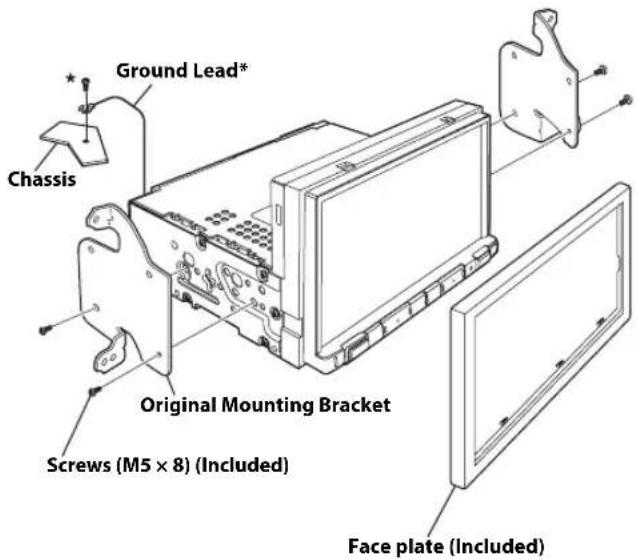
* To securely connect the ground lead, use an already installed screw on a metal part of the vehicle (marked (★ or a clean, bare metal spot on the vehicle's chassis.
2 Connect all other leads of the unit according to details described in the "Connections" (page 95).
3Mounting the unit in a car.
- Fix the cables carefully. Do not damage them by tucking them into movable parts, such as a seat rail, or by locating them against sharp or pointed edges.
Note on using HDMI Connection Cables
When using HDMI connection cables, secure the cables to the HDMI Terminals with the supplied HDMI Fixation Bracket.
1 Slide the HDMI Fixation Bracket into the grooves (A).
2 Secure it with the screw (B).
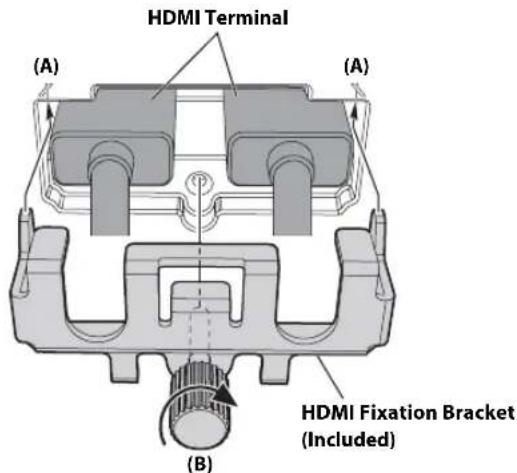
Connections
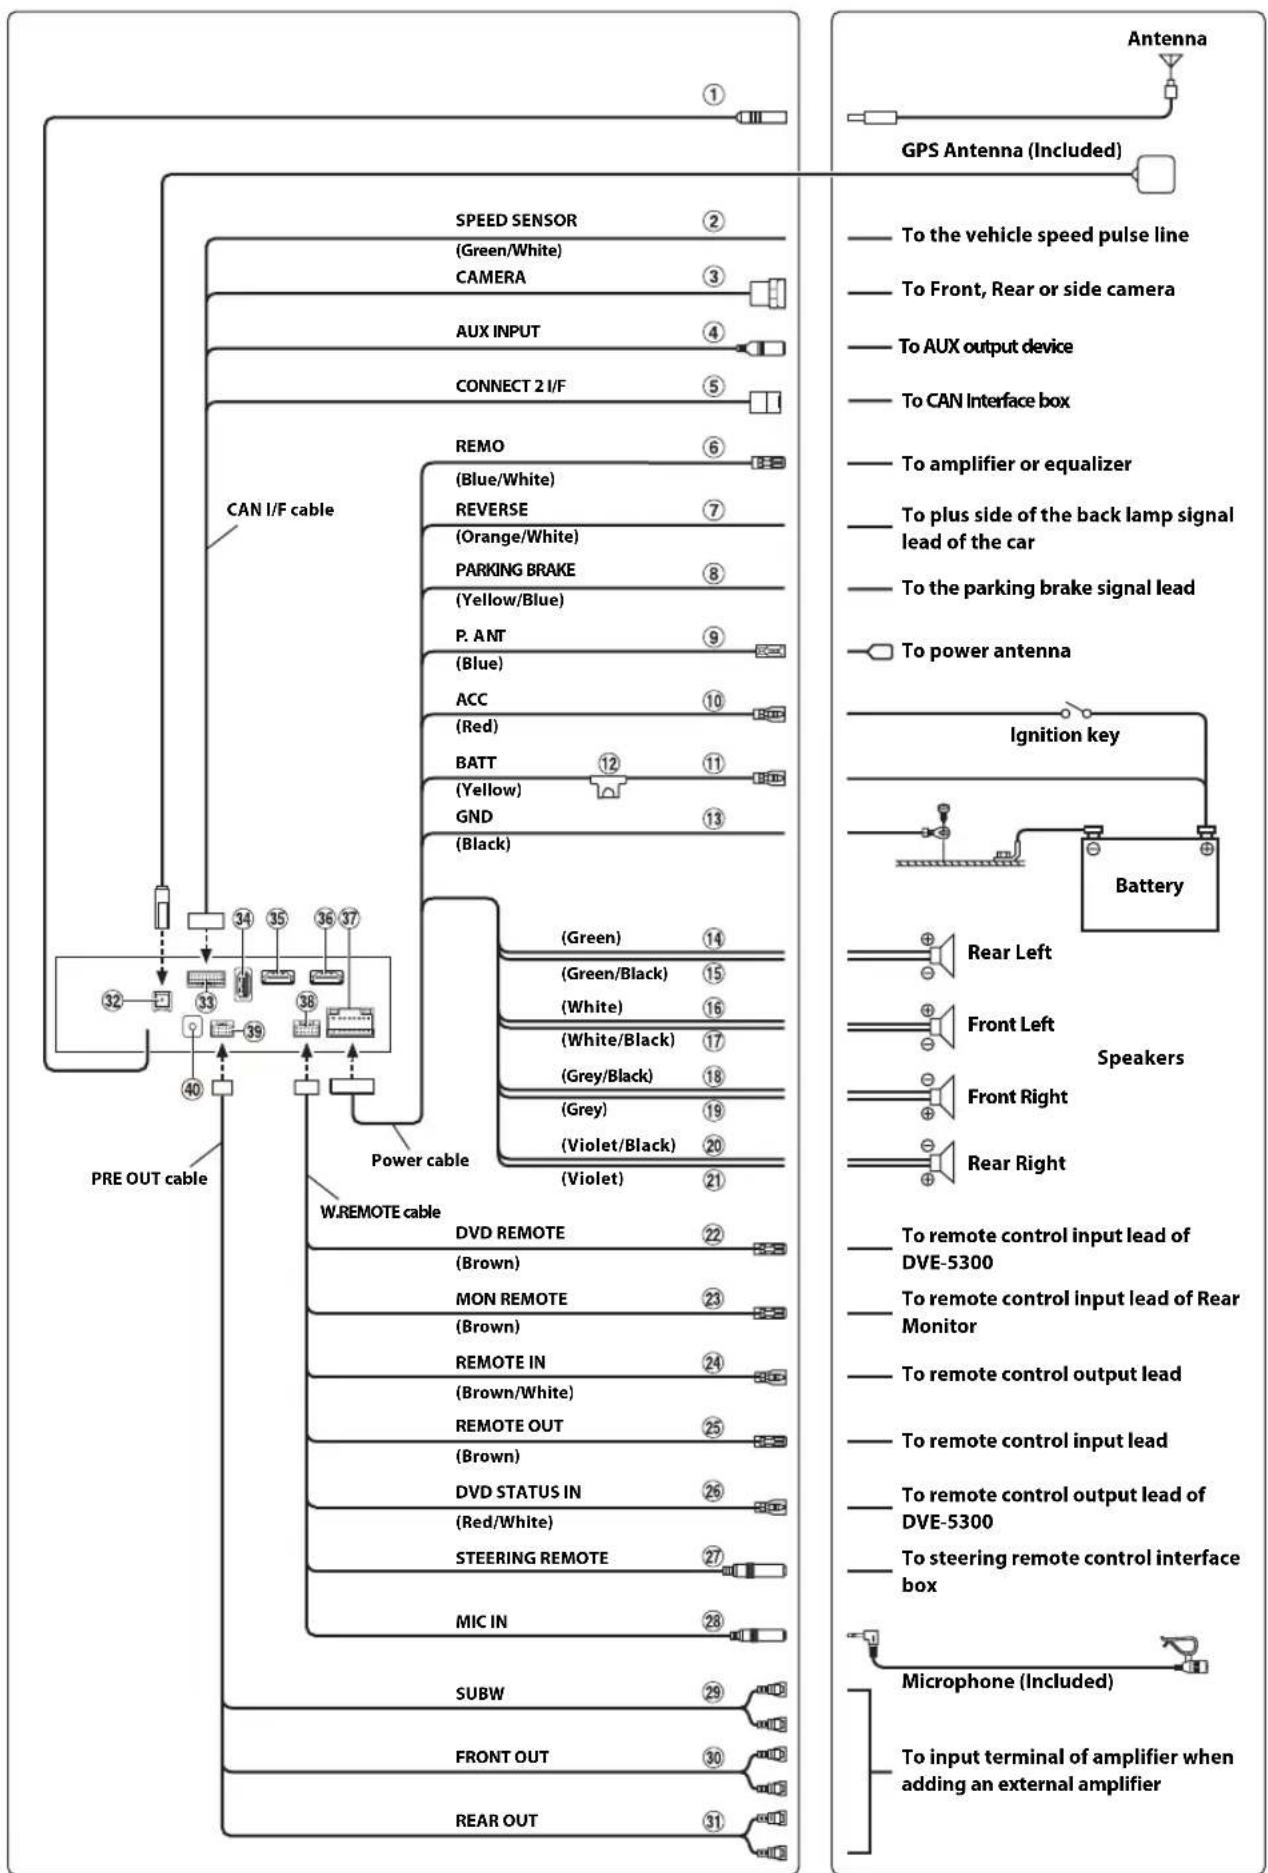
flowchart
graph TD
    A["GPS Antenna (Included)"] --> B["To the vehicle speed pulse line"]
    B --> C["To Front, Rear or side camera"]
    C --> D["To AUX output device"]
    D --> E["To CAN Interface box"]
    E --> F["To amplifier or equalizer"]
    F --> G["To plus side of the back lamp signal lead of the car"]
    G --> H["To the parking brake signal lead"]
    H --> I["To power antenna"]
    I --> J["Ignition key"]
    J --> K["Battery"]
    K --> L["Rear Left"]
    K --> M["Front Left"]
    K --> N["Speaker"]
    K --> O["Front Right"]
    K --> P["Rear Right"]
    K --> Q["To remote control input lead of DVE-5300"]
    K --> R["To remote control input lead of Rear Monitor"]
    K --> S["To remote control output lead"]
    K --> T["To remote control input lead"]
    K --> U["To remote control output lead of DVE-5300"]
    K --> V["To steering remote control interface box"]
    K --> W["Microphone (Included)"]
    W --> X["To input terminal of amplifier when adding an external amplifier"]

    subgraph Power Cable
        A1["SPEED SENSOR ②<br>(Green/White)<br>CAMERA ③"]
        A2["AUX INPUT ④"]
        A3["CONNECT 2 I/F ⑤"]
        A4["REMO ⑥<br>(Blue/White)"]
        A5["REVERSE ⑦<br>(Orange/White)"]
        A6["P. ANT ⑧<br>(Yellow/Blue)"]
        A7["ACC ⑨<br>(Blue)"]
        A8["BATT ⑩<br>(Red)"]
        A9["GND ⑪<br>(Yellow)"]
        A10["(Black) ⑫"]
        A11["(Green) ⑬<br>(Green/Black)"]
        A12["(White) ⑭<br>(White/Black)"]
        A13["(Grey) ⑮<br>(Grey/Black)"]
        A14["(Violet) ⑯<br>(Violet)"]
        A15["(Violet) ⑰<br>(Violet)"]
        A16["(Green) ⑱<br>(Green/Black)"]
        A17["(White) ⑲<br>(White/Black)"]
        A18["(Grey) ⑲<br>(Grey/Black)"]
        A19["(Violet) ㉑<br>(Violet)"]
        A20["(Violet) ㉒<br>(Violet)"]
        A21["(Green) ㉓<br>(Green/Black)"]
        A22["(Brown) ㉓<br>MON REMOTE ㉓<br>(Brown)"]
        A23["(Brown) ㉔<br>REMOTE IN ㉔<br>(Brown/White)"]
        A24["(Brown) ㉕<br>REMOTE OUT ㉕<br>(Brown)"]
        A25["(Red/White) ㉖<br>DVD STATUS IN ㉖<br>(MIC IN) ㉖"]
        A26["(Red/White) ㉗<br>STEERING REMOTE ㉗<br>SUBW ㉘<br>FRONT OUT ㉙<br>REAR OUT ㉚"]
        A27["(Red/White) ㉚<br>SUBW ㉛<br>FRONT OUT ㉜<br>REAR OUT ㉝"]
    end

    subgraph Power Cable
        B1["SPEED SENSOR ②<br>(Green/White)<br>CAMERA ③"]
        B2["AUX INPUT ④"]
        B3["CONNECT 2 I/F ⑤"]
        B4["REMO ⑥<br>(Blue/White)"]
        B5["REVERSE ⑦<br>(Orange/White)"]
        B6["P. ANT ⑧<br>(Yellow/Blue)"]
        B7["ACC ⑩<br>(Red)"]
        B8["BATT ⑪<br>(Yellow)"]
        B9["GND ⑫<br>(Black)"]
        B10["(Green) ⑭<br>(Green/Black)"]
        B11["(White) ⑮<br>(White/Black)"]
        B12["(Grey) ⑯<br>(Grey/Black)"]
        B13["(Violet) ㉑<br>(Violet)"]
        B14["(Violet) ㉒"]
        B15["(Green) ㉓<br>(Green/Black)"]
        B16["(White) ㉔<br>(White/Black)"]
        B17["(Grey) ㉕<br>(Grey/Black)"]
        B18["(Violet) ㉖<br>(Violet)"]
        B19["(Violet) ㉗"]
        B20["(Green) ㉘<br>(Green/Black)"]
        B21["(Yellow) ㉙<br>(Wiret/Black)"]
        B22["(Green) ㉚<br>(Wiret/Black)"]
        B23["(Yellow) ㉟<br>(Wiret/Black)"]
        B24["(Grey) ㉟<br>(Wiret/Black)"]
        B25["(Violet) ㉟"]
        B26["(Green) ㉟a<br>(Violet/Black)"]
        B27["(Red/White) ㉟a<br>(Freight/Black)"]
        B28["(Red/White) ㉟a<br>(Freight/Black)"]
        B29["(Red/White) ㉟a<br>(Freight/Black)"]
        B30["(Red/White) ㉟a<br>(Freight/Black)"]
        B31["(Red/White) ㉟a<br>(Freight/Black)"]
    end
① Radio Antenna Receptacle
② Speed Sensor Lead (Green/White)
Improper connection of the speed pulse line may cause important safety features of the vehicle to fail (such as the brakes or air bags). Such failures may result in an accident and loss of life. We strongly recommend that the installation be performed by a trained, authorized Alpine dealer.
③ Direct CAMERA Input Connector
Use when the optional direct camera is connected.
④ AUX Input Connector
Input lead for AUX video/audio signal.
- A separately sold AV/RCA interface cable (4-pole mini AV plug to 3-RCA) is required. For details on using an AV/RCA interface cable (4-pole mini AV plug to 3-RCA), see "Usable AV/RCA Interface Cable (4-pole mini AV plug to 3-RCA)" (page 97).
⑤ CAN Interface Connector
To CAN Interface box.
⑥ Remote Turn-On Lead (Blue/White)
Connect this lead to the remote turn-on lead of your amplifier or signal processor.
⑦ Reverse Lead (Orange/White)
Connect to the plus side of the car's reverse lights. These lights illuminate when the transmission is shifted into reverse (R). With this lead properly wired, the video picture automatically switches to the rear camera whenever the car is put into reverse (R).
⑧ Parking Brake Lead (Yellow/Blue)
Connect this lead to the power supply side of parking brake switch to transmit the parking brake status signals to the unit.
⑨ Power Antenna Lead (Blue)
Connect this lead to the +B terminal of your power antenna, if applicable.
- This lead should be used only for controlling the vehicle's power antenna. Do not use this lead to turn on an amplifier or a signal processor, etc.
⑩ Switched Power Lead (Ignition) (Red)
Connect this lead to an open terminal on the vehicle's fuse box or another unused power source that provides (+) 12V only when the ignition is turned on or in the accessory position.
⑪ Battery Lead (Yellow)
Connect this lead to the positive (+) post of the vehicle's battery.
⑫ Fuse Holder (15A)
⑬ Ground Lead (Black)
Connect this lead to a good chassis ground on the vehicle. Make sure the connection is made to bare metal and is securely fastened using the sheet metal screw provided.
⑭ Left Rear (+) Speaker Output Lead (Green)
⑮ Left Rear (−) Speaker Output Lead (Green/Black)
⑯ Left Front (+) Speaker Output Lead (White)
⑰ Left Front (−) Speaker Output Lead (White/Black)
⑱ Right Front (−) Speaker Output Lead (Grey/Black)
⑲ Right Front (+) Speaker Output Lead (Grey)
20 Right Rear (−) Speaker Output Lead (Violet/Black)
②1 Right Rear (+) Speaker Output Lead (Violet)
② Remote Control Output Lead (Brown) (For DVD Player DVE-5300)
Connect this lead to the remote control input lead. This lead outputs the controlling signals from the remote control.
23 Remote Control Output Lead (Brown) (For Rear Monitor)
Connect this lead to the remote control input lead. This lead outputs the controlling signals from the remote control.
⑳ Remote Control Input Lead (Brown/White)
Connect the external Alpine product to the remote control output lead.
⑳ Remote Control Output Lead (Brown)
Connect this lead to the remote control input lead. This lead outputs the controlling signals from the remote control.
②6 DVD Control Input Lead (Red/White) (For DVD Player DVE-5300)
Connect the DVD Player DVE-5300 to the remote control output lead.
27 Steering Remote Control Interface Connector
To steering remote control interface box.
For details about connections, consult your nearest Alpine dealer.
28 MIC Input Connector
To microphone (Included)
- When using supplied microphone, set Microphone Select to "Add-on." For details, see "Setting the Microphone Select" (page 27).
29 Subwoofer RCA Connectors
RED is right and WHITE is left.
30 Front Output RCA Connectors
Can be used as Front Output RCA Connectors. RED is right and WHITE is left.
③1 Rear Output RCA Connectors
Can be used as Rear Output RCA Connectors. RED is right and WHITE is left.
③2 GPS Antenna Receptacle
Connect to GPS antenna (Included).
33 CAN I/F Connector
③4 USB Connector
To USB flash drive, iPod/iPhone or Android smartphone.
③5 HDMI Input Connector
③6 HDMI Output Connector
③7 Power Supply Connector
38 W.REMOTE Connector
39 PRE OUT Connector
④0 DAB Antenna Connector
To DAB Antenna (Sold Separately).
Usable AV/RCA Interface Cable (4-pole mini AV plug to 3-RCA)
Wiring convention of this system is as follows;
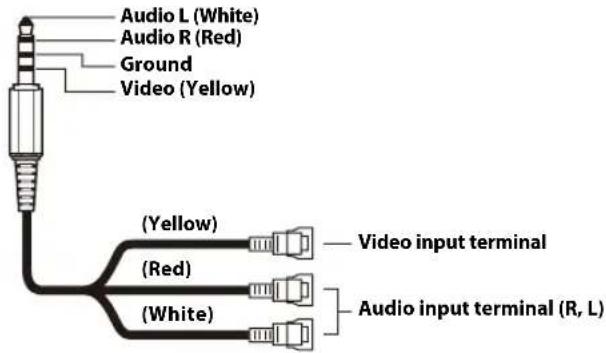
- Configuration commercially available 4-pole mini AV plugs is not standardised.
If an ACC power supply is not available
Connection Diagram of SPST Switch (sold separately)
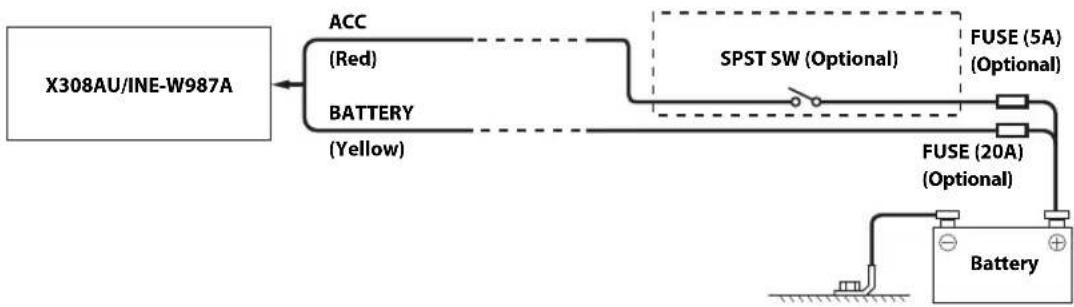
flowchart
graph LR
    A["X308AU/INE-W987A"] --> B["ACC (Red)"]
    A --> C["BATTERY (Yellow)"]
    B --> D["SPST SW (Optional)"]
    C --> D
    D --> E["FUSE (5A) (Optional)"]
    D --> F["FUSE (20A) (Optional)"]
    F --> G["Battery"]
- If your vehicle has no ACC power supply, add an SPST (single-pole, single-throw) switch (sold separately) and fuse (sold separately).
- The diagram and the fuse amperage shown above are in the case when the unit is used individually.
- If the switched power (ignition) lead of the unit is connected directly to the positive (+) post of the vehicle's battery, the unit draws some current (several hundred milliamperes) even when its switch is placed in the OFF position, and the battery may be discharged.
To prevent external noise from entering the audio system.
- Locate the unit and route the leads at least 10 cm away from the car harness.
- Keep the battery power leads as far away from other leads as possible.
- Connect the ground lead securely to a bare metal spot (remove any paint, dirt or grease if necessary) of the car chassis.
- If you add an optional noise suppressor, connect it as far away from the unit as possible. Your Alpine dealer carries various noise suppressors, contact them for further information.
- Your Alpine dealer knows best about noise prevention measures so consult your dealer for further information.
System Example
Connection of an iPod/iPhone
When connecting to an iPod/iPhone with a Lightning connector
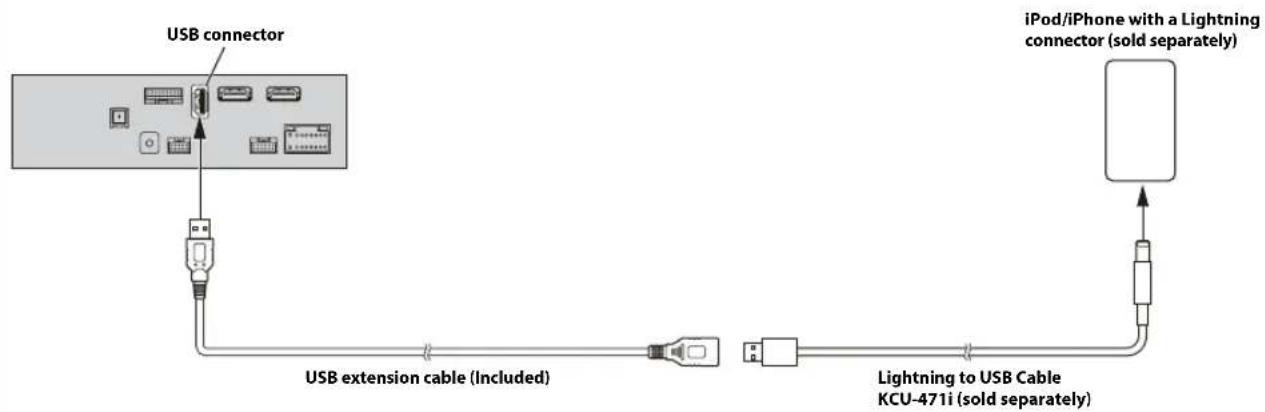
flowchart
graph TD
    A["USB connector"] --> B["USB extension cable (Included)"]
    B --> C["Lightning to USB Cable KCU-471i (sold separately)"]
    C --> D["iPod/iPhone with a Lightning connector (sold separately)"]
When connecting to iPhone 4S
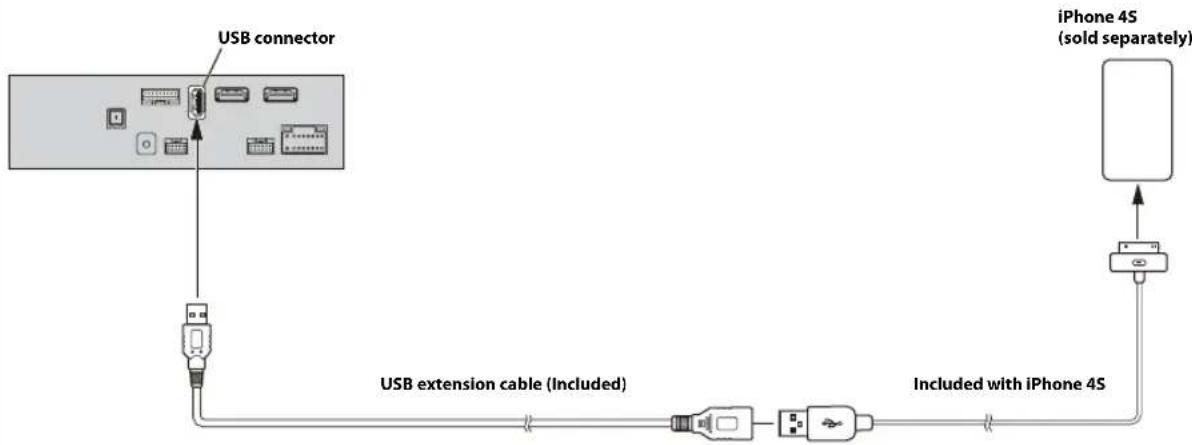
flowchart
graph TD
    A["USB connector"] --> B["USB extension cable (Included)"]
    B --> C["Included with iPhone 4S"]
    C --> D["iPhone 4S (sold separately)"]
- Do not leave an iPod/iPhone in a vehicle for a long time. Heat and humidity may damage the iPod/iPhone, and you may not be able to play it again.
Connection of a Flash Drive
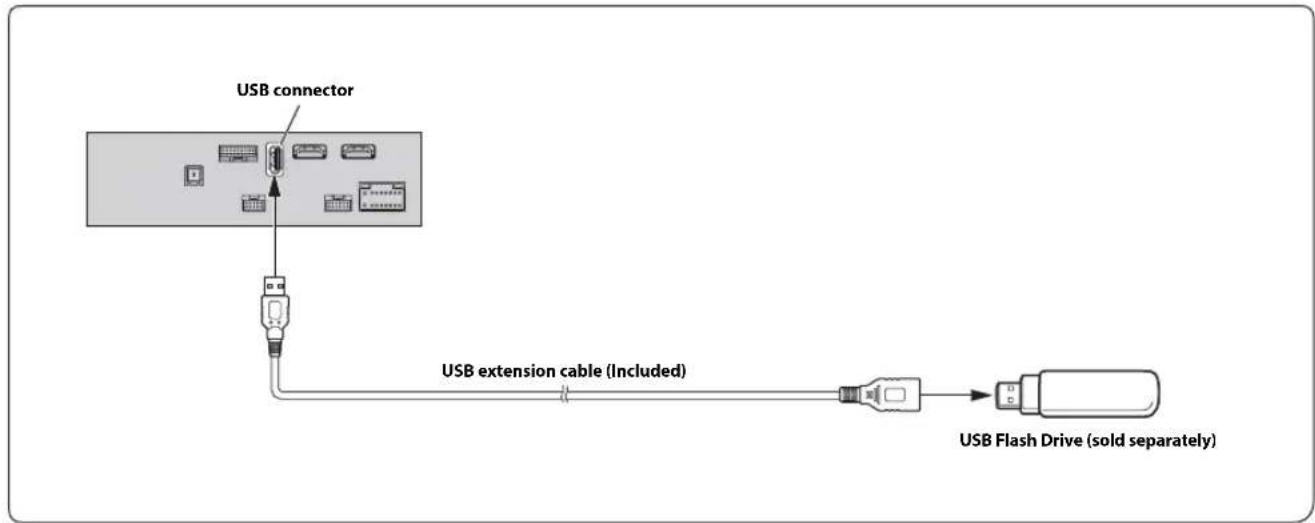
flowchart
graph TD
    A["USB connector"] --> B["USB extension cable (Included)"]
    B --> C["USB Flash Drive (sold separately)"]
- Do not leave a flash drive in a vehicle for a long time. Heat and humidity may damage the flash drive.
Connection of an HDMI Device (iPhone with a Lightning connector)
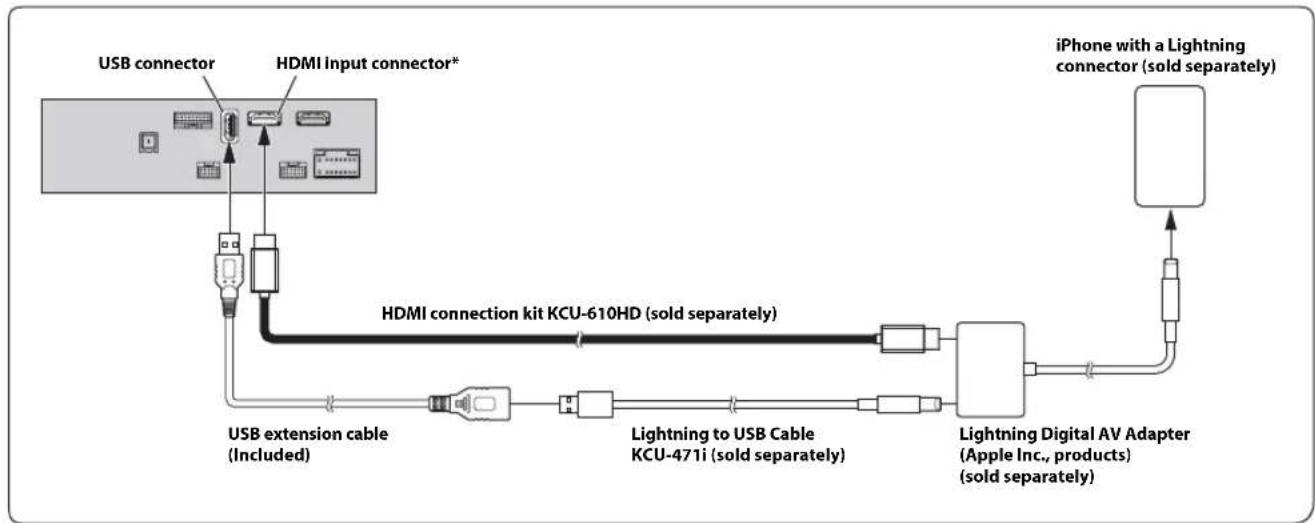
flowchart
graph TD
    A["USB connector"] --> B["HDMI Input connector*"]
    B --> C["USB extension cable (Included)"]
    C --> D["Lightning to USB Cable KCU-471i (sold separately)"]
    D --> E["Lightning Digital AV Adapter (Apple Inc., products) (sold separately)"]
    E --> F["iPhone with a Lightning connector (sold separately)"]
    B --> G["HDMI connection kit KCU-610HD (sold separately)"]
* When connecting an HDMI connection cable, be sure to secure it using the supplied HDMI Fixation Bracket. For details on how to secure it, see "Note on using HDMI Connection Cables" (page 94).
- Set the HDMI Setup to "HDMI." For details, see "HDMI Setup" (page 41).
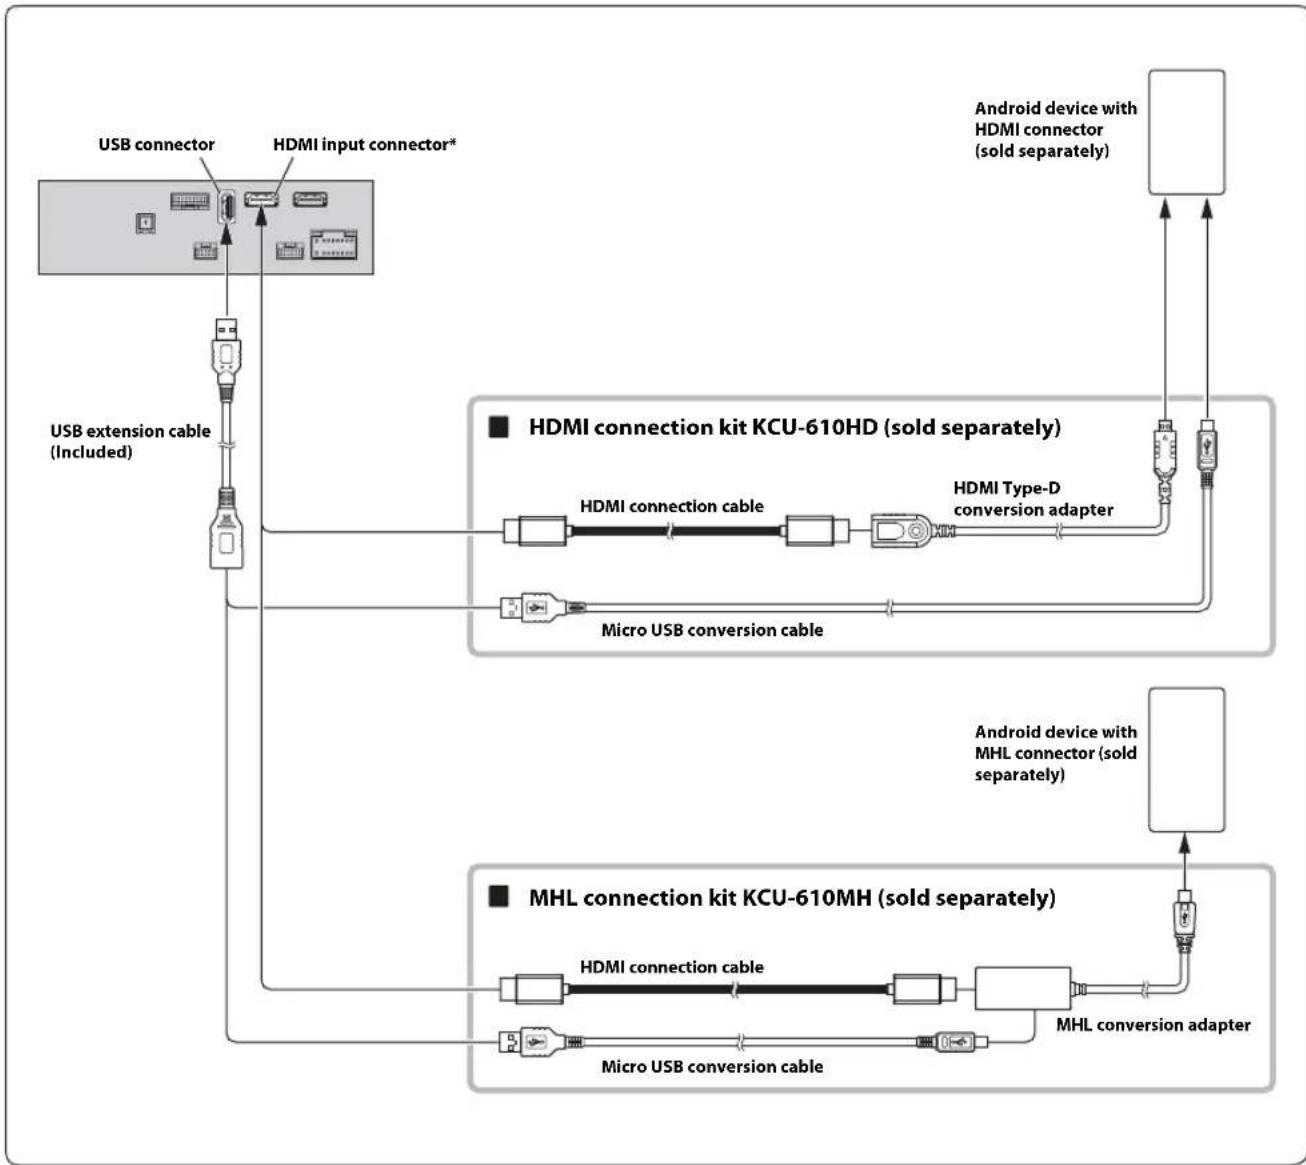
flowchart
graph TD
    A["USB connector"] --> B["USB extension cable (Included)"]
    B --> C["Hybrid"]
    D["HDMI input connector*"] --> C
    C --> E["Hybrid device with HDMI connector (sold separately)"]
    E --> F["Hybrid device with HDMI connector (sold separately)"]
    G["Hybrid Device"] --> H["Hybrid Device with HDMI connector (sold separately)"]
    H --> I["Hybrid Device with MHL connector (sold separately)"]
    I --> J["Hybrid Device with MHL connector (sold separately)"]
    K["Hybrid Device with Micro USB conversion cable"] --> L["Hybrid Device with Micro USB conversion cable"]
    L --> M["Hybrid Device with Micro USB conversion cable"]
    N["HDMI connection kit KCU-610HD (sold separately)"] --> O["Hybrid Device with HDMI Type-D conversion adapter"]
    P["HDMI connection kit KCU-610HD (sold separately)"] --> Q["Hybrid Device with MHL connector (sold separately)"]
    R["MHL connection kit KCU-610MH (sold separately)"] --> S["Hybrid Device with MHL connector (sold separately)"]
    T["MHL connection kit KCU-610MH (sold separately)"] --> U["Hybrid Device with Micro USB conversion cable"]
    V["MHL connection kit KCU-610MH (sold separately)"] --> W["Hybrid Device with Micro USB conversion cable"]
- A connection kit or adapter kit suitable for the type of terminal on the connecting device is required.
- Set the HDMI Setup to "HDMI." For details, see "HDMI Setup" (page 41).
* When connecting an HDMI connection cable, be sure to secure it using the supplied HDMI Fixation Bracket. For details on how to secure it, see "Note on using HDMI Connection Cables" (page 94).
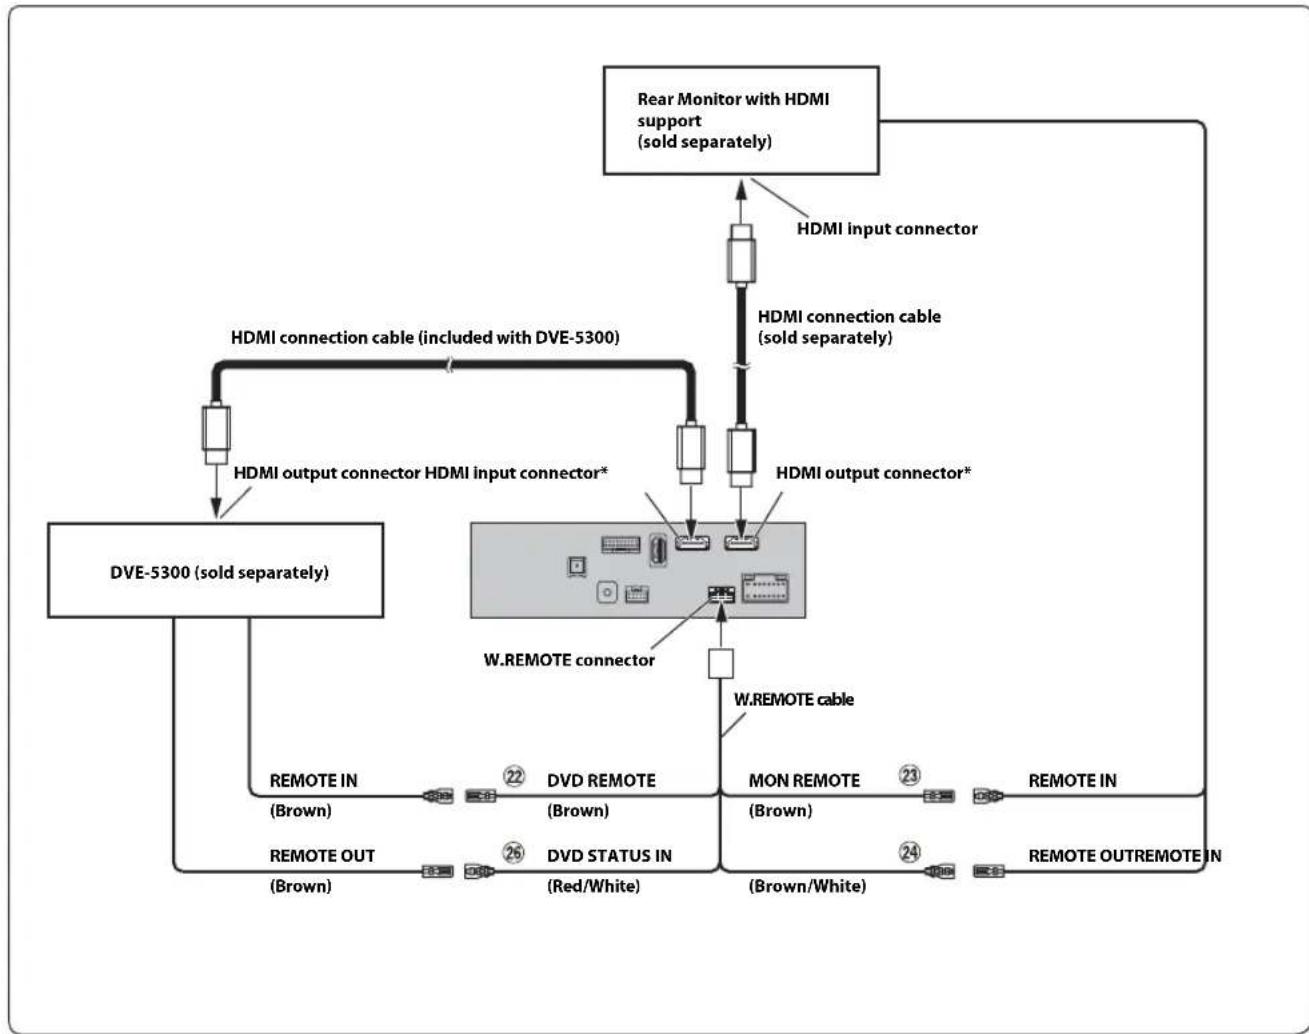
flowchart
graph TD
    A["DME-5300 (sold separately)"] -->|HDMI output connector HDMI input connector*| B["HDMI connection cable (included with DVE-5300)"]
    B --> C["HDMI connection cable (sold separately)"]
    C --> D["HDMI input connector"]
    D --> E["Rear Monitor with HDMI support (sold separately)"]
    E --> F["W.REMOTE connector"]
    F --> G["W.REMOTE cable"]
    G --> H["MON REMOTE (Brown)"]
    G --> I["REMOTE IN (Brown)"]
    G --> J["REMOTE OUT (Brown)"]
    F --> K["DVD REMOTE (Brown)"]
    F --> L["DVD STATUS IN (Red/White)"]
    F --> M["REMOTE OUTREMOTE IN (Brown/White)"]
    F --> N["REMOTE IN (Brown)"]
    F --> O["REMOTE OUT (Brown)"]
22 Remote Control Output Lead (Brown) (For DVD Plyer DVE-5300)
23 Remote Control Output Lead (Brown) (For Rear Monitor)
②4 Remote Control Input Lead (Brown/White) (For Rear Monitor)
⑳ DVD Control Input Lead (Red/White) (For DVD Player DVE-5300)
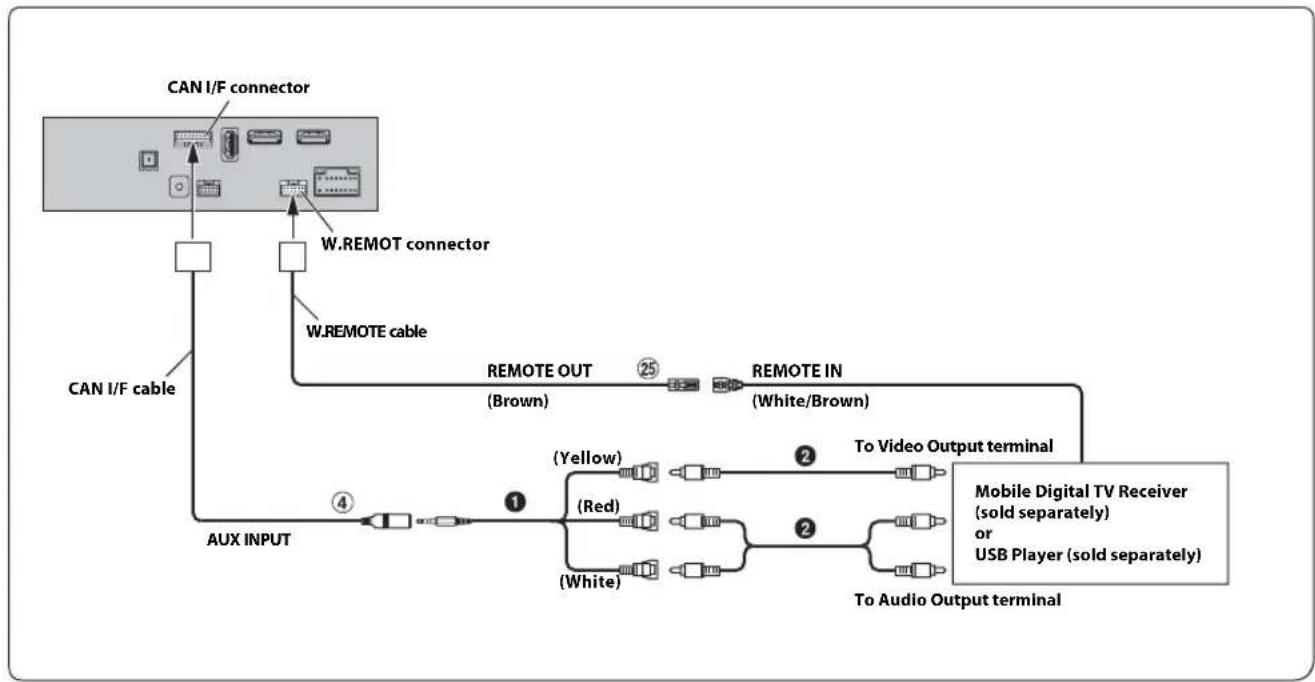
flowchart
graph TD
    A["CAN I/F connector"] --> B["W.REMOT connector"]
    A --> C["W.REMOTE cable"]
    A --> D["CAN I/F cable"]
    B --> E["REMOTE OUT (Brown)"]
    B --> F["REMOTE IN (White/Brown)"]
    E --> G["(Yellow)"]
    E --> H["(Red)"]
    E --> I["(White)"]
    F --> J["To Video Output terminal"]
    G --> K["To Audio Output terminal"]
    H --> L["Mobile Digital TV Receiver (sold separately) or USB Player (sold separately)"]
    I --> M["To Video Output terminal"]
④ AUX Input Connector
25 Remote Control Output Lead (Brown)
1 AV/RCA Interface Cable (4-pole mini AV plug to 3-RCA) (sold separately)
② RCA Extension Cable (sold separately)
- For details on using an AV/RCA interface cable (4-pole mini AV plug to 3-RCA), see "Usable AV/RCA Interface Cable (4-pole mini AV plug to 3-RCA)" (page 97).
- Set the AUX Name to "DVB-T" or "USB Player." For details, see "Setting the Auxiliary (AUX) Name" (page 40).
Connection of an External Device
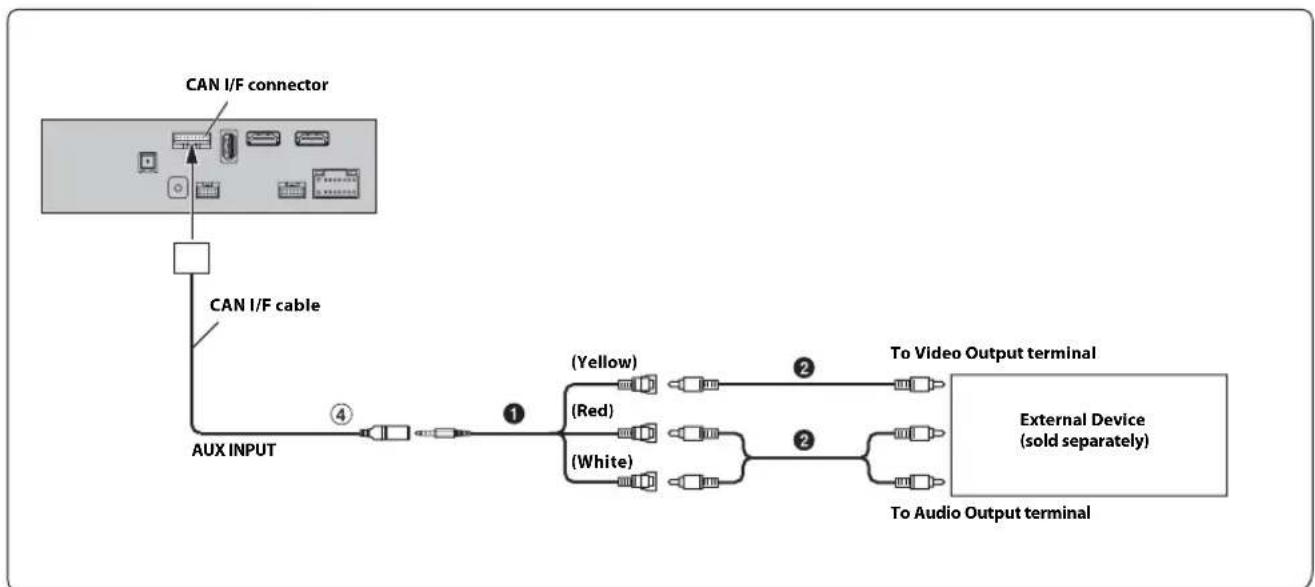
flowchart
graph LR
    A["CAN I/F connector"] --> B["AUX INPUT"]
    C["CAN I/F cable"] --> B
    B --> D["(Yellow)"]
    B --> E["(Red)"]
    B --> F["(White)"]
    D --> G["To Video Output terminal"]
    E --> H["To Audio Output terminal"]
    F --> I["External Device (sold separately)"]
④ AUX Input Connector AV/RCA Interface Cable (4-pole mini AV plug to 3-RCA)
(sold separately)
② RCA Extension Cable (sold separately)
- You can change the name of an external device. For details, see "Setting the Auxiliary (AUX) Name" (page 40).
- For details on using an AV/RCA interface cable (4-pole mini AV plug to 3-RCA), see "Usable AV/RCA Interface Cable (4-pole mini AV plug to 3-RCA)" (page 97).
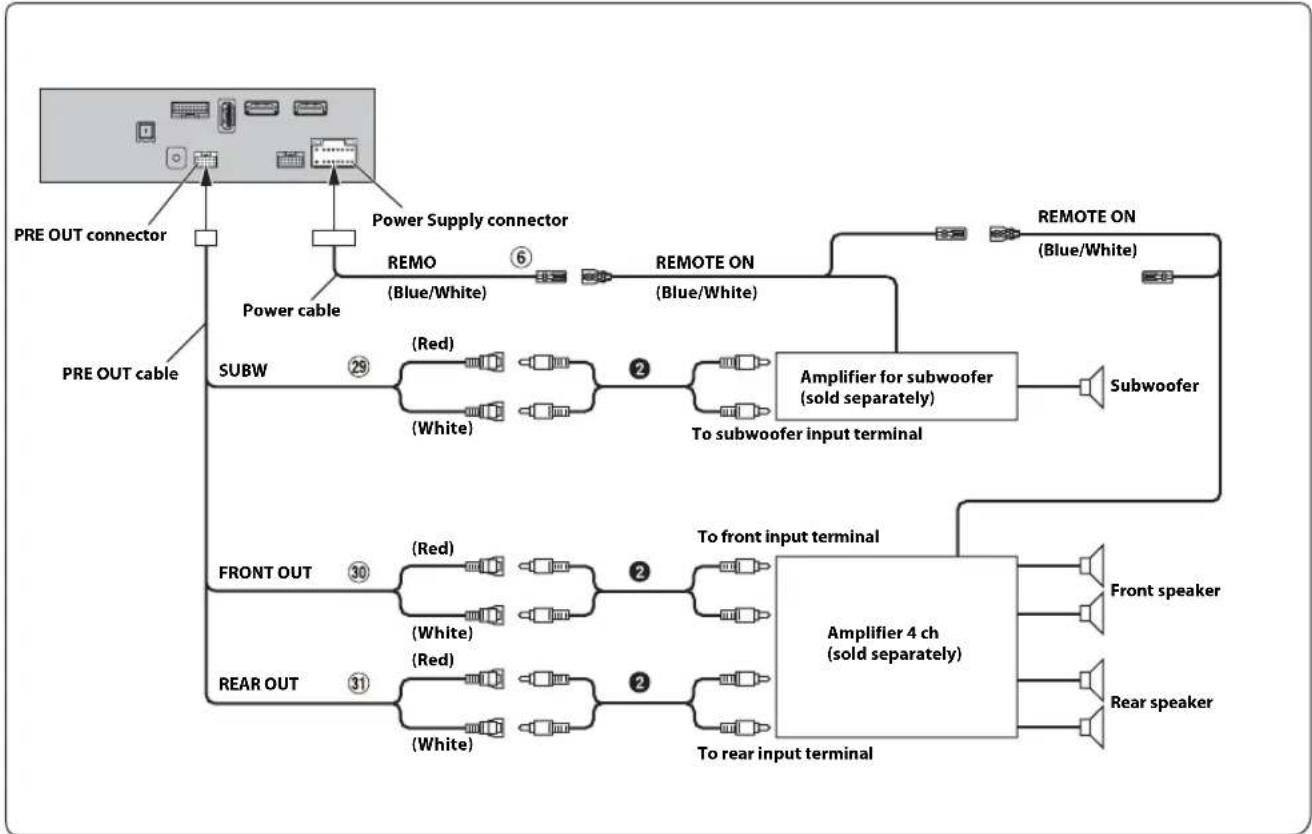
flowchart
graph TD
    A["PRE OUT connector"] --> B["Power supply connector"]
    B --> C["REMOTE ON (Blue/White)"]
    C --> D["Subwoofer"]
    D --> E["To rear input terminal"]
    E --> F["Front speaker"]
    E --> G["Rear speaker"]
    H["PRE OUT cable"] --> I["SUBW"]
    I --> J["(Red)"]
    J --> K["(White)"]
    K --> L["(Red)"]
    L --> M["(White)"]
    M --> N["(Red)"]
    N --> O["(White)"]
    O --> P["(Red)"]
    P --> Q["(White)"]
    Q --> R["(Red)"]
    R --> S["(White)"]
    S --> T["(Red)"]
    T --> U["(White)"]
    U --> V["(Red)"]
    V --> W["(White)"]
    W --> X["(Red)"]
    X --> Y["(White)"]
    Y --> Z["(Red)"]
    Z --> AA["(White)"]
    AA --> AB["(Red)"]
    AB --> AC["(White)"]
    AC --> AD["(Red)"]
    AD --> AE["(White)"]
    AE --> AF["(Red)"]
    AF --> AG["(White)"]
    AG --> AH["(Red)"]
    AH --> AI["(White)"]
    AI --> AJ["(Red)"]
    AJ --> AK["(White)"]
    AK --> AL["(Red)"]
    AL --> AM["(White)"]
    AM --> AN["(Red)"]
    AN --> AO["(White)"]
    AO --> AP["(Red)"]
    AP --> AQ["(White)"]
    AQ --> AR["(Red)"]
    AR --> AS["(White)"]
    AS --> AT["(Red)"]
    AT --> AU["(White)"]
    AU --> AV["(Red)"]
    AV --> AW["(White)"]
    AW --> AX["(Red)"]
    AX --> AY["(White)"]
    AY --> AZ["(Red)"]
    AZ --> BA["(White)"]
    BA --> BB["(Red)"]
    BB --> BC["(White)"]
    BC --> BD["(Red)"]
    BD --> BE["(White)"]
    BE --> BF["(Red)"]
    BF --> BG["(White)"]
    BG --> BH["(Red)"]
    BH --> BI["(White)"]
    BI --> BJ["(Red)"]
    BJ --> BK["(White)"]
    BK --> BL["(Red)"]
    BL --> BM["(White)"]
    BM --> BN["(Red)"]
    BN --> BO["(White)"]
    BO --> BP["(Red)"]
    BP --> BQ["(White)"]
    BQ --> BR["(Red)"]
    BR --> BS["(White)"]
    BS --> BT["(Red)"]
    BT --> BU["(White)"]
    BU --> BV["(Red)"]
    BV --> BW["(White)"]
    BW --> BX["(Red)"]
    BX --> BY["(White)"]
    BY --> BZ["(Red)"]
    BZ --> CA["(White)"]
    CA --> CB["(Red)"]
    CB --> CC["(White)"]
    CC --> CD["(Red)"]
    CD --> CE["(White)"]
    CE --> CF["(Red)"]
    CF --> CG["(White)"]
    CG --> CH["(Red)"]
    CH --> CI["(White)"]
    CI --> CJ["(Red)"]
    CJ --> CK["(White)"]
    CK --> CL["(Red)"]
    CL --> CM["(White)"]
    CM --> CN["(Red)"]
    CN --> CO["(White)"]
    CO --> CP["(Red)"]
    CP --> CQ["(White)"]
⑥ Remote Turn-On Lead (Blue/White)
29 Subwoofer RCA Connectors
30 Front Output RCA Connectors
③1 Rear Output RCA Connectors
② RCA Extension Cable (sold separately)
Connection of a Rearview camera
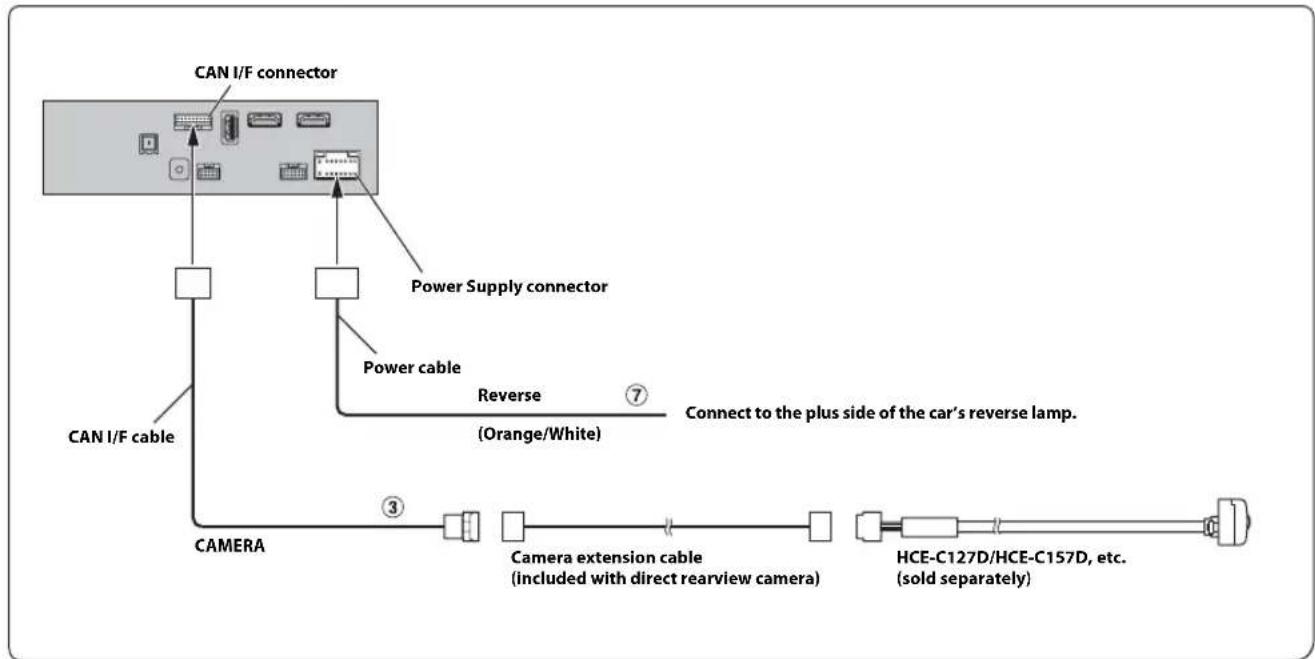
flowchart
graph TD
    A["CAN I/F connector"] --> B["CAN I/F cable"]
    A --> C["Power Supply connector"]
    C --> D["Power cable"]
    D --> E["Reverse (Orange/White)"]
    E --> F["Connect to the plus side of the car's reverse lamp."]
    G["CAMERA"] --> H["Camera extension cable (included with direct rearview camera)"]
    H --> I["HCE-C127D/HCE-C157D, etc. (sold separately)"]
③ Direct CAMERA Input Connector Reverse Lead (Orange/White)⑦
- Set the Camera Select to "Rear." For details, see "Setting the Camera Input" (page 42).
Connection of a Frontview camera
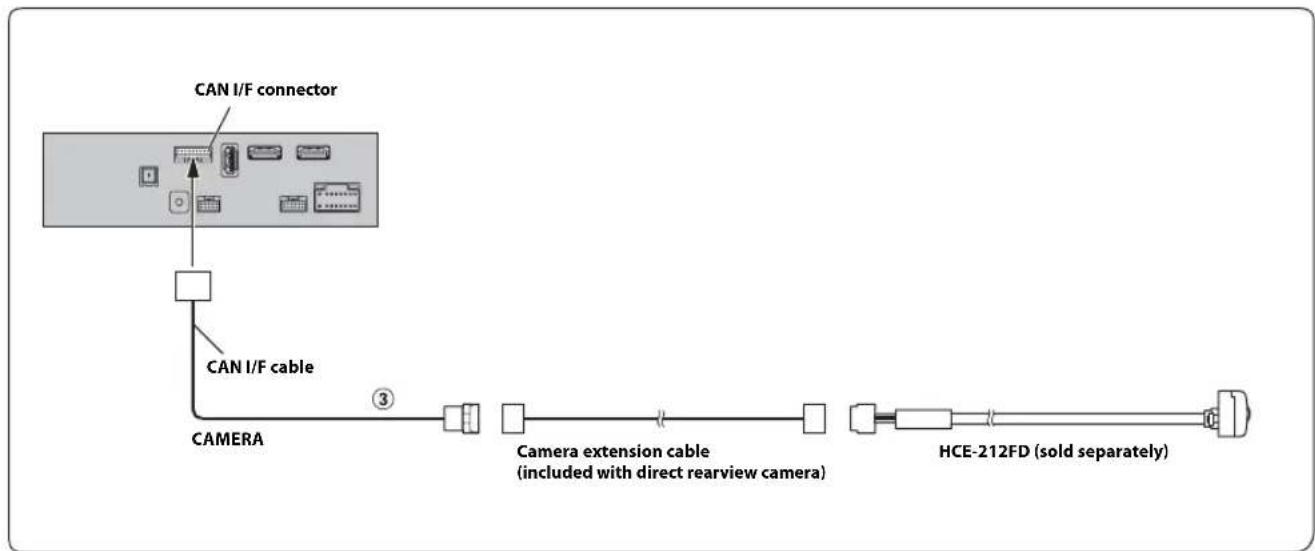
flowchart
graph LR
    A["CAN I/F connector"] --> B["CAMERA"]
    B --> C["Camera extension cable (included with direct rearview camera)"]
    C --> D["HCE-212FD (sold separately)"]
    style A fill:#f9f,stroke:#333
    style B fill:#ccf,stroke:#333
    style C fill:#cfc,stroke:#333
    style D fill:#fcc,stroke:#333
③ Direct CAMERA Input Connector
- Set the Camera Select to "Front." For details, see "Setting the Camera Input" (page 42).
- Operating Instructions
- PRECAUTIONS
- WARNING
- Features
- Getting Started
- Favourite Function
- Applying Alpine Tunelt App
- Setup
- Wireless (Bluetooth) Setup
- General Setup
- Sources Setup
- System Setup
- Android Auto (Optional)
- Apple CarPlay (Optional)
- Radio/RDS
- Radio Basic Operation
- RDS Operation
- DAB/DAB+/DMB
- USB Flash drive (Optional)
- iPod/iPhone (Optional)
- HDMI Device (Optional)
- DVD Player Operation
- CD/MP3/WMA/AAC/WAV
- DVD
- HDMI Operation
- Bluetooth Operation
- Hands-free Phone Control
- Bluetooth Audio
- Auxiliary Device (Optional)
- Camera Operation (Optional)
- About Vehicle Interlock Function
- Information
- Installation and Connections
- IMPORTANT INFORMATION, PLEASE READ CAREFULLY BEFORE USING THIS PRODUCT.
- Points to Observe for Safe Usage
- INSTALL THE PRODUCT CORRECTLY SO THAT THE DRIVER CANNOT WATCH TV/VIDEO UNLESS THE VEHICLE IS STOPPED AND THE EMERGENCY BRAKE IS APPLIED.
- DO NOT WATCH VIDEO WHILE DRIVING.
- DO NOT OPERATE ANY FUNCTION THAT TAKES YOUR ATTENTION AWAY FROM SAFELY DRIVING YOUR VEHICLE.
- DO NOT FOLLOW ROUTE SUGGESTIONS IF THE NAVIGATION SYSTEM INSTRUCTS YOU TO PERFORM AN UNSAFE OR ILLEGAL MANEUVER, OR PLACES YOU IN AN UNSAFE SITUATION OR AREA.
- KEEP THE VOLUME AT A LEVEL WHERE YOU CAN STILL HEAR OUTSIDE NOISES WHILE DRIVING.
- MINIMIZE DISPLAY VIEWING WHILE DRIVING.
- DO NOT DISASSEMBLE OR ALTER.
- USE ONLY IN CARS WITH A 12 VOLT NEGATIVE GROUND.
- KEEP SMALL OBJECTS SUCH AS SCREWS OUT OF THE REACH OF CHILDREN.
- USE THE CORRECT AMPERE RATING WHEN REPLACING FUSES.
- DO NOT BLOCK VENTS OR RADIATOR PANELS.
- USE THIS PRODUCT FOR MOBILE 12V APPLICATIONS.
- MAKE THE CORRECT CONNECTIONS.
- BEFORE WIRING, DISCONNECT THE CABLE FROM THE NEGATIVE BATTERY TERMINAL.
- DO NOT ALLOW CABLES TO BECOME ENTANGLED IN SURROUNDING OBJECTS.
- DO NOT SPLICE INTO ELECTRICAL CABLES.
- DO NOT DAMAGE PIPE OR WIRING WHEN DRILLING HOLES.
- DO NOT USE BOLTS OR NUTS IN THE BRAKE OR STEERING SYSTEMS TO MAKE GROUND CONNECTIONS.
- DO NOT INSTALL IN LOCATIONS WHICH MIGHT HINDER VEHICLE OPERATION, SUCH AS THE STEERING WHEEL OR SHIFT LEVER.
- CAUTION
- HALT USE IMMEDIATELY IF A PROBLEM APPEARS.
- HAVE THE WIRING AND INSTALLATION DONE BY EXPERTS.
- USE SPECIFIED ACCESSORY PARTS AND INSTALL THEM SECURELY.
- ARRANGE THE WIRING SO IT IS NOT CRIMPED OR PINCHED BY A SHARP METAL EDGE.
- DO NOT INSTALL IN LOCATIONS WITH HIGH MOISTURE OR DUST.
- NOTICE
- Security
- Product Cleaning
- Temperature
- Maintenance
- Protecting the USB connector
- On Handling USB Flash drive
- About Swiping the Touch Screen
- Switching the Audio Sources Screen to a Dedicated Screen
- About Dual Screen
- Dual Screen Display Position
- Location of Controls
- button
- Controllable with Remote Control
- About the button descriptions used in this Owner's Manual
- Turning Power On or Off
- Turn the ignition key to the ACC or ON position.
- Press and hold the MENU/(Power Off) button for at least 5 seconds to turn the power off.
- Turning the System On
- Initial System Start-Up
- Adjusting the Volume
- Lowering Volume Quickly
- Touch Screen Operation
- Touch operation
- Swipe operation
- Drag & Drop operation
- Switching Sources
- Switching sources using the (AUDIO) button
- During audio/visual playback, press the ⚠AUDIO) button repeatedly to switch to the desired source.
- Switching Sources from the Menu screen
- Press the MENU button.
- Touch your desired source in the Audio source selecting area.
- Operating the Function Button on the Audio/Video Main Screen
- Swipe to the right or left to change to the Function mode.
- Radio main screen example
- About Basic Operation for List Screen
- About the Shortcut Setup Screen
- Sound Setup Function
- Adjusting Bass Level/Treble Level
- Setting item:
- Setting contents:
- Setting the BASS ENGINE SQ
- Setting the BASS ENGINE Type
- Adjusting the BASS ENGINE Level
- ■ About setup when the external power amplifier is connected
- Rear Seat Entertainment Function
- About the Menu Screen
- Press the MENU button.
- ■ Menu screen example
- Edit Menu
- Touch the desired source icon in the Menu screen for at least 2 seconds.
- ■ Changing the order of Audio source
- Hiding/Displaying Audio source
- Touch [Done].
- About the Shortcut Key
- About the Indicator Display
- Opening screen Customisation
- How to Input Characters and Numbers (Keypad)
- Using the Favourite Function
- Press and hold the ♪/(Favourite) button for at least 2 seconds.
- Favourite screen example
- Touch your desired Favourite registered item.
- Editing the Favourite Screen
- Touch [ ] (Edit).
- After editing is complete, touch [ ] (Save).
- After the caption for the confirmation is displayed, touch [Yes].
- Editing is complete and the screen switches to the Favourite screen.
- Registering Items
- Touch [ ] (Add).
- Touch the desired item to be added (category).
- Choose the desired item to be added.
- Audio/Visual
- Navigation
- ■ Phone (Shortcut Dialing)\* 4
- Changing Item Names
- Touch the text area of the registered item.
- Input the name and touch [OK].
- Changing Icons (only the Shortcut Dialing and Navigation icons)
- Touch the icon that you want to change.
- Touch the icon you want to change from the icon list.
- Changing the Layout
- Deleting Items
- When deleting a selected item
- Touch the checkbox at the left of the item you want to delete and place a check ( ) in it.
- Touch [ ] (Delete).
- When deleting all items
- Adjusting the sound via the Smartphone
- Make sure the unit is powered on.
- Launch the Alpine Tunelt App on the Smartphone. Adjust the unit's sound accordingly on the Smartphone.
- Setup Operation
- Touch [Setup].
- Touch the required setting icon on the upper part of the Setup main screen or swipe the list area vertically, then touch the setting item.
- Setting items:
- Wireless Setup Menu screen
- Select the desired item.
- To switch the setting, touch [<], [>], [+], [-], or mark the checkboxes "Off" (or "On").
- Touch [X] to return to the main source screen.
- Bluetooth Setup
- Displaying Bluetooth Information
- Registering the Bluetooth Device
- Touch [Q] (Search) of "No Device."
- Touch [♪] (Audio), [♪] (Hands-free) or [♪/♪] (Both) of the device you want to connect from the list.
- When the device registration is complete, a message appears and the device returns to normal mode.
- Setting the Bluetooth Device
- Touch [♪] (Audio) or [♪] (Hands free) of the device you want to connect from the Paired Device list.
- Deleting a Bluetooth Device from the list
- Touch [💡] (Delete) of the Bluetooth compatible device to delete from the Paired Device list.
- Touch [OK].
- Hands-free Device Primary/Secondary Setting
- Touch the checkbox for Primary/Secondary of the device names that are registered to the unit to set them.
- iPhone Auto Pairing Setting
- Phone Setup
- Setting the Passcode
- Enter a 4-digit passcode (old), and then touch [OK].
- Enter a 4-digit passcode (new), and then touch [OK].
- Enter the passcode that you entered in step 2 again, and then touch [OK].
- Changing the Character Code of the Phone Book
- Selecting the Output Speaker
- Setting the Microphone Select
- Sounds Setup
- Setting the Balance/Fader/Rear Speaker/Subwoofer
- Fad./Bal. screen
- Setting the Balance/Fader
- Balance:
- Fader:
- Rear Speaker Setting
- Turning Subwoofer ON/OFF
- Adjusting the Subwoofer Level
- Setting the Subwoofer Phase
- Setting the Media Xpander (MX HD)
- ■ Adjustable source (media) and setting value
- FM/DAB: Off (Initial setting) / Level1 / Level2 / Level3
- Compressed Media: Off (Initial setting) / Level1 / Level2 / Level3
- HDMI/AUX: Off (Initial setting) / Compressed Media / Movie / Music
- (Movie)
- (Music)
- Equalizer Presets
- Adjusting the Parametric Equalizer Curve (Dual HD EQ)
- Adjust the Dual HD EQ to your preference.
- Adjusting the Band
- Adjusting the Frequency
- Adjustable frequency bands:
- Adjusting the Level
- Setting the Bandwidth
- To adjust another band, repeat step 1, and adjust all bands.
- To store the adjusted setting value, touch and hold [Preset 1], [Preset 2], or [Preset 3] for at least 2 seconds.
- Calling the Dual HD EQ adjusted value
- Touch [Preset 1], [Preset 2], or [Preset 3] on the Dual HD EQ screen.
- Adjusting the Crossover Settings (X-OVER)
- Selecting the Cut-Off Frequency
- Adjusting the Slope
- Calling the X-OVER adjusted value
- Touch [Preset 1], [Preset 2], or [Preset 3] on the X-OVER screen.
- Adjusting the Time Correction (TCR)
- Calling the Time Correction Value
- Touch [Preset 1], [Preset 2], or [Preset 3] on the time correction screen.
- Setting Defeat
- Setting the Volume for Each Source
- Setting contents *3 :
- Setting the Volume for Apple CarPlay
- Setting contents for Media:
- Setting contents for Ringtones & Alerts:
- Setting contents for other items:
- Setting the Volume for Android Auto
- Setting contents for Phone Calls:
- Adjusting the Caller Level
- Adjusting the Microphone Level
- Adjusting the Ring Tone Level
- Key Sound Volume Setting
- Auto Volume Setting
- Setting Audio Mute On/Off while Backing up
- Setting the Microphone Effect
- Default Sound Settings
- About the Crossover
- Crossover (X-OVER):
- About Time Correction
- Example 1. Listening Position: Front Left Seat
- Example 2. Listening Position: All Seats
- Language Setting
- Visual Setup
- [Video] (Video media) 4 :
- [Camera]\*2:
- [Navigation]:
- Selecting the Visual EQ Mode (Factory's setting)
- Adjusting Brightness
- Adjusting Colour of Picture
- Adjusting Tint of Picture
- Adjusting Image Contrast
- Adjusting Picture Quality
- Saving and calling the adjusted picture quality
- Screen Setup
- Screen/Lighting Customise
- Touch [Screen/Lighting] in the Display/Key Setup Menu screen.
- Setting the Brightness of the Backlighting
- Adjusting the Dimmer of Button Lighting at Night
- Adjusting the Minimum Level of Backlight
- Setting content:
- Switching the Display Colour
- Switching the Illumination Colour
- Setting the Text Scroll
- Switching the Artwork Position
- Format settings
- Setting Security code About X308AU/INE-W987A
- Setting the password
- Clearing the password
- Displaying the Product Information
- Initializing the System
- Setting Demo mode to Off/On
- Car Setup
- Steering wheel Setting
- Installation Setup
- To switch the setting, touch [<], [>], [+], [-], or mark the checkboxes "Off" (☐ or "On" (). √
- Touch [×] to return to the main source screen.
- Radio Setup
- PI SEEK Setting
- Receiving RDS Regional (Local) Stations
- Switching the Display Language of PTY (Programme Type)
- Setting PTY31 (Emergency Broadcast) Reception
- Setting the TUNER (FM) Tone Quality (Tuner Condition)
- DAB Setting
- Setting Alarm (Emergency Broadcast) Reception
- Setting Announcement Reception
- Setting the FM Linking ON/OFF (Service Following)
- Setting the DAB Antenna ON/OFF
- AUX Setup
- Setting the Auxiliary (AUX) Name
- Setting Direct Touch Operation
- Switching the Visual Input Signal System
- HDMI Setup
- Apple CarPlay Setup
- System Setup Menu screen
- To switch the setting, touch [<], [>], [+], [-], or mark the checkboxes "Off" (or "On" (). √
- Camera Setup
- Setting the Camera Input
- Setting the Camera Signal Input
- Further setting item:
- Switching Video Patterns for Multi View Camera
- Touch [Guide Adjustment].
- Multi View compatible Side Camera
- Touch [Front] or [Rear].
- Multi View compatible Front Camera/Rear Camera
- Touch [Back], [Panorama], [Corner], or [Top].
- Adjusting the Rear/Front/Side Camera Guide
- Touch [Adjust].
- Touch the guide you intend to adjust.
- ■ Rear Camera screen example
- Front Camera screen example
- Side Camera screen example
- Touch [∨], [∧], [〈] or [〉] to adjust the position of the guide.
- After the adjustment is completed, touch [Set].
- Touch [Link].
- Turning Guide Display On/Off (Rear/Front Camera only)
- Touch [On/Off].
- To turn the guide on, touch [On/Off] again.
- Returning Guides to Default
- Touch [Default].
- Camera Interrupt Setting (Power OFF Mode) (Rear Camera Only)
- Setting Multi Camera to On/Off
- Setting a Default Camera
- CAN-I/F Setup
- Setting the Default Vehicle Screen
- Setting the Climate Interrupt Time
- Setting the Parking Sensor Interrupt On/Off
- Rear Seat Entertainment Setup
- Setting the Rear Seat Entertainment System
- Remote Sensor Setting
- Unit Setup
- Setting the External AP
- Setting the HDMI Selector On/Off
- Application Setup
- What is Android Auto
- Activate Android Auto
- Touch [Android Auto].
- Access to Apple CarPlay
- Touch [Apple CarPlay].
- Listening to the Radio
- Press the ♪ (AUDIO) button to select radio mode.
- Touch [icon].
- Select the desired band from FM1/FM2/MW/LW.
- Touch [||||].
- Touch the desired tuning mode.
- Touch [|◀◀], [▶▶] or [◀◀], [▶▶] to change the radio frequency up or down respectively.
- Presetting Stations Manually
- Tune in a desired radio station you wish to store in the preset memory by manual or automatic seek tuning.
- Touch the Preset number you want to store, for at least 2 seconds.
- Repeat the procedure to store up to 11 other stations onto the same band.
- Presetting Stations Automatically
- Select the desired band then touch and hold [≡↓] (Auto Memory).
- Tuning to Preset Stations
- Touch [ ]
- Select the desired band from FM1/FM2/MW/LW.
- Touch any one of the Preset numbers you have already stored in the Preset mode screen.
- Inputting Frequency Directly and Receiving the Radio Station
- Touch [■] (Direct Tune).
- Touch a desired number.
- Touch [Enter] on the numeric keypad mode screen to confirm your selection.
- Turning AF (Alternative Frequencies) On or Off
- Touch [95] (AF) to select the AF (Alternative Frequency) ON or OFF mode.
- Tips
- Interruption Function
- Receiving Traffic Announcement
- Touch [ /i\ ] (TA).
- News Programme Interruption
- Touch [ ] (News).
- Receiving Traffic Information Manually
- Selecting the Receivable PTY
- Touch the PTY list button.
- ■ PTY list screen example
- Select the desired programme type in the PTY list screen.
- Displaying Radio Text
- Listening to DAB/DAB+/DMB
- Press the ♪ (AUDIO) button to select DAB mode.
- Touch [....].
- Touch the desired tuning mode.
- Touch [◀]/[▶], [|◀◀]/[▶▶] or [◀◀]/[▶▶] to change the Service or Ensemble up or down respectively.
- Presetting Service
- Tuning to Preset Service
- Touch any one of the preset buttons that has a service stored to it.
- Service Component/PTY Search Function
- Service Search Function
- PTY Search Function
- List Update Function
- Touch [ / ] (TA).
- Inputting Channel Number Directly and Receiving the Broadcasts
- Input the desired channel number.
- Touch [OK].
- Switching to Secondary Service Components
- Touch [←] (Sub.Ch).
- Displaying DAB Text
- About DAB/DAB+/DMB
- What is DAB?
- What is DAB+?
- What is DMB?
- The USB Video operation screen display during video file playback
- Touch the screen while the USB Video playback screen is displayed.
- Playback
- Press the ♪ (AUDIO) button to select USB mode.
- Touch [◀◀] or [▶▶] or to select the desired track (file).
- To pause playback, touch [▶/III].
- Fast-forwarding/Fast-reversing (USB Video only)
- During playback, touch and hold [|◀◀] (Fast-reverse) or touch and hold [▶▶] (Fast-forward).
- Release [◀◀] or [▶▶] to return to normal playback.
- Stopping Playback (USB Video only)
- Touch [■] during playback.
- Repeat Play
- Touch [ ⟹ ].
- 2Select your desired Repeat mode.
- Random Play (USB Audio only)
- Touch [×].
- Select your desired Random Play mode.
- Searching for a Desired Song
- Quick Search mode
- Touch your desired Folder name or File name.
- Full Search mode
- Touch [Audio] or [Video] to switch whether the search list displays music files or video files.
- Touch your desired Folder name\* 2 or File name.
- Switching Display Modes (During Video File Play Back)
- Touch [ ]
- Fit mode
- Fill mode
- About USB Video format
- About iPod/iPhone models usable with this unit
- ■ iPod/iPhone main screen example
- Audio mode
- Function mode
- ■ Quick Search mode screen example
- Press the ♪ (AUDIO) button to select iPod mode.
- Touch [|◀◀] or [▶▶] or to select the desired track (file).
- Searching for a Music File
- In Quick Search mode, touch the desired list (for example, Album list).
- For example: Searching by Artist name
- Touch [Artists] in the Full Search mode screen.
- Select the desired artist.
- To play back the Artist directly
- To search for the Album of the Artist
- To search for a Song in the Album of the Artist
- Touch the desired album's name.
- Touch the desired song's name.
- Alphabet Search Function
- Touch "O-U" of the alphabet group.
- Touch "R" you want to search.
- Touch your desired artist name.
- Random Play (Shuffle)
- 2Select your desired Random Play mode.
- About HDMI selector (Optional)
- DVD Player SETUP
- Touch [💡] (Setup).
- MP3/WMA/AAC main screen example
- Stopping Playback
- MIX (Random Play)
- File/Folder Name Search (Concerning MP3/WMA/AAC/WAV)
- Selecting Folders (Concerning MP3/WMA/AAC/WAV)
- Info Mode Function
- ■ DVD Video main screen example
- Info mode
- ■ Video CD main screen example
- Disc types that can be used for each heading are represented by the following marks.
- The DVD operation screen display
- Touch the screen while the DVD playback screen is displayed.
- Playing a Disc DVD-V V CD
- 1
- If a Menu Screen Appears
- Direct Menu Operations DVD-V
- Touch the screen while the DVD menu is being displayed.
- Touch the DVD menu directly.
- Menu Operations DVD-V V CD
- Touch [☐] (Menu Control).
- Touch [Key].
- Select a desired menu item by touching [ ∨ ], [ ∧ ], [ ⟨ ] or [ ⟩ ] .
- Touch [Enter] to confirm the selected item.
- Numeric Keypad Input Operations DVD-V
- Displaying the Top Menu Screen
- Displaying the Menu Screen DVD-V V CD
- Playing Still Frames (Pausing) DVD-V V CD
- Stopping Playback DVD-V VCD
- Fast-forwarding/Fast-reversing DVD-V V CD
- Finding the Beginnings of Chapters/Tracks/Files
- Supplementary explanations
- Forward/Reverse frame-by-frame Playback
- In the pause mode, touch [◀◀] or [▶▶].
- Touch [▶/Ⅲ] to return to normal mode.
- Repeat Playback
- Touch [ ⟶ ] to repeatedly play back.
- DVD Video
- Video CD
- Searching by Title Number DVD-V
- Touch [Key] again in the menu operation mode.
- Enter a desired title by touching its number.
- Touch [Enter].
- Touch [×].
- Searching Directly by Chapter Number
- Touch and enter the chapter number you want to play.
- Touch [Enter] to confirm your selection.
- Touch [X].
- Switching the Angle
- Touch [ ] (Angle).
- Switching the Audio Tracks DVD-V VCD
- Touch [ ] (Audio).
- Video CDs with multiplex audio
- Switching the Subtitles (Subtitle Language)
- DVD-V
- Touch [☐] (Sub Title).
- Switching Display Modes
- While your vehicle is parked, touch [WIDE] to display a popup list of Display Mode.
- iPhone, Smartphone, etc.
- Press the ♪ (AUDIO) button to select HDMI mode.
- 2In HDMI player mode, the screen of the device displays the content of electronic equipment by mirror image.
- Switching the source when two HDMI devices are connected
- Screen example when the HDMI Setup is "HDMI 1"
- Touch [→25] (HDMI 2).
- Setup Before Using
- About Bluetooth
- About the Hands-free Phone
- Before Using Bluetooth
- Set "Bluetooth" to "On" (). √
- 2Register a Bluetooth device in this unit (page 26).
- ■ Phone menu screen example
- Answering a Call
- Hanging up the Telephone
- Call Waiting Function
- Second incoming call during a conversation in the Phone Operation screen
- Calling
- Calling by Favourite Function
- Press and hold the ♪ (Favourite) button for at least 2 seconds.
- Favourite screen
- Touch the Short Cut icon.
- Touch [Call].
- Making a phone call using the Phone Menu
- Making a phone call from the Recent Events list
- Touch [?] (Recents) to change to the Recent Events list screen.
- Touch the name of the contact you want to call.
- E Touch [d]. C a l l ) .
- Calling from the Contacts list (Phone Book)
- Touch [icon] (Contacts) to change to the Contacts list screen.
- Touch [ ] .
- Entering a Phone Number to Make a Call
- Touch [icon] (Keypad).
- Enter the phone number you wish to call.
- Touch [Call].
- Using Voice Recognition function
- Using Siri
- Press the VOICE button.
- Speak into the microphone supplied with this unit.
- To finish the Voice Control mode, touch [] o xpress the VOICE button.
- Touch [−] or [+].
- Stopping input to the microphone
- Voice Dial Function
- Say the telephone number\* or name\* you want to call, into the microphone.
- To finish the Voice Dial mode, touch [] or press the VOICE button.
- Operations During a Conversation
- Adjusting the Speech Volume
- Changing the Voice Output
- DTMF (Touch-Tone) Function
- Phone Book Function
- Synchronising the Phone Book
- Adding the Phone Book
- Deleting the Phone Book Entries
- Deleting One Entry from the Phone Book
- Deleting All Entries from the Phone Book
- Searching in the Phone Book
- Bluetooth Audio main screen example
- Compatible AVRCP versions: 1.0, 1.3, 1.4, 1.5
- Press the ♪ (AUDIO) button to select Bluetooth Audio mode.
- Touch [|◀◀] or [▶▶] to select the desired track (file).
- 3To pause playback, touch [/]▶ II
- Touch [∅].
- Random Play
- Search Function
- Touch your desired Group name or File name.
- Touch your desired Group name\*2 or File name.
- Connecting a Bluetooth Device
- Disconnecting the Bluetooth Connection
- Changing the connecting Bluetooth Device
- Operating Auxiliary Devices (Optional)
- Press the ♪ (AUDIO) button to select Auxiliary (AUX)\* mode.
- AUX Operation Screen Display During Video File Playback
- Touch the screen.
- Operating an AUX, AUX DVD, GAME or USB Player
- Operating an External DVD Player
- ■ Menu operation mode screen example
- Operating an External DVD Changer
- ■ External DVD changer screen example
- Operating the Mobile Digital TV Receiver (DVB-T)
- Operating a TV
- Front camera:
- Rear camera:
- Other camera:
- Rear Camera Operation
- Displaying the Rear Camera Image from the Menu screen
- Touch [Camera].
- Displaying the rear view video while the car is in reverse
- Shift the gear lever to the reverse (R) position.
- Switching the Image Pattern for the Rear Camera
- Touch the screen when the image from the rear camera is displayed.
- Touch [Back], [Panorama], [Corner] or [Top].
- Guide Display ON/OFF Setting
- Touch the screen when the image from the camera is displayed.
- Touch [Guide Off] on the Rear camera display screen.
- Touch [Guide On] to turn on the guide.
- Adjusting the Caution Display Location
- Touch [♦ Caution].
- About the Rear Camera Guide
- ■ Indication mark meaning
- Distance guidance mark
- Error between the screen and the actual road surface
- When there is a steep upward slope behind the car (example)
- Front Camera Operation
- Displaying the Front Camera image from the Menu screen.
- Switching the Image Pattern for the Front Camera
- About the adjustment of guide display ON/OFF setting and adjustment of Caution display location
- Side Camera Operation
- Displaying the Side Camera image from the Menu screen
- Switching the Image Pattern for the Side Camera
- Touch the screen when the image from the side camera is displayed.
- Touch [Rear] or [Front].
- Available Main Functions
- Vehicle Info mode
- Function Screen Examples
- Climate screen example
- Parking Sensor screen
- Parking Sensor Full screen example
- Indicator colours when an obstacle is detected.
- Parking Sensor Camera interlock screen example (Rear camera)
- Product Software Update
- Updating this product
- Important information on the software
- About the software licence of the product
- About the Supported Formats
- About MP3/WMA/AAC/FLAC
- What is MP3?
- What is WMA?
- What is AAC?
- What is FLAC?
- Method for creating MP3/WMA/AAC/FLAC (USB Flash drive) files
- Supported playback sampling rates and bit rates
- ID3 tags/WMA tags
- Playing back MP3/WMA/AAC/FLAC
- Media supported
- Corresponding File Systems
- Order of files
- Terminology
- Bit rate
- Sampling rate
- Encoding
- Tag
- Root folder
- In Case of Difficulty
- Basic
- No function or display.
- No sound or unnatural sound.
- Screen not displayed.
- Movement of displayed picture is abnormal.
- The optional remote control is inoperative.
- Radio
- Unable to receive stations.
- Unable to tune stations in the seek mode.
- Broadcast is noisy.
- USB Audio
- Unit does not operate.
- Picture is unclear or noisy.
- Rear Seat Entertainment System
- DVD sound is not being output from the rear monitor headphones.
- The Navigation cannot work properly.
- If this Message Appears
- System
- If you are driving, please pull over before using this function.
- USB current error.
- USB HUB is not supported.
- File Format not supported.
- Connected USB device is not supported.
- No data.
- Un-readable song was skipped.
- DAB Antenna error
- Bluetooth
- Please connect Bluetooth audio device.
- Unable to download phonebook.
- HDMI
- HDMI communication error,
- Please check your device and operate it again.
- HDMI current error,
- Please Connect your device again.
- Monitor connect via HDMI has been exceeded.
- Please check the connection.
- CAN Interface
- CAN Communication Error
- You can not use Sound App
- Because External AP is on.
- The vehicle's position is erroneous.
- No operation
- Specifications
- MONITOR SECTION
- FM TUNER SECTION
- MW TUNER SECTION
- LW TUNER SECTION
- DAB SECTION
- USB SECTION
- HDMI SECTION
- GPS SECTION
- GLONASS SECTION
- Bluetooth SECTION
- GENERAL
- CHASSIS SIZE
- NOSE SIZE
- END USER LICENCE AGREEMENT (HERE)
- NOTICE TO THE USER
- OWNERSHIP
- LICENCE GRANT
- LIMITATIONS ON USE
- TRANSFER OF LICENCE
- LIMITED WARRANTY
- LIMITATION OF LIABILITY
- WARNINGS
- GOVERNING LAW
- Accessory List
- Installation
- Caution concerning the installation location
- Angle of installation
- Mounting the GPS Antenna inside the vehicle
- Mounting the Microphone.
- Installation example using the Original Mounting Bracket
- Note on using HDMI Connection Cables
- Usable AV/RCA Interface Cable (4-pole mini AV plug to 3-RCA)
- If an ACC power supply is not available
- Connection Diagram of SPST Switch (sold separately)
- To prevent external noise from entering the audio system.
- System Example
- Connection of an iPod/iPhone
- Connection of a Flash Drive
- Connection of an HDMI Device (iPhone with a Lightning connector)
- Connection of an External Device
- Connection of a Rearview camera
- ③ Direct CAMERA Input Connector Reverse Lead (Orange/White)⑦
- Connection of a Frontview camera
- ③ Direct CAMERA Input Connector
Brand : ALPINE
Model : X308AU
Category : Browser