
Washlink 3 Concealed - Hydraulic pump Protege - Free user manual and instructions
Find the device manual for free Washlink 3 Concealed Protege in PDF.


| Product Type | Concealed Macerator Pump |
| Brand | Protege |
| Model | Washlink 3 Concealed |
| Power Supply | 220-240V / 50Hz |
| Power Rating | 400W |
| Motor Speed | 2800 RPM |
| Max Vertical Discharge | 8 meters |
| Max Horizontal Discharge | 80 meters |
| Flow Rate at Max Head | 145 L/min |
| Tank Capacity | 14 liters |
| Noise Level | 35-50 dBA |
| IP Rating | IPX4 |
| Cutting System | Yes, stainless steel blade (304) |
| Thermal Protection | 90°C (motor auto-reset after cool-down) |
| Water Temperature Range | 1-65°C (80°C for up to 1 hour) |
| Inlet Connections | 1x φ100mm (toilet), 2x φ40mm |
| Outlet Connection | φ23/28/32/44mm |
| Maintenance | No regular maintenance; active carbon filter |
| Safety Features | RCD required, thermal protection, double insulation |
| Dimensions (approx.) | 416 x 380 x 488.5 mm |
| Weight (approx.) | 10 kg |
Frequently Asked Questions - Washlink 3 Concealed Protege
User questions about Washlink 3 Concealed Protege
0 question about this device. Answer the ones you know or ask your own.
Ask a new question about this device
Download the instructions for your Hydraulic pump in PDF format for free! Find your manual Washlink 3 Concealed - Protege and take your electronic device back in hand. On this page are published all the documents necessary for the use of your device. Washlink 3 Concealed by Protege.
USER MANUAL Washlink 3 Concealed Protege
Concealed Macerator Pump Washlink 3 Concealed

natural_image
White white kitchen grater with two side pipes and a handle, placed on a wooden table (no visible text or symbols)User Manual
[Revision 2.0 July 2021]
Safety
Safety messages are designed to alert you to possible dangers or hazards that could cause death, injury or equipment or property damage if not understood or followed. Safety messages have the following symbols:

You WILL be KILLED or SERIOUSLY INJURED if you do not follow instructions.
It is vital that you read and understand this user manual before using the product, including safety warnings, and any assembly and operating instructions. Keep the manual for future reference.
Safety precautions and recommendations detailed here must be fully understood and followed to reduce the risk of injury, fire, explosion, electrical hazard, and/or property damage.
Safety information presented here is generic in nature – some advice may not be applicable to every product. The term "equipment" refers to the product, be it electrical mains powered, battery powered or combustion engine powered.
- Before Use - If you are not familiar with the safe operation/handling of the equipment or are in any way unsure of any aspect of suitability or correct use for your application, you should complete training conducted by a person or organization qualified in safe use and operation of this equipment, including fuel/electrical handling and safety.
- Do NOT operate the equipment in flammable or explosive environments, such as in the presence of flammable liquids, gases or dust. The equipment may create sparks or heat that may ignite flammable substances.
- Keep clear of moving parts.
- Equipment may be a potential source of electric shock or injury if misused.
- Do NOT operate the equipment if it is damaged, malfunctioning or is in an excessively worn state.
- Do NOT allow others to use the equipment unless they have read this manual and are adequately trained.
- Keep packaging away from children - risk of suffocation! Operators must use the equipment correctly. When using the equipment, consider conditions and pay due care to persons and property.
General Work Area Safety
• Work areas should be clean and well it.
- Do not operate the equipment if bystanders, animals etc are within operating range of the equipment or the general work area.
- If devices are provided for connecting dust extraction / collection facilities, ensure these are connected and used properly. Dust collection can reduce dust-related hazards.

You CAN be KILLED or SERIOUSLY INJURED if you do not follow instructions.

You CAN be INJURED if you do not follow instructions or equipment damage may occur.
General Personal Safety
- Wear appropriate protective equipment when operating, servicing, or when in the operating area of the equipment to help protect from eye and ear injury, poisoning, burns, cutting and crush injuries. Protective equipment such as safety goggles, respirators, non-slip safety footwear, hard hat, hearing protection etc should be used for appropriate equipment / conditions. Other people nearby should also wear appropriate personal protective equipment. Do not wear loose clothing or jewellery, which can be caught in moving parts. Keep hair and clothing away from the equipment.
- Stay alert and use common sense when operating the equipment. Do not overreach. Always maintain secure footing and balance.
- Do not use the equipment if tired or under the influence of drugs, alcohol or medication.
- This equipment is not intended for use by persons with reduced physical, sensory or mental capabilities.
General Fuel Safety
- Petrol/fuel/gasoline is extremely flammable – keep clear of naked flames or other ignition sources.
- Do not spill fuel. If you spill fuel, wipe it off the equipment immediately – if fuel gets on your clothing, change clothing.
- Do NOT smoke near fuel or when refuelling.
• Always shut off the engine before refuelling. - Do NOT refuel a hot engine.
- Open the fuel cap carefully to allow any pressure build-up in the tank to release slowly.
• Always refuel in well ventilated areas. - Always check for fuel leakage. If fuel leakage is found, do not start or run the engine until all leaks are fixed.
General Carbon-Monoxide Safety
- Using a combustion engine indoors CAN KILL IN MINUTES. Engine exhaust contains carbon-monoxide – a poison you cannot smell or see.
- Use combustion engines OUTSIDE only, and far away from windows, doors and vents.
General Equipment Use and Care
- The equipment is designed for domestic use only.
- Handle the equipment safely and carefully.
- Before use, inspect the equipment for misalignment or binding of moving parts, loose components, damage or any other condition that may affect its operation. If damaged, have the equipment repaired by an authorised service centre or technician before use.
- Prevent unintentional starting of the equipment - ensure equipment and power switches are in the OFF position before connecting or moving equipment. Do not carry equipment with hands or fingers touching any controls. Remove any tools or other items that are not a part of the equipment from it before starting or switching on.
- Do not force the equipment. Use the correct equipment for your application. Equipment will perform better and be safer when used within its design and usage parameters.
- Use the equipment and accessories etc. in accordance with these instructions, considering working conditions and the work to be performed. Using the equipment for operations different from those intended could result in hazardous situations.
- Always keep equipment components (engines, hoses, handles, controls, frames, housings, guards etc) and accessories (cutting tools, nozzles, bits etc) properly maintained. Keep the equipment clean and, where applicable, properly lubricated.
- Store the equipment out of reach of children or untrained persons. To avoid burns or fire hazards, let the equipment cool completely before transporting or storing. Never place or store the equipment near flammable materials, combustible gases or liquids etc.
- The equipment is not weather-proof, and should not be stored in direct sunlight, at high ambient temperatures or locations that are damp or humid.
- Do not clean equipment with solvents, flammable liquids or harsh abrasives.
- For specific equipment safety use and care, see Equipment Safety.
General Electrical Safety
- Inspect electrical equipment, extension cords, power bars, and electrical fittings for damage or wear before each use. Repair or replace damaged equipment immediately.
- Ensure all power sources conform to equipment voltage requirements and are disconnected before connecting or disconnecting equipment.
- When wiring electrically powered equipment, follow all electrical and safety codes.
- Wherever possible, use a residual current device (RCD).
- High voltage / high current power lines may be present. Use extreme caution to avoid contact or interference with power lines. Electrical shock can be fatal.
General Electrical Safety
- Electrically grounded equipment must have an approved cord and plug and be connected to a grounded electrical outlet.
- Do NOT bypass the ON/OFF switch and operate equipment by connecting and disconnecting the electrical cord.
- Do NOT use equipment that has exposed wiring, damaged switches, covers or guards.
- Do NOT use electrical equipment in wet conditions or in damp locations.
- Do NOT use electrical cords to lift, move or carry equipment.
- Do NOT coil or knot electrical cords, and ensure electrical cords are not trip hazards.
General Service Information
- The equipment must be serviced or repaired at authorised service centres by qualified personnel only.
- Replacement parts must be original equipment manufacturer (OEM) to ensure equipment safety is maintained.
- Do NOT attempt any maintenance or repair work not described in this manual.
- After use, the equipment and components may still be hot – allow the equipment to cool and disconnect spark plugs and/or electrical power sources and/or batteries from it before adjusting, changing accessories, or performing repair or maintenance.
- Do NOT adjust while the equipment is running.
- Perform service-related activities in suitable conditions, such as a workshop.
- Replace worn, damaged or missing warning/safety labels immediately.
Macerator Pump Safety
- The appliance is only ready for use AFTER installation.
- The appliance must be supplied through a residual current device (RCD) that have a rated residual operating current not exceeding 30mA.
- If the supply cord is damaged, have it repaired immediately by an authorised technician or service centre to avoid electrical hazards.
- This appliance is not intended for use by persons (including children) with reduced physical, sensory, or mental capabilities, or lack of experience and knowledge, unless they have been given supervision or instruction concerning use of the appliance by a person responsible for their safety.
- Children should be supervised to ensure that they do not play with the appliance.
• This appliance is for domestic use only. - WARNING! If away for long periods (e.g., holidays), we recommend that you turn off the water supply to the pump served by the unit.
- Toilet connected to this unit can be used like any normal toilet and requires minimum maintenance. The unit will operate automatically as soon as the required level of water enters the case.
- The motor thermal protector will operate once the motor is overheated. Unplug the plug from the socket-outlet, then plug again, the appliance will work normally again after waiting for about 30-60 minutes.
- WARNING! Only the disposal of toilet papers, faecal matter, and wastewater will be under warranty. Any damage due to foreign bodies such as cotton, condoms, sanitary towels, wet wipes, food, hair, metal, wood, or plastic objects, will not be under warranty. Solvents, acids, and other chemicals can also cause damage to the unit and will invalidate the warranty.
Safety Symbols
The product may have safety warning labels attached to it, explained below. Understand the symbols on your product and their meanings. If any stickers become unreadable, unattached etc., replace them.
 Flammable Material HazardFlammable liquids, gases or substances etc may present.Avoid ignition sources and open flames. Danger of fire. Flammable Material HazardFlammable liquids, gases or substances etc may present.Avoid ignition sources and open flames. Danger of fire. |  Read User ManualRead and fully understand product safety warnings, operation, procedures etc before using the product. Read User ManualRead and fully understand product safety warnings, operation, procedures etc before using the product. |  Use Hand ProtectionWear appropriate hand protection and take due care as the product or use of the product may present hand hazards. Use Hand ProtectionWear appropriate hand protection and take due care as the product or use of the product may present hand hazards. |  Exhaust FumesCarbon-Monoxide HazardDo not use the product in confined areas or without adequate ventilation. Carbon-monoxide poisoning can be fatal. Exhaust FumesCarbon-Monoxide HazardDo not use the product in confined areas or without adequate ventilation. Carbon-monoxide poisoning can be fatal. |
 Electrocution / Electrical Shock HazardHigh voltage or high current electricity may be present or required by the product. Take due care when handling electrical products, cables, plugs and leads. Electrical shock can be fatal. Electrocution / Electrical Shock HazardHigh voltage or high current electricity may be present or required by the product. Take due care when handling electrical products, cables, plugs and leads. Electrical shock can be fatal. |  Toxic Fumes / Dust HazardUsing the product or by-products from use may produce fumes, smoke or particles that could be harmful if inhaled. Wear appropriate breathing protection and have adequate ventilation. Toxic Fumes / Dust HazardUsing the product or by-products from use may produce fumes, smoke or particles that could be harmful if inhaled. Wear appropriate breathing protection and have adequate ventilation. | 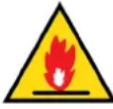 Explosive Material HazardCombustible liquids, gases or substances etc may be present.Avoid ignition sources and open flames. Danger of explosion. Explosive Material HazardCombustible liquids, gases or substances etc may be present.Avoid ignition sources and open flames. Danger of explosion. |  Cutting / Amputation HazardThe product may have blades, edges or mechanical devices that can cause severe cut injury to fingers, limbs etc. Take due care when handling and using the product. Cutting / Amputation HazardThe product may have blades, edges or mechanical devices that can cause severe cut injury to fingers, limbs etc. Take due care when handling and using the product. |
 Crush HazardThe product may have blades, edges or mechanical devices that can cause severe crush injury to fingers, limbs etc. Take due care when handling and using the product. Crush HazardThe product may have blades, edges or mechanical devices that can cause severe crush injury to fingers, limbs etc. Take due care when handling and using the product. |  Single Operator OnlyThe product must be operated by a single person only. More than one person operating the product may introduce additional hazards. Single Operator OnlyThe product must be operated by a single person only. More than one person operating the product may introduce additional hazards. |  Use Face ProtectionWear appropriate full-face protection and take due care as the product or use of the product may present face and eye hazards. Use Face ProtectionWear appropriate full-face protection and take due care as the product or use of the product may present face and eye hazards. |  Use Foot ProtectionWear appropriate foot protection and take due care as the product or use of the product may present foot hazards. Use Foot ProtectionWear appropriate foot protection and take due care as the product or use of the product may present foot hazards. |
 Use Eye / Ear / Head ProtectionWear appropriate eye and / or ear and / or head protection and take due care as the product or use of the product may present eye, hearing and head hazards. Use Eye / Ear / Head ProtectionWear appropriate eye and / or ear and / or head protection and take due care as the product or use of the product may present eye, hearing and head hazards. |  Running HazardDo not run on or near the product as doing so may present a fall hazard. Running HazardDo not run on or near the product as doing so may present a fall hazard. |  Diving HazardDo not dive into the product as doing so may present a neck / head injury hazard. Diving HazardDo not dive into the product as doing so may present a neck / head injury hazard. |  Adult Supervision RequiredAlways supervise children and other users of a product to prevent drowning or injury. Adult Supervision RequiredAlways supervise children and other users of a product to prevent drowning or injury. |
 Skin Penetration / Puncture HazardThe product may produce pressure, emit liquids or objects that can cause severe injury to fingers, limbs, blood etc. Take due care when handling and using the product. Skin Penetration / Puncture HazardThe product may produce pressure, emit liquids or objects that can cause severe injury to fingers, limbs, blood etc. Take due care when handling and using the product. |  Hot Surface HazardBe aware that the product may produce high temperatures and hot surfaces that can cause burn injuries. Hot Surface HazardBe aware that the product may produce high temperatures and hot surfaces that can cause burn injuries. |  Flying Debris HazardBe aware that the product or use of the product may present hazards produced by flying debris. Wear appropriate clothing and protective devices. Flying Debris HazardBe aware that the product or use of the product may present hazards produced by flying debris. Wear appropriate clothing and protective devices. | 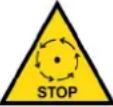 Moving Parts HazardBe aware that the product contains or uses mechanical devices that move or rotate. Always wait for moving parts to stop fully before handling the product, adjusting, maintenance etc. Moving Parts HazardBe aware that the product contains or uses mechanical devices that move or rotate. Always wait for moving parts to stop fully before handling the product, adjusting, maintenance etc. |
 Carbon-Monoxide HazardDo not use the product in confined areas or without adequate ventilation. Carbon-monoxide poisoning can be fatal. Carbon-Monoxide HazardDo not use the product in confined areas or without adequate ventilation. Carbon-monoxide poisoning can be fatal. |  Pull HazardBe aware that the product contains or uses mechanical devices that can pull in objects and can cause severe injury to fingers, limbs etc. Take due care when handling and using the product. Pull HazardBe aware that the product contains or uses mechanical devices that can pull in objects and can cause severe injury to fingers, limbs etc. Take due care when handling and using the product. | 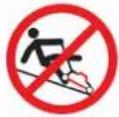 Slope / Fall Injury HazardBe aware that using the product on sloping surfaces or in slippery conditions may present additional dangers from falls and contact with blades, moving parts, hot surfaces etc. Slope / Fall Injury HazardBe aware that using the product on sloping surfaces or in slippery conditions may present additional dangers from falls and contact with blades, moving parts, hot surfaces etc. | 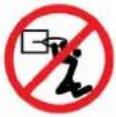 "Slam Dunk" WarningDo NOT attempt "slam dunk" manoeuvres as this may result in severe injury due to falling, product breakage or collapse etc. "Slam Dunk" WarningDo NOT attempt "slam dunk" manoeuvres as this may result in severe injury due to falling, product breakage or collapse etc. |
 Electrocution / Electrical Shock Hazard - OutdoorHigh voltage or high current electricity may be present or required by the product. Do NOT use in rain, damp or wet conditions. Electrical shock can be fatal. Electrocution / Electrical Shock Hazard - OutdoorHigh voltage or high current electricity may be present or required by the product. Do NOT use in rain, damp or wet conditions. Electrical shock can be fatal. |  Electrocution / Electrical Shock Hazard - DisconnectHigh voltage or high current electricity may be present or required by the product. Always disconnect the product from the electrical supply before handling the product, adjusting, maintenance etc. Electrocution / Electrical Shock Hazard - DisconnectHigh voltage or high current electricity may be present or required by the product. Always disconnect the product from the electrical supply before handling the product, adjusting, maintenance etc. | 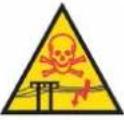 Power Line Electrocution HazardHigh voltage / high current power lines may be present. Use extreme caution to avoid contact or interference with power lines.Electrical shock can be fatal. Power Line Electrocution HazardHigh voltage / high current power lines may be present. Use extreme caution to avoid contact or interference with power lines.Electrical shock can be fatal. |  "Kick-Back" HazardHigh level of "kick-back" hazard that can cause the machine to suddenly rotate towards operator.Kick-back injury can be fatal. "Kick-Back" HazardHigh level of "kick-back" hazard that can cause the machine to suddenly rotate towards operator.Kick-back injury can be fatal. |
 Winch Operator Position HazardDo NOT stand between winch and load. Do NOT use winch to move people. Winch Operator Position HazardDo NOT stand between winch and load. Do NOT use winch to move people. |  Winch Lift HazardDo NOT LIFT load vertically. Use machine to PULL only. Winch Lift HazardDo NOT LIFT load vertically. Use machine to PULL only. |  Cable HazardEnsure that load bearing cable is not kinked or knotted. Cable HazardEnsure that load bearing cable is not kinked or knotted. |  Winch Cable HazardEnsure that there is a minimum number of cable coils on winching mechanism. Winch Cable HazardEnsure that there is a minimum number of cable coils on winching mechanism. |
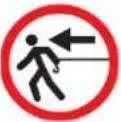 Winch Hook HazardCarry hook to load – do NOT throw or run. Winch Hook HazardCarry hook to load – do NOT throw or run. |  Flash / Blinding HazardWear appropriate eye protection for welding. Direct exposure to weld arcs may cause permanent eye injury. Flash / Blinding HazardWear appropriate eye protection for welding. Direct exposure to weld arcs may cause permanent eye injury. |  Laser HazardLaser may be in use – do NOT look directly at laser or allow others to. Laser HazardLaser may be in use – do NOT look directly at laser or allow others to. |
Table of Contents
Safety 2
Safety Symbols....4
Installation....7
Connecting to the Toilet....7
Securing the Macerator Pump....7
Proper Installation....7
Installing the Outlet (Check Valve) 8
Connecting the Discharge Pipework 9
Technical Advice for Discharge Pipework....9
Connecting to an Electrical Supply....10
Operation....10
Operating Principle ...... 10
Accessing the Repair Panel 11
Pipe Heights 11
Flow Rates....12
Other Installation Diagrams....12
Maintenance....14
Specifications ....15
Technical 15
Dimensions 16
Installation

The appliance must be installed in such a way as to ensure easy access for repair and maintenance. Installation must be carried out by a qualified person.
Connecting to the Toilet
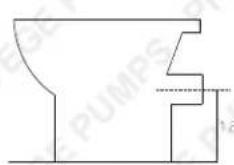
- Put some silicon or liquid soap on the toilet spigot.
- Fit the collar supplied on the bowl outlet.
- Pull the flexible sleeve over the pan spigot.
- Position the jubilee clip over the edge of the flexible sleeve and tighten with a screwdriver.
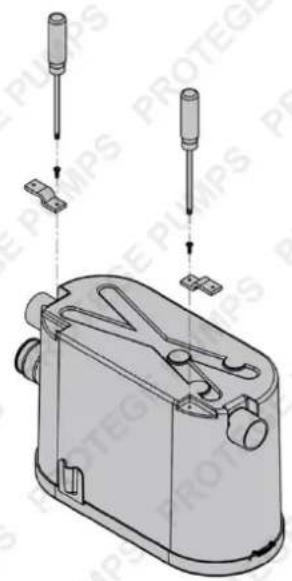
- Once the appliance has been positioned, fix it to the floor using the 2 screws supplied.
If using the two floor fixing lugs, secure them to the floor before positioning the unit.

natural_image
Pure technical line drawing of a mechanical component without any text, numbers, or symbols
natural_image
Pure geometric line drawing of a mechanical part or bracket (no text or symbols)
WARNING! There should be no water dripping from the toilet cistern or any other sanitary appliances. If there is, this will cause the unit to activate repeatedly as it pumps the water away.
Securing the Macerator Pump

natural_image
Technical line drawing of a mechanical device with multiple ports and mounting features (no text or symbols)Proper Installation
- Outlet check valve is necessary.
Concealed Macerator Pump - Washlink 3 Concealed
- Install an extra manual check valve for repair (recommended).
- Lift the shower 14cm high when you connect the side inlet.
- Install a filter in the shower & lavatory to reduce hair going into the macerator pump.

Installing the Outlet (Check Valve)
NOTE: Do not insert the outlet (check) valve too deeply, as it is only 1-2cm.

natural_image
Technical illustration of industrial piping components with no visible text or symbols
natural_image
3D rendering of a pipe fitting with a container and valve assembly (no text or symbols visible)
natural_image
Close-up of a pipe fitting with a valve and connector, showing mechanical assembly (no text or symbols visible)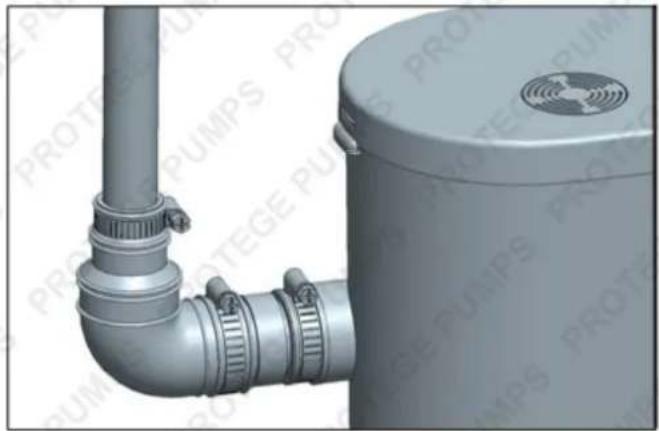
natural_image
3D rendering of a pipe fitting with attached valve and container (no text or symbols visible)Connecting the Discharge Pipework
Insert the discharge elbow into the rubber discharge pipe, turn to the desired direction and secure with the metal jubilee clip provided (36-50mm). Then connect the hose to it using the 20-32mm metal jubilee clip, making sure the hose is not kinked. A 22-32mm plastic reducer is supplied if a 32mm discharge pipework is to be installed.
Technical Advice for Discharge Pipework
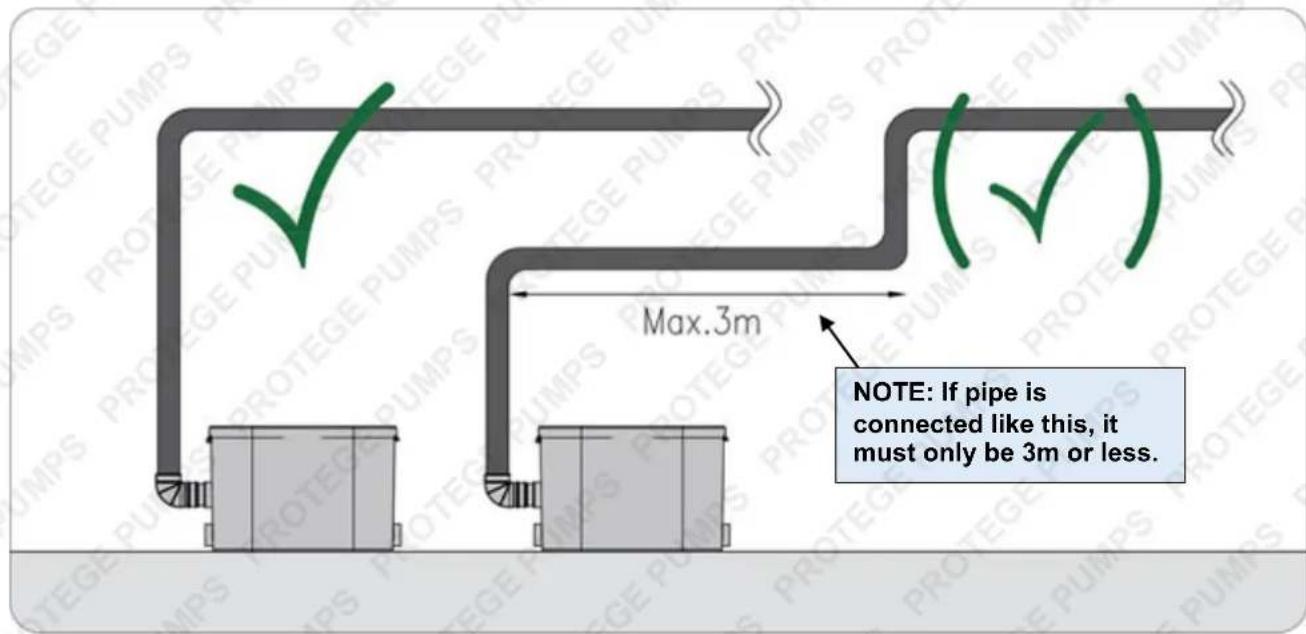
• Horizontal pipe runs must have a minimum fall of 1:200 (5mm per metre) to the soil stack.
- If a vertical lift is required, it must be made before the horizontal run at the start of the pipe run,
- It is recommended that a drain-off point is installed to allow the discharge pipework to be drained down before any service work.
- If the discharge pipework runs to a level considerably lower than the unit, the resulting siphoning effect can suck out the water seal in the unit. Fitting an air admittance valve (BBA approved) at the high point of the pipe run will overcome this problem.
- The discharge pipework must be connected to the soil stack using an appropriate strap on boss. Ensure all external pipework is adequately lagged to avoid the possibility of freezing.
NOTE: Any elbow on the discharge pipe of the unit will create friction loss (roughly 50cm per elbow to be deducted from the vertical pumping spec.) Always use smooth bends (or 2 x 45 degree bends together) and not 90 degree elbows.
Connecting to an Electrical Supply

IMPORTANT! The electrical installation should only be carried out by a qualified electrician. The unit should be connected to a fully earthed electrical supply.
Once electrical and pipe connections have been made, flush the toilet once. The motor should run from 5 to 10 seconds to clear waste (depending on the height of the pipe run). If it runs for more than 20 seconds, check that the pipework is clear, and that the discharge hose is not kinked. Flush the toilet checking that all seals and connections are watertight. Check both the discharge pipework from the unit and the other sanitary appliances connections.
Operation
Operating Principle
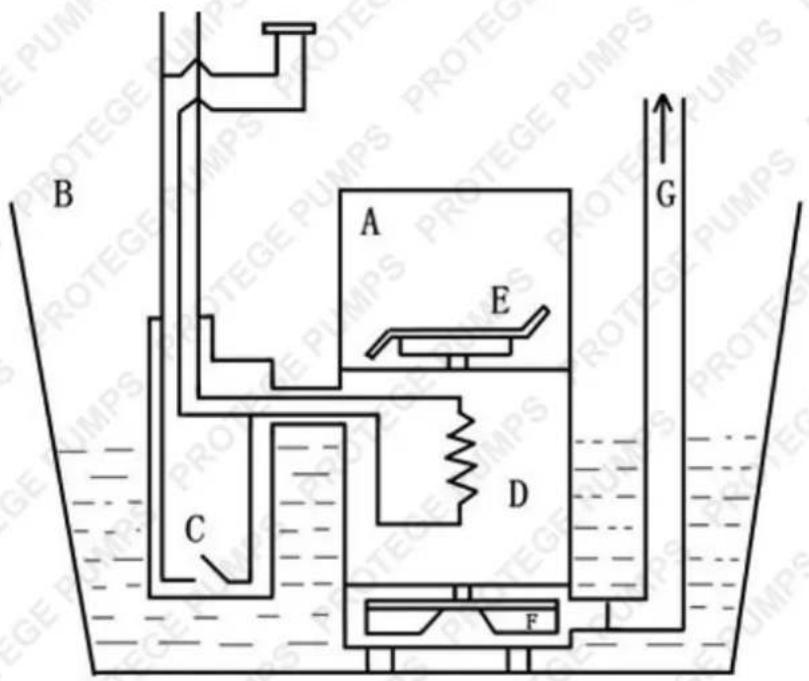
The pump has been designed to pump away the waste from toilet and other sanitary appliances. The pump for toilets comprises an electric pump (D) that is automatically controlled by a float switch (C).
The discharge action is triggered when the flushing system is activated, as with a conventional toilet.
Accessing the Repair Panel
Open the top repair panel to remove all blockages and foreign objects.

Pipe Heights

Flow Rates

line
| Q(l/min) | H(m) | | -------- | ---- | | 20 | 7.5 | | 40 | 6.5 | | 60 | 5.5 | | 80 | 4.5 | | 100 | 3.5 | | 120 | 2.5 | | 140 | 1.5 |Other Installation Diagrams
Minimum distance from walls and obstacles
Min.250mm

natural_image
Technical line drawing of a toilet with pump and valve components (no text or symbols)Pipe Angles
It is recommended to use 2pcs. of 45' elbow instead of 1pc. 90' elbow.

Discharge Pipe Connections

Maintenance
Disconnect the electrical power supply before attempting any work on the unit.
No need for any maintenance. This unit is fitted with an active carbon filter and requires no external venting.
Specifications
Technical
| Product Standard GS/CE | |
| Features | Suitable for family useSilent & multifunctionalFor wall hung toilets |
| Applications | Toilets (wall hung p-trap toilets only, normal p-trap is ok to install but piping is complex)Wash basinsBathtubsShowersWashing machines |
| Cutting system | Yes |
| Toilet inlet | Side toilet inlet |
| Number and size of inlet | 1 x for toilet φ100mm2 x φ40mm |
| Number and size of outlet | 1 x φ23/28/32/44mm |
| Tank size 14L | |
| Flow rate at max head (L/min) | 145L/Min |
| Water temperature (degree) | 1-65°C (80°C in 1 hour) |
| Thermal protection 90°C | |
| Noise level (dbs.) | 35-50dbs. |
| Horizontal discharge (m) | 80 |
| Vertical discharge (m) 8 | |
| IP rating | IPX4 |
| Air vent | Yes |
| Repair panel | You can easily take out the block near the blade |
| None return valve | Yes |
| Power | 400W |
| Motor | 220-240V / 50Hz / 2800RMPMotor filled with oil, copper wire motorMotor size: 110mm |
| Plug | SAA |
| Tank material | PP bottom + ABS lid |
| Blade material | 304 stainless steel |
| Fully automated operation triggered by flushing | Yes |
| Manual mode option | No |
| Water start level | 8.5 - 9.5cm |
| Lift the shower high when you connect the side inlet | 14cm |
| Min. size below shower | Not recommended to be installed under shower |
| Min. size from toilet outlet to rear wall | 250mm |
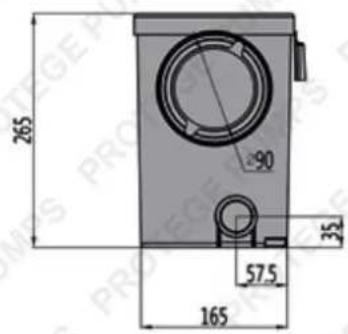
Dimensions


Some experts believe that the incorrect or prolonged use of almost any product may cause serious injury or death. To help reduce your risk of serious injury or death, refer to the information below. For more information, see www.datastreamserver.com/safety
- Consult all documentation, packaging and product labelling before use. Note that some products feature documentation available online. It is recommended to print and retain the documentation.
■ Before each use, check the product for loose/broken/damaged/missing parts, wear or leaks (if applicable). Never use a product with loose/broken/damaged/missing parts, wear or leaks.
■ Products must be inspected and serviced (if applicable) by a qualified technician every 6 months. This is based on average residential use by persons of average size and strength, and on a property of average metropolitan size. Use beyond these recommendations may require more frequent inspections/servicing.
■ Ensure that all users of the product have completed a suitable industry recognised training course before being allowed access to the product.
The product has been supplied by a general merchandise retailer that may not be familiar with your specific application or description of application. Be sure to attain third-party approval from a qualified specialist for your application before use, regardless of any assurances from the retailer or its representatives.
This product is not intended for use where fail-safe operation is required. As with any product (for example, automobile, computer, toaster), there is the possibility of technical issues that may require the repair or replacement of parts, or the product itself. If the possibility of such failure and the associated time it may take to rectify could in any way inconvenience the user, business or employee, or financially affect the user, business or employee, then the product is not suitable for your requirements. This product is not intended for use where incorrect operation or a failure of any kind, including but not limited to, a condition requiring product return, replacement, parts replacement or service by a technician may cause financial loss, loss of employee time or an inconvenience requiring compensation.
If this product has been purchased in error when considering the information presented here, contact the retailer directly for details of their returns policy, if required.

topia.com.au


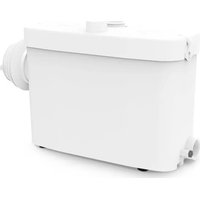

- Concealed Macerator Pump Washlink 3 Concealed
- Safety
- General Work Area Safety
- General Personal Safety
- General Fuel Safety
- General Carbon-Monoxide Safety
- General Equipment Use and Care
- General Electrical Safety
- General Service Information
- Macerator Pump Safety
- Safety Symbols
- Table of Contents
- Safety 2
- Installation....7
- Operation....10
- Maintenance....14
- Specifications ....15
- Installation
- Connecting to the Toilet
- Securing the Macerator Pump
- Proper Installation
- Installing the Outlet (Check Valve)
- Connecting the Discharge Pipework
- Technical Advice for Discharge Pipework
- Connecting to an Electrical Supply
- Operation
- Operating Principle
- Accessing the Repair Panel
- Flow Rates
- Other Installation Diagrams
- Pipe Angles
- Maintenance
- Specifications
- Some experts believe that the incorrect or prolonged use of almost any product may cause serious injury or death. To help reduce your risk of serious injury or death, refer to the information below. For more information, see www.datastreamserver.com/safety
Brand : Protege
Model : Washlink 3 Concealed
Category : Hydraulic pump