
BIA64EGP - Cooker Bellini - Free user manual and instructions
Find the device manual for free BIA64EGP Bellini in PDF.


| Product Type | Induction Cooktop |
| Model | BIA64EGP (also BIA64EGP-W, BIA64EGP-F) |
| Dimensions (W x D x H) | 580 x 510 x 65 mm |
| Cutout Dimensions (W x D) | 560 x 490 mm |
| Net Weight | Approx. 10 kg |
| Power Supply | AC 220-240 V, 50/60 Hz |
| Total Power | 6000 W (estimated from zones) |
| Number of Cooking Zones | 4 |
| Zone Powers (front left / front right / rear left / rear right) | 1800 W / 1200 W / 1200 W / 1800 W |
| Control Type | Touch control with LED display |
| Timer | 0-99 minutes per zone, adjustable with +/- buttons |
| Child Lock | Yes, press and hold to lock/unlock |
| Pan Detection | Automatic, displays 'E0' if no pan or incompatible pan |
| Residual Heat Indicator | Displays 'H' when zone is hot |
| Automatic Shut-off | After 60 seconds without pan detection |
| Overheat Protection | Yes, reduces power or shuts off if IGBT or surface overheats |
| Hob Surface Material | Glass ceramic |
| Cleaning | Use damp cloth or cream cleaner for glass hobs; avoid abrasives |
| Fan Cooling | Yes, fan delays shut-off if temperature >50°C |
| Installation Type | Built-in, requires cutout and minimum ventilation |
| Warranty | 3 years in-home (Australia/NZ) |
| Certifications | Complies with Australian safety standards |
Frequently Asked Questions - BIA64EGP Bellini
User questions about BIA64EGP Bellini
0 question about this device. Answer the ones you know or ask your own.
Ask a new question about this device
Download the instructions for your Cooker in PDF format for free! Find your manual BIA64EGP - Bellini and take your electronic device back in hand. On this page are published all the documents necessary for the use of your device. BIA64EGP by Bellini.
USER MANUAL BIA64EGP Bellini
natural_image
Four circular diagrams with control buttons below, no text or symbols present60cm Induction Cooktop
Model No.
BIA64EGP-W
BIA64EGP-F
BIA64EGP
FINELINE:0081479
V.3 June19
Thank you
Thank you for choosing Bellini Appliances.
Bellini prides itself on ‘affordable living’ making sure there is no compromise in your favourite room ... The Kitchen
All Bellini appliances carry a 3-year In Home warranty, be sure to retain your installation and user manual and receipt.
For all warranty and technical queries, please contact
1300 373 199
Content
3....Safety instructions
4-6....Installation
7-9.....Description of the appliance
10....Fault code
11....Pots and pans and how to use them
12-13......Safety reminding and Maintenance and cleaning
14....Troubleshooting
15 Environmental note
Important
This appliance generates magnetic field in the direct vicinity.
ATTENTION: People with PACEMAKERS must ensure that their pacemaker has been designed in conformity with the norms in force. It is recommended that the manufacture or your doctor is consulted to verify any incompatibility.
Important
This appliance generates short-range magnetic field therefore people with other types of electrical medical equipment, such as hearing aids for the deaf, must ensure they confirm to the norms regarding electromagnetic disturbances.
This appliance has been designed for family use only. In case of doubts or questions, please contact the manufacturer.
Keep the packing material away from children (plastic bags, parts in foamed plastic, etc.) they could be potentially dangerous.
To prevent electrical shocks, contact the technical service centre for any repairs.
Make sure that installation and electrical connections are carried out by qualified personnel, following the manufacturer's instructions and in conformity with local norms in force.
The hob must be installed and grounded by qualified personnel. Do not repair or replace any part of the appliance unless specifically recommended in this manual. All other interventions must be carried out by qualified technicians.
This hob comes with a cooling fan with air vent underneath the worktop itself. If there is a drawer under the worktop, do not put any paper or small light objects in it as they could be sucked up by the fan, damaging it or compromising its function.
Do not use aluminium foil to protect parts of the hob.
Do not leave the kitchen unattended when cooking foods where high contents of oil or fat are used, the oil could catch fire. If the oil catches fire never, put out with water. Immediately suffocate the fire with a lid and turn off the hob.
Do not cook on the hob if the glass is broken. Water or cleaning products could filter through the breakage and cause electrical shocks. Immediately contact qualified personnel as soon as you notice a breakage.
Keep the area around the hob free from combustible material (plastic, paper etc.) or flammable liquids, these can catch fire, metal parts can heat up and cause burns.
Children must not be along in the kitchen when the hob is in use.
After use, when the cooking element or entire hob is turned off, a residual heat indicator will come on, showing an H (hot) for each cooking area that was used: this indicates that the corresponding cooking area is still dangerous.
If the supply cord is damaged, it must be replaced by the manufacturer, its service agent or similarly qualified persons in order to avoid a hazard.
✿ WARNING: If the surface is cracked, switch off the appliance to avoid the possibility of electric shock.
✨ A steam cleaner is not to be used.
Metallic objects such as knives, forks, spoons and lids should not be placed on the hob surface since they can get hot.
The appliance is not intended to be operated by means of an external timer or separate remote-control system.
✨ Danger of fire: Do not store items on the cooking surfaces.
✿ CAUTION: The cooking process has to be supervised. A short-term cooking process has to be supervised continuously.
WARNING: Use only hob guards designed by the manufacturer of the cooking appliance or indicated by the manufacturer of the appliance in the instructions for use as suitable or hob guards incorporated in the appliance. The use of inappropriate guards can cause accidents.
Children should be supervised to ensure that they do not play with the appliance.
This appliance is not intended for use by persons (including children) with reduced physical, sensory or mental capabilities, or lack of experience and knowledge, unless they have been given supervision or instruction concerning use of the appliance by a person responsible for their safety.
✿ Means for disconnection must be incorporated in the fixed wiring in accordance with the wiring rules.
✿ WARNING: The appliance and its accessible parts become hot during use.
Care should be taken to avoid touching heating elements.
After use, turn off the hob using the command device and do not rely on the pan detector.
Important
The heating elements do not work if the pan has a diameter that is too small or not magnetically detectable. To verify that the material of the pan is suitable that is ferrous, use a magnet. To prevent damage to the electronic circuit, the hob has a sensor that constantly controls the temperature of the circuit itself: in the case of overheating, the hob automatically reduces power or turns itself off until a safe temperature is reached.
Installation
Preparing the unit for a built-in appliance
- Drill a hole on the table surface according to the size shown in the drawing. For the purpose of the installation and use, a minimum of 50mm space shall be preserved around the hole. Be sure the thickness of the table surface should be at least 30mm. please select heat-resistant table material to avoid larger deformation caused by the heat radiation from the cooker. As shown in the Figure 1.

- ATTENTION: important assembly instructions for keeping the induction module cold.
- Do not install the hob on top of a refrigerator or dishwasher. If the hob is installed on top of a drawer put a shelf in between as shown (50mm). If shelves are put in between ensure that they allow air to flow (30mm).

Product
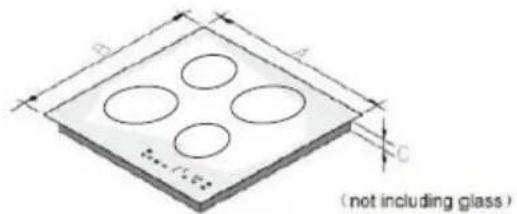
A. 580mm
B.510mm
C. 65mm
dimensions

WARNING
The kitchen units that are in direct contact with the appliances must be heatproof (min. 95°).
The appliance can be installed on a work surface with a thickness of between 30 and 40 mm and near to walls, which are higher than the work surface, maintaining a minimum distance of 100 mm .
Carry out all cutting of the unit and work surface then carefully remove shavings or sawdust before inserting the appliances.
To ensure a correct ventilation of the hob please comply with the dimensions shows in figures.
Always refer to the manufacturer for specific instructions,
Make sure the surface is level and square and that no part interferes with the space required for installation.
Prepare the cut as indicated (see installation dimensions).

Installing the hob
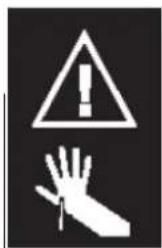
WARNING
Risk of cutting.
Be careful of cutting edges.
End parts in foamed plastic - be careful.
During transportation, these could cause slight injury or cuts.
Remove the material and envelope of documents from the packaging.
Before proceeding with installation read the work instructions carefully.
Step.1
Put a towel or cloth on the work surface. Place the hob face down on the protected surface.
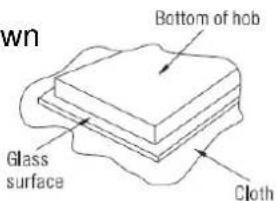

Step.2
Apply the strip seal, supplied with the hob, which is for sealing it onto the work surface.
Do not use silicone. Apply the seal to the edge of the bottom of the hob, leaving about 3mm from the edge of the glass.
Apply the seal all around the circumference.
Cut any excess and bring the two ends of the seal together so they match.
Step.3
Fix the brackets on the front side and rear side by screw. Put the induction hob in the cutout cabinet.


Attention:
The electric hob is recommended to be installed by professional. Please never conduct the operation by yourself.
The wall and the heating area above the table surface shall withstand heat.
To avoid danger, the ceramic cooker hob must be installed into the cabinet before use.
Applicable cabinet material: wood, marble resin etc.
Connect to the mains power supply
To connect the mains power supply, please follow these steps:
1) The "green-yellow" earth wire must be connected to the terminal marked. It Must be about 10 mm longer than the live and neutral wires.
2) The "blue" or "black" neutral wire must be connected to the terminal marked with letter (N) - The "red" or "brown" live wire must be connected to the terminal marked with letter (L).
Hard Wired Appliances : When making the mains supply conductor connections to the terminal block within the terminal box, please ensure that minimum clearances are being maintained between individual conductors and conductors/connectors to the adjacent metal surfaces of the terminal box itself, where possible add heat shrink sleeves to any bare conductor end/connectors prior to securing.

- If the cable is damaged or needs replacing, this should be done by an after-sales technician using the proper tools, to avoid any accidents.
- If the appliance is being connected directly to the mains supply, an omnipolar Safety instructions
Circuit breaker must be installed with a minimum gap of 3mm between the contacts. - The installer must ensure that the correct electrical connection has been made and that it
complies with safety regulations.
-
The cable must not be bent or compressed.
-
The cable must be checked regularly and only replaced by a properly qualified person.
Electrical principle diagram
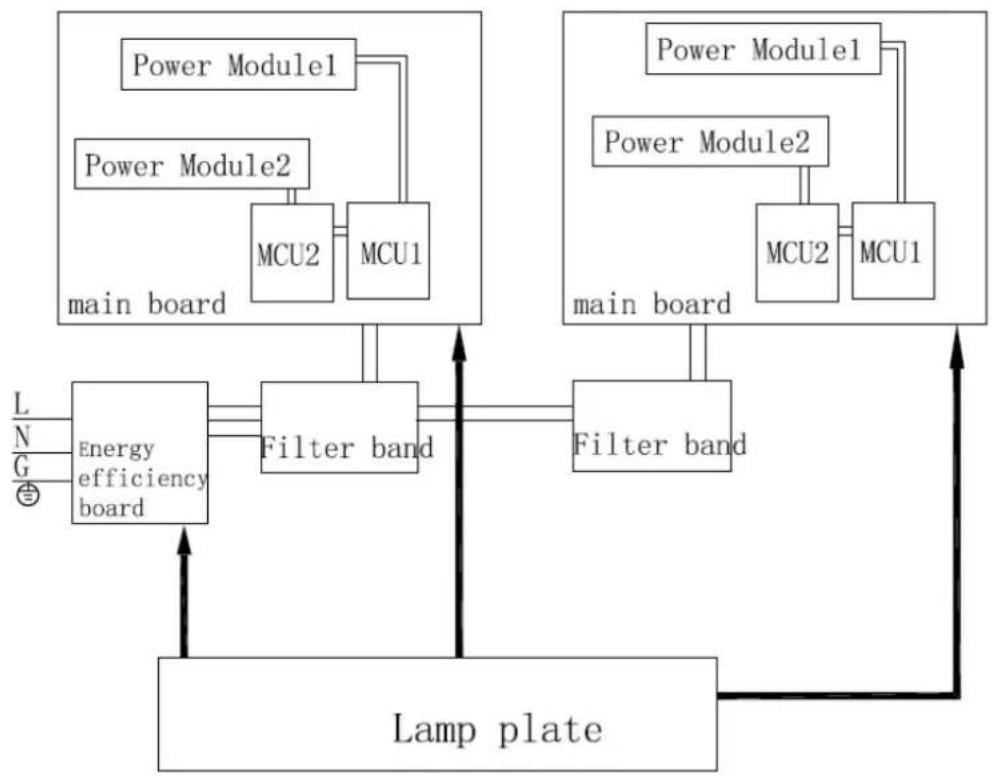
flowchart
graph TD
    subgraph Main Board
        PowerModule1["Power Module1"] --> MCU2["MCU2"]
        PowerModule1 --> MCU1["MCU1"]
        PowerModule2["Power Module2"] --> MCU2
        PowerModule2 --> MCU1
        MCU2 --> FilterBand["Filter band"]
        MCU1 --> FilterBand
    end

    subgraph Main Board
        PowerModule1b["Power Module1"] --> MCU2b["MCU2"]
        PowerModule1b --> MCU1b["MCU1"]
        PowerModule2b["Power Module2"] --> MCU2b
        PowerModule2b --> MCU1b
        MCU2b --> FilterBand
        MCU1b --> FilterBand
    end

    L --> EnergyEfficiencyBoard["Energy efficiency board"]
    N --> EnergyEfficiencyBoard
    G --> EnergyEfficiencyBoard
    L --> LampPlate["Lamp plate"]
    N --> LampPlate
    G --> LampPlate
    L --> FilterBand
    N --> FilterBand
    G --> FilterBand
    L --> FilterBand
    N --> FilterBand
    G --> FilterBand
    L --> FilterBand
    N --> FilterBand
    G --> FilterBand
    L --> FilterBand
    N --> FilterBand
    G --> FilterBand
    L --> FilterBand
    N --> FilterBand
    G --> FilterBand
    L --> FilterBand
    N --> FilterBand
    G --> FilterBand
    L --> FilterBand
    N <--> EnergyEfficiencyBoard
    EnergyEfficiencyBoard --> FilterBand
    FilterBand --> FilterBand
    FilterBand --> LampPlate
Description of the appliance
Control Panel

Schematic diagram of the control panel

Instruction
| 1 |  | ON/OFF: Turn ON or OFF the appliance. |
| 2 |  | CHILD LOCK:Press the button one time to lock keys (the indicator light keep bright) and hold for a while to unlock, When it is activated, none of the other buttons can be activated except for ON / OFF. |
| 3 |  , , | UP:Increasethe power level or add the time. |
| 4 |  , , | DOWN: Reduce the power level or reduce the time. |
| 5 |  | Single digital tube: It shows power level and error code. |
| 6 |  | Twin digital tube: It shows time. |
| 7 |  | The left above burner. |
| 8 |  | The right above burner. |
| 9 |  | The left bottom burner. |
| 10 |  | The right bottom burner. |
| 11 |  | Timer: Setting the time as you need. |
Display instructions
1) Display rule of the LED light
A. Switch indicator light: The indicator light will flash in standby state, and will remain on in other states.
B. Function indicator light: the corresponding indicator light will not bright when not work. In addition, it will stays bright when start working.
2) Display rule of the digital tube
A: In normal working:
Single digital tube (total four single digital tube): display the power level of each burner. Twin digital tube: display the setting time of each burner.
B: When the digital tube fails, the single digital tube will display the error code (two single digital tube will flash); and the twin digital tube will not displayed.
Operation
Operate and display requirement
(1) Standby status:
Plug in and connected to the electrical supply, the buzzer will "beep" a sound, all indicator lights and all characters on the digital tube are lit for 1s, then the "ON / OFF" indicator lights flash, and the child lock indicator lights keep bright to indicate that the induction cooker is in standby condition.
(2) Power on status:
"ON / OFF" button used for switching ON and OFF the induction cooker.
A. Under standby state, press child lock, first unlock, then press "ON / OFF" button, power indicator light always on, child lock indicator light does not show, Single digital tube display "-", 20s without any operation, return to standby state. (10s no operation, Child lock indicator light keep bright automatically lock.)
B. In working status, press the "ON / OFF" button to return to state of power-on, without any operation in 20S will return to the standby state.
(3) Work status:
A. Choosing the cooking zone: Under power ON state, press the cooking zone select button, enter to select the cooking zone, the default power level 5, single digital tube will display "5" and flash. (If it is under standby state, it must be turned on first, then enter to select the cooking zone, and then make appropriate operation.
B. Power level adjustment:
After select the cooking zone, when the single digital tube flash and display the power level, press the +/- button to adjust the power level.
Each press of the “+” button, the power level increased by one unit; each press of the “-” button, the power level reduced by one unit;
Power level:0,1,2,3,4,5,6,7,8,9.
Max power level: 9, Min power level: 1, 0 level close the power output.
In the working process, various faults are detected, and if occurs, the appliance will enter into fault alarm processing state.
(4) Timer Control:
Under working condition, press cooking zone select button, when the twin digital tube flash, press "timing" button to set the timer. The twin digital tube will display the timing and flash, press the +/- button to set the timer.
Each press of the “+” button, the timer increased by one unit; Long press “+” button, the timer is incremented in minute.
Each press of the “-” button, the timer reduced by one unit; Long press “-” button, the timer is descended in minute.
Max time: 99 minutes, Min time: 1 minute.
Adjustable time range: 0-99 minutes recyclable.
The first time a timer is set, the default timing starts at "00".
Display: After setting the timing time, if there is no operation in 5s, the timing takes effect, the timer of each cooking zone is alternately displayed 5s, when the cooking zone is displayed, and the dot in the lower right corner of "8" will be displayed.
(5) Child Lock:
Standby state: child lock indicator light long lit, you must long press the child lock button to unlock before entering the standby state.
Power on state or working state: The child lock indicator light is not on, but no operation in 10s will automatically locked, the child lock indicator light is always on. Unlock long press the child lock button.
(6) Fan delay:
After shutdown, if the cooking surface temperature is above 50\ °C , fan will be delay 5 minutes off. If the cooking surface temperature is below 50\ °C , the fan will be shut down immediately.
FAULT CODE
| Fault Code | Possible Cause | Description |
| E0 | No pan or pot, or their size, material, etc. is not suitable, or not placed precisely in the middle of the cooking area. | If no suitable pan or pot is placed on after 60s, the hob will turn off automatically; if suitable pan or pot is placed within 60s, the hob will start to work. |
| E1 | Voltage is too low. | Lower than AC 160V. |
| E2 | Voltage is too high. | Higher than AC 270V. |
| E3 | IGBT overheat. | IGBT reaches 105±5°C for 3s (It can recover automatically when temperature decrease 50°C-70°C). |
| E4 | Hob surface sensor open-circuit | Power on and judge within 2 minutes. |
| Hob surface sensor short-circuit | Power on and judge within 10S. | |
| E5 | IGBT sensor open-circuit | Power on and judge within 2 minutes. |
| IGBT sensor short-circuit | Power on and judge within 10S. | |
| E6 | Hob surface overheat. | Hob surface temperature higher than set value. |
| E7 | Hob surface sensor become invalid. | |
| E9 | Communication failures. | Unplug or poor contact. |
| Eb | Line fault. | Coil panel is not connected. |
| H | Hob surface is of high temperature. | After the hob is off, if the hob surface temperature is too high, it will display "H", and the fan will delay working for 5 minutes. |
Pots and pans and how to use them
Attention
◆ The pots and pans that can be used on this hob must be made of ferromagnetic material. They can be made of enamoured steel, cast iron or special pans of stainless steel for induction. The diameter of the pan should be at least 11cm.
◆ To make sure a pan is suitable, try using a magnet to see if it sticks to the bottom of the pan. Never use normal thin steel nor anything containing even just an amount of glass, terracotta, copper or aluminium.
◆ The display of the cooking area will show if the pan is suitable, if the power indicator flashes the pan is not suitable or the diameter of the bottom is too small for the diameter of the cooking area.
◆ The pots and pans must be placed precisely in the middle of the cooking area.
In some cooking areas, an internal diameter is indicated, with a lighter outline, which advises the user to go to a smaller cooking area, if available, with smaller diameter pan. This is to obtain optimum performance and efficiency. You can however use pans with smaller diameters than this limit.

Safety reminding

natural_image
Simple line drawing of a cabinet or storage unit enclosed in a circle (no text or symbols)A dedicated power protection air switch must be incorporated in the fixed wiring in accordance with the wiring rules.
Never use the hob in high temperature environment.

natural_image
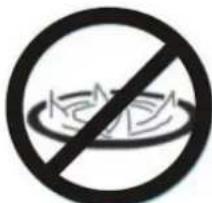
Black and white prohibition sign with a submerged object, no text or symbols presentNever wash the hob with water directly. Steam cleaner is not to be used.

Never have the hob to work Without food in pot, otherwise Its operational performance May be affected and danger May happen.

for sealed foods such as canned goods, please do not heat them before opening their covers so as to avoid Any dangers of explosion due To heating expansion.
natural_image
Illustration of a person standing at a desk with a chalkboard, enclosed in a circular frame (no text or symbols)the appliance is not intended to be used by children or handicapped persons, unless they have been supervised by a Responsible person to Ensure they can use it Safely.

Do not place rough or Uneven appliances, which May damage the ceramic Surface.

if the surface is cracked, pull out the plug to avoid the possibility of electric shock.

do not put any detergents or flammable materials in The equipment installed Under the hob.

Because the hob can Generate very high Temperature, please use a Pot resistant to a temperature Of over 200.

after being used, the corresponding heating zone of the hob is still hot. Never touch the hob surface To avoid burn.

natural_image
Simple line drawing of a coiled tube inside a circle (no text or symbols)If the supply is damaged, it must be replaced by the Manufacturer, its service agent or similarly qualified Persons in order to avoid a Hazard.
Maintenance and cleaning
- Please shut off the power and pull out the plug before cleaning of the appliance.
- Clean the appliance until it cools down completely.
- To remove dirt, please select illustrious detergent.
- After removing dirt, please use neat wet cloth to clean the unit.
- Do not clean by water directly, water gets inside may cause malfunction.
- Keep the crystal glass plate and pan clean before cook, otherwise dirt after charring is very difficult to clean and the plate may get discoloration.
- You may clean air vent / air entry's dirt using vacuum cleaner to suck up. If there is dirt with oil, add a little illustrious detergent with toothbrush to clean.
- Don't use caustic impregnates to clean? It may damage the cooker by chemical reaction. Do not use scrubbing brush or polishing powder to clean the induction cooker.
Important
- Periodically check that dust does not deposit under the fan or in the discharge openings, this could obstruct ventilation for cooling the electronic system, reducing the efficiency of your hob.
- The hob could be damaged if hard and sharp edged objects fall on it, it is recommended that such objects be kept away from the hob where they cannot fall on it.
- Do not put hot pans on the control area or on the edge of the hob, do not use pans with a raised design or pattern on the base, they could scratch the hob.
Cleaning techniques
➢ Attention: When chemical products heat up them can corrode and damage the glass, moreover the fumes can be dangerous for your health.
Clean the surface when it is completely cold except for the following: dried sugar, syrupy sugar, tomato sauce, milk, these must be removed immediately with the scraper.
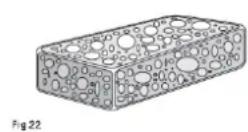
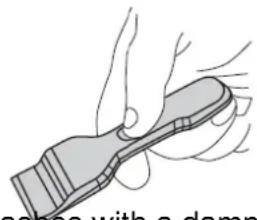
natural_image
Illustration of hands using a tool to grip a small object, with no visible text or symbols.Cleaning after each use:
Dry any splashes with a damp sponge or paper towel, rinse and dry. If any stains remain, use some vinegar, rinse and dry.
Cleaning with cream detergents for glass hobs:
Apply a small amount of cream detergent for hobs, when dry, shine the surface with a soft cloth or paper.

natural_image
Two abstract shapes: a curved ribbon-like shape and a bottle with a cap (no text or symbols)Do not use these products:
Abrasive powders or detergents, spray products for ovens, whitening products, sponges with abrasive surfaces, steel wool balls or synthetic ones. These products could seriously damage your hob.

Troubleshooting
| Faults | Causes | Remedies |
| The appliance does not work the control lights are all off. | The appliance is not powered, the plant is defective. | Check that the appliance is connected, that there is electricity and that the current limiter or differential has not intervened. |
| The appliance turns off during use and an intermittent acoustic signal is emitted. | The control may be dirty or utensils may be on it. | Press any key to stop the acoustic signal, clean the control area or remove any utensils and continue cooking. |
| During cooking, the hob makes a noise. | The technology of induction heating is based on the capacity of certain materials to vibrate when subject to high frequency waves. In some conditions, where vibrations can produce noise. | This is normal. |
| The control lights continue to flash when the hob is in use. | The pan that is being used is not suitable for induction. | Verify that the pan is made of suitable material by using a magnet. |
| The fan continues to work even after the appliance has been turned off. | The electronics of the appliance have a high temperature and must cool down. | This is normal. Once the appliance has cooled down the fan will automatically turn off. |
Environmental note
Note: Before discarding an old appliance, switch off and disconnect it from the power supply. Cut off and render any plug useless. Cut the cable off directly behind the appliance to prevent misuse. This should be undertaken by a competent person.

natural_image
Symbol of a trash bin crossed with a diagonal line and a blank rectangular block below (no text or labels)This product must not be disposed together with domestic waste. This product has to be disposed at an authorised place for recycling of electrical and electronic appliances. By collecting and recycling waste, you help save natural resources, and make sure the product is disposed in an environmental friendly and healthy way.

WARRANTY
1.1 In this warranty:
1.1.1 Australian Consumer Law means the law as set out in Schedule 2 of the Competition and Consumer Act 2010;
1.1.2 Company means GSM Retail Australia Pty Ltd ABN 53 007 682 475 of 142-144 Fullarton Road, Rose Park SA 5067. Telephone 1300 373 199. Email admin@gsmretailaust.com.au;
1.1.3 Consumer means a “consumer” as that term is defined in Section 3 of the Australian Consumer Law as the original purchaser of a Bellini product;
1.1.4 Consumer Guarantees means the guarantees under the Australian Consumer Law;
1.1.5 You means the Consumer.
1.2 Nothing in this warranty affects any person's rights under the Australian Consumer Law. The benefits to any Consumer under this warranty are in addition to the rights and remedies available under any Consumer Guarantees.
1.3 Subject to the other clauses of this warranty, the Company warrants to the Consumer that the Bellini product will be free of manufacturing defects and will perform to the Company's specifications.
1.4 The benefit of this warranty extends only to the Consumer as original purchaser of a Bellini product, which is installed in a domestic household area.
*The in Home warranty does not apply to Commercial and or industrial usage. *Please see 1.7.7 for additional information
1.5 This warranty commences on the date of purchase of the Bellini product by the Consumer and continues for the benefit only of the Consumer until the expiry of three (3) year (Warranty Period).
1.6 If within the Warranty Period a manufacturing defect is discovered in the Bellini product or it fails to perform to the Company's specifications as a result of some defect in materials, components or workmanship (Defect) then the Company will, at its option, repair the Bellini product or supply a replacement Bellini product free of charge. A replacement Bellini product may differ from the original product purchased by the Consumer.
1.7 This warranty will not apply to any Bellini product:
1.7.1 Installed by any person other than a qualified tradesperson; or
1.7.2 Subjected to misuse, neglect, negligence or accidental damage; or
1.7.3 Operated in any way contrary to any operating or maintenance instructions; or
1.7.4 Improperly handled, installed or maintained; or
1.7.5 Altered or modified prior to or after installation; or
1.7.6 Damaged directly or indirectly by power surges, electrical storm damage or connection to incorrect power supply
1.7.7 Industrial and or Commercial usage is inclusive of staff areas in office/shop environments, hotel/motel or other similar accommodation or rental type properties including Bed and Breakfast establishments.
The Australian Consumer Law requires the inclusion of the following statement
with this warranty:
Our goods come with guaranteed that cannot be excluded under the Australian Consumer Law. You are entitled to a replacement or refund for a major failure and for compensation for any other reasonably foreseeable loss or damage.
You are also entitled to have the goods repaired or replaced if the goods fail to be of acceptable quality and the failure does not amount to a major failure.
IN ORDER TO MAKE A CLAIM UNDER THIS WARRANTY THE CONSUMER
MUST CALL 1300 373 199 (AUSTRALIA) OR 0508 123 108
(NEW ZEALAND) TO CONNECT TO THE NEAREST AUTHORISED CENTRE
1.8 You must provide proof of your purchase of the Bellini product and the date of purchase in order to obtain the benefit of this warranty.
1.9 If you live outside the service area of the Company or one of its service agents, this warranty does not cover the cost of transport of the Bellini product for service nor the service agent's traveling costs to and from your home.
1.10 If you are required to transport the Bellini product to the Company or its service agent, you must ensure it is safely disconnected by a qualified tradesman and securely packed and insured. The Company does not accept any responsibility for loss or damage of the Bellini product prior to it being received by the Company or its service agent.
1.11 You will be responsible for all costs of returning a Bellini product to the Company and for redelivery of the Bellini product by the Company (whether it is the original or a repaired and/or a replacement Bellini product) and for any other expenses you incur in claiming under this warranty.
1.12 The Company or its service agent will examine any Bellini product and if the Company determines that it is defective through no fault of the Owner and is otherwise undamaged, the Company will repair or replace the Bellini product in accordance with this warranty.
DO NOT SEND IN THIS WARRANTY
Fill out the following details and file with your purchase invoice.
RETAIN & FILE WITH YOUR RECEIPT
Your Purchase Receipt/Invoice is proof of date of purchase. If you are unable to establish the date of purchase, if the fault is not covered by this warranty, or if the product is found to be in working order, you will be required to bear all service call charges.
GSM Retail Australia Pty Ltd reserves the right to discontinue items, modify designs and change specifications without incurring obligation.
Whilst every effort is made to ensure that descriptions, specifications and other information in this publication is correct, no warranty is given in respect thereof and the company shall not be liable for any errors therein.
Purchased from:
Co. Name:
Address:
Date of Purchase:
Serial number:
NOTE: Consistent with our continuing product development policy, improvements may have been made which render the contents of this packaging slightly different to that shown.
FOR WARRANTY SERVICE CALL 1300 373 199 (AUSTRALIA) OR 0508 123 108 (NEW ZEALAND) TO CONNECT YOU TO THE NEAREST AUTHORISED SERVICE CENTRE
G | S | M
Gerard Sourcing & Manufacturing
GSM RETAIL AUSTRALIA PTY LTD
The GSM Retail Australia Pty Ltd Group Companies has a policy of continual improvement throughout the product range. As such the unit contained within may differ slightly from the unit illustrated on the pack.
MADE IN CHINA for the GSM Retail Australia Pty Ltd. Group Companies



- Thank you
- Content
- Important
- Installation
- Preparing the unit for a built-in appliance
- WARNING
- Installing the hob
- Step.1
- Step.2
- Step.3
- Attention:
- Connect to the mains power supply
- Description of the appliance
- Display instructions
- Operation
- Pots and pans and how to use them
- Attention
- Safety reminding
- Maintenance and cleaning
- Cleaning techniques
- Cleaning after each use:
- Cleaning with cream detergents for glass hobs:
- Environmental note
- WARRANTY
- DO NOT SEND IN THIS WARRANTY
- RETAIN & FILE WITH YOUR RECEIPT
- FOR WARRANTY SERVICE CALL 1300 373 199 (AUSTRALIA) OR 0508 123 108 (NEW ZEALAND) TO CONNECT YOU TO THE NEAREST AUTHORISED SERVICE CENTRE
Brand : Bellini
Model : BIA64EGP
Category : Cooker