
BDI302G - Cooker Bellini - Free user manual and instructions
Find the device manual for free BDI302G Bellini in PDF.

| Product Type | Built-in Induction Cooktop |
| Brand | Bellini |
| Model | BDI302G |
| Dimensions (H x W x D) | 56 x 288 x 520 mm |
| Net Weight | 5.2 kg |
| Electrical Connection | 220-240 V ~ 50/60 Hz |
| Total Power | 3500 W |
| Cooking Zones | 2 zones: Left 140 mm (1500 W), Right 180 mm (2000 W) |
| Power Levels | 9 levels (0-9) |
| Timer | Up to 99 minutes, minute minder or zone auto-off |
| Child Lock | Yes, touch and hold to lock/unlock |
| Residual Heat Indicator | Displays 'H' when zone is hot |
| Pan Detection | Automatic; flashes 'U' if unsuitable |
| Control Type | Touch slide controls with zone selection |
| Installation Type | Built-in, cut-out required |
| Minimum Worktop Thickness | 30 mm |
| Safety Clearance Above | At least 760 mm |
| Air Ventilation Gap | 5 mm between worktop and front of unit |
| Cable Requirements | 3 x 20 A omni-polar circuit breaker |
| Suitable Cookware | Induction-compatible, flat bottom, minimum 120 mm diameter |
| Cleaning Agent | Specialized ceramic glass cooktop cleaner |
| Warranty | 3 years in-home (Australia) |
| Included Accessories | User manual, 4 fixing brackets, 4 screws ST 3.5x10 |
Frequently Asked Questions - BDI302G Bellini
User questions about BDI302G Bellini
0 question about this device. Answer the ones you know or ask your own.
Ask a new question about this device
Download the instructions for your Cooker in PDF format for free! Find your manual BDI302G - Bellini and take your electronic device back in hand. On this page are published all the documents necessary for the use of your device. BDI302G by Bellini.
USER MANUAL BDI302G Bellini
natural_image
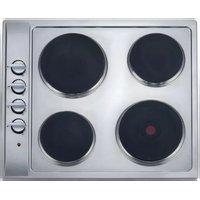
Top-down view of a two-c� electric stove burner with circular ventricles and control buttons at the bottom (no text or symbols on main body)30 cm Built In Induction Cooktop
Model No.
BDI302G Fineline: 5103058 Aust Only
BDI302G-F
Thank you
Thank you for choosing Bellini Appliances.
Bellini prides itself on ‘affordable living’ making sure there is no compromise in your favourite room ... The Kitchen
All Bellini appliances carry a 3 year In Home warranty,
be sure to retain your installation and user manual and
receipt.
For all warranty and technical queries please contact
1300 373 199
Content
Safety instructions---- 2
Product description---- 4
Installation----5
Start using your appliance----8
Maintenance 13
Warranty---- 14
Safety instructions
This manual explains the proper installation and use of your appliance, please read it carefully before using even if you are familiar with the product. The manual should be kept in a safe place for future reference. In case of failure, only the Authorised Technical Service may repair this hob. Otherwise the guarantee will be null and void. All Bellini Appliances are for domestic use only.
Warning
General safety
- The appliance may only be installed and connected by trained, registered service engineers.
● Built-in appliances may only be used after they have built in to suitable built-in units and work surfaces that meet standards. - In the event of faults with the appliance or damage to the glass ceramic(cracks, scratches or splits), the appliance must be switched off and disconnected from the electrical supply, to prevent the possibility of an electric shock.
● Repairs to the appliance must only be carried out by trained registered service engineers.
● The technical and identification data for the hob figure on the reference plate fixed to the appliance. - This reference plate must be consulted before making the electrical connections.
- The electrical connections must be made by specialist aware to the legal and regulatory, requirements in each country.
- If the cable is damaged in any way it must be replaced by the manufacturer or after sale service or by authorized technical staff, to avoid hazard.
● Power line connection: The power cord should be connected in compliance with the relevant standard, to a 3×20A omni-polar circuit breaker. - If the appliance is being connected directly to the mains an Omni-polar circuit-breaker must be installed with a minimum opening of 3mm between contacts.
Correct use
- People (including children) who, because of their physical, sensory or mental capabilities or their inexperience or ignorance are not able to use the device safely, should not use this device without supervision or instruction by a responsible person.
- The appliance is not intended to be operated by means of an external timer or separate remote-control system.
- This appliance should be used only for normal domestic cooking and frying of food.
- The appliance must not be used as a work surface or as a storage surface.
- Additions or modifications to the appliance are not permitted.
- Do not place or store flammable liquids, highly inflammable materials or fusible objects (e.g. plastic film, plastic, aluminum) on or near the appliance.
● After being used for a long time, the corresponding heating zone of the induction hotplate is still hot. Never touch the ceramic surface to avoid burning. - Do not heat an empty pan on the appliance.
Children's safety
- This appliance can be used by children aged from 8 years and above and persons with reduced physical, sensory or mental capabilities or lack of experience and knowledge if they have been given supervision or instruction concerning use of the appliance in a safe way and understand the hazards involved. Children shall not play with the appliance. Cleaning and user maintenance shall not be made by children without supervision.
- The cooking zones will become hot when you cook. Therefore, always keep small children away from the appliance.
- The appliance is not intended for use by young children or infirm persons without supervision.
- Young children should be supervised to ensure that they do not play with the appliance.
- To avoid small children and pets unintentionally switching the appliance on, we recommend activation of the child safety device.
Safety during use
- Remove stickers and film from the glass ceramic.
- There is the risk of burns from the appliance if used carelessly.
- Cables from electrical appliances must not touch the hot surface of the appliance or hot cookware.
● Overheated fats and oils can ignite very quickly. Warning! Fire hazard! - Switch the cooking zones off after each use.
- Users with implanted pacemakers should keep their upper body at least 30 cm from induction cooking zones that are switched on.
● Risk of burns! Do not place objects made of metal,
such as knives, forks, spoons and saucepan lids on the cooking surface, as they can get hot.

natural_image
Symbol of crossed-out food items with a crossed-out X (no text or labels)Safety when cleaning
- For cleaning, the appliance must be switched off and cooled down.
- For safety reasons, the cleaning of the appliance with steam jet or high pressure cleaning equipment is not permitted.
How to avoid damage to the appliance
● The glass ceramic can be damaged by objects falling onto it.
- The edge of the glass ceramic can be damaged by being knocked by the cookware.
- Cookware made of cast iron, cast aluminum or with damaged bottoms can scratch the glass ceramic if pushed across the surface.
- Objects that melt and things that boil over can burn onto the glass ceramic and should be removed straightaway.
- Do not use the cooking zones with empty cookware or without cookware.
- To avoid damaging cookware and glass ceramics, do not allow saucepans or frying pans to boil dry.
- The ventilation gap of 5mm between the worktop and front of the unit underneath it must not be covered.
| By ensuring that this appliance is disposed of correctly, you will help prevent any possible damage to the environment and to human health, which might otherwise be caused if it were disposed of in the wrong way.The symbol indicates that it may not be treated as normal household waste. It should be taken to a collection point for the recycling of electrical and electronic goods.This appliance requires specialist waste disposal. For further information regarding the treatment, recover and recycling of this product please contact your local council, your household waste disposal service, or the shop where you purchased it.For more detailed information about treatment, recovery and recycling of this product, please contact your local city office, your household waste disposal service or the shop where you purchased the product. | |
| DISPOSAL: Do not dispose this product as unsorted municipal waste. Collection of such waste separately for special treatment is necessary. |
Product description
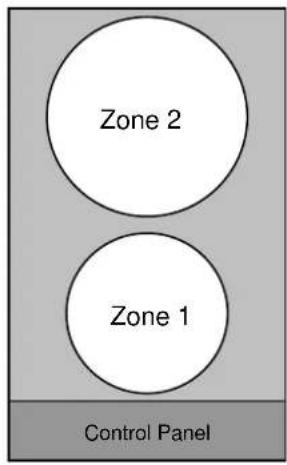
Zone 1. max. 1500 W 140mm
Zone 2. max. 2000 W 180mm

- ON/OFF control
- Power / Timer regulating controls
- Heating zone selection controls
- Timer control
- keylock control
| Accessory Name | Picture(for reference only, physical unit maybe different) | Quantity |
| User Manual 1 | ||
| Fixing Bracket 4 |  | |
| Screw ST 3.5x10 4 | 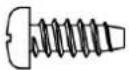 |
Technical Specifications
| Product Dimensions (h x w x d) mm | Approx. Net Weight | Electrical Connection | Rated Input Power Power Level | Max Timer Duration(min) | |
| 56x288x520 5.2Kg | 220-240V~50Hz or 60Hz | 3500W 9 | 99 | ||
Installation
Before you install the hob, make sure that
● the work surface is square and level, and no structural members interfere with space requirements
● the work surface is made of a heat-resistant material and at least 30mm thick.
- if the hob is installed above an oven, the oven has a built-in cooling fan
● the installation will comply with all clearance requirements and applicable standards and regulations
- a suitable isolating switch providing full disconnection from the mains power supply is incorporated in the permanent wiring, mounted and positioned to comply with the local wiring rules and regulations. The isolating switch must be of an approved type and provide a 3 mm air gap contact separation in all poles (or in all active [phase] conductors if the local wiring rules allow for this variation of the requirements)
● the isolating switch will be easily accessible to the customer with the hob installed
- you consult local building authorities and by-laws if in doubt regarding installation
- you use heat-resistant and easy-to-clean finishes (such as ceramic tiles) for the wall surfaces surrounding the hob.
When you have installed the hob, make sure that
● the power supply cable is not accessible through cupboard doors or drawers
● there is adequate flow of fresh air from outside the cabinetry to the base of the hob
- if the hob is installed above a drawer or cupboard space, a thermal protection barrier is installed below the base of the hob
● the isolating switch is easily accessible by the custom er
Before locating the fixing brackets
The unit should be placed on a stable, smooth surface (use the packaging). Do not apply force onto the controls protruding from the hob.
Adjusting the bracket position
Fix the hob on the work surface by screw 4 brackets on the bottom of hob(see picture) after installation.
Adjust the bracket position to suit for different table top thickness.

natural_image
Technical line drawing of a battery pack with a magnified inset showing internal components (no text or symbols)Cautions
- The induction hotplate must be installed by qualified personnel or technicians. We have professionals at your service. Please never conduct the operation by yourself.
- The hob will not be installed directly above a dishwasher, fridge, freezer, washing machine or clothes dryer, as the humidity may damage the hob electronics
- The induction hotplate shall be installed such that better heat radiation can be ensured to enhance its reliability.
● The wall and induced heating zone above the table surface shall withstand heat.
● To avoid any damage, the sandwich layer and adhesive must be resistant to hea t.
1. Cupboard Cutting

Under any circumstances, make sure the Induction cooker hob is well ventilated and the air inlet and outlet are not blocked. Ensure the Induction cooker hob is in good work state. As shown below

Note: The safety distance between the hotplate and the cupboard above the hotplate should be at least 760mm.

| A(mm) | B(mm) | C(mm) | D | E | |
| 760 50 | mini | 30 | mini | Air intake | Air exit 10mm |
2. Electrical connection.
Important:
● the domestic wiring system is suitable for the power drawn by the hob.
● the voltage corresponds to the value given in the rating plate
● the power supply cable sections can withstand the load specified on the rating plate.
- To connect the hob to the mains power supply, do not use adapters, reducers, or branching devices, as they can cause overheating and fire.
- The power supply cable must not touch any hot parts and must be positioned so that its temperature will not exceed 75°C at any point.
- Check with an electrician whether the domestic wiring system is suitable without alterations. Any alterations must only be made by a qualified electrician.
- If the cable is damaged or to be replaced, the operation must be carried out the by after-sale agent with dedicated tools to avoid any accidents.
- If the appliance is being connected directly to the mains an omnipolar circuit-breaker must be installed with a minimum opening of 3mm between contacts.
- The installer must ensure that the correct electrical connection has been made and that it is compliant with safety regulations.
● The cable must not be bent, kinked or compressed.
● The cable must be checked regularly and replaced by authorised technicians only.
Step 1: Undo screws, open terminal board cover at rear panel of appliance, make connection as per below

Step 2: close the cover and complete electrical connection.
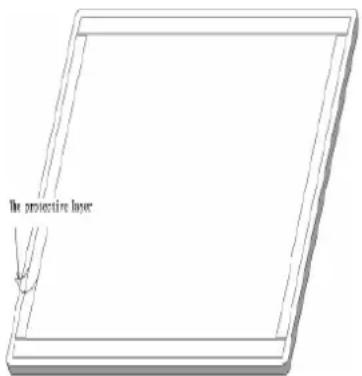
3. Finally fix the appliance
- Place the hob face down on a table.
- Remove the protective layer.
- Place the hob in the hole made in the cupboard,
- pressing it firmly in so that it is closed off by the seal.
Hard Wired Appliances :
When making the mains supply conductor connections to the terminal block within the terminal box, please ensure that minimum clearances are being maintained between individual conductors and conductors/connectors to the adjacent metal surfaces of the terminal box itself, where possible add heat shrink sleeves to any bare conductor end/connectors prior to securing.
Start using your appliance
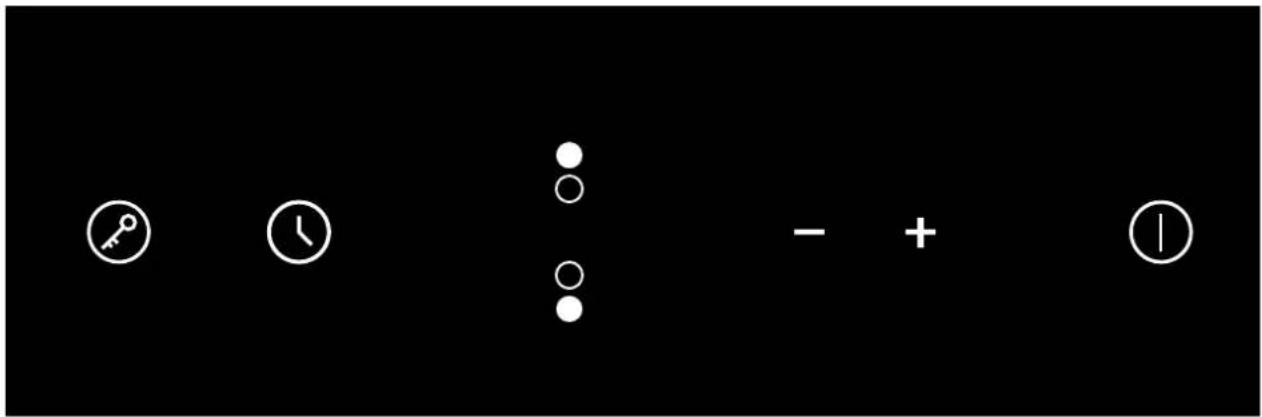
| Description Explanation | ||
 Zone indicators Zone indicators | These show the above touch control sensor is controlling which zone of the appliance. | |
 Slide control to Increase/decrease power or increase/decrease of timer Slide control to Increase/decrease power or increase/decrease of timer | Power setting of the zones, from 0 to 9, for example, this display shows lower-right-hand zone power selected at level 6 | |
 Timer Timer | You can use it as a simple minute minder or timer to control one or more zones. Max timer setting is 99min. | |
 Child lock Child lock | Touch it to lock keys(display show “Lo”) and press and hold for a while to unlock. When it is activated, none of the other buttons can be activated except for On/Off. | |
 On/Off On/Off | Turn on/off the appliance. You will see “0” display above power setting when turn on the appliance. | |
 | Residual heat indicator | An H lights up on the power display to indicate that a particular zone is very hot and should not be touched. It may remain on up to approximately 30 minutes. Depending on the power setting selected. |
Start cooking
-
Power on the unit, the buzzer beeps once, all displays show “—” or “—”, indicating that the induction hob has entered the state of standby mode.
-
Touch the ON/OFF ① control.
-
Place a suitable pan on the cooking zone that you wish to use.
-
Touching the heating zone selection control, and a indicator next to the key will flash

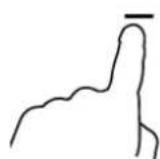
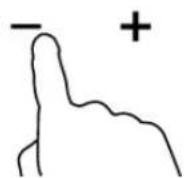
- Adjust heat setting by touching the “-” and “+”.
NOTE:
- If you don't choose a heat setting within 1 minute, the Induction hob will automatically switch off. You will need to restart from step 2.
- You can modify the heat setting at any time during cooking g.
- Your induction cooktop can automatically detect if the pan you placed is suitable or not, when display flashes ≥ Uthen the pan is not suitable for this appliance.
When you have finished cooking
- Touching the heating zone selection control that you wish to switch off

- Turn the cooking zone off by scrolling down to "0" or touching"-and"+ control together. Make sure the display shows"0"

OR

- Turn the whole cooktop off by touching the ON/OFF control.

- Beware of hot surfaces
H will show which cooking zone is hot to touch. It will disappear when the surface has cooled down to a safe temperature. It can also be used as an energy saving function if you want to heat further pans, use the hotplate that is still hot.

Work with timer:
You can use the timer in two different ways:
- You can use it as a minute minder. In this case, it will not turn any cooking zone off when the set time is up.
● You can set the timer up to 99 minutes.
Example: To set it as 95 minute minder
- Make sure the cooktop is turned on.
Note: you can use the minute minder even if you're not selecting any cooking zone.
- Touch timer control, the "10" will show in the timer display and the "0" flashes.

- Adjust the timer setting by touch the “-” or “+” controls. The minute minder indicator will start flashing and will show in the timer display.
Hint: Touch the “-” or “+” control of the timer once to decrease or increase by 1 minute.
Touch and hold the “-” or “+” control of the timer to decrease or increase by 10 minutes.
If the setting time exceeds 99 minutes, the timer will automatically return to 0 minute.
-
Touching the"- " and "+" together, the timer is cancelled, and the"00" will show in the minute
-
display.

- Then the time is set, it will begin to count down immediately. The display will show the remaining time
- Buzzer will beep for 30 seconds and the timer indicator shows “- -” when the setting time finished.
Example: To set it as 95 minute timer
- Touch the heating zone selection control that you want to set the timer for.
- Touch timer control, the "10" will show in the timer display. and the "0" flashes.

- Adjust the timer setting by touch the “-” or “+” controls. The minute minder indicator will start flashing and will show in the timer display.

Hint: Touch the “-” or “+” control of the timer once to decrease or increase by 1 minute.
Touch and hold the “-”or“+” control of the timer to decrease or increase by 10 minutes.
If the setting time exceeds 99 minutes, the timer will automatically return to 0 minute.
- When the time is set, it will begin to count down immediately. The display will show the remaining time
- When time is up, the corresponding cooking zone will be switch off automatically.
NOTE:
The red dot next to power level indicator will illuminate indicating that zone is selected.
Cancel the timer:
- Touching the heating zone selection control that you want to cancel the timer
- Touching the timer control, the indicator flash
- Touching the"- " and "+" together, the timer is cancelled
Cooking tips:
| Heat setting | Suitability |
| 1 - 2 | ·delicate warming for small amounts of food·melting chocolate, butter, and foods that burn quickly·gentle simmering·slow warming |
| 3 - 4 | ·reheating·rapid simmering·cooking rice |
| 5 - 6 | ·pancakes |
| 7 - 8 | ·sautéing·cooking pasta |
| 9 | ·stir-frying·searing·bringing soup to the boil·boiling water |
When food comes to the boil, reduce the temperature setting.
- Using a lid will reduce cooking times and save energy by retaining the heat.
- Minimize the amount of liquid or fat to reduce cooking times.
- Start cooking on a high setting and reduce the setting when the food has heated through h.
Simmering, cooking rice
- Simmering occurs below boiling point, at around 85°C, when bubbles are just rising occasionally to the surface of the cooking liquid. It is the key to delicious soups and tender stews because the flavours develop without overcooking the food. You should also cook egg-based and flour thickened sauces below boiling point.
- Some tasks, including cooking rice by the absorption method, may require a setting higher than the lowest setting to ensure the food is cooked properly in the time recommended.
Searing steak
To cook juicy flavoursome steaks:
- Stand the meat at room temperature for about 20 minutes before cooking.
- Heat up a heavy-based frying pan.
- Brush both sides of the steak with oil. Drizzle a small amount of oil into the hot pan and then lower the meat onto the hot pan.
- Turn the steak only once during cooking. The exact cooking time will depend on the thickness of the steak and how cooked you want it. Times may vary from about 2 – 8 minutes per side. Press the steak to gauge how cooked it is – the firmer it feels the more ‘well done’ it will be.
- Leave the steak to rest on a warm plate for a few minutes to allow it to relax and become tender before serving.
For stir-frying
- Choose an induction compatible flat-based wok or a large frying pan.
- Have all the ingredients and equipment ready. Stir-frying should be quick. If cooking large quantities, cook the food in several smaller batches.
- Preheat the pan briefly and add two tablespoons of oil.
-
Cook any meat first, put it inside and keep warm.
-
Stir-fry the vegetables. When they are hot but still crisp, turn the cooking zone to a lower setting, return the meat to the pan and add your sauce.
- Stir the ingredients gently to make sure they are heated through.
- Serve immediately.
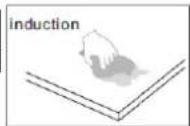
To choose proper pan
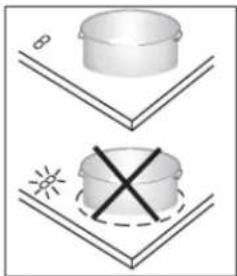
natural_image
Diagram showing two containers with different shapes and symbols, one marked with a cross and the other with a lightning bolt (no text or labels)You appliance can tell whether the pan you are using is suitable or not. If the power indicator is flashing, that means pan is not suitable and won't heat up.
Following up below points will help you choose proper pan.
1. Choose proper pan bottom size
| Zone Diameter(mm) Suggested minimum pan bottom diameter(mm) | |
| 140 120 | |
| 180 120 | |
2. Choose prop er pan base
Different types of pan are suitable for induction cooking, but those with a thick base are the best.
It is recommended to use flat-bottom pans with. Do not use pans with a rough base to prevent scratching the heat surface of the cooktop

3. Choose proper pan m aterial
Glass, ceramic, earthen-ware, aluminum, copper and non-magnetic stainless steel pans are generally unsuitable. However, enameled stainless steel pans with a special base suitable for induction cooking may be used (make sure the pan is labeled as suitable for induction cooking).
Caution:
- Avoid scraping the glass of the hob when you move the pans. Lift them up to move.
- Do not leave any cooking utensils on the hob when it is switched on. It could detect them as pans and heat them up.
- Never heat an empty pan.

Maintenance & Troubleshooting


Caution:
Before maintenance or cleaning is carried out, the cooktop should be disconnected from the main power supply. Ensure that the cooktop is switched off at the wall socket and the plug removed.
● Spills and splashes will not harden and stick to the glass, as it hardly heats up.
- Both Vitro-ceramic and induction rings should however be cleaned of any spills or splashes as quickly as possible.
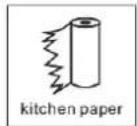
- Slight stains can be removed with kitchen paper or cloth. Do not use steam clearer.
- More resistant stains will need specific product for vitro-ceramic glass. Follow each product's instructions.
- To avoid the chance of permanent damage from stains and spills, it is recommended you clean any residue off the glass by using an cleaner that is specially formulated for cleaning & polishing ceramic glass cooktops.
- Switch off the appliance from the electrical supply, wait for the glass to completely cool down and use a cleaner that is non-scratch and formulated to remove stains & spills; avoid using general household cleaners that may scratch or damage your cooktop.
| What? How? | Important! | |
| Everyday soiling on glass (fingerprints, marks, stains left by food or non-sugary spillovers on the glass) | 1. Switch the power to the cooktop off.2. Apply a cooktop cleaner while the glass is still warm (but not hot!)3. Rinse and wipe dry with a clean cloth or paper towel.4. Switch the power to the cooktop back on. | When the power to the cooktop is switched off, there will be no ‘hot surface’ indication but the cooking zone may still be hot! Take extreme care.Heavy-duty scourers, some nylon scourers and harsh/abrasive cleaning agents may scratch the glass. Always read the label to check if your cleaner or scourer is suitable.Never leave cleaning residue on the cooktop: the glass may become stained. |
| Boilovers, melts, and hot sugary spills on the glass | Remove these immediately with a fish slice, palette knife or razor blade scraper suitable for Induction glass cooktop, but beware of hot cooking zone surfaces:1. Switch the power to the cooktop off at the wall.2. Hold the blade or utensil at a 30° angle and scrape the soiling or spill to a cool area of the cooktop.3. Clean the soiling or spill up with a dish cloth or paper towel.4. Follow steps 2 to 4 of ‘Everyday soiling on glass’ above. | Remove stains left by melts and sugary food or spillovers as soon as possible. If left to cool on the glass, they may be difficult to remove or even permanently damage the glass surface.Cut hazard: when the safety cover is retracted, the blade in a scraper is razor-sharp. Use with extreme care and always store safely and out of reach of children. |
| Spillovers on the touch controls | 1. Switch the power to the cooktop off.2. Soak up the spill3. Wipe the touch control area with a clean damp sponge or cloth.4. Wipe the area completely dry5. with a paper towel.6. Switch the power to the cooktop back on. | The cooktop may beep and turn itself off, and the touch controls may not function while there is liquid on them. Make sure you wipe the touch control area dry before turning the cooktop back on. |
WARRANTY
1.1 In this warranty:
1.1.1 Australian Consumer Law means the law as set out in Schedule 2 of the Competition and Consumer Act 2010;
1.1.2 Company means GSM Retail Australia Pty Ltd ABN 53 007 682 475 of 142-144 Fullarton Road, Rose Park SA 5067. Telephone 1300 373 199. Email admin@gsmretailaust.com.au;
1.1.3 Consumer means a "consumer" as that term is defined in Section 3 of the Australian Consumer Law as the original purchaser of a Belliniproduct;
1.1.4 Consumer Guarantees means the guarantees under the Australian Consumer Law;
1.1.5 You means the Consumer.
1.2 Nothing in this warranty affects any person's rights under the Australian Consumer Law. The benefits to any Consumer under this warranty are in addition to the rights and remedies available under any Consumer Guarantees.
1.3 Subject to the other clauses of this warranty, the Company warrants to the Consumer that the Bellini product will be free of manufacturing defects and will perform to the Company's specifications.
1.4 The benefit of this warranty extends only to the Consumer as original purchaser of a Bellini product which is installed in a domestic household area.
*The in Home warranty does not apply to Commercial and or industrial usage. * Please See 1.7.7 for additional information
1.5 This warranty commences on the date of purchase of the Bellini product by the Consumer and continues for the benefit only of the Consumer until the expiry of three (3) year (Warranty Period).
1.6 If within the Warranty Period a manufacturing defect is discovered in the Bellini product or it fails to perform to the Company's specifications as a result of some defect in materials, components or workmanship (Defect) then the Company will, at its option, repair the Bellini product or supply a replacement Bellini product free of charge. A replacement Bellini product may differ from the original product purchased by the Consumer.
1.7 This warranty will not apply to any Bellini product:
1.7.1 Installed by any person other than a qualified tradesperson; or
1.7.2 Subjected to misuse, neglect, negligence or accidental damage; or
1.7.3 Operated in any way contrary to any operating or maintenance instructions; or
1.7.4 Improperly handled, installed or maintained; or
1.7.5 Altered or modified prior to or after installation; or
1.7.6 Damaged directly or indirectly by power surges, electrical storm damage or connection to incorrect power supply
1.7.7 Industrial and or Commercial usage is inclusive of staff areas in office/shop environments, hotel/motel or other similar accommodation or rental type properties including Bed and Breakfast establishments.
The Australian Consumer Law requires the inclusion of the following
statement with this warranty:
Our goods come with guaranteed that cannot be excluded under the Australian Consumer Law. You are entitled to a replacement or refund for a major failure and for compensation for any other reasonably foreseeable loss or damage. You are also entitled to have the goods repaired or replaced if the goods fail to be of acceptable quality and the failure does not amount to a major failure.
IN ORDER TO MAKE A CLAIM UNDER THIS WARRANTY THE CONSUMER
MUST CALL 1300 373 199 (AUSTRALIA) OR 0800 764 912
(NEW ZEALAND) TO CONNECT TO THE NEAREST AUTHORISED CENTRE
1.8 You must provide proof of your purchase of the Bellini product and the date of purchase in order to obtain the benefit of this warranty.
1.9 If you live outside the service area of the Company or one of its service agents, this warranty does not cover the cost of transport of the Bellini product for service nor the service agent's traveling costs to and from your home.
1.10 If you are required to transport the Bellini product to the Company or its service agent, you must ensure it is safely disconnected by a qualified tradesman and securely packed and insured. The Company does not accept any responsibility for loss or damage of the Bellini product prior to it being received by the Company or its service agent.
1.11 You will be responsible for all costs of returning a Bellini product to the Company and for redelivery of the Bellini product by the Company (whether it is the original or a repaired and/or a replacement Bellini product) and for any other expenses you incur in claiming under this warranty.
1.12 The Company or its service agent will examine any Bellini product and if the Company determines that it is defective through no fault of the Owner and is otherwise undamaged, the Company will repair or replace the Bellini product in accordance with this warranty.
DO NOT SEND IN THIS WARRANTY
Fill out the following details and file with your purchase invoice.
RETAIN & FILE WITH YOUR RECEIPT
Your Purchase Receipt/Invoice is proof of date of purchase. If you are unable to establish the date of purchase, or if the fault is not covered by this warranty, or if the product is found to be in working order, you will be required to bear all service call charges.
GSM Retail Australia Pty Ltd reserves the right to discontinue items, modify designs and change specifications without incurring obligation.
Whilst every effort is made to ensure that descriptions, specifications and other information in this publication is correct, no warranty is given in respect thereof and the company shall not be liable for any errors therein.
Purchased from:
Co. Name:
Address:
Date of Purchase:
Serial number:
NOTE: Consistent with our continuing product development policy, improvements may have been made which render the contents of this packaging slightly different to that shown.
FOR WARRANTY SERVICE CALL 1300 373 199 (AUSTRALIA) OR 0800 764 912 (NEW ZEALAND) TO CONNECT YOU TO THE NEAREST AUTHORISED SERVICE CENTRE

Gerard Sourcing & Manufacturing
GSM RETAIL AUSTRALIA PTY LTD
The GSM Retail Australia Pty Ltd Group Companies has a policy of continual improvement throughout the product range. As such the unit contained within may differ slightly from the unit illustrated on the pack.
MADE IN CHINA for the GSM Retail Australia Pty Ltd. Group Companies


- Thank you
- Content
- Safety instructions
- Warning
- General safety
- Correct use
- Children's safety
- Safety during use
- Safety when cleaning
- How to avoid damage to the appliance
- Product description
- Installation
- Before you install the hob, make sure that
- When you have installed the hob, make sure that
- Before locating the fixing brackets
- Adjusting the bracket position
- Cautions
- Cupboard Cutting
- Electrical connection.
- Important:
- Finally fix the appliance
- Hard Wired Appliances :
- Start using your appliance
- Start cooking
- NOTE:
- When you have finished cooking
- Work with timer:
- Cancel the timer:
- Cooking tips:
- Simmering, cooking rice
- Searing steak
- For stir-frying
- To choose proper pan
- Choose proper pan bottom size
- Choose prop er pan base
- Choose proper pan m aterial
- Caution:
- Maintenance & Troubleshooting
- WARRANTY
- In this warranty:
- DO NOT SEND IN THIS WARRANTY
- RETAIN & FILE WITH YOUR RECEIPT
- FOR WARRANTY SERVICE CALL 1300 373 199 (AUSTRALIA) OR 0800 764 912 (NEW ZEALAND) TO CONNECT YOU TO THE NEAREST AUTHORISED SERVICE CENTRE
Brand : Bellini
Model : BDI302G
Category : Cooker