
BV765BLC - DVD player BOSS - Free user manual and instructions
Find the device manual for free BV765BLC BOSS in PDF.


| Product Type | DVD/MP3/CD AM/FM Receiver with Bluetooth |
| Brand | Boss Audio Systems |
| Model | BV765BLC |
| Dimensions (W x D x H) | 6.5 x 7.0 x 3.9 inches |
| Weight | 4.6 lbs |
| Power Supply | 11-16V DC, max 10A |
| Maximum Power Output | 80W x 4 channels |
| Display | 6.5-inch TFT, 800x480 resolution |
| Aspect Ratio | 4:3 / 16:9 selectable |
| Compatible Disc Formats | DVD±R/RW, CD±R/RW, MP3, WMA, JPEG |
| USB Interface | USB 2.0, supports MP3, WMA, MPEG1, MPEG2, AVI |
| SD Card Slot | SD/MMC, supports MP3, WMA |
| Bluetooth | Hands-free calling and A2DP music streaming |
| Radio Bands | FM (18 presets) and AM (12 presets) |
| Remote Control Battery | CR2025 (3V) lithium cell |
| Working Temperature | -4°F to +140°F |
| Care & Cleaning | Wipe with soft cloth; clean discs from center outward |
| Safety Feature | Parking brake interlock for video playback |
| Spare Parts Available | Remote control, power cable, mounting bracket, trim ring |
| Repairability | Fuse replaceable; reset button for microcomputer |
Frequently Asked Questions - BV765BLC BOSS
User questions about BV765BLC BOSS
0 question about this device. Answer the ones you know or ask your own.
Ask a new question about this device
Download the instructions for your DVD player in PDF format for free! Find your manual BV765BLC - BOSS and take your electronic device back in hand. On this page are published all the documents necessary for the use of your device. BV765BLC by BOSS.
USER MANUAL BV765BLC BOSS
To ensure safety while driving
and to comply with laws,
drivers should not watch video or
operate the video device while driving.
Congratulations on your purchase of a Boss Audio Systems Multimedia Receiver. It has been designed, engineered and manufactured to bring you the highest level of performance and quality, and will offer you years of entertainment pleasure.
Content
Accessories 02
Unit Installation....03
Wire Connection....03
Parking Brake Connection 04
Speaker connection....05
Button Description....06
Remote Control....07
Main Menu....10
Radio Operation....10
DVD Operation....11
USB /SD Operation....12
Settings Operation 12
Bluetooth Operation....15
Aux-In Operation 17
Notes of Disc....18
Troubleshooting 19
General Specification....21
Package contains the following accessories for installation and operation of the unit.
| (1) Washer, Spring(2) Washer, M5 Nut | 1 | 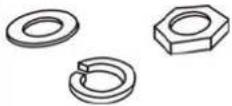 | (5) Rubber Cushion | 1 | 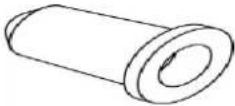 | |
| (3) Screw | 1 | 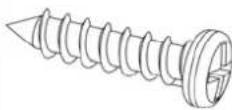 | (6) Screw | 8 | 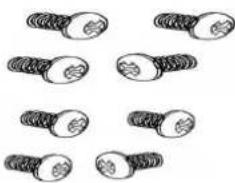 | |
| (4) Bolt | 1 | 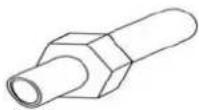 | (7)installation bracket | 1 | Left | 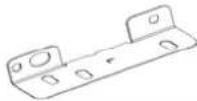 |
| 1 | Right | 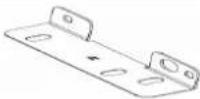 | ||||
| (5) Mounting Strap | 1 |  | ||||
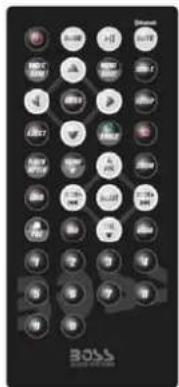
Remote Control
Power Cable
Trim Ring
User Manual
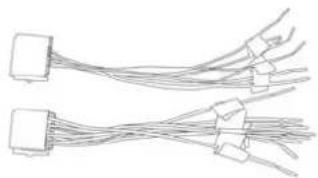
natural_image
Two types of electrical connectors with wires, no text or symbols visible
natural_image
Blank rectangular frame with black border (no text or symbols)
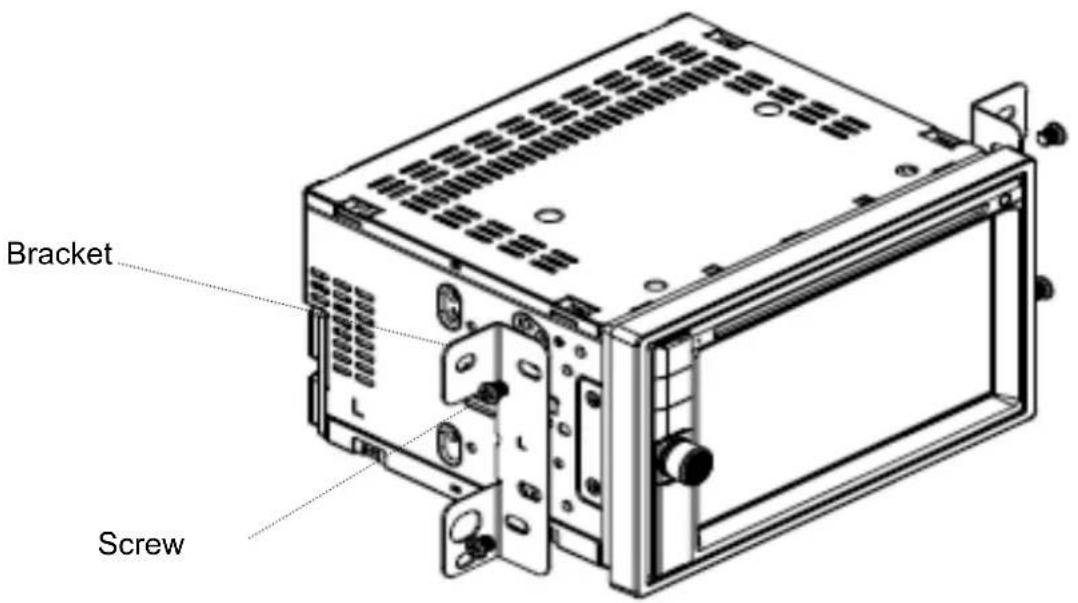
- Put the 2 brackets to the left and right side of the unit;
- Use screws to fix the brackets to the unit.
Wire Connection
The Description of the Input/output Interface of the Rear Chassis
![Subwoofer OUTPUT Camera in Rear PRE-AMP OUTPUT Video OUTPUT Front PRE-AMP OUTPUT SWC Light Green Parking Brake Violet / White Rear View Camera A B Connector A Green......Rear Left (+) Green/Black......Rear Left (-) White......Front Left (+) White/Black......Front Left (-) Grey......Front Right (+) Grey/Black......Front Right (-) Violet......Rear Right (+) Violet/Black......Rear Right (-) Connector B Yellow......[B+]12V Red......[+12V] ACC Blue......ANT +12V DC Black......Ground](/content/2026/05/927935/images/e27b5aa500bdb9e482d4b6ac44bfde39118c6555110b91a237874388121671e8.jpg)
In order to view videos, the parking brake wire must be connected, and the vehicle stopped
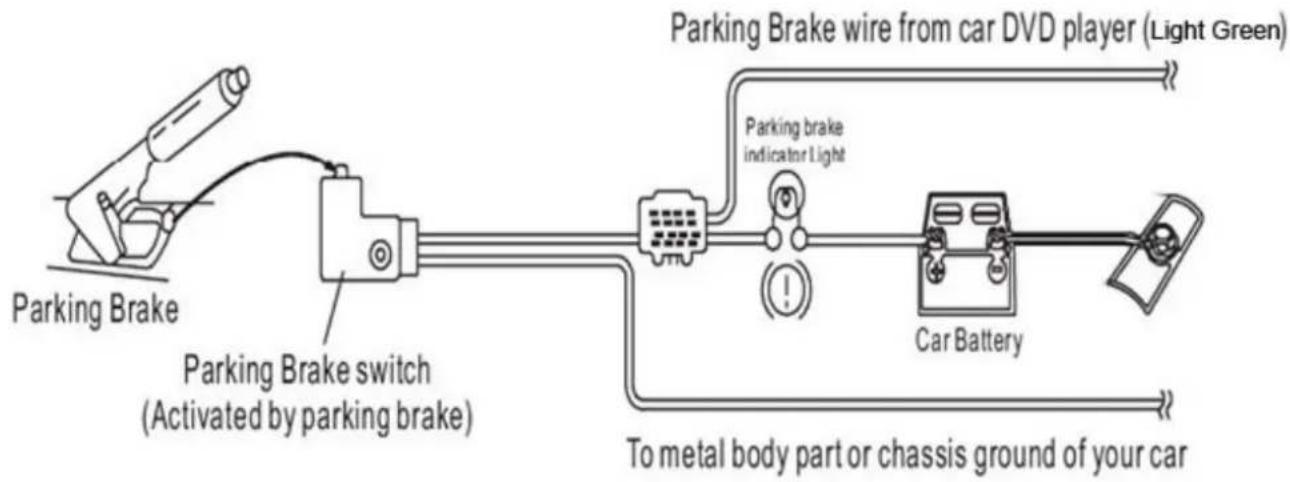
flowchart
graph LR
    A["Parking Brake"] --> B["Operating Brake"]
    B --> C["Car Battery"]
    C --> D["To metal body part or chassis ground of your car"]
    B --> E["Parking Brake switch (Activated by parking brake)"]
    E --> F["Parking Brake wire from car DVD player (Light Green)"]
    F --> G["Warning Light"]
    G --> H["Warning Light"]
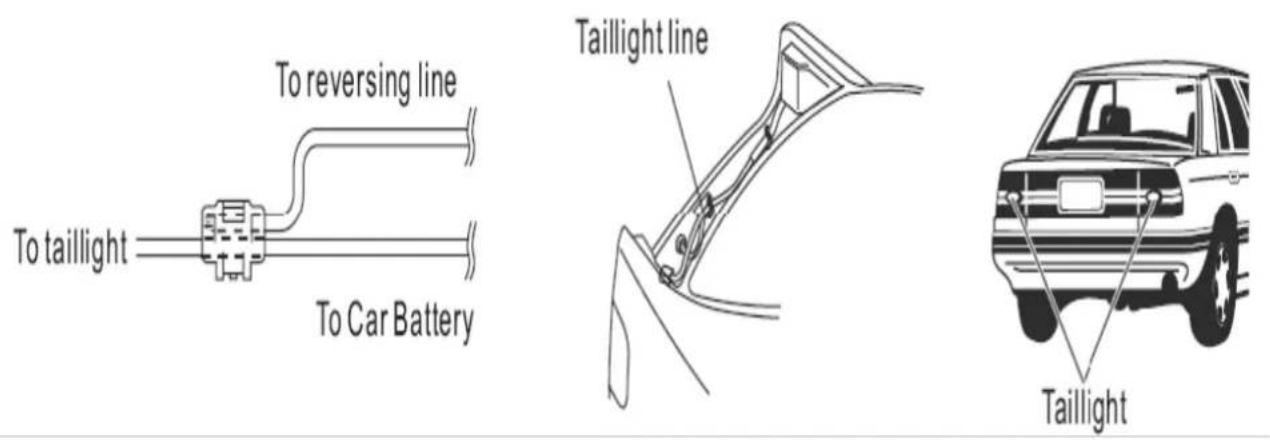
Connecting the reversing line to taillight on the car
Speaker Connection
Connect the speakers according the following diagram, incorrect connections may damage the unit and/or your speakers. Do not chassis ground speakers. Always observe correct polarity.
Correct connection
Left front - Right front | Left rear - Right rear
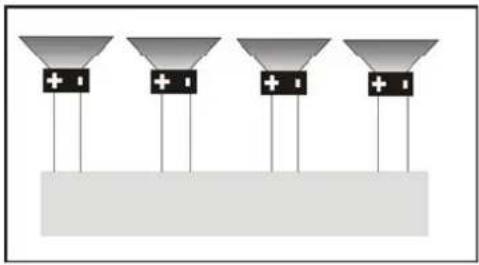
natural_image
Diagram of four identical funnel-shaped objects with plus signs placed on a base, no text or symbols present.Incorrect connections
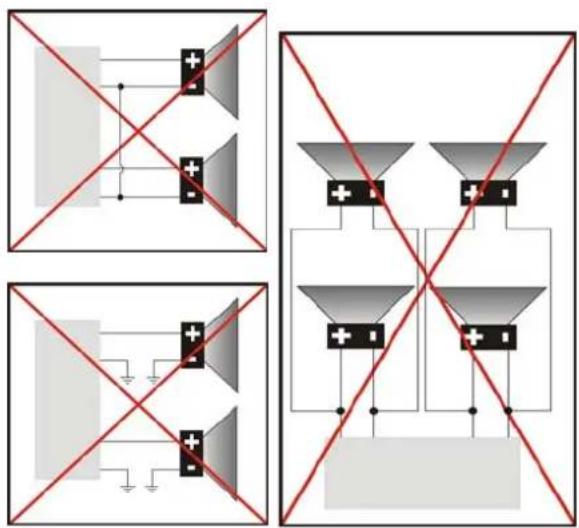
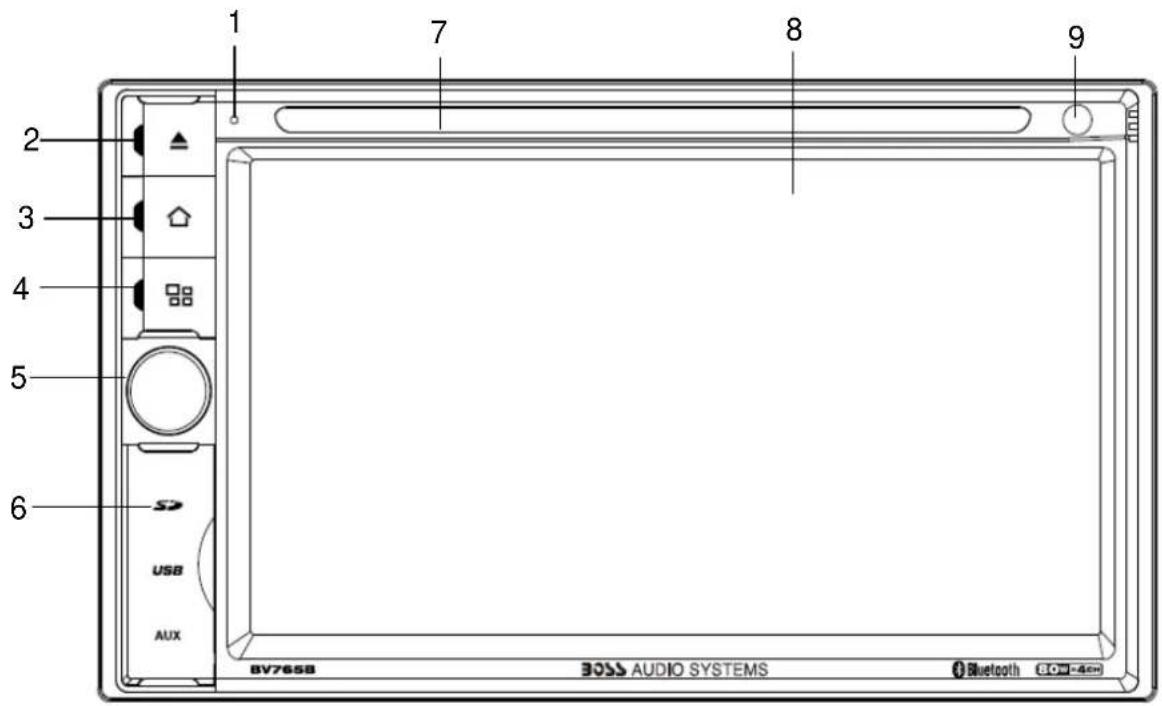
-
MIC
-
EJECT Button
Press to eject a disc. If the disc is not removed for about 10 seconds after eject, the disc is reinserted automatically.
- HOME BUTTON
Press home button to return back to main menu.
- SOURCE BUTTON
Press source button to change mode.
- POWER / MUTE Button / VOL
Press it to turn on the unit. Press and hold for 2 seconds to turn the unit off .Press the button.
briefly to mute .Please notes that the volume will be muted on all audio output connector.
Press VOL knob to power on unit and Press and hold for 2 seconds to turn the unit off
Rotate VOL knob to increase or reduce the volume.
- USB/ SD/ AUX
USB for Multimedia playback files only. insert a USB into this slot and the unit will automatically start reading and playback. * Supported Music File Format: MP3, WMA files.
SD card slot, for Multimedia playback files only. Insert a SD CARD into this slot and the unit will automatically start reading and playback. * Supported Music File Format: MP3, WMA files
Put the Aux plug into the Aux-In jack which was marked on front panel.
-
DISC Slot
-
Display
LCD display Information when operation the unit.
- Remote Sensor
Remote control signal receiving window. Max distance is 6-8 meters, 45 angels.
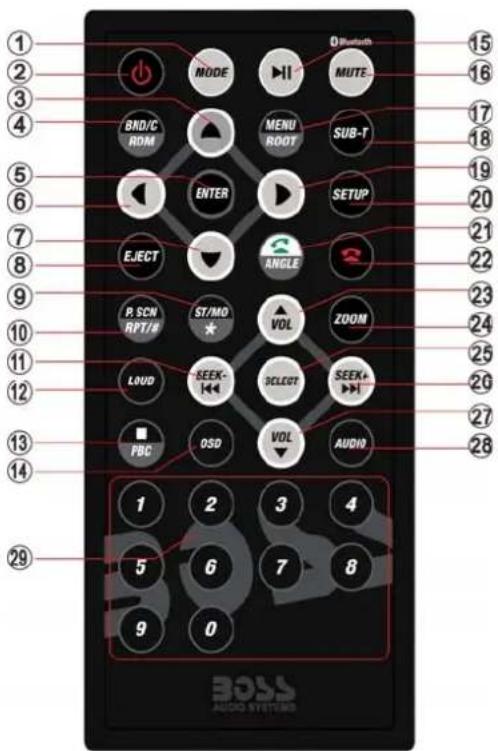
1: MODE
2: POWER
3: UP
4: BAND/RANDOM/CLEAR
5: ENTER
6: LEFT
7: DOWN
8: EJECT
9: STEREO/MONO/*
10:P.SCAN/REPEAT/#
11: SEEK-/BACKWARD
12: LOUD
13: STOP/PBC
14: OSD
15: PLAY/PAUSE
16: MUTE/BLUETOOTH
17: MENU/ROOT
18: SUBTITLE
19: RIGHT
20: SETUP
21: DIAL/ANGLE
22: HANG UP
23: VOLUME UP
24: ZOOM
25: SELECT
26: SEEK+/FORWARD
27: VOLUME DOWN
28: AUDIO
29: NUMERIC KEY
1. MODE button
Press it to select the mode: radio, disc (if there is a disc in unit), USB (if there is a USB device in the unit), SD (if there is a SD/MMC card in the unit), Bluetooth, Aux-In
2. POWER button
Power on or power off.
3. UP button
Press it to move the cursor up.
4. BAND/ RDM/ CLEAR button
In radio mode, press to change radio band in sequence of FM1 → FM2 → FM3 → AM1 → AM2; In DVD mode, press to play randomly; In Bluetooth mode, short press it to clear the single phone number; long press it to clear all the phone number.
5: ENTER
Press it to confirm your selection
6. LEFT button
Press it to move the cursor left
7. DOWN button
Press it to move the cursor d
8. EJECT button
Press it to eject the disc.
9. STEREO/ MONO/ \* button
Press to switch the radio in stereo and mono sound. In Bluetooth mode, press it to make a symbol.
10. P.SCN/ RPT / # button
In DVD mode, press to repeat REP 1 => REP Title => REP ALL.
In SD /USB mode, press to repeat REP 1 => REP Dir => REP ALL.
In radio mode, PS (preset scan): Press to scan all preset stations in the memory of the CPU and stay on each memory stations for about 5 seconds.
AS (Auto Save), long press to save the stations with good reception automatically.
In bluetooth mode, press it to make a # symbol.
11. / SEEK- button
In DVD mode, press ◀ button to skip to the previous track, press and hold ◀ button for two seconds to activate fast reverse (REW) search in a track.
In radio mode, press and hold ◀ button to select station backward automatically, touch again will stop select station. ◀ button frequency down.
12. LOUD
Press to select loudness on or off.
13. STOP/ PBC button
Press to stop playback from the current position, press again to final stop from the beginning. Press play/pause button to play.
14. OSD button
In DVD mode press to show disc playing information.
15. PLAY/ PAUSE button
In DVD/USB/SD mode, press it to break playback, press again to resume playback.
16. Mute button/ Bluetooth button
X : Short press to mute the volume output, press again to resume volume.
Long press this button to enter into Bluetooth mode (Hands free).
17. MENU/ ROOT button
Press it to show main menu, in DVD mode, long press it to enter title menu (Available only if the DVD disc with title menu).
18. SUBTITLE button
Press it to select the subtitle language (Available only if the disc with subtitle function).
19. RIGHT button
Press it to move cursor right.
20. SETUP button
In DVD mode press it to enter the setup menu, press again to resume playback.
21. Dial button/ ANGLE Button
In DVD mode, press it repeatedly to change the viewing angle (Available only with a recorded DVD file or DVD disc has this function).
In Bluetooth mode, press to make a call after inputted a phone number or accept an incoming call.
22. HANG UP button
In Bluetooth mode, press to reject a coming call or hang up while calling.
23. VOLUME UP button
Press to increase volume level.
24. ZOOM button
In DVD mode Press to zoom the image in or out in the sequence of zoom 2-> zoom 3-> zoom4-> zoom 5-> zoom 1/2-> zoom 1/3-> zoom 1/4-> zoom off.
25. SELECT button
Press it to enter the EQ setting menu, and press cursor up/down button to choose an item and press cursor left/right buttons to set the item, press select button again to exit the menu.
26. SEEK + buttons
In DVD mode, press ▶ button to skip to the next track, press and hold ▶ button for two seconds to activate fast forward (FF) search in a track.
In radio mode, press and hold ▶ button to select station forward automatically, touch again will stop select station. ▶ button frequency up.
27. VOLUME DOWN button
Press to decrease volume level.
28. AUDIO
In DVD mode press it to select the audio language.
29. NUMERIC KEY
In radio mode, select 1-6 the desired band; In DVD mode, select track.
In Bluetooth mode, press to input phone number, long press 0 number to make a + symbol.
Note:
■ The distance may vary according to the brightness of ambient light.
If the remote is not used for an extended period of time, remove the battery to prevent possible damage from battery leakage and corrosion.
■ Do not place any objects between the remote control unit and the sensor on the unit.
■ Do not drop the remote control onto the floor; it will damage it beyond repair.
■ Do not use the remote control unit, while simultaneously operating the remote control unit of any other equipment; they may interfere resulting in improper operation.
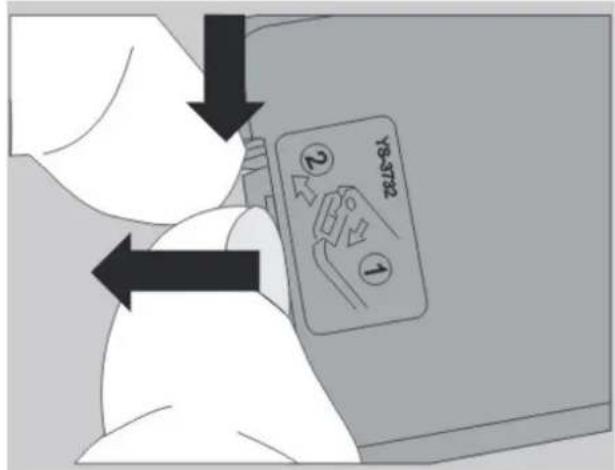
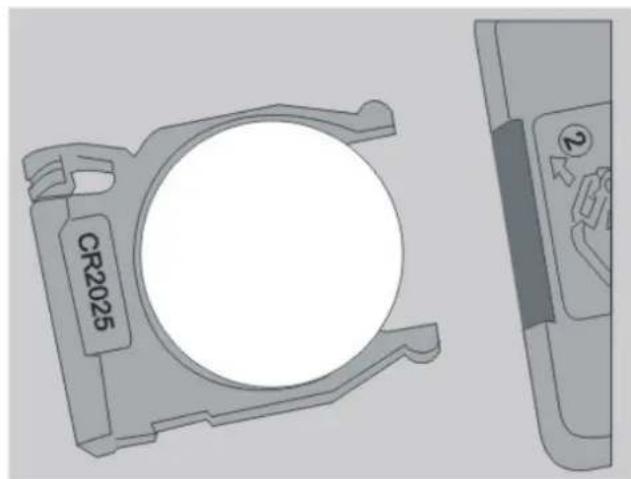
The battery normally last for about one year although depending how often the remote control is used. If the remote control unit isn't working even when it is operated near the unit, replace the battery with a new battery of the same make and use only a lithium cell battery type: CR2025 (3V).
■ Dispose empty batteries in accordance with your local governmental regulations.
■ Do not short-circuit, disassemble, heat or dispose of fire or flames the battery.
- Keep the battery out of reach of children, should the battery be swallowed, immediately consult a doctor.
natural_image
Technical drawing of a mechanical component with circular center and side view (no text or symbols)Main Menu
The best way to discover the program is to explore each screen in detail, and to find out how to move from one to another. Read this chapter for a guided tour.
Unit starts by displaying the main menu.
This is the root of the screen hierarchy, and you can simply access all features by tapping on the touch screen buttons.
Tap the icons to enter a desired mode. Slip the screen left and right to switch between the 3 menu pages.
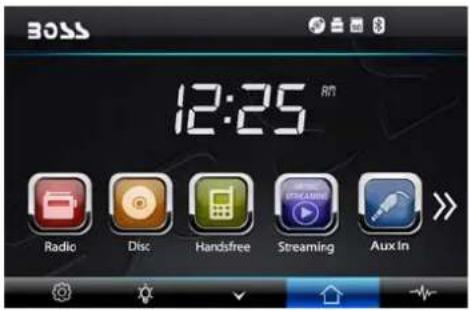
Page 1
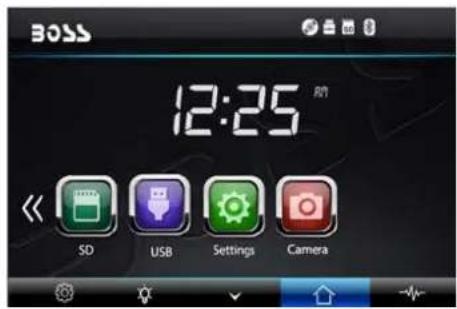
Page 2
Radio Operation
To start radio, tap radio button on main menu screen.
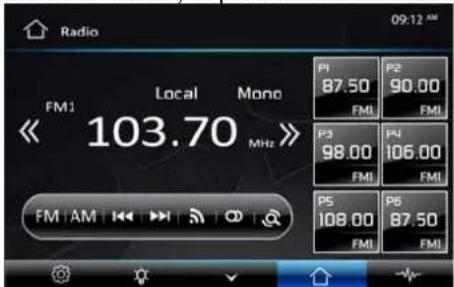

Touch it to select station backward manually, touch and hold this icon to select station backward automatically.

Touch it to select station forward manually, touch and hold this icon to select station. forward automatically.

Touch it to select FM1—>FM2—>FM3.

Touch it to select AM1—>AM2.

Touch it to select station forward automatically. Touch again will stop select station.

Touch it to select station backward automatically. Touch again will stop select station.

Touch this button can turn on or turn off Local function.

Touch this button to select mono sound reception.

Touch this button can scan the stations from 1-6, Long Touch it to save the stations with good reception automatically and scan each station for about 5 seconds.

Touch this button go to setting mode.

Touch this button to adjust the brightness of TFT panel.

Touch this button to return to main menu.

Touch button go to EQ setting.
DVD Player
To start DVD player, tap on DVD button from main menu screen.
Touch Screen Menu
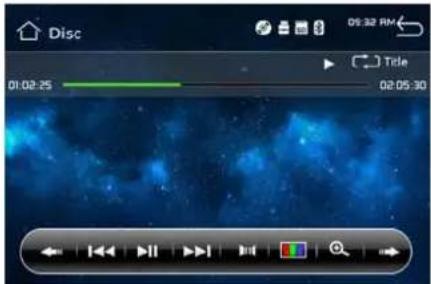
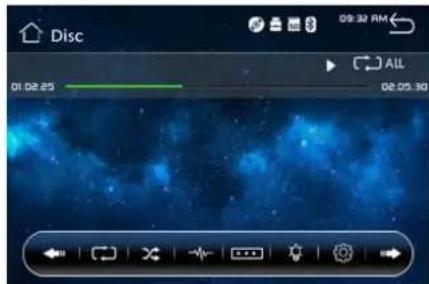
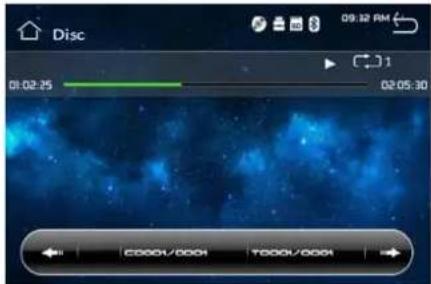
You will not see any buttons while DVD is played, buttons will appear when you tap on TFT screen. Tap the screen again to hide the buttons, slide the subtitle part of bottom screen to switch the following 2 pages.
Note:
- DVD player will automatically start playing when you insert the DVD disc.
- Suggest that don't watch video if the vehicle is moving for driver's safety.
- DVD Player will not only play video, but picture and music files as well.


ch it to enter to previous/next page menu.

Touch it skip to the previous track

Touch it to pause/play

Touch it skip to the next track

Touch it to select the sound track in the sequence of mono L => mono R => auto L => auto R => stereo.

Touch it choose brightness

Zoom the image in or out in the sequence of ×2×3×4×5×1/2×1/3×1/4

In DVD mode, touches it chooses Repeat 1=>repeat title =>repeat all.

In VCD mode, touch it can choose REP 1 => REP DIR => REP ALL

Touch it to turn on / off random playback.

Touch it go to EQ mode

Select the subtitle language

Touch it setting the display brightness of TFT panel.
Touch it go to setting

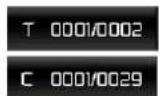
Press it to select title (only the file has many files)
Press it to select file
In VCD mode touch it can choose PBC ON or OFF
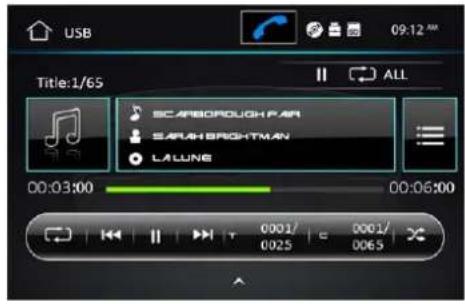
When a file of USB or SD card is played (music, video, photo), the screen will show following interface:


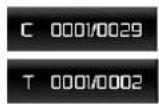


Press it to repeat REP 1 => REP DIR => REP ALL
Press it to skip to the previous track.
Play/pause button. Press it to break the track, press again to resume playback.
Press it to skip to the next track
Press it to select file
Press it to select title (only the file has many files).
Press it to play track randomly
Rotate the image in the sequence of ×90×180×270
Zoom the image in or out in the sequence of ×2×3×4×5×1/2×1/3×1/4
Change the image playback direction
Settings Operation
Setting Control
Your device has default system setting, you can customize the settings to suit your personal needs. Once you change settings, your new settings will remain until you change it again. To start setting, tap it on main menu.
General Control
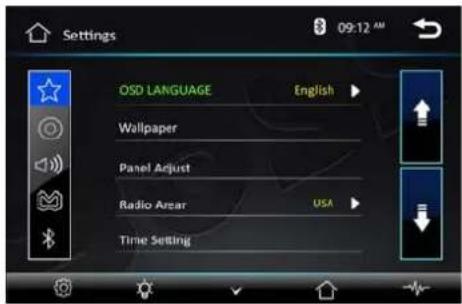
| OSD Language : select English /Spanish | |
| Wallpaper :select and change the wallpaper setting | |
| Panel Adjust :calibrate the touch panel | |
| Radio Area :select radio area, from Europe— USA— South America—Russian— Asia | |
| Clock & Calendar :setting the clock and date | |
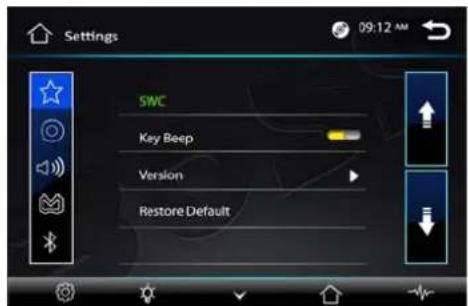
| SWC : program Steering Wheel Control | |
| Key Beep :set beep sound on or off | |
| Standby Display :set standby display on or off | |
| Version : just show you the firmware version | |
| Restore Default |
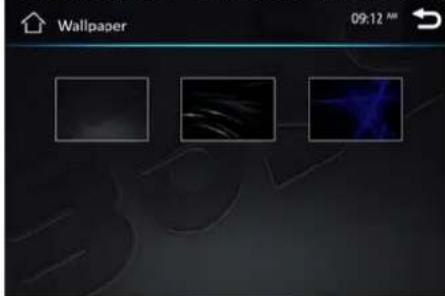
Tap Wallpaper button to setup wallpaper
Tap Panel Adjust button to setup panel touch
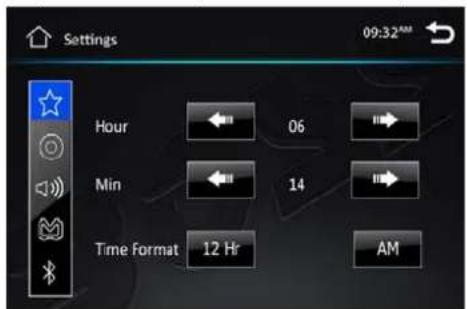
Tap time setting button to setup time
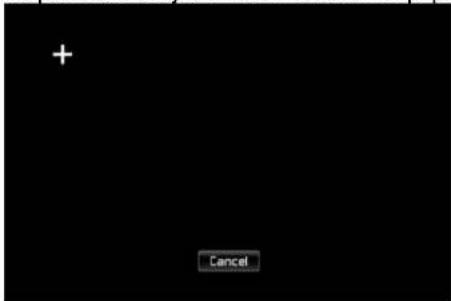
Tap center of the hold at least 2S, after tap five point, then it will show OK in the picture. and press OK exit calibration mode.
Tap SWC item to program SWC
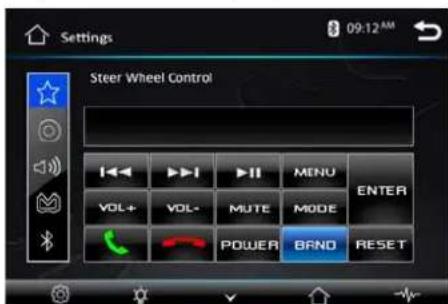
1) First check whether the car has steering wheel button.
2) The steering wheel and the unit must be connected on the line.
3) While holding down the button on the steering wheel and the corresponding button on the SWC interface it will display complete setting. When all the buttons on the steering wheel and the corresponding button on the SWC interface complete setting, you can use the steering wheel button to operation the unit, such as in radio mode, press ◀◀ button or ▶▶ button to search station backward or forward; In DVD mode, press ◀◀ button or ▶▶ button to select the previous or next track and activate fast reverse (REW) search or fast forward in a track, press VOL+ button or VOL - button to adjust the volume.
Note:
- The "Enter" button and the "reset" button are not included in steering wheel, press the "enter" button to confirm the select, press the "reset" button to clear the former select.
- The restriction of use SWC is the voltage between the adjacent buttons are above 0.2V that can be identified.
DVD Setup Menu
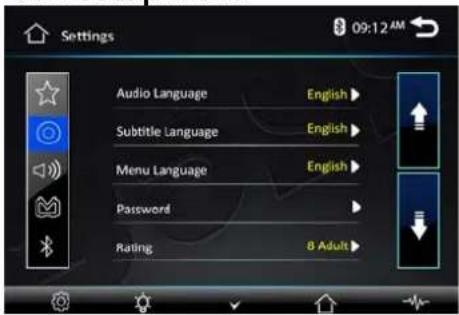
| Audio Language : select desired language |
| Subtitle Language :select desired language |
| Menu Language :select desired language |
| Password |
| Rating |
[1].Subtitle Lang setting:
With this option you can select the preferred language for the subtitles. When the selected language is recorded on the disc then this language will automatically be shown. If not, the first language recorded on the disc is displayed.
[2].Audio Lang setting:
With this option you can select the preferred language for the audio output. When the selected language is recorded on the disc (not all discs have multiple languages recorded) then this language will automatically be played. If not, the first language recorded on the disc is played.
[3]. DVD Menu Lang setting:
With this option you can select the preferred language for the disc menu. When the selected language is recorded on the disc then this language will automatically be selected. If not, the first language recorded on the disc is displayed.
Sound Control
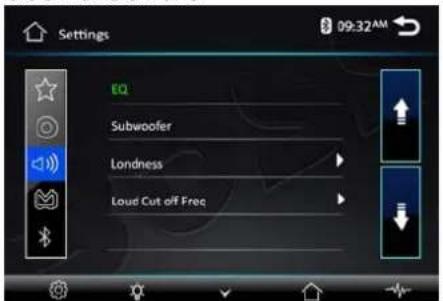
| Sound Effect |
| Subwoofer |
| Loudness : select on/off |
| Loud Cut off Freq: |
Tap Sound Effect button to show following interface
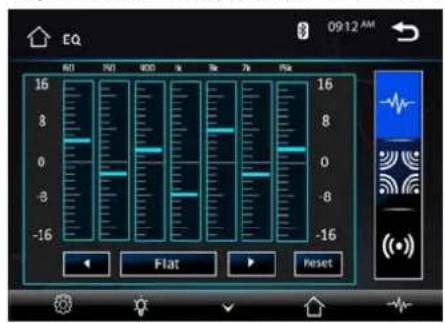
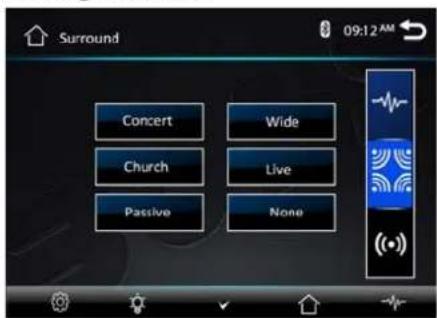
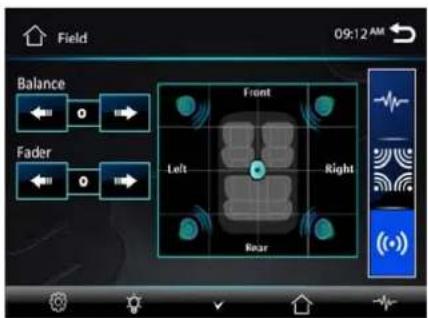
| EQ : select User—Classic—Rock—Pop—Jazz—Electric—Flat |
| Reset |
TV Type
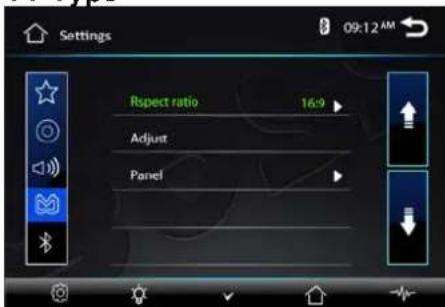
| Aspect ratio : select 4:3PS/4:3LB /16:9 |
| Adjust : adjust screen brightness /contrast/Hue/Saturation/Sharpness |
| Panel :setting backlight time |
Set TFT screen mode to the correct ratio:
Three screen ratio modes are available, Normal/PS (4:3 Pan Scan) and Normal/LB (4:3Letterbox) Different disc formats will display different images depending this setting and the screen size used.
Note: additional wide 16:9 only for DVD player.
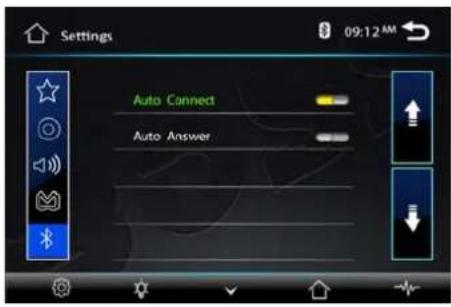
Bluetooth section
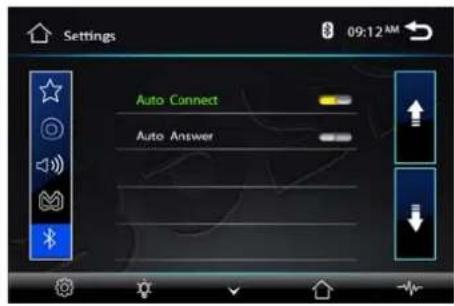
Auto connect: select on/off
Auto answer : select on/off
Subwoofer
Connect the subwoofer to the unit using sub output (see electrical diagram), tap menu on screen enter into main menu setting choose setting menu., choose sound and set subwoofer on to enable subwoofer.
Parking
When the car is stopped and the parking brake is working, the screen can display the video image, otherwise the screen can't display the video image.
Back View Camera
This unit is equipped with back view camera output. The camera is used to observe the situation behind the vehicle when you are backing the car.
Please connect your back view camera with the back car video input. And connect the reverse wire for back a car with the rear gear light. Rear view camera picture will be enabled when you are backing the car.
Bluetooth Operation
Warning: Driving and having a telephone conversation at the same time is dangerous, please park your car before having a telephone conversation. The supplier waves any and all liability when this warning is not followed.
To enter bluetooth mode, you can tap bluetooth icon on main menu or long press the mute/bluetooth button on the remote control or press mode button on remote.
Tap calling button to use phone functions.
Tap music button to start bluetooth music player.
Pairing Mode
At the 1st time when using bluetooth, you need to pair the mobile phone first.
When a phone has not been paired with the unit, the BT icon and pairingmark will blink continually on the panel.
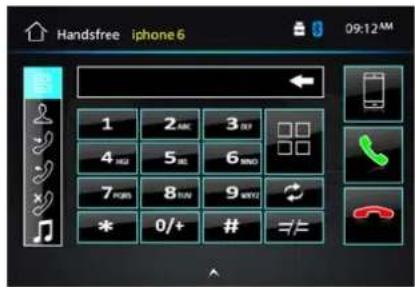
When the unit have connect with phone, the BT icon will turn on and the mobile phone name (if available) will be displayed on the panel.
According to mobile pairing device manual, after searching new device (BT friendly name: Boss Audio BV765B) select it, input password "0000" and confirm ok, device paring is finished.
The phone name will available on the panel after the pairing is completed. It means device is connected and ready for bluetooth communication.
Auto-connect - Disconnect
When power on the unit, the last paired phone will be connected to the device via Bluetooth
automatically, it can keep five phone names in the unit. Tap will delete from the first paired phone. if you want to disconnect the bluetooth connection, turn off the mobile phone Bluetooth function or tap the phone name in the list, and tap phone name again it will be connected again.
Calling Button
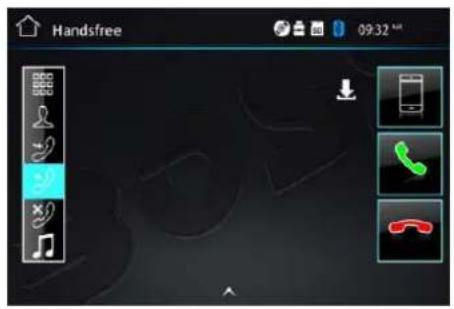
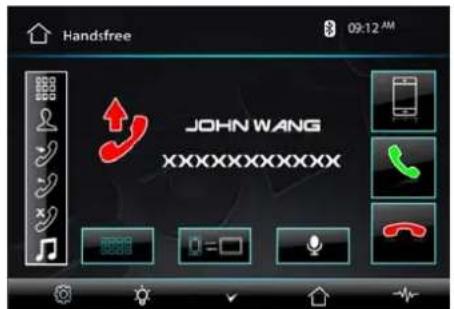
Tap on calling button to enter call mode.
In call mode, the unit can be used as your phone, making and receiving calls are possible with
bluetooth, simply tap phone number and tap button to make a call, and tap button to hang up.
1) Tap clear button shortly to delete a wrong digit, tap the clear button or press RDM/C button on remote for 3-4 seconds to delete all the numbers at once.
2) Tap the button for 3-4 seconds, the device automatically makes a call to the latest call in its call log.
3) The volume will be operated separately while calling.
4) In handsfree mode, press the icon ↓, it will ask or enter into a menu to download phonebook.
5) Tap the car see phonebook.
6) Tap the 🔒 can search phonebook contacts.
Note: the phonebook only supports western characters, any difference in character will be shown such as “+ , * or #”.
BT Phone Book
The unit can download the data from phone when the pairing between a phone and the unit is completed.
The unit displays the data which have been downloading from a phone.
Please note that certain mobile device functions are not supported. Phonebook contacts will be listed in alphabetical order.
Voice Transfer
During a call, you can change a call from bluetooth mode to phone by tapping transfer button, to have a call in bluetooth mode again, tap transfer button.
(A2DP) Music Mode
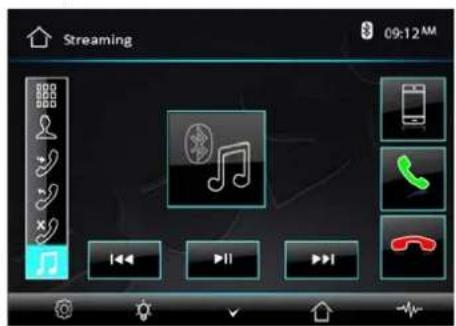
Tap music button to listen music in bluetooth mode.
Tap the button for 'music' in bluetooth main menu.
You can select the function with the key for previous, play / pause, stop, and next.
A2DP (Advanced Audio Distribution Profile) Music Player
A2DP is a function which can receive the audio frequency signal from the mobile phone, amplified by the car audio and played out by the car speakers.
Notice: your mobile phone need to support A2DP.
Tap the buttons on the screen as shown, or press corresponding buttons (pause/play, stop, previous/next) on remote control to play, pause, play previous, or next music file.
Aux-In MODE
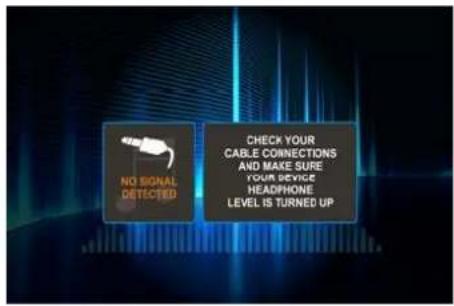
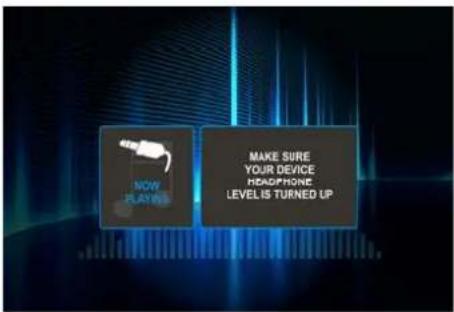
To start Aux-In Mode, tap Aux-In icon from main menu screen. connect the external audio signal source to this unit will display "NOW PLAYING".
Note: Aux-In does not support a video display function. So, there is "NO SIGNAL DETECTED" displayed if no audio signal input. Press the 📋 icon to be back to main menu.
In order to view videos, the parking brake wire must be connected, and the vehicle stopped
Handling discs
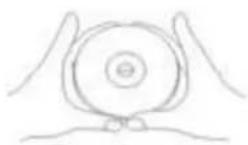
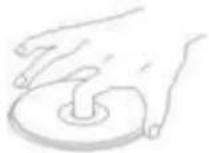
Handling
When holding With both hands
When holding with one hand
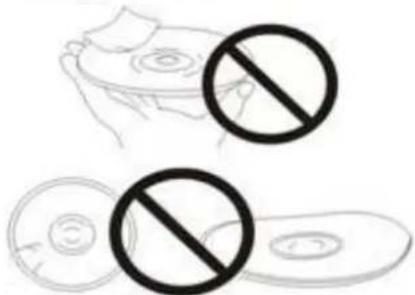
- Do not use damaged (cracked or warped) discs.
- Do not scratch the signal surface or let it get dirty.
- Do not attach paper or seals to discs. The player may be damaged if there is any exposed glue, etc., On discs. For rental discs in particular, extra labels are often attached to the discs. Check carefully for any exposed glue before using such discs.
Storing discs
● Always place discs in their case and store them vertically.
Avoid storing discs in hot or humid places, places exposed to direct sunlight and places in which the temperature is extremely low.
- Read any cautions included with the discs carefully.
Cleaning discs
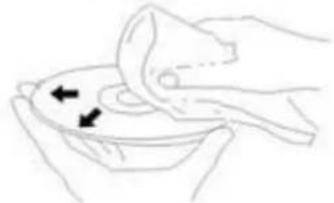
● Fingerprints or dust on discs may reduce sound or picture quality. Remove them by gently wiping the disc from the center toward the edges using a soft cloth.
natural_image
Illustration of hands holding a bowl with arrows indicating direction (no text or symbols)- Do not use benzene, thinner or other volatile chemicals.
Do not use record spray or antistatic spray either. - We recommend using the separately sold cleaning set to clean discs.
- For tough dirt, apply some water to a soft cloth, wring out thoroughly wipe off the dirt, then wipe the disc with a dry cloth.
Irregular shaped discs Irregular shaped discs(heart-shaped discs, hexagonal discs, etc.)Cannot be played on this playeDoing so could damage the player. Never use such discs.

Troubleshooting
| Symptom Cause | Remedy | ||
| General | Power does not turn on(No sound is produced) | Fuse is blown | Replace with fuse of the same amperage. If the fuse blows again, consult your store of purchase |
| In correct wiring Consult your local retailer | |||
| No sound output when operating the unit with amplifiers or power antenna attached | Power antennal lead is shorted to ground, excessive current is required or remote on the amplifiers or power antenna | 1. Turn off the unit2. Remove all wires attached to the power antenna lead, check each wire for a possible short to ground using an ohm meter3. Turn on the unit4. Reconnect each amplifier remote wire to the power antenna lead one by one. If the amplifiers turn off before all wires are attached, use an external replay to provide remote-on voltage (excessive current required) | |
| Nothing happens when buttons are pressedDisplay is not Accurate | Unit needs to be Reset | Using a pen or toothpick, press and release the Reset button. | |
| Panel or main unitConnectors are dirty | Wipe the dirt off with a soft cloth moistened with cleaning alcohol | ||
| CD | Sound is bad directly after power is turned on | Compact disc is dirty | Clean the compact disc without scratches |
| Compact disc is heavily scratched or warped | Replace with a compact disc without scratches | ||
| Sound is bad directly after power is turned on | Water droplets may form on the internal lens when the car is parked in a humid place | Let it dry for about 1 hour with the power on | |
Troubleshooting
| symptom | Cause | Solution |
| No power | The car ignition is not on | If the power supply is properly connected to the car accessory switch the ignition key to “ACC” |
| The fuse is blown Replace the fuse | ||
| Disc cannot be loaded | Presence of disc inside the player | Remove the disc in the player then put a new upward |
| Disc cannot be read | Inserting the disc in upside down | Insert the compact disc with the label facing upward |
| Compact disc is extremely dirty or defective | Clean the disc or try to play a new one | |
| Temperature inside the car is too high | Cool off until the ambient temperature returns to normal | |
| No sound | Volume is in minimum Adjust volume to a desired level | |
| Wiring is not properly connected | Check wiring connection | |
| The operation keys do not work | The built-in microcomputer is not operating properly due to noise | Press the power button for about 10 seconds to reset the unit |
| Front panel is not properly fix into its place | ||
| Sound skips | The installation angle is more than 30 degrees | Adjust the installation angle to less than 30 degrees |
| The disc is extremely dirty or defective | Clean the compact disc/try to play a new one | |
| The radio does not work, the radio station automatic selection does not work | The antenna cable is not connected the signals are too weak | Insert the antenna cable firmly select a station manually |
General Specification
| General | |
| Power supply 11~16V DC | |
| Current consumption Max. 10 A | |
| Maximum power output 80W x 4 channels (max) | |
| Compatible formats DVD ±R/RW Video, CD ±R/RW Audio & Video | |
| Dimensions (W x D x H) / weight | 6.5" x 7.0" x 3.9" /4.6 lbs |
| Working temperature range | -4°F -- +140°F |
| ESP function 10 sec. for Audio CD, 120 sec. for MP3 | |
| TFT display | |
| Screen size 6.5 inch | |
| Resolution | 800* 480 pixel |
| Aspect ration 4:3/16:9 | |
| Brightness | 460 cd/m3 |
| Contrast ratio 500:1 | |
| FM radio | |
| Frequency range(Europe area) | FM:87.5 -108MHz(Step 50KHz) |
| Frequency range(America area) FM:87.5 -107.9MHz(Step 200KHz) | |
| Frequency range(Asia area) FM:87.5 -108MHz(Step 100KHz) | |
| Frequency range(South America area) FM:87.5 -108MHz(Step 100KHz) | |
| Frequency range(Russia area) FM:87.5 -108MHz(Step 50KHz) 65-74MHz(Step 30KHz) | |
| Preset memory stations 18 | |
| AM(MW)radio | |
| Frequency range(Europe area) | AM:522-1620(Step 9KHz) |
| Frequency range(America area) | AM:530-1710(Step 10KHz) |
| Frequency range(Asia area) AM:531-1602 (Step 9KHz) | |
| Frequency range(South America area) | AM:520-1710(Step 10KHz) |
| Frequency range(Russia area) | AM:522-1620(Step 9KHz) |
| Preset memory stations 12 | |
| Audio specification | |
| Frequency response | 20 Hz-20 KHz |
| TV Color System | Color system NTSC/PAL |
| USB interface | |
| USB type | USB 2.0 full speed |
| Support format | MP3 , WMA, MPEG1, MPEG2, AVI |
Specifications are subject to change without notice, mass and dimension are approximate.
USER'S MANUAL
BV765B
BLUETOOTH® | DVD/MP3/CD AM/FM RECEIVER
BOSS®
AUDIO SYSTEMS
BOSS Audio Systems
3451 Lunar Court • Oxnard, CA 93030
www.bossaudio.com
800-999-1236 US Toll-free
805-751-4853 Customer Service
tech support: www.bossaudio.com/support/technical-support


0817
iPod® / iPhone® are trademarks of Apple, Inc. registered in the U.S. and other countries.
MBS Audio Systems is not affiliated with Apple, Inc.
The Bluetooth® word mark and logos are registered trademarks owned by Bluetooth 246, Inc. and any use of such marks by BOSU Audio Systems in under license.
Other trademarks and trade names are those of their respective entities.
- Congratulations on your purchase of a Boss Audio Systems Multimedia Receiver. It has been designed, engineered and manufactured to bring you the highest level of performance and quality, and will offer you years of entertainment pleasure.
- Content
- Wire Connection
- Speaker Connection
- Correct connection
- MODE button
- POWER button
- UP button
- BAND/ RDM/ CLEAR button
- 5: ENTER
- LEFT button
- DOWN button
- EJECT button
- STEREO/ MONO/ \* button
- P.SCN/ RPT / # button
- / SEEK- button
- LOUD
- STOP/ PBC button
- OSD button
- PLAY/ PAUSE button
- Mute button/ Bluetooth button
- MENU/ ROOT button
- SUBTITLE button
- RIGHT button
- SETUP button
- Dial button/ ANGLE Button
- HANG UP button
- VOLUME UP button
- ZOOM button
- SELECT button
- SEEK + buttons
- VOLUME DOWN button
- AUDIO
- NUMERIC KEY
- Note:
- Main Menu
- Radio Operation
- DVD Player
- Touch Screen Menu
- Settings Operation
- Setting Control
- DVD Setup Menu
- [1].Subtitle Lang setting:
- [2].Audio Lang setting:
- [3]. DVD Menu Lang setting:
- Subwoofer
- Parking
- Back View Camera
- Bluetooth Operation
- Pairing Mode
- Calling Button
- BT Phone Book
- Voice Transfer
- (A2DP) Music Mode
- A2DP (Advanced Audio Distribution Profile) Music Player
- Aux-In MODE
- Handling discs
- Handling
- Storing discs
- Cleaning discs
Brand : BOSS
Model : BV765BLC
Category : DVD player