
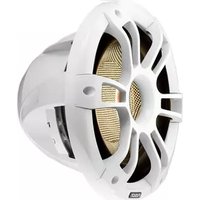
XS-S10CWB - Subwoofer Fusion - Free user manual and instructions
Find the device manual for free XS-S10CWB Fusion in PDF.


| Product Type | Powered Subwoofer |
| Model | XS-S10CWB |
| Brand | Fusion |
| Woofer Size | 10 inches (25.4 cm) |
| Enclosure Type | Sealed / Ported (customizable) |
| RMS Power | 300 W |
| Peak Power | 600 W |
| Frequency Response | 25 Hz – 200 Hz |
| Impedance | 4 Ohms |
| Sensitivity | 88 dB (1W/1m) |
| Amplifier Class | Class D |
| Inputs | RCA Line In, High-Level Speaker Input |
| Controls | Volume, Low-Pass Filter (50-200 Hz), Phase Switch (0°/180°) |
| Dimensions (H x W x D) | 14.2 x 13.0 x 12.6 inches (36 x 33 x 32 cm) |
| Weight | 24.3 lbs (11 kg) |
| Power Supply | AC 110-120V / 60Hz (or 220-240V / 50Hz with switch) |
| Power Consumption | 400 W max, <0.5 W standby |
| Protection | Overload, short circuit, thermal protection |
| Enclosure Material | MDF with vinyl finish |
| Grille | Removable cloth grille |
| Maintenance | Wipe with dry cloth; do not use solvents |
| Spare Parts / Repairability | Available: Amplifier module, woofer cone, fuse; service by qualified technician |
| Safety | Do not expose to water; ensure proper ventilation; unplug during storms |
| Certifications | CE, RoHS |
Frequently Asked Questions - XS-S10CWB Fusion
User questions about XS-S10CWB Fusion
0 question about this device. Answer the ones you know or ask your own.
Ask a new question about this device
Download the instructions for your Subwoofer in PDF format for free! Find your manual XS-S10CWB - Fusion and take your electronic device back in hand. On this page are published all the documents necessary for the use of your device. XS-S10CWB by Fusion.
USER MANUAL XS-S10CWB Fusion
XS Series Subwoofer Installation Instructions 2
Garmin f , the Garmin logo, FUSION f , the Fusion logo, and True-Marine ™ are trademarks of Garmin Ltd. or its subsidiaries, registered in the USA and other countries. These trademarks may not be used without the express permission of Garmin.
XS Series Subwoofer Installation Instructions
Important Safety Information
WARNING
Failure to follow these warnings and cautions could result in personal injury, damage to the vehicle or vessel, or poor product performance.
See the Important Safety and Product Information guide in the product box for product warnings and other important information.
This device must be installed according to these instructions.
Disconnect the vehicle's or vessel's power supply before beginning to install this product.
CAUTION
Continuous exposure to sound pressure levels over 100 dBA may cause permanent hearing loss. The volume is typically too loud if you cannot hear people speaking around you. Limit the amount of time you listen at high volume. If you experience ringing in your ears or muffled speech, stop listening and have your hearing checked.
Always wear safety goggles, ear protection, and a dust mask when drilling, cutting, or sanding.
NOTICE
When drilling or cutting, always check what is on the opposite side of the surface.
It is strongly recommended that you have your audio system installed by a professional installer to ensure optimum performance.
You must read all installation instructions before beginning the installation. If you experience difficulty during the installation, go to www.fusionentertainment.com for product support.
After installing the subwoofer, you should run the subwoofer at low to medium volumes for the first few hours of use. This helps to improve the overall sound by gradually loosening up the moving components of the subwoofer, such as the cone, spider, and surround
What's In the Box
- 1 subwoofer
- 6 Phillips stainless steel, 4.8 mm x 50 mm (10 gauge x 2 in.) mounting screws
- Mounting template
- Grilles
Tools Needed
- Electric drill
- Drill bit (size varies based on surface material)
- Phillips screwdriver
- Wire strippers
- Crimping tool
- Electrical tape
- Appropriate saw or utility knife to cut surface material
• Marine sealant (optional) - Suitable gauge speaker wire for the length required
NOTE: For customized installations, additional tools and materials may be needed.
Mounting Considerations
Selecting the correct mounting location is critical to optimize the performance of the audio system. This FUSION ® subwoofer is designed to perform in the widest possible range of mounting
locations, but the more you plan the installation, the better the subwoofer sound will be.
- The audio system must be turned off before making any connections. Failure to do so could result in permanent damage to the audio system.
- You should protect all terminals and connections from grounding and from each other. Failure to do so could result in permanent damage to the audio system and voids the product warranty.
- You should protect the wires from sharp objects and always use rubber grommets when wiring through panels.
- The mounting location must avoid potential obstacles, such as fuel and hydraulic lines and wiring.
- The mounting location must provide sufficient clearance for the mounting depth of the subwoofer as specified in the side view drawings and the specifications.
- When possible, the area behind each subwoofer should be enclosed.
- To avoid interference with a magnetic compass, the subwoofer should not be installed closer to a compass than the compass-safe distance value listed in the product specifications.
- You should select a flat mounting surface for the best seal.
- For better bass performance, the subwoofer should be mounted in an area that provides just enough room behind the subwoofer. Too small an area restricts bass, and too large an area compromises bass performance. Refer to the specifications for optimum volume recommendations.
- When a subwoofer is not exposed to the outside environment, a better bass performance can be achieved using an enclosure that has a ported design. Theile Small parameters are provided in the specifications to assist with enclosure and port design.
-
If you intend to mount the subwoofer outside the boat, follow these considerations.
-
When mounted correctly, the subwoofer is rated IP65 for protection in the marine environment from the front of the subwoofer. Water exposure and damage to the rear of the subwoofer voids the warranty.
• The subwoofer must be mounted in a location well above the waterline, where it is not submerged.
• The subwoofer must be mounted in a location where it cannot be damaged by docks, pilings, or other pieces of equipment.
The subwoofer should be mounted in a sealed enclosure, especially if it is exposed to wash down. A port or vent may allow water to collect in the enclosure and damage the subwoofer.
Mounting the Subwoofer
Before mounting the subwoofer, you must choose a location following the mounting considerations above.
Before cutting the mounting surface, you should verify that there is enough clearance for the speaker behind the surface. Refer to the specifications for clearance information.
NOTICE
Do not apply grease or lubricant to the screws when fastening the subwoofer to the mounting surface. Grease or other lubricants can cause damage to the subwoofer housing.
1 Route the wires from the source to the mounting location, away from sources of electrical interference.
2 Trim the template and make sure it fits in the selected location.
3 Orient the template so the FUSION logo is level in the selected location.
4 Secure the template to the selected location.
5 Using a rotary tool or jigsaw, cut the mounting surface along the inside of the line on the template.
6 Place the subwoofer in the cutout to test the fit.
7 If necessary, use a file and sandpaper to refine the size of the cutout.
8 After the subwoofer fits correctly in the cutout, ensure the mounting holes on the subwoofer line up with the pilot holes on the template.
9 If the mounting holes on the subwoofer do not line up, mark the new hole locations.
10 Using an appropriately sized drill bit for the mounting surface and screw type, drill the holes.
11 Remove the template from the mounting surface.
12 Connect the subwoofer wires ① while observing polarity (Subwoofer Wiring, page 3).

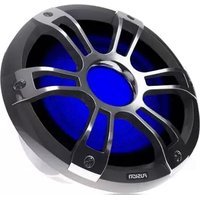
13 If necessary, connect the LED wires to the Sports model subwoofer (LED Wiring, page 3).
14 Place the subwoofer in the cutout.
15 Secure the subwoofer to the mounting surface using the included screws ②.
NOTE: Do not over tighten the screws, especially if the mounting surface is not flat.
16 With the subwoofer mounted, hold the grille with the FUSION logo at the bottom, or at the 6 o'clock position.
17 Press on the grille to snap it into place.
Subwoofer Wiring
When connecting the subwoofer to your amplifier or source, observe the following considerations.
- Speaker wire is not included with the subwoofer. You should use 20 AWG (0.52 mm 2 ) speaker wire to connect the subwoofer to the amplifier or source.
- The leads on the subwoofer are terminated using male spade connectors. You should use female spade connectors (not included) to connect the speaker wire to the speaker leads for the best connection.
- The subwoofer features a dual 2 Ohm voice coil that can be configured for 2.1 operation (two speakers and one subwoofer) when connected to a FUSION stereo with DSP capability (Configuring the Subwoofer for 2.1 Operation, page 4).
- You can use the following table to identify the polarity of the leads on the speaker.
| White Positive (+) | |
| Gray with a black stripe Negative (-) |
NOTE: Gray and white with a black stripe wires are connected to jumper terminals on the back of the subwoofer. These wires must remain connected to the jumper terminals for normal use (4 Ohm) and should be disconnected only when configuring the speaker for 2.1 operation.
LED Wiring
Connecting the LED Wires
You can control the color of the LEDs by connecting the LED color wires to ground. You can splice the ground wire to multiple LED wires to customize the LED color.
NOTE: This feature is available only on the sports model.
NOTE: Instead of connecting the LED wires for one dedicated color, you can install a remote control to turn the LEDs on and off, change the color, and create lighting effects. See your FUSION dealer or www.fusionentertainment.com for more information.
The black wire on the LED cable is terminated with a 4 mm female bullet connector, and the color wires are terminated with 4 mm male bullet connectors. You can connect these to 4 mm bullet connectors on your wires (not included), or remove the bullet connectors to connect to the bare wires instead.
1 Connect a positive wire to the black wire on the LED cable.
2 Connect a ground wire to the wire on the LED cable according to the preferred LED color.
| LED Color LED Wire Color | |
| Red Red | |
| Green Green | |
| Blue Blue | |
| Yellow Red and green | |
| Magenta Red and blue | |
| Cyan Blue and green | |
| White Red, green, and blue | |
3 Route the positive and negative wires, and connect them to a power source (Connecting the LED Wires to Power, page 3).
Connecting the LED Wires to Power
NOTE: This feature is available on only the sports model.
You must connect all 12 Vdc wiring to the LEDs to a 3 A fuse at the power-source end of the cable. You should connect the positive (+) power wire to a 12 Vdc power source through an isolator switch or circuit breaker to turn the LEDs on and off. You can use the same isolator or circuit breaker controlling the power supply to your stereo, which allows you to turn the LEDs and the stereo on and off at the same time.
You should use 22 AWG (0.33 mm 4 ) or thicker wire to connect the LEDs to the battery.
1 Route the positive power (+) and negative ground (-) wires from the LED-wire connections to the battery.
2 Connect the negative wire to the negative (-) battery terminal.
3 Connect the positive wire to the positive (+) terminal through a 3 A fuse and isolator switch or circuit breaker.
Subwoofer Sound Optimization
While installing the subwoofer, you can ensure the sound from the subwoofer is optimized by running the subwoofer out of phase. You can switch the positive and negative wires on the amplifier or source to run them out of phase.
Running the subwoofer out of phase from the speakers allows you to hear if the perception of bass is more from the location of the subwoofer or from the speakers. If running the subwoofer out of phase gives a better perception that the bass is from the speakers' location, then out-of-phase wiring is correct for your system.
You can run the subwoofer out of phase by temporarily switching the positive and negative connections from the subwoofer at the amplifier or source. Depending on the outcome of the test, you can then switch the connections back if necessary.
Configuring the Subwoofer for 2.1 Operation
The subwoofer features dual 2 Ohm voice coils and is pre-configured for 4 Ohm operation. You can change the configuration of the subwoofer for 2.1 operation (two speakers and one subwoofer) when connected to a FUSION stereo with DSP capability, such as an Apollo™ RA770.
1 Disconnect the gray wire and the white with a black stripe wire from the jumper terminals on the back of the subwoofer.
2 Connect the wires from the subwoofer to the stereo using the following table as a reference.
| Subwoofer wire Stereo wire | |
| White Zone 2 right positive (+) | |
| White with a black stripe Zone 2 right negative (-) | |
| Gray Zone 2 left positive (+) | |
| Gray with a black stripe Zone 2 left negative (-) | |
3 Turn on the connected stereo.
4 Launch the FUSION-Link™ app, and select the 2.1 option for the connected stereo.
The subwoofer operates in 2.1 mode, with the volume control tied to zone 1 on the stereo. The zone 2 volume control and the zone 2 line out connectors are disabled.
Additional Information
True-Marine™ Products
True-Marine products are subjected to rigorous environmental testing under harsh marine conditions to surpass industry guidelines for marine products.
Any product that bears the True-Marine stamp of assurance has been designed for simplicity of use and combines advanced marine technologies to deliver an industry leading entertainment experience. All True-Marine products are supported by the FUSION 3-year worldwide limited consumer warranty.
Registering Your XS Series
Help us better support you by completing our online registration today.
- Go to www.fusionentertainment.com.
- Keep the original sales receipt, or a photocopy, in a safe place.
Cleaning the Subwoofer
NOTICE
Do not use harsh or solvent-based cleaners on the subwoofer. Using such cleaners may damage the product and void the warranty.
When mounted correctly, this subwoofer is rated IP65 for protection in the harsh marine environment from the front of the subwoofer. The subwoofer is not designed to withstand high pressure water spray, which may occur when you wash down your vessel. Failure to carefully spray-clean the vessel may damage the product and void the warranty.
1 Clean all salt water and salt residue from the grille with a damp cloth soaked in fresh water.
2 Use a mild detergent to remove a heavy buildup of salt or stains.
Troubleshooting
Before you contact your FUSION dealer or service center, you should perform a few simple troubleshooting steps to help diagnose the problem.
If the FUSION subwoofer has been installed by a professional installation company, you should contact the company so the technicians can assess the problem and advise you about possible solutions.
There is no sound coming from the subwoofer
- Verify that all connections are connected correctly to the proper terminals.
The system lacks bass
- Verify that the subwoofer is attached firmly to the mounting surface.
The audio is distorted
- Verify that the panels surrounding the subwoofer on the vessel are not rattling.
- Verify that the amplifier is connected to the subwoofer terminals correctly.
- If the subwoofer is connected to an amplifier, verify that the input level of the amplifier is matched to the output level of the stereo.
For more information, see the manual for the amplifier.
The LED lights will not turn on
- Verify that all wiring connections are correct and tight.
The LEDs pulse with the bass notes of the music
• Install a FUSION LED voltage regulator (SG-VREGLED).
Specifications
| Peak power (Watts) 600 W | |
| RMS power (Watts) 120 W | |
| Efficiency (1 W/1 m) 87 dB | |
| Frequency response From 30 Hz to 2000 Hz | |
| Nominal impedance 4 ohm | |
| Recommended amplifier power (RMS) | 40 to 300 W per channel |
| Min. mounting depth (clearance) 113 mm (4 7/16 in.) | |
| Mounting diameter (clearance) 223 mm (8 3/4 in.) | |
| Optimum enclosure volume recommendation* | 40 L |
| LED color options (sports model only) RGB | |
| LED supply voltage (Sports model only) | From 10.8 to 16 Vdc |
| LED load current at 14.4 Vdc (Sports model only) | 150 mA |
| Operating temperature range From 0 to 50°C (from 32 to 122°F) | |
| Storage temperature range From -20 to 70°C (from -4 to 158°F) | |
| Cone/surround material | Polypropylene cone, rubber surround |
| Water and dust rating | IEC 60529 IP65 (Protected against dust and water ingress) |
*Sealed enclosure, fully filled with absorption material.
NOTE: This speaker is not intended to be installed in a vented or ported enclosure when exposed to the outside environment.
Speaker Dimensions

| 1 | 274 mm ( 1013/16 in.) |
| 2 | Classic grille: 32 mm ( 11/4 in.)Sports grille: 37 mm ( 17/16 in.) |
| 3 | 110 mm ( 45/16 in.) |
| 4 | 221 mm ( 811/16 in.) |
A Sports model subwoofer is shown, but the dimensions are the same for the Classic model unless noted.
Subwoofer Compass-Safe Distance
All speakers and subwoofers contain magnets which are likely to cause interference with instruments on your boat. The size of the magnet used in the subwoofer affects how much interference the subwoofer may cause.
Interference can cause deviations and variations in the readings of sensitive navigational equipment, such as magnetic compasses. These deviations can cause inaccuracies or offsets in the readings, but will not harm the equipment. To alleviate the deviations, adjust the compass for the deviation following the manufacturer's instructions or move the subwoofer away from the navigational equipment. After moving a source of interference, you may need to recalibrate the compass.
If you are navigating solely by a magnetic compass, use extreme caution to place the speaker far enough away from the compass to avoid causing deviations in the readings.
To avoid deviations to navigational equipment, position the subwoofer so it is separated from the navigational equipment by at least the distance listed in the table below.
![graph TD A["Central Component"] --> B["Arrow ①"] A --> C["Arrow ②"] A --> D["Arrow ③"] A --> E["Arrow ④"] A --> F["Arrow ⑤"] A --> G["Arrow ⑥"]](/content/2026/05/927845/images/ff7ac2d106313b822277d37fc0282e9e695368412e7fefc6dd785628d906adab.jpg)
| Direction from Subwoofer 10" Subwoofer | |
| 1 | 280 cm (9 ft. 2 in.) |
| 2 | 280 cm (9 ft. 2 in.) |
| 3 | 370 cm (12 ft. 2 in.) |
| 4 | 280 cm (9 ft. 2 in.) |
| 5 | 295 cm (9 ft. 8 in.) |
| 6 | 350 cm (11 ft. 6 in.) |
Thiele Small Parameters
You can use the Thiele Small (T/S) parameters when designing a custom enclosure for your subwoofer.
NOTE: Thiele/Small parameters may vary between samples, based on the environment and how much the speaker has been used. These values are intended as a guide to help with enclosure design.
| Electrical Q factor (Qes) 1.20 | |
| Mechanical Q factor (Qms) 5.80 | |
| Total Q factor (Qts) 0.99 | |
| Resonance frequency (Fs) 41 Hz | |
| Equivalent air load (Vas) 40 L |
FUSGN®
Printing a Mounting Template
NOTICE
It is not recommended that you print a mounting template on your own. Use the template that came in the product box.
If you do print the template, you must follow these instructions for printing a mounting template precisely. To print large templates, you need large enough paper and printer. Failure to have the correct sized paper and printer, or a failure to follow these instructions, may result in an incorrectly sized template and therefore an incorrect cutout (too large or too small) on the mounting surface of your boat.
1 Select File > Print.

2 Select None for Page Scaling ①.
3 Ensure the check mark is next to Auto-Rotate and Center ②.
4 Drag the arrow ③ to the right, to view page 2 in the window below.
4 Verify that the paper size is larger than the template ④.
In this example, the paper is not larger than the template.
5 If the paper size is not large enough, select Properties ⑤ and select a Page Size that is larger than the template.
NOTICE
Fusion is not responsible for any damages or expenses resulting from a miscut mounting surface arising from a failure to follow these instructions.

October 2018 © 2018 Garmin Ltd. or its subsidiaries Printed in China 190-02481-07_0A

FUSON®
Important Safety and Product Information....2
Important Safety and Product Information
WARNING
Failure to heed the following warnings could result in an accident resulting in death or serious injury.
Marine Operation Warnings
- You are responsible for the safe and prudent operation of your vessel. This device does not relieve you from the
responsibility of safely operating your vessel. Avoid navigational hazards and never leave the helm unattended
• Always be prepared to promptly regain control of the vessel. Use caution near hazards in the water, such as docks, pilings and other vessels.
Hearing Damage Warning
Listening to the stereo at high volume can cause damage to your hearing.
Product Environmental Programs
Information about the Garmin® product recycling program and WEEE, RoHS, REACH, and other compliance programs can be found at www.garmin.com/aboutGarmin/environment.
Declaration of Conformity
Hereby, Garmin declares that this product is in compliance with the essential requirements and other relevant provisions of Directive 1999/5/E.C. To view the full Declaration of Conformity, go to www.fusionentertainment.com.
Software License Agreement
BY USING THE DEVICE, YOU AGREE TO BE BOUND BY THE TERMS AND CONDITIONS OF THE FOLLOWING SOFTWARE LICENSE AGREEMENT. PLEASE READ THIS AGREEMENT CAREFULLY.
Garmin Ltd. and its subsidiaries ("Garmin") grant you a limited license to use the software embedded in this device (the "Software") in binary executable form in the normal operation of the product. Title, ownership rights, and intellectual property rights in and to the Software remain in Garmin and/or its third-party providers.
You acknowledge that the Software is the property of Garmin and/or its third-party providers and is protected under the United States of America copyright laws and international copyright treaties. You further acknowledge that the structure, organization, and code of the Software, for which source code is not provided, are valuable trade secrets of Garmin and/or its third-party providers and that the Software in source code form remains a valuable trade secret of Garmin and/or its third-party providers. You agree not to decompile, disassemble, modify, reverse assemble, reverse engineer, or reduce to human readable form the Software or any part thereof or create any derivative works based on the Software. You agree not to export or re-export the Software to any country in violation of the export control laws of the United States of America or the export control laws of any other applicable country.
Limited 3-Year Marine Consumer Warranty
Garmin New Zealand Limited, trading as FUSION Entertainment ('FUSION'), warrants that this FUSION Marine product is free from defects in material and workmanship, according to the following terms and conditions:
- The limited warranty for the FUSION product purchased extends to 36 months beginning on the date of purchase of the product.
- The limited warranty extends only to consumers who purchase the product in one of the countries (or areas) set forth on www.fusionentertainment.com. The limited warranty is only valid in FUSION's intended country (or area) of sale of the product.
- During the limited warranty period, FUSION or its authorised service network will repair or replace (at FUSION's discretion), any defective product or parts thereof with new and return the product to the consumer in working condition. No charge will be made to the consumer for either parts or labour in repairing or replacing the product. All replaced parts and cosmetic parts should be free of defects at the time of shipment and, therefore shall not be covered under these limited warranty terms.
- Repaired product will be warranted for the balance of the original warranty period or for ninety (90) days from the date of repair, whichever is longer.
- All warranty claims must be accompanied with a copy of this warranty card, and a copy of proof of purchase.
The consumer shall have no coverage or benefits under this limited warranty if any of the following conditions are applicable: - The product has been subject to: abnormal use, abnormal conditions, improper storage, unauthorised modifications, unauthorised connections, unauthorised repair including but not limited to use of unauthorised spare parts in repairs, misuse, neglect, abuse, accident, alteration, improper installation, acts of God, spill of foods or liquids, maladjustment of customer controls or other acts which are beyond the reasonable control of FUSION, including deficiencies in consumable
parts such as fuses, and breakage or damage to antennae unless caused directly by defects in materials or workmanship, and normal wear and tear of the product.
- FUSION was not notified by the consumer of the alleged defect or malfunction of the product during the applicable limited warranty period.
• The product serial number or the accessory date code has been removed, defaced or altered.
- The product was used with or connected to an accessory not supplied by FUSION or fit for use with FUSION product, or used in a manner other than its intended use.
If a problem develops during the limited warranty period, the consumer should take the following step-by-step procedure:
1 The consumer shall return the product to any authorised FUSION dealer in authorised sales countries for repair or replacement processing. FUSION assumes no freight or shipping responsibility for returning goods to an authorised FUSION dealer, or return freight from an authorised dealer to the consumer submitting the warranty claim.
2 The consumer shall be charged for any parts or labour charges not covered by this limited warranty. The consumer shall be responsible for expenses related to removal and reinstallation of the product.
3 If the product is returned to FUSION after the expiration of the warranty period, FUSION's normal service policies shall apply and the consumer will be charged accordingly.
The benefits conferred by this warranty apply to the extent that they are not superseded by any other rights and remedies available under any applicable legislation that cannot be excluded. In jurisdictions where implied or legal warranties may be excluded, any implied or legal warranty is hereby excluded and the foregoing warranty is the purchaser's sole and exclusive remedy and is in lieu of all other warranties, express or implied.
- Some states in America do not allow the exclusion or limitation of consequential damages, so the above limitation and
exclusion may not apply to you. This warranty gives you specific legal rights which may vary from state to state.
- FUSION neither assumes nor authorises any authorised service centre or any person or entity to assume for it any other obligation or liability beyond that which is expressly provided for in this warranty.
- All warranty information, product features and specifications are subject to change without notice.
Limited 3-Year Marine Consumer Warranty for Australian Consumers
Garmin Australasia, 30 Clay Place, Eastern Creek, NSW 2766, Australia.
EMAIL: australia@fusionentertainment.com PHONE: 1800 235 822
THE FUSION PROMISE OF QUALITY LIMITED 3-YEAR CONSUMER WARRANTY
This warranty is given in addition to other rights and remedies available to the consumer under Australian Consumer Law. In addition to the FUSION Warranty, our goods come with guarantees that cannot be excluded under the Australian Consumer Law. You are entitled to a replacement or refund for a major failure and for compensation for any others reasonably foreseeable loss or damage. You are also entitled to have the goods repaired or replaced if the goods fail to be of acceptable quality and the failure does not amount to a major failure.
Garmin New Zealand Limited, trading as FUSION Entertainment ("FUSION"), warrants this FUSION Product including, Speaker, Subwoofer, Amplifier, Head Unit, or genuine FUSION Accessory 'product' is free from defects in materials and workmanship, in accordance with the following terms and conditions:
- The limited warranty for the FUSION product purchased is only available for (36) months after the date of purchase.
- The limited warranty extends only to the original consumer of the product and may not be assigned or transferred to any other person or consumer without FUSION's prior written consent being provided.
- During the limited warranty period, FUSION or its authorised service network will repair or replace any defective or faulty product or parts at its own cost.
- Repaired or replaced product will be warranted for the balance of the original warranty period or for ninety (90) days after the date of repair, whichever is longer.
- All warranty claims must be notified to FUSION or its authorised Dealer in writing during the warranty period accompanied with a copy of this warranty card, proof of purchase date and the product with an intact and unaltered serial number or accessory date code.
This warranty will not apply if:
The consumer causes the Product to be of unacceptable quality or fails to take steps to prevent the product from becoming of unacceptable quality and/or it is damaged by abnormal use. Examples of goods becoming of unacceptable quality or of abnormal use by the consumer include:
• Storage of product under improper conditions.
• Exposure to excessive moisture or dampness
- Exposure to excessive temperature extremes or other adverse environmental conditions.
- Unauthorised modifications of product, connections or otherwise unauthorised repairs including, but not limited, to the use of unauthorised parts in the repair of products.
- Improper use of or installation of, or interference with, product adjustments or controls and or including antenna breakage or damage due to misuse.
• Damage caused by consumables or by electricity supply. - Acts of god (force majeure), exposure of product to food spills, or any other type of fluid ingress.
• Using the product in a way for which was not intended to be used or connecting it to an accessory not supplied by, specified by, or authorised by FUSION.
• Any other abnormal use of or conduct causing product to become of unacceptable quality.
Other exclusions:
- This warranty extends to the repair or replacement of FUSION product only and the consumer is responsible for any expenses relating to the removal or installation of the product or related services including the cost of delivering the product to FUSION or its authorised dealer.
- Repair work conducted by FUSION after this warranty has expired or if this warranty for any other reason this Fusion warranty does not apply is subject to FUSION's normal service policies and FUSION charges for labour and material may apply.
- This is a manufacturers warranty provided to consumers of FUSION products. Variations to this warranty may only be made by FUSION and will be notified to the customer in writing or issued on the FUSION website. Fusion Dealers, agents and authorised dealers are not authorised to make changes or vary this FUSION warranty.
- All warranty information, product features and specifications are subject to change without notice.
- FUSION is not responsible for replacing or the cost of replacing any consumer data lost occurring either due to equipment failure or during the repair and replacement process.
- XS SERIES SUBWOOFER INSTALLATION INSTRUCTIONS
- IMPORTANT SAFETY INFORMATION
- WARNING
- CAUTION
- NOTICE
- WHAT'S IN THE BOX
- TOOLS NEEDED
- MOUNTING CONSIDERATIONS
- MOUNTING THE SUBWOOFER
- SUBWOOFER WIRING
- LED WIRING
- CONNECTING THE LED WIRES
- CONNECTING THE LED WIRES TO POWER
- SUBWOOFER SOUND OPTIMIZATION
- CONFIGURING THE SUBWOOFER FOR 2.1 OPERATION
- ADDITIONAL INFORMATION
- TRUE-MARINE™ PRODUCTS
- REGISTERING YOUR XS SERIES
- CLEANING THE SUBWOOFER
- TROUBLESHOOTING
- THERE IS NO SOUND COMING FROM THE SUBWOOFER
- THE SYSTEM LACKS BASS
- THE AUDIO IS DISTORTED
- THE LED LIGHTS WILL NOT TURN ON
- THE LEDS PULSE WITH THE BASS NOTES OF THE MUSIC
- SPECIFICATIONS
- SPEAKER DIMENSIONS
- SUBWOOFER COMPASS-SAFE DISTANCE
- THIELE SMALL PARAMETERS
- FUSGN®
- PRINTING A MOUNTING TEMPLATE
- 1 SELECT FILE > PRINT
- FUSON®
- IMPORTANT SAFETY AND PRODUCT INFORMATION
- MARINE OPERATION WARNINGS
- HEARING DAMAGE WARNING
- PRODUCT ENVIRONMENTAL PROGRAMS
- DECLARATION OF CONFORMITY
- SOFTWARE LICENSE AGREEMENT
- LIMITED 3-YEAR MARINE CONSUMER WARRANTY
- THIS WARRANTY WILL NOT APPLY IF
- OTHER EXCLUSIONS
Brand : Fusion
Model : XS-S10CWB
Category : Subwoofer