
SH5010N - Dehumidifier SWAN - Free user manual and instructions
Find the device manual for free SH5010N SWAN in PDF.


| Type | Dehumidifier |
| Brand | Swan |
| Model | SH5010N |
| Dimensions (approx.) | 480 x 330 x 250 mm |
| Weight (approx.) | 12 kg |
| Power Supply | 220-240V ~ 50Hz |
| Power Consumption (approx.) | 250 W |
| Refrigerant | R134a (GWP 1430) |
| Water Tank Capacity (approx.) | 2.5 L |
| Dehumidification Capacity (approx.) | 12 L/day (at 30°C, 80% RH) |
| Humidity Set Range | 35% - 80% RH |
| Operating Temperature Range | 5°C – 35°C (41°F – 95°F) |
| Noise Level (approx.) | 48 dB(A) |
| Airflow | Not specified |
| Filter Type | Washable mesh filter |
| Modes | Continuous, Timer, Auto defrost |
| Control Type | Electronic touch pad with LED indicators |
| Features | Bucket full indicator, auto restart, 3-minute restart delay, casters, continuous drain option |
| Safety | Overheat protection, auto shut off when bucket full |
| Warranty | 2 years |
Frequently Asked Questions - SH5010N SWAN
User questions about SH5010N SWAN
0 question about this device. Answer the ones you know or ask your own.
Ask a new question about this device
Download the instructions for your Dehumidifier in PDF format for free! Find your manual SH5010N - SWAN and take your electronic device back in hand. On this page are published all the documents necessary for the use of your device. SH5010N by SWAN.
USER MANUAL SH5010N SWAN
IMPORTANT INFORMATION - RETAIN FOR FUTURE USE
When using any electrical appliance, basic safety precautions should always be followed including the following:
• Always ensure that the voltage on the rating label corresponds to the mains voltage in your home.
- Incorrect operation and improper use can damage the appliance and cause injury to the user.
- This appliance can be used by children aged from 8 years and above if they have been given supervision or instruction concerning use of the appliance in a safe way and if they understand the hazards involved. Cleaning and user maintenance shall not be performed by children unless they are older than 8 and supervised. Keep the appliance and its cord out of reach of children aged less than 8 years. Check the power cord and plug regularly for any damage. If the cord or the plug is damaged, it must be replaced by the manufacturer or qualified person in order to avoid and an electrical hazard.
- Do not use the appliance if it has been dropped or damaged in any way. In case of damage, take the unit in for examination and/or repair by an authorized service agent.
- Never immerse the unit in water or any other liquid for cleaning purposes.
- Remove the plug from the socket by gripping the plug. Do not pull on the cord to disconnect the appliance from the mains. Always unplug the unit when not in use, before cleaning or when adding or removing parts.
- The use of accessory attachments that are not recommended or supplied by the manufacturer may result in injuries, fire or electric shock.
- Do not let the cord hang over the edge of a table or counter. Ensure that the cord is not in a position where it can be pulled on inadvertently.
- Do not allow the cord to touch hot surfaces and do not place on or near a hot gas or electric burner or in a heated oven.
- Do not use the appliance on a gas or electric cooking top or over or near an open flame.
- Use of an extension cord with this appliance is not recommended. However, if it is necessary to use an extension lead, ensure that the lead is suited to the power consumption of the appliance to avoid overheating of extension cord, appliance or plug print. Do not place the
SAFETY PRECAUTIONS
To prevent injury to the user or other people and property damage, the following instructions must be followed. Incorrect operation due to ignoring of instructions may cause harm or damage.
• The seriousness is classified by the following indications.
| WARNING | This symbol indicates the possibility of death or serious injury. |
| CAUTION | This symbol indicates the possibility of injury or damage to property. |
• Meanings of symbols used in this manual are as shown below.
| ⊗ | Never do this. |
| ! | Always do this. |
| ⚠ WARNING | ||
| Do not exceed the rating of the power outlet or connection device. | Do not operate or stop the unit by switching on or off the power. | Do not damage or use an unspecified power cord. |
| Otherwise, it may cause electric shock or fire due to excess heat generation. | It may cause electric shock or fire due to heat generation. | It may cause electric shock or fire. |
| Do not modify power cord length or share the outlet with other appliances | Do not insert or pull out plug with wet hands. | Do not place the unit near a heat source. |
| It may cause electric shock or fire due to heat generation. | It may cause electric shock. | Plastic parts may melt and cause a fire. |
| Disconnect the power if strange sounds, smell, or | You should never try to take apart or repairs the unit by | Before cleaning, turn off the power and unlike the |
CAUTION
Do not cover the intake or exhaust openings with cloths or towels.
● A lack of air flow can lead to overheating and fire.
Never insert your finger or other foreign objects into grills or openings. Take special care to warn children of these dangers.
- It may cause electric shock or failure of appliance.
① Always insert the filters securely. Clean filter once every two weeks.
● Operation without filters may cause failure.
① Care should be taken when using the unit in a room with the following persons:
- Infants, children, elderly people, and people not sensitive to humidity.
Do not place heavy object on the power cord and take care so that the cord is not compressed.
- There is danger of fire or electric shock.
① If water enters the unit, turn the unit off and disconnect the power, contact a qualified service technician.
- It may cause failure of appliance or accident.
Do not use in areas where chemicals are handled.
● This will cause the unit deterioration due to chemicals and solvents dissolved in the air.
Do not climb up on or sit on the unit.
- You may be injured if you fall or if the unit falls over.
Do not place flower vases or other water container on top of the unit.
● Water may spill inside the unit, causing insulation failure and electrical shock or fire.
Electrical Information
- The manufactures nameplate is located on the rear panel of the unit and contains electrical and other technical data specific to this unit.
- Be sure the unit is properly grounded. To minimize shock and fire hazards, proper grounding is important. The power cord is equipped with a three-prong grounding


Identification of parts
① Control panel
② Air intake grille
③ Water bucket
4 Air filter (behind the air intake grille)
5 Handle
6 Air Outlet grille
⑦ Power cord band (Used only when storing the unit.)
8 Drain hose outlet
9 Power Cord
10 Wheels
NOTE: All the pictures in the manual are for explanation purposes only. Your unit may be slightly different. The actual shape shall prevail. The operations and functions are the same.
CONTROL PANEL
The control panel of the dehumidifier you purchased may look like one of the following:

- Protection Code:
P2- Bucket is full or bucket is not in the right position-- Empty the bucket and replace in the right position.
- Auto defrosts operation on indicator light (green)
- Timer on indicator light (green)
- Continuous operation on indicator light(green)
Control pads
- Continue Pad Select for the dehumidifier to operate continuously for maximum dehumidification until the bucket is full. The Humidity set control pads cannot be used when Continuous operation is
Other features
Bucket Full Light
Glows when the bucket is ready to be emptied, or when the bucket is on. Press this pad again to cancel Continuous operation.
- TIMER Pad
Press to initiate the Auto start or Auto stop feature, in conjunction with the + and - pads.
- UP(+) / DOWN(-) Pads
- Humidity Set Control Pads The humidity level can be set within a range of 35%RH (Relative Humidity)
- POWER Pad
Press to turn the dehumidifier on and off. removed or not replaced in the proper position.
Auto Shut Off
The water level control switch shuts off the dehumidifier when the bucket is full, or when the bucket is removed or not replaced in the proper position. When the setting humidity is reached, the unit will be shut off automatically.
Wait 3 minutes before resuming operation After the unit has stopped, it cannot restart operation for the next 3 minutes. This is to protect the unit. Operation will automatically start after 3 minutes.
Auto Defrost
When frost builds up on the evaporator coils, the compressor will cycle off and the fan will continue to run until the frost disappears.
Auto-Restart
If the unit breaks off unexpectedly due to the power cut, it will restart with the previous function setting automatically when the power resumes.
Setting the Timer
- When the unit is on, press the Timer button to activate the AUTO STOP feature
OPERATING THE UNIT
Positioning the unit
A dehumidifier operating in a basement will have little or no effect in drying an adjacent enclosed storage area, such as a closet, unless there is adequate circulation of air in and out of 40cm or more the area.
- Do not use outdoors.
- This dehumidifier is intended for indoor, residential applications only.
- This dehumidifier should not be used for commercial or industrial purposes.
- Place the dehumidifier on a smooth, level floor strong enough to support the unit with a full bucket of water.
- Allow at least 20cm of air space on all sides of the unit Air intake grille 20cm or more 20cm or more for good air circulation.
- Place the unit in an area where the temperature will not fall below 5oC(41oF). The coils can become covered with frost at temperatures below 5oC(41oF), which may reduce performance.
- Place the unit away from the clothes dryer, heater or radiator.
- Use the unit to prevent moisture damage anywhere books or valuables are stored.
- Use the dehumidifier in a basement to help prevent moisture damage.
- The dehumidifier must be operated in an enclosed area to be most effective.
- Close all doors, windows and other outside

Fig.4
Casters (Installed at four points on the bottom of unit)
- Do not force casters to move over carpet, nor move the unit with water in the bucket. (The unit may tip over and spill water.)
Removing the collected water
There are two ways to remove collected water.
1. Use the bucket
- When the bucket is full, the unit will automatically stop running, and the Full indicator light will flash.
- Slowly pull out the bucket. Grip the left and right handles securely and carefully pull out straight so water does not spill. Do not put the bucket on the floor because the bottom of the bucket is uneven. Otherwise the bucket will fall and cause the water to spill.
- Throw away the water from the water outlet (See Fig.7) and replace the bucket. The bucket must be in place and securely seated for the dehumidifier to operate.
- The machine will re-start when the bucket is restored in its correct position.
NOTES:
- When you remove the bucket, do not touch any parts inside of the unit. Doing so may damage the product.
- Be sure to push the bucket gently all the way into the unit. Banging the bucket against anything or failing to push it in securely may cause the unit not to operate.
2. Continuous draining
Water can be automatically emptied into a floor drain by attaching the unit with a water hose (12mm) (not included).
- Remove the rubber plug from the back of the unit and store it in a safe location.
-
Insert the water hose into the unit from the drain outlet in the back of the unit as shown in Fig.8. Attach the water hose to the drain hose outlet of the unit. Make sure the connection of the water hose and the drain hose outlet of the unit is tight and do not let the water leak.
-
Pull out the bucket a little.

Fig.5
- Hold both sides of the bucket with even strength, and pull it out from the unit.

Fig.6
- Pour the water out.

CARE AND MAINTENANCE
There are two ways to remove collected water.
Care and cleaning of the dehumidifierTurn off the dehumidifier and remove the plug from the wall outlet before cleaning.
1. Clean the Grille and Case
- Use water and a mild detergent.
- Do not use bleach or abrasives.
- Do not splash water directly onto the main unit. Doing so may cause an electrical shock, cause the insulation to deteriorate, or cause the unit to rust.
- The air intake and outlet grilles get soiled easily, so use a vacuum attachment or brush to clean.
2. Clean the bucket
Every few weeks, clean the bucket to prevent growth of mold, mildew and bacteria. Partially fill the bucket with clean water and add a little mild detergent. Swish it around in the bucket, empty and rinse.
NOTE: Do not use a dishwasher to clean the bucket. After clean, the bucket must be in place and securely seated for the dehumidifier to operate.
3. Clean the air filter
The air filter behind the front grille should be checked and cleaned at least every 30 days or more often if necessary.
NOTE: DO NOT RINSE OR PUT THE FILTER IN AN AUTOMATIC DISHWASHER.
To remove:
- Pull the water bucket out as shown in Fig.10.
- Grip the tab on the filter and press them in slightly to take them out from the filter holder, and then pull out the filter downward. (See Fig.11\~13).

TROUBLESHOOTING TIPS
Before calling for service, review the chart below first yourself.
| Problem | What to check |
| Unit does not start | Make sure the dehumidifier's plug is pushed completely into the outlet.Check the house fuse/circuit breaker box.Dehumidifier has reached its preset level or bucket is full.Bucket is not in the proper position. |
| Dehumidifier does not dry the air as it should | Did not allow enough time to remove the moisture.Make sure there are no curtains, blinds or furniture blocking the front or back of the dehumidifier.The humidity selector may not be set low enough.Check that all doors, windows and other openings are securely closed.Room temperature is too low, below 5°C(41°F).There is a kerosene heater or something giving off water vapor in the room. |
| The unit makes a loud noise when operating | The air filter is clogged.The unit is tilted instead of upright as it should be.The floor surface is not level. |
DOCUMENTATION
We Swan Products Ltd declare that this product conforms to the following product legislation in accordance with the following directive(s):
2014/30/EU. The EMC Directive (the Electromagnetic Compatibility Directive)
2014/35/EU. The LVD Directive (Low Voltage Directive)
2011/65/EU. The RoHS directive (Restriction of Hazardous Substances Directive)
WARRANTY
This product is guaranteed for 2 years from the date of original purchase. If any defect arises due to faulty materials of workmanship the faulty products must be returned to the place of purchase. Refunds or replacement is at the discretion of the store,
The following conditions apply:
- The product must be returned to the retailer with proof of purchase.
- The product must be installed and used in accordance with the instructions contained in this instruction guide.
- It must be used only for domestic purposes.
- It does not cover wear and tear, damage, misuse or consumable parts.
• Swan Products Ltd has limited liability for incidental or consequential loss or damage.
• This guarantee is valid in the UK and Eire Only.
BS PLUG
The wires in the mains lead are colored in accordance with the following code:
DISPOSAL OF UNIT
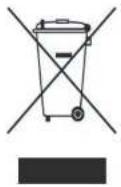
Appliances bearing the symbol shown here may not be disposed of in domestic rubbish. You are required to dispose of old electrical and electronic appliances like this separately. Please visit www.recycle-more.co.uk or www.recyclenow.co.uk for access to information about the recycling of electrical items. Please visit www.weeeirland.ie for access to information about the recycling of electrical items purchased in Ireland. The WEEE directive, introduced in August 2006, states that all electrical items must be recycled rather than taken to landfill. Please arrange to take this appliance to your local Civic Amenity site for recycling, once it has reached the end of its life.
According to EU Regulation 517/2014, R134A is a gas fluorinated greenhouse under the Kyoto Protocol. Its potential for global warming (GWP) is 1430.

- IMPORTANT INFORMATION - RETAIN FOR FUTURE USE
- SAFETY PRECAUTIONS
- CAUTION
- ELECTRICAL INFORMATION
- IDENTIFICATION OF PARTS
- CONTROL PANEL
- PROTECTION CODE
- CONTROL PADS
- OTHER FEATURES
- BUCKET FULL LIGHT
- OPERATING THE UNIT
- POSITIONING THE UNIT
- REMOVING THE COLLECTED WATER
- THERE ARE TWO WAYS TO REMOVE COLLECTED WATER
- USE THE BUCKET
- NOTES
- CONTINUOUS DRAINING
- CARE AND MAINTENANCE
- CLEAN THE GRILLE AND CASE
- CLEAN THE BUCKET
- CLEAN THE AIR FILTER
- NOTE: DO NOT RINSE OR PUT THE FILTER IN AN AUTOMATIC DISHWASHER
- TO REMOVE
- TROUBLESHOOTING TIPS
- DOCUMENTATION
- WARRANTY
- THE FOLLOWING CONDITIONS APPLY
- BS PLUG
- DISPOSAL OF UNIT
Brand : SWAN
Model : SH5010N
Category : Dehumidifier