
SDR-H21GC - Camcorder PANASONIC - Free user manual and instructions
Find the device manual for free SDR-H21GC PANASONIC in PDF.


| Product Type | Camcorder |
| Brand | Panasonic |
| Model | SDR-H21GC |
| Dimensions (W x H x D) | 70.1 x 73.0 x 120.8 mm |
| Weight (without battery and lens cap) | Approx. 430 g |
| Power Supply | AC adaptor (110-240 V) or rechargeable battery pack (7.2 V) |
| Battery Charging Time | Approx. 1 h 40 min (supplied battery) |
| Recording Media | 30 GB internal HDD + SD/SDHC memory card |
| Recording Format | MPEG-2 (motion pictures), JPEG (still pictures) |
| Video Recording Modes | XP (10 Mbps), SP (5 Mbps), LP (2.5 Mbps) |
| Maximum Recording Time (HDD) | XP: 7 h, SP: 13 h 30 min, LP: 27 h |
| Image Sensor | 1/6" CCD, total 800K pixels |
| Lens | Auto Iris, F1.8 to F2.8, focal length 3.0-30.0 mm (32x optical zoom) |
| Digital Zoom | Up to 1000x (optional) |
| Image Stabilizer | Optical (MEGA O.I.S.) |
| LCD Monitor | 2.7" color LCD, adjustable brightness and color |
| Focus | Auto/Manual, Tele macro function |
| White Balance | Auto, Manual presets |
| Scene Modes | Sports, Portrait, Low light, Spotlight, Surf & snow |
| Built-in Light | Video light (gain up mode) |
| Connectivity | USB 2.0 (Hi-Speed), AV/S video output, DC input |
| Compatible TV System | PAL |
| Operating Temperature | 0°C to 40°C |
| Cleaning Instructions | Wipe with soft dry cloth; do not use benzene, thinner or alcohol |
| Safety Precautions | Avoid rain, moisture; do not obstruct ventilation; use only recommended accessories |
| Spare Parts / Repairability | Battery packs, AC adaptor, remote control (SDR-H250 only), lens cap |
Frequently Asked Questions - SDR-H21GC PANASONIC
User questions about SDR-H21GC PANASONIC
0 question about this device. Answer the ones you know or ask your own.
Ask a new question about this device
Download the instructions for your Camcorder in PDF format for free! Find your manual SDR-H21GC - PANASONIC and take your electronic device back in hand. On this page are published all the documents necessary for the use of your device. SDR-H21GC by PANASONIC.
USER MANUAL SDR-H21GC PANASONIC
Operating Instructions
SD 卡/硬碟
攝錄放影機
SD Card/Hard Disk
Video Camera
Model No.
SDR-H250GC
SDR-H21GC
SDR-H20GC
- 国防照明的是 SDR-H250
- SDR-H20型没有酒精喷听
• The illustration shows SDR-H250.
• SDR-H20 does not have a video light.
使用的,請大專回填本說以書
Before use, please read these instructions


■ 易於拍攝!(→32)
新拍摄内容不含需要任何以前拍摄的场景。

natural_image
Illustration of two people, one holding a phone and the other looking up with thought bubbles (no text or symbols)

flowchart
graph TD
    A["Start: Bike and Motorcycle"] --> B["Step 1: Mountain View"]
    B --> C["Step 2: Mountain View"]
    C --> D["Step 3: Mountain View"]
    D --> E["Step 4: Mountain View"]
    E --> F["Step 5: Mountain View"]
    F --> G["Step 6: Mountain View"]
    G --> H["End: Construction with Parking"]
■ 與計算機一起使用!(→69)
natural_image
Illustration of a person using a laptop with a USB cable (no text or symbols)

6端子菜
7 功能表按钮 [MENU] (→ 26)
8 DC输入端子[DC/C.C.IN] (→20)
9 LCD 顯示屏開啓部分 (→ 11)
10 電池座 (→ 17)
11 音频视频输出端子 [A/V] (→ 65, 66)
12 次態指示道 (→ 20)
13 電源開關 [OFF/ON] (→ 20)
14 便碟/計算機存取指示道 [ACCESS/PC]
(→ 15,73)
15 模式轉盤 (→ 22)
16 操綫桿 (→ 22)
17 删除按钮 [面] (→ 55, 58, 59)
18 USB 端子 [←] (→ 67, 73)
19 拍器開始/停止按钮(→32)


24 配镜卡插槽 (→ 21)
25 三脚架插座(→11
26 電泡释放手柄 [BATTERY] (→ 17)

27 LCD 显示开(→11)
natural_image
Technical line drawing of a mechanical component with no visible text or symbols37手持带 (→ 10)
使用手持带
调整带子长度以适合手的尺寸
調整帶子的長度和親墊的位置。

-白動白平衡 (→ 96) -白動對象 (→ 96)
natural_image
Diagram of a digital camera with a rotary dial and scroll wheel (no text or symbols)natural_image
Line drawing of a digital camera with an arrow indicating rotation around the lens (no text or symbols)选择 [start] → [All Programs (Programs)] → [PIXELA] → [ImageMixer3 for Panasonic] → [ImageMixer3 for
Panasonic]
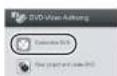
3單擊 [Create DVD-Video]

4單擊 [Create New DVD]


Information for Your Safety
WARNING:
TO REDUCE THE RISK OF FIRE,
ELECTRIC SHOCK OR PRODUCT
DAMAGE
DO NOT EXPOSE THIS APPARATUS TO RAIN, MOISTURE, DRIPPING OR SPLASHING AND THAT NO OBJECTS FILLED WITH LIQUIDS, SUCH AS VASES, SHALL BE PLACED ON THE APPARATUS.
- USE ONLY THE RECOMMENDED ACCESSORIES.
- DO NOT REMOVE THE COVER (OR BACK); THERE ARE NO USER SERVICEABLE PARTS INSIDE. REFER SERVICING TO QUALIFIED SERVICE PERSONNEL.
The socket outlet shall be installed near the equipment and easily accessible.
The mains plug of the power supply cord shall remain readily operable.
To completely disconnect this apparatus from the AC Mains, disconnect the power supply cord plug from AC receptacle.
Product Identification Marking is located on the bottom of units.
CAUTION!
- DO NOT INSTALL OR PLACE THIS UNIT IN A BOOKCASE, BUILT-IN CABINET OR IN ANOTHER CONFINED SPACE. ENSURE THE UNIT IS WELL VENTILATED. TO PREVENT RISK OF ELECTRIC SHOCK OR FIRE HAZARD DUE TO OVERHEATING, ENSURE THAT CURTAINS AND ANY OTHER MATERIALS DO NOT OBSTRUCT THE VENTILATION VENTS.
Use only the recommended accessories.
- Do not use any other AV/S cables and USB cables except the supplied one.
- When you use the cable which are sold separately, please make sure to use the one whose length is less than 3 meters.


■ How to replace the Fuse
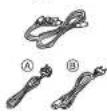
The location of the fuse differ according to the type of AC mains plug (figures A and B). Confirm the AC mains plug fitted and follow the instructions below. Illustrations may differ from actual AC mains plug.
1) Open the fuse cover with a screwdriver.

2) Replace the fuse and close or attach the fuse cover.

-If you see this symbol-
Information on Disposal in other Countries outside the European Union

This symbol is only valid in the European Union. If you wish to discard this product, please contact your local authorities or dealer and ask for the correct method of disposal.


■ Indemnity concerning recording content
The manufacturer shall in no event be liable for the loss of recordings due to malfunction or defect of this unit, its accessories or recordable media.
■ Carefully observe copyright laws
Recording of pre-recorded tapes or discs or other published or broadcast material for purposes other than your own private use may infringe copyright laws. Even for the purpose of private use, recording of certain material may be restricted.
• SDHC Logo is a trademark.
- miniSD Logo is a trademark.
- The Movie Camera uses copyright-protected technologies and is protected by the patented technologies and intellectual properties of Japan and the U.S. To use these copyright-protected technologies, authorization of the Macrovision Company is required. It is prohibited to disassemble or modify the Movie Camera.
- Manufactured under license from Dolby Laboratories.
Dolby and the double-D symbol are trademarks of Dolby Laboratories.
• LEICA is a registered trademark of Leica Microsystems IR GmbH and DICOMAR is a
- Other names of systems and products mentioned in these instructions are usually the registered trademarks or trademarks of the manufacturers who developed the system or product concerned.
These operating instructions are designed for use with models SDR-H250, SDR-H21 and SDR-H20. Pictures may be slightly different from the original.
- The illustrations used in these operating instructions show model SDR-H250, however, parts of the explanation refer to different models.
- Depending on the model, some functions are not available.
- Features may vary, so please read carefully.


Parts identification and handling ..... 111
Using the LCD monitor 114 Using the remote control (GDP U250) 445
HDD and SD card 117
Concerning the internal HDD and cards
that can be used on this unit 117
Concerning SD cards 117
HDD handling precautions 119
Access lamp 119
Setup
Power supply....121
Charging the battery....121
Connecting to the AC outlet 124
Turning the unit on/off....124
Inserting/removing an SD card .....125
Selecting a mode....126
How to use the joystick ....126
Switching the language....130
Using the menu screen....130
Setting date and time.... 132
Adjusting the LCD monitor ....133
Soft skin mode 147
Tele macro function (SDR-H250) ..... 148
Colour night view function.... 148
Self-timer recording.... 149
Recording guideline function.... 149
Wide mode....150
Image stabilizer function 150
Wind noise reduction function.... 150
Manual recording functions .....151
Scene mode.... 151
Manual focus adjustment 152
White balance 152
Manual shutter speed/aperture
adjustment 154
Playback
Motion picture playback .....156
Still picture playback 160
Editing
Editing scenes....162
Deleting scenes 162
Locking motion picture scenes.... 163
Using playlists....163
What is a playlist? 163
Creating a new playlist.... 164
Playing back a playlist.... 165
Editing a playlist.... 165
Editing still pictures....167
Deleting still picture files 167
Locking still picture files 168


onto a DVD recorder 174
With a VCR....174
Dubbing images
onto other video devices 174
With a printer (PictBridge).... 175
With a computer
Before using with a computer.....178
What you can do with a computer .....178
Operating environment....179
Installation 181
Installing ImageMixer3 for Panasonic ....181
Reading the software help....182
Software uninstallation 182
Connection and recognition .....182
Connection and recognition
procedures 182
About the computer display....183
To disconnect USB cable safely .....184
Using the recorded images on a
computer....184
DVD COPY function 184
Playing back and importing images.....185
Creating DVD-Video discs
with the selected images 187
Others
Menus....189
Menu list 189
Other menus....190
1.2.4.5.6 402
■ Extended recording!
You can record the equivalent of approximately twenty-two 8 cm DVD discs on the 30 GB internal HDD. You can also record motion pictures and still pictures on an SD card.

■ Easy recording! (→ 137)
No need to search for the recording start position.
The new recording will not overwrite any previously recorded scene.

natural_image
Illustration of two people, one holding a phone and the other looking up with thought bubbles (no text or symbols)
You can create an original video (playlist) by collecting together your favourite scenes recorded on the HDD.

flowchart
graph TD
    A["Camphons"] --> D["Beefing"]
    B["Cycling"] --> D["Beefing"]
    C["Water"] --> E["Beefing"]
    F["Marine"] --> E["Beefing"]
    G["Truck"] --> H["Beefing"]
    I["Wood"] --> H["Beefing"]
    J["Light Water"] --> K["Beefing"]
    L["Sun"] --> M["Beefing"]
    N["Sun Life"] --> O["Beefing"]
    P["Sun Life"] --> Q["Beefing"]
■ Using with a computer! (→ 178)
If you use the supplied software, you can create a backup DVD of the scenes recorded on this unit with just one button.
You can also make an original DVD-Video by exporting the scenes to a computer and then editing them.


natural_image
Illustration of a person using a laptop with a computer nearby (no text or symbols)

Check the accessories before using this unit.
SD Memory Card (512 MB)
Battery pack (SDR-H250)
Battery pack (SDR-H21/SDR-H20)
AC adaptor
DC cable
AV/S cable
AC cable


Optional accessories
Some optional accessories may not be available in some countries.
| AC adaptor (VW-AD11E/EB) |
| Battery pack (lithium/CGR-DU06/640 mAh)(SDR-H21/SDR-H20) |
| Battery pack (lithium/CGA-DU07/680 mAh)(SDR-H21/SDR-H20) |
| Battery pack (lithium/CGA-DU12/1150 mAh) |
| Battery pack (lithium/CGA-DU14/1360 mAh) |
| Battery pack (lithium/CGA-DU21/2040 mAh) |
| Tripod (VW-CT45E) |
Parts identification and handling


4 White balance sensor (→ 153)
Remote control sensor (SDR-H250)
116
5 Microphone (built-in, stereo)

6 Terminal cover
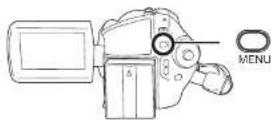
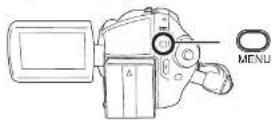
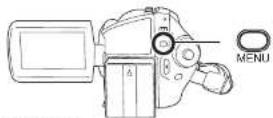
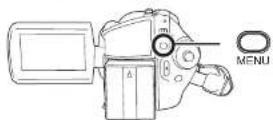
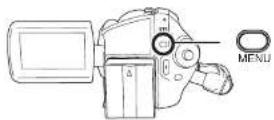
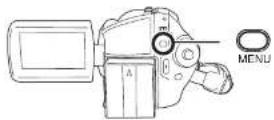
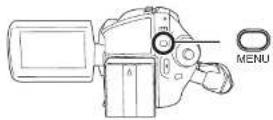
7 Menu button [MENU] (→ 130)
8 DC input terminal [DC/C.C. IN] (→ 124)
9 LCD monitor open part (→ 114)
10 Battery holder (→ 121)
11 Audio-video output terminal [A/V]
(→ 173, 174)
12 Status indicator (→ 124)
13 Power switch [OFF/ON] (→ 124)
14 HDD/computer access lamp [ACCESS/
PC] (→ 119, 183)
15 Mode dial (→ 126)
16 Joystick (→ 126)
17 Delete button []→ 162, 166, 167)
21 When recording: Zoom lever [W/T]
(→ 144)
When playing back: Volume lever
[-VOL+] (→ 158)
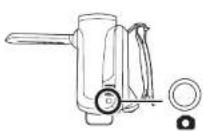
22 Photoshot button [10] 140
23 Illumination LED (→ 191)

24 Card slot (→ 125)
25 Tripod receptacle (→ 114)
26 Battery release lever [BATTERY] (→ 121)


35 Card slot cover [SD CARD] (→ 125)
36 Card access lamp [ACCESS] (→ 120, 183)
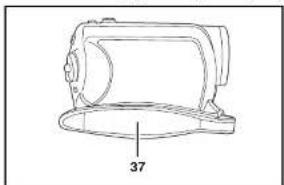
natural_image
Technical line drawing of a mechanical component with no visible text or symbols37 Grip belt (→ 113)
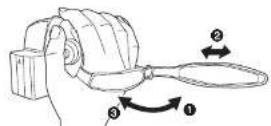
Using grip belt
Adjust the belt length so it fits your hand.
Adjust the belt length and the pad position.
Rotate the lens cover open/close ring.

Attaching the lens cap (SDR-H21/SDR-H20)
Attach the lens cap to protect the surface of the lens.
1 Pass the end of the lens cap cord through the belt.

2 Pass the lens cap through the loop.


3 To attach or remove the lens cap, hold both sides of the lens cap with the tips of your finger and thumb.

During recording The removed lens cap can be attached to the lens cap fixture.

Tripod receptacle
This is a hole for attaching the unit to the optional tripod.
(Please carefully read the operating instructions for how to attach the unit to the tripod.)

Using the LCD monitor
You can record the image while viewing it on the LCD monitor.
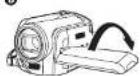
1 Place your finger on the LCD monitor open part Ⓐ and pull the LCD monitor out in the direction of the arrow.

- It can open up to 90°.
2 Adjust the angle of the LCD monitor as desired. - It can rotate up to 180irc A towards the lens or 90irc B towards the opposite direction.
A

B


1 Photoshot button [PHOTO SHOT, ]
2 On-screen display button [EXT DISPLAY]
(→ 174)
3 Date/time button [DATE/TIME] (→ 132)
4 Playback operation buttons (→ 157)
5 Delete button [ ]*
6 Direction buttons [▲,▼,◄,►] (→ 131)
7 Recording start/stop button [START/STOP]
1 While pressing the stopper Ⓐ, pull out the battery holder.

2 Set the button-type battery with its (+) mark facing upward and then put the battery holder back in place.
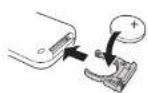
■ Concerning the button-type battery
- When the button-type battery runs down, replace it with a new battery (part number: CR2025). The battery should normally last about 1 year, however this depends on how frequently the unit is used.
- Keep the button-type battery out of the reach of children.
CAUTION


■ Remote control usable range
The distance between the remote control and the unit's remote control sensor A: Within approx. 5 m
Angle: Approx. 10irc up and 15irc down, left, and right
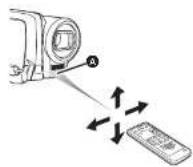
- The remote control is intended for indoor operation. Outdoors or under strong light, the unit may not operate properly even within the usable ranges.


This unit can be used for recording motion pictures and still pictures to the internal HDD and an SD card.
Concerning the internal HDD and cards that can be used on this unit
| Internal HDD(Hard Disk Drive) | SD Memory Card | SDHC Memory Card | |||
| Display on the screen | |||||
| Indication in these instructions | HDD | SD | ||||
| Capacity 30 GB | '1 | 8 MB/16 MB | 32 MB/64 MB/128 MB | 256 MB/512 MB(supplied)/1 GB / 2 GB | 4 GB |
| Functions | |||||
| Recording motion pictures | ● - ● | '2 | ● | ||
| Recording still pictures | ● | ● | |||
| Creating playlists ● | - | ||||
- available - not available


- Use this unit to format SD cards. If an SD card is formatted on other products (such as a computer), the time spent for recording may become longer and you may not be able to use the SD card.
- When using an SD card on which data has been written many times, the remaining time left for recording may be reduced.
- Keep the Memory Card out of reach of children to prevent swallowing.
- A MultimediaCard cannot be used on this unit.
- When the write-protect switch Ⓐ on SD card is locked, no recording, deletion or editing will be possible on the card.

■ About SD cards that you can use for motion picture recording
We recommend using SD cards conforming to Class 2 or higher of the SD Speed Class Rating or the following SD cards made by Panasonic for motion picture recording. (If another kind of SD card is used, the recording may suddenly stop during motion picture recording.)
| Pro High SpeedSD Memory Card | Super High SpeedSD Memory Card | High SpeedSD Memory Card | SDHC MemoryCard | |
| 256 MB – RP-SDH256 RP-SDR256 – | ||||
| 512 MB RP-SDK512 RP-SDH512 | * | - | RP-SDR512 – | |
| 1 GB | RP-SDK01GRP-SDV01G | RP-SDH01G* | RP-SDQ01G*RP-SDR01G | – |
| 2 GB | RP-SDK02GRP-SDV02G | – | RP-SDQ02G*RP-SDR02GRP-SDM02G | – |
| 4 GB – | – | – | RP-SDR04GRP-SDM04GRP-SDV04G | |
* No longer made.


This unit has an internal HDD. The HDD is a precision instrument so take care when handling it.
■ Do not cause any vibrations or impacts to this unit.
The HDD may no longer be recognised or recording or playback may no longer be possible. In particular, do not cause any vibrations or impacts during recording or playback.
■ Do not drop this unit.
The HDD may be damaged if this unit receives a strong impact due it to being dropped etc. This unit has a drop detection function to protect the HDD from impact if this unit is dropped. If it detects that this unit has been dropped during motion picture recording, the HDD protection operation sound may be recorded. Also if it detects that the unit is being continuously dropped, recording or playback may stop.
■ Take note of the temperature of this unit
It may no longer be possible to record or playback if the temperature of this unit is too high or low. A warning message will appear on this unit's LCD monitor if an irregularity in the temperature is detected. (→ 194)
■ Do not use the unit in a low pressure area
The HDD may be damaged if you use this unit where the altitude is more than 3000 m.
■ Back up important recorded data to protect it.
Save recorded data periodically on a computer, DVD disc, etc. for backup purposes. If the HDD fails, the recorded data cannot be repaired.
■ Indemnity concerning recorded content
Panasonic does not accept any responsibility for damages directly or indirectly due to any type of problems that result in loss of recording or edited content, and does not guarantee any content if

- When this unit accesses the SD card (reading, recording, playback, erasing, etc.), the access lamp lights up.
- If the following operations are performed when the access lamp is lit, then the SD card or the recorded data may be damaged or this unit may malfunction.
-Opening the card slot cover
Removing the SD card
-Operating the OFFION switch of the mode dial
-Removing the battery or disconnecting the AC adaptor


Charging the battery
When this unit is purchased, the battery is not charged. Charge the battery before using this unit.
- If the DC cable is connected to the AC adaptor, then the battery will not be charged. Remove the DC cable from the AC adaptor.

1 Connect the AC cable to the AC adaptor and the AC outlet.
2 Put the battery on the battery mount by aligning the mark, and then securely plug it in.
- The output plug of the AC cable is not completely connected to the AC adaptor socket. As shown in A, there is a gap.
- Charging lamp
Inserting the battery
Push the battery against the battery holder and slide it until it clicks.

Removing the battery
While sliding the BATTERY lever, slide the battery to remove it.

- Hold the battery with your hand so it does not fall.
• Before removing the battery, be sure to set the


Charging time and recordable time
The times shown in the tables below are for when the temperature is 25 °C and the humidity is 60%. If the temperature is higher or lower than 25 °C, the charging time will become longer.
■ Charging time
• The charging time shown in the table are approximations.
- "2 h 25 min" indicates 2 hours 25 minutes.
| Battery model number Voltage/capacity Charging time | ||
| Supplied battery/ CGA-DU12 (optional) | 7.2 V/1150 mAh | 2 h 25 min |
| CGA-DU14 (optional) | 7.2 V/1360 mAh | 2 h 45 min |
| CGA-DU21 (optional) | 7.2 V/2040 mAh | 3 h 55 min |
SDR-H21/SDR-H20:
| Battery model number Voltage/capacity Charging time | ||
| Supplied battery/ CGR-DU06 (optional) | 7.2 V/640 mAh | 1 h 40 min |
| CGA-DU07 (optional) | 7.2 V/680 mAh | 1 h 30 min |
| CGA-DU12 (optional) | 7.2 V/1150 mAh | 2 h 25 min |
| CGA-DU14 (optional) | 7.2 V/1360 mAh | 2 h 45 min |
| CGA-DU21 (optional) | 7.2 V/2040 mAh | 3 h 55 min |
■ Recordable time
- The actual recordable time refers to the recordable time when repeatedly starting/stopping recording, turning the unit on/off, moving the zoom lever, etc.
- "2 h 5 min" indicates 2 hours 5 minutes


• The display changes as the battery capacity reduces.
4→4→4→4→4
If the battery discharges, then, it will
- The recordable times will vary depending on the status of use. These times are approximations. The recordable time will become shorter when you use this unit with the LCD monitor lit up by pressing the POWER LCD PLUS button.
- The batteries heat up after use or charging. This unit will also heat up while being used. This is not a malfunction.
- Be aware that the operating time of the battery will become shorter in low temperatures. We recommend charging a spare battery for use when recording.


Connecting to the AC outlet
The unit is in the standby condition when the AC adaptor is connected. The primary circuit is always "live" as long as the AC adaptor is connected to an electrical outlet.
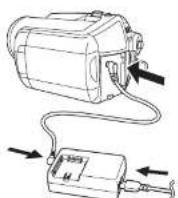
1 Connect the AC cable to the AC adaptor and the AC outlet.
2 Connect the DC cable to the AC adaptor.
3 Connect the DC cable to this unit.
- Do not use the AC cable with any other equipment as it is designed only for this unit.
How to turn on the power
Set the OFF/ON switch to ON.

The status indicator Ⓐ lights and the power turns on.
- When the unit is turned on for the first time, a message asking you to set the date and time will appear. Select [YES] and set the date and time. (→ 132)
- When the unit is turned on for the first time, a selection screen will appear to select the recording destination for motion pictures and still pictures.
Select [HDD] or [SD CARD] for each type of picture and then press the joystick.
How to turn off the power
Set the OFF/ON switch to OFF.

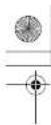

■ To turn on the power Open the LCD monitor.

The status indicator lights and the power turns on.
■ To turn off the power Close the LCD monitor.

The status indicator goes off and the power turns off.
- The power will not turn off while recording even if the LCD monitor is closed.
Set the OFF/ON switch to OFF when the unit is not being used.
- Check that the status indicator has gone off.
2 Open the LCD monitor and then slide the card slot open lever Ⓐ to open the card slot cover.

3 Insert/remove the SD card into/from the card slot.
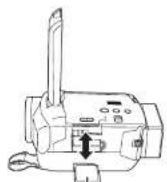


4 Securely close the card slot cover.

Selecting a mode
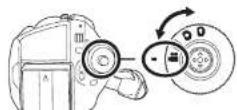
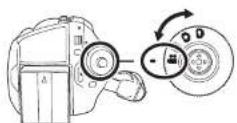
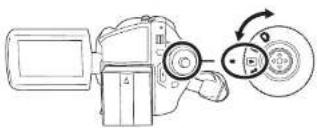
The mode dial is used to switch between recording and playback modes. Rotate the mode dial slowly but surely.
Rotate the mode dial, and set the desired mode pictograph to the position shown in the illustration.
How to use the joystick
This unit has a joystick for selecting functions, performing operations, etc. so it is easy to operate this unit with one hand.
Basic operations
Operations on the menu screen and selection of files on the thumbnail view screen, etc. Move the joystick up, down, left, or right to select an item or scene, and then press the joystick to set it.

1 Select by moving up.
② Select by moving down.
③ Select by moving left.
4 Select by moving right.
⑤ Press the joystick to select the item.
- Menu screen operations (→ 130)
Operations during recording
◇ Rotate the mode dial to select 📞
。
1 Press the centre of the joystick,


2 Move the joystick up, left or right to select an item.

Operations during playback
◇Rotate the mode dial to select 📂.
1 Move the joystick up, down, left or right to select the scene to be played back and press the joystick.


The selected scene is played back on the full screen.
- The operation icon is automatically displayed on the screen.


About the operation icons displayed in each mode
About auto mode and manual mode (→ 136)

Video recording mode
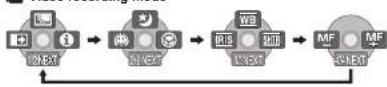
| Icon Direction Function Page | |||
| (1/2) | ▲ Backlight compensation 146 | ||
| ◀ Fade 146 | |||
| ▶ Help mode 130 | |||
| (2/2) | ▲ Colour night view 148 | ||
| ◀ Soft skin mode 147 | |||
| ▶ Tele macro (SDR-H250) 148 | |||
| In manual mode(3/3) | WB | ▲ White balance 152 | |
| IRS | ◀ Iris or gain value | 54 | |
| ▶ Shutter speed | 54 | ||
| In manual focusmode (4/4) | MF MF | ◀▶ Manual focus adjustment | 152 |
- The shaded operation icons are not displayed while recording.


Picture recording mode

| Icon Direction Function Page | |||
| (1/2) | ▲ Backlight compensation 146 | ||
| ◀ Self timer 149 | |||
| ▶ Help mode 130 | |||
| (2/2) | ◀ Soft skin mode 147 | ||
| ▶ Tele macro (SDR-H250) 148 | |||
| In manual mode (3/3) | ▲ White balance 152 | ||
| ◀ Iris or gain value 154 | |||
| ▶ Shutter speed 154 | |||
| In manual focus mode (4/4) | ◀ Manual focus adjustment | 152 | |
Picture playback mode

| Icon | Direction | Function | Page |
| ▶/■ | ▲ | Slide show start/nause | 160 |


The help mode explains the operation icons that are displayed when the AUTO/MANUAL/FOCUS switch is set to AUTO in video/picture recording mode.
◇Rotate the mode dial to select
1 Press the joystick to display the icon during the recording pause.
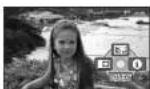
2 Move the joystick right to select [θ].

3 Move the joystick up, left or right to select the desired icon.
- When the help mode is used, functions cannot be set.
- When the help mode is used, motion pictures and still pictures cannot be recorded.
Switching the language
You can switch the language on the screen display or the menu screen.
1 Press the MENU button, then select [LANGUAGE] and press the joystick.

2 Select [English] and press the joystick.
Using the menu screen
Refer to "Menu list" (→ 189) for information about


- Do not switch the mode dial when the menu is displayed.
2 Move the joystick up or down in order to select the desired top menu.


3 Move the joystick right or press the joystick.


4 Move the joystick up or down in order to select the submenu item.


6 Move the joystick up or down in order to select the desired item.


7 Press the joystick to enter the selection.

To get back to the previous screen Move the joystick left.

To exit the menu screen Press the MENU button.

- The menu screen does not appear during recording or playing. You cannot start other


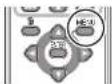
- Use the direction buttons (▲,▼,◄,►) and ENTER button in place of the joystick on the main unit.
3 Press the MENU button to exit the menu screen.
Setting date and time
When the unit is turned on for the first time, a message asking you to set the date and time will appear.
- Select [YES] and press the joystick. Perform steps 2 and 3 below to set the date and time.
If the screen shows the incorrect date and time, then adjust it.
2 Move the joystick left or right to select the item to be set. Then, move the joystick up or down to set the desired value.

- The year will change as follows: 2000, 2001, ..., 2099, 2000, ... - The 24-hour system is used to display the time.
3 Press the joystick to enter the selection.
- The clock function starts at [00] seconds when the joystick is pressed. - After pressing the MENU button to finish the setting, check the date and time display.
■ Changing the date and time display style
Press the MENU button, then select [SETUP] → [DATE/TIME] → desired display style and press the joystick.
- You can also show or change the date and time display by repeatedly pressing the DATE/TIME button on the remote control. (SDR-H250)


- The date and time function are driven by a built-in lithium battery.
• Make sure to check the time before recording. - If the time display becomes [- -], the built-in lithium battery has run down. Use the following steps to charge the battery. When you turn on the power for the first time after charging, a message asking you to set the date and time will appear. Select [YES] and set the date and time.
To recharge the built-in lithium battery Connect the AC adaptor or attach the battery to the unit, and the built-in lithium battery will be recharged. Leave the unit as it is for approx. 24 hours and the battery will save the date and time for approx. 6 months. (Even if the OFF/ON switch is set to OFF, the battery is still being recharged.)
Adjusting the LCD monitor
2 Move the joystick up or down to select the item to be adjusted. Then, move the joystick left or right to make the adjustment.
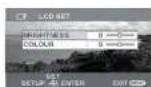
The bar display moves. [BRIGHTNESS]: Brightness of the LCD monitor [COLOUR]: Colour level of the LCD monitor
- When the LCD monitor is rotated by 180" towards the lens, the brightness and colour level of the LCD monitor cannot be adjusted.
• These settings will not affect the images actually recorded.
Increasing and decreasing the brightness of the entire LCD monitor
Press the POWER LCD PLUS button.


1 Original brightness
② Bright
3 Brighter
4 Darker
5 Dark

flowchart
graph TD
    A["①"] --> B["②"]
    B --> C["③"]
    C --> D["④"]
    D --> E["⑤"]
    E --> A
• This will not affect the images to be recorded.
- If you turn on the unit when the AC adaptor is used, this function will automatically be "Bright".
- (SDR-H250/SDR-H21) The LCD monitor will become a little darker when the video light is lit.

Basic camera positioning

Hold the camera with both hands.
② Put your hand through the grip belt.
Do not cover the microphones or sensors with your hands.
A Keep your arms near your body


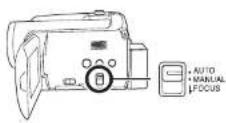
Set the AUTO/MANUAL/FOCUS switch to AUTO, and colour balance (white balance) and focusing will be adjusted
automatically.
-Auto white balance (→ 206)
-Auto focusing (→ 207) Depending on the brightness of the subject etc., the aperture and shutter speed are automatically adjusted for optimum brightness.
(When set to the video recording mode: The shutter speed is adjusted to a maximum of 1/250.)
- Colour balance and focus may not be adjusted automatically depending on light sources or scenes. If
so, manually adjust these settings.
-Scene mode (→ 151)
-White balance (→ 152)
-Shutter speed (→ 154)
-Iris/gain value (→ 154)
-Focus (→ 152)
■ Anti-Ground-Shooting (AGS) (SDR-H250)
This function prevents unnecessary recording when you forget to pause recording and walk with the unit tilted upside down while recording continues.
- If the unit continues to be tilted upside down from the normal horizontal position while recording motion pictures, it is automatically set to recording pause.
◇Rotate the mode dial to select
Press the MENU button, then select [SETUP] → [AGS] → [ON] and press the joystick.

- The AGS function may activate and cause the unit to pause the recording if you are recording a subject right above or right below you. In these cases, set [AGS] to [OFF] then continue the recording.

Recording motion pictures
HDD SD
This unit can be used for recording motion pictures to the internal HDD and an SD card. (→ 117) Before recording, use the menu to select the recording destination. (→ below)
When the unit is turned on for the first time, the media select screen for recording motion pictures will appear. Select [HDD] or [SD CARD] and press the joystick.
- When the unit is purchased, the aspect ratio is set to [16:9] for recording images compatible with a wide-screen TV.
To watch images on a regular TV (4:3), change the aspect ratio setting ( → 150) before recording the images or when watching them on the connected TV ( → 173).
- (SDR-H250) Open the lens cover before turning the unit on. If the unit is turned on with the lens cover closed, the automatic white balance adjustment may not function properly.
- (SDR-H21/SDR-H20) Remove the lens cap before turning the unit on. If the unit is turned on with the lens cap attached, the automatic white balance adjustment may not function properly.
1 Turn the unit on.
2 Rotate the mode dial to select
3 Open the LCD monitor.


To end the recording
Press the recording start/stop button again to pause recording.
- [●] and [■] are red during recording. Do not move this unit until [■] is green.

The images recorded between pressing the recording start/stop button to start recording and pressing it again to pause recording become one scene.
However if the recording destination is the HDD, the scene is automatically divided when the recorded data exceeds 4 GB. (The recording will continue.)
- When about 5 minutes have passed without any operation in recording pause, the unit automatically turns off to prevent the battery from running down. When you want to use the unit, turn it on again. This setting can also be set to [OFF]. (→ 190, [POWER SAVE])
Screen indications in the video recording mode
A Recording mode
B Selected recording destination
Remaining time left for recording (When the remaining time is less than 1 minute, [R 0h00m]
Recording time elapsed
A

- Sound is recorded from the internal stereo microphone on the front of the unit. Take care not to block this microphone.
- If the write protection switch on the SD card is set to LOCK, it cannot be used for recording. (→ 118)
- Each time the unit enters the recording pause mode, the counter display will be reset to *0h00m00s*
- While motion picture recording is in progress, the recording will not stop even if the LCD monitor is

Recording modes and recordable time available for the motion picture
Changing the recording mode of the motion picture.
Press the MENU button, then select [BASIC] -> [REC MODE] -> desired item and press the joystick.
• The recordable time shown in the table are approximations.
■ HDD
| Recording mode | |||
| XP(High quality) | SP(Normal) | LP(Long play) | |
| Capacity | |||
| 30 GB 7 h 13 h 30 min 27 h | |||
| Image quality prioritized←→Recording time prioritized | |||
■ SD card
| Recording mode | |||
| XP(High quality) | SP(Normal) | LP(Long play) | |
| Capacity | |||
| 256 MB 3 min | 6 min 12 min | ||
| 512 MB (supplied) | 6 min 12 min 25 min | ||
| 1 GB | 12 min | 25 min | 50 min |


Recording still pictures
HDD SD
This unit can be used for recording still pictures to the internal HDD and an SD card. (→ 117) Before recording, use the menu to select the recording destination. (→ below) When the unit is turned on for the first time, the media select screen for recording still pictures will appear. Select [HDD] or [SD CARD] and press the joystick.
- When this unit is purchased, [PICTURE SIZE] is set to [2M] (SDR-H250)/ [0.2M] (SDR-H21/SDR-H20) for recording pictures compatible with a wide-screen TV (16:9). To record pictures with a 4:3 aspect ratio, change the [PICTURE SIZE] setting before recording ( → 143).
- (SDR-H250) Open the lens cover before turning the unit on. If the unit is turned on with the lens cover closed, the automatic white balance adjustment may not function properly.
- (SDR-H21/SDR-H20) Remove the lens cap before turning the unit on. If the unit is turned on with the lens cap attached, the automatic white balance adjustment may not function properly.
1 Turn the unit on.
2 Rotate the mode dial to select

3 Open the LCD monitor.

○ (The white lamp flashes.): Focusing
● (The green lamp lights up.): When in focus
No mark: When focusing is unsuccessful.
- The focus indication is indicated as follows when the Photoshop
button [ ] not pressed halfway. Please use it as a guide for recording.
● (The green lamp lights up.): When in focus and a good picture can be recorded.
○ (The white lamp lights up.): Almost in focus
B Focus area

6 Press the Photoshot button [ ] fully to take the picture.

■ SDR-H21/SDR-H20
5 Press the Photoshot button [ ]
The unit automatically focuses on the subject at the centre of screen (when auto focus is selected)


Screen indications in picture recording mode
A Size of still pictures
B Selected recording destination
© Remaining number of still pictures
(Flashes in red when [R 0] appears.)
D Quality of still pictures
■ About the focus indication (SDR-H250)
- The focus indication does not appear in manual focus mode.
- Focus on a subject manually when it is not easily focused
- You can record still pictures even if the focus indication does not appear, but pictures may be
recorded without being focused
- The focus indication does not appear or has difficulty displaying in the following cases.
-When the zoom magnification is high.
-When the unit is shaken.
-When the subject is moving.
—When the subject stands in front of a light source.
- When close subjects and far subjects are included in the same scene.
—When the scene is dark.
When there is a bright part in the scene.
When the scene is filled with only horizontal lines.
When the scene lacks contrast.

■ Concerning the focusing area (SDR-H250)
When there is a contrasting object ahead or behind the subject in the focus area, the subject may not
be focused. If so, move the contrasting object out of the focus area.
Even when it is still difficult to focus, adjust the focus manually.
Recording with a shutter operation effect
You can add a shutter sound when recording still pictures


Number of pixels and picture quality for still picture recording
■ [PICTURE SIZE]
Changing the recording size.
Press the MENU button, then select [BASIC] → [PICTURE SIZE] → desired item and press the joystick.
![PANASONIC SDR-H21GC - ■ [PICTURE SIZE] - 1](/content/2026/05/926245/images/db56a62cd2d5fd5df2843ae5f6456deb1106142104693edfb6296e3d49d7cb3a.jpg)
SDR-H250:
| Icon Aspect Number of pixels | |
| 31 | 4:3 2048×1512 |
| 1v | 4:3 1280×960 |
| 01 | 4:3 640×180 |
| 2M | 16:9 1920×1080 |
SDR-H21/SDR-H20:
| Icon Aspect Number of pixels | |
| 0.1 | 4:3 640×480 |
| 0.2M | 16:9 640×360 |
- When this unit is purchased, [PICTURE SIZE] is set to [2H] (SDR-H250)/[12H] (SDR-H21/SDR-H20). The sides of pictures recorded with a 16:9 aspect ratio may be cut at printing. Check before printing.
■ [PICT. QUALITY]
Selecting the picture quality.
![PANASONIC SDR-H21GC - ■ [PICT. QUALITY] - 1](/content/2026/05/926245/images/020f4059f394b5a8250c7557fe692208d15d67f8bc09c6d13b6862d4089cdca3.jpg)
![PANASONIC SDR-H21GC - ■ [PICT. QUALITY] - 2](/content/2026/05/926245/images/f5ebabdf6d1058ad1ee434be4f712508f7fef4a98c8c54520fd1a8ae959972c1.jpg)
Various recording functions
Zoom in/out function
HDD SD
SDR-H250:
You can zoom in up to 10× optically.
SDR-H21/SDR-H20:
You can zoom in up to 32× optically.
◇Rotate the mode dial to select
。
Move the zoom lever.

T side:
Close-up recording (zoom in)
W side:
Wide-angle recording (zoom out)

(SDR-H250)/2 cm (SDR-H21/SDR-H20) away from the lens. (Macro function)
■ The zoom speed varies depending on the
range over which the zoom lever is moved.
(The zoom speed does not vary when
operating with the remote control.)
■ When the zoom speed is high, the subject may
not be focused easily.
- If you take your finger off the zoom lever during
zoom operation, the operation sound may be
recorded. When returning the zoom lever to
the original position, move it quietly.
Digital zoom function
HDD SD
If the zoom magnification exceeds 10×
(SDR-H250)32× (SDR-H21/SDR-H20), then the
digital zoom function will be activated. The
maximum magnification provided by the digital
zoom can be switched.
◇ Rotate the mode dial to select
Press the MENU button, then select
[ADVANCED] → [D.ZOOM] →
desired item and press the joystick.


- This function cannot be used in picture recording mode.
To use the zoom microphone function
HDD SD
The zoom microphone is linked to the zooming operation so that far-away sounds with a tele-shot and close-up sounds with a wide-angle shot are recorded more clearly.
◇Rotate the mode dial to select ☐ Press the MENU button, then select [ADVANCED] → [ZOOM MIC] → [ON] and press the joystick.
Recording yourself
HDD SD
You can record yourself while viewing the LCD monitor.
- When the LCD monitor is rotated towards the lens side, the icon will not be displayed even if you press the joystick.
- Only some indications will appear on the screen. When [[1]] appears, return the direction of the LCD monitor to normal position and check the warning/alarm indication.
(→ 194)
Recording with the video light (SDR-H250/SDR-H21) This built-in video light is for recording in dark places.
HDD SD
Gain up mode works with the video light to enhance the light's brightness and brighten the natural colours in a scene.
- (SDR-H250) Gain up mode cannot be used in picture recording mode.
◇Rotate the mode dial to select 📂.
Press the LIGHT button.


• Video recording mode

• Picture recording mode

SDR-H21:
• Video recording mode/Picture recording mode

• The subject should be within 1.3 m of the unit.
• Using the video light reduces battery time
- Set the video light to off when not in use.
- Do not look directly into the light.
• Using the colour night view function at the
same time will make conditions even brighter
- The video light enables brightening of the images taken in a dimly-lit place. We also recommend using it in a bright place to obtain high quality images.
1 Press the joystick. Then move the joystick down to display the icon shown in the illustration.
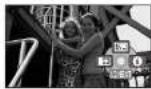
2 Move the joystick up to select [Fm].

The image on the screen will become brighter.
To return to normal recording
Select [F2n] again.
- If you turn off the power or operate the mode dial, the backlight compensation function is cancelled.
Fade in/fade out function
HDD SD
F-12-12


2 Move the joystick left to select [→].
![PANASONIC SDR-H21GC - Move the joystick left to select [→]. - 1](/content/2026/05/926245/images/3e6fcbb67551022f565bba09db19ca5f2a9a523d2e4e1dd3d49d29a6faa2d734.jpg)
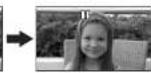
3 Press the recording start/stop button. Start recording. (Fade in)

natural_image
Black-and-white photo collage showing two children in a scenic outdoor setting (no text or symbols visible)When you start recording, the image/audio gradually appears.
Pause recording. (Fade out)
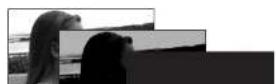
Press the MENU button, then select [ADVANCED] → [FADE COLOUR] → [WHITE] or [BLACK] and press the joystick.
- If you turn off the power, the fade function is cancelled.
- While the fade in/fade out function is selected, it takes several seconds to display the image when you start recording. It also takes several seconds to pause recording.
- The thumbnails of scenes recorded using fade in become black (or white).
Soft skin mode
This makes skin colours appear softer for a more attractive appearance.
HDD SD
This is more effective if you record a person closely from the torso up.
◇Rotate the mode dial to select 📂.
1 Press the joystick. Then move the joystick down to display the icon shown in the illustration.


- If the background or anything else in the scene has colours similar to the skin colour, they will also be smoothed.
- If the brightness is insufficient, the effect may not be clear.
-
You may not be able to see the face clearly when recording a distant person. In this case, cancel soft skin mode or zoom in on the face.
-
If a sharper focus cannot be achieved, adjust the focus manually. (→ 152)
- In the following cases, the tele macro function is cancelled.
- The zoom magnification becomes lower than 10x
—The power is turned off or the mode dial is operated.
Tele macro function (SDR-H250)
This is for bringing only what you want to record into focus to take close-ups.
HDD SD
By focusing only on the subject and blurring the background, the image can be impressive. The unit can focus on the subject at a distance of approx. 50 cm.
◇Rotate the mode dial to select 📄.
1 Press the joystick. Then move the joystick down to display the icon shown in the illustration.

Colour night view function This allows recording in dark locations.
HDD SD
This function allows you to record colour subjects in dark locations to stand out against the background.
Attach this unit to a tripod, and you can record images free from vibration.
■ Minimum required illumination: approx. 1 lx (SDR-H250)/approx. 2 lx (SDR-H21/SDR-H20)
- Recorded scene is seen as if frames were missed.
◇Rotate the mode dial to select
1 Press the joystick. Then move the joystick down to display the icon shown in the illustration.



To cancel the colour night view function Select [ ] again.
The colour night view function makes the signal charging time of CCD up to approximately 25× longer than usual, so that dark scenes can be recorded brightly. For the reason, bright dots that are usually invisible may be seen, but this is not a malfunction.
- If you turn off the power or operate the mode dial, the colour night view function is cancelled.
- If set in a bright place, the screen may become whitish for a while.
Self-timer recording
This is for recording shots of yourself as well.
HDD SD
You can record still pictures using the timer.
◇Rotate the mode dial to select
1 Press the joystick. Then move the joystick down to display the icon shown in the illustration.

is focused when the button is pressed halfway. (SDR-H250)
- When you press the Photoshop button fully in auto focus mode, the subject is focused just before recording. (SDR-H250)
To stop the timer midway through
Press the MENU button. (The self-timer setting is cancelled.)
- If you turn off the power, the self-timer standby mode is cancelled.
- Depending on the time taken to bring the subject into focus, the recording may take longer than the set time before the picture is taken.
Recording guideline
function
Checking if the image is level.
HDD SD
You can check if the image is level while recording by using the lines displayed on the screen.
◇ Rotate the mode dial to select 📁.
Press the MENU button, then select [BASIC] → [GUIDE LINES] → [ON] and press the joystick.


This is for selecting the screen's aspect ratio when recording motion pictures.
HDD SD
This allows you to record images compatible with wide-screen TVs (16:9) and regular TVs (4:3).
■ Recording images with a 16:9 aspect ratio
◇Rotate the mode dial to select 📄 Press the MENU button, then select [BASIC] → [REC ASPECT] → [16:9] and press the joystick.

■ Recording images with a 4:3 aspect ratio
◇ Rotate the mode dial to select 📄 Press the MENU button, then select [BASIC] → [REC ASPECT] → [4:3]
Press the MENU button, then select [ADVANCED] → [O.I.S.] → [ON] and press the joystick.

To cancel the image stabilizer function Press the MENU button, then select [ADVANCED] → [O.I.S.] → [OFF] and press the joystick.
- This function's default setting is [ON].
- In the picture recording mode, pressing the Photoshot button [ ] halfway increases the effect of the image stabilizer function. (MEGA optical image stabilizer) (SDR-H250)
- In the following cases, the image stabilizer function may not work effectively.
- When the digital zoom is used
- When the unit is shaken greatly When you record a moving subject while tracking it
Wind noise reduction
function This is for reducing the wind noise

To cancel the wind noise reduction
function
Press the MENU button, then select [ADVANCED] → [WIND CUT] → [OFF] and press the joystick.
- This function's default setting is [ON].
- The wind noise reduction depends on the wind strength. (If this function is activated in strong winds, the stereo effect may be reduced. When the wind weakens, the stereo effect will be restored.)
Manual recording functions
Scene mode
1 Set the AUTO/MANUAL/FOCUS switch to MANUAL.

2 Press the MENU button, then select [BASIC] → [SCENE MODE] → desired item and press the joystick.
[ ] Sports
To record sports scenes or scenes where there are quick motions
[Portrait
To make people stand out against the background
[Low light
To make the scene brighter in dark conditions
[Spotlight
To make the subject under a spotlight look more


- During normal playback, the image movement may not look smooth.
- Avoid recording under fluorescent light, mercury light or sodium light because the colour and brightness of the playback image may change.
- If you record a subject illuminated with strong light or a highly reflective subject, vertical lines of light may appear.
- If the brightness is insufficient, the sports mode does not function. The [ ] display flashes.
- If this mode is used indoors, the screen may flicker.
Portrait mode
- If this mode is used indoors, the screen may flicker. If so, change the scene mode setting to [OFF].
Low light mode
Spotlight mode
Surf & snow mode
- Extremely dark scenes may not be able to be recorded finely.
- If the recording subject is extremely bright, the recorded image may become whitish and the periphery of the recorded image extremely dark.
- If the subject is extremely bright, the recorded image may become whitish.
Manual focus adjustment
HDD SD
If auto focusing is difficult due to the conditions.
2 Move the switch down and set it to FOCUS position.


The manual focus indication [MF] and the icon shown in the illustration appear.
3 Move the joystick left or right to bring the subject into focus.

- The subject may not be in focus when zoomed in if focusing with a wide angle. First, zoom in on the subject, and then focus on it.

To restore to the automatic adjustment Press the AUTO/MANUAL/FOCUS switch down again to the FOCUS position.


1 Set the AUTO/MANUAL/FOCUS switch to MANUAL.

The icon shown in the illustration is displayed automatically.
2 Move the joystick up to select [WB].

3 Move the joystick left or right to select the white balance mode.

[AWB] Auto white balance adjustment
To set the white balance manually
1 Select [] and fill the screen with a white subject.

2 Move the joystick up to select [■].

When the [icon] display changes from flashing to on, setting is complete.
- When the display continues flashing, the white balance cannot be set because the place is dark etc. In this case, use the automatic white balance.
■ About the white balance sensor A


This is one of the 3CCD system functions that automatically adjusts the black when the white balance is set in the manual adjustment mode. When the black balance is adjusted, the screen will temporarily be black. (The black balance cannot be adjusted manually.)
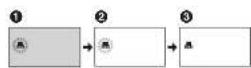
① Black balance adjustment in progress. (Flashes.)
② White balance adjustment in progress. (Flashes.)
③ Adjustment completed. (Lights up.)
- (SDR-H250) When the unit is turned on with the lens cover closed, the automatic white balance adjustment may not function properly. Please turn the unit on after opening the lens cover.
- (SDR-H21/SDR-H20) When the unit is turned on with the lens cap attached, the automatic white balance adjustment may not function properly. Please turn the unit on after removing the lens cap.
- When the display flashes, the manual white balance previously adjusted is stored. Whenever recording conditions change, re-set the white balance for correct adjustment.
1 Set the AUTO/MANUAL/FOCUS switch to MANUAL.

The icon shown in the illustration is displayed automatically.
2 Move the joystick left or right to select [1](aperture) or [ ] (shutter speed).
 or [ ] (shutter speed). - 1](/content/2026/05/926245/images/60344b775d069fdc215dcbd1fc4029f281dfd283f29b3cd1d716affddefe6794.jpg)
3 Move the joystick left or right to make the adjustment.

Shutter speed:


■ Manual shutter speed adjustment
■ Manual iris/gain adjustment
- When setting both the shutter speed and the iris/gain value, set the shutter speed and then set the iris/gain value.
- Avoid recording under fluorescent light, mercury light or sodium light because the colour and brightness of the playback image may change.
- If you increase the shutter speed manually, the gain value will increase automatically depending on how much the sensitivity lowers and the noise on the screen may increase.
- You may see vertical lines of light in the playback image of a brightly shining subject or highly reflective subject, but this is not a malfunction.
- During normal playback, image movement may not look smooth.
- When recording in an extremely bright place, the screen may change colour or flicker. If so adjust the shutter speed manually to [1/50] or [1/100].
- If the gain value is increased, the noise on the screen increases.
- Depending on the zoom magnification, there are iris values that are not displayed.


Motion picture playback
HDD SD
Play back the motion pictures recorded on the internal HDD or SD card. Use the menu to select the desired playback medium. (→ below)
1 Rotate the mode dial to select ▶.
natural_image
Line drawing of a digital camera with a circular dial and scroll wheel (no text or symbols)2 Press the MENU button, then select [MEDIA SELECT] → [HDD] or [SD CARD] to select the desired medium and press the joystick.
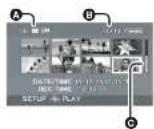
The motion pictures recorded on the selected medium are displayed as thumbnails.
3 Select the scene to be played back.
A Selected medium
B Scene number
© Scroll bar display
The selected scene will be encircled by a yellow frame.
- When 9 or more scenes have been recorded, the next (or previous) page is displayed by moving the joystick.
- If you move and hold the joystick up or down, you can fast forward or fast rewind the pages. The screen will not change at this time, but the scene numbers and scroll bar display will change. Release the joystick when you have arrived at the page with the scene you want to display.


- When the amount of time recorded on the scene is short, playback may not be possible.
- When a scene is displayed as [☐] on the thumbnail display, playback is not possible.
- The power will not turn off when the LCD monitor is closed.
- When playing back motion pictures recorded on an SD card with other products on this unit or playing back motion pictures recorded on an SD card with this unit on other products, the picture quality may deteriorate and they may be unplayable. (The message "CANNOT PLAY." appears.)
- The time displayed may be different from the recording time and it may take time to display the thumbnail display when playing back motion pictures recorded on an SD card with other products.
To display the recording date during playback
Press the MENU button, then select [SETUP] → [DATE/TIME] → [D/T] or [DATE] and press the joystick.
- You can also show or change the date and time display by repeatedly pressing the DATE/TIME button on the remote control. (SDR-H250)
- The recording time is not displayed on the screen during playback of scenes recorded on an SD card with other products.
Fast forward/rewind playback
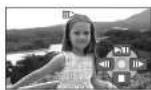
Move and hold the joystick right during playback until fast-forward starts.
(Move and hold the joystick left to rewind.)
- Move the joystick again to increase the speed.
- Normal playback is restored when you move the joystick up.
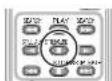
■ Operating with the remote control (SDR-H250)
Press the ◀◀ or ▶▶ button.



■ Operating with the remote control (SDR-H250)
Press the <1 or 1> button.

Frame-by-frame playback
The motion picture is advanced one frame at a time.
1 Move the joystick up during playback to pause the playback.
2 Move the joystick right.
(The frames will be advanced one at a time in the reverse direction when you move the joystick left
- Normal playback is restored when you move the joystick up.
■ Operating with the remote control (SDR-H250)
1 Press the II button.
2 Press the ◀ or ▶ button.


Scenes recorded on the same day can be played back in succession.
1 Press the MENU button, then select [PLAY SETUP] → [PLAY MODE] → [BY DATE] and press the joystick.
The [VIEW BY DATE] screen is displayed by month when playing back motion pictures on the HDD. Proceed to step 3 when playing back an SD card.
- When [PLAY MODE] is set to [VIEW ALL], all recorded motion pictures will be played back in succession.

2 (When playing back motion pictures on the HDD only) Move the joystick left or right to select the month.

3 Move the joystick up or down to select the date for playback, then press the joystick.
The scenes recorded on the same day are displayed as thumbnails.
4 Select the scene to be played back.
- Even if scenes are recorded on the same day, they are grouped separately when the number of scenes exceeds 99.
Resuming the previous playback
Press the MENU button, then select


Still picture playback
HDD SD
Play back the still pictures recorded on the internal HDD or SD card. Use the menu to select the desired playback medium. (→ below)
1 Rotate the mode dial to select ▶.

natural_image
Diagram of a digital camera with an arrow indicating rotation (no text or symbols present)2 Press the MENU button, then select [MEDIA SELECT] → [HDD] or [SD CARD] to select the desired medium and press the joystick.
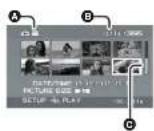
The still pictures recorded on the selected medium are displayed as thumbnails.
3 Select the file to be played back.
A Selected medium
File number
© Scroll bar display
The selected file will be encircled by a yellow frame.
- When 9 or more files have been recorded, the next (or previous) page is displayed by moving the joystick.
- If you move and hold the joystick up or down, you can fast forward or fast rewind the pages. The screen will not change at this time, but the file numbers and scroll bar display will change. Release the joystick when you have arrived at the page with the file you want to display.


- The file format supported by this unit is JPEG. (Not all JPEG formatted files will be played back.)
- If a non-standard file is played back, the folder/file number may not be displayed
-
This unit may degrade or not play back data recorded or created on another product and another product may degrade or not play back data recorded on this unit.
-
Do not operate the mode dial during the slide show.
- While this unit accesses the SD card (the access lamp is lit), do not remove the SD card.
- It takes time to display the file depending on the number of pixels of the file.
- When a file is displayed as [1] on the thumbnail display, playback is not possible.
- If you attempt to play back a file recorded in a different format or file data is defective, an error
message may appear. - The time displayed may be different from the recording time and it may take time to display the
thumbnail display when playing back still pictures recorded on an SD card with other products.
• The power will not turn off when the LCD monitor is closed.


This is for deleting motion picture scenes.
HDD SD
The deleted scenes cannot be restored.
Deleting scenes one at a time
◇Rotate the mode dial to select ▶
◇Select [HDD] or [SD CARD] in [MEDIA SELECT].
1 Press the button during playback.

2 When the confirmation message appears, select [YES], then press the joystick.
1 Press the button in the thumbnail display.

2 Select [ALL] or [SELECT] and press the joystick.
■ When [ALL] is selected, the following scenes will be deleted. Proceed to step 5.
- When [PLAY MODE] is set to [VIEW ALL]: All the scenes on the selected medium except the locked scenes
- When [PLAY MODE] is set to [BY DATE]: All the scenes selected by date except the locked scenes
3 (Only when [SELECT] is selected in step 2) Select the scene to be deleted, then press the joystick.


To cancel deleting halfway
Press the MENU button.
- Scenes are deleted from the last scene on the thumbnail display. The scenes that have already been deleted when the deletion is cancelled cannot be restored.
To complete editing
Press the MENU button.
- You can also delete scenes by pressing the MENU button, selecting [DELETE] and then selecting [ALL] or [SELECT].
- In case of [ALL], the deletion may take time if there are many scenes.
- Do not turn off this unit while deleting.
- When you delete scenes, use a battery with sufficient battery power or use the AC adaptor
- Do not open the card slot cover while deleting scenes recorded on an SD card. The deletion will stop.
• The locked scenes cannot be deleted.
Locking motion picture scenes
This is for preventing motion picture scenes from being deleted by mistake.
HDD SD
Motion picture scenes can be locked so that they are not deleted by mistake. (However, please be
SET] -> [YES] and press the joystick.

2 Select the scene to be protected, then press the joystick.

[Φ] display appears and the selected scene is locked.
- Press the joystick again to release the lock setting.
- You can also select multiple scenes in succession.
To complete the settings
Press the MENU button.
Using playlists

- If you create or delete playlists, the original scenes will not be modified. Editing scenes on a playlist will not affect the original scenes.
A

flowchart
graph TD
    A["Outdoor scenes"] --> B["Construction"]
    A --> C["Transportation"]
    A --> D["Leaving"]
    A --> E["Construction"]
    A --> F["Transportation"]
    A --> G["Leaving"]
    B --> H["Final Output ①"]
    C --> H
    D --> H
    E --> H
    F --> H
    G --> H
A Recorded scenes B Playlist
- You can create a playlist on the HDD only. You cannot create a playlist on an SD card.
- The maximum number of items on the HDD
- Playlists: 4
- Playlist scenes: 99
- If original scenes are deleted, the portion of playlists created with these scenes is also deleted.
[PLAYLIST] -> [CREATE] and press the joystick.

2 Select the scene to be added to the playlist, then press the joystick.

The selected scene is encircled by a red frame.
- When the joystick is pressed again, the selected scene will be cancelled.
- Up to 50 scenes can be set in succession.
- The scenes are registered in the playlist in the order that they were selected. After creating a playlist, the order of the scenes in it can be changed with the [MOVE] function. (→ 166)
3 Press the MENU button.


Playing back a playlist
HDD
◇Rotate the mode dial to select ▶
◇Select [HDD] in [MEDIA SELECT].
1 Press the MENU button, then select [PLAY SETUP] → [PLAYLIST] → [VIEW LIST] and press the joystick.

2 Select the playlist to be played back, then press the joystick.

Scenes in the selected playlist are displayed as thumbnails.
Editing a playlist
HDD
Editing scenes on a playlist will not affect the original scenes.
Adding scenes to playlist
◇ Select playlist playback mode. (→ 165, "Playing back a playlist", steps 1 and 2)
1 Press the MENU button, then select [EDIT] → [ADD] → [YES] and press the joystick.
2 Select the scene to be added, then press the joystick.


The thumbnail view screen of the playlist that scenes were added to is displayed.
To continue adding scenes to the playlist Repeat steps 1-4.
Moving scenes
The scenes in a playlist can be moved.
Select playlist playback mode. (→ 165, "Playing back a playlist", steps 1 and 2)
1 Press the MENU button, then select [EDIT] → [MOVE] → [YES] and press the joystick.
2 Select the scene to be moved, then press the joystick.
To continue moving other scenes in the playlist Repeat steps 2-3.
To complete editing Press the MENU button.
Deleting scenes
- Deleting scenes on a playlist will not affect the original scenes.
■ Deleting scenes one at a time
◇ Select playlist playback mode. (→ 165, "Playing back a playlist", steps 1 and 2)
1 Press the Button during playback.

2 When the confirmation message appears, select [YES], then press the joystick.


2 Select [ALL] or [SELECT] and press the joystick.
- When [ALL] is selected, the selected playlist will be erased. Proceed to step 5.
3 (Only when [SELECT] is selected in step 2) Select the scene to be deleted, then press the joystick.

The selected scene is encircled by a red frame.
- When the joystick is pressed again, the
selected scene will be cancelled - Up to 50 scenes can be set in succession.
4 (Only when [SELECT] is selected in step 2) Press the button.
5 When the confirmation message appears, select [YES], then press the joystick.
(Only when [SELECT] is selected in step 2)
To continue deleting other scenes Repeat steps 3-5.
- When a playlist is deleted, the number of each subsequent playlist decreases by one.
Editing still pictures
Deleting still picture files This is for deleting still picture files.
HDD SD
The deleted files cannot be restored.
Deleting files one at a time
◇Rotate the mode dial to select
◇Select [HDD] or [SD CARD] in [MEDIA SELECT].
1 Press the button during playback.

2 When the confirmation message appears, select [YES] then press


1 Press the button in the thumbnail display.

2 Select [ALL] or [SELECT] and press the joystick.
- When [ALL] is selected, all files on the medium except the locked files will be erased. Proceed to step 5.
3 (Only when [SELECT] is selected in step 2) Select the file to be deleted, then press the joystick.
![PANASONIC SDR-H21GC - (Only when [SELECT] is selected in step 2) Select the file to be deleted, then press the joystick. - 1](/content/2026/05/926245/images/351fa7780027680e6037d2b18ff550b76b6787be8bdfc0780d48198f093c4a37.jpg)
The selected file is encircled by a red frame.
- When the joystick is pressed again, the selected file will be cancelled.
- Up to 50 files can be set in succession.
been deleted when the deletion is cancelled cannot be restored.
To complete editing
Press the MENU button.
■ Deleting still picture files recorded on an SD card by other products
A still picture file (other than JPEG) that cannot be played back on this unit may be erased.
- You can also delete files by pressing the MENU button, selecting [DELETE] and then selecting [ALL] or [SELECT].
■ In case of [ALL], the deletion may take time if there are many files. - Do not turn off this unit while deleting.
- When you delete files, use a battery with sufficient battery power or use the AC adap
- Do not open the card slot cover while deleting files recorded on an SD card. The deletion will stop.
- If files conforming to DCF standard are deleted, all the data related to the files will be deleted.
Locking still picture files
This is for preventing still picture files
from being deleted by mistake.
HDD SD
Still picture files can be locked so that they are


1 Press the MENU button, then select [PHOTO SETUP] → [LOCK SET] → [YES] and press the joystick.

2 Select the file to be protected, then press the joystick.

[Φ] display appears and the selected file is locked.
- Press the joystick again to release the lock setting.
- You can also select multiple files in succession.
To complete the settings
Press the MENU button.
DPOF setting
[DPOF SET] -> [SET] and press the joystick.

2 Select the file to be set, then press the joystick.
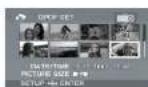
The number of prints set to be in DPOF is displayed.
3 Move the joystick up or down to select the number of prints, then press the joystick.
- You can select from 0 to 999. (The selected number of pictures can be printed with the printer supporting DPOF.)
- To cancel the setting, set the number of prints to [0].
- You can also select multiple files in succession.


- The DPOF setting can be established for up to 999 files.
- DPOF setting made on other devices may not be recognised by this unit. Please perform the DPOF settings on this unit.
- You cannot add the recording date to pictures to be printed with the DPOF settings.
Copying still picture files This is for copying still picture file from the HDD to an SD card or vice versa.
HDD SD
◇Rotate the mode dial to select
1 Press the MENU button, then select [PHOTO SETUP] → [COPY] → desired direction and press the joystick.

Copying from the HDD to an SD card
Copying from an SD card to the HDD
3 (Only when [SELECT] is selected in step 2) Select the file to be copied, then press the joystick.

The selected file is encircled by a red frame.
- When the joystick is pressed again, the
selected file will be cancelled
• Up to 50 files can be set in succession.
- The files are copied in the order that they were selected.
4 (Only when [SELECT] is selected in step 2) Press the MENU button.
5 When the confirmation message appears, select [YES], then press
the joystick. Copying of the file starts.
(Only when [SELECT] is selected in step 2)
To continue copying other files
Repeat steps 3-5.
To cancel copying halfway
Press the MENU button.

HDD and card management
HDD management
Formatting HDD
This is for initializing HDD.
HDD
Please be aware that if the HDD is formatted, then all the data recorded on the HDD will be erased. Store important data on a computer, etc.
◇Rotate the mode dial to select ▶
◇Select [HDD] in [MEDIA SELECT].
1 Press the MENU button, then select [SETUP] → [FORMAT HDD] → [YES] and press the joystick.
2 When the confirmation message appears, select [YES], then press the joystick.
- When formatting is complete, press the MENU
Press the MENU button, then select [SETUP] → [HDD STATUS] → [YES] and press the joystick.
To exit the information screen Press the MENU button.
- The 30 GB hard drive utilizes a portion of the storage space for formatting, file management and other purposes. 30 GB is 30,000,000,000 bytes. Usable capacity will be less.
Card management
Formatting an SD card
This is for initializing cards.
SD
Please be aware that if an SD card is formatted, then all the data recorded on the card will be erased. Store important data on a computer, etc.


HDD and card management
2 When the confirmation message appears, select [YES], then press the joystick.
- When formatting is complete, press the MENU button to exit the message screen.
- Use this unit to format SD cards. If an SD card is formatted on other products (such as a computer), the time spent for recording may become longer and you may not be able to use the SD card.
- Depending on the type of SD card being used, it may take time to format.
• During formatting, do not turn this unit off. - When you format the SD card, use a battery with sufficient battery power or the AC adaptor
- Do not open the card slot cover while formatting. The formatting will stop.

The motion pictures and still pictures recorded by this unit can be played back on a TV.
- Use the AC adaptor to free you from worrying about the battery running down.
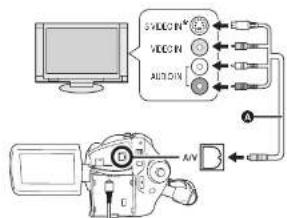
1 Connect this unit and a TV.
flowchart
graph TD
    A["Computer"] --> B["Video Device"]
    B --> C["Audio/Video Unit"]
    C --> D["Display Unit"]
    D --> E["Monitor"]
A AV/S cable (supplied) • Insert the plugs as far as they will go.
If the TV has an S Video terminal, also connect
- The channel set will differ depending on the terminal to which the unit is connected.
5 Start playback on this unit.
The image and audio are output on the TV.
■ If the image or audio from this unit is not output on the TV
- Check that the plugs are inserted as far as they go.
- Check the connected terminal.
- Check the TV's input setting (Input switch). (For more information, please read the operating instructions for the TV.)
- If you have a TV with an SD card slot, the motion pictures and still pictures recorded on an SD card may be played back on the TV. (Refer to the operating instructions of the TV for details about TV compatibility.)
- If the images are not displayed correctly on a wide-screen TV, adjust the aspect setting on the TV. (Refer to the operating instructions of the TV for details.) If the pictures are displayed squeezed horizontally on a regular TV (4:3), change the [TV ASPECT] setting on this unit. ( → below)
■ To watch images with a 16:9 aspect ratio on a regular TV (4:3)
When playing back motion pictures recorded with a 16:9 aspect ratio (|REC ASPECT| was set to


The information displayed on the screen (operation icon and time code, etc.) can be displayed on the TV.
Press the EXT DISPLAY button on the remote control.

- Press the button again to erase the information.
• The screen on this unit will not change.
DVD recorder with the AV/S cable (supplied) and then dub. ( → below)
Insert the SD card into the SD card slot on the DVD recorder, then dub the contents onto the hard disk or a disc.
- For details on how to dub the images, refer to the operating instructions of the DVD recorder.
If you dub images directly from the SD card or with the A/W/S cable and then play them back on a wide-screen TV, they may be squeezed horizontally. In this case, refer to the operating instructions of the device you are dubbing to or read the operating instructions of the wide-screen TV and set the aspect setting to 16:9 (Full).
With a VCR
Dubbing images onto other video devices
HDD SD
You can dub images played back on this unit onto other video devices. You can create a playlist by gathering the scenes on the HDD that you want to dub, then dub the

1 Connect this unit and a video device.

A AV/S cable (supplied)
- Insert the plugs as far as they will go.
* If the video device has an S Video terminal, also connect the S Video plug into it. This allows you to enjoy more beautiful pictures.
2 Turn on this unit, then rotate the mode dial to select ▶
3 Press the MENU button, then select [MEDIA SELECT] → [HDD] or [SD CARD] to select the desired medium and press the iovstick.
- If the date and time display and function indication are unnecessary, cancel them before dubbing. (SDR-H250) (→ 132, 174)
With a printer (PictBridge)
HDD SD
To print pictures by directly connecting this unit the printer, use a printer compatible with PictBridge. (Read the operating instructions for the printer.)
◇Connect this unit to the AC adaptor and turn on the unit.
1 Connect this unit and a printer.

natural_image
Diagram of a printer setup with a screen, lens, and cable connections (no text or labels)USB cable (supplied) - Insert the plugs as far as they will go.


3 Select a file to be printed, then press the joystick.

The number of pictures set is displayed.
4 Move the joystick up or down to select the desired number of prints, then press the joystick.
- You can set up to 9 prints.
- To cancel the setting, set the number of prints to [0].
- Up to 8 files displayed on a page can be set in succession by repeating steps 3 and 4.
5 Press the MENU button to display the PictBridge menus.

6 Select the date print setting on
[A4]: A4 size
- You cannot set paper sizes not supported on the printer.
8 Select the layout setting on [PAGE LAYOUT].

[STANDARD]: Layout specific to the printer
[图]
No frame print
[图]
Frame print
- You cannot set page layouts not supported on the printer.
9 Select [PRINT] → [YES] and press the joystick.
The pictures are printed.
- Exit PictBridge by disconnecting the USB cable after the pictures have been printed.
When you want to stop printing halfway Move the joystick down.
A confirmation message appears. If [YES] is selected, the number of prints set is cancelled and the screen returns to step 3. If [NO] is selected, all the settings are kept and the screen

- You may not be able to print still pictures recorded with other products.
- When the unit is connected directly to the printer, the DPOF settings cannot be used.
- Connect the printer directly to this unit. Do not use a USB hub.


Before using with a computer
What you can do with a computer
When you have installed ImageMixer3 for Panasonic from the supplied CD-ROM and connected your computer to the unit, you can perform the operations described below.

A You can play back the images recorded by this unit on your computer or import the images to your computer.
⑤ You can edit the motion pictures you have imported to your computer.
⑥ You can import the images recorded by this unit to ImageMixer3 and then create original DVD-Video discs. (→ 187)
You can also write data in the DVD-VR (DVD Video Recording) format on DVD-RAM or DVD-RW


Operating environment
- A CD-ROM drive is necessary to install the supplied software.
- When 2 or more USB devices are connected to a computer, or when devices are connected through USB hubs or by using extension cables, proper operation is not guaranteed.
- Use the supplied USB cable when connecting to the computer. (Operation is not guaranteed with any other USB cables.)
■ ImageMixer3 for Panasonic
| Hardware IBM PC/AT | compatible personal computer |
| OS | Microsoft Windows 2000 Professional Service Pack 3 or Service Pack 4Microsoft Windows XP Home EditionMicrosoft Windows XP Professional |
| CPU | Intel Pentium III 800 MHz or higher, Pentium 4, Celeron, or AMD Athlon XP/Duron of equivalent performance(Intel Pentium 4 1.7 GHz or higher recommended) |
| RAM Windows 2000 Professional:128 MB or more (256 MB or more recommended)Windows XP Home Edition/Professional:256 MB or more (512 MB or more recommended) | |
| Display High Colour (6 bit) or moreDesktop resolution of 1024×768 pixels or moreGraphic accelerator supporting DirectX 9.0c or later and with 4 MB or moreof VRAM | |
| Free hard disk space | For installing the application: 300 MB or moreWhen creating discs (DVD-Video):14 GB or more for the work folder (28 GB or more in the case of dual layer discs) |
| Necessary software DirectX 9.0c | |


- Depending upon the environment of your computer, if it does not support Hi-Speed USB (USB 2.0), for example, frame dropout may occur, the audio may be intermittent, or the software may run slowly when you play back recorded images.
- Set the display resolution to 1024 × 768 (16 bits colour) or higher.
Select [start] → ([Settings] →) [Control Panel] → ([Appearance and Themes] →) [Display] and select [Settings] tab, and then adjust [Screen resolution] and [Color quality]. - This unit's USB terminal is read only. It cannot be used to write data to the unit from the computer.
■ Using Built-in SD Drive
| Hardware IBM PCIAT compatible personal computer | |
| OS Microsoft Windows | 2000 ProfessionalMicrosoft Windows XP Home EditionMicrosoft Windows XP Professional |
| CPU | Intel Pentium II 300 MHz or higher |
| RAM | 32 MB or more (64 MB or more recommended) |
| Interface USB 1.1 or later — A type | |
- The USB equipment operates with the driver installed as standard in the OS.
■ Usable discs
The table below lists the types of DVD discs which can be used by the supplied software.
| Disc type | Function | |
| For creating discs (DVD-Video format)/ DVD COPY | For creating discs (DVD-VR format) | |
| DVD-R/+R ● | - | |
| DVD-R DL/+R DL ● | - | |
| DVD-RW/+RW | ● | ● (DVD-RW only) |


When installing the software, log on to your computer as the Administrator or with a user name with equivalent authorization. (If you do not have authorization to do this, consult your manager.)
- Before starting the installation, close any other software applications which are running.
- Do not perform any other operations on your computer while the software is being installed.
Installing ImageMixer3 for Panasonic
1 Insert the CD-ROM into the computer.
The setup language selection screen appears.
- If the setup language selection screen does not appear, double-click the CD-ROM drive icon in [My Computer].
2 Select the language for the installation and click [Next].

[I accept the terms of the license agreement], and click [Next].

- You cannot install the application if you check [I do not accept the terms of the license agreement].
5 Select where the application is to be installed, and click [Next].

6 Select [PAL] for the TV system, click [Next].
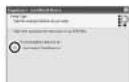


The computer must be rebooted for the application to work.
- Depending on the operating environment, you may be required to install DirectX 9.0c. If so, click [Yes], and install it. If you install the software in a computer that is not compatible with DirectX 9.0c, the computer may not work properly. If you are unsure whether or not your computer is compatible, contact the maker of your computer.
Reading the software help
For details on how to use the software, read the help.
- Help uses JavaScript. To view its contents, activate JavaScript using the browser settings
Click the icon in the ImageMixer3 launcher screen.
- You can also select [Help] → [imageMixer3 Help] from the menu bar to display the help.
Software uninstallation
Follow the steps below to uninstall the software if it is no longer required.
2 Select [ImageMixer3], then click [Remove].

- Depending on the operating environment, the name of the buttons may differ. (Example: [Channel/Remove])
- Proceed with the uninstallation by following the on-screen instructions.
- After uninstalling the software, be sure to reboot the computer.
Connection and recognition
Connection and recognition procedures
After the software is installed, the unit must be connected to the computer and be correctly recognised by the computer.
- Connect after installing the software. - If the supplied CD-ROM is inserted in the computer, remove it. (If the installer setup is


1 Connect this unit and a computer.

A USB cable (supplied)
- Insert the plugs as far as they will go. The unit and computer will not operate properly if the plugs are not inserted fully.
- Do not use any other USB cables except the supplied one. (Operation is not guaranteed with any other USB cables.)
The USB function selection screen will appear.
2 Select [PC CONNECT] → [HDD] or [SD CARD] and press the joystick.
This unit is automatically recognised by the computer.
- When the unit is connected to a computer,
About the computer display
When the unit is connected to a computer, it is recognised as an external drive.
- This unit supports only the readout of data using the computer. The computer cannot write data to the unit, or close data from the unit
- Depending on the operating environment of the computer, the shape of the drive icon and the drive name (Example: E:) will differ.
Drive icons
The icon is displayed in [My Computer].
When accessing the HDD
- Windows XP:

Windows 2000:

When accessing the card
- Windows XP:

- Windows 2000:


- SD-Video format motion pictures are stored in the [PRG***] folder. ("****" denotes base-16 (hexadecimal) characters from 001 to FFF.)
- Up to 99 files can be recorded in the [PRG* * *] folder.
- JPEG format still pictures (IMGA0001.JPG etc.) are stored in the [100CDPFP] folder. These can be opened with picture playback software that supports JPEG pictures.
- Up to 999 files can be recorded in the [100CDPFP] or other such folder.
- The DPOF setting files are recorded in the [MISC] folder (SD card only).
- Do not use the computer to delete the SD card's folders. Otherwise, it may no longer be possible for this unit to read the SD card.
• Always use this unit to format SD cards.
- When data not supported by this unit has been recorded on a computer, it will not be recognised by this unit.
- You can use Windows Explorer to copy still picture files to a computer.
Cam USB Device] is selected and click [OK].
Click [Close], and you can safely disconnect the cable.
- If you disconnect the USB cable while the ACCESS/PC lamp or card access lamp is on or while 📄 appears on the LCD monitor, it may damage the data.
Using the recorded images on a computer
DVD COPY function
When ImageMixer3 is used, you can easily create DVD-Video discs by pressing the unit's DVD COPY button.
Among the images recorded on the unit's HDD, those scenes which have not yet been copied to the DVD using this function will be automatically identified and written onto the DVD.
DVD-Video discs created using this function can be played back on a DVD player or other device.
◇Connect this unit to the AC adaptor and turn on the unit.
1 Rotate the mode dial to select ▶ or ▶.

3 Connect this unit and a computer.

A USB cable (supplied)
- Insert the plugs as far as they will go. The unit and computer will not operate properly if the plugs are not inserted fully.
- Do not use any other USB cables except the supplied one. (Operation is not guaranteed with any other USB cables.)
The DVD COPY preparation screen appears.
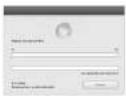
4 Insert a DVD disc into the DVD
- If all of the data cannot be written onto one DVD disc, it will be written onto a second (or third, etc.) disc. When the writing on the first disc is completed, a message will appear so insert another disc of the same type as the first.
- Still pictures are converted to motion pictures and written onto the DVD disc.
- Check on the DVD player or other player device whether the DVD-Video disc you have created can be played properly. If the disc cannot be played properly, create the DVD-Video disc by following the steps in "Creating DVD-Video discs with the selected images". (→ 187)
- The images cannot be stored in the computer.
- The images recorded on the DVD-Video disc you have created cannot be edited by the computer. To edit them, import the images to the computer.
- When playing a DVD-Video disc you have created, there will be a pause of several seconds between scenes.
- The images recorded on SD cards cannot be copied onto discs using the DVD COPY function. Import the images to your computer and then write them on the DVD disc. (→ 187)
- The image saving history is stored for each computer user account. For this reason, even if images have already been copied onto a DVD disc, they will be copied onto the DVD disc again when a different user account is used,


1 Connect this unit and a computer.
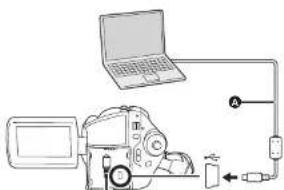
A USB cable (supplied)
- Insert the plugs as far as they will go. The unit and computer will not operate properly if the plugs are not inserted fully.
- Do not use any other USB cables except the supplied one. (Operation is not guaranteed with any other USB cables.)
The USB function selection screen will appear.
2 Select [PC CONNECT] → [HDD] or [SD CARD] and press the joystick.
This unit will be automatically recognised by the computer and ImageMixer3 will start automatically.
If ImageMixer3 fails to start automatically, take
The browser screen is displayed.
4 Select [SDR-H250]/[SDR-H21]/[SDR-H20] (HDD) or [Removable Disk] (SD card) in [Source].

The contents recorded on the HDD or SD card are displayed.
Motion pictures
Still pictures
5 (To play back the scenes)
Click the desired scene and click [Playback] (A).
(To import images to your computer)
Click the desired scene and click [Import] (B).

11

Creating DVD-Video discs with the selected images
Use ImageMixer3 to import the images recorded by this unit that you want to write to a DVD disc and then create a DVD-Video.
DVD-Video discs created using this function can be played back on a DVD player or other device.
- You can edit motion pictures or add your favourite menus. For details, refer to software help. (→ 182)
◇Connect this unit to the AC adaptor and turn on the unit.
1 Connect this unit and a computer.

natural_image
Diagram of a laptop connected to a camera and power supply unit (no text or symbols)A USB cable (supplied) - Insert the plugs as far as they will go. The unit
Select [start]
[All Programs (Programs)] → [PIXELA] → [ImageMixer3 for Panasonic] → [ImageMixer3 for Panasonic].
3 Click [Create DVD-Video].

4 Click [Create New DVD].

5 Select the appropriate project settings and click [OK].
6 Select [SDR-H250]/[SDR-H21]/[SDR-H20] (HDD) or [Removable Right] (SDR card) and click


• The folder itself can also be added to the list
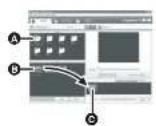
■ To import still pictures
① Click [Still image] (D).
2 Click the desired folder (E), select the file (F) and add it to the list (G) by drag and drop.
- The folder itself can also be added to the list.

- Still pictures are converted to motion pictures and written onto the DVD disc.
8 Click [Authoring] tab.
- All the ... and all the
- You cannot add a still picture to the menu if it is not a file folder. For details, refer to software help. (→ 182)
![PANASONIC SDR-H21GC - Click [Authoring] tab. - 1](/content/2026/05/926245/images/2226f96810294da1a8e17f1c2b1b4ef11b91a1d1c4d9d7f22997849fb48eae30.jpg)
11 Insert a DVD disc into the DVD drive and click [Write] tab.
- It is recommended that you use a brand-new DVD disc.
![PANASONIC SDR-H21GC - Click [Authoring] tab. - 2](/content/2026/05/926245/images/e8383d1f28e22a5e6e085ab1e50b390aaac13c7136f19f11d6d26fbf1fe711d0.jpg)
12 Select the appropriate write settings and click [Write].
![PANASONIC SDR-H21GC - Click [Authoring] tab. - 3](/content/2026/05/926245/images/fd1c19f18df0b35587a3d8fb617c9a576fb7e66fe41f2339f5e02c94e9a715e4.jpg)
![PANASONIC SDR-H21GC - Click [Authoring] tab. - 4](/content/2026/05/926245/images/44f9b8e8509209bec7b62351d6e9906ea45653895842d8041123a57ce0941505.jpg)
![PANASONIC SDR-H21GC - Click [Authoring] tab. - 5](/content/2026/05/926245/images/1611bf64a52829a2fb47001c42ef76e25a55df36fb7ada039678f188da446304.jpg)
Motion picture recording menus
![PANASONIC SDR-H21GC - Click [Authoring] tab. - 6](/content/2026/05/926245/images/7314da577fc9c8b7d01c2dd1653d1d8991745a539d01c9c2a2cd112080315bcd.jpg)
[BASIC]
[SCENE MODE] (→ 151)
[GUIDE LINES] (→ 149)
[REC MODE] (→ 139)
[REC ASPECT] (→ 150) [CLOCK SET] (→ 132)
[LOCK SET] (7-132)
■ [ADVANCED]
[D.ZOOM] (→ 144)
[O.I.S.] (→ 150)
[FADE COLOUR] (→ 147)
[WIND CUT] (→ 150)
[ZOOM MIC] (→ 145)
■ [MEDIA SELECT]
[HDD] (→ 137)
[SD CARD] (→ 137)
[SETUP]
(1) 2017年1月1日
Still picture recording menus

[BASIC]
[SCENE MODE] (→ 151)
[GUIDE LINES] (→ 149)
[PICTURE SIZE] (→ 143)
[PICT. QUALITY] (→ 143)
[CLOCK SET] (→ 132)
■ [ADVANCED]
[O.I.S.] (→ 150)
[SHTR EFFECT] (→ 142)
■ [MEDIA SELECT]
[HDD] (→ 140)
[SD CARD] (→ 140)
[SETUP]
[DISPLAY] (→ 190)
[DATE/TIME] (→ 132)
[DATE FORMAT] (→ 132)
[FORMAT CARD] 2 (→ 171)
[POWER SAVE] (→ 190)
[BEEP SOUND] (→ 191)
[LOD SET] (→ 155)
[INITIAL SET] (→ 151)
[TELOMINATION] (→ 191)


[RESUME PLAY] (→ 159) [LOCK SET] (→ 163) [PLAYLIST] 1 (→ 164, 165)
■ [MEDIA SELECT] [HDD] (→ 156) [SD CARD] (→ 156)
- [SETUP] [DISPLAY] (→ 190) [DATE/TIME] (→ 132) [DATE FORMAT] (→ 132) [FORMAT CARD] 2 (→ 171) [POWER SAVE] (→ 190) [BEEP SOUND] (→ 191) [LCD SET] (→ 133) [TV ASPECT] (→ 173) [ILLUMINATION] (→ 191) [FORMAT HDD] 1 (→ 171) [HDD STATUS] 1 (→ 171)
■ [LANGUAGE] (→ 130)
(In playlist playback mode) ■ [EDIT] [ADD] (→ 165) [MOVE] (→ 166) [DELETE] (→ 166) ■ [CREATE] (→ 164) ■ [PLAYLIST VIEW] (→ 1 ■ [END] (→ 165)
Still picture playback menus
[SD CARD] (→ 160)
■ [SETUP] [DISPLAY] (→ 190) [DATE/TIME] (→ 132) [DATE FORMAT] (→ 132) [FORMAT CARD] 2 (→ 171) [POWER SAVE] (→ 190) [BEEP SOUND] (→ 191) [LCD SET] (→ 133) [TV ASPECT] (→ 173) [ILLUMINATION] (→ 191)
■ [LANGUAGE] (→ 130)
*1 Only when [MEDIA SELECT] is set to [HDD] *2 Only when [MEDIA SELECT] is set to [SD CARD]
Other menus
■ [DISPLAY] • [OFF] • [ON] The screen indications are selected as shown in the illustration below.
[OFF]

[ON]
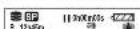


- In the following cases, the unit may not turn off even when you set this to [5 MINUTES].
-When using the AC adaptor
- When connecting the unit to a computer or printer via the USB cable
[BEEP SOUND]
• [OFF] • [ON]
This allows operations such as starting and ending recording to be signaled by a beep. When [OFF] is set, no beep is heard when an operation such as recording is started or ended.
1 Beep
When you start recording
When you turn on the power
When this unit is recognised by the computer or the printer, etc.
2 Beeps
When you pause recording
When you turn off the power
2 Beeps for 4 times
When an error occurs e.g. recording not starting. Check the sentence displayed on the screen.
(→ 194)
■ [INITIAL SET]
- [YES] • [NO] When there is a menu that cannot be selected due another function or mode being activated, set to [YES] for changing the menu settings back to the initial shipping condition.
(The language setting cannot be changed back
During motion picture recording (in orange)
During playback and while connected to a
computer, a printer, etc. (in blue)
Flashes continuously
While formatting, copying, deleting, etc. (in orange)
■ [DEMO MODE]
■ [OFF] • [ON]
This item is used to start the unit demonstration.
(Only when using the AC adaptor and the mode
dial is at the postion)
If you set this to [ON] without inserting an SD
card, this unit is automatically set to the
demonstration mode for introducing its functions.
If any button is pressed or operated, the
demonstration mode is cancelled. If no
operations take place for approx. 10 minutes, the
demonstration mode automatically starts. To
terminate the demonstration mode, insert an SD
card, or set this to [OFF]. For normal use, set this
function to [OFF].
![PANASONIC SDR-H21GC - ■ [DEMO MODE] - 1](/content/2026/05/926245/images/719a5403e229b42473ddea6e8cea3d9d7924010869aef11a15fecfd76f04d995.jpg)
![PANASONIC SDR-H21GC - ■ [DEMO MODE] - 2](/content/2026/05/926245/images/0e39ac3db0ffd8871403197be8dff4e5e27b88b4b021e9c7d8e6f51e308d2f32.jpg)
| Media indications | |
| HDD is selected | |
| SD card is selected | |
■ Recording indications
Motion picture recording
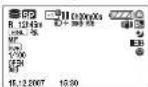
Still picture recording

| Remaining battery power | |
| R 0h00m Remaining time for recording | |
| 0h00m00s Elapsed recording time | |
| 15.12.200715:30 | Date/time indication |
| ∅ | Soft skin mode |
| ∅ | Tele macro (SDR-H250) |
| EW, E### (White), Fade (Black) | |
| Colour night view function | |
| ID | Video light (SDR-H250/ SDR-H21) |
| J000# | Zoom microphone |
| Wind noise reduction | |
| Power LCD plus function | |
| RF, SP, TP | Motion picture recording mode |
| Sports mode | |
| Portrait mode | |
| Low light mode | |
| Spotlight mode | |
| Surf & snow mode | |
| AVB | Auto white balance |
| Indoor mode (recording under incandescent lamp) | |
| Outdoor mode | |
| Manual adjustment mode | |
| ○ (White)● (Green) | Focus indication (SDR-H250) |
| Self-Timer recording | |
| MEGA | MEGA OIS (SDR-H250) |
| SDR-H250: | Number of recording pixels for still pictures |


Motion picture playback

Still picture playback

| ▶Playback | |
| ■Pause | |
| ▶, >>>/ ◀◀, ◀◀ | Fast forward/rewind |
| ▶/◄ Last/first scene paused | |
| ▶►/◄◄ Skip playback | |
| ►/◄ Slow motion playback | |
| ■►/◄◄ | Frame-by-frame playback |
| 0h00m00s Motion picture playback time | |
| ALL | Play modeAll scenes on the media displayed |
| AID | Scenes recorded on the selected date displayed |
| Ow | Locked motion pictures and still pictures |
| SDR-H250: | Number of recording pixels for still pictures. |
| 2048×1512 | |
| 1920×1080 | |
| 1280×960 | |
| 640×480 | |
| SDR-H21/SDR-H20: | 640×480 |
| 640×360 | |
| The picture size is not displayed for still pictures recorded with other products that have different picture sizes from the sizes shown above. | |
■ Confirmatory indications
| — (Time display) | The built-in battery is low. (→ 133) |
| The warning/alarm indication appears when LCD monitor is rotated towards the lens side. Return the direction of the LCD monitor to normal position and check the warning/alarm indication. | |
| No SD card is inserted/ unusable card. | |
| The HDD cannot be accessed |


| NO DATA. There are no images recorded on the media. | |
| CAN NOT RECORD. HDD IS FULL. | The HDD is full or the number of scenes has reached the maximum limit so no further data can be recorded. Back up the data on the HDD to a computer, etc. and then delete unnecessary scenes or format the HDD. (→ 162, 167, 171) |
| CAN NOT RECORD. THE NUMBER OF SCENES HAS EXCEEDED THE MAXIMUM LIMIT. BACKUP HDD THEN FORMAT. | |
| RECOMMEND DATA BACK UP PERIODICALLY. | The capacity of the HDD is limited. We recommend backing up important recorded data periodically to a computer etc. to protect it. This message does not indicate that there is a problem with this unit. |
| HDD BACKUP RECOMMENDED. | There is a possible problem with the HDD. Immediately copy the data on the HDD to a computer etc. and then have the unit repaired. |
| THIS CARD CANNOT RECORD IN VIDEO MODE. | An 8 MB or 16 MB SD card has been inserted in video recording mode. |
| CHECK CARD. This card is not compatible or it cannot be recognised by the unit. | |
| CARD LOCKED. | The write protection switch on the SD card is set to LOCK. (→ 118) |
| CARD FULL. The SD card is full or the number of scenes has reached the maximum limit so no further data can be recorded. Delete unnecessary scenes (→ 162, 167) or insert a new SD card. | |
| SCENE NUMBER IS FULL. | |
| CARD DOOR OPENED. The card slot cover is open. Close it. | |


| CHANGE TO MANUAL MODE. | You are attempting to use a function that cannot be used simultaneously. |
| CANCEL NIGHT VIEW MODE. | |
| TURN OFF THE VIDEO LIGHT. | |
| OPERATION FAILED.EXCESSIVE SHOCK DETECTED. PLEASE TRY AGAIN AFTER A WHILE. | The unit has detected that it is being dropped so the operation has stopped. |
| INTERNAL TEMPERATURE TOO HIGH. PLEASE TURN UNIT OFF AND WAIT A WHILE. | The internal temperature of this unit is high so it cannot be operated.Turn off the power, wait until the temperature falls and then turn on the power again. |
| OPERATION STOPPED.TEMPERATURE TOO LOW. | The internal temperature of this unit is extremely low so it cannot be operated.If "Please Wait," appears after this message, wait a while without turning the unit off. It may take time until the unit can be used. |
| PUSH THE RESET SWITCH. | An irregularity in the unit has been detected. Remove the SD card then press the RESET button to restart the unit. (→ 202) |
| DISCONNECT USB CABLE. | The unit cannot correctly establish the connection to the computer or printer. Disconnect and reconnect the USB cable and then select the desired USB function again. |
| CANNOT OPERATE WHILE USB CONNECTED. | The unit's power cannot be turned off when the unit is connected to the computer. |
About recovery


Functions that cannot be used simultaneously
Some functions in this unit are disabled or cannot be selected due to the unit's specifications. The table below shows examples of functions restricted by various conditions.
| Functions | Conditions which disable the functions |
| Digital zoom | In picture recording mode |
| Fade | |
| Colour night view | While recording (Cannot set or cancel)In picture recording modeWhen the video light is on (gain up mode) |
| Backlight compensation | When the colour night view function is usedWhen the video light is on (gain up mode)When the iris/gain is set |
| Soft skin mode (Set and cancel) | While recordingTele macro (Set and cancel) |
| Help mode | |
| Video light on (gain up mode) | In picture recording mode |
| Scene mode | When setting the AUTO/MANUAL/FOCUS switch to AUTOWhen the colour night view function is usedWhen the video light is on (When in video recording mode) |
| Change of white balance | When digital zoom is usedWhen the colour night view function is usedWhen the video light is on (gain up mode) |


Frequently asked questions

What kind of cards can be used on this unit?

SD Memory Cards and SDHC Memory Cards can be used. (→ 117)

Can motion pictures be recorded on an SD card?

Yes, they can be recorded.
To record motion pictures, we recommend using SD cards from 256 MB to 4 GB that
conform to Class 2 or higher of the SD Speed Class Rating.

Can I record continuously from the HDD to an SD card or vice versa?

No, you cannot record continuously.
Use [MEDIA SELECT] on the menu to switch the recording destination. (→ 137, 140)

Is it possible to copy data on the HDD and an SD card with this unit?

Copying still pictures is possible. (→ 170)
Copying motion pictures is not possible.

Is it possible to play back an SD card recorded with this unit on other products?

Motion pictures:
These can be played back on any device which supports motion pictures based on the
SD-Video standard, the MPEG-2 video format and the MPEG-1 Audio Layer 2 audio
format.


Can I write data from a computer onto the unit's HDD or SD card?

No, you cannot.
This unit's USB terminal is read only.

Is playback possible on a computer?

Use ImageMixer3.

Is editing possible on a computer?

Use ImageMixer3.
- Motion pictures that have been saved to the ImageMixer3 library can be edited.

Can I use the DVD COPY function to copy still pictures as well?

Yes, you can.
The motion pictures are recorded first onto the disc and then the still pictures are converted to motion pictures and recorded after the motion pictures. Original still picture files (JPEG files) are also recorded onto the DVD disc.

Can I use the DVD COPY function to copy motion pictures recorded on SD cards onto DVD discs as well?

No, you cannot.
You can use the DVD COPY function to copy only the images recorded on the HDD.

Can I make additions to a DVD disc on which data has already been written?


| Problem Check points | |
| This unit cannot be turned on. | Is the battery fully charged?→ Charge the battery using the AC adaptor. (→ 121)The battery protection circuit may have operated. Attach the battery to the AC adaptor for 5 to 10 seconds. If the unit still cannot be used, the battery is faulty.Is the LCD monitor opened? |
| This unit is turned off automatically. | If you do not use the unit for approximately 5 minutes, the power is automatically turned off to conserve the battery charge. To resume recording, turn the power back on.The power will not turn off automatically when the power save function (→ 190) is set to [OFF]. |
| This unit does not stay on long enough. | Is the battery low?→ If the remaining battery power indication is flashing or the message 'LOW BATTERY.' Is displayed, the battery has run down. Charge the battery. (→ 121) |
| A clicking sound is heard when the power is turned off. | This is the sound of the lens moving and is not a malfunction. |
| Battery runs down quickly. | Is the battery fully charged?→ Charge it with the AC adaptor. (→ 121)Are you using the battery in an extremely cold place?→ The battery is affected by ambient temperature. In cold places, the operating time of the battery becomes shorter.Has the battery worn out?→ The battery has a limited life. If the operating time is still too short even after the battery is fully charged, the battery has worn out |


| Problem Check points | |
| The remote control does not function. | Has the button-type battery of the remote control run out?→ Replace it with a new button-type battery. (→ 115) |
| A function indication such as the remaining time indication or the elapsed time indication is not shown. | If you set [SETUP] → [DISPLAY] → [OFF], indications other than warnings and date indications disappear. |
| Recording does not start although power is supplied to this unit. | Has the SD card's write protect switch been set to LOCK?→ No recording is possible while the write protect switch is set to LOCK. (→ 118)Is the memory of the HDD or card full?→ If the HDD or card has no more available memory, free up some memory by deleting unnecessary scenes (→ 162, 167) or use a now card.Is the unit set to the video recording mode or picture recording mode?→ No recording is possible unless the mode dial is a for . Is the card slot cover open?→ If the cover is open, this unit may not operate normally. Close the card slot cover. |
| Recording starts but stops immediately.The playback picture breaks up for a moment. | The unit is hot. Follow the messages on the display.→ To use the unit again, turn the unit off and leave it for a while. |
| The unit arbitrarily stops recording. | Is the AGS function activated?→ Record in the normal horizontal position or set [AGS] to [OFF].(→ 138)Can the SD card be used for motion picture recording?→ Use an SD card that can be used for motion picture recording. |


| Problem Check points | |
| Recorded still pictures are not clear. | Are you trying to record small or finely detailed objects with [PICT. QUALITY] set at []2→ If you try to record small or finely detailed objects with [PICT. QUALITY] set at []the images may break up into a mosaic-like pattern. Record with [PICT. QUALITY] set at []instead. (→ 143) |
| Auto focus function does not work. | Is manual focus mode selected?→ Set the AUTO/MANUAL/FOCUS switch to AUTO.Are you trying to record a scene which is hard to bring into focus in auto focus mode?→ There are some recording subjects and surroundings for which the auto focus does not operate correctly. (→ 207) If so, use the manual focus mode to adjust the focus. (→ 152) |
| Sound is not played back from the built-in speaker of this unit. | Is the volume too low?→ During playback, move the volume lever to display the volume indication and adjust it. (→ 158) |
| Although this unit is correctly connected to a TV, playback images cannot be seen.The playback images are squeezed horizontally. | Have you selected video input on the TV?→ Please read the operating instructions of your TV and select the channel that matches the input used for the connection.Is the [TV ASPECT] setting correct?→ Change the setting to match the aspect ratio of the TV.Press the MENU button, then select [SETUP] → [TV ASPECT] → [16:9] or [4:3] and press the joystick. |
| Scenes or files cannot be deleted or edited. | Are the scenes or the files locked?→ Locked scenes or files cannot be deleted. Release the lock setting. (→ 163, 168)It may not be possible to delete scenes that are displayed as []on the thumbnail display. If the scenes are unnecessary, format the HDD or card to erase the data. (→ 171) Please be |


The indication disappears.
The screen is frozen. No operation can be performed.
"PUSH THE RESET SWITCH." is displayed.
• Is this unit connected to a computer?
→ No operation can be performed on this unit when it is connected to a computer.
- Turn off the power to this unit. If the power cannot be turned off, remove the SD card then press the RESET button, or remove the battery or AC adaptor and then reattach it. After that, turn on the power again. If normal operation is still not restored, detach the power connected, and consult the dealer who you purchased this unit from.
- The unit has automatically detected an error. Remove the SD card then press the RESET button to restart the unit.
(SDR-H250) Press the RESET button with the projecting part of the grip belt A.
→ (SDR-H21/SDR-H20) Press the RESET button with the projecting part of the lens cap B.
- If you do not press the RESET button, the power to this unit is


| Problem Check points | |
| Even if connected by the USB cable, this unit is not recognised by the computer. | The USB function selection screen does not appear if the USB cable is connected while the menu screen is displayed.→ Close the menu screen before connecting the USB cable.Select another USB terminal on the computer.■ Check the operating environment. (→ 179)■ Disconnect the USB cable, turn the unit off then on and then reconnect the USB cable. |
| An image that should have been recorded does not appear when ImageMixer3 is started. | If there are multiple drives, a drive other than this unit may be selected.HDD: Select [SDR-H250], [SDR-H21] or [SDR-H20] from [Source].SD card: Select [Removable Disk] from [Source]. |
| When the USB cable is disconnected, an error message will appear on the computer. | To disconnect the USB cable safely, double-click theicon in the task tray and follow the instructions on the screen. |
| The DVD COPY function will not start even when I press the DVD COPY button. | To create DVD-Video discs using the DVD COPY function, you need to install ImageMixer3 for Panasonic from the supplied CD-ROM to your computer. (→ 181)The DVD COPY function cannot be used in the video recording mode or picture recording mode.→ Rotate the mode dial to selector ,then press the DVD COPY button. |
| I cannot copy images using the DVD COPY function. | Have you already copied those images using the DVD COPY function?→ Once images have been copied using the DVD COPY function, they cannot be copied a second or subsequent time.Import the images into ImageMixer3, and then write them on the |


- The unit and card become warm after long operation, but this is not a malfunction.
Keep the SD Card/Hard Disk Video Camera as far away as possible from electromagnetic equipment (such as microwave ovens, TVs, video games etc.).
- If you use the SD Card/Hard Disk Video Camera on top of or near a TV, the pictures and sound on the SD Card/Hard Disk Video Camera may be disrupted by electromagnetic wave radiation.
- Do not use the SD Card/Hard Disk Video Camera near cell phones because doing so may result in noise adversely affecting the pictures and sound.
- Recorded data may be damaged, or pictures may be distorted, by strong magnetic fields created by speakers or large motors.
- Electromagnetic wave radiation generated by microprocessors may adversely affect the SD Card/Hard Disk Video Camera, disturbing the pictures and sound.
- If the SD Card/Hard Disk Video Camera is adversely affected by electromagnetic equipment and stops functioning properly, turn the SD Card/Hard Disk Video Camera off and remove the battery or disconnect AC adaptor.
Do not spray insecticides or volatile chemicals onto the unit.
- If the unit is sprayed with such chemicals, its body may be marred and the surface finish may peel off.
- Do not leave rubber or plastic products in contact with the unit for a long time.
When you use the unit in a sandy or dusty place such as a beach, do not let sand or fine dust get into the body and terminals of the unit.
Also, keep the unit away from sea water.
- Sand or dust may damage the unit. (Care should be taken when inserting and removing a card.)
- If sea water splashes onto the unit, wipe off the water with a well wrung cloth. Then wipe the unit again with a dry cloth.
When carrying the unit, do not drop or bump
- A strong impact can break the unit's casing, causing it to malfunction.
Do not use benzine, paint thinner or alcohol for cleaning the unit.
■ Before cleaning, detach the battery or pull out the AC cable from the AC outlet.
- The camera body may be discoloured and the surface finish may peel off.
- Wipe the unit with a soft dry cloth to remove dust and fingerprints. To remove stubborn


- When storing the unit in a cupboard or cabinet, it is recommended that you place a desiccant (silica gel) in with it.
About the battery
The battery used in this unit is a rechargeable lithium-ion battery. It is susceptible to humidity and temperature and the effect increases the more the temperature rises or falls. In cold areas, the full charge indication may not appear or the low battery indication may appear for about 5 minutes after starting use. At high temperatures, the protection function may be triggered, making it impossible to use the unit.
Be sure to detach the battery after use.
- If the battery is left attached, a minute amount of current continues to flow even if the unit's power is off. Keeping the unit in this state may result in over discharge of the battery. This may result in you not being able to use the battery even after it is charged.
- The battery should be stored in the vinyl bag so metal does not come into contact with the terminals.
- The battery should be stored in a cool place free from humidity, with as constant temperature as possible. (Recommended temperature: 15 °C to 25 °C, Recommended humidity: 40% to 60%)
- Extremely high temperatures or low temperatures will shorten the life of the battery.
- When you travel, do not forget to bring an AC adaptor so that you can recharge the batteries at your destination.
If you drop the battery accidentally, check to see if the terminals are damaged.
- Attaching a battery with damaged terminals can damage the unit or AC adaptor.
Do not throw old battery into fire.
- Heating a battery or throwing it into a fire may result in an explosion.
- If the operating time is very short even after the battery has been recharged, the battery has worn out. Please purchase a new battery.
About the AC adaptor
- If the battery is warm, charging requires more time than normal.
- If the temperature of the battery is extremely high or extremely low, the CHARGE lamp may continue flashing, and the battery may not be charged. Wait until the appropriate temperature is restored before charging the battery again. If the battery still fails to charge, something may be wrong with the battery or AC adaptor. Contact your dealer.
- If you use the AC adaptor near a radio, radio reception may be disturbed. Keep the AC adaptor 1 m or more away from the radio.
- When using the AC adaptor, it may generate whirring sounds. However, this is normal.


- During prolonged use, the unit's surfaces and the SD card will heat up slightly. This is normal.
When inserting or removing the SD card, always set the OFF/ON switch to OFF.
While this unit accesses the SD card (while → / → being displayed/the access lamp is lit), do not open the card slot cover and remove the SD card, operate the mode dial, turn off the power or shake or impact the unit.
■ About the miniSD Card
- Be sure to insert miniSD Cards in the dedicated card adaptor before use. Inserting a card in this unit without the adaptor may damage the unit or the card.
- Do not insert an empty card adaptor in this unit. Do not leave the adaptor in this unit while inserting or removing miniSD Cards. This may cause the unit to malfunction.
LCD monitor
- When the LCD monitor gets dirty, wipe it with a dry soft cloth.
- In a place with drastic temperature changes, condensation may form on the LCD monitor. Wipe it with soft dry cloth.
- When the unit has become very cold, for example due to storage in a cold area, its LCD monitor will be slightly darker than usual immediately after the power is turned on. The
may not work properly. Make every effort to ensure that condensation does not form. If it does form, take the actions described below.
Causes of condensation
Condensation takes place when the ambient temperature or humidity is changed as follows.
- When this unit is brought inside from the cold (e.g. a ski slope) to a warm room.
- When this unit is moved from an
air-conditioned car to outside. - When a cold room has been warmed up quickly.
- When cool wind from an air conditioner is directly blown onto this unit.
■ After summer afternoon showers of rain. - When this unit is in a very humid place where the air is thick with steam. (e.g. a heated swimming pool)
When this unit is taken to a location with a significant temperature difference such as from a cold place to a hot place.
If, for example, you have used this unit for recording on a ski slope and are taking it into a heated room, place the unit inside a plastic bag, remove as much of the air from inside the bag as possible, then seal the bag. Leave the unit for about an hour in the room so the temperature of the unit is close to the ambient temperature of the room, then use it.
-
-
-
-
- 18.
-
-
-


This is called automatic white balance adjustment.
However, since the unit only stores while colour information under certain light sources, automatic white balance adjustment does not function normally under other light sources.

The illustration above shows the range over which the auto white balance functions.
1) The effective range of automatic white balance adjustment on this unit
2) Blue sky
3) Cloudy sky (rain)
4) TV screen
5) Sunlight
6) White fluorescent lamp
7) Halogen light bulb
8) Incandescent light bulb
9) Sunrise or sunset
10i Candlelight
White balance adjustment determines the white colour under different light sources. By recognising which is the white colour under sunlight and which is the white colour under a fluorescent light, the unit can adjust the balance among the other colours.
Since the white colour is the reference for all the colours (that make up light), the unit can record pictures in a natural hue if it can recognise the reference colour white.
Auto focus
The lens is moved forward or backward automatically to bring the subject into focus.
Auto focus has the following characteristics.
- Adjusts the focus so that the vertical lines of a
subject are seen more clearly.
■ Attempts to bring an object with higher contrast
into focus.
■ Focuses on the screen centre only.
Due to these characteristics, auto focus does not work correctly in the following situations. Record pictures in the manual focus mode.
Recording distant and close-up objects at the same time
Since the unit focuses on whatever is at the centre of the screen, it is difficult to bring the background into focus when close-up objects are placed in focus. When recording people with distant mountains in the background, you cannot


recorded. The focus may become blurry when recording subjects at the beach, at night views or in scenes involving fireworks or special lights.
Recording a subject in dark surroundings The unit cannot focus correctly because the light information that comes through the lens decreases considerably.
Recording a fast-moving subject
As the focus lens-inside moves mechanically, it cannot keep up with a fast-moving subject. When, for example, recording a sports event with fast moving subjects, the focus may lose its sharpness.
Recording a subject with little contrast
It is easy to bring subjects with a sharp contrast or vertical lines or stripes into focus. This means that a subject with little contrast, such as a white wall, may become blurry because the unit achieves focus based upon the vertical lines of an image.
SD Speed Class Rating Class 2
CLASS②
This indicates a Class 2 rating in the high speed standards (SD Speed Class) stipulated by the SD Card Association for high speed writing between SD compatible products and SD Memory cards.


Information for your safety
| Power source: | DC 7.9 V/7.2 V |
| Power consumption: | Recording5.7 W (SDR-H250)/4.7 W (SDR-H21)/4.4 W (SDR-H20) |
| Signal system | CCIR: 625 lines, 50 fields PAL colour signal |
| Recording format | SD card: Based on the SD-Video standardHDD: Independent standard |
| Image sensor | SDR-H250:1/6" 3CCD image sensorTotal: 800 K×3Effective pixels:Moving picture: 630 K×3 (4:3), 540 K×3 (16:9)Still picture: 710 K×3 (4:3), 540 K×3 (16:9)SDR-H21/SDR-H20:1/6" CCD image sensorTotal: 800 KEffective pixels:Moving picture: 400 K (4:3), 540 K (16:9)Still picture: 410 K (4:3), 550 K (16:9) |
| Lens | SDR-H250:Auto Iris, F1.8 to F2.8Focal length:3.0 mm to 30.0 mmMacro (Full range AF)SDR-H21/SDR-H20: |


| Video output level | 1.0 Vp-p, 75 Ω |
| S Vide o output level | Y: 1.0 Vp-p, 75 ΩC: 0.3 Vp-p, 75 Ω |
| Audio output level (Line) | 316 mV, 600 Ω |
| USB | Card reader function (No copyright protection support)HDD reader functionHi-Speed USB (USB 2.0) compliantPictBridge-compliant |
| Dimensions(excluding the projectingparts) | 70.1 mm (W) × 73.0 mm (H) × 120.8 mm (Ω) |
| Mass(without battery and lenscap) | SDR-H250:Approx. 450 gSDR-H21/SDR-H20:Approx. 430 g |
| Operating temperature 0°C to 40°C | |
| Operating humidity 10% to 80% | |
| Operating altitude Less than 3000 m above sea level | |
Motion pictures
| Recording media | SD Memory Card:32 MB*1/64 MB*1/128 MB*1/256 MB/612 MB/1 GB/2 GB (removable type) (FAT12 and FAT16 format corresponding)SDHC Memory Card:4 GB (removable type) (FAT32 format corresponding)HDD: 30 GB*2 (fixed type) |
| Compression MPEG-2 | |
| Recording mode and | XP: 10 Mbps (VBR)SP: 5 Mbps (VBR) |


* The 30 GB hard drive utilizes a portion of the storage space for formatting, file management and other purposes. 30 GB is 30,000,000,000 bytes. Usable capacity will be less.
AC adaptor: VSK0651
Information for your safety
| Power source: | AC 110 V to 240 V, 50/60 Hz |
| Power consumption: | 19 W |
| DC output: | DC 7.9 V, 1.4 A (Unit operation)DC 8.4 V, 0.65 A (Battery charging) |
| Dimensions | 61 mm (W) × 32 mm (H) × 91 mm (D) |
| Mass Approx. 110 e |
Specifications may change without prior notice.

Number of recordable pictures on the HDD or an SD card
SDR-H250:
| Picture size | 17 (2048×1512) | 23 (1920×1080) | |||
| Picture quality | |||||
| HDD 30 | GB 19160 29950 24960 39230 | ||||
| SD | 8 M B 2 | 4 | 3 | 6 | |
| 16 MB 7 | 1 | 2 | 1 | 0 | |
| 32 MB 18 28 23 37 | |||||
| 64 MB 38 61 50 80 | |||||
| 128 MB 75 120 98 155 | |||||
| 256 MB 155 250 210 320 | |||||
| 512 MB 310 490 410 640 | |||||
| 1 G B 630 990 820 | 1290 | ||||
| 2 GB | 1280 | 2010 | 1670 | 2630 | |
| 4 GB | 2520 | 3950 | 3290 | 5170 | |
| Picture size | (1280×950) | (640×480) | |||
| Picture quality | |||||
| HDD 30 | GB 47070 74890 99999 99999 | ||||
| SD | 8 M B 7 | 1 | 2 | 3 | 7 |
| 16 MB 20 32 92 185 | |||||
| 32 MB 45 73 200 410 | |||||
| 64 MB 96 155 430 850 | |||||
| 128 MB 185 300 820 | 1840 | ||||
| 256 MB | 390 | 620 | 1710 | 3410 | |
1 6
7 5


- The number of recordable pictures depends on whether [■] and [⊥] are used together and on the subject being recorded.
• The numbers shown in the table are approximations.
- If you record motion pictures on the HDD or an SD card, the number of recordable still pictures will become smaller.
natural_image
Pure geometric lines forming a crosshair symbol (no text or labels)- Information for Your Safety
- WARNING:
- CAUTION!
- ■ How to replace the Fuse
- -If you see this symbol-
- ■ Indemnity concerning recording content
- ■ Carefully observe copyright laws
- Setup
- Playback
- Editing
- With a computer
- Others
- ■ Extended recording!
- ■ Easy recording! (→ 137)
- ■ Using with a computer! (→ 178)
- Optional accessories
- Parts identification and handling
- Using grip belt
- Tripod receptacle
- Using the LCD monitor
- ■ Remote control usable range
- ■ About SD cards that you can use for motion picture recording
- Charging the battery
- Inserting the battery
- Removing the battery
- Charging time and recordable time
- ■ Charging time
- ■ Recordable time
- Connecting to the AC outlet
- How to turn on the power
- How to turn off the power
- Selecting a mode
- How to use the joystick
- Basic operations
- Operations during recording
- About the operation icons displayed in each mode
- Switching the language
- Using the menu screen
- Setting date and time
- Adjusting the LCD monitor
- ■ Anti-Ground-Shooting (AGS) (SDR-H250)
- ◇Rotate the mode dial to select
- Recording motion pictures
- HDD SD
- To end the recording
- Screen indications in the video recording mode
- Recording modes and recordable time available for the motion picture
- Recording still pictures
- Screen indications in picture recording mode
- Recording with a shutter operation effect
- Number of pixels and picture quality for still picture recording
- ■ [PICTURE SIZE]
- ■ [PICT. QUALITY]
- Various recording functions
- Zoom in/out function
- Digital zoom function
- To use the zoom microphone function
- Recording yourself
- Recording with the video light (SDR-H250/SDR-H21) This built-in video light is for recording in dark places.
- SDR-H21:
- To return to normal recording
- Fade in/fade out function
- Move the joystick left to select [→].
- Press the recording start/stop button. Start recording. (Fade in)
- Soft skin mode
- ◇Rotate the mode dial to select 📂.
- Tele macro function (SDR-H250)
- Colour night view function This allows recording in dark locations.
- Self-timer recording
- Recording guideline
- function
- Wind noise reduction
- Manual recording functions
- Portrait mode
- Low light mode
- Spotlight mode
- Surf & snow mode
- Manual focus adjustment
- Move the switch down and set it to FOCUS position.
- Move the joystick left or right to bring the subject into focus.
- Set the AUTO/MANUAL/FOCUS switch to MANUAL.
- Move the joystick left or right to select [1](aperture) or [ ] (shutter speed).
- Move the joystick left or right to make the adjustment.
- ■ Manual shutter speed adjustment
- ■ Manual iris/gain adjustment
- Motion picture playback
- To display the recording date during playback
- Fast forward/rewind playback
- Move and hold the joystick right during playback until fast-forward starts.
- Frame-by-frame playback
- Still picture playback
- Deleting scenes one at a time
- To cancel deleting halfway
- To complete editing
- Locking motion picture scenes
- Playing back a playlist
- Editing a playlist
- Moving scenes
- Deleting scenes
- Editing still pictures
- Deleting files one at a time
- Press the button in the thumbnail display.
- Select [ALL] or [SELECT] and press the joystick.
- (Only when [SELECT] is selected in step 2) Select the file to be deleted, then press the joystick.
- Locking still picture files
- Copying still picture files This is for copying still picture file from the HDD to an SD card or vice versa.
- HDD management
- Formatting HDD
- Card management
- Formatting an SD card
- HDD and card management
- Connect this unit and a TV.
- Start playback on this unit.
- ■ To watch images with a 16:9 aspect ratio on a regular TV (4:3)
- With a VCR
- Dubbing images onto other video devices
- With a printer (PictBridge)
- Before using with a computer
- What you can do with a computer
- Operating environment
- ■ Usable discs
- Installing ImageMixer3 for Panasonic
- Reading the software help
- Software uninstallation
- Connection and recognition
- Connection and recognition procedures
- About the computer display
- Cam USB Device] is selected and click [OK].
- Using the recorded images on a computer
- DVD COPY function
- Connect this unit and a computer.
- Creating DVD-Video discs with the selected images
- Click [Authoring] tab.
- Still picture recording menus
- Other menus
- [BEEP SOUND]
- Beep
- Beeps
- ■ [INITIAL SET]
- ■ [DEMO MODE]
- ■ Recording indications
- Functions that cannot be used simultaneously
- Frequently asked questions
- About the battery
- Be sure to detach the battery after use.
- If you drop the battery accidentally, check to see if the terminals are damaged.
- Do not throw old battery into fire.
- About the AC adaptor
- ■ About the miniSD Card
- LCD monitor
- Causes of condensation
- Auto focus
- Recording distant and close-up objects at the same time
- Recording a fast-moving subject
- Recording a subject with little contrast
- SD Speed Class Rating Class 2
- CLASS②
- AC adaptor: VSK0651
Brand : PANASONIC
Model : SDR-H21GC
Category : Camcorder