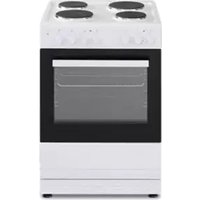
TOC919 - Oven Tisira - Free user manual and instructions
Find the device manual for free TOC919 Tisira in PDF.


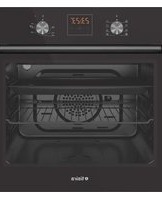
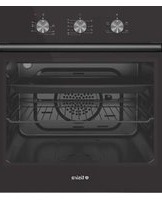
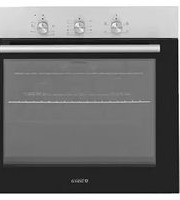
| Product Type | Built-in Electric Oven |
| Brand | Tisira |
| Model | TOC919 |
| Number of Functions | 9 |
| Functions List | Light, Defrost, Natural Convection, Fan Grill, Fan Bake, Bake, plus 3 additional (refer to manual) |
| Power Supply | 220-240V, 50Hz, 15A |
| Maximum Power (approx.) | 2.8 kW |
| Oven Capacity (approx.) | 60 L |
| Temperature Range | 50°C – MAX (250°C approx.) |
| Thermostat | Yes, with cooling fan |
| Timer | 3-button digital timer (minute minder, operation period, operation stop, time-of-day) |
| Oven Lighting | 1 x E14 15W oven lamp (300°C) |
| Installation Type | Built-in under worktop or above another appliance |
| Dimensions (H x W x D) – typical built-in | 595 x 595 x 550 mm (refer to installation diagram for exact) |
| Weight (approx.) | 30 kg |
| Control Type | Knobs (thermostat and function selector) + digital timer |
| Safety Features | Cooling fan, automatic shut-off via timer, requires professional installation |
| Cleaning Method | Warm soapy water, soft non-abrasive cloth; no steam cleaning |
| Self-Cleaning | No |
| Spare Parts Available | Oven lamp (E14 15W) |
| Country of Design | Australia / New Zealand |
| Manufacturer | Arisit Pty Limited |
| Warranty | Proof of purchase required for service |
Frequently Asked Questions - TOC919 Tisira
User questions about TOC919 Tisira
0 question about this device. Answer the ones you know or ask your own.
Ask a new question about this device
Download the instructions for your Oven in PDF format for free! Find your manual TOC919 - Tisira and take your electronic device back in hand. On this page are published all the documents necessary for the use of your device. TOC919 by Tisira.
USER MANUAL TOC919 Tisira
IMPORTANT // Please ensure that you read through this user manual prior to installation and use. This manual contains important information to ensure optimal performance and keep you safe. Please retain your proof of purchase, as this will be required in the event that you require warranty service. Remember to keep this manual for future reference.
Hello
CONGRATULATIONS ON THE SELECTION OF THIS TISIRA APPLIANCE. TISIRA APPLIANCES HAVE BEEN SPECIFICALLY DESIGNED FOR AUSTRALIAN AND NEW ZEALAND KITCHENS.
Please read through this user manual carefully as it contains information that will ensure that your appliance is installed correctly, important operating & care instructions and also some advice of what you need to do if this appliance is not performing as intended.
Contents
Warning & Safety Instructions
Product Overview
Electrical Connection 6
Installation 7 - 8
Operating Instructions 9-10
3 Button Digital Timer 11-12
Maintaining your Oven 13-14
Notes 15
Contact Details 16
4
5
Warning & Safety Information
IMPORTANT // To ensure best performance, avoid risk of damage or accidents.
Please read the operating instructions prior to first time use.
- This appliance is designed for indoor domestic use only. The manufacturer will not be held liable for any damages that might arise out of incorrect installation or improper, incorrect or unreasonable use of the appliance.
- This appliance is not intended for use by persons (including children) with reduced physical, sensory or mental capabilities, or lack of experience and knowledge, unless they have been given supervision or instruction concerning use of the appliance by a person responsible for their safety.
- The electrical system of the appliance may be only used safely when it is correctly connected to an efficient earthing system in compliance with the safety standards currently in effect.
turer or its service agent or a similarly qualified person in order to avoid a hazard.
- This appliance must be installed correctly by a suitably qualified person, strictly in accordance with the manufacturer's instructions.
- Never line the bottom of the oven with aluminium foil or rest pans on the base of the oven, as this will damage your oven enamel coating and void warranty.
- When the appliance is not in use it must be left in the 'off' position.
- All cabinetry and surrounding materials that is used in the installation of this oven must be able to withstand a minimum 50ircC above the ambient room temperature whilst the oven is in
Product Overview

900 ELECTRIC OVEN 9 FUNCTION
- Thermostat
2.3 Button digital timer - Function selector
Electrical Connection
NOTICE // This appliance must be connected only be a licensed electrician and installed in accordance with the manufacturers instructions.
- Check that the power rating of the mains supply and of the sockets are suitable for the maximum power of the appliance as indicated on the specification plate. This oven must be connected to a 220-240V 50Hz power supply. It is earthed via the cord and 15A plug.
-
If the appliance is fitted with a supply lead and is not fitted with a plug, then permanently connect it to the fixed wiring as follow:
-
The “yellow/green” earth wire, which must be connected to terminal, has to be about 10mm longer than the other wires; the “blue” neutral wire has to be connected to the terminal marked with letter N.
- "Black, brown, red" live wires have to be connected to terminal L. Mains connection can also be made by fitting a double pole switch with a minimum gap between the contacts of 3mm, proportionate to the load and complying with the regulations in force.
- The yellow/green earth wire should not be controlled by the switch.
- The plug or a double pole switch used for mains supply connection should be easy to get at,
Installation

Installation
IMPORTANT // The panels of the adjoining furniture should be heat resistant. Particularly when the adjoining furniture is made of veneered wood, the adhesives should be able to withstand a temperature of 120irc C. To comply with safety regulations, once the appliance has been fitted it should not be possible to make contact with the electrical parts. All parts, which offer protection, should be fixed in such a way that they cannot be removed without the use of a tool.
To ensure that the oven works as intended it is important to install the unit as shown in the diagram and allow enough airflow to enable to ovens cooling system to perform.
Fit the appliance into its surround (beneath a work-top or above another appliance) by inserting screws into the 4 holes that can be seen in the frame of the oven when the door is open.

natural_image
Technical line drawing of a cabinet with internal structure and cross-sectional details (no text or symbols)Operating Instructions
Turning the function selector to the required function and setting the desired temperature (in a clockwise direction) will turn on your oven ready for use.
NOTICE // Your oven is equipped with a thermostatically controlled cooling fan that will switch on when required to cool the oven door and cabinetry. This fan may continue to run even after the oven is switched off, but will automatically turn off when the cavity is sufficiently cool. Some air may discharge from the front of the oven this is a normal function.
GENERAL FUNCTIONS GUIDE

LIGHT
Only the oven light comes on. It remains on in all the cooking functions.

DEFROST
The air at ambient temperature is distributed inside the oven for defrosting food more quickly.

NATURAL CONVECTION
Both the lower and upper elements operate together. This traditional cooking function is good for roasting, baking and crisping food. Good results are achieved by adjusting the shelf height to suit your cooking requirements. Temperature range: 50°C – MAX.
Operating Instructions

FAN GRILL
The full grill element and the fan operate together, with the fan circulating the heat generated by the grill element. This function is ideal for cooking tender cuts of meat and poultry. Temperature range: 50°C – 200°C.

FAN BAKE
The bottom element and the fan operate together. This function is idea for cooking food that require heat from the base with the additional benefit of the heat being circulated by the fan. Temperature range: 50irc C – MAX.

BAKE
The bottom element operates to generate heat from the base of the oven. This function is used for cooking pizza and other food that requires only heat from the bottom. Temperature range: 50°C – MAX.
3 Button Digital Timer
The operation of this timer is done using 3 buttons. The functions of the buttons are:

With this arrangement it is possible to select the following four functions:
- Minute minder • Operation period
• Operation stop • Time-of-day
These modes can be selected by repeatedly pressing the mode button. The desired time for minute minder, operation period, operation stop or time-of-day can be set with the "+" and "-" buttons.
Time of day
3 Button Digital Timer
Operation period
In order to set an operation period, the mode button has to be pressed repeatedly until the LED L1 is flashing. Then the desired operation period (time frame between 0.01h and 10.00h) can be set using the plus and minus buttons. Once adjusted, it will be stored after approx. 5 seconds, the LED L1 remains illuminated steadily, and the set time starts running down. The display reverts to the time-of-day. As soon as the operation period has ended, the relay opens and the alarm signal sounds (4 beeps every 2 seconds) and the LED L1 is flashing again. Pressing any of the buttons stops the signal and the flashing, the LED goes dark and the relay closes again. If the alarm is not stopped manually, it terminates automatically after 2 minutes.
Operation stop
In order to set an operation stop, the mode button has to be pressed repeatedly until the LED L2 is flashing. Then the desired operation stop, which is limited to a point being maximally 23.59 h in the future, can be set using the plus and minus buttons. Once adjusted it will be stored after approx. 5 seconds, and the LED L2 remains illuminated steadily. The display reverts to the time-of-day. As soon as the operation stop has been reached, the relay opens and the alarm signal sounds (4 beeps for 2 minutes) and the LED L2 is flashing. Pressing any of the buttons stops the signal and the flashing, the LED goes dark and the relay closes again.
It is possible to combine the duration and end time in order to program a delayed mode. To do
Maintaining your Oven
GENERAL MAINTENANCE
Ensure that the power to the unit is switched off prior to cleaning the unit. Surface should only be cleaned with warm soapy water and a soft non abrasive cloth. In coastal environments and humid areas more frequent cleaning is required to maintain the finish.
To extend the life of your oven, it must be cleaned frequently, keeping in mind that:
- Do not use steam equipment to clean the appliance.
- To protect against the risk of electrical shock, do not immerse the unit, cord or plug in water or other liquid or sprinkle water to clean the appliance!
- Don't clean the appliance when it is hot! The inside and external surface of the oven should preferably be cleaned by damp cloth when it is cooled down. Wash all accessories in hot soapy water, wipe dry with a paper or cloth towel.
- If you use your oven for an extended period of time, condensation may form. Dry it using a soft cloth.
- There is a rubber seal surrounding the oven opening, which guarantees its perfect functioning. Check the condition of this seal on a regular basis. If necessary, clean it and avoid using abrasive products or objects to do so. Should it become damaged, please contact your nearest service centre. We recommend you avoid using the oven until it has been repaired.
- Never line the oven bottom with aluminum foil, as the consequent accumulation of heat
Maintaining your Oven
Lamp Replacement
WARNING // Ensure that the appliance is completely cool and that the power to the unit has been switched.
Your oven is fitted with E14 15W oven lamps (300°C). Replacement lamps can be purchased from your nearest service centre. To remove the lamp, twist the cover in an anti-clockwise direction. Unscrew the lamp and replace it with a new lamp. Replace the cover.

natural_image
Close-up of a metallic mechanical component with numbered callouts (1, 2, 3), no visible text or symbols.Adjusting the shelf/tray position
When adjusting or positioning your shelf, please ensure the following:
- Ensure that the shelf / tray is located between the two wire siderack guides. (see point 1)
- The shelf stops should be facing downwards and towards the rear. (see point 2)
- The guard rail should always be located at the rear of the oven (see point 3)
Notes
CONTACT DETAILS
AUSTRALIA
ARISIT PTY LIMITED
40-44 Mark Anthony Drive, Dandenong South, VIC 3175, Australia
P//1300762219
F//0397680838
consumer.care@arisit.com
NEW ZEALAND
ARISIT PTY LIMITED
PO Box 68-140 Newton, Auckland 1145, New Zealand
P//093061020
F 77 09 302 0077 sales@aristonappliances.co.nz
TEARA IS COMMITTED TO ONSONG RESEARCH AND DEVELOPMENT. EVERY EFFORT HAS BEEN MADE TO ENSURE ALL INFORMATION IN THIS USER MANUAL IS CORRECT AT TIME OF GOING TO PRINT DIMENSIONS SHOULD BE USED AS A REFERENCE ONLY AND ACTUAL DIMENSIONS SHOULD BE TAKEN FROM THE PHYSICAL PRODUCT ONLY
MANUFACTURER RESERVES THE RIGHT TO CHANGE SPECIFICATIONS WITHOUT NOTICE.
- Hello
- Contents
- Warning & Safety Information
- Product Overview
- ELECTRIC OVEN 9 FUNCTION
- Electrical Connection
- Installation
- Operating Instructions
- GENERAL FUNCTIONS GUIDE
- Button Digital Timer
- Operation period
- Operation stop
- Maintaining your Oven
- GENERAL MAINTENANCE
- Lamp Replacement
- Adjusting the shelf/tray position
- Notes
- CONTACT DETAILS
- AUSTRALIA
- ARISIT PTY LIMITED
- NEW ZEALAND
Brand : Tisira
Model : TOC919
Category : Oven