
DV-981HD - DVD player OPPO - Free user manual and instructions
Find the device manual for free DV-981HD OPPO in PDF.


| Product Type | DVD player with up-conversion to 1080p |
| Model | OPPO DV-981HD |
| Disc Compatibility | DVD-Video, DVD-Audio, SACD, CD, HDCD, Kodak Picture CD, DivX (3.11–5.1), CD-R/RW, DVD±R/RW, DVD+R DL |
| Video Output | HDMI with HDCP, Composite, S-Video; Up-conversion: 480p/720p/1080i/1080p (NTSC), 576p/720p/1080i/1080p (PAL) |
| Audio Output | Analog: Stereo, 5.1ch; Digital: Coaxial, Optical; HDMI Audio (LPCM or Auto) |
| Dimensions (W x D x H) | 420 mm x 270 mm x 41 mm (16.5 x 10.6 x 1.6 inches) |
| Weight | 2.4 kg (5.20 lbs) |
| Power Supply | AC 100V–240V, 50/60 Hz |
| Power Consumption | 20 W |
| Video Processor | Genesis/Faroudja with TrueLife, Cross Color Suppression, Noise Reduction |
| Audio Decoding | Dolby Digital, DTS, Dolby Pro Logic II, HDCD |
| Special Features | HDMI up-conversion, SACD playback, DivX playback, Disc Browser, Virtual Keyboard, Bookmarks, Power Spectrum Meter, Sound Field and EQ modes |
| Front Panel Controls | Power, Open/Close, Play/Pause, Stop, IR sensor, Display window |
| Remote Control | Full-function remote with backlight, batteries included (2x AAA) |
| Safety Features | Polarized plug, laser safety, FCC Class B, overvoltage protection, no user-serviceable parts inside |
| Cleaning Instructions | Use a soft dry cloth; mild detergent solution for stubborn dirt; avoid abrasive pads, alcohol, benzene |
| Repairability | No user-serviceable parts; refer servicing to qualified personnel; limited one-year warranty |
| Warranty | 1 year limited warranty (USA/Canada); registration required |
| Operating Temperature | 5°C – 35°C (41°F – 95°F) |
| Operating Humidity | 15% – 75% (no condensation) |
Frequently Asked Questions - DV-981HD OPPO
User questions about DV-981HD OPPO
0 question about this device. Answer the ones you know or ask your own.
Ask a new question about this device
Download the instructions for your DVD player in PDF format for free! Find your manual DV-981HD - OPPO and take your electronic device back in hand. On this page are published all the documents necessary for the use of your device. DV-981HD by OPPO.
USER MANUAL DV-981HD OPPO
R E A D C A B E F O R E

Table of Contents
Table of Contents .... 1
Important Information....1
Important Safety Instructions ....2
Additional Safety Instructions....2
Cautions....3
FCC Statement 3
Copyright Protection 4
Trademarks 4
Compatible Disc Types .... 4
INSTALLATION 5
Front Panel Controls 5
Front Panel Display Window 5
Rear Panel Connectors 5
Remote Control 6
Battery Installation....7
Using the Remote Control ....7
Making the Video Connection....8
HDMI Connection....8
DVI Connection....9
Connecting to an Audio System 10
Connecting to a Receiver/Amplifier with HDMI Input/Output 10
Connecting to a Receiver/Amplifier with 5.1ch Audio Input....11
Connecting to a Receiver/Amplifier with Dolby Digital or DTS Decoder....12
Connecting to a Stereo or Surround Audio System....13
Setting Up the Player - Initial Setup 14
Use the Setup Menu System ....14
Determine Your Display Type....16
Select the Best Output Resolution....17
Set up Audio Options....18
BASIC OPERATIONS....21
Disc Playback 21
Pause Playback 21
DVD Menu Playback 22
Volume Control....22
Mute 22
OSD (On-Screen Display)....23
Audio Language/Channel Selection 23
Subtitle Selection 23
Angle Selection....24
Zooming the Displayed Frame 24
Sound Field and EQ Mode Adjustment 25
Power Spectrum Meter (PSM) 25
TV System Selection 26
Fast Playback....26
Slow Playback 27
Repeat Playback 27
Repeat the Selected Section 27
Random and Shuffle Playback....28
Playback by Track Number 28
Playback from a Specific Location 28
DVD discs 28
CD discs....29
Memory and Automatic Resume 30
Bookmarks 30
Viewing Static Pictures on DVD-Audio Discs 31
Virtual Keyboard 31
Disc Browser 32
Playing DivX, Digital Audio and Picture Files 32
Digital Music Play Operations....33
Digital Picture Play Operations ....34
Playing a Disc with Both Digital Audio and Picture Files ....34
SETUP MENU OPTIONS.... 35
General Setup Page 35
Speaker Setup Page 37
Audio Setup Page 40
Video Setup Page 43
Preference Page 45
REFERENCES....47
Useful Notes......47
Troubleshooting 47
Specifications 48
Language Code List 49
LIMITED WARRANTY 50
OPPO Digital, Inc. Limited One Year Warranty.... 50
Important Information


CAUTION:
TO PREVENT ELECTRICAL SHOCK, DO NOT REMOVE THE COVER. NO USER-SERVICEABLE PARTS INSIDE. REFER SERVICING TO QUALIFIED SERVICE PERSONNEL.
WARNING:
TO PREVENT DAMAGE WHICH MAY RESULT IN FIRE OR SHOCK HAZARD, DO NOT EXPOSE THIS APPLIANCE TO RAIN OR MOISTURE.

The lightning flash with arrowhead symbol, within an equilateral triangle, is intended to alert the user to the presence of uninsulated “dangerous voltage” within the product's enclosure that may be of sufficient magnitude to constitute a risk of electric shock to persons.

The exclamation point within an equilateral triangle is intended to alert the user to the presence of important operation and maintenance (servicing) instruction in the literature accompanying the appliance.
WARNING: TO REDUCE THE RISK OF FIRE OR ELECTRIC SHOCK, DO NOT EXPOSE THIS APPLIANCE TO RAIN OR MOISTURE. DANGEROUS HIGH VOLTAGES ARE PRESENT INSIDE THE ENCLOSURE. DO NOT OPEN THE CABINET. REFER SERVICING TO QUALIFIED PERSONNEL ONLY.
WARNING: THE APPARATUS SHALL NOT BE EXPOSED TO DRIPPING OR SPLASHING AND THAT NO OBJECTS FILLED WITH LIQUIDS, SUCH AS VASES SHALL BE PLACED ON THE APPARATUS.
CAUTION: TO PREVENT ELECTRIC SHOCK, MATCH WIDE BLADE OF PLUG TO WIDE SLOT, FULLY INSERT.
CAUTION: THESE SERVICING INSTRUCTIONS ARE FOR USE BY QUALIFIED SERVICE PERSONNEL ONLY. TO REDUCE THE RISK OF ELECTRIC SHOCK DO NOT PERFORM ANY SERVICING OTHER THAN THAT CONTAINED IN THE OPERATING INSTRUCTIONS UNLESS YOU ARE QUALIFIED TO DO SO.
CAUTION: DANGER OF EXPLOSION IF BATTERY IS INCORRECTLY REPLACED. REPLACE ONLY WITH THE SAME OR EQUIVALENT TYPE.
CAUTION: THIS PRODUCT UTILIZES A LASER. USE OF CONTROLS OR ADJUSTMENTS OR PERFORMANCE OF PROCEDURES OTHER THAN THOSE SPECIFIED HEREIN MAY RESULT IN HAZARDOUS RADIATION EXPOSURE. DO NOT OPEN COVERS AND DO NOT REPAIR YOURSELF. REFER SERVICING TO QUALIFIED PERSONNEL.
Important Safety Instructions
1) Read these instructions.
2) Keep these instructions.
3) Heed all warnings.
4) Follow all instructions.
5) Do not use this apparatus near water.
6) Clean only with dry cloth.
7) Do not block any ventilation openings. Install in accordance with the manufacturer's instructions.
8) Do not install near any heat sources such as radiators, heat registers, stoves, or other apparatus (including amplifiers) that produce heat.
9) Do not defeat the safety purpose of the polarized or grounding-type plug. A polarized plug has two blades with one wider than the other. A grounding type plug has two blades and a third grounding prong. The wide blade or the third prong is provided for your safety. If the provided plug does not fit into your outlet, consult an electrician for replacement of the obsolete outlet.
10) Protect the power cord from being walked on or pinched, particularly at plug, receptacle, and the point where it exits from the apparatus.
11) Only use attachments/accessories specified by the manufacturer.
12) Use only with the cart, stand, tripod, bracket, or table specified by the manufacturer, or sold with the apparatus. When a cart is used, use caution when moving the cart/apparatus combination to avoid injury from tip-over.
13) Unplug this apparatus during lightning storms or when unused for long periods of time.
14) Refer all servicing to qualified service personnel. Servicing is required when the apparatus has been damaged in any way, such as power-supply cord or plug is damaged, liquid has been spilled or objects have fallen into the apparatus, the apparatus has been exposed to rain or moisture, does not operate normally, or has been dropped.

Additional Safety Instructions
1) Before connecting the AC power cord to the appliance, make sure the voltage designation of the appliance corresponds to the local electrical supply. If you are unsure of your power supply, ask your local power company.
2) To avoid electric shock, never touch the inside components. Only a qualified technician should open the case of the product.
3) Do not use this product if power cord is damaged. Do not hang any object on the power cord and do not install the power cord at places where people walk.
4) Please hold the power plug when unplugging power. Do not hold the power cord.
5) Please do not unplug the power plug when this unit is working well. Turn off the unit before unplugging.
6) If this unit is damaged, do not service it yourself and you should contact professional maintenance personnel.
7) Please use equipped accessories to ensure proper operation of the product and reduce incidents.
8) Please unplug the power cord if you are not going to use the product for a long period.
9) High temperature will lead to abnormal operation of this unit. Do not expose this unit to direct sunlight or near other heating objects.
10) To ensure the good ventilation around this product, please do not place this product on a sofa, bed or rug. When installing this product on a wall or bookshelf, you need to leave appropriate space.
11) Do not expose this unit in rain or near humid places such as kitchen and swimming pool to avoid electric shock or fire. Prevent this unit from dripping or splashing. Do not place objects full of liquid such as vases on the unit.
12) Do not place this product on unstable cart, stand, tripod, bracket and table. Do not clean the LCD screen with ethyl alcohol, toluene, ethyl acid, or methyl.
13) When smoke, abnormal smell or sound appears from the product, please cut off power immediately and contact your dealer or service center.
14) Never insert any metal object into the cabinet. It may create danger of electric shock.
15) After service and maintenance, please let the service person do safety check to ensure proper operation of the unit.
16) The power socket is used as the device for cutting off power, so make sure the socket easy to unplug. This product employs CLASS I electric construction, so the connected socket should be with secure grounding.
17) When replacing accessories, please ensure the maintenance person use the accessories and tools appointed by manufacturer.
Cautions
- Ensure that all audio/video cables are properly connected before plugging in the power plug. The player is not disconnected from the AC power source as long as it is connected to the wall outlet, even if the player itself has been turned off.
- The acceptable power input range is AC \~ 100V-240V, 50/60Hz
- Before turning on the power of the player, please adjust the volume level of TVs, audio system speakers and amplifiers to the minimum. Adjust the volume as necessary only after normal playback has started to avoid damage to your hearing and equipments.
- Do not put the player near any high power loudspeakers so as to avoid any interference due to vibration or magnetic fields.
• Before moving the player, take out any discs. Otherwise the disc may be damaged. - When moving the player from a cold place to a warm one, or vice versa, moisture may condense on the laser pickup unit inside the player. Should this occur, the player may not operate properly. In such a case please turn the power on for 1-2 hours (without disc) until the moisture evaporates.
- Clean the cabinet, panel, and controls only with a soft cloth slightly moistened with water or a mild detergent solution. Never use any type of abrasive pad, scouring powder or solvent such as alcohol or benzene for cleaning.
FCC Statement
This equipment has been tested and found to comply with the limits for a Class B digital device, pursuant to Part 15 of the FCC Rules. These limits are designed to provide reasonable protection against harmful interference in a residential installation. This equipment generates, uses, and can radiate radio frequency energy and, if not installed and used in accordance with the instructions, may cause harmful interference to radio communications. However, there is no guarantee that interference will not occur in a particular installation. If this equipment does cause harmful interference to radio or television reception, which can be determined by turning the equipment off and on, the user is encouraged to try to correct the interference by one or more of the following measures:
- Reorient or relocate the receiving antenna.
- Increase the separation between the equipment and receiver.
- Connect the equipment into an outlet on a circuit different from that to which the receiver is connected.
- Consult the dealer or an experienced radio/TV technician for help.
Any unauthorized changes or modifications to this equipment would void the user's authority to operate this device.
This device complies with Part 15 of the FCC Rules. Operation is subject to the following two conditions: (1) This device may not cause harmful interference, and (2) this device must accept any interference received, including interference that may cause undesired operation.
Copyright Protection
This product incorporates copyright protection technology that is protected by U.S. patents and other intellectual property rights. Use of this copyright protection technology must be authorized by Macrovision Corporation, and is intended for home and other limited viewing uses only unless otherwise authorized by Macrovision Corporation. Reverse engineering or disassembly is prohibited.
Trademarks
- DVD Logo is a trademark of DVD Format/Logo Licensing Corp., registered in the U.S., Japan and other countries.
- Super Audio CD, SACD and the SACD logo are joint trademarks of Sony Corporation and Philips Electronics N.V
- DivX, DivX Certified, and associated logos are trademarks of DivX, Inc. and are used under license.
- Microsoft, HDCD, and the HDCD logo are trademarks or registered trademarks of Microsoft Corporation in the United States and/or other countries.
- Manufactured under license from Dolby Laboratories. "Dolby" and the double-D symbol are trademarks of Dolby Laboratories.
- "DTS" and "DTS Digital Out" are trademarks of Digital Theater Systems, Inc.
- HDMI, the HDMI logo and High-Definition Multimedia Interface are trademarks or registered trademarks of HDMI Licensing LLC.
- "DCDi" is a trademark of Faroudja, a division of Genesis Microchip Inc.
• The 480p/720p/1080i/1080p up-converting arrow logo is a trademark of OPPO Digital, Inc.
• All other trademarks are the properties of their respective owners.
Compatible Disc Types
| Type | Size | Recorded | Contents |
 | 12cm or 8cm | DVD: Compressed digital audio + compressed digital video (dynamic picture) | |
 | 12cm or 8cm | DVD-Audio: Multi-channel digital audio + compressed digital video or still pictures | |
 SUPER AUDIO CD SUPER AUDIO CD | 12cm or 8cm | Super Audio CD: Multi-channel digital audio | |
 | 12cm or 8cm | CD-DA: Digital Audio | |
This manual uses the following icons to indicate items applicable to the compatible disc types:

Applies to DVD discs

Applies to DVD-Audio discs

Applies to Super Audio CD discs

Applies to CD discs
INSTALLATION
Front Panel Controls
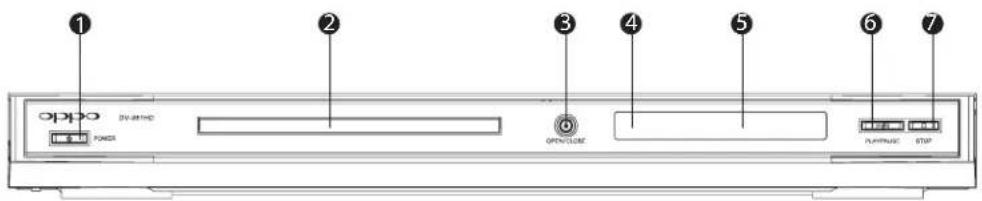
- POWER Button 2. Disc Tray 3. OPEN/CLOSE Button
- IR Remote Sensor 5. Display Window 6. PLAY/PAUSE Button
- STOP Button
Front Panel Display Window
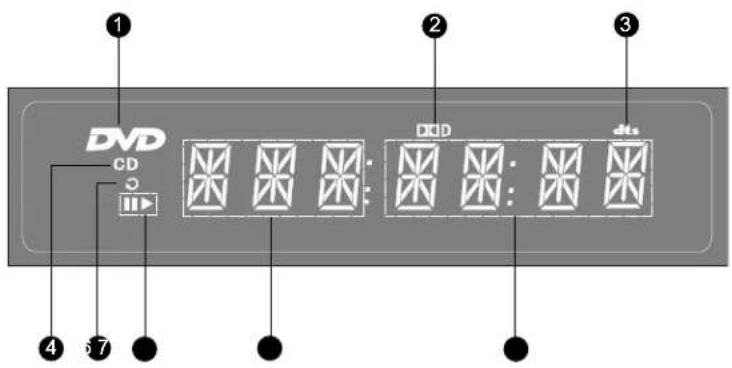
-
DVD Disc 2. Dolby Digital 3. DTS
-
CD Disc 5. Repeat
-
Play/Pause
-
Playback Time
-
Chapter or Track
Rear Panel Connectors
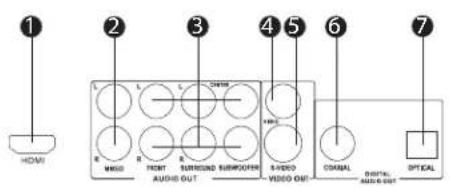
- HDMI Jack 2. Mixed L/R Audio Out Jacks 3. 5.1ch Audio Out Jacks
- Video Out Jack 5. S-Video Jack 6. Coaxial Digital Audio Jack
- Optical Digital Audio Jack
Remote Control
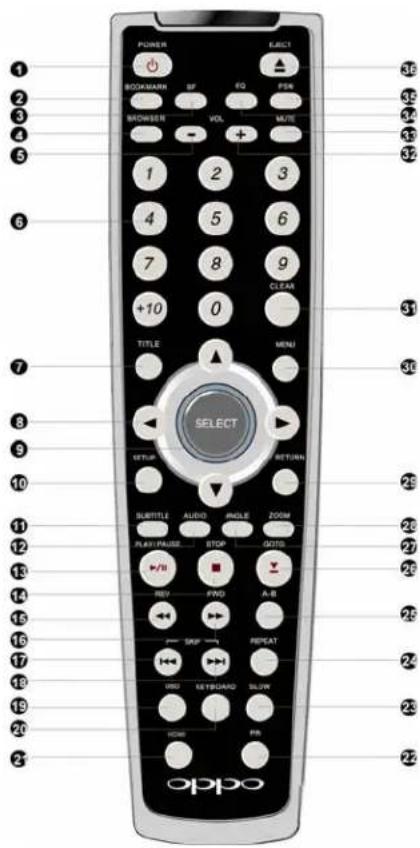
- POWER Button – Toggle power STANDBY and ON
- BOOKMARK Button – Bookmark playing point or retrieve bookmarks
-
SF Button – Select Sound Field effect
-
BROWSER Button – Display disc info browser
- VOLUME -- Decrease volume
- NUMBER Buttons – Enter numeric values
- TITLE Button – Show DVD title menu
- ARROW Buttons – Navigate menu selection
- SELECT Button – Confirm menu selection
- SETUP Button – Enter the DVD player setup menu
- SUBTITLE Button – Change subtitle language / Switch picture display mode
- AUDIO Button – Change the audio language or channel
- PLAY/PAUSE Button – Start or pause playback
- STOP Button – Stop playback
- REV Button – Fast reverse play
- FWD Button – Fast forward play
- PREV Button – Skip previous
- NEXT Button – Skip next
- OSD Button – Show/hide On-Screen Display
-
KEYBOARD Button – Show/hide virtual keyboard
-
HDMI Button – Switch HDMI output resolution
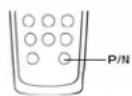
- P/N Button – Switch output TV system: NTSC, PAL or AUTO
- SLOW Button – Slow play
- REPEAT Button – Repeat play
- A-B Button – Repeat play the selected section
- GOTO Button – Play from a specified location
- ANGLE Button – Change camera angles
- ZOOM Button – Zoom in/out the display
- RETURN Button – Return to the previous menu
- MENU Button – Show DVD menu
- CLEAR Button – Clear input numbers
- VOLUME + - Increase volume
- MUTE Button – Mute audio
- EQ Button – Select audio equalizer mode
- PSM Button – Power Spectrum Meter on/off
- EJECT Button – Open/close the disc tray
Battery Installation
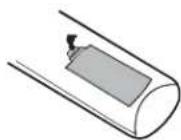
1. Remove the battery compartment cover
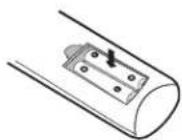
2. Insert batteries
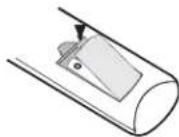
3. Replace the battery compartment cover
Using the Remote Control
When using the remote control, the front window of the remote control should be pointed to the infrared sensor on the front panel within an angle of ±30^ and a range of about 26 ft.
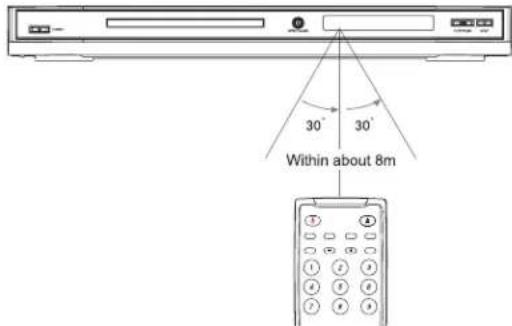
CAUTIONS
- Never drop the remote control or expose it to moisture.
- Never expose the infrared remote sensor on the front panel to direct sunlight or strong beams.
- Remote may not operate consistently when batteries become low. Replace them if operation deteriorates.
- If the remote control will not be used for a long time, please remove the batteries from it.
NOTE
When a button is pressed but its function is invalid or unavailable at the moment, the TV screen displays:
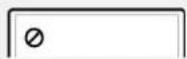
Making the Video Connection
HDMI Connection
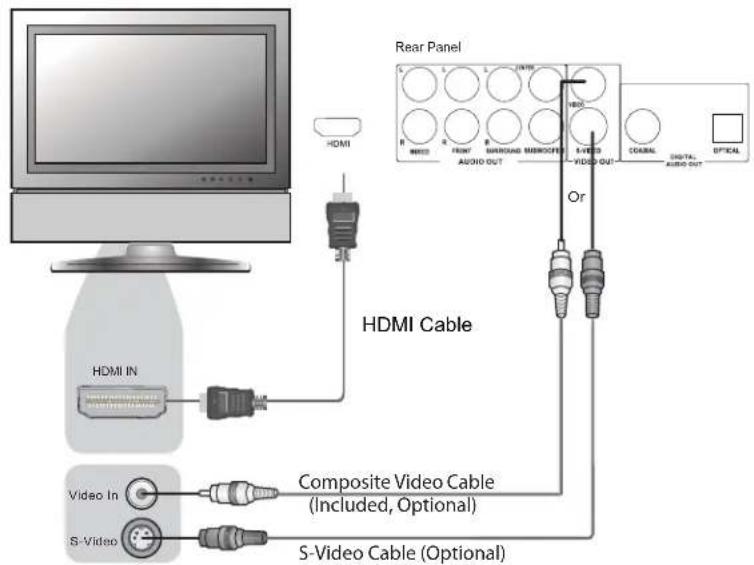
Method 1 – HDMI Connection Directly to TV
- If your TV has an HDMI (High-Definition Multimedia Interface) input, you can use the included HDMI cable to connect the DVD player to the TV. This connection method delivers both video and audio in pure digital format via a single cable. The HDMI video output of the DVD player presents the highest possible resolutions and video quality.
- You may connect the composite video or S-Video cable to the TV for trouble-shooting purpose, just in case there is a problem with HDMI. However it is not recommended to use the composite video or S-Video as the primary method of video delivery to the TV, because using it will lose the advantage of video up-conversion and you will only get standard definition video.
DVI Connection
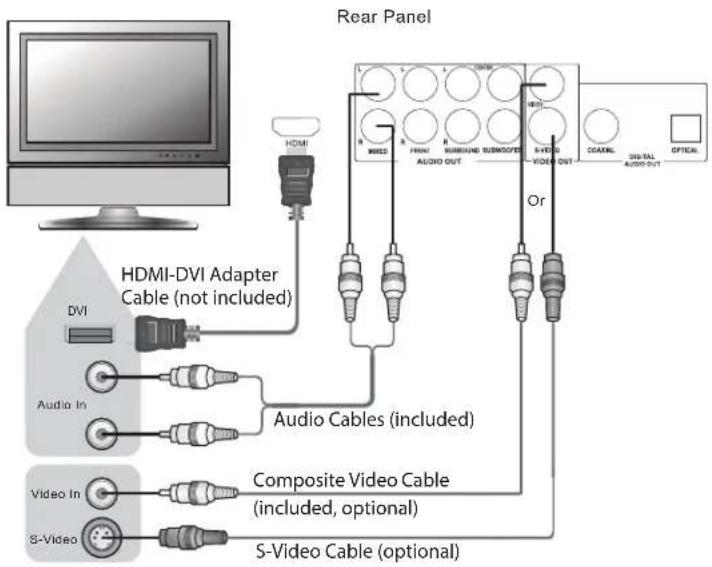
Method 2 – DVI Connection to TV
- If your TV has a DVI input, you can purchase an HDMI-DVI adapter cable to connect the DVD player to the TV. This connection method delivers digital video to the TV without any signal degradation. The HDMI video output of the OPPO DVD player presents the highest possible resolutions and video quality.
- Please use the Red/White audio cables to connect the MIXED audio output of the DVD player to the TV. Make sure the audio cables are connected to the same input terminal group on the TV as the DVI input. Usually the input terminals are marked as "DVI Audio" or "PC Audio". On some TVs you may need to use an RCA-3.5mm Mini-Jack adapter cable to connect the audio.
- You may connect the composite video or S-Video cable to the TV for trouble-shooting purpose, just in case there is a problem with DVI. However it is not recommended to use the composite video or S-Video as the primary method of video delivery to the TV, because using it will lose the advantage of video up-conversion and you will only get standard definition video.
Connecting to an Audio System
Connecting to a Receiver/Amplifier with HDMI Input/Output
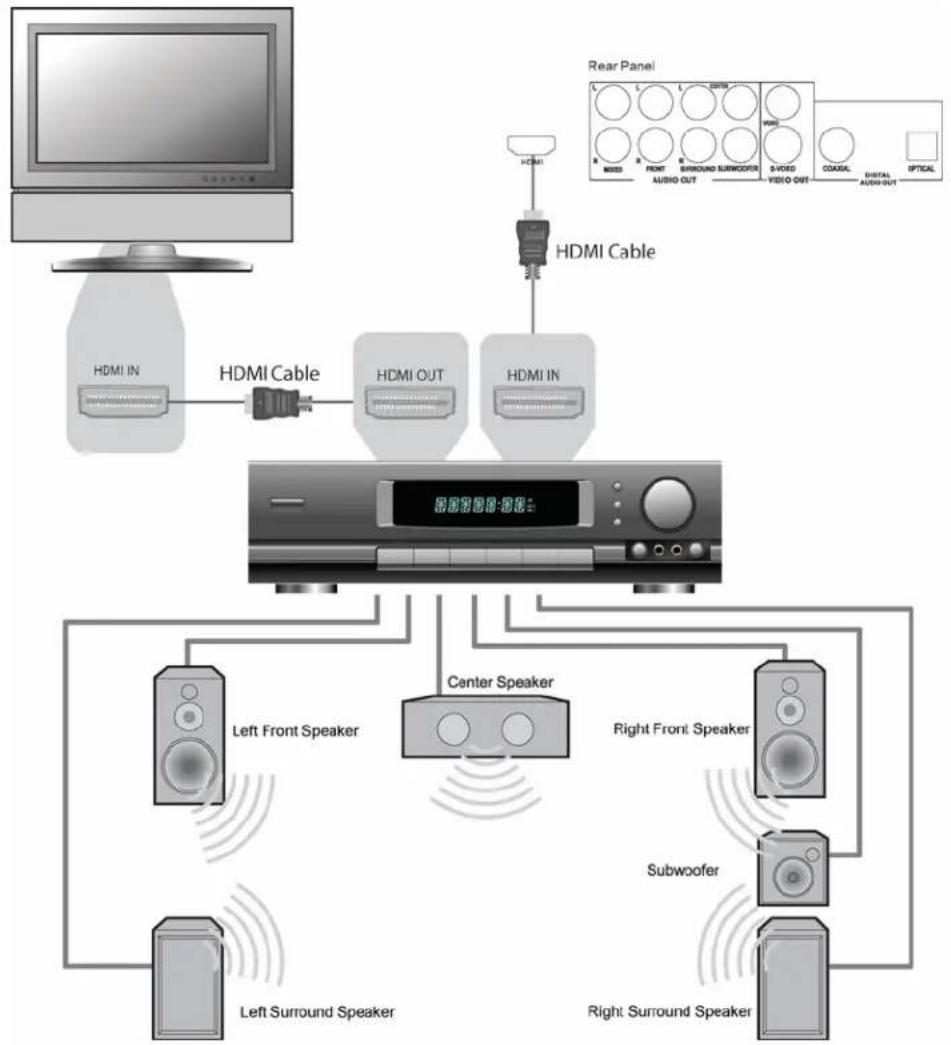
flowchart
graph TD
    A["Computer"] --> B["HDMI IN"]
    B --> C["HDMI Cable"]
    C --> D["HDMI OUT"]
    D --> E["HDMI IN"]
    E --> F["HDMI Cable"]
    F --> G["Central Speaker"]
    G --> H["Left Front Speaker"]
    G --> I["Center Speaker"]
    G --> J["Right Front Speaker"]
    G --> K["Subwoofer"]
    G --> L["Left Surround Speaker"]
    G --> M["Right Surround Speaker"]
    N["Rear Panel"] --> O["Rearrled Audio Out"]
    O --> P["Audio Out"]
    P --> Q["Video Out"]
    Q --> R["Comaxial Audio Out"]
    R --> S["Optical"]
Method 3 – HDMI Connection to Receiver and TV
- HDMI can transmit both audio and video signals over a single cable. If you have an HDMI-capable receiver that can support HDMI audio, you can simply run an HDMI cable from the DVD player to your receiver and enable HDMI audio on the receiver (see your receiver's owners' manual for more information). The receiver usually has an HDMI output that you can connect to your TV to pass video signal.
Connecting to a Receiver/Amplifier with 5.1ch Audio Input
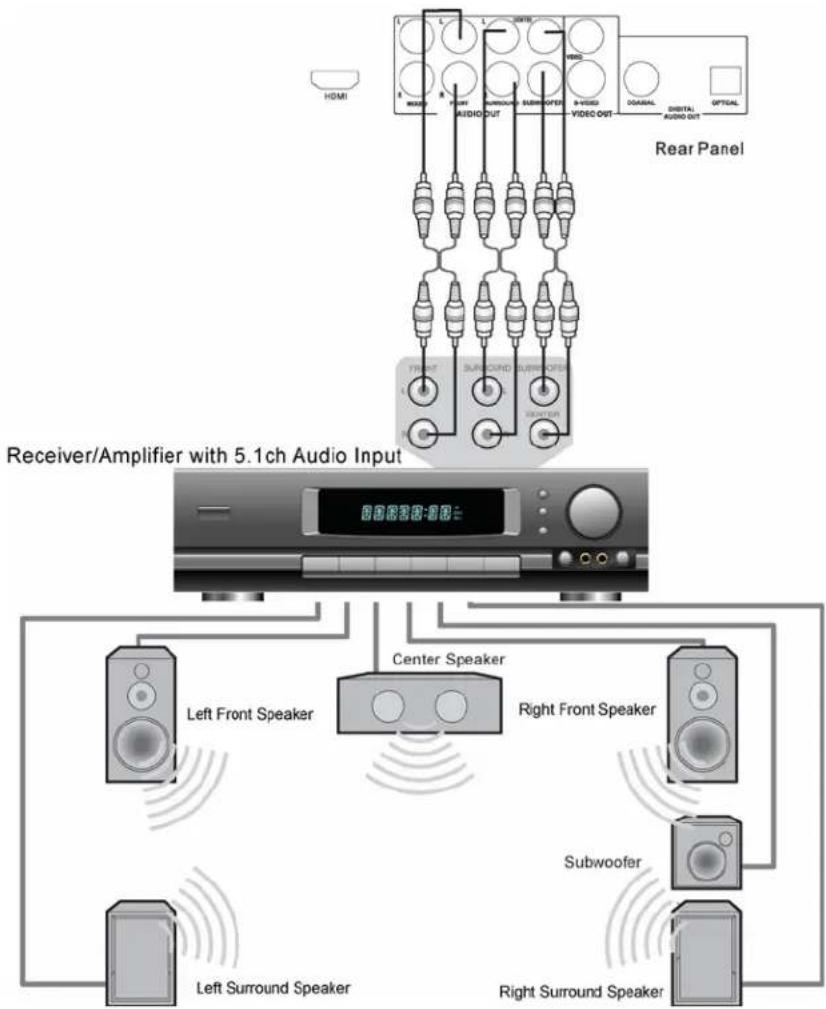
flowchart
graph TD
    A["Rear Panel"] --> B["Receiver/Amplifier with 5.1ch Audio Input"]
    B --> C["Left Front Speaker"]
    B --> D["Center Speaker"]
    B --> E["Right Front Speaker"]
    B --> F["Subwoofer"]
    B --> G["Left Surround Speaker"]
    B --> H["Right Surround Speaker"]
    C --> I["Speaker 1"]
    D --> J["Speaker 2"]
    E --> K["Speaker 3"]
    F --> L["Speaker 4"]
    G --> M["Speaker 5"]
    H --> N["Speaker 6"]
    I --> O["Radio Control"]
    J --> P["Audio Output"]
    K --> Q["Video Output"]
    L --> R["Signal Lines"]
    M --> S["Signal Lines"]
    N --> T["Signal Lines"]
Method 4 – 5.1ch Analog Audio Connection
- Please use 6 RCA-style audio interconnect cables to connect the FRONT L/R, SURROUND L/R, CENTER and SUBWOOFER analog outputs of the OPPO DVD player to the corresponding multi-channel analog audio input jacks of your A/V receiver.
Connecting to a Receiver/Amplifier with Dolby Digital or DTS Decoder
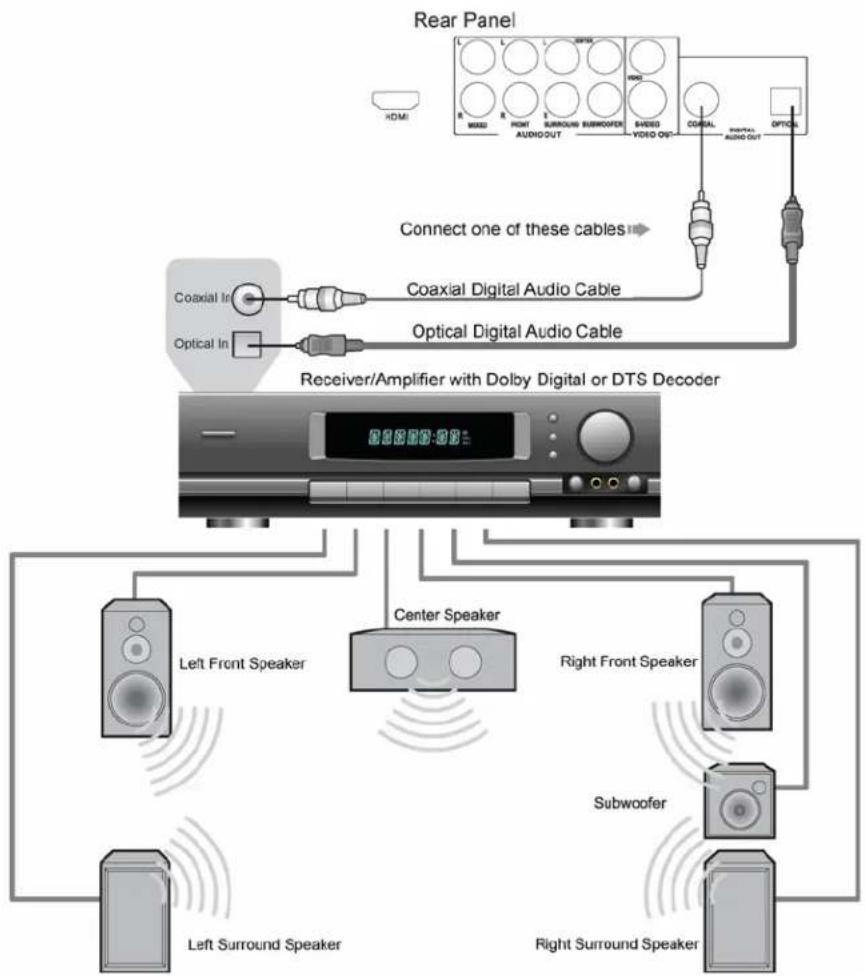
flowchart
graph TD
    A["Rear Panel"] --> B["Coaxial In"]
    A --> C["Coaxial Digital Audio Cable"]
    A --> D["Optical In"]
    B --> E["Receiver/Amplifier with Dolby Digital or DTS Decoder"]
    C --> E
    D --> E
    E --> F["Left Front Speaker"]
    E --> G["Center Speaker"]
    E --> H["Right Front Speaker"]
    E --> I["Subwoofer"]
    E --> J["Left Surround Speaker"]
    E --> K["Right Surround Speaker"]
    F --> L["Left Surround Speaker"]
    G --> M["Right Surround Speaker"]
    H --> N["Left Surround Speaker"]
    I --> O["Right Surround Speaker"]
    J --> P["Left Surround Speaker"]
    K --> Q["Right Surround Speaker"]
    L --> R["HDMI"]
    M --> S["HDMI"]
    N --> T["HDMI"]
    O --> U["HDMI"]
    P --> V["HDMI"]
    Q --> W["HDMI"]
Method 5 – Digital Audio Connection
- Please use either a 75-Ohm coaxial digital audio cable with RCA-style connectors or an S/PDIF optical digital audio cable to connect one of the digital audio outputs to the corresponding input terminal on your A/V receiver.
NOTE
- Manufactured under license from Dolby Laboratories. "Dolby" and the double-D symbol are trademarks of Dolby Laboratories.
- "DTS" and "DTS Digital Out" are trademarks of Digital Theater Systems, Inc.
- Due to copy-control restrictions and bandwidth limitation, full resolution audio output from DVD-Audio or SACD playback cannot be sent through the coaxial or optical digital audio output. To listen to DVD-Audio or SACD in full resolution, please use HDMI or 5.1ch analog audio connections.
Connecting to a Stereo or Surround Audio System
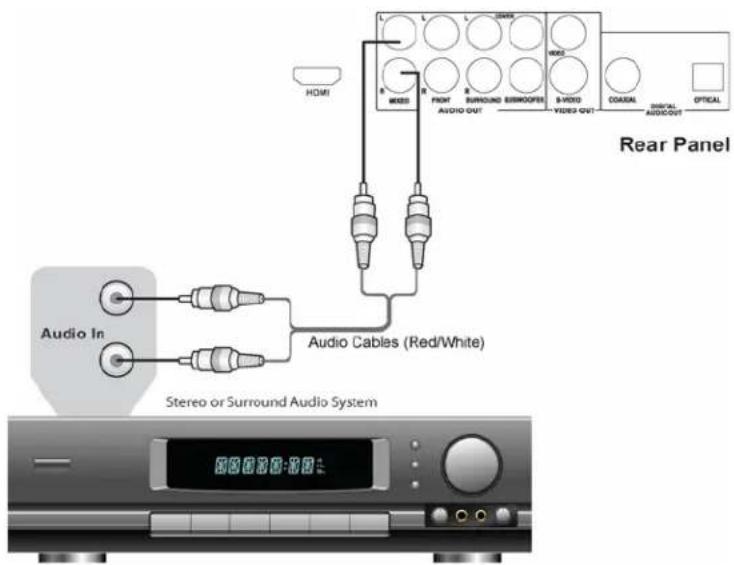
Method 6 – Stereo Analog Audio Connection
- If your audio system only offers stereo audio inputs, you can connect it to the MIXED L/R audio outputs of the DVD player using the supplied Red/White audio cables. Depending on the capability of your audio system, you may set up your DVD player with one of the following configurations:
- If the audio system does not have surround speakers, please set the down-mix mode to "Stereo" or "V. Surround".
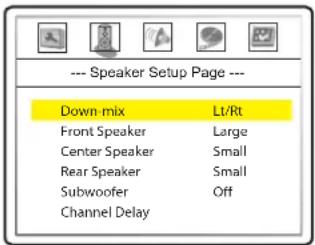
- If the audio system has surround speakers and Dolby Pro Logic Surround support, please set the down-mix mode to "Lt/Rt".
(Please refer to page 20 for details.)
Setting Up the Player - Initial Setup
Use the Setup Menu System
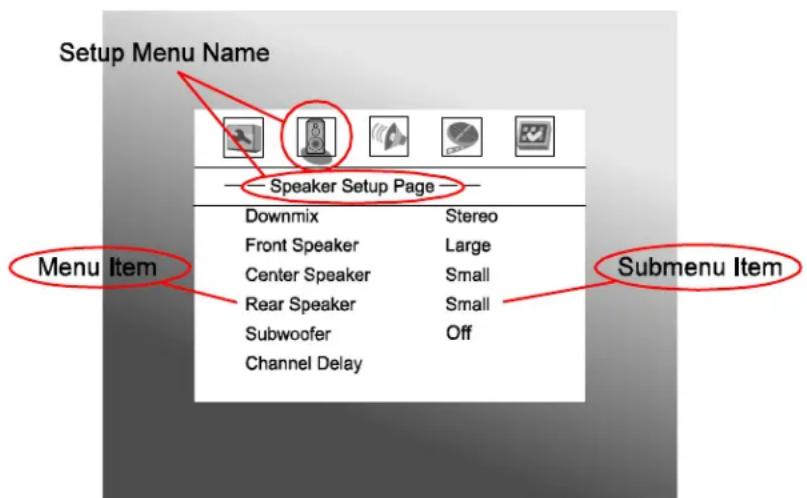
In many places of this guide, the DVD player's Setup Menu needs to be adjusted to match your specific audio/video configuration. When asking you to make menu adjustments, we will use the following terminology to indicate the location of the desired function:
Setup Menu Name > Menu Item > Submenu Item (or Selection)
Setup Menu Name is the actual name of the uppermost setup menu level. With the OPPO DV-981HD there are exactly five (5) Setup Menu pages or sections, each represented by an icon on the top of the Setup Menu screen. They are: General Setup Page, Speaker Setup Page, Audio Setup Page, Video Setup Page, and Preference Page.
Menu Item is the parameter to be adjusted which appears below the Setup Menu Name. It is the list of items on the left of the current Setup screen.
Submenu Item (or the selection) is the actual numeric or descriptive element that represents the change being made to the selected parameter. It is the item located to the immediate right of its corresponding Menu Item.
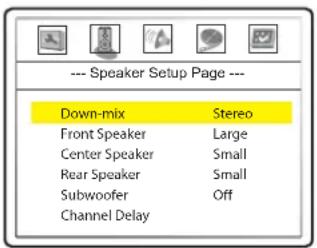
This diagram should give a good description of the various elements and their context. In this screen we could, for example, instruct you to set the Rear Speaker parameter to Small in the Speaker Setup Page. To indicate where we were, you would see the following: Speaker Setup Page > Rear Speaker > Small.
To access the DVD player's Setup Menu simply press the SETUP button on the remote control. Since some setup menu options can become inaccessible when the player is playing a disc, it is recommended that you operate the setup menu when playback is fully stopped or when there is no disc in the player.
- Press the SETUP button on the remote control, and the TV screen displays:
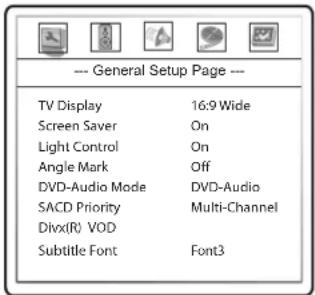
- Press the left/right ARROW buttons to select the setup page. There are 5 pages: General Setup Page, Speaker Setup Page, Audio Setup Page, Video Setup Page, and Preference Page. Press the SELECT button to enter the selected setup page. The Preference page can only be accessed when playback is completely stopped, or when there is no disc in the player.
- Press the up/down ARROW buttons to select the setup item to be changed, and press the SELECT button to change the setting.
For example, in the Video Setup Page, you may use the up/down ARROW buttons to select the "Sharpness" setup item, and press the SELECT button to change the "Sharpness" setting.
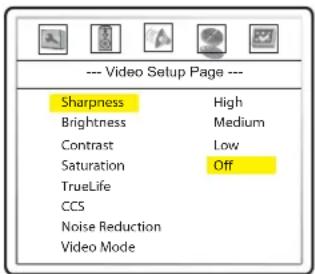
- To select a value from the list of available settings, press the up/down ARROW buttons and then press the SELECT button to confirm.
For example, after using the up/down ARROW buttons to select "Off" for "Sharpness" and pressing the SELECT button, the screen will look like this:
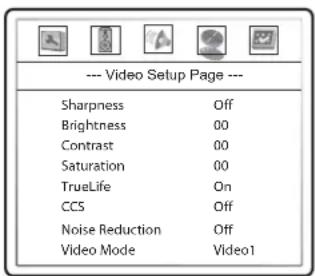
- To exit the SETUP menu, press the SETUP button on the remote control.
NOTE
It is possible that some setup items are grayed-out and inaccessible. This can be caused by disc still being played back or interlocking with mutually exclusive setup items. Please stop
playback or eject the disc before trying to change these setup items. If you still cannot access the setup item, please check for configuration conflicts and consistency. For example, if the audio "Down-mix" mode is set to "Stereo", the center and rear speaker size settings will be grayed-out. Setting the "Down-mix" mode to "5.1CH" will enable the center and rear speaker size settings.
Determine Your Display Type
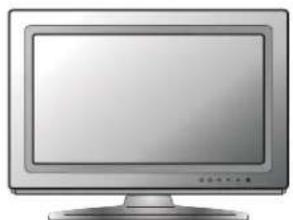
natural_image
Illustration of a flat-screen computer monitor (no text or symbols visible)Widescreen, or 16:9 TV
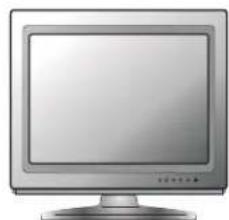
natural_image
Illustration of a flat-screen computer monitor (no text or symbols visible)Standard Definition, or 4:3 TV
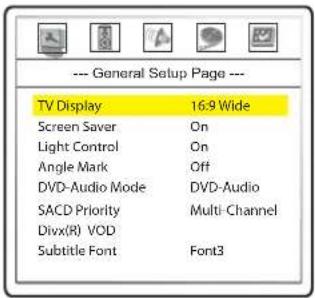
For best performance, your OPPO DVD player must be correctly configured for playback even before the first disc is inserted. This is done under General Setup Page > TV Display in the Setup Menu.
If you have a widescreen (16:9) display as pictured on the left, select one of these options:
- 16:9 Wide – 16:9 (widescreen) sources will be displayed in their native aspect ratio, and 4:3 sources will be stretched.
- 16:9 Wide/Auto – 16:9 (widescreen) as well as 4:3 sources will be displayed in their native aspect ratio. Please note that in this mode 4:3 sources will be displayed with black borders on both sides to maintain the correct 4:3 aspect ratio.
NOTE
If you are using a plasma or widescreen CRT display you will want to avoid leaving black bars on the screen for any length of time as you may encounter temporary burn-in where the display retains memory of the "used" part of screen and the unused (black bar) portions are clearly defined on the screen during subsequent viewing sessions. The "16:9 Wide" mode is the best choice for these types of displays.
If you have a 4:3 or standard definition screen as pictured on the right, select one of these options:
- 4:3 Pan/Scan – 4:3 TV Pan and Scan. Choose when the display is 4:3. Both sides of a widescreen image are clipped (you lose about 30% of the picture).
- 4:3 Letterbox – 4:3 TV Letterbox. Choose when the display is 4:3. Widescreen image is displayed in "letterbox" format with black borders on top and bottom (preferred).
| DVD Content | TV Screen Appearance | |||
| 4:3 | 16:9 | |||
| Pan-Scan Letterbox Wide Wide/SQZ | ||||
4:3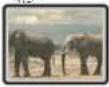 | 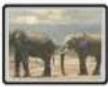 | 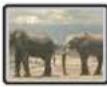 | 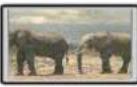 | 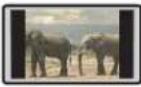 |
16:9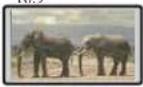 | 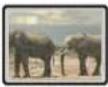 | 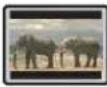 |  |  |
Select the Best Output Resolution
One of the major advantages of the OPPO DVD player is its ability to up-convert standard definition video contents stored on the DVD discs to high definition video signal and output it to the TV through HDMI. The sophisticated video processor inside the player ensures that the resulted video will have the best possible color, detail and motion. The DVD player offers several standard and high definition video output resolutions. To get the best visual result, it is important to select an output resolution that matches your TV or display device.
The rule of thumb is selecting an output resolution that matches the "native resolution" of your TV or display device as closely as possible. The "native resolution" is the resolution of the actual display component in the TV, such as the Plasma panel, LCD panel, or DLP™ chip. The TV may accept input signals with lower or higher resolutions than its native resolution. In such cases the electronics in the TV will up-scale or down-scale the video to fit its display component. Unfortunately many TVs on the market only do an average job scaling the video. On the other hand, if you set the OPPO DVD player to output a resolution that matches or is very close to the native resolution of the TV, you are more likely to get a great picture. For the latest generation of 1080p, "Full HD" or "True HD" displays, the best output resolution will naturally be 1080p. For most flat panels and DLP™, LCD or LCoS (SXRD™, D-ILA™) rear projection televisions this will be 720p. For CRT rear projection televisions this will likely be 1080i. For non HD displays (very rare if they have HDMI or DVI) this will be 480p. You may want to try all available output resolutions and select the one that produces the best picture quality on your TV.
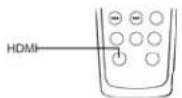
You may use the HDMI button on the remote control to select the output resolution:
- Make sure the HDMI cable or the HDMI-DVI adapter cable is properly connected.
- Turn on the TV. Adjust the TV to use the proper input (HDMI or DVI).
- Turn on the DVD player with no disc in its tray, or if the DVD player is already on, make sure that playback is completely stopped.
- Press the HDMI button to show the current output resolution. Each subsequent press of the HDMI button switches the output resolution in the following sequence:
NTSC output:
$$ 4 8 0 \mathrm{p} \rightarrow 7 2 0 \mathrm{p} 6 0 \mathrm{Hz} \rightarrow 1 0 8 0 \mathrm{i} 6 0 \mathrm{Hz} \rightarrow 1 0 8 0 \mathrm{p} 6 0 \mathrm{Hz} \rightarrow \text {Back to } 4 8 0 \mathrm{p} \text {again} $$
PAL output:
$$ 5 7 6 p \rightarrow 7 2 0 p 5 0 H z \rightarrow 1 0 8 0 i 5 0 H z \rightarrow 1 0 8 0 p 5 0 H z \rightarrow B a c k t o 5 7 6 p a g a i n $$
- The selected output resolution will be briefly displayed on the upper left corner of the TV screen as well as on the DVD player's front panel display.
NOTE
- Some TV sets do not support one or more HDMI output resolutions (particularly 1080p). In this case repeatedly press the HDMI button until a supported resolution is selected. Give your display a second or two to "grab on" to the new signal and attempt to display a picture.
- In case you are not able to get a picture using the HDMI output, please connect the DVD player to the TV using either the composite video or S-Video output, and then use the setup menu to adjust the DVD player settings.
Set up Audio Options
Depending on your specific audio/video connection method, the audio options of the DVD player may need to be adjusted to match your configuration. Please refer to the video and audio connection methods described previously in this guide and the following audio setup guidelines.
Audio Connection Directly to TV
If your DVD player is connected directly to the TV through HDMI (as described in "Method 1" on page 8) or through DVI and analog L/R audio cables (as described in "Method 2" on page 9), it is recommended that you keep the factory default settings. The factory default settings set Speaker Setup Page > Down-mix to "Stereo". In this mode the DVD player will mix the surround and center channels of multi-channel audio contents with the left and right front channels. Since most TVs only come with stereo speakers, this setup will ensure you hear all conversation and background audio from the DVD.
Multi-Channel Digital Audio to Receiver through HDMI
If your DVD player is connected to an A/V receiver or processor with HDMI inputs for high resolution multi-channel digital audio, you are in luck! You are now equipped to send all current audio formats to your receiver in pure digital form. The connection method will typically be as described in "Method 3" on page 10 of this guide.
To get the best possible audio via HDMI, you may need to set the following options on the DVD player's setup menu, depending on your HDMI-capable receiver configuration:
- If your receiver supports HDMI 1.1 Multi-Channel PCM audio, most likely it also support DTS and/or Dolby Digital decoding and has surround speakers. Please set these DVD player options:
- Speaker Setup Page > Down-mix to "5.1 CH"
- Speaker Setup Page > Front Speaker to "Large"
- Speaker Setup Page > Center Speaker to "Large"
- Speaker Setup Page > Rear Speaker to "Large"
- Speaker Setup Page > Subwoofer to "On"
○ Audio Setup Page > Digital Output to "Raw"
○ Audio Setup Page > HDMI Audio to "Auto"
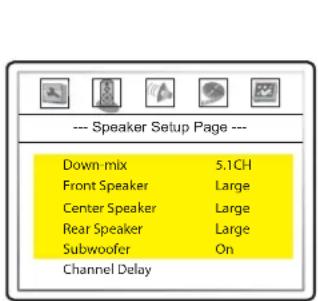
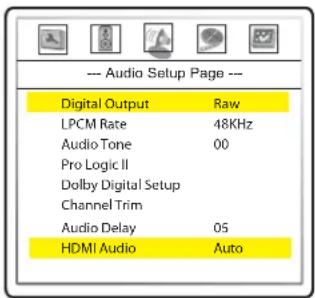
In this configuration you can enjoy all audio formats using the HDMI connection.
NOTE
HDMI is a wonderful thing. A single cable can transport both audio AND video from your DVD player to your display. Be aware, however, that HDMI is an evolving standard, and there could be compatibility issues. The OPPO DV-981HD supports HDMI 1.1 audio. A receiver that supports HDMI 1.1 is required in order to play multi-channel audio for all formats, including DVD-Video/Audio and SACD (SACD DSD audio converted to multi-channel PCM). If the receiver supports HDMI 1.0 only, DVD-Audio and SACD will NOT be able to be sent via HDMI. To utilize DVD-Audio or SACD, please see next section for multi-channel analogue audio connection.
Multi-Channel Analog Audio to Receiver
If your DVD player is connected to an A/V receiver through the 5.1ch analog audio jacks using 6 RCA cables (as described in "Method 4" on page 11), you can play all supported audio formats and listen to it with your A/V receiver and surround systems. The following setup options are recommended:
- Set the Speaker Setup Page > Down-mix to "5.1CH".
- Set the speaker size and subwoofer properly according to your actual audio hardware.
- Enable or select the multi-channel analog inputs on your receiver
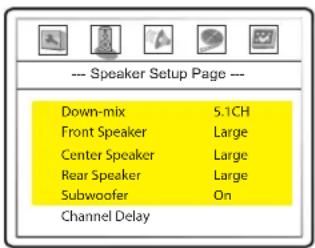
Using the multi-channel analog audio output is necessary for playing DVD-Audio and SACD if your receiver does not support HDMI multi-channel audio. This is absolutely worth it if you haven't yet upgraded to a receiver with HDMI audio. Truly discrete audio channels are a wondrous thing, so enjoy them if you can.
Coaxial or Optical Digital Audio to Receiver
If your audio connection is as described in "Method 5" on page 12 of this guide, and the A/V receiver support Dolby Digital and DTS decoding, the following setup options are recommended:
- Set the Audio Setup Page > Digital Output to "Raw". This will ensure the original Dolby Digital and DTS audio stream will be sent to the receiver for decoding. Stereo audio content will also be sent in digital format.
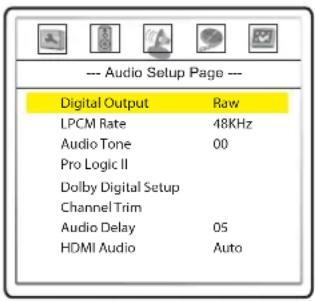
Due to bandwidth limitation of the technology and copyright restrictions, unfortunately it is impossible to send high-resolution multi-channel digital audio from a source like SACD or DVD-Audio to the receiver using this connection method. To enjoy SACD or DVD-Audio in their full resolution, please use the HDMI connection if you have a receiver that handles HDMI audio and use multi-channel outputs if you do not.
Stereo Analog Audio to Receiver
If you primarily listen to stereo contents or your receiver only offers stereo audio connections, please use the analog RCA-style cables to connect the MIXED L/R output of the DVD player to your receiver, as described in "Method 6" on page 13 of this guide. Depending on whether the receiver has surround speakers and supports Dolby Pro Logic II decoding, you may use one of the following audio configurations:
- No Surround Speakers: If the audio system does not have surround speakers, please set the Speaker Setup Page > Down-mix to "Stereo" or "V. Surround".
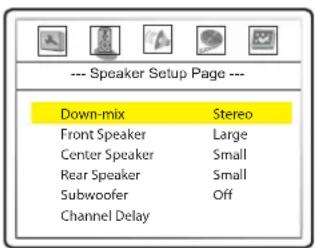
- Surround Speakers and Dolby Pro Logic II Support: If the audio system has surround speakers and Dolby Pro Logic II Surround support, please set the Speaker Setup Page > Down-mix to "Lt/Rt".
BASIC OPERATIONS
Disc Playback


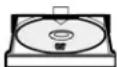
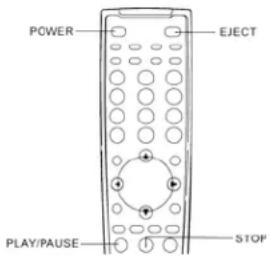
- Press the POWER button to turn on the DVD player.
- Press the OPEN/CLOSE (EJECT) button to eject the disc tray.
- Place the disc with the label side facing up and the record side facing down.
- Press the OPEN/CLOSE (EJECT) button again to retract the tray.
- The DVD player reads disc information and starts playback.
- Depending on the content of the disc, a menu or navigation screen may appear. Please use the navigation ARROW and SELECT buttons to select the content to play.
- To stop playback, press the STOP button.
- During DVD playback, pressing the STOP button for the first time brings the DVD player to a pre-stop mode. You can resume playback from the stopped point by pressing the PLAY/PAUSE button. This pre-stop mode allows you to change the player settings and then resume playback.
• To completely stop playback, press the STOP button twice.
- To turn off the player, press the POWER button.
- This unit consumes a small amount of power even when it is turned off to STANDBY mode. To save power when the unit is not to be used for a long time, unplug it from the household AC outlet.
Pause Playback


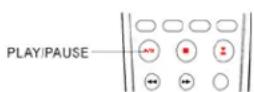
- During playback, press the PLAY/PAUSE button to temporarily pause the program.
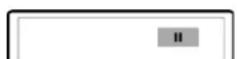
- In the PAUSE status, the TV screen displays:
- Press the PLAY/PAUSE button again to resume playback.
NOTE
If the screen saver is set to "ON" (please refer to page 35 for details), after pausing for 2 minutes the screen saver will be displayed automatically. This is to minimize possible burn-in on plasma or CRT screens caused by displaying a static image for a prolonged period of time.
DVD Menu Playback
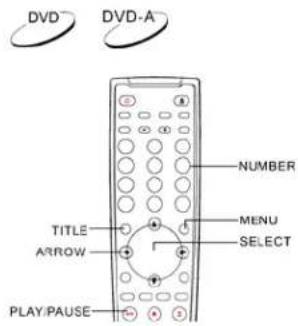
- Some DVD discs contain title menu or chapter menu functions.
- Press the MENU button on the remote control to display the menu on the TV screen.
- Make menu selections using the number buttons or navigate the menu using the ARROW buttons, and then press the PLAY/PAUSE or SELECT button to make the selection.
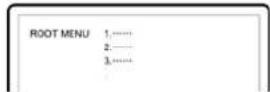
You may also:
- Press the TITLE button to return to the disc title menu.
- Press the MENU button to return to the initial menu.
- Press the RETURN button to return to the previous menu. The return location varies with discs.
Volume Control

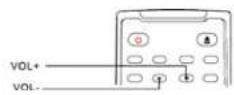
- For regular audio volume adjustment, it is recommended that you use the volume control on your TV or receiver/amplifier.
- The VOL +/- buttons on the DVD remote control is provided as an alternative way of controlling the audio volume. It is recommended that you use this control to make the audio volume from the DVD player the same as from other sources, such as TV programs or a VCR.
- Press the VOL – button to decrease the volume.
- Press the VOL + button to increase the volume.
NOTE
The volume control does not apply to digital audio output in raw bit stream format. However when the volume is decreased to 0, digital audio output will be muted.
Mute

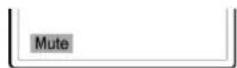
- Press the MUTE button on the remote control during playback to turn off audio output. The TV screen displays "MUTE".
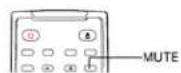
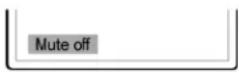
- Press the MUTE button again to resume audio output.
NOTE
Check the MUTE status by pressing the MUTE button when there is no audio output.
OSD (On-Screen Display)

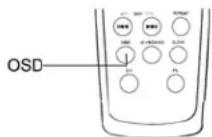
Press the OSD button on the remote control to show disc information and operation function hints on the TV screen.
The OSD display includes the followings:
DVD disc:

CD disc:

Audio Language/Channel Selection

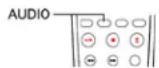
To select the audio language or channel, press the AUDIO button on the remote control during playback.
- For DVD or DivX discs that are encoded with multiple audio languages or channels, you may select the desired language or channel.

- For CD or other stereo audio content, you may select audio output from the LEFT channel only, RIGHT channel only, or STEREO.
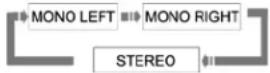
NOTE
Availability of languages and audio channels varies with discs.
Subtitle Selection
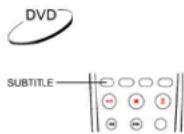
When playing DVD discs or DivX programs recorded with subtitles, press the SUBTITLE button on the remote control to select the desired subtitle.
Each press of SUBTITLE button switches one available subtitle in a looping manner:
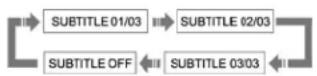
NOTE
Availability of subtitle depends on discs and contents.
Angle Selection

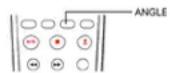
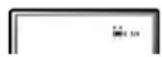
- When playing DVD discs, an angle mark will be displayed on the screen when the player detects scenes recorded with multiple angles:
- Press the ANGLE button on the remote control to select the desired playing angle.
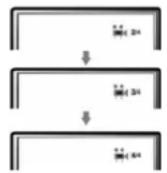
- To resume normal playback, repeat pressing the ANGLE button until the default angle is displayed.
NOTE
- This function is available only when the discs are recorded with multiple angles.
- The angle mark on the screen can be turned off using the setup menu of the DVD player.
Zooming the Displayed Frame

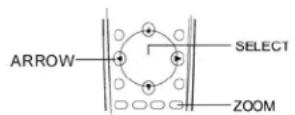
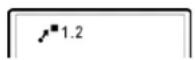
The feature zooms in or out the displayed frame.
- To change the zoom ratio, press the ZOOM button on the remote control. Each press of the ZOOM button will switch the zoom ratio in the following sequence:
1.0 (No zooming) → 1.2 → 1.3 → 1.5 → 2 → 2.5 → 3 → 3.5 → 4 → ½ → ¼ → ¼ → Back to 1.0 again
- When the frame is magnified, press the ARROW buttons to move the visible area in the frame (Panning).
Sound Field and EQ Mode Adjustment
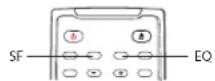
When playing discs, you may adjust sound field or equalization mode according to your preference.
- Press the EQ button on the remote control to set the equalization pattern type. Available options are: Off, Rock, Pop, Live, Dance, Techno, Classic and Soft.
- Press the SF button to set the sound field effect. Available options are: Off, Concert, Living Room, Hall, Bathroom, Cave, Arena and Church.
NOTE
The sound field and EQ mode do not apply to digital audio output in raw bit stream format. Sound field and EQ mode are cancelled if the unit is switched to STANDBY.
Power Spectrum Meter (PSM)
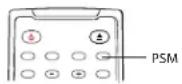
The Power Spectrum Meter is a graphical display of the audio signal. It can be used to assist adjusting sound field and equalization pattern setting. Press the PSM button on the remote to show the Power Spectrum Meter during playback.
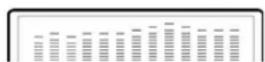
- Press the PSM button once to show the first PSM pattern:
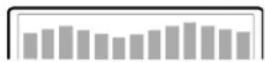
- Press the PSM button again to show the second PSM pattern:
- Press the PSM button for the third time to cancel PSM display.
ADVANCED OPERATIONS
TV System Selection
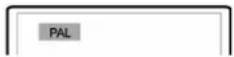
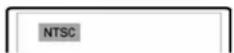
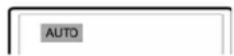
While you will want to set the video output system (NTSC/PAL) to the same as that supported by your TV, realize that the DVD player will convert, on-the-fly any content that is not in the format your TV understands. The default output is NTSC for North America.
Press the P/N button on the remote control to cycle the video output to PAL, NTSC or AUTO system. The TV screen displays the selected system name.
Some points to keep in mind:
- When the video output is set to PAL or NTSC system, the DVD player will convert the disc content to the selected system if it is different.
- When the video output is set to AUTO, the DVD player will not perform system conversion. The AUTO mode is only to be used if your TV supports both NTSC and PAL systems.
- Playback must be stopped before switching the system from one setting to another.
NOTE
- Some TV sets only support one of the NTSC or PAL systems. If the wrong output is selected, the TV may not display a picture. In this case repeatedly press the P/N button until a supported system is selected.
- The output system selection chosen with the P/N button will be reset when the DVD player is turned off. To permanently set the output system, please use the "TV Type" setup menu item in the "Preference" setup menu page. (Refer to page 45 for details.)
Fast Playback

You may fast forward or reverse to search for a certain point during playback.
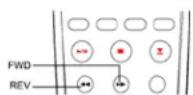
- Press the FWD button on the remote control and the player starts fast forward playback. Each press of the FWD button switches the playback speed in the following sequence:

- Press the REV button on the remote control and the player starts fast reverse playback. Each press of the REV button switches the playback speed in the following sequence:

Slow Playback

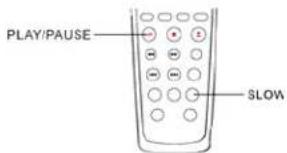
To slow down the playback speed, please use the following steps.
- Press the SLOW button on the remote control and the player starts slow playback. Each press of the SLOW button switches the playback speed in the following sequence:

- Press the PLAY/PAUSE button during slow playback to resume normal playback speed.
Repeat Playback


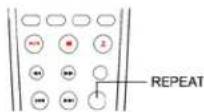
To repeat a certain chapter, title, track or disc, press the REPEAT button on the remote control.
Each press of the REPEAT button switches the repeat mode in the following sequence:
DVD, DVD-Audio disc:
CD disc:


SACD disc:

flowchart
graph LR
    A["Folder"] --> B["Single"]
    B --> C["Repeat one"]
    C --> D["Repeat folder"]
Repeat the Selected Section


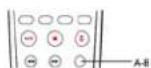
To repeatedly play a specified section, please follow these steps:
- During normal playback, press the A-B button on the remote at the desired beginning point (Point A) for the repeat play.
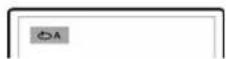
- When playback reached the desired ending point (Point B) for the repeat play, press the A-B button again.
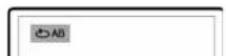
- The player now repeatedly plays back the specified section (A-B).
- Press the A-B button for the third time to resume normal playback.
NOTE
Not available for all disc formats or contents.
Random and Shuffle Playback

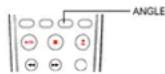
When playing an audio CD disc, you may use the ANGLE button to switch the playback mode from normal playback mode to random or shuffle playback mode.
In normal playback mode, each track of the CD disc is played back in sequential order. As the name implies, the random playback mode randomly selects a track to play. The shuffle mode also plays back the tracks in random order, but it ensures that each track is played only once.
Playback by Track Number


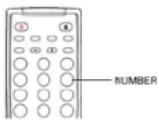
Insert disc. After the player begins reading the disc, press the NUMBER buttons on the remote control to select the chapter/track for playback.
- Press the NUMBER buttons 1-9 to directly select the corresponding chapter/track if the chapter/track number is below 10. For example, to select the seventh track, press the [7] button.

- Press the +10 button and then the NUMBER buttons 0-9 to directly select the corresponding chapter/track if the chapter/track number is above 10 (including 10).
- For example, to select the 16^th track, press [+10] followed by [6]:

- To select the 25^th track, press [+10] twice followed by [5].
Playback from a Specific Location


DVD discs
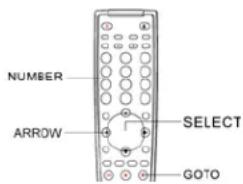
You may specify a point to start playback by entering the title, chapter or time directly.
- Title and chapter search. For example, search for Title 6, Chapter 2:
- Press the GOTO button on the remote, and the TV screen displays:
TITLE /030 Chapter 000/002
(You may need to use the ARROW buttons to move the cursor to the "Title" location.)
- Enter the title number 6. The cursor moves to the "Chapter" location and the TV screen displays:
TITLE 006/030 Chapter 000/002
• Enter the chapter number 2. The TV screen displays:
TITLE 006/030 Chapter 002/002
- Playback starts from the specified title and chapter.
NOTE
To enter a number greater than 9, use the +10 button.
- Title time search. For example, search for a specified elapsed time within the currently playing title.
- Repeatedly press the GOTO button until the TV screen displays the following picture. Use the NUMBER buttons to enter the HOUR, MINUTE and SECOND.
- Chapter time search. For example, search for a specified elapsed time within the currently playing chapter.
- Repeatedly press the GOTO button until the TV screen displays the following picture. Use the NUMBER buttons to enter the HOUR, MINUTE and SECOND.
- Repeatedly press the GOTO button until the TV screen displays the following picture. Use the NUMBER buttons to enter the MINUTE and SECOND.
DISC GOTO --:
- Track time search
- Repeatedly press the GOTO button until the TV screen displays the following picture. Use the NUMBER buttons to enter the MINUTE and SECOND.
TRACK GOTO
- Select a track
- Repeatedly press the GOTO button until the TV screen displays the following picture. Use the NUMBER buttons to enter the track number. For track numbers greater than 9, please press the +10 button first.
SELECT TRACK --/15
Memory and Automatic Resume

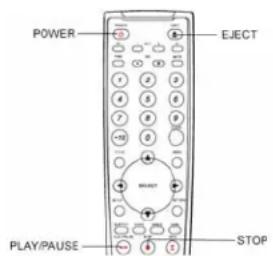
- If you must interrupt the playback and would like to resume from the interrupted position at a later time, you may press the EJECT button on the remote control to eject the disc. While ejecting the disc the DVD player will save the current playing position.
- The position is memorized even after turning off the unit or changing the disc.
- When the next time the disc with a memorized playing position is played back, the DVD player will recognize the saved playing position. Playback will automatically resume from the saved playing position. However if you wish to cancel the automatic resume and start playback from the beginning, you may press the STOP button when prompted.
Bookmarks


This function lets you bookmark positions of a disc so you can quickly find them at a later time.
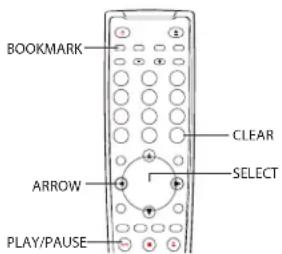
- Press the BOOKMARK button on the remote control to show the bookmark selection box:
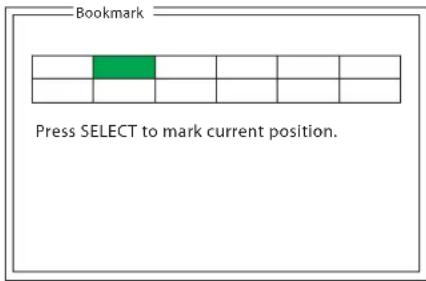
- Press the ARROW buttons to highlight an unused bookmark position.
- When playback reaches the position you want to bookmark, press the SELECT button. The title, chapter/track and elapsed time will appear on the screen.
- You may continue to make more bookmarks or press the BOOKMARK button to exit the bookmark selection box.
- To recall a bookmarked position later, press the BOOKMARK button to show the bookmark selection box. Use the ARROW buttons to select the desired bookmark, and then press the SELECT or PLAY/PAUSE button to jump to the marked position.
- To clear an existing bookmark, show the bookmark selection box and highlight the bookmark to be cleared, and then press the CLEAR button on the remote control.
NOTE
All bookmarks are cleared once the disc is ejected or the player is turned off. To memorize a playback position across disc ejection and power cycles, please use the "Memory and Automatic Resume" function.
Viewing Static Pictures on DVD-Audio Discs

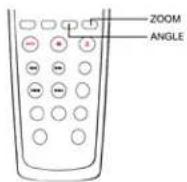
Some DVD-Audio discs contain static pictures, such as photos of the band or narration of the album. When a DVD-Audio track is playing, you may use the ANGLE button to select the previous picture or the ZOOM button to select the next picture.
Virtual Keyboard

While enjoying a movie in a dark environment, the on-screen virtual keyboard and the easy-to-locate ARROW buttons on the remote control allow you to easily perform playback controls and configurations.
- Press the KEYBOARD button on the remote control, a virtual keyboard will appear on the screen as shown in the figure:
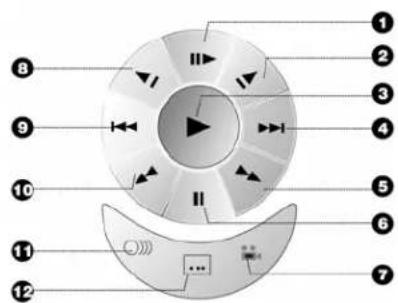
- Step 7. Angle
- Forward Slow 8. Reverse Slow Playback
- Play 9. Skip Previous
- Skip Next 10. Fast Reverse
- Fast Forward 11. Audio
-
Pause 12. Subtitle
-
Use the four ARROW buttons to select the function you wish to perform, and then press the SELECT button to confirm. For instance, to select a subtitle:
- Press the ARROW buttons to select the subtitle icon in the virtual keyboard. Each press of the SELECT button switches an available subtitle language.
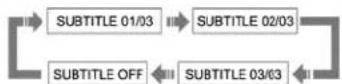
- To exit the virtual keyboard, press the KEYBOARD button again.
NOTE
The virtual keyboard function is applicable to DVD discs only.
Disc Browser

The disc browser enables you to conveniently view the disc information, perform disc navigation and playback control. The following example shows how to use the disc browser during DVD playback.
- Press the BROWSER button on the remote control. The TV screen displays the following:
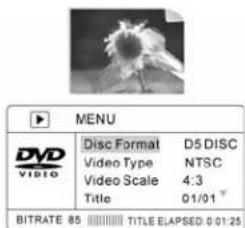
• Video preview in the top half of the screen
• Disc information in the lower half of the screen
- Current bit rate (unit: 100kbps) and playback time at the bottom of the screen
- Press the up/down ARROW buttons to select an item in the disc information display. If the selected item allows modification, press the SELECT button to make selections or modifications.
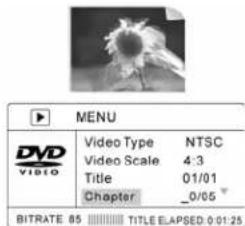
- For example, to navigate to a specific chapter, press the up/down ARROW buttons to select the "Chapter" item, and then press the SELECT button.
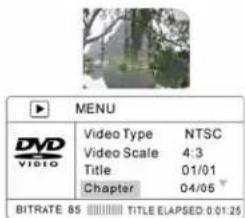
- Press the NUMBER buttons to select the desired chapter. To select the 4 ^th chapter, press 0 and 4.
- To exit the disc browser, press the BROWSER button again.
Playing DivX, Digital Audio and Picture Files
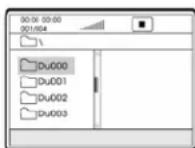
When you insert a disc which contains DivX, XviD, digital audio or digital picture files, the TV screen displays a disc navigation menu as shown the in the figure:
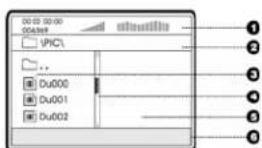
- Status Window – Displays the current status information
- Directory Window – Displays the current directory path
- File Window – Lists the files in the current directory
- Scroll Bar – Indicates the position of the current file in the directory
- Preview Window – Picture preview or other file information
- Information Window – Displays file information or operation prompts
You may switch between the directory listing mode and file listing mode using the ANGLE button on the remote control. In the directory listing mode (default) the files are listed according to the directory structure of the disc. In the file listing mode all files in the disc are listed in a flat view.
The Status Window contains the following elements:
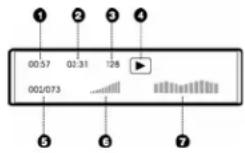
- Elapsed play time of the current digital audio file
- Total play time of the current digital audio file
- The audio bit rate
- Current playback mode indicator (play/stop/pause)
- Track indicator
- Volume indicator
- Dynamic frequency power spectrum meter
When a disc is first loaded into the player, it may take a few moments to search the compatible files and build the disc navigation menu. Please be patient.
To navigate the disc navigation menu:
A:
B:
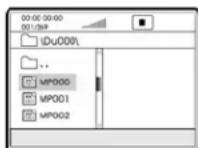
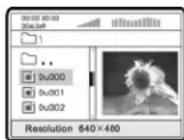
- Press the up/down ARROW buttons to select the desired directory and press the SELECT button to enter it.
- To return to the previous level of directory, select the [☐..] directory in the first line, or press the left ARROW button.
- If a directory contains many files, you may press the PREV or NEXT SKIP button to the previous or next page of the directory listing.
- Press the up/down ARROW buttons to select the DivX, XviD, digital audio or digital picture file. If a preview image or additional information is available, the preview will appear in the preview window.
- Press the SELECT button to play the file. DivX/XviD file will be decoded and played back. Digital music file will start playing, and digital picture will be displayed in full screen slide show mode.
Digital Music Play Operations
When playing digital music files, the following operations are available:
- Repeat, Shuffle or Random Playback – Press the REPEAT button on the remote control to switch the playback mode.
- Skip – While a song is playing, the SKIP PREV and SKIP NEXT buttons can be used to skip to the previous or next song. You may also use the ARROW buttons on the remote control to highlight the song to play, and then press the SELECT button. When playback is stopped, the SKIP PREV and SKIP NEXT buttons are used to move the cursor to the next or previous page of the song list.
Digital Picture Play Operations
When a picture is displayed in full screen slide show mode, the following operations are available:
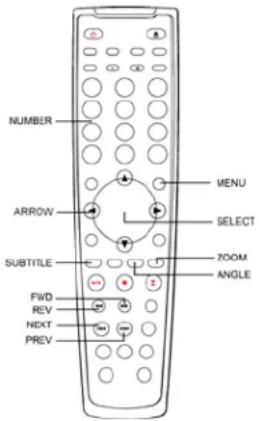
- Press the SUBTITLE button to switch among various picture transition modes.
- Press the ZOOM button to start the zoom in/out function. The TV screen displays "Zoom 100%"
While in the zoom mode, press the FWD or REV button to change the zoom ratio. Available zoom ratios are from 50% to 200%.
When the picture is magnified larger than the screen, you may use the ARROW buttons to move the visible area in the picture frame (Panning). - To exit the zoom mode, press the ZOOM button again.
- Press the STOP button to stop the slide show and display the pictures in thumbnail mode. You may:
o Press the PREV or NEXT SKIP button to display the previous or next page of thumbnails;
- Use the ARROW and SELECT buttons to select a picture to display;
- Use the NUMBER buttons to directly select a picture to display.
- Press the MENU button to stop the slide show and return to the disc navigation menu.
- Press the ARROW buttons to rotate or flip the picture:
o UP: Invert
- DOWN: Mirror
o LEFT: Rotate counter-clockwise
- RIGHT: Rotate clockwise
Playing a Disc with Both Digital Audio and Picture Files
If the disc contains both digital audio and picture files, you can enjoy both of them simultaneously. First navigate to the folder that contains the digital audio files and start the audio playback. Next you can navigate to the folder that contains the digital picture files and start the slide show. The slide show will start with the already playing digital audio as background music.
SETUP MENU OPTIONS
The Setup Menu of the DVD player presents many setup and configuration options. For most users, the default configuration works well enough and there is no need to change the settings. However if you need to configure the DVD player to perfectly match your home theater settings and watching preference, please refer to the following sections for details about each configuration option. The basics of how to operate the setup menu system have already been discussed in the “Installation” section of this guide on page 14.
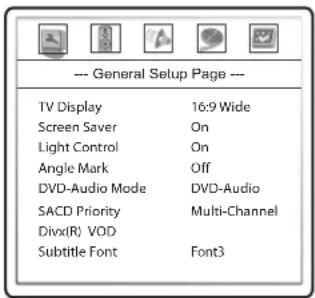
General Setup Page
-
TV Display: To set the aspect ratio of the player's output image to match your TV. The options are :
-
4:3 Pan/Scan – 4:3 TV Pan and Scan. Choose when the display is 4:3. Both sides of widescreen image are clipped.
- 4:3 Letterbox – 4:3 TV Letterbox. Choose when the display is 4:3. Widescreen image is displayed in "letterbox" format with black borders on top and bottom.
- 16:9 Wide – Choose when the display is 16:9. 16:9 materials will be displayed in its native aspect ratio, and 4:3 materials will be stretched.
-
16:9 Wide/Auto – 16:9 TV Wide/Auto Pillarbox Mode. Choose when the display is 16:9. 16:9 materials will be displayed in its native aspect ratio, and 4:3 materials will be displayed with black borders on both sides to maintain 4:3 aspect ratio.
-
Screen Saver (on/off): To turn on/off the screen saver function. When the screen saver is on, a moving logo will appear instead of the static image after 2 minutes of inactivity. This is designed to minimize the burn-in issue for plasma and CRT display devices.
- Light Control: To control the front panel button illumination lights and Vacuum Fluorescent Display information window. In case you feel that the blue button illumination lights become a distraction to your enjoyment of the video, this option allows you to dim or turn off the lights. The available options are:
- On - Both the VFD window and the button LED lights are on.
• LED Off - Button LED lights are turned off; VFD window is on.
- Dim - Button LED lights are turned off; VFD window is at reduced brightness.
- All Off - All front panel lights and displays are turned off. This setting resumes back to "On" after the player is turned off to avoid user confusion.
-
Angle Mark (on/off): To turn on/off the display of angle mark when DVD content with multiple available angles is played.
-
DVD-Audio Mode: To select which portion of a hybrid DVD-Audio disc to playback. The options are:
• DVD-Audio – Play the DVD-Audio portion of the disc with high-resolution audio
• DVD-Video – Play the DVD-Video portion of the disc with Dolby Digital or DTS audio
-
SACD Priority: To select which audio tracks to play for SACD (Super Audio CD). The options are:
-
Multi-Channel – Play the multi-channel surround audio
• 2-Channel – Play the 2-channel stereo audio -
CD Mode – Play the CD layer of a hybrid SACD disc
-
DivX(R) VOD: Divx Video on Demand – To display the device registration code for DivX Video on Demand service. To learn more, visit www.divx.com/vod
![DivX(R) Video On Demand Your registration code is : XXXXXXXXX To learn more visit www.divx.com/vod [Done]](/content/2026/05/924036/images/40c2926aba08d46981696ff541b87327ddd9ce082558a868df3aacfcf2b80669.jpg)
- Subtitle Font: To select the subtitle font size for DivX video. There are three font sizes available. This setting applies only to DivX video files with a text subtitle. DivX video files with a graphic subtitle do not use the DVD player's built-in font, so the font size cannot be adjusted.
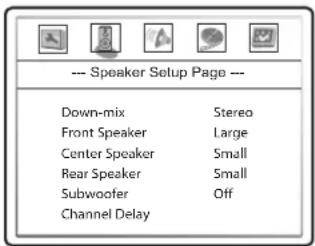
Speaker Setup Page
-
Down-mix Mode: To set the audio down-mix mode for converting multi-channel audio into two-channel output. This setting affects the analog and HDMI audio outputs. The options are:
-
Lt/Rt – Dolby Pro Logic II Left Total/Right Total. This mode is intended for use with two-channel Dolby Pro Logic II receivers. The center and surround channels are mixed into the two front channels according to the Lt/Rt matrix. A Dolby Pro Logic II receiver will decode the two-channel audio into surround audio.
- Stereo - This mode down-mixes decoded multi-channel (5.1ch) audio to 2-channel stereo output. For original stereo content the output will still be stereo. For original multi-channel content the surround and center channels will be mixed with the left and right front channels. Recommended for use with TV sets or stereo receiver/amplifiers.
- V. Surround - Virtual Surround. This mode creates a virtual surround effect from stereo or multi-channel audio contents.
-
5.1CH – This mode enables 5.1ch decoded audio output. The number of actual output channels depends on the disc.
-
Front Speaker: To set the sound filtering control for the front speakers. The options are:
-
Large – Choose if the front speakers are large. Bass frequencies are passed to the front speakers.
-
Small – Choose if the front speakers are small. Bass frequencies are not passed to the front speakers to reduce possible distortion.
-
Center Speaker: To set the sound filtering control for the center speaker. The options are:
-
Large – Choose if the center speaker is large. Bass frequencies are passed to the center speaker.
- Small – Choose if the center speaker is small. Bass frequencies are not passed to the center speaker to reduce possible distortion.
-
Off – Choose if there is no center speaker.
-
Rear Speaker: To set the sound filtering control for the rear speakers. The options are:
-
Large – Choose if the rear surround speakers are large. Bass frequencies are passed to the rear speakers.
- Small – Choose if the rear surround speakers are small. Bass frequencies are not passed to the rear speakers to reduce possible distortion.
-
Off – Choose if there are no rear speakers.
-
Subwoofer: To enable/disable the subwoofer output. The options are:
-
On – Subwoofer output is enabled.
-
Off – Subwoofer output is disabled.
-
Channel Delay: To set the delay time for the center, rear speakers and the subwoofer. The delay is to compensate for the audio propagation time difference caused by the distance difference of the speakers to the listener.
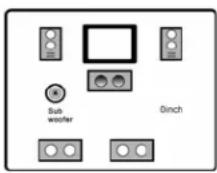
- Press the up/down ARROW buttons to select the speaker to set the distance difference.
- Press the left/right ARROW buttons to set the distance difference.
- Press the SELECT button to confirm the settings and return to the Speaker Setup Page.
flowchart
graph TD
    A["SW"] --> B["Central Node"]
    C["L"] --> B
    D["LS"] --> B
    E["RS"] --> B
    F["C"] --> B
    G["R"] --> B
    B --> H["Signal Path ①"]
    B --> I["Signal Path ②"]
    B --> J["Signal Path ③"]
    B --> K["Signal Path ④"]
    B --> L["Signal Path ⑤"]
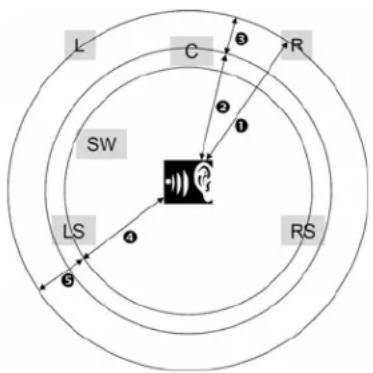
- The channel delay is the difference between the distance from the listener to the front speakers and the distance from the listener to the speaker to be configured.
- Measure the distance (in inches) from the primary listening position to the Front Left Speaker. This is your baseline measurement – the primary distance that will determine the adjustments for your system. Your Front Right and Left speakers should measure the same distance. If they do not, please adjust them if possible.
- Measure the distance (in inches) from other speakers to the listening position. If it is LESS than the distance to the Front Left speaker, enter the difference (as close as possible) in inches using the left/right ARROW buttons as channel delay. If it is GREATER than the distance to the Front Left speaker, then leave the channel delay at 0.
- Repeat for each speaker in the system (Center, Left Surround, Right Surround, and Subwoofer) as available.
For example, if the distance between the listener and the front main speakers is 60 inches (① in the above picture), and the distance between the listener and the center speaker is 56 inches (②), the channel delay for the center speaker is 4 inches (①-②=③). Similarly, if the left surround speaker is 48 inches (④) away from the listener, the channel delay for the left surround speaker should be 12 inches (①-④=⑤).
Distance between the surround speakers and the listener must be shorter than or equal to that between the front speakers and the listener.
In case the channel delay settings cannot match your speaker configuration, please set all distance difference to 0 inch and use your receiver/amplifier to set the channel delay.
Example Channel Delay Adjustment:
Supported Configuration Unsupported Configuration
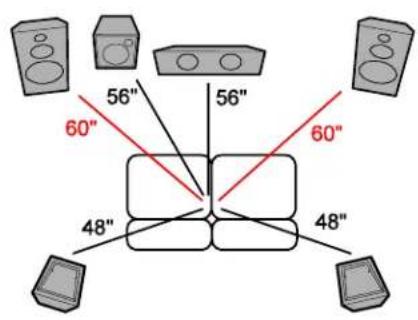
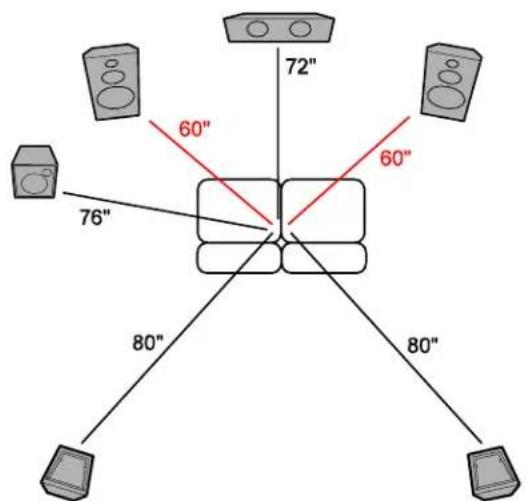
Settings:
Center Speaker – 4 Inches
Subwoofer - 4 Inches
Left Surround - 12 Inches
Right Surround – 12 Inches
Settings:
Center Speaker - 0 Inch
Subwoofer - 0 Inch
Left Surround - 0 Inch
Right Surround - 0 Inch
Audio Setup Page
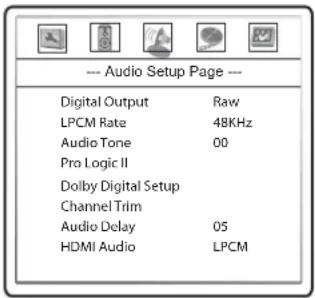
-
Digital Output: To set the bit stream type of the digital audio output for use with Dolby Digital and DTS-compatible receivers. The options are:
-
Raw – Passes the encoded multi-channel digital audio unaltered. Choose this setting if your receiver/amplifier is capable of decoding Dolby Digital and/or DTS.
-
PCM – Forces down-mixed 2-channel digital audio output. Choose this setting if your receiver/amplifier only supports stereo digital (PCM) audio.
-
LPCM Rate: To set the maximum Linear PCM output frequency. The options are:
• 48K – Supported by most equipment.
- 96K – Allows a higher sampling rate and frequency response. It can result better audio quality. Ensure that the receiver/amplifier can support it.
- 192K – Allows the highest sampling rate and frequency response. It can result in the best audio quality. Ensure that the receiver/amplifier can support it.
Note: The LPCM rate is selectable only when HDMI Audio is turned off.
-
Audio Tone (+/-16): This function raises or lowers the tone (key/pitch) of the audio track. This is useful for playing Karaoke discs and should not be used for regular music listening or movies.
-
Press the SELECT button to show the tone control window.
- Press the left/right ARROW buttons to lower or raise the tone/pitch.
-
Press the SELECT button to confirm the setting.
-
Pro Logic II: Taking a step further than most DVD players, the OPPO DVD player allows you to configure Dolby Pro Logic II to expand 2-channel source audio into full 5-channel surround sound. Note: Pro Logic II functionality is effective only when Speaker Setup Page > Down-mix is set to "5.1ch" and Digital Output is set to "Raw".
-
Press the SELECT button to enter the "Pro Logic II Config" page.
- Press the left ARROW button to exit the "Pro Logic II Config" page.
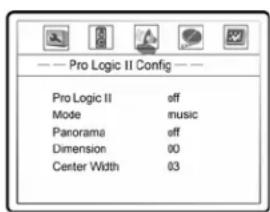
A. Pro Logic II: To turn on or off the Pro Logic II processing. The options are:
- On – Pro Logic II processing is always on
- Off – No Pro Logic II processing
- Auto – Pro Logic II processing is on only when Dolby Pro Logic II encoded content is detected.
B. Mode: To set the processing mode of Pro Logic II. The options are:
• Music – The surround experience is tailored for multi-channel music playback
- Movie – Emphasis is given to the center channel as two-channel audio is decoded and played back into your 5.1 system
- Pro Logic – This activates decoding and processing of the original Dolby Pro Logic processing with mono-surround channel. We recommend using the Dolby Pro Logic Movie mode in lieu of this 4-channel surround format.
- Auto – Automatically selects processing mode based on the input format
C. Panorama (Music mode only): Turns on/off panorama mode. When turned on, the front stereo audio is partially fed into the surround channels for an enveloping effect.
D. Dimension (Music mode only): Allows gradual adjustment of the sound field either towards the front or towards the rear. This is useful in setting a more even balance from all speakers with some rooms.
E. Center Width (Music mode only): To control the width of the center channel sound effect by blending the center speaker to the left and right speakers. As the level number increases, the center channel sound moves toward the left and right speakers.
-
Dolby Digital Setup: To configure the Dolby Digital decoder.
-
Press the SELECT button to enter the Dolby Digital Setup page.
- Press the left ARROW button to exit the Dolby Digital Setup page.
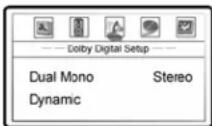
A. Dual Mono: To choose the output for Dolby Digital discs encoded with two independent audio channels, such as bilingual programs. The options are:
- Stereo – Stereo output
• L-Mono – Left channel output to both Left and Right speakers. - R-Mono – Right channel output to both Left and Right speakers.
- Mix Mono – Left and Right channels mixed to both Left and Right speakers.
B. Dynamic: To set the Dynamic Range Compression (DRC). DRC can smooth out the sonic peaks and valleys common with wide-range digital audio. Increasing DRC may make low level audio more audible during low-level listening. Decreasing or turning off DRC restores the sonic energy present in the original recording.
- Channel Trim: To set the volume of each individual channel.
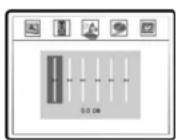
- Press the left/right ARROW buttons to select the channel to be adjusted.
- Press the up/down ARROW buttons to raise or lower the volume of the selected channel in 0.5dB increments.
- Press the SELECT button to confirm the settings and return to the Audio Setup Page.
Channel trim is generally not required since most A/V receivers have the capability to adjust channel trim and compensate for speaker sensitivity differences. However if your receiver does not have such functions, you may adjust channel trim on the DVD player. For most accurate results, it is recommended that you use test tones from a calibration disc, such as AVIA Guide to Home Theater, and a SPL (Sound Pressure Level) meter.
-
Audio Delay: To add delay to analog or PCM digital audio output. If you experience audio/video synchronization problem, you may use this option to add a slight delay to the audio so it is in-sync with video.
-
Press the left/right ARROW buttons to adjust delay. The audio delay can be adjusted in 10ms steps.
-
Audio delay does not apply to raw bit stream digital audio output.
-
HDMI Audio: To select digital audio output from the HDMI port. The options are:
-
LPCM – Digital audio output via HDMI will be multi-channel Linear PCM format. The Down-mix setting in the "Speaker Setup Page" will affect whether and how multi-channel audio content will be down-mixed to stereo. When this option is selected, compressed audio bit streams will decoded by the DVD player. This setting is recommended when connecting the HDMI output directly to a TV.
- Auto – Digital audio output via HDMI will be the same as the digital coaxial/optical audio output for CD, Dolby Digital and DTS audio signals. For high resolution stereo or multi-channel audio contents such as DVD-Audio and Super Audio CD, the DVD player will send multi-channel PCM audio signals with the highest available sample frequency and bit numbers. Depending on the original audio content, the format could be 44.1kHz - 192kHz, 2 - 6 channels. This option is recommended when connecting the HDMI output to an A/V receiver or processor with HDMI 1.1 or above audio capabilities.
- Off – No digital audio output via HDMI.
NOTE
If you use HDMI to connect audio to an HDMI A/V receiver or audio processor, it is recommended that you choose 720p or higher HDMI output resolution when playing high resolution audio content (DVD-Audio and SACD). According to the HDMI specification, the bandwidth available for audio is proportional to the total bandwidth used by video. At 480p/576p resolution, the HDMI specification can only support 2 channels of audio with high sample rate (up to 192kHz), or 8 channels of audio with standard sample rate (up to 48kHz). Depending on the capability of your A/V receiver or audio processor, if you play high resolution audio content at 480p/576p resolution, you may get reduced audio resolution, incomplete audio channels, or even no audio/video output at all. Choosing a high HDMI output resolution such as 720p or 1080i allows enough bandwidth for all high sample rate audio channels.
Video Setup Page
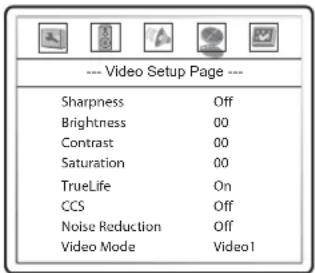
-
Sharpness: To set the sharpness of video output. Sharpness level can be set with the following options:
-
High – High edge enhancement. Video details are the sharpest but it may cause white line etching around objects.
- Medium – Medium edge enhancement. Video details are sharper but it may cause slight white line etching around objects.
- Low – Low edge enhancement. This setting produces slightly sharpened video details.
- Off (recommended) – Turn off edge enhancement completely.
NOTE
Sharpness (edge enhancement) is an artificial video processing function that can produce a sharper looking picture but at the same time may degrade the details of the picture or cause unwanted artifacts. We recommend leaving it off.
-
Brightness: To adjust the brightness (black level) of the video output.
-
Press the SELECT button to show the Brightness scale, and then use the left/right ARROW buttons to adjust.
-
Press the SELECT button to confirm the new setting.
-
Contrast: To adjust the contrast (white level) of the video output.
NOTE
The ability to set brightness and contrast is no small thing. If you do not have the correct black and white levels then your images can appear washed out or you won't be able to see into the shadows when watching darker scenes in movies. Televisions have brightness (black level) and contrast (white level) controls; however it may take a combination of tweaking both the DVD player and your television to get just the right result. We recommend using a calibration DVD like AVIA Guide to Home Theater or Digital Video Essentials and setting your display for the best possible picture. Once that is done, see if the DVD player settings can get even closer.
- Saturation: To adjust the saturation (color intensity level) of the video output.
- TrueLife: To turn on/off the TrueLife™ video processing of the built-in Genesis/Faroudja video processor. TrueLife is a Faroudja proprietary two dimensional, non-linear, luma & chroma video enhancer that brings out details in the picture to produce a more life-like image. Since many
advanced video processing functions rely on the TrueLife feature, we recommend leaving this option on.
-
CCS: To turn on/off the Cross Color Suppression feature of the built-in Genesis/Faroudja video processor. CCS helps separate contrasting colors and may prevent the colors from bleeding into one another. The setting is useful in some circumstances, especially when displaying static pictures recorded as video. This setting is effective only when TrueLife is turned on. Since CCS mainly affects static pictures instead of motion contents, we recommend turning it off.
-
Noise Reduction: To set the video noise reduction level of the built-in Genesis/Faroudja video processor. Turning on noise reduction can reduce the snow-like or block-like video noise generated by broadcasting or video encoding. However the side effect of noise reduction is some loss of fine details and some "ghosting" effect – fast moving objects may show a visible trace. The recommended setting is "Off". Turn on noise reduction only when the original content has a lot of video noise. This setting is effective only when TrueLife is turned on. The available settings are:
-
High – High noise reduction. Video noise is significantly reduced. Moving objects may leave a visible trail ("ghosting").
- Medium – Medium noise reduction. Video noise is strongly reduced. Moving objects may leave a visible trail.
- Low – Low noise reduction. Video noise is slightly reduced. Moving objects may leave a slightly visible trail.
-
Off – Turn off noise reduction completely.
-
Video Mode: To select the mode of conversion for video output. The options are:
-
Video 1 – Video 1 mode is recommended for viewing NTSC content with video or 3:2 cadence. If you primarily watch NTSC content, this is the preferred mode.
-
Video 2 – Video 2 mode is recommended for viewing NTSC/PAL contents with video, 3:2 and 2:2 cadences. If you watch both NTSC and PAL movies this is the preferred mode. Please note that in Video 2 mode, NTSC/PAL conversion is not performed for analog video outputs (composite and S-Video).
-
RGB Range: To select the HDMI RGB output range. This setting only affects output in RGB color space, primarily used when the DVD player is connected to a DVI input. The options are:
-
Normal – Normal RGB range suitable for video display.
- Enhanced – Expanded RGB range suitable for personal computer (PC) display. Some TVs are designed to be used as a PC monitor, and expect signal in expanded RGB range when the DVI input is selected. For these TVs if the video signal uses the normal RGB range, the black-white contrast will be reduced. You can set the DVD player to use the Enhanced RGB Range and restore proper contrast.
Preference Page
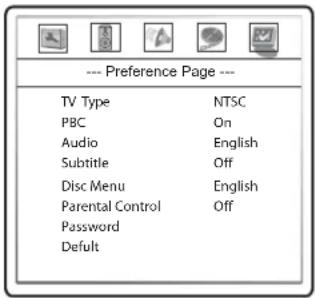
The Preference Page can only be accessed when playback is completely stopped, or when there is no disc in the DVD player.
-
TV Type: To set the output video system (PAL/NTSC) to match the type of TV. The options are:
-
Auto – No system conversion is performed. The output video system is the same as that encoded on the disc. Requires TV that supports multi-systems.
- PAL – When playing PAL-encoded discs, no system conversion is performed. NTSC-encoded contents are converted to PAL output.
-
NTSC (default) – When playing NTSC-encoded discs, no system conversion is performed. PAL-encoded contents are converted to NTSC output.
-
PBC – Play Back Control: To enable/disable play back control by disc contents. The options are:
-
On – If the disc contains Play Back Control, follow the disc instructions.
-
Off – Play back the contents by sequence.
-
Audio: To set the preferred audio language for DVD. If an audio track of the selected language is available on the disc, the audio track will be played back.
- Subtitle: To set the preferred subtitle language for DVD. If a subtitle of the selected language is available, it will be displayed. When "Auto" is selected, the subtitle display is decided by the disc.
- Disc Menu: To set the preferred language for displaying DVD disc menus. If a disc menu of the selected language is available, the menu will be shown instead of the default disc menu.
NOTE
If your preferred language is not listed in the Audio, Subtitle or Disc Menu options, select "Other" and enter the Language Code found on page 49 of this manual.
-
Parental Control: To set parental control ratings in order to prevent minors from watching inappropriate contents. This function requires that the disc being properly rated and encoded.
-
Press the SELECT button to bring up the rating selection menu.
- Press the up/down ARROW buttons to select the rating to allow (G/PG/PG 13/PGR/R/NC17/ADULT). The selected rating and below will be allowed, and any rating above the selected will be blocked.
- Press the SELECT button to confirm the selection. You will be asked for the parental control password. Enter the password (default password: 7890) and press the SELECT button.
- Password: To set parental control password. To change the password, enter the old password (default: 7890) and then enter a 4-digit number as the new password. Enter the new password again to confirm, and then press the SELECT button.
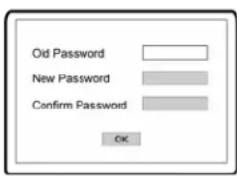
- Default: To reset all settings to the factory default value. The parental control password will not be reset.
REFERENCES
Useful Notes
- In order to prolong the service life of your DVD player, it is recommended to wait at least 30 seconds before you turn it on again after switching it off.
- Remove disc and turn off power after operation.
- Some functions of the player may not be applicable to certain discs.
- Some discs with special features may not be fully supported by the player. This is not a malfunction of the unit.
- In case of player malfunctioning, please turn it off, wait for 30 seconds and turn it back on. If the problem still exists, please follow the troubleshooting instructions or contact an OPPO service center.
Troubleshooting
Use this chart to help you solve operational problems. If there are any problems that you cannot solve, please contact your OPPO service center.
| Symptom | Possible Cause | Solution | Reference Page |
| No sound | Audio cable is not properly connected | Check audio cable, and then reconnect if necessary. 8 - 13 | |
| Muting is activated Press the MU | TE button to cancel the mute. 22 | ||
| DVD-Audio or SACD is played and the audio connection is coaxial or optical digital audio | This is not supported due to copyright restrictions of DVD-Audio and SACD. Please use the analogue 5.1-channel audio output. | 12 | |
| No picture | Video cable is not properly connected | Check video cable, then reconnect if necessary 8 - 9 | |
| TV input is not correctly selected | Select the input to which the DVD player is connected | ||
| Video output format is not support by the TV | When playback is completely stopped, repeatedly press the HDMI button | 17 | |
| Video system is not supported by the TV | Press the P/N button or set the correct TV Type. | 26, 45 | |
| No color | Video system is not supported by the TV | Press the P/N button or set the correct TV Type | 26, 45 |
| Saturation set too low Check the | saturation setting on TV and DVD player | 43 | |
| Picture rolling Video system is not supported by the TV | Press the P/N button or set the correct TV Type 26, 45 | ||
| “No Disc” error | No disc or incompatible disc loaded in player | Eject disc and check | 21 |
| Disc not properly loaded | Eject disc and make sure the label side is facing up and the record side is facing down | 21 | |
| Condensation on the Laser pick-up head | Turn on the player, eject the disc and leave the player on for about an hour | 2 | |
| Remote control failure | Remote control is out of range | Use the remote control within the effective range | 7 |
| Low battery | Replace the batteries | 7 | |
| Temporary function failure | Scratched or damaged disc is used | Replace the disc | 21 |
| Some functions are not available during playback | Stop playback completely, then try again | 21 | |
| Interference from other devices | Identify interference by turning off other devices, and then relocate or replace the offending device | 3 | |
| Some setup menu items are grayed out | Some setup options cannot be changed while a disc is playing. Some setup options may be mutually exclusive with other setup options. | Fully stop playback, eject the disc and try the setup menu again. | 14 |
Specifications
Designs and specifications are subject to change without notice.
| Disc Types* DVD | -Video, DVD-Audio, SACD, CD, HDCD, Kodak Picture CDDivX (DivX Certified Home Theater Profile Parameters, V2.2. Covers DivX 3.11 – 5.1)CD-R/RW, DVD±R/RW, DVD+R DL |
| Output Analog Audio: Stereo, 5.1chDigital Audio: Coaxial, OpticalAnalog Video: Composite, S-Video (Y/C)Digital Video: HDMI with HDCP (NTSC: 480p/720p/1080i/1080p, PAL: 576p/720p/1080i/1080p) | |
| VideoCharacteristics | Composite Video Amplitude: 1.0Vp-p (75Ω)S-Video Amplitude: Y: 1.0Vp-p (75Ω), C: 0.286Vp-p (75Ω) |
| AudioCharacteristics** | Frequency: 20Hz – 20kHz (±1dB)Signal-to-Noise Ratio: >100dBTotal Harmonic Distortion: < 0.01% |
| GeneralSpecification | Power Supply: ~ 100V – 240V, 50/60Hz ACPower Consumption: 20WDimensions: 420mm x 270mm x 41mm, 16 12 x 10 58 x 1 58 inchesMass: 2.4kg / 5.20 lbs |
| OperatingTemperature | 5°C - 35°C41°F - 95°F |
| OperatingHumidity | 15% - 75%No condensation |
* Compatibility with user-encoded contents or user-created discs is on a best effort basis with no guarantee due to the variation of media, software and techniques used.
**Nominal specification.
NOTE:
- Region Management Information: This DVD player is designed and manufactured to respond to the region management information. If the region number of a DVD disc does not correspond to the region number of this DVD player, this DVD player cannot play the disc. The region number for this DVD player is region No.1.
- Design and specifications are subject to change without notice.
Language Code List
| Code | Language Name | Code | Language Name | Code | Language Name |
| 6565 | Afar | 7285 | Hungarian | 8084 | Portuguese |
| 6566 | Abkhazian | 7289 | Armenian | 8185 | Quechua |
| 6570 | Afrikaans | 7365 | Interlingua | 8277 | Rhaeto-Romance |
| 6577 | Ameharic | 7378 | Indonesian | 8279 | Romanian |
| 6582 | Arabic | 7383 | Icelandic | 8285 | Russian |
| 6583 | Assamese | 7384 | Italian | 8365 | Sanskrit |
| 6588 | Aymara | 7387 | Hebrew | 8368 | Sindhi |
| 6590 | Azerbaijani | 7465 | Japanese | 8372 | Serbo-Croatian |
| 6665 | Bashkir | 7473 | Yiddish | 8373 | Singhalese |
| 6669 | Byelorussian | 7487 | Javanese | 8375 | Slovak |
| 6671 | Bulgarian | 7565 | Georgian | 8376 | Slovenian |
| 6672 | Bihari | 7575 | Kazakh | 8377 | Samoan |
| 6678 | Bengali, Bangla | 7576 | Greenlandic | 8378 | Shona |
| 6679 | Tibetan | 7577 | Cambodian | 8379 | Somali |
| 6682 | Breton | 7578 | Kannada | 8381 | Albanian |
| 6765 | Catalan | 7579 | Korean | 8382 | Serbian |
| 6779 | Corsican | 7583 | Kashmiri | 8385 | Sundanese |
| 6783 | Czech | 7585 | Kurdish | 8386 | Swedish |
| 6789 | Welsh | 7589 | Kirghiz | 8387 | Swahili |
| 6865 | Danish | 7665 | Latin | 8465 | Tamil |
| 6869 | German | 7678 | Lingala | 8469 | Telugu |
| 6890 | Bhutani | 7679 | Laothian | 8471 | Tajik |
| 6976 | Greek | 7684 | Lithuanian | 8472 | Thai |
| 6978 | English | 7686 | Latvian,Lettish | 8473 | Tigrinya |
| 6979 | Esperanto | 7771 | Malagasy | 8475 | Turkmen |
| 6983 | Spanish | 7773 | Maori | 8476 | Tagalog |
| 6984 | Estonian | 7775 | Macedonian | 8479 | Tonga |
| 6985 | Basque | 7776 | Malayalam | 8482 | Turkish |
| 7065 | Persian | 7778 | Mongolian | 8484 | Tatar |
| 7073 | Finnish | 7779 | Moldavian | 8487 | Twi |
| 7074 | Fiji | 7782 | Marathi | 8575 | Ukrainian |
| 7079 | Faroese | 7783 | Malay | 8582 | Urdu |
| 7082 | French | 7784 | Maltese | 8590 | Uzbek |
| 7089 | Frisian | 7789 | Burmese | 8673 | Vietnamese |
| 7165 | Irish | 7865 | Nauru | 8679 | Volapuk |
| 7168 | Scots Gaelic | 7869 | Nepali | 8779 | Wolof |
| 7176 | Galician | 7876 | Dutch | 8872 | Xhosa |
| 7178 | Guarani | 7879 | Norwegian | 8979 | Yoruba |
| 7185 | Gujarati | 7982 | Oriya | 9072 | Chinese |
| 7265 | Hausa | 8065 | Panjabi | 9085 | Zulu |
| 7273 | Hindi | 8076 | Polish | ||
| 7282 | Croatian | 8083 | Pashto, Pushto |
LIMITED WARRANTY
OPPO Digital, Inc. Limited One Year Warranty
Your OPPO product has been manufactured to precise standards, and with rigid quality control through every process of manufacturing. It is warranted by OPPO DIGITAL, INC. against defective workmanship or materials for one (1) full year from the original date of purchase. This warranty applies only to OPPO brand products imported or manufactured by OPPO Digital, Inc. and sold to the original consumer purchaser in the U.S.A. or Canada by either OPPO Digital, Inc. or an OPPO authorized reseller. This warranty does not apply to OPPO brand products imported and sold by unauthorized dealers, distributors, or other sellers. This warranty does not apply to products purchased or shipped outside of the U.S.A. and Canada. OPPO Digital, Inc. may at its sole discretion, refuse to honor the warranty of any such unauthorized product that may be presented for service.
Warranty service can only be performed by OPPO Digital, Inc. or an OPPO authorized service center. The original dated bill of sale must be presented upon request as proof of purchase.
OPPO Digital, Inc. will, at its option and at no charge as stipulated herein, repair or replace product which is returned either in person or postpaid and insured to an OPPO service center, with new or reconditioned parts or products. Replacement parts and products assume the remaining original warranty, or ninety (90) days, whichever is longer.
This limited warranty covers noncommercial use of this product, and shall not apply to the following, including, but not limited to: applications and uses for which this product was not intended; altered product or serial numbers; cosmetic damage or exterior finish; batteries and cable accessories; accidents, abuse, neglect, fire, water, lightning or other acts of nature; incorrect electrical line voltage, fluctuations and surges; failure to follow operating or maintenance instructions. OPPO Digital, Inc. does not warrant uninterrupted or error-free operation of the product. This limited warranty shall not extend to anyone other than the original purchaser of the product. It is nontransferable and states your exclusive remedy.
THE FOREGOING WARRANTY IS THE ONLY WARRANTY WITH RESPECT TO THE PRODUCT AND OPPO DIGITAL, INC. MAKES NO OTHER WARRANTY WHATSOEVER, EXPRESS OR IMPLIED, REGARDING THE PRODUCT INCLUDING MERCHANTABILITY AND FITNESS FOR A PARTICULAR PURPOSE. IN NO EVENT WILL OPPO DIGITAL, INC. OR ITS AUTHORIZED RESELLERS BE LIABLE FOR INCIDENTAL, CONSEQUENTIAL OR SPECIAL DAMAGES, EVEN IF SUCH DAMAGES RESULT FROM NEGLIGENCE OR OTHER FAULT.
Some states do not allow limitation on how long an implied warranty lasts, or the exclusion or limitation of incidental or consequential damages, so the above limitations or exclusions may not apply to you. This warranty gives you specific legal rights, and you may also have other rights which vary from state to state.
TO REGISTER YOUR PURCHASE FOR WARRANTY, please visit the following Web site:
http://www.oppodigital.com/registration.asp
TO OBTAIN WARRANTY SERVICE, please follow these instructions:
- Contact OPPO customer service via email at service@oppodigital.com or by phone at (650) 961-1118 with details of the defect claimed, product model, serial number, date and place of the original purchase.
- If it is determined that your product needs service, a Return Merchandise Authorization (RMA) number will be issued to you along with return instructions and address of an OPPO service center.
- Pack the product securely, preferably in the original packaging, with your assigned RMA number marked clearly on the outside of the package. Send the package postpaid and insured to the OPPO service center to obtain warranty service.
Thank you for choosing OPPO. Your satisfaction is our highest priority.
OPPO Digital, Inc.
453 Ravendale Dr. Suite D
Mountain View, CA 94043, U.S.A.
www.oppodigital.com
service@oppodigital.com
(650) 961-1118
5195150 V2.1
- Table of Contents
- Table of Contents .... 1
- Important Information....1
- INSTALLATION 5
- BASIC OPERATIONS....21
- SETUP MENU OPTIONS.... 35
- REFERENCES....47
- LIMITED WARRANTY 50
- Important Information
- CAUTION:
- WARNING:
- Important Safety Instructions
- Additional Safety Instructions
- Cautions
- FCC Statement
- Copyright Protection
- Trademarks
- INSTALLATION
- Battery Installation
- Using the Remote Control
- NOTE
- Making the Video Connection
- HDMI Connection
- DVI Connection
- Connecting to an Audio System
- Connecting to a Receiver/Amplifier with HDMI Input/Output
- Connecting to a Receiver/Amplifier with Dolby Digital or DTS Decoder
- Connecting to a Stereo or Surround Audio System
- Setting Up the Player - Initial Setup
- Use the Setup Menu System
- Setup Menu Name > Menu Item > Submenu Item (or Selection)
- Determine Your Display Type
- Select the Best Output Resolution
- Set up Audio Options
- Audio Connection Directly to TV
- Multi-Channel Digital Audio to Receiver through HDMI
- Multi-Channel Analog Audio to Receiver
- BASIC OPERATIONS
- Disc Playback
- Pause Playback
- DVD Menu Playback
- Volume Control
- Mute
- OSD (On-Screen Display)
- DVD disc:
- CD disc:
- Audio Language/Channel Selection
- Subtitle Selection
- Angle Selection
- Zooming the Displayed Frame
- Sound Field and EQ Mode Adjustment
- Power Spectrum Meter (PSM)
- ADVANCED OPERATIONS
- TV System Selection
- Fast Playback
- Slow Playback
- Repeat Playback
- Repeat the Selected Section
- Random and Shuffle Playback
- Playback by Track Number
- Playback from a Specific Location
- Memory and Automatic Resume
- Bookmarks
- Viewing Static Pictures on DVD-Audio Discs
- Virtual Keyboard
- Disc Browser
- Playing DivX, Digital Audio and Picture Files
- Digital Music Play Operations
- Digital Picture Play Operations
- Playing a Disc with Both Digital Audio and Picture Files
- SETUP MENU OPTIONS
- General Setup Page
- Speaker Setup Page
- Example Channel Delay Adjustment:
- Settings:
- Audio Setup Page
- Video Setup Page
- Preference Page
- REFERENCES
- Useful Notes
- Troubleshooting
- Specifications
- NOTE:
- LIMITED WARRANTY
- OPPO Digital, Inc. Limited One Year Warranty
Brand : OPPO
Model : DV-981HD
Category : DVD player