
PRN-4011 - Video recorder SAMSUNG - Free user manual and instructions
Find the device manual for free PRN-4011 SAMSUNG in PDF.


| Product Type | Network Video Recorder (NVR) |
| Brand | Samsung |
| Model | PRN-4011 |
| Recording Channels | Up to 64 channels |
| Video Resolution | 4K (3840x2160, 4096x2160) via HDMI |
| Video Outputs | HDMI, VGA, dual monitor support (expand/duplicate) |
| Audio | 1 Audio Out (RCA), audio from network cameras |
| Storage | Up to 12 SATA HDDs (internal), iSCSI support |
| Backup | USB 2.0, external HDD, network backup |
| Network Interfaces | 3 x Ethernet (10/100/1000Base-T), 2 x Optical (shared) |
| Alarm | 14 alarm inputs, 4 alarm outputs, alarm reset |
| Power Supply | AC 100-240V, 50/60Hz (dual power supply optional) |
| Dimensions (W x D x H) | 430 x 350 x 88 mm (2U rack mount) |
| Weight | Approximately 8 kg (without HDDs) |
| Operating Temperature | 0°C to 40°C (32°F to 104°F) |
| HDD Compatibility | SATA HDDs; check compatibility list before installation |
| Security | Administrator password, multi-user permissions, auto logout |
| Cleaning | Use soft dry cloth; no alcohol, solvents, or detergents |
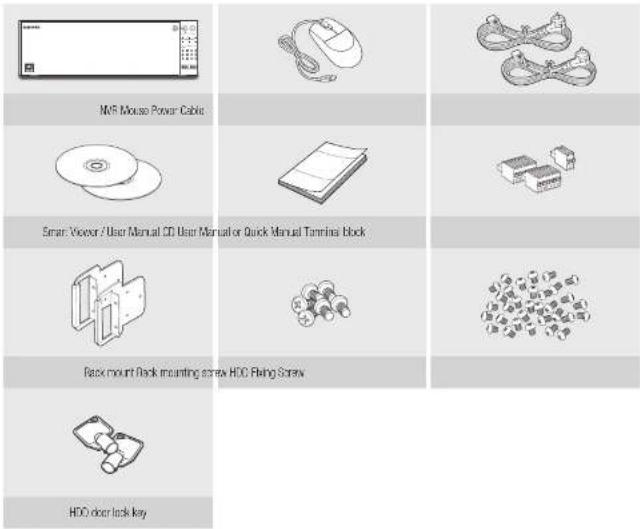
| Accessories Included | Mouse, power cable, CD (manual), quick manual, rack mount kit, HDD screws, HDD door lock key |
Frequently Asked Questions - PRN-4011 SAMSUNG
User questions about PRN-4011 SAMSUNG
0 question about this device. Answer the ones you know or ask your own.
Ask a new question about this device
Download the instructions for your Video recorder in PDF format for free! Find your manual PRN-4011 - SAMSUNG and take your electronic device back in hand. On this page are published all the documents necessary for the use of your device. PRN-4011 by SAMSUNG.
USER MANUAL PRN-4011 SAMSUNG
©2016 Henwhe Techwin Co., Ltd. All rights reserved.
Trademark
Each trademark has been registered. The name of this product and other trademarks mentioned in this statement are the registered trademarks of
their respective companies.
Restriction
Copyright of this document is reserved. Under no circumstances shall this document be reproduced, distributed, or changed, partially or wholly.
without authorization.
Disclaimer
Henwhe Techwin makes the best effort to verify the integrity and correctness of the contents in this document, but no formal guarantee shall be
provided. Use of this document and the subsequent results shall be entirely at the user's own responsibility. Henwhe Techwin reserves the right
to change the contents of this document without prior notice.
Design and specifications are subject to change without prior notice.
The initial administrator ID is "admin" and the password should be set when logging in for the first time.
Please change your password every three months to safely protect personal information and to prevent the damage of
information theft.
Please note that it is the user's responsibility for the security and any other problems caused by mismanaging a password.
IMPORTANT SAFETY INSTRUCTIONS
Read these operating instructions carefully before using the unit.
Follow all the safety instructions listed below.
Keep these operating instructions handy for future reference.
1) Read these instructions.
2) Keep these instructions.
3) Heed all warnings.
4) Follow all instructions.
5) Do not use this apparatus near water.
6) Clean the contaminated area on the product surface with a soft, dry cloth or a damp cloth. (Do not use a detergent or cosmetic products that contain alcohol, solvents or surfactants or oil constituents as they may deform or cause damage to the product.)
7) Do not block any ventilation openings. Install in accordance with the manufacturer's instructions.
8) Do not install near any heat sources such as radiators, heat registers, stoves, or other apparatus (including amplifiers) that produce heat.
9) Do not defeat the safety purpose of the polarized or grounding-type plug. A polarized plug has two blades with one wider than the other. A grounding type plug has two blades and a third grounding prong. The wide blade or the third prong are provided for your safety. If the provided plug does not fit into your outlet, consult an electrician for replacement of the obsolete outlet.
10) Protect the power cord from being walked on or pinched particularly at plugs, convenience receptacles, and the point where they exit from the apparatus.
11) Only use attachments/accessories specified by the manufacturer.
12) Use only with the cart, stand, tripod, bracket, or table specified by the manufacturer, or sold with the apparatus. When a cart is used, use caution when moving the cart/apparatus combination to avoid injury from tip-over.
13) Unplug this apparatus during lightning storms or when unused for long periods of time.
14) Refer all servicing to qualified service personnel. Servicing is required when the apparatus has been damaged in any way, such as power-supply cord or plug is damaged, liquid has been spilled or objects have fallen into the apparatus, the apparatus has been exposed to rain or moisture, does not operate normally, or has been dropped.

Standards Approvals


Any changes or modifications in construction of this device which are not expressly approved by the party responsible for compliance could void the user's authority to operate the equipment.
This device complies with part 15 of the FCC Rules. Operation is subject to the following two conditions: (1) This device may not cause harmful interference, and (2) this device must accept any interference received, including interference that may cause undesired operation.
This equipment has been tested and found to comply with the limits for a Class A digital device, pursuant to part 15 of the FCC Rules. These limits are designed to provide reasonable protection against harmful interference when the equipment is operated in a commercial environment.
This equipment generates, uses, and can radiate radio frequency energy and, if not installed and used in accordance with the instruction manual, may cause harmful interference to radio communications. Operation of this equipment in a residential area is likely to cause harmful interference in which case the user will be required to correct the interference at his own expense.
BEFORE START
This manual provides operational information necessary for using the product and contains a description about each component part and its function as well as menu or network settings. You have to keep in mind the following notices:
• Hanwha Techwin retains the copyright on this manual.
- This manual cannot be copied without Hanwha Techwin's prior written approval.
- We are not liable for any or all losses to the product incurred by your use of non-standard product or violation of instructions mentioned in this manual.
- Prior to opening the case, please consult a qualified technician first. Whenever this is needed power must be removed from the unit.
- Before adding a hard disk drive or external storage (USB memory, USB HDD, etc.), check if it is compliant with this product. For the compatibility list, contact the retailer.
Warning
Battery
It is essential that when changing the battery in the unit, the replacement battery must be of the same type, otherwise there may be a possibility of an explosion.
The following are the specifications of the battery you are using now.
- Normal voltage: 3V • Normal capacity: 210mAh • Continuous standard load: 0.4mA
- Operating temperature: -20°C to +60°C (-4°F to +140°F)
CALIFORNIA USA ONLY
This Perchlorate warning applies only to primary CF (Manganese Dioxide) Lithium coin cells in the product sold or distributed ONLY in California USA. "Perchlorate Material - special handling may apply," See www.disc.ca.gov/raparidouwaste/perchlorate.
Caution
- Connect the power cord into a grounded outlet.
- The Mains plug is used as a disconnect device and shall stay readily operable at any time.
- Batteries shall not be exposed to excessive heat such as sunshine, fire or the like.
- Risk of Explosion if Battery is replaced by an Incorrect Type. Dispose of Used Batteries According to the Instructions.
System Shutdown
Turning off the power while the product is in operation, or undertaking improper actions may cause damage or malfunction to the hard drive or the product. Press on the system shutdown popup window and then remove the power cable to ensure a safe power off. You may want to install a UPS system for safe operation in order to prevent damage caused by an unexpected power stoppage. (Any questions concerning UPS, consult your UPS retailer.)
If powered off abnormally, restarting may take more time for restoring data from hard disk drive for proper operation.
Overview
Operating Temperature
The guaranteed operating temperature range of this product is 0°C \~ 40°C (32°F \~ 104°F).
This product may not work properly if you run right after a long period of storage at a temperature below the guaranteed one.
Prior to using a device that has been stored for a long period in low temperatures, allow the product to stand at room temperature for a period.
Especially for the built-in HDD in the product, its guaranteed temperature range is 5°C \~ 55°C (41°F \~ 131°F). Likewise, the hard drive may not work at a temperature below the guaranteed one.
Ethernet Port
This equipment is in door use and all the communication wirings are limited to inside of the building.
Security Precautions
The initial administrator ID is "admin" and the password should be set when logging in for the first time. Please change your password every three months to safely protect personal information and to prevent the damage of the information theft.
Please, take note that it's a user's responsibility for the security and any other problems caused by mismanaging a password.
Use of graphical symbols
Graphical symbols placed on the equipment, whether required by this standard or not, shall be in accordance with IEC 60417 or ISO 3884-2 or ISO 7000, if available. In the absence of suitable symbols, the manufacturer may design specific graphical symbols.
Symbols placed on the equipment shall be explained in the user manual.
| Symbol Publication Description | ||
| IE080417, No.5032 Alternating current | ||
CONTENTS
| CONTENTS | SEARCH & PLAY | 50 | Search | ||
| 53 | Playback | ||||
| OVERVIEW | 3 | Important Safety Instructions | 50 | ||
| 3 | Before Start | ||||
| 5 | Contents | ||||
| 6 | Features | ||||
| 7 | Part Names and Functions (Front) | STARTING WEB VIEWER | 54 | What is Web Viewer? | |
| 7 | Part Namos and Functions (Roar) | 54 | Connecting Web Viewer | ||
| INSTALLATION | 8 | Checking the installation environment | 54 | ||
| 8 | Pack Installation | ||||
| 8 | H DD Addition | ||||
| LIVE VIEWER | 56 | Live Viewer | |||
| 57 | Live Screen Configuration | ||||
| 60 | Controlling a Connected Network Camera | ||||
| CONNECTING WITH OTHER DEVICE | 10 | Connecting to an external device | 56 | ||
| 10 | Connecting an optical module | ||||
| 11 | Connecting the USB | ||||
| 11 | Connecting the Alarm Input/Output | ||||
| 12 | Connecting the Network | ||||
| LIVE | 13 | Getting Started | 62 | Search Viewer | |
| 15 | Live Screen Configuration | ||||
| 18 | Live Screen Mode | ||||
| 20 | Zoom | ||||
| 21 | Layout | ||||
| 21 | Audio ON/OFF | ||||
| 21 | Freeze | ||||
| 21 | Event Monitoring | ||||
| 22 | Capture | ||||
| 22 | Maintain the Screen Ratio | ||||
| 23 | Display Text | ||||
| 23 | PTZ control | ||||
| 24 | Backup | ||||
| MENU SETUP | 25 | System Setup | 74 | 76 | Product Specification |
| 30 | Setting the Device | 78 | Product Overview | ||
| 40 | Setting the Recording | 78 | Default Setting | ||
| 42 | Setting the Event | 80 | Troubleshooting | ||
| 44 | Network Configuration | 83 | Open Source License Report on the Product | ||
Overview
FEATURES
The product records video and audio from network cameras to a hard disk, and enables playback from the hard disk. It also provides remote monitoring environment for video and audio over the network using a remote computer.
- User-friendly UI • Supports a range of 4K camera resolutions (3840X2160, 4096X2160, 4000X3000) • Outputs a 4K high definition image using HDMI • 64 split screens decoding • Supports dual monitor output (expand, duplicate) • Supports multiple passwords
- Record and play video
- Record and play audio • Supports OMIF Profile S standard and RTP / RTSP protocols • Display the HDD operation status by HDD SMART
- HDD overwrite enabled
- Backup using USB 2. protocols and external HDD • Simultaneous play of 16 channels
- Various Search Modes (Time, EventSmart, Text, Backup, ARB)
- Various Recording Modes (Normal, Event, Scheduled Recording)
- Alarm Input / Output • Remote Monitoring function by Windows Network Viewer • Live monitoring of the network camera • Installation Wizard Function (Easy Sets) • Supports remote viewer multi profiles • Supports ARB • Supports Falover • Function used to set the storage period for each channel
Package Contents
Please unwrap the product, and place the product on a flat place or in the place to be installed. Please check the following contents are included in addition to the main unit.
PART NAMES AND FUNCTIONS (FRONT)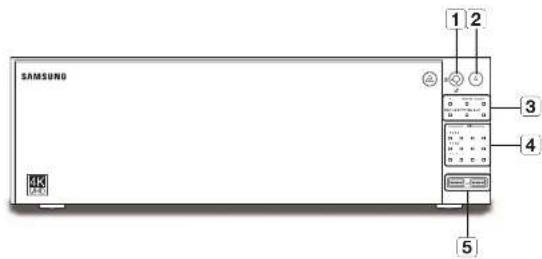
| Part Names Functions | ||
| 1 | HDD door lock key | This is a locking device used to restrict access to the I/O. Use the product key provided when you purchase the product. |
| 2 | Power | Used to turn the ON/OFF. |
| 3 | LED Indicator | REC : Lights on when recording is in progress. |
| ALARM : Lights on when an event occurs. | ||
| POWER : Shows the power ON/OFF status. | ||
| BACKUP : Displays when Backup is in progress. | ||
| NETWORK : Displays both network connection and data transfer status. | ||
| RAID : Displays ongoing RAID operation. | ||
| 4 | HDD | Displays the normal access to HDD. LED turns on when accessing the hard disk. |
| 5 | USB | Connects the USB devices. |
PART NAMES AND FUNCTIONS (REAR)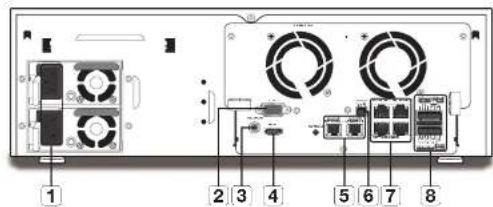
| Part Names Functions | ||
| 1 | Power | Terminal to connect power to.■ With duplex power supply, even if you connect only one power supply; it can operate properly. However, for reliability, it is recommended you use separate power supplies.■ If a problem occurs during motion, SMPS buzzer will sound, (you can turn off the buzzer by pressing the sound green button)■ Even if the power supply is not connected, the applicable green SMPS button LED and SMPS fan can be operated. |
| 2 | VGA | VGA Video Signal Output Port |
| 3 | AUDIO OUT | Audio Signal Output Port (RCA jack). |
| 4 | HDMI | HDMI connector port. |
| 5 | OPTICAL NETWORK 1/2 | Optical communications IF port. |
| 6 | RS-232C | Cable terminal for serial communication. |
| 7 | NETWORK 1 | Port for camera connections; it receives video from a camera. |
| NETWORK 2 | Port for camera connections; it receives video from a camera. | |
| NETWORK 3 | Port used to send video to the web viewer. | |
| ISCSI | Port to make a connection to the external iSCSI. | |
| 8 | ALARM | - ALARM IN : Alarm input ports. (14-CI)- ALARM RESET : Alarm Reset port- ALARM OUT : Alarm output ports. (1-4 CI) |
- [CONSOLE] is designed for service repair purposes only.
Installation
Please take note of the following before using this product.
- Do not use the product outdoors.
- Do not spill water or liquid on the connection part of the product.
- Do not subject the system to excessive shock or force.
- Do not pull out the power plug forcefully.
- Do not disassemble the product on your own.
- Do not exceed the rated input/output range.
- Use a certified power cord only.
- For the product with an input ground, use a grounded power plug.
CHECKING THE INSTALLATION ENVIRONMENT
This product is a top-notch security device that is equipped with a high-capacity HDD and other key circuit boards.
Note that an excessive internal temperature of the product may cause a system failure or a shortened product life (see the right figure). Keep in mind the following instructions before installing the product.
Temperature Unit: ℃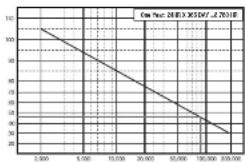
Life (Unit: HOURS) are 1]
When mounting the product on a rack, comply with the following instructions.
- Please ensure that the rack inside is not sealed.
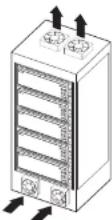
- Please ensure the air is circulated through the inlet/outlet as shown in the picture.
- If you pile up the products or other rack-mount devices as shown in figure 2, secure room for ventilation or install a vent.
- For natural air convection, place the inlet at the bottom of the rack and the outlet on top.
- It is strongly recommended that a fan motor is installed at the inlet and the outlet for air circulation. (Please fit a filter at the inlet to screen dust or foreign substances.)
- Please maintain the temperature inside the rack or surrounding areas between 0°C \~ 40°C (32°F \~ 104°F) as shown in the figure 1.
Rack Mount Instructions - The following or similar rack-mount instructions are included with the installation instructions :
A) Elevated Operating Ambient - If installed in a closed or multi-unit rack assembly, the operating ambient temperature of the rack environment may be greater than room ambient. Therefore, consideration should be given to installing the equipment in an environment compatible with the maximum ambient temperature (Tma) specified by the manufacturer.
B) Reduced Air Flow - Installation of the equipment in a rack should be such that the amount of air flow required for safe operation of the equipment is not compromised.
C) Mechanical Loading - Mounting of the equipment in the rack should be such that a hazardous condition is not achieved due to uneven mechanical loading.
D) Circuit Overloading - Consideration should be given to the connection of the equipment to the supply circuit and the effect that overloading of the circuits might have on overcurrent protection and supply wiring. Appropriate consideration of equipment nameplate ratings should be used when addressing this concern.
E) Reliable Earthing - Reliable earthing of rack-mounted equipment should be maintained. Particular attention should be given to supply connections other than direct connections to the branch circuit (e.g. use of power strips).
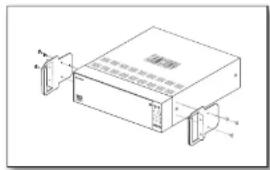
RACK INSTALLATION
Install the Bracket-Rack as shown in the figure, and then fasten the screws on both sides.
■ Fix the screws not to be loosened by vibrations.
HDD ADDITION
Make sure to unplug the power cord from the wall outlet to prevent possible electric shock, injury or product damage. Please consult your provider for further information on HDD installation since improper installation or settings may damage the product.
■ Number of HDDs supported : Up to 12 HDDs supported
- Make sure to unplug the power cord from the wall outlet before proceeding with the installation.

■ Cautions for data loss (HDD care)
Please pay attention so that the data inside the HDD is not damaged. Before adding a HDD, please check the compatibility with this product. HDD is vulnerable to malfunction due to its sensitive nature especially against shock when operating. Please ensure that the HDD is free from such shock. We are not liable for any damage to the HDD incurred by user's carelessness or misuse.
■ Cases might cause damage to HDD or recorded data
To minimize the risk of data loss from a damaged HDD, please backup data as often as possible. If exposed to shock when disassembling or installing, data stored in the hard disk may be damaged. A sudden power failure or turning off the product while in HDD operation may damage the hard disk drive. HDD or files stored inside may be damaged if the main body is moved or impacted during the HDD operation.
Cautions when installing a HDD
- Do not apply excessive force to the HDD.
- Pay attention so as not to lose the disassembly screws or accessories.
- If the screws or accessories are not put together correctly, the product may break down or not operate properly.
- Please check the HDD compatibility before adding a HDD.
- Please contact your nearest dealer to obtain the list of compatible devices.
- If you wish to replace or add an HDD, contact your dealer or our customer service first.
- Only the product administrator can open the HDD door on the front side.
Installing the HDD

- If you are adding a new or previously used HDD to this product, in addition to the HDD(s) originally installed, format the new HDD manually in the set before use. For information on how to format an HDD, refer to "Device/Format" (page 36).
- For replacement or installation of an additional HDD, you must contact your dealer or our customer center.
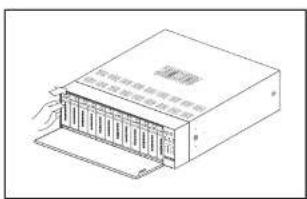
- Press the button on the front to open the front cover.
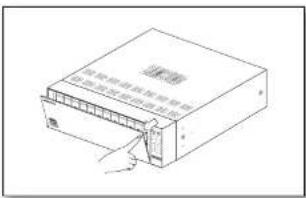
- After pressing the blue button in the HDD bracket, pull it manually to separate the HDD bracket from the main body.
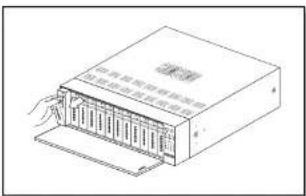
- Mount a HDD in the HDD bracket and screw it in using the screws provided.
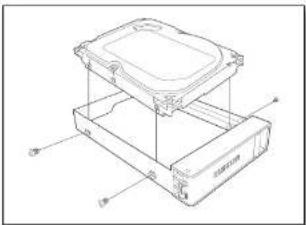
- Once the HDD is mounted in the bracket, push the bracket into the main body and close the front cover.
Connecting with other device
CONNECTING TO AN EXTERNAL DEVICE
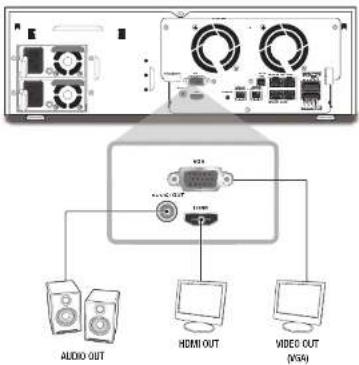
- Unrated or improper power source may cause damage to the system. Ensure that you use only the rated power source before pressing the POWER button.
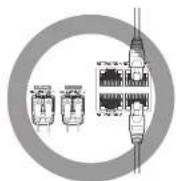
CONNECTING AN OPTICAL MODULE
The rated power for an optical module is DC 3.3V 0.25A.

- When an optical module is installed, the use of the UTP part is limited.
- Install an optical module only when one is needed.
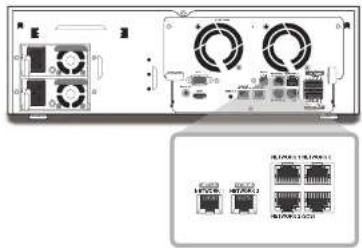
- [OPTICAL NETWORK1] is a port that is shared with [NETWORK1].
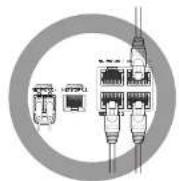
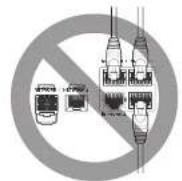
- [OPTICAL NETWORK2] is a port that is shared with [NETWORK2].
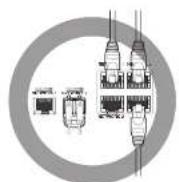
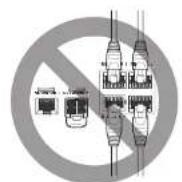
- [OPTICAL NETWORK1/2] is a port that is shared with [NETWORK1/2].
CONNECTING THE USB
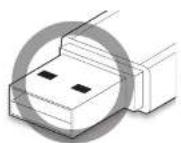
- On the front of the product, there is a USB port.
- You can connect a USB HDD, USB memory or mouse to the USB port.
- If a USB HDD is connected to the system, recognition and settings are available in "Menu > Device > Storage Device". (Page 35)
- The product supports hot plugging function that enables connecting/disconnecting USB devices while the system is operating.
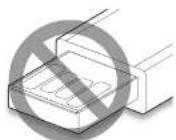
If you use the USB device for backup purposes, format it with FAT32 on a PC if it is not formatted on the KVR. - Some USB devices may fail to function properly due to compatibility issues, please check the device before using. - Only USB storage devices that comply with the standards (having a metal cover) are guaranteed for data transfer. - In case the USB device's electric contacts have been worn out, data transfer between the devices may not function properly.
CONNECTING THE ALARM INPUT/OUTPUT
The Alarm In/Out port at the back is composed of the following.
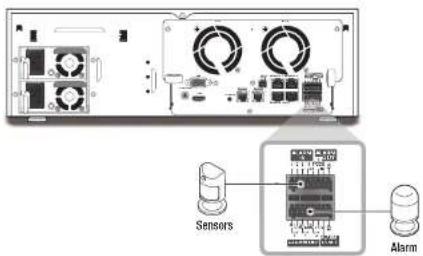
• ALARM IN 1-4: Alarm Input Port - ALARM RESET: On receiving an Alarm Reset signal, the system cancels the current Alarm Input and resumes sensing. • ALARM OUT 1-4: Alarm Output Port
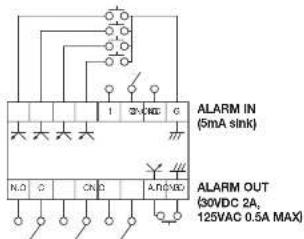
CONNECTING WITH OTHER DEVICE
CONNECTING THE NETWORK

- For more information about network connection, refer to "Network Configuration". (Page 44)
Network connection via Ethernet (10/100/1000BaseT)
![graph TD A["Switch"] --> B["Network Camera"] B --> C["Switch"] C --> D["Windows Network Viewer"] style A fill:#f9f,stroke:#333 style B fill:#ccf,stroke:#333 style C fill:#cfc,stroke:#333 style D fill:#fcc,stroke:#333](/content/2026/05/922951/images/820c95122af8d5e006f14c86b4055a7566a12031ea76ef1597b2a4bc584ae494.jpg)
Network connection via router
![graph TD A["Switch"] --> B["Network Camera"] B --> C["xDSL or Cable Modem"] C --> D["Network"] D --> E["Windows Network Viewer"] D --> F["DINAS Server (Data Center)"] G["Broadband router"] --> H["xDSL or Cable Modem"] H --> D](/content/2026/05/922951/images/545c9607c755e7f1c642afe142a20297fd252869e11d6dbc7c2cfea5a16b78af.jpg)
Connecting to Internet through PPPoE
![graph TD A["Network Device"] --> B["Switch"] A --> C["Network Camera"] A --> D["Windows Network Viewer"] A --> E["PPP&E MODEM"] E --> F["PP&E Line"] F --> G["Network"] G --> H["Switch"] H --> I["Computer"]](/content/2026/05/922951/images/78f2b8fec059aa9ec988473ed24ae1f1135768edad3631cd1b049e0cdf959e63.jpg)
Connecting the iSCSI
Directly connecting to the NVR
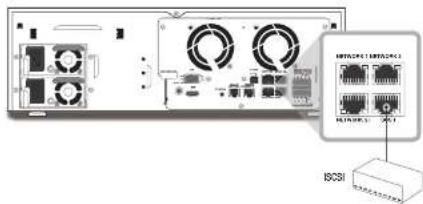
A switch can be used for connection
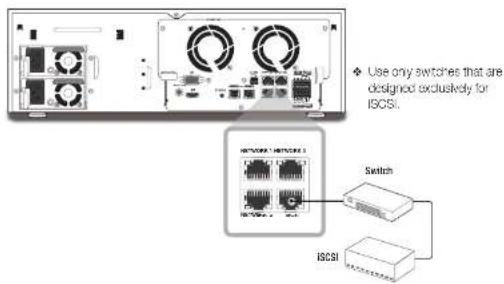
12_ connecting with other device
GETTING STARTED
Starting the system
- Connect the power cable of the NVR to the wall outlet.
- You will see the initialization screen. The initialization process will last about 2 minutes. If a new HDD is installed, the initialization process may take longer.
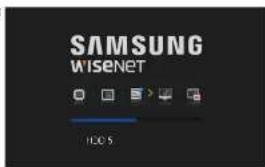
- If the HDD number is displayed at the bottom of the screen along with < > while the product is booting up, it indicates that the HDD is in recovery, and for this reason booting up may take longer.
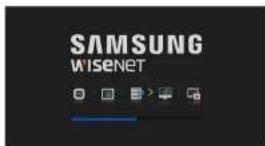
If the HDD number is displayed at the bottom of the screen along with < > while the product is booting up, it indicates that the HDD is in recovery, and for this reason booting up may take longer.
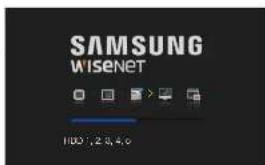
- If the progress stalls while in <→> state, it indicates that the HDD has problems. Visit your nearest customer service center to check the HDD.
- The live screen appears with a beep.
Install Wizard
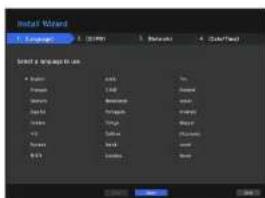
As shown below, proceed through each step of the .
- In the screen, select the language and press the button.
- In the screen, set the password and press .
- Setting Camera Password
You can change the password of the camera en bloc if the camera password is in a factory reset slate. If the camera password is not in a factory reset slate, please enter the password of the current camera to register the camera.
- New Password: Input a new password according to the password setting rules. - Confirm Password: Input the new password again.
A camera password registered with ONMF and RTSP cannot be changed.
- Password setting guide
When you click < ☐ >, a basic guide for setting a password is displayed. Check the password setting rules.
- In the screen, set the network access method and the access environment. To use a simple intranet, click .
- DHCP server: If the DHCP server is set to enable, an IP is automatically assigned to the camera. For more information, please refer to 'DHCP Server' in the menu settings. (Page 48)
- Depending on the camera's state, no IP may be automatically assigned to the camera. After exiting the Installation Wizard, go to the menu to assign an IP to DHCP, or set the IP manually.
- Network 1 (Camera) / Network 2 (Camera) : Connects to the camera and receives the video feed from the camera.
- When a UTP cable is connected, UTP is displayed on the screen, and when a Fiber Optic Cable is connected, OPTIC is displayed on the screen.
• Network 3 (Viewer): This is a port for transmitting an image to the webviewer.
- Network 4 (iSCSI); This is a port for connecting an external iSCSI.
- Network 1 / Network 2 / Network 3 / Network 4 Setup - IP Type : Choose the network connection method. - IP Address, Subnet Mask, Gateway, DNS
- If the LAN cable is not connected to the port, the setting button will not be activated for use. Check the LAN cable connection.
- The built-in DHCP Server in NWR will turn on automatically at stage 3. At this stage, using the existing DHCP server in the same network may cause a problem, as two DHCP servers would be simultaneously operating.
■ For more details on network settings, refer to the user manual.
- After setting the date/time in the screen, click the button to open the setting completion window.
- In the setting completion window, click the button to finish camera settings and open the camera registration screen.
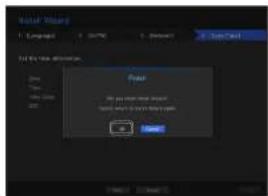

- If 64 or fewer cameras are found, they will be automatically registered and their information (fps, recording days) will be displayed.
- If 64 or fewer cameras are found
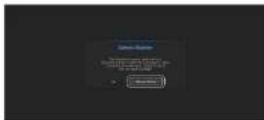
- The found cameras will be automatically registered and the initial recording values will be displayed.
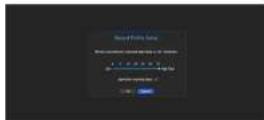
- In the camera registration window, click the button to modify the automatically set recording settings.
• If more than 64 cameras are found
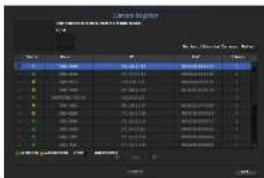
Select a camera to register and click the button. Once camera registration is complete, proceed with the same steps as after automatic registration.
Shutting Down the System
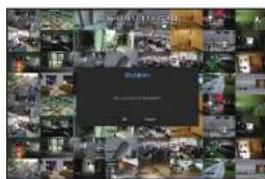
- In the live screen menu, select .
- The "Shutdown" confirmation pop-up window will appear.
- Click on . The system will shut down.
- Only users with the "shutdown" permission can shut down the system.
- For permission management, refer to "User > Setting Permissions". (Page 27)
Login
To use the NVR menu, you are required to login as a user that is authorized to access the applicable menu.
- Right click with your mouse button on the live mode screen. You will see the context menu on the screen as shown.
- Select . The login dialog appears.
The Initial administrator ID is set to "admin" and you will need to configure the password in the installation wizard.
- Please change your password every three months to safety protect personal information and to prevent the damage of the information theft.
Please, take note that it's a user's responsibility for the security and any other problems caused by mismanaging a password.
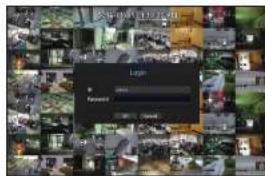
For the restricted permission, refer to 'User > Setting Permissions'. (Page 27)
Icons on the Live Screen
You can check the status or operation of the NVR with the icons on the live screen.
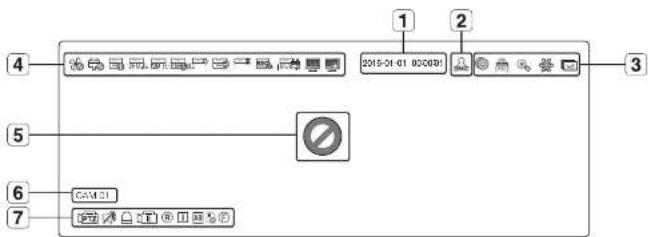
| Name Description | |||
| 1 | Current Date, Time | Displays the current time and date. | |
| 2 | Login Information | When you are logged in, the "LOG ON" icon will be displayed. | |
| 3 | Screen Mode | It is displayed when there is ongoing backup in the live condition. | |
| If access to the recording canceling menu is restricted, then it is only displayed when there is ongoing manual recording.Only a user with the right to cancel recording can do so. | |||
| It is displayed when the magnifying function is in operation. | |||
| This icon is displayed when you press the Freeze button. | |||
| It is displayed when all the channels are switched at the set time interval. | |||
| 4 | System Operation | It is displayed when there is a problem with the fan. | |
| It is displayed when there is a problem with the power supply. | |||
| It is displayed when the recording data cannot be received properly due to a device problem. | |||
| Displayed if the HDD is full and the NRF has an insufficient space to record. | |||
| Displayed if no HDD is installed or the existing HDD should be replaced. | |||
| Displayed if the HDD needs a technical examination. | |||
| Name Description | |||
| 4 | System Operation | It is displayed when there is a malfunctioning HDD in the RAID.There are one or two HDD malfunctions but you can still read or write to it. | |
| It is displayed when recovering a RAD Error. | |||
| It is displayed when you cannot write RAID due to a malfunction of HDD. | |||
| Displayed when the total amount of input data exceeds the total amount of data allowed. | |||
| It is displayed when an ICSI device is disconnected. | |||
| It is displayed when this network is overloaded.It occurs when the max receiving allowance is exceeded, causing an overload to the CPU. It will disappear if you modify the camera settings or delete a camera to reduce the performance burden. | |||
| It is displayed when there is firmware to update the server. | |||
| 5 | Video Input Status | Displayed If no input is entered in the condition that the camera is set to. | |
| Displayed when the live image with the camera turnedexceeds the supported resolution. | |||
| WISENET | Displayed If no permission to live view is granted. | ||
| If a camera is,or if no camera is registered, or it is inmode, nothing will be displayed on the screen.If the camera is set to, the video will be displayed but the OSD menus will not be displayed. | |||
| 6 | Camera Title / Channel | Display the camera title and channel number. | |
| 7 | Camera Operation | This icon is displayed for a channel that a PTZ featuring camera is connected to. | |
| Displays AUDIO ON/MUTE. Not displayed in video mode if deceased. | |||
| If the sensor is set to, the input signal will be displayed on the screen of the connected channel. | |||
| This icon is displayed when Motion Detection is set toand a camera motion or camera event occurs. | |||
| R/E/S | It displays the status of general/event/scheduled recording. | ||
| It is displayed when it falls to choose all the frames due to limited decoding performance and in this case only the I-Frame is decoded. | |||
| This is displayed when a PCS (lead) event occurs. | |||
| RED - Displayed when there is any abnormality in the RED- SO card.YELLOW - Displayed when there is no storage space in the SD card. | |||
| Flickers when a defocus event occurs. When you click the icon, a simple focus command is sent to the camera. | |||

Error Information
- If the built-in HDD is not connected, the "NO HDD" icon (☐) will be displayed in the top left corner. In this case, make sure you contact the service center for assistance as this may cause a failure of recording, playback or backup.
- If the cooling fan does not work properly or has a problem, the window will appear and the fan error icon (off) will be displayed on the top left corner. In this case, check to see if the internal fan works.
As a fan error can shorten the product life, make sure you contact the service center for assistance.

If an abnormal PWN icon (90) or NO HDO (☐) icon, HDO FAIL (☐) icon is displayed, contact our customer service.
Live Screen Menu
If you right-click with your mouse button in live screen mode, it will launch the live screen menu where you can access each menu.
The context menu differs depending on the state of Log in/out, split mode, and NWR operation status.

- Depending on the user permissions, you may have limited access to menu items of Live View, Backup, Stop Recording, Search, PTZ, Remote Alarm Output, and Exit.
Single Mode Menu
The single mode menu is available only in Single Mode.
If the menu is displayed as in the single screen, it is displayed as a in the menu where only one channel is selected in the split screen.
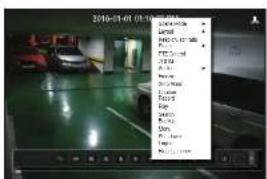
< Single Mode Menu >
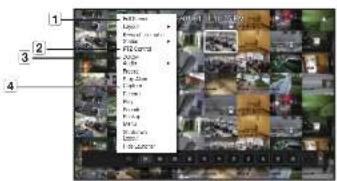
< One channel selection menu in the split screen >
| Menu Description | ||
| 1 | Full Screen | Select and click a desired channel in Split mode to switch to the full screen of the selected channel. |
| 2 | PTZ Control | Accesses the PTZ Control menu. The PTZ menu will be active on the Live screen after you select a single channel. (Page 23) |
| 3 | ZOOM You can enlarge the selected screen. (Page 20) | |
| 4 | Capture Captures the screen of the selected channel. (Page 22) | |
Split Mode Menu
In Live split mode, right-click to display this context menu as shown.
The context sensitive menu in split mode differs, depending on the login/logout status.
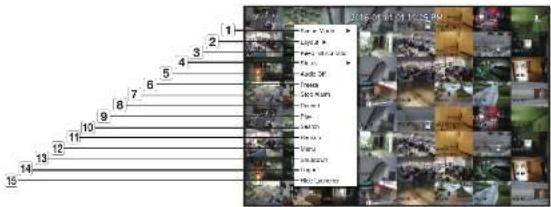
| Menu Description | ||
| 1 | Screen Mode | Select a screen mode for the Live screen.Refer to "Live screen mode". (Page 18) |
| 2 | Layout | Set the layout of each channel.Rotor to "Layout". (Page 21) |
| 3 | Keep full scr ratio/Keep ch. scr ratio | Channel screen ratio is changed.Rotor to "Maintain the Screen Ratio". (Page 22) |
| 4 | Status | Shows the connection information of camera connected to each channel as well as live and recording status.Refer to "Status". (Page 19) |
| 5 | Audio On/Off | Turns ON/MUTE the sound of the selected channel.Refer to "Audio ON/OFF". (Page 21) |
| 6 | Freeze | Stop playing the video temporarily. Refer to "Freeze". (Page 21) |
| 7 | Stop Alarm | Stop the alarm output, deactivate the event icon and release the auto sequencing.Rotor to "Event Monitoring". (Page 21) |
| 8 | Record/Stop Starts/stop the standard recording. | |
| 9 | Play | Refer to "Search & Play > Play". (Page 53) |
| 10 | Search | Refer to "Search & Play > Search". (Page 50) |
| 11 | Backup | Searches for a backup device and runs backup for each channel or schedule backup later at a more preferable time. (Page 24) |
| 12 | Menu Enter the main menu. Refer to the menu settings. (Page 25) | |
| 13 | Shutdown | The system shutdown dialog will appear. |
| 14 | Login/Logout You can log | in or out. |
| 15 | Show/Hide Launcher | Shows or hides the launcher. Refer to "View the Launcher Menu". |
View the Launcher Menu
The Launcher menu appears on the bottom of the live screen.
- Select in the context menu of the Live screen.
- Move the cursor to the bottom and click a desired item in the Launcher menu.
If no input is entered for 10 seconds, the menu will disappear.
| Layout 01 | 15 | 24 | 25 | 16 | 9 | 3 | 2 | 6 | 9 | 12 | ||||||||||||||||||||||||||||||||||||||||||||||||||||||||||||||||||||||||||||||||||||||||||||||||||||
| 1 | 2 | 3 | 13 |
| Menu Description | ||
| 1 | Layout Select the layout to be displayed on the screen. | |
| 2 | Layout Setup You can set change or delete the new layout of each channel. | |
| 3 | Screen Mode | Displays a list of split modes available in a bar type.The current screen mode will be displayed gray. |
| 4 | Menu Expansion Button | Click to display the hidden menu to the right. |
| 5 | Backup | Searches for a backup device and runs backup of each channel or schedule it for later at a more desirable time. |
| 6 | Zoom Enlarges the selected area. This is available only in Single Live mode. | |
| 7 | PTZ | If the network camera connected to the selected channel supports the PTZ operations, this will run the PTZ control launcher. This is active only in Live single mode. |
| 8 | Alarm Stops the alarm if it's activated. | |
| 9 | Freeze Removes the Live screen temporarily. | |
| 10 | Capture Captures the screen of the selected channel. | |
| 11 | Text Text output is OK or OFF. | |
| 12 | Play | Enters Play mode if a file to play exist, and if not, enters Search mode. |
| 13 | Record | Start/End recording the Live screen. |
LIVE SCREEN MODE
You can play up to 64 live video channels in single, 11-split, or auto sequence mode.

- When you register a camera, the LiveNVR profile is created to set H.264 800*500 30fps as default. If necessary, you can change it in Menu > Device > Camera > Camera Settings. If the performance is exceeded, it may play I frame only. Based on real-time playback (30fps) 3840*2160:1 to 4 split screen 1920*1080: 1 to 16 split screen 800*600 : 1 to 64 split screen
- If you cannot create an additional profile for the camera specifications, then sometimes you cannot create LiveNVR. In this case, you need to modify the camera profile. Refer to 'Camera Setting'. (Page 32)
Method for displaying screen mode
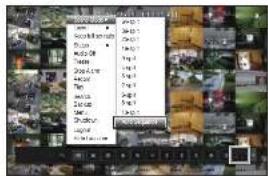
If you want to change the split mode, select a screen mode suggested in the launcher menu or right click with the mouse button and select a split mode in the screen mode menu.

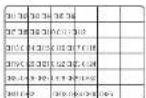
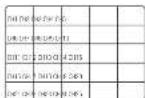
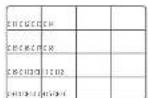
64-split mode 36-split mode 25-split mode 16-split mode 9-split mode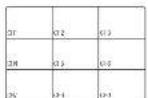
4-split mode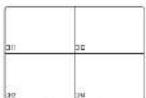
3-split mode
2-split mode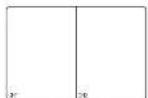
6-split mode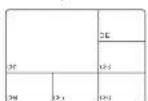
8-split mode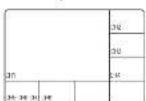
13-split mode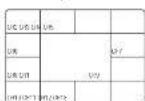
Auto Sequence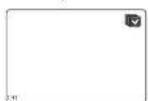
Single mode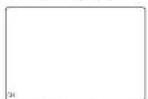
Switching the split mode
You can also play 64 Live channels in the sequence of: Single, 4-split, 9-split and 16-split mode.
Press the button in the launcher or use the right menu to automatically switch the screen.
Mouse right button menu → Screen mode → Auto switching mode
If you reach the end of the steps as outlined in the previous page, you will be moved to the first page and no automatic switching will be performed.
Auto Sequence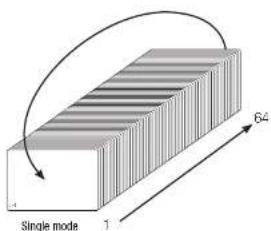
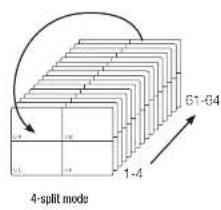
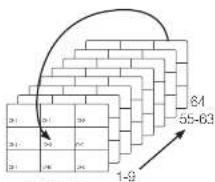
9-split mode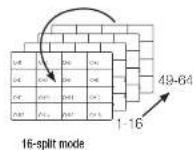
In a split mode, if you have set in "Setting the Device > Monitor", Auto Sequence will be conducted at the set interval. (Page 39) - When you switch the channel, the video may be delayed depending on the network condition.
Manual Switching
Click the arrow </> key to move to the next split mode.
- If pressing the right button in 16-split mode :
Channel (CH 01-16) → Channel (CH 17-32) → Channel (CH 33-48) → Channel (CH 49-64)
![graph LR A["Start"] --> B["Step 1: 2x1, 2x2, 2x3, 2x4, 2x5"] --> C["Step 2: 2x1, 2x2, 2x3, 2x4, 2x5"] --> D["Step 3: 2x1, 2x2, 2x3, 2x4, 2x5"] --> E["End"]](/content/2026/05/922951/images/bd26690886f2c304050d157c10f83057f8e5542eeda418a01928693786ba3990.jpg)
Status
You can check the connection information of the camera to be connected to each channel on the live screen.
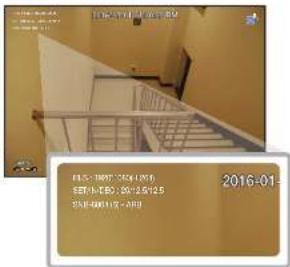
Channel info
If you select in the menu on the live screen, the information of an incoming video on the live screen that you are currently monitoring is output.

■ ARB is only displayed when an ARB situation occurs.
The letter marked next to the model name indicates the protocol used when registering the camera.
- S and V indicates Samsung protocol, O indicates ONVP and R indicates RTSP.
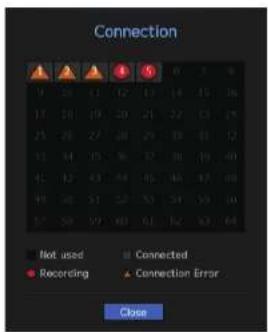
Connection
If you select in the menu on the live screen, you can check the connection state of the camera connected to each channel.
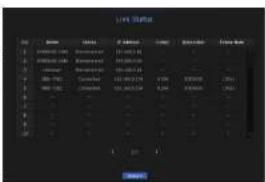
Live Status
If you select in the menu on the live screen, you can check the transmission information and state of the camera connected to each channel.
- Frame Rate: Displays the live profile transmission rate for a camera set to each channel.
- Model: Displays the camera model name connected to each channel.
- Status: Displays the status of camera connection set to each channel.
- IP Address : Displays the IP address of a camera set to each channel.
- Codec : Displays the live profile codec information for a camera set to each channel.
- Resolution: Displays the live profile resolution of a camera set to each channel.
If you select this under the menu on the live screen, you can check a channel's video type, recording type, number of input/recording frames, and allowed/input/recording data volume.
- Total Bitrate (Record/Max): Record bitrate shows the amount of actual data being recorded, while Total bitrate shows the maximum data transfer allowed by the NVR. • Profile: Shows the video profile configured for each channel.
- Frame (fps): Shows the input/record frames per second for each channel.
- Bitrate (bps)
- Limit / Input / Record: Shows the amount of limit/input/recording data for each channel.
- Input / Limit: Shows the data ratio of actual data
transferred from the camera and the allowed maximum defined by the user. - Current: Shows the recording status information of currently transferred data. MAX: Shows recording information of the largest recording data out of configured standard and event recordings. : Reloads the recording information. - Record Setup: The menu screen will switch to the record setting screen.
The warning message at the bottom of the list means that the NVR replaced the selected recording profile with another available profile, since the selected one does not produce video data, which prohibits screen saving. If the screen displays video, it automatically reads to the selected profile and its name turns yellow in the list.
- If Key Frame recording exceeds the allowed data amount specified by the limit bitrate, a popup alert and message appear on the screen. The limited recording alert popup does not repeat; after displaying once, unless camera or recording settings are changed, it may appear again if settings were changed to notify such status. If you want to set the alert popup not to appear, change your setting to not display a message popup. For further information on bitrate limit of recording data, refer to "Record Setting": (Page 41)

Channel Setting
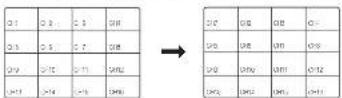
You can display the channel in a desired area of a split screen.
- Place the cursor over the camera name of each channel to display the <▼> key on the right side of the screen.
- Click a camera name to display a channel list where you can select a different channel.
- Select a desired channel and click it.
The current channel will be switched to the selected one.
Use the cursor to select a channel to move, and drag and drop it to a desired channel; this can also change the channel position.
Ex: if switching CH 1 to CH 7
Switching to Single Mode
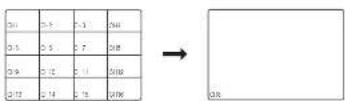
When in split mode, select and double-click a desired channel to switch to its Single mode.
Ex: If double-clicking CH 3.
ZOOM
This is activated only in Live Single mode.
After selecting a single screen, if you use the Magnify function, the selected area will be magnified by 3.
- In the live screen menu, select You can also click on < ◆ in the launcher menu. The Magnify icon in the middle of the screen will be displayed.
- Drag and drop with your mouse to select the area to magnify.
- Double click on it to magnify the selected area by 3.
- In the magnified screen, you can drag and drop the selected area for magnification.
- When you are zooming in, you can check the zoom level using the preview box.
- In the live screen menu, select . Click on < ∈ in the launcher menu to release the magnification function.
- You can disable the zoom-in function by double-clicking the preview box.
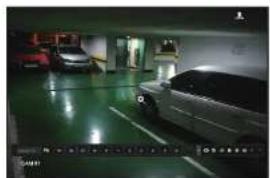
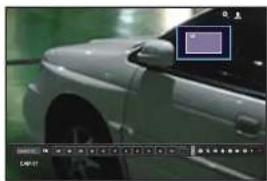
<3x zoom-in screen>
LAYOUT
In the live screen, you can set the layout for each channel.
Setting Up the Live Layout
This section outlines how to select a series of channels based on their purpose/accessibility and monitor them in a single layout.
Example) Layout "Lobby" - Lobby camera 1, Lobby camera 2, Front entrance camera 2
Layout "VIP" - Directors' meeting room 1, Directors' meeting room 2, Directors' lounge 1, Corridor camera on the 7th floor
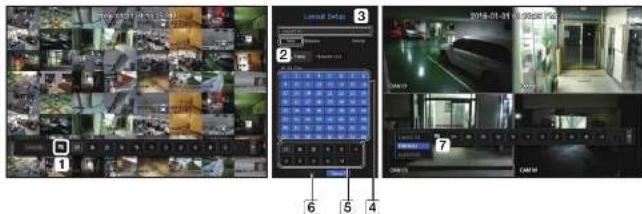
To create a new layout, follow these steps:
① Open the channel layout setup menu. ② Click [New]. ③ Enter a name for the selected channels (e.g., ELEVATOR). ④ Select the channels that you want to add to the layout (e.g., 2, 7, 10, 15). ⑤ Choose a split mode to apply (e.g., 4-way split). ⑥ Click [OK]. ⑦ Choose a layout to view it on the screen (e.g., change to ELEVATOR). 1. Select the < 周>
The layout setting screen will appear.
- New: You can set the new layout.
- Rename: You can make changes to the selected layout. When the layout is changed, the channel order is initialized.
- Delete: You can delete the selected layout.
- Channel Table: You can select channels in the table to be registered in, or removed from the layout.
- Channel List: You can select channels in the list to be registered in, or removed from the layout.
- Press the button and enter the name of the layout to add.
- In the or , click and select the channel to be displayed on the layout screen.
- Click on to save the selected layout.
■ The layout for each user is saved separately.
- You can use a configured layout even in the Search Time function to facilitate search using the channel sequence and combination that you have set. Refer to 'Time Search' (page 50).
AUDIO ON/OFF
You can turn the sound on/off corresponding to the channel in Live mode.
AUDIO ON/OFF in Single mode
Click on the audio icon (on the screen) to turn it ON/OFF.

- If you have configured the audio output settings properly but the audio or voice is not output, check if the connected network camera supports the sound signal and if you have configured the sound settings as appropriate. The sound icon can be displayed if the sound signal fails to output from noise.
- Only the channel where audio is enabled in "Setting the Device > Camera" displays the audio icon (☐) in Live mode, which you can use to turn the sound on or off.
FREEZE
This is available only in Live mode; it temporarily pauses the Live image.
- Click < 📄 > in the launcher mode. Video playback is paused.
- Click on < >. Pause is canceled. Playback resumes.
EVENT MONITORING
This displays the channel in sync with a specific event (Sensor/Motion/Video Loss) if it occurs.
In "Monitor > Event Display", set event monitoring to ON/OFF and specify the event display time. (Page 39)
- If multiple events occur simultaneously, the screen switches to a split mode. -2 - 4 events: 4-split mode
- 5 - 9 events: 9-split mode
- 10 - 16 events: 16-split mode
- 17 - 25 events: 25-split mode
- 26 - 35 events: 36-split mode -37 - 64 events: 64-split mode (For duplicate mode)
- If the second event occurs within the set time of the first, the first event will last until the second one is terminated.
Ex: If you set to 5 seconds, and only one event occurs in CI 1.
Event occurrence 5 seconds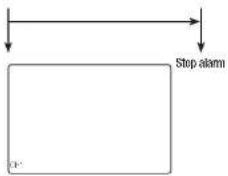

Ex: if you sell to 5 seconds, and the second event occurs in CH 2 within the set time after the first event occurred in CH 1.
Event occurrence 4 seconds 9 seconds![graph TD A["CH"] --> B["Stop alarm"] C["CH"] --> D["Stop alarm"]](/content/2026/05/922951/images/e015f119e9f5295463d53a581f79f10d4ce2b7285356672d7badddf8741c51d7.jpg)

- Select to initialize the status of alarm output and release the event function.
If an alarm is output with the pre-event and post-event times specified together with the event recording settings, the event recording will perform according to the specified recording type (pre event or post event).

- In case of continuous events such as motion detection, switching to another split mode display may not immediate if concatenating events follow, even when you stopped alarm of the event.
■ The video may be delayed depending on the network condition.
The event output can be delayed as the transfer of the alarm event from the network camera takes time.
CAPTURE
You can capture a screen selected on the live screen.
Function to perform in single channel mode on the live screen or when selecting a channel.
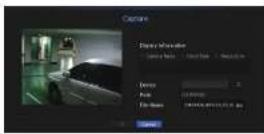
- Select from the live screen menu. You can click on < in the launcher menu.
- Select the output information to be displayed on the captured screen.
- When you select the check box, a window to enter a description is opened and you can enter up to 50 Korean letters.
- Select a device to save a captured file, file path and file name.
- Complete the settings and click, then the image captured from the screen is saved to the selected device.
The screen ratio for a live video can be changed.
Maintain a screen ratio for all channels
Video screen ratio for all channels can be changed in live split screen mode.
- Select from the live screen menu. The screen ratio for all channels will be changed.
- If you want to go back to the previous screen ratio, check the menu option for .
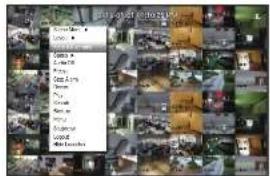
→
Maintain a channel screen ratio
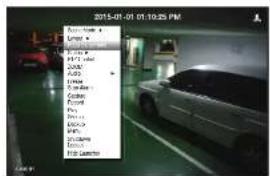
If you select a channel from a live single screen or split screen, you can change its video screen ratio.
- Select from the live screen menu. The screen ratio of a specified channel will be changed.
- If you want to go back to a previous screen ratio, select again.
→
DISPLAY TEXT
Change text output
The NVR can display text on a live screen when a text device is set.
Select text output
This is executable when a text device is connected.
- How to turn the text output off: Select 'OFF' from the text list.
- How to display on other devices differently from the preset device: Select a device to display from the text list.
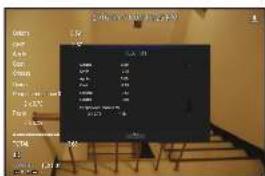
PTZ CONTROL
With this NVR, you can configure the settings of a PTZ camera as well as commercial cameras in the market to your preference.
PTZ device
This is active only if a channel that a PTZ camera is connected to is selected.
Getting started with PTZ operations
The PTZ camera will be activated only if the channel of the PTZ camera is selected, which can be performed in the following way:
- Using the launcher menu: Click > from the launcher menu of the Live screen.
- Using the Live screen menu: Select in the context menu of the Live screen.
- Using the icons on the Live screen: Simply click the SP12 > icon on the Live screen.
This is available only if a PTZ camera is connected and the icon is displayed on the screen.
Even if the connected network camera does not support the PTZ operations, you can configure the PTZ control settings (if possible) by installing the PTZ driver (physical device). - It only supports a network camera with Hanmina Techwin's PTZ function and a camera registered in the OMIE.
Using the PTZ camera
You can use a single PTZ camera to perform Pan, Tilt, and Zoom operations to monitor multiple places, and configure the custom settings of the presets in a desired mode.
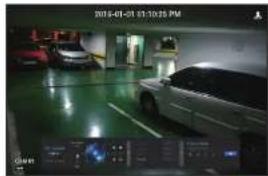
- Open the menu.
The
icon in the left bottom of the screen will turn yellow, indicating that the system accesses 'PTZ Control' mode. You will see the 'PTZ Control' launcher menu.

- The PTZ working (active) mark can be active even if the PTZ operation is not available in normal mode. So ensure that you have completed the PTZ settings before proceeding.
- Use the PTZ Wheel in the launch menu to adjust the location of recording by a camera.
- Sensitivity: Adjust sensitivity for Pan and Tilt controls.
- PTZ Wheel: Click a near area from the center to move the camera lens slowly; clicking a far area will move it fast.
- If clicking and holding the mouse on the left will turn the camera counterclockwise; if clicking and holding the mouse on the right will move the camera lens clockwise.
- Zoom: Activate the Zoom operation of the PTZ camera.
- Iris: Adjust the amount of light incoming to the camera.
• Focus: You can adjust the focus manually.
- Swing: Swing is a monitoring function that moves between two preset points and enables you to trace the motion.
- Group: The group function enables you to group various presets before calling them in sequence.
- Trace: Tracking remembers the trace of movements that you instructed and reproduces it for your reference.
- Tour: Monitor all the groups created by a user in turn.
- Some cameras may differ in the menu title and operation with regard to Swing, Group, Tour and Trace.

Even if the network camera supports the PTZ operations by default, the PTZ control can be enabled only if the applicable menu is active in the launcher menu.
Using Digital PTZ (D-PTZ) function
- Register a camera that supports the D-PTZ profile.
- In cameras that support the D-PTZ profile, you can use the D-PTZ function.
- Both cameras that support general PTZ and cameras that support D-PTZ can control the live image using some of the function menus.
- For more information about the supported functions, please refer to the camera manual.

Preset
Preset is a specific position remembered by the PTZ camera. You can use the Preset function to define up to 255 presets for a single PTZ camera.
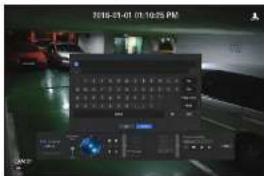
To add a preset
- Check the preset checkbox.
- Select < The virtual keyboard will appear on the screen. Use it to provide the preset name. ■ Rotor to "Using Virtual Keyboard". (Page 26)
• : You can change the preset settings to your preference.
• Delete a selected preset.
• : Delete all the existing preset settings.
- You can add up to 255 presets, which is the max count supported by the NMR.
If you replace a camera that saves your preset settings with a different one, you must configure the preset settings again.
- Select
The preset setting will be saved in the provided name.
To change or delete a registered preset
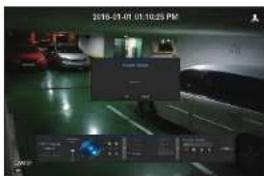
- Check the preset checkbox and select a preset to change or delete.
- Press < ■ > or < ■ > as needed. • : Delete all the existing preset settings.
- Provide a new name and press .
BACKUP
You can check the backup device and set the backup schedule by channel or by time.
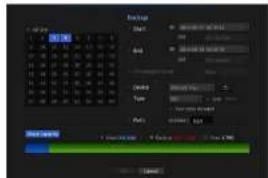
- Select from the live screen menu. You can click on <@> in the launcher menu.
- The backup settings screen will be opened. • Channel : Sets the channel to backup.
- You can select multiple channels.
If you select , all channels will be selected.
- Backup Range: Sets the and time for the backup. • Overlapped Data : Shows a list of overlapping data on a same time according to the number of data. It appears when one channel has multiple data on a certain time point due to changing of time or time zone settings, etc.
- Refer to time and time zone of "Setting the Date/Time/Language". (Page 25)
- Device : Select a backup device from the recognized devices. • Type : Sets the backup data format.
SEC : Saves data in the proprietary format with built-in viewer, which supports immediate playback on a PC. - N VR: Saved data can be played back only by the NVR. - When you select the SEC format, you can select or deselect "Password" and "Text data Included".
- Path : displays the location of the folder in which the backup file is to be saved.
- Check capacity: Shows the size of the selected backup data, used and available capacity of the selected backup device.
- When the backup setup is done, press .
- If no available device is recognized for backup. button is not activated.
- If you insert a USB memory stick with insufficient storage space, volume calculation may be disabled. Format the memory stick or delete some of the data on the memory stick to secure adequate storage space.
■ The application may slow down during the backup.
- You can switch to the menu screen during the backup in operation, but playback of data is not available.
- The data can be played back on a Webviewer while the backup is in progress but audio does not function.
- If backup has failed, select "Device > Storage Device" and check the tree space of the HDD and check also if the HDD is properly connected.
- Pressing the during the backup will return to the previous menu, while the backup progresses.
menu setup
You can setup the system, devices, and options for recording, event and network.
SYSTEM SETUP
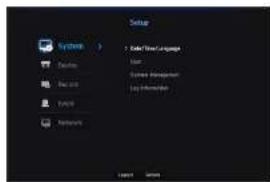
You can setup Date/Time/Language, User, System Properties and Log.
Date/Time/Language
Setting the Date/Time/Language
You can check and setup the current Date/Time and time related properties, as well as the language used for the interface on the screen.
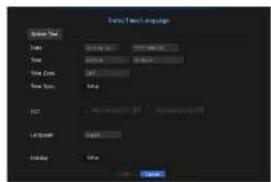
- Date: Sets the date and its format that will appear on the screen.
• Time : Sets the time and its format that will appear on the screen.
• Time Zone: Sets the time zone of your area based on the Greenwich Mean Time (GMT).
- GMT (Greenwich Mean Time) is standard World Time and the basis of world time zone.
• Time Sync.: Specify the use of synchronization with the time server.
Click the button to display time synchronization setup screen.
If you select to use the , the current time will be synchronized on a regular basis by the server defined as .
If this is the case, you cannot change the time setting manually.
- Synchronization : Specify the use of synchronization with the time server.
- Time Server: Enter an IP or URL address of the time server.
- Last Sync Time : Displays the most recent synchronization time from the selected time server.
- Activate as Server: Set to to allow the NVR to act as a Time Server for other NVRs.
- DST: Set up Daylight Saving Time with its period to make the time earlier than the GMT of its time zone by 1 hour during the set period.
- Language: Select your language. Sets the language for the interface.
English, French, German, Spanish, Italian, Chinese, Russian, Korean, Polish, Japanese, Dutch, Portuguese, Turkish, Czech, Danish, Swedish, Thai, Romanian, Serbian, Croatian, Hungarian, Greek, Finnish, and Norwegian are supported.
- Holiday: A user can select specific dates as holidays according to their own preferences. Holidays are applied in the or setting too.
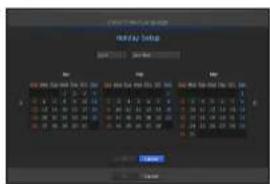
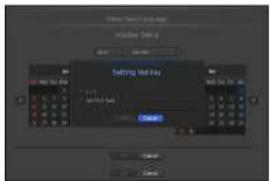
e.g. every first day of a year is set to be a holiday if you select January 1 and check <1/1>, and every first day of a year and every first Wednesday of January are sat to be holidays if you check <1/1> and .
To use the calendar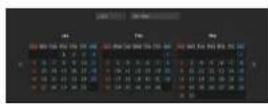
- Select year and month.
Select the <◀> key on both ends of year and month to move back/forward to the previous/next year or previous/next three months.
- Select a date and click on the button.
- A date is marked in gray if there exist data for search for system log, event log, time search and event search.
User
You can set permissions of each user over the NVR's specific function and settings.
Setting the Administrator
You can set and change Administrator's ID and password.
The administrator can use and set all menu items and functions.
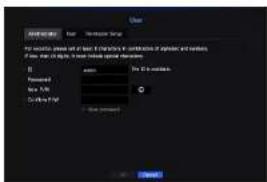
• ID : Change the admin ID.
- Password: Checks the current password.
- New P/W : Enter new password.
- Confirm P/W: Confirms the new password.
- If selected, the password will no longer be hidden on the screen when you type it.

- The initial administrator ID is set to "admin" and you will need to configure the password in the installation wizard.
- Please change your password every three months to safely protect personal information and to prevent damage to that information.
Please note that it is the user's responsibility for the security and any other problems caused by mismanaging a password.
- If you click < Ⓞ >, a basic guide for password setup is displayed.
Using Virtual Keyboard
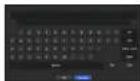
- For alphanumeric inputs, the virtual keyboard window appears.
- Using a mouse, click on the desired character tab.
- In the upper text input box of the virtual keyboard, a list of candidate words containing the selected character is displayed.
- Select a word from the list, or use the keyboard to enter the whole word.
- If there are many candidate words, use the < <> > buttons to move between them forward and backward.
- Select
Entered word is applied.
- For upper case letters, use button.
- For special characters, use button
- Using the virtual keyboard is the same as using a normal keyboard in your region.
- ID allows alphanumeric characters only.
- The password should be at minimum a 5-digit combination of alphabetical letters and numbers.

User setting
You can create a group or set permissions for each group. You can add a user and edit the registered user information.
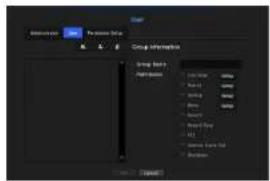
If you want to add a group
- Click on the [ ] button to launch the Group Addition popup window. If you want to add a group, click on .
- Press the group name item to launch the virtual keyboard used to enter group names. Enter the group name to register.
■ You can add a maximum of 10 groups.
If you want to set group permission
Set permission to access each group. Each group's users can only access items with a check mark beside them.
- Select the menu to set group permissions.
The menu with access permissions will appear when a user of the group logs in.
• Live View: You can set permissions to access the live screen for each channel.
- Search: You can set permissions to access the search menu for each channel.
- Backup: You can set permissions to access the backup menu for each channel.
- Menu: You can select and set the setting menu that can be accessed. A group user can only access the menu selected. If you select the menu, the menu permission setting screen will be displayed.
- Record Stop, PTZ, Remote Alarm Out, Shutdown: You can select these functions to add to a group's permissions.
- Click
Check a group user to give them the permission to access the selected item.
If you want to register a user
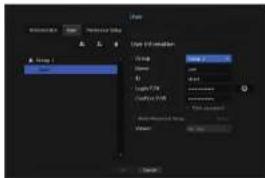
- Click on the | ▼ution to launch the user addition popup window. To add a user, click on .
- Select a group. When registering a user, the selected group will be automatically registered.
- A group can be changed after inputting all required information.
- Enter a name, ID and password (confirm password) and enable or disable the viewer option. If you activate use of , you will have the right to use the web viewer and the network viewer. If is selected, the password is no longer hidden on the screen when you type it.
- If you select the check box, a window that allows you to set multiple passwords will open. You can configure advanced settings for passwords.
- If the administrator or a user logs in after setting multiple passwords, the administrator or user should enter a registered BY passwords to access the backup and search function.
- Click . Registered user information will be saved.
When you want to delete the group and user information
- To delete, click on the [ ] button.
- The deletion confirmation window will appear and you can select an item to delete and click on .
Setting Permissions
You can set restricted access for all general users. Items with restrictions will require logging in for use.
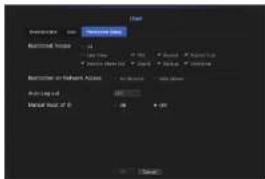
- Restricted Access: All menu items allowed for a user can be set with restricted access.
Checked ( ) Restricted - Not checked (■ Accessible
- If it is not checked (■) in , any user can access the item no matter what the setting. - If it is checked (■) in , a user can access the item only if the user has permission in setting.
- Restriction on Network Access : Restricts remote access from a network.
- All Network : Restricts all access instances via Network Viewer and Web Viewer.
- Web Viewer : Restricts access via the Web Viewer.
- Auto Log out: A user will be automatically logged out if there is no operation on the NVR for over a set period of time.
- Manual Input of ID: In the login window, select whether to enter the ID.
If the user has restricted access
If a new group is restricted from accessing the entire menus, the users belonging to the group can access only the basic menus and can change only their respective passwords.
If all permissions are restricted, you will see only some menu items accessible in the Live screen menu.
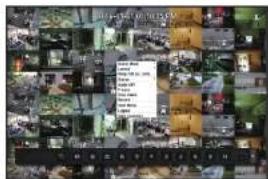
To change the user password
If you log in with the user account of a group with restricted access, you can only change your own password.
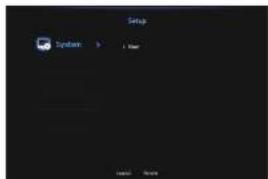
- Provide the login information.
- Select . The Permission Management screen appears.
- Select . The Password dialog shall appear.
- Provide a new password.
- Select . The old password will be changed to a new one.
Menu Setup
System Management
You can check the system version, update to a newer version, as well as data backup and initialization.
Checking the System Information
You can check the current software version and MAC address before proceeding with the upgrade.
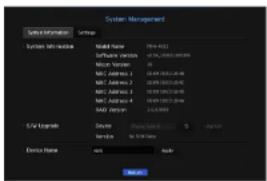
- System Information: Shows the current system's information. The values cannot be changed by a user.
- Model Name: Shows the model name of the product.
- Micom Version: Version of Micom.
- RAID Version: Shows the version of RAID that is supported by this product.
- S/W Upgrade: Updates the NVR's software up to date.
- Press the < button to search for and display the equipment to upgrade.
- Device Name: Displayed if the network viewer is connected to NVR.
To upgrade the current software version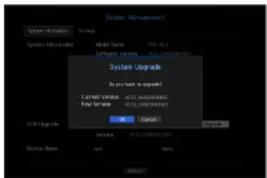
- Connect a device storing the software to be updated.
It may take about 10 seconds to recognize the device. Upgradeable devices include USB memory and network devices. - To update over the network, the current NVR should have been connected to the network. Upgrade via the proxy server may not be enabled due to restricted access.
- Select from the window.
- Select.
- When the recognized device appears, select it.
- If you connect a device in the upgrade menu window, you can press the < > button to search for available software.
- If there is an upgrade image on the network, the popup window will appear.
- The button will be activated only if the current version is the same as or older than that of the upgrade.
- Press the button in the 'S/W Upgrade' window.
■ While updating, it shows the progress.
- When the updating is done, it automatically restarts.
Do not turn the power off until it finishes restarting.

- If "Upgrade Failed" appears, retry from step 4.
If you experience continued failure, consult the service center for assistance.
Settings
You can copy and import the NVR settings by using a storage media.
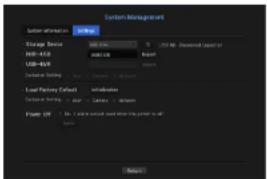
- Storage Device: Shows the connected storage device.
- Press the < button to view the list of storage devices.
- Export: Exports NVR settings to the connected storage device.
- Import: Imports NVR settings from the storage device and applies to the NVR.
- Uncheck the checkbox of an item(s) that you want to import. Only the other items than the selected one will be applied to the NVR.
- and settings should be used in the same software version.
- Load Factory Default: Restore the factory default settings of NVR. Uncheck the checkbox of an item(s) that you want to react. Then, only the other items than the selected one will return to the factory default. If is selected, a confirmation dialog for "Load Factory Default" prompts. Press to initialize the system to the factory default.
- Power off: If the power is off, the first alarm is generated. After checking the checkbox, if the button is pressed, all event alarms that are set to the first alarm output are released, and then the first alarm cannot be selected by other alarm output.
- If that function is set, the first alarm-out checkbox and all alarms in the alarm setup screen are deactivated, to Off.

- If you want to initialize the you need to reset the password.
If the robot is not working, reset it using the installation Wizard. If that doesn't work, use the guide screen to reset it.
Log Information
You can browse logs on the system and events.
Checking the system log
System Log shows log and timestamp on every system start up, system shutdown, and changes on system settings.
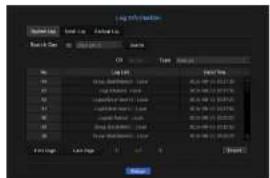
- Search Day: Click the Calendar icon to display the calendar window, or use the direction buttons to specify the search period of the system log.
- For using the calendar, refer to "To use the calendar". (Page 26)
- Search: Specify the date and press this button to display the search result in the log list.
- Type: When there are too many logs, you can display logs of the desired format by selecting the type.
- Export: Save all the logged information recorded in the NVR into the storage media.
Checking the event log
You can search recorded events including alarms, camera events and video loss. It also shows the log and its timestamp.
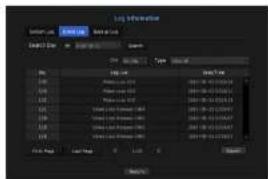
- Search Day: Click the Calendar icon to display the calendar window, or use the direction buttons to specify the search period of the system log.
- For using the calendar, refer to "To use the calendar". (Page 25)
- Search: Specify the date and press this button to display the search result in the log list.
- Type: When there are too many logs, you can display logs of the desired format by selecting the type.
- Export: Save all the logged information recorded in the NVR into the storage media.
Checking the backup log
You can find out who backed up and the details (backup time, channel, device to use, file format, etc.).
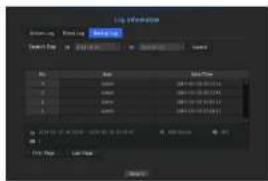
- Search Day: Click the Calendar icon to display the calendar window, or use the direction buttons to specify the search period of the system log.
- For using the calendar, refer to 'To use the calendar'. (Page 25)
- Search: Specify the date and press this button to display the search result in the log list.
SETTING THE DEVICE
You can configure settings related to camera, storage media, monitor and text.
Camera
To register a camera
You can register a network camera for each channel and make connection between.
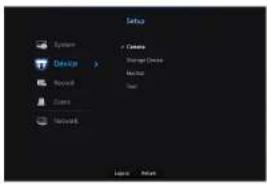
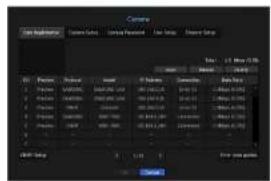
- Preview: View the video of the channel as a current image.
- Camera searched with CNMF does not provide previews.
- Protocol: Show the protocol information of a registered network camera.
- Model: Show the camera model name.
- IP Address: Display the IP address of a network camera.
- Connection: Display the connection status. • Data Rate: Displays the total amount of data received by the channel.
If the NVR has been initialized, it may not connect to cameras. Configure the network settings first and add cameras. For more information on network settings, refer to "Network Configuration" (Page 44).
To auto-search for and register a network camera
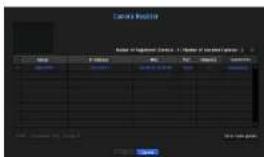
- In the field, click on the button.
- Search for a network camera connected.
- An already registered camera will be marked in blue in the list.
- If you search for the camera again or if the IP is an old IP that was not assigned by the DHCP server (such as -192.168.1.100), then press the < ☐ > button to check if a new IP has been assigned. If the IP is still the same, then select Assign IP to assign the IP manually.
- Select a camera from the camera list to see a preview of its current video feed.
- Camera searched with OMVF does not provide previews.
- Check the checkbox next to a network camera that you want to connect to.
- You can select all of the network cameras in the list and provide them all at once.
- Click a header at the top of the list to sort the list according to that header.
- Registering a camera with a user account other than admin may restrict camera function.
- When you change the camera ID/password in the camera web viewer, if the camera is already registered in the NVR, you also have to change the camera ID/password information registered in the NVR.
- Click on the button to enter the selected network camera's settings.
- Press the button to make a connection to a camera.
- Press to register the selected camera.
To manually search for and register a network camera.
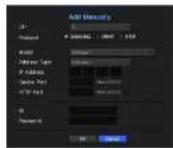
- In the menu, click on the button.
- The manual search window will appear.
- Select a channel and protocol used to connect to a camera. The input items may differ depending on the selected protocol. • SAMSUNG: Comply with the internal network protocols adopted by Hanwha Techwin.
- ONVIF: Means the camera supports ONVIF protocols. When connecting a camera whose name cannot be found from the list, select this option.
If the time difference between the ONVIF camera and NVR exceeds more than 2 minutes, the camera cannot be connected. In this case, synchronize the ONVIF camera's time to the NVR or set times of both camera and NVR to the same NTP server (if in the same time zone), or make the NVR an NTP server.
- RTSP: Comply with RFC 2326, one of "Real Time Streaming Protocol (RTSP)" for real-time streaming.
- If you select the protocol, check options as necessary.
- Model: Select a camera model.
- Samsung Network Camera/Encoder : Means the camera/encoder supports Hanwha Techwin's SUNAPI, SVNP protocol. When connecting a camera that does not appear in the camera list, select Samsung Network Camera/Encoder.
However, you must select the correct model name of the camera, if it's in the list. Some obsolete camera models may not be supported.
The below models are discontinued. If you register them with CNWIF, some camera functions will be restricted or cause errors. It is recommended you register the Samsung protocol. - SND-3200, SND-3000, SNC-B2315, SNC-B2331, SNC-B2335, SNC-B5368, SNC-B5395, SNC-B5399, SNC-570, SNC-1300, SND-460V, SND-560, SND-3080, SND-3080C, SND-3080F, SND-3080F, SND-3081, SNP 3301, SNP 3301, SNP 3350, SNP 3370, SNP 3370TH, SNP 3750, SNP 3800, SNP 3430
- Address type : Select an address type of the camera.
- Address type can be different depending on connected product model.
- Static(IPv4)/Static(IPv6) : Used to provide the IP address of the camera manually.
- Wisenet DDNS : This is available only if the camera is registered with the Wisenet DDNS(ddns.hanwha-security.com) server. Provide the registered domain for DDNS ID.
Ex) http://tdns.hanwha-security.com/snb5000 → provide "snb5000" for Wisenet. DDNS
URL : Used for URL address input.
- Refer to the user manual of the connected camera and check the DDNS specification that is supported by the camera.
- IP Address : Provide the IP address of the camera.
• Device Port : Provide the device port of the camera.
- HTTP Port : Provide the HTTP port of the camera.
• ID: Provide the ID of the camera that you want to register.
- Password: Enter the password of the camera to be registered.
- Select the protocol and enter your input for each field that appears.
- ONVIF Address / RTSP URL: Enter the camera's RTSP access address that supports ONVIF or RTSP. For more information about the RTSP address, refer to the manual of each applicable network camera.
• ID: Enter the ID for accessing via ONVIF/RTSP protocol.
- Password: Enter the password for accessing via ONVIF/RTSP protocol.
- Mode: If the button is clicked, a setup window will appear. Select a mode that is supported by the network camera in RTSP connection mode.
TCP: The connection type with the network camera will switch to "RTP over TCP".
UDP: The connection type with the network camera will switch to "RTP over UDP".
HTTP: The connection type with the network camera will switch to "RTP over TCP (HTTP)".
- HTTPS: The connection type with the network camera will switch to "RTP over TCP (HTTPS)".
If you want to check the error details of camera registration
If you failed to register a camera, the reason for the failure will be displayed.
- Connection failed due to unknown error.: This message appears if the camera has failed to be registered due to unknown connection status.
- Due to the camera account locking, access has failed.: When you enter a wrong ID/password 5 times to log in to the camera account, this message is displayed. Try to log in again after 30 seconds. If the same message appears, you may need to check whether someone has tried to access your camera account from the outside.
- Connected successfully. This message appears if the camera is connected successfully.
- Incorrect model information. Provide the correct model information. This message appears if the model information provided for registering the camera is incorrect.
- Authentication has failed. This message appears if the ID or password provided for registering the camera is incorrect.
- Connection has failed due to excessive concurrent users. This message appears if the concurrent user count exceeds the upper limit.
- Connection has failed due to incorrect HTTP port information. This message appears if the HTTP port number of the camera is invalid.
- Connection has failed. Unknown connection status. This message appears if the camera has failed to be connected due to an unknown error.
- User Model Modification: When registering a new camera, it is named according to the device's default if the user sets the model to . In case automatic registration fails, the user can change the model name of the camera to be registered.
To edit camera profile
When a camera is added for the first time, it is added as the default profile of H.264, H.265, and MJPEG in order temporarily.
To change its profile, refer to "Setting the network camera's recording profile" (Page 41) or "Live Setting" (Page 34).
In case of MrB, if you set 3 different profiles for live, recording, and network profile, one camera will produce video streams accordingly having different stream formats. Especially, note that the live profile may vary depending on the used screen split mode.
- For cameras, if applied with only one profile, the produced frame rate is fixed as the profile specifies; if applied with multiple profiles, the produced video stream's frame rate is not guaranteed. For example, if applied with 2 profiles of 30fps, the camera may transmit streams at 20fps.
ONVIF Setup
In the bottom of the camera addition screen, click on the button to set additional settings for cameras with the ONVIF protocol.
- You can change the information only if the user account (camera account used for camera registration) is used to read the user information and a connection is made with the admin privilege.
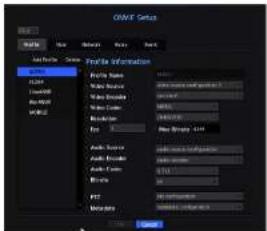
Profile
- CH: It shows the list of registered cameras with the ONVIF setting.
- Add Profile: You can add a camera profile. After adding a profile, click on the button to add it to the list.
- Delete: After selecting the profile to delete, click on the button to delete the selected profile. • Profile information: You can set the details of the selected profile. After finishing setting each item, click on the button to save changes.
User
- Add User: You can add a camera user. After adding a user, click on the button to add them to the list.
- Delete: After selecting the user to delete, click on the button to delete the selected user.
- User Information: You can set the details of the selected user.
Network
You can set the details of the network.
- IP Type: Select from either the IPv4/IPv6 IP types. • DHCP: Select whether to use the DHCP.
- DNS / NTP Server: Only if the DHCP setting is enabled, the DHCP checkbox will be activated.
- If the DHCP is checked, you can manually enter the IP address.
Relay
You can set details of the relay.
• Digital Output: You can select a digital output channel. - Relay Mode: Select either bi-stable or mono-stable modes. - Relay Idle State: Select either open or closed relay standby modes. - Delay Time: Select the relay operation waiting time.
Event
You can set details of the event. • Available events (camera): It shows the list of all the events supported by a camera by using the ONVIF protocol. - NVR supported events: You can map the list of events supported by a camera to events that the NVR can detect. There is no default value. It only shows the value sent by a camera.
Camera Setting
You can change the video settings of a registered network camera for each channel.
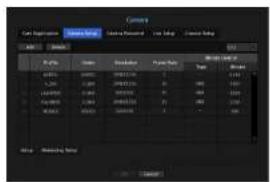
- Add: You can add camera profile. Click on the Add button to launch the addition window. Enter the information and click on the button to add it to the list.
- Delete: You can delete the selected profile from the list.
- Select Camera: Select the camera channel to change the video transmission settings. • Profile: Show a video profile for the connected camera.
- Codec: Show the codec information for the selected profile.
- Resolution: You can change the resolution of the selected profile. • Frame Rate: You can change the frame rate of the selected profile.
- Bitrate Control: You can change the bit rate for video transmission of the selected profile.

If you change the settings of a specific profile for each model, the effective range of the frame rate may be changed accordingly. Ex) if you set the frame rate of the first profile to 30fps, the frame rate of the second profile will be changed to 15fps.
- Menu options other than codec, resolution and transmission rate can be configured in the settings menu of the network camera.
- If you change the current profile settings, you may encounter an interrupted playback on the recording or live screen for a certain time.
- Changes made in Camera Setup page are applied immediately, while changes made through the camera's web page may require up to 3 minutes.
Setup
In the bottom of the camera setting screen, press the button to set your camera while watching the live video of the selected camera.

- SUNAPI (Samsung Unified Network API): Camera that supports the communication protocols provided by Hanwha Techwin 1. Camera supporting SUNAPI.
- A camera connected with admin privileges.
- A camera connected to Samsung protocols. In the above cases, you can use the function. ■ For more details on camera settings, refer to the camera user manual. Settings and operational spec vary depending on each camera. ■ This function is not supported in some models.
SSDR
If there is a significant difference between the dark and the bright areas, increase the brightness of the dark areas to maintain the level of brightness of the entire area. Mode. level, D-Range can be set.
Backlight
You can view both bright and dark areas.
Mode, WDR level, WDR black/white levels can be set.
Exposure
You can adjust the exposure of your camera.
Brightness control, shutter, SSNR, Sens-up, shutter/lens, and gains can be set.
Day/Night
You can change the mode to adjust the color and contrast.
Mode, switching time, brightness change, alarm time, alarm input/output, negative color, daytime/nighttime switching and simple focus, and activation time can be set.
Special
DIS (shaking compensation), use of Defog levels can be set.
Focus
You can adjust the focus of your camera's video.
Items of Simple Focus and Focus-Initialize Setting can be set.
Flip
Mirror and flip modes can be set.
Privacy
You can set an area to be hidden in the camera image range to protect privacy.

With a PTZ camera, it is not possible to configure settings, and when it is permitted, the setting area may be incorrect.
After finishing with setting camera, click on the button to move back to the previous screen.
Dewarping Setup
Press at the bottom of the camera settings screen and a distortion correction settings window for each channel is prompted.
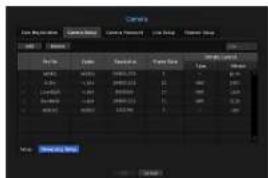
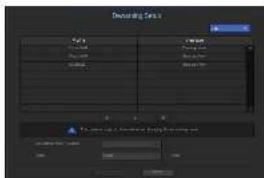
- Profile/View type: You can select the view type of profiles, except for fixed profiles (SourceMJPEG, SourceH264, DewarpMJPEG, DewarpH264) whose settings can't be changed, in the profile list on the distortion correction settings pop-up window.
- Mounting mode: You can change the fisheye installation type. You can select a view mode from among CEILING/GROUND/WALL depending on the installation location.
- View: You can change the fisheye view mode of the current screen according to each split section.

- If there is no camera registered in the NVR that supports fisheye view, will not be available.
Menu setup
Setting Camera Password
You can change the passwords of all registered cameras at once.
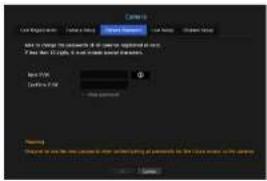
- New P/W : Input a new password according to the password setting rules.
- Confirm P/W : Input the new password again.
If you click < ① >, a basic guide for password setup is displayed.
- If is selected, the password is no longer hidden on the screen when you type it.
- A camera password registered with OMIF and RTSP cannot be changed.
Password setting guide
The length and limitations of a password are as follows.
- Uppercase letters/lowercase letters/numbers/special characters, containing at least 3 out of the 4 character types mentioned: 8 or 9 digit combination
- Uppercase letters/lowercase letters/numbers/special characters, containing at least 2 out of the 4 character types mentioned: 10 to 15 digit combination
- The password shall not be identical to the user ID. To enhance security, it is not recommended to use repeated digits or letters, or keyboard patterns as a password.
- Special characters accepted for a password: \~100%^0_+-=|H|.??
Live Setting
You can change the live transfer settings of the network camera.
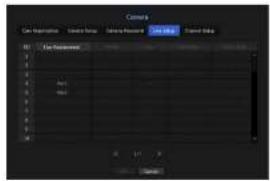
• Live Replacement: You can select the live profile setup mode. If you select , the profile setup items are enabled, and you can change settings manually. - Auto: In case of split mode, the profile for live monitoring shows the Live4NV/R profile?basic: H.264 800*600 30fps created at the time of registration and it automatically selects the second profile in case of single mode. - Manual: Live monitoring is performed with the profile selected by the user from the registered camera profiles. - Record: Live monitoring is performed with the profile set for recording. • Profile : You can select the video profile of the connected camera setting. - Codec: Show the codec of the selected recording profile. - Resolution: Show the resolution of the selected profile. • Frame Rate : Show the frame rate of the selected profile.
Channel Setting
You can configure the video settings for each channel.
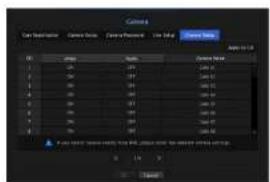
- Apply to CH: If you select , the 'Apply to CH' confirmation window will appear. After selecting channels that the settings will be applied to, click on to apply them to the selected channels. • Video
- : You can turn ON/OFF the selected channel's camera.
- : Shows information other than the video of the selected channel. For privacy protection, it does not display the video while the recording continues.
- : Shows nothing but an empty screen while the recording continues.
If the channel is set to or mode, the channel's sound is not hearable. However, the channel's sound is recorded if its Audio setting is set to , even the sound is not heard in Live mode.
• Audio
- If set to , you can turn the audio of the channel ON/OFF on the Live screen.
- If set to , the channel's audio is off on the Live screen and not recorded.
- Camera Name : Provide a camera Name.
■ You can enter up to 15 characters including space.
Storage Device
You can check information on storage devices.
Device/Format
You can check storage devices and their capacity, usage as well as status. HDD, ISCSI and USB (memory or HDD) can be connected as a storage device.
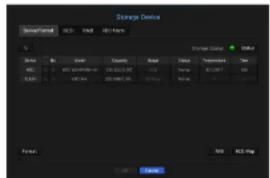
- Storage Status : Displays the working status of a storage device. - Red : Displays the situation of video loss.
- Green : Displays the normal situation without video recording losses.
- Status
■ Full BPS : Displays the current rate of recording.
■ Current Loss Rate : Displays the current recording loss rate. - Max Loss Amount: Displays the maximum amount of losses up until now. ■ If loss is continuously generated, check the following.
For more information, refer to the "Troubleshooting". (page 80)
When data is received due to a system malfunction (reset the video transmission volume of the camera) - When there is a problem in HDD recording performance due to an HDD malfunction (check the HDD error or replace the HDD)
• No. : You can check the designated number for the built-in HDD. - If you want to find out about the location corresponding to the HDD number, refer to the . - Capacity: Displays the amount of storage device use and the full capacity. - Usage: Designate the purpose of use for a storage device. (However, only the display function is available for RAID, iSCSI and ARB) - If the state of use is in "Not Defined", format the HDD before use.
- Status: Displays the current working condition of a storage device.
For inspection or replacement of HDD alarms, please refer to 'HDD Alarm Setting.' (Page 38)
- Normal : It is displayed during normal operation.
- Inspection : Operating with partial problems.
In the case of the RAID Array, it is displayed when status is displayed as Degraded or Rebuilding.
- Replacement: It is displayed when you can no longer use it.
In case of the RAID Array, it is displayed when there is a system failure.
- RAID(?) : Unknown RAID. It is an HDD that used the RAID in the past. Currently, the RAID is not used. If you organize the RAID again, it will be included in the full format. To use the general HDD, you need to format it first.
- Unknown : The RAID array is installed in the currently used slot, but the HDD does not constitute the RAID.
- Temperature: You can check the temperature of the HDD mounted in the NVR. • Time : Displays the use time of an HDD.
- Format : Select a device and click on format after which a format confirmation window appears. Click on the button to format the selected storage device.
- Formatting will delete all the recording data that has been saved. Be careful.
■ While formatting is ongoing, you cannot record video. - Do not remove a formatting device until it is finished. - If you mount an HDD configured as RAID on the RAID Array which uses Individual HDDs, the HDD installed will be displayed as RAID (?). If you format RAID (?), the RAID configuration will be disassembled and the list of Individual HDDs mounted on the RAID Array will appear. - You can't use a RAID and an individual HDD at the same time (when you use a single RAID Array and mount an individual HDD on a different Array, the HDD is displayed as RAID (?) and is unable to be formatted. - With no RAID Array used, if an HDD used as a RAID is additionally installed but is displayed as "RAID (?)" or "Not Defined", format it before use. - After installing an HDD, if the state of use of the HDD is "Not Defined", format the HDD before use (if the warning message persists after formatting, replace the HDD with a new one).
- ARB: Video that was not recorded due to a camera disconnection can be backed up after the connection with the camera is re-established. Press the button and a window is opened.
- For ARB storage: Select a storage device to be set to ARB.
Select ARB channel: Select a channel to run the ARB.
■ You can select multiple channels. If you select , all channels will be selected.
- ARB bandwidth: Select a bandwidth for the ARB function.
- Only our camera products (SUNAPI version 2.3.2 or higher) support the ARB function. To use this function, the camera will need to record video on the SD card.
To use the ARB function correctly, both the camera and NVR should be time synchronized with the time server. (Page 25) - ARB function is activated when MVR starts/when the channel camera set is reconnected/when an NVR recording missing section recurs at regular intervals after NVR starts. - MVR recording missing section that can be restored with the ARB function is for 24 hours backwards from the point when the ARB function is activated. - You can check which channels have ARB function activated through the message on each channel screen that is displayed when selecting a channel. (Page 19) - You can check a file that has been automatically recovered by ARB using the "ARB Search" function. (page 52)
- HDD Map: You can check the location according to the assigned number for the HDDs installed inside.
■ Refer to this when servicing or installing an additional HDD.
Do not add or remove an HDD while NVR is running (except for rebuilding or degrading RAID).
menu setup
Connecting the iSCSI
If you connect the NVR with an iSCSI device, you can search, connect and disconnect the iSCSI device.
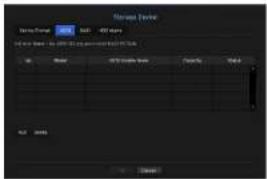
- iSCSI Usable Name: It displays the name of iSCSI in compliance with the iSCSI protocol format.
- Capacity: Displays the currently used amount and total capacity of iSCSI devices.
- Status: Displays the status of an installed iSCSI device.
List of supported products
Promise Technology vessRAID 1740i / 1840i / 2600i and JBOD 3ca
Adding an iSCSI device
- In the iSCSI window, click on the button.
- On the Auto Add screen, enter the IP address and the connecting port, and click .
- In the list, click on a device to add.
- After entering ID/password, click on the button.
Canceling registration of iSCSI devices
- In the list, select an iSCSI device to delete.
- Click on the button to launch the Delete window.
- If you click , the iSCSI device is removed from the list.
For an iSCSI device, use a dedicated iSCSI port.
- When using a hub to connect an iSCSI device with NVR, make sure to use a GbE hub and to use an independent network to save data normally.
- When you perform single directional CHAP authentication in Vers. RAID, an ISCSI code in compliance with the IVR, you need to use the ISCSI Manual Add function to make a connection to ISCSI.
- If multiple NMRs try to access a single ISCS device, it can cause a problem.
- When the MVR is connected to an iSCSI device, if you change the iSCSI equipment setting, a problem can occur.
- A IDD to be mounted in vess RWD should be listed in the RWD compatibility list.
- It is recommended that you configure each volume for an iSCS device with a maximum of 16 HDD.
- When you register an ISCSI device in the NVR for the first time, you need to format it first.
■ The iSCS fun mapping function is supported.
- If you activate the lun mapping function in the ISCSI device, the lun can only be connected to an NVR which is mapped.
- More than one mapped lun should be available to connect to the initiator when using lun mapping.
RAID mode setting
If you enable the RAID (Redundant Array of Independent Disks) mode, when a system HDD is damaged you can restore data safety. This NVR supports RAID level 6/level 6. RAID Level 5 that is supported by the NVR can restore motions and data only for a malfunction of 1 HDD among the HDDs comprising the RAID array, while RAID Level 6 can restore motions and data for a malfunction of 2 HDDs among the HDDs comprising the RAID array.
In this NVR, you can organize two RAD. The first RAD uses only the HDDs installed in HDD slot 1 to 6, and the second RAD uses only the HDDs installed in HDD slot 7 to 12.
- If the RAID has 5\~6 HDDs installed, you can operate and organize it.
- You can use RAID level 6 only if a single RAID has 6 HDDs mounted in it.
- If you configure RAID on an individual HDD, a beep will sound and the pop-up message "HDD connection status changed. Please check the HDD connection." will appear. This is normal.
- This phenomenon occurs because the number of individual HDDs defined by MVR, which was at least 5 before configuring RAID, decreases after RAID is configured, and it does not affect the recording function of MVR and the use of RAID and HDDs.
Even for typical HDDs, the phenomenon of a decrease in the number of HDDs in use also occurs, but this does not have any effect on the NVR recording function and the use of HDDs.
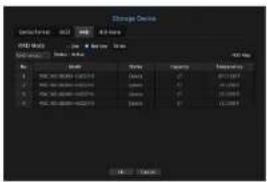
- Status: Displays the operational status of the RAID.
- Active: Signals the fact that the RAID is operating normally.
- Degraded: It is displayed when one or more HDDs that make up the RAID are malfunctioning. When the maximum number of HDDs allowed in the RAID level are malfunctioning, if an additional HDD malfunctions, you cannot use or restore the RAID. Immediately, replace the HDD and proceed with restoration.
- For more on how to replace the HDD and to restore the RAID, refer to "Recovering RAID Array" (Page 37).
- Rebuilding: It means that a RAID is being restored. When the maximum allowable number of HDDs in the RAID are being rebuilt (due to malfunctioning), if an additional HDD malfunctions, you cannot use or restore the RAID.
- Fall: This means that the RAID cannot be used or restored.
- Status: Displays the current operating condition of the HDDs installed in a RAID.
- Active: Displays that the HDD is operating normally.
- Faulty: It displays that the HDD is malfunctioning. You need to immediately replace the HDD for smooth recovery of the RAID.
- Check: A problem occurs on the HDD, requiring replacement or inspection.
- Ready: If recovery of 2 HDDs is required in the RAID 6 state, HDDs for which rebuild is pending are displayed. • Capacity: It shows the total capacity of the HDDs that compose a RAID. • Temperature: You can check the temperature of HDD(s) that compose a RAID.
RAID mode setting
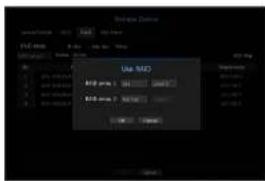
- Click on the or button.
- In the RAID window, select the RAID settings and click the button.
- Use/Not Used: You can select whether or not to use the RAID mode.
- Level5/Level6: It shows the type of RAID supported by the NVR.
- It will show the list of HDDs that compose a RAID. In the RAID screen, click on the button.
- The data deletion and system rebooting message window will appear. You can click the button to reboot the system for RAID mode setting.
- When RAID building is complete, select - - - to check the build.
When you build the RAID in level 5, the available capacity of a RAID is (the least HDD capacity) x (total number of HDDs - 1). When you build the RAID in level 6, the available capacity of a RAID is (the least HDD capacity) x (total number of HDDs - 2).
- If you use HDDs with different capacities, the HDD with the smallest capacity will be used to build a RAID.
- If you deactivate the RAID mode, all the RAID will be deselected. If you want to select a single RAID to be canceled, a particular RAID to be deactivated may be selected in the setup window.
- If the status of HDD is displayed as Inspected/replaced in the device/format page, you cannot use it to build a RAID.
- When the RAID mode is in use, it is recommended to use HDDs with the same storage space from the same manufacturer.
If you enable or disable the RAID mode, existing data will be deleted. You make sure to backup your data.
Recovering RAID Array
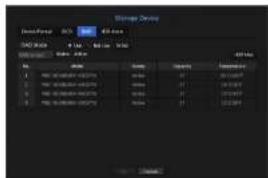
- If the number of HDDs for which the Faulty/Check indicator is displayed on the is identified, check the position of the HDD to be replaced on the HDD map.
- Replace the malfunctioning HDD from the NVR with a new HDD.
- When recovery starts, the LED for the replaced HDD will blink in orange. The menu will show the progress of recovery.
Replace it with the same model of HDD or an HDD of the same capacity from the same manufacturer.
- A HDD used to build the RAID should be one of the recommended models. If it's not possible to use the same model of HDD, then use the HDD with the same capacity from the same manufacturer. If you remove the power cord while using the RAID, it can damage it, so be careful. For reliable power, it is recommended you use the UPS.
- A new HDD to be replaced should be one that is not RAID configured.
Use Joystick
The SPC 2000 joystick is operated as follows:
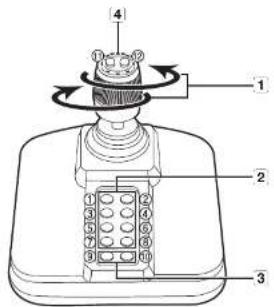
| Name Function | ||
| 1 | Up/Down/Left/Right | In PTZ mode, the camera can be panned, tilt, and controlled in 5 directions.The webviewer only supports the PTZ mode.In Screen mode, the top/bottom/left/right tile can be selected.When you press the Near/Far button while controlling with the joystick, you can perform control simultaneously. |
| Rotation | In PTZ mode, the screen is zoomed in when it is rotated clockwise and zoomed out when it is rotated counterdoxkose | |
| 2 | 1~8 | In PTZ mode, precels number 1~8 are run.Screen mode works as follows:1: Changing two layout / 2: Search3: Backup / 4: Zoom mode5: Freeze mode / 6: Audio7: Alarm / 8: Rec |
| 3 | 9 | It allows to exit PTZ mode in PTZ mode.The webviewer won't be able to stop the PTZ on its own.This is used to change to PTZ mode from screen mode. |
| 10 | It allows to exit PTZ mode in PTZ mode.The webviewer won't be able to stop the PTZ on its own. | |
| 4 | 11, 12 | In PTZ mode. Focus Near/Far operation is run.When using the screen mode, the same operations can be done by moving the mouse. |
HDD Alarm Setting
For HDD malfunctions, you can set the inspection alarm output terminal, the replacement alarm output terminal, the iSCSI alarm output terminal and the alarm time.
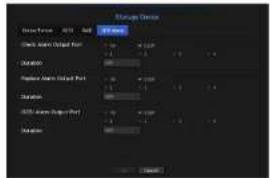
• Alarm
- If was selected, both beep sound and alarm signal through rear side ports will output.
- If was selected, a beep will sound.
- Alarm signal will output through the alarm out port on the rear side when selected <1>, <2>, <3>, and <4>.
- Check Alarm Output Port: If HDD generates check alarm, the alarm signal will output to the specified alarm output port.
- Replace Alarm Output Port: If HDD generates replace alarm, the alarm signal will output to the specified alarm output port.
- iSCSI Alarm Output Port: If a connection to your iSCSI device is lost, a signal is sent to the designated alarm terminal. • Duration: Sets the alarm duration for the alarm signal and beep sound.

- status means that the HDD is operating but it has problems that require technical examination.
(50ears on the live screen.
If a RAID is degraded or rebuilding, < 1/2 > will appear on the live screen.
- status means that the HDD has defect and requires immediate replacement.
(5) Appears on the Live screen.
If a RAID has failed, < 30%> will appear on the live screen.
Monitor
You can set the information displayed on the monitor as well as the output system.
Monitor settings
You can configure the monitor output-related settings including the displayed information, dwell time and output system.
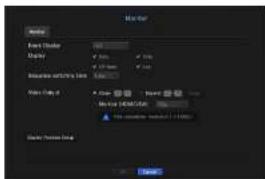
- Event Display: Sets the dwell time of the event channel display on the monitor when an event occurs. If you set it, it will keep displaying until you cancel it.
- Display: Displays only checked items on the monitor screen.
- Sequence switching time: Set the automatic switching time for the segmented screen in live mode.
- Video Output: Selects either mode to output the video, and sets the resolution of it.
Clone mode: You can set the resolution of the main monitor (HDMI) and the sub monitor (VGA) as identical to each other.
- When operating in copy mode, if the resolution is set to a value exceeding 1080p, no image will be displayed on the sub monitor.
Expand mode: You can separately set the resolution of the main monitor (HDMI) and the sub monitor (VGA).
To set an expansion monitor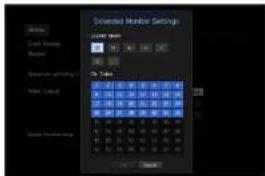
- Select the Expand mode, then the button to change the layout of the expansion monitor is enabled.
- Select split mode in the layout mode.
- Select as many channels on the channel table as the number of channels selected in layout mode, and you can view the applicable screens on the monitor.

- If the new resolution does not fit the monitor, the output will not be displayed normally. In this case, wait until the monitor returns to the default resolution and then change to a different resolution.
- Specify the event display time and dwell time in consideration of the video delay depending on the network environment.
- The profile used for the live output of the expanded monitor is "Live4MVR". If the user changes the Live4MVR profile, the video output on the monitor may be affected.
- Resolution of up to 1080p is available for an expanded monitor.
- Resolution of up to 720p is available for the live video input to an expanded monitor.
- 64 split screen mode is only available in Duplicate mode, and 32 split mode is available for the main monitor in expansion mode. Spot monitor supports a split of up to 32.
To adjust the display position
Some monitors may not display information (camera name, icon, time information, etc.) about the NVR, depending on the condition. Then, you can change the display position of the data.
- From the monitor setup menu, select .
- Use the number button to adjust the screen that is cut off.
- Press .
menu setup
Text
Device and events can be set up.
Device Settings
Relevant values of a device connected to NVR can be set.
• Device : Enter the user's desired name • Use : Select whether or not to use - CH: Select a channel to add a device from a channel table. - Port : Display a port number that is set - Encoding type : Select an encoding type to use from a list. - You can select starting and ending character strings.
General characters, special characters, and Hex codes (e.g. 0x12, 0x34) can be used for character strings.
- Equipment connected to NVR uses TCP/IP communication protocol.
Event Settings
You can set up event keywords.
- Total amount : Set a total amount condition to receive alarms.
- Keyword: If the button is clicked, a screen to add keywords pops up. If you select one of the added keywords to delete and click the button, the selected keyword will be deleted.
SETTING THE RECORDING
You can set up scheduled recording, event recording, and other recording-related settings.
Recording Schedule
Make a reservation on a date and time to schedule the recording at a specified time.
- AI: The entire time range (Monday through Sunday, including holidays, AM 0--PM 23) will be reserved with the same recording schedule.
- Apply to CH: If you select, the 'Apply to CH' confirmation pop-up window will appear. After selecting channels that the settings will be applied to, click on to apply them to the selected channels.
Event recording and scheduled recording start about 3 seconds prior to the event/schedule for guaranteed recording.
Record setting by color
| Color Function Description | |
| No Color No Recording No schedule / event recording | |
| Green Continuous Scheduled recording only | |
| Orange Event Event recording only | |
| White Both(Com)Ent Both scheduled / event recordings |
Each press of a selected cell will cycle through -- -- --
Recording performance spec for the HDD condition Unit: (Mbps)
| Storage method Rcv | Save | Remotetransmission | PlaybackInternal | |||
| iSCSI | ||||||
| Normal | Rebuilding | |||||
| Internal (RAD5j) | 400 | 400 | 320 | 300 | 300 | 32 |
| Internal (RAD6j) | 400 | 400 | 320 | 300 | 300 | 32 |
| Single HDD | 400 | 250 | - | 250 | 300 | 32 |
| iSCSI | 300 | - | - | 300 | 300 | 32 |
※ Internet/ISCSI storage performance is based on an individual use scenario.
Record Setting
You can set resolution, IPS, and quality of recordings by channel, and by recording type of standard/event. You can check frame rates and data transfer amount of Full Frame and Key Frame recordings for each channel, and set the transfer limit for recordings.
- Apply to CH: If you select, the 'Apply to CH' confirmation window will appear. After selecting channels that the settings will be applied to, click on to apply them to the selected channels.
- Standard, Event: Configures Standard recording and Event recording.
- FULL: Records all frames fed by the camera.
- KEY: Records only key frames fed by the camera. Actual recording rate may differ from camera settings. In general, 1 to 2 frames per second are recorded.
- OFF: No recording is made.
- Frame
- FULL: Shows the amount of data for all the scene recordings.
- KEY: Shows the amount of data for the main scene recordings.
- Limit: Set the amount of data allowed for input for each channel. • Event: When an event occurs, you can set which point you will start or stop recording.
- Pre: When an event occurs, recording will be started regardless of the time set.
If you set it to five seconds, recording will start at five seconds before an event occurs. Post: When an event occurs, recording will continue after the time set. If you set it to five seconds, recording will continue for a further five seconds after an event is finished.
- Audio: Specify whether to record the sound received from the camera or not.

If a channel's data transfer exceeds defined allowed limit, then it may affect other channels, and may force switching to recording even when the channel is configured to recording mode. For key frame recording channels, the icon for limited recording appears on the live screen's top side. But if the sum of the limits is below the max limit, you can still receive the entire frames despite exceeding the permitted bitrates for each channel.
A channel displayed in yellow indicates that the recorded data is not being transferred from the camera and that the recording is being performed temporarily using another profile on the camera.
Check the channel information to see the applied profile to the channel listed in yellow.
A channel displayed in orange indicates that the amount of inputted data is greater than the permitted data amount. In this case, it is impossible to record all of the incoming frames.
Instead, only part of the frames (1 or 2 frames per second) can be recorded. To resolve this issue, you must set the permitted data amount to be greater than the amount of inputted data.
Refer to notes on "Record status". (Page 19)
Setting the network camera's recording profile
You can configure the video profile settings for instructing the network camera (connected to each channel) to make recording.

- You can configure the settings only for the profiles that are supported by the camera.
- If the profiles used for recording and network are different, camera's video feed may not comply with the frame rate as specified in the camera.
• Profile : Select a record profile for the connected camera. - Codes: Show the codes information for the selected record profile. - Resolution : Display the resolution for the selected record profile. - Frame Rate : Display the baud rate for the selected record profile.
Record Option
When the HDD capacity is full, you can set whether to stop recording or start overwriting.
- Disk End Mode : Select a HDD repetitive recording type.
- Overwrite: If the HDD is full, this will overwrite the existing data and keep recording.
- Stop: If the HDD is full, this will stop recording automatically.
- Disk End Beep: If you select this for the disk end mode, this button will be active. Specify the use of a beep when the HDD recording ends. If you check it, the beep will sound when the disk is full and recording stops.
- Auto Delete: If you check this option, the period list box becomes active. Specify the deletion period to delete any data earlier than the specified date. However, you can search for data from the current time to the selected date.
- If you select this as a method to end recording, the button is enabled.
- You can select a channel and set a different recording duration for each channel.
- Apply to CH: If you select this, a confirmation dialog window opens. Select a channel to apply the applicable settings, then press the button. The settings will be applied to the selected channel.
- If you press this when you have completed your settings, all existing data earlier than the specified period will be deleted automatically. So it is recommended to back up the previous data if necessary for later use.
SETTING THE EVENT
You can make the setup for recording in case of sensor detection, camera event, or video loss detection.
Sensor Detection
You can set the sensor's operating condition and connected camera, as well as alarm output and its duration.
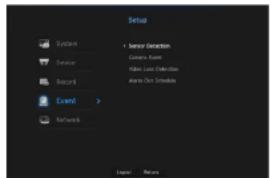
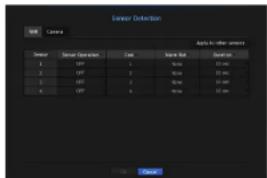
- Apply to other sensors: If you select this, the 'Apply to other sensors' confirmation window will appear. After selecting channels that the settings will be applied to, click on the button to apply them to the selected channels.
- Sensor Operation: Sets the operation mode of sensors.
In the tab, you can set whether or not to use a sensor.
- : Sensor is opened. If the sensor is closed, it generates an alarm.
- : Sensor is closed. If the sensor is open, it generates an alarm.
- Cam: Select a channel to be connected to the sensor.
If a camera is selected, the "Cam Preset setup" window appears.
Select a channel and set up the preset.
■ Preset setup can be done in PTZ mode.
- Alarm out: Sets the alarm output method.
- For further information on alarm output, refer to "HDD Alarm > Alarm" (Page 38). • Duration: Sets the duration of the alarm signal and alarm sound.
If you select the tab, you can configure the sensor operation settings of the network camera connected to each channel.
If the connected network camera that has configured the alarm input settings triggers an alarm, the NVR will perform the alarm out.
Camera Event
You can set the activation of events (motion detection, video analysis, audio event) sent from the camera, the alarm output method, and the alarm time.
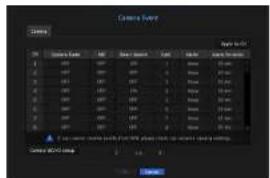
- Apply to CH: If you select , the 'Apply to CH' confirmation window will appear. After selecting the channels that the settings will be applied to, click on to apply them to the selected channels.
- Camera Event: Select whether to use event detection.
- MD: Select whether or not to use motion detection from the camera. • Smart Search: Enables or disables the Smart Search option.
- To use the smart search function, the smart search option must be set to . Refer to "Smart Search" (page 5.1).
- Cam: Select an event detection channel. If you select a camera item, the 'Camera preset' screen will appear. Select a channel to connect and set the preset. ■ You can set the preset in PTZ mode.
- Alarm: Select the method for alarm output. For more details, refer to "HDD alarm > Alarm" (Page 38).
- Alarm Duration: Set the duration of the alarm.
- Camera MD/VA setup: You can set the detailed settings for motion detection on a connected network camera.
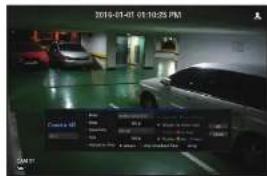
- Mode: Sets the Motion/Video analysis detection mode.
- Area: Click on it, and when the detailed setup menu appears, set the motion detection area.
- Sensitivity: Set the sensitivity for motion detection (very low/low/medium/high/very high).
- Size: Click on it. When the detailed setup menu appears, set the maximum and minimum size of the object to be detected.
Activation Time: Select the operation time for motion detection.
After finishing the setup, click the button to return to the previous screen after saving the settings.
Video Loss Detection
You can set the camera to trigger an alarm if it is disconnected or if video is lost due to an unstable network connection.
- Apply to CH: If you select it, the "Apply to CH" confirmation window will appear. After selecting the channels to which the settings will be applied, click to apply them to the selected channels. • Video Loss State: Specify whether to use video loss detection.
- Alarm Out: Select an alarm output method.
- For further information on alarm output, refer to "HDD Alarm > Alarm" (Page 38).
- Alarm Duration: Specify the duration of the alarm output with the beep.
Alarm Out Schedule
You can set the conditions and operating hours for scheduled alarms.
![A## 0.5.3.2016 [1] [2] [3] [4] [5] [6] [7] [8] [9] [10] [11] [12] [13] [14] [15] [16] [17] [18] [19] [20] [21] [22] [23] [24] [25] [26] [27] [28] [29] [30] [31] [32] [33] [34] [35] [36] [37] [38] [39] [40] [41] [42] [43] [44] [45] [46] [47] [48] [49] [50] [51] [52] [53] [54] [55] [56] [57] [58] [59]…](/content/2026/05/922951/images/deaa2ff36b1e8656b53486d92d55b9675186a31adec5ba5d7f953068bff7d45a.jpg)
- Alarm Out: Sets the alarm output method.
- For further information on alarm output, refer to "HDD Alarm > Alarm" (Page 38). : Marked in green, and always generates alarm on scheduled time.
- : Marked in black, no alarm is generated even if an event occurs.
- : Marked in orange, generates alarm only when an event occurs.
- Apply to All Alarm out: Applies the configured schedule to all alarms.

- When the alarm is generated on the scheduled time, you can stop the alarm by canceling the schedule.
It provides networked monitoring of Live screen from a remote place, and supports mail forwarding function with events. You can configure the network environment which enables such functions.
Interface
You can set the network connection route and protocol.
Setting a network connection
Sets the protocol and environment of the network.
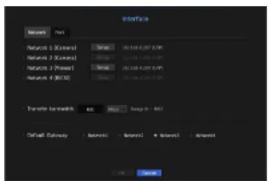
• Network 1 (Camera) : Port recommended for camera connection, which receives an image from the camera.
- When a UTP cable is connected, UTP is displayed on the screen, and when a Fiber Optic Cable is connected, OPTIC is displayed on the screen.
• Network 2 (Camera): Port recommended for camera connection, which receives an image from the camera.
- When a UTP cable is connected, UTP is displayed on the screen, and when a Fiber Optic Cable is connected, OPTIC is displayed on the screen.
• Network 3 [Viewer]: Port used to send video to the web viewer.
• Network 4 (iSCSI): Port to make a connection to the external iSCSI.
• Network 1 (Camera) / Network 2 (Camera) / Network 3 (Viewer) / Network 4 (iSCSI) setup
- IP Type: Select a network connection type.
- IP Address, Subnet Mask, Gateway, DNS
: You can manually enter IP address, subnet mask, gateway and DNS.
: IP address, subnet mask and gateway values will be automatically set.
: IP address, subnet mask and gateway values will be automatically set.
- User ID, Password: If you set the connection mode to PPPoE, you need to enter "User ID" and "Password" to register in PPPoE.
- Transfer bandwidth: Enter the maximum amount of upload data bandwidth.
Check the assigned setting in Connection Mode before entering your value.
- Default Gateway: Set the basic gateway by using Network1 / Network2 / Network3 / Network4 setup.

- You can manually input DNS of and when it selected to .
Connecting and Setting the Network
Networking may differ from the connection method, check your environment before setting the connection mode.
When no router is used
- Static mode
- Internet connection: Static IP, leased line, and LAN environments allow connection between the NVR and remote user.
- NVR Network Settings: Set the in menu of the connected NVR to .
- Consult your network manager for IP, Gateway and Subnet Mask.
- DHCP mode
- Internet connection: Connect the NVR directly to a cable modem, DHCP ADSL modem or FTTH network.
- NVR Network Settings: Set the in menu of the connected NVR to .
- PPPoE
- Internet connection: A PPPoE modem is directly connected to the NVR, where the PPPoE connection requires user ID and password.
- NVR Network Settings: Set the in menu of the connected NVR to .
- PPPoE and should be the same to the PPPoE user information.
If you don't know the ID and password, consult your PPPoE service provider.
When a router is used

- To avoid IP address conflicts with the MFR's static IP, check the following:
- Setting the NVR with a static IP
- Internet connection: You can connect the NVR to a router that is connected to a PPPoE/Cable modem or a router in a Local Area Network (LAN) environment.
- Setting the NVR Network
- Set the [IP Address] in the menu of the connected NVR to [Static IP].
- Check whether the set IP address is in the static IP range provided by the Broadband Router, IP Address, Gateway, and Subnet Mask: Consult your network manager.
- Check whether the set IP address is in the static IP range provided by the Broadband Router.

- If a DHCP server is configured with starting address (192.168.0.100) and end address (192.168.0.200), you should set the IP address out of the configured DHCP range (192.168.0.2 - 192.168.0.99 and 192.168.0.201 - 192.168.0.254).
- Check that the Gateway address and subnet mask are equal to those set in the Broadband Router.
- Setting the DHCP IP Address of the Broadband Router
- To access the Broadband Router's configurations, open a web browser on the local PC that is connected to the Broadband Router and enter the router's address (e.g., http://192.168.1.1).
- At this stage, configure the local PC's Windows network settings as shown in the example below: Example IP: 192.168.1.2
Subnet Mask: 255.255.255.0 Gateway: 192.168.1.1
- Once connected to the Broadband Router, it prompts for a password. While leaving the User Name field empty, enter "admin" in the password field and press to access the router configuration.
- Access the router's DHCP configuration menu and enable its DHCP server, then provide the start and end addresses. Set the start address (192.168.0.100) and end address (192.168.0.200).

- The above steps may differ depending on the router manufacturer.
Port Setting
- Protocol Type: Select the protocol type among TCP, UDP - Unicast, and UDP - Multicast.
- Device Port: Enter the connectable port number. Initially, <554> is set.
- TCP: It has better stability and lower speed compared to UDP, and is recommended for internet environments.
- UDP Port: Initially, <8000~8159> is set. It increases/decreases by 160.
- UDP: It has less stability and faster speed compared to TCP, and is recommended for local area network (LAN) environments.
- Multicast IP Address: User can directly input.
- Multicast TTL: Select from 0~255. Initial value for the TTL is set to <5>.
- HTTP Port: Enter the port number for the Web Viewer. Initially, it is set to <80>.
- Send SSL: Select this option to send SSL.
- Backup Bandwidth: Select the degree of backup bandwidth.
DDNS
If a remote user accesses the network, you can set whether or not to use DDNS and the site to be connected.
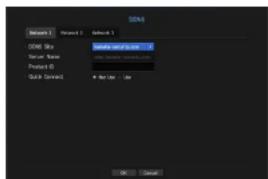
- DDNS Site: Specify the use of DDNS and select a site that you registered.
- Host Name: Provide the host name that you registered with the DDNS site.
- User Name: Provide the user ID that you registered with the DDNS site.
- Password: Provide the password that you registered with the DDNS site.

■ Refer to "Using Virtual Keyboard" (Page 26).
■ If you select , the input box will be inactive.
- If you select , the host name input box will be inactive.
- Quick Connect: Appears if the is selected for a . To use the function, set to after connecting the NVR to a UPnP router.

- If canceled during Quick Connect configuration, it automatically switches to and saved.
To check Quick Connect status
A progress bar and its message appears for a Quick Connect.
- Quick Connect Success: Message for a successful connection.
- Invalid Network Configuration: Message appears if the network configuration is not valid. Check the configuration.
- Please enable UPnP function of the router: Message appears if the router requires UPnP function enabled.
- Failed to find the router: Message appears if the router is not found. Check the router's configurations.
- Please restart the router: Message appears if the router should be restarted.
Menu Setup
DDNS Setting
DDNS is a short form of Dynamic Domain Naming System.
DNS (Domain Name System) is a service that routes a domain name consisting of user friendly characters (ex: www.google.com) to an IP address consisting of numbers [61.233.189.104].
DDNS (Dynamic DNS) is a service that registers a domain name and the floating IP address with the DDNS server so that the domain name can be routed to the IP address even if the IP is changed in a dynamic IP system.
- Setting DDNS in the NVR
Set in the menu of the connected NVR to the following:
Ex) Protocol Type: TCP
Port (TCP): 554, 555, 556, 557, 558
DDNS Site: hanwha-security.com
• DDNS Settings of the Router
Select the corresponding menu for the network transfer protocol of the router.
- Setting up UPnP of Router
Refer to the router's documentation to enable the UPnP function of the router.
IP Filtering
You can prepare the list of IP addresses to allow or block access to a specific IP address.
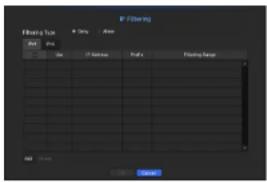
- Filtering Type :
- Deny: If you select reject, access to the registered IP address will be limited.
- Allow: If you choose permit, then they can only access the registered IP addresses.
- Use: Select the checkbox for the IP address that will use IP filtering. • IP Address : Enter the IP address for filtering.
- Filtering Range: If you enter an IP address or prefix, then the range of IP addresses blocked or permitted will be displayed.

- If a camera's IP address is not included in the Permit list or is in the Reject list access to it will be rejected.
SSL
You can select a security connection system or install public certificates.
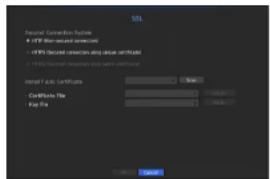
- Secured Connection System: You can select a type of security connection system.
- HTTP (Non-secured connection)
- HTTPS (Secured connection using unique certificate)
- HTTPS (Secured connection using public certificate)

- If the MVR device is connected to the external internet or installed in an environment with high priority for security, making a secure connection is recommended.
• Install Public Certificate : You can scan and register public certificates to be installed.
If you want to use a certificate, you need to install a certificate file along with an encryption file.
- The menu can be selected only if there is a registered public
certificate.
802.1x
When connecting to a network, you can select whether to use the 802.1x protocol and install a corresponding certificate.
802.1x is a certificate system for the server and the client. It can guarantee robust performance against hacking into the Tx/Rx network data, virus or information leaks.
By using this system, you can block access from a client who is not certified and only allow communication to certified users and thus increase the level of security.
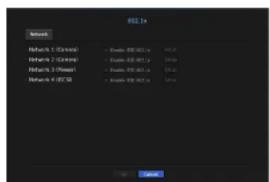
- EAPOL Version: Select the EAPOL version to be used as protocol.
- Some switch hubs will not operate if you set them to version <2>. Select version <1>. • ID : Enter the ID provided by the RADIUS server administrator.
- If the entered ID does not match the ID of the client's certificate, it won't be processed properly.
- Password: Enter the password provided by the RADIUS server administrator.
- If the password you entered does not match that of the client's private key, it won't be processed properly.
- Certificates: Search for a device. Click to search for a device again.
- CA Certificate: Select this only if your public certificate includes the public key.
- Client Certificate: Select if the public certificate includes a client's authentication key.
- Client Private Key: Select it if the public certificate contains the client private key.

- For successful implementation of the 802.1x operating environment, the administrator must use the RADIUS server. In addition, the switch hub connected to the server must be a device that supports 802.1x.
- If the time setting of the RADIUS server, the switch hub and an MVR device do not match, communication between them can fail.
- If a password is assigned to the client's private key, the server administrator should confirm the ID and password. The ID and password allow up to 30 characters each. (It only supports letters, numbers and special characters (*-, "", * - 3 types) only.
Accessing non password-protected files is allowed without entering a password.
■ The 802.1x protocol adopted by the MVR is EAP-TLS. - You need to install all three certificates to use 802.1x.
Live Streaming Setting
You can set the video profile transmitted to the network.
When you set a live profile to Manual, this profile will be used for the output of the expanded monitor.
• Profile: Select a network profile for the connected camera. - Codec: Show the codec information for the selected network profile. - Resolution: Display the resolution for the selected network profile. • Frame Rate: Display the frame rate for the selected network profile.

- If the profiles used for network and recording are different, the camera's video feed may not comply with the frame rate as specified in the camera.
You can send an e-mail to a NVR-registered user at a specific time interval, or if an event occurs.
SMTP Setting
Sets the SMTP mail server.
- Server Address: Enter the SMTP server address to connect to.
- Port: Sets the communication port.
- Use Authentication: Check this if the SMTP server uses user authentication. The account input box will be activated.
- ID: Enter an ID to use authentication when connecting to the SMTP server.
- Password: Enter the password of the SMTP server user.
- Secure Transfer: Select one from and .
- Sender: Use the virtual keyboard to enter the sender's e-mail address.
- Refer to "Using Virtual Keyboard". (Page 26) • E-mail Test: Conducts the test on the server settings.
Event Setting
You can set the interval and type of the event that will be sent to the user.
• Event Interval: Set the event interval. If a series of events occurs, the e-mail will be sent at the specified interval, not on each event. • Use Event Transfer: Select an event type to send if an event occurs. If the selected event occurs, the e-mail will be sent to the group that has the recipient authority.
Menu Setup
Recipient Setting
You can create a group and add users to it, or you can delete users and change a group.
- Click on <■> to add a group.
Select a group name and the privilege.
- Select a recipient group to receive emails.
If a group is added, it will appear in the group list.
- Click on to add a recipient.
Select a group and enter names and email addresses.
If a group is created, you can add a recipient.
- For inputting the recipient name and email address, refer to "Using Virtual Keyboard" (Page 26).
SNMP
Using the SNMP protocol, the system or network administrator can monitor the network devices remotely as well as the operating environment.
![File (SDF-1) File (SDF-2) Model: [ ] [ ] [ ] File Name: [ ] [ ] [ ] File Type: [ ] [ ] [ ] File Date: [ ] [ ] [ ] [ ] File Edit: [ ] [ ] [ ] [ ]](/content/2026/05/922951/images/e9a8ebf39c22e0f1da4d06ff56a7c03b24c9fc882709d39382ae5124b6efd7f0.jpg)
- Enable SNMP v1: SNMP version 1 is used.
- Enable SNMP v2: SNMP version 2 is used.
- Read Community: Enter the name of the read-only community to access SNMP information. By default, it is set to public.
- Write Community: Enter the name of the write-only community to access SNMP information. By default, it is set to private.
- Enable SNMP v3: SNMP version 3 is used.
- Password: Set the initial user password for SNMP version 3.
- Enable SNMP Traps: SNMP traps are used to send important events and conditions to the Admin System.
- Trap Manager: Enter the IP address to which messages will be sent.

- SNMP v3 can be set only if the security connection method is set to HTTPS mode.
Refer to "SSL" for more details. (Page 46)
DHCP Server
You can set the internal DHCP server and assign an IP address to the network camera.
Network Setting
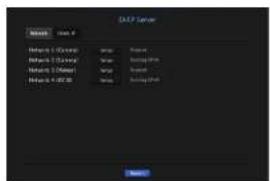
- Network 1/2/3/4: Select the network, and you can set the IP range operated by the server and the lease time.
To set the DHCP server
- On the DHCP Server Setup window, click .
- Select in the field.
- Enter the starting IP and end IP in the field.
- Fill in the field.
- Click .
The IP range entered is set as the DHCP server address of the network.
Check IP
You can check the IP Address and Mac currently used through the DHCP server, and the connected network port.
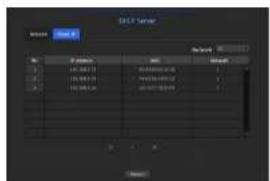
• Network : Select the network port to check the information on IP and others.
Failover
Functions allowing other devices in a ready-state to perform recording if the NVR device can't perform recording due to network error.
Up to 32 'Normal' devices can be connected to a single 'Standby' device.

For a device to be configured for troubleshooting, both the camera and the viewer port must be connected to the local network.
- All devices should be the same mode when performing troubleshooting. ■ Troubleshooting network interface supports IPv4 only.
- The time of all devices should be synchronized. For more information about the time synchronization settings, refer to 'System Settings'. (Page 25)
- The network IP bandwidth should be set differently in the MVR.
Example of IP in a different bandwidth
Example 1: IP : 192.168.1.200, subnet 255.255.255.0
In the Example 1 above, since 255 of the subnet corresponds to 192.168.1, any IP in a format of
192.168.1.x has the same bandwidth.
An IP in a format of 192.168.2.x has a different bandwidth with an IP in a format of 192.168.1.x.
Example 2: IP : 172.16.1.200. subnet 255.255.0.0
In the Example 2 above, since 255 of the subnet corresponds to 172.16, any IP in a format of 172.16.x.x has the same bandwidth.
An IP in a format of 172.17.x.x has a different bandwidth with an IP in a format of 172.16.x.x.
- For detailed network settings, please refer to 'Network Configuration' (Page 44).
To set troubleshooting
- Set a device to 'Standby' and set the rest of the devices to 'Normal' mode.
- Enter the viewer port ID and administrator's password of a 'Standby' device that you wish to connect from a device set to normal mode, and press the button under the status bar.
- Check the IP and status of the 'Normal' devices connected to the 'Standby' device.
- Mode: Select either mode.
- Normal: Device in recording operation. It is monitored by the Standby device.
- Standby: Device that is in a ready-state, not performing the recording operation. It performs the recording operation instead of the Normal device that is out of order.
In the case of normal mode
- Standby IP (All): Enter the viewer port ID of a standby device to access.
- Standby Password: Enter the administrator password of the standby device. • Status: Displays the current connection status.
- Access or Disconnect button: Click the button to access or disconnect the access.
In the case of standby mode
- Device list/Status: Shows the current state of the normal device(s) connected to the standby device. To delete a connected normal device, click the button on the right side of the device.

- For a Standby device, you can only use limited functions in the . and menus. You can't use the and menus.
- Activating the troubleshooting operation while playing a video or backing up a section in the Standby device will stop the previous operation and a live image will be displayed.
| State name Descriptions | |
| Ready | Ready to be connected |
| Connected | Normal and standby are connected (troubleshooting mode available) |
| Fallover | Troubleshooting is being performed |
| Connected fail | Connection was attempted but failed |
| Authentication failure | Authentication failed due to incorrect standby password when attempting connection |
| Connected(Match Time Required) | Connected but not time synchronized with the standby equipment |
| Connected(check camera port IP) | Situation in which the IP bandwidth of the camera port does not match even in a case of connecting from the camera port of a normal device to the viewer port of a standby device or to the port of the same viewer |
| Connected fall(check camera port IP) | Situation in which connection from the camera port of a normal device to the camera port of a standby device has been attempted, but it failed to establish connection |
| Connected fail (It is a different model.) | Attempted to establish a connection between different models but failed to establish connection |
When troubleshooting is performed (example)
- Subnet 1 -> Network 1 (camera)
- Subnet 2 -> Network 2 (camera)
- Subnet 3 -> Network 3 (all)
![graph TD A["Router 1"] --> B["Subnet 1 / Subnet 2"] B --> C["Router 2"] C --> D["Subnet 3"] D --> E["Switch"] E --> F["Normal"] E --> G["Unknown"] style A fill:#f9f,stroke:#333 style B fill:#ccf,stroke:#333 style C fill:#cfc,stroke:#333 style D fill:#fcc,stroke:#333 style E fill:#cff,stroke:#333 sty…](/content/2026/05/922951/images/a41b5e6119001d56ee4da5487ae1da46c317e066fddb9164b462a80353f3afeb.jpg)
Search & Play
SEARCH
You can perform the search for recorded data by time or by search criteria such as an event. You can access the menu directly in Live mode.
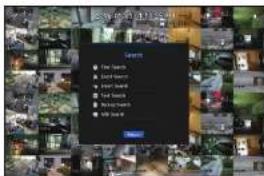
- In live mode, right-click with your mouse button. The Live menu appears.
- Select .
- The Search menu should appear.
- The search can be restricted by the Auto Delete function. Refer to 'Setting the Recording > Record Option'. (Page 42)
Overlapped data: It only appears if there exists overlapped data on a certain time, produced due to the change of MVR's time setup. The latest data comes first, from . It does not appear in .
■ The search time is based on the time specified by NVR.
Time Search
You can search for recorded data of a desired time.
The displayed time is based on the local time zone and the daylight saving time (DST). Therefore, data recorded at the same time from different areas may differ based on the time zone and the DST.
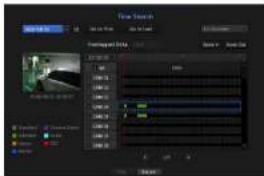
- Select in the menu.
- In the date selection window, click on the < ♦ > button to select a search date. ■ For using the calendar, refer to "To use the calendar" (Page 25)
- The record data on the specific date will be listed.
The display bar is different according to the data type. So check the data type for the color in the left pane.

- If DST (Daylight Saving Time) is configured, overlapping multiple recordings may be produced for a certain moment of time. Such a time section is distinguished with red color to mark DST section.
- Go to First : Move to the earliest recording date.
- Go to Last: Move to the latest recording date.
- Select Layout: You can perform search according to the layout that the user wants using the channel(s) and the channel sequence designated by the user in live mode.
- Time: Enter a time to perform the search or use the up/down button <◆> to select one.
- Zoom in: The map enlarges in detail. It will switch in the sequence of 24 hours - 12 hours - 6 hours - 2 hours - 1 hour.
- Zoom Out: The map will switch in the reverse order of the detailed mode above. It will switch in the sequence of 1 hour - 2 hours - 6 hours - 12 hours - 24 hours.
- Preview: Click and select (click, drag) a time to display a still image for that portion.
- If the selected channel does not contain any recorded data, it will be marked black.
- Select a data item and click . The screen switches to the data playback mode.
Color indications depending on current recording status
The recorded data types are represented through the use of different colors. Each color corresponds to a certain recording type.
Event Search
You can search for events by the channel and play them.
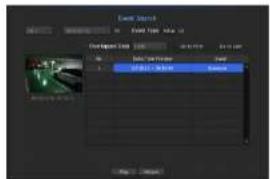
- Select in the menu.
- Configure the channel, search date and event type settings.
- Depending on the menu selected, it will search for all/motion detection/video analysis/audio detection/sensors/reservation/general recording events.
- Date/Time Preview: If you select a data item in the list, the still image of the selected data will be displayed in the left preview pane. • Event : Displays the type of the event that occurred.
- Select a data item and click . The screen switches to the event data playback mode.
Smart Search
You can select a specific area of the image as an area of interest or exclusion using a virtual line to perform a search of events that have occurred in a specific time period.
- To perform smart search, the option in should be turned and the camera motion event option must be set to the entire area (page 43).
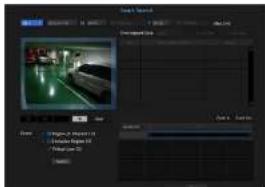
- In the menu, select .
- Configure the channel, search date and time settings.
- Go to First: Moves to the oldest smart search result.
- Go to Last: Moves to the most recent smart search result.
• Event : Displays the type of event generated.
- Region of Interest: The entire screen is set as a non-detection area and a specific area designated as a detection area. Click and drag on the image or select 4 vertexes to designate a desired detection area.
- Exclusive Region: The entire screen is set as a detection area and a specific area designated as a non-detection area. Click and drag on the image or select 4 vertexes to designate a desired non-detection area.
- Virtual Line: Detects a motion towards a marked direction based on the virtual line. At a desired position on the screen, click or drag the start point and end point of the line.
- Up to 3 areas of Interest, areas of exclusion and virtual lines can be set, respectively.
- Click the button.
- Search results displayed include a list. timeline and thumbnail.
- When you double-click a list or thumbnail displayed as search results, the applicable data can be played back.
- Select data to play and click .
Moves to the playback screen for the data searched.
Text Search
You can search data that was entered into POS systems connected to NVR.
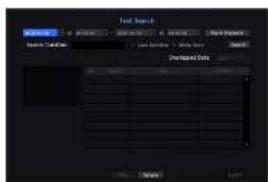
- Select from the menu.
- Please specify the search criteria and click the button.
- A deeper and more detailed search can be performed by using specific characters.
- Search characters: Enter characters using a virtual keyboard.
- Event Keyword: Search using a condition set in the "Device > Text > Event settings" menu. (Page 40)
- Search Condition: Enter a word to search in the input screen and press the button.
; If this option is checked, the search terms are case-sensitive.
: If checked, only results that exactly match the input words will be displayed.
- Time overlap: This is displayed if there is data duplicated during a preset time interval.
- Preview screen: If data is selected from a list, a preview image is displayed.
All information is displayed in the text display below.
- Export: Stores all text search information recorded in NVR to storage media.
- Select data and .
Moves to a replay screen for searched text data.
search & play
Backup Search
Searches for backup data in the connected backup device. Only data in the format of NVR is included in the search.
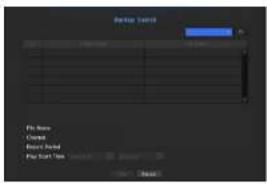
- Select in the menu.
- When storage media with data is connected, the list of recordings stored is displayed on the equipment.
- File Name : Displays the name of a file recorded. • Channel : Displays the recorded channel. • Record Period : Displays the record period.
- Play Start Time: Select a time that you start playing.
- Select data to play and click . The screen switches to the backup data playback mode.
ARB Search
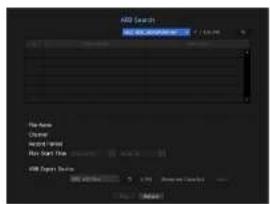
- Select from the menu.
- For ARB search, the option in should be enabled. (page 35)
- The type and model name of the ARB storage device are displayed. When storage media with data is connected, the list of recordings stored and ARB data volume are displayed on the equipment.
- File Name: Displays the name of a file recorded. • Channel: Displays the channel recorded. • Record Period: Displays the duration of recording.
- Play Start Time: Select the time at which the video is to be played.
- ARB Export Device: Selects an ARB storage device and exports a file.
- Press the < □ > button and you can check the free space remaining in the storage device.
- Select data to play and click .
The screen moves to the ARB backup data play screen.
PLAYBACK
Play
You can play data stored in the HDD and backup a desired portion of the data.
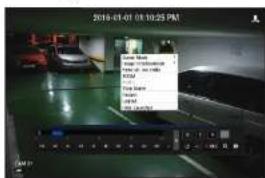
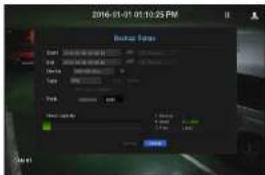
- In the live screen menu, select the menu or click on <▶> in the launcher menu.
- Select a menu for searches.
- If this is the first time you try to play, you will start with the data search window.
For data search, refer to "Search", (Page 50)
- Select a data item and click in the Search menu.
The selected data is played and the play launcher appears on the screen.
- If there is existing data, playback will start immediately without performing the search.
- Playback Information: Displays the date and time of the current data in the top corner.
- Backup: Click < ☐ > to set the current time to the start time of backup: you can specify a backup area using the mouse (yellow triangle).
Click < > again to set the current time to the end time of the backup and the "Backup Range" window appears.
Type: Supports formats of NVR and SEC.
- When you select the SEC format, you can select or deselect "Text data Included".
Device: Select a backup device.
Check Capacity: Enables you to check the capacity of the selected storage device.
- If you want to go back to the live screen during playback, then click on < ■ > of the launcher menu.
Checking menu while playing a video
- Right-click on the play screen.
Screen menu appears on the play screen.
- Select a menu to run.
For more information about each menu, please refer to the "Split Mode Menu". (Page 16)

- Totals made only appears in single screen mode. You can rotate the play screen by 30 degrees.
Using the Playback Button
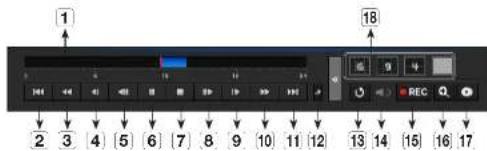
| Name Description | |
| 1 | Play Timeline indicates the current playback point, and can be used to move. |
| 2 | Skip Backward Moves backward by unit time. |
| 3 | Backward Fast Play Used to rownd a video.(Supports x1, x2, x4, x8, x16, x22, x64, x1, x2 and x4 speed) |
| 4 | Backward Slow Play Used to rownd the video at a slow speed.(Supports x1/2, x1/4, x1/5, x1/2 and x1/4 speed) |
| 5 | Step Backward Moves backward by one frame at a time. |
| 6 | Pause Stops playing the current video temporarily. |
| 7 | Stop Stops playback and moves to the live screen. |
| 8 | Step Forward Moves forward by one frame at a time. |
| 9 | Forward Slow Play Used to play the video forward at a slow speed.(Supports x1/2, x1/4, x1/5, x1/2 and x1/4 speed) |
| 10 | Forward Fast Play Used to play a video forwards.(Supports x1, x2, x4, x8, x16, x22, x64, x1, x2 speed) |
| 11 | Skip Forward Moves forward by unit time. |
| 12 | Playback settings You can configure the settings for fast play, save play and skip in detail.- Settings may be applied differently depending on the number of channels. |
| 13 | Return Return to the search setup screen. |
| 14 | Audio Sets Audio ON/OFF. |
| 15 | REC Records all channels in Live mode. |
| 16 | ZOOM This is available in Single mode, which will enlarge the video from a selected channel.To cancel the zooming, simply double-click the enlarged Image or select.In the Live screen menu. |
| 17 | Partial Backup Begins backup of the selected section of the video being played, with the specified starting/ending point. |
| 18 | Mode Switch Click on a desirable play mode to change the screen segmentation mode. |
Starting Web Viewer
WHAT IS WEB VIEWER?
Web Viewer is a software program with which the operator can access a remote NVR (Network Video Recorder) for real-time monitoring, PTZ control (if configured) or search.
![graph TD A["Network Camera"] --> B["Network"] B --> C["Network"] C --> D["Remote PC"] C --> E["NR"] E --> B](/content/2026/05/922951/images/f38d089bdc67129233bc54803162421fecca24fb841ad4955740e3462340e510.jpg)
Product Features
- Remote connection using the browser • PTZ camera control enabled • 4:3 mode : supports 1, 4, 9, 16, 25, 36, 1+5, 1+7, 1+12, 1+9, 1-11, and 2+8 channels (up to 64 cameras) • 16:9 mode : supports 6, 12, 20, and 30 channels (up to 64 cameras)
- Saving function in JPEG/BMP/PNG image format for printing and storage.
- Record video in AMI format compatible with popular media players. (The integrated codec is needed)
- To play the video in Windows Media Player, you must download and install the relevant codec from www.windows7codecs.com. (version 4.0.3 or higher)
System Requirements
The following lists the minimum suggested hardware and operating system requirements needed to run the Web Viewer.
| Item Minimum Recommended | ||
| CPU Intel Core 2 Quad 2.5GHz or higher Intel 7 (3.5GHz) or more | ||
| RAM 3GB or more 4GB or more | ||
| HDD 200GB or more 500GB or more | ||
| VGA Memory 612VB or more 1 GB or more | ||
| Display Resolution 1280 x 1024 or higher | ||
| Graphics card GTX G45 or higher | ||
| OS | - Supported OS : Windows 7, 8.1, 10, Mac OS X 10.9, 10.10, 10.11Plug In free web viewerSupported web browsers : Google Chrome 47, MS Edge 20- Plug-in WebviewerSupported web browsers : MS Explorer 11, Mozilla Firefox 43, Apple Safari 9 ※ Mac OS X only | |
| Network | 10/100/1000 Ethernet NIC | |
CONNECTING WEB VIEWER
- Open your web browser and type the IP address or URL of the NVR into the URL address box.

- Access the web viewer by connecting to Network 3 (recommended).
- "192.168.3.200" is set as the default IP.
- You must have specified the IP address in "Network > Interface".
- The URL connection will be enabled only when the DDNS connection settings have been completed. For more information, refer to "Network Configuration > DDNS" (Page 45).
- A user with admin permissions should provide the admin ID and password. A registered user should provide the user ID and password.

- The initial ID and password for the web viewer are "admin" and "4321". When an initial password is entered, while partially resetting to access a web viewer, a pop-up window will appear that will guide the user to change the password. When doing a whole reset to access a web viewer, a pop-up window will appear that will guide the user to complete the settings for the Install Wizard. Set a new password when a pop-up window appears.
- If you change the web port when connecting to the WebViewer, you may fail to access since the applicable port is blocked. In this case, change the port to a different port.
- Please change your password every three months to safely protect personal information and to prevent the damage of information theft. Please note that it is the user's responsibility for the security and any other problems caused by mismanaging a password.

- It allows up to 10 simultaneous accesses including the Admin and general users.
- Passwords of the Admin and general users can be changed in the menu of the NVR.
- Normal users should have set under to Use before connecting to the Web Viewer (Page 27).
- All settings are applied by the NVR's settings.
- The plugin installation confirmation pop-up window will appear.
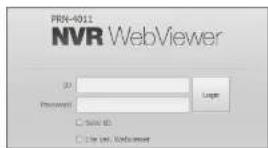
- When a program installation wizard window appears, press the [Install] button to install the program.
- The version of the program installed may vary depending on the update version.
- When program installation is complete, click on the [Finish] button.
- After completing installation and successfully logging in, the main live viewer screen appears.
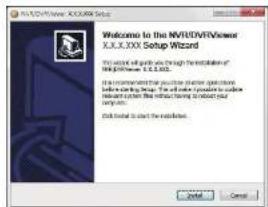
If you want to access the web viewer with multiple browsers
Set auto execution of plugin (npNVRViewer) in the browser menu that you first access and refresh the screen after activating the plugin or selecting plugin reliability.
- Each time the browser is upgraded in the future, the plugin activation method can be changed. Plug in setting menu can be referred to in the browser manual.
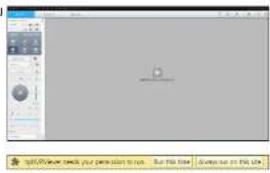

- For chrome browsers, 'Plug In Is not activated. Please select 'Always run on this site' and refresh', then select the 'always execute on this site' button in the top of the browser.

In a browser in the latest version that does not support plug-ins, please refer to the descriptions about the plug-in tree web ever stated below.
Accessing the Plug-in Free Webviewer from a web browser
To log in
- Open a web browser and enter the IP address of the NVR or a URL in the address bar.
- A user with administrator authority should enter an administrator ID and password. A regular user should enter a user ID and password.
- The check box is selected by default on a browser that does not support plug-ins.
This option is only supported by an Internet browser that does not use plug-ins (e.g., Chrome, Edge Browser).
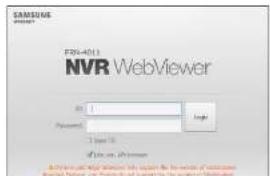

As the plug-in free web viewer has lower performance than the plug-in web viewer, it has a limit on the monitoring of high quality profiles. To monitor high quality profiles, use either a plug-in web viewer or network Viewer.
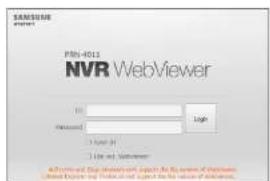
Live viewer screen layout
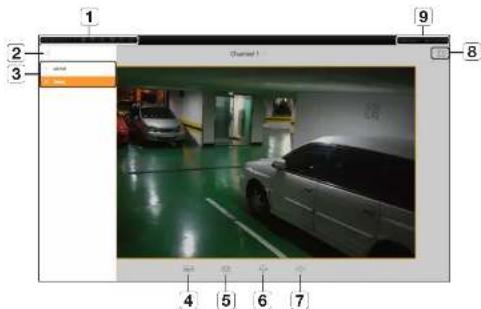
| Menu Description | ||
| 1 | System Status Display | Displays icons that indicate the screen state of system status.▪ For more information about each icon, please refer to 'System Status'. (Page 57) |
| 2 | View Menu | Enables or disables View Menu. |
| 3 | Select Menu | Displays the user login ID and moves to the setup page.▪ The way that you configure settings is identical to the existing web viewer settings. Please refer to.(Page 65) |
| 4 | Changes the camera profile. | |
| 5 | Captures the current video and saves it in a designated path. | |
| 6 | Supports the PTZ Digital Zoom function. | |
| 7 | Turns the sound ON/OFF.▪ Channel camera(s) supporting audio is displayed and the output volume can be adjusted. | |
| 8 | Changes the aspect ratio. | |
| 9 | Logout | Logs out your account. |
| Shutdown | Turns off the power of the XWR system. | |
Plug-in Free Web viewer only supports a single split like screen. However, output of only up to 720p resolution is available. Resolution exceeding 720p will not be displayed. (Exception: H.265 codec is not output if the resolution and frame rate exceed 720P 26fps.)
- You can change the live screen by selecting .
- If 'Out of Web Resources' pop-up message is prompted, adjust the monitor resolution.
Live viewer
LIVE VIEWER
You can check the video from camera registered in the NVR connected from a remote PC. Also, you can adjust the camera and check the network transfer status.
Live Viewer Screen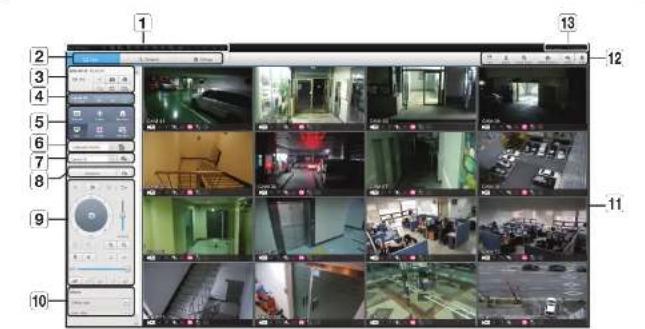
| Menu Description | ||
| 1 | System Stauts Indicator | Displays icons to display the screen or system status. |
| 2 | Menu Selection | Switches Into corresponding menu screen by clicking each menu. |
| 3 | Date/channel | Shows the access date/time and the selected channel. |
| Sound | Sets the sound connected to each channel to either OR/CFF. | |
| Capture | Saves current video for the selected channel in the path designated by the user. | |
| Prints current video image for the selected channel through designated printer. | ||
| Rotate Video | Rotates the screen of a selected channel by 90 degrees. | |
| Keep ch. scr ratio | Changas screen ratio of the selected channel. | |
| Keep full scr ratio | Changas screen ratio for all channels. | |
| 4 | Channel change | Switches to the previous/next channel group. |
| Full screen | Switch from the full screen to the still screen.Press the [ESC] key on the keyboard to exit full screen mode.Safari for Mac does not support full screen mode. | |
| Menu Description | ||
| 5 | Channel information | Shows the channel information selected.▪ If the user's PC monitor does not support 60Hz at a specific high resolution, or the HDMI cable does not support HDMI 2.0, 60fps or higher will not be output from the channel information. |
| Pause | Temporarily stops the video in all the channels or deactivates the Pause function in suspending status. | |
| Stop Alarm | Deactivates an alarm when it occurs. | |
| OSD | Check the OSD item to display the OSD screen information in the web viewer window. | |
| PC recording | Saves the real-time video, in AVI format, from the selected channel in a designated folder on the PC. | |
| NVR recording | Start and stop NVR recording. | |
| 6 | Select Profile | Sets a desired profile for each channel. |
| 7 | Layout setting | Set the layout. |
| 8 | Switching | Set the sequence. |
| 9 | PTZ | Controls connect PTZ cameras(s). |
| 10 | Fisheye | Runs the fisheye settings for the selected channel.iConfigures the mounting mode and the view mode to correct the screen distortion.) |
| 11 | Display Pane | Displays the video of camera connected to NVR. |
| 12 | Text | Turns text devices and data output located in the right side of Search ON/OFF. |
| ID | Display the ID of user connected. | |
| Quick setup | Simple camera registration and recording settings. | |
| Manual backup | Manually backup the video of the camera connected. | |
| Status | Shows the camera live and recording status. | |
| Help | Move to the help window. | |
| 13 | Logout | Performs logout process. |
| Shutdown | Turn off the NVR system. | |
You can check the status or operation of the NVR with the icons on the live screen.
On a plug-in free web viewer, some of the status information icons are not displayed.
| X | Y | B | F | L | U | G | H | I | J | K | L | M | N | O | P | Q | R | S | T | U | V | W | X | Y | Z | A | B | C | D | E | F | G | H | I | J | K | L | M | N | O | P | Q | R | S | T | U | V | W | X | Y | Z | A | B | C | D | E | F | G | H | I | J | K | L | M | N | O | P | Q | R | S | T | U | V | W | X | Y | Z | A | B | C | F | G | H | I | J | K | L | M | N | O | P | Q | R | S | T | U | V | W | X | Y | Z | A | B | C | F | G | H | I | J | K | L | M | N | O | P | Q | R | S | T | U | V | W | X | Y | Z | A | B | C | F | H | I | J | K | L | M | N | O | P | Q | R | S | T | U | V | W | X | Y | Z | A | B | C | F | G | H | I | J | K | L | M | N | O | P | Q | R | S | T | U | V | W | X | Y | Z | A | B | C | F | G | H | i | J | K | L | M | N | O | P | Q | R | S | T | U | V | W | X | Y | Z | A | B | C | F | G | H | I | J | K | L | M | N | O | P | Q | R | S | T | U | V | W | X | Y | Z | A | B | C | F | G | H | I | J | k | L | M | N | O | P | Q | R | S | T | U | V | W | X | Y | Z | A | B | C | F | G | H | I | J | k | L | M | N | O | P | Q | R | S | T | U | V | W | X | Y | Z | A | B | C | F | G | H | I | J | k | L | m | N | O | P | Q | R | S | T | U | V | W | X | Y | Z | A | B | C | F | G | H | I | J | k | L | m | N | O | P | Q | R | S | T | U | V | W | X | Y | Z | A | B | C | F | G | H | I | J | k | L | m | N | o | P | Q | R | S | T | U | V | W | X | Y | Z | A | B | C | F | G | H | I | J | k | L | m | N | O | P | Q | R | S | T | U | V | W | X | Y | Z | A | B | C | F | G | H | I | J | k | L | m | N | o | P | q | R | S | T | U | V | W | X | Y | Z | A | B | C | F | G | H | I | J | k | L | m | N | o | P | Q | R | S | T | U | V | W | X | Y | Z | A | B | C | F | G | H | I | J | k | L | m | N | o | P | Q | R | S | T | U | V | W | X | Y | Z | A | B | C | F | G | H | I | J | k | L | m | N | o | P | Q | R | s | T | U | V | W | X | Y | Z | A | B | C | F | G | H | I | J | k | L | m | N | o | P | Q | R | S | T | U | V | W | X | Y | Z | A | B | C | F | G | H | I | J | k | L | m | N | o | P | Q | R | S | T | u | V | W | X | Y | Z | A | B | C | F | G | H | I | J | k | L | m | N | o | P | Q | R | s | T | U | V | W | X | Y | Z | A | B | C | F | G | H | I | J | k | L | m | N | o | P | Q | R | s | T | U | V | W | X | Y | Z | A | B | C | F | G | H | I | J | k | L | m | N | o | P | Q | R | s | T | U | V | w | X | Y | Z | A | B | C | F | G | H | I | J | k | L | m | N | o | P | Q | R | s | T | U | V | W | X | Y | Z | A | B | C | F | G | H | I | J | k | L | m | N | o | P | Q | R | s | T | U | V | W | X | y | Z | A | B | C | F | G | H | I | J | k | L | m | N | o | P | Q | R | s | T | U | V | W | X | y | Z | A | B | C | F | G | H | I | J | k | L | m | N | o | P | Q | R | s | T | U | V | W | X | y | Z | a | B | C | F | G | H | I | J | k | L | m | N | o | P | Q | R | s | T | U | V | W | X | y | Z | A | B | C | F | G | H | I | J | k | L | m | N | o | P | Q | R | s | T | U | V | W | X | y | Z | A | B | c | F | G | H | I | J | k | L | m | N | o | P | Q | R | s | T | U | V | W | X | y | Z | A | B | C | F | G | H | I | J | k | L | m | N | o | P | Q | R | s | T | U | V | W | X | y | Z | A | B | C | F | F | G | H | I | J | k | L | m | N | o | P | Q | R | s | T | U | V | W | X | y | Z | A | B | C | F | G | H | I | J | k | L | m | N | o | P | Q | R | s | T | U | V | W | X | y | Z | A | B | C | F | g | H | I | J | k | L | m | N | o | P | Q | R | s | T | U | V | W | X | y | Z | A | B | C | F | G | H | I | J | k | L | m | N | o | P | Q | R | s | T | U | V | W | X | y | Z | A | B | C | F | G | H | i | J | k | L | m | N | o | P | Q | R | s | T | U | V | W | X | y | Z | A | B | C | F | G | H | I | J | k | L | m | N | o | P | Q | R | s | T | U | V | W | X | y | Z | A | B | C | F | G | H | I | J | m | L | m | N | o | P | Q | R | s | T | U | V | W | X | y | Z | A | B | C | F | G | H | I | J | k | L | m | N | o | P | Q | R | s | T | U | V | W | X | y | Z | A | B | C | F | G | H | I | J | k | L | n | m | N | o | P | Q | R | s | T | U | V | W | X | y | Z | A | B | C | F | G | H | I | J | k | L | m | N | o | P | Q | R | s | T | U | V | W | X | y | Z | A | B | C | F | G | H | I | J | k | L | m | No | P | Q | R | s | T | U | V | W | X | y | Z |
| Item Description | ||
| System Operation | It is displayed when there is a problem with the tan. | |
| It is displayed when there is an issue with the recording conditions. | ||
| Displayed if the HDD is full and the MVR has an insufficient space to record. | ||
| Displayed if no HDD is installed or the existing HDD should be replaced. | ||
| Displayed if the HDD needs a technical examination. | ||
| It is displayed when there is a malfunctioning HDD in the RAID.There are one or two HDD malfunctions but you can still read or write to it. | ||
| It is displayed when recovering an RAID Error. | ||
| It is displayed when you cannot write RAID due to a malfunction of HDD. | ||
| It is displayed when the max permitted amount of data for each channel is exceeded. | ||
| Item Description | ||
| System Operation | It is displayed when an iSCSI device is disconnected. | |
| It is displayed when the network is overloaded, it is displayed when the network is overloaded.It occurs when the max receiving performance is exceeded, causing an overload to the CPU. It will disappear if you modify the camera setting or rotate a camera to reduce the level of performance overload. | ||
| It is displayed when there is firmware to update the server. It is displayed when there is firmware to update the server. | ||
| Displayed when the battery that enables time information to be saved in the NVR equipment is empty. | ||
| If you press the screen stop button, it is displayed. | ||
| It is displayed when all the channels are switched at the set time interval. | ||
To capture a screen
- Click the × button. When a pop-up window appears, select the saving path for the captured image.
- Select the path and name the file. Then click the button.
- Save the current camera's video image as a .bmp, .jpg, or .png file.
- If the viewer is running without administrator's permission in Windows 7, you may not be able to save the captured image as a .bmp, .jpg, or .png file.
To print a screen
- Click the < > button.
- Print the current camera's video image using the printer connected to the PC operating the Web Viewer.
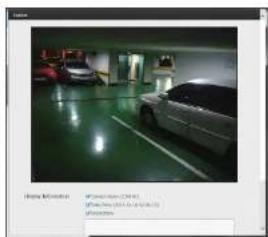
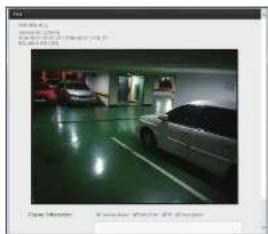
Live viewer
Selecting a profile
You can select a profile for each channel.
- Multi-split screen is connected to profile #1 by default.
- Single split screen is connected to profile #2 by default.
- The user can select a profile to change it.
■ Connection may not be established or video output may malfunction due to problems in PC performance or network bandwidth.
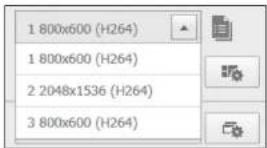
Setting the layout
If you don't add or save it in the layout after registering a camera, the live screen will not be displayed.
Click on the < button to launch the layout setting screen.
If you want to add a layout
Click on <
Set the layout name to add and click on the button to add it.
If you want to change the layout name
Select the layout name to change and click on <1#. After changing the name, click on the outside of the layout window to change the name.
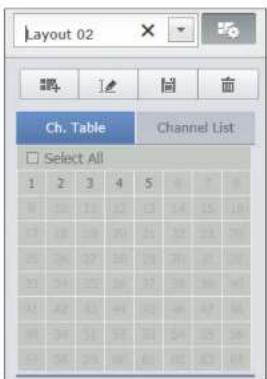
If you want to save the layout
Click on <
The changed layout will be saved.

The layout for each user is saved separately.
If you want to delete the layout
After selecting the layout to delete, click on < □>
The selected layout will be deleted.

Unless you press the Save or Delete button, changes will not be applied.
Changing Split Mode
When clicking the Split Mode selection button, the screen changes to the selected split mode.
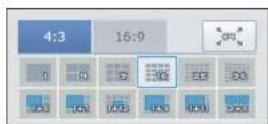
To switch to full screen mode
Click on <
To switch from the 64-channel split screen to the full screen.
To exit full screen, press the [ESC] key.
Setting screen switching
If you don't register the layout, the screen switching function will not operate.
You can view the layouts one by one.
Click on the < > button to launch the switching setting window.
- Select the layouts to be shown in turn by pressing < √ >.
- Enter the screen switching time.
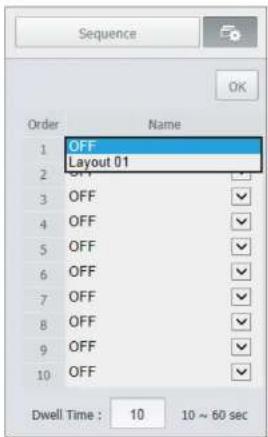
- Click the button to save the designated sequence.
To perform switching
Click the button to activate switching mode and run a sequence.
Auto Sequence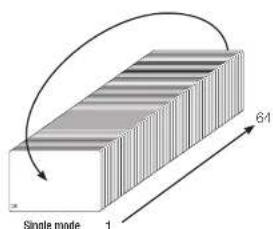
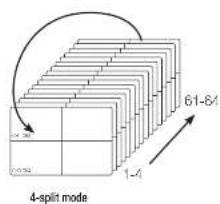
![graph TD A["1-9"] --> B["2-10"] B --> C["3-11"] C --> D["4-12"] D --> E["5-13"] E --> F["6-14"] F --> G["7-15"] G --> H["8-16"] H --> I["9-17"] I --> J["1-9"] style A fill:#f9f,stroke:#333 style B fill:#f9f,stroke:#333 style C fill:#f9f,stroke:#333 style D fill:#f9f,stroke:#333 style E fill:#f9f,str…](/content/2026/05/922951/images/bf502f8b0040c004bfff80e72207008e6eee1c8b554bd61ba3a36d9fd9c26f59.jpg)
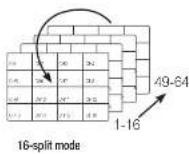
In split mode, if you have set "Device > Monitor", Auto Sequence will be conducted at the set interval. (Page 39)
- When switching to another channel, the video may be slightly delayed depending on network status.
- If you perform automatic switching of a single screen, the layout setting menu will be deactivated during operation.
Live Viewer
How to query text devices and data
Checks the text data transmitted from POS systems connected to the NVR.
If the button is selected, you can turn on/off the function to query text devices and data located in a separate area.
- A queued device should be set in terms of its usage, channel, etc. by selecting "Device > Text > Device". (Page 40)
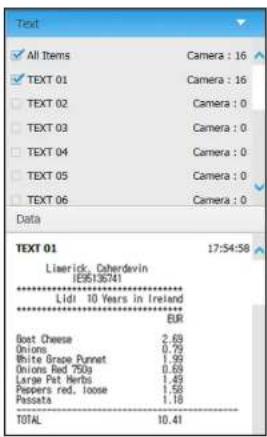
CONTROLLING A CONNECTED NETWORK CAMERA
Controlling PTZ
If a PTZ camera is connected, the < icon > icon appears on screen. When selecting the corresponding camera channel, the PTZ tab is provided to allow you to control the PTZ.
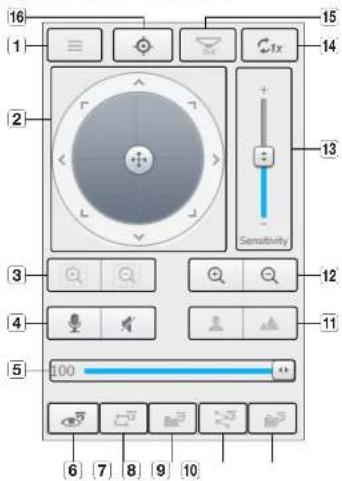
| Item Description | ||
| 1 | Camera menu | Displays the camera settings menu. |
| 2 | Direction Adjustment | Use this to adjust the direction of the camera or click the crosshair in the corner to use it as an CK button. |
| 3 | Digital zoom | Adjust digital zooming to make an image larger or smaller. |
| 4 | Sound | You can set the camera audio torque and mute. |
| 5 | Volume control | Change the PC volume between 0 and 100. |
| 6 | Preset | Sets the preset position for camera framing and moves to designated preset position when selecting a desired preset. |
| 7 | Swing | Moves between the preset start point and end point. |
| 8 | Group | Moves in the path specified by combining the preset. |
| 9 | Trace | Moves camera's framing in the predefined path. |
| 10 | Tour | Moves in the path specified by combining multiple groups. |
| 11 | Focus | Adjusts the focus of the camera. |
| 12 | Zoom | Zooms In/out the image by controlling camera's zoom. |
| 13 | Sensitivity | Adjust the sensitivity of your camera operation. |
| 14 | Digital Zoom Off | Returns to the original size from the zoomed state. |
| 15 | Fisheye D-PTZ | Provides the digital PTZ function for the distortion corrected screen. |
| 16 | Simple focus | Automatically adjusts the camera focus. |
To activate digital zoom
- Press the < > button and the screen will be zoomed in by 50% per click.
- Press the < > button and the screen will be zoomed out by 50% per click. ■ You can zoom in or out by 10% with the mouse wheel.
- Click the < Ctrl > button and the screen returns to 100% size.
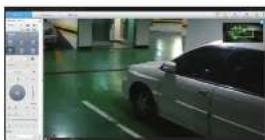
The digital zoom function is only available in the single model.
To use the digital PTZ function on a distortion corrected screen
Mouse over the screen and drag to control.
To set a preset
- Click < > button to display "Preset" window.
- Click on < ▼> to select the preset order.
- Enter the name of preset.
- Use direction keys to adjust the direction which camera aims at.
- Click the < □ > button.
To activate the preset
- Click < > button to display "Preset" window.
- Select a desired preset to activate from the list. The camera's framing moves to the preset position.
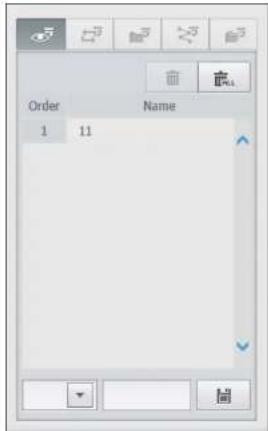
To activate Swing (Auto-pan), Group (Scan), Trace (Pattern), and Tour
You can activate listed functions in the same manner as using a preset. For more information, refer to the corresponding user manual of the applicable camera.
Only selective functions of the camera can be supported, depending on the camera.
To use the Digital PTZ (D-PTZ) function
- Register a camera that supports the D-PTZ profile. In cameras that support the D-PTZ profile, you can use the D-PTZ function.
- Both cameras that support general PTZ and cameras that support D-PTZ can control the live image using some of the function menus.
- For more information about the supported functions, please refer to the camera manual.
Search Viewer
SEARCH VIEWER
You can search and play the video record saved in NVR by accessing NVR remotely.
Search Viewer Screen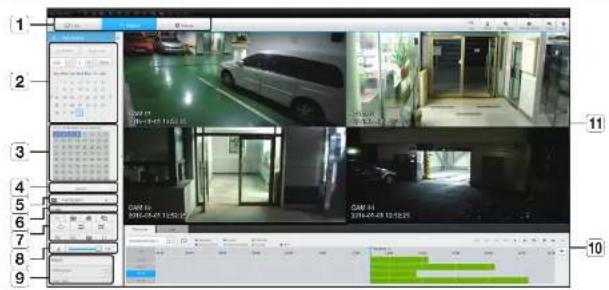
| Item Description | ||
| 1 | Menu Selection | Switches to the corresponding menu screen by clicking each menu. |
| 2 | Calendar | Displays the video recorded date in blue and today in red. Click the date in blue color to display the recorded video information in timeline. |
| 3 | Channel selection | Displays the search channels. |
| 4 | Search | Search for the user designated channel for the selected date. |
| 5 | Text Search | Searches data that was entered into POS systems connected to NVR. |
| 6 | Channel displays | Display the selected channel number. |
| Item Description | ||
| 7 | Sound | Sets the sound connected to each channel to either ON/OFF. |
| Capture | Saves current video for selected channel in the designated path. | |
| Prints current video image for selected channel through the assigned printer. | ||
| Section backup | Backup the video for the selected section. | |
| Rotate Video | Rotates the screen of a selected channel by 90 degrees. | |
| Keep ch. scr ratio | Changes screen ratio of the selected channel. | |
| Keep full scr ratio | Changes screen ratio for all channels. | |
| Magnify/Shrink | Magnify or shrink the current video for the selected channel. | |
| OSD | Displays the channel information. | |
| Full screen | Show the four way split screen in the full screen. | |
| 8 | Sound control | Adjust the audio for the video searched. |
| 9 | Fisheye | Runs the fisheye settings for the selected channel.(Contigures the mounting mode and the view mode to correct the screen distortion.) |
| 10 | Recording Color | Displays the corresponding color depending on recorded data type if you pace your mouse cursor on that area. |
| 11 | Display Pane | Plays corresponding data on the screen if you select a search result. |
Time Search
You can search recorded data by setting date and time.
To search by date
You can select the search date by using the calendar.
- Click on < □ ▶ to select the year/month for your search. If a data has data associated with it, it is displayed in blue. The current date is displayed as a blue box.
- Click the date to search in the calendar. The first image of the searched video data on that date is displayed on screen, and the data is displayed in the timeline.
- To search video data for today, click . Today's date is selected.
Color indications depending on current recording status
Displays the corresponding color according to the recorded data type.

If 2 or more kinds of recording types are mixed for the same timeline, only the recording type with higher priority is displayed. Priority: Standard > Motion > Schedule > Sensor > Camera Event > Audio Detection > DST)
To adjust the timeline
If searched data are overlapping, you can select the desired data, move its playback time point, and zoom in/out the timeline.

- Select the number of data to search if data is overlapping. It appears only when data are overlapped and assigns <0> to the most recent data.
- Click your desired time point to play on the timeline. The playback start point is moved.
- Click <+> / <-> to zoom in/out the zoom factor to display time.
- When magnified, if you want to view the pre/post timeline, click on the timeline and drag it in the direction you want to move it.
If you want to check the recording list
The results for each recording section will be displayed.

To back up the search results
You can back up the search results in the list.
- Click the [ ] button.
- From the search results, select the check box of the item you wish to back up.
- Format: Select the format of the file to back up.
- AVI: Codec information provided from the NVR is saved together and can be played in a separate viewer (Windows Media Player, etc.) on the PC.
- SEC: Proprietary file format, which can be played on the PC immediately as it is saved with a dedicated viewer.
- When you select the SEC format, you can select or deselect "Password" and "Text data Included".
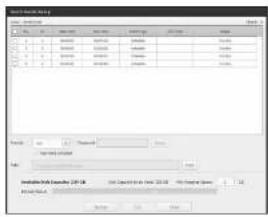
- Path: displays the location of the folder in which the section backup file is to be saved.
- After completing the backup settings, click the button.
- If you press the button during the backup process, the backup will be suspended.
To run the section backup function
You can select and back up a desired section in the timeline or list of video(s) being played.
- Click the button.
- On the timeline of a video being played, select the start point and the end point of the section to back up. Section backup settings screen will open.
- Channel: Displays the channel for the section backup.
- Backup section: Displays the start and end times of a section to back up.
- Format: Selects the format of a section to back up.
- AVI: Codec information provided from the NVR is saved together and can be played on a separate viewer (Windows Media Player, etc.) on the PC.
- SEC: Proprietary file format, which can be played on the PC immediately as it is saved with a dedicated viewer.
- When you select the SEC format, you can select or deselect 'Password' and 'Text data Included'.
- File name: Sets the name of a section backup file.
- Path: Displays the location of the folder in which the section backup file is to be saved.
- After completing the section backup settings, click the button.
- If you press the button during the section backup process, the backup will be suspended.
Search viewer
Text Search
You can search data that was entered into POS systems connected to NVR.
If you want to search by a text
- Select a date and time to search.
- Set event keywords and search conditions.
- Search Condition: Enter a text to search.
- Event Keyword: Searches based on the condition set in "Device > Text > Event settings". (Page 40)
- : If checked, search terms are case-sensitive. : If checked, only results that exactly match the input search terms are returned.
- Click the button.
= Refer to for the detailed text search method. (Page 51)
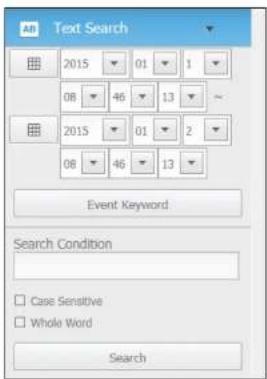
If you want to restore text search
When you enter search conditions and replay the search result with ON/OFF button in the upper right hand, it is possible to query text data.
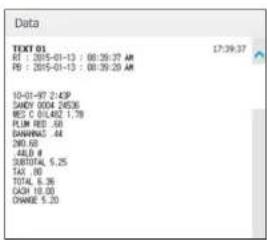
Names and Functions of Play Buttons
| Item Description | ||
| 1 | Back | Returns to the previous event. |
| 2 | Rewind | Used to rewind a video.(Supports x1, x2, x4, x6, x10, x32, x64, x1, x2 and x4 speed) |
| 3 | Slow Rewind | Used to rewind the video at a slow speed.(Supports x1/2, x1/4, x1/8, x1/2 and x1/4 speed) |
| 4 | Previous frame | Move to the frame in reverse direction. |
| 5 | Play/Pause | Video is played and paused. |
| 6 | Stop | Terminates the video play. |
| 7 | Next frame | Move to the frame in the forward direction. |
| 8 | Slow Play | Used to play the video forward at a slow speed.(Supports x1/2, x1/4, x1/8, x1/2 and x1/4 speed) |
| 9 | Slow Forward | Used to play a video forwards.(Supports x1, x2, x4, x8, x16, x32, x64, x1, x2 speed) |
| 10 | Move forward | Proceeds to the next event. |
Setup Viewer
SETUP VIEWER
You can configure the NVR settings remotely on the network.
To configure the NVR settings, click the Settings icon.
Settings Screen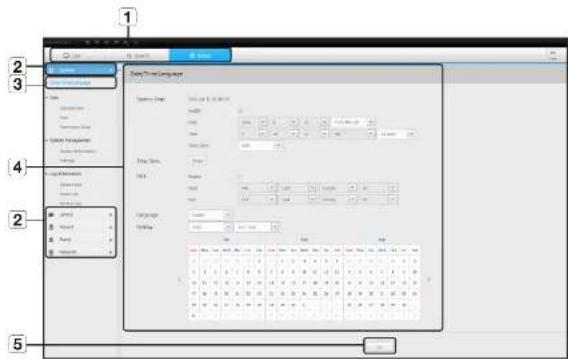
| Item Description | ||
| 1 | Menu Selection | Click each menu to switch into corresponding menu screen. |
| 2 | Parent Menu | Configure the settings or select a parent item to change the existing settings. |
| 3 | Sub-Menu | Among the sub-menus of selected parent menu, select a desired item to set. |
| 4 | Detailed Menu | Click desired item's input field to change and enter a desired value. |
| 5 | OK | Apply the modified settings. |
System
You can configure the various settings of the NVR system.
Date/Time/Language
For more information, refer to 'Date/Time/Language' in the "System" menu. (Page 25)
Date/Time
Set the date and time.
Time Synchronization Setup
Set the time synchronization.
DST (Daylight Saving Time)
During the summer, Daylight Saving Time (DST) advances clocks one hour forward from the standard local time zone.
Language
Select a preferred language for the NVR.
Holiday
A user can select specific dates as holidays according to their own preferences.
Setup Viewer
User
For more information, refer to "User" in the "System Setup" menu. (Page 26)
Administrator
You can change the admin ID or the password. - ID allows alphanumeric characters only. - If the admin ID is not used for access, you cannot change the ID. - If the ID being used is changed, you will be automatically logged out.
User
You can add, change or remove a user or users.
Permission Setup
You can set the user permission.
System Management
For more information, refer to 'System Management' in the 'System' menu. (Page 28)
System Information
You can see information of the current system. Check the model name, software version, micom version, MAC address and RAID version. You can search for a file from the storage device connected to the PC to perform an upgrade.
Settings
Using a storage device, you can apply the current configuration of NVR to another NVR. Press the initialize button to return the network settings to their factory default state. Items in the category are excluded from the initialization.
Log information
System log
Data recorded in the system log displays various system-related logs/date/time such as system starts, system ending and menu selling changes.
Event log
The event log lists recorded events, such as sensor events, camera events, or image losses.
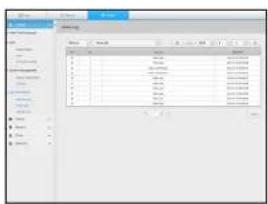
Backup log
You can inquire about a user who performed a backup, execution time, details (backup time, channel, backup device, backup file type).
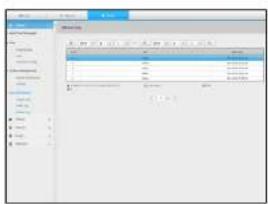
Device
You can check a list of devices that are connected to the NVR and configure the necessary settings. Click in the menu screen. For more information, refer to "Setting the Device". (Page 30)
Camera
Cam Registration
You can add a network camera(s).
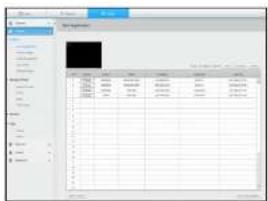
Camera Setup
You can change the settings of a connected network camera.
- When you click the [Camera website] button, a new camera web browser window is opened.
- It supports the version specified below or later for each Q/P/X series camera. (CND-7010R series: 1.01, OND-7080R series: 1.02, OND-6010R series: 1.02, OND-6070R series: 1.01, P series: 1.01)
- It supports only when the camera is connected to IPv4 and is not set to HTTPS.
- When you are connecting to the camera web page on a closed network, a camera that does not support the universal web will not be able to output an image.
Camera Password
You can change the passwords of all registered cameras at once.
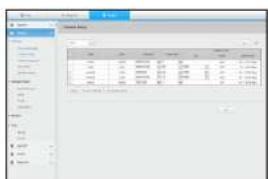
Live Setup
You can change the live transfer settings of the network camera.
Setup Viewer
Channel Setup
You can configure the video settings for each channel.
RAID
If you set the RAID mode, then even if the system HDD is damaged, you can safely recover data.
Storage Device
You can check and change the settings related to the data storage device.
Device/Format
You can check a storage device, amount of use, type of use, and status of storage device.
- ARB: Video that was not recorded due to disconnection from the camera can be backed up after the connection with the camera is re-established.
Press the button and a window is opened.
For more information about settings, please refer to "Device/Format". (Page 33)
HDD Alarm
You can set the alarm output port and the duration in case an error occurs.
If you connect NVR with an iSCSI device, you can search, connect, or disconnect the iSCSI device.
Monitor
Monitor
You can configure the monitoring screen settings and set the output system.

If the video is not played properly, refer to the troubleshooting action later in this manual. (Page 80)
- The Monitor Setup settings control the monitor connected to the NMR.
Text
Device
Relevant values of a device connected to NVR can be set.
Event
It is possible to set total amount conditions and keywords to display events of a text device.
Record
For more information, refer to 'Setting the Recording'. (Page 40)
Recording Schedule
If you set a recording schedule for a specific date and time, the recording will start at that specific time.
Record Setup
NVR
Select a type of the normal/event recording frame rate for each channel.
setup viewer
Camera
You can set the recording profile for a network camera.
Record Option
You can set the Disk End Mode.
- You can set the recording duration separately for each channel.
Event
For more information, refer to "Setting the Event". (Page 42)
Sensor Detection
NVR / Camera
You can set the sensor operation mode and the synchronized camera as well as the alarm output type and the duration.
- If the connected network camera that has configured the alarm in our settings triggers an alarm, NEF will perform the alarm cut.
Camera Event
You can set NVR and camera event mode, alarm output type and alarm time.
Video Loss Detection
You can set to trigger the alarm if a video loss occurs.
Alarm Out Schedule
You can schedule the alarm output according to the day of the week and the time.
The default setting is Event Sync, which activates the alarm only if an event occurs.
Network
For more information, refer to "Network Configuration". (Page 44)
Interface
A remote user can access the NVR via the network to check the current mode and the IP address.
Network
Specify the network connection path.
Port
You can configure the protocol-related settings.
DDNS
Network 1/2/3
You can check the DDNS settings.
IP Filtering
You can prepare the list of IP addresses to allow or block accesses to a specific IP address.
SSL
You can select a security connection system or install public certificates.
While using HTTPS, if you want to switch to HTTP, then abnormal operation can take place as the browser contains the setting values. You need to change the URL to HTTP and reconnect or initialize the candle setting of the browser.
Setup Viewer
802.1x
When connecting to a network, you can select whether to use the 802.1x protocol and install corresponding certificate.
Live Streaming
You can set the video profile transmitted to the network and the expansion monitor.
You can specify the SMTP server that sends a mail if an event occurs and set the recipient group and users.
SMTP
You can set the server that sends mails and specify if you use the authentication process.
Event
You can set the event interval and specify which events the server sends mails for.
Recipient
You can set groups and recipients to receive emails.
SNMP
Using the SNMP protocol, the system or network administrator can remotely monitor network devices and set the environment.
DHCP Server
Network
You can set the internal DHCP server and assign an IP address to the network camera.
Check IP
You can check the IP and MAC currently used through the DHCP server, and the connected network port.
Using the setting icons
| ABText | admin | Quick Setup | Manual Backup | Status | Help |
- If the button is selected, you can turn on/off the function to query text devices and data that are located in a separate area. • Display the ID of the user connected.
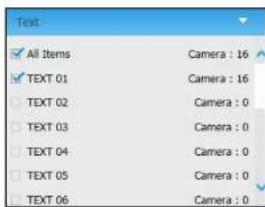
- You can register a network camera for each channel and easily set the resolution and the number of shots in case of event occurrence or manual recording.
- For more on how to register a camera, refer to 'To register a camera' (Page 30);
- If the failover mode is in a standby state, the item is hidden.
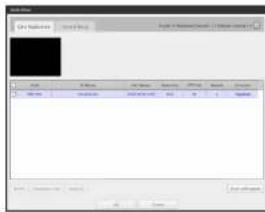
• You can manually enter the desired backup channel and time/date to backup the recorded video.
- You can select whether or not to include "Text data" for SEC format.
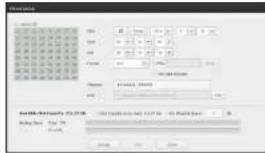
- 📄: You can check the recording status and the status of the camera connected.
- Live: Select to check the status of the camera connected to each channel and the transmission information.
- Recording: Select to check the following for each channel: profile, recording type, inputs/recording transmission rate, settings/inputs/amount of recorded data.
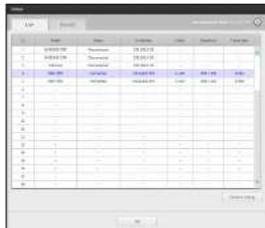
- <: >: You will be immediately directed to the homepage of Hanwha Techwin.
Backup Viewer
SEC Backup Viewer
You can play a file that is backed up in the format of SEC.
Backup in SEC format produces a backup data file, a library file, and a self-executable viewer file.
If you run the backup file viewer, the backup data file will be played.
Recommended System Requirements
PCs with a lower specification than the recommended below may not fully support forward/backward and high-speed playback.
PC Specifications
- Minimum requirements
- CPU: Intel Core 2 Quad 2.5GHz
- RAM: 2GB or higher
- HDD: 200GB or Higher
- VGA memory: 512MB or Higher
- Display resolution: 1280*1024
- Recommended
- CPU: Intel i7 (3.5GHz) or Higher
- RAM: 4GB or Higher
- HDD: 500GB or Higher
- GPU: GTX940 or Higher
- VGA memory: 2GB or Higher
- Display resolution: 1920x1080 or Higher
• OS
- Windows 7, 8, 10, Mac OS X (10.8 or Higher)
- Browser
1) Non-Plugin Webviewer
Google Chrome 47, MS Edge 20
2) Plugin Webviewer
- MS IE 11, Mozilla Firefox 43, Apple Safari 9 (Mac OS X Only)
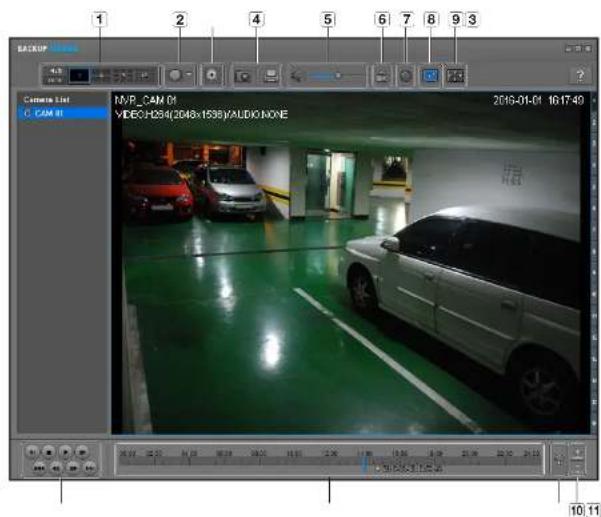
| Item Description | |||
| 1 | Split screen | Selects screen ratio to display. | |
| The screen is changed to a split screen. | |||
| 2 | Fish eye view mode | If < 10 is pushed, it is possible to change to a fish eye installation type. It is possible to select WALL/GROUND/CEILING mode according to the installation place. | |
| The fish eye view mode on the current screen can be changed independently on each split. | |||
| 3 | Digital Zoom | Enlarge the image by up to 100 times as big as the current one.Press the Zoom In (on) button the enlarge the image; press the Zoom Out (on) button to shrink the image.You can also use the slide bar (in) in the pop-up window to zoom in/out.Press (on) on a size-changed video to restore the default zoom factor (100%).If you enlarge the image by more than 200%, the enlarged area will be marked on the digital zooming screen. Click on the marked area and move it to a desired position.The digital zooming is applied to all backup viewer. When the digital zooming is canceled, the video size will restore the default rate of 100%. | |
| 4 | Screen Printout | Saves the current video's image as in an Image file. Supports JPEG file format | |
| Prints out the current screen. You should have installed the appropriate printer driver before you can print out the screen. | |||
| 5 | Audio | A toggle button. Each time you press this button, the audio output will toggle between activated and deactivated. | |
| You can adjust the volume level from 0 to 100. | |||
| 6 | Watermark | Press the button to enable file tampering detection, to detect data file forging. | |
| 7 | Deinterlace | You can enable the Do Interface function. | |
| 8 | Show OSD | Check the OSD checkbox to display the OSD information on the backup playback screen.Information such as backup date, day of the week, time, model name, and channel number will be displayed on the screen. | |
| 9 | Maintain aspect ratio/Full screen | Maintains the aspect ratio of the playback screen. | |
| Plays the video on a full screen. | |||
| 10 | Enlarge / Reduce Timeline | Collapses the time range that is displayed on the range bar of the storage time.You can collapse the range bar until the overall range is shortened to 24 hours. | |
| Enlarges the time range that is displayed on the range bar of the storage time.You can enlarge the range bar until the overall range is extended to 1 minute. | |||
| 11 | Restore Timeline | Restore the timeline to the default. | |
| 12 | Display of storage time range | Displays the time range of a stored video file.You can move the gridline of the range bar to select a time point to play. | |
| 13 | Playback Control | You can adjust the video playback of the timeline. | |
PRODUCT SPECIFICATION
| Item Details | ||
| Display | ||
| Network Camera | Inputs Max | 64CJ |
| Resolution CIF -- 12MP | ||
| Protocols Samsung, ONVIF | ||
| Live | Local Display 1x HDMI / 1x VIA Dual Monitor | |
| Multi-Channel Display | [Local Monitor] 1 / 2V / 3V / 4 / 9 / 16 / 25 / 36 / 64 / Sequence [Wec] 1 / 4 / 8 / 16 / 25 / 36 / 64 / Sequence | |
| Performance | [Local Monitor] - 12M (30fps) - 8.3M(120fps) - 1080p(480fps) - 720P(960fps) - D111920fps | |
| Performance | ||
| Operating System Embedded | Linux | |
| Record | Compression H.265, H.264, MJPEG WiseStream(H.265, H.264) | |
| Recording Bandwidth Max. 400Mbps (RVD-5V6) | ||
| Resolution CIF ~ 12MP | ||
| Type | Normal, Schedule(Continuous/Event), Event (Pro:Post) | |
| Event Trigger | Alarm Input, Video Loss, Camera Event(Sensor, MD, Video Analytics, Dotocus) | |
| Event Action e-Mail, PTZ Post, Alarm Out, Burzar, Monitor Out | ||
| Search & Play | Playback Bandwidth | Max. 32Mbps(18ch simultaneously) |
| User Max. 4 Users (Local 1, Remote 3) | ||
| Mode | Date & Time(Calendar/Event Log List/Text Search/POSYSmart Search | |
| Simultaneous playback Max. 16 channels(Local Monitor, CMS) | ||
| Resolution CIF ~ 12MP | ||
| Fisheye Dowarping | WEB / CMS | |
| Playback Control | Fast/Sow Forward/Backward, Move one step up/down | |
| Item Details | ||
| Storage | Built-In | 0TB ~ 8TB |
| Internal HDD | 12 (Max 96T3, Non-RAD Mode) | |
| External | (SCI storage)(Max. 192TB)- Promise Vess/Raid R2500 | |
| RAID | RAID-5/6(Array Size: 6-HDD x 2 Array) | |
| Backup | File backup | BU/Exe(GU), JPG/WI(Network) |
| Function | Multi channel(Upto 16CI, Play, Date-Time/Title display | |
| Sensor | I/O | 4/4 (NO/NC Selectability) |
| Audio | Input | 64 channels (network) |
| Compression G.711, G.726, MAC(16/48K/L) | ||
| Audio Communication | 2 Wsty | |
| Network | ||
| Interface | RJ-15(Gipacil Ethernet) x4, SPF x2 | |
| Protocol | TCP/IP, UDP/IP, FTP (LDP), RTP (TCP), RTSP, NTP, HTTP, DHCP (Server, Client), PPPoE, SMTP, ICMP, IGMP, ARP, DNS, DDNS, uPrP, HTTPS, SNMP, ONIVF (Profile-S), SUNAPI(Server, Client) | |
| DDNS | Hanwha DONS | |
| Transmission Bandwidth | Max. 400Mbps | |
| Max Remote Users | Search(B) / Live unicast(10) / Multicast(20) | |
| IP Version | IPv4/V6 | |
| Security | IP address filtering, User access Log, 802.1x, Encryption, 2Mon Rule | |
| Language | English, French, German, Italian, Spanish, Russian, Turkish, Polish, Dutch, Swedish, Czech, Portuguese, Danish, Romanian, Serbian, Croatian, Hungarian, Grook, Norwegian, Finnish, Korean, Chinese, Japanese, Thai | |
| OS | Window 7, 8, 10, Mac OS X(10.8 or above) | |
| Web Browser | MS E, Google Chrome, Mac Safari, Firefox | |
| Viewer Software | Type | SSM, WebViewer, SmartViewer, Polis Mobile Viewer |
| CMS Support | Support SDK/CGI(SUNAPI) for Integration to 3rd party VMS | |
| Functions | ||
| Camera Setup | Register Auto, Manual | |
| Setup Items | IP address. Add profile edit, Bitrate, Compression. GOP, Quality, Camera MD setupCamera video setup (Simple focus, Brightness/Contrast, Flip/Mirror, IRIS, WDR, DoN, SSNR, Shutter, SSDR, DIS), Fisheye Dowarping Mode, Hallway View Setup, Camera Webpage | |
| PTZ | Control Via GUI, WebAllowor, SPC 2000 | |
| Preset 25 | S Presets | |
| Smart phone | Support Model | Android, IOS |
| Protocol Support | RTP, RTSP, HTTP, CO(sUN4Pi) | |
| Control | Line(16ch) - Multi Profile SupportPlayback(1ch) | |
| Max. Remote Users | Search(3) / Live unicast(10) | |
| Redundancy | Failover | N-1 |
| ARB | Yes | |
| System Control | Mouse, Web, SPC-2000(Controller; | |
| Indicator/Interface | ||
| Front | Indicator | LED(Status indicator)- HDD Acion(12), RMD Status(1), Alarm(1), Power(1), Record(1), Backup(1), Network(1) |
| Connectors | VGA | Sub : 1 EA (Support Live screen upto 32 div. mode); |
| HDMI | Main : 1 EA (Both Support Line / PB / Setup)- Support upto 4K (3840 x 2160, Single Monitor Mode 64 div) | |
| Audio Out(1EA, RCA, Line); | ||
| Ethernet | RU-45 4EA (LAN/WAN, 1Stups), 1000M SFP 2ea | |
| Alarm | 1) In(4EA, Terminal Block)2) Alarm Reset(1EA)3) Out (4EA, Terminal Block)- Relay Out(1NO/NC/COM)- Relay Out(2~4NO/COM) | |
| USB | 2EA(Front 2) | |
| Item Details | ||
| Connectors | Storage | iSCS |
| Serial FS-232C (UPS Support) | ||
| Reset Switch(1EA) | ||
| Power Cord 2EA AC Inlet | ||
| System | ||
| Log Log List Max. 20,000 (System Log Event Log each) | ||
| Environmental | ||
| Operating Temperature / Humidity +0°C to +10°C (+32°F to +10.4°F) | ||
| Humidity 20% ~ 85% R/I | ||
| Electrical | ||
| Power | 100 ~ 240 VAC =10%; 50/60 Hz, 3~1.5A (Dual SMPS) | |
| Power Consumption Max. 250V (853 BTU with HDD 12sec) | ||
| Mechanical | ||
| Color / Material Black / Metal | ||
| Dimension (WxHxD) | W436.0 x H132.0 x D450.0mm (17.17" x 5.2" x 17.72") (3u) | |
| Weight Approx. 11 Kg (24.3 lb, HDD not Included) | ||
PRODUCT OVERVIEW
unit: mm (inches)
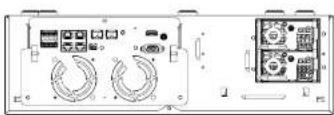
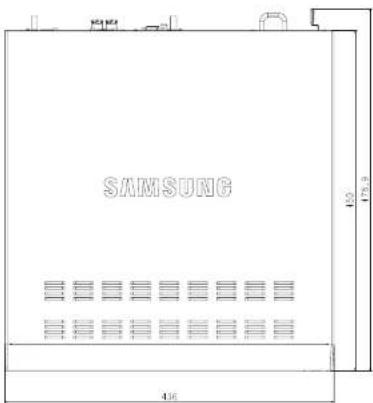
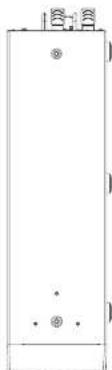
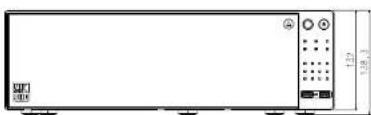
DEFAULT SETTING
To reset the system, go to 'System Management > Settings > Load Factory Default' and press the button.
This returns the factory default settings.
When you initialize with the included, you are required to reboot the camera and reset the password.
The initial administrator ID is 'admin' and the password should be set when logging in for the first time. Please change your password every three months to safely protect personal information and to prevent the damage of information theft. Please note that it is the user's responsibility for the security and any other problems caused by mismanaging a password.
| Category Details Factory Default | ||||
| System | Date/Time/Language Date/Time/Language | Date YYYY-MM-DD | ||
| Time 24 hours | ||||
| Time Zone GMT | ||||
| Time Sync. OFF | ||||
| LIST OFF | ||||
| Language English | ||||
| User | Admin ID admin | |||
| Permission Setup | Restricted Access | Backup/Record/RecordStop/Search/PTZ/RemoteAlarm Out/Shutdown | ||
| Restriction on Network Access | None | |||
| Auto Log cut 3 Min | ||||
| Manual Input of ID OFF | ||||
| System Management | System Information | Device Name | MVR | |
| Log Information | System Log | Type | View all | |
| Event Log | Type | View all | ||
| Backup Log | OFF | |||
| Device | Camera | Camera Register | OFF | |
| Set Camera | OFF | |||
| Camera Password | OFF | |||
| Live Setup | OFF | |||
| Channel Setup | Video | ON | ||
| Audio | OFF | |||
| Camera Name | CAM 01 -- CAM 64 | |||
| Storage Device | Device/Format | Device | HCO | |
| Usage | ||||
| Status | ||||
| Temperature | - | |||
| Use Time | - | |||
| Device | Storage Device | ISCSI OFF | ||
| RAID RAID Mode Not Used | ||||
| IIDC Alarm | Check Alarm Output Port BEEP | |||
| Duration Continuous | ||||
| Replace Alarm Output Port BEEP | ||||
| Duration Continuous | ||||
| ISCSI Alarm Output Port BEEP | ||||
| Duration Continuous | ||||
| Monitor Monitor | Event Display OFF | |||
| Display All | ||||
| Sequence switching time 5 sec | ||||
| Video Output Clone | ||||
| Display Position Setup 30 | ||||
| Text | Device | Device TEXT 01~ | 64 | |
| Use | No: Used | |||
| Port | 7001-7064(able to switch ports) | |||
| Encoding type | US-ASCII | |||
| Event | Total amount | 0 | ||
| Record | Recording School | CH1-CH64 | Both(Cont&Even) | |
| Record Setup | Standard | Full | ||
| Event | Full | |||
| Pro Event | OFF | |||
| POST Event | 1 min | |||
| Audio | OFF | |||
| Record Option | Disk End Mode | Overwrite | ||
| Disk End Back OFF | ||||
| Auto Delete | OFF | |||
| Event | Sensor Detection | NVR | Sensor Operation | OFF |
| Cam | Camera No. | |||
| Alarm Cut | None | |||
| Duration | 10 sec | |||
| Camera | Sensor Operation | OFF | ||
| Cam | Camera No. | |||
| Alarm Cut | None | |||
| Duration | 10 sec | |||
| Category Details Factory Default | ||||
| Event | Camera Event | Camera | Camera Event | OFF |
| MD | OTT | |||
| Smart Search | OFF | |||
| Cam | Camera No. | |||
| Alarm | None | |||
| Alarm Duration | 10 sec | |||
| Video loss selection | Video loss status OFF | |||
| Alarm Out | None | |||
| Alarm Duration | 10 sec | |||
| Alarm Out Schedule | Alarm Out1 | Event Sync | ||
| Network | Interface | Network | IP Type | Static IP |
| Network 1(Camera) | 192.168.1.200 | |||
| Network 2(Camera) | 192.168.2.200 | |||
| Network 3(Viewer) | 192.168.3.200 | |||
| Network 4(SCSI) | 192.168.4.200 | |||
| Submit Mask | 255.255.255.0 | |||
| Gateway | 192.168.1.1 | |||
| DNS | 168.126.63.1 | |||
| Fort | Protocol Type TCP | |||
| Device Type | 554 | |||
| UDP Port | 8000~8159 | |||
| Multicast IP Address | 224.126.63.1 | |||
| Multicast TTL | 5 | |||
| HTTP Port | 80 | |||
| Send SSL | OFF | |||
| Backup Bandwidth | Low | |||
| DONS | Network1/2/3 | DONS Site | OFF | |
| IP Filtering | Filtering Type | Deny | ||
| SSL | Secured Connection System | HTTP (Non-sacured connection) | ||
| 802.1x | Network1/2/3/4 | Enable CCC 802.1x | OFF | |
| Live Streaming | OFF | |||
| SMTP | Port | 25 | ||
| Use Authentication | OFF | |||
| Secure Transfer | Never | |||
| Event | Event Interval | 10 min | ||
| Use Event Transfer | OFF | |||
| Recipient | Group Name | OFF | ||
| Permission | OFF | |||
| Category Details Factory Default | ||||
| Network | SNMP | Enable SNMP v1 OFF | ||
| Enable SNMP v2 D/T | ||||
| Enable SNMP v3 OFF | ||||
| Enable SNMP Traps OFF | ||||
| DHCP Server | Network 1 (camera) | IP Range | 192.168.1.1 ~ 192.168.1.254 | |
| IP Lease time 86/00 | ||||
| Network 2 (camera) | IP Range | 192.168.2.1 ~ 192.168.2.254 | ||
| IP Lease time 86/00 | ||||
| Network 3 (lower) | IP Range | 192.168.3.1 ~ 192.168.3.254 | ||
| IP Lease time 86/00 | ||||
| Network 4 (SCSI) | IP Range | 192.168.4.1 ~ 192.168.4.254 | ||
| IP Lease time 86/00 | ||||
| Failover Mode Normal | ||||
TROUBLESHOOTING
| Problem | Action |
| Live video will be slow or cut off. • | The frame number set for multiple data transmission set in camera or network environment could differ from the actual rate of transmission. Right click with the mouse button and select <Channel Information> to check the number of incoming frames for each channel and the actual number of framed played. Basically, when you register a camera, the LiveIVR profile is created and the rate is set to F: 264.800*600bps. If necessary, go to <Menu> → <Device> → <Camera> → <Camera Setting> and change the number of frames. If you keep seeing video show down or cut off, then check the network environment or camera condition. |
| The system does not turn on and the indicator on the front panel does not work at all. | Check if the power supply system is properly connected. Check the system for the input voltage from the power source. • If the problem persists even after you have taken the above actions, check the power supplier and replace it with a new one if necessary. Check inside if the cables are properly connected. (SMPS, FRONT) |
| Some channels display just a clock screen even if they receive video sources. | • Check if the camera is properly supplied with power. • Check the video output connecting the camera's view viewer. • Check if the network port is properly connected and the network setting is set correctly. • Change the hub supporting Gigabit. It may solve. |
| The screen displays the logo image repeatedly. • | This may occur from a problem with the main board, or the related software is contact. Contact the nearest service center for more information. |
| The Channel button does not work on the Live screen. | The Channel button does not work if the current screen is in the event monitoring mode. |
| The cursor will not move to the Start button when I start the calendar search. | Check if the channel and the date that you want to play are marked with the V symbol. Both channel and date should be checked before you can start playing with the Start button. |
| No video is played on the connected monitor. • | Check if the necessary cables are connected to the monitor properly. Some monitors do not support the VWR output (HDMI or VGA). (VWR output resolution : VGA : 1280°720, 1280°1324, 1320°1080, HDMI : 720P, 1080P, 1440P, 216UPCheck the monitor resolution In case of a 4K video, check whether the cable in use supports HDMI 2.0. |
| Logo screen on bootup stalls in the [ ] state. | The IDD may have problems. Visit your nearest customer service center to check the IDD. |
| No response controlling PTZ in the live viewer. | Check the registered Camera if it support PTZ function. |
| The camera is not connected or the PC falls to connect to the product. | Check if the network calls is connected properly.Ensure that you have soft Network - Connection Mode.Check the IP setting of the PC or camera.Try the Ping Test.Check if there is a different device near the product uses the same P. |
| I registered a camera, but the web viewer does not show live video. | After registering a camera, a user need to deliver the desired layout, before the screen split mode and live screen fit for the setting appears. |
| In the web viewer, the screen does not switch automatically. | You need to select the dashed layout for sequence operation. In the automatic switching menu. |
| The Live screen is too bright or too dark. | Check the video settings of the registered camera. |
| A message of "Need to reset date/time." is displayed on the screen. | This message is displayed if there occurs a problem with the time setting of the internal clock or an error in the clock itself.Contact the retailer or the service center for more information. |
| The time bar is not displayed in Search mode. | The timeline can switch between normal and extension mode. In extension mode, the time bar may not be displayed in the current timeline. Switch to normal mode or use the left or right button to navigate through the time bar. |
| The "NO HDD" Icon and an error message are displayed. | Check the HDD for connection, if the problem persists in a normal condition, contact the nearest service center to have the HDD checked by the service personnel. |
| I have installed an additional HDD on the NVR but it does not recognize the HDD. | See the compatibility list to check if the additional HDD is supported by the NVR. For the compatibility list, contact the retailer where you purchased the NVR. |
| I have connected an external storage device (USB Memory, USB HDD) to the NVR but the NVR seems not to recognize it. | See the compatibility list of external storage devices to check if the connected device is supported by the NVR. For the compatibility list, contact the retailer where you purchases the NVR. |
| If I press the ESC key in full screen mode of the WebViewer, the system does not switch to a normal split mode. | Press the ALT+TAB keys to select 'ACTIVE MOVIE' and press the ESC key again. The system will switch to a normal split mode. |
| I found it difficult to configure the network settings if using the default search, backup and router settings. | For more information, refer to the user manual.You want to check the basics of the product for a quick start, refer to the quick start guide (backup, search).If you use the router for network connection, refer to the "Connecting and Setting the Network" section in this manual. |
| Problem | Action |
| I forgot the password. • | Contact the NWR administrator for help. |
| Backup data is just not played by the PC or NWR. • | When you are backing up data, you have choices about the player other PC or NWR. Make your selection before proceeding.If you are using the PC to play the data, the format of the backup file should be either SEC.If you are using the NWR for this purpose, formatting backup files should be done by the NWR. |
| Recording does not work. • | If your prayer does not display a live image at all, that indicates recording does not work so first check if you see an image on the screen.Recording does not work if the recording settings are not properly configuredScheduled Record: Specify a desired time in Menu – Record – RecordingSchedule. Recording will start at the specified time.- <Continuous> Record: Recording will proceed in any conditions at the specified time.- <Event> Record: When an event occurs, recording will perform only if the event is of alarm, motion detection and video loss. If there is no event found, recording will not perform.- <Continuous / Event> Record: If there is no event found, Continuous recording will perform. Whereas, if an event occurs, Event recording will perform. |
| The image quality of the recording data is not good. • | Increase the resolution and quality level in Menu – Record – Quality / Resolution.1) Resolution: Select a bigger size when specifying the recording size.The recording image in the CIF format shows a deteriorated quality as it is enlarged from a small-sized image.2) Record Quality: Specify a bigger level for the recording quality.If you increase the resolution and the recording quality, the data size increases accordingly. So the HDD will be filled faster. Overcoming will overcome the existing data so recording will proceed at a shorter interval. |
| Frame rate of the actual recording does not match that of configured to the camera. | If multiple profiles were applied to one camera for video transmission, the actual video stream can be serviced by the camera at a lower frame rate than specified.Configure your camera to use one profile for data streaming as possible.For example, if you set the same profile for recording and network profiles, the actual recording is made at the specified frame rate.Still, live video display using split screen mode may apply yet another profile to camera in accordance with the used screen mode.Note that allowed limit bitrate for recording / recording settings should be set to be bigger values than that of camera's feed. |
| Problem | Action |
| In the recording setting screen, the permitted level for a specific channel is displayed in orange. | # the input data is greater than the permitted level for each channel, it is displayed in orange. Set the permitted data limit to higher than the amount of input data.# the sum of input data for each channel exceeds the limit, the alarm icon will be displayed. In this case, the channel exceeding the input limit does not record the entire frame, but it records the main frame only (one or two per sec). |
| In the live screen, the [ ] is displayed and the message window saying " recording data load exceeds the limit. Check it in the record setting." pops up. | # the sum of input data for each channel exceeds the limit, the alarm icon and the pop up window will be displayed. In this case, the channel exceeding the input limit does not record the entire frame, but it records the main frame only (one or two per sec).Set the permitted data limit to higher than the amount of input data entered in the record setting menu page 40#. |
| Recording is not performed in accordance with the settings. | # the recording status displays ' Exceeds the maximum hard disc performance', set the recording size according to the recording performance specifications for each HDD condition.(Refer to "Record Settings" in the menu settings. (Page 41). |
| The iSCSI disconnected icon and the error message pop up window will appear. | Check if the iSCSI port is connected to the network cable. Check the IP address setting of the iSCSI equipment.Try a ping test. |
| The recording screen will show down. | Check whether the recording performance specifications for each HDD condition match the actual recording settings.(Refer to "Record Settings" in the menu settings. (Page 41).)If the data volume of a video exceeds the playing performance, only the main frame is played.(Refer to "Product Specifications" in the appendix. (Page 76). |
| If recording loss persists continuously | Reset the camera recording profile to let the entire recording ops size fit the recording performance for each HDD condition. (Refer to "Record Settings" in the menu settings. (Page 41).)Check the HDD status and determine whether inspection or replacement is necessary.(Refer to "Storage Device" in the menu settings. (Page 35)). |
OPEN SOURCE LICENSE REPORT ON THE PRODUCT
The software included in the product contains copyrighted software that is licensed under the GPL, LGPL, MPL-1.1, BSD 2-Clause License, BSD 3-Clause License, MIT License, IBM2 License, Apache 2.0 License, zlib/libpng License, Boost Software License, Curl License, Microsoft Public License, Code Project Open 1.02 License, JFIF License, RSA M34 or M36 Message Digest Algorithm License, PHP License 8.01, OpenSSL Combined License, CHB-5 License, NTP License, CodeGear License, GLUI for Win32 License, ISC License, Ulan Gadsman Alternate License. You may obtain the complete Corresponding Source code here for a period of three years after our last shipment of this product by sending email to help.cctv@hanwha.com
If you want to obtain the complete Corresponding Source code in a physical medium such as CD-ROM, the cost of physically packaging the source distribution might be charged.
For more details about Open Source, refer to the CD or Hanwha Website.
- GPL Software: hennis=1.00a, buybox 1.23.2, chible: 0.5.4, Linux Kernel 3.10.y, altlocl 3.11, texsi 0.20, mertester 4.0.5, mtl-locl-1.8.11, mtl-utle-1.5.1, smartronto-e-6.4, uchop-0.9.5, wpa-supplicant-0.7.3, xdsprop-3.1.11, gdo-7.8.1, merto-1.4.21, parted-3.1, wget-1.14
• LGPL Software: fmpap-2.4.3, glico 2.16, Live555, Qt 4.7.2
• MPL 1.1: roapi-edk
- BSD 2-Clause License: FreeBSD
- BSD 3-Clause License: miniuprpc-1.5-pcc, net-srrmp-5.62.1, cpc-2.4.5, jquery.she256, jstn, ibpeg-turco, lightpd, maintypes, requires, spheral+, sprnl'0.7, System Verilog Packet Library, Text OpenGL Extension Wrangler Library 1.7.0
- MIT License: aplaschorva2, avapendous, json, cJSON Data Gamble dynamus, javascript ipv6, jpGrid, jQuery UI, jquery form, query hashchange, jquery-json, jquery-numeric, jquery-throttle-debounce 1.1, US-Browser-Driver, moon8, noty, Raphael JavaScript Library, wildflower 1.3.Bala
- libxml2 License: libxml2 2.7.7
• Apache 2.0 License: ELLib
- zlib/libpng License: coinaga, HM NIS Edit, Nulsc0 Scriptable Install System 2.46, PNG tolerance library, target 2.8.2, /k:
- Boost Software License: boost 1.57.0
• Curl License: curl 7.47.0
• Microsoft Public License: Mirims, Text Designer Outline Text Library
• Code Project Open 1.02 License: CPPPSOLite - C++ Wrapper for SQLite, A reusable, high performance, socket server class - Part3
• JPEG License: Ib/pea-5b
• RSA MD4 or MD5 Message-Digest Algorithm License: JavaScript MD5 1.1, sixtsp
• PHP License 3.01: HFHP-2.1.0, PHP 5.8.14
• OnproSSL Combined License: OverSSL 0.9.8/1
• PCRE 5 License: pcrp 8.3
• NTP License: rtn 4.2.6n4
• Codolipiter License: Cxclavian
• GLUT for Win32 License: GLUT for Win32
• ISC License: dhcp 4.3-2r2
• Brian Gladman Alternate License: AES with the VIA ACE
- Acknowledgement: This product includes modified version of fimpeg. Live555, Qt 4.7.2, and npepi-edk.
GNU General Public License (GPL)
Version 2, June 1991
Copyright (C) 1989, 1991 Free Software Foundation, Inc. 59 Temple Place, Suite 330, Boston, MA 02111-1307 USA Everyone is permitted to copy and distribute verbatim copies of this license document, but changing it is not allowed.
Preamble
The licenses for most software are designed to take away your freedom to share and change it. By contrast, the GNU General Public License is intended to guarantee your freedom to share and change free software—to make sure the software is free for all users. The General Public License applies to most of the Free Software Foundation's software and to any other program whose authors commit to using it. (Some other Free Software Foundation software is covered by the GNU Library General Public License instead.) You can apply it to your programs, too. When we speak of free software, we are referring to freedom, not price. Our General Public Licenses are designed to make sure that you have the freedom to distribute copies of free software (and charge for this service if you wish), that you receive source code or can get it if you want it, that you can change the software or use pieces of it in new free programs; and that you know you can do these things.
To protect your rights, we need to make restrictions that forbid anyone to deny you these rights or to ask you to surrender the rights. These restrictions translate to certain responsibilities for you if you distribute copies of the software, or if you modify it.
For example, if you distribute copies of such a program, whether gratis or for a fee, you must give the recipients all the rights that you have. You must make sure that they, too, receive or can get the source code. And you must show them these terms so they know their rights. We protect your rights with two steps: (1) copyright the software, and (2) offer you this license which gives you legal permission to copy, distribute and/or modify the software.
Also, for each author's protection and ours, we want to make certain that everyone understands that there is no warranty for this free software. If the software is modified by someone else and passed on, we want its recipients to know that what they have is not the original, so that any problems introduced by others will not reflect on the original authors' reputations.
Finally, any free program is threatened constantly by software patents. We wish to avoid the danger that redistributors of a free program will individually obtain patent licenses, in effect making the program proprietary. To prevent this, we have made it clear that any patent must be licensed for everyone's free use or not licensed at all. The precise terms and conditions for copying, distribution and modification follow.
TERMS AND CONDITIONS FOR COPYING, DISTRIBUTION AND MODIFICATION
- This License applies to any program or other work which contains a notice placed by the copyright holder saying it may be distributed under the terms of this General Public License. The "Program", below, refers to any such program or work, and a "work based on the Program" means either the Program or any derivative work under copyright law: that is to say, a work containing the Program or a portion of it, either verbatim or with modifications and/or translated into another language. (Hereinafter, translation is included without limitation in the term "modification"). Each licensee is addressed as "you".
Activities other than copying, distribution and modification are not covered by this license; they are outside its scope. The act of running the Program is not restricted, and the output from the Program is covered only if its contents constitute a work based on the Program (independent or having been made by running the Program). Whether that is true depends on what the Program does.
- You may copy and distribute verbatim copies of the Program's source code as you receive it, in any medium, provided that you conspicuously and appropriately publish on each copy an appropriate copyright notice and disclaimer of warranty; keep intact all the notices that refer to this License and to the absence of any warranty; and give any other recipients of the Program a copy of this License along with the Program.
You may charge a fee for the physical act of transferring a copy, and you may at your option offer warranty protection in exchange for a fee. 2. You may modify your copy or copies of the Program or any portion of it, thus forming a work based on the Program, and copy and distribute such modifications or work under the terms of Section 1 above, provided that you also meet all of these conditions:
a) You must cause the modified files to carry prominent notices stating that you changed the files and the date of any changes.
b) You must cause any work that you distribute or publish, that in whole or in part contains or is derived from the Program or any part thereof, to be licensed as a whole at no charge to all third parties under the terms of this License.
c) If the modified program normally reads commands interactively when run, you must cause it, when started running for such interactive use in the most ordinary way, to print or display an announcement including an appropriate copyright notice and a notice that there is no warranty (or else, saying that you provide a warranty) and that users may redistribute the program under these conditions, and telling the user how to view a copy of this License. (Exception: If the Program itself is interactive but does not normally print such an announcement, your work based on the Program is not required to print an announcement.)
These requirements apply to the modified work as a whole. If identifiable sections of that work are not derived from the Program, and can be reasonably considered independent and separate works in themselves, then this License, and its terms, do not apply to those sections when you distribute them as separate works. But when you distribute the same sections as part of a whole which is a work based on the Program, the distribution of the whole must be on the terms of this License, whose permissions for other licensees extend to the entire whole, and thus to each and every part regardless of who wrote it.
Thus, it is not the intent of this section to claim rights or contest your rights to work written entirely by you; rather, the intent is to exercise the right to control the distribution of derivative or collective works based on the Program.
In addition, mere aggregation of another work not based on the Program with the Program (or with a work based on the Program) on a volume of a storage or distribution medium does not bring the other work under the scope of this License.
- You may copy and distribute the Program (or a work based on it, under Section 2) in object code or executable form under the terms of Sections 1 and 2 above provided that you also do one of the following:
a) Accompany it with the complete corresponding machine-readable source code, which must be distributed under the terms of Sections 1 and 2 above on a medium customarily used for software interchange; or,
b) Accompany it with a written offer, valid for at least three years, to give any third party, for a charge no more than your cost of physically performing source distribution, a complete machine-readable copy of the corresponding source code, to be distributed under the terms of Sections 1 and 2 above on a medium customarily used for software interchange; or,
c) Accompany it with the information you received as to the offer to distribute corresponding source code. (This alternative is allowed only for noncommercial distribution and only if you received the program in object code or executable form with such an offer, in accord with Subsection b above.)
The source code for a work means the preferred form of the work for making modifications to it. For an executable work, complete source code means all the source code for all modules it contains, plus any associated interface definition files, plus the scripts used to control compilation and installation of the executable. However, as a special exception, the source code distributed need not include anything that is normally distributed (in either source or binary form) with the major components (compiler, kernel, and so on) of the operating system on which the executable runs, unless that component itself accompanies the executable.
If distribution of executable or object code is made by offering access to copy from a designated place, then offering equivalent access to copy the source code from the same place counts as distribution of the source code, even though third parties are not compelled to copy the source along with the object code.
- You may not copy, modify, sublicense, or distribute the Program except as expressly provided under this License. Any attempt otherwise to copy, modify, sublicense or distribute the Program is void, and will automatically terminate your rights under this License. However, parties who have received copies, or rights, from you under this License will not have their licenses terminated so long as such parties remain in full compliance.
- You are not required to accept this License, since you have not signed it. However, nothing else grants you permission to modify or distribute the Program or its derivative works. These actions are prohibited by law if you do not accept the License. Therefore, by modifying or distributing the Program (or any work based on the Program), you indicate your acceptance of this License to do so, and all its terms and conditions for copying, distributing or modifying the Program or works based on it.
- Each time you redistribute the Program (or any work based on the Program), the recipient automatically receives a license from the original licensor. If you receive the Program subject to these terms and conditions, you may not impose any restrictions on the recipients' exercise of the rights granted herein. You are not responsible for enforcing compliance by third parties to this License.
- If, as a consequence of a court judgment or allegation of patent infringement or for any other reason (not limited to patent issues), conditions are imposed on you (whether by court order, agreement or otherwise) that contradict the conditions of this License, they do not excuse you from the conditions of this License. If you cannot distribute so as to satisfy simultaneously your obligations under this License and any other pertinent obligations, then as a consequence you may not distribute the Program at all. For example, if a patent license would not permit royalty-free redistribution of the Program by all those who receive copies directly or indirectly through you, then the only way you could satisfy both it and this License would be to refrain entirely from distribution of the Program.
If any portion of this section is held invalid or unenforceable under any particular circumstances, the balance of the section is intended to apply and the section as a whole is intended to apply in other circumstances. It is not the purpose of this section to induce you to infringe any patents or other property right claims or to contest validity of any such claims. This section has the purpose of protecting the integrity of the free software distribution system, which is implemented by public license practices. Many people have made generous contributions to the wide range of software distributed through that system in reliance on consistent application of that system; it is up to the author/donor to decide if he or she is willing to distribute software through any other system and a licensee cannot impose that choice.
This section is intended to make thoroughly clear what is believed to be a consequence of the rest of this License.
B. If the distribution and/or use of the Program is restricted in certain countries either by patents or by copyrighted interfaces, the original copyright holder who places the Program under this License may add an explicit geographical distribution limitation excluding those countries, so that distribution is permitted only in or among countries not thus excluded. In such case, this License incorporates the limitation as if written in the body of the License.
- The Free Software Foundation may publish revised and/or new versions of the General Public License from time to time. Such new versions will be similar in spirit to the present version, but may differ in detail to address new problems or concerns.
Each version is given a distinguishing version number. If the Program specifies a version number of this License which applies to it and "any later version", you have the option of following the terms and conditions either of that version or of any later version published by the Free
Software Foundation. If the Program does not specify a version number of this License, you may choose any version ever published by the Free Software Foundation.
- If you wish to incorporate parts of the Program into other free programs whose distribution conditions are different, write to the author to ask for permission. For software which is copyrighted by the Free Software Foundation, write to the Free Software Foundation; we sometimes make exceptions for this. Our decision will be guided by the two goals of preserving the free status of all derivatives of our free software and of promoting the sharing and reuse of software generally.
NO WARRANTY
- BECAUSE THE PROGRAM IS LICENSED FREE OF CHARGE, THERE IS NO WARRANTY FOR THE PROGRAM TO THE EXTENT PERMITTED BY APPLICABLE LAW, EXCEPT WHEN OTHERWISE STATED IN WRITING THE COPYRIGHT HOLDERS AND/OR OTHER PARTIES PROVIDE THE PROGRAM "AS IS" WITHOUT WARRANTY OF ANY KIND, EITHER EXPRESSED OR IMPLIED, INCLUDING, BUT NOT LIMITED TO, THE IMPLIED WARRANTIES OF MERCHANTABILITY AND FITNESS FOR A PARTICULAR PURPOSE. THE ENTIRE RISK AS TO THE QUALITY AND PERFORMANCE OF THE PROGRAM IS WITH YOU. SHOULD THE PROGRAM PROVE DEFECTIVE, YOU ASSUME THE COST OF ALL NECESSARY SERVICING, REPAIR OR CORRECTION.
- IN NO EVENT UNLESS REQUIRED BY APPLICABLE LAW OR AGREED TO IN WRITING WILL ANY COPYRIGHT HOLDER, OR ANY OTHER PARTY WHO MAY MODIFY AND/OR REDISTRIBUTE THE PROGRAM AS PERMITTED ABOVE, BE LIABLE TO YOU FOR DAMAGES, INCLUDING ANY GENERAL, SPECIAL, INCIDENTAL OR CONSEQUENTIAL DAMAGES ARISING OUT OF THE USE OR INABILITY TO USE THE PROGRAM (INCLUDING BUT NOT LIMITED TO LOSS OF DATA OR DATA BEING RENDERED INACCURATE OR LOSSES SUSTAINED BY YOU OR THIRD PARTIES OR A FAILURE OF THE PROGRAM TO OPERATE WITH ANY OTHER PROGRAMS), EVEN IF SUCH HOLDER OR OTHER PARTY HAS BEEN ADVISED OF THE POSSIBILITY OF SUCH DAMAGES.
END OF TERMS AND CONDITIONS
How to Apply These Terms to Your New Programs
If you develop a new program, and you want it to be of the greatest possible use to the public, the best way to achieve this is to make it free software which everyone can redistribute and change under these terms. To do so, attach the following notices to the program. It is safest to attach them to the start of each source file to most effectively convey the exclusion of warranty; and each file should have at least the "copyright" line and a pointer to where the full notice is found.
One line to give the program's name and an idea of what it does. Copyright (C) yyyy name of author
This program is free software; you can redistribute it and/or modify it under the terms of the GNU General Public License as published by the Free Software Foundation; either version 2 of the License, or (at your option) any later version.
This program is distributed in the hope that it will be useful, but WITHOUT ANY WARRANTY; without even the implied warranty of MERCHANTABILITY or FITNESS FOR A PARTICULAR PURPOSE. See the
GNU General Public License for more details. You should have received a copy of the GNU General Public License along with this program; if not, write to the Free Software Foundation, Inc., 51 Franklin Street, Fifth Floor, Boston, MA 02110-1301, USA
Also add information on how to contact you by electronic and paper mail.
If the program is interactive, make it output a short notice like this when it starts in an interactive mode:
Gnomovision version 69, Copyright (C) year name of author Gnomovision comes with ABSOLUTELY NO WARRANTY; for details type `show w'. This is free software, and you are welcome
to redistribute it under certain conditions; type `show c' for details.
The hypothetical commands `show w' and `show c' should show the appropriate parts of the General Public License. Of course, the
commands you use may be called something other than `show w' and `show c'; they could even be mouse-clicks or menu items--whatever suits your program.
You should also get your employer (if you work as a programmer) or your school, if any, to sign a "copyright disclaimer" for the program, if necessary. Here is a sample; alter the names:
Yoyodyne, Inc., hereby disclaims all copyright
interest in the program `Gnomovision'
(which makes passes at compilers) written by James Hacker.
by James Hacker.
signature of Ty Coon, 1 April 1983
Ty Coen, President of Vice
This General Public License does not permit incorporating your program into proprietary programs. If your program is a subroutine library, you may consider it more useful to permit linking proprietary applications with the library. If this is what you want to do, use the GNU Lesser General Public License instead of this License.
GNU General Public License
Version 3, 29 June 2007
Copyright (C) 2007 Free Software Foundation, Inc. http://ref.org Everyone is permitted to copy and distribute verbatim copies of this license document, but changing it is not allowed.
Preamble
The GNU General Public License is a free, copyleft license for software and other kinds of works.
The licenses for most software and other practical works are designed to take away your freedom to share and change the works. By contrast, the GNU General Public License is intended to guarantee your freedom to share and change all versions of a program—to make sure it remains free software for all its users. We, the Free Software Foundation, use the GNU General Public License for most of our software; it applies also to any other work released this way by its authors. You can apply it to your program, too.
When we speak of free software, we are referring to freedom, not prices. Our General Public Licenses are designed to make sure that you have the freedom to distribute copies of free software and charge for them if you want, that you receive source code or can get it if you want it, that you can change the software or use pieces of it in new free programs, and that you know you can do these things.
To protect your rights, we need to prevent others from denying you these rights or asking you to surrender the rights. Therefore, you have certain responsibilities if you distribute copies of the software, or if you modify it: responsibilities to respect the freedom of others.
For example, if you distribute copies of such a program, whether gratis or for a fee, you must pass on to the recipients the same freedoms that you received. You must make sure that they, too, receive or can get the source code. And you must show them these terms so they know their rights.
Developers that use the GNU GPL protect your rights with two steps: (1) assert copyright on the software, and (2) offer you this License giving you legal permission to copy, distribute and/or modify it.
For the developers' and authors' protection, the GPL clearly explains that there is no warranty for this free software. For both users' and authors' sake, the GPL requires that modified versions be marked as changed, so that their problems will not be attributed erroneously to authors of previous versions.
Some services are designed to demand users access to install or run modified versions of the software inside them, although the manufacturer can use. This is fundamentally incompatible with the aim of protecting users' freedom to change the software. The systematic pattern of such issues occurs in the area of products for introduction to use, which is precisely where it is most unacceptable. The errors, we have designed this version of the GPL to prohibit the practice for these products. If such problems are substantially in other domains, we stand ready to extend this provision to those domains in future versions of the GPL as needed to protect the freedom of users.
Finally, every program is threatened constantly by software patents. States should not allow patents to restrict development and use of software on general purpose computers, but in those that do, we wish to avoid the special danger that patents applied to a free program could make it effectively proprietary. To prevent this, the GPL ensures that patents cannot be used to render the program non-free.
The precise terms and conditions for copying, distribution and modification follow.
TERMS AND CONDITIONS
- Definitions.
"This License" refers to version 3 of the GNU General Public License. "Copyright" also means copyright-like laws that apply to other kinds of works, such as semiconductor masks.
"The Program" refers to any copyrightable work licensed under this license. Each licensee is addressed as "you". "Licensees" and "recipients" may be individuals or organizations.
To "modify" a work means to copy from or adapt all or part of the work in a fashion requiring copyright permission, other than the making of an exact copy. The resulting work is called a "modified version" of the earlier work or a work "based on" the earlier work.
A "covered work" means either the unmodified Program or a work based on the Program.
To "propagate" a work means to do anything with it that, without permission, would make you directly or secondarily liable for infringement under applicable copyright law, except executing it on a computer or modifying a private copy. Propagation includes copying, distribution (with or without modification), making available to the public, and in some countries other activities as well.
To "convey" a work means any kind of propagation that enables other parties to make or receive copies. Mere interaction with a user through a computer network, with no transfer of a copy, is not conveying.
An interactive user interface displays "Appropriate Legal Notices" to the extent that it includes a convenient and prominently visible notice that (1) displays an appropriate copyright notice, and (2) tells the user that there is no warranty for the work (except to the extent that warranties are provided), that licensees may convey the work under this License, and how to view a copy of this License. If the interface presents a list of user commands or options, such as a menu, a prominent item in the list contains this notice.
- Source Code.
The "source code" for a work means the preferred form of the work for making modifications to it. "Object code" means any non-source form of a work.
A "Standard Interface" means an interface that either is an official standard defined by a recognized standards body, or, in the case of interfaces specified for a particular programming language, one that is widely used among developers working in that language.
The "System Libraries" of an executable work include anything, other than the work as a whole, that is included in the normal form of packaging a Major Component, but which is not part of that Major Component, and that serves only to enable use of the work with the Major Component, or to implement a Standard Interface for which an implementation is available to the public in source code form. A "Major Component", in this context, means a major essential component (kernel, window system, and so on) of the specific operating system (if any) on which the executable work runs, or a compiler used to produce the work, or an object code interpreter used to run it.
The "Corresponding Source" for a work in object code form means all the source code needed to generate, install, and (for an executable work) run the object code and to modify the work, including scripts to control those activities. However, it does not include the work's System Libraries, or general-purpose tools or generally available free programs which are used unmodified in performing those activities but which are not part of the work. For example, Corresponding Source includes
interface definition files associated with source files for the work, and the source code for shared libraries and dynamically linked subprograms that the work is specifically designed to require, such as by intimate data communication or control flow between those subprograms and other parts of the work.
The Corresponding Source need not include anything that users can regenerate automatically from other parts of the Corresponding Source. The Corresponding Source for a work in source code form is that same work.
- Basic Permissions.
All rights granted under this License are granted for the term of copyright on the Program, and are irrevocable provided the stated conditions are met. This License explicitly affirms your unlimited permission to run the unmodified Program. The output from running a covered work is covered
by the License only if the output, given its content, constitutes a covered work. This License acknowledges your rights of fair use or other equivalent, as provided by copyright law.
You may make, run and propagate covered works that you do not convey, without conditions so long as your license otherwise remains in force. You may convey covered works to others for the sole purpose of having them make modifications exclusively for you, or provide you with facilities for running those works, provided that you comply with the terms of this License in conveying all material for which you do not control copyright. Those thus making or running the covered works for you do so exclusively on your behalf, under your direction and control, on terms that prohibit them from making any copies of your copyrighted material outside their relationship with you.
Conveying under any other circumstances is permitted solely under the conditions stated below. Sublicensing is not allowed; section 10 makes it unnecessary.
- Protecting Users' Legal Rights From Anti-Circumvention Law. No covered work shall be deemed part of an effective technological measure under any applicable laws fulfilling obligations under article 1 of the WIPO copyright framework adopted on 20 December 1995, or similar laws prohibiting or restricting circumvention of such measures. When you convey a covered work, you waive any legal power to forbid circumvention of technological measures to the extent such circumvention is effected by exercising rights under this License with respect to the covered work, and you disclaim any intention to limit operation or modification of the work as a means of enforcing, against the work's users, your or third parties' legal rights to forbid circumvention of technological measures.
- Conveying Verbatim Copies.
You may convey verbatim copies of the Program's source code as you receive it, in any medium, provided that you conspicuously and appropriately publish on each copy an appropriate copyright notice; keep intact all notices stating that this License and any non-permissive terms added in accord with section 7 apply to the code; keep intact all notices of the absence of any warranty; and give all recipients a copy of this License along with the Program.
You may charge any price or no price for each copy that you convey, and you may offer support or warranty protection for a fee.
- Conveying Modified Source Versions.
You may convey a work based on the Program, or the modifications to produce it from the Program, in the form of source code under the terms of section 4, provided that you also meet all of these conditions:
a) The work must carry prominent notices stating that you modified it, and giving a relevant date.
b) The work must carry prominent notices stating that it is released under this License and any conditions added under section 7. This requirement modifies the requirement in section 4 to "keep intact all notices".
c) You must license the entire work, as a whole, under this License to anyone who comes into possession of a copy. This License will therefore apply, along with any applicable section 7 additional terms, to the whole of the work, and all its parts, regardless of how they are packaged. This License gives no permission to license the work in any other way, but it does not invalidate such permission if you have separately received it.
d) If the work has interactive user interfaces, each must display Appropriate Legal Notices; however, if the Program has interactive interfaces that do not display Appropriate Legal Notices, your work need not make them do so.
A compilation of a covered work with other separate and independent works, which are not by their nature extensions of the covered work, and which are not combined with it such as to form a larger program, in or on a volume of a storage or distribution medium, is called an "aggregate" if the compilation and its resulting copyright are not used to limit the access or legal rights of the compilation's users beyond what the individual works permit. Inclusion of a covered work in an aggregate does not cause this License to apply to the other parts of the aggregate.
- Conveying Non-Source Forms.
You may convey a covered work in object code form under the terms of sections 4 and 5, provided that you also convey the machine-readable Corresponding Source under the terms of this License, in one of these ways:
a) Convey the object code in, or embodied in, a physical product (including a physical distribution medium), accompanied by the Corresponding Source fixed on a durable physical medium customarily used for software interchange.
Convey the object code in, or embedded in, a physical product (including a physical distribution medium), accompanied by a written offer, valid for at least three years and valid for as long as you offer spare parts or customer support for that product model, to give anyone who possesses the object code either (1) a copy of the Corresponding Source for all the software in the product that is covered by this License, on a durable physical medium customarily used for software interchange, for a price no more than your reasonable cost of physically performing this conveying of source, or (2) access to copy the Corresponding Source from a network server at no charge.
c) Convey individual copies of the object code with a copy of the written offer to provide the Corresponding Source. This alternative is allowed only occasionally and non-commercially, and only if you received the object code with such an offer, in accord with subsection 6b.
d) Convey the object code by offering access from a designated place (gratis or for a charge), and offer equivalent access to the
Corresponding Source in the same way through the same place at no further charge. You need not require recipients to copy the
Corresponding Source along with the object code. If the place to copy the object code is a network server, the Corresponding Source may be on a different server (operated by you or a third party) that supports equivalent copying facilities, provided you maintain clear directions next to the object code saying where to find the Corresponding Source. Regardless of what server hosts the Corresponding Source, you remain obligated to ensure that it is available for as long as needed to satisfy these requirements.
e) Convey the object code using peer-to-peer transmission, provided you inform other peers where the object code and Corresponding Source of the work are being offered to the general public at no charge under subsection 6d.
A separable portion of the object code, whose source code is excluded from the Corresponding Source as a System Library, need not be included in conveying the object code work.
A "User Product" is defined as (1) a consumer product, which means any tangible personal property that is normally used for personal, family, or household purposes, or (2) anything designed or sold for incorporation into a dwelling. In determining whether a product is a consumer product, doubtful cases shall be resolved in favor of coverage. For a particular product received by a particular user, "normally used" refers to a typical or common use of that class of product, regardless of the status of the particular user or of the way in which the particular user actually uses, or expects or is expected to use, the product. A product is a consumer product regardless of whether the product has substantial commercial, industrial or non-consumer uses, unless such uses represent the only significant mode of use of the product.
"Installation information" for a User Product means any methods, procedures, authorization keys, or other information required to install and execute modified versions of a covered work in that User Product from a modified version of its Corresponding Source. The information must suffice to ensure that the continued functioning of the modified object code is in no case prevented or interfered with solely because modification has been made.
If you convey an object code work under this section in, or with, or specifically for use in, a User Product, and the conveying occurs as part of a transaction in which the right of possession and use of the User Product is transferred to the recipient in perpetuity or for a fixed term (regardless of how the transaction is characterized), the Corresponding Source conveyed under this section must be accompanied by the Installation Information. But this requirement does not apply if neither you nor any third party retains the ability to install modified object code on the User Product (for example, the work has been installed in ROM).
The requirement to provide Installation Information does not include a requirement to continue to provide support service, warranty, or updates for a work that has been modified or installed by the recipient, or for the User Product in which it has been modified or installed. Access to a network may be denied when the modification itself materially and adversely affects the operation of the network or violates the rules and protocols for communication across the network.
Corresponding Source conveyed and Installation Information provided, in accord with this section, must be in a format that is publicly documented (and with an implementation available to the public in source code form), and must require no special password or key for unpacking, reading, or copying.
- Additional Terms.
"Additional permissions" are terms that supplement the terms of this License by making exceptions from one or more of its conditions.
Additional permissions that are applicable to the entire Program shall be treated as though they were included in this License, to the extent that they are valid under applicable law. If additional permissions apply only to part of the Program, that part may be used separately under those permissions, but the entire Program remains governed by the License without regard to the additional permissions.
When you convey a copy of a covered work, you may at your option remove any additional permissions from that copy, or from any part of it. (Additional permissions may be written to require their own removal in certain cases when you modify the work.) You may place additional permissions on material added by you to a covered work, for which you have or can give appropriate copyright permission.
Notwithstanding any other provision of this License, for material you add to a covered work, you may (if authorized by the copyright holders of that material) supplement the terms of this License with terms:
a) Disclaiming warranty or limiting liability differently from the terms of sections 15 and 16 of this License; or
b) Requiring preservation of specified reasonable legal notices or author attributions in that material or in the Appropriate Legal Notices displayed by works containing it; or
c) Prohibiting misrepresentation of the origin of that material, or requiring that modified versions of such material be marked in reasonable ways as different from the original version; or
d) Limiting the use for publicity purposes of names of licensors or authors of the material; or
e) Declining to grant rights under trademark law for use of some trade names, trademarks, or service marks; or
f) Requiring indemnification of licensors and authors of that material by anyone who conveys the material (or modified versions of it) with contractual assumptions of liability to the recipient, for any liability that these contractual assumptions directly impose on these licensors and authors.
All other non-permissive additional terms are considered "further restrictions" within the meaning of section 10. If the Program as you received it, or any part of it, contains a notice stating that it is governed by this License and that there is a term that is a further restriction, you may remove that term. If a license document contains a further restriction but permits relicensing or conveying under this License, you may add to a covered work material governed by the terms of that license document, provided that the further restriction does not survive such relicensing or conveying.
If you add terms to a covered work in accordance with this section, you must place in the relevant source files a statement of the additional terms that apply to those files, or a notice indicating where to find the applicable terms.
Additional terms, permissive or non-permissive, may be stated in the form of a separately written license, or stated as exceptions; the above requirements apply either way.
- Termination.
You may not propagate or modify a covered work except as expressly provided under this License. Any attempt otherwise to propagate or modify it is void, and will automatically terminate your rights under this License (including any patent licenses granted under the third paragraph of section 11).
However, if you cease all violation of this License, then your license from a particular copyright holder is reinstated (a) provisionally, unless and until the copyright holder explicitly and finally terminates your license, and (b) permanently, if the copyright holder fails to notify you of the violation by some reasonable means prior to 60 days after the cessation.
Moreover, your license from a particular copyright holder is reinstated permanently if the copyright holder notifies you of the violation by some reasonable means, this is the first time you have received notice of violation of this License (for any work) from that copyright holder, and you cure the violation prior to 30 days after your receipt of the notice.
Termination of your rights under this section does not terminate the licenses of parties who have received copies or rights from you under the License. If your rights have been terminated and not permanently reinstated, you do not qualify to receive new licenses for the same material under section 10.
- Acceptance Not Required for Having Copies.
You are not required to accept this License in order to receive or run a copy of the Program. Ancillary propagation of a covered work occurring solely as a consequence of using peer-to-peer transmission to receive a copy likewise does not require acceptance. However, nothing other than the License grants you permission to propagate or modify any covered
work. These actions initiate copyright infringement if you do not accept this License. Therefore, by modifying or propagating a covered work, you indicate your acceptance of this License to do so.
- Automatic Licensing of Downstream Recipients.
Each time you convey a covered work, the recipient automatically receives a license from the original licensors, to run, modify and propagate that work, subject to this License. You are not responsible for enforcing compliance by third parties with this License.
An "entity transaction" is a transaction transferring control of an organization, or substantially all assets of one, or subdividing an organization, or merging organizations. If propagation of a covered work results from an entity transaction, each party to that transaction who receives a copy of the work also receives whatever licenses to the work the party's predecessor in interest had or could give under the previous paragraph, plus a right to possession of the Corresponding Source of the work from the predecessor in interest, if the predecessor has it or can get it with reasonable efforts.
You may not impose any further restrictions on the exercise of the rights granted or affirmed under this License. For example, you may not impose a license fee, royalty, or other charge for exercise of rights granted under this License, and you may not initiate litigation (including a cross-claim or counterclaim in a lawsuit) alleging that any patent claim is infringed by making, using, selling, offering for sale, or importing the Program or any portion of it.
- Patents.
A "contributor" is a copyright holder who authorizes use under this License of the Program or a work on which the Program is based. The work thus licensed is called the contributor's "contributor version".
A contributor's "essential patent claims" are all patent claims owned or controlled by the contributor, whether already acquired or hereafter acquired, that would be infringed by some manner, permitted by this License, of making, using, or selling its contributor version, but do not include claims that would be infringed only as a consequence of further modification of the contributor version. For purposes of this definition, "control" includes the right to grant patent sublicenses in a manner consistent with the requirements of this License.
Each contributor grants you a non-exclusive, worldwide, royalty-free patent license under the contributor's essential patent claims, to make, use, sell, offer for sale, import and otherwise run, modify and propagate the contents of its contributor version.
In the following three paragraphs, a "patent license" is any express agreement or commitment, however denominated, not to enforce a patent (such as an express permission to practice a patent or covenant not to sue for patent infringement). To "grant" such a patent license to a party means to make such an agreement or commitment not to enforce a patent against the party.
If you convey a covered work, knowingly relying on a patent license, and the Corresponding Source of the work is not available for anyone to copy, free of charge and under the terms of this License, through a publicly available network server or other readily accessible means, then you must either (1) cause the Corresponding Source to be so available, or (2) arrange to deprive yourself of the benefit of the patent license for this particular work, or (3) arrange, in a manner consistent with the requirements of this License, to extend the patent license to the recipients. "Knowingly relying" means you have actual knowledge that, but for the patent license, your conveying the covered work in a country, or your recipient's use of the covered work in a country, would infringe one or more identifiable patents in that country that you have reason to believe are valid.
If, pursuant to or in connection with a single transaction or arrangement, you convey, or propagate by procuring conveyance of, a covered work, and grant a patent license to some of the parties receiving the covered work authorizing them to use, propagate, modify or convey a specific copy of the covered work, then the patent license you grant is automatically extended to all recipients of the covered work and works based on it.
A patent license is "discriminatory" if it does not include within the scope of its coverage, prohibits the exercise of, or is conditioned on the non-exercise of one or more of the rights that are specifically granted under this license. You may not convey a covered work if you are a party to an arrangement with a third party that is in the business of distributing software, under which you make payment to the third party based on the extent of your activity of conveying the work, and under which the third party grants, to any of the parties who receive the covered work from you, a discriminatory patent license: (a) in connection with copies of the covered work conveyed by you (or copies made from those copies), or (b) primarily for and in connection with specific products or
compilations that contain the covered work, unless you entered into that arrangement, or that patent license was granted, prior to 25 March 2007.
Nothing in this License shall be construed as excluding or limiting any implied license or other defenses to infringement that may otherwise be available to you under applicable patent law.
- No Surrender of Others' Freedom.
If conditions are imposed on you (whether by court order, agreement or otherwise) that contradict the conditions of this License, they do not excuse you from the conditions of this License. If you cannot convey a covered work so as to satisfy simultaneously your obligations under this License and any other pertinent obligations, then as a consequence you may not convey it at all. For example, if you agree to terms that obligate you to collect a royalty for further conveying from those to whom you convey the Program, the only way you could satisfy both those terms and this License would be to refrain entirely from conveying the Program.
- Use with the GNU Affero General Public License.
Notwithstanding any other provision of this License, you have permission to link or combine any covered work with a work licensed under version 3 of the GNU Affero General Public License into a single combined work, and to convey the resulting work. The terms of this License will continue to apply to the part which is the covered work, but the special requirements of the GNU Affero General Public License, section 13, concerning interaction through a network will apply to the combination as such.
- Revised Versions of this License.
The Free Software Foundation may publish revised and/or new versions of the GNU General Public License from time to time. Such new versions will be similar in spirit to the present version, but may differ in detail to address new problems or concerns.
Each version is given a distinguishing version number. If the Program specifies that a certain numbered version of the GNU General Public License "or any later version" applies to it, you have the option of following the terms and conditions either of that numbered version or of any later version published by the Free Software Foundation. If the Program does not specify a version number of the GNU General Public License, you may choose any version ever published by the Free Software Foundation.
If the Program specifies that a proxy can decide which future versions of the GNU General Public License can be used, that proxy's public statement of acceptance of a version permanently authorizes you to choose that version for the Program.
Later license versions may give you additional or different permissions. However, no additional obligations are imposed on any author or copyright holder as a result of your choosing to follow a later version.
- Disclaimer of Warranty.
THERE IS NO WARRANTY FOR THE PROGRAM, TO THE EXTENT PERMITTED BY APPLICABLE LAW. EXCEPT WHEN OTHERWISE STATED IN WRITING THE COPYRIGHT HOLDERS AND/OR OTHER PARTIES PROVIDE THE PROGRAM "AS IS" WITHOUT WARRANTY OF ANY KIND, EITHER EXPRESSED OR IMPLIED, INCLUDING, BUT NOT LIMITED TO, THE IMPLIED WARRANTIES OF MERCHANTABILITY AND FITNESS FOR A PARTICULAR PURPOSE. THE ENTIRE RISK AS TO THE QUALITY AND PERFORMANCE OF THE PROGRAM IS WITH YOU. SHOULD THE PROGRAM PROVE DEFECTIVE, YOU ASSUME THE COST OF ALL NECESSARY SERVICING, REPAIR OR CORRECTION.
- Limitation of Liability.
IN NO EVENT UNLESS REQUIRED BY APPLICABLE LAW OR AGREED TO IN WRITING WILL ANY COPYRIGHT HOLDER, OR ANY OTHER PARTY WHO PROVIDES AND/OR CONVEYS THE PROGRAM AS PERMITTED ABOVE, BE LIABLE TO YOU FOR DAMAGES, INCLUDING ANY GENERAL, SPECIAL, INCIDENTAL OR CONSEQUENTIAL DAMAGES ARISING OUT OF THE USE OR INABILITY TO USE THE PROGRAM (INCLUDING BUT NOT LIMITED TO LOSS OF DATA OR DATA BEING RENDERED INACCURATE OR LOSSES SUSTAINED BY YOU OR THIRD PARTIES OR A FAILURE OF THE PROGRAM TO OPERATE WITH ANY OTHER PROGRAMS), EVEN IF SUCH HOLDER OR OTHER PARTY HAS BEEN ADVISED OF THE POSSIBILITY OF SUCH DAMAGES.
- Interpretation of Sections 15 and 16.
If the disclaimer of warranty and limitation of liability provided above cannot be given local legal effect according to their terms, reviewing courts shall apply local law that most closely approximates an absolute waiver of all civil liability in connection with the Program, unless a warranty or assumption of liability accompanies a copy of the Program in return for a fee.
END OF TERMS AND CONDITIONS
How to Apply These Terms to Your New Programs
If you develop a new program, and you want it to be of the greatest possible use to the public, the best way to achieve this is to make it free software which everyone can redistribute and change under these terms. To do so, attach the following notices to the program. It is safest to attach them to the start of each source file to most effectively state the exclusion of warranty; and each file should have at least the "copyright" line and a pointer to where the full notice is found.
one line to give the program's name and a brief idea of what it does.
Copyright (C)
This program is free software: you can redistribute it and/or modify it under the terms of the GNU General Public License as published by the Free Software Foundation, either version 3 of the License, or (at your option) any later version.
This program is distributed in the hope that it will be useful, but WITHOUT ANY WARRANTY; without even the implied warranty of MERCHANTABILITY or FITNESS FOR A PARTICULAR PURPOSE. See the GNU General Public License for more details.
You should have received a copy of the GNU General Public License along with this program. If not, see http://www.gnu.org/licenses/.
Also add information on how to contact you by electronic and paper mail.
If the program does terminal interaction, make it output a short notice like this when it starts in an interactive mode:
Copyright (C)
This program comes with ABSOLUTELY NO WARRANTY; for details type 'show w'.
This is free software, and you are welcome to redistribute it under certain conditions; type 'show a' for details.
The hypothetical commands 'show w' and 'show c' should show the appropriate parts of the General Public License. Of course, your program's commands might be different; for a GUI interface, you would use an "about box".
You should also get your employer (if you work as a programmer) or school, if any, to sign a "copyright disclaimer" for the program, if necessary. For more information on this, and how to apply and follow the GNU GPL, see http://www.gnu.org/licenses/.
The GNU General Public License does not permit incorporating your program into proprietary programs. If your program is a subroutine library, you may consider it more useful to permit linking proprietary applications with the library. If this is what you want to do, use the GNU Lesser General Public License instead of this License. But first, please read https://www.gnu.org/philosophy/why-not-lgpl.html.
GNU Lesser General Public License
Version 2.1, February 1999
Copyright (C) 1991, 1999 Free Software Foundation, Inc. 59 Temple Place, Suite 330, Boston, MA 02111-1307 USA Everyone is permitted to copy and distribute verbatim copies of this license document, but changing it is not allowed. [This is the first released version of the Lesser GPL. It also counts as the successor of the GNU Library Public License, version 2, hence the version number 2.1.]
Preamble
The licenses for most software are designed to take away your freedom to share and change it. By contrast, the GNU General Public Licenses are intended to guarantee your freedom to share and change free software--to make sure the software is free for all its users.
This license, the Lesser General Public License, applies to some specially designated software packages--typically libraries--of the Free Software Foundation and other authors who decide to use it. You can use it too, but we suggest you think carefully about whether this license or the ordinary General Public License is the better strategy to use in any particular case, based on the explanations below.
When we speak of free software, we are referring to freedom of use, not price. Our General Public Licenses are designed to make sure that you have the freedom to distribute copies of free software and charge for this service if you wish; that you receive source code or can get it if you want it; that you can change the software and use pieces of it in new free programs; and that you are informed that you can do these things.
To protect your rights, we need to make restrictions that forbid distributors to deny you these rights or to ask you to surrender these rights. These restrictions translate to certain responsibilities for you if you distribute copies of the library or if you modify it.
For example, if you distribute copies of the library, whether gratis or for a fee, you must give the recipients all the rights that we gave you. You must make sure that they, too, receive or can get the source code. If you link other code with the library, you must provide complete object files to the recipients, so that they can link them with the library after making changes to the library and recompiling it. And you must show them these terms so they know their rights.
We protect your rights with a two-step method: (1) we copyright the library, and (2) we offer you this license, which gives you legal permission to copy, distribute and/or modify the library.
To protect each distributor, we want to make it very clear that there is no warranty for the free library. Also, if the library is modified by someone else and passed on, the recipients should know that what they have is not the original version, so that the original author's reputation will not be affected by problems that might be introduced by others.
Finally, software patents pose a constant threat to the existence of any free program. We wish to make sure that a company cannot effectively restrict the users of a free program by obtaining a restrictive license from a patent holder. Therefore, we insert that any patent license obtained for a version of the library must be consistent with the full freedom or use specified in this license.
Most GNU software, including some libraries, is covered by the ordinary GNU General Public License. This license, the GNU Lesser General Public License, applies to certain designated libraries, and is quite different from the ordinary General Public License. We use this license for certain libraries in order to permit linking those libraries into non-free programs.
When a program is linked with a library, whether statically or using a shared library, the combination of the two is legally speaking a combined work, a derivative of the original library. The ordinary General Public License therefore permits such linking only if the entire combination fits its terms of freedom. The Lesser General Public License permits more lax policies for linking other codes with the library.
We call this license the "Lesser" General Public License because it does less to protect the user's freedom than the ordinary General Public License. It also provides other free software developers less of an
advantage over competing non-free programs. These disadvantages are the reason we use the ordinary General Public License for many libraries. However, the Lesser license provides advantages in certain special circumstances.
For example, on rare occasions, there may be a special need to encourage the widest possible use of a certain library, so that it becomes a de facto standard. To achieve this, non-free programs must be allowed to use the library. A more frequent case is that a free library does the same job as widely used non-free libraries. In this case, there is little to gain by limiting the free library to free software only, so we use the Lesser General Public License.
In other cases, permission to use a particular library in non-free programs enables a greater number of people to use a large body of free software. For example, permission to use the GNU C Library in non-free programs enables many more people to use the whole GNU operating system, as well as its variant, the GNU/Linux operating system.
Although the Lesser General Public License is less protective of the users' freedom, it does ensure that the user of a program that is linked with the Library has the freedom and the ability to run that program using a modified version of the Library.
The precise terms and conditions for copying, distribution and modification follow. Pay close attention to the difference between a 'work based on the library' and a "work that uses the library". The former contains code derived from the library, whereas the latter must be combined with the library in order to run.
TERMS AND CONDITIONS FOR COPYING, DISTRIBUTION AND MODIFICATION
- This License Agreement applies to any software library or other program which contains a notice placed by the copyright holder or other authorized party saying it may be distributed under the terms of this Lesser General Public License (also called "the License"). Each licensee is addressed as "you".
A "library" means a collection of software functions and/or data prepared so as to be conveniently linked with application programs (which use some of those functions and data) to form executables.
The "Library", below, refers to any such software library or work which has been distributed under these terms. A work based on the Library means either the Library or any derivative work under copyright law; that is to say, a work containing the Library or a portion of it, either verbatim or with modifications and/or translated straightforwardly into another language. (Hereinafter, translation is included without limitation in the term "modification");
"Source code" for a work means the preferred form of the work for making modifications to it. For a library, complete source code means all the source code for all modules it contains, plus any associated interfaces (e.g., bin files, plus the scripts used to control compilation and installation of the library.
Activities other than copying, distribution and modification are not covered by this License; they are outside its scope. The act of running a program using the Library is not restricted, and output from such a program is covered only if its contents constitute a work based on the Library independent of the use of the Library in a tool for writing it. Whether that is true depends on what the Library does and what the program that uses the Library does.
- You may copy and distribute verbatim copies of the Library's complete source code as you receive it, in any medium, provided that you conspicuously and appropriately publish on each copy an appropriate copyright notice and disclaimer of warranty; keep intact all the notices that refer to the License and to the absence of any warranty; and distribute a copy of this License along with the Library.
You may charge a fee for the physical act of transferring a copy, and you may at your option offer warranty protection in exchange for a fee.
- You may modify your copy or copies of the Library or any portion of it, thus forming a work based on the Library, and copy and distribute such modifications or work under the terms of Section I above, provided that you also meet all of these conditions:
a) The modified work must itself be a software library.
b) You must cause the files modified to carry prominent notices
stating that you changed the files and the date of any change.
c) You must cause the whole of the work to be licensed at no charge to all third parties under the terms of this License.
If a facility in the modified Library refers to a function or a table of data to be supplied by an application program that uses the facility, other than as an argument passed when the facility is invoked, then you must make a good faith effort to ensure that, in the event an application does not supply such function or table, the facility still operates, and performs whatever part of its purpose remains meaningful.
For example, a function in a library to compute square roots has a purpose that is entirely well-defined independent of the application. Therefore, Subsection 2d requires that any application-supplied function or table used by this function must be optional: if the application does not supply it, the square root function must still compute square roots.)
These requirements apply to the modified work as a whole. If identifiable sections of that work are not derived from the Library, and can be reasonably considered independent and separate works in themselves, then this License and its terms do not apply to those sections when you distribute them as separate works. But when you distribute the same sections as part of a whole which is a work based on the Library, the distribution of the whole must be on the terms of this License, whose permissions for other licensees extend to the entire whole, and thus to each and every part regardless of who wrote it.
Thus, it is not the intent of this section to claim rights or contest your rights to work written entirely by you; rather, the intent is to exercise the right to control the distribution of derivative or collective works based on the Library.
In addition, mere aggregation of another work not based on the Library with the Library (or with a work based on the Library) on a volume of a storage or distribution medium does not bring the other work under the scope of this License.
- You may opt to apply the terms of the ordinary GNU General Public License instead of this License to a given copy of the Library. To do this, you must alter all the notices that refer to this License, so that they refer to the ordinary GNU General Public License, version 2, instead of to this License. (If a newer version than version 2 of the ordinary GNU General Public License has appeared, then you can specify that version instead if you wish.) Do not make any other change in these notices.
Once this change is made in a given copy, it is irreversible for that copy, so the ordinary GNU General Public License applies to all subsequent copies and derivative works made from that copy.
This option is useful when you wish to copy part of the code of the Library into a program that is not a library.
- You may copy and distribute the Library (or a portion or derivative of it, under Section 2) in object code or executable form under the terms of Sections 1 and 2 above, provided that you accompany it with the complete corresponding machine-readable source code, which must be distributed under the terms of Sections 1 and 2 above on a medium customarily used for software interchange.
If distribution of object code is made by offering access to copy from a designated place, then offering equivalent access to copy the source code from the same place satisfies the requirement to distribute the source code, even though third parties are not compelled to copy the source along with the object code.
- A program that contains no derivative of any portion of the Library, but is designed to work with the Library by being compiled or linked with it, is called a "work that uses the Library". Such a work, in isolation, is not a derivative work of the Library, and therefore falls outside the scope of this License.
However, linking a "work that uses the Library" with the Library creates an executable that is a derivative of the Library (because it contains portions of the Library), rather than a "work that uses the Library". The executable is therefore covered by this License. Section 6 states terms for distribution of such executables.
When a "work that uses the Library" uses material from a header file that is part of the Library, the object code for the work may be a derivative work of the Library even though the source code is not. Whether this is true is especially significant if the work can be linked without the Library, or if the work is itself a library. The threshold for this to be true is not precisely defined by law.
If such an object file uses only numerical parameters, data structure layouts and accessors, and small macros and small inline functions (ten lines or less in length), then the use of the object file is unrestricted, regardless of whether it is legally a derivative work. (Executables containing this object code plus portions of the Library will still fall under Section 6.)
Otherwise, if the work is a derivative of the Library, you may distribute the object code for the work under the terms of Section 6. Any executables containing that work also fall under Section 6, whether or not they are linked directly with the Library itself.
- As an exception to the Sections above, you may also combine or link a "work that uses the Library" with the Library to produce a work containing portions of the Library, and distribute that work under terms of your choice, provided that the terms permit modification of the work for the customer's own use and reverse engineering for debugging such modifications.
You must give prominent notice with each copy of the work that the Library is used in it and that the Library and its use are covered by this License. You must supply a copy of this License. If the work during execution displays copyright notices, you must include the copyright notice for the Library among them, as well as a reference directing the user to the copy of this License. Also, you must do one of these things:
a) Accompany the work with the complete corresponding machine-readable source code for the Library including whatever changes were used in the work (which must be distributed under Sections 1 and 2 above), and, if the work is an executable linked with the Library, with the complete machine-readable "work that uses the Library", as object code and/or source code, so that the user can modify the Library and then relink to produce a modified executable containing the modified Library. It is understood that the user who changes the contents of definitions files in the Library will not necessarily be able to recompile the application to use the modified definitions.
b) Use a suitable shared library mechanism for linking with the Library. A suitable mechanism is one that (1) uses at run time a copy of the library already present on the user's computer system, rather than copying library functions into the executable, and (2) will operate properly with a modified version of the library, if the user installs one.
as long as the modified version is interface-compatible with the version that the work was made with.
c) Accompany the work with a written offer, valid for at least three years, to give the same user the materials specified in Subsection 6a, above, for a charge no more than the cost of performing this distribution.
d) If distribution of the work is made by offering access to copy from a designated place, offer equivalent access to copy the above specified materials from the same place.
e) Verify that the user has already received a copy of these materials or that you have already sent this user a copy.
For an executable, the required form of the "work that uses the Library" must include any data and utility programs needed for reproducing the executable from it. However, as a special exception, the materials to be distributed need not include anything that is normally distributed (in either source or binary form) with the major components (compiler, kernel, and so on) of the operating system on which the executable runs, unless that component itself accompanies the executable.
It may happen that this requirement contradicts the license restrictions of other proprietary libraries that do not normally accompany the operating system. Such a contradiction means you cannot use both them and the Library together in an executable that you distribute.
- You may place library facilities that are a work based on the Library side by side in a single library together with other library facilities not covered by this License and distribute such a combined library, provided that the separate distribution of the work based on the Library and of the other library facilities is otherwise permitted, and provided that you do these two things:
a) Accompany the combined library with a copy of the same work based on the Library, uncombined with any other library facilities. This must be distributed under the terms of the Sections above.
b) Give prominent notice with the combined library of the fact that part of it is a work based on the Library, and explaining where to find the accompanying uncombined form of the same work.
- You may not copy, modify, sublicense, link with, or distribute the Library except as expressly provided under the License. Any attempt otherwise to copy, modify, sublicense, link with, or distribute the Library is void, and will automatically terminate your rights under the License. However, parties who have received copies, or rights, from you under this License will not have their licenses terminated so long as such parties remain in full compliance.
- You are not required to accept this license, since you have not signed it. However, nothing else grants you permission to modify or distribute the Library or its derivative works. These actions are prohibited by law if you do not accept this license. Therefore, by modifying or distributing the Library or any work based on the Library, you indicate your acceptance of the License to do so, and all its terms and conditions for copying, distributing or modifying the Library or works based on it.
- Each time you redistribute the Library (or any work based on the Library), the recipient automatically receives a license from the original licensor to copy, distribute, link to, or modify the Library subject to these terms and conditions. You may not impose any further restrictions on the recipients' exercise of the rights granted herein. You are not responsible for enforcing compliance by third parties with this License.
- If, as a consequence of a court judgment or allegation of patent infringement or for any other reason (not limited to patent issues), conditions are imposed on you (whether by court order, agreement or otherwise) that contradict the conditions of this License, they do not excuse you from the conditions of this License. If you cannot distribute so as to satisfy simultaneously your obligations under this License and any other pertinent obligations, then as a consequence you may not distribute the Library at all. For example, if a patent license would not permit royalty-free redistribution of the Library by all those who receive copies directly or indirectly through you, then the only way you could satisfy both it and this License would be to refrain entirely from distribution of the Library.
If any portion of this section is held invalid or unenforceable under any particular circumstance, the balance of the section is intended to apply, and the section as a whole is intended to apply in other circumstances. It is not the purpose of this section to induce you to infringe any patents or other property right claims or to contest validity of any such claims; this section has the sole purpose of protecting the integrity of the free software distribution system which is implemented by public license practices. Many people have made generous contributions to the wide range of software distributions through that system in reliance on
consistent application of that system; it is up to the author/donor to decide whether he or she is willing to distribute software through any other system and a licensee cannot impose that choice.
This section is intended to make thoroughly clear what is believed to be a consequence of the rest of this License.
- If the distribution and/or use of the Library is restricted in certain countries either by patents or by copyrighted interfaces, the original copyright holder who places the Library under this License may add an explicit geographical distribution limitation excluding those countries, so that distribution is permitted only in or among countries not thus excluded. In such case, this License incorporates the limitation as if written in the body of this License.
- The Free Software Foundation may publish revised and/or new versions of the Lesser General Public License from time to time. Such new versions will be similar in spirit to the present version, but may differ in detail to address new problems or concerns.
Each version is given a distinguishing version number. If the Library specifies a version number of this License which applies to it and "any later version", you have the option of following the terms and conditions either of that version or of any later version published by the Free Software Foundation. If the Library does not specify a license version number, you may choose any version ever published by the Free Software Foundation.
- If you wish to incorporate parts of the Library into other free programs whose distribution conditions are incompatible with these, write to the author to ask for permission. For software which is copyrighted by the Free Software Foundation, write to the Free Software Foundation; we sometimes make exceptions for this. Our decision will be guided by the two goals of preserving the free status of all derivatives of our free software and of promoting the sharing and reuse of software generally.
NO WARRANTY
- BECAUSE THE LIBRARY IS LICENSED FREE OF CHARGE, THERE IS NO WARRANTY FOR THE LIBRARY, TO THE EXTENT PERMITTED BY APPLICABLE LAW. EXCEPT WHEN OTHERWISE STATED IN WRITING, THE COPYRIGHT HOLDERS AND/OR OTHER PARTIES PROVIDE THE LIBRARY "AS IS" WITHOUT WARRANTY OF ANY KIND, EITHER EXPRESSED OR IMPLIED, INCLUDING, BUT NOT LIMITED TO, THE IMPLIED WARRANTIES OF MERCHANTABILITY AND FITNESS FOR A PARTICULAR PURPOSE. THE ENTIRE RISK AS TO THE QUALITY AND PERFORMANCE OF THE LIBRARY IS WITH YOU. SHOULD THE LIBRARY PROVE DEFECTIVE, YOU ASSUME THE COST OF ALL NECESSARY SERVICING, REPAIR OR CORRECTION.
- IN NO EVENT UNLESS REQUIRED BY APPLICABLE LAW OR AGREED TO IN WRITING WILL ANY COPYRIGHT HOLDER, OR ANY OTHER PARTY WHO MAY MODIFY AND/OR REDISTRIBUTE THE LIBRARY AS PERMITTED ABOVE, BE LIABLE TO YOU FOR DAMAGES, INCLUDING ANY GENERAL, SPECIAL, INCIDENTAL OR CONSEQUENTIAL DAMAGES ARISING OUT OF THE USE OR INABILITY TO USE THE LIBRARY (INCLUDING BUT NOT LIMITED TO LOSS OF DATA OR DATA BEING RENDERED INACCURATE OR LOSSES SUSTAINED BY YOU OR THIRD PARTIES OR A FAILURE OF THE LIBRARY TO OPERATE WITH ANY OTHER SOFTWARE), EVEN IF SUCH HOLDER OR OTHER PARTY HAS BEEN ADVISED OF THE POSSIBILITY OF SUCH DAMAGES.
END OF TERMS AND CONDITIONS
How to Apply These Terms to Your New Libraries
If you develop a new library, and you want it to be of the greatest possible use to the public, we recommend making it free software that everyone can redistribute and change. You can do so by permitting redistribution under these terms (or, alternatively, under the terms of the ordinary General Public License).
To apply these terms, attach the following notices to the library. It is safest to attach them to the start of each source file to most effectively convey the exclusion of warranty; and each file should have at least the "copyright" line and a pointer to where the full notice is found.
one line to give the library's name and an idea of what it does. Copyright (C) year name of author.
This library is free software; you can redistribute it and/or modify it under the terms of the GNU Lesser General Public
License as published by the Free Software Foundation, either
version 2.1 of the License, or (at your option) any later version.
This library is distributed in the hope that it will be useful,
but WITHOUT ANY WARRANTY; without even the implied warranty of MERCHANTABILITY or FITNESS FOR A PARTICULAR PURPOSE. See the GNU
Lesser General Public License for more details.
You should have received a copy of the GNU Lesser General Public License along with this program; if not, write to the Free Software
Foundation, Inc., 50 Temple Place, Suite 330, Boston, MA 02111-1307 USA
Also add information on how to contact you by electronic and paper mail.
You should also get your employer (if you work as a programmer) or your school, if any, to sign a "copyright disclaimer" for the program, if necessary. Here is a sample; alter the names:
Yoyabne, Inc., hereby disclaims all copyright interest in
the library "Frob" (a library for tweaking knobs) written
by James Random Hacker.
Signature of Ty Coon, 1 April 1990
Ty Coon, President of Vice
That's all there is to it!
MOZILLA PUBLIC LICENSE
Copyright © 2004, Apple Computer, Inc. and The Mozilla Foundation.
Copyright (c) 2004-2005 HighPoint Technologies, Inc.
Copyright (c) 2004-2005 HighPoint Technologies, Inc.
Version 1.1
1. Definitions.
1.0.1. "Commercial Use" means distribution or otherwise making the Covered Code available to a third party.
1.1. "Contributor" means each entity that creates or contributes to the creation of modifications.
1.2. "Contributor Version" means the combination of the Original Code, prior Modifications used by a Contributor and the Modifications made by that particular Contributor.
1.3. "Covered Code" means the Original Code or Modifications or the combination of the Original Code and Modifications, in each case including portions thereof.
1.4. "Electronic Distribution Mechanism" means a mechanism generally accepted in the software development community for the electronic transfer of data.
1.5. "Executable" means Covered Code in any form other than Source Code.
1.6. "Initial Developer" means the individual or entity identified as the Initial Developer in the Source Code notice required by Exhibit A.
1.7. "Larger Work" means a work which combines Covered Code or portions thereof with code not governed by the terms of this License. 1.8. "License" means this document.
1.8.1. "Licensable" means having the right to grant, to the maximum extent possible, whether at the time of the initial grant or subsequently acquired, any and all of the rights conveyed herein.
1.9. "Modifications" means any addition to or deletion from the substance or structure of either the Original Code or any previous Modifications. When Covered Code is released as a series of files, a Modification is:
A. Any addition to or deletion from the contents of a file containing Original Code or previous Modifications.
B. Any new file that contains any part of the Original Code or previous Modifications.
1.10. "Original Code" means Source Code of computer software code which is described in the Source Code notice required by Exhibit A as Original Code, and which, at the time of its release under this License is not already Covered Code governed by this License.
1.10.1. "Patent Claims" means any patent claim(s), now owned or hereafter acquired, including without limitation, method, process, and apparatus claims in any patent Licensable by grantor.
1.11. "Source Code" means the preferred form of the Covered Code for making modifications to it, including all modules it contains, plus any associated interface definition files, and the scripts used to control compilation and installation of an Executable, or source code.
Shenzhen's companies are against other the original Code of a similar work known, available Covered Code of the Contributor's choice. The
Source: Boston can be in-compression or arching film, provided the appropriate decompression or de-archiving software is widely available for no charge.
1.12. "You" (or "Your") means an individual or a legal entity exercising rights under, and complying with all of the terms of, this License or a future version of this License issued under Section 6.1. For legal
entities, "You" includes any entity which controls, is controlled by, or is under common control with You. For purposes of this definition, "control" means (a) the power, direct or indirect, to cause the direction or management of such entity, whether by contract or otherwise, or (b) ownership of more than fifty percent (50%) of the outstanding shares or potential ownership of such entity.
2. Source Code License.
2.1. The Initial Developer Grant. The Initial Developer hereby grants You a world-wide, royalty-free, non-exclusive license, subject to third party intellectual property claims:
(a) under intellectual property rights (other than patent or trademark) licensable by Initial Developer to use, reproduce, modify, display, perform, sublicense and distribute the Original Code (or portions thereof) with or without Modifications, and/or as part of a Larger Work; and
(b) under Patent Claims infringed by the making, using or selling of Original Code, to make, have made, use, practice, sell, and offer for sale, and/or otherwise dispose of the Original Code (or portions thereof).
(c) the licenses granted in this Section 2.1(a) and (b) are effective on the date Initial Developer first distributes Original Code under the terms of this License.
(d) Notwithstanding Section 2.1(b) above, no patent license is granted: 1) for code that You delete from the Original Code; 2) separate from the Original Code; or 3) for infringements caused by: i) the modification of the Original Code or ii) the combination of the Original Code with other software or devices.
2.2. Contributor Grant. Subject to third party intellectual property claims, each Contributor hereby grants You a world-wide, royalty-free, non-exclusive license
(a) under intellectual property rights (other than patent or trademark) licensable by Contributor to use, reproduce, modify, display, perform, sublicense and distribute the Modifications created by such Contributor (or portions thereof) either on an unmodified basis with other Modifications, as Covered Code and/or as part of a Larger Work; and
(b) under Patent Claims infringed by the making, using, or selling of Modifications made by that Contributor either alone and/or in combination with its Contributor Version for portions of such combinations, to make, use, sell, offer for sale, have made, and/or otherwise dispose of: 1) Modifications made by that Contributor (or portions thereof); and 2) the combination of Modifications made by that Contributor with its Contributor Version (or portions of such combinations).
(c) the licenses granted in Section 2.2(a) and 2.2(b) are effective on the date Contributor first makes Commercial Use of the Covered Code.
(d) Notwithstanding Section 2.2(b) above, no patent license is granted: 1) for any code that Contributor has deleted from the Contributor Version; 2) separate from the Contributor Version; 3) for infringements caused by third party modifications of Contributor Version or by the combination of modifications made by that Contributor with other software (except as part of the Contributor Version) or other devices; or 4) under Patent Claims infringed by Covered Code in the absence of Modifications made by that Contributor.
3. Distribution Obligations.
3.1. Application of License. The Modifications which You create or to which You contribute are governed by the terms of this License, including without limitation Section 2.2. The Source Code version of Covered Code may be distributed only under the terms of this License or a future version of the License released under Section 6.1, and You must include a copy of this License with every copy of the Source
Code You distribute. You may not offer or impose any terms on any Source Code version that alters or restricts the applicable version of this License or its recipients' rights hereunder. However, You may include an additional document offering the additional rights described in Section 3.5.
3.2. Availability of Source Code. Any Modifications which You create or to which You contribute must be made available in Source Code form under the terms of this License either on the same media as an Executable version or via an accepted Electronic Distribution Mechanism to anyone to whom You made an Executable version available; and if made available by Electronic Distribution Mechanism, must remain available for at least twelve (12) months after the date it initially became available, or at least six (6) months after a subsequent version of that particular Modification has been made available to such recipients. You are responsible for ensuring that the Source Code version remains available even if the Electronic Distribution Mechanism is maintained by a third party.
3.3. Description of Modifications. You must cause all Covered Code to which You contribute to contain a file documenting the changes You made to create that Covered Code and the date of any change. You must include a prominent statement that the Modification is derived, directly or indirectly, from Original Code provided by the initial Developer and including the name of the Initial Developer in the Source Code, and [a] in any notice in an Executable version or related documentation in which you describe the origin or ownership of the Covered Code.
3.4. Intellectual Property Matters
(a) Third Party Claims. If Contributor has knowledge that a licensee under a third party's intellectual property rights is required to exercise the rights granted by such Contributor under Sections 2.1 or 2.2, Contributor must include a text file with the Covered Code distribution titled LEGAL, which describes the claim and the party making the claim in sufficient detail that a recipient will know whom to contact. If Contributor obtains such knowledge after the Covered Code distribution is made, this document is subject to an increase of 100% of Contributor shall promptly modify the LEGAL file in all copies Contributor makes available thereafter and shall take other steps (such as notifying appropriate mailing lists or newsgroups) reasonably calculated to inform those who received the Covered Code that new knowledge has been obtained.
(b) Contributor APIs. If Contributor's Modifications include an application programming interface and Contributor has knowledge of patent licenses which are reasonably necessary to implement that API, Contributor must also include this information in the LEGAL file.
(c) Representations.
Contributor represents that, except as disclosed pursuant to Section 3.4(a) above, Contributor believes that Contributor's Modifications are Contributor's original creation(s) and/or Contributor has sufficient rights to grant the rights conveyed by this License.
3.5. Required Notices. You must duplicate the notice in Exhibit A in each file of the Source Code. If it is not possible to put such notice in a particular Source Code file due to its structure, then you must include such notice in a location (such as a relevant directory) where a user would be likely to look for such a notice. If you created one or more Modifications, you may add your name as a Contributor to the notice. You must not reproduce in any copy of the documentation or the Source Code any description of recipients' rights or ownership rights relating to Covered Code. You may choose to offer, and to charge a fee for, warranty, support, indemnity or liability obligations to one or more recipients of Covered Code. However, you may do so only on your own behalf and not on behalf of the Initial Developer or any Contributor. You must make it absolutely clear that any such warranty, support, indemnity or liability obligation is offered by you alone, and you hereby agree to indemnify the Initial Developer and every Contributor for any liability incurred by the Initial Developer or such Contributor as a result of warranty, support, indemnity or liability terms you offer.
3.6. Distribution of Executable Versions. You may distribute Covered Code in Executable Version only if the requirements of Sections 3.1-3.5 have been met for that Covered Code, and if you include a notice stating that the Source Code version of the Covered Code is available under the terms of this License, including a description of how and where you have fulfilled the obligations of Section 3.2. The notice must be conspicuously included in any notice in an Executable version, related documentation or collateral in any way. If you describe recipients' rights relating to the Covered Code, you may distribute the Executable version of Covered Code or ownership rights under a license of your choice, which may contain terms different from this License, provided that you are in compliance with the terms of this License and that the license for the Executable version does not attempt to limit or alter the recipient's rights in the Source Code version from the rights set forth in this License. If you distribute the Executable version under a different license, you must make it absolutely clear that any terms which differ from this License are offered by you alone, not by the Initial Developer or any Contributor. You hereby agree to indemnify the Initial Developer and every Contributor for any liability incurred by the Initial Developer or such Contributor as a result of any such terms you offer.
3.7. Larger Works. You may create a Larger Work by combining Covered Code with other code not governed by the terms of this License and distribute the Larger Work as a single product. In such a case, you must make sure the requirements of this License are fulfilled for the Covered Code.
4. Inability to Comply Due to Statute or Regulation.
It is impossible for You to comply with any of the terms of the License with respect to some or all of the Covered Code due to statute, judicial order, or regulation, then You must: (a) comply with the terms of this License to the maximum extent possible; and (b) describe the limitations and the code they affect. Such description must be included in the LEGAL file described in Section 3.4 and must be included with all distributions of the Source Code. Except to the extent prohibited by statute or regulation, such description must be sufficiently detailed for a recipient of ordinary skill to be able to understand it.
5. Application of this License.
This License applies to code to which the Initial Developer has attached the notice in Exhibit A and is related Covered Code.
6. Versions of the License.
6.1. New Versions. Netscape Communications Corporation ("Netscape") may publish revised and/or new versions of the License from time to time. Each version will be given a distinguishing version number.
6.2. Effect of New Versions. Once Covered Code has been published under a particular version of the License, You may always continue to use it under the terms of that version. You may also choose to use such Covered Code under the terms of any subsequent version of the License published by Netscape. No one other than Netscape has the right to modify the terms applicable to Covered Code created under this License.
6.3. Derivative Works. If you create or use a modified version of this License (which you may only do in order to apply it to code which is not already Covered Code governed by this License), you must (a) revise your license so that the phrases "Mozilla", "MOZILLA LICENSE", "MOZILLA PUBLIC LICENSE", "Netscape", "MPL", "NPL" or any confusingly similar phrase do not appear in your license (except to note that your license differs from this License) and (b) otherwise make it clear that your version of the license contains terms which differ from the Mozilla Public License and Netscape Public License. (Filing in the name of the Initial Developer, Original Code or Contributor in the notice described in Exhibit A shall not of themselves be deemed to be modifications of this License.)
- DISCLAIMER OF WARRANTY. COVERED CODE IS PROVIDED UNDER THIS LICENSE ON AN "AS IS" BASIS, WITHOUT WARRANTY OF ANY KIND, EITHER EXPRESSED OR IMPLIED, INCLUDING, WITHOUT LIMITATION, WARRANTIES THAT THE COVERED CODE IS FREE OF DEFECTS, MERCHANTABLE, FIT FOR A PARTICULAR PURPOSE OR NON-INFRINGING. THE ENTIRE RISK AS TO THE QUALITY AND PERFORMANCE OF THE COVERED CODE IS WITH YOU. SHOULD ANY COVERED CODE PROVE DEFECTIVE IN ANY RESPECT, YOU (NOT THE INITIAL DEVELOPER OR ANY OTHER CONTRIBUTOR) ASSUME THE COST OF ANY NECESSARY SERVICING, REPAIR OR CORRECTION. THIS DISCLAIMER OF WARRANTY CONSTITUTES AN ESSENTIAL PART OF THIS LICENSE. NO USE OF ANY COVERED CODE IS AUTHORIZED HEREUNDER EXCEPT UNDER THIS DISCLAIMER.
8. TERMINATION.
8.1. This License and the rights granted hereunder will terminate automatically if You fail to comply with the terms herein and fail to cure such breach within 30 days of becoming aware of the breach. All licenses to the Covered Code which are properly granted shall survive any termination of this License. Provisions which, by their nature, must remain in effect beyond the termination of the License shall survive.
8.2. If You initiate litigation by asserting a patent infringement claim (excluding declaratory judgment actions) against Initial Developer or a Contributor (the Initial Developer or Contributor against whom You file such action is referred to as "Participant") alleging that:
(a) such Participant's Contributor Version directly or indirectly infringes any patent, then any and all rights granted by such Participant to You under Sections 2.1 and/or 2.2 of this License shall, upon 60 days notice from Participant, terminate prospectively, unless if within 60 days after receipt of notice You either: (i) agree in writing to pay Participant a mutually agreeable reasonable royalty for Your past and future use of Modifications made by such Participant, or (ii) withdraw Your litigation claim with respect to the Contributor Version against such Participant. If within the 60 day notice period, the parties do not mutually agree upon the royalty or the litigation claim is not withdrawn, then the rights granted by Participant to You under Sections 2.1 and/or 2.2 shall terminate automatically upon the expiration of the 60 day notice period specified above.
(b) any software, hardware, or device, other than such Participant's Contributor Version, directly or indirectly infringes any patent, then any rights granted to You by such Participant under Sections 2.1(b) and 2.2(b) are revoked effective as of the date You first made, used, sold, distributed, or had made, modifications made by that Participant.
8.3. If You assert a patent infringement claim against Participant alleging that such Participant's Contributor Version directly or indirectly infringes any patent where such claim is resolved (such as by license or settlement) prior to the initiation of patent infringement litigation, then the reasonable value of the licenses granted by such Participant under Sections 2.1 or 2.2 shall be taken into account in determining the amount or value of any payment or license.
8.4. In the event of termination under Sections 8.1 or 8.2 above, all end user license agreements (excluding distributors and resellers) which have been validly granted by You or any distributor hereunder prior to termination shall survive termination.
- LIMITATION OF LIABILITY. UNDER NO CIRCUMSTANCES AND UNDER NO LEGAL THEORY, WHETHER TORT (INCLUDING NEGLIGENCE), CONTRACT, OR OTHERWISE, SHALL YOU, THE INITIAL DEVELOPER, ANY OTHER CONTRIBUTOR, OR ANY DISTRIBUTOR OF COVERED CODE, OR ANY SUPPLIER OF ANY SUCH PARTY, BE LIABLE TO ANY PERSON FOR ANY INDIRECT, SPECIAL, INCIDENTAL, OR CONSEQUENTIAL DAMAGES OF ANY CHARACTER INCLUDING, WITHOUT LIMITATION, DAMAGES FOR LOSS OF GOODWILL, WORK STOPPAGE, COMPUTER FAILURE OR MALFUNCTION, OR ANY AND ALL OTHER COMMERCIAL DAMAGES OR LOSSES, EVEN IF SUCH PARTY SHALL HAVE BEEN INFORMED OF THE POSSIBILITY OF SUCH DAMAGES. THIS LIMITATION OF LIABILITY SHALL NOT APPLY TO LIABILITY FOR DEATH OR PERSONAL INJURY RESULTING FROM A PARTY'S NEGLIGENCE TO THE EXTENT APPLICABLE LAW PROHIBITS SUCH LIMITATION.
10. U.S. GOVERNMENT END USERS.
The Covered Code is a "commercial item," as that term is defined in 48 C.F.R. 2.101 (Oct. 1995), consisting of "commercial computer software" and "commercial computer software documentation," as such terms are used in 48 C.F.R. 12.212 (Sept. 1995). Consistent with 48 C.F.R. 12.212 and 48 C.F.R. 227.7202-1 through 227.7202-4 (June 1995), all U.S. Government End Users acquire Covered Code with only those rights set forth herein.
11. MISCELLANEOUS.
This License represents the complete agreement concerning subject matter hereof. If any provision of this License is held to be unenforceable, such provision shall be reformed only to the extent necessary to make it enforceable. This License shall be governed by California law (except to the extent applicable law, if any, provides otherwise, excluding its conflict-of-law provisions). With respect to disputes in which any party hereto is a citizen of, or an entity chartered or registered to do business in, the United States of America, any litigation relating to this License shall be subject to the jurisdiction of the Federal Courts of the Northern District of California, with venue lying in Santa Clara County, California, with the losing party responsible for costs, including without limitation, court costs and attorneys' fees. The provisions of the United Nations Convention on Contracts for the International Sale of Goods is expressly excluded. Any law or regulation which provides that the language of a contract shall be construed against the drafter shall not apply to this License.
12. RESPONSIBILITY FOR CLAIMS.
As between Initial Developer and the Contributors, each party is responsible for claims and damages arising, directly or indirectly, out of its utilization of rights under this License and You agree to work with Initial Developer and Contributors to distribute such responsibility on an equitable basis. Nothing herein is intended or shall be deemed to constitute any admission of liability.
13. MULTIPLE-LICENSED CODE.
The Initial Developer may designate portions of the Covered Code as Multiple-Licensed. Multiple-Licensed means that the Initial Developer permits you to utilize portions of the Covered Code under Your choice of the MPL or the alternative licenses, if any, specified by the Initial Developer in the file described in Exhibit A.
EXHIBIT A - Mozilla Public License.
The contents of this file are subject to the Mozilla Public License Version 1.1 (the "License"); you may not use this file except in compliance with the License. You may obtain a copy of the License at http://www.mozilla.org/MPL/. Software distributed under the License is distributed on an "AS IS" basis, WITHOUT WARRANTY OF ANY KIND, either express or implied. See the License for the specific language governing rights and limitations under the License.
The Original Code is
The Initial Developer of the Original Code is ____, Portions created by ____ are Copyright (C) ____, All Rights Reserved.
Contributor(s):
Alternatively, the contents of this file may be used under the terms of the license (the "License"), in which case the provisions of the License are applicable instead of those above. If you wish to allow use of your version of this file only under the terms of the License and not to allow others to use your version of this file under the MPL, indicate your decision by deleting the provisions above and replacing them with the notice and other provisions required by the License. If you have made the provisions above, a recipient may use your version of this file under either the MPL or the License, unless otherwise specified. [NOTE: The text of this Exhibit A may differ slightly from the text of the notices in the Source Code of the Original Code. You should use the text of this Exhibit A rather than the text found in the Original Code Source Code for Your modifications.]
BSD Two Clause License
Copyright: (c) 2004-2005 HighPoint Technologies, Inc. All rights reserved.
Redistribution and use in source and binary forms, with or without modification, are permitted provided that the following conditions are met:
- Redistributions of source code must retain the above copyright notice, this list of conditions and the following disclaimer.
- Redistributions in binary form must reproduce the above copyright notice, this list of conditions and the following disclaimer in the documentation and/or other materials provided with the distribution. THIS SOFTWARE IS PROVIDED BY THE AUTHOR "AS IS" AND ANY EXPRESS OR IMPLIED WARRANTIES, INCLUDING, BUT NOT LIMITED TO, THE IMPLIED WARRANTIES OF MERCHANTABILITY AND FITNESS FOR A PARTICULAR PURPOSE ARE DISCLAIMED. IN NO EVENT SHALL THE AUTHOR BE LIABLE FOR ANY DIRECT, INDIRECT, INCIDENTAL, SPECIAL, EXEMPLARY, OR CONSEQUENTIAL DAMAGES (INCLUDING, BUT NOT LIMITED TO, PROCUREMENT OF SUBSTITUTE GOODS OR SERVICES; LOSS OF USE, DATA, OR PROFITS; OR BUSINESS INTERRUPTION) HOWEVER CAUSED AND ON ANY THEORY OF LIABILITY, WHETHER IN CONTRACT, STRICT LIABILITY, OR TORT (INCLUDING NEGLIGENCE OR OTHERWISE) ARISING IN ANY WAY OUT OF THE USE OF THIS SOFTWARE, EVEN IF ADVISED OF THE POSSIBILITY OF SUCH DAMAGE.
BSD 3-clause License
Copyright: (c) 2003-2013, Marvell International Ltd. Copyright: (c) 2005-2009, Alex Weber. Copyright: (c) 2005, Tom Wu.
Copyright (c) 2000-2009, Paul Johneton.
Copyright (c) 1994-1997, Thomas G. Lane.
Copyright (c) 2009, 2011, D. R. Commander.
Copyright (c) 2009 Texas Instruments Incorporated - http://www.ti.com/
Copyright (c) 2006 Alexander Chamoris.
Copyright (c) 2008 Sun Microsystems, Inc.
Copyright (c) 2010-2015, The Dolo Foundation.
Copyright (c) 2015-2007 Paul Heieh.
Copyright (c) Alexandru Marasteanu.
Copyright © 2003, 2010. Dr. Brian Gaudrani, Worcester, UK.
Copyright (c) 2002-2508, Milan kits
Copyright © 2002.2008, Muraka E. Maqakan «arrapaludabian pros
Copyright (c) 2002, Live Powitashov.
Copyright (c) 2007 The Khronos Group Inc.
All rights reserved.
Redistribution and use in source and binary forms, with or without
modification, are permitted provided that the following conditions are
met:
- Redistributions of source code must retain the above copyright notice,
this list of conditions and the following disclaimer.
- Redistributions in binary form must reproduce the above copyright
notice, this list of conditions and the following disclaimer in the
documentation and/or other materials provided with the distribution.
- Neither the name of the copyright holder nor the names of its
- contributors may be used to endorse or promote products derived from
this software without specific prior written permission.
THIS SOFTWARE IS PROVIDED BY THE COPYRIGHT HOLDERS AND
WARRANTIES, INCLUDING, BUT NOT LIMITED TO, THE IMPLIED
WARRANTIES OF MERCHANTABILITY AND FITNESS FOR A
PARTICULAR PURPOSE ARE DISCLAIMED. IN NO EVENT SHALL THE
COPYRIGHT OWNER OR CONTRIBUTORS BE LIABLE FOR ANY
DIRECT, INDIRECT, INCIDENTAL, SPECIAL, EXEMPLARY, OR
CONSEQUENTIAL DAMAGES (INCLUDING, BUT NOT LIMITED TO:
USE DATA, OR LOSS OF PROFITS OR BUSINESS INTERRUPTION)
CAUSED AND ON ANY THEORY OF LIABILITY WHETHER IN
CONTRACT, STRICT LIABILITY, OR TORT (INCLUDING NEGLIGENCE
OR OTHERWISE) ARISING IN ANY WAY OUT OF THE USE OF THIS
SOFTWARE, EVEN IF ADVISED OF THE POSSIBILITY OF SUCH
DAMAGE.
The MIT License
Copyright (c) 2008-2010 Adrian Tesca
Copyright © 2010-2011 Illinois LLC
Copyright (c) 2009 Dave Gambie
Copyright (c) 2008-2011 Martin Wendt
Copyright (c) 2008-2005 Tom Viu
Copyright © 2030 Ten, 10 November
Copyright (c) 2012, AUTHORS (http://queryui.com/about)
Copyright (c) 2010 "Cowboy" Ben Alman
Copyright (c) 2009-2011 Brantley Harris
Copyright © 2011-2012 Time Tips
Copyright © 2006-2011 Sam Colini Library (www.lxcelo.edu.cn)
Copyright © 2009 Microsoft
Copyright (c) 2009-2012 Paris
Copyright © 2006-2012 Copyright ©
Copyright (c) 2006-2012 September 2008
Copyright © 2007-2014 jQuery Foundation and other contributors
Permission is hereby granted, free of charge, to any person obtaining a
copy of this software and associated documentation files (the
"Software"), to deal in the Software without restriction, including without
limitation the rights to use, copy, modify, merge, publish, distribute,
sublicense, and/or sell copies of the Software, and to permit persons to whom the Software is furnished to do so, subject to the following
conditions:
The above copyright notice and this permission notice shall be included
in all copies or substantial portions of the Software.
THE SOFTWARE IS PROVIDED "AS IS", WITHOUT WARRANTY OF ANY KIND, EXPRESS OR IMPLIED, INCLUDING BUT NOT LIMITED TO THE WARRANTIES OF MERCHANTABILITY, FITNESS FOR A PARTICULAR PURPOSE AND NONINFRINGEMENT. IN NO EVENT SHALL THE AUTHORS OR COPYRIGHT HOLDERS BE LIABLE FOR ANY CLAIM, DAMAGES OR OTHER LIABILITY, WHETHER IN AN ACTION OF CONTRACT, TORT OR OTHERWISE, ARISING FROM, OUT OF OR IN CONNECTION WITH THE SOFTWARE OR THE USE OR OTHER DEALINGS IN THE SOFTWARE.
libxml2 License
Except where otherwise noted in the source code (e.g. the files hash.c, list.c and the trio files, which are covered by a similar licence but with different copyright notices) the following are:
Copyright © 1950-2009 Daniel Veillard. All Rights Reserved.
Permission is hereby granted, free of charge, to any person obtaining a
copy of this software and associated documentation files (the
Permission is hereby granted, free of charge, to any person obtaining a copy of this software and associated documentation files (the "Software"), to deal in the Software without restriction, including without limitation the rights to use, copy, modify, merge, publish, distribute, sublicense, and/or sell copies of the Software, and to permit persons to whom the Software is furnished to do so, subject to the following conditions:
The above copyright notice and this permission notice shall be included in all copies or substantial portions of the Software.
THE SOFTWARE IS PROVIDED "AS IS", WITHOUT WARRANTY OF ANY KIND, EXPRESS OR IMPLIED, INCLUDING BUT NOT LIMITED TO THE WARRANTIES OF MERCHANTABILITY, FITNESS FOR A PARTICULAR PURPOSE AND NONINFRINGEMENT. IN NO EVENT SHALL THE AUTHORS OR COPYRIGHT HOLDERS BE LIABLE FOR ANY CLAIM, DAMAGES OR OTHER LIABILITY, WHETHER IN AN ACTION OF CONTRACT, TORT OR OTHERWISE, ARISING FROM, OUT OF OR IN CONNECTION WITH THE SOFTWARE OR THE USE OR OTHER DEALINGS IN THE SOFTWARE.
Except as contained in this notice, the name of Daniel Veillard shall not be used in advertising or otherwise to promote the sale, use or other dealings in this Software without prior written authorization from him.
edrings in this Software without prior written authorization from him.
Apache License
Version 2.0, January 2004
Copyright (c) 2015 Samnda Abeyruwan [saminds@cs.mism.edu]
http://www.apache.org/licenses/
TERMS AND CONDITIONS FOR USE, REPRODUCTION, AND DISTRIBUTION
1. Definitions.
"License" shall mean the terms and conditions for use, reproduction, and distribution as defined by Sections 1 through 9 of this document.
"Licensor" shall mean the copyright owner or entity authorized by the copyright owner that is granting the License.
"Legal Entity" shall mean the union of the acting entity and all other entities that control, are controlled by, or are under common control with that entity. For the purposes of this definition, "control" means the power, direct or indirect, to cause the direction or management of such entity.
copyright owner that is granting the Licensee.
"Legal Entity" shall mean the union of the acting entity and all other
entities that control, are controlled by, or are under common control with
that is implied. For the purposes of this classification, “conflict” remains [the
power, direct or indirect, to direct the management of such
such entity:
"You" (or "Your") shall mean an individual or Legal Entity exercising
permissions granted by the License.
"Source" form shall mean the preferred form for making modifications,
including but not limited to software source code, documentation source
and configuration files.
"Object" form shall mean any form resulting from mechanical
transformation or translation of a Source form, including but
not limited to compiled object code, generated documentation, and conversions to
other media types.
form, made available under the License, as indicated by a copyright
notice that is included in or attached to the work (an example is provided)
notice that is included in or attached to the work (an example is provided
"Derivative Works" shall mean any work, whether in Source or Object
form, that is based on (or derived from) the Work and for which the
editorial revisions, annotations, elaborations, or other modifications represent, as a whole, an original work of authorship. For the purposes
of this License, Derivative Works shall not include works that remain
separable from, or merely link (or bind by name) to the interfaces of, the Work and Derivative Works thereof.
"Contribution" shall mean any work of authorship, including the original version of the Work and any modifications or additions to that Work or Derivative Works thereof, that is intentionally submitted to Licensor for inclusion in the Work by the copyright owner or by an individual or Legal Entity authorized to submit on behalf of the copyright owner. For the purposes of this definition, "submitted" means any form of electronic, verbal, or written communication sent to the Licensor or its
representatives, including but not limited to communication on electronic mailing lists, source code control systems, and issue tracking systems that are managed by, or on behalf of, the Licensor for the purpose of discussing and improving the Work, but excluding communication that is conspicuously marked or otherwise designated in writing by the copyright owner as "Not a Contribution."
"Contributor" shall mean Licensor and any individual or Legal Entity on behalf of whom a Contribution has been received by Licensor and subsequently incorporated within the Work.
- Grant of Copyright License. Subject to the terms and conditions of this License, each Contributor hereby grants to You a perpetual, worldwide, non-exclusive, no-charge, royalty-free, irrevocable copyright license to reproduce, prepare Derivative Works of, publicly display, publicly perform, sublicense, and distribute the Work and such Derivative Works in Source or Object form.
- Grant of Patent License. Subject to the terms and conditions of this License, each Contributor hereby grants to You a perpetual, worldwide, non-exclusive, no-charge, royalty-free, irrevocable (except as stated in this section) patent license to make, have made, use, offer to sell, sell, import, and otherwise transfer the Work, where such license applies only to those patent claims licensable by such Contributor that are necessarily infringed by their Contribution(s) alone or by combination of their Contribution(s) with the Work to which such Contribution(s) was submitted.
If You institute patent litigation against any entity (including a cross-claim or counterclaim in a lawsuit) alleging that the Work or a Contribution incorporated within the Work constitutes direct or
contributory patent infringement, then any patent licenses granted to You under this License for that Work shall terminate as of the date such litigation is filed.
- Redistribution. You may reproduce and distribute copies of the Work or Derivative Works thereof in any medium, with or without modifications, and in Source or Object form, provided that You meet the following conditions:
a. You must give any other recipients of the Work or Derivative Works a copy of this License; and
b. You must cause any modified files to carry prominent notices stating that You changed the files; and
c. You must retain, in the Source form of any Derivative Works that You distribute, all copyright, patent, trademark, and attribution notices from the Source form of the Work, excluding those notices that do not pertain to any part of the Derivative Works; and
d. If the Work includes a "NOTICE" text file as part of its distribution, then any Derivative Works that You distribute must include a readable copy of the attribution notices contained within such NOTICE file, excluding those notices that do not pertain to any part of the Derivative Works, in at least one of the following places: within a NOTICE text file distributed as part of the Derivative Works; within the Source form or documentation, if provided along with the Derivative Works; or, within a display generated by the Derivative Works, if and wherever such third-party notices normally appear. The contents of the NOTICE file are for informational purposes only and do not modify the License. You may add Your own attribution notices within Derivative Works that You distribute, alongside or as an appendix to the NOTICE text from the Work, provided that such additional attribution notices cannot be construed as modifying the License.
Three-party notices normally spread. The contents of the NOTICE file are for informational purposes only and do not modify the License. You may add Your own attribution notices within Derivative Works that you distribute, alongside or as an appendix to the NOTICE text from the Work, provided that such additional attribution notices cannot be construed as modifying the License.
You may add Your own copyright statement to Your modifications and may provide additional or different license terms and conditions for use, reproduction, or distribution of Your modifications, or for any such Derivative Works as a whole, provided Your use, reproduction, and distribution of the Work otherwise complies with the conditions stated in this License.
- Submission of Contributions. Unless You explicitly state otherwise, any Contribution Intentionally submitted for inclusion in the Work by You to the Licensor shall be under the terms and conditions of this License, without any additional terms or conditions. Notwithstanding the above, nothing herein shall supersede or modify the terms of any separate license agreement you may have executed with Licensor regarding such Contributions.
- Trademarks. This License does not grant permission to use the trade names, trademarks, service marks, or product names of the Licensor, except as required for reasonable and customary use in describing the origin of the Work and reproducing the content of the NOTICE file.
- Disclaimer of Warranty. Unless required by applicable law or agreed to in writing, Licensor provides the Work (and each Contributor provides its Contributions) on an "AS IS" BASIS, WITHOUT WARRANTIES OR CONDITIONS OF ANY KIND, either express or implied, including, without limitation, any warranties or conditions of TITLE, NON-INFRINGEMENT, MERCHANTABILITY, or FITNESS FOR A PARTICULAR PURPOSE. You are solely responsible for determining the appropriateness of using or redistributing the Work and assume any risks associated with your exercise of permissions under this License.
- Limitation of Liability. In no event and under no legal theory, whether in fact (including negligence), contract, or otherwise, unless required by applicable law (such as deliberate and grossly negligent acts) or agreed to in writing, shall any Contributor be liable to You for damages, including any direct, indirect, special, incidental, or consequential damages of any character arising as a result of this License or out of the use or inability to use the Work (including but not limited to damages for loss of goodwill, work stoppage, computer failure or malfunction, or any and all other commercial damages or losses), even if such Contributor has been advised of the possibility of such damages.
- Accepting Warranty or Additional Liability. While redistributing the Work or Derivative Works thereof, you may choose to offer, and charge a fee for, acceptance of support, warranty, indemnity, or other liability obligations and/or rights consistent with this License. However, in accepting such obligations, you may act only on Your own behalf and on Your sole responsibility, not on behalf of any other Contributor, and only if you agree to indemnify, defend, and hold each Contributor harmless for any liability incurred by, or claims asserted against, such Contributor by reason of your accepting any such warranty or additional liability.
END OF TERMS AND CONDITIONS
APPENDIX: How to apply the Apache License to your work
To apply the Apache License to your work, attach the following boilerplate notice, with the fields enclosed by brackets "[]" replaced with your own identifying information. (Don't include the brackets.) The text should be enclosed in the appropriate comment syntax for the file format. We also recommend that a file or class name and description of purpose be included on the same "printed page" as the copyright notice for easier identification within third-party archives.
Copyright [yyyy] [name of copyright owner] Licensed under the Apache License, Version 2.0 (the "License"); you may not use this file except in compliance with the License. You may obtain a copy of the License at http://www.apache.org/licenses/LICENSE-2.0 Unless required by
applicable law or agreed to in writing, software distributed under the License is distributed on an "AS IS" BASIS, WITHOUT WARRANTIES OR CONDITIONS OF ANY KIND, either express or implied. See the License for the specific language governing permissions and limitations under the License.
The zlib/libpng License
Copyright (c) 2011 Lee Thomson
Copyright (c) 1995-2012 Jean-loup Gailly and Mark Adler
Copyright (c) 1999-2012 Glenn Randers-Pehrson
Copyright (c) 2008-2005 Hector Mauricio Rodriguez Segura
Copyright (c) 1995-2008 Nullsoft and Contributors
Copyright (c) 2002-2008 Davide Pizzolano
This software is provided 'as-is', without any express or implied warranty. In no event will the authors be held liable for any damage arising from the use of this software.
Permission is granted to anyone to use this software for any purpose, including commercial applications, and to alter it and redistribute it freely, subject to the following restrictions:
- The origin of this software must not be misrepresented; you must not claim that you wrote the original software. If you use this software in a product, an acknowledgment in the product documentation would be appreciated but is not required.
- Altered source versions must be plainly marked as such, and must not be misrepresented as being the original software.
- This notice may not be removed or altered from any source distribution.
Boost Software License - Version 1.0
August 17th, 2003
Permission is hereby granted, free of charge, to any person or organization obtaining a copy of the Software and accompanying documentation covered by this license (the "Software") to use, reproduce, display, distribute, execute, and transmit the Software, and to prepare derivative works of the Software, and to permit third parties to whom the Software is furnished to do so, all subject to the following:
The copyright notices in the Software and this entire statement, including the above license grant, this restriction and the following disclaimer, must be included in all copies of the Software, in whole or in part, and all derivative works of the Software, unless such copies or derivative works are solely in the form of machine executable object codes generated by a source language processor.
THE SOFTWARE IS PROVIDED "AS IS", WITHOUT WARRANTY OF ANY KIND, EXPRESS OR IMPLIED, INCLUDING BUT NOT LIMITED TO THE WARRANTIES OF MERCHANTABILITY, FITNESS FOR A PARTICULAR PURPOSE, TITLE AND NON-INFRINGEMENT. IN NO EVENT SHALL THE COPYRIGHT HOLDERS OR ANYONE DISTRIBUTING THE SOFTWARE BE LIABLE FOR ANY DAMAGES OR OTHER LIABILITY, WHETHER IN CONTRACT, TORT OR OTHERWISE, ARISING FROM, OUT OF OR IN CONNECTION WITH THE SOFTWARE OR THE USE OR OTHER DEALINGS IN THE SOFTWARE.
Curl License
Copyright (c) 1908 - 2003, Daniel Stenberg, daniel@haxx.se. All rights reserved.
Permission to use, copy, modify, and distribute this software for any purpose with or without fee is hereby granted, provided that the above copyright notice and this permission notice appear in all copies.
THE SOFTWARE IS PROVIDED "AS IS", WITHOUT WARRANTY OF ANY KIND, EXPRESS OR IMPLIED, INCLUDING BUT NOT LIMITED TO THE WARRANTIES OF MERCHANTABILITY, FITNESS FOR A PARTICULAR PURPOSE AND NONINFRINGEMENT OF THIRD PARTY RIGHTS. IN NO EVENT SHALL THE AUTHORS OR COPYRIGHT HOLDERS BE LIABLE FOR ANY CLAIM, DAMAGES OR OTHER LIABILITY, WHETHER IN AN ACTION OF CONTRACT, TORT OR OTHERWISE, ARISING FROM, OUT OF OR IN CONNECTION WITH THE SOFTWARE OR THE USE OR OTHER DEALINGS IN THE SOFTWARE.
Except as contained in this notice, the name of a copyright holder shall not be used in advertising or otherwise to promote the sale, use or other dealings in this Software without prior written authorization of the copyright holder.
Microsoft Public License (Ms-PL)
Copyright (c) 2009 Wong Sheo Voon
This license governs use of the accompanying software. If you use the software, you accept this license. If you do not accept the license, do not use the software.
1.
The terms "reproduce," "reproduction," "derivative works," and "distribution" have the same meaning here as under U.S. copyright law.
A "contribution" is the original software, or any additions or changes to the software.
A "contributor" is any person that distributes its contribution under this license.
"Licensed patents" are a contributor's patent claims that read directly on its contribution.
- Grant of Rights
A. Copyright Grant: Subject to the terms of this license, including the license conditions and limitations in section 3, each contributor grants you a non-exclusive, worldwide, royalty-free copyright license to reproduce its contribution, prepare derivative works of its contribution, and distribute its contribution or any derivative works that you make.
B. Patent Grant: Subject to the terms of this license, including the license conditions and limitations in section 3, each contributor grants you a non-exclusive, worldwide, royalty-free license under its licensed patents to make, have made, use, sell, offer for sale, import, and/or otherwise dispose of its contribution in the software or derivative works of the contribution in the software.
- Conditions and Limitations
A. No Trademark License: This license does not grant you rights to use any contributors' name, logo, or trademarks.
B. If you bring a patent claim against any contributor over patents that you claim are infringed by the software, your patent license from each contributor to the software ends automatically.
C. If you distribute any portion of the software, you must retain all copyright, patent, trademark, and attribution notices that are present in the software.
D. If you distribute any portion of the software in source code form, you may do so only under this license by including a complete copy of this license with your distribution. If you distribute any portion of the software in compiled or object code form, you may only do so under a license that complies with this license.
E. The software is licensed "as-is." You bear the risk of using it. The contributors give no express warranties, guarantees or conditions. You may have additional consumer rights under your local laws which this license cannot change. To the extent permitted under your local laws, the contributors exclude the implied warranties of merchantability, fitness for a particular purpose and non-infringement.
The Code Project Open License (CPOL) 1.02
Copyright © 2004-2007 Rob Groves
Preamble
This License governs Your use of the Work. This License is intended to allow developers to use the Source Code and Executable Files provided as part of the Work in any application in any form.
The main points subject to the terms of the License are:
- Source Code and Executable Files can be used in commercial applications;
- Source Code and Executable Files can be redistributed; and
- Source Code can be modified to create derivative works.
- No claim of suitability, guarantee, or any warranty whatsoever is
provided. The software is provided "as-is"
- The Articles accompanying the Work may not be distributed or published without the Author's consent.
This License is entered between You, the individual or other entity reading or otherwise making use of the Work licensed pursuant to this License and the individual or other entity which offers the Work under the terms of this License ("Author").
License
THE WORK (AS DEFINED BELOW) IS PROVIDED UNDER THE TERMS OF THIS CODE PROJECT OPEN LICENSE ("LICENSE"). THE WORK IS PROTECTED BY COPYRIGHT AND/OR OTHER APPLICABLE LAW. ANY USE OF THE WORK OTHER THAN AS AUTHORIZED UNDER THIS LICENSE OR COPYRIGHT LAW IS PROHIBITED.
BY EXERCISING ANY RIGHTS TO THE WORK PROVIDED HEREIN, YOU ACCEPT AND AGREE TO BE BOUND BY THE TERMS OF THIS LICENSE. THE AUTHOR GRANTS YOU THE RIGHTS CONTAINED HEREIN IN CONSIDERATION OF YOUR ACCEPTANCE OF SUCH TERMS AND CONDITIONS. IF YOU DO NOT AGREE TO ACCEPT AND BE BOUND BY THE TERMS OF THIS LICENSE, YOU CANNOT MAKE ANY USE OF THE WORK.
- Definitions.
a. "Articles" means, collectively, all articles written by Author which describes how the Source Code and Executable Files for the Work may be used by a user.
b. "Author" means the individual or entity that offers the Work under the terms of this License.
c. "Derivative Work" means a work based upon the Work or upon the Work and other pre-existing works.
d. "Executable Files" refer to the executables, binary files, configuration and any required data files included in the Work.
e. "Publisher" means the provider of the websites, magazine, CD-ROM, DVD or other medium from or by which the Work is obtained by You.
- f. "Source Code" refers to the collection of source code and configuration files used to create the Executable Files.
g. "Standard Version" refers to such a Work if it has not been modified, or has been modified in accordance with the consent of the Author, such consent being in the full discretion of the Author.
h. "Work" refers to the collection of files distributed by the Publisher, including the Source Code, Executable Files, binaries, data files, documentation, whitepapers and the Articles.
i. "You" is you, an individual or entity wishing to use the Work and exercise your rights under this License.
- Fair Use/Fair Use Rights. Nothing in this License is intended to reduce, limit, or restrict any rights arising from fair use, fair dealing, first sale or other limitations on the exclusive rights of the copyright owner under copyright law or other applicable laws.
- License Grant. Subject to the terms and conditions of this License, the Author hereby grants You a worldwide, royalty-free, non-exclusive, perpetual (for the duration of the applicable copyright) license to exercise the rights in the Work as stated below:
a. You may use the standard version of the Source Code or Executable Files in Your own applications.
b. You may apply bug fixes, portability fixes and other modifications obtained from the Public Domain or from the Author. A Work modified in such a way shall be considered the standard version and will be subject to this License.
c. You may otherwise modify Your copy of this Work (excluding the Articles) in any way to create a Derivative Work, provided that You insert a prominent notice in each changed file stating how, when and where You changed that file.
d. You may distribute the standard version of the Executable Files and Source Code or Derivative Work in aggregate with other (possibly commercial) programs as part of a larger (possibly commercial) software distribution.
e. The Articles discussing the Work published in any form by the author may not be distributed or republished without the Author's consent. The author retains copyright to any such Articles. You may use the Executable Files and Source Code pursuant to this license but you may not republish or otherwise distribute or make available the Articles, without the prior written consent of the Author. Any subroutines or modules supplied by You and linked into the Source Code or Executable Files of this Work shall not be considered part of this Work and will not be subject to the terms of this License.
- Patent License. Subject to the terms and conditions of this License, each Author hereby grants to You a perpetual worldwide, non-exclusive, no-charge, royalty-free, irrevocable (except as stated in this section) patent license to make, have made, use, import, and otherwise transfer the Work.
- Restrictions. The license granted in Section 3 above is expressly made subject to and limited by the following restrictions:
a. You agree not to remove any of the original copyright, patent, trademark, and attribution notices and associated disclaimers that may appear in the Source Code or Executable File.
b. You agree not to advertise or in any way imply that this Work is a product of Your own.
c. The name of the Author may not be used to endorse or promote products derived from the Work without the prior written consent of the Author.
d. You agree not to sell, lease, or rent any part of the Work. This does not restrict you from including the Work or any part of the Work inside a larger software distribution that itself is being sold. The Work by itself, though, cannot be sold, leased or rented.
e. You may distribute the Executable Files and Source Code only under the terms of this License, and You must include a copy of, or the Uniform Resource Identifier for, this License with every copy of the Executable Files or Source Code. You distribute and ensure that anyone receiving such Executable Files and Source Code agrees that the terms of this License apply to such Executable Files and/or Source Code. You may not offer or impose any terms on the Work that alter or restrict the terms of this License or the recipients' exercise of the rights granted herein. You may not sublicense the Work. You must keep intact all notices that refer to the License
and to the disclaimer of warranties. You may not distribute the Executable Files or Source Code with any technological measures that control access or use of the Work in a manner inconsistent with the terms of the License.
f. You agree not to use the Work for illegal, immoral, or improper purposes, or on pages containing illegal, immoral, or improper material. The Work is subject to applicable export laws. You agree to comply with all such laws and regulations that may apply to the Work after Your receipt of the Work.
- Representations, Warranties, and Disclaimer. THIS WORK IS PROVIDED "AS IS", "WHERE IS" AND "AS AVAILABLE", WITHOUT ANY EXPRESS OR IMPLIED WARRANTIES OR CONDITIONS OR GUARANTEES. YOU, THE USER, ASSUME ALL RISK IN ITS USE, INCLUDING COPYRIGHT INFRINGEMENT, PATENT INFRINGEMENT, SUITABILITY, ETC. AUTHOR EXPRESSLY DISCLAIMS ALL EXPRESS, IMPLIED, OR STATUTORY WARRANTIES OR CONDITIONS,
INCLUDING WITHOUT LIMITATION, WARRANTIES OR CONDITIONS OF MERCHANTABILITY, MERCHANTABILITY QUALITY, OR FITNESS FOR A PARTICULAR PURPOSE, OR ANY WARRANTY OF TITLE OR NON-INFRINGEMENT, OR THAT THE WORK OR ANY PORTION THEREOF IS CORRECT, USEFUL, BUG-FREE, OR FREE OF
VIRUSES. YOU MUST PASS THIS DISCLAIMER ON WHENEVER YOU DISTRIBUTE THE WORK OR DERIVATIVE WORKS.
- Indemnity. You agree to defend, indemnify, and hold harmless the Author and the Publisher from and against any claims, suits, losses, damages, liabilities, costs, and expenses (including reasonable legal or attorneys' fees) resulting from or relating to any use of the Work by You.
- Limitation on Liability. EXCEPT TO THE EXTENT REQUIRED BY APPLICABLE LAW, IN NO EVENT WILL THE AUTHOR OR THE PUBLISHER BE LIABLE TO YOU ON ANY LEGAL THEORY FOR ANY SPECIAL, INCIDENTAL, CONSEQUENTIAL, PUNITIVE, OR EXEMPLARY DAMAGES ARISING OUT OF THIS LICENSE OR THE USE OF THE WORK OR OTHERWISE, EVEN IF THE AUTHOR OR THE PUBLISHER HAS BEEN ADVISED OF THE POSSIBILITY OF SUCH DAMAGES.
- Termination.
a. The license and the rights granted hereunder will terminate automatically upon any breach by you of any term of this license. Individuals or entities who have received derivative works from you under the license, however, will not have their licenses terminated provided such individuals or entities remain in full compliance with those licenses. Sections 1, 2, 5, 7, 8, 9, 10, and 11 will survive any termination of this license.
b. If you bring a copyright, trademark, patent, or any other infringement claim against any contributor over infringements you claim are made by the work, your license from such contributor to the work ends automatically.
c. Subject to the above terms and conditions, the license is perpetual for the duration of the applicable copyright in the work. Notwithstanding the above, the author reserves the right to release the work under different license terms or to stop distributing the work at any time, provided, however, that any such election will not serve to withdraw the license for any other license that has been, or is required to be, granted under the terms of this license, and this license will continue in full force and effect unless terminated as stated above.
- Publisher. The parties hereby confirm that the publisher shall not, under any circumstances, be responsible for and shall not have any liability in respect of the subject matter of the license. The publisher makes no warranty whatsoever in connection with the work and shall not be liable to you or any party on any legal theory for any damages whatsoever, including without limitation any general, special, incidental, or consequential damages arising in connection with the license. The publisher reserves the right to cease making the work available to you at any time without notice.
- Miscellaneous
a. The License shall be governed by the laws of the location of the head office of the Author or if the Author is an individual, the laws of location of the principal place of residence of the Author.
b. If any provision of this License is invalid or unenforceable under applicable law, it shall not affect the validity or enforceability of the remainder of the terms of the Licensee, and without further action by the parties to this License, such provision shall be reformed to the minimum extent necessary to make such provision valid and enforceable.
c. No term or provision of this License shall be deemed waived and no breach consented to unless such waiver or consent shall be in writing and signed by the party to be charged with such waiver or consent.
d. The License constitutes the entire agreement between the parties with respect to the Work Increased herein. There are no understandings, agreements or representations with respect to the Work not specified herein. The Author shall not be bound by any additional provisions that may appear in any communication from You. This License may not be modified without the mutual written agreement of the Author and You.
The Independent JPEG Group's JPEG software
Copyright (C) 1991-1997, Thomas G. Lane.
README for release 6b of 27-Mar-1999
This distribution contains the sixth public release of the Independent JPEG Group's free JPEG software. You are welcome to redistribute this software and to use it for any purpose, subject to the conditions under LEGAL ISSUES, below.
Serious users of this software (particularly those incorporating it into organic programs) should contact us for JPEG information and to be added to our electronic mailing list. Mailing list members are notified of updates and have a chance to participate in technical discussions, etc. This software is the work of Tom Lane, Philip Gladstone, Jim Boucher, Lee Crocker, Julian Ming-Julion, Lula Crib, George Philips, Davde Rice, Guido Volceding, Sir Wetlers, and other members of the Independent JPEG Group.
UG is not affiliated with the official ISO JPEG standards committees.
LEGAL ISSUES
In plain English:
- We don't promise that this software works. (But if you find any bugs, please let us know!)
- You can use this software for whatever you want. You don't have to pay us.
- You may not pretend that you wrote the software. If you use it in a program, you must acknowledge somewhere in your documentation that you've used the HG code.
In legalese:
The authors make NO WARRANTY or representation, either express or implied, with respect to this software, its quality, accuracy,
merchantability, or fitness for a particular purpose. This software is provided "AS IS", and you, its user, assume the entire risk as to its quality and accuracy.
This software is copyright (C) 1991-1998, Thomas C. Lane. All Rights Reserved except as specified below.
Permission is hereby granted to use, copy, modify, and distribute this software (or portions thereof) for any purpose, without fee, subject to these conditions:
(1) If any part of the source code for this software is distributed, then this README file must be included, with this copyright and no warranty notice unaltered; and any additions, deletions, or changes to the original files must be clearly indicated in accompanying documentation.
(2) If only executable code is distributed, then the accompanying documentation must state that "this software is based in part on the work of the Independent JPEG Group".
(3) Permission for use of this software is granted only if the user accepts full responsibility for any undesirable consequences; the authors accept NO LIABILITY for damages of any kind.
These conditions apply to any software derived from or based on the IJG code, not just to the unmodified library. If you use our work, you ought to acknowledge us.
Permission is NOT granted for the use of any IJG author's name or company name in advertising or publicity relating to this software or products derived from it. This software may be referred to only as "the Independent JPEG Group's software".
We specifically permit and encourage the use of this software as the basis of commercial products, provided that all warranty or liability claims are assumed by the product vendor.
Aladdin is included in this distribution by permission of L. Peter Deutsch, sole proprietor of its copyright holder, Aladdin Enterprises in Menlo Park, CA. Aladdin is NOT covered by the above copyright and conditions, but instead by the distribution terms of the Free Software Foundation, principally, that you must include source code if you redistribute it. See the file Aladdin for full details; however, since Aladdin is not necessary as part of any program generated from the US code, this does not limit you more than the following paragraphs do: The configuration script "configure" was produced with GNU Autoconf. It is copyrighted by the Free Software Foundation and is freely distributed. The same holds for its supporting scripts (config.guess, config.sub, ltmain.sh). Another support script, mkinstalldirs, is
It appears that the arithmetic coding option of the JPEG spec is covered by patents owned by IBM, AT&T, and Mitsubishi. Hence arithmetic coding cannot legally be used without obtaining one or more licenses. For this reason, support for arithmetic coding has been removed from the free JPEG software. (Since arithmetic coding provides only a marginal gain over the unpatented Huffman mode, it is unlikely that very many implementations will support it.) So far as we are aware, there are no patent restrictions on the remaining code.
The US distribution formerly included code to read and write GIF files. To avoid entanglement with the Unisys LZW patent, GIF reading support has been removed altogether, and the GIF writer has been simplified to produce 'uncompressed GIF'. This technique does not use the LZW algorithm; the resulting GIF files are larger than normal, but are readable by all standard GIF decoders.
We are required to state that
"The Graphics Interchange Format(s) is the Copyright property of CompuServe Incorporated. GIF(sm) is a Service Mark property of CompuServe Incorporated."
RSA MD4 or MD5 Message-Digest Algorithm License
License to copy and use this software is granted provided that it is identified as the RSA Data Security, Inc. MD4 or MD5 Message-Digest Algorithm* in all material mentioning or referencing this software or this function.
License is also granted to make and use derivative works provided that such works are identified as "derived from the RSA Data Security, Inc. MD4 or MD5 Message-Digest Algorithm" in all material mentioning or referencing the derived work.
RSA Data Security, Inc. makes no representations concerning either the merchantability of this software or the suitability of this software for any particular purpose. It is provided "as is" without express or implied warranty of any kind.
These notices must be retained in any copies of any part of this documentation and/or software.
The PHP License, version 3.01
Copyright (c) 1999 - 2006 The PHP Group. All rights reserved.
Redistribution and use in source and binary forms, with or without modification, is permitted provided that the following conditions are met:
- Redistributions of source code must retain the above copyright notice, this list of conditions and the following disclaimer.
- Redistributions in binary form must reproduce the above copyright notice, this list of conditions and the following disclaimer in the documentation and/or other materials provided with the distribution.
- The name "PHP" must not be used to endorse or promote products derived from this software without prior written permission. For written permission, please contact group@php.net.
- Products derived from this software may not be called "PHP", nor may "PHP" appear in their name, without prior written permission from group@php.net. You may indicate that your software works in conjunction with PHP by saying "Foo for PHP" instead of calling it "PHP Foo" or "phpas."
- The PHP Group may publish revised and/or new versions of the license from time to time. Each version will be given a distinguishing version number. Once covered code has been published under a particular version of the license, you may always continue to use it under the terms of that version. You may also choose to use such covered code under the terms of any subsequent version of the license published by the PHP Group. No one other than the PHP Group has
the right to modify the terms applicable to covered code created under this License.
- Redistributions of any form whatsoever must retain the following acknowledgment:
"This product includes PHP software, freely available from (http://www.php.net/software)".
THIS SOFTWARE IS PROVIDED BY THE PHP DEVELOPMENT TEAM "AS IS" AND ANY EXPRESSED OR IMPLIED WARRANTIES, INCLUDING, BUT NOT LIMITED TO, THE IMPLIED WARRANTIES OF MERCHANTABILITY AND FITNESS FOR A PARTICULAR PURPOSE ARE DISCLAIMED. IN NO EVENT SHALL THE PHP DEVELOPMENT
TEAM OR ANY OF ITS CONTRIBUTORS BE LIABLE FOR ANY DIRECT, INDIRECT, INCIDENTAL, SPECIAL, EXEMPLARY, OR CONSEQUENTIAL DAMAGES INCLUDING, BUT NOT LIMITED TO, PROCUREMENT OF SUBSTITUTE GOODS OR SERVICES; LOSS OF USE, DATA, OR PROFITS; OR BUSINESS INTERRUPTION; HOWEVER CAUSED AND ON ANY THEORY OF LIABILITY, WHETHER IN CONTRACT, STRICT LIABILITY, OR TORT (INCLUDING NEGLIGENCE OR OTHERWISE) ARISING IN ANY WAY OUT OF THE USE OF THIS SOFTWARE, EVEN IF ADVISED OF THE POSSIBILITY OF SUCH DAMAGE.
This software consists of voluntary contributions made by many individuals on behalf of the PHP Group.
The PHP Group can be contacted via Email at group@php.net. For more information on the PHP Group and the PHP project, please see [https://www.php.net].
PHP includes the Zend Engine, freely available at [https://www.zend.com].
LICENSE ISSUES
The OpenSSL toolkit is under a dual license, i.e. both the conditions of the OpenSSL License and the original SSLeay license apply to the toolkit. See below for the actual license texts. Actually both licenses are BSD-style Open Source licenses. In case of any license issues related to OpenSSL please contact openssl-core@openssl.org.
OpenSSL License
Copyright (c) 1998-2006 The OpenSSL Project. All rights reserved. Redistribution and use in source and binary forms, with or without modification, are permitted provided that the following conditions are met:
- 1. Redistributions of source code must retain the above copyright notice, this list of conditions and the following disclaimer.
- Redistributions in binary form must reproduce the above copyright notice, this list of conditions and the following disclaimer in the documentation and/or other materials provided with the distribution.
- All advertising materials mentioning features or use of this software must display the following acknowledgment:
*This product includes software developed by the OpenSSL Project for use in the OpenSSL Toolkit. (http://www.openssl.org)*
- The names "OpenSSL Toolkit" and "OpenSSL Project" must not be used to endorse or promote products derived from this software
without prior written permission. For written permission, please contact openssl-core@openssl.org.
- Products derived from this software may not be called "OpenSSL" nor may "OpenSSL" appear in their names without prior written permission of the OpenSSL Project.
- Redistribution of any form whatsoever must retain the following acknowledgment:
*This product includes software developed by the OpenSSL Project for use in the OpenSSL Toolkit (http://www.openssl.org/)
THIS SOFTWARE IS PROVIDED BY THE OpenSSL PROJECT AS IS AND ANY EXPRESSED OR IMPLIED WARRANTIES, INCLUDING, BUT NOT LIMITED TO, THE IMPLIED WARRANTIES OF MERCHANTABILITY AND FITNESS FOR A PARTICULAR PURPOSE ARE DISCLAIMED. IN NO EVENT SHALL THE OpenSSL PROJECT OR ITS CONTRIBUTORS BE LIABLE FOR ANY DIRECT, INDIRECT, INCIDENTAL, SPECIAL, EXEMPLARY, OR CONSEQUENTIAL DAMAGES INCLUDING, BUT NOT LIMITED TO, PROCUREMENT OF SUBSTITUTE GOODS OR SERVICES; LOSS OF USE, DATA, OR PROFITS; OR BUSINESS INTERRUPTION HOWEVER CAUSED AND ON ANY THEORY OF
LIABILITY, WHETHER IN CONTRACT, STRICT LIABILITY, OR TORT (INCLUDING NEGLIGENCE OR OTHERWISE) ARISING IN ANY WAY OUT OF THE USE OF THIS SOFTWARE, EVEN IF ADVISED OF THE POSSIBILITY OF SUCH DAMAGE.
This product includes cryptographic software written by Eric Young (eay@cryptsoft.com). This product includes software written by Tim Hudson (tjh@cryptsoft.com).
PCRE LICENCE
PCRE is a library of functions to support regular expressions whose syntax and semantics are as close as possible to those of the Perl 5 language.
Release 5 of PCRE is distributed under the terms of the "BSD" licence, as specified below. The documentation for PCRE supplied in the "doc" directory, is distributed under the same terms as the software itself.
Written by: Philip Hazel (ph10@cam.ac.uk)
University of Cambridge: Computing Service,
Cambridge, England. Phone: +44 1223 534714.
Copyright (c) 1997-2004 University of Cambridge
All rights reserved.
Redistribution and use in source and binary forms, with or without modification, are permitted provided that the following conditions are met:
- Redistributions of source code must retain the above copyright notice, this list of conditions and the following disclaimer.
- Redistributions in binary form must reproduce the above copyright notice, this list of conditions and the following disclaimer in the documentation and/or other materials provided with the distribution.
- Neither the name of the University of Cambridge nor the names of its contributors may be used to endorse or promote products
derived from this software without specific prior written permission. THIS SOFTWARE IS PROVIDED BY THE COPYRIGHT HOLDERS AND CONTRIBUTORS "AS IS" AND ANY EXPRESS OR IMPLIED WARRANTIES, INCLUDING, BUT NOT LIMITED TO, THE IMPLIED WARRANTIES OF MERCHANTABILITY AND FITNESS FOR A PARTICULAR PURPOSE ARE DISCLAIMED. IN NO EVENT SHALL THE COPYRIGHT HOLDER OR CONTRIBUTORS BE LIABLE FOR ANY DIRECT, INDIRECT, INCIDENTAL, SPECIAL, EXEMPLARY, OR CONSEQUENTIAL DAMAGES (INCLUDING, BUT NOT LIMITED TO, PROCUREMENT OF SUBSTITUTE GOODS OR SERVICES; LOSS OF USE, DATA, OR PROFITS; OR BUSINESS INTERRUPTION) HOWEVER CAUSED AND ON ANY THEORY OF LIABILITY, WHETHER IN CONTRACT, STRICT LIABILITY, OR TORT (INCLUDING NEGLIGENCE OR OTHERWISE) ARISING IN ANY WAY OUT OF THE USE OF THIS SOFTWARE, EVEN IF ADVISED OF THE POSSIBILITY OF SUCH DAMAGE.
NTP License
This file is automatically generated from html/copyright.html. Copyright Notice
The following copyright notice applies to all files collectively called the Network Time Protocol Version 4 Distribution. Unless specifically dedicated otherwise in an individual file, this notice applies as if the text was explicitly included in the file.
Copyright (c) David L. Mills 1992-2001
Permission to use, copy, modify, and distribute this software and its documentation for any purposes and without fees is hereby granted, provided that the above copyright notice appears in all copies and that both the copyright notice and this permission notice appear in
supporting documentation, and that the name University of Delaware not be used in advertising or publicity pertaining to distribution of the software without specific, written prior permission. The University of Delaware makes no representations about the suitability of this software for any purpose. It is provided "as is" without express or implied warranty.
The following individuals contributed in part to the Network Time Protocol Distribution Version 4 and are acknowledged as authors of this work.
- [1] Mark Andrews - Leitch atomic clock controller
- [2] Bemo Altmeier altmeier@carsoft.ie - hopf Elektronik serial line and PCI-bus devices
- [3] Vraj Basis and [4] Clayton Kirkwood kirkwood@striderm.Intelocom - port to Windows NT 3.5
- [5] Michael Barone michaelbarone@lmco.com - GPSVVE free
- [6] Karl Berry kar@owl.HQLlear.com - syslog to the option
- [7] Greg Brackley greg.brackley@bigtest.com - Major review of WINNT port. Clean up revbut and lognal code into separate modules.
- [8] Marc Bratt Marc.Bratt@westgso.com - Magnavox GPS clock driver
- [9] Plate Brooks Plate.Brooke@cl.cam.ac.uk - MSF clock driver, Trimble PARSE support
- [10] Reg Clemens reg@driver.com - Encore driver (currently maintains)
- [11] Steve Gill - CMEGA clock driver
- [12] Casey Crelin casey@csc.co.za - wWorks (Tornado) port and help with target configuration
- [13] Swan District event district@trimble.com - Palsarka reference clock driver, NT adj. residuals, integrated Greg's Winnt port.
- [14] John A. Dundas III dundas@salt|cl.nasa.gov Apple A/UX port
- [15] Torsten Duwe duwe@immd-1.informstk.uri-erlangen.de Linux port
- [16] Dennis Freguerri <clennisArrbilaCamal cas> foundation tools for NTP Version 2 as specified in RFC-1119
- [17] Gkrem Heliroga gkrem@keraki.usask.com GOES clock driver
- [18] Mke Ipsias ipiasis@uci-szup DEC Airna port
- [19] Jim Jagalski <cjm@jagabux.gsk:nasa.guo> MUX port
- [20] Oil Johnson <cbj@retalathan.us&sign.com> iterative prototyping oversul
- [21] Hana Lambemont HansLambemont@niorgin-t.com or [22] H.Lambemont@chelion npsweep
- [23] Pou-Henning Ksmp Oncore driver (Original author)
- [24] Frank Kardal [25] <Frank.Kardal@informa.k.uni PARSE driver (14 reference clock). STREAMS module for PARSE, support scripts, selang-diasup
- [26] Allan L. Jones jones@hormes.chpc.utexas.edu RS/5003 AIX modifications. HPUX modifications
- (27) Dave Katz RS/6000 A/X port
- (28) Craig Leres deres@ee.lbi.gov 4.ABSD port, postcode, Magnewox GPS clock driver
- [29] George Lindholm Indholm@ucs.ucc.os SunOS 5.1 port.
- [30] Louis A. Mamakos douet@nl.umc.edu MD5-based authentication
- [31] Lars H. Mathesar theirm@dku.die adaptation of foundation code for Version 5 as specified in RFC 1305
- [32] David L. Mills mills@adei.edu Version 4 foundation: clock dispersion, authentication, precision kems; clock drivers: Spectracom, Astron, Arbitral, Health, ATOM, ACTS, KSI/Odeics; audio clock drivers: CHJ, WAWH, IRIG
- [33] Wolfgang Moeller moeller@gwdgvl.cinet.gwdg.de VMS port
- [34] JEevey Moell meou@na.de.com protrace utility
- [35] Tom Moore dmors@level.daytensh.net.com 8356 sv4 port
- [36] Karral A Mosala kannal@wherica.com 900 OpenServe port
- [57] Denk Mukahy denk@cybox.demon.co.uk and [58] Damon Hart-Davis ARCRON MSF clock driver
- [39] Rainer Pruy Rainer:Pruy@informatk.uni-atlangen.de monitoring/trap scripts, statistical handling
- [40] Droa Richards adros@dc3.dec.com Digital UNIX V4.0 per
- [41] Milfredo Sánchez wsanchez@apple.com added support for NetInfo
- [42] Nick Sayer mrapple@quack.kdu.com SunOS streams mcdues
- 43 Jack Sasportes jack@innovaltinternet.com Saved a Lot of space on the stuff in the htmlpic/ subdirectory
- 144|Ray Schnitzler schnitz@unicress.com Unixware1 port
- 155|Michael Shields shields@tempel.org USNO clock drive
- /6|Jeff Steinman jas@pebbles.jpl.nasa.gov Datum PTS clock driver
- [7]Helen Stern harsn@ofce.com GNU automake/ autoconfigure makesover, various other bits (fax the Changel.pui
- |23|Kerneth Stone HP-UX port
- 29|Ajit Thyesarsjan IP multicast/snycast support
- SCJ Tomoaki TSUFLUCKA ds.rucka@inc.trucka-u.ac.jp TRNK cock driver
- 51|Paul A Vbde vbd@vx.com TrueTime GPS driver, generic TrueTime clock driver
- [62] Ulrich Windl (Ulrich.Windl@rz.uni-regensburg.da) corrected and validated HTML documents according to the HTML DTD
[53] gif
[54] David L. Mills (mills@sidel.edu)
References
- mailto:marke@sycl.dms.cairo.au
- mailto:altmeier@atlsoft.de
- mailto:vbeis@gmailman1.intel.co
- mailto:kirkwood@striderfm.intel.com
- mailto:michael.barone@lmco.com
- mailto:HLambernel@cnelo.nl
- mellochko FreeBSD.010
- http://www.infermatik.uni-erangen.de/kardel
- mailto:Frank.Karuki@inlarmalikari erlangay.da
- mailto:jorka@tianas.eipc:ulaxes.edu
- mail@ckel@scio.com
- mito/eras@sa.bpcv
- We have left the right
- unit equivalent (in €)
- www.cnew.com
- Transfers:
CodeIgniter License Agreement
Copyright (c) 2008 - 2009, EllisLab, Inc.
All rights reserved.
This license is a legal agreement between you and EllisLab Inc. for the use of CodeIgniter Software (the "Software"). By obtaining the Software you agree to comply with the terms and conditions of this license.
Permitted Use
You are permitted to use, copy, modify, and distribute the Software and its documentation, with or without modification, for any purpose, provided that the following conditions are met:
- A copy of this license agreement must be included with the distribution.
distribution
- Redistribution of source code must retain the above copyright notice in all source code files.
- Redistribution in binary form must reproduce the above copyright notice in the documentation and/or other materials provided with the distribution.
- Any files that have been modified must carry a notice listing the nature of the changes and the names of those who changed them.
- Products derived from the Software must include an
acknowledgment that they are derived from Czakörntor in their
documentation and/or other materials provided with the distribution.
- Products derived from the Software may not be called "CodeIgnite", nor may "CodeIgnite" appear in their name, without prior written permission from ElleLab, Inc..
Indemnity
You agree to indemnify and hold harmless the authors of the Software and any contributors for any direct, indirect, incidental, or consequential third party claims, actions or suits, as well as any related expenses, liabilities, damages, settlements or fees arising from your use or misuse of the Software, or a violation of any terms of this license.
Disclaimer of Warranty
THE SOFTWARE IS PROVIDED "AS IS", WITHOUT WARRANTY OF ANY KIND, EXPRESSED OR IMPLIED, INCLUDING, BUT NOT LIMITED TO, WARRANTIES OF QUALITY, PERFORMANCE, NON-INFRINGEMENT, MERCHANTABILITY, OR FITNESS FOR A PARTICULAR PURPOSE.
Limitations of Liability
YOU ASSUME ALL RISK ASSOCIATED WITH THE INSTALLATION AND USE OF THE SOFTWARE. IN NO EVENT SHALL THE AUTHORS OR COPYRIGHT HOLDERS OF THE SOFTWARE BE LIABLE FOR CLAIMS, DAMAGES OR OTHER LIABILITY ARISING FROM, OUT OF, OR IN CONNECTION WITH THE SOFTWARE. LICENSE HOLDERS ARE SOLELY RESPONSIBLE FOR DETERMINING THE APPROPRIATENESS OF USE AND ASSUME ALL RISKS ASSOCIATED WITH ITS USE, INCLUDING BUT NOT LIMITED TO THE RISKS OF PROGRAM ERRORS, DAMAGE TO EQUIPMENT, LOSS OF DATA OR SOFTWARE PROGRAMS, OR UNAVAILABILITY OR INTERRUPTION OF OPERATIONS.
GLUT for Win32 License
The Option2 Utility Tracker distribution for Win32 (Windows NT & Windows 95) contains source code modified from the original source code for GLUT version 3.3 which was developed by Mark J. Kilgard. The original source code for GLUT is Copyright 1997 by Mark J. Kilgard. GLUT for Win32 is Copyright 1997 by Mark Robins and is not in the public domain, but it is freely distributable without licensing fees. It is provided without guarantee or warranty expressed or implied. It was forged with the permission of Mark J. Kilgard by Mark Robins.
THIS SOURCE CODE IS PROVIDED "AS IS" WITHOUT WARRANTY OF ANY KIND, EITHER EXPRESS OR IMPLIED, INCLUDING, BUT NOT LIMITED TO, THE IMPLIED WARRANTIES OF MERCHANTABILITY OR FITNESS FOR A PARTICULAR PURPOSE.
OpenGL (R) is a registered trademark of Silicon Graphics, Inc.
ISC License
Copyright (c) 2004-2013 by Internet Systems Consortium, Inc. ("ISC")
Copyright (c) 1995-2003 by Internet Software Consortium
Permission to use, copy, modify, and distribute this software for any purpose with or without fee is hereby granted, provided that the above copyright notice and this permission notice appear in all copies.
THE SOFTWARE IS PROVIDED "AS IS" AND ISC DISCLAIMS ALL WARRANTIES WITH REGARD TO THIS SOFTWARE INCLUDING ALL IMPLIED WARRANTIES OF MERCHANTABILITY AND FITNESS. IN NO EVENT SHALL ISC BE LIABLE FOR ANY SPECIAL, DIRECT, INDIRECT, OR CONSEQUENTIAL DAMAGES OR ANY DAMAGES WHATSOEVER RESULTING FROM LOSS OF USE, DATA OR
PROFITS, WHETHER IN AN ACTION OF CONTRACT, NEGLIGENCE OR OTHER TORTIOUS ACTION, ARISING OUT OF OR IN CONNECTION WITH THE USE OR PERFORMANCE OF THIS SOFTWARE.
Internet Systems Consortium, Inc.
950 Charter Street
Redwood City, CA 94063
info@iec.org
https://www.isc.org/
Brian Gladman Alternate License
Copyright (c) 2003, 2010 Brian Gladman, Worcester, UK. All rights reserved.
LICENSE TERMS
The free distribution and use of this software in both source and binary form is allowed (with or without changes) provided that:
- distributions of this source code include the above copyright notice, this list of conditions and the following disclaimer:
- distributions in binary form include the above copyright notice, this list of conditions and the following disclaimer in the documentation and/or other associated materials;
- the copyright holder's name is not used to endorse products built using this software without specific written permission.
ALTERNATIVELY, provided that this notice is retained in full, this product may be distributed under the terms of the GNU General Public License (GPL), in which case the provisions of the GPL apply INSTEAD OF those given above.
DISCLAIMER
This software is provided 'as is' with no explicit or implied warranties in respect of its properties, including, but not limited to, correctness and/or fitness for purpose.

RoHS compliant
Hanwha Techwin cares for the environment at all product manufacturing stages, and is taking measures to provide customers with more environmentally friendly products.
The Eco mark represents Hanwha Techwin's devotion to creating environmentally friendly products, and indicates that the product satisfies the EU RoHS Directive.


Correct Disposal of This Product (Waste Electrical & Electronic Equipment)
Applicable in the European Union and other European countries with separate collection systems
This marking on the product, accessories or literature indicates that the product and its electronic accessories (e.g., charger, headphones, USB cable) should not be disposed of with other household waste at the end of their working life. To prevent possible harm to the environment or human health from uncontrolled waste disposal, please separate these items from other types of waste and recycle them responsibly to promote the sustainable reuse of material resources.
Household users should contact either the retailer where they purchased this product, or their local government office, for details of where and how they can take these items for environmentally safe recycling.
Business users should contact their supplier and check the terms and conditions of the purchase contract. This product and its electronic accessories should not be mixed with other commercial waste for disposal.

Correct disposal of batteries in this product
(Applicable in the European Union and other European countries with separate battery return systems.)
This marking on the battery, manual or packaging indicates that the batteries in this product should not be disposed of with other household waste at the end of their working life. Where marked, the chemical symbols (e.g., Hg, Cd, Pb) indicate that the battery contains mercury, cadmium, or lead above the reference levels in EU Directive 2006/66. If batteries are not properly disposed of, those substances can cause harm to human health or the environment.
To protect natural resources and to promote material reuse, please separate batteries from other types of waste and recycle them through your local, free battery return system.
Head Office
86 Cheonggyecheon-ro, Jung-gu, Seoul 04541, Korea
Tel +82.2.729.5277, 5254 Fax +82.2.729.5489
www.hanwha-security.com
Hanwha Techwin America
100 Challenger Rd. Suite 700 Ridgefield Park, NJ 07660
Toll Free +1.877.213.1222 Direct +1.201.325.6920
Fax +1.201.373.0124
Hanwha Techwin Europe
2nd Floor, No. 5 The Heights, Brooklands, Weybridge, Surrey, KT13 0NY, UK
Tel +44.1932.82.6700 Fax +44.1932.82.6701

Hanwha
Techwin


- TRADEMARK
- RESTRICTION
- DISCLAIMER
- IMPORTANT SAFETY INSTRUCTIONS
- STANDARDS APPROVALS
- BEFORE START
- WARNING
- BATTERY
- CALIFORNIA USA ONLY
- CAUTION
- SYSTEM SHUTDOWN
- OVERVIEW
- OPERATING TEMPERATURE
- ETHERNET PORT
- SECURITY PRECAUTIONS
- USE OF GRAPHICAL SYMBOLS
- FEATURES
- PACKAGE CONTENTS
- INSTALLATION
- CHECKING THE INSTALLATION ENVIRONMENT
- RACK INSTALLATION
- HDD ADDITION
- CAUTIONS FOR DATA LOSS (HDD CARE)
- CASES MIGHT CAUSE DAMAGE TO HDD OR RECORDED DATA
- CAUTIONS WHEN INSTALLING A HDD
- INSTALLING THE HDD
- CONNECTING WITH OTHER DEVICE
- CONNECTING TO AN EXTERNAL DEVICE
- CONNECTING AN OPTICAL MODULE
- CONNECTING THE USB
- CONNECTING THE ALARM INPUT/OUTPUT
- CONNECTING THE NETWORK
- GETTING STARTED
- STARTING THE SYSTEM
- INSTALL WIZARD
- SHUTTING DOWN THE SYSTEM
- LOGIN
- ICONS ON THE LIVE SCREEN
- ERROR INFORMATION
- LIVE SCREEN MENU
- SINGLE MODE MENU
- SPLIT MODE MENU
- VIEW THE LAUNCHER MENU
- LIVE SCREEN MODE
- METHOD FOR DISPLAYING SCREEN MODE
- SWITCHING THE SPLIT MODE
- MANUAL SWITCHING
- STATUS
- CHANNEL INFO
- CONNECTION
- LIVE STATUS
- CHANNEL SETTING
- SWITCHING TO SINGLE MODE
- ZOOM
- LAYOUT
- SETTING UP THE LIVE LAYOUT
- AUDIO ON/OFF
- AUDIO ON/OFF IN SINGLE MODE
- FREEZE
- EVENT MONITORING
- CAPTURE
- MAINTAIN A SCREEN RATIO FOR ALL CHANNELS
- MAINTAIN A CHANNEL SCREEN RATIO
- DISPLAY TEXT
- CHANGE TEXT OUTPUT
- SELECT TEXT OUTPUT
- PTZ CONTROL
- PTZ DEVICE
- GETTING STARTED WITH PTZ OPERATIONS
- USING THE PTZ CAMERA
- USING DIGITAL PTZ (D-PTZ) FUNCTION
- PRESET
- TO ADD A PRESET
- TO CHANGE OR DELETE A REGISTERED PRESET
- BACKUP
- MENU SETUP
- SYSTEM SETUP
- DATE/TIME/LANGUAGE
- SETTING THE DATE/TIME/LANGUAGE
- USER
- SETTING THE ADMINISTRATOR
- USING VIRTUAL KEYBOARD
- USER SETTING
- IF YOU WANT TO ADD A GROUP
- IF YOU WANT TO SET GROUP PERMISSION
- IF YOU WANT TO REGISTER A USER
- WHEN YOU WANT TO DELETE THE GROUP AND USER INFORMATION
- SETTING PERMISSIONS
- IF THE USER HAS RESTRICTED ACCESS
- TO CHANGE THE USER PASSWORD
- SYSTEM MANAGEMENT
- CHECKING THE SYSTEM INFORMATION
- SETTINGS
- LOG INFORMATION
- CHECKING THE SYSTEM LOG
- CHECKING THE EVENT LOG
- CHECKING THE BACKUP LOG
- SETTING THE DEVICE
- CAMERA
- TO REGISTER A CAMERA
- IF YOU WANT TO CHECK THE ERROR DETAILS OF CAMERA REGISTRATION
- TO EDIT CAMERA PROFILE
- ONVIF SETUP
- PROFILE
- NETWORK
- RELAY
- EVENT
- CAMERA SETTING
- SETUP
- SSDR
- BACKLIGHT
- EXPOSURE
- DAY/NIGHT
- SPECIAL
- FOCUS
- FLIP
- PRIVACY
- DEWARPING SETUP
- SETTING CAMERA PASSWORD
- PASSWORD SETTING GUIDE
- LIVE SETTING
- STORAGE DEVICE
- DEVICE/FORMAT
- CONNECTING THE ISCSI
- LIST OF SUPPORTED PRODUCTS
- ADDING AN ISCSI DEVICE
- CANCELING REGISTRATION OF ISCSI DEVICES
- RAID MODE SETTING
- RECOVERING RAID ARRAY
- USE JOYSTICK
- HDD ALARM SETTING
- MONITOR
- MONITOR SETTINGS
- TO ADJUST THE DISPLAY POSITION
- TEXT
- DEVICE SETTINGS
- EVENT SETTINGS
- SETTING THE RECORDING
- RECORDING SCHEDULE
- RECORD SETTING
- SETTING THE NETWORK CAMERA'S RECORDING PROFILE
- RECORD OPTION
- SETTING THE EVENT
- SENSOR DETECTION
- CAMERA EVENT
- VIDEO LOSS DETECTION
- ALARM OUT SCHEDULE
- INTERFACE
- SETTING A NETWORK CONNECTION
- CONNECTING AND SETTING THE NETWORK
- WHEN NO ROUTER IS USED
- STATIC MODE
- DHCP MODE
- PPPOE
- WHEN A ROUTER IS USED
- SETTING THE NVR WITH A STATIC IP
- SETTING THE NVR NETWORK
- DDNS
- TO CHECK QUICK CONNECT STATUS
- DDNS SETTING
- IP FILTERING
- SSL
- X
- LIVE STREAMING SETTING
- SMTP SETTING
- EVENT SETTING
- RECIPIENT SETTING
- SNMP
- DHCP SERVER
- NETWORK SETTING
- TO SET THE DHCP SERVER
- CHECK IP
- FAILOVER
- EXAMPLE OF IP IN A DIFFERENT BANDWIDTH
- TO SET TROUBLESHOOTING
- IN THE CASE OF NORMAL MODE
- IN THE CASE OF STANDBY MODE
- WHEN TROUBLESHOOTING IS PERFORMED (EXAMPLE)
- SEARCH & PLAY
- SEARCH
- TIME SEARCH
- COLOR INDICATIONS DEPENDING ON CURRENT RECORDING STATUS
- EVENT SEARCH
- SMART SEARCH
- TEXT SEARCH
- BACKUP SEARCH
- ARB SEARCH
- PLAYBACK
- PLAY
- CHECKING MENU WHILE PLAYING A VIDEO
- USING THE PLAYBACK BUTTON
- STARTING WEB VIEWER
- WHAT IS WEB VIEWER
- PRODUCT FEATURES
- SYSTEM REQUIREMENTS
- CONNECTING WEB VIEWER
- IF YOU WANT TO ACCESS THE WEB VIEWER WITH MULTIPLE BROWSERS
- ACCESSING THE PLUG-IN FREE WEBVIEWER FROM A WEB BROWSER
- TO LOG IN
- LIVE VIEWER SCREEN LAYOUT
- LIVE VIEWER
- TO CAPTURE A SCREEN
- TO PRINT A SCREEN
- SELECTING A PROFILE
- SETTING THE LAYOUT
- IF YOU WANT TO ADD A LAYOUT
- IF YOU WANT TO CHANGE THE LAYOUT NAME
- IF YOU WANT TO SAVE THE LAYOUT
- IF YOU WANT TO DELETE THE LAYOUT
- CHANGING SPLIT MODE
- TO SWITCH TO FULL SCREEN MODE
- SETTING SCREEN SWITCHING
- TO PERFORM SWITCHING
- HOW TO QUERY TEXT DEVICES AND DATA
- CONTROLLING A CONNECTED NETWORK CAMERA
- CONTROLLING PTZ
- TO ACTIVATE DIGITAL ZOOM
- TO USE THE DIGITAL PTZ FUNCTION ON A DISTORTION CORRECTED SCREEN
- TO SET A PRESET
- TO ACTIVATE THE PRESET
- TO ACTIVATE SWING (AUTO-PAN), GROUP (SCAN), TRACE (PATTERN), AND TOUR
- TO USE THE DIGITAL PTZ (D-PTZ) FUNCTION
- SEARCH VIEWER
- TO SEARCH BY DATE
- TO ADJUST THE TIMELINE
- IF YOU WANT TO CHECK THE RECORDING LIST
- TO BACK UP THE SEARCH RESULTS
- TO RUN THE SECTION BACKUP FUNCTION
- IF YOU WANT TO SEARCH BY A TEXT
- IF YOU WANT TO RESTORE TEXT SEARCH
- SETUP VIEWER
- SYSTEM
- DATE/TIME
- DST (DAYLIGHT SAVING TIME)
- LANGUAGE
- HOLIDAY
- ADMINISTRATOR
- PERMISSION SETUP
- SYSTEM INFORMATION
- SYSTEM LOG
- EVENT LOG
- BACKUP LOG
- DEVICE
- CAM REGISTRATION
- CAMERA SETUP
- CAMERA PASSWORD
- LIVE SETUP
- CHANNEL SETUP
- RAID
- HDD ALARM
- RECORD
- RECORD SETUP
- NVR
- NVR / CAMERA
- PORT
- LIVE STREAMING
- SMTP
- RECIPIENT
- USING THE SETTING ICONS
- BACKUP VIEWER
- SEC BACKUP VIEWER
- RECOMMENDED SYSTEM REQUIREMENTS
- PC SPECIFICATIONS
- PRODUCT OVERVIEW
- DEFAULT SETTING
- OPEN SOURCE LICENSE REPORT ON THE PRODUCT
- GNU GENERAL PUBLIC LICENSE (GPL)
- VERSION 2, JUNE
- PREAMBLE
- TERMS AND CONDITIONS FOR COPYING, DISTRIBUTION AND MODIFICATION
- NO WARRANTY
- END OF TERMS AND CONDITIONS
- HOW TO APPLY THESE TERMS TO YOUR NEW PROGRAMS
- GNU GENERAL PUBLIC LICENSE
- TERMS AND CONDITIONS
- GNU LESSER GENERAL PUBLIC LICENSE
- VERSION 2.1, FEBRUARY
- HOW TO APPLY THESE TERMS TO YOUR NEW LIBRARIES
- MOZILLA PUBLIC LICENSE
- VERSION
- DEFINITIONS
- SOURCE CODE LICENSE
- DISTRIBUTION OBLIGATIONS
- INTELLECTUAL PROPERTY MATTERS
- REPRESENTATIONS
- INABILITY TO COMPLY DUE TO STATUTE OR REGULATION
- APPLICATION OF THIS LICENSE
- VERSIONS OF THE LICENSE
- TERMINATION
- U.S. GOVERNMENT END USERS
- MISCELLANEOUS
- RESPONSIBILITY FOR CLAIMS
- MULTIPLE-LICENSED CODE
- EXHIBIT A - MOZILLA PUBLIC LICENSE
- THE ORIGINAL CODE IS
- CONTRIBUTOR(S)
- BSD TWO CLAUSE LICENSE
- BSD 3-CLAUSE LICENSE
- THE MIT LICENSE
- LIBXML2 LICENSE
- APACHE LICENSE
- VERSION 2.0, JANUARY
- LICENSE" SHALL MEAN THE TERMS AND CONDITIONS FOR USE, REPRODUCTION, AND DISTRIBUTION AS DEFINED BY SECTIONS 1 THROUGH 9 OF THIS DOCUMENT
- APPENDIX: HOW TO APPLY THE APACHE LICENSE TO YOUR WORK
- THE ZLIB/LIBPNG LICENSE
- BOOST SOFTWARE LICENSE - VERSION
- AUGUST 17TH
- CURL LICENSE
- MICROSOFT PUBLIC LICENSE (MS-PL)
- THE CODE PROJECT OPEN LICENSE (CPOL)
- LICENSE
- THE INDEPENDENT JPEG GROUP'S JPEG SOFTWARE
- RSA MD4 OR MD5 MESSAGE-DIGEST ALGORITHM LICENSE
- THE PHP LICENSE, VERSION
- OPENSSL LICENSE
- PCRE LICENCE
- NTP LICENSE
- CODEIGNITER LICENSE AGREEMENT
- PERMITTED USE
- INDEMNITY
- DISCLAIMER OF WARRANTY
- LIMITATIONS OF LIABILITY
- GLUT FOR WIN32 LICENSE
- ISC LICENSE
- BRIAN GLADMAN ALTERNATE LICENSE
- LICENSE TERMS
- CORRECT DISPOSAL OF THIS PRODUCT (WASTE ELECTRICAL & ELECTRONIC EQUIPMENT)
- CORRECT DISPOSAL OF BATTERIES IN THIS PRODUCT
Brand : SAMSUNG
Model : PRN-4011
Category : Video recorder