
GF388 - Mobile Phone ERICSSON - Free user manual and instructions
Find the device manual for free GF388 ERICSSON in PDF.


| Product Type | Mobile Phone |
| Brand | Ericsson |
| Model | GF388 |
| Dimensions | 130 x 49 x 23 mm |
| Weight | 135 g (with battery) |
| Battery | NiMH 600 mAh, rechargeable |
| Standby Time | Up to 100 hours |
| Talk Time | Up to 3 hours |
| Display | Monochrome LCD, 2 lines |
| Network | GSM 900/1800 |
| Antenna | Retractable external |
| Key Functions | SMS, phonebook, call log, alarm, calculator, games |
| Keypad | Alphanumeric |
| Connectivity | None (no Bluetooth or infrared) |
| Memory | SIM card based |
| Ringtone | Monophonic |
| Charger | Included (AC adapter) |
| Headset | Optional, included in some packages |
| SAR Value | 0.8 W/kg |
| Maintenance | Clean with dry cloth; avoid moisture |
| Safety | Keep away from water; use original charger only |
| Spare Parts | Battery and charger available separately |
| General Information | Manual available in PDF format |
Frequently Asked Questions - GF388 ERICSSON
User questions about GF388 ERICSSON
0 question about this device. Answer the ones you know or ask your own.
Ask a new question about this device
Download the instructions for your Mobile Phone in PDF format for free! Find your manual GF388 - ERICSSON and take your electronic device back in hand. On this page are published all the documents necessary for the use of your device. GF388 by ERICSSON.
USER MANUAL GF388 ERICSSON
Ericsson GH388/GF388
Handheld Telephone for the GSM Network
User's Manual
The CE symbol on our products signifies that they have been certified according to the EMC directive 89/336/EEC, the Telecommunications directive 91/263/EEC, and the Low Voltage directive 73/23/EEC when applicable. The products fulfil the requirements according to the following standards:
Cellular Phones and Accessories in Combination:
ETS 300 342-1 EMC for European digital cellular telecommunications.
Accessories Without Direct Connection to a Cellular Phone:
EN 50081 Electromagnetic compatability, Generic Emission Standard, and EN 50082 Electromagnetic compatability, Generic Immunity Standard.
This manual describes Ericsson GF388/GF388, all versions
First edition (October 1995)
This manual is published by Ericsson Mobile Communications AB, without any warranty. Improvements and changes to this manual necessitated by typographical errors, inaccuracies of current information, or improvements to programs and/or equipment, may be made by Ericsson Mobile Communications AB, at any time and without notice. Such changes will, however, be incorporated into new editions of this manual.
All rights reserved.
© Ericsson Mobile Communications AB, 1995.
Publication number: EN/LZT 126 1298 R1A.
Printed in Sweden.
INNOVATRON PATENTS
Safety Precautions
Turn off your cellular telephone when in an aircraft. The use of cellular telephones in an aircraft may be dangerous to the operation of the aircraft, disrupt the cellular network and is illegal. Failure to observe this instruction may lead to suspension or denial of cellular telephone services to the offender, or legal action, or both.
Turn off your cellular telephone when at a refuelling point.
Users are reminded of the need to observe restrictions on the use of radio equipment in fuel depots, chemical plants, or where blasting operations are in progress.
There may be a hazard associated with using your cellular telephone close to personal medical electronic devices, such as hearing aids and pacemakers.
Operation of your cellular telephone close to other electronic equipment, such as televisions, radios and personal computers may cause interference.
The phone contains a magnet. Do not place it next to magnetic storage media such as computer diskettes or credit cards.
Do not dismount the antenna. If a child gets it into the throat, there may be a suffocation risk.
Do not attempt to dismantle your cellular telephone yourself. There are no user-serviceable parts inside.
Do not expose your cellular telephone to rain or spill beverages on it.
Have your cellular telephone installed in a vehicle by qualified personnel.
If you use your cellular telephone in a vehicle, it is advised that a handheld microphone or telephone handset should not be used by the driver while the vehicle is moving, except in an emergency. Speak only into a fixed neck slung or clipped-on microphone when it would not distract your attention from the road. Do not stop on the hard shoulder of a motorway to answer or make a call, however urgent.
Use only chargers and AC/DC Converters approved by the manufacturer of this telephone. Use of any other battery charger and/or AC/DC Converter with this telephone will invalidate any approval given to this telephone and may be dangerous.
Table of Contents
Introduction 9
- Overview 9
- Key Functions 10
- Key Functions in the Menu System 11
To enter letters 12
To enter lower-case letters 12
- Protecting the SIM Card and the Phone 13
Card Lock 13
The PIN can be changed 13
PIN2 13
Phone Lock 13
The factory-programmed security code should be changed 13
Two levels of locking 13
Keypad Lock 13
Menus 15
- International Number and Other Useful Dialling Functions 15
To make an international call – Inter number 15
To insert special characters – Special characters 15
To insert the international character “+” - Enter + 15
To insert a pause character – Pause 16
To show your phone number when making a call - Send Id* 16
To hide your phone number when making a call – Hide Id* 16
To check the first characters—CHECK 16
-
Speech then Fax (Data Menu) 16
-
The INFO Menu 17
To display the battery voltage -Battery 17
To display the time or cost of the last call – Last call 17
To display the total call time or call cost – Tot calls 17
To reset the total call time/cost meter 17
To have the call cost displayed - Price* 17
-
Next Call Type (Data Menu) 18
-
The DIVERT Menu* 19
To divert: 19
all calls – All calls ^* calls when you are engaged in a call
- On busy*
calls if you do not answer them
- No reply*
calls when you are unreachable
- Unreachabl(e)*
To activate the call divert 19
To review the status of the call divert 19
To cancel the call divert 20
To cancel ALL call diverts -Cancel all* 20
To review the status of ALL call diverts - Check all* 20
- The NETWORKS Menu 20
To select a network – Select net 20
List of Forbidden Networks 21
To choose automatic or manual network search mode – Searchmode 21
Automatic search mode 21
Manual search mode 21
To create a list of preferred networks on your SIM card – Edit List 21
To review the list of networks 21
To add a network to the list 22
To delete a network from the list 22
To re-arrange the order of the networks in the list 22
To start an automatic network search – New Search 22
11. The ACCESS Menu 22
BARRING\* 22
To bar: 23
all outgoing calls - All outgoing calls*
outgoing international calls
- All outgoing int calls*
all outgoing international calls except to your home country
- Int outgoing when roam*
all incoming calls - All incoming calls*
all incoming calls when you are abroad (when roaming)
- All incoming when roam*
To activate a call bar 23
To review the status of a call bar 23
To cancel a call bar 23
To cancel ALL call bars –Cancel all* 23
To change your password
- Change password* 24
CALL WAITING\* 24
To activate, review the status or cancel the Call Waiting function – Call Waiting* 24
CARD LOCK\* 24
To activate the card lock—Lock card* 24
To turn the card lock off - Unlock card* 24
CHANGE PIN CODE 25
To change the PIN code
- Change PIN code 25
CHANGE PIN2 CODE 25
To change the PIN2 code
- Change PIN2 code 25
PHONE LOCK 25
To lock or unlock the Phone
- Phone lock 25
PHONE LOCK CHANGE CODE 26
To change the security code
- Phone lock Change code 26
12. The SETTINGS Menu 26
To set the level of the ringing signal
- Ring level 26
To set the tone of the ringing signal
- Ring type 26
To choose manual or automatic key lock – Keylock 27
To set the key sound – Key sound 27
To turn the DTMF tones on/off -DTMF 27
To set the illumination of the display and keypad - Light 27
To be reminded of the conversation time spent during a call - Min minder 27
To choose call time or call cost - Call info 27
To choose answering mode when using the phone with handsfree equipment – Answering Mode 27
To be able to answer a call by pressing ANY key – Any key 27
To choose automatic answering – Auto 28
To personalise the greeting displayed each time the phone is turned on – Greeting 28
To have your phone number displayed each time the phone is turned on – Phone no 28
To select another language in the display – Language 28
To activate data menus – Data menus 29
13. The Calculator Menu 29
To make a calculation (134 / 32) 29
14. The CLOCK Menu 30
Read this first 30
To set the time of the alarm – To turn the alarm function on/off – Set alarm 30
To set the time and turn the alarm function on 30
To turn the alarm function off 30
To turn the alarm function on without changing the time of the alarm 31
To set the clock - Set clock 31
To set today's date - Set date 31
To select the a.m./p.m. format or 24-hour format – Clock mode 31
To select the date format- Date mode 31
15. The KEYLOCK Menu 32
Automatic or Manual Key Lock 32
To lock the keypad manually
- Keylock On? 32
To unlock the keypad manually
- Keylock Off? 32
16. The MAIL Menu 33
To call your answering service
- Voice mail ^* 33
To read area messages
- Area Messages* 33
To read text messages
- Read messages* 33
To read text messages stored on your
SIM card - Card messages* 33
To send text messages
- Send messages* 33
To review the phone numbers of the last
10 unanswered calls – Missed calls* 33
To activate the Voice Mail function
- Set VoiceM* 33
To turn area messages on/off
- Area Info* 33
17. The PHONE BOOK Menu 33
THE PHONE BOOK 33
Card memory and Phone memory 33
Overwrite protection 33
Card memory full 34
Both memories full 34
To recall a phone number using
the name – Name recall 34
To recall a phone number using
the position – Position recall
To store a phone number – Store
Alternative method to recall a phone number using the name 34
To change a phone number, name
or storage position – Edit
To erase a phone number – Erase 34
Alternative method to erase a phone number 35
To copy from the Card memory to the
Phone memory and vice versa - Copy 35
THE DIALLED NUMBER MEMORY 35
To recall the numbers last called – Last call 35
To turn the dialled number memory off 36
To turn the dialled number memory on again 36
Advanced Functions 37
18. Rejecting Incoming Calls 37
19. Putting a Call on Hold 37
20. Handling Two Calls Simultaneously 37
To activate, review status, or cancel Call Waiting function 37
To switch between two calls 38
To make a second call while a call is in progress 38
Method 1 38
Method 2 38
To receive a second call while engaged in a call 38
To end the current call 38
To receive a third call 38
Accepting 38
Rejecting 38
21. Who Is Calling? 39
To receive a call 39
Unanswered calls 39
To review the numbers of unanswered calls 39
To call a number in the display 39
To erase the unanswered call 39
To hide your phone number 39
To send your phone number 39
22. Sending DTMF Tones 40
To set phone to DTMF Signalling 40
DTMF pause function 40
To call and send a code 40
Using several pauses 40
Pre-programmed DTMF signalling 40
To store a phone number and code 40
To send a code 40
23. Sending and Receiving Text Messages (SMS) 41
Messages memory 41
To set phone for text messaging 41
To read a new message 41
To reply to a message 41
SIM card memory 42
To store messages 42
To call a phone number
in a message 42
To read stored messages 42
To read messages 42
Own messages 42
To send messages 42
To repeat a message
when no answer 43
To change message type 43
24. Voice Messages 44
Voice Mail function 44
To activate and set phone number of your voice mail 44
To change the number of your answering service 44
To turn the Voice Mail function off 44
To call your answering service 44
25. Using Area Information 45
To receive area information 45
To turn area information on or off 45
To edit the list of area information 45
To erase or replace a code 46
Supplementary Information 47
26. Batteries and Recharging 47
Batteries 47
Battery meter 47
Low Battery alarm 47
Recharging a battery 47
Battery care and maintenance 47
27. Accessories 48
Handsfree vehicle kit 48
Operation 48
Portable handsfree 49
Mobile Office kit 49
Battery chargers 49
28. Problems You Can Solve 50
Phone does not come on 50
Phone locked is displayed, followed
by the prompt Enter lock code 50
To unlock the phone 50
If you have forgotten your security code 50
Insert card is displayed 50
Wrong PIN or Wrong PIN2 is displayed 50
Card blocked. Unblock? is displayed 50
To unblock the SIM card 50
Alternative method to unblock the SIM card 51
BLOCKED. Contact card provider is displayed 51
Enter PUK2 is displayed 51
Emergency calls only is displayed 51
No network is displayed 51
Keylock is displayed 51
To unlock the keypad 51
Indicator light blinks red 51
Menus and functions marked with an asterisk (*) may not always be used. The reason may be that they are not available on the network you are using, or that you may not have subscribed to the service that the menu or function represents.
Introduction
1. Overview
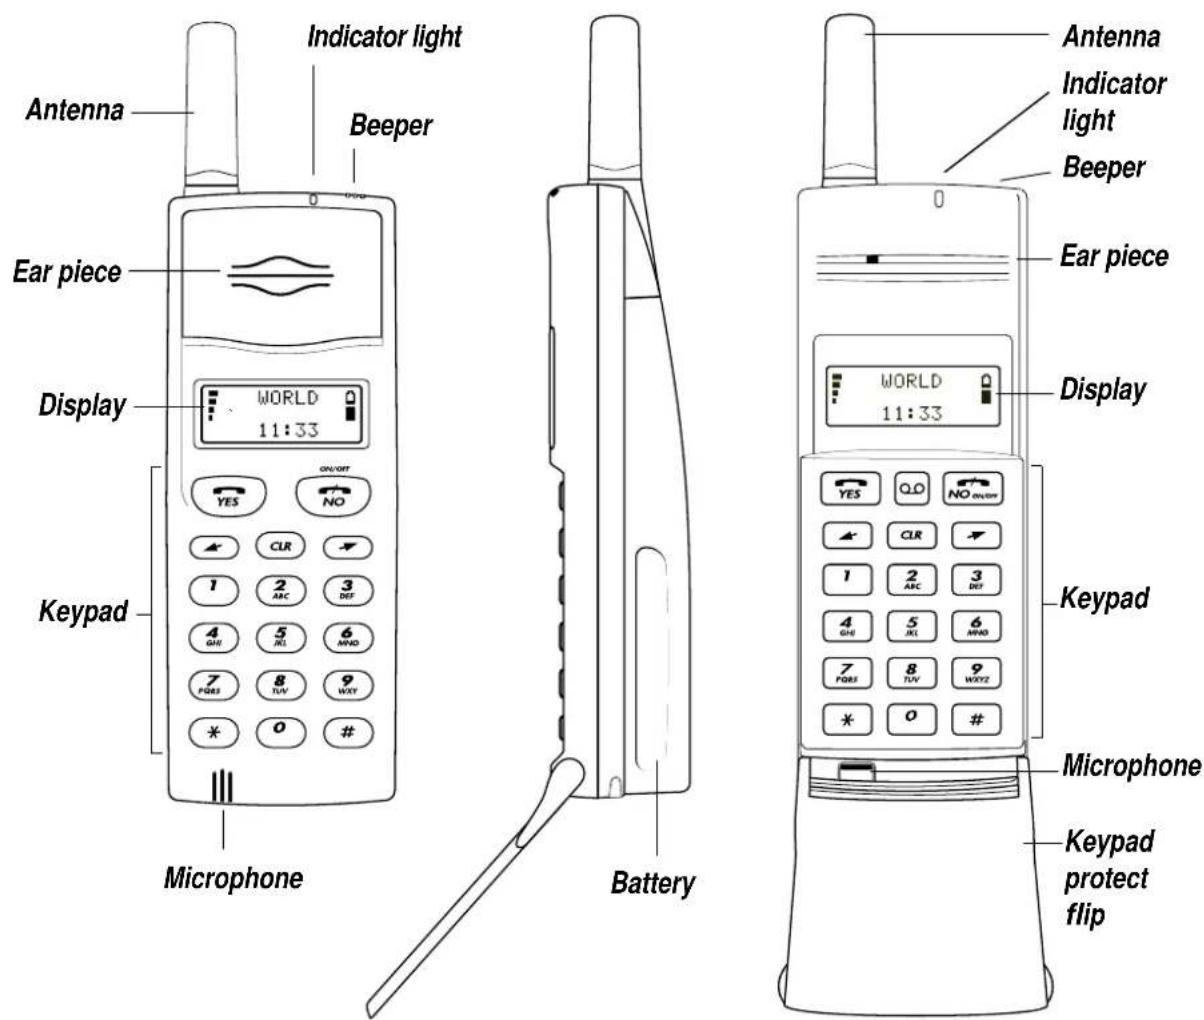
This digital handheld cellular telephone is designed for use on a GSM network (Global System for Mobile Service).
The most essential operations, such as turning the phone on and off, making and answering calls, and storing and recalling phone numbers, are described in the Basic Guide.
This User's Manual deals with the more advanced functions of the phone, such as using the phone's menus, handling two calls simul-
taneously, and receiving and sending text messages.
The phone is prepared for use with a Mobile Office kit which works as an interface between the phone and a personal computer or laptop. This lets you receive and send e-mail and fax messages and use data communication. Accessing the special menus needed is explained in the manual supplied with the Mobile Office kit.
2. Key Functions

(Send)
Used to make a call after a phone number has been entered.
Used to put a call on hold and to switch between two calls. Refer to chapter 19. Putting a Call On Hold and 20. Handling Two Calls Simultaneously.

Voice Mail
This key is only available on telephones with a flip.
Press to recall the number of your answering service. Refer to chapter 24. Voice Messages.
ON/OFF
To turn the phone on, press and hold down the key until the display turns on.

To turn the phone off, ensure it is in standby mode. Then press and hold down the key until the display turns off.
(End)
Used to terminate a call.


Left Arrow and Right Arrow
Used during a call to decrease or increase the volume of the ear piece or handsfree loudspeaker. Briefly press ↗ or ↗ to adjust the volume by one step. There are five volume steps indicated by small squares in the bottom line of the display.
You can have one volume setting when you use the phone as a handheld unit and another setting when the phone is powered from an external source, for example, when you use it as a handsfree phone in a car. Both settings will remain unchanged after you have turned the phone off.
Used to enter the Menu system.
To enter the Menu system while a call is in progress, you must hold down ▶ or ▶.

Clear
Erases digits from the bottom line of the display. Hold down to erase all digits simultaneously.
If held down while a call is in progress, it disconnects the microphone (Mute function).


Numeric keys
Used to enter the digits 0 - 9.
Also used to enter letters. Refer to chapter 3. Key Functions in the Menu System.
Star and Hash
Used to enter the characters* and #.
Press and hold down * to enter a pause character (p). Refer to chapter
22. Sending DTMF Tones.
# is used to terminate the input of PIN and security codes.
# can be used to recall a phone number from the Phone Book (enter the number of the storage position and then press#).
Press and hold down # to enter the character x which precedes the storage positions in the phone memory. Refer to chapter 17. The PHONE BOOK Menu.
3. Key Functions in the Menu System

Left Arrow and Right Arrow
Press repeatedly or hold down to move:
• from menu to menu
• from function to function within a menu
- from setting to setting within a function, or from storage position to storage position in the Phone Book and other memories

YES
Press to select a menu, a function or a setting.
NO
Press to move one level up in the menu system:
• from a setting back to a function
• from a function back to a menu
• from a menu back to the starting point


CLR
Press to leave the Menu system (from anywhere in the Menu system) and return to the starting point.
You will leave the Menu system automatically if you do not press a key within 60 seconds or if you receive a call.
To enter letters
Press the appropriate key, 1 - 9, 0 or # (repeatedly) until the desired letter, character or digit appears in the display.
1 Space - ? ! , . : " ' ( ) 1
2 A B C Å Ä Æ à Ç Γ 2
3 DEFè É Δρ 3
4 GHli4
5 JKLA5
6 MNOÑÖ∅ò6
7 PQRSBΠΣ7
8 TUVÜù8
9 WXYZ9
0 0 + & @ / \$ % £ Θ Ξ φ Ω
# \*
To enter lower-case letters
Enter the letter, for example an A, and then press*. An a appears.
Lower-case letters will now appear until you press* again.
4. Protecting the SIM Card and the Phone
The SIM card contains a computer chip that holds information specific to your subscription and the services that you have requested from your network operator.
Card Lock
The card lock protects your SIM card.
When you purchase your SIM card, you obtain a 4- to 8-digit PIN code. PIN stands for Personal Identification Number.
Each time you turn the phone on, you have to enter the PIN code and then press #.
If the wrong PIN is entered three times in succession, the SIM card is blocked. If this happens, refer to chapter 28. Problems You Can Solve.
If your SIM card allows it, you may turn off the card lock. This is described in chapter 11. The ACCESS Menu.
The PIN can be changed
If you do not like the original PIN, you may change it to a code you find easy to remember.
How to change the PIN code is described in chapter 11. The ACCESS Menu.
Should you forget your PIN, you may choose a new PIN by entering a sequence of characters, including your personal unblocking key (PUK) as described in chapter 28. Problems You Can Solve. Refer to the section entitled Alternative method to unblock the SIM card.
PIN2
Some services require that you enter a second PIN code, the PIN2 code. Also the second PIN code can be changed in the Access menu.
Phone Lock
The phone lock protects the phone against unauthorised use of the phone in the event of a theft.
The phone lock is not activated when you purchase the phone. You should, however, activate it as soon as possible.
The factory-programmed security code should be changed
The phone is factory-programmed with a 4-digit security code of 0000. To improve security, you should change this to any 4- to 8-digit personalised code.
You should choose your security code carefully. You can, for example, use the same code as your PIN, or another code that you find easy to remember.
How to change the security code is described in chapter 11. The ACCESS Menu.
Should you forget your security code, you must contact an authorised dealer.
Two levels of locking
There are two levels of locking the phone:
- Full Lock
- Autolock
When the Full Lock is activated, the message Phone locked is displayed briefly, followed by the prompt Enter lock code, each time the phone is turned on. The user then has to enter the security code, followed by #, to be able to use the phone.
When the Autolock is activated, the message Phone locked and the prompt Enter lock code will not appear until a different SIM card is inserted in the phone. After the security code has been entered correctly, the phone can be used with new SIM card. Not until the original or a different SIM card is inserted in the phone, will the user again be asked to enter the security code.
How to lock the phone is described in chapter 11. The ACCESS Menu.
Keypad Lock
You can lock the keypad so that unintentional key action has no effect if the phone is turned on when you are carrying it in a pocket or a handbag. This function is useful if you have a phone without keypad protect flip.
How to lock and unlock the keypad is described in chapter 15. The KEYLOCK Menu.
Introduction
Menus
Menus and functions are listed in the order in which they appear in the display when you scroll with ↗ (right arrow).
Menus and functions marked with an asterisk (*) may not always be used. The reason may be that they are not available on the network
you are using, or that you may not have subscribed to the service that the menu or function represents.
If you are in doubt whether you can use a service or not, contact your network operator or service provider.
5. International Number and Other Useful Dialling Functions
- If you have not entered any digits into the display, pressing ↗ takes you to the International Number function, which lets you insert the international character “+” before a phone number.
-
If you have entered characters into the display, pressing ↗ takes you to the Special Characters menu, which lets you
-
insert the international character “+”
- insert a pause character (p)
— show your phone number when making a call* - hide your phone number when making a call*
- If you have entered more than 20 characters into the display, pressing ↗ takes you to the CHECK function, which lets you see the first digits.
To make an international call – Inter number
The time is shown in the bottom line of the display:
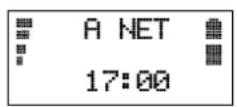
Press ↗.
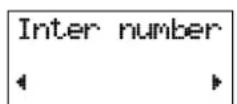
Press YES to insert the international character "+" before the phone number
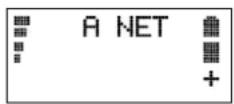
or enter the first digit of the country code.
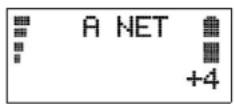
The “+” character will be replaced by the correct international prefix when you make the call, independent of the country you are calling from, home or abroad.
To insert special characters – Special characters
To insert the international character “+” – Enter +
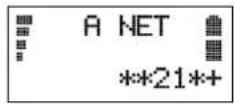
For example, if you wish to divert all calls using the network service code * *21 *, you may need to enter the international character “+” before a country code.
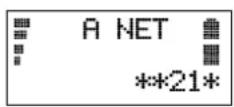
Press ↗.
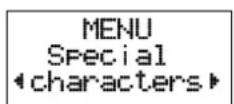
Menus
Press YES to select the Special Characters menu.
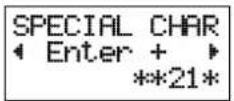
Press YES to insert the "+" character.
To insert a pause character – Pause
A pause character lets you enter a phone number followed by code (a sequence of characters) that you want to send as DTMF tones when the call is connected.
Enter the phone number you wish to call.
Press ↗.
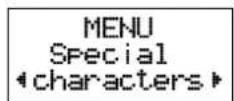
Press YES to select the Special Characters menu.
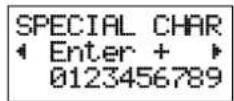
Press ↗.
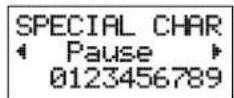
Press YES to insert the pause character (p).
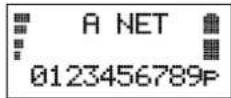
Enter the code you wish to send.
For more information about DTMF signalling and the use of pauses, refer to chapter 222.
Sending DTMF Tones.
To show your phone number when making a call - Send Id*
To hide your phone number when making a call – Hide Id*
Refer to chapter 21. Who Is Calling?
To check the first characters – CHECK
If you enter more than 20 characters (0 - 9 and *, #, + or p), the first characters will disappear from the display. Instead, a left arrow is shown on the left in the second line, in front of the characters.
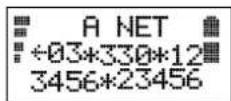
To see the first characters, press ↗.
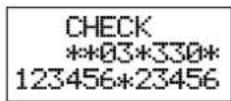
If you wish to enter another special character, for example a pause character, press ↗.
The maximum number of characters that can be entered is 36.
6. Speech then Fax (Data Menu)
This menu is not available unless you have turned it on in the Data menus function in the Settings menu.
How to use this menu is described in the manual for the Mobile Office kit.
7. The INFO Menu
The Info menu lets you display:
- the voltage of the battery attached to the phone
• the time or cost of the last call
• the total call time or call cost
It also lets you:
- reset the total call meter
To display the battery voltage – Battery
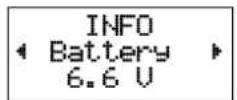
The voltage of a fully charged battery is at least 6.9 – a battery that is almost empty has a voltage of 6.1 or less.
To display the time or cost of the last call – Last call
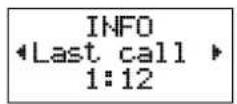
Depending on the setting in the CallInfo function in the Settings menu:
- the elapsed time of the last outgoing call in (hours,) minutes and seconds
- the elapsed time of the last incoming or outgoing call in (hours,) minutes and seconds
- the cost of the last incoming or outgoing call, provided you have subscribed to this feature.
To display the total call time or call cost - Tot calls
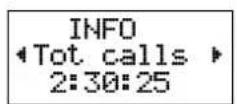
Depending on the setting in the Call Info function in the Settingsmenu:
- the elapsed time of all outgoing calls in (hours,) minutes and seconds
- the elapsed time of all incoming and outgoing call in (hours,) in minutes and seconds
- the cost of all incoming and outgoing calls, provided you have subscribed to this feature.
To reset the total call time/cost meter
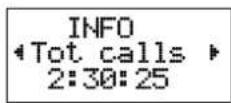
Press YES.
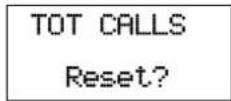
Press YES to reset the meter.
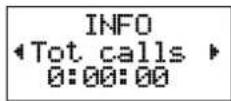
If you have chosen the call cost option, you must enter the PIN2 code to be able to reset the meter.
To have the call cost displayed – Price*
This function only appears if you have selected the Cost option in the Call Info function in the Settings menu. It is a prerequisite that your SIM card allows the call cost to be displayed.
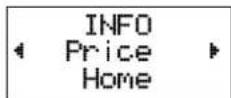
"Home" means that the number of call units will be displayed during a call, and in the Last call and Tot calls functions.
The Price function lets you enter and vary the price per call unit. The price entered will be stored on the SIM card.
To enter the price per call unit:
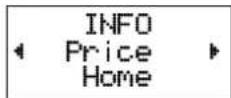
Press YES.
Menus
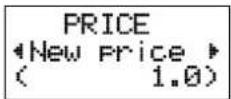
Press YES.
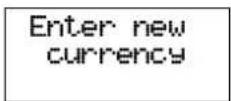
Enter the currency with the numeric keys, for example GBP for Pounds Sterling, and press YES.
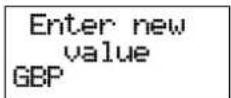
Enter the price per call unit, for example 0.25, and press YES. To enter the decimal point, press * or #.
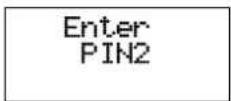
Enter the PIN2 code and press #.
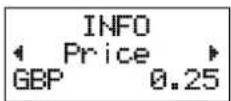
To revert to displaying call units or charge the price:
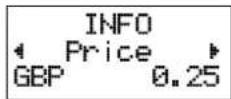
Press YES.
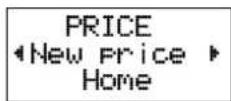
a. To revert to displaying call units, press YES. b. To change the price, press ↗.
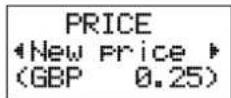
Proceed as described above under Toeater the price per call unit. If you wish to keep the selected currency, just press YES when the prompt Enter currency is displayed.
8. Next Call Type (Data Menu)
This menu is not available unless you have turned it on in the Data menus function in the Settings menu.
How to use this menu is described in the manual for the Mobile Office kit.
9. The DIVERT Menu\*
If you want to make certain that your incoming calls are taken care of when you are unable to answer them, you can use the Call Divert service of the cellular network to divert (forward) them to another phone number, for example, the number of your answering machine.
The Call Divert service lets you:
- divert calls if you already are engaged in a call – On busy
- divert calls that you do not answer (within normally 30 seconds) – No reply
- divert calls when you have turned off the phone or you are unreachable – Unreachable
You may use all three call diverts and you may divert the calls to different phone numbers, dependent on the situation.
You may also divert All calls, regardless of whether your phone is turned on or off, or you are unreachable. If turned on, the phone will not ring if a call is received.
If you activate the All calls divert, all other diverts will be cancelled automatically. They will, however, be activated again when you cancel the All calls divert.
To divert:
all calls - All calls*
calls when you are engaged in a call – On busy*
calls if you do not answer them – No reply*
calls when you are unreachable - Unreachabl(e)*
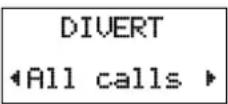
The first option in the Divert menu is All calls. To choose another divert, scroll with ↗/▲.
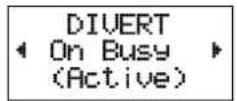
Press YES to select the desired divert. In this example we will choose On busy.
To activate the call divert
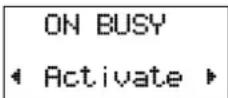
The first option is Activate. Press YES to select it.
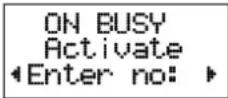
You may now:
a. Enter the phone number where you want your calls to be diverted, including the area code, and then press YES.
b. Enter an international number. Press ↗ to insert the international character “+”. Then enter the country code, the area code and the phone number. Note that a leading 0 in an area code must be omitted. Finally, press YES.
c. Recall the number from the Phone Book. Press ▶ and then recall the number. Finally, press YES.
If you used the ON busy divert on an earlier occasion and then cancelled it, the phone number to which the calls were diverted will be suggested. To keep the number, just press YES. Otherwise, erase the number using the CLR key and enter the new number.
There may be a short delay before the network responds. In the meantime, the message
Please wait is displayed. This is followed by the message On busy Divert ON, together with the phone number.
Incoming calls will now be diverted to this phone number when you are engaged in a call.
As a reminder, the display will inform you about any activated call divert each time you turn the phone on.
To review the status of the call divert
Menus
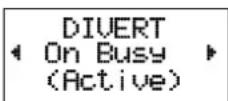
Press YES and scroll with ↗/✗ to the Get status option.
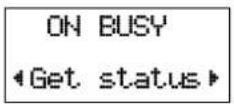
Press YES to check the status. The message Please wait appears, followed by either the phone number and (Active) if the call divert is activated, or (Off) if it is not activated.
To cancel the call divert
Press YES.
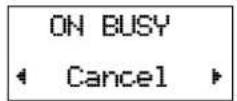
Press YES to cancel the call divert. The message Please wait appears, followed by a message which informs you that the call divert has been cancelled.
To cancel ALL call diverts - Cancel all*
Select the Divert menu and scroll to the Cancel all option.
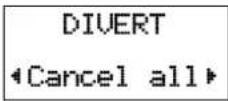
Press YES to cancel all activated call diverts.
The message Please wait appears, followed by a message which informs you that all call diverts have been cancelled.
To review the status of ALL call diverts - Check all*
Select the Divert menu and scroll to the Check all option.
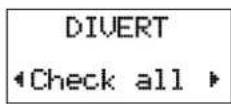
Press YES to check the status of all call diverts.
The message Please wait appears, followed by information about all call diverts and whether they are activated (Active) or not (Off). If a call divert is activated, the phone number is also displayed.
The call diverts are displayed automatically, one after the other.
Check All is a good way to update the phone's own information about call diverts.
10. The NETWORKS Menu
When you turn the phone on, it normally selects its home network. If this is not within range, for example when you are abroad, you may use another network, provided your home network has an agreement which allows you use this network. This is called roaming.
The Networks menu includes a number of functions which you can use to determine how the phone searches for a network. You may also select a network yourself from those within range.
To select a network – Select net
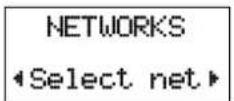
To select a network from those within range, press YES. The message Please wait is displayed briefly.
a. If the home network is within range and you are using it, its name is displayed with the message Current.
If you are using another network, the name of the home network is displayed with the message Home.
Instead of the full name of a country and a network, an abbreviation is displayed when you use the Networks menu.
If you wish to see the full name of a network, press *.
b. If the home network is not within range, the name of another network is displayed
with the message Current, Preferred, Available or Forbidden.
- Current means that the network is currently used.
- Preferred means that the name of the network is included in a list of preferred networks on your SIM card. Refer to the description of the Edit List function below.
- Available means that you are allowed to use the network.
- Forbidden means that you are not allowed to use the network. You can, however, make emergency calls. See also the next section, List of Forbidden Networks.
c. If no network is within range, the message No network is displayed.
If more than one network is within range, the name of the other networks can be displayed one by one by pressing ↗.
When the network you wish to use is displayed, press YES to select it.
List of Forbidden Networks
The names of the “forbidden” networks are stored in a list on your SIM card. If such a network is in range, it will be omitted when the phone searches for a network (automatic search mode).
If the state of things changes, and your home network and a “forbidden” network have come to an agreement that allows you to use the “forbidden” network, you can select this network though the message Forbidden is displayed. By doing so, you will delete the name of the network from the list of forbidden networks.
To choose automatic or manual network search mode
- Searchmode
Automatic search mode
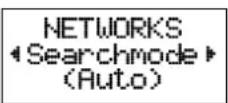
In the first place, the phone searches for its home network. If this is not available, the phone will search for another available network from those within range.
The order of preference in which the phone will select a network, in case the home network is not within range, is determined by a list of preferred networks on your SIM card.
Manual search mode
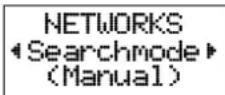
The phone will select its home network in the first place. If this is not within range, the question Select network? will be displayed.
To select a network, press YES. Then proceed as described above under To select a network – Select net
If you do not press YES within ten seconds, the phone automatically selects the network that was last used, provided it is within range.
To create a list of preferred networks on your SIM card – Edit List
If you wish, you can create a list which defines the order of preference in which the phone will select a network during automatic network selection when the home network is not within range.
The number of networks that can be stored in the list depends on your SIM card.
The Edit List function lets you review the networks in the list, add networks to the list, delete networks from the list and re-arrange the order of the networks
To review the list of networks
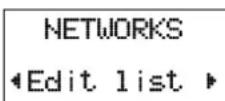
To review the list, press YES. The message Please wait is displayed briefly.
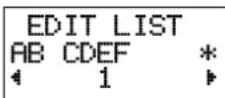
The name of the first network is displayed. If a * is also displayed, this indicates that the network is within range.
To see the full name of a network, press *.
Menus
You can scroll through the other networks in the list with ↗/↖.
To add a network to the list
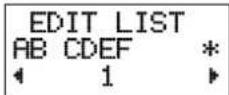
Scroll with ↗/↗ to the position where you wish to insert the network.
a. If you scroll to the first free position, the question Add net? appears
b. If you scroll to a position that already is occupied, you must press YES and then scroll with ↗/ ↗ until Add net appears.
Press YES and then scroll with ↗/↖ until you find the desired network.
If the desired network does not appear, press YES when the question Other? appears. Then enter the 3-digit country number and the 2-digit network number.
Finally, press YES to add the network to the list.
To delete a network from the list
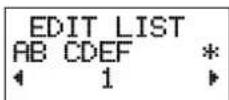
Scroll with ↗/↗ to the network you wish to delete and press YES.
Scroll with ↗/↖ until Erase appears.
Press YES to delete the network from the list.
To re-arrange the order of the networks in the list
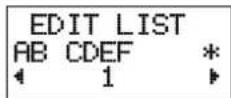
Scroll with ↗/▲ to the network you wish to move and press YES.
Move is displayed. Press YES and then enter the new position within in the list.
Press YES to move the network to its new position.
To start an automatic network search — New Search

You can at any time start an automatic network search by pressing YES.
11. The ACCESS Menu
The Access menu includes the following functions:
- Barring*
- Call waiting*
- Lock/Unlock card*
- Change PIN code
- Change PIN2 code
- Phone lock
- Phone lock – Change code
BARRING\*
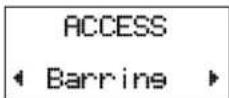
The Call Bar service of the cellular network allows you bar different types of outgoing and incoming calls to restrict the use of your phone.
You can bar:
- All outgoing calls
• All outgoing international calls - All outgoing international calls except to your home country.
- All incoming calls
- All incoming calls when you are abroad (when roaming).
To ensure that a call bar is not changed by someone else, a password, which comes with your subscription, is necessary to activate or cancel a call bar.
To bar:
all outgoing calls
- All outgoing calls*
outgoing international calls – All outgoing int calls*
all outgoing international calls except to your home country – Int outgoing when roam*
all incoming calls
- All incoming calls*
all incoming calls when you are abroad (when roaming)
- All incoming when roam*
BARRING All outsoins ← calls →
The first type of call bar is All outgoing calls.
To choose another type of call bar, scroll with
↗/↘.
Press YES to select the desired type of call bar. In this example we will choose All outgoing international calls.
To activate a call bar
The first option is Activate.
ALL OUTGOING INT CALLS Activate
Press YES.
Enter Password
Enter your password and then press YES.
There may be a short delay before the network responds. In the meantime, the message
Please wait is displayed. This is followed by a message which tells you that all outgoing international calls are barred.
If you divert your incoming calls you cannot activate some barring alternatives. Likewise, if you bar calls, you cannot activate some call divert alternatives.
To review the status of a call bar
BARRING All outsoins ← int calls →
Press YES and then scroll with ↗/✗ to the Get status option.
ALL OUTGOING INT CALLS ◄ Get status ►
Press YES.
The message Please wait appears, followed by a message that informs whether the call bar is activated or not.
To cancel a call bar
BARRING All outsoins ← int calls →
Press YES and then scroll with ↗/↖ to the Cancel option.
ALL OUTGOING INT CALLS ◀ Cancel ▶
Press YES.
Enter Password
Enter your password and then press YES.
The message Please wait appears, followed by a message that confirms that the call bar is cancelled.
To cancel ALL call bars
- Cancel all*
BARRING All outsoins ← calls →
Scroll with ↗/↗ to the Cancel all option.
BARRING ◀Cancel all▶
Press YES.
Enter Password
Menus
Enter your password and then press YES.
The message Please wait appears, followed by a message that confirms that all call bars are cancelled.
To change your password – Change password\*
The password for the Call Bar service comes with your subscription. You can easily change the password as often as you like.
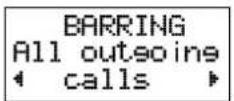
Scroll with ↗/▲ to the Change password option.
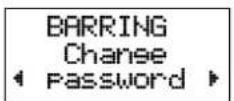
Press YES.
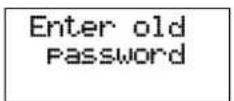
Enter the old (the current) password and then press YES.
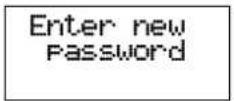
Enter the new password and then press YES.
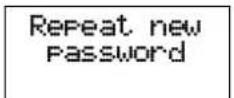
Enter the new password again and then press YES.
The message Please wait appears, followed by a message that confirms that the password has been changed.
CALL WAITING\*
If activated, the Call Waiting function allows you to receive a second call while you are engaged in a call.
To activate, review the status or cancel the Call Waiting function – Call Waiting*
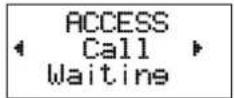
Refer to the description in chapter 20. Handling Two Calls Simultaneously.
CARD LOCK\*
This function only appears if your SIM card allows you to turn the card lock off.
The card lock protects your SIM card. You can read more about it in chapter 4. Protecting the SIM Card and the Phone.
Depending on whether the card lock is activated or turned off, the display shows either:
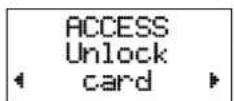
or
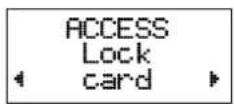
To activate the card lock - Lock card*
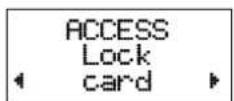
Press YES.
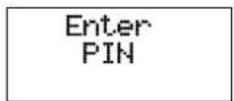
Enter your PIN and press # .
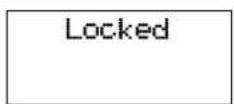
The card lock is now activated.
To turn the card lock off - Unlock card*
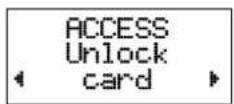
Press YES.
Enter PIN
Enter your PIN and press #.
Unlocked
The card lock is now turned off.
CHANGE PIN CODE
To change the PIN code - Change PIN code
ACCESS ← Change PIN code
Press YES.
Enter old PIN
Enter the current PIN and press #.
Enter new PIN
Enter the new PIN and press #.
Repeat new PIN
Enter the new PIN again.
New PIN
The PIN has been changed.
If the message Matching error appears, the new PIN was entered incorrectly.
If the message Wrong PIN appears, followed by Enter Old PIN, the old PIN was entered incorrectly.
If the old PIN is entered incorrectly three times in succession, the SIM card will be blocked.
This is indicated by the message Card blocked Unblock? Should this happen, refer to chapter 28. Problems You Can Solve at the end of the manual.
CHANGE PIN2 CODE
To change the PIN2 code – Change PIN2 code
ACCESS Change PIN2 code
Proceed as described above under CHANGE PIN CODE.
PHONE LOCK
The phone lock protects the phone against unauthorised use of the phone in the event of a theft. You can read more about it in chapter 4.
Protecting the SIM Card and the Phone.
The phone lock is not activated when you purchase the phone. You should, however, activate it as soon as possible.
To lock or unlock the Phone – Phone lock
ACCESS ◀ Phone lock ▶ (Unlocked)
The current setting Full Lock, Autolock or Unlocked is shown between brackets.
Press YES.
PHONE LOCK ◀ Unlocked ▶
If necessary, scroll with ↗ / ↕ to desired option:
Full lock, Autolock or Unlocked.
When the desired option is displayed, for example Autolock, press YES to select it.
Enter lock code
Enter the security code and press #.
When the phone is delivered, it is programmed with a security code of 0000.
Phone lock is displayed, together with the new setting: Full Lock, Autolock or Unlocked.
Menus
PHONE LOCK CHANGE CODE
To change the security code – Phone lock Change code
The phone factory-programmed with a security code of 0000. To improve security, you should change this to any 4- to 8-digit personalised code.
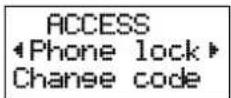
Press YES.
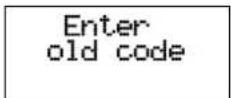
Enter the current security code and press #.
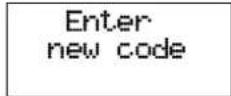
Enter the new security code (4 to 8 digits) and press #.
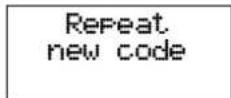
Enter the new security code again and press# .
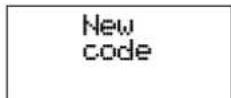
The security code has been changed.
12. The SETTINGS Menu
The Settings menu includes a number of functions which let you adapt your phone to your personal needs in different situations.
To set the level of the ringing signal – Ring level
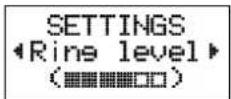
You can set the level of the ringing signal in six steps. The first step means that two clicks will be heard when a call is received.
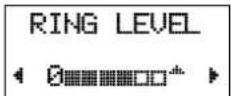
You can also turn the ringing signal off (0) or choose a ringing signal that rises in steps from the lowest to the highest level (▲).
If you turn the ringing signal off, all audible signals will also be turned off. You will, however, be informed by the indicator light on the top of the phone and the display.
As a reminder that the ringing signal is turned off, an icon in the shape of a crossed music
symbol is shown on the right in the bottom line of the display.
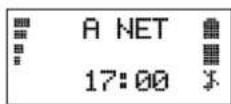
You can have one volume setting when the phone is used as a handheld unit and another setting when the phone is powered from an external source, for example, when it is used as a handsfree phone in a car.
To set the tone of the ringing signal – Ring type
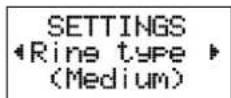
You can set the tone of the ringing signal in three steps: low, medium or high. You can also choose a mixed tone or a melody.
You can have one tone setting when the phone is used as a handheld unit and another setting when the phone is powered from an external source.
To choose manual or automatic key lock – Keylock
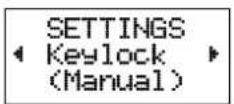
You can choose either manual or automatic key lock. Refer to chapter 15. The KEYLOCK Menu.
To set the key sound – Key sound
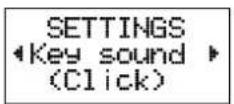
You can choose whether clicks, tones or neither (silent) will be heard when you press the keys.
To turn the DTMF tones on/off - DTMF
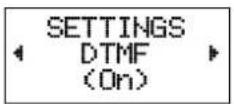
No matter which key sound setting you have chosen, DTMF tones will always be sent if you press keys 0 - 9, * and # while a call is in progress. This allows you to perform banking by phone and to control answering machines, for example.
Sometimes, it may be inconvenient that the DTMF tones are sent. Therefore, this function lets you turn the DTMF tones on/off.
To set the illumination of the display and keypad – Light
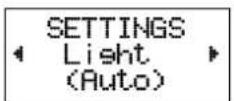
The illumination can be set to automatic, turned off, or turned on all the time.
In the automatic mode, the illumination is turned off 20 seconds after the last key was pressed. It will be turned on again when a key is pressed, or when a call or message is received.
You can have one setting when the phone is used as a handheld unit and another setting when the phone is powered from an external source.
To be reminded of the conversation time spent during a call – Min minder
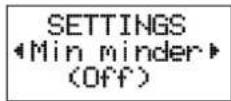
This function gives an indication of the time spent during conversation by emitting a short beep in the ear piece or handsfree loudspeaker every full minute.
To choose call time or call cost – Call info
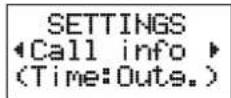
During an outgoing call, the call time is shown in the display. The Last Call and Total Calls functions in the Info menu let you check the elapsed time of outgoing calls.
With the Call Info function you can choose to have the call time displayed for all calls, both incoming and outgoing.
You can also have the call cost displayed, provided you have subscribed to this feature.
To choose answering mode when using the phone with handsfree equipment – Answering Mode
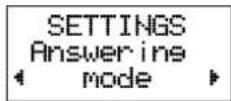
This submenu includes two functions, Any key and Auto, which are useful when the phone is used with handsfree equipment.
To be able to answer a call by pressing ANY key – Any key
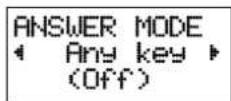
If you turn this function om, you can answer an incoming call by pressing any key except the key if the phone is used with handsfree equipment.
Menus
To choose automatic answering – Auto If you choose automatic answering mode, an incoming call will be answered automatically after one ringing signal if the phone is used with handsfree equipment.
To personalise the greeting displayed each time the phone is turned on – Greeting
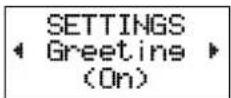
Instead of the greeting Welcome, which is displayed each time the phone is turned on, you can have your phone display a welcome greeting that you choose yourself.
Letters are entered with the numeric keys 2 - 9. Refer to the table in chapter 3
The Greeting function also lets you turn the greeting text off.
To have your phone number displayed each time the phone is turned on – Phone no
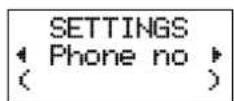
You can have your phone number displayed each time you turn the phone on.
To enter the phone number:
Press YES.
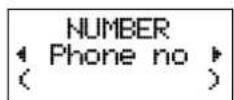
Press YES.
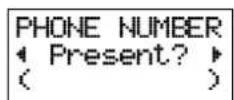
Press ↗.
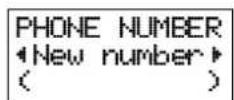
Press YES.
Enter the number and press YES.
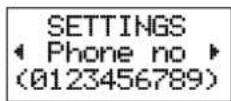
If you use your phone with the Mobile Office kit: You can also enter your fax and/or data number.
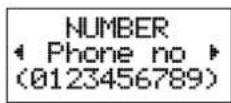
Scroll with ↗/↖ until Fax no or Data no appears.
To enter the fax or data number, processed as described above under To enter the phone number.
Different ringing signals for phone calls, fax calls and data calls:
Select Phone no, Fax no or Data no, and press YES when the question Present? appears.
If you selected the Data no, the Ring level and Ring type functions appear as follows:
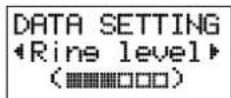
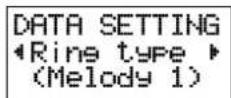
You can then set ringing different ringing signals for phone calls, fax calls and data calls.
To select another language in the display – Language
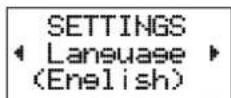
The phone is normally delivered with English text in the display. This function lets you select a language other than English.
Press YES. Scroll with ↗/↖ until you find the desired language, for example German,
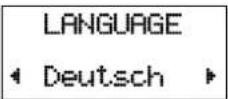
and press YES.
To activate data menus – Data menus
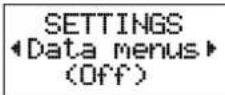
This function lets you turn the phone's data menus on or off.
You should not turn the data menus on unless you use the phone with the Mobile Office kit.
13. The Calculator Menu
The calculator supports the four fundamental rules of arithmetic and percentages.
To make a calculation (134 / 32)
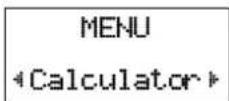
Enter 134.
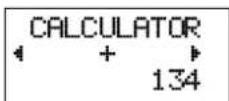
Press L / R to find the division sign, and press YES.
Enter 32.
Press L / R to find the equal sign, and press YES for the result.
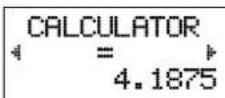
Press CLR to clear the display.
Shortcut!
Comma in number: press * once.
Multiplying: press * twice.
Equal sign: press #.
14. The CLOCK Menu
Read this first
Clock (time of day)
The time is shown continuously in the bottom line of the display when the phone is in stand-by mode. The hours and minutes are presented in the 24-hour format.
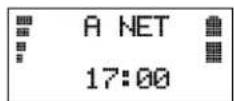
The Set clock function lets you set the time.
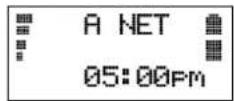
The Clock mode function lets you choose the a.m./p.m. format instead of the 24-hour format.
Alarm
The phone has an alarm function,
The alarm will sound at the time set, even if the phone is turned off. The illumination of the keys and the display will flash, too.
The alarm will sound for 60 seconds and it will be repeated every five minutes if you do not turn it off. To turn it off, you can press any key.
The sound level of the alarm depends on the setting of the ringing signal level. If you have turned the ringing signal off, only a click will be heard.
An icon in the shape of a bell prior to the time of day informs you that the alarm function is turned on.
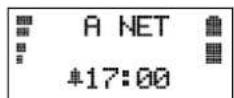
The Set alarm function lets you set the time of the alarm and turn the alarm function on. You can also turn the alarm function off, or turn it on without changing the time.
Calendar
You can have today's date presented in the middle line of the display when the phone is in stand-by mode.
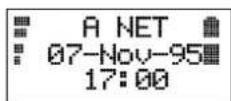
The Set date function lets you set the date. The Date mode function lets you set the date format.
To set the time of the alarm
- To turn the alarm function on/off
- Set alarm
To set the time and turn the alarm function on
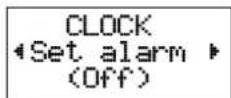
Press YES. Scroll with ↗/↖ until New time is displayed.
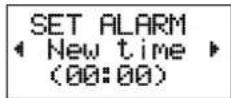
Press YES.
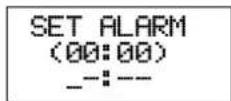
If you have chosen the a.m./p.m. format in the Clock mode function, you can change from a.m. to p.m., or vice versa, by pressing * or #. Enter the time, in hours and minutes, for example 14:30, and thenpressYESS.
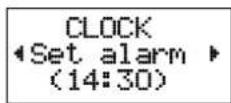
If you wish to keep the minute digits, just enter the hour digits and press YES. You can also change the hour digits by pressing ↗ and ↕.
To turn the alarm function off
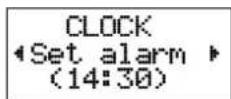
Press YES. Scroll with ↗/↖ until Off is displayed.
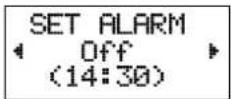
Press YES.
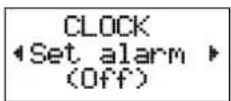
To turn the alarm function on without changing the time of the alarm
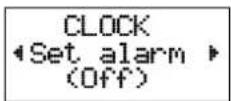
Press YES. Scroll with ↗/↖ until On is displayed.
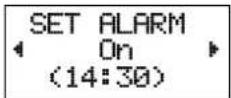
Press YES.
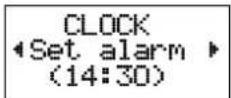
To set the clock - Set clock
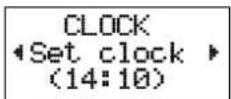
The current setting, in hours and minutes, is shown between brackets. To set the clock, press YES.
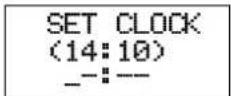
If you have chosen the a.m./p.m. format in the Clock mode function, you can change from a.m. to p.m., or vice versa, by pressing * or #. Enter the time, in hours and minutes, and then press YES.
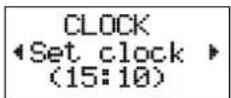
If you wish to keep the minute digits, just enter the hour digits and press YES. You can also change the hour digits by pressing ↗ and ↕.
To set today's date – Set date
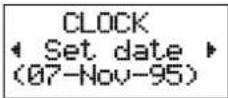
The current date is shown within brackets. The date is presented in the format you have chosen in the Date mode function.
To set the today's date, press YES.
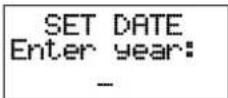
Enter the year (two digits) and press YES.
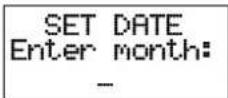
Enter the month (two digits) and press YES.
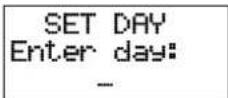
Enter the day (two digits) and press YES.
To select the a.m./p.m. format or 24-hour format – Clock mode
The display shows either
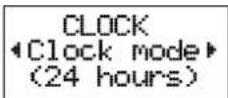
or
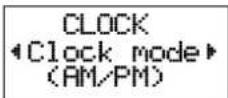
depending on the current setting.
To change from the 24-hour to the a.m./p.m. format, or vice versa, press YES.
To select the date format – Date mode
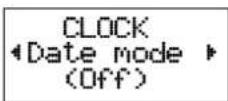
Press YES. Scroll with ↗/↖ until the desired format appears, for example:
Menus
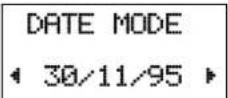
Press YES. The date will then be presented in the middle line of the display when the phone is in standby mode.
The date will also be presented in the format selected in messages that you receive.
15. The KEYLOCK Menu
You can lock the keypad so that unintentional key action has no effect if the phone is turned on when you are carrying it in a pocket or bag. This function is useful if you have a phone without keypad protect flip.
Calls to the international emergency number 112 can be made when the keypad is locked. You can also turn the alarm off by pressing any key.
The keypad remains locked until you:
- answer an incoming call by pressing (YES). You may also reject the call by pressing (NO)
- replace the battery
- unlock the keypad yourself
Automatic or Manual Key Lock
The Keylock function in the Settings menu lets you choose automatic or manual key lock.
If you choose the automatic mode, the keypad is locked automatically 30 seconds after the last key was pressed. The display shows:
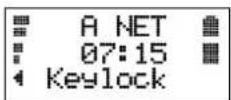
To lock the keypad manually - Keylock On?
Scroll to the Keylock menu with ↗/✗.
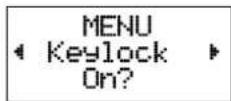
and press YES.
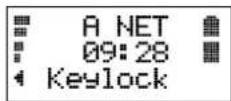
To unlock the keypad manually – Keylock Off?
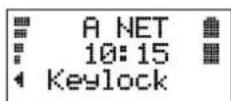
When the keypad is locked, the only menu you can reach is the Keylock menu. Press ↗,
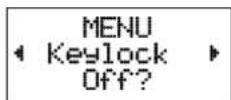
Press YES to unlock.
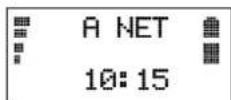
16. The MAIL Menu
To call your answering service – Voice mail*
The Voice Mail function lets you call your answering service to listen to recorded voice messages.
The function appears only if you have activated it using the the Set VoiceM(ail) function.
Refer to chapter 24. Voice Messages.
To read area messages
- Area Messages*
Refer to chapter 25. Using Area Information.
To read text messages
- Read messages*
Refer to chapter 23. Sending an Receiving Text Messages.
To read text messages stored on your SIM card
- Card messages*
Refer to chapter 23. Sending and Receiving Text Messages.
To send text messages – Send messages*
Refer to chapter 23. Sending and Receiving Text Messages.
To review the phone numbers of the last 10 unanswered calls – Missed calls*
Refer to chapter 21. Who Is Calling?
To activate the Voice Mail function - Set VoiceM*
This function lets you enter the phone number to your answering service and activate the Voice Mail function.
Refer to chapter 24. Voice Messages.
To turn area messages on/off – Area Info*
Refer to chapter 25. Using Area Information.
17. The PHONE BOOK Menu
THE PHONE BOOK
Card memory and Phone memory
As described in the Basic Guide, you can store phone numbers in the memory on your SIM card. The number of phone numbers that can be stored depends on the SIM card.
Besides the Card memory, the phone has a memory that can be used to store up to 99 phone numbers. The memory positions in the Phone memory are designated ☎1 – ☎99.
Overwrite protection
STORE 10 Used Overwrite?
This message appears if you try to store a phone number in a position which already contains a phone number. You can then:
a. Store the number in a different position. Press NO and enter the number of the position.
Menus
b. Store the number in the selected position, thus erasing the old number (and name). Press YES.
Card memory full
If you try to store a phone number when all positions are occupied, a position number in the Phone memory will be suggested in the top line of the display.
Both memories full
If both memories become full, no position number will be suggested,
If you do wish to store the phone number, you have to enter the number of an already occupied position, thus erasing the old number (and name).
To recall a phone number using the name – Name recall
To recall a phone number using the position – Position recall
To store a phone number – Store
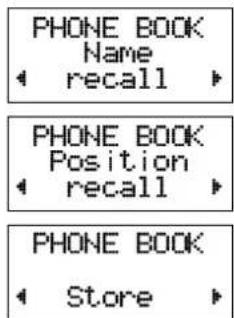
Storing phone numbers in the Card memory, and recalling phone numbers from the Card memory, is described in the Basic Guide.
If you wish to store a phone number in the Phone memory, press # to enter the □ character. For example, press # followed by 1 to store a phone number in memory position □1. The same applies when you recall a phone number using Position recall.
The procedure for recalling a phone number using Name recall is the same, regardless of whether the phone number is stored in the Card or Phone memory.
Alternative method to recall a phone number using the name
Press CLR to erase any digits from the display.
Press ↗, followed by a numeric key and YES.
For example, to recall a name beginning with A, press the 2 key. To recall a name beginning with E, press the 3 key twice.
If the name displayed is not the desired one, scroll with ↗ or ↕.
To change a phone number, name or storage position – Edit
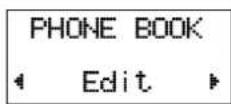
Enter the Phone book menu and select Edit.
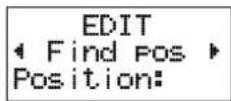
a. Enter the position number and press YES. b. If you wish to enter the name, press ↗.
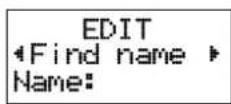
Enter the full name and press YES.
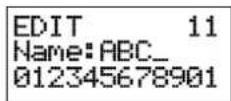
You can now change the position number (in the top line), the name (in the middle line) or the phone number (in the bottom line). You can move the cursor to the desired line with ↗/↗ and then make the changes. Use the CLR key to erase. When you are finished, press YES. If you did not change the position number, the message Used Overwrite? is displayed, indicating that the edited name or phone number will be stored in its old position. Press YES.
To erase a phone number – Erase
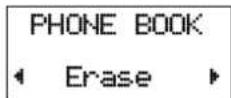
Enter the Phone book menu and select Erase.
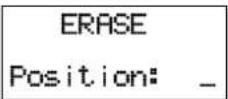
Enter the position number or scroll with ↗ / ↗ until you find the position number with the (name) and phone number you wish to erase.
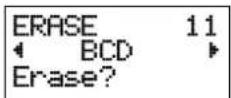
Press YES to erase the (name) and number.
Alternative method to erase a phone number Recall the (name) and number using Name or Position recall.
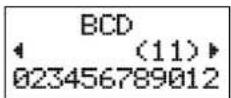
Press CLR. The question Erase? appears. Press YES to erase the (name) and number.
To copy from the Card memory to the Phone memory and vice versa – Copy
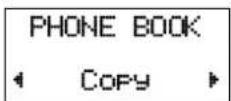
Enter the Phone book menu and select Copy.
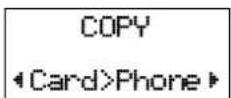
To copy from the Card memory to the Phone memory:
Press YES.
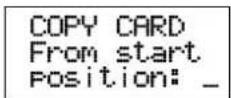
Enter the number of the first position in the Card memory you wish to copy, for example 1, and press YES.
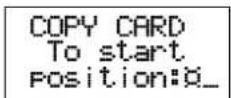
Enter the number of the first position in the Phone memory you wish to copy to, for example 10, and press YES.
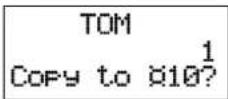
Press YES to copy. The next position in the Card memory is displayed.
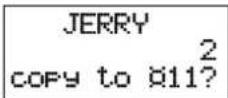
Press:
- YES to copy.
- NO to go on to the next position in the Card memory.
- CLR to copy to another position in the Phone memory. Enter the number of the position and press YES.
• CLR twice to interrupt the copying.
To copy from the Phone memory to the Card memory:
Enter the Phone book menu and select Copy.
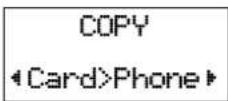
Press ↗.
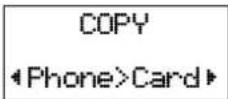
Press YES.
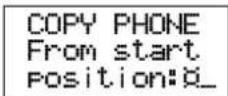
To copy from the Phone memory to the Card memory, proceed in the same way as described in the preceding section.
THE DIALLED NUMBER MEMORY
The last 10 numbers called are stored in a memory in the phone, the dialled number memory.
To recall the numbers last called – Last call
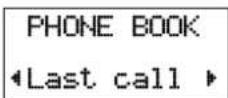
Menus
How to recall the numbers from the dialled number memory is described in the Basic Guide.
To turn the dialled number memory off If, for some reason, you do not wish the phone numbers called to be stored, you can turn the dialled number memory off.
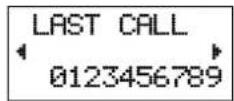
Scroll with ↗/↖ until Off appears.
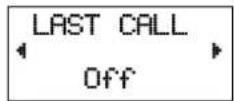
Press YES to turn the dialled number memory off and erase the stored phone numbers.
To turn the dialled number memory on again
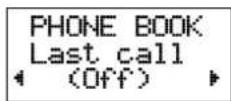
Press YES to select the Last Call function.
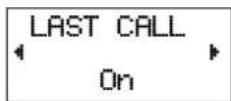
Press YES to turn the dialled number memory on.
Advanced Functions
18. Rejecting Incoming Calls
Sometimes, it may be inconvenient to answer an incoming call.
To reject a call, press 📂, and the message Busy Tone appears in the display. If the caller's network supports it, the caller will hear an engaged (busy) tone.
You can activate Divert On Busy (see DIVERT menu) to automatically divert rejected calls to another phone number, for example your
answering service. The message Diverted appears on the display to indicate that a rejected call is diverted.
If you receive a second call while you are engaged in another call, you must press 0, followed by ☐, to reject it (refer To receive a second call while engaged in a call in chapter 20).
19. Putting a Call on Hold
If you are engaged in a call, you can put it on hold by pressing ☐. This disconnects the microphone so you can have a private conversation without the person at the other end hearing. Press ☐ again, to take the call off hold.
You can also put a call on hold to make another call, or to accept a waiting call, as described in chapter 20.
20. Handling Two Calls Simultaneously
This service may not be available on all networks. In addition, a special subscription may be required to use the service.
The phone allows you to handle two calls simultaneously. This means that you may hold a call in progress and make a second call, and then switch between them.
You may also hold a call in progress and answer a second call, and switch between the two. However, to receive a second call, you need to activate the Call Waiting function.
The descriptions below assume that the Call Waiting function is activated.
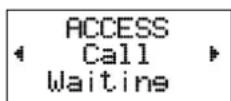
To activate, review status, or cancel Call Waiting function
- Access the Call Waiting function from the Access menu.
-
Press YES to select it.
-
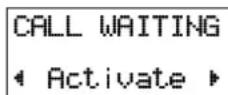
Using the arrow keys, you can now scroll between three options: Activate, Get status or Cancel.
-
Press YES to select the desired option.
Advanced Functions
There may be a short delay before the network responds. In the meantime, the message Please Wait is displayed. This is followed by the message Call Waiting ON, Not available, or Call Waiting OFF.
To switch between two calls
When one call is active and the other is on hold, you can switch between them by pressing ☐.
To make a second call while a call is in progress
Method 1
If anything else but the time is shown in the bottom line of the display, erase it with the CLR key.
- Press ☐ to put the current call on hold. The message 1 on hold (1st call on hold) is displayed.
- Enter the number you wish to call, or recall it from the phone book or the dialled number memory, and press ☐.
Method 2
- Enter the number you wish to call and press 📞. The message 1 on hold is displayed.
To receive a second call while engaged in a call
You will hear a tone in the ear piece and the message Call Wait appears in the display when the Call Waiting function is activated.
Do one of the following to:
a. End the current call and accept the waiting call by pressing 🔍.
The phone rings, and the question
Answer? appears in the display.
Press ☐ to answer the waiting call.
b. Put the current call on hold and accept the waiting call by pressing ☐.
The message 1 on hold is displayed.
c. Reject the waiting call and continue the current call by pressing 0, followed by ☐.
The waiting call is cleared. If the caller's network supports it, the caller will hear an engaged (busy) tone.
If you have activated Divert On Busy, the waiting call is diverted to the number you have specified, for example the number of your answering machine.
To end the current call
End the current call by pressing ↗.
The message Retrieve held call? appears in the display.
Do one of the following:
a. End the held call by pressing ↗.
b. Return to the held call by pressing YES within three seconds.
If you do not press or within three seconds, the message Retrieve held call? disappears from the display and the held call is ended automatically.
To receive a third call
Provided the Call Waiting function is activated, you may receive a third call when you are engaged in one call and have a second call on hold. You will hear a tone in the ear piece and the message Call Wait appears in the display. You may either accept the third call or reject it.
Accepting
Only one call can be on hold at a time. If you wish to accept the third call, you must, end the first or the second call, or both. See To end the current call above.
a. If you end the first or the second call, you can accept the waiting call (the third call) by pressing ☐.
b. If you end both calls, the phone rings and the question Answer? appears in the display. Press → to answer the waiting call.
Rejecting
Press 0, followed by □.
The third call is cleared. Provided the caller's network supports this function, the caller will hear an engaged (busy) tone.
If you have activated Divert On Busy, the waiting call is diverted to the number you have specified, for example the number of your answering machine.
21. Who Is Calling?
This service may not be available on all networks. In addition, a special subscription may be required to use the service.
The Calling Line Identification (CLI) service enables you to see the caller's phone number in the display, giving you a chance to identify the caller. The call must, however, be originated from a phone in a network that supports this service, and the caller must have agreed to present the number.
To receive a call
When an incoming call is received, the caller's number appears in the display. If the caller's number is stored in the phone book, the caller's name will be displayed too.
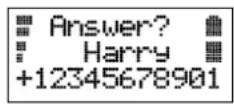
- Press ☐ to answer the call, or reject the call by pressing ☐.
Unanswered calls
The phone numbers and the time of the last 10 unanswered calls are stored in a memory in the phone – the Missed Calls memory.
To review the numbers of unanswered calls
- Access the Missed Calls function from the Mail menu.
The last caller's number or name (if the number is stored in the phone book) appears, together with the time when the unanswered call was received.
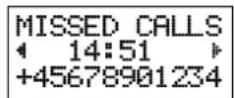
- Scroll to next missed call with▼, or press CLR to clear the message from the screen.
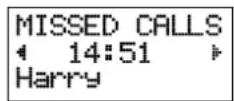
If no information about a caller's number was received, the number is replaced by the word Unidentified. If the phone number is unlisted, the message reads Restricted.
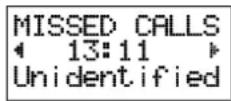
If the call has not been reached within 24 hours, the time of the call is replaced with the date. You toggle between date and time by pressing *.
To call a number in the display
- Press ☐ if the caller's number is displayed on the phone.
To erase the unanswered call
- Press CLR when the missed call is displayed.
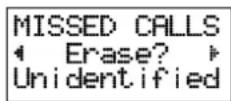
- Press YES.
The message is cleared from the memory.
To hide your phone number
Normally your phone number is shown on the receiver's phone. If for any reason you don't wish your number to be shown:
- Enter the phone number you wish to call.
- Press ↗ once and press Yes.
The Special Character display appears.
- Scroll to Hide Id and press ↗.
To send your phone number
If you wish to send your normally hidden phone number, do as follows:
- Enter the phone number you wish to call.
- Press ↗ once and press Yes.
The Special Character display appears.
- Scroll to Send Id and press ↗.
22. Sending DTMF Tones
Tone signals can be used for a variety of purposes, such as tele-banking or to control an answering machine. This telephone sends tone signals by DTMF (Dual Tone Multi Frequency).
To set phone to DTMF Signalling
You can send DTMF signals automatically during a call if the DTMF function is selected (see SETTINGS menu). You can send the characters 0 - 9, *, and # as DTMF signals by pressing the corresponding keys.
DTMF pause function
If you wish to send a code, i.e. your personal access number, it might be helpful to use the pause function. Before you make the call, you enter both the phone number and the code separated by a pause.
To call and send a code
- Enter the desired phone number.
- Enter a pause by pressing ↗, YES, ↗, YES, and a p appears in the display.
- Enter the code you wish to send. The code can be any combination of the digits 0 - 9 and the characters * and #. (Maximum of 36 characters, including the phone number and the pause.)
- Press ☐ to make the call. When the call has been connected, the phone number disappears from the display.
- Press ☐ to send the code. The characters are sent one by one. In the meantime the message Sending is displayed.
You can also enter a pause by holding down *.
Using several pauses
You can enter several pauses, for example: PHONE. NO. p CODE1 p CODE2
You can enter a maximum of 36 characters, including the pauses.
Pressing ☐ when the call is connected will send the characters to the next pause.
Pre-programmed DTMF signalling
You can store a code (and a phone number) in the phone book in the same way as you store a phone number. The code can be any combination of the characters 0 - 9, *, and # (maximum 20 characters).
To store a phone number and code
- Enter the phone number, the pause (p), and the code.
- Select the Phone Book menu and store the number, the pause, and the code.
To send a code
-
Call the desired phone number and wait until the call has been connected.
-
Recall the code from the memory. You must hold down ↗ to reach the Phone Book menu.
-
Send the code by pressing ☐. The characters are sent one by one. In the meantime the message Sending is displayed.
23. Sending and Receiving Text Messages (SMS)
This service may not be available on all networks. In addition, a special subscription may be required to use the service.
The Short Message Service (SMS) of the cellular network allows you to send and receive text messages to your phone. SMS may contain up to 160 characters.
Text messages can be received when the phone is in standby mode, when you are engaged in a call, or when incoming calls are diverted to another phone number.
Messages memory
When you receive SMS, the phone gives a message signal—two beeps and the indicator lamp on the top of the phone rapidly blinks green. You will also see the text Message together with Read? (the ☐ symbol appears on the bottom right corner if you answer NO).
The message is automatically stored in the first free memory position in the phone. You may read the messages any time you wish (the symbol remains in the display until you have read the message). The messages memory can hold up to 20 messages.
A message remains in the message memory until you erase it or until you insert a different SIM card.
To set phone for text messaging
Before you send messages, you need to see the Service centre address.
- Enter the Send Message function through the Mail menu.
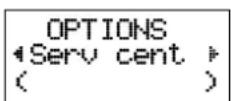
You will be prompted to set the Service centre number.
- Press YES.
SERV CENT Enter no:
- Enter the Service centre number and press YES. Press CLR to return to the stand-by display.
Your phone is now ready to send and receive messages, but you are only able to send and receive messages within your operator's net.
To read a new message
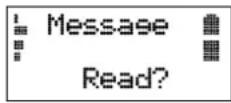
- Press YES when Read? is in the display. New Message appears on the display.
- Press YES to enter the message. You see the first three lines of the message.
- Scroll forward through the message with ↗, backward with ↖. Hold down an arrow key for more than three seconds to get to the beginning or end of the message. Press the numeric key 3 to go three lines forward.
To reply to a message
After the last line has appeared, the question Reply? appears. If the caller wants you to reply, the last line will read Reply Requested.
last line 4 Reply?
You can now:
- Press ↗ to scroll backward through the message.
- Press YES to reply to the message.
- Press NO if you do not wish reply.
If you press NO, the question Erase? appears. You can now:
- Press YES to erase the message in your phone. You will then automatically come to the next message in the message list.
- Press NO if you do not wish to erase the message. The message will remain in the Messages memory.
You can press CLR anywhere within the message to erase it. When the question Erase? appears, press YES.
Advanced Functions
SIM card memory
You can store read messages on your SIM card. The number of messages that can be stored is SIM-dependent. You can retrieve these messages regardless of which phone you use. If the SIM card memory is full, you will be informed of this by a low beep and a text in the display. You then need to erase read messages to provide free memory space.
You are prompted when no messages are stored. The message received/sent/written will always be presented first.
To store messages
- Press YES when you are prompted to save the message.
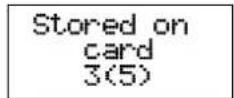
The display shows that this message is the third of five that is possible to store.
To call a phone number in a message
- Press YES when a phone number is found in the display to call the number direct.
After the number has been called, the message is considered as read and it remains in the phone's memory.
To read stored messages
- Scroll to Read messages in the Mail menu and press YES.
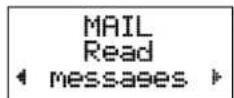
- Scroll with ↗/↖ until you find the message you are looking for and press YES.
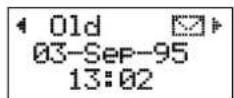
A read message is called old, while an unread message is called new.
- You may let the message remain in the memory or erase it.
To read messages
- Scroll to Card messages in the Mail menu and press YES.
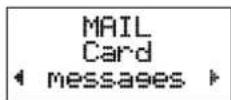
-
Scroll with ↗/↖ until you find the message you are looking for and press YES.
-
You may let the message remain in the SIM memory or erase it.
Own messages
You can write, send, repeat, and change types of messages as follows.
To send messages
-
Enter the Mail menu.
-
Scroll with ↗/↖ until you find Send messages and press YES.
-
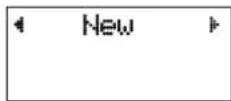
Press YES when New is in the display, and an empty display appears.
-
Key in your message and press YES. A Request for reply prompts appears. Press YES if you want a reply or NO if you do not.
-
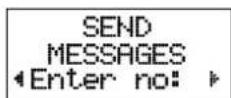
Enter the phone number or scroll with ✗/✗ until you find the phone number of whom you wish to send a message.
-
Press YES to send the message, or NO to store the message for later use.
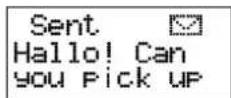
If you decide to send the message later, the display will say Written instead of Sent when you access the message.
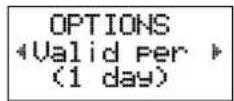
To repeat a message when no answer You can set the phone to repeat a message for a certain amount of time: 1 hour, 12 hours, 1 day, 1 week, or maximum (operator dependent).
-
Choose Options and Valid per in the Send Message menu.
-
Scroll to the desired repeat length.
- Press YES.
To change message type
You can send other types of messages, such as telex, fax, or voice messages.
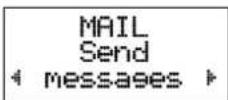
-
Scroll to Send Messages in the Mail menu and press YES.
-
Select Options then Message type.
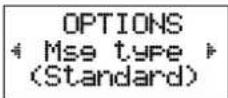
- Select the way you wish to send the message (fax, telex, voice, etc).
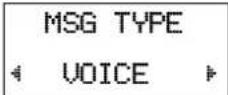
- Press YES.
Faxes, data messages and telexes can only be sent when you use a Mobile Office kit (or similar).
24. Voice Messages
This service may not be available on all networks. In addition, a special subscription may be required to use the service.
Voice Mail function
The voice mail function works like an answering machine which records any voice messages.
To activate and set phone number of your voice mail
1.1. Scroll with / to the Mail menu and press YES.
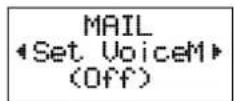
- Scroll with ↗/↗ to Set Voicell(ail) and press YES.
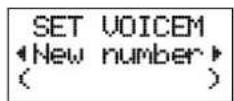
- Scroll with ↗/↖ until you find New number and press YES.
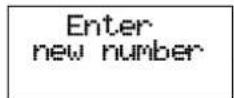
- Enter the phone number of the answering service and press YES.
The voice mail function is automatically activated.
To change the number of your answering service
-
Scroll with ↗/↖ to the Mail menu and press YES.
-
Scroll with ↗/✗ to Set VoiceM(ail) and press YES.
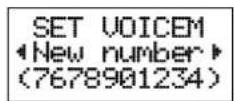
- If necessary, scroll with ↗/↖ until New Number appears, and press YES.
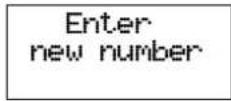
- Enter the new phone number of the answering service and press YES.
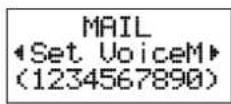
To turn the Voice Mail function off
- Scroll to the Mail menu with ✗/✗ and press YES.
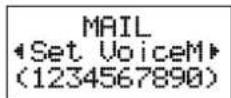
- Scroll with ✗/✗ to Set VoiceM(ail) and press YES.
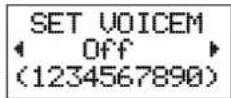
- Scroll with ↗/↖ until you find Off and press YES.
To call your answering service You can call your answering service at anytime and listen to recorded messages.
- Scroll with ↗/✗ to the Mail menu and press YES.
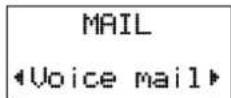
- Press ☐ to call your voice messages and listen to the call.
If you have a phone with a flip, you reach the voice messages by pressing ☐ followed by
25. Using Area Information
This feature may not be available on all networks. In addition, a special subscription may be required to use the service.
The ordinary Short Message Service can be said to be a personal service, with messages specifically and exclusively directed to you. The Area Information (AI) is another, impersonal, type of Short Message which is sent to all subscribers in a certain cell of a network at the same time.
The AI is displayed immediately, unless you are engaged in a call. The information may be a local road report or a local taxi phone number. Each type of message is identified by a 3-digit code. At present, the following message types exist:
Code Title
000 Index
010 Flashes
020 Hospitals
022 Doctors
024 Pharmacy
030 Long-distance road reports
032 Local road reports
034 Taxis
040 Weather
050 District (base station identity)
052 Network information
054 Operator services
056 Directory enquiries (national)
057 Directory enquiries (international)
058 Customer care (national)
059 Customer care (international)
Refer to the information supplied by your network operator, for information about the AI services you can use.
To receive area information
An incoming call always interrupts the presentation of a AI message. When the call is finished, the AI presentation continues until completed.
To turn area information on or off
You can turn the AI presentation on/off with the Area info function in the Mail menu.
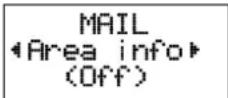
-
Press YES to select the Area info function.
-
Scroll with ↗/↗ to On or Off depending on if you wish AI messages to be presented in the display or not.
-
Press YES.
You can decide which types of AI message you wish to be presented in the display. The phone's AI message list can hold up to 19 codes.
You can both erase already existing codes from the list and add new codes to the list. If a code has been erased from position 4, the code in position 5 is automatically moved up to position 4. Empty positions are always found at the end of the list.
To edit the list of area information
You edit the AI position list in the Area info function in the Mail menu.
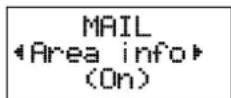
-
Press YES to select the Area info function.
-
If necessary, scroll with ↗/↖ to Edit List and press YES.
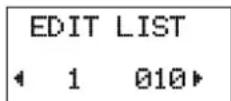
The digit to the left indicates the position in the list. You can scroll forward and backward through the list with the ↗/✗.
- To enter a code, scroll to the first empty location with ▶ and press YES.
Advanced Functions
- Enter the new code. (You only need to enter 40 for code 040, since the phone will add the leading zero automatically.)
To erase or replace a code
If you wish to erase a code or replace a code, press YES when that specific code is shown in the display. The question Erase? appears.
a. To erase the code, press YES.
b. To replace the code, press ↗, followed by YES. Enter the new code and press YES.
An AI is only displayed once, unless its content has changed. If you wish to have a message repeated, you must first erase the code for that message type and then enter the same code again. The phone will see this as a new code which is being entered and thus display the first message available of that type.
Supplementary Information
26. Batteries and Recharging
Batteries
Batteries with different capacities are available. They are all of the NiMH type. (NiMH stands for Nickel Metal Hydride.)
Compared to the commonly used NiCd (Nickel Cadmium) batteries, the NiMH batteries have a higher capacity and they are much more friendly to the environment.
Battery meter
The battery icon, on the right of the display, reflects the state of charge of the battery attached to the phone.
Low Battery alarm
As a reminder that the battery soon needs re-charging or replacing, an alarm signal (a long beep) sounds and the message Battery low appears for ten seconds in the display.
In addition, the indicator light on the top edge of the phone starts blinking red. If the phone is left on, the low battery alarm will be repeated several times and, finally, the phone will turn itself off when the battery is no longer able to power it satisfactorily. It is not possible to turn the phone on again. Instead the battery must be recharged, or replaced with a charged one.
If the condition of a battery is very bad, the phone will turn itself off immediately after the low battery alarm is issued for the first time.
Low battery alarm during a call:
If the low battery alarm is issued when a call is in progress, you should end the call as quickly as possible. If the call continues, the phone will turn itself off after a short period.
Recharging a battery
Besides the charger delivered with the phone, there are a number of other chargers available that can be used to recharge a battery.
Some of these chargers are connected to the socket at the bottom of the phone, allowing the battery to remain attached to the phone.
Such a charger both recharges the battery and supplies power to the phone. The recharging is controlled by the phone, which must be turned on. To indicate that recharging is in progress, the battery icon in the display is filled and emptied continuously.
The indicator light on the top edge of the phone shows green constantly (instead of slowly blinking green) when the phone is powered via the socket at the bottom, to indicate that service is available from a cellular network.
Battery care and maintenance
A battery has a long maintenance-free service life if properly treated.
- A new battery, or an old battery that has not been used for a long period of time, needs to be recharged and discharged 2 – 3 times, to reach full capacity. To discharge the battery, operate the phone as usual until the low battery alarm is issued.
- Avoid recharging a full, or almost full, battery. If you have the opportunity, wait until the low battery alarm is issued.
- Do not keep a battery in a sunny place. Extremely high temperatures reduce the battery's capacity permanently.
- Never let a battery get into contact with metal objects that may short-circuit the battery poles, for example a bunch of keys in a pocket.
Supplementary Information
- Do not disassemble a battery.
- A battery may explode if disposed of in a fire.
A hint:
If you are uncertain of the state of charge of a battery, you can attach the battery to the phone. If the phone does not come on, when you press and hold down the ON/OFF key, the battery is probably empty.
On the other hand, if the phone comes on, enter the PIN and then observe the battery icon in the display.
27. Accessories
A number of accessories are available for use with your phone. Some are dealt with in this chapter.
For full information on all accessories available, please contact your dealer.
Handsfree vehicle kit
The Handsfree kit incorporates a complete system for handsfree usage, powering the phone from the vehicle's battery, and recharging the battery attached to the phone.
An external antenna should be used for better telephone communication.
The handsfree kit should be installed in the vehicle by qualified personnel.
When the phone rests in the holder, the internal microphone and ear piece are disabled. Instead, an external microphone and a loudspeaker are used.
The handsfree feature allows you to make or answer calls without removing the phone from the holder. You can comfortably have a telephone conversation and still have both hands on the wheel.
Service Available indicator
The indicator light on the top edge of the phone shows green constantly (instead of slowly blinking green) when service is available from a cellular network.
Battery recharging
When the phone is ON, the attached battery will be recharged if this is required. To indicate that recharging is in progress, the battery icon in the display is filled and emptied continuously.
Operation
When the phone is used with the hands-free system, its operation is essentially the same as when it is used as a handheld unit.
Any Key facility
If you turn on the Any Key function (in the Settings menu) you can answer an incoming call by pressing any key except the 🔗 key.
Automatic Answering facility
If you turn on the Automatic answering function (in the Settings menu) an incoming call will be answered automatically after one ringing signal
Automatic redial
The automatic redial function will redial a phone number without the need to press ☐.
Different settings
The following settings can be made without affecting the settings made when the phone is used as a handheld unit:
- Loudspeaker volume (with the ↗ and ↗ keys)
- Illumination of the display and keypad (in the Settings menu)
- The level and tone of the ringing signal (in the Settings menu)
Portable handsfree
The portable handsfree set is plugged into the socket at the bottom of the phone.
Any Key and Automatic Answering facilities
The Any Key and Automatic Answering facilities, described in the preceding section, are available when the portable handsfree set is used.
Mobile Office kit
The Mobile Office kit contains all the equipment you need to make your phone and your personal computer or laptop the perfect couple in a Mobile Office environment.
Battery chargers
Several chargers are available, both for indoor and vehicle use. For full information, please contact your dealer.
28. Problems You Can Solve
This chapter lists some simple things you should check before calling for service personnel. This could save the cost of unnecessary service.
Phone does not come on
Handheld phone:
Recharge or replace the battery.
Handsfree phone in a vehicle:
If the phone comes on, but not the handsfree equipment, ensure that the phone is properly inserted in its holder.
Check the fuse. The fuse holder is fitted to the battery cable, near the vehicle's battery.
Phone locked is displayed, followed by the prompt Enter lock code
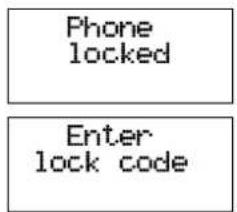
The phone is locked to prevent unauthorised use.
To unlock the phone
Enter your personal 4- to 8-digit security code and press #.
If you have forgotten your security code
Contact your dealer. The only way to unlock the phone is through using your security code. Be aware that it, for security reasons, may take some time to solve the problem.
Insert card is displayed
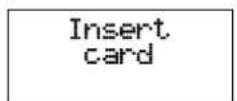
No SIM card is inserted in the phone. Tumto your Basic Guide for the procedure of inserting the SIM card.
Wrong PIN or Wrong PIN2 is displayed
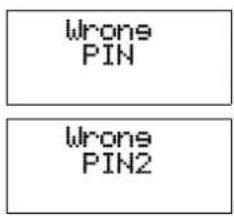
The PIN or the PIN2 code has been entered incorrectly.
This message is followed by the prompt Enter PIN or Enter PIN2.
Enter the PIN or PIN2 code correctly and press #.
Card blocked. Unblock? is displayed

This message appears if the PIN code has been entered incorrectly three times in succession.
To unblock the SIM card Press YES.
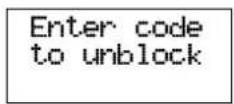
Enter your personal unblocking key (PUK) and press #. You obtain the PUK from your network operator or service provider when you purchase your SIM.
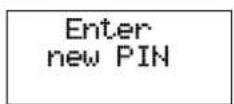
Enter the PIN code and press # . You can either enter the current PIN, or a new one.
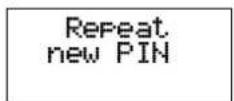
Enter the PIN code again and press #.
If you entered both the unblocking key and the PIN code correctly, the message New PIN appears.
Alternative method to unblock the SIM card
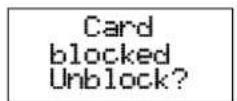
To unblock the SIM card, enter the following sequence:
* * 0 5 * UNBLOCK KEY * NEW PIN * NEW PIN #
BLOCKED. Contact card provider is displayed
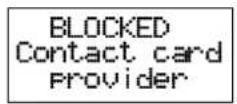
The SIM card is permanently blocked after the unblocking code has been entered incorrectly ten times in succession. Contact your network operator or service provider.
Enter PUK2 is displayed
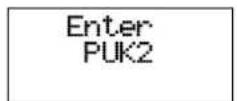
The PIN2 code has been entered incorrectly three times in succession.
Enter your personal unblocking key 2 (PUK2) and press #. You obtain your PUK2 from your network operator or service provider.
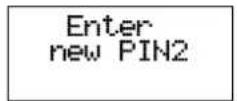
Enter the PIN2 code and press #. You can either enter the current PIN2 code, or a new one.
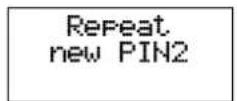
Enter the PIN2 code again and press #.
If you entered both the unblocking key and the PIN2 code correctly, the message NewPIN appears.
Emergency calls only is displayed
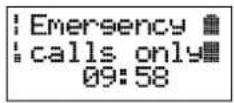
A network is in range but you are not allowed to use this network.
You may, however, call the emergency number 112.
No network is displayed
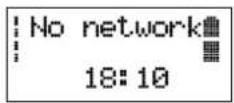
This indicates that no network is in range. The reason for this is either:
a. You are in an area which is not covered by a network.
b. The received signal is too weak. You have to move to obtain a sufficiently strong signal.
Handsfree phone in a vehicle:
Ensure that the phone is properly inserted in its holder.
Check the external antenna and its connection.
Keylock is displayed
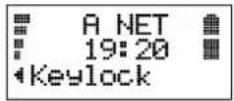
The keypad is locked to prevent unintentional key action.
To unlock the keypad
Press ↗, followed by YES.
Indicator light blinks red
This indicates that the battery is becoming exhausted and soon needs recharging or replacing.
- Ericsson GH388/GF388
- User's Manual
- Cellular Phones and Accessories in Combination:
- Accessories Without Direct Connection to a Cellular Phone:
- This manual describes Ericsson GF388/GF388, all versions
- First edition (October 1995)
- Safety Precautions
- Table of Contents
- Introduction 9
- Menus 15
- The ACCESS Menu 22
- BARRING\* 22
- CALL WAITING\* 24
- CARD LOCK\* 24
- CHANGE PIN CODE 25
- CHANGE PIN2 CODE 25
- PHONE LOCK 25
- PHONE LOCK CHANGE CODE 26
- The SETTINGS Menu 26
- The Calculator Menu 29
- The CLOCK Menu 30
- The KEYLOCK Menu 32
- The MAIL Menu 33
- The PHONE BOOK Menu 33
- THE PHONE BOOK 33
- THE DIALLED NUMBER MEMORY 35
- Advanced Functions 37
- Rejecting Incoming Calls 37
- Putting a Call on Hold 37
- Handling Two Calls Simultaneously 37
- Who Is Calling? 39
- Sending DTMF Tones 40
- Sending and Receiving Text Messages (SMS) 41
- Voice Messages 44
- Using Area Information 45
- Batteries and Recharging 47
- Accessories 48
- Problems You Can Solve 50
- Introduction
- Overview
- Key Functions
- (Send)
- Voice Mail
- ON/OFF
- (End)
- Left Arrow and Right Arrow
- Clear
- Numeric keys
- Star and Hash
- Sending DTMF Tones.
- Key Functions in the Menu System
- YES
- NO
- CLR
- To enter letters
- # \*
- Protecting the SIM Card and the Phone
- Card Lock
- PIN2
- Phone Lock
- Keypad Lock
- Menus
- International Number and Other Useful Dialling Functions
- To make an international call – Inter number
- To insert special characters – Special characters
- Speech then Fax (Data Menu)
- The INFO Menu
- Press YES.
- Next Call Type (Data Menu)
- The DIVERT Menu\*
- The NETWORKS Menu
- The ACCESS Menu
- BARRING\*
- You can bar:
- To change your password – Change password\*
- CALL WAITING\*
- CARD LOCK\*
- CHANGE PIN CODE
- CHANGE PIN2 CODE
- PHONE LOCK CHANGE CODE
- To change the security code – Phone lock Change code
- The SETTINGS Menu
- To set the level of the ringing signal – Ring level
- To set the tone of the ringing signal – Ring type
- The Calculator Menu
- The CLOCK Menu
- Read this first
- To turn the alarm function on without changing the time of the alarm
- To set the clock - Set clock
- To set today's date – Set date
- To select the a.m./p.m. format or 24-hour format – Clock mode
- To select the date format – Date mode
- The KEYLOCK Menu
- Automatic or Manual Key Lock
- The MAIL Menu
- The PHONE BOOK Menu
- THE PHONE BOOK
- Card memory full
- Both memories full
- Press:
- THE DIALLED NUMBER MEMORY
- Advanced Functions
- Rejecting Incoming Calls
- Putting a Call on Hold
- Handling Two Calls Simultaneously
- To switch between two calls
- To make a second call while a call is in progress
- To receive a second call while engaged in a call
- To end the current call
- To receive a third call
- Accepting
- Rejecting
- Who Is Calling?
- To receive a call
- Unanswered calls
- To hide your phone number
- To send your phone number
- Sending DTMF Tones
- To set phone to DTMF Signalling
- DTMF pause function
- To call and send a code
- Using several pauses
- Pre-programmed DTMF signalling
- To store a phone number and code
- To send a code
- Sending and Receiving Text Messages (SMS)
- Messages memory
- SIM card memory
- To store messages
- Own messages
- To change message type
- Voice Messages
- Voice Mail function
- Using Area Information
- Code Title
- To receive area information
- To edit the list of area information
- To erase or replace a code
- Supplementary Information
- Batteries and Recharging
- Batteries
- Battery meter
- Low Battery alarm
- Low battery alarm during a call:
- Recharging a battery
- Battery care and maintenance
- A hint:
- Accessories
- Handsfree vehicle kit
- Service Available indicator
- Battery recharging
- Operation
- Any Key facility
- Automatic Answering facility
- Automatic redial
- Different settings
- Portable handsfree
- Mobile Office kit
- Battery chargers
- Problems You Can Solve
- Phone does not come on
- Phone locked is displayed, followed by the prompt Enter lock code
- Insert card is displayed
- Wrong PIN or Wrong PIN2 is displayed
- Card blocked. Unblock? is displayed
- To unblock the SIM card Press YES.
- BLOCKED. Contact card provider is displayed
- Enter PUK2 is displayed
- Emergency calls only is displayed
- No network is displayed
- Keylock is displayed
- Indicator light blinks red
Brand : ERICSSON
Model : GF388
Category : Mobile Phone