
I3-371UVVF - Security Camera Provision-ISR - Free user manual and instructions
Find the device manual for free I3-371UVVF Provision-ISR in PDF.


| Type | Security Camera |
| Image Sensor | 1/3" Sony CCD |
| DSP System | UltraVision DSP |
| Effective Pixels | PAL: 752(H)×582(V) / NTSC: 768(H)×494(V) |
| Horizontal Resolution | 650 TVL (color) |
| Minimum Illumination | Color: 0.003 Lux (Sens-up OFF) / B/W: 0.0001 Lux (Sens-up OFF) |
| Lens | 2.8~12mm Varifocal (C/CS mount) |
| Power Supply | DC 12V ±10% |
| Power Consumption | Max 2.0W |
| Weight | 520 g |
| Dimensions (W×H×D) | 115×90×115 mm (approx.) |
| WDR (Wide Dynamic Range) | Yes, selectable Low/Middle/High |
| 3D-DNR | Yes, on/off, level adjustable 0-63 |
| Digital Zoom | Up to x10 |
| Digital Image Stabilization (DIS) | Yes, on/off |
| Privacy Masking | 8 zones, adjustable size and color |
| Motion Detection | 8 zones, sensitivity adjustable |
| White Balance | ATW, COL-ROLL, AWC, Manual |
| Day/Night | Auto, Day, Night, EXT (for IR) |
| Sync System | Internal / Line-lock |
| OSD Menu | Yes, English/Spanish/Chinese/Russian/French |
| Bad Pixel Correction | Up to 64 defects |
Frequently Asked Questions - I3-371UVVF Provision-ISR
User questions about I3-371UVVF Provision-ISR
0 question about this device. Answer the ones you know or ask your own.
Ask a new question about this device
Download the instructions for your Security Camera in PDF format for free! Find your manual I3-371UVVF - Provision-ISR and take your electronic device back in hand. On this page are published all the documents necessary for the use of your device. I3-371UVVF by Provision-ISR.
USER MANUAL I3-371UVVF Provision-ISR

Now you can see!


Now you can see!
UltraVision Series
Breakthrough DSP
OSD MANUAL
English/Spanish
Content

English Manual 1

Note: Only professional technicians is allowed to open the front or back cover of this camera.

In order to avoid electrical shock or fire, please use proper power according to the manual.
Nota:
OSD Menu Operation 7
1) Camera Name 7
2) Lens 10
3) Exposure 12
4) Day/Night Settings 15
5) WDR/BLC/ECLPS 18
6) White Balance Settings 22
7) 3D-DNR 25
8) Effects Menu 27
9) Special Menu 33
Specifications 42
Spanish Manual 48
Note:
In order to avoid electrical shock or fire, please use proper power according to the manual.
General
Thank you for using our products. Before use, please read this manual carefully to ensure correct use of this series of products. Please keep the manual properly for future use.
This series of cameras take high-sensitivity CCD as the image sensor, all circuits have long work life and high reliability. Excellent image will be top choice for your camera.
Precautions
- Do not install the camera in places where the temperature is above 50° C or under -10° C.
- Do not touch the CCD surface with your finger. If cleaning is needed, please wipe it using a soft cloth with a little bit of alcohol.
- Do not install in places with high humidity, it can seriously damage the quality of the picture.
- Do not drop the camera and avoid physical shock.
- Do not face your camera to a strong light, it can damage the CCD.
- Do not expose the camera to rain or dusty surroundings.
- Its highly important to use the correct and suitable power supply(DC12V) for the camera.
- Only professional and qualified technician can install and test
- During use, if any errors occur, cut off the power immediately and contact your local distributor.
Features
WDR (Wide Dynamic Range):
Provides a powerful Wide Dynamic Range solution, allows the camera to provide vivid colors without losing details. The difficult lighting is automatically compensated to extract the details in both bright and dark areas, without having cutoff or saturation. The UltraVision DSP enhanced WDR performance has strong light compensation, so it always shows clear and perfect contrast picture in any environment.
D-DNR (Digital Noise Reduction):
Equipped with the most advance Motion compensated 3D-DNR (3-Dimensional Digital Noise Reduction) function. With this powerful DSP image noise can be removed efficiently and it shows clean and obvious image in low luminance. The result is a superior noise reduction with less motion blurring artifacts even in extreme low-light situations.
- TVL2 – Ultra High H&V Resolution:
Both Vertical and Horizontal resolutions are ultra-high. While high-resolution cameras improve the horizontal resolution only, UltraVision DSP cameras achieve horizontal resolution of 600 TV Lines at color mode, and up to 700 TV Lines with Black/White sensors, and at the same time also reach a vertical resolution of 580TVL. All of these provide clean, noiseless and reliable pictures.
Eclipse:
The Eclipse function blocks out high-brightness areas and enables better visibility of other areas. An example of the eclipse function usage is an ability to recognize the number plates on a vehicle at night, where the headlights are too bright.
• DIS (Digital Image Stabilization):
Performs digital image stabilization to allow stable and pleasant video even in situations where the camera is shaking. This feature is especially important for the high-zoom cameras where every small movement of the camera is highly noticeable and disturbing for the observer.
D Zoom x1-x10:
Advance digital zooming technology enables a programmable magnification of up to factor of 10, and scales the region of interest to the whole screen.
• Vertical and Horizontal flip:
Built-in mechanism enables the vertical and horizontal flipping of the image, to allow an easy installation of the camera regardless of its holding position.
Bad Pixel Correction:
Supports bad pixels correction for compensating the CCD non-uniform, blemish pixels. Up to 64 defects can be fixed. The result is clear image with no white spots even at long integration time (DSS).
- Privacy Masking:
Protects the privacy of the pictured area by placing a mask over the video output at the defined privacy zones. The camera allows the size and position of masking area to be freely defined within the frame. Up to 8 AREAS can be masked. Mask color is programmable
OSD Menu
This camera utilizes an on-screen user MENU. To set items on the menu, use the following buttons on the OSD panel.
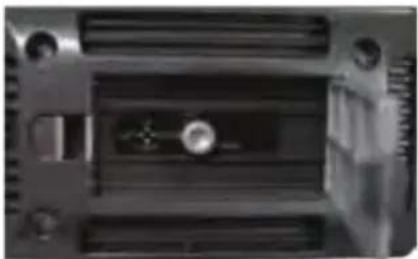
OSD Controller For Box Camera
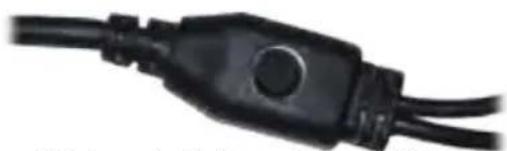
OSD Controller For Dome Tube and Hidden Cameras
▲ – Moves the cursor upwards.
▼ – Moves the cursor downwards.
- Moves the cursor to the left.
▶ – Moves the cursor to the right.
O – Display the MAIN MENU, press to make selections and display a submenu for an item with the mark.
OSD Main Menu
Main Menu
![graph TD A["Cam Name"] --> B["On/Off"] C["Lens"] --> D["DC IRIS/Manual"] E["Exposure"] --> F["AGC / Shutter / Sens-Up / Initial Set / Previous"] G["Day/Night"] --> H["Day / Night / EXT - WDR Level / Auto - D/N Level, Filter Dly, Night Burst, Initial Set."] I["WDR/BLC/ECLPS"] --> J["WDR Level / BLC L…](/content/2026/05/921089/images/c703c419c081ab41a6a60e4f91c1154a1ee7d6f3d36e15106c74b5c00dbcf15b.jpg)
OSD Menu Operation
- To enter the MAIN MENU screen Press O.
The MAIN MENU screen appears on the monitor.
- To exit the MAIN MENU screen.
Use ▲ or ▼ button to select the EXIT then Press O.
Note:
When you see the

sign
Press O for sub-menus.
| 1.CAM NAME | OFF |
| 2.LENS | DC IRIS |
| 3.EXPOSURE | |
| 4.DAY/NIGHT | AUTO |
| 5.WDR/BLC/ECLPS | WDR |
| 6.WHITE BAL | ATW |
| 7.3D-DNR | ON |
| 8.EFFECTS | |
| 9.SPECIAL | |
| 0.EXIT | RET |
1) Camera Name
You can set a name for your camera which will be displayed on the monitor. - Scroll to CAM NAME using ▲ or ▼. - use ◀ or ▶ to select ON and press O.| 1.CAM NAME | OFF |
| 2.LENS | DC IRIS |
| 3.EXPOSURE ← | |
| 4.DAY/NIGHT | AUTO |
| 5.WDR/BLC/ECLPS | WDR |
| 6.WHITE BAL | ATW |
| 7.3D-DNR | ON ← |
| 8.EFFECTS ← | |
| 9.SPECIAL ← | |
| 0.EXIT | RET ← |
| <CAMERA NAME> | |||
| A | B | C | D |
| E | F | G | H |
| I | K | J | K |
| L | M | N | O |
| a | b | c | d |
| f | g | h | l |
| k | l | m | l |
| n | o | p | r |
| s | t | u | v |
| w | x | y | z |
| - | 0 | 1 | 2 |
| 3 | 4 | 5 | 6 |
| 7 | 8 | 9 | 8 |
| - | - | - | - |
2) Lens
Iris is mechanism which closes and opens allowing more or less light into the lens. The camera supports two types of lens: * MANUAL Iris lens, where the aperture is fixed or set manually by the user * DC Iris Lens, in which the aperture is continuously controlled by the camera to automatically set to the desired level of brightness. The LENS menu allows you to set the lens which attached to your camera, and to adjust the desired brightness if DC lens is used. - Scroll to LENS using ▲ or ▼ - Use ◀ or ▶ to select between MANUAL and DC IRIS. - When selected MANUAL there is no need for more settings.  \- When selected DC IRIS you can press O for entering DC IRIS MENU In order to set the BRIGHTNESS level. \- Use ◀ or ▶ to select the BRIGHTNESS level 0-100.  PREVIOUS – Return to previous menu3) Exposure
To compensate for the lighting conditions, the exposure control can be adjusted. Use this menu to set the means for the camera to automatically control the brightness. Available means include automatic gain control (AGC), electronic light control (ELC or SHUTTER) and slow-shutter (SENS-UP). These settings determine how the cameras will behave at various light levels and affect video image quality. \- Scroll to EXPOSURE using ▲ or ▼.  \- Press O to enter the EXPOSURE MENU.AGC (Automatic Gain Control)
At low-lighting conditions, if the image is too dark, select between OFF/LOW/MIDDLE/HIGH. Higher AGC level means the camera would amplify the CCD input signal more, and the image would become brighter, but noisier. - Scroll to AGC using ▲ or ▼. - Use ◀ or ▶ for selecting the allowed gain level.SHUTTER
Controls the amount of light according to your own environment-Increase shutter value in dark places for a brighter picture Decrease shutter value in places with more light for reducing amount of light. - Scroll to SHUTTER using ▲ or ▼. - Use ◀ or ▶ to change the shutter speed: AUTO / OFF / A.FLK / 1/160 - 1/90000, X2 - X512.SENS-UP
When this mode enabled, the camera would use digital slow shutter of over a field-time when needed. Field time is equal to 1/50 sec (PAL) or 1/60 (NTSC). The menu allow the setting of the shutter limitation, where x2 refers to 1/50 sec, x50 is 1second, etc. - Scroll to SENS-UP using ▲ or ▼. - Use ◀ or ▶ to set SENS-UP limit OFF/X2 - X512. Values of more than X16 will cause objects in motion to look blurred at low light condition. Note: SENS-UP settings will be available only if selected AUTO / A.FLK in the SHUTTER menu. If not available, SENS-UP will be marked with --- sign. INITIAL SET – Back to factory default. PREVIOUS – Return to previous menu4) Day/Night Settings
Day/Night refers to the mechanism of changing of the optical filter between IR-cut filter to non-IRC filter. AUTO - set the filter automatically, DAY - force the usage of the IRC filter (color), and NIGHT - force usage of IR-PASS filter (and display B&W image). EXT - is used for Smart-IR mode when the IR-LED board provides the light info to the camera. - Scroll to DAY/NIGHT using ▲or▼. - Choose DAY/NIGHT/EXT/AUTO using ◀ or ▶.  a) If selected AUTO press O to enter D/N AUTO MENU| <D/N AUTO MENU> | |
| D/N LEVEL | LOW |
| FILTER DLY | 1 SEC |
| NIGHT BURST | ON |
| INITIAL SET | |
| PREVIOUS | |
D/N LEVEL
Level of darkness in which the camera would switch the IR filter from Day to Night - Scroll to D/N LEVEL using ▲ or ▼. - Use ◀ or ▶ to change between LOW/MIDDLE/HIGH.FILTER DLY
Time (in seconds) to wait before switching between Day/ Night modes. - Scroll to FILTER DLY using ▲ or ▼. - Use ◀ or ▶ change Value from 1sec – 60sec.NIGHT BURST
Allow disable the color burst in the video signal at Night mode. - Scroll to NIGHT BURST using ▲ or ▼. - Use ◀ or ▶ to switch ON/OFF. b) If Selected EXT press O to enter D/N EXT Menu. This is related to the Smart-IR when working with IR-LED camera. It refers to the level of saturation the camera should allow at night when the IR LED works. \- Use ◀or▶ to select level between LOW/MIDDLE/HIGH.  INITIAL SET – Back to factory default PREVIOUS – Return to previous menu Note: If selected AGC OFF options in the EXPORURE menu the AUTO option in DAY/NIGHT menu won't be available and the --- sign will be displayed.5) WDR/BLC/ECLPS
WDR is used when your want to see BOTH bright and dark zones of the image. In the mode, you will see the details in both the dark and bright; however, the image sometimes looks a little 'flat'. - Scroll to WDR/BLC/ECLPS using ▲ or ▼. - Use ◀ or ▶ to switch between .  a) If selected WDR press O to enter WDR MENU. \- Use ◀or▶ to select WDR level between LOW/MIDDLE/HIGH.  b) If selected BLC press O to enter BLC MENU. BLC is used when you have a WDR scene, and you want to see the DARK zone, and you do not mind if the bright zone would be saturated. \- Use ◀or▶ for selecting BLC level between LOW/MIDDLE/HIGH.  PREVIOUS – Return to previous menu c) If selected Eclipse press O for entering ECLIPSE MENU. ECLIPSE is mainly used when you want to see cars at night, and want to mask the car strong head-lights. AREA SETTING
\- Scroll to AREA SETTING using ▲ or ▼ and press O. Inside you have 16 in depended ON/OFF areas that you can set manually according to the requirements of the actual environment.  Use ◀ or ▶ to move across the screen and use ▲ or ▼ to set ON/OFF. Press O anywhere on the screen to return to ECLIPSE MENU.ALL AREA SET
Instead of setting each area individually you can select or deselect all areas. - Scroll to ALL AREA SET using ▲ or ▼. - Use◀ or ▶ to set ON/OFF.MASK COLOR
You can choose the color of the eclipse mask. - Scroll to MASK COLOR SET using ▲ or ▼. - Use◀ or ▶ to select a color - GREY, D.GREY, BLACK.ECLPS LEVEL
You can choose the ECLIPSE LEVEL between 1–5. Higher values will increase start the masking at higher level. \- Scroll to ECLPS LEVEL using ▲ or ▼. \- Use◀ or ▶ to set a level between 1-5.GAIN CONTROL
You can set an automatic control for the ECLIPSE LEVEL gain. \- Scroll to GAIN CONTROL ▲ or ▼. \- Use◀ or ▶ to select ON/OFF. PREVIOUS – Return to previous menu6) White Balance Settings
White balance setting can be adjusted according to the color temperature of object. \- Scroll to WHITE BAL using ▲ or ▼. \- Use◀ or ▶ to select between ATW / COL-ROLL / PUSH / MANUAL.  ATW In outdoor environment the color temperature is between 2500°K\~9500°K, For that it's recommended to use ATW. COL-ROLL In indoor environment, the color temperature is between 2000°K\~20000°K. For that it's recommended to use COL-ROLL.PUSH
It is use in environment full of none "white" light (like bright yellow light) which affect the AWB and cause a falls color under AWB. In this case you can take a white paper in natural light environment and choose PUSH. The WB values will be set from now and will not change automatically any more. MANUAL For Setting up WHITE BALACE SETTING manually select MANUAL and press O, The WB MANUAL MENU will appear COLOR TEMP
- Scroll to COLOR TEMP using ▲ or ▼. - Use ◀ or ▶ to set INDOOR/OUTDOOR according to environment conditions.RED
- Scroll to RED using ▲ or ▼. - Use ◀ or ▶ to set amount of RED.BLUE
- Scroll to BLUE using ▲ or ▼. - Use ◀ or ▶ to set amount of BLUE. INITIAL SET – Back to factory default. PREVIOUS – Return to previous menu7) 3D-DNR
The camera is equipped with the most advance Motion compensated 3D-DNR (3-Dimensional Digital Noise Reduction) function; it operates in both spatially and temporally, while calculating and compensating for motion in the image to minimize ghosts. The result is a superior noise reduction with less motion blurring artifacts even at extreme low-light situations. This menu allows the tuning of the camera behavior at low light condition and balance between image quality parameters as noise level versus bluer and ghost. - Scroll to 3D-DNR using ▲ or ▼. - Use ◀ or ▶ to select OFF/ON.  \- If Selected ON press O for more settings and the 3D-DNR MENU will appear.DNR LEVEL
Set the level of noise reduction. The more reduction is set, the image would be more blurry, but with less noise. - Scroll to LEVEL using ▲ or ▼. - Use ◀ or ▶ to select level between 0-63.DESTINATION
Set the level of brightness at low-light conditions. - Scroll to DESTINATION using ▲ or ▼. - Use ◀ or ▶ to select level between 0-63.GLOBAL MOVEMENT
Allows more or less Movement vs. Motion blurs. - Scroll to GLOBAL MOVEMENT using ▲ or ▼. - Use ◀ or ▶ to select ON/OFF. Note: If selected AGC OFF in the EXPOSURE menu, the 3D-DNR function on the MAIN MENU will be automatically OFF! PREVIOUS – Return to previous menu.8) EFFECTS MENU
Here you can find a collection of special effects to handle the image. \- Scroll to EFFECTS using ▲ or ▼.  \- Press O and the EFFECTS MENU will appear DZOOM MODE
Allows you to digitally zoom the image and tour inside it. \- Scroll to DZOOM MODE using ▲ or ▼. \- Use ◀ or ▶ to select ON/OFF. \- If selected ON press O and the DIGITAL ZOOM MENU will appear. ZOOM
- Scroll to ZOOM using ▲ or ▼. - Use ◀ or ▶ to select zoom level X1.00 - X6.13.DZOOM PAN
- Scroll to DZOOM PAN using ▲ or ▼. - Use◀ or ▶ to select PAN LEVEL -100 - +100. - Use ◀ for left, ▶ for right.DZOOM TILT
- Scroll to DZOOM TILT using ▲ or ▼. - Use ◀ or ▶ to select TILT LEVEL -100 - +100 - Use ◀ for up, ▶ for down. PREVIOUS – Return to previous menuIMAGE FREEZE
Pausing the live image. \- Scroll to IMAGE FREEZE using ▲ or ▼. \- Use ◀ or ▶ to select ON/OFF.| DZOOM MODE | OFF |
| IMAGE FREEZE | OFF |
| D-EFFECT | OFF |
| COLOR | ON |
| CONTRAST | 50 ---- |
| SHARPNESS | 50 ---- |
| CR GAIN | 50 ---- |
| CB GAIN | 50 ---- |
| INITIAL SET | |
| PREVIOUS | |
Note:
When selected IMAGE FREEZE- ON DZOOM MODE won't be available and the --- Sign will appear.D-EFFECT
Help you with extreme mounting of the camera - Scroll to D-EFFET using ▲ or ▼. - Use ◀ or ▶ to select between OFF/V-FLIP/MIRROR/ROTATE. Example: OFF  V-FLIP  MIRROR  ROTATE COLOR
Set Color/Black & White picture. \- Scroll to COLOR using ▲ or ▼. \- Use ◀ or ▶ to set ON/OFF.| <EFFECTS MENU> | |
| DZOOM MODE | OFF |
| IMAGE FREEZE | OFF |
| D-EFFECT | OFF |
| COLOR | ON |
| CONTRAST | 50 ----|---- |
| SHARPNESS | 50 ----|---- |
| CR GAIN | 50 ----|---- |
| CB GAIN | 50 ----|---- |
| INITIAL SET← | |
| PREVIOUS | ← |
CONTRAST
Set the CONTRAST of the picture. - Scroll to CONTRAST using ▲ or ▼. - Use ◀ or ▶ to select contrast level between 0 - 100.SHARPNESS
Set the SHARPNESS of the picture. - Scroll to SHARPNESS using ▲ or ▼. - Use ◀ or ▶ to select sharpness level between 0 - 100.CR GAIN
Set CR GAIN level. - Scroll to CR GAIN using ▲ or ▼. - Use ◀ or ▶ to select CR Gain level between 0 - 100.CB GAIN
Set CB GAIN level. - Scroll to CB GAIN using ▲ or ▼. - Use ◀ or ▶ to select CB Gain level between 0 - 100. INITIAL SET – Back to factory default. PREVIOUS – Return to previous menu9) SPECIAL MENU
Here \- Scroll to SPECIAL using ▲ or ▼.  \- Press O and the SPECIAL MENU will appear.| <SPECIAL MENU> | |
| MOTION DET | OFF |
| PRIVACY MASK | OFF |
| LANGUAGE | ENG |
| STABILIZER | OFF |
| L/L SYNC | INT |
| MONITOR TYPE | LCD |
| FACTORY RESET | |
| COMM SET | |
| PREVIOUS | |
MOTION DETECT
Your camera transmits an alert signal when it detects motion of an object on the screen. You can connect the camera to an external alarm or recording system, and activate it when the camera detects motion. The camera allows up to 8 independently-defined zones to be monitored for motion. You can control ON/OFF/WIDTH/HEIGHT/MOVE X/MOVE Y of each zone independently to define if the motion detection mechanism would be active at the zone or not, and to set the zone location in the image and its sensitivity. - Scroll to MOTION DET using ▲ or ▼. - Use ◀ or ▶ to set ON/OFF. - If select ON press O for more settings and the MOTION DET MENU will appear.| <MOTION DET MENU> | |
| ZONE NUMBER | ZONE1 |
| ZONE STATE | OFF |
| WIDTH | 30----|---- |
| HEIGHT | 30----|---- |
| MOVE X | 30----|---- |
| MOVE Y | 30----|---- |
| SENSITIVITY | 30----|---- |
| INITIAL SET ↻ | |
| PREVIOUS | ↗ |
ZONE NUMBER
- Scroll to ZONE NUMBER using ▲ or ▼. - Use ◀ or ▶ to select ZONE1 - ZONE 8.ZONE STATE
- Scroll to ZONE STATE using ▲ or ▼. - Use ◀ or ▶ to set ON/OFF.WIDTH
Enlarge or decrease the horizontal size of the zone - Scroll to WIDTH using ▲ or ▼. - Use ◀ or ▶ to change width 16 - 90.HEIGHT
Enlarge or decrease the vertical size of the zone. - Scroll to HEIGHT using ▲ or ▼. - Use ◀ or ▶ to change height 12 - 54.MOVE X
Moves horizontal position of the zone. - Scroll to MOVE X using ▲ or ▼. - Use ◀ or ▶ to move left or right 8 - 92.MOVE Y
Moves vertical position of the zone - Scroll to MOVE Y using ▲ or ▼. - Use ◀ or ▶ to move up or down 26 - 74.SENSITIVITY
You can set different sensitivity level to each zone. The more sensitive the detection is, it would detect even smaller motion, but it might cause more false alarms, and vise versa. - Scroll to SENSITIVITY using ▲ or ▼. - Use ◀ or ▶ to change sensitivity level 0 – 100. INITIAL SET – Back to factory default PREVIOUS – Return to previous mePRIVACY MASK
This function is aiming at the protection of personal privacy, You can select up to 8 parts on the screen to be masked with colored cover. Size and location of the area is also adjustable. \- Scroll to PRIVACY MASK using ▲ or ▼| <SPECIAL MENU> | |
| MOTION DET | OFF |
| PRIVACY MASK | OFF |
| LANGUAGE | ENG |
| STABILIZER | OFF |
| L/L SYNC | INT |
| MONITOR TYPE | LCD |
| FACTORY RESET | |
| COMM SET | |
| PREVIOUS | |
| MASK NUMBER | MASK1 |
| MASK STATE | OFF |
| MASK COLOR | GRAY |
| WIDTH | 30----|---- |
| HEIGHT | 30----|---- |
| MOVE X | 30----|---- |
| MOVE Y | 30----|---- |
| INITIAL SET | |
| PREVIOUS |
MASK NUMBER
\- Scroll to MASK NUMBER using ▲ or ▼ \- Use ◀ or ▶ to select MASK 1 - MASK 8.MASK STATE
\- Scroll to MASK STATE using ▲ or ▼. \- Use ◀ or ▶ to set ON/OFF.MASK COLOR
\- Scroll to MASK COLOR using ▲ or ▼. \- Use ◀ or ▶ to select a color GRAY/WHITE/RED/GREEN/BLUE/YELLOW/BLACK.WIDTH
Enlarge or decrease the horizontal size of the mask. \- Scroll to WIDTH using ▲ or ▼. \- Use ◀ or ▶ to change width 4 - 60.HEIGHT
Enlarge or decrease the vertical size of the mask. \- Scroll to HEIGHT using ▲ or ▼. \- Use ◀ or ▶ to change height 4 - 50.MOVE X
Moves horizontal position of the mask. \- Scroll to MOVE X using ▲ or ▼. \- Use ◀ or ▶ to move left or right 2 - 98.MOVE Y
Moves vertical position of the mask \- Scroll to MOVE Y using ▲ or ▼. \- Use ◀ or ▶ to move up or down 2 - 98. INITIAL SET – Back to factory default PREVIOUS – Return to previous menuLANGUAGE
You can select a language for the OSD MENU. \- Scroll to LANGUAGE using ▲ or ▼. \- Use ◀ or ▶ to set a language: ENGLISH/ CHINES/RUSSIÁN/SPANISH/FRENCH.| <SPECIAL MENU> | |
| MOTION DET | OFF |
| PRIVACY MASK | OFF |
| LANGUAGE | ENG |
| STABILIZER | OFF |
| L/L SYNC | INT |
| MONITOR TYPE | LCD |
| FACTORY RESET | |
| COMM SET | |
| PREVIOUS | |
STABILIZER
This function helps to stabilize the picture and reduce the image shake when the camera physically moves. This function is useful especially when using a high-zoom lens, where every small movement of the camera results in shake of the image. - Scroll to STABILIZER using ▲ or ▼. - Use ◀ or ▶ to set ON/OFF.L/L SYNC
The Line-Lock (L/L) feature allows the camera to synchronize its frame rate to the power line phase. The function is only available when the camera is operated by AC power. It allows the reduction of the fluorescent lights color rolling effect. When using 12v DC power, the camera is automatically set to internal (INT) synchronization mode.MONITOR TYPE
You can choose the type of screen you are working with between CRT/LCD. - Scroll to MONITOR TYPE using ▲ or ▼. - Use ◀ or ▶ to select CRT/LCD.FACTORY RESET
Restore all settings to factory default settings. - Scroll to FACTORY RESET using ▲ or ▼. - Press O for resetting.COMM SETTINGS
\- Scroll to SPECIAL MENU using ▲ or ▼.| <SPECIAL MENU> | |
| MOTION DET | OFF |
| PRIVACY MASK | OFF |
| LANGUAGE | ENG |
| STABILIZER | OFF |
| L/L SYNC | INT |
| MONITOR TYPE | LCD |
| FACTORY RESET | |
| COMM SET | |
| PREVIOUS | |
DISPLAY ID
You can choose if your camera ID will be displayed or not. \- Scroll to DISPLAY ID using ▲ or ▼. \- Use ◀ or ▶ to select ON/OFF.ID POSITION
You can choose the position where your camera ID will be displayed on the monitor. \- Scroll to ID POSITION using ▲ or ▼ and press O. \- Use ◀ or ▶ to select a position and press O when finished. 001 ◀ ▶ MOVE AND PRESS SET PREVIOUS – Return to previous menu. BAUD RATE - Default 9600 \- Scroll to BAUD RATE using ▲ or ▼. \- Use ◀ or ▶ to set baud rate value 4800/9600/19200/38400/57600. SAVE/REBOOT Saves settings and reboots the camera. \- Scroll to SAVE/REBOOT using ▲ or ▼. \- Press O to SAVE/REBOOT. PREVIOUS – Return to previous menu. Specifications| MODEL | BX-371UV |
| Image Sensor | 1/3" Sony CCD (PAL:ICX639BK/NTSC:ICX638BK) |
| DSP System | Ultra Vision DSP |
| Effective Pixels | PAL: 752(H)×582(V) / NTSC: 768(H)×494(V) |
| Scanning System | 2 : 1 Interlace |
| O.S.D | Available |
| Sync. System | Internal/Line lock |
| Horizontal Resolution | 650TVL |
| 3D-DNR | Off/ On(1~63 level adjustable) |
| S/N(Y Sing al) | 52dB(AGC OFF) |
| Lens mount | C/CS |
| Minimum Illumination | Color: 0.003(0.6)Lux(Sens-up OFF)/B/W: 0.0001(0.1)Lux(Sens-up OFF) |
| Privacy zone | On/Off(8Zone) |
| Sens-up | Auto/Fixed/Off(selectable limit ×2~×512) |
| Motion Detection | On/Off(8Zone, Alarm output) |
| Dynamic Range | 52dB(×128) |
| Digital Zoom | On(×10)/Off |
| Electronic Shutter Speed | NTSC:1/60sec-1/120,000sec PAL:1/50sec-1/120,000sec |
| Backlight Compensation | WDR/BLC/OFF selectable |
| Gain Control | Low/Middle/High/Off selectable |
| D/N Selection | Color/Black&White/Auto/Exit |
| STABILIZER | On / Off |
| Mirror(H-REV) | On / Off |
| FLIP(V-REV) | On / Off |
| White Balance | ATW/AWC/Manual/Outdoor |
| Freeze | On / Off |
| SHARPNESS | On/Off(Level Adjutable) |
| Blemish compensation | 64 Point(Even 32 point, ODD 32 point) |
| Iris Control | DC/Manual |
| Power | DC12±10% Max 2.0W |
| Weight | 410g |
| Dimension | 122L×75W×65Hmm |
| MODEL | DX-371UVVF |
| Image Sensor | 1/3" Sony CCD (PAL:ICX639BK/NTSC:ICX638BK) |
| DSP System | Ultra Vision DSP |
| Effective Pixels | PAL: 752(H)×582(V) / NTSC:768(H)×494(V) |
| Scanning System | 2 : 1 Interlace |
| OSD | Available |
| Sync. System | Internal/Line lock |
| Horizontal Resolution | 650TVL |
| 3D-DNR | Off/On(1~63 level adjustable) |
| S/N(Y Singal) | 52dB(AGC OFF) |
| Lens mount | 2.8~12mm Van-Focal Mega-PixelLens |
| Minimum Illumination | Color: 0.003(0.6)Lux(Sens up OFF)/B/W: 0.0001(0.1)Lux(Sens up OFF) |
| Privacy zone | On/Off(8Zone) |
| Sens-up | Auto/Fixed/Off(selectable limit ×2~×512) |
| Motion Detection | On/Off(8Zone, Alarm output) |
| Dynamic Range | 52dB(×128) |
| Digital Zoom | On(×10)/Off |
| Electronic Shutter Speed | NTSC:1/60sec-1/120.000sec PAL:1/50sec-1/120.000sec |
| Backlight Compensation | WDR/BLC/OFF selectable |
| Gain Control | Low/Middle/High/Off selectable |
| D/N Selection | Color/Black&White/Auto/Exit |
| STABILIZER | On / Off |
| Mirror(H-REV) | On / Off |
| FLIP(V-REV) | On / Off |
| White Balance | ATW/AWC/Manual/Outdoor |
| Freeze | On / Off |
| SHARPNESS | On/Off(Level Adjustable) |
| Blemishcompensation | 64 Point(Even32 point, ODD32 point) |
| Iris Control | DC/Manual |
| Power | DC12±10% Max 2.0W |
| Dimension | 100W x 80H mm |
| Weight | 280g |
| MODEL | DA-371UVVF |
| Image Sensor | 1/3" Sony CCD (PAL:ICX639BK/NTSC:ICX638BK) |
| DSP System | Ultra Vision DSP |
| Effective Pixels | PAL: 752(H)×582(V) / NTSC: 768(H)×494(V) |
| Scanning System | 2 : 1 interlace |
| OSD | Available |
| Sync. System | Internal/Line lock |
| Horizontal Resolution | 650TVL |
| 3D-DNR | Off/ On(1~63 level adjustable) |
| S/N(Y Singal) | 52dB(AGC OFF) |
| Lens mount | 2.8~12mm Vari-Focal Mega-PixelLens |
| Minimum Illumination | Color: 0.003(0.6)Lux(Sens-up OFF)/B/W: 0.0001(0.1)Lux(Sens-up OFF) |
| Privacy zone | On/Off(8Zone) |
| Sens-up | Auto/Fixed/Off(selectable limit |
| Motion Detection | ×2~×512)On/Off(8Zone, Alarm output) |
| Dynamic Range | 52dB(×128) |
| Digital Zoom | On(×10)/Off |
| Electronic Shutter Speed | NTSC:1/60sec-1/120,000sec PAL:1/50sec-1/120,000sec |
| Backlight Compensation | WDR/BLC/OFFselectable |
| Gain Control | Low/Middle/High/Off selectable |
| D/N Selection | Color/Black&White/Auto/Exit |
| STABILIZER | On / Off |
| Mirror(H-REV) | On / Off |
| FLIP(V-REV) | On / Off |
| White Balance | ATW/AWC/Manual/Outdoor |
| Freeze | On / Off |
| SHARPNESS | On/Off(Level Adjustable) |
| Blemishcompensation | 64 Point(Even32 point, ODD32point) |
| Iris Control | DC/Manual |
| Power | DC12±10% Max 2.0W |
| Dimension | 115W x 90H mm |
| Weight | 520g |
| MODEL | DI-371UVVF |
| Image Sensor | 1/3" Sony CCD (PAL:ICX639BK/NTSC:ICX638BK) |
| DSP System | UltraVision DSP |
| Effective Pixels | PAL: 752(H)×582(V) / NTSC: 768(H)×494(V) |
| Scanning System | 2 : 1 Interface |
| OSD | Available |
| Sync. System | Internal/Line lock |
| Horizontal Resolution | Color 650TVL |
| 3D-DNR | Off/On(1~63 level adjustable) |
| S/N(Y Singal) | 52dB(AGC OFF) |
| Lensmount | 4~9mm Vari-Focal |
| Minimum Illumination | Color: 0.003(0.6)Lux(Sens-up OFF) (0 Lux IR On) 36 IR Led 25m |
| Privacy zone | On/Off(8Zone) |
| Sens-up | Auto/Fixed/Off(selectable limit ×2~×512) |
| MotionDetection | On/Off(8Zone, Alarmoutput) |
| Dynamic Range | 52dB(×128) |
| Digital Zoom | On(×10)/Off |
| Electronic Shutter Speed | NTSC:1/60sec-1/120,000sec PAL:1/50sec-1/120,000sec |
| Backlight Compensation | WDR/BLC/OFF selectable |
| Gain Control | Low/Middle/High/Off selectable |
| D/N Selection | Color/Black&White/Auto/Exit |
| STABILIZER | On / Off |
| Mirror(H-REV) | On / Off |
| FLIP(V-REV) | On / Off |
| WhiteBalance | ATW/AWC/Manual/Outdoor |
| Freeze | On / Off |
| SHARPNESS | On/Off(Level Adjutable) |
| Blemishcompensation | 64 Point(Ever82 point, ODD32point) |
| IrisControl | DC/Manual |
| Power | DC12±10% Max 2.0W |
| Dimension | 118W x 94H mm |
| Weight | 730g |
| MODEL | MC-371UV |
| Image Sensor | 1/3" Sony CCD (PAL:ICX639BK/NTSC:ICX638BK) |
| DSP System | Ultra Vision DSP |
| Effective Pixels | PAL: 752(H)×582(V) / NTSC: 768(H)×494(V) |
| Scanning System | 2 : 1 Interlace |
| OSD | Available |
| Sync. System | Internal/Line lock |
| Horizontal Resolution | Color 650TVL |
| 3D-DNR | Off/On(1~63 level adjustable) |
| S/N(Y Singal) | 52dB(AGC OFF) |
| Lensmount | 3.7mm Lens |
| Minimum Illumination | Color: 0.009(0.6)Lux(Sens-up OFF)/B/W: 0.0001(0.1)Lux(Sens-up OFF) |
| Privacy zone | On/Off(8Zone) |
| Sens-up | Auto/Fixed/Off(selectable limit ×2~×512) |
| Motion Detection | On/Off(8Zone, Alarm output) |
| Dynamic Range | 52dB(×128) |
| Digital Zoom | On(×10)/Off |
| Electronic Shutter Speed | NTSC:1/60sec-1/120,000sec PAL:1/50sec-1/120,000sec |
| Backlight Compensation | WDR/BLC/OFF selectable |
| Gain Control | Low/Middle/High/Off selectable |
| D/N Selection | Color/Black&White/Auto/Exit |
| STABILIZER | On / Off |
| Mirror(H-REV) | On / Off |
| FLIP(V-REV) | On / Off |
| WhiteBalance | ATW/AWC/Manual/Outdoor |
| Freeze | On / Off |
| SHARPNESS | On/Off(Level Adjustable) |
| Blemishcompensation | 64 Point(Even32 point, ODD32 point) |
| IrisControl | DC/Manual |
| Power | DC12±10% Max 2.0W |
| Dimension | 43L x 30W x43Hmm |
| Weight | 90g |
| MODEL | I4s-371UVVF |
| Image Sensor | 1/3" Sony CCD (PAL:ICX639BK/NTSC:ICX638BK) |
| DSP System | Ultra Vision DSP |
| Effective Pixels | PAL: 752(H)×582(V) / NTSC: 768(H)×494(V) |
| Scanning System | 2 : 1 Interface |
| OSD | Available |
| Sync. System | Internal/Line lock |
| Horizontal Resolution | Color 650TVL |
| 3D-DNR | Off/On(1~63 level adjustable) |
| S/N(Y Singal) | 52dB(AGC OFF) |
| Lensmount | 4~9mm Var-Focal |
| Minimum Illumination | 36 IR Led 25m to -> 1led Array 40m |
| Privacy zone | On/Off(8Zone) |
| Sens-up | Auto/Fixed/Off(selectable limit x2~x512) |
| Motion Detection | On/Off(8Zone, Alarmoutput) |
| Dynamic Range | 52dB(x128) |
| Digital Zoom | On(x10)/Off |
| Electronic Shutter Speed | NTSC:1/60sec-1/120,000sec PAL:1/50sec-1/120,000sec |
| Backlight Compensation | WDR/BLC/OFF selectable |
| Gain Control | Low/Middle/High/Off selectable |
| D/N Selection | Color/Black&White/Auto/Exit |
| STABILIZER | On/ Off |
| Mirror(H-REV) | On/ Off |
| FLIP(V-REV) | On/ Off |
| White Balance | ATW/AWC/Manual/Outdoor |
| Freeze | On/Off |
| SHARPNESS | On/Off(Level Adjutable) |
| Blemishcompensation | 64 Point(Ever82 point, ODD 32point) |
| Iris Control | DC/Manual |
| Power | DC12±10% Max 2.0W |
| Dimension | 161L x82Wx 78H mm |
| Weight | 770g |
PROVISION
ISR
Now you can see! UltraVision Series
Breakthrough DSP OSD MANUAL ESPAÑOLContenido
General 50 Precauciones 50 Características 51 OSD Menú 53 OSD Menú de Operación 55 1) Usuario 55 2) Lente/Iris 58 3) Exposición 60 4) Día/Noche 63 5) WDR/BLC/ECLPS 66 6) Modo Balance de Blanco 70 7) 3D-DNR 73 8) Ajuste de Imagen 75 9) Menú Especial 81 10) Guardar y Salir 89 Especificaciones 90 Nota:
Para prevención de choques eléctricos o fuego, por favor use la corriente apropiada, acorde con el manual.General
Gracias por usar nuestros productos. Ante todo, por favor, lea cuidadosamente este manual para asegurar un correcto uso del producto. Por favor conserve este manual para cualquier consulta futura. Esta serie de cámaras posee un sensor CCD de alta sensibilidad y todos los circuitos soportan una prolongada vida útil, una alta conabilidad y una excelente imagen.Precauciones
1. No instale la cámara en sitios cuya temperatura supera los 50°C o por debajo de los -10°C. 2. No tocar la supericie del CCD con los dedos. Si necesita limpieza utilice un paño suave con alcohol. 3. No instale la cámara en sitios de mucha humedad podría dañar la calidad de imagen. 4. No exponga la cámara a golpes. 5. No exponga la cámara a fuertes luces que podrían dañar el CCD. 6. No exponga la cámara a lluvia o sitios con polvo. 7. Es sumamente i importante utilizar la fuente de alimentación correcta para la cámara (DC12V). 8. Se requiere la instalación por personal técnico calificado 9. Si se produce algún fallo durante el uso de la cámara inmediatamente corte el suministro eléctrico de la cámara y contacte a su distribuidor local.Características
WDR (Wide Dynamic Range) (Amplio Rango Dinámico) : Provee un potenteAmplio Rango Dinámico, permitiendo a la cámara transmisión de colores vivos y sin pérdida de detalles. Las dificultades de iluminación son automáticamente compensadas extrayendo detalles de excesivo brillo o áreas oscuras, sin interrupción o saturación Las cámaras Ultravision WDR poseen un poderoso sistema de compensación de luz que permite visualizar la imagen en forma clara y en perfecto contraste en cualquier tipo de ambiente. D-DNR (Digital Noise Reduction) (Reducción digital de ruidos): Equipada con la más avanzada tecnología en compensación de movimiento 3D-DNR (3-Dimensional Digital Noise Reduction) Con esta potente función DSPse eliminarán los ruidos en imagen eficientemente permitiendo claridad de imagen aun con baja luminosidad El resultado es una superior reducción de ruidos con menor pérdida de claridad y enfoque de objetos en movimiento aún en situaciones de baja iluminación. - TVL2– Muy Alta Resolución Horizontal y Vertical: Ambas resoluciones, Vertical como Horizontal son muy altas. Mientras las cámaras de alta resolución mejoran solo la resolución horizontal, las cámaras Ultra Visión DSP logran una resolución horizontal de 600 TV Líneas en modo color, y hasta 700 TV Líneas con sensor blanco/negro y al mismo tiempo logra una resolución vertical of 580TVL. Eclipse: La función eclipse bloquea las áreas con alto y permite una mejor visibilidad en otras áreas. Un ejemplo de uso de esta función es para reconocer el número de licencia de automóviles por la noche donde las luces de sus faros son muy brillantes - DIS (Estabilización digital de imagen): Provee una estabilización digital de imagen permitiendo una estable y agradable calidad de video aun en situaciones de movimientos o sacudidas. Esta característica es especialmente importante para altos zoom donde cualquier pequeño movimiento puede causar una gran molestia en la visualización de la imagen. D Zoom x1-x10: Avanzada tecnología de zoom digital que permite programar magnificación de imagen hasta un factor x 10, y escalar ciertas regiones de interés de la imagen a pantalla completa. - Rotación Vertical y Horizontal : Mecanismo interno que permite la rotación de la imagen generada para facilitar la instalación de la cámara en posiciones de sujecióncomplicadas. Corrección de Malos Pixeles: Corrige los llamados pixeles malos compensandoel sensor de lente y evitando pixeles manchados Corrige hasta 64 defectos de imagen. El resultado es una imagen clara y sin manchas blancas - Mascaras de Privacidad : Protege áreas privadas mediante la colocación de mascaras en la imagen de salida pudiendo definir hasta 8 máscaras y su ubicación en pantallaOSD Menú
Esta cámara utiliza un menú de usuario en pantalla. Para configurar los diferentes parámetros utilice el botón abriendo la tapa OSD MENU.  Controlador OSD para Box Camera  Controlador OSD para cámaras Domo y Cámara Agujero de alfiler ▲ – Movimiento de cursor hacia arriba. ▼ - Movimiento de cursor hacia abajo. - Movimiento de cursor hacia izquierda. - Movimiento de cursor hacia derecha. O - Muestra el MENU PRINCIPAL, p resione para seleccionar ítem y mostrar submenú- OSD Menú Principal Menú principal
OSD Menú de Operación
- Para ingresar al Menú Principal en pantalla presionar el botón O. El Menú Principal aparecerá en el monitor. - Para salir del menú principal desplazar el cursor mediante el botón ▲ o ▼ hasta 10. Guardar y Salir y presionar el botón central. Nota: Cuando vea el símbolo  Presione O para abrir submenú| 1.USUARIO | OFF |
| 2.IRIS | AUTO |
| 3.EXPOSICION | |
| 4.DIA/NOCHE | AUTO |
| 5.WDR/BLC/ECLPS | ATW |
| 6.MODO WB | ON |
| 7.3D-DNR | OFF |
| 8.AJUSTE IMAGEN | |
| 9.ESPECIAL | |
| 10.GUARDAR Y SALIR | ATRAS |
1) USUARIO
Podrá ajustar el nombre de la cámara que se visualizará en el monitor. - Desplace el cursor usando ▲ o ▼. - use ◀ o ▶ y seleccione ON y presione el boton O.| 1. USUARIO | OFF |
| 2.IRIS | AUTO |
| 3.EXPOSICION | |
| 4.DIA/NOCHE | AUTO |
| 5.WDR/BLC/ECLPS | ATW |
| 6.MODO WB | ON |
| 7.3DDNR | OFF |
| 8.AJUSTE IMAGEN | |
| 9.ESPECIAL | |
| 10.GUARDAR Y SALIR | ATRAS |
| a | b | c | d | e | f | g | h | l | j | k | l | m |
| nopqrstuvwxyz |
| - | 0123456789 |
2) Iris
Iris es un mecanismo que se cierra o abre permitiendo el ingreso de más o menos luz al. La cámara soporta 2 tipos de ajustes: * Iris lente MANUAL, donde la apertura es fija o ajustable por el usuario. * Iris lente AUTO, donde la apertura es continuamente controlada automáticamente por la cámara pudiendo ajustar el nivel de brillo deseado. En este modo automático el menú permite ajustar la lente agregada a su cámara y ajustar el brillo deseado. \- Desplace el cursor a IRIS usando ▲ o ▼ \- Use ◀ o ▶ para seleccionar MANUAL o AUTO. \- Cuando seleccione MANUAL no necesitara de otros ajustes.| <CONFIGURACION CAMERA> | |
| 1. USUARIO | OFF |
| 2. IRIS | AUTO |
| 3. EXPOSICION | |
| 4. DIA/NOCHE | AUTO |
| 5. WDR/BLC/ECLPS | ATW |
| 6. MODO WB | ON |
| 7. 3D-DNR | OFF |
| 8. AJUSTE IMAGEN | |
| 9. ESPECIAL | |
| 10. GUARDAR Y SALIR | ATRAS |
3) Exposición
El control de exposición puede ser ajustado para compensar las condiciones de luz. Use este menú para un control automático de brillo. El modo Exposición permite el ajuste del Control Automático de Ganancia (AGC), Control de Obturador y Obturador digital lento (SENS-UP). Estos ajustes determinan el modo en que la cámara se comportará en distintos niveles de iluminación que afectarán en la calidad de video. \- desplazar el cursor al modo EXPOSICION usando ▲o▼.  \- Presionar O para ingresar al MENU EXPOSICION. AGC (Control Automático de Ganancia)
En condiciones de poca luz, si la imagen es muy oscura, seleccione entre OFF/BAJO /MEDIO/ALTO. Un nivel alto AGC significa que la cámara amplificará la señal de entrada del sensor CCD, y la imagen podrá ser más brillante pero también más ruidosa. - Desplazar el cursor a AGC usando ▲ o ▼. - Use ◀ o ▶ para seleccionar el nivel de ganancia.OBTURADOR
Controla la cantidad de luz de acuerdo a la condición ambiental – Aumenta el valor de obturador en ambientes oscuros dando una imagen más clara. Reduce el valor de obturador en ambientes con más luz reduciendo así el exceso de luz que ingresa en la cámara. - Desplace el cursor a OBTURADOR usando ▲ or ▼. - Use ◀ o ▶ para cambiar la velocidad de obturador: AUTO / OFF / A.FLK /1/160 - 1/90000, X2 - X512.SENS-UP
Habilitando este modo, la cámara usara un valor de obturador lento cuando sea necesario (field time). . El Field time es equivalente a:1/50 seg (PAL) o 1/60 (NTSC). El menú permite el ajuste de limitación del obturador, donde x2 se refiere a 1/50 seg, x50 es 1 segundo, etc. - Desplace a SENS-UP usando ▲ o ▼. - Use ◀ o ▶ para ajustar el límite de SENS-UP OFF/X2 – X512. Los valores mayores de X16 causaran que el objeto en movimiento aparecerá borroso en condiciones de baja iluminación. Nota: Los ajustes de SENS-UP estarán habilitados solo en el modo AUTO / A.FLK del obturador. En otro estado, el SENS-UP aparecerá con las marcas ----. AJUSTE INICIAL – Retorna a los valores de fábrica. ATRAS – Retorna al menú anterior.4) Ajuste Día/Noche
El modo Día/Noche es un mecanismo de variación del filtro óptico IRC o IR. AUTO – ajusta el filtro automáticamente, DIA – fuerza el uso del filtro IRC (color), and NOCHE- fuerza el uso del filtro IR-PASS (y muestra la imagen Blanco y Negro). EXT- es usado por IR inteligente donde Leds infrarrojos vienen provistos en la cámara que suministran información de iluminación. - Desplace el cursor a DIA/NOCHE usando ▲o▼. - Seleccione DIA/NOCHE /EXT /AUTO usando ◀ o ▶. NIVEL D/N
Nivel de oscuridad el cual la cámara alternara el filtro IR de Día a Noche \- Desplace el cursor a Nivel D/N usando ▲o▼. \- Use ◀ o ▶ para cambiar entre BAJO/MEDIO/ALTO.FILTRO DE RETARDO
Es el tiempo (en segundos) de espera previo al intercambio entre el modo Día/Noche. \- Desplace el cursor a RETARDO FILTRO usando ▲o▼. \- Use ◀ o ▶ cambie el valor de 1seg - 60seg.BURST NOCTURNO
Permite deshabilitar los estallidos de color en la señal de video en el modo NOCHE. \- Desplace el cursor a BURST NOCHE usando ▲o▼. \- Use ◀ o ▶ para intercambiar ON/OFF. Si selecciona EXT presione O para entrar al Menu D/N EXT. Este modo está relacionado con los Smart-IR cuando se trabaja con cámaras IR-LED. Se refiere al nivel de saturación que la cámara permitirá en horario nocturno cuando los IR Leds estén en funcionamiento. \- Use ◀o▶ para seleccionar el modo ON/OFF.  ATRAS – Retorna al menú anterior. Note: Si el modo AGC es OFF en el menú EXPOSICION, la opción AUTO en el menú DIA/NOCHE no estará habilitada y aparecerán los signos ---.5) WDR/BLC/ECLPS
WDR (wide dynamic range) es usada para visualizar ambas zonas de brillo y oscuridad de la imagen. \- Desplace el cursor a WDR/BLC/ECLPS usando ▲o▼. - Use ◀ o ▶ para intercambiar entre WDR/BLC/ECLPS.  a) Si selecciona WDR presione O e ingrese al MENU WDR. - Use ◀o▶ para seleccionar el limite WDR bajo/medio/alto.  Si selecciona BLC presione O e ingrese al MENU BLC. BLC es usado cuando existe una imagen WDR, y se quiere ver la zona oscura, sin acentuar la zona brillosa hasta saturarla. \- Use ◀o▶ para seleccionar el nivel BLC bajo/medio/alto.  ATRAS – Retorna al menú anterior c) Si selecciona Eclipse presione O e ingrese al ECLIPSE MENU ECLIPSE es comúnmente usado cuando se desea visualizar automóviles en la noche y evitar el encandilamiento. AJUSTE AREA
\- Desplace el cursor AJUSTE AREA usando ▲o▼ y presione O. Dentro de la imagen existen 16 áreas independientes ON/OFF que podrán ser ajustadas manualmente de acuerdo a las necesidades del ambiente. ON OFF OFF OFF OFF OFF OFF OFF OFF OFF OFF OFF OFF OFF OFF OFF Use ◀ o ▶ para deplazamiento entre areas y ▲o▼ para ON/OFF. Presionar O en cualquier momento para retornar al ECLIPSE MENU.SELECCIONAR TODO
Mediante este modo se podrá también seleccionar o deseleccionar toda el área en lugar de ajustar cada área individualmente. - Desplace el cursor a SELECCIONAR TODO usando ▲ o ▼. - Use ◀ o ▶ y ajuste ON/OFF.COLOR AREA
Se podrá seleccionar el color de la máscara de eclipse. - Desplace el cursor a COLOR DE AREA usando ▲ o ▼. - Use ◀ o ▶ y seleccione un color - gris, gris oscuro, negro. AJUSTE DE AREA SELEC TODO OFF COLOR DE AREA GRAY NIVEL ECLPS 1----|---- GAIN CONTROL OFF ATRASNIVEL ECLIPSE
Se podrá seleccionar NIVEL ECLIPSE entre 1–5. A mayor valor aumentara el inicio de la máscara a mayor nivel. - Desplace el cursor ECLPS LEVEL usando ▲ o ▼. - Use ◀ o ▶ para ajustar el nivel entre 1-5.GAIN CONTROL
Se podrá ajustar el automático control de ganancia del NIVEL DE ECLIPSE. - Desplace el cursor a GAIN CONTROL usando ▲ o ▼. - Use ◀ o ▶ para seleccionar ON/OFF. ATRAS – Retorna al menú anterior6) Ajuste de WB (Balance de Blancos)
El ajuste del Balance de Blancos podrá ser ajustado de acuerdo a la temperatura de color del objeto. - Desplace el cursor a MODO WB usando ▲ o ▼. - Use ◀ o ▶ para seleccionar entre ATW / COL-ROLL / AWC / MANUAL.ATW
En ambientes exteriores la temperatura de color oscila entre 2500°K\~9500°K, para estos se recomienda usar el modo ATW.COL-ROLL
En ambientes interiores, la temperatura de color oscila entre 2000°K\~20000°K. para estos se recomienda usar el modo COL-ROLL.AWC
Si el ambiente no posee luminosidad blanco (como ser luces amarillentas) que afectan causando colores no verdaderos bajo el AWB. En este caso, tomar un papel blanco y elegir el modo AWC para fijar el nivel de blanco del ambiente.MANUAL
Para ajustar el balance de blanco manualmente seleccionar MANUAL y presionar O, y aparecerá MENU WB MANUAL. TEMPERATURA DE COLOR
- Desplace el cursor a COLOR TEMP usando ▲ o ▼. - Use ◀ o ▶ para ajustar INTERIOR/EXTERIOR de acuerdo a las condiciones ambientales.ROJO
- Desplace el cursor a ROJO usando ▲ o ▼. - Use ◀ o ▶ para ajustar la cantidad de ROJO.AZUL
- Desplace el cursor a AZUL usando ▲ o ▼. - Use ◀ o ▶ para ajustar la cantidad de AZUL. AJUSTE INICIAL – Retorna a los valores de fabrica. ATRAS – Retorna al menú anterior.7) 3D-DNR
La cámara está equipada con el más avanzado sistema de compensación de movimiento 3D-DNR (3-Dimensional Digital Noise Reduction) ; que opera en ambos parámetros y tiempo, calculando y compensando el movimiento en la imagen para minimizar los fantasmas de imagen. El resultado es una superior reducción de ruidos en la imagen con menor desenfoque aun en condiciones extremas de baja iluminación. Este menú permite la sintonización del comportamiento de la cámara en condiciones de baja luz y balance entre los parámetros de calidad de la imagen tales como nivel de ruido contra niveles de azul y fantasma. - Desplace el cursor a 3D-DNR usando ▲ o ▼. - Use ◀ o ▶ para seleccionar OFF/ON.  \- Si selecciona ON presione O aparecerá el MENU 3D-DNR permitiendo así otros ajustes.NIVEL DNR
Ajuste el nivel de reducción de ruido. La mayor reducción produce un mayor enfoque con menor ruido. - Desplace el cursor a LEVEL usando ▲ o ▼. - Use ◀ o ▶ para seleccionar el nivel entre 0-63.DESTINATION
Ajuste el nivel de brillo en condiciones de baja luminosidad. - Desplace el cursor a DESTINATION usando ▲ o ▼. - Use ◀ o ▶ para seleccionar el nivel entre 0-63.MOVIMIENTO GLOBAL
Permite mayor o menor Movimiento vs. Enfoque de movimiento. - Desplace el cursor a MOVIMIENTO GLOBAL usando ▲ o ▼. - Use ◀ o ▶ para seleccionar ON/OFF. Note: Si el modo AGC es OFF en el menú EXPOSICION. La función 3D-DNR en el Menú Principal será automáticamente OFF ! ATRAS – Retorna al menú anterior.8) MENU AJUSTE IMAGEN
Aquí podrá encontrar una colección de efectos especiales para mejorar la imagen. \- Desplace el cursor a AJUSTE IMAGEN usando ▲ o ▼.  \- Presionar O y aparecerá MENU AJUSTE IMAGEN ZOOM DIGITAL
Permite el zoom digital y el desplazamiento en la imagen. \- Desplace el cursor a ZOOM DIGITAL usando ▲ o ▼. \- Use ◀ o ▶ para seleccionar ON/OFF. \- Si selecciona ON presione O y se abrirá MENU ZOOM DIGITAL ZOOM
- Desplace el cursor a ZOOM usando ▲ o ▼. - Use ◀ o ▶ para seleccionar nivel zoom X1.00 - X6.13.DZOOM PAN
- Desplace el cursor a DZOOM PAN usando ▲ o ▼. - Use ◀ o ▶ para seleccionar PAN LEVEL -100 - +100. - Use ◀ hacia la izquierda, ▶ hacia la derecha.DZOOM TILT
- Desplace el cursor a DZOOM TILT usando ▲ o ▼. - Use ◀ o ▶ para seleccionar TILT LEVEL -100 - +100 - Use ◀ hacia arriba, ► hacia abajo. ATRAS – Retorna al menú anterior.IMAGEN CONGELADA
Produce una pausa en la imagen en vivo. - Desplace el cursor a CONGELADO usando ▲ o ▼. - Use ◀o ▶ para seleccionar ON/OFF.  Nota: Cuando seleccione CONGELADO en ON el modo ZOOM DIGITAL no estará disponible apareciendo el símbolo ---.MODO REVERSO
Este modo permitirá montar la cámara en lugares de difícil sujeción. - Desplace el cursor a MODO REVERSO usando ▲ o ▼. - Use ◀ o ▶ para seleccionar entre: OFF/flip/espejo /rotación. Ejemplo: OFF  V-FLIP  ESPEJO  ROTACION CONTRASTE
Ajuste el CONTRASTE de la imagen. \- Desplace el cursor a CONTRAST usando ▲ o ▼. \- Use ◀o ▶ para seleccionar nivel contrast e entre 0 – 100.NITIDEZ
Ajuste el NITIDEZ de la imagen. \- Desplace el cursor a NITIDEZ usando ▲ o ▼. \- Use ◀o ▶ para seleccionar nivel contrast e entre 0 – 100.MENU AJUSTE DE COLOR
Este menú permitirá ajustar distintos parámetros de color de la imagen \- Desplace el cursor a AJUSTE DE COLOR usando ▲ o ▼.- CONTENT
- NOTA
- NOTE
- GENERAL
- PRECAUTIONS
- FEATURES
- WDR (WIDE DYNAMIC RANGE)
- D-DNR (DIGITAL NOISE REDUCTION)
- TVL2 – ULTRA HIGH H&V RESOLUTION
- ECLIPSE
- DIS (DIGITAL IMAGE STABILIZATION)
- D ZOOM X1-X10
- VERTICAL AND HORIZONTAL FLIP
- BAD PIXEL CORRECTION
- PRIVACY MASKING
- OSD MENU
- OSD MAIN MENU
- OSD MENU OPERATION
- CAMERA NAME
- LENS
- EXPOSURE
- AGC (AUTOMATIC GAIN CONTROL)
- SHUTTER
- SENS-UP
- DAY/NIGHT SETTINGS
- D/N LEVEL
- FILTER DLY
- NIGHT BURST
- WDR/BLC/ECLPS
- AREA SETTING
- ALL AREA SET
- MASK COLOR
- ECLPS LEVEL
- GAIN CONTROL
- WHITE BALANCE SETTINGS
- PUSH
- COLOR TEMP
- RED
- BLUE
- 3D-DNR
- DNR LEVEL
- DESTINATION
- GLOBAL MOVEMENT
- EFFECTS MENU
- DZOOM MODE
- ZOOM
- DZOOM PAN
- DZOOM TILT
- IMAGE FREEZE
- D-EFFECT
- COLOR
- CONTRAST
- SHARPNESS
- CR GAIN
- CB GAIN
- SPECIAL MENU
- MOTION DETECT
- ZONE NUMBER
- ZONE STATE
- WIDTH
- HEIGHT
- MOVE X
- MOVE Y
- SENSITIVITY
- PRIVACY MASK
- MASK NUMBER
- MASK STATE
- LANGUAGE
- STABILIZER
- L/L SYNC
- MONITOR TYPE
- FACTORY RESET
- COMM SETTINGS
- DISPLAY ID
- ID POSITION
- PROVISION
- ISR
- ULTRAVISION SERIES
- CONTENIDO
- PRECAUCIONES
- CARACTERÍSTICAS
- OSD MENÚ
- OSD MENÚ PRINCIPAL MENÚ PRINCIPAL
- OSD MENÚ DE OPERACIÓN
- USUARIO
- IRIS
- EXPOSICIÓN
- AGC (CONTROL AUTOMÁTICO DE GANANCIA)
- OBTURADOR
- AJUSTE DÍA/NOCHE
- NIVEL D/N
- FILTRO DE RETARDO
- BURST NOCTURNO
- AJUSTE AREA
- SELECCIONAR TODO
- COLOR AREA
- NIVEL ECLIPSE
- AJUSTE DE WB (BALANCE DE BLANCOS)
- ATW
- COL-ROLL
- AWC
- MANUAL
- TEMPERATURA DE COLOR
- ROJO
- AZUL
- NIVEL DNR
- MOVIMIENTO GLOBAL
- MENU AJUSTE IMAGEN
- ZOOM DIGITAL
- IMAGEN CONGELADA
- MODO REVERSO
- CONTRASTE
- NITIDEZ
- MENU AJUSTE DE COLOR
- TONALIDAD
- GANANCIA ROJO
- GANANCIA AZUL
- MENU ESPECIAL
- DETECCION MOVIMIENTO
- NUMERO DE ZONA
- ACTIVAR ZONA
- ANCHURA
- ALTURA
- MOVIMIENTO X
- MOVIMIENTO Y
- SENSIBILIDAD
- MASCARA DE PRIVACIDAD
- NUMERO MASCARA
- ACTIVA MASCARA
- COLOR DE MASCARA
- ANCHO DE MASCARA
- ALTURA DE MASCARA
- MOVIMIENTO X (HORIZONTAL)
- MOVIMIENTO Y (VERTICAL)
- IDIOMA
- ESTABILIZADOR
- SINCRONIZACION
- TIPO DE MONITOR
- AJUSTE DE FABRICA
- COMUNICACION
- ID DE CAMARA
- POSICION DE ID
- ATRAS – RETORNA AL MENÚ ANTERIOR
- BAUDIOS
- GUARDAR Y REINICIAR
- GUARDAR Y SALIR
Brand : Provision-ISR
Model : I3-371UVVF
Category : Security Camera