
DWS20BX - Dishwasher SAUTER - Free user manual and instructions
Find the device manual for free DWS20BX SAUTER in PDF.


| Product Type | Built-in Dishwasher |
| Brand | Sauter |
| Model | DWS20BX |
| Dimensions (H x W x D) | 85 x 60 x 60 cm (approximate) |
| Weight | 45 kg (approximate) |
| Power Supply | 220-240 V / 50 Hz / 10 A |
| Capacity | 12 place settings |
| Programmes | Soak, Intensive, Normal, Eco |
| Energy Consumption (Eco) | 1.05 kWh per cycle |
| Water Consumption (Eco) | 18 L per cycle |
| Water Softener | Adjustable with regenerating salt |
| Rinse Aid Dispenser | Adjustable (settings 1-3) |
| Salt Indicator | Yes |
| Rinse Aid Indicator | Yes |
| Safety Systems | Anti-flood system, Anti-leak system |
| Filter System | Main filter, micro-filter, waste filter (2-part) |
| Upper Basket | Height adjustable |
| Cutlery Basket | Removable, can be placed in upper basket |
| Drying System | Extra drying option |
| Control Type | Rotary knob and buttons |
Frequently Asked Questions - DWS20BX SAUTER
User questions about DWS20BX SAUTER
0 question about this device. Answer the ones you know or ask your own.
Ask a new question about this device
Download the instructions for your Dishwasher in PDF format for free! Find your manual DWS20BX - SAUTER and take your electronic device back in hand. On this page are published all the documents necessary for the use of your device. DWS20BX by SAUTER.
USER MANUAL DWS20BX SAUTER
Operating Instructions for your dishwasher
Sauter
Contents
Page
1 - Description of your dishwasher .....4-5
2 - What to do before using the machine for the first time .....6-9
Step 1: Adjusting the water softener – Measuring the water hardness 6
Mechanical adjustment ....6
Filling the regenerating salt reservoir .....7
Step 2: Rinse aid - Filling - Setting .....8
Step 3: Washing products .....9
3 - Loading the dishwasher .....10-12
The lower basket – Cutlery – The upper basket .....10-12
4 - Selecting and running a washing programme .....13
Selecting a washing programme Starting - Programme end13
The washing programmes 14
5 - Running a programme and options ..... 14
Cancelling a programme - Extra drying option ..... 15
6 - Running maintenance .....16-17
Cleaning the waste filters 16
Cleaning and maintenance 17
7 - Protecting the environment .....18
Recycling the packaging .....18
Recycling your old dishwasher 18
Washing ecologically and economically .....18
8 - Troubleshooting, what to do? .....19-23
9 - Instructions for laboratory tests .....24-25

Please read carefully Precautions when using


Environmental protection Advice, tips and remarks
5

Please read your dishwasher's installation and operating manuals carefully so that your machine will provide full and complete satisfaction. These will enable you to discover all the advantages of this machine and put them to best use.
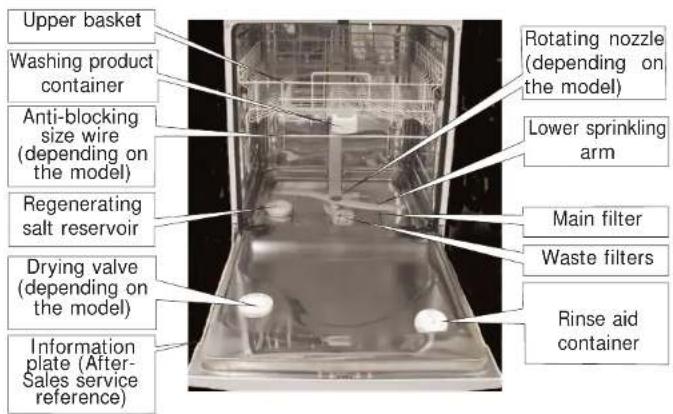
The above photograph of the machine with the lower basket removed shows you all the main components described in these operating instructions.
Your dishwasher is fitted with safety systems protecting you from flooding: The ANTI-OVERFLOW SYSTEM. This system automatically activates the drain pump if the water in the tub reaches an abnormal level. The ANTI-LEAK SYSTEM. This system cuts off the water supply if a leak is detected under the machine.
Description of your dishwasherDescription of you
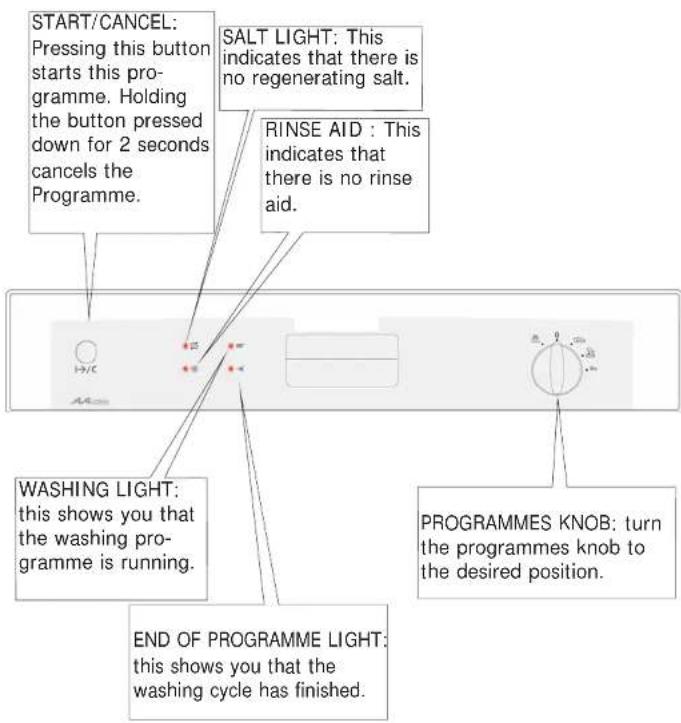

STEP 1: Adjusting the water softener
For impeccable washing and drying results with no streaks.
The water softener must be adjusted correctly to ensure no streaks after washing and drying.
Your dishwasher is fitted with a water softening system that operates using regenerating salt.
You must set the water softener according to the hardness of the water in your area.

Measuring the water hardness
To do this: contact your local water supplier to find out the water hardness level and adjust on the machine as described below.

Adjustment via the cursor inside the tub.
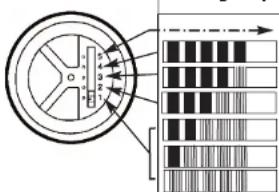
Adjust the setting using the cursor on the left-hand side inside the tub by positioning it correctly on the desired number, depending on the water hardness.
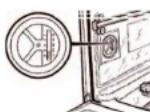
Check that the cursor is fully over the number.
Testing strip
| Water hardness | Salt required |
| >70°F | YES |
| 55 - 70°F | YES |
| 40 - 55°F | YES |
| 25 - 40°F | YES |
| 18 - 25°F | YES |
| 10 - 18°F | YES |
| 0 - 10°F | NO |
You must fill the salt reservoir with water before using the machine, even if the water softener setting selected does not require any regenerating salt. If you move house and take the dishwasher with you you will need to check the water hardness and adjust accordingly. For good wash results it is very important to set the dishwasher to the correct level of water hardness and to set the correct level of rinse aid.
What to do before using the machine for the first time What
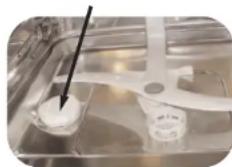
③ Filling the regenerating salt reservoir You must fill this, with water just before starting your first wash then add the salt:
Filling with salt is essential to obtain a good wash with no streaks. The salt regenerates the resins, which soften the water by removing its limestone content unless the water is already sufficiently soft (see "Adjusting the water softener").
Salt reservoir
natural_image
Close-up of a glassware container with a black stick inserted into it, placed on a metal tray (no visible text or symbols)
Never put deter-
gent in this resin-
voir: this will ruin
ater softener.
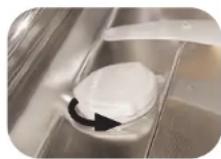
- Unscrew the salt reservoir's stopper and remove it.
- Use the funnel to introduce the salt. (available from the after-sales department under reference : 31X3964).
- Fill the reservoir with regenerating salt specially designed for dishwashers.
- On the first time, add water until it reaches the edge of the reservoir.
- Screw the salt reservoir's stop back in fully.

Do not use kitchen salt.
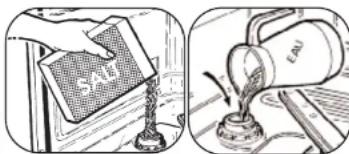
Should any regenerating salt overflow when filling, we recommend that you remove the loose salt crystals to avoid oxidising the machine.
Indication of the level of regenerating salt
SALT indicator light:
This illuminates showing salt needs to be added. After you have refilled the salt reservoir, the light may still remain lit until the salt has dissolved sufficiently, generally after one cycle (or if the reservoir has not been completely filled, for
instance when putting the machine into operating using the sample.
If the water is especially soft and does not require the use of any regenerating salt, the SALT light remains lit.
What to do before using the machine for the first time

STEP 2:
Rinse aid
For brilliant and very dry results
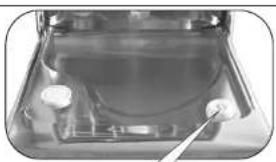
① Filling
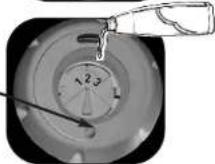
When putting the machine into operation, fill the container level with the top of the adjustment lever. Put in at least all the contents of the sample supplied.
Close the container tightly
Contents: 120 ml (approx. one glass)
Indicator:
Opaque: some product remaining Brilliant: container empty
Should any regenerating salt overflow when filling, mop up the excess to avoid foam forming.
natural_image
Close-up of a mechanical component with a tool inserted, no visible text or symbols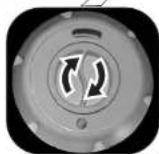
② Adjustment (if necessary)
The original setting is in the middle (Medium position: setting 2).
After a few cycles, if there are streaks or the drying is poor, you can adjust the setting using the adjustment lever:
- Setting 1 to reduce the dose, (soft water) - Setting 3 to increase the dose (hard water)
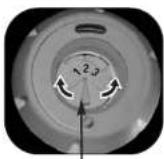
Adjustment lever
The rinse aid indicator light: \*
This illuminates showing rinse aid must be added.
What to do before using the machine for the first time

STEP 3:
the washing products
for a clean wash
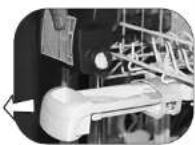
For easy loading, the detergent container is located on the front of the upper basket.
The detergent container is designed to take tablets powder or liquid recommended for dishwasher use.
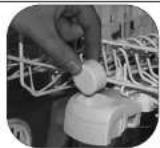
Tablets
Place the tablet in the compartment. underneath the top basket.
Powder or liquid
Pull the container out to fill it with liquid detergent or powder.
Fill it up to the Minimum mark for lightly soiled items.
Fill it up to the Maximum mark for dirty items. Close the container.

Keep all these pro- ducts out of children's reach and away from lamp environments.

Only use the washing products specially designed for dishwasher use.

VERY IMPORTANT:
- For good wash results it is recommended to use individual detergent, salt and rinse aid products.
- However "2 in 1" tablets (detergent and rinse aid) can be used, if so, you may need to adjust the rinse aid dial according to the wash results.
- Good wash results depend on getting the salt + rinse aid levels set correctly according to use level of water hardness.
Loading the dishwasher
The lower basket
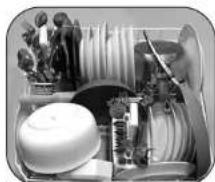
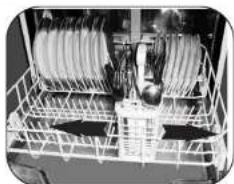
Lay the items out so that the water can circulate freely and spray all the utensils. Place the plates and the wide pots and pans at the sides.
Do not intersperse or superimpose plates and dishes or place them side-by-side.
The fold-down spikes help you to arrange your large items (depending on the model).
natural_image
Interior view of a kitchen appliance with household appliances and a dome-shaped base (no visible text or labels)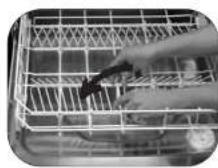

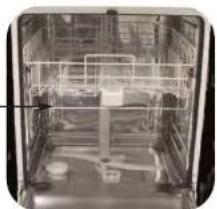
No items should interfere with the rotation of the washing arms (pot handles, cutlery, etc.)
Anti-blocking size wire_(depending on the model)
natural_image
Interior view of a large industrial or laboratory facility with transparent structural framework (no visible text or symbols)
Unloading the dishwasher
First of all empty the lower basket to avoid any drops of water falling onto it from the upper basket.

Items unsuitable for dishwasher use
-Wooden cutting boards
Oxidisable steel or non heat-resistant plastic utensils,
- Pewter or copper items,
-Glued items, - Cutlery with wooden, horn or mother-of-pearl handles,
- Antique or hand-painted porcelain.
When purchasing crockery, glassware, cutlery, etc., ensure that they are suitable for use in a dishwasher.
Loading the dishwasher
Cutlery
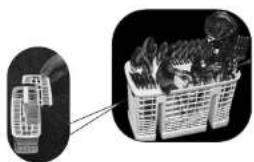
Removable grilds are available if you wish to organise the loading of your cutlery.
For optimum washing and drying, use these separation grills fully or partially.
- Place your cutlery with the handles at the bottom.
- Avoid washing cutlery with horn handles in your machine.
- Separate silverware from cutlery in other metals using the separation grills.
natural_image
Two black-and-white photos showing a small mechanical component and a basket filled with various objects (no visible text or symbols)The sliding cutlery baskets
These can be arranged in any position in the lower basket. You can therefore arrange different loads according to the items you wish to wash.
You can place a cutlery basket in the upper basket.
If your cutlery or your plates are too large, adjust the height of the upper basket (it is height-adjustable).
natural_image
Close-up of a kitchen appliance with shelves and a rack (no visible text or symbols)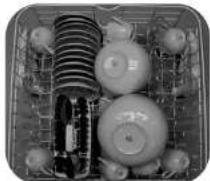

Important note:
For safety reasons, we recommend that you arrange any knives with pointed ends point downwards in the cutlery baskets (to avoid accidents). Any long-bladed knives and other sharp kitchen utensils should be placed flat in the upper basket.
Loading the dishwasher
The upper basket
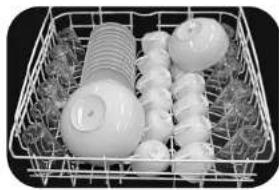
This basket is designed in particular to take: glasses, cups, ramekins, small salad bowls, bowls, saucers, etc. Arrange the items methodically to save space (a row of glasses, cups, bowls, etc.).
natural_image
Basket filled with various small white objects, possibly eggs or fruits, arranged on a patterned surface (no text or symbols visible)
Place glasses, cups and bowls facing downwards.
Depending on the model: when loading large plates into the lower basket, you may have to adjust the height of the upper basket. This can be done even when the basket is full.
Adjusting to the HIGH POSITION: Gently lift the basket until you hear the first "Click" on both sides.
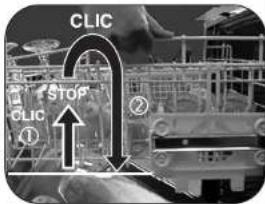
②Adjusting to the LOW POSITION: Lift the basket at the back on both sides ("Click") and then gently lower it.

Check that the slides are both at the same height and that the basket is level.
Selecting and running a washing programme
Refer to the Programmes table on the following page to determine the best programme for the amount of washing up and how dirty it is.
Turn the programmes knob to the desired programme
Check that the power cable is plugged into the socket and that the water tap is open.
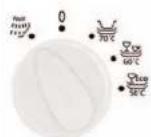
Soak
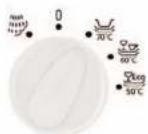
Intensif
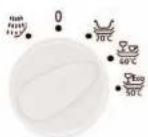
Normal
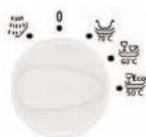
Eco
Starting the washing programme
Select the programme you desire and press the "Start" button. The programme will start and the "Washing" light 📄 illuminate.
Programme end
The "Stop" light flashes 15 minutes before the end of the programme. When the programme is finished, the → light is permanently lit. You can then remove your washing up.
Rest the programmes knob to position "0" to switch off the power to your machine
The washing programmes Running a programme and options
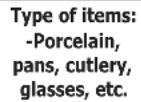 | Mixed | Resistant | Mixed | Delicate |
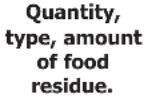 | This very short cycle enables you to rinse through your items while waiting to wash them until the following day or even the day after. | A large amount of dried-on and adhering residue, baked-on stains, grease, residue from frying, cooked cheese, sauce, etc. | Normal amount of dried-on and adhering residue: everyday items | A normal amount of slightly sticky residue: everyday items. |
| Programmes | Soak | Intensif | Normal | Eco |
| Programme cycle. | Cold pre-wash | 70°C | 60°C | 50°C |
| Wash at 70°C | Wash at 60°C | Wash at 50°C | ||
| Rinse | Rinse | Rinse | ||
| Hot rinse | Hot rinse | Hot rinse | ||
| Drying | Drying | Drying | ||
| For information only | ||||
| Length in minutes | 140 | |||
| Water (L) | 18 | |||
| Energy (KwH) | 1,05 | |||
| Mixed | Resistant | Mixed | Delicate |
| This very short cycle enables you to rinse through your items while waiting to wash them until the following day or even the day after. | A large amount of dried-on and adhering residue, baked-on stains, grease, residue from frying, cooked cheese, sauce, etc. | Normal amount of dried-on and adhering residue: everyday items | A normal amount of slightly sticky residue: everyday items. |
| Soak | Intensif | Normal | Eco |
| 70°C | 60°C | 50°C | |
| Cold pre-wash | Wash at 70°C | Wash at 60°C | Wash at 50°C |
| Rinse | Rinse | Rinse |
| Hot rinse | Hot rinse | Hot rinse |
| Drying | Drying | Drying |
Cancelling a programme
Hold down the "Start Cancel" button for two seconds.
The programme will stop and the "Washing" light will light out. You can then re-programme.

Extra drying option:
Your machine must be unpowered, in position "0"
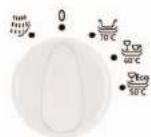
Turn the programmes knob to the option desired, as shown opposite.
The or the light will first of all flash and then go out.
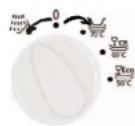

Extra drying
activated

Extra drying
not activated
To alter the option: hold down the "Start" button and turn the programmes knob to the option desired, as shown opposite
The or the light will first of all flash and then go out.
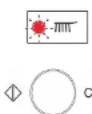

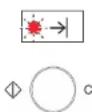
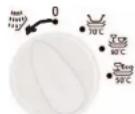
not activated
Running maintenance
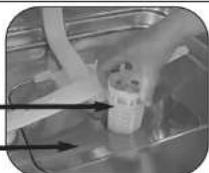
Cleaning the waste filters The filtration system consists of several components:
A – The two-part waste filter B – The main filter C – The micro-filter
The filters are located in the middle of the tub and must be cleaned regularly to ensure optimum washing results.
① Before removing the filters, remove any waste from the main filter with a sponge to avoid the waste blocking the sprinkling arms.
②①Unscrew the waste filter a quarter turn and remove it.
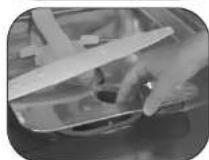
③ Remove the main filter
④Remove the micro-filter.
A
B
C
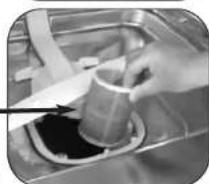
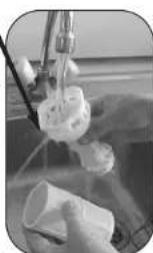
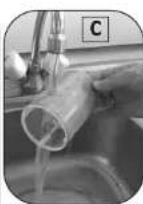
⑤Carefully clean all the filters under running water.
To re-inset the filters Follow the above instructions in reverse.
Important: Do not forget to lock the waste filter by turning it a quarter turn.
Running maintenance
Regularly proceed to clean (if required):
All around the door and the door seal with a damp sponge to remove any deposits.
Every year
To ensure your machine's long-term operation, clean it once or twice a year by running an Intensive programme with the machine empty, using a commercially available special dishwasher cleaning product.
Prolonged stoppage
Clean your dishwasher completely, then disconnect the power supply and close the water tap. Keep your machine away from the risk of frost.
Only use soap and water on the casing and the control panel. Do not use abrasive powders, metal sponges, alcohol-based products or thinners. Use a soft cloth or a sponge.
If you are moving, to avoid any water leaking, first of all run a Soak programme.
Protecting the environment

Recycling the packaging

Recycling your old dishwasher
Warning: Keep all the packaging materials out of children's reach (e.g. plastic bags, polystyrene, etc.): these can be dangerous for children: risk of suffocation).
Recovering and reprocessing packaging material saves on material and reduces the amount of waste.
Take your packaging to the nearest recycling centre. Contact your town's local authorities for details of its location.
If you wish to dispose of your old dishwasher, make it completely unusable. Break the door lock so that it cannot close (children can become locked in when playing inside the machine – risk of suffocation).
Remove the electrical plug and cut off the power cable. Take your unusable machine to the nearest recycling centre. Contact your town's local authorities for details of its location.

Washing economically and ecologically
DO not wash the items first by hand (unnecessary waste of water). Use your dishwasher's capacity to the full. You will then wash economically and ecologically.
Always select a washing programme suitable for the type of items and how dirty they are. Do not overdose with detergent,
regenerating salt or rinse aid. Follow the recommendations in these instructions (Pages 6-7-8) and the manufacturer's instructions on the pack.
Ensure that the water softener is set correctly (see Page 6)
Troubleshooting, what to do?
If you are in any doubt about the operation of your machine, before calling a qualified engineer, check the following points (depending on the symptoms noticed).
| When first using the machine | Possible causes | What to do |
| Small door leak | - The machine is wobbly, not level- The door is not correctly centred on the tub- The seal's lip has been flattened during storage. | - Adjust the adjustable feet- Adjust the rear feet- Take off the door seal all around the door. |
| Small leak around or under the machine (move the machine to locate the leak better) | - Leak at the tap- Leak in the machine | - Check that the seal is present and re-tighten the nut- Close the water tap and call an engineer. |
| The door "catches" when you close it | - The machine or the door is not correctly centred on the tub | - Recentre the door by adjusting the rear feet.- Contact the installer. |
| The door falls down heavily when you open it (integratable models) | - The door springs are not tensioned enough to compensate for the weight of the basket. | - Pull the machine out 10cm and tighten the 2 tensioning screws.- Contact the installer. |
| The door is not level when open or goes back up too quickly (integratable machine) | - The door springs are over-tensioned.- No wooden panel | - Pull the machine out 10cm and tighten the 2 tensioning screws.- Fit a wooden panel to the door (a chipboard panel OK if on a temporary basis) and adjust the springs.- Contact the installer. |
| The upper basket will not stay in the high position | - Poor handling (the basket has been pulled upwards too quickly). | - Move the basket gradually on one side and then the other (until you hear a "Click") = -> see the Operating Instructions. |
| Programming, display anomalies | Possible causes What to do | |
| The cycle takes too long. | - The energy-saving programmes take longer because they compensate for the lower washing and drying temperatures by longer agitation and drying. | - Use these programmes preferably at night when the length and the finishing time are not important. |
Troubleshooting, what to do?
| Programming, display anomalies | Possible causes What to do | |
| The lights light up one after another | - Wrongly programmed. | - Cancel the current pro-gramme by holding down the "Start" button for 3 seconds and then reprogramme. |
| The Salt light does not go out | - No salt or too little salt in the reservoir to trigger the float. | - Fill the reservoir and wait until the cycle ends. If the water is soft enough not to require salt, the Salt light is permanently lit. |
| Poor operation Possible causes What to do | ||
| The machine cuts off | - Insufficient amperage to supply all the equipment being used at the same time.- Internal fault in the machine | - Check the plug's amperage (10A minimum) and the meter's capacity- Call an engineer. |
| The machine will not start | - No power supply to the socket- The tap is closed- The water supply hose is kinked- Programme selection error and programme blocked- "Start" button held down too long (> 2 seconds)- Safety system (anti-leak) | - Check the socket and the fuse- Check that the tap is open- Check that hose run- Cancel by pressing "Start" for 3 seconds and reprogramme- Press "Start" only briefly to start the programme- Call an engineer. |
| The machine does not drain. | - Protective cover on the sink's U bend not removed- Drainage hose kinked- Drain filter totally blocked- Pump blocked. | - Remove the protective cover- Check the hose runs correctly behind the machine- Remove the filters and clean them and the drain hole- Start a soak programme. If the fault persists, call an engineer. |
Troubleshooting, what to do?
| Poor operation Possible causes What to do | ||
| A lot of residue left on the main filter at the end of the cycle. | - The drain hole and the filters are blocked by too much residue. | - Remove the filters and clean them and the drain hole. Remove any large amounts of residue from the plates before placing them in the dishwasher. |
| Steam appears approx. 20 minutes before the end of the cycle (model with ventilated drying). | - The steam from drying is in contact with a flow of cold air. | - A normal but infrequent occurrence only when drying starts (connected with the temperature of the room, draughts, etc.). |
| Poor washing results | Possible causes | What to do |
| Traces of food, deposits, "grains of sand" in the glasses. | - The washing up has been badly arranged (items masked by another, larger item or placed under it, items side by side or nesting together).- The upper agitator is blocked by cutlery, plates, etc.)- The filter is not screwed in tightly and is lifting during washing- The micro-filter's sieve is clogged. | - Arrange the items correctly; use the most suitable areas and accessories for each type of item (see Operating Instructions).- Check that the agitator rotates freely (sizing wire), set the basket to the High position if necessary.- Check the seating and the tightness of the filter (screw it in fully to the right).- Remove and clean all the filters (with warm water), including the sieve. |
| Greasy marks. | - Too little detergent, poor detergent, stale detergent.- Unsuitable programme (temperature too low, not long enough). | - Increase the amount of detergent; try another detergent.- Select a programme with a higher temperature. |
Troubleshooting, what to do?
| Poor washing results Possible causes What to do | ||
| White marks(Identify the nature of the marks) | - Chalky film (can be removed with vinegar). | - Check that there is salt in the reservoir (light unlit = OK)- Check the water hardness at the tap and that the water softener is set correctly. Set it on a higher setting if necessary.- Water too hard for using a "3 in 1" detergent (not recommended). |
| - Traces of salt(item ahs a salty taste) | - Check that the salt pot's stopper is firmly closed. | |
| - Opalisation of the glass because water too soft (cannot be removed). | - Check the water hardness at the tap and that the water softener is set correctly. Some detergent tablets are more aggressive to glasses and decorations (change the detergent, use a protective product if necessary). | |
| Coloured marks (tea, wine, coffee, blood) | - Items poorly arranged- Not enough or poor detergent- Programme with too low a temperature. | - Turn the open ends (of glasses, bowls, etc.) towards the jets- Increase the amount of detergent- Select a more suitable programme, with a higher temperature. |
| Run marks or dried droplets on the glasses | - Insufficient or no rinse aid.- Poor or out-of-date rinse aid. | - Check the indicator light and fill the reservoir completely, set the dispenser to the upper position if necessary.- Replace with a recent agent (a good rinse aid dilutes easily and foams in cold water). |
Troubleshooting, what to do?
| Poor operation | Possible causes What to do | |
| Traces of rust on stainless steel | - The quality of the stain-less steel (in knives in particular) is unsuitable for washing in a machine. | - Use special “dishwa-sher-safe” cutlery- Check that the salt pot’s stopper is firmly closed. |
| Poor washing results | Possible causes What to do | |
| A lot of drops on the glasses | - Insufficient or no rinse aid.- The dose has not been distributed.- Position of the items. | - Check the indicator light and fill the reservoir completely.- If the reservoir is not empty after approxi-mately 60 washes, call an engineer.- To relieve the problem, arrange the items so as to restrict as much as possible any water retention: if possible, leave the door ajar for a few minutes. |
| Drops on plastic glasses, Tefal coatings, etc. | - These insulating items have a low calorific mass. | - Arrange them optimally, prioritising the use of the upper basket if pos-sible. |
| Drying is less good in rapid programmes. | - In the rapid pro-grammes, the drying temperature and the drying time are reduced to restrict the length of the cycle to a minimum level. | - Select the most appro-priate rapid programme. |
| Condensation on the walls of the inner door or the tub. | - Condensation may form on the walls, particularly after cooling down (sound insulation increases its occurrence). | |
Instructions for laboratory tests
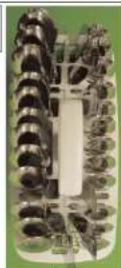
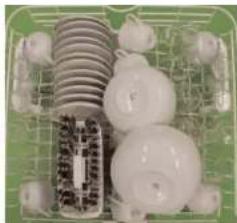
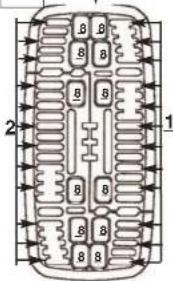
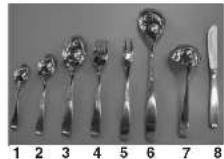
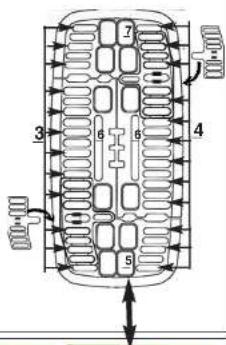
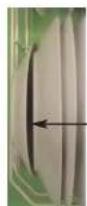
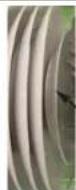
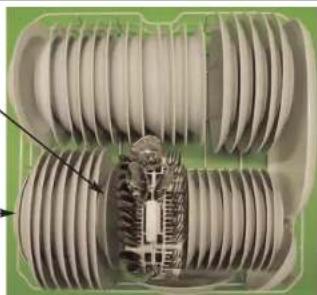
Arrange the items as shown in Figures A - B - C (see following page) in accordance with EN 50242 : standard: Eco Programme and the Mixed method (IEC 436/DIN 44900) : Normal
√ Washing capacity
12 standardised
√ Detergent dose
30g of detergent B
√ Detergent dispenser setting
3
Setting for the upper basket
√ Loaded in accordance with the instructions on the following page, with no side shelves.
√ The water softener MUST be set to a setting immediately higher than that recommended, depending on the water hardness, to take into account the lack of phosphate in standardised detergents.
√ For more information on the comparison tests in accordance with EN 50242 regarding the level of soiling, the type of items, etc., please contact the manufacturer of the machine before commencing testing.
Instructions for laboratory tests:elle
A
natural_image
Close-up of a transparent plastic enclosure containing various electronic components and wiring (no visible text or symbols)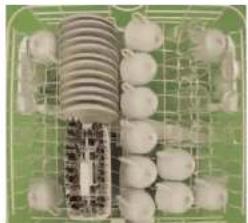
natural_image
Green container with white spherical objects and a meshed top layer, no visible text or symbolsB
C
natural_image
Cross-sectional diagram of a mechanical or electrical component with layered structure (no visible text or symbols)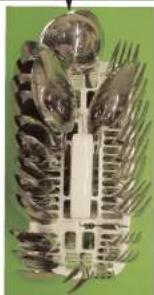
natural_image
3D cutaway model of a mechanical or architectural component with spiky surfaces and layered structure (no visible text or symbols)- Contents
- Page
- Description of your dishwasherDescription of you
- STEP 1: Adjusting the water softener
- Measuring the water hardness
- Adjustment via the cursor inside the tub.
- What to do before using the machine for the first time What
- ③ Filling the regenerating salt reservoir You must fill this, with water just before starting your first wash then add the salt:
- Indication of the level of regenerating salt
- SALT indicator light:
- What to do before using the machine for the first time
- STEP 2:
- Rinse aid
- For brilliant and very dry results
- ① Filling
- Close the container tightly
- Indicator:
- ② Adjustment (if necessary)
- The rinse aid indicator light: \*
- STEP 3:
- the washing products
- for a clean wash
- Tablets
- Powder or liquid
- VERY IMPORTANT:
- Loading the dishwasher
- The lower basket
- Unloading the dishwasher
- Items unsuitable for dishwasher use
- Cutlery
- The sliding cutlery baskets
- Important note:
- The upper basket
- Selecting and running a washing programme
- Starting the washing programme
- Programme end
- The washing programmes Running a programme and options
- Cancelling a programme
- Extra drying option:
- Running maintenance
- Cleaning the waste filters The filtration system consists of several components:
- Regularly proceed to clean (if required):
- Every year
- Prolonged stoppage
- Protecting the environment
- Recycling the packaging
- Recycling your old dishwasher
- Washing economically and ecologically
- Troubleshooting, what to do?
- Instructions for laboratory tests
- Instructions for laboratory tests:elle
Brand : SAUTER
Model : DWS20BX
Category : Dishwasher