
BBM300 - Bread maker BREVILLE - Free user manual and instructions
Find the device manual for free BBM300 BREVILLE in PDF.


| Product Type | Bread Maker |
| Brand | Breville |
| Model | BBM300 |
| Loaf Sizes | 1 kg and 0.75 kg (750 g) |
| Program Settings | 11 (Basic, Basic Rapid, Wholewheat, Wholewheat Rapid, Gluten Free, French, Sweet, Yeast Free, Dough, Jam, Bake Only) |
| Crust Color Options | Light, Medium, Dark |
| Preset Timer | Up to 13 hours |
| Keep Warm Cycle | Up to 60 minutes (on select settings) |
| Power Supply | 230-240 V |
| Safety Features | Automatic error detection (E01-E04); cool-down protection; residual current device recommended |
| Bread Pan Material | Non-stick coated |
| Kneading Blades | Collapsible blade for bread/dough; standard blade for jam |
| Cleaning Instructions | Hand wash only; do not immerse pan or machine; do not use dishwasher |
| Memory Function | 30-minute memory after power interruption |
| Accessories Included | Collapsible kneading blade, standard kneading blade, recipe book |
| Spare Parts Availability | Contact Breville Spare Parts (Australia 1300 139 798, New Zealand 0800 253 007) |
| Warranty | Manufacturer's warranty (details not specified) |
| Dimensions (Approx.) | 30 x 25 x 30 cm (not specified, estimate) |
| Weight (Approx.) | 5.5 kg (not specified, estimate) |
Frequently Asked Questions - BBM300 BREVILLE
User questions about BBM300 BREVILLE
0 question about this device. Answer the ones you know or ask your own.
Ask a new question about this device
Download the instructions for your Bread maker in PDF format for free! Find your manual BBM300 - BREVILLE and take your electronic device back in hand. On this page are published all the documents necessary for the use of your device. BBM300 by BREVILLE.
USER MANUAL BBM300 BREVILLE
Breville is a registered trademark of Breville Pty. Ltd.
ABN 98 000 092 928
Breville Customer Service Centre
Australian Customers
Breville Customer Service Centre
PO Box 22
Botany NSW 2019
AUSTRALIA
Customer Service: 1300 139 798
Fax (02) 9384 9601
Email Customer Service: askus@breville.com.au
New Zealand Customers
Breville Customer Service Centre
Private Bag 94411
Greenmount
Auckland, New Zealand
Customer Service: 0800 273 845
Fax 0800 288 513
Email Customer Service: askus@breville.com.au
www.breville.com.au

PRINTED ON RECYCLED PAPER

© Copyright. Breville Pty. Ltd. 2008
Due to continual improvements in design or otherwise,
the product you purchase may differ slightly from the one
Illustrated in this booklet
Model: BBM300 Issue 1/08
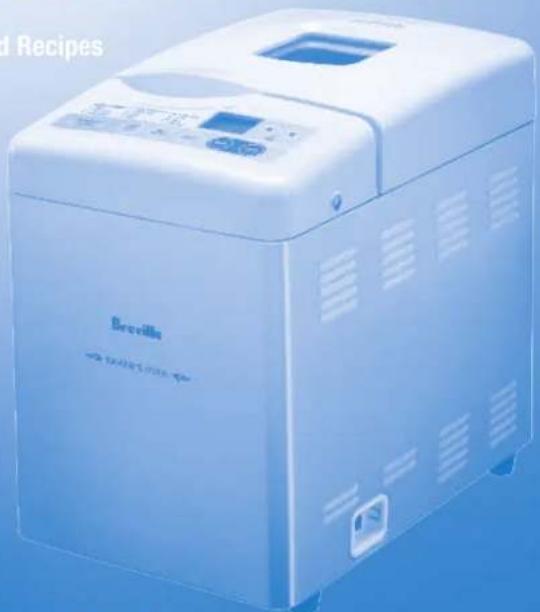
Breville
BAKER'S OVEN
Instructions and Recipes
BBM300
natural_image
White portable milk carton with control panel and digital display (no visible text or symbols)Inspiration. Every day.™
Contents
Page
Welcome 4
Breville Recommends Safety First 5
Know your Breville Baker's Oven 7
Beginner's Guide to Baking Your First Loaf 13
Weighing and Measuring 17
The Vital Ingredients 18
Hints and Tips for Better Bread Making 21
Questions and Answers 22
Control Panel Messages 24
Care, Cleaning and Storage 25
Troubleshooting – Recipe 26
Troubleshooting - Baker's Oven 28
Easy Bake Recipes R1
Notes R44
Congratulations
on the purchase of your new Breville Baker's Oven
Welcome
Breville recommends safety first
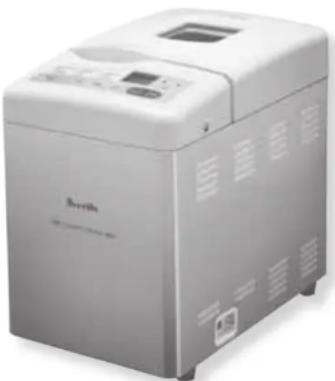
BREVILLE BAKER'S OVEN
We have designed the Breville Baker's Oven with you, our valued customer in mind.
The Breville Baker's Oven will bake 1kg and 750g sandwich style loaves. We have made the Breville Baker's Oven easy to use as you will find from the 'Beginner's guide to your first loaf' on page 15. After that you will find over 75 delicious recipes to try in our 'Easy Bake' recipe section. And with the special 'JAM' setting the Breville Baker's Oven can create delicious fresh home-made jams, a taste sensation on your freshly baked bread.
For people who like to hand shape bread, there is also a 'DOUGH' setting. In addition the Breville Baker's Oven will bake superb 'YEAST FREE' or 'GLUTEN FREE' breads.
Finally, if you enjoy waking up to the aroma of freshly baked bread every morning, the 13 hour 'PRESET TIMER' on the Breville Baker's Oven makes it easy to do so.
For our New Zealand customers we have included information relating to variances in measurements and availability of ingredients.
Before making your first loaf of bread, please read this book thoroughly to ensure you get the best results.
We wish you, your family and friends much enjoyment from the superb range of breads you can bake and doughs you can knead in your Breville Baker's Oven.
natural_image
Exterior view of a modern white industrial machine (no visible text or symbols)At Breville we are very safety conscious. We design and manufacture consumer products with the safety of you, our valued customer, foremost in mind. In addition we ask that you exercise a degree of care when using any electrical appliance and adhere to the following precautions:
IMPORTANT SAFEGUARDS FOR YOUR BREVILLE BAKER'S OVEN
- Carefully read all instructions before operating and save for future reference.
- Remove and safely discard any packaging material and promotional labels before using the Breville Baker's Oven for the first time.
- To eliminate a choking hazard for young children, remove and safely discard the protective cover fitted to the power plug of this appliance.
- Do not place the Breville Baker's Oven near the edge of a bench or table during operation. Ensure the surface is level, clean and free of water, flour and other substances. Vibration during the kneading cycles may cause the bread machine to move slightly.
- Do not place the Breville Baker's Oven on or near a hot gas or electric burner, or where it could touch a heated oven. Position the appliance at a minimum distance of 10cm away from walls. This will help prevent the possibility of wall discolouration due to radiated heat.
- Always operate the Breville Baker's Oven on a stable and heat-resistant surface. Do not use on a cloth-covered surface, near curtains or other flammable materials.
-
Do not operate the Breville Baker's Oven on a sink drain board.
-
Always ensure the Breville Baker's Oven is properly assembled before connecting to a power outlet and operating. Follow the instructions provided in this book.
- The Breville Baker's Oven is not intended to be operated by means of an external timer or separate remote control system.
- The lid and the outer surface may get hot when the appliance is operating.
- The temperature of accessible surfaces may be high when the appliance is operating.
- Do not touch hot surfaces. Allow the Breville Baker's Oven to cool before cleaning any parts.
- Steam vents are very hot during baking. Do not place anything on top of the lid.
- Do not cover the air vents when the Breville Baker's Oven is in use.
- Use oven mitts when removing the hot bread pan and the hot bread or jam from the pan.
• Take care when pouring jam from the bread pan as the jam is extremely hot. - Do not place any ingredients directly into the baking chamber. Place ingredients into the bread pan only.
- Do not place fingers or hands inside the Breville Baker's Oven while in operation. Avoid contact with moving parts.

CAUTION: THE LID AND THE OUTER SURFACE MAY GET HOT WHEN THE APPLIANCE IS OPERATING.
THE TEMPERATURE OF ACCESSIBLE SURFACES MAY BE HIGH WHEN THE APPLIANCE IS OPERATING.
Breville recommends safety first continued Know your Breville Baker's Oven
- Ensure that the Breville Baker's Oven is switched off and then unplugged from the power outlet when not in use and before cleaning.
- Do not immerse the bread pan in water. Doing so may interfere with the free movement of the shaft. Wash only the interior of the bread pan.
- Do not leave the lid standing open for extended periods of time.
• Always ensure the kneading blade is removed from the base of the baked loaf prior to slicing.
• To protect against electric shock, do not immerse power cord, power plug or appliance in water.
- Keep the inside and outside of the appliance clean. Follow the cleaning instructions provided in this book.
IMPORTANT SAFEGUARDS FOR ALL ELECTRICAL APPLIANCES
• Unwind the power cord fully before use.
- Do not let the power cord hang over the edge of a bench or table, touch hot surfaces or become knotted.
- The appliance is not intended for use by persons (including children) with reduced physical, sensory or mental capabilities, or lack of experience and knowledge, unless they have been given supervision or instruction concerning use of the appliance by a person responsible for their safety.
• Children should be supervised to ensure that they do not play with the appliance.
- It is recommended to regularly inspect the appliance. Do not use the appliance if power supply cord, power plug or appliance becomes damaged in any way. Return the entire appliance to the nearest authorised Breville Service Centre for examination and/or repair.
- Any maintenance, other than cleaning, should be performed at an authorised Breville Service Centre.
- This appliance is for household use only. Do not use this appliance for anything other than its intended use. Do not use in moving vehicles or boats. Do not use outdoors. Misuse may cause injury.
- The installation of a residual current device (safety switch) is recommended to provide additional safety protection when using electrical appliances. It is advisable that a safety switch with a rated residual operating current not exceeding 30mA be installed in the electrical circuit supplying the appliance. See your electrician for professional advice.
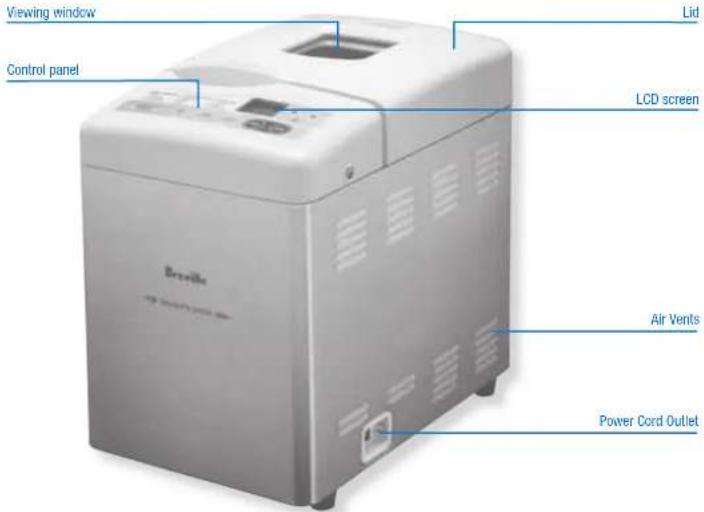

STEAM VENTS ARE VERY HOT DURING BAKING.
Know your Breville Baker's Oven continued
THE CONTROL PANEL
The control panel is designed to perform several functions. The LCD screen indicates the setting number, loaf size and crust colour selection then the completion time for the setting. The various buttons are used to set the functions and to start or stop the Breville Baker's Oven. The buttons should be pressed firmly. A soft 'beep' sound is made as each button is pressed and the function advances.
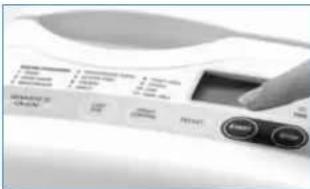
| LCD SCREEN | The LCD screen shows the setting number, loaf size and crust colour selected. When the 'START' button is pressed the time displayed (in hours and minutes) is the time remaining until the selected setting is completed. |
| SELECT | Press the 'SELECT' button to select the 11 automatic settings available. These settings are listed on pages 9-10 under 'Bread, Dough and Jam Settings'. Each time the 'SELECT' button is pressed the setting changes. The setting selected is shown on the LCD screen as a number between 1 and 11. |
| CRUST | Press the 'CRUST' button to select the 3 crust colours available for the bread settings only. The crust colour selected is shown on the LCD screen as LIGHT, MEDIUM or DARK. The LCD screen will default to MEDIUM when the bread machine is switched on or a new bread setting is selected. |
| LOAF SIZE | Press the 'LOAF SIZE' button to select the 2 sizes for the bread and dough settings only. The size selected is shown on the LCD screen as 1KG or 0.75KG. The LCD screen will default to 1KG when the bread machine is switched on or a new bread or dough setting is selected. |
| START | Press the 'START' button to commence the selected setting or begin the 'PRESET TIMER' countdown for delayed operation. |
| STOP | To stop and cancel a selected setting mid-cycle press the 'STOP' button and hold down for 5-10 seconds until the machine 'beeps' and the LCD screen is reset. This will result in the setting being cancelled. (When the bread is ready the bread machine automatically stops and sounds 3 double 'beeps'. The time display will show '0:00'). DO NOT PRESS THE 'STOP' BUTTON when checking the bread as this will cancel the selected setting and the bread machine will not continue the operation. |
| PRESET TIMER (up ▲/down▼ arrows) | Use the 'PRESET TIMER' to delay the start of the selected setting. Press the up ▲' and down▼ arrow buttons (which will change the time display up or down in 10 minute increments) until the delay time is displayed then press the 'START' button to start the 'PRESET TIMER' countdown. The up ▲' and down▼ arrow buttons can also be used to change the time required for the 'BAKE ONLY' setting. |
Know your Breville Baker's Oven continued
BREAD, DOUGH AND JAM SETTINGS
| SETTING 1: BASIC | Press the ‘SELECT’ button once and the LCD screen will show 1 1KG MEDIUM. To select a light or dark crust colour, press ‘CRUST’ button once for DARK, twice for LIGHT. To select the 750g (0.75KG) size, press ‘LOAF SIZE’ button once. |
| SETTING 2: BASIC RAPID | Press the ‘SELECT’ button twice and the LCD screen will show 2 1KG MEDIUM. To select a light or dark crust colour, press ‘CRUST’ button once for DARK, twice for LIGHT. To select the 750g (0.75KG) size, press ‘LOAF SIZE’ button once.This setting has shorter kneading and rising times therefore the bread may be lower in height, heavier in texture and with less flavour development depending on the ingredients used. |
| SETTING 3: WHOLEWHEAT | Press the ‘SELECT’ button three times and the LCD screen will show 3 1KG MEDIUM. To select a light or dark crust colour, press ‘CRUST’ button once for DARK, twice for LIGHT. To select the 750g (0.75KG) size, press ‘LOAF SIZE’ button once. |
| SETTING 4: WHOLEWHEAT RAPID | Press the ‘SELECT’ button four times and the LCD screen will show 4 1KG MEDIUM. To select a light or dark crust colour, press ‘CRUST’ button once for DARK, twice for LIGHT. To select the 750g (0.75KG) size, press ‘LOAF SIZE’ button once.This setting has shorter kneading and rising times therefore the bread may be lower in height, heavier in texture and with less flavour development depending on the ingredients used. |
| SETTING 5: GLUTEN FREE | Press the ‘SELECT’ button five times and the LCD screen will show 5 1KG MEDIUM. To select a light or dark crust colour, press ‘CRUST’ button once for DARK, twice for LIGHT. To select the 750g (0.75KG) size, press ‘LOAF SIZE’ button once.This setting is suitable for breads made with gluten-free flours such as rice, potato, buckwheat, etc. The shorter rising times and higher baking temperature gives a well-risen, golden brown gluten-free loaf. |
| SETTING 6: FRENCH | Press the ‘SELECT’ button six times and the LCD screen will show 6 1KG MEDIUM. To select a light or dark crust colour, press ‘CRUST’ button once for DARK, twice for LIGHT. To select the 750g (0.75KG) size, press ‘LOAF SIZE’ button once.This setting is suitable for breads lower in fat and sugar as the rising times are longer and the baking temperature higher. It will produce a coarser crumb with a harder, crustier crust depending on the ingredients used. |
| SETTING 7: SWEET | Press the ‘SELECT’ button seven times and the LCD screen will show 7 1KG MEDIUM. To select a light or dark crust colour, press ‘CRUST’ button once for DARK, twice for LIGHT. To select the 750g (0.75KG) size, press ‘LOAF SIZE’ button once.This setting is suitable for sweeter style breads as the rising times are longer and the baking temperature lower. |
Know your Breville Baker's Oven continued
Know your Breville Baker's Oven continued
| SETTING 8: YEAST FREE | Press the 'SELECT' button eight times and the LCD screen will show 8 1KG MEDIUM. To select a light or dark crust colour, press 'CRUST' button once for DARK, twice for LIGHT. To select the 750g (0.75KG) size, press 'LOAF SIZE' button once. Dough or batter recipes that rely on baking powder or bicarbonate of soda as the raising agent are suitable for use on this setting. |
| SETTING 9: DOUGH | Press the 'SELECT' button nine times and the LCD screen will show 9 1KG. To select the 750g (0.75KG) size, press 'LOAF SIZE' button once.This cycle takes 1 hour 30 minutes to complete then the dough is removed from the bread machine, hand shaped and baked in the conventional oven. Instructions and recipes for Pizza and Foccacia are also included in the Dough section of this book. |
| SETTING 10: JAM | Press the 'SELECT' button ten times and the LCD screen will show 10.This setting is designed to make home-made style jam using seasonal fresh fruit. A variety of recipes can be found in the 'Just Jam' section of this book. |
| SETTING 11: BAKE ONLY | Press the 'SELECT' button eleven times and the LCD screen will show 11.Press the up/down '▲'/'▼' arrow buttons to select a time between 5 minutes and 2 hours.For those who enjoy a crispier crust, this setting will extend the baking time or add interest to the loaf with delicious topping or melt ideas. |
USING THE PRESET TIMER
The Baker's Oven 'PRESET TIMER' lets you wake to the aroma of fresh baked bread in the morning. You can set the timer up to 13 hours in advance before you require your baked loaf.
Recipes using perishable ingredients should not be made using the 'PRESET TIMER'.
Step 1
To bake a loaf of bread on the 1 (BASIC) 1KG MEDIUM setting using the 'PRESET TIMER', follow Steps 1-8 under the heading 'Beginner's Guide to Baking Your First Loaf' on pages 13-14.
Step 2
To preset the timer use the up/down '▲'/'▼' arrows on the control panel to enter the number of hours in which you want your bread to be ready (the amount of time shown on the LCD screen will include the total setting time). To set the time, press the down '▼' arrow or up '▲' arrow the appropriate number of times until you see the number of hours and minutes displayed. Each time you press the up '▲' arrow button, the timer advances 10 minutes. Each time you press the down '▼' arrow button the timer is set back 10 minutes. Hold down the up '▲' or down '▼' arrow buttons for speedier adjustments.
Step 3
Press 'START'. The colon (:) in the time displayed begins to flash, letting you know the 'PRESET TIMER' has started. The remaining time will count down in one minute increments. When the time on the LCD SCREEN indicates '0:00', baking is complete. If you make an error during or after your selection, press and hold the 'STOP' button and you can begin your selection again.
Example:
Before leaving for work at 8.00am, you decide to make a loaf of white bread and wish to have it ready for dinner at 6.00pm (10 hours later). Press the up '▲' arrow until 10:00 appears on the LCD SCREEN. Press 'START'.
Your Baker's Oven will begin making your bread at the appropriate time for it to be ready at exactly 6.00pm.
Note
The 'PRESET TIMER' cannot be used with the 'JAM' or 'BAKE ONLY' settings.
Note
The 'PRESET TIMER' cannot be used for all recipes. Individual recipes will specify if not suitable.
Note
It is advisable, before using the 'PRESET TIMER' for the first time, to test the recipe. It is also advisable to weigh and measure ingredients accurately to ensure the correct ratio of flour/water and other ingredients is used.
Note
To ensure the efficient operation of the bread machine, use in an area not affected by extremes of heat or coldness.
Note
Know your Breville Baker's Oven continued Beginner's Guide to Baking Your First Loaf
USING THE BAKE ONLY SETTING
The 'Bake Only' setting of the Baker's Oven gives more versatility to your bread making. The 'Bake Only' setting is useful when wishing to:
- Extend the baking time if a darker, crisper loaf crust is required.
• Crispen loaves already baked and cooled.
• Re-warm loaves already baked and cooled. - Delay bake a finished dough.
- Melt or brown toppings.
- Press the 'SELECT' button eleven times and the LCD screen will show 11.
- Before pressing the 'START' button, the time can be altered by using the up/down '▲'/'▼' arrows. The 'BAKE ONLY' setting times range from 5 minutes to 2 hours.
- If the time is not altered, the default 'BAKE ONLY' time of 55 minutes will commence when the 'START' button is pressed.
Try this creative idea:
- Prepare and make a bread of your choosing.
- Combine 3 tablespoons of Cheddar cheese, 3 tablespoons chopped bacon with 2 teaspoons chopped fresh chives.
- When bread has finished baking, press 'STOP'.
- Sprinkle combined ingredients over the top of loaf.
- Press the 'SELECT' button eleven times and the LCD screen will show 11. Change the time to 20 minutes using the up/down '▲'/'▼' arrows. Press 'START'. If a browner, crisper topping is required reset the 'BAKE ONLY' setting for an additional time.
- At the end of baking, press 'STOP.'
- Remove bread from the bread machine and bread pan. Allow to cool on a rack.
USING THE JAM SETTING
The ‘JAM’ setting of the Baker’s Oven allows you to make sufficient quantity of delicious homemade jam to accompany your freshly baked bread.
- Insert the standard kneading blade (for jam making) onto the shaft of the bread pan.
- Place prepared fruit into the bread pan followed by remaining ingredients.
- Press the 'SELECT' button ten times and the LCD screen will show 10. Press 'START'.
- After 1:05 hours, the bread machine will 'beep', indicating the end of the cycle. Press 'STOP'. Use oven mitts to remove the bread pan as the jam is extremely hot.
- Pour the hot jam into warm, dry, sterilised jars, leaving 1.25cm from the top of the jar. Seal the jars immediately and label.
- Jam will thicken upon cooling and storage.
See the recipe section, under 'Just Jam' for more details (refer page R41).
The following instructions are to be used when making Bread or Dough recipes from the recipe section of this book.
All recipes use local ingredients and Australian Standard Metric Measuring tools (cup, spoons and weighing scales), for accuracy in producing a 1kg or 750g loaf of bread.
Remove and safely discard any packaging material and promotional labels before using the Baker's Oven for the first time.
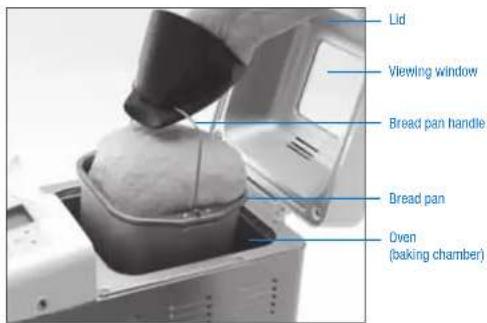
Step 1: Open the lid and remove the bread pan
Open the lid and remove the bread pan from the Baker's Oven by holding the handle and lifting straight up.
Always remove bread pan from the Baker's Oven before adding ingredients to ensure ingredients are not spilt into the baking chamber and onto the element.
Before using for the first time, we recommend that the inside of the bread pan and the kneading blades be washed with warm soapy water, rinsed and dried thoroughly. Do not immerse the bread pan in water.
Step 2: Insert the kneading blade
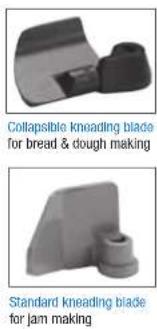
There are two kneading blades provided with the Baker's Oven. The collapsible blade is for use on the 'BREAD' and 'DOUGH' settings. The standard blade is for use on the 'JAM' setting.
It is important that when using either kneading blade that it is properly mounted on the shaft in the base of the bread pan by aligning the flat edge in the central hole of the kneading blade with the flat side of the shaft. If the either blade is not seated correctly, ingredients may not be mixed or kneaded properly.
The collapsible blade should be placed on the shaft in the upright position to ensure the ingredients are mixed and kneaded properly when the kneading cycle commences. The further
kneading action of the bread machine ensures that the collapsible blade is upright or flat at the appropriate times in the kneading, rising and baking cycles.
Before inserting the collapsible blade, ensure that no baked bread residue remains attached to the shaft inside the bread pan or inside the hole or around the hinge area of the collapsible kneading blade. This will ensure that the hinge pivots freely. For further cleaning instructions refer to page 25.
Note
Step 3: Add ingredients into the bread pan
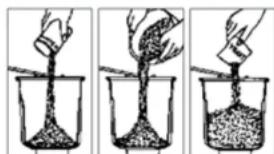
It is important that the ingredients are added in the correct order listed in the recipe and that the ingredients are measured and weighed accurately otherwise the dough may not mix correctly or rise sufficiently. Ensure the collapsible kneading blade is in the upright position before adding ingredients to the bread pan.
All ingredients should be at room temperature 20-25°C and should be added in the following order:
- Liquid ingredients
- Fat
- Dry ingredients: salt, sugar, flour
- Yeast
natural_image
Three-step illustration showing a hand pouring granular material into beakers in different containers (no text or symbols)Beginner's Guide to Baking Your First Loaf continued
Beginner's Guide to Baking Your First Loaf continued
If using Prepackaged Bread Mixes, refer to page R37.
Note
Mound the flour into the pan, make a small hollow in the centre and place the yeast in the hollow. This is important when using the 'PRESET TIMER' because if the yeast comes in contact with the water and is activated at some length of time before kneading commences, the bread may not rise.
Note
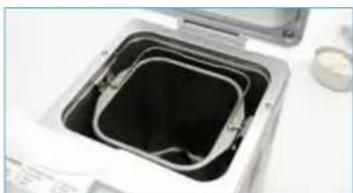
Step 4: Return the bread pan to the machine Insert the bread pan into the machine as follows:
- Place the bread pan into the baking chamber, with the word 'FRONT', on the top edge of the bread pan, facing towards the front of the bread machine.
- Locate the drive mechanism of the pan directly into the drive mechanism in the base of the baking chamber.
- Push the bread pan down firmly until it clicks into position and is secured in the retaining clips.
natural_image
Close-up of a white appliance with a square vent containing black liquid, placed on a surface (no visible text or symbols)Step 5: Close the lid
After closing the lid, it is not recommended to open the lid during operation except to check the consistency of the dough in the kneading cycle or to glaze and add seeds to the top of the loaf in the baking cycle (refer to page R43).
Step 6: Switch on the bread machine
Insert the power plug into a 230/240V volt power outlet. Switch on at the power outlet. When the Baker's Oven is plugged in and switched on, the LCD screen will automatically flash '000' and one long 'beep' will sound.
Step 7: Select the setting
Press the 'SELECT' button and the LCD screen shows 1 1KG MEDIUM. Continue pressing the 'SELECT' button until the desired setting (between 2 and 11) is selected (refer to page 9-10 for description of each setting).
Step 8: Select the loaf size or crust colour
When a bread setting is selected the loaf size and crust colour will default to 1KG MEDIUM. If wishing to select the smaller loaf size or a darker or lighter crust, press the 'LOAF SIZE' button once to select 750g (0.75KG) and press the 'CRUST' button once for DARK and twice for LIGHT. When the 'DOUGH' setting is selected the dough size will default to 1KG. If a smaller quantity of dough is required, press the 'LOAF SIZE' button once to select 750g (0.75KG).
Step 9: Start the bread machine
Press the 'START' button to begin the bread machine operation. The total setting time will appear in the LCD screen. The setting time will count down in one-minute increments.
- The kneading cycles commence with the Add-in Ingredient Beeper sounding 8 'beeps' at approximately 5 minutes before the end of the second kneading cycle.
- The Add-In Ingredient Beeper sounds in the 'BASIC', 'BASIC RAPID', 'WHOLEWHEAT', 'WHOLEWHEAT RAPID', 'FRENCH' and 'SWEET' settings indicating the time to add any additional fruit, nuts, herbs, chocolate, etc. required or as specified in recipes. The addition of ingredients at this time assists with keeping fruits, etc. whole, rather than being mashed through the bread dough. While the machine is still kneading add the ingredients gradually in batches, allowing the dough to slowly combine with the added ingredients.
Take care not to drop the additional ingredients over the side of the bread pan into the baking chamber, as these may burn and smoke during the baking cycle.
DO NOT PRESS THE 'STOP' BUTTON WHEN ADDING INGREDIENTS AS THIS WILL CANCEL THE PROGRAM.
- At the end the kneading cycles the dough will start to rise. During the rising cycles the dough will be degassed twice by the blade moving at the end of the first and second rising cycles. The dough rises fully in the third rising cycle, then the baking cycle commences. The 'GLUTEN FREE' and 'DOUGH' settings have only one rising cycle with no degassing of the dough. The 'YEAST FREE' setting does not have a rising cycle.
- During the baking cycle steam may be emitted from the vents on the lid and condensation may form on the viewing window for a short time. This is normal and part of the bread making process.
- When the baking cycle is finished, the bread machine will sound 3 double 'beeps' and the LCD screen will show '0:00'. The baked bread is now ready to remove.
If the power is accidentally turned off for 30 minutes or less during the bread making process, the Baker's Oven has a 30 minute memory function, that will automatically resume bread making when power is restored.
Note
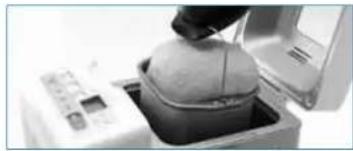
Step 10: Remove the bread pan
The bread pan is now ready to be removed. Use oven mitts to open the lid and carefully grasp the handle of the hot bread pan. Pull the bread pan upwards to release from drive mechanism and retaining clips.
natural_image
Close-up of a person pressing down on a mixing bowl into a machine (no visible text or symbols)If the hot bread pan is placed onto a bench or table ensure the surface is heat proof.
It is recommended to remove the bread at the end of the baking cycle to retain the crispness of the crust. However, if you do not wish to remove the hot bread immediately, the Baker's Oven will automatically go into the Keep Warm cycle, maintaining the temperature of the bread for up to 60 minutes. The 'Keep Warm' cycle is not available on 'YEAST FREE', 'DOUGH', 'JAM' or 'BAKE ONLY' settings.
Beginner's Guide to Baking Your First Loaf continued
Step 11: Take the bread out of the bread pan Use oven mitts to gently shake the bread out of the bread pan onto a wire rack. Check that the kneading blade remains on the drive shaft of the bread pan. Place the bread upright on the wire rack to cool. Allow sufficient cooling time before slicing the bread.
When baking is finished and the bread has been removed from the bread pan, remove the kneading blade from the pan using oven mitts. Do not remove the blade with bare hands, as it is very hot! If the kneading blade is difficult to remove from the drive shaft, pour some warm water with detergent into the pan and allow to stand for 10 minutes. The kneading blade should then be easily removed from the shaft. Follow 'Care and Cleaning' instructions on page 25.
Note
Step 12: Making another loaf
Allow approximately one hour for the Baker's Oven to cool before using again.
Open the lid to help cool the bread machine. If the Baker's Oven is too hot the LCD screen will show an error code (refer page 24) and will not operate until it cools to the correct operating temperature for kneading and rising.
Step 13: Switch off and unplug the bread machine
Press the 'STOP' button to clear the finished setting. The LCD screen will reset to 1 1KG MEDIUM. Switch off at the power outlet and unplug the power cord from the power outlet.
To store the bread machine, ensure the bread machine is completely cool, clean and dry.
Place kneading blades into the bread pan then insert into the baking chamber and close the lid. Do not place anything on top of the bread machine during storage. Store the bread machine upright.
Step 14: Cut the bread
Before cutting the bread always ensure the kneading blade is in the bread pan and not in the bottom of the baked bread loaf.
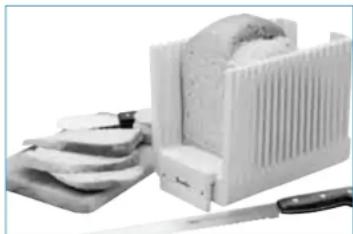
When the bread is cool, cut the bread using a serrated bread knife or electric knife on a firmly seated breadboard. A standard knife is not suitable as it will tear the bread.
Breville recommends using the Breville Bread Slicing Guide – Model BS1. This foldable, lightweight cutting guide is the ideal accessory for any bread maker. The guide slots ensure straight, even slices every time when using a bread knife or electric knife.
natural_image
Close-up of hands using a white food processor with a knife, no visible text or symbolsStep 15: Store the bread
Store the bread in freezer bags or a sealable bread box. To store for more than a few days, place the bread into freezer bags. Remove air from the bags then secure with ties and label. Bread may be frozen for up to 1 month.
Weighing and Measuring
Baking bread is in part a science and an art with each ingredient playing an integral role. Care should be taken when weighing and measuring ingredients to ensure accuracy and consistency.
Recipes in this Instruction Book were developed using Australian Metric Weights and Measurements.
| AUSTRALIAN METRIC MEASUREMENTS | mls |
| 1 teaspoon 5 | |
| 1 tablespoon 20 | |
| 1 cup 250 |
For New Zealand customers
| NZ METRIC MEASUREMENTS mls | |
| 1 teaspoon 5 | |
| 1 tablespoon 15 | |
| 1 cup 250 |
The New Zealand tablespoon is 5ml less than that of the Australian tablespoon, so care should be taken when measuring ingredients to compensate for the variance. For example, 1 Australian tablespoon = 1 New Zealand tablespoon + 1 New Zealand teaspoon.
Note
Metric liquid measuring jugs
If measuring liquids using a graduated, metric measuring jug, place jug on a flat surface, check for accuracy at eye level.
DO NOT USE TABLEWARE JUGS OR MEASURING CUPS.
It is important to note that New Zealand ingredients, especially flour and yeast, differ from the Australian equivalents. In the Vital Ingredients section (pages 18-20) suitable New Zealand products have been listed. We suggest these New Zealand products be substituted for the Australian products in the Easy Bake Recipe section. For further New Zealand bread making assistance Telephone: 0800 273 845.
Note
Metric weighing scales
For consistent results it is recommended to use metric weighing scales if possible as they provide greater accuracy than measuring cups. Tare (or zero) the scales with the container in position then spoon or pour ingredients in until the desired weight is achieved.
In general, water weighs the same in grams as it measures in millilitres.
Note
Metric measuring cups and spoons
If using the graduated, metric measuring cups, it is important to spoon or scoop the dry ingredients loosely into the required cup. Do not tap the cup on the bench, or pack the ingredients into the cup, unless otherwise directed. Level the top of the cup with a knife. When using graduated, metric measuring spoons, level the top of the spoon with a straight edged knife or spatula.
DO NOT USE TABLEWARE SPOONS OR CUPS.
The Vital Ingredients
FLOUR
Flour is the most important ingredient used for bread making. It provides food for the yeast and structures the loaf. When mixed with liquid, the protein in the flour starts to form gluten. Gluten is a network of elastic strands, which interlock to trap the gases produced by yeast. This process increases as the dough undergoes kneading and provides the dough with the structure required to produce the weight and shape of the bread.
White wheat flour
The flour used in the bread machine should be bread or baker's flour. There is no need to sift the flour. Plain flour is most readily available, however best results are obtained with flour with at least 11%-12% protein content. For this reason, the recipes in this book requiring bread flour, have been made with flours with 11-12% protein content. This is normally indicated on the packaging. Do not use self-raising flour unless indicated in the recipe.
When using a low protein, stone ground, wholemeal or plain flour the quality of the bread can be improved by adding 1½-2 tablespoons of gluten flour.
Note
Baker's or bread flour
Several brands of baker's or bread flour are available nationally at larger supermarkets. Baker's flour was used for the development of most of the recipes contained in this guide. It is a high protein, white wheat flour, with 11 - 12% protein content, ensuring a higher quality and consistency to the baked bread.
NEW ZEALAND ONLY: 'Elfin High Grade White Flour' or 'Champion High Grade Flour'. These are high protein, white bread flours, containing 12% protein.
Wholemeal flour
Contains all the bran, germ and flour of the wholewheat grain. Although breads baked with wholemeal flour will be higher in fibre, the loaf can be lower in height and heavier in texture depending on the protein level of the flour. Wholemeal flour with low protein level can be improved by adding gluten flour or replacing 1 cup of wholemeal flour with bread or baker's flour.
Rye flour
Popular for continental bread making, rye flour is low in protein so it is essential to combine rye flour with bread flour to make bread successfully in the bread machine. Rye flour is traditionally used to make Pumpernickel and Black Breads.
Gluten flour
Gluten flour is a concentrated mixture of gluten forming protein and wheat flour. Adding gluten flour can improve the structure and volume of bread when using a low protein, stone ground, wholemeal or plain flour. Gluten flour can be purchased at most health food stores.
BREAD MIXES
These convenient mixes contain flour, sugar, milk, salt, oil and other ingredients such as bread improvers. Usually only the addition of water and yeast is required. Bread mix brands such as 'Defiance', 'Laucke' and 'Kitchen Collection' are available nationally from major supermarkets. Recipes for some bread mix brands are listed in the 'Easy Bake' recipe section of this book (refer pages R37-R40).
For information on other brands of bread mix contact the manufacturer listed on the package.
NEW ZEALAND ONLY: Bread mix brands such as 'Elfin' are available.
The Vital Ingredients continued
BREAD IMPROVER
Several brands of bread improvers are available nationally in supermarkets and health food stores. The ingredients in a bread improver are usually a food acid such as ascorbic acid (Vitamin C) and other enzymes (Amylases) extracted from wheat flours.
Adding a bread improver will help strengthen the framework of the bread resulting in a loaf that is lighter in texture, higher in volume, more stable and with enhanced keeping qualities.
A commercial bread improver has been used in some of the bread recipes listed in the 'Easy Bake' recipe section of this book. A crushed, unflavoured Vitamin C tablet or Vitamin C powder can be used as a bread improver and added to the dry ingredients.
Note
SUGAR
Sugar provides food for the yeast, sweetness and flavour to the crumb and helps brown the crust. White sugar, brown sugar, honey and golden syrup are all suitable to use. When using honey or golden syrup it must be counted as additional liquid. We have successfully tested granulated 'Splenda' as a sugar substitute.
NEW ZEALAND ONLY: Sugar can be reduce for more improved results.
POWDERED MILK
Milk and milk products enhance the flavour and increase the nutritional value of the bread. Powdered milk is convenient and easy to use (store in an airtight container in the refrigerator). Fresh milk should not be substituted for powdered milk unless stated in the recipe. Low fat or skim milk powder can be used with good results. Soy milk powder can also be used but produces a denser loaf.
SALT
Salt is an important ingredient in bread making. However salt inhibits the rising of the bread, so be careful when measuring as it should be accurate. Refer to 'Questions and Answers' (page 22).
NEW ZEALAND ONLY: Salt can be reduced for more improved results.
FAT
Butter, margarine or oils, such as vegetable, safflower, sunflower, canola, etc., will add flavour, retain the moisture and enhance the keeping qualities of the bread.
YEAST
Without yeast the bread will not rise. Yeast needs liquid, sugar and warmth to activate. Dried yeast has been used in the recipes in this instruction book where appropriate. Before using dried yeast always check the use by date, as stale yeast will prevent the bread from rising.
'Tandaco' brand yeast (available nationally in most supermarkets) was used in the development of all yeasted recipes contained in this book with the exception of the 'Bread Mix' recipes.
Smaller packets of bread mix usually contain sachets of yeast. Larger bulk bags of bread mix usually do not include the yeast sachets, however the corresponding brand of yeast may be purchased separately.
Some bulk and imported yeasts are more active, therefore it is recommended to use less of these yeasts. Yeast may also be more active in hot weather. For information on other brands of yeast relating to quantities contact the manufacturer listed on the package.
NEW ZEALAND ONLY: We recommend the use of 'Elfin' brand yeast.
The Vital Ingredients continued
Rapid rise yeast
These products are a mixture of yeast and bread improver. Brands will vary in strength. If wishing to substitute for yeast in a recipe, omit the bread improver. Rapid rise yeasts should not be used with bread mix as bread improver is already included.
NEW ZEALAND ONLY: 'Edmonds Surebake Yeast' is the most readily available yeast product in New Zealand. Where a recipe states 'Bread Improver and Tandaco Yeast' substitute with 'Edmonds Surebake Yeast.'
WATER
Tap water is used in all recipes. If using water in cold climates or from the refrigerator, allow water to come to room temperature. Extremes of hot or cold water will prevent the yeast activating.
EGGS
Eggs are used in some bread recipes and provide liquid, help with rising and increase the nutritional value of the bread. They give flavour and tenderness and are usually used in the sweeter type of breads.
OTHER INGREDIENTS
Fruit, nuts, chocolate chips, etc. are added when the bread machine sounds 8 short 'beeps' approximately 5 minutes before the end of the second kneading when using the 'BASIC', 'BASIC RAPID', 'WHOLEWHEAT', 'WHOLEWHEAT RAPID', 'FRENCH' and 'SWEET' settings. If added before this stage, excessive kneading will cause the ingredients to break down, rather than hold their shape.
JAM SETTING MIX
'Jam Setta' brand setting mix contains the ingredient 'pectin' which is a naturally occurring substance found in fresh fruit. The addition of 'Jam Setta' to the jam recipes helps the jam to set. This product is available in 50g packets nationally from supermarkets and some hardware stores.
NEW ZEALAND ONLY: 'King Jam Setting Mix' is available in 70g sachets from major supermarkets.
For more information about bread mixes please contact the relevant number listed below, or refer to contact details on the packaging of the bread mix.
Defiance: 1800 628 883
Laucke: 1300 133 331
Kitchen Collection: 1800 645 515
Elfin (New Zealand only): 0800 110 800
For more information about Bread or Baker's Flour please contact the relevant number listed below, or refer to contact details on the package.
Defiance White Baker's Flour: 1800 628 883
Laucke Wallaby Baker's Flour: 1300 133 331
Elfin/Champion High Grade Plain Flour (New Zealand only): 0800 110 800
For more information about Bread Improver please contact:
Lowan Wholefoods: 1800 355 718
Hints and Tips for Better Bread Making
√ Ensure the collapsible kneading blade is in the upright position before adding ingredients to the bread pan.
Do measure ingredients accurately – weighed measurements are more accurate than volumetric measurements.
√ Do use bread flour unless recipe states otherwise.
√ Do check use-by dates on ingredients.
√ Do add ingredients to the bread pan in the order stated in the recipe.
√ Do store opened ingredients in airtight containers.
Do use ingredients at room temperature.
Don't use flour that contains a protein level of less than 11% , for example, generic brands of plain flour.
X Don't use tableware cups and spoons for measuring.
Don't use compressed yeast.
X Don't use hot water or liquids.
Don't use metal objects to remove the kneading blade from the cooked loaf of bread or the bread pan as this may cause damage to the non-stick coating.
Don't operate the machine if any ingredients have spilled over or around the element. Wipe away any spills first to prevent smoking occurring in the baking cycle.
NEVER Use the 'PRESET TIMER' setting for recipes that contain perishable items, such as eggs, cheese, milk, cream and meats.
NEVER Use self-raising flour to make yeasted bread unless recipe states otherwise.
NEVER Immerse your bread machine or bread pan in water.
TIP: If you live in an area with a high altitude (above 900m) you will probably need to alter your bread recipe, as the higher the altitude, the lower the air pressure, the faster the dough will rise. Try reducing the yeast by 14 teaspoon.
TIP: If the weather is hot and humid, reduce the yeast by 14 teaspoon to avoid over rising of the dough.
TIP: Flour properties can alter on a seasonal or storage basis, therefore it may be necessary to adjust the water and flour ratio. This can be determined after ten minutes of the kneading cycle. Simply open the lid of the bread machine and if the dough is too sticky, add a little more flour, 1 tablespoon at a time, until the dough reaches a firmer consistency. If the dough is too dry add a little more water, 1 teaspoon at a time until a softer, more pliable dough results. After being properly kneaded, dough with the correct amount of water should form into a smooth, round ball.
TIP: When hand-shaping dough for rolls, weigh each piece of dough for more evenly sized rolls.
Questions and Answers
Questions and Answers continued
ABOUT INGREDIENTS:
Q: Can other bread recipes be made in this machine?
A: The recipes in this book are sized so that the dough is kneaded properly and the finished bread does not exceed the bread pan capacity. Use only recipes with similar quantities of ingredients.
Q: Can fresh milk be used instead of dry milk?
A: Yes – but not when using the 'PRESET TIMER'. Bread made with fresh milk will have a heavier texture than bread made with milk powder. If using fresh milk substitute the water with fresh milk and omit the milk powder. Scald the milk and cool before adding to the other dough ingredients.
Q: Can butter or margarine be used in place of oil?
A: Yes, but the bread crumb may appear a more creamy, yellow colour.
Q: Can other sweetening agents be used in place of sugar?
A: Yes – honey, golden syrup or brown sugar can be used. Do not use powdered or liquid artificial sweeteners. However granulated 'SPLENDA' was successfully tested during recipe development. When substituting honey or similar sweet liquids for sugar, reduce the water by the same amount.
Q: Can salt be omitted?
A: Salt plays a very important part in bread making. Omitting it will decrease water retention in the dough, as well as affect mixing, the strength of gluten development and the fermentation of the yeast. In the finished bread, salt improves the loaf shape, crumb structure and crust colour, as well as extending shelf life and enhancing flavour.
Q: Why do the ingredients need to be placed into the pan in the specified order?
A: To ensure all dry ingredients are mixed with water and to avoid the yeast activating prematurely with the water when using the 'PRESET TIMER'.
ABOUT BAKING BREAD:
Q: The bread setting has been accidentally cancelled/reset or a power failure has occurred during the bread making process. What can I do?
A: If the power is accidentally turned off for 30 minutes or less during the operation, the Baker's Oven has a 30 minute memory function, that will automatically resume bread making, where it was interrupted, when power is restored.
If the operation cannot be resumed or the setting is cancelled:
During the kneading stage – Reselect the bread setting again and allow dough to re-knead and continue through the rising and baking process. The result may be a loaf higher in volume and lighter in texture.
During the rising stage – Turn the bread machine off. Leave the dough in the pan and in the baking chamber with the lid closed. Allow the dough to rise until almost near the top of the pan. Turn the bread machine on. Select the 'BAKE ONLY' setting, set time for between 5 minutes and 2 hours. Press the 'START' button. During the baking cycle – Select the 'BAKE ONLY' setting. Select required baking time (Between 5 minutes and 2 hours). Press the 'START' button.
Q: What happens if the bread isn't removed when the bake cycle is complete?
A: The bread machine will automatically go into a keep warm cycle, (in the 'BASIC', 'BASIC RAPID', 'WHOLEWHEAT', 'WHOLEWHEAT RAPID', 'GLUTEN FREE', 'FRENCH' and 'SWEET' settings) holding the temperature of the bread for up to 60 minutes. However, as the loaf cools it gives off steam which can't escape from the bread pan. The bread crust may become soft and the loaf may slightly lose its shape.
Q: Why did the bread not rise?
A: There may be several reasons. Check the protein level of the flour and use-by-date of the yeast. The yeast may have failed to activate, the yeast measurements may be inaccurate or sometimes people just forget to add the yeast.
Q: Why do large holes appear inside the bread?
A: Occasionally air bubbles will concentrate at a certain location during the last rising and will bake in this state. This could be caused by too much water and/or yeast or insufficient flour. Check the recipe ingredients and method of weighing/measuring.
Q: Why does the top of the bread collapse?
A: Usually this is because the ingredients are not in balance or a low protein flour is used. Check the method of weighing/measuring the ingredients. Too much yeast, water or other liquid ingredients, or insufficient flour, may cause the bread to be pale on top and collapse with baking.
Q: Why does bread colour differ?
A: This is probably because the ingredients used in each recipe may vary. A different crust colour may also have been selected.
Q: Are the room and water temperatures important?
A: Yes – Room and water temperature influences yeast activity and therefore can affect the quality of your bread. The average room temperature is approximately 20-25°C. Water at room temperature should also be used.
NEVER use hot water as it will kill the yeast.
Note
ABOUT USING THE TIMER:
Q: Why can't the 'PRESET TIMER' be set past 13 hours?
A: The ingredients may deteriorate in quality or ferment if they are left inside the bread pan for many hours. This is especially the case during summer, when the 'PRESET TIMER' should be set to a shorter period of time.
Q: Why can't some ingredients be used with the 'PRESET TIMER'?
A: Most protein foods, such as milk, cheese, eggs, bacon, etc., are perishable and will deteriorate if left unrefrigerated for more than one hour.
Control Panel Messages
ERROR DETECTION
When the 'START' button has been pressed to begin the process and there is a problem relating to the sensor, the machine will 'beep' twice and then flash the particular error message specific to the problem.
There are 4 different error messages:
| ERRORMESSAGE | PROBLEM CORRECTION | |
| E:01 | If attempting to use the bread machine shortly after a loaf has been baked, its interior will still be warm, that is, the sensor temperature will still be above 40°C. | Press ‘STOP’ to reset. Open the lid and remove the bread pan to cool. Always allow the bread machine sufficient time to cool before using again. |
| E:02 | Contact your nearest authorised Breville Service Centre (refer to the back page for details). | |
| E:03 | Contact your nearest authorised Breville Service Centre (refer to the back page for details). | |
| E:04 | Contact your nearest authorised Breville Service Centre (refer to the back page for details). |
Care, Cleaning and Storage
Before cleaning your bread machine, switch off and then unplug from the power outlet and allow the bread machine to cool completely.
BREAD MACHINE
The inside and outside of the bread machine and the lid should be wiped with a soft, damp cloth then dried thoroughly. If over spills such as flour, nuts, sultanas, etc., occur in the baking chamber, carefully remove, using a damp cloth. Before reusing your bread machine ensure that all parts are completely dry.
NEVER immerse the bread machine or the bread pan in water.
Note
BREAD PAN AND KNEADING BLADE
The inside of the bread pan and collapsible kneading blade are coated with a high quality, non-stick coating. As with any non-stick coated surface, NEVER use metal utensils or abrasive cleaners on these items.
To clean the bread pan and blades:
Half fill the bread pan with soapy water (use a non-abrasive detergent), allow to stand for 10-20 minutes. Remove the kneading blade and clean both blade and inside of bread pan using a soft cloth. Be sure to remove any crust or dough that may become lodged around the drive shaft and the kneading blade. Take care not to scratch the non-stick surface on the inside of the bread pan and the kneading blade.
DO NOT USE HARSH CLEANERS, ABRASIVES, BRUSHES OR STEEL WOOL.
NEVER WASH THE BREAD PAN OR KNEADING BLADE IN THE DISHWASHER.
To clean the collapsible blade:
Particular care should be used to clean the hinged area of the collapsible blade. After soaking in warm, soapy water for 10-20 minutes, use a wooden toothpick or thin wooden skewer to remove any bread residue from the hinged area. Failure to clean the hinged area may eventually result in the collapsible blade not working effectively.
Some discolouration may appear on the bread pan over time. This is a natural effect caused by moisture and steam and will not affect the bread in any way.
Note
STORAGE
When storing the bread machine, switch off and then remove the power plug from the power outlet. Ensure it is completely cool, clean and dry. Place the bread pan and kneading blades into the baking chamber and close the lid. Do not place heavy objects on top of the lid. Store the bread machine upright.
REPLACEMENT BREAD PAN AND BLADES
Both the collapsible blade and bread pan coating are operating parts of the machine and as such are subject to normal wear and tear over the life of the machine. Depending on your usage of the bread machine they may need replacement if the bread begins to stick.
SPARE PARTS
Replacement parts are available from Breville Spare Parts:
Australia Customer Service: 1300 139 798
New Zealand Customer Service: 0800 253 007
Troubleshooting Guide - Recipe
| Bread sinks in the centre | Over browned | Sticky patch on top of bread | Doughy centre | Heavy dense texture | ||
| Flour | Not measured correctly | ● ● ● ● | ||||
| Low % protein | ● | ● | ||||
| Passed use-by-date | ● | ● | ||||
| Self raising flour used | ● ● ● | |||||
| Sugar | Not measured correctly | ● ● ● ● ● | ||||
| Salt | Not measured correctly | ● | ||||
| Water/liquid | Not measured correctly | ● ● ● | ||||
| Too hot | ● | |||||
| Too cold | ||||||
| Yeast | Not measured correctly | ● | ● | |||
| Bread mix | Not measured correctly | ● ● ● ● | ||||
| Used in place of flour | ● ● ● ● ● | |||||
| Room temperature | Too hot | ● | ||||
| Too hot | ● | |||||
Troubleshooting Guide - Recipe (continued)
| Coarse holey texture | Bread rises too much | Bread doesn't rise enough | Corrective action Ref page | |
| ● | ● | Check method of weighing/measuring ingredients | 17 | |
| ● | Use suitable high protein flour or add gluten flour | 18 | ||
| ● | Discard and use fresh flour | 21 | ||
| ● | Use bread or plain flour - self-raising flour already contains baking powder as the raising agent | 18 | ||
| ●●● | Use metric measuring spoons | 17 | ||
| ● | Use metric measuring spoons | 17 | ||
| ●●● | Check method of weighing/measuring | 17 | ||
| ● | Water must be between 20-25°C | 20 | ||
| ● | Water must be between 20-25°C | 20 | ||
| ● | Use metric measuring spoons | 17 | ||
| ●●● | Check method of weighing/measuring | 17 | ||
| ●●● | Bread mix already contains salt, sugar, etc. and cannot be substituted for flour | 18 | ||
| ● | ● | Room temperature must be less than 28°C | 23 | |
| ● | Room temperature must be more than 10°C | 23 |
Troubleshooting Guide - Baker's Oven
Troubleshooting Guide - Baker's Oven (continued)
| Machine | Machine will not operate | Error code E01 in Display Window | Ingredients not mixed |
| Appliance unplugged | |||
| Kneading blade not on shaft | |||
| Selected setting incorrect | |||
| Power interruption (refer to pages 15 and 22) | |||
| Stop button pressed after starting machine (refer to page 22) | |||
| Machine has not cooled from previous use | |||
| Lid opened during rising or baking | |||
| Hot bread left in pan too long | |||
| Incorrect crust colour selection | |||
| Start button not pressed | |||
| Bread pan unseated |
| Bread not baked | Bread rises too much | Baked bread is damp | Under browned crust | Preset timer did not function | Bread not sufficiently baked | Loaf is small |
Contents
Easy Bake Recipes
Page
Traditional Favourites R3
Flavoured White Bread R8
Flavoured Sweet Bread R11
Flavoured Wholemeal Bread R17
Rapid Bread R20
Dough R23
Yeast Free & Muffin Bread R29
Gluten Free Bread R33
Prepackaged Bread Mixes R37
Just Jam R41
Glazes R43
Notes R44
Traditional Favourites
There are many breads that we all like to place in our lunch box. This section includes a variety of breads made from all natural ingredients. After tasting all of these recipes, you just might discover a new found favourite.
Procedure
- Place ingredients into the bread pan, in the exact order listed in the recipe.
- Wipe spills from outside of bread pan.
- Lock the bread pan into position in the baking chamber and close the lid.
- Press 'SELECT' to access the setting as specified in the following recipes. Each bread setting and the dough setting will default to 1KG MEDIUM (crust colour).
- Press 'LOAF SIZE' to select 750g (0.75KG) if required.
- Press 'CRUST' once for DARK or twice for LIGHT if required.
- Press 'START'.
- At the end of the program, press 'STOP'.
- Remove bread from bread machine and bread pan. Cool on rack.
Ensure the collapsible kneading blade is in the upright position before adding ingredients.
Note
Traditional Favourites continued
SEQUENCE FOR 'BASIC' SETTING:
| SIZE CRUST | 1ST KNEAD | 2ND KNEAD | 1ST RISE | PUNCH DOWN | 2ND RISE | PUNCH DOWN | 3RD RISE | BAKE TIME | TOTAL TIME | |
| 1kg | LIGHT 3 min | 22 min | 30 min | 5 secs | 15 min | 7 secs | 50 min | 46 | 2hr 46min | |
| MEDIUM 3 min | 22 min | 30 min | 5 secs | 15 min | 7 secs | 50 min | 58 | 2hr 58min | ||
| DARK 3 min | 22 min | 30 min | 5 secs | 15 min | 7 secs | 50 min | 65 | 3hr 05min | ||
| 750g | LIGHT 3 min | 22 min | 30 min | 5 secs | 15 min | 7 secs | 50 min | 41 | 2hr 41min | |
| MEDIUM 3 min | 22 min | 30 min | 5 secs | 15 min | 7 secs | 50 min | 53 | 2hr 53min | ||
| DARK 3 min | 22 min | 30 min | 5 secs | 15 min | 7 secs | 50 min | 60 | 3 hr 00min | ||
ADD-IN BEEPS:
The Baker's Oven 'beeps' 8 times at 5 minutes before the end of the second knead. Extra ingredients such as fruit, nuts, etc. should be added at this time.
BASIC WHITE BREAD
| INGREDIENTS 1kg 750g | ||
| Water 350ml 300ml | ||
| Oil 2 tbl 1 tbl | ||
| Salt 2 tsp | 1 12 tsp | |
| Sugar 2 tbl 1 12 tbl | ||
| Bread flour | 650g /4 12 cups | 450g /3 cups |
| Milk powder | 2 tbl 1 tbl | |
| Breadimprover | 1 tsp | 34 tsp |
| Tandaco yeast | 1 12 tsp | 1 14 tsp |
| SETTING: 1 (BASIC) LIGHT/MEDIUM/DARK | ||
MILK BREAD
Not suitable for 'PRESET TIMER'.
| INGREDIENTS | 1kg | 750g |
| Full cream milk, scaled & cooled | 370ml | 310ml |
| Oil | 1 tbl | 3 tsp |
| Salt | 114 tsp | 112 tsp |
| Sugar | 2 tbl | 112 tbl |
| Bread flour | 600g / 4 cups | 450g / 3 cups |
| Bread improver 1 tsp 34 tsp | ||
| Tandaco yeast | 114 tsp | 112 tsp |
| SETTING: 1 (BASIC) LIGHT/MEDIUM/DARK | ||
Traditional Favourites continued
Traditional Favourites continued
SEQUENCE FOR 'FRENCH' SETTING:
| SIZE CRUST | 1ST KNEAD | 2ND KNEAD | 1ST RISE | PUNCH DOWN | 2ND RISE | PUNCH DOWN | 3RD RISE | BAKE TIME | TOTAL TIME | |
| 1kg | LIGHT 3 min | 20 min | 40 min | 10 | secs | 30 min | 12 secs | 60 min | 55 min | 3hr 28min |
| MEDIUM 3 min | 20 min | 40 min | 10 | secs | 30 min | 12 secs | 60 min | 60 min | 3hr 33min | |
| DARK 3 min | 20 min | 40 min | 10 | secs | 30 min | 12 secs | 60 min | 67 min | 3hr 40min | |
| 750g | LIGHT 3 min | 20 min | 40 min | 10 | secs | 30 min | 12 secs | 60 min | 50 min | 3hr 23min |
| MEDIUM 3 min | 20 min | 40 min | 10 | secs | 30 min | 12 secs | 60 min | 55 min | 3hr 28min | |
| DARK 3 min | 20 min | 40 min | 10 | secs | 30 min | 12 secs | 60 min | 62 min | 3hr 35min | |
ADD-IN BEEPS:
The Baker's Oven 'beeps' 8 times at 5 minutes before the end of the second knead. Extra ingredients such as fruit, nuts, etc. should be added at this time.
FRENCH BREAD
| INGREDIENTS 1kg 750g | ||
| Water 350ml 300ml | ||
| Oil 3 tsp 2 tsp | ||
| Salt 2 tsp 1 12 tsp | ||
| Sugar 2 tsp 1 12 tsp | ||
| Bread flour 650g /4 12 cups | 500g /3 12 cups | |
| Breadimprover | 1 tsp | 34 tsp |
| Tandaco yeast | 1 12 tsp | 1 14 tsp |
| SETTING: 6 (FRENCH) LIGHT/MEDIUM/DARK | ||
SEQUENCE FOR 'WHOLEWHEAT' SETTING:
| SIZE CRUST | 1ST KNEAD | 2ND KNEAD | 1ST RISE | PUNCH DOWN | 2ND RISE | PUNCH DOWN | 3RD RISE | BAKE TIME | TOTAL TIME | |
| 1kg | LIGHT | 3 min 20 | min 30 | min 10 | secs | 20 min 6 | secs | 65 min 48 | min | 3hr 06min |
| MEDIUM | 3 min 20 | min 30 | min 10 | secs | 20 min 6 | secs | 65 min 53 | min | 3hr 11min | |
| DARK | 3 min 20 | min 30 | min 10 | secs | 20 min 6 | secs | 65 min 55 | min | 3hr 13min | |
| 750g | LIGHT | 3 min 20 | min 30 | min 10 | secs | 20 min 6 | secs | 65 min 43 | min | 3hr 01min |
| MEDIUM | 3 min 20 | min 30 | min 10 | secs | 20 min 6 | secs | 65 min 48 | min | 3hr 06min | |
| DARK | 3 min 20 | min 30 | min 10 | secs | 20 min 6 | secs | 65 min 50 | min | 3hr 08min | |
ADD-IN BEEPS:
The Baker's Oven 'beeps' 8 times at 5 minutes before the end of the second knead. Extra ingredients such as fruit, nuts, etc. should be added at this time.
100% WHOLEMEAL BREAD
| INGREDIENTS | 1kg | 750g |
| Water | 380ml 320ml | |
| Oil | 2 12 tbl 2 tbl | |
| Salt | 2 tsp | 1 12 tsp |
| Sugar | 3 tbl | 2 12 tbl |
| Wholemeal plain flour | 560g / 3 34 cups | 450g / 3 cups |
| Gluten flour 3 tbl | 2 12 tbl | |
| Milk powder | 2 tbl | 1 12 tbl |
| Bread improver | 1 tsp | 34 tsp |
| Tandaco yeast | 2 tsp | 1 12 tsp |
| SETTING: 3 (WHOLEWHEAT)LIGHT/MEDIUM/DARK | ||
Traditional Favourites continued
MULTIGRAIN BREAD
| INGREDIENTS 1kg 750g | ||
| Water 370ml 310ml | ||
| Oil 3 tbl 2 tbl | ||
| Salt 2 tsp 1 12 tsp | ||
| Sugar 3 tbl 2 tbl | ||
| Bread flour 375g /2 12 cups | 300g /2 cups | |
| Wholemeal plain flour | 225g /1 12 cups | 150g /1 cup |
| Gluten flour 2 tbl | 1 tbl | |
| Milk powder 2 tbl | 1 12 tbl | |
| Bread improver 1 tsp | 14 tsp | |
| Sunflower seeds 3 12 tbl 3 tbl | ||
| Kibble wheat 3 12 tbl 3 tbl | ||
| Whole linseeds | 2 12 tbl 2 tbl | |
| Sesame seeds | 2 12 tbl 2 tbl | |
| Cracked buckwheat | 1 12 tbl 1 tbl | |
| Tandaco yeast | 1 12 tsp | 1 14 tsp |
| SETTING: 3 (WHOLEWHEAT)LIGHT/MEDIUM/DARK | ||
Flavoured White Bread
Recipes in this section have the addition of seeds, nuts or other flavour enhancing ingredients. The addition occurs mostly at the sound of the 'beeps'. Therefore these recipes are not suitable to use on the Preset Timer.
Procedure
- Place ingredients into the bread pan, in the exact order listed in the recipe.
- Wipe spills from outside of bread pan.
- Lock the bread pan into position in the baking chamber and close the lid.
- Press 'SELECT' to access the setting as specified in the following recipes. Each bread setting and the dough setting will default to 1kg MEDIUM (crust colour).
- Press 'LOAF SIZE' to select 750g (0.75KG) if required.
- Press 'CRUST' once for DARK or twice for LIGHT if required.
- Press 'START'.
- At the end of the program, press 'STOP'.
- Remove bread from bread machine and bread pan. Cool on rack.
ADD-IN BEEPS:
The Baker's Oven 'beeps' 8 times at 5 minutes before the end of the second knead. Extra ingredients such as fruit, nuts, etc. should be added at this time.
PUMPKIN & PEPITA BREAD
| INGREDIENTS | 1kg | 750g(0.75KG) |
| Water | 220ml | 180ml |
| Oil | 3 tbl | 2 tbl |
| Cooked pumpkin,well drained &mashed | 175g / 14 cup | 140g / 12 cup |
| Salt | 2 tsp | 112 tsp |
| Sugar | 2 tbl | 112 tbl |
| Bread flour | 600g /4 cups | 450g /3 cups |
| Milk powder | 2 tbl | 112 tbl |
| Bread improver | 1 tsp | 34 tsp |
| Gluten flour | 3 tsp | 2 tsp |
| Ground cumin | 1 tsp | 34 tsp |
| Ground nutmeg | 12 tsp | 14 tsp |
| Tandaco yeast 112 tsp | 114 tsp | |
| ⊕ ADD AT THE BEEPS: | ||
| Pepita seeds | 80g / 12 cup | 50g / 12 cup |
| SETTING: 1 (BASIC) LIGHT/MEDIUM/DARK | ||
Ensure the collapsible kneading blade is in the upright position before adding ingredients.
Note
Flavoured White Bread continued
Flavoured White Bread continued
SWEET CORN & CAPSICUM BREAD
| INGREDIENTS 1kg 750g | ||
| Water 240ml 210ml | ||
| Oil 3 tbl 2 tbl | ||
| Salt 2 tsp 1 12 tsp | ||
| Sugar 2 12 tbl 2 tbl | ||
| Cannedcreamed corn | 4 12 tbl 4 tbl | |
| Bread flour 600g | / 4 cups 450g / 3 cups | |
| Milk powder 2 tbl | 1 12 tbl | |
| Gluten flour 3 tsp | 2 tsp | |
| Bread improver 1 12 tsp 1 tsp | ||
| Cajun seasoning 1 | tsp 12 tsp | |
| Tandaco yeast | 1 12 tsp 1 14 tsp | |
| ADD AT THE BEEPS: | ||
| Canned cornkernels, drained& dried | 2 12 tbl 2 tbl | |
| Chopped redcapsicum | 2 12 tbl 2 tbl | |
| SETTING: 1 (BASIC) LIGHT/MEDIUM/DARK | ||
CARROT & EDAM BREAD
| INGREDIENTS | 1kg | 750g |
| Water | 270ml | 250ml |
| Oil | 3 tbl | 2 tbl |
| Salt | 114 tsp 112 tsp | |
| Sugar | 212 tbl | 2 tbl |
| Bread flour | 600g / 4 cups | 450g / 3 cups |
| Gluten flour | 3 tsp 3 tsp | |
| Bread improver | 1 tsp 1 tsp | |
| Milk powder | 2 tbl | 2 tbl |
| Dried dill | 114 tsp 1 tsp | |
| Cracked black peppercorns | 114 tsp 1 tsp | |
| Tandaco yeast | 112 tsp 114 tsp | |
| ADD AT THE BEEPS: | ||
| Grated carrot | 60g / 12 cup | 45g / 12 cup |
| Grated Edam cheese | 70g / 12 cup | 50g / 12 cup |
| Finely chopped shallots | 112 tbl | 1 tbl |
| SETTING: 1 (BASIC) LIGHT/MEDIUM/DARK | ||
GRAIN MUSTARD & HERB BREAD
| INGREDIENTS | 1kg | 750g |
| Water | 300ml | 280ml |
| Oil | 3 tbl 2 tbl | |
| Salt | 112 tsp | 1 tsp |
| Sugar | 212 tbl | 2 tbl |
| Bread flour | 600g /4 cups | 450g /3 cups |
| Bread improver | 1 tsp 1 tsp | |
| Milk powder | 2 tbl 112 tbl | |
| Wholegrain mustard | 1 tbl 3 tsp | |
| Tandaco yeast | 112 tsp | 114 tsp |
| ✿ ADD AT THE BEEPS: | ||
| Fresh mixed herbsof your choice,chopped | 4 tbl 3 tbl | |
| SETTING: 1 (BASIC) LIGHT/MEDIUM/DARK | ||
PEANUT SATE BREAD
| INGREDIENTS | 1kg | 750g |
| Water | 320ml | 270ml |
| Oil | 2 tbl | 1 tbl |
| Laksa Curry Mix | 112 tbl | 1 tbl |
| Salt | 114 tsp | 1 tsp |
| Sugar | 2 tbl | 1 tbl |
| Bread flour | 600g /4 cups | 450g /3 cups |
| Gluten flour | 3 tsp 3 tsp | |
| Bread improver | 1 tsp 1 tsp | |
| Milk powder | 2 tbl | 2 tbl |
| Tandaco yeast 134 tsp | 112 tsp | |
| ADD AT THE BEEPS: | ||
| Crushed nuts | 70g / 13 cup | 50g / 14 cup |
| SETTING: 1 (BASIC) LIGHT/MEDIUM/DARK | ||
Flavoured Sweet Bread
Most of the recipes in this section have the addition of nuts, chocolate, sultanas or other flavour enhancing ingredients. The addition occurs mostly at the sound of the beeps towards the end of the second kneading cycle. Therefore these recipes are not suitable to use with the Preset Timer.
Procedure
- Place ingredients into the bread pan, in the exact order listed in the recipe.
- Wipe spills from outside of bread pan.
- Lock the bread pan into position in the baking chamber and close the lid.
- Press 'SELECT' to access the setting as specified in the following recipes. Each bread setting and the dough setting will default to 1kg MEDIUM (crust colour).
- Press 'LOAF SIZE' to select 750g (0.75KG) if required.
- Press 'CRUST' once for DARK or twice for LIGHT if required.
- Press 'START'.
- At the end of the program, press 'STOP'.
- Remove bread from bread machine and bread pan. Cool on rack.
Ensure the collapsible kneading blade is in the upright position before adding ingredients.
Note
Flavoured Sweet Bread continued
SEQUENCE FOR 'SWEET' SETTING:
| SIZE CRUST | 1ST KNEAD | 2ND KNEAD | 1ST RISE | PUNCH DOWN | 2ND RISE | PUNCH DOWN | 3RD RISE | TOTAL TIME | ||
| 1kg | LIGHT 5 min | 20 min | 40 min 10 | secs 25 | min 7 secs | 55 min | 55 | min | 3hr 20min | |
| MEDIUM 5 min | 20 min | 40 min | 10 secs | 25 min 7 secs | 55 min | 62 | min | 3hr 27min | ||
| DARK 5 min | 20 min | 40 min 10 | secs 25 | min 7 secs | 55 min | 68 | min | 3hr 33min | ||
| 750g | LIGHT 5 min | 20 min | 40 min 10 | secs 25 | min 7 secs | 55 min | 50 | min | 2hr 15min | |
| MEDIUM 5 min | 20 min | 40 min | 10 secs | 25 min 7 secs | 55 min | 57 | min | 3hr 22min | ||
| DARK 5 min | 20 min | 40 min 10 | secs 25 | min 7 secs | 55 min | 63 | min | 3hr 28min | ||
ADD-IN BEEPS:
The Baker's Oven 'beeps' 8 times at 5 minutes before the end of the second knead. Extra ingredients such as fruit, nuts, etc. should be added at this time.
Flavoured Sweet Bread continued
Flavoured Sweet Bread continued
RICH FRUIT LOAF
| INGREDIENTS 1kg 750g | ||
| Water 340ml 290ml | ||
| Oil 3 tbl 2 tbl | ||
| Salt 1 12 tsp 1 12 tsp | ||
| Grated orange rind | 2 12 tsp 2 tsp | |
| Brown sugar 2 12 tbl 2 tbl | ||
| Bread flour 600g / 4 cups 450g / 3 cups | ||
| Gluten flour 3 tsp 2 tsp | ||
| Bread improver | 1 tsp | 34 tsp |
| Milk powder | 2 tbl 1 | 12 tbl |
| Mixed spice | 1 tbl | 34 tbl |
| Tandaco yeast 1 12 tsp 1 14 tsp | ||
| ADD AT THE BEEPS: | ||
| Fruit medley | 60g / 12 cup 45g / 14 cup | |
| Sultanas | 2 tbl 1 tbl | |
| Prunes, chopped | 1 12 tbl 1 tbl | |
| Glace cherries, halved | 1 12 tbl 1 tbl | |
| SETTING: 7 (SWEET) LIGHT/MEDIUM/DARK | ||
LEMON & POPPY SEED BREAD
| INGREDIENTS | 1kg | 750g |
| Water | 310ml | 250ml |
| Lemon Butter Spread | 3 tbl | 2 tbl |
| Oil | 112 tbl | 1 tbl |
| Salt | 2 tsp | 112 tsp |
| Bread flour | 600g / 4 cups | 450g / 3 cups |
| Bread improver | 1 tsp | 34 tsp |
| Milk powder | 2 tbl | 112 tbl |
| Tandaco yeast | 112 tsp | 114 tsp |
| COMBINE THE FOLLOWING & ADD AT THE BEEPS: | ||
| Grated lemon rind | 212 tsp | 2 tsp |
| Poppy seeds | 2 tbl | 112 tbl |
| Oil | 112 tbl | 1 tbl |
| SETTING: 7 (SWEET) LIGHT/MEDIUM/DARK | ||
STRAWBERRY & PISTACHIO LOAF
| INGREDIENTS | 1kg 750g | |
| Water | 270ml 250ml | |
| Strawberry jam | 3 tbl 3 tbl | |
| Oil | 3 tbl 2 tbl | |
| Salt | 112 tsp 114 tsp | |
| Bread flour | 560g / 314 cups | 450g /3 cups |
| Gluten flour | 3 tsp 2 tsp | |
| Bread improver | 1 tsp | 14 tsp |
| Milk powder 2 tbl | 112 tbl | |
| Tandaco yeast | 112 tsp 114 tsp | |
| ADD AT THE BEEPS: | ||
| Strawberry Fruit Bars, chopped | 70g / 312 bars | 60g /3 bars |
| Pistachio nuts, chopped | 312 tbl 3 tbl | |
| SETTING: 7 (SWEET) LIGHT/MEDIUM/DARK | ||
LIME & CARAWAY BREAD
| INGREDIENTS | 1kg | 750g |
| Water | 300ml | 250ml |
| Lime marmalade | 3 tbl | 3 tbl |
| Oil | 3 tbl | 2 tbl |
| Salt | 2 tsp | 112 tsp |
| Bread flour | 600g / 4 cups | 450g / 3 cups |
| Bread improver | 1 tsp | 1 tsp |
| Milk powder 2 tbl | 112 tbl | |
| Tandaco yeast | 112 tsp | 114 tsp |
| ADD AT THE BEEPS: | ||
| Grated lime rind | 212 tsp | 2 tsp |
| Caraway seeds | 212 tsp | 2 tsp |
| SETTING: 7 (SWEET) LIGHT/MEDIUM/DARK | ||
Flavoured Sweet Bread continued
Flavoured Sweet Bread continued
GLACE PEAR & GINGER BREAD
| INGREDIENTS | 1kg 750g | |
| Water 330ml 270ml | ||
| Oil 3 tbl 2 tbl | ||
| Salt 1 14 tsp 1 14 tsp | ||
| Light brown sugar | 2 12 tbl 2 tbl | |
| Bread flour 600g / 4 cups 450g / 3 cups | ||
| Gluten flour 3 tsp 3 tsp | ||
| Bread improver | 1 tsp 1 tsp | |
| Milk powder 2 tbl 2 tbl | ||
| Tandaco yeast 1 12 tsp 1 14 tsp | ||
| ✿ ADD AT THE BEEPS: | ||
| Glace pear, chopped | 60g / 12 cup 45g / 14 cup | |
| Glace ginger, chopped | 60g / 12 cup 30g / 14 cup | |
| SETTING: 7 (SWEET) LIGHT/MEDIUM/DARK | ||
APPLE SPICE BREAD
| INGREDIENTS | 1kg 750g | |
| Water 360ml | 280ml | |
| Oil | 3 tbl 2 tbl | |
| Salt | 2 tsp 112 tsp | |
| Sugar 112 tbl | 1 tbl | |
| Bread flour | 600g /4 cups | 450g /3 cups |
| Gluten flour | 1 tbl 3 tsp | |
| Bread improver | 1 tsp | 34 tsp |
| Milk powder | 2 tbl 1 | 12 tbl |
| Mixed spice | 1 tbl 3 tsp | |
| Tandaco yeast | 112 tsp | 114 tsp |
| ADD AT THE BEEPS: | ||
| Dried apple,chopped | 40g / 12 cup | 20g / 14 cup |
| SETTING: 7 (SWEET) LIGHT/MEDIUM/DARK | ||
CHOC RAISIN & PEANUT BREAD
| INGREDIENTS | 1kg | 750g |
| Water | 320ml | 270ml |
| Oil | 3 tbl | 2 tbl |
| Salt | 2 tsp | 112 tsp |
| Sugar | 212 tbl | 2 tbl |
| Bread flour | 560g / 334 cups | 450g / 3 cups |
| Bread improver | 1 tsp | 34 tsp |
| Milk powder | 2 tbl | 114 tbl |
| Tandaco yeast | 112 tsp | 114 tsp |
| ADD AT THE BEEPS: | ||
| Choc Peanuts | 55g / 12 cup | 40g / 14 cup |
| Choc Raisins 55g / 12 cup | 40g / 14 cup | |
| SETTING: 7 (SWEET) LIGHT/MEDIUM/DARK | ||
TRIPLE BANANA BREAD
| INGREDIENTS | 1kg | 750g |
| Water | 250ml | 210ml |
| Oil | 2 tbl | 2 tbl |
| Banana, ripened, mashed | 135g / 12 cup | 100g / 14 cup |
| Salt | 2 tsp | 112 tsp |
| Sugar | 2 tbl | 112 tbl |
| Bread flour | 560g / 312 cups | 450g /3 cups |
| Bread improver | 1 tsp | 34 tsp |
| Milk powder 2 tbl | 1 | 12 tbl |
| Tandaco yeast | 112 tsp | 114 tsp |
| ADD AT THE BEEPS: | ||
| Dried banana chips, crushed | 212 tbl | 2 tbl |
| Banana fruit bars, chopped | 60g / 212 bars | 40g /2 bars |
| SETTING: 7 (SWEET) LIGHT/MEDIUM/DARK | ||
Wholemeal Flavoured Bread
Wholemeal Flavoured Bread continued
The recipes in this section use ingredients such as wholemeal flour, rye flour and other grains or cereals. The wholewheat setting has been designed with this in mind, providing longer rising times to produce a loaf of bread lighter in texture and higher in volume.
Procedure
- Place ingredients into the bread pan, in the exact order listed in the recipe.
- Wipe spills from outside of bread pan.
- Lock the bread pan into position in the baking chamber and close the lid.
- Press 'SELECT' to access the setting as specified in the following recipes. Each bread setting and the dough setting will default to 1KG MEDIUM (crust colour).
- Press 'LOAF SIZE' to select 750g (0.75KG) if required.
- Press 'CRUST' once for DARK or twice for LIGHT if required.
- Press 'START'.
- At the end of the program, press 'STOP'.
- Remove bread from bread machine and bread pan. Cool on rack.
50/50 WHOLEMEAL BREAD
| INGREDIENTS | 1kg 750g | |
| Water 370ml | 300ml | |
| Oil 3 tbl 2 tbl | ||
| Salt 2 tsp 1 12 tsp | ||
| Sugar 3 tbl 2 tbl | ||
| Wholemealplain flour | 300g / 2 cups 225g / 1 12 cups | |
| Bread flour 300g / 2 cups 225g / 1 12 cups | ||
| Gluten flour 2 tbl 1 12 tbl | ||
| Breadimprover | 1 tsp | 34 tsp |
| Milk powder 2 | tbl 1 12 tbl | |
| Tandacoyeast | 1 12 tsp 1 14 tsp | |
| SETTING: 3 (WHOLEWHEAT)LIGHT/MEDIUM/DARK | ||
ADD-IN BEEPS:
The Baker's Oven 'beeps' 8 times at 5 minutes before the end of the second knead. Extra ingredients such as fruit, nuts, etc. should be added at this time.
Ensure the collapsible kneading blade is in the upright position before adding ingredients.
Note
FIBRE PLUS WHOLEMEAL BREAD
| INGREDIENTS | 1kg 750g | |
| Water 370ml 310ml | ||
| Oil 3 tbl | 2 tbl | |
| Salt | 2 tsp | 112 tsp |
| Brown sugar | 3 tbl | 2 tbl |
| Wholemeal plain flour | 375g / 212 cups | 300g / 2 cups |
| Bread flour | 225g / 112 cups | 150g / 1 cup |
| Wheat bran | 3 tbl | 2 tbl |
| Wheat germ | 3 tbl | 2 tbl |
| Cracked wheat | 112 tbl 1 tbl | |
| Gluten flour | 212 tbl 2 tbl | |
| Bread improver | 1 tsp | 34 tsp |
| Milk powder | 2 tbl | 112 tbl |
| Tandaco yeast | 112 tsp | 114 tsp |
| SETTING: 3 (WHOLEWHEAT)LIGHT/MEDIUM/DARK | ||
BRAN FLAKE BREAD
| INGREDIENTS | 1kg | 750g |
| Water | 390ml | 320ml |
| Oil | 3 tbl | 2 tbl |
| Salt | 2 tsp 1 12 tsp | |
| Light brown sugar | 4 tbl | 3 tbl |
| Wholemeal plain flour | 300g /2 cups | 225g /1 12 cups |
| Bread flour | 300g /2 cups | 225g /1 12 cup |
| Gluten flour | 2 12 tbl | 2 tbl |
| Bread improver | 1 tsp 1 tsp | |
| Milk powder | 2 tbl | 2 tbl |
| Tandaco yeast 1 12 tsp 1 14 tsp | ||
| ADD AT THE BEEPS: | ||
| Bran Flake cereal | 40g / 13 cup | 30g / 12 cup |
| SETTING: 3 (WHOLEWHEAT)LIGHT/MEDIUM/DARK | ||
Wholemeal Flavoured Bread continued
Rapid Bread
LIGHT RYE BREAD
| INGREDIENTS | 1kg 750g | |
| Water 320ml 270ml | ||
| Oil 3 tbl 2 tbl | ||
| Golden syrup 2 tbl | 112 tbl | |
| Salt 2 tsp 112 tsp | ||
| Bread flour 415g /2 34 cups | 300g /2 cups | |
| Rye flour 240g /2 cups | 180g / 112 cups | |
| Gluten flour 2 tbl 1 tbl | ||
| Bread improver 1 tsp | 34 tsp | |
| Milk powder 2 tbl | 112 tbl | |
| Tandaco yeast 2 tsp 112 tsp | ||
| SETTING: 3 (WHOLEWHEAT)LIGHT/MEDIUM/DARK | ||
SOY & LINSEED BREAD
| INGREDIENTS | 1kg | 750g |
| Water | 370ml 310ml | |
| Oil | 3 tbl | 2 tbl |
| Salt | 2 tsp | 112 tsp |
| Sugar | 212 tbl 2 tbl | |
| Wholemeal plain flour | 300g /2 cups | 225g / 112 cups |
| Bread flour | 300g /2 cups | 225g / 112 cup |
| Soy flour | 212 tbl 2 tbl | |
| Gluten flour 3 tbl | 2 tbl | |
| Bread improver | 1 tsp | 34 tsp |
| Milk powder | 2 tbl | 112 tbl |
| Tandaco yeast | 112 tsp | 114 tsp |
| ADD AT THE BEEPS: | ||
| Linseeds | 212 tbl | 2 tbl |
| Soy Grits | 212 tbl | 2 tbl |
| SETTING: 3 (WHOLEWHEAT)LIGHT/MEDIUM/DARK | ||
The recipes in this section have been developed to produce a loaf of bread similar in volume to that of bread made on any of the longer bread cycles. Unless otherwise stated, most of the yeasted bread recipes can be baked on this cycle, however the volume will be slightly reduced and the texture a little more dense.
Procedure
- Place ingredients into the bread pan, in the exact order listed in the recipe.
- Wipe spills from outside of bread pan.
- Lock the bread pan into position in the baking chamber and close the lid.
- Press 'SELECT' to access the setting as specified in the following recipes. Each bread setting and the dough setting will default to 1KG MEDIUM (crust colour).
- Press 'LOAF SIZE' to select 750g (0.75KG) if required.
- Press 'CRUST' once for DARK or twice for LIGHT if required.
- Press 'START'.
- At the end of the program, press 'STOP'.
- Remove bread from bread machine and bread pan. Cool on rack.
Ensure the collapsible kneading blade is in the upright position before adding ingredients.
Note
Rapid Bread continued
Rapid Bread continued
SEQUENCE FOR 'BASIC RAPID' SETTING:
| SIZE CRUST | 1ST KNEAD | 2ND KNEAD | 1ST RISE | PUNCH DOWN | 2ND RISE | PUNCH DOWN | 3RD RISE | BAKE TIME | TOTAL TIME | |
| 1kg | LIGHT 3 min | 18 min | 15 min | 10 | secs | 10 min | 12 secs | 32 min | 42 min | 2hr 00min |
| MEDIUM 3 min | 18 min | 15 min | 10 | secs | 10 min | 12 secs | 32 min | 50 min | 2hr 08min | |
| DARK 3 min | 18 min | 15 min | 10 | secs | 10 min | 12 secs | 32 min | 54 min | 2hr 12min | |
| 750g | LIGHT 3 min | 18 min | 15 min | 10 | secs | 10 min | 12 secs | 32 min | 37 min | 1hr 55min |
| MEDIUM 3 min | 18 min | 15 min | 10 | secs | 10 min | 12 secs | 32 min | 45 min | 2hr 03min | |
| DARK 3 min | 18 min | 15 min | 10 | secs | 10 min | 12 secs | 32 min | 49 min | 2hr 07min | |
ADD-IN BEEPS:
The Baker's Oven 'beeps' 8 times at 5 minutes before the end of the second knead. Extra ingredients such as fruit, nuts, etc. should be added at this time.
BASIC WHITE LOAF
| INGREDIENTS | 1kg 750g | |
| Water 340ml 290ml | ||
| Oil 3 tbl 2 tbl | ||
| Salt 2 tsp 1 12 tsp | ||
| Sugar 2 12 tbl 2 tbl | ||
| Bread flour 650g / | 4 14 cups | 450g /3 cups |
| Bread improver 1 tsp | 14 tsp | |
| Milk powder | 2 12 tbl 2 tbl | |
| Tandaco yeast | 2 14 tsp | 2 tsp |
| SETTING: 2 (BASIC RAPID)LIGHT/MEDIUM/DARK | ||
SEQUENCE FOR 'WHOLEWHEAT RAPID'
SETTING:
| SIZE CRUST | 1ST KNEAD | 2ND KNEAD | 1ST RISE | PUNCH DOWN | 2ND RISE | PUNCH DOWN | 3RD RISE | BAKE TIME | TOTAL TIME | |
| 1kg | LIGHT 3 min | 18 min | 26 min 10 | secs | 16 min | 6 secs | 58 min 45 min | 2hr 46min | ||
| MEDIUM 3 min | 18 min | 26 min | 10 | secs | 16 min | 6 secs | 58 min 50 min | 2hr 51min | ||
| DARK 3 min | 18 min | 26 min 10 | secs | 16 min | 6 secs | 58 min 57 min | 2hr 58min | |||
| 750g | LIGHT 3 min | 18 min | 26 min 10 | secs | 16 min | 6 secs | 58 min 40 min | 2hr 41min | ||
| MEDIUM 3 min | 18 min | 26 min | 10 | secs | 16 min | 6 secs | 58 min 45 min | 2hr 46min | ||
| DARK 3 min | 18 min | 26 min 10 | secs | 16 min | 6 secs | 58 min 52 min | 2hr 53min | |||
ADD-IN BEEPS:
The Baker's Oven 'beeps' 8 times at 5 minutes before the end of the second knead. Extra ingredients such as fruit, nuts, etc. should be added at this time.
100% WHOLEMEAL BREAD
| INGREDIENTS | 1kg 750g | |
| Water 340ml 300ml | ||
| Oil 2 tbl 1 12 tbl | ||
| Salt 1 12 tsp | 1 tsp | |
| Sugar 3 tbl 2 12 tbl | ||
| Wholemeal plain flour | 600g / 4 cups | 450g / 3 cups |
| Gluten flour | 3 tbl | 2 tbl |
| Bread improver 1 tsp | 12 tsp | |
| Milk powder | 2 12 tbl 2 tbl | |
| Tandaco yeast | 2 14 tsp | 2 tsp |
| SETTING: 4 (WHOLE/HEAT RAPID)LIGHT/MEDIUM/DARK | ||
Dough Dough continued
Procedure
- Place ingredients into the bread pan, in the exact order listed in the recipe.
- Wipe spills from outside of bread pan.
- Lock the bread pan into position in the baking chamber and close the lid.
- Press 'SELECT' to setting 9 ('DOUGH').
- Press 'LOAF SIZE' to select 750g (0.75KG) if required.
- Press 'START'.
- At the end of the program, press 'STOP'.
- Remove bread pan from the baking chamber and remove dough from the bread pan. Dough is now ready for hand-shaping, rising and baking.
ADD-IN BEEPS:
Do not sound on the 'DOUGH' setting.
| Ensure the collapsible kneading blade is in the upright position before adding ingredients. |
| Note |
| The weight of the shaped and baked dough will vary depending on recipe style. |
| Note |
SEQUENCE FOR 'DOUGH' SETTING:
| SIZE 1ST | KNEAD | 2ND KNEAD | 1ST RISE | TOTAL TIME |
| 1kg 3 min | 27 min | 60 min | 1hr | 30min |
| 750kg 3 min | 27 min | 60 min | 1hr | 25min |
TO MAKE A MASTER DOUGH:
WHITE BREAD DOUGH
| INGREDIENTS | 1kg 750g | |
| Full cream milk, scalded & cooled | 350ml 260ml | |
| Egg yolk 1 1 | ||
| Butter or oil 2 tbl | 112 tbl | |
| Salt 1 tsp | 34 tsp | |
| Sugar 1 tbl 112 tbl | ||
| Bread flour 560g / 3 34 cups | 400g / 2 12 cups | |
| Bread improver 1 tsp | 34 tsp | |
| Tandaco yeast | 214 tsp | 114 tsp |
| SETTING: 9 (DOUGH) | ||
SWEET DOUGH
| INGREDIENTS | 1kg | 750g |
| Water | 290ml | 220ml |
| Egg, lightly beaten | 1 x 60g | 1 x 60g |
| Butter or oil | 2 tbl | 1 tbl |
| Salt | 1 tsp | 34 tsp |
| Sugar | 2 tbl | 112 tbl |
| Bread flour 525g/3 12 cups | 400g /2 12 cups | |
| Milk powder | 3 tbl | 2 tbl |
| Bread improver | 1 tsp | 34 tsp |
| Tandaco yeast | 214 tsp | 114 tsp |
| SETTING: 9 (DOUGH) | ||
WHOLEMEAL DOUGH
| INGREDIENTS | 1kg | 750g |
| Water | 310ml | 250ml |
| Oil | 2 tbl | 112 tbl |
| Salt | 1 tsp | 34 tsp |
| Sugar | 2 tbl | 112 tbl |
| Wholemealplain flour | 450g /3 cups | 375g / 212 cups |
| Gluten flour 2 tbl | 112 tbl | |
| Bread improver | 1 tsp | 34 tsp |
| Milk powder | 2 tbl | 112 tbl |
| Tandaco yeast | 214 tsp | 114 tsp |
| SETTING: 9 (DOUGH) | ||
MULTIGRAIN DOUGH
| INGREDIENTS | 1kg | 750g |
| Water | 320ml | 250ml |
| Oil | 2 tbl | 112 tbl |
| Salt | 1 tsp | 34 tsp |
| Sugar | 2 tbl | 112 tbl |
| Bread flour 300g /2 cups | 225g / 112 cups | |
| Wholemeal plain flour | 150g / 1 cup | 115g / 34 cup |
| Gluten flour 1 tbl | 3 tsp | |
| Bread improver | 1 tsp | 34 tsp |
| Milk powder | 2 tbl | 112 tbl |
| Sunflower seeds | 3 tbl | 2 tbl |
| Kibble wheat | 3 tbl | 2 tbl |
| Whole linseeds | 2 tbl | 112 tbl |
| Sesame seeds | 2 tbl | 112 tbl |
| Cracked buckwheat | 1 tbl | 34 tbl |
| Tandaco yeast | 214 tsp | 134 tsp |
| SETTING: 9 (DOUGH) | ||
Dough continued
Dough continued
SHAPING IDEAS FOR MASTER DOUGHS:
BREAD ROLLS
- Take a quantity of one of the Master Dough recipes.
- Divide 1kg dough into quantity into 16 equal pieces (or the 750g dough quantity into 12 equal pieces). Knead each piece and shape into a round.
- Place rolls together on a lightly greased baking tray.
- Cover rolls with lightly greased plastic food wrap and stand in a warm area for 30 minutes or until doubled in size.
- Remove wrap, brush tops of rolls with milk.
- Bake in a preheated oven at 200°C for 12-15 minutes or until cooked and golden brown.
STICKY CINNAMON ROLLS
- Take a 1kg quantity of Sweet Dough.
- Roll dough out to a 40cm x 38cm square. Melt 3 tablespoons of butter. Brush half over dough. Combine 4 tablespoons brown sugar, 70g / 12 cup finely chopped pecan nuts with 1 12 tablespoons ground cinnamon and sprinkle over rolled out dough.
- Drizzle remaining melted butter over sugar mixture. Roll up widthwise and cut into 2cm thick slices.
- Place on a lightly greased baking tray, 5cm apart. Cover with lightly greased plastic food wrap and stand in a warm area for 20 minutes or until doubled in size. Remove wrap.
- Bake in a preheated oven at 180^ C for 25-30 minutes or until golden brown. Brush with Gelatine Glaze (recipe on page R43) whilst still hot, then drizzle with Vanilla Glaze (recipe on page R43).
WHOLEWHEAT HONEY ROLLS
- Replace the sugar in the Wholemeal Dough with honey.
- Divide completed 1kg dough into 16 equal pieces (or the 750g into 12 equal pieces). Knead each piece and shape into rounds.
- Place rolls close together on a lightly greased baking tray.
- Cover rolls with lightly greased plastic food wrap and stand in a warm area for 50-60 minutes or until doubled in size.
- Remove wrap, brush tops of rolls with milk.
- Bake in a preheated oven at 200^ C for 12-15 minutes or until cooked and golden brown. Brush with Gelatine Glaze (recipe on page R43) while still hot, if desired.
DOUGHNUTS
- Take a quantity of Sweet Dough (either 1kg or 750g).
- Turn out onto a lightly floured surface and roll out to 1 cm thickness. Cut into 5.5cm rounds, using a pastry cutter.
- Place a teaspoon of strawberry jam on half the rounds, top with remaining rounds. Press edges together with fingers and place onto greased trays. Cover loosely with lightly greased plastic food wrap and stand in a warm area until doubled in size. Remove wrap.
- Cook doughnuts in hot oil, a few at a time until golden brown and cooked through. Drain on absorbent paper. Combine 12 cup sugar with 1 tablespoon of ground cinnamon. Toss hot Doughnuts in sugar mixture. Serve warm.
APPLE TWIST
- Take a 1kg quantity of Sweet Dough.
- Roll dough out into a 30cm x 50cm rectangle. Cut into 4 strips lengthwise.
- Combine 300g can of pie apples, 12 cup mixed dried fruit and 12 cup desiccated coconut, then spoon mixture equally down the centre of each strip. Fold each strip in half lengthwise, over the mixture, and seal edges by pressing together. Roll into a sausage shape.
- Twist 2 shapes together, secure the ends and place on a greased baking tray. Repeat with remaining shapes.
- Cover loosely with lightly greased plastic food wrap and stand in a warm area for 20 minutes or until doubled in size. Remove plastic food wrap.
- Bake in a preheated oven at 180^ C for 20-25 minutes or until golden brown.
- Slide apple twists onto a wire rack. Brush with Gelatine Glaze (recipe on page R43) whilst still hot. Stand for 5-10 minutes before serving.
HOT CROSS BUNS
- Include 1 tablespoon of ground cinnamon and 1 tablespoon ground mixed spice with dry ingredients when making 1kg Sweet Dough recipe.
- Remove dough at completion of cycle, knead in 150g / 1cup sultanas and 45g / ¼ cup mixed peel.
- Divide dough into 18 pieces and shape into rounds. Place close together on a lightly greased baking tray.
-
Cover loosely with lightly greased plastic food wrap and leave to stand in a warm area for 20 minutes or until doubled in size.
-
Blend together 2 tablespoons of water and 40g / ¼ cup plain flour until a smooth batter is formed. Spoon into a piping bag fitted with a small piping nozzle. Remove wrap from rolls and pipe a cross onto each bun.
- Bake in a preheated oven 190°C for 15-20 minutes or until golden brown.
- Slide buns from baking tray onto a wire rack. If desired, brush Hot Cross Bun Glaze (recipe on page R43) over hot buns. Stand for 5-10 minutes before serving.
HAM & PICKLE ROLLS
- Roll out a 750g quantity of Multigrain Dough into a rectangle shape approximately 25cm x 40cm. Measure half way across the width of the rectangle then use a knife to lightly score down the entire length of the dough.
- Spread 3 tablespoons of mustard pickles over one half of the dough, then top with 3 slices finely sliced ham.
- Roll up the filled side of the dough lengthwise, like a Swiss Roll, to encase the filling. Turn dough over and repeat with the same quantity of mustard pickles and ham on the opposite half of the dough. Then roll in the same manner to reach the first roll and form a double scroll.
- Trim the ends then cut into 2.5cm slices. Place slices, cut side upwards, onto a lightly greased baking tray.
- Cover loosely with lightly greased plastic food wrap and allow to stand in a warm area until doubled in size. Remove wrap. Brush with milk.
- Bake at 190^ C for 20-25 minutes or until cooked and golden brown.
Dough continued
Dough continued
PIZZA & FOCACCIA DOUGHS
The 'Dough' setting is suitable to use for all your favourite pizza and focaccia recipes.
Procedure
- Place ingredients into the bread pan, in the exact order listed in the recipe.
- Wipe spills from outside of bread pan.
- Lock the bread pan into position in the baking chamber and close the lid.
- Press 'SELECT' to setting 9 ('DOUGH').
- Press 'LOAF SIZE' to select 750g (0.75KG) if required.
- Press 'START'. For a softer more pliable texture remove pizza or focaccia dough from the bread pan 30 minutes before completion of the 'DOUGH' setting.
- Press 'STOP'. The Dough is now ready for hand-shaping and baking
Ensure the collapsible kneading blade is in the upright position before adding ingredients.
Note
PIZZA DOUGH
| INGREDIENTS | 1kg 750g | |
| Water 325ml | 250ml | |
| Olive oil 2 tbl | 12 tbl | |
| Salt 112 tsp | 1 tsp | |
| Bread flour | 600g / 4 cups | 450g / 3 cups |
| Tandaco yeast | 212 tsp | 2 tsp |
| SETTING: 9 (DOUGH) | ||
Suggested toppings:
Tomato paste, mushrooms, capsicums, onions, tomatoes, capers, pineapple pieces, olives, herbs, salami, ham, anchovies, sardines, cheese (i.e. grated Mozzarella, Parmesan).
Handshaping
- Roll 1kg pizza dough on a lightly floured surface into 2 x 25cm rounds for a thick based pizza or into 4 x 20cm rounds for thinner based pizzas. The 750g pizza quantity can be used for smaller sized pizzas.
- Place onto a lightly greased baking tray. Spread or sprinkle pizza with selected pizza toppings.
- Bake in a preheated oven at 200°C for 12-15 minutes or until base is cooked and topping heated through.
FOCACCIA DOUGH
| INGREDIENTS | 1kg 750g | |
| Water 325ml | 250ml | |
| Olive oil 2 tbl | 2 tbl | |
| Salt 1 12 tsp 1 | tsp | |
| Sugar 3 tsp 2 | tsp | |
| Bread flour 60 | 0g / 4 cups 450g | / 3 cups |
| Tandaco yeast | 2 12 tsp 2 tsp | |
| SETTING: 9 (DOUGH) | ||
Suggested toppings:
Olive oil, herbs, rock salt, sliced black olives.
Handshaping
For thick Focaccia:
- Divide a 1kg Focaccia dough quantity into two. Knead and press each half into two lightly greased 20cm x 30cm lamington pans.
- Loosely cover with lightly greased plastic food wrap and stand in a warm area for 30 minutes or until doubled in size.
- Remove wrap, brush dough with olive oil and sprinkle with herbs or rock salt and olives.
- Bake in a preheated oven at 200°C for 25-30 minutes or until golden brown.
For a thinner Focaccia:
- Roll a 750g focaccia dough quantity on a lightly greased baking tray until 2cm thick. Prepare as for a thick Focaccia.
Yeast Free & Muffin Bread
Yeast Free & Muffin Bread continued
Yeast Free Bread is a simple bread and is made using baking powder as the main raising agent (it does not have the same strength as yeast).
The following recipes will give Damper or Muffin-Style Breads, which will be heavy in texture and not as highly risen as yeasted breads.
To ensure a well baked loaf is achieved, check the dough in the first five minutes of kneading.
If the dough is too slack and running down onto the base of the pan, add small amounts of flour or bread mix to ensure the dough forms into a round ball. If the dough is too slack it may give the baked loaf the appearance of being overcooked or laminated on the base and having a heavy, doughy top. If the dough is too dry just add 1-2 teaspoons of water extra. All recipes use local ingredients and Australian Standard Metric measuring tools (cup, spoons and weighing scales) for accuracy. There will be a weight variance in each baked loaf in this section.
The 'PRESET TIMER' should not be used for recipes in this section. The raising agents used in place of yeast in these recipes could be prematurely activated and prevent the loaf from rising.
Note
All ingredients should be at room temperature. Add ingredients in the order listed in the recipe.
Note
Procedure
- Add liquid ingredients to bread pan.
- Sift dry ingredients together and add to bread pan.
- Wipe spills from outside of bread pan. Lock bread pan into baking chamber.
- Press 'SELECT' button to setting 8 ('YEAST FREE'). The setting will default to 1KG MEDIUM (crust colour).
-
Press 'LOAF SIZE' to select 750g (0.75KG) if required.
-
Press 'CRUST' once for DARK or twice for LIGHT if required.
-
Press 'START'.
-
With machine still running, use a plastic spatula to scrape mixture from the sides, corners and base of bread pan, and add additions if applicable.
-
After ingredients have mixed together well, close the lid and leave the bread machine to complete the program.
-
After baking, press 'STOP'.
-
Remove bread from bread machine and bread pan. Cool on rack.
Ensure the collapsible kneading blade is in the upright position before adding ingredients.
Note
SEQUENCE FOR 'YEAST FREE' SETTING:
* Baking temperature is lower.
ADD-IN BEEPS:
Do not sound on the 'YEAST FREE' setting.
PLAIN WHITE DAMPER
| LIQUID INGREDIENTS | 1kg 750g | |
| Water 375ml 270ml | ||
| Oil | 1 12 tbl 1 tbl | |
| DRY INGREDIENTS | ||
| White bread flour | 560g / 3 34 cups | 450g / 3 cups |
| Bread improver 1 14 tsp | 1 tsp | |
| Sugar 2 12 tsp 2 tsp | ||
| Salt | 34 tsp 12 tsp | |
| Milk powder | 2 12 tsp 2 tsp | |
| Baking powder 2 tbl | 1 12 tbl | |
| SETTING: 8 (YEAST FREE) | ||
PLAIN WHOLEMEAL DAMPER
| LIQUID INGREDIENTS | 1kg 750g | |
| Water | 390ml 310ml | |
| Oil | 112 tbl 1 tbl | |
| DRY INGREDIENTS | ||
| Wholemeal plain flour | 375g / 212 cups | 300g / 2 cups |
| White bread flour | 190g / 114 cups | 150g / 1 cup |
| Bread improver | 114 tsp | 1 tsp |
| Sugar | 212 tsp | 2 tsp |
| Salt | 34 tsp | 12 tsp |
| Milk powder | 212 tsp | 2 tsp |
| Baking powder | 2 tbl 112 tbl | |
| SETTING: 8 (YEAST FREE) | ||
Yeast Free & Muffin Bread continued
Yeast Free & Muffin Bread continued
| LIQUID INGREDIENTS | 1kg | 750g |
| Water | 250ml 200ml | |
| Passionfruit in syrup (170g can) | 112 cans | 1 can |
| DRY INGREDIENTS | ||
| Self-raising flour | 560g / 334 cups | 450g / 3 cups |
| Bread improver | 114 tsp | 1 tsp |
| Light brown sugar | 112 tbl 1 tbl | |
| Baking powder | 3 tsp 2 tsp | |
| SETTING: 8 (YEAST FREE) | ||
CURRANT Malted Spice Bread
| LIQUID INGREDIENTS | 1kg 750g | |
| Water 250ml 190ml | ||
| Oil 1 12 tbl | 1 tbl | |
| DRY INGREDIENTS | ||
| Liquid malt | 1 12 tbl 1 tbl | |
| Self-raising flour | 560g /3 34 cups | 450g /3 cups |
| Bread improver 1 14 tsp | 1 tsp | |
| Dark brown sugar | 12 cup | 14 cup |
| Mixed spice | 1 tbl | 3 tsp |
| Baking powder | 2 12 tsp | 2 tsp |
| ADDITIONS: | ||
| Currants | 75g / 12 cup 50g / 12 cup | |
| SETTING: 8 (YEAST FREE) | ||
Gluten Free Bread Gluten Free Bread continued
Making gluten free bread is different from traditional baking, therefore it is important to carefully read the following information:
Your Breville Baker's Oven will make delicious Gluten Free Bread with ease. The following recipes have been developed without using any grains or ingredients that contain gluten. Therefore, these recipes are suitable for people with specific food allergies or intolerances.
All recipes use local ingredients and Australian Standard Metric measuring tools (cup, spoons and weighing scales) for accuracy. The weight of the baked bread in this section will be more than that of the Wheat Bread, due to the ingredient properties used in each recipe.
• Always use the ingredients specified in recipes for successful gluten free baking. For information on the suitability and availability of gluten free ingredients contact the Coeliac Society in your state.
- Ensure that the flour is gluten free. Buy it from a reliable source to ensure freshness.
- Check with the yeast manufacturer to ensure that the yeast is gluten free. Only use active dry yeast when making these recipes.
- Ensure that the vinegar used is gluten free. Vinegar helps strengthen the dough.
• Guar and Xanthan gums are available from health food stores.
- Guar Gum is a powdery substance with a similar function to Xanthan Gum. It is high in fibre and can sometimes have a laxative effect on people with sensitive digestive systems. Guar gum is food additive 412.
- Xanthan Gum is a fine creamy white powder. It acts as a substitute for gluten and gives structure to the dough so that it can rise. Xanthan Gum is food additive number 415.
- Lactose Intolerance: the milk powder may be substituted with a soy milk powder but may result in a heavier loaf. Coconut powder can also be used as a substitute and will give a pleasant flavour.
- Follow the directions for each recipe carefully. As the preparation is different from automatic bread making, the Preset Timer cannot be used when making these recipes.
Procedure
- Mix liquid ingredients together in a bowl. (Do not use an electric mixer or a whisk as this will aerate the mixture.)
- Mix dry ingredients together in a large bowl. Do not sift.
- Use a pliable spatula to combine the liquid and dry ingredients. Mix to a soft dough ensuring all ingredients are well combined. Fold in additions, if applicable.
- Spoon dough into bread pan, pressing down with a spatula after each spoonful, to eliminate air bubbles or air pockets. Lock bread pan into baking chamber.
- Press 'SELECT' button to setting 5 (GLUTEN FREE). The setting will default to 1KG MEDIUM (crust colour).
- Press 'LOAF SIZE' to select 750g (0.75KG) if required.
- Press 'CRUST' once for DARK or twice for LIGHT if required.
- Press 'START'.
- After baking, press 'STOP'.
- Remove bread from bread machine and bread pan. Cool on rack.
Ensure the collapsible kneading blade is in the upright position before adding ingredients.
Note
SEQUENCE FOR 'GLUTEN FREE' SETTING:
| SIZE CRUST 1ST KNEAD 2ND KNEAD 1ST RISE BAKE TIME TOTAL TIME | ||||||
| 1kg | LIGHT 3 min 17 | min 50 min 45 | min 1hr 55min | |||
| MEDIUM 3 min | 17 min 50 min | 55 min 2hr 05min | ||||
| DARK 3 min 17 | min 50 min 65 | min 2hr 15min | ||||
| 750g | LIGHT 3 min 17 | min 50 min 40 | min 1hr 50min | |||
| MEDIUM 3 min | 17 min 50 min | 50 min 2hr 00min | ||||
| DARK 3 min 17 | min 50 min 60 | min 2hr 10min | ||||
GLUTEN FREE COUNTRY STYLE BREAD
| LIQUID INGREDIENTS | 1kg 750g | |
| Water 330ml 250ml | ||
| Oil | 3 tbl | 212 tbl |
| Eggs (60g) | 3 | 2 |
| Cider vinegar | 1 tsp | 34 tsp |
| DRY INGREDIENTS | ||
| White rice flour | 320g /2 cups | 240g / 112 cups |
| Potato flour | 220g / 114 cups | 170g /1 cup |
| Soy flour | 50g / 14 cup | 40g / 14 cup |
| Tapioca flour(arrowroot) | 75g / 12 cup | 55g / 12 cup |
| Sugar 14 cup | 212 tbl | |
| Salt | 112 tsp | 1 tsp |
| Milk powder | 12 cup | 12 cup |
| Guar or XanthanGum | 1 tbl | 34 tbl |
| Tandaco yeast | 2 tsp | 112 tsp |
| SETTING: 5 (GLUTEN FREE)LIGHT/MEDIUM/DARK | ||
Gluten Free Bread continued
Gluten Free Bread continued
GLUTEN FREE WHOLESOME SEED BREAD
| LIQUID INGREDIENTS | 1kg 750g | |
| Water 330ml 250ml | ||
| Olive oil 3 tbl 212 tbl | ||
| Eggs (60g) 3 2 | ||
| Cider vinegar 1 tsp 314 tsp | ||
| DRY INGREDIENTS | ||
| Brown rice flour | 320g /2 cups | 240g / 112 cups |
| Potato flour 220g / 114 cups | 170g /1 cup | |
| Soy flour 50g / | 12 cup 40g / 14 cup | |
| Tapioca flour(arrowroot) | 75g / 12 cup 55g / 12 cup | |
| Dark brown sugar | 14 cup 212 tbl | |
| Salt 112 tsp | 1 tsp | |
| Milk powder | 12 cup | 12 cup |
| Guar or Xanthan Gum | 1 tbl 34 tbl | |
| LSA mix,(Linseed,Sunflower &Almond) | 14 cup 2 tbl | |
| Carraway or Cumin seeds | 2 tbl 112 tbl | |
| Tandaco yeast | 2 tsp 112 tsp | |
| SETTING: 5 (GLUTEN FREE)LIGHT/MEDIUM/DARK | ||
GLUTEN FREE SPICY SULTANA BREAD
| LIQUID INGREDIENTS | 1kg | 750g |
| Water | 330ml | 250ml |
| Olive oil | 3 tbl 212 tbl | |
| Eggs (60g) | 3 | 2 |
| Cider vinegar | 1 tsp | 314 tsp |
| DRY INGREDIENTS | ||
| Brown rice flour | 320g /2 cups | 240g / 112 cups |
| Potato flour | 220g / 114 cups | 170g /1 cup |
| Soy flour 50g / | 12 cup | 40g / 14 cup |
| Tapioca flour(arrowroot) | 75g / 12 cup | 55g / 12 cup |
| Light brown sugar | 14 cup | 212 tbl |
| Salt 112 tsp | 1 tsp | |
| Milk powder | 12 cup | 12 cup |
| Guar or Xanthan Gum | 1 tbl 34 tbl | |
| Mixed spice | 2 tbl 112 tbl | |
| Tandaco yeast 2 tsp | 112 tsp | |
| ADDITIONS: | ||
| Sultanas | 100g / 12 cup | 75g / 12 cup |
| SETTING: 5 (GLUTEN FREE)LIGHT/MEDIUM/DARK | ||
VARIATION:
Substitute sultanas with other dried fruit, chopped to a suitable size such as raisins, dates, apricots, etc.
GLUTEN FREE CHEESY CHEDDAR BREAD
| LIQUID INGREDIENTS | 1kg 750g | |
| Water | 330ml | 250ml |
| Olive oil | 112 tbl | 1 tbl |
| Eggs (60g) | 3 | 2 |
| Cider vinegar | 1 tsp | 314 tsp |
| DRY INGREDIENTS | ||
| White rice | 320g /2 cups | 240g / 112 cups |
| Potato flour | 220g / 114 cups | 170g /1 cup |
| Soy flour 50g / | 12 cup | 40g / 14 cup |
| Tapioca flour(arrowroot) | 75g / 12 cup | 55g / 12 cup |
| Dark brownsugar | 14 cup | 212 tbl |
| Salt | 112 tsp | 1 tsp |
| Milk powder 12 cup | 12 cup | |
| Guar or XanthanGum | 1 tbl | 314 tbl |
| Tandaco yeast 2 tsp | 112 tsp | |
| ADDITIONS: | ||
| Cheddar cheese,grated | 130g / 1 cup | 100g / 314 cup |
| SETTING: 5 (GLUTEN FREE)LIGHT/MEDIUM/DARK | ||
Prepackaged Bread Mixes
Prepackaged Bread Mixes continued
These convenient Bread Mixes are available nationally in supermarkets and at some bulk outlets. They are available in various sized packaging and should not be confused with Bread Flour. Bread mixes contain high protein bread flour, sugar, salt, milk powder, oil and other ingredients such as bread improvers.
Usually only the addition of water and yeast is necessary, however some results are improved by adding extra oil.
All recipes use local ingredients and Australian Standard Metric measuring tools (cups, spoons and weighing scales) for accuracy. The weight of the bread in this section may vary compared to settings used. This is due to properties of the bread mixes. Recipes were tested with bread mix milled just before the printing of this book.
Properties of the bread mixes can alter on a seasonal or storage basis, so it may be necessary to adjust the water and flour ratio. Check the dough in the first ten minutes of kneading by opening the lid – if the dough is too dry add 1-2 teaspoons of water extra, if the dough is too sticky add up to a tablespoon of bread mix extra. The dough should be forming into a smooth round ball.
Note
If a brand of bread mix is not listed in this book, use one of the corresponding type of Bread Mix Recipes as a guide.
Procedure
- Place ingredients into the bread pan, in the exact order listed in the recipe.
- Wipe spills from outside of bread pan.
- Lock the bread pan into position in the baking chamber and close the lid.
- Press 'SELECT' to the setting as specified in the following recipes.
- Press 'LOAF SIZE' to select 750g (0.75KG) if required.
- Press 'CRUST' once for DARK or twice for LIGHT if required.
- Press 'START'.
- At the end of the program, press 'STOP'.
- Remove bread from the baking chamber. Cool on rack.
Ensure the collapsible kneading blade is in the upright position before adding ingredients.
Note
'BASIC' or 'BASIC RAPID' settings can be used for white bread mix recipes. However, loaves baked on the 'BASIC RAPID' will not be as highly risen as those baked on the 'BASIC' setting. Add 14 tsp extra yeast when using a Rapid setting, if desired.
Note
A lighter textured bread can be achieved by using the 'BASIC BREAD' setting for grain bread mix recipes. Also substituting a tablespoon of water with a tablespoon of oil will give a more tender crumb and a browner, crisper crust.
Tip
WHITE PREPACKAGED BREAD MIXES
DEFIANCE WHITE BREAD MIX
| INGREDIENTS | 1kg 750g | |
| Water 350ml 315ml | ||
| Bread mix 600g / Defiance yeast 2 | 4 cups tsp 1 | 500g / 3 12 cups 12 tsp |
| SETTING: 1 (BASIC) LIGHT/MEDIUM/DARK | ||
DEFIANCE CRUSTY WHITE BREAD MIX
| INGREDIENTS | 1kg 750g | |
| Water 350ml 300ml | ||
| Bread mix 600g / Defiance yeast 2 | 4 cups | 500g / 3 12 cups |
| tsp 1 | 12 tsp | |
| SETTING: 1 (BASIC) LIGHT/MEDIUM/DARK | ||
Prepackaged Bread Mixes continued
Prepackaged Bread Mixes continued
GRAIN PREPACKAGED BREAD MIXES
DEFIANCE GRAIN BREAD MIX
| INGREDIENTS | 1kg 750g | |
| Water 375ml 320ml | ||
| Bread mix 600g / | 4 cups | 500g /3 12 cups |
| Defiance yeast 2 tsp 1 | 12 tsp | |
| SETTING: 3 (WHOLEWHEAT) LIGHT/MEDIUM/DARK | ||
LAUCKE MULTIGRAIN SOY & LINSEED BREAD MIX
| INGREDIENTS | 1kg 750g | |
| Water 430ml 320ml | ||
| Bread mix 600g / | 4 cups | 450g /3 cups |
| Laucke yeast 1 12 tsp 1 14 tsp | ||
| SETTING: 6 (FRENCH) LIGHT/MEDIUM/DARK | ||
KITCHEN COLLECTION GRAIN BREAD MIX
| INGREDIENTS | 1kg 750g | |
| Water 360ml 310ml | ||
| Bread mix 600g / | 4 cups | 500g /3 12 cups |
| Kitchen Collection yeast | 2 14 tsp | 2 tsp |
| SETTING: 3 (WHOLEWHEAT) LIGHT/MEDIUM/DARK | ||
LAUCKE GERMAN GRAIN BREAD MIX
| INGREDIENTS | 1kg 750g | |
| Water 460ml 300ml | ||
| Bread mix 600g / | 4 cups | 450g /3 cups |
| Laucke yeast 1 12 tsp 1 14 tsp | ||
| SETTING: 6 (FRENCH) LIGHT/MEDIUM/DARK | ||
KITCHEN COLLECTION SOY & LINSEED BREAD MIX
| INGREDIENTS | 1kg 750g | |
| Water 360ml 310ml | ||
| Bread mix 600g / | 4 cups | 500g /3 12 cups |
| Kitchen Collection yeast | 2 14 tsp 2 tsp | |
| SETTING: 3 (WHOLEWHEAT) LIGHT/MEDIUM/DARK | ||
WHOLEMEAL PREPACKAGED BREAD MIXES
LAUCKE BIO-FORT GOLDEN WHOLEMEAL BREAD MIX
| INGREDIENTS | 1kg | 750g |
| Water | 445ml 330ml | |
| Bread mix | 600g /4 cups | 450g /3 cups |
| Laucke yeast | 112 tsp | 114 tsp |
| SETTING: 6 (FRENCH) LIGHT/MEDIUM/DARK | ||
KITCHEN COLLECTION WHOLEMEAL BREAD MIX
| INGREDIENTS | 1kg | 750g |
| Water | 375ml 350ml | |
| Bread mix | 600g /4 cups | 500g /3 12 cups |
| Defiance yeast | 2 14 tsp | 2 tsp |
| SETTING: 3 (WHOLEWHEAT) LIGHT/MEDIUM/DARK | ||
RYE PREPACKAGED BREAD MIXES
LAUCKE SOURDOUGH RYE BREAD MIX
| INGREDIENTS | 1kg 750g | |
| Water | 480ml | 330ml |
| Bread mix | 600g / 4 cups | 450g / 3 cups |
| Laucke yeast | 34 tsp | 34 tsp |
| SETTING: 6 (FRENCH) LIGHT/MEDIUM/DARK | ||
For more information about the Bread Mixes contained in this section, please contact the relevant number listed below:
Defiance Bread Mixes: 1800 628 883
Laucke Bread Mixes: 1300 133 331
Kitchen Collection Bread Mixes: 1800 645 515
Just Jam Just Jam continued
FOR BEST RESULTS:
• Always use the exact amount of sugar, fruit and Jam Setta. Do not reduce sugar stated in recipes or use substitutes.
- Use only fresh, ripe fruit for best flavour and natural pectin level.
- Remove stems or pits from fruit before slicing.
- Do not puree fruit. Jam should contain pieces of fruit. Fruit can be chopped with a food processor, using a pulse action.
- Recipes should not exceed 3½ cups. Weigh fruit after slicing.
- The gel, texture, flavour, aroma and colour of the cooled jam may vary when compared to commercially made jams. The natural pectin, ripeness, juiciness, etc. of the fruit used will influence the finished product.
- Due to the natural pectin of some fruits, if the jam appears to be thickening before the total cooking time has elapsed and no further cooking is required, press the 'STOP' button then complete the bottling procedure.
- 'Jam Setta' is a jam setting mixture it contains the ingredient 'pectin' which is a naturally occurring substance found in fresh fruit. It is this pectin in fruit which when cooked produces a gel. The addition of 'Jam Setta' in our recipes ensures a thicker setting action occurs. This product is available at most supermarkets in 50g sachets.
- The 'Preset Timer' cannot be use for recipes in this section.
All recipes use local ingredients and Australian Standard Metric measuring tools (cup, spoons and weighing scales) for accuracy.
Procedure
- With the standard kneading blade in position inside bread pan, add the ingredients to the bread pan.
- Wipe spills from outside of the bread pan.
- Lock the bread pan into position in the baking chamber and close the lid.
- Press 'SELECT' to setting 10 ('JAM').
- Press 'START'.
- The bread machine will preheat for 15 minutes before any movement occurs in the pan. After preheating, the jam will be cooked and mixed for approximately 50 minutes. The entire cycle takes 1 hour 5 minutes.
- The bread machine will 'beep' when the setting is complete.
- Press 'STOP'.
- Use oven mitts to remove the bread pan.
- Pour the hot jam into warm, dry, sterilised jars, leaving 1.25cm from the top of the jar. Seal immediately and label. Jam will thicken upon cooling and storage.
SEQUENCE FOR 'JAM' SETTING:
| PREHEAT MIX/COOK TOTAL TIME | ||
| 15 min 50 min | 1hr 05min | |
Do not use the collapsible kneading blade when making jam.
Note
Preparation of Jars for Jam
Soak jars in warm water until label is easy to remove. Remove any wet cardboard liners from lids of jars. Wash jars and lids in hot, soapy water. Rinse well in hot water, do not wipe dry.
Place jars and metal lids onto an oven tray. Place into a preheated oven 100°C for 15-20 minutes or until completely dry. Remove from oven using oven mitts and use immediately.
It is important that these recipes are measured accurately, otherwise the ingredients may boil over, making cleaning difficult.
TWO FRUIT MARMALADE
| INGREDIENTS | |
| Oranges, sliced thinly 300g | |
| Lemons, sliced thinly 100g | |
| Sugar 1 cup | |
| Jam Setta 1 tbl | |
| SETTING: 10 (JAM) | |
STRAWBERRY JAM
| INGREDIENTS | |
| Strawberries, hulled & chopped 400g | |
| Sugar 1 cup | |
| Jam Setta 1 tbl | |
| SETTING: 10 (JAM) | |
KIWIFRUIT JAM
| INGREDIENTS | |
| Kiwifruit, peeled & sliced 400g | |
| Sugar 1 cup | |
| Jam Setta 1 tbl | |
| SETTING: 10 (JAM) | |
PLUM JAM
| INGREDIENTS | |
| Blood plums, peeled, deseeded & chopped | 400g |
| Sugar 1 cup | |
| Jam Setta | 1 tbl |
| SETTING: 10 (JAM) | |
TOMATO & PINEAPPLE JAM
| INGREDIENTS | |
| Tomatoes, peeled, seeded & finely chopped | 250g |
| Pineapple flesh, finely chopped | 150g |
| Sugar | 1 cup |
| Jam Setta | 1 tbl |
| SETTING: 10 (JAM) | |
MANGO & PEACH JAM
| INGREDIENTS | |
| Peaches, seeded & finely chopped | 200g |
| Mango flesh, finely chopped | 200g |
| Sugar | 1 cup |
| Jam Setta | 1 tbl |
| SETTING: 10 (JAM) | |
CREATE YOUR OWN JAM RECIPES
| INGREDIENTS | |
| Chopped fruit of your choice 400g | |
| Sugar (depending on pectin level offruit used) | 1-1 12 cups |
| Jam Setta | 1 tbl |
| SETTING: 10 (JAM) | |
Glazes Notes
The following Glazes are easy and quick to prepare and will enhance the flavour and appearance of your breads.
CHOCOLATE GLAZE
2 tablespoons butter or margarine, melted
23 cup icing sugar, sifted
1 tablespoon cocoa, sifted
½ teaspoon vanilla essence
2 tablespoons milk
HOT CROSS BUN AND BROWN BUN GLAZE
½ cup icing sugar, sifted
14 teaspoon allspice
14 teaspoon ground cinnamon
2 tablespoons water
CITRUS GLAZE
½ cup icing sugar, sifted
1 teaspoon grated lemon rind
1 teaspoon grated orange rind
2 tablespoons lemon or orange juice
VANILLA GLAZE
½ cup icing sugar, sifted
12 teaspoon vanilla essence
2 tablespoons milk
Procedure
-
Combine ingredients in a small mixing bowl and stir until smooth and thin enough to drizzle.
-
After baking, press 'STOP'. Remove bread from Baker's Oven and bread pan. Place on rack.
-
Coat top of loaf with glaze. Cool on rack.
GELATINE GLAZE
3 tablespoons water
1½ tablespoons sugar
3 teaspoons gelatine
Procedure
-
Place ingredients in a small saucepan, stir over low heat until sugar and gelatine dissolves.
-
Brush over hot bread.
EGG GLAZE/SEEDS ON TOP
1 x 60g egg, lightly beaten
2-3 tablespoons water
Seeds, for example, poppy, sesame, sunflower, linseed, etc.
Procedure
-
Combine egg and water until smooth. Do not whisk. Strain through a sieve if required.
-
Open the lid 15 minutes before the end of the baking cycle, brush glaze over bread. Sprinkle with seeds if desired.
-
Close the lid and continue baking.
NotesNotes
- Breville Customer Service Centre
- Australian Customers
- New Zealand Customers
- Breville
- BAKER'S OVEN
- Contents
- Congratulations
- Welcome
- Breville recommends safety first
- BREVILLE BAKER'S OVEN
- IMPORTANT SAFEGUARDS FOR YOUR BREVILLE BAKER'S OVEN
- Breville recommends safety first continued Know your Breville Baker's Oven
- IMPORTANT SAFEGUARDS FOR ALL ELECTRICAL APPLIANCES
- STEAM VENTS ARE VERY HOT DURING BAKING.
- Know your Breville Baker's Oven continued
- THE CONTROL PANEL
- USING THE PRESET TIMER
- Step 1
- Step 2
- Step 3
- Example:
- Note
- Know your Breville Baker's Oven continued Beginner's Guide to Baking Your First Loaf
- USING THE BAKE ONLY SETTING
- Try this creative idea:
- USING THE JAM SETTING
- Step 2: Insert the kneading blade
- Step 3: Add ingredients into the bread pan
- Beginner's Guide to Baking Your First Loaf continued
- DO NOT PRESS THE 'STOP' BUTTON WHEN ADDING INGREDIENTS AS THIS WILL CANCEL THE PROGRAM.
- Step 12: Making another loaf
- Step 13: Switch off and unplug the bread machine
- Step 14: Cut the bread
- Step 15: Store the bread
- Weighing and Measuring
- Metric liquid measuring jugs
- Metric weighing scales
- Metric measuring cups and spoons
- The Vital Ingredients
- FLOUR
- White wheat flour
- Baker's or bread flour
- Wholemeal flour
- Rye flour
- Gluten flour
- BREAD MIXES
- The Vital Ingredients continued
- BREAD IMPROVER
- SUGAR
- POWDERED MILK
- SALT
- FAT
- YEAST
- Rapid rise yeast
- WATER
- EGGS
- OTHER INGREDIENTS
- JAM SETTING MIX
- Hints and Tips for Better Bread Making
- Questions and Answers
- Questions and Answers continued
- ABOUT INGREDIENTS:
- ABOUT BAKING BREAD:
- ABOUT USING THE TIMER:
- Control Panel Messages
- ERROR DETECTION
- Care, Cleaning and Storage
- BREAD MACHINE
- BREAD PAN AND KNEADING BLADE
- To clean the bread pan and blades:
- To clean the collapsible blade:
- STORAGE
- REPLACEMENT BREAD PAN AND BLADES
- SPARE PARTS
- Easy Bake Recipes
- Traditional Favourites
- Procedure
- Traditional Favourites continued
- ADD-IN BEEPS:
- Flavoured White Bread
- Flavoured White Bread continued
- Flavoured Sweet Bread
- Flavoured Sweet Bread continued
- Wholemeal Flavoured Bread
- Wholemeal Flavoured Bread continued
- Rapid Bread
- Rapid Bread continued
- SEQUENCE FOR 'WHOLEWHEAT RAPID'
- Dough Dough continued
- TO MAKE A MASTER DOUGH:
- Dough continued
- SHAPING IDEAS FOR MASTER DOUGHS:
- BREAD ROLLS
- STICKY CINNAMON ROLLS
- WHOLEWHEAT HONEY ROLLS
- DOUGHNUTS
- APPLE TWIST
- HOT CROSS BUNS
- HAM & PICKLE ROLLS
- PIZZA & FOCACCIA DOUGHS
- Suggested toppings:
- Handshaping
- For a thinner Focaccia:
- Yeast Free & Muffin Bread
- Yeast Free & Muffin Bread continued
- Gluten Free Bread Gluten Free Bread continued
- Gluten Free Bread continued
- VARIATION:
- Prepackaged Bread Mixes
- Prepackaged Bread Mixes continued
- Tip
- WHITE PREPACKAGED BREAD MIXES
- GRAIN PREPACKAGED BREAD MIXES
- WHOLEMEAL PREPACKAGED BREAD MIXES
- RYE PREPACKAGED BREAD MIXES
- Just Jam Just Jam continued
- FOR BEST RESULTS:
- Preparation of Jars for Jam
- Glazes Notes
- CHOCOLATE GLAZE
- HOT CROSS BUN AND BROWN BUN GLAZE
- CITRUS GLAZE
- VANILLA GLAZE
- GELATINE GLAZE
- EGG GLAZE/SEEDS ON TOP
- NotesNotes
Brand : BREVILLE
Model : BBM300
Category : Bread maker