
Indoor Cam (2nd Generation) - Camera RING - Free user manual and instructions
Find the device manual for free Indoor Cam (2nd Generation) RING in PDF.


| Product Type | Indoor Security Camera |
| Brand | Ring |
| Model | Indoor Cam (2nd Generation) |
| Category | Camera |
| Dimensions | 3.8 x 2.4 x 2.4 inches (96.5 x 61 x 61 mm) |
| Weight | 4.8 oz (136 g) |
| Power | Micro USB (included cable and adapter) |
| Video Resolution | 1080p HD |
| Field of View | 140° horizontal, 80° vertical |
| Night Vision | Infrared LEDs for clear night vision |
| Two-Way Audio | Yes, with noise cancellation |
| Motion Detection | Adjustable motion zones and alerts |
| Storage | Local via microSD (not included) or cloud subscription |
| Connectivity | 2.4 GHz Wi-Fi (802.11 b/g/n) |
| Compatibility | Amazon Alexa, Ring app (iOS/Android) |
| Setup | Plug in, download Ring app, follow in-app instructions |
| Maintenance | Clean lens with soft dry cloth; avoid liquids |
| Security | Encrypted video and audio; privacy shutter covers lens when not in use |
| Accessories | Mounting bracket, screws, and anchors included |
| Smart Home Integration | Works with Alexa routines and Ring ecosystem |
Frequently Asked Questions - Indoor Cam (2nd Generation) RING
User questions about Indoor Cam (2nd Generation) RING
0 question about this device. Answer the ones you know or ask your own.
Ask a new question about this device
Download the instructions for your Camera in PDF format for free! Find your manual Indoor Cam (2nd Generation) - RING and take your electronic device back in hand. On this page are published all the documents necessary for the use of your device. Indoor Cam (2nd Generation) by RING.
USER MANUAL Indoor Cam (2nd Generation) RING
natural_image
Modern digital camera on a wooden desk next to a stone cup (no visible text or symbols)Installing your Ring Indoor Cam (2nd Gen)
Use this step-by-step process to install your Ring Indoor Cam (2nd Gen).
Quick Start
- Download and open the Ring app.
- Select Set Up a Device.
- Scan QR code on your device with the Ring app.
Hardware included


Tools needed
For wall or ceiling installation:

natural_image
Simple line drawing of a screwdriver with a plus sign, no text or symbols present
Choose a location.

natural_image
Simple line drawing of a computer monitor with a base (no text or symbols)
natural_image
Simple line drawing of a cabinet or shelf unit with a vertical pole and side mount (no text or symbols)Warning: Ring Indoor Cam (2nd Gen) and its accessories are for indoor use only. Don't expose your device to steam, extreme heat or cold. For example, do not install your device near any heat sources such as space heaters, heater vents, radiators, stoves, or other things that produce heat. Use your device in a location where temperatures remain within the device's operating temperature range. Your device may get warm during normal use. To reduce the effect of the warming, place your device on a heat resistant surface.
Plug in the power cable.

natural_image
Diagram of an electric vehicle charging station with battery symbol and plug (no text or labels)Warning: Use only accessories supplied with your device, or specifically marketed for use with your device. Use of third-party accessories may impact your device's performance. In limited circumstances, use of third-party accessories may cause damage to your device or the third-party accessory. Read all safety instructions for any accessories before using with your device.
When this device is plugged into an electrical socket-outlet, unplugging this device will disconnect it from the AC mains supply. Only plug this device into an easily accessible socket-outlet. Devices with a power cord must be located near the socket-outlet.
Your device does not have an on/off button. If you wish to stop power from flowing into your device, unplug the power cord. Do not plug multiple electric devices into the same wall socket. Overloading a socket can cause it to overheat and may result in a fire.
If the adapter or cable appears damaged, discontinue use immediately.
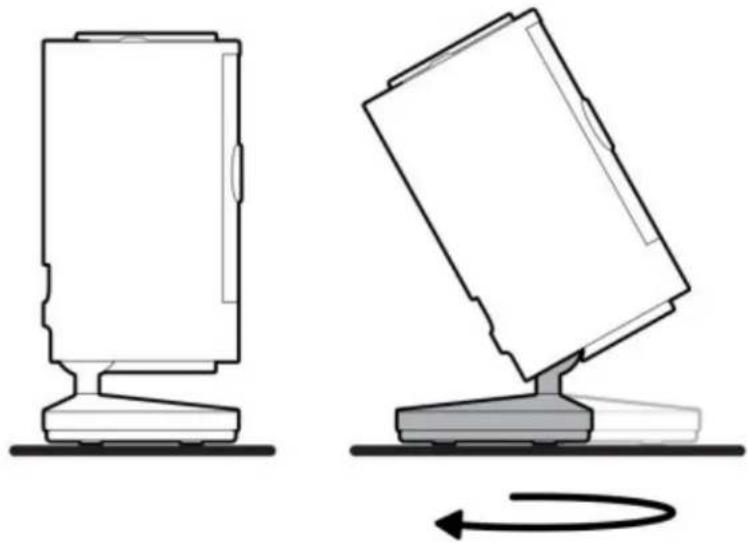
Flat installation:
natural_image
Diagram showing two views of a device with a rotating base, one viewed from the side and the other from the side (no text or symbols)Wall or ceiling installation:
Slide down to unhook and remove the mounting plate.
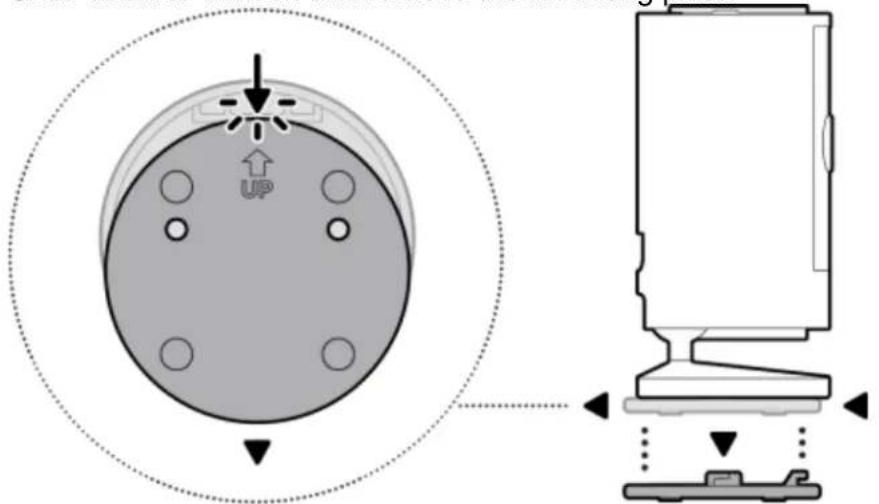
Install the mounting plate.
natural_image
Technical line drawing of a mechanical assembly with no visible text or symbols
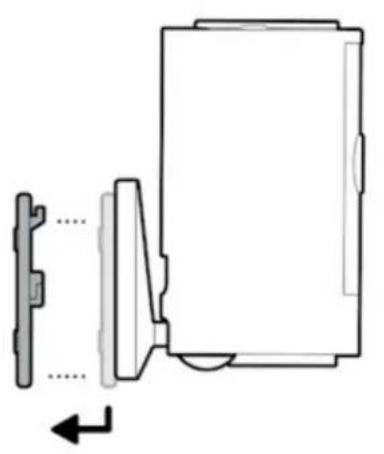
Slide Indoor Cam (2nd Gen) onto mounting plate.

natural_image
Diagram showing a device with circular components and an arrow indicating rotation or motion (no text or symbols)
Adjust the camera angle.

natural_image
Illustration of a desktop computer monitor with a circular button and two curved arrows indicating rotation (no text or symbols)
natural_image
Illustration of a desktop computer tower with a speaker grille and indicator lights (no text or symbols)
natural_image
Illustration of a portable electronic device with a circular vent and base (no text or symbols)
natural_image
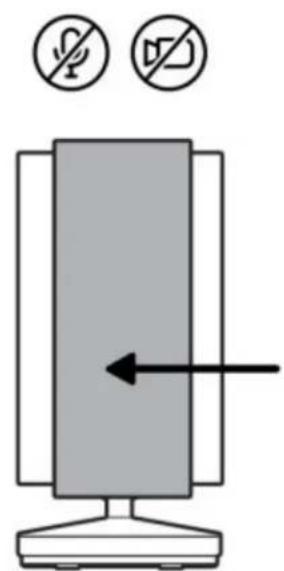
Illustration of a computer monitor with a circular screen and two overlapping sheets, no text or symbols present.Using the privacy cover.
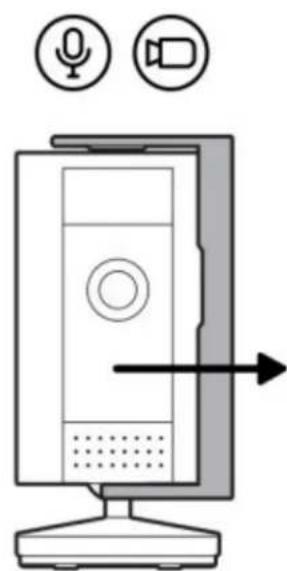
natural_image
Illustration of a desktop computer monitor with speaker and video icons, showing sound waves and an input arrow (no text or symbols)Removing the privacy cover.

natural_image
Diagram of a mechanical component with a circular arrow indicating rotation or direction (no text or symbols)
natural_image
Mechanical component diagram showing a circular housing with a central hole and mounting flanges (no text or symbols)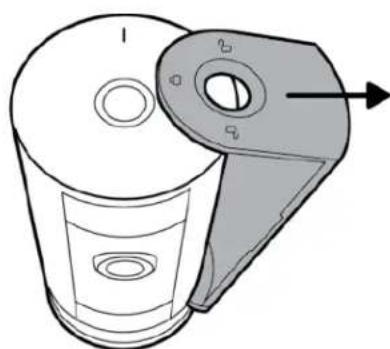
natural_image
Technical line drawing of a mechanical component with a cylindrical body and a handle, showing internal features and a circular hole (no text or symbols)Attaching the privacy cover.
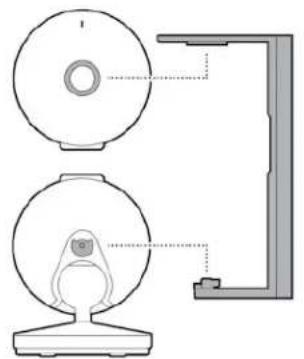
natural_image
Technical line drawing of a mechanical device with two circular components and a bracket (no text or symbols)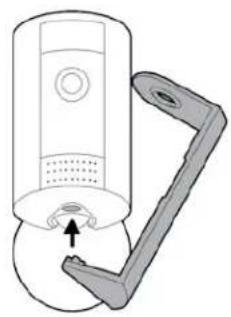
natural_image
Diagram of a device with a lever and handle, no text or symbols present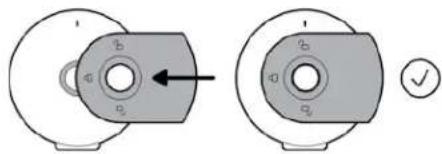
Was this article helpful?
Yes No
Last updated 10 months ago
Related Articles
Installing your Indoor Cam (1st Gen) Arrow Up
Installing your Stick Up Cam Battery (2nd Gen) Arrow Up
Installing your Pan-Tilt Indoor Cam Arrow Up


Brand : RING
Model : Indoor Cam (2nd Generation)
Category : Camera