
HS Freeze 2s - Flash ROLLEI - Free user manual and instructions
Find the device manual for free HS Freeze 2s ROLLEI in PDF.


| Product Type | Studio Flash / Monolight |
| Brand | Rollei |
| Model | HS Freeze 2s |
| Guide Number | 60 (ISO 100, 35mm zoom) |
| Power Output | 400Ws (adjustable 1/1 to 1/128) |
| Recycle Time | 0.1 – 3.5 seconds |
| Flash Duration | 1/200 to 1/10000 sec (t0.1) |
| High-Speed Sync | Up to 1/8000 sec |
| Freeze Function | Yes, for ultra-fast action |
| Trigger Modes | Sync cord, wireless slave (optical/radio), test button |
| Modeling Light | LED, 30W, dimmable |
| Accessories Included | Power cable, sync cord, protective cover |
| Dimensions (without reflector) | 20 x 15 x 12 cm |
| Weight | 1.8 kg |
| Power Supply | AC 100-240V, 50/60Hz |
| Compatible Mounts | Bowens S-type |
| Construction | Aluminum housing, fan-cooled |
| Maintenance | Wipe with dry cloth; avoid moisture |
| Safety Features | Overheat protection, auto shut-off |
| Spare Parts Availability | Flash tubes, reflectors, sync cords |
| Warranty | 2 years |
Frequently Asked Questions - HS Freeze 2s ROLLEI
User questions about HS Freeze 2s ROLLEI
0 question about this device. Answer the ones you know or ask your own.
Ask a new question about this device
Download the instructions for your Flash in PDF format for free! Find your manual HS Freeze 2s - ROLLEI and take your electronic device back in hand. On this page are published all the documents necessary for the use of your device. HS Freeze 2s by ROLLEI.
USER MANUAL HS Freeze 2s ROLLEI
Instructions in English

natural_image
Circular icon with a green sphere and lightning bolt, no text or symbols present
natural_image
Circular black object with smooth gradient shading (no text or symbols)Option
| Mode | TTL |
| Sync Type | NOR |
| Channel | 01 |
| Group | A |
| Wireless | TTL-ALL |
| ID number | 00 |
Option
| Slave | ON |
| Buzz | ON |
| TTL->M | OFF |
| Auto-off | 10 |
| Backlight | MAX |
| Factory setting | NO |
Blitz-Modus
| Option | |
| Slave | ON |
| Buzz | ON |
| TTL->M | OFF |
| Auto-off | 10 |
| Backlight | MAX |
| Factory setting | NO |
Signalton-Funktion
natural_image
Close-up of a dark, elongated mechanical part with a highlighted circular detail (no text or symbols visible)
natural_image
Black electronic device with a charging plug and cable connector, shown alongside an open battery pack (no visible text or symbols)natural_image
Close-up of a gloved hand holding a transparent mechanical component with an orange ring (no visible text or symbols)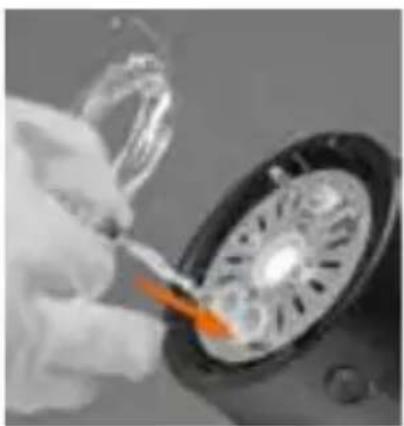
natural_image
Close-up of gloved hands using a tool to apply material to a circular mechanical component (no visible text or symbols)Please read the operating instructions and the safety instructions carefully before using the device for the first time. Keep the operating instructions together with the device for future use. If you pass on the device to a third party, this manual is part of the device and must be supplied with the device.
Explanation of symbols
The following symbols are used in this manual, on the flash, the power supply unit or on the packaging.

Products marked with this symbol comply with all relevant community regulations of the European Economic Area.

Products marked with this symbol are operated with direct current.

Products marked with this symbol are operated with alternating current.

Products with this symbol have additional or reinforced insulation and comply with protection class II.

For indoor use only. Devices with this symbol may only be operated indoors (dry environment).

Dispose of the packaging according to its type. Use the local possibilities for collecting paper, cardboard and other materials. (Applicable in the European Union and other European countries with systems for the separate collection of recyclable materials)

Devices that are marked with this symbol must not be disposed of with household waste! You are legally obliged to dispose of old devices separately from to dispose of household waste. Information on collection points that accept old appliances free of charge can be obtained from your local authority or town council.
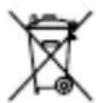
Batteries and rechargeable accumulators must not be disposed of in household waste! As a consumer you are legally obliged to dispose of all batteries and accumulators, whether they contain harmful substances* or not, to be disposed of in an environmentally sound manner. Accumulators and batteries are therefore marked with the symbol shown opposite. For more information, contact your dealer or contact return and collection points in your community. *marked with: Cd = Cadmium, Hg = Mercury, Pb = Lead
Conformity
Herewith Rollei GmbH & Co. KG declares that the radio system type "Rollei HS Freeze 2s" complies with Directive 2014/53/EU:
2011/65/EU RoHS Directive
2014/53/EU RED Directive
2009/125/EC ErP Directive

The complete text of the EU Declaration of Conformity can be downloaded at the following Internet address:: https://www.rollei.com/egk/hsfreeze2s
Rollei GmbH & Co. KG, In de Tarpen 42, D-22848 Norderstedt, Germany
1 Rollei mount for light shapers (compatibility with Bowens S-type only via separately available adapter)

2 Modeling lamp
3 Flash Tube
4 Accessories release button
5 Umbrella hole
6 USB-C port for firmware updates
7 HS Freeze 2s lithium-ion battery
8 Lock knob for removable handle
9 Photocell (infrared sensor)
10 LC display
11 Power switch / Flash test button
12 Modelling light button / Back button
13 Service control button
14 Tilt lock with different steps
15 Lamp tripod locking

Overview

16 Flash mode icon
17 Output power value icon
18 Modeling lamp icon
19 Wireless channel number icon
20 Battery indicator
21 TTL / M manual mode output power value icon
22 Group icon
23 Flash sync mode: normal mode / HSS mode / FREEZE mode
24 Slave: Turn on / Turn off
25 Beep: Turn on / Turn off
26 RT mode
27 Radio signal
Overview menu navigation
16 Flash mode icon: M (L0 \~ 9.0) / TTL (±3.0)
17 Output power value icon: 1.0 \~ 9.0 (M) / ±3.0 (TTL)
18 Modeling lamp icon: Modeling lamp synchronization mode, the brightness is adjusted in proportion to the power. Modeling lamp custom mode, brightness custom brightness adjustment "1.0 \~ 9.0"
19 Wireless channel number icon: "00 \~ 31"
20 Battery indicator
21 TTL output power conversion to M manual mode output power value icon
22 Group icon: A / B / C / D / E / F / G / H / I / J / L / O / P / Q / S / U It can be chosen between 16 different groups.
23 Fash sync mode
Normal mode: with constant color temperature of 5500K±100K
HSS mode: shutter speed up to 1/8000s (minimum / medium / maximum)
FREEZE mode: up to 1/20.000s flash duration
24 Slave: Turn on / Turn off
Note: After the slave function is turned on, the wireless receiving function is automatically turned off.
25 Beep: Turn on / Turn off
26 Radio signal icon in RT mode
27 Wireless Remote Control
TTL-ALL: (integrated hot shoe transmitter) – Professional radio transmitter Mark II
TTL-C (Canon remote control)
TTL-N (Nikon remote control)
TTL-S (Sony remote control)
TTL-F (Fujifilm remote control)
CH/GR (CH & GR remote control)
Canon RT radio „ID“ numbers can be set between 00 – 99 / AU.
Flash and Canon speedlites can be synchronized when CH & ID numbers keep the same.
Install the handle
Align the positioning hole of the handle with the corresponding positioning slot of the flash, tighten the locking knob clockwise, pay attention to the direction during installation, the locking wheel for the handle of the flash is on the right side.
Battery Installation
The battery contacts are inserted in line with the contacts of the battery compartment of the fuse-lage. A "click" is heard to indicate that the battery has been installed.
Basic operation
Press and hold the power switch for about 3 seconds to turn on the device.
Short press the power setting knob to access the menu and select the function setting.


natural_image
Circular icon with a green sphere and a lightning bolt, no text or symbols present.
natural_image
Circular black object with smooth gradient shading (no text or symbols)Option
| Mode | TTL |
| Sync Type | NOR |
| Channel | 01 |
| Group | A |
| Wireless | TTL-ALL |
| ID number | 00 |
Option
| Slave | ON |
| Buzz | ON |
| TTL->M | OFF |
| Auto-off | 10 |
| Backlight | MAX |
| Factory setting | NO |
Operation
Flash mode
Adjust the power regulation knob to move the white frame to "Mode", short press the power regulation knob, the white frame turns green, adjust the knob to select the flash mode "M /TTL", short press the knob to confirm.
Flash sync mode
Adjust the power regulation knob to move the white frame to "SyncType", short press the knob, the white frame turns green, adjust the knob to select the synchronization mode "NOR" standard mode / "HSS" high-speed synchronization / "FRE" freeze mode, short press the knob to confirm.
Wireless channel
Adjust the power regulation knob to move the white frame to "Channel", short press the knob, the white frame turns green, adjust the knob to select the wireless channel "00 – 31", short press to confirm.
Group
Adjust the power regulation knob to move the white frame to "Group", short press the knob, the white frame turns green, and turn the knob to select the group "A / B / C / D / E / F / G / H / I / J / L / O / P / Q / S / U", short press to confirm.
Wireless remote control
Adjust the power regulation knob to move the white frame to "Wireless", short press the knob, the white frame turns green, turn the knob to select the wireless receiving mode "TTL-ALL / TTL-C / TTL-N / TTL-S / TTL-F / CHGR / RT / OFF", press the knob to confirm.
Canon RT mode wireless value setting
Adjust the power regulation knob to move the white frame to "ID number", short press the knob, the white frame turns green, adjust the knob to select the Canon RT mode wireless value "00 – 99", short press the knob to confirm.
Operation
Slave receiver function
Adjust the power regulation knob to move the white frame to "Slave", short press the knob, the white frame turns green, adjust the knob to select the slave receiving function "ON / OFF", short press the knob to confirm.
Option
| Slave | ON |
| Buzz | ON |
| TTL→M | OFF |
| Auto-off | 10 |
| Backlight | MAX |
| Factory setting | NO |
Beep sound function
Adjust the power regulation knob to move the white frame to "Buzz", short press the knob, the white frame turns green, adjust the knob to select the beep sound function "ON/OFF", short press the knob to confirm.
„TTL“ flash power is switched to "M" manual mode output power value
Adjust the power regulation knob to move the white frame to "TTL M", short press the knob, the white frame tums green, adjust the knob to select "TTL/M" mode function "ON / OFF", short press the knob to confirm.
Auto-Off mode
Turn the power regulation knob to move the white frame to "Auto-off", short press the knob, the white frame turns green, adjust the knob to select the automatic power off mode time "10 min / 30 min /OFF", short press the knob to confirm.
Backlight brightness adjustment
Adjust the power regulation knob to move the white frame to "Backlight", short press the knob, the white frame turns green, adjust the knob to select the backlight brightness "MIN / MID / MAX", short press the knob to confirm.
Factory setting reset
Adjust the power regulation knob to move the white frame to "Factory setting", short press the knob, the white frame turns green, adjust the knob to select the factory reset "YES / NO", short press the knob to confirm.
Lithium battery charging
- Press the battery release button and remove the battery.
- The battery contacts are inserted in line with the positive and negative poles of the charger. A "click" sound indicates that the battery has been inserted into place.
- The current battery level is displayed on the charger: "25% / 50% / 80% / 100%".
Changing the flash tube
Please observe the following instructions for changing the flash tube*:
- Make sure that the unit is switched off and disconnected from the power supply. Wait until the flash tube has cooled down before changing it. Please always use clean cotton gloves or a microfibre cloth when changing the flash tube.
- Uncoil the twisted ignition wire from the flash tube holder and carefully pull the flash tube out of the unit.
- To insert a new flash tube, support the legs of the flash tube and carefully slide the flash tube to its final position. Then place the trigger wire around the flash tube holder.
*Pictures similar

natural_image
Close-up of a dark, rectangular object with a circled orange highlight on the side (no visible text or symbols)
natural_image
Exterior view of a Samsung 1000 battery pack and its internal circuit board (no visible text or symbols)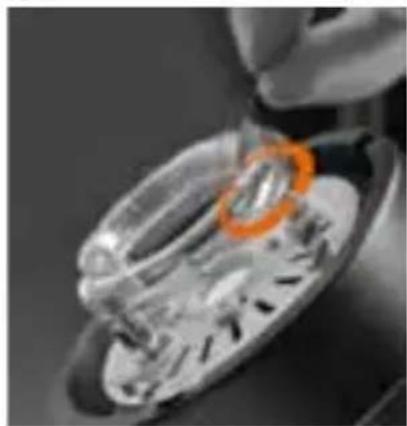
natural_image
Close-up of a hand holding a metallic mechanical component with an orange ring (no visible text or symbols)
natural_image
Close-up of a gloved hand holding a small object with an orange tip, next to a circular mechanical component (no visible text or symbols)Battery Maintenance
Warranty: Rollei provides 6 months warranty towards Lithium batteries.
- According to industry standards, lithium battery supports 300 – 500 times complete charge cycles in its lifespan. Capacitance of a lithium battery goes down with times of use. Complete charge cycle means to charge the battery from quantity less than 10% to over 90%.
Battery Maintenance
- Lithium batteries are of no memory effects, thus support charging on demand. It will extend battery lifespan with incomplete charge cycle.
- When quantity is running low level, it is highly suggested the battery is charged immediately to avoid irreversible damage. Do NOT charge the battery continuously over 24 hours. Charge the battery for 0.5 – 1 hour with matching charger every 3 months when it's idle, to ensure the battery keeps 40 % – 60 % quantity.
- Long-term storage (over 3 months) requires an environment with temperature of 20 ± 10^ ( 10 - 30^ ) and humidity of 65 ± 20%RH . Lithium battery service life is affected by temperature. 0 - 40^ is the ideal environment.
- Knocking, needling, watering and treading are harmful to battery. Keep the battery away from heart pacemaker, flammable gas, sun exposure, microwave and high pressure. Do NOT dismantle the battery to avoid safety risks.
- During the charging or discharging process of the lithium battery, if there are odors and noises or it expands or runs out, stop charging or discharging immediately and contact your Rollei retailer.
Description of continuous flash shooting:
If the flash fires continuously at full power for a longer period of time, the temperature of the flash head will increase. To prevent the flash head from being worn or damaged by overheating, the HS Freeze 2s automatically activates the overheating protection and initially reduces the recycling time. At a temperature of 25^ C, the flash fires continuously at full power every 1.3s for approximately 50s, then the recycling time is automatically extended to 2s and the flash continues firing until the overheat protection is activated and "OH" appears on the display. The symbol disappears again when the flash cools down.
Updating the firmware
The Freeze 2s has a USB-C port which can be used to update your device. In our download area at www.rollei.com we offer you the latest firmware for your product. Download the file and install the firmware on your device via USB cable. You will find detailed instructions in the download file. To avoid malfunctions, please make sure that your device always runs with the latest firmware.
| Power / Guide number | 200 Ws, F 32.2(1 m, HS Freeze 2s Reflector, ISO 100, t = 1/125 s) |
| Flash modes M, TTL | |
| Synchronisation modes | Normal | HSS | First / second shutter curtain synchronization | Freeze |
| Power adjustment M / HSS: 1.0 – 9.0 (1/256 – 1/1) | TTL: ± 3.0 EV | |
| Flash duration (t = 0.5 s) | Normal: 1/800 – 1/8000s | Freeze: 1/800 – 1/20,000 s |
| Recycling time 0.05 – 1.3 s | |
| Channels 32 (00 – 31) | |
| Groups 16 (A – J / L / O / P / Q / S / U) | |
| Colour temperature M / TTL: 5500 K ± 150 K | Freeze / HSS: 5200 K(may vary up to 9000 K) | |
| Modeling lamp 5 W LED (5000 K ± 300 K) | |
| Receiver Integrated, 2.4 GHz, Range > 100 m | |
| Bowens s-type mount No, but adapter sold separately. Here: Rollei mount | |
| Battery operation Lithium-Ion battery 14.4 V — 10 A / 37 Wh / 2600 mAhInput max. 1.3 A, 16.8 V | > 450 flashes | |
| Battery life 300 charge circles (to 80% capacity) | |
| Battery charger | Input: 100 – 240 V ~ 1.4 A, 50/60 HzOutput: 16.8 V — 1 A / 16.8 W |
| More features | Auto Shutdown: 10 min / 30 min / off / Sync socket3.5 mm / Sync voltage DC 5 V / EasyCap & Delay (only possible with Rollei TTL Trigger and App) / Firmware upgrade |
| Compatible triggers | Rollei professional radio transmitter Mark II |
| Compatible cameras | Canon, Nikon, Sony, Fuji, Panasonic, Olympus |
| Dimensions | Weight | 23 x 14,2 x 8 cm (L x B x H) | 785 g (without battery) |
| Lieferumfang | HS Freeze 2s battery studio flash, Lithium-ion battery,charger incl. cable, HS Freeze 2s reflector, accessoryadapter, honeycomb, 6 colour foils, carrying case |
We reserve the right to update functions or parameters without further notice.
Danger from electric current!
Faulty electrical installations or excessive mains voltage can cause electric shock.
- Only connect the product if the mains voltage of the socket corresponds to the specifications on the type plate.
- Connect the product to an easily accessible power outlet so that you can quickly disconnect it from the mains in case of problems.
- Use only the supplied power cord.
- Do not use the product if it is visibly damaged or if the cable is defective.
- If the product or its accessories are damaged, they must be replaced or repaired by the manufacturer, its service department or a similarly qualified person to prevent hazards.
- The housing must not be opened and repairs must only be carried out by a qualified technician. To do this, contact a specialist workshop. Any liability and all warranty claims are excluded in the event of repairs by the user, improper connection or incorrect operation.
- Do not use the product with an external timer or a separate remote control system.
- If you do not use the product for a long period of time, always disconnect it from the power source.
- Protect the product from moisture. Do not touch the product with wet/damp hands or immerse it in water.
- This product is not waterproof! Do not use this product in the rain or in wet environments. Never touch the product during a thunderstorm.
- Only use the product with the supplied rechargeable battery.
- Before disconnecting the power or battery, turn off the unit at the main switch.
- Do not store or use the flash in places where it is exposed to strong electromagnetic fields or dust. Keep the unit away from other sources of interference.
- Switch off the flash and disconnect it from the power supply (battery) when changing the flash tube.
- Do not open or damage the battery, short-circuit it, bypass it or use it for any other purpose.
Warnings and safety instructions
- Keep the battery away from children, naked flames and liquids and do not expose it to temperatures exceeding 50°C. In addition, follow the battery care instructions on page 26 of this manual.
- To charge the battery, disconnect it from the flash. Only use the charger supplied to charge the battery. To charge the battery, first connect the charger to the battery to be charged and then to the mains power supply.
Caution!
- Never use the mains cable as a carrying handle.
- Keep the product and accessories away from naked flames, hot surfaces and easily flammable materials.
- Lay the power cord in such a way that it does not present a tripping hazard.
- Do not bend the power cord or lay it over sharp edges.
Caution!
Danger for children and persons with reduced physical, sensory or mental abilities (e.g. partially disabled, elderly persons with reduced physical and mental abilities) or lack of experience and know-how (e.g. older children).
- This product may be used by persons with reduced physical, sensory or mental abilities or lack of experience and know-how, provided that they are supervised or have received instructions for the safe use of the product and understand the potential risks arising from its use. Children must not play with the product. The product must not be cleaned or maintained by children. Keep children under eight years of age away from the product and its accessories.
- Remove the protective cap before use.
- Do not insert any objects into the product.
- Do not leave the product unattended during operation.
-
The product is not a toy. Keep the product, accessories and packaging materials away from children and pets to prevent accidents and suffocation.
-
Do not discharge the flash at a very close distance to objects, people or animals. Keep a minimum distance of approximately two metres. The flash releases intense heat and may cause serious injury or damage.
- For photographic lighting purposes only. Not suitable for permanent room lighting.
- Do not film car, bus, bicycle, motorbike or train drivers while driving this product. The driver may be dazzled and cause an accident. This also applies to unlisted persons or groups if possible glare could cause an accident.
- Do not shine directly into the eyes of people or animals as this may cause damage to the retina, visual disturbances and even blindness.
- Ensure adequate ventilation during operation. Never cover the ventilation slits of the unit.
- Do not use or store the unit in high temperatures or in closed rooms exposed to direct sunlight, and do not charge the battery while doing so. The product should not be used in ambient temperatures above 40^ C.
- Please note that the flash tube, modelling light and a connected reflector can become very hot during operation. Do not touch these parts during or immediately after operation. Allow the unit components to cool down before replacing the flash tube or reflector.
- Handle glass parts such as the flash tube with care so that the glass is not broken. Do not touch the flash tube with bare hands, use clean cotton gloves or a microfibre cloth. Small residues of skin grease can cause the flash tube to burst.
- Make sure that the flash tilt lever is firmly tightened before using the unit and connecting accessories to it.
- Mount the flash unit on a tripod with sufficient load-bearing capacity and set up the tripod so that it cannot tip over or slip.
- For storage or transport, disconnect the battery from the flash unit.
- Allow the flash to cool down before packing it for transport or storage.
Rollei
- Blitz-Modus
- Signalton-Funktion
- Explanation of symbols
- Conformity
- Overview
- Overview menu navigation
- Install the handle
- Battery Installation
- Basic operation
- Operation
- Flash mode
- Flash sync mode
- Wireless channel
- Group
- Wireless remote control
- Canon RT mode wireless value setting
- Slave receiver function
- Beep sound function
- „TTL“ flash power is switched to "M" manual mode output power value
- Auto-Off mode
- Backlight brightness adjustment
- Factory setting reset
- Lithium battery charging
- Changing the flash tube
- Battery Maintenance
- Description of continuous flash shooting:
- Updating the firmware
- Danger from electric current!
- Warnings and safety instructions
- Caution!
- Rollei
Brand : ROLLEI
Model : HS Freeze 2s
Category : Flash