
RTX3500 - Food processor Geritz - Free user manual and instructions
Find the device manual for free RTX3500 Geritz in PDF.


| Product Type | Food Processor |
| Brand | Geritz |
| Model | RTX3500 |
| Power Consumption | 1000 W |
| Bowl Capacity | 4 L |
| Feeder Tube Size | Large (up to whole fruits) |
| Speed Settings | 2 variable speeds + Pulse |
| Functions | Chopping, slicing, shredding, mixing, kneading, emulsifying |
| Included Attachments | S-blade, shredding disc, slicing disc, dough blade, citrus press |
| Safety Features | Safety lock on lid, non-slip feet, overload protection |
| Material | BPA-free plastic bowl, stainless steel blades |
| Cleaning | Dishwasher safe removable parts (except motor base) |
| Dimensions (L x W x H) | 25 x 20 x 40 cm |
| Weight | 4.5 kg |
| Cord Length | 1.2 m |
| Warranty | 2 years |
| Certifications | CE, RoHS |
| Repairability | Spare parts available online; user-replaceable blades |
Frequently Asked Questions - RTX3500 Geritz
User questions about RTX3500 Geritz
0 question about this device. Answer the ones you know or ask your own.
Ask a new question about this device
Download the instructions for your Food processor in PDF format for free! Find your manual RTX3500 - Geritz and take your electronic device back in hand. On this page are published all the documents necessary for the use of your device. RTX3500 by Geritz.
USER MANUAL RTX3500 Geritz
DE KÜCHENMASCHINE


Abb. 1
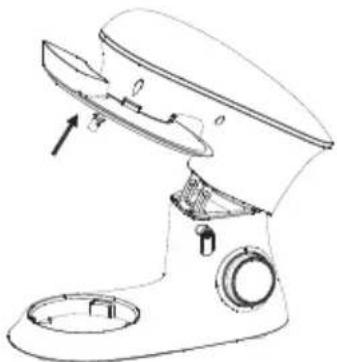
Abb. 2
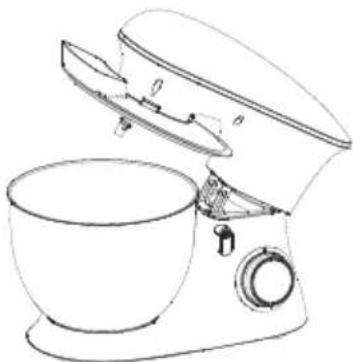
Abb. 3

Abb. 4

Abb. 5

Abb. 6
Thank you for choosing our product. This appliance has been designed and manufactured to high standards of engineering and with proper use and care, as described in this leaflet, will give you years of useful service. Please read these instructions carefully.
IMPORTANT SAFETY ADVICE
- Read instructions carefully before using this device and keep them for future reference.
- Do not operate in extreme heat (over 50° C) or cold conditions (under 5° C), avoid direct exposition to sunlight and dust.
- This device is intended for household use only and not for commercial or industrial use.
- Do not reach for any appliance that has fallen into water. Switch off the device and unplug immediately from the power outlet.
- Do not immerse electric parts in water or other liquids while cleaning. Never hold the appliance under running water.
- While cleaning the device the water temperature should not exceed 50°C.
- Do not remove the plug from the power outlet until the appliance has switched off.
- Do not twist, kink or wrap the cord around the appliance, as this may cause the insulation to weaken and split.
- Do not remove the plug from the power outlet by pulling the cord, always grip the plug.
- In case of damaged power supply cord and/or device body, further usage is strictly forbidden. In order to avoid danger, replacement must be performed by the manufacturer or its service department or similar qualified technicians.
- Do not use outdoors.
- Before using, put this machine on a stable, even, skid proof and dry surface.
- Before using, make sure that all components are in place and correctly assembled. Only then start using your device.
- Always disconnect the device from the power supply when it is left unattended and before assembly, disassembly or cleaning.
- During operation, please do not leave the machine and never let children operate this machine.
- No-loaded (longer than 5 seconds) or overloaded work is strictly prohibited and may cause motor damage.
WARNING: In order to avoid a hazard due to inadvertent resetting of the thermal cut-out, this appliance must not be supplied through an external switching device, such as a timer, or connected to a circuit that is regularly switched on and off by the utility.
- After operation, do not remove food residuals before power supply has been cut off.
- Switch off the appliance and disconnect from supply before changing accessories or approaching parts that move in use.
- Do not insert anything into the rotating hooks while the machine is working.
- This machine is unavailable for the weakness, unresponsive or psychopathic person (including children), unless under the direction or help from the person who have the responsibility for security. Children should be overseen, so it can be testified that they are not playing with it.
- This machine must not be used for others beyond regulated purposes according to this manual.
- The use of any accessory or equipment not recommended by the manufacturer may cause fire, electrical shock, injury and damages and voids the warranty.
- In the event of improper use or wrong operation, we do not accept any liability for resulting damages.
PARTS LIST


① Tool socket
② Lift lever
③ Speed control knob
④ Power cord
⑤ Mixing bowl
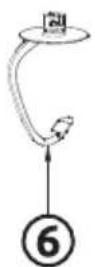
⑥ Dough hook
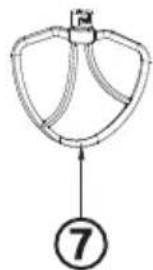
⑦ Silicone beater
⑧ Whisk
⑨ Splash cover
BEFORE FIRST USE
All parts of the stand mixer should be cleaned before being used for the first time (see section: "CARE & CLEANING").
USING THE MIXING BOWL
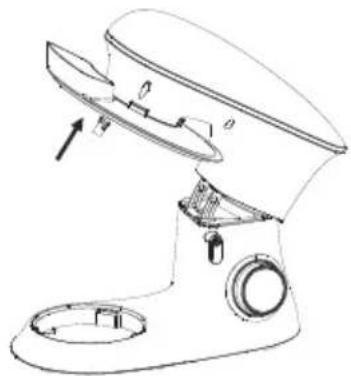
- In order to lift the arm, clockwise rotation the lift lever (2). The arm will now move upwards. [Fig. 1]
- Place the splash cover (9) into its body and turn the splash cover until it locks into place. [Fig. 2]
- Place the mixing bowl (5) into its holding device (A) and turn the bowl clockwise until it locks into place (B). [Fig. 3]
- Mount the required tool (dough hook (6) or silicone beater (7) or whisk (8)) by inserting the top into the tool socket and turn counterclockwise until it locks into place. [Fig. 4 & Fig. 5]
- Now fill in your ingredients.
WARNING: Do not overfill the machine - the maximum quantity of ingredients is 1.5kg.
- Lower the arm using the lift lever (2). [Fig. 6]
- Insert the mains plug into a power socket.
- Switch the machine using the speed control knob (3) to a speed between 1 and 6 (according to the mixture).
- For pulse operation (kneading at short intervals), turn the speed control knob (3) to the P position. The speed control knob (3) has to be held in this position according to the desired
interval length. When the speed control knob (3) is released it returns automatically to the 0 position.
- After kneading/stirring turn the speed control knob (3) back to the 0 position as soon as the mixture has formed a ball. Then remove the mains plug.
- Push the lift lever (2) downwards and the arm will be raised.
- The mixture can now be released with the help of a spatula and removed from the mixing bowl.
- The mixing bowl can now be removed.
- Clean the parts as described under "CARE & CLEANING".
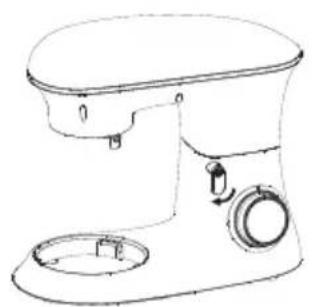
Fig. 1

Fig. 2
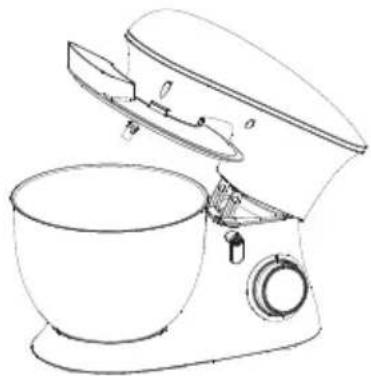
Fig. 3

Fig. 4
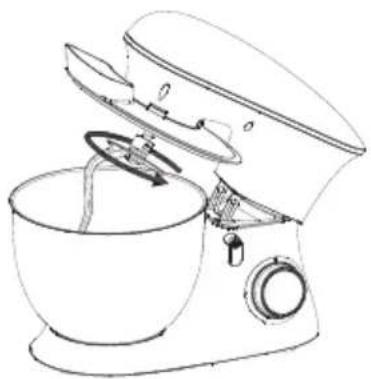
Fig. 5
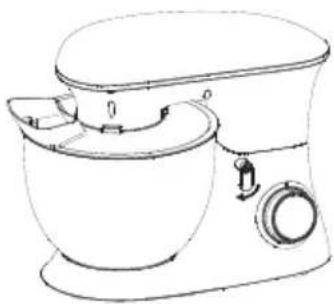
Fug. 6
RECOMMENDED SPEED LEVELS FOR SELECTED APPLICATIONS
| Tool | Speed level (Time) | Maximum ingredients capacity | Application | |
| Dough hook |  | 1 (30 sec.)2 (30 sec.)3 (2-4 min.) | 1300g flour & 700ml waterMAX. 2.0KG ! | Heavy mixtures (e.g. bread or short pastry) |
| Silicone beater | 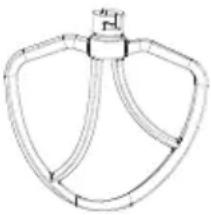 | 2 (30 sec.)3 (30 sec.)4 (3-10 min.) | 660g flour & 840ml water | Medium-heavy mixtures(e.g.crepes or sponge mixture) |
Whisk 5-6 (3-10  ) ) | 3 egg whites(Minimum) | Light mixtures(e.g. cream,egg white, blancmange) | ||
TROUBLESHOOTING
| ISSUE SOLUTION | |
| The machine doesn’t work 1) | Check if the plug is in good contact with the socket.2) Check if the lift lever (2) spring back in place.3) Check if the machine works continuously more than 6 minutes, and wait until the motor cool down. |
| Noise in the mixing bowl (5) when working (the tool scraped the bowl) | 1) Check if the mixing bowl (5) is properly installed.2) Check if the tool (6, 7, 8) is properly installed. |
| The splash cover (9) doesn’t fit the mixing bowl (5) properly | 1) Check if the splash cover placed on the machine properly.2) Check if the mixing bowl installed properly on machine and locked correctly. |
| The machine doesn’t work on certain speed | 1) Check if the mark on speed control knob (3) correspond to the speed silkscreen on housing.2) Rotate speed control knob (3) to 0 ,and re-check if the machine works. |
| Movements when the machine working | 1) Check if the anti-slip feet fall off.2) Check if the machine is placed on a smooth and flat tabletop. |
| The lift lever (2) didn’t springback in place after installing the mixing bowl (5) and splash cover (9) | 1) Check if the splash cover (9) placed on the machine properly.2) Check if the mixing bowl (5) is properly installed. |
CARE & CLEANING
- Unplug the device from the power outlet before cleaning. Disassemble all accessories.
- Do not use any sharp or abrasive detergents.
- Only a damp rinsing cloth should be used to clean the outside of the housing.
WARNING: The tools or components are not suitable for cleaning in a dishwasher. If exposed to heat or caustic cleaners they might become misshapen or discolored.
- Components that have come into contact with food can be cleaned in soapy water.
- Allow the parts to dry thoroughly before reassembling the device.
- Please apply a small quantity of vegetable oil likely to the screens after they have dried.
- If not used for a longer time, please store this device at a dry and well-ventilated place, without direct exposition to sunlight, so as to prevent the motor from being damped and getting moldy.
DISPOSAL
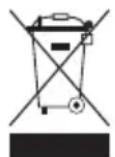
Correct product disposal:
This mark means that electrical appliances in the EU must not be disposed of with normal household waste.
Please use the return and collection systems in your community or contact the company where the product was purchased.
TECHNICAL DATA
Power supply 220-240V \~ 50/60Hz
Power consumption 2000W
Bowl capacity 7 l
Protection class: II
WARRANTY
We ensure that all Koliber products are free of defects at the time of purchase. In case of any production or material defects, the product will be replaced or repaired free of charge within the statutory period, without prejudice to extensive claims. A warranty claim by the buyer does not apply if caused by improper handling, overloading or installation errors. Without our written approval, technical interventions by third parties will lead to the immediate expiration of the warranty claim. The customer must present the original purchase document in order to assert the claim and bears the costs and the risk of the transport in the warranty period.
The guarantee period is 36 months for consumers and 12 months for commercial customers and it starts with the date of purchase. Please keep the purchase document for proof of the purchase date. No costs will be incurred for claiming your warranty. However, the warranty will be rendered void if the device is damaged, altered or misused. Please keep the original packaging for possible repairs.
Repaired or replaced components are subject to the remaining warranty period of the device.


Rys. 1
Rys. 2

Rys. 3

Rys. 4

Rys. 5

Rys. 6
ZALECANE PRĘDKOŚCI DLA WYBRANYCH ZASTOSOWAŃ

Brand : Geritz
Model : RTX3500
Category : Food processor