KABNCHTPDWA - Dishwasher Kogan - Free user manual and instructions
Find the device manual for free KABNCHTPDWA Kogan in PDF.


| Product Type | Benchtop Dishwasher |
| Model | KABNCHTPDWA |
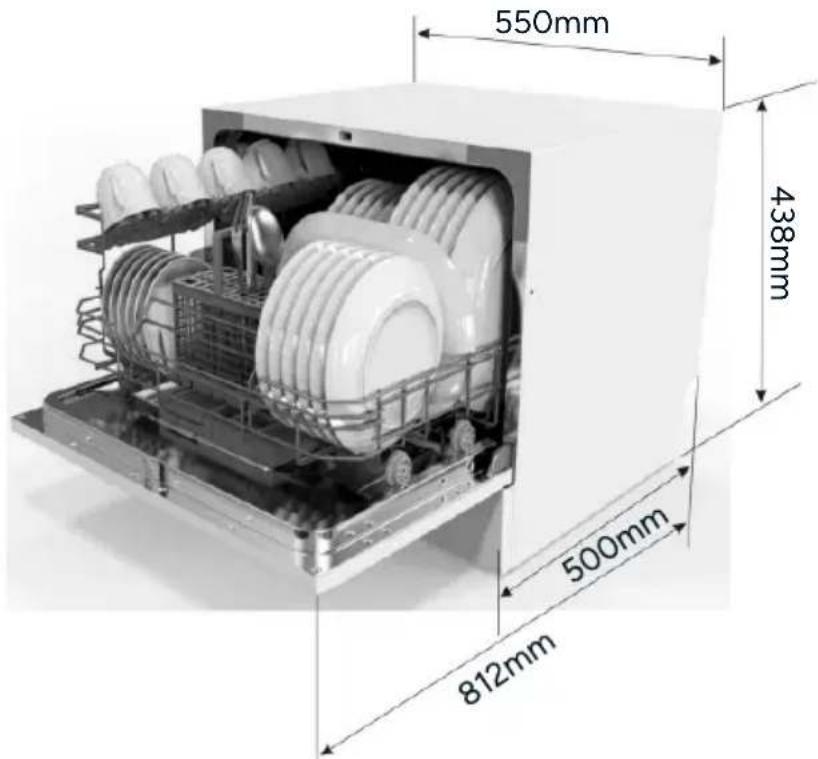
| Dimensions (H x W x D) | 438 mm x 550 mm x 500 mm |
| Capacity | 6 Place Settings |
| Water Pressure Range | 0.04 - 1.0 MPa |
| Programs | Intensive, Heavy, ECO, Glass, 90 min, Rapid, Self-cleaning |
| Energy Consumption (ECO) | 0.45 kWh |
| Water Consumption (ECO) | 0.45 L |
| Rinse Aid Capacity | Approx. 110 ml |
| Detergent Compartments | Main wash and pre-wash |
| Filter System | 3-part: main, fine, coarse filters |
| Spray Arms | Removable for cleaning |
| Water Connection | Cold water only, 3/4" threaded connector |
| Drain Hose Length | Max extension 4 m |
| Self-Cleaning Program | Yes, for cleaning the dishwasher interior |
| Safety Features | Door lock, overflow protection, child supervision warning |
| Power Supply | 10A dedicated circuit, 230V (refer to rating label) |
Frequently Asked Questions - KABNCHTPDWA Kogan
User questions about KABNCHTPDWA Kogan
0 question about this device. Answer the ones you know or ask your own.
Ask a new question about this device
Download the instructions for your Dishwasher in PDF format for free! Find your manual KABNCHTPDWA - Kogan and take your electronic device back in hand. On this page are published all the documents necessary for the use of your device. KABNCHTPDWA by Kogan.
USER MANUAL KABNCHTPDWA Kogan
natural_image
Front view of a stainless steel kitchen appliance with digital display and control buttons (no visible text or symbols)Benchtop Dishwasher
KABNCHTPDWA
Safety & Warnings 3
Overview 5
Installation 8
Before First Use 11
Operation 14
Cleaning & Care 22
Specifications 25
Troubleshooting 26
Notes 29
Safety & Warnings
- This dishwasher is intended for household and similar environments, including:
• Staff areas in shops, offices, and other work environments.
- Farmhouses.
• Motels, hotels, and other residential settings.
- Bed and breakfast establishments.
- This appliance is not suitable for use by individuals (including children) with reduced physical, sensory, or mental abilities, or by those lacking experience and knowledge, unless supervised or instructed on its safe use by someone responsible for their safety.
• This product is for indoor use only.
- To reduce the risk of electric shock, do not immerse the unit, cord, or plug in water or other liquids.
- Unplug the dishwasher before cleaning or performing maintenance. Use a soft cloth with mild soap, then wipe with a dry cloth.
- Do not sit or stand on the dishwasher door or dish rack.
- Ensure all enclosure panels are properly in place before operating the dishwasher.
- Open the door cautiously if the dishwasher is in operation, as water may spray out.
- Avoid placing heavy objects on the open door, as the unit may tip forward.
- When loading items, place knives and utensils with sharp points in the basket with points down or lay them horizontally to avoid damaging the door seal.
- Ensure the detergent compartment is empty at the end of each wash cycle.
- Do not wash plastic items unless they are marked dishwasher safe.
- Use only detergents or rinse aids designed for automatic dishwashers.
- Never use soap, laundry detergent, or hand-washing detergents in the dishwasher.
• Children must be supervised to prevent them from playing with the appliance.
- Discard all packaging materials, as they pose a risk to young children.
- If the power cord is damaged, do not use the dishwasher. Keep it unplugged and contact help.Kogan.com.
- Do not tamper with the controls.
• Maximum inlet water pressure: 1 MPa; minimum inlet water pressure: 0.04 MPa.
- Do not dispose of the dishwasher with general household waste. Contact your local waste disposal facility or council for guidance on proper disposal of electrical products.
- Do not use extension cords, power boards, or double adapters with this appliance.
- Avoid placing the power cord where it may be tripped over, pinched in a door, or touch surfaces that become hot.
- Refer to the rating label for the appropriate voltage and connect the dishwasher to a suitable power source.
- Use a 10-amp fuse, time-delay fuse, or circuit breaker and a dedicated circuit for the appliance.
Overview
Front View
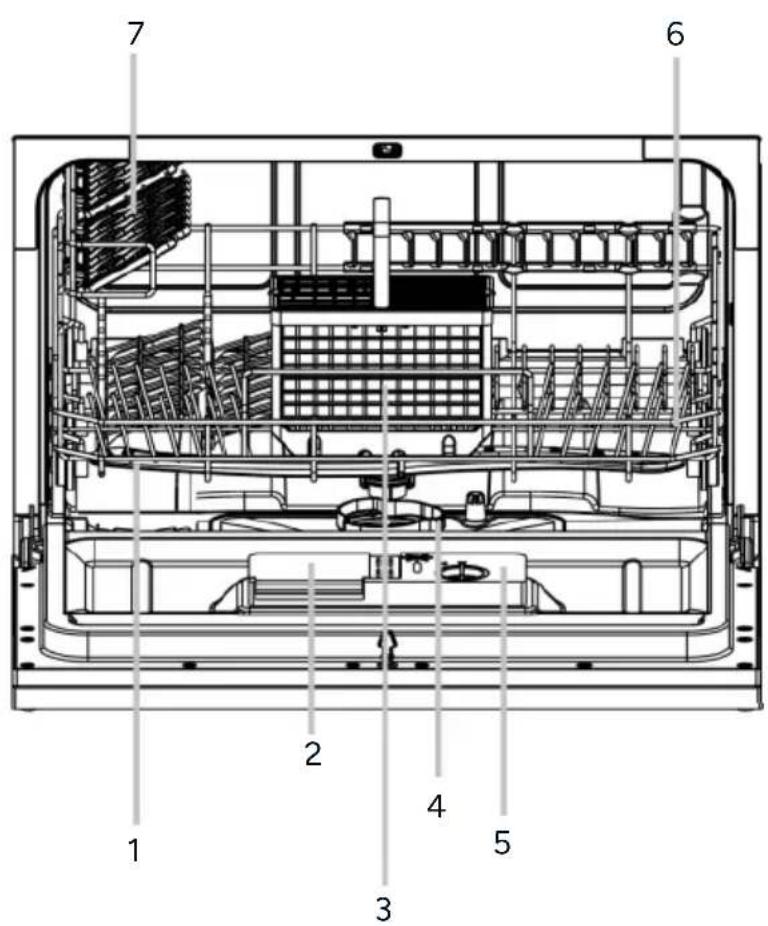
1 Spray Arms
2 Detergent Dispenser
3 Cutlery Basket
4 Filter Assembly
5 Rinse Aid Dispenser
6 Basket
7 Cup Shelf
Rear View
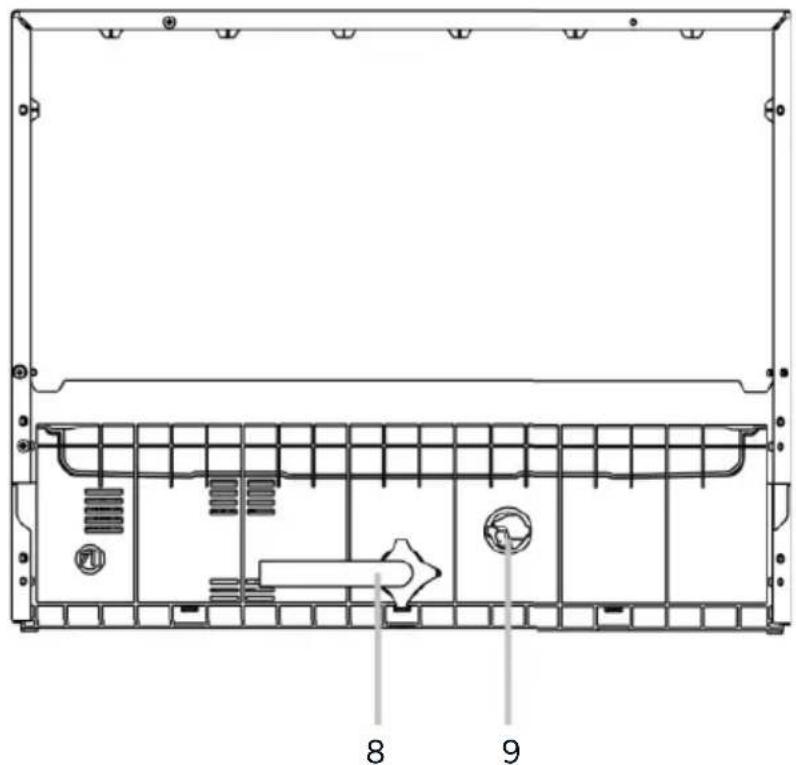
8 Intel Pipe Connector
9 Drainpipe Connector
Control Panel
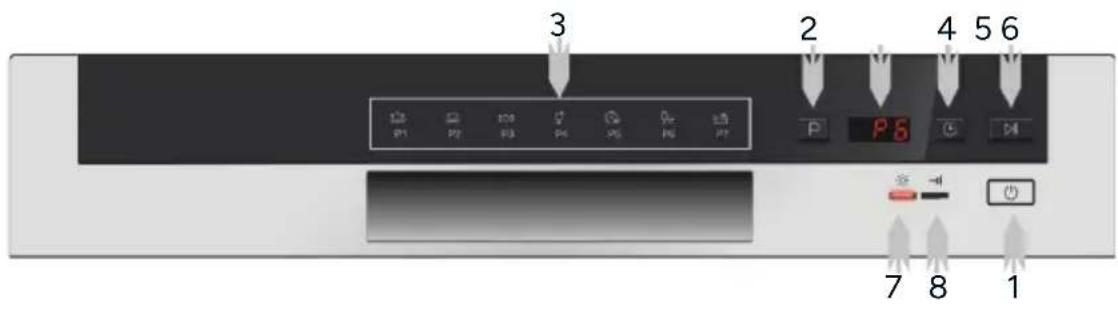
1 Power Button
2 Wash Program Selector
3 Program Indicator
4 Delay Button
5 Start/Pause Button
6 Display Screen
7 Rinse Aid Warning Indicator
8 Program End Indicator
Turn the dishwasher on/off.
Select wash cycle.
Illuminates when a program is selected.
Set a cycle delay.
Start or pause a cycle.
Show remaining time, etc.
Illuminates when the dishwasher requires rinse aid.
Illuminates when a program ends.
Installation
WARNING: The installation of plumbing and electrical components must be conducted by qualified trade professionals.
WARNING: Electrical Shock Hazard. Disconnect electrical power before installing dishwasher. Failure to do so can result in death or electrical shock.
Preparation
Place the dishwasher near an existing water inlet, drain outlet, and electrical outlet. Install the dishwasher on one side of the sink cabinet for easier connection of drain hoses.
Positioning the Appliance
- Position the dishwasher in the desired location, ensuring the back rests against the wall and the sides are aligned with adjacent cabinets or walls.
- The water supply and drain hoses can be positioned to the right or left to facilitate installation.
Water Connection
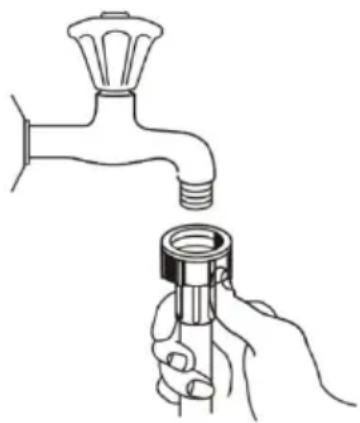
- This dishwasher requires a cold-water connection. Connect the cold-water supply hose to a threaded 3/4" connector, ensuring it is tightly secured.
- If the water pipes are new or unused for an extended time, let the water run to ensure it is clear of impurities, preventing potential blockage or damage to the dishwasher.
natural_image
Line drawing of a hand holding a faucet and a valve (no text or symbols)Note:
If the supplied hose does not fit your tap, contact your local plumbing supply centre to purchase a suitable adapter.
Drain Hose
- Insert the drain hose into a drainpipe with a minimum diameter of 4cm or position it in a sink.
- Avoid bending or crimping the hose.
- Ensure the hose's free end is below 30cm in height and not immersed in water to prevent backflow.
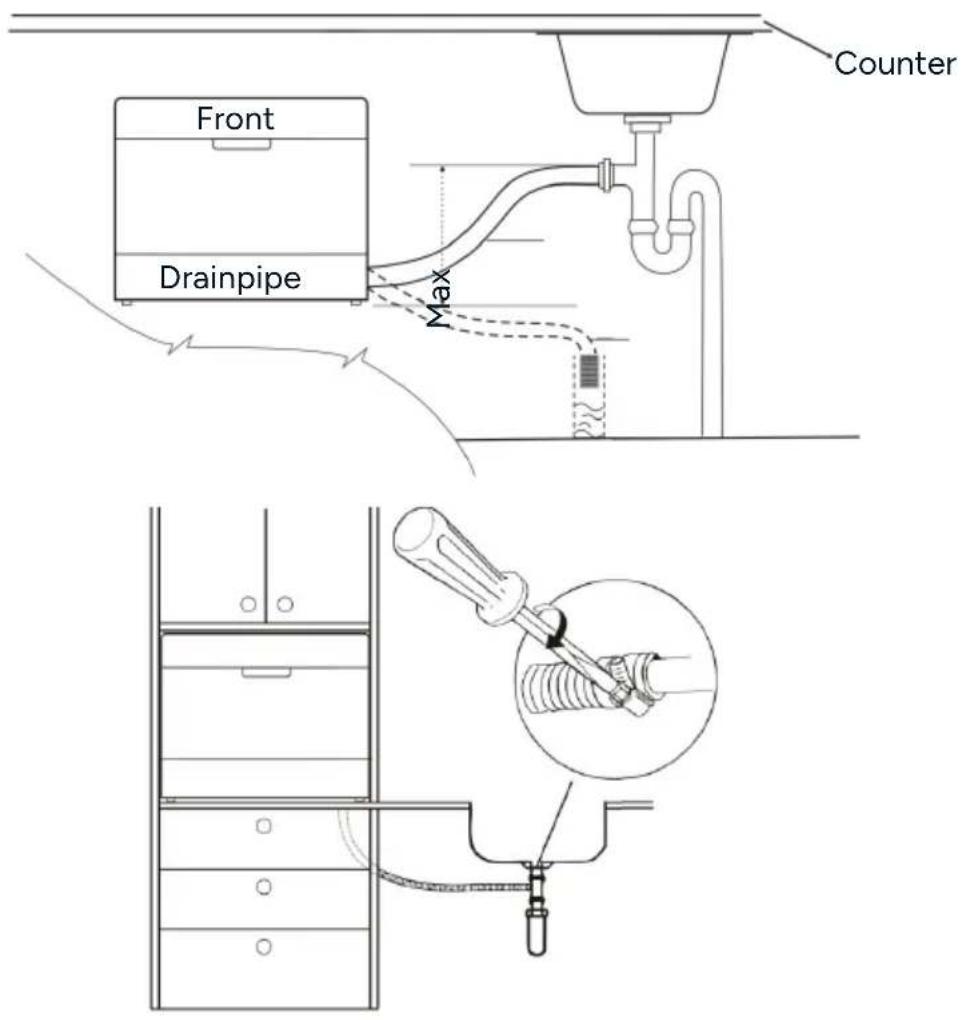
Draining Excess Water from Hoses
If the sink is over 300mm above floor level, the excess water in the hoses may not drain directly. Drain excess water into a bowl or container that is outside and lower than the sink.
Water Outlet
Securely connect the water drain hose to avoid leaks. Ensure it is not kinked or compressed.
Extension Hose
If a drain hose extension is needed, use a similar hose no longer than 4m to maintain dishwasher efficiency.
First Use Checklist
Before starting the dishwasher, confirm the following:
- The dishwasher is level and securely placed.
• The water supply is turned on. - Inlet hose connections are fully tightened and not leaking.
- The power plug is securely in the electrical outlet.
- The power is switched on.
- The inlet water and drain hoses are free from tangles or kinks.
- All packaging materials have been removed from the dishwasher.
Before First Use
Rinse Aid Dispenser
- The rinse aid is released during the final rinse to prevent water droplets from forming on your dishes, which can cause spots and streaks. It also enhances drying by allowing water to roll off the dishes. This dishwasher is designed to use liquid rinse aids.
- The rinse aid dispenser is located inside the door, next to the detergent dispenser. To fill it, open the cap and pour in the rinse aid until the 'Rinse Aid' indicator turns completely black. The rinse aid dispenser holds approximately 110ml.
Note:
Use only branded rinse aid for dishwashers. Never fill the rinse aid dispenser with any other substances.
When to refill the rinse aid dispenser:
- You can monitor the rinse aid level using the optical indicator 'C' located beside the cap.
- When the container is full, the indicator will appear completely dark.
- As the rinse aid decreases, the dark area will reduce. Refill the rinse aid when it is below 14 full.

Full

^3/_4 full

12 full

14 full

Empty
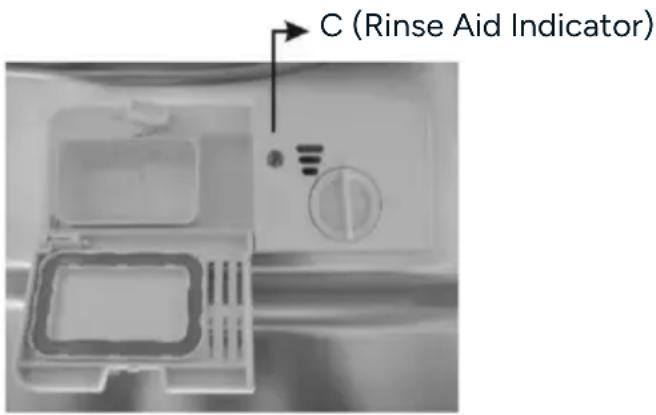
Filling the rinse aid dispenser:
-
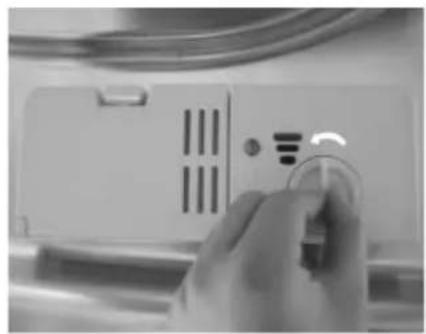
To open the dispenser, turn the cap to the left and lift it out.
-
Pour rinse aid into the dispenser, taking care not to overfill. Clean up any rinse aid spilled during filling with an absorbent cloth to avoid excessive foaming during the next wash.
-
Replace the cap and turn it to the right to secure it.
natural_image
Close-up of a hand holding a circular button on a white appliance panel (no visible text or symbols)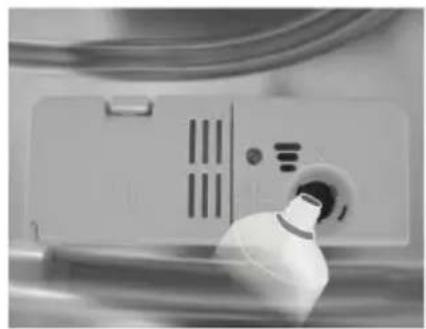
natural_image
Close-up of a white plastic bag with a circular button, partially visible against a blurred background (no text or symbols)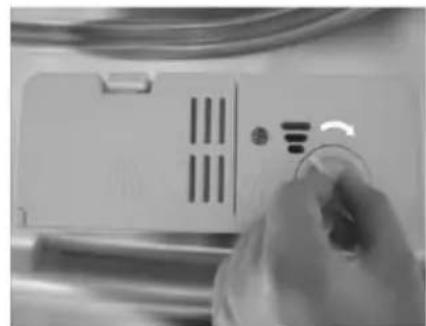
natural_image
Close-up of a hand holding a small electronic device with a circular button, next to a white panel (no visible text or symbols)Adjusting the rinse aid:
- The rinse aid dispenser has 6 settings. Begin with the setting on 4.
• If spots or poor drying occur, increase the setting to 5. - If you notice whitish stains or a bluish film on glassware, reduce the setting. Adjust until dishes are consistently spot-free.
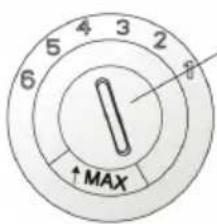
Adjustment Dial (Rinse)
Detergent
WARNING: Dishwasher detergent is corrosive! Keep out of reach of children.
- Detergents contain chemicals necessary for removing dirt and flushing it out of the dishwasher. Refill the dispenser before each wash cycle.
- Typically, one tablespoon of detergent is sufficient for a normal wash load. Heavily soiled items may require more detergent.
- Always add detergent just before starting the dishwasher to prevent it from becoming damp and not dissolving properly.
Adding detergent to the dispenser:
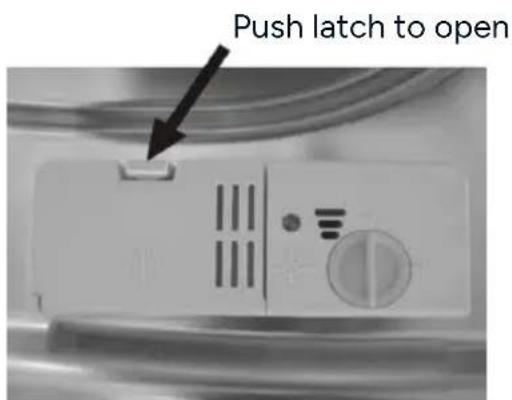
- Push the latch to open the detergent compartment.
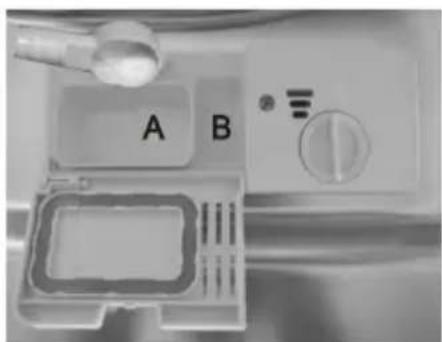
- Fill the compartment with detergent according to the level markings.
• A: Main Wash Cycle Detergent.
• B: Pre-wash Cycle Detergent.
- For heavily soiled dishes, you may add extra detergent to the pre-wash chamber.
- Press the lid closed until it locks.
natural_image
Close-up of a kitchen appliance panel with labeled buttons (A, B) and a handle, no readable text or symbols beyond labelsOperation
Quick Use Guide
| Step | Action | Description | |
| 1 | Switch on the appliance. | Press the 'Power' button to turn the washing machine on. Open the door. | |
| 2 | Fill the detergent dispenser. | Compartment A: Use for each wash cycle.Compartment B: For programs with pre-wash only (follow product instructions). | 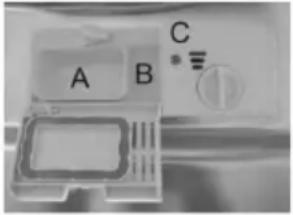 |
| 3 | Check rinse-aid level. | Check 'Rinse Aid' indicator (C) for the rinse-aid level. | |
| 4 Load the baskets. | Scrape off large or loose food particles. Soften any burnt food remnants in pans, then load the baskets according to the tray loading instructions in the user manual. | ||
| 5 Select a program. | Close the door and press the 'Program' button until the desired program illuminates. | ||
| 6 | Run the dishwasher. | Turn on the water tap, then press the 'Start/Pause' button. The machine will start after approximately 10 seconds. | |
| Changing the program. | You can only modify a running cycle if it has been running for a short time. If detergent has already been dispensed and water drained, refill the dispenser.To change the program, press the 'Start/Pause' button, then hold the 'Program' button for 3 seconds to cancel the current cycle. Select a new program, then restart the dishwasher. | ||
| Add forgotten dishes. | Press the 'Start/Pause' button to pause the machine. Carefully open the door (Warning: Hot steam may escape!). Add the dishes, close the door, and press 'Start/Pause' to resume. The dishwasher will start again after approximately 10 seconds. | ||
| If appliance switches off during a cycle. | If the appliance shuts off during a wash cycle or there is a power failure, switch it back on. Re-select the desired cycle and restart the dishwasher from the beginning. | ||
| 7 | Switch the dishwasher off. | When the cycle is finished, the buzzer will sound 8 times and then stop. Turn off the dishwasher using the 'Power' button. The dishwasher will automatically power off after 30 minutes if left in standby mode. | |
| 8 | Turn off the water tap and unload baskets. | Warning: Wait 15 minutes after the cycle completes before unloading to avoid burns, as dishes and utensils may still be hot and fragile. | |
Recommendations
- Consider purchasing utensils labeled as dishwasher safe.
- To prevent damage, avoid removing glassware and cutlery immediately after the wash cycle ends.
Suitability for Use in the Dishwasher
Not suitable for use:
• Cutlery with handles made of wood, horn, China, or mother-of-pearl.
- Plastic items that are not heat-resistant.
- Older cutlery with glued parts that are not temperature resistant.
• Bonded cutlery items or dishes.
- Items made of pewter or copper.
- Crystal glassware.
• Steel items that are prone to rusting.
- Wooden items.
- Items made of synthetic fibers.
Limited suitability:
- Some glass types may become dull or cloudy with repeated washing.
• Silver and aluminum parts may discolor over time. - Glazed patterns may fade with frequent machine washing.
Loading and Unloading Guidelines
For optimal performance, follow these tips:
- Scrape off the food particles and soften burnt food remnants in pans. Pre-rinsing under running water is generally unnecessary.
- Place items like cups, glasses, pots, and pans facing downward.
- Load curved items or those with recesses at a slight angle to allow water to drain.
- Stack all utensils securely to prevent tipping.
- Ensure that all items are positioned to allow the spray arms to rotate freely.
- Avoid placing very small items in the dishwasher that could fall through the basket.
- Load hollow items (e.g., cups, glasses) with openings facing downward to prevent water from collecting.
- Arrange dishes and cutlery so they do not nest inside or cover each other.
- Long-bladed knives are a potential hazard when stored upright; position them horizontally in the basket.
- Avoid overloading the dishwasher to ensure effective cleaning and reasonable energy consumption.
Loading the Basket
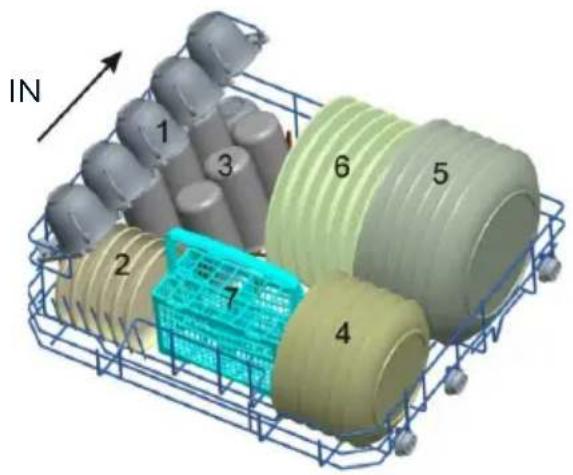

1 Cups
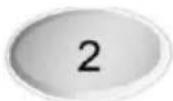
2 Saucers
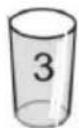
3 Glasses
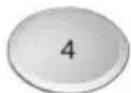
4 Dessert Dishes
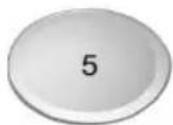
5 Dinner Plates
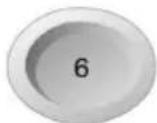
6 Soup Plates
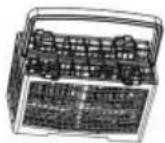
7 Cutlery Basket
Cutlery Basket
- Cutlery should be placed into the basket with the handles at the bottom.
- Place most silverware handles down; however, knives and other potentially dangerous utensils should be placed with their handles up.
natural_image
Circular diagram with grid lines and a crossed X symbol, no readable text or labelsWarning!
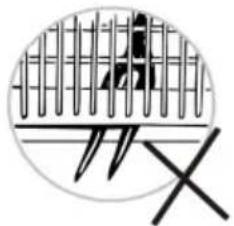
- Do not let any item extend through bottom.
• Always load sharp utensils with the sharp point down!
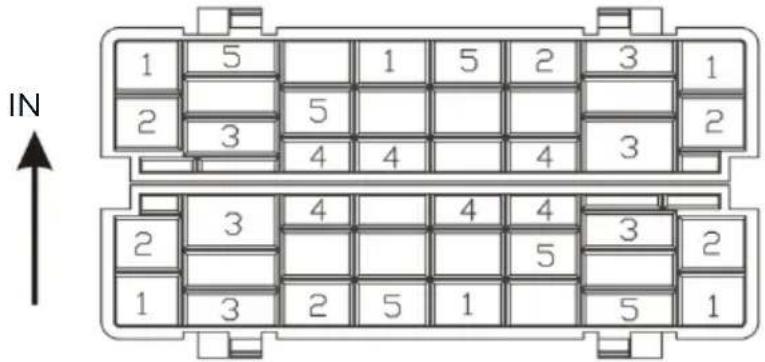
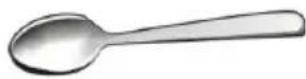
1 Soup Spoons

2 Forks

3 Knives
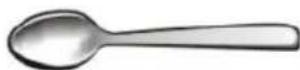
4 Teaspoons
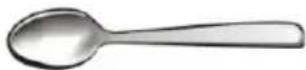
5 Dessert Spoons
Starting a Cycle
Wash Cycle Table
| Program | Cycle Selection Information | Description of cycle | Deter gent Pre/ main | Running time (min) | Energy (kWh) | Water (L) | Rinse Aid |
 Intensive Intensive | For heaviest soiled crockery and normally soiled pots, pans, dishes etc. with dried on food. | Prewash (50°C) Wash (55°C) Rinse Rinse Rinse Rinse (70°C) Drying | 5/1.75 g | 140 0.85 | 9.7 |  | |
 Heavy Heavy | For heavily soiled loads, such as pots, plates, glasses and lightly soiled pans. | Prewash Wash (60°C) Rinse Rinse (70°C) Drying | 5/17.5 g | 120 0.65 | 7.8 |  | |
| ECO | For normal loads, such as pots, plates, glasses and lightly soiled pans. Standard daily cycle. | Prewash Wash (47°C) Rinse Rinse (50°C) Drying | 5/17.5 g | 135 0.45 | 0.45 | ★ | |
 Glass Glass | For light soiled loads such as glasses, crystal and fine China. | Wash (45°C) Rinse Rinse (60°C) Drying | 22.5g | 70 0.45 | 6 |  | |
 90 min 90 min | For lightly soiled crockery and glass. | Wash (65°C) Rinse (70°C) Drying | 22.5g | 90 0.65 | 7 |  | |
 Rapid Rapid | A shorter wash for lightly soiled loads. | Wash (40°C) Rinse Rinse | 15g | 30 | 0.32 | 5.8 | |
 Self-cleaning Self-cleaning | This program provides an effective cleaning of the dishwasher itself. | Wash (70°C) Rinse Rinse (65°C) Drying | 15g 80 | 0.48 5 |  |

means this mode is suitable for rinse-aid use.
Turning the Machine On
- Ensure the dishwasher is plugged into an electrical outlet, and the outlet is turned on.
- Remove the basket, load the dishes, and push the basket back into place.
- Add the required amount of detergent, then close the detergent compartment.
- Ensure the water supply is turned on at full pressure.
- Press the 'Program' button repeatedly until the desired wash program is displayed: ECO → Glass → 90 min → Rapid → Self-Cleaning → Intensive → Heavy. When a program is selected, the corresponding indicator will illuminate.
- Press the 'Start/Pause' button to begin the wash.
Note:
If you press the 'Start/Pause' button during a wash, the 'Program' indicator will stop flashing, and the dishwasher will emit a sound every minute until the 'Start/Pause' button is pressed again to resume the wash.
Changing the Program
- You can modify the program if the dishwasher has only recently started its cycle.
- If the detergent has already been dispensed or washed away, refill the detergent compartment before setting the new program.
- To change the program, hold the 'Start/Pause' button for 3 seconds to put the dishwasher into standby mode. Then, select the desired program.
Adding a Forgotten Dish
If you forgot to add a dish, you can do so at any time before the detergent is released.
- Press the 'Start/Pause' button.
- Open the door slightly to pause the washing.
- Once the spray arms stop spinning, open the door fully.
- Add the forgotten dish.
- Close the door.
- Press the 'Start/Pause' button to resume cleaning.
At the End of the Wash Cycle
- When the wash cycle finishes, a buzzer will sound 8 times and then stop.
- Turn off the dishwasher using the 'Power' button, shut off the water supply, and open the dishwasher door.
- Wait a few minutes before unloading to prevent burns and to allow dishes to cool.
• Leaving the door open for a few minutes after the cycle also improves drying.
Cleaning & Care
Filtering System
- The filter prevents large food particles or other objects from entering the pump.
-
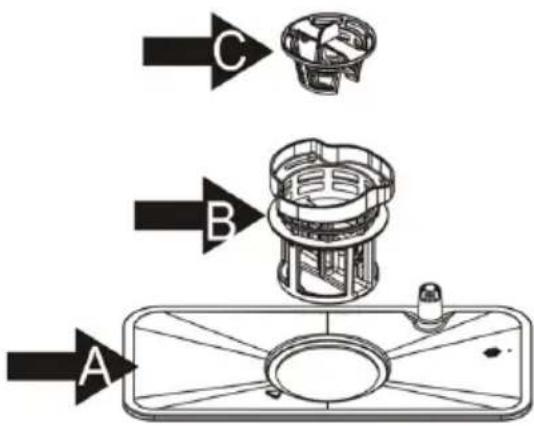
The filtering system consists of three parts: a flat (main) filter, a fine (micro) filter and a coarse filter.
-
Main Filter (A): Traps food particles, which are pulverised by a spray arm jet and washed down the drain.
- Fine Filter (B): Retains food residue in the sump, preventing it from redepositing on dishes during a wash.
- Coarse Filter (C): Captures larger items like bones or glass pieces that could block the drain. To remove trapped items, gently squeeze the top of the coarse filter and lift it out.
- The filter effectively removes food particles, allowing the wash water to be recycled. For optimal performance, clean the filter regularly by rinsing it under running water after each wash cycle.
Note:
Always ensure the filters are in place before running the dishwasher. Improperly replacing the filter may reduce cleaning performance and damage dishes or utensils.
Removing the filter:
| Step 1Rotate and lift the entire filter assembly (A, B, and C). | 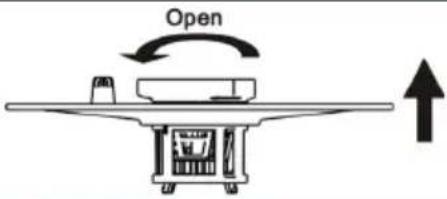 |
| Step 2Lift B and C upwards from A. | 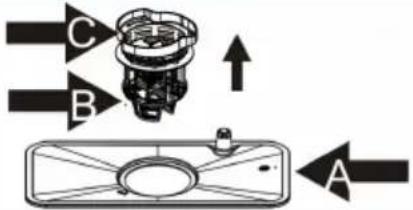 |
| Step 3Separate B and C. | 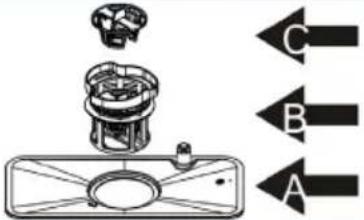 |
Note:
To reinstall, repeat the above steps in the reverse order. Inspect filters after each use and clean any blockages by unscrewing the coarse filter and rinsing under running water. Clean the filter assembly thoroughly at least once a week.
Cleaning the Dishwasher
- Control Panel: Clean with a lightly damp cloth, then dry thoroughly. Use appliance polish for the exterior if desired.
- Cleaning the Door: Use a soft, damp cloth to clean the edge around the door. Avoid spray cleaners to prevent water from entering the door lock and electrical components.
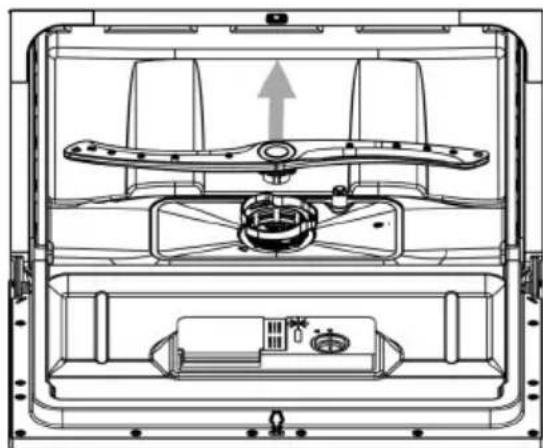
- Cleaning the Spray Arms: Remove spray arms periodically to clean nozzle openings and prevent clogs. Rinse under running water and ensure the arms rotate freely when replaced.
- To remove: Grasp the middle of the spray arm, pull upwards, rinse under water, then replace carefully in its position.
natural_image
Technical line drawing of a mechanical device interior showing internal components and housing (no text or symbols)Maintaining the Dishwasher
- After Every Wash: Turn off the water supply and leave the door slightly open to prevent moisture and odours from being trapped.
- Unplugging: Always unplug the dishwasher before cleaning or performing maintenance.
- Avoid Solvents or Abrasives: Use only a cloth with warm soapy water for the exterior and rubber parts. For interior stains, use a cloth dampened with water and a small amount of vinegar or a dishwasher-safe cleaning product.
- If Not in Use for an Extended Time: Run a wash cycle with the dishwasher empty, unplug, turn off the water, and leave the door slightly open. This will help prolong the life of the door seals.
- Moving the Appliance: Keep the dishwasher upright when moving. If necessary, lay it on its back.
- Seals: Clean the seals periodically with a damp sponge to prevent food particles from causing odours.
Specifications
Height 438mm
Width 550mm
Depth 500mm
Water Pressure 0.04 - 1.0MPa
Capacity 6 Place Settings
Troubleshooting
If you experience any issues with this dishwasher, refer to this section to check for possible solutions before contacting help.Kogan.com.
| Problem | Possible Cause | Solution | |
| Technical Issues. | Dishwasher doesn't start. | Fuse blown/circuit tripped. | Replace the fuse or reset the circuit breaker.Disconnect other appliances sharing the circuit with the dishwasher. |
| Power supply not turned on. | Ensure the dishwasher is turned on and the power cord is securely plugged into the outlet. | ||
| Door not properly closed. | Ensure the dishwasher door is fully closed. | ||
| Water not pumped from dishwasher. | Kink in the drain hose. | Check and straighten the drain hose if necessary. | |
| Filter clogged. | Inspect and clean the coarse filter. | ||
| Kitchen sink clogged. | Ensure the kitchen sink is draining properly. If not, a plumber may be needed. | ||
| General Issues. | Suds in the dishwasher. | Improper detergent. | Ensure you are using dishwashing detergent. |
| Spilled rinse aid. | Wipe up any spilled rinse aid immediately. | ||
| Stained interior. | Detergent with colourant. | Use detergent without colouring agents. | |
| White film on inside surface. | Hard water minerals. | Clean the interior with a damp sponge and dishwashing detergent.Avoid other cleaners to prevent excess suds. | |
| Rust stains on cutlery. | Items are not corrosion resistant. | Avoid washing these items in the dishwasher.Hand-wash and dry them. | |
| Noise. | Knocking noise inside the dishwasher. | Spray arm hitting an item in the basket. | Pause the program and rearrange any items obstructing the spray arm. |
| Rattling inside the dishwasher. | Loose item in the dishwasher. | Pause the program and reposition any loose items. | |
| Knocking noise inside the water pipes. | Installation or pipe cross-section. | This does not affect dishwasher performance, but you may consult a plumber if needed. | |
| Washing Results. | Dishes are not clean. | Dishes not loaded correctly. | Refer to the 'Loading the Dishwasher' section for guidance. |
| Program not powerful enough. | Select a more intensive cleaning program. | ||
| Insufficient detergent. | Add more detergent or consider using a different brand. | ||
| Items blocking the spray arms. | Rearrange the items so that the sprinkler arm can rotate freely. | ||
| Filter not clean or installed incorrectly. | Clean and reinstall the filter correctly. Clean the spray arm jets if necessary. | ||
| Cloudiness of glassware. | Soft water with too much detergent. | Reduce the amount of detergent or select a shorter cycle for glassware. | |
| Black or grey marks on dishes. | Aluminium utensils rubbing against dishes. | Use a mild abrasive cleaner to remove marks. | |
| Detergent left in dispenser cups. | Dishes blocking dispenser cups. | Reload dishes to ensure dispenser cups can open fully. | |
| Drying Results. | Dishes are not drying. | Improper loading. | Load the dishwasher as directed in this user guide. |
| Insufficient rinse aid. | Increase or refill the rinse aid. | ||
| Dishes removed too soon. | Open the door slightly after washing to allow steam to escape. Wait until dishes are cool before unloading. | ||
| Incorrect program selected. | Short programs may use lower rinse temperatures. Select a program with a higher rinse temperature for better drying. | ||
| Low-quality coating on cutlery | Cutlery or dishes with poor-quality coatings may not dry well and are not recommended for dishwasher use. | ||
Error Codes
When a malfunction occurs, the appliance will display error codes to warn you.
| Code Meaning Possible Cause | ||
| E1 | Longer inlet time | Tap is not on, or water pressure is too low. |
| E3 | Temperature not reached | Possible heating element malfunction. |
| E4 | Overflow | Dishwasher component may be leaking. |
Note:
If an overflow error occurs, turn off the water supply and contact help.Kogan.com for support.
Notes
Need more information?
We hope that this user guide has given you the assistance needed for a simple set-up.
For the most up-to-date guide for your product, as well as any additional assistance you may require, head online to help.Kogan.com.
kogan.com

- Benchtop Dishwasher
- Safety & Warnings
- Overview
- Front View
- Rear View
- Control Panel
- Installation
- Preparation
- Positioning the Appliance
- Water Connection
- Note:
- Drain Hose
- Draining Excess Water from Hoses
- Water Outlet
- Extension Hose
- First Use Checklist
- Before First Use
- Rinse Aid Dispenser
- When to refill the rinse aid dispenser:
- Filling the rinse aid dispenser:
- Adjusting the rinse aid:
- Detergent
- WARNING: Dishwasher detergent is corrosive! Keep out of reach of children.
- Adding detergent to the dispenser:
- Operation
- Recommendations
- Suitability for Use in the Dishwasher
- Not suitable for use:
- Limited suitability:
- Loading and Unloading Guidelines
- Loading the Basket
- Cutlery Basket
- Warning!
- Starting a Cycle
- Turning the Machine On
- Changing the Program
- Adding a Forgotten Dish
- At the End of the Wash Cycle
- Cleaning & Care
- Filtering System
- Removing the filter:
- Cleaning the Dishwasher
- Maintaining the Dishwasher
- Specifications
- Troubleshooting
- Error Codes
- Notes
- Need more information?
Brand : Kogan
Model : KABNCHTPDWA
Category : Dishwasher