
Santa FE (2000) - Automotive HYUNDAI - Free user manual and instructions
Find the device manual for free Santa FE (2000) HYUNDAI in PDF.


| Product Type | SUV |
| Model Year | 2000 |
| Engine Options | 2.4L 4-cylinder, 2.7L V6 |
| Transmission | 5-speed manual / 4-speed automatic |
| Drivetrain | Front-wheel drive / All-wheel drive |
| Fuel Type | Gasoline |
| Fuel Tank Capacity | 65 L (17.2 gal) |
| Dimensions (L x W x H) | 4500 mm x 1820 mm x 1675 mm |
| Wheelbase | 2620 mm |
| Curb Weight | 1580 kg (approx.) |
| Seating Capacity | 5 passengers |
| Safety Features | ABS, dual front airbags, side impact beams |
| Maintenance Interval | Oil change every 5,000 km / 3,000 mi |
| Recommended Oil | 5W-30 (API SJ or higher) |
| Tire Pressure (Front/Rear) | 32 psi / 30 psi |
| Battery Type | 12V, Group Size 24F |
| Fuel Economy (City/Highway) | 12 L/100 km / 9 L/100 km (approx.) |
| Spare Tire | Full-size spare under cargo floor |
| Service Light Reset | Press trip reset button with ignition off, then turn to ON |
Frequently Asked Questions - Santa FE (2000) HYUNDAI
User questions about Santa FE (2000) HYUNDAI
0 question about this device. Answer the ones you know or ask your own.
Ask a new question about this device
Download the instructions for your Automotive in PDF format for free! Find your manual Santa FE (2000) - HYUNDAI and take your electronic device back in hand. On this page are published all the documents necessary for the use of your device. Santa FE (2000) by HYUNDAI.
USER MANUAL Santa FE (2000) HYUNDAI
This Owner's Manual should be considered a part of the car and remain with it when it is sold for the use of the next owner.
OWNER'S I.D.
ORIGINAL:
ADDRESS:
NAME:
STREET:
TOWN:
COUNTRY:
P.CODE:
DATE OF SALE:
SUBSEQUENT:
ADDRESS:
NAME:
STREET:
TOWN
COUNTRY:
P.CODE:
TRANSFER DATE:
HYUNDAI
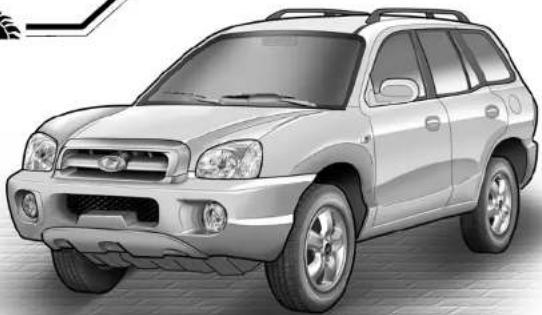
SANTA FE
natural_image
Exterior view of a silver SUV (no visible text or symbols)OWNER'S MANUAL
A000A010-GAT
Operation
Maintenance
Specifications
A03DA01O
All information in the Owner's Manual is current at the time of publication. Hyundai reserves the right to make changes at any time as part of our policy of continual product improvement may be carried out.
This manual applies to current Hyundai SANTA FEEM models and explanations of optional as well as standard equipment are included. As a result, you may find material in this manual that does not apply to your specific vehicle.
Please note that some SANTA FEE models are equipped with Right-Hand Drive (RHD). The explanations and illustrations for some operations in RHD models are opposite of those written in this manual.
AD20A01A-AAT
RESPONSIBILITY FOR MAINTENANCE
The maintenance requirements for your new Hyundai are found in Section 5. As the owner, it is your responsibility to see that all maintenance operations specified by the manufacturer are carried out at the appropriate intervals. When the vehicle is used in severe driving conditions, more frequent maintenance is required for some operations. Maintenance requirements for severe operating conditions are also included in Section 5.
A040A01A-AAT
FOREWORD
Thank you for choosing Hyundai. We are pleased to welcome you to the growing number of discriminating people who drive Hyundais. The advanced engineering and high-quality construction of each Hyundai we build is something of which we're very proud.
Your Owner's Manual will introduce you to the features and operation of your new Hyundai. It is suggested that you read it carefully because the information it contains can contribute greatly to the satisfaction you receive from your new car.
The manufacturer also recommends that all service and maintenance on your car be performed by an authorized Hyundai dealer. Hyundai dealers are prepared to provide high-quality service, maintenance and any other assistance that may be required.
A050A05A-AAT
HYUNDAI MOTOR COMPANY
Note: Because future owners will also need the information included in this manual, if you sell this Hyundai, please leave the manual in the vehicle for their use. Thank you.

CAUTION:
Severe engine and transaxle damage may result from the use of poor quality fuels and lubricants that do not meet Hyundai specifications. You must always use high quality fuels and lubricants that meet the specifications listed on Page 9-4 in the Vehicle Specifications section of the Owner's Manual.
Copyright 2005 Hyundai Motor Company. All rights reserved. No part of this publication may be reproduced, stored in any retrieval system or transmitted in any form or by any means without the prior written permission of Hyundai Motor Company.
A070A01A-GAT

CAUTION: MODIFICATIONS TO YOUR HYUNDAI
Modification of components may void the manufacturer's warranty
Your Hyundai should not be modified in any way. Modifications may adversely affect the safety, durability and performance of your Hyundai. Components which are subjected to modification or are added to the vehicle resulting in consequential damage are not covered by the vehicle manufacturer's warranty.
A0004815-AAT
TWO-WAY RADIO OR CELLULAR TELEPHONE INSTALLATION
Your vehicle is equipped with electronic fuel injection and other electronic components. It is possible for an improperly installed/adjusted two-way radio or cellular telephone to adversely affect electronic systems. For this reason, we recommend that you carefully follow the radio manufacturer's instructions or consult your Hyundai dealer for precautionary measures or special instructions if you choose to install one of these devices.
A06UAU1A-AAT
SAFETY AND VEHICLE DAMAGE WARNING
This manual includes information titled as WARNING, CAUTION and NOTE. These titles indicate the following:

WARNING:
This indicates that a condition may result in harm, serious injury or death to you or other persons if the warning is not heeded. Follow the advice provided with the warning.

CAUTION:
This indicates that a condition may result in damage to your vehicle or its equipment if the caution is not heeded. Follow the advice provided with the caution.
NOTE:
This indicates that interesting or helpful information is being provided.
A10DA01L-GAT
GUIDE TO HYUNDAI GENUINE PARTS
1. What are Hyundai Genuine Parts?
Hyundai Genuine Parts are the same parts used by Hyundai Motor Company to manufacture vehicles. They are designed and tested for the optimum safety, performance, and reliability to our customers.
2. Why should you use genuine parts?
Hyundai Genuine Parts are engineered and built to meet rigid manufacturing requirements. Using imi-
tation, counterfeit or used salvage parts are not covered under the Hyundai New Vehicle Limited Warranty or any other Hyundai warranty. In addition, any damage to or failure of Genuine Hyundai Parts caused by the installation or failure of an imitation, counterfeit or used salvage part is not covered by Hyundai Motor Company.
3. How can you tell if you purchasing Hyundai Genuine Parts?
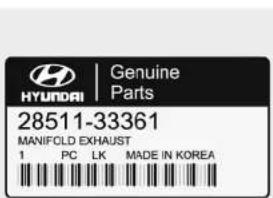
Look for the Hyundai Genuine Parts Logo on the package (see below).
The export specifications are written in English only.
Hyundai Genuine Parts are only sold through authorized Hyundai Dealership and Service Center.

HYUNDAI
Genuine
Parts
A100A01L
A100A02L A100A04L
TABLE OF CONTENTS
SECTION
FEATURES OF YOUR HYUNDAI 1
DRIVING YOUR HYUNDAI 2
WHAT TO DO IN AN EMERGENCY 3
CORROSION PREVENTION & APPEARANCE CARE 4
VEHICLE MAINTENANCE REQUIREMENTS 5
DO-IT-YOURSELF MAINTENANCE 6
B250A010
-
Multi-Function Light Switch
-
Instrument Cluster
-
Horn and Driver's Airbag (If installed)
-
Trip Odometer Reset Switch/ Trip Computer Switch (If installed)
-
Ignition Switch
-
Windshield Wiper/Washer Switch
-
Front Fog Light Switch (If installed)
-
Multimeter (If installed)
-
Hazard Warning Light Switch
-
Digital Clock
-
Rear Fog Light Switch (If installed)
-
Rear Window Defroster Switch (If installed)
-
Audio System (If installed)
-
Passenger's Airbag (If installed)
-
4WD Lock Switch (If installed)
-
Front Windshield Deicer Switch (If installed)
-
Hood Release Lever
-
Panel Brightness Control Knob (Rheostat Switch) (If installed)
-
Traction Control System Switch (If installed)
-
Cruise Control Switch (If installed)
-
Steering Wheel Tilt Lever
-
Ashtray
-
Parking Brake Lever
-
Shift Lever (If installed)
-
Power Outlet
-
Cigarette Lighter
-
Heating/Air Conditioning Control Panel (If installed)
-
Glove Box

CAUTION:
When Installing a container of liquid air freshener Inside the vehicle, do not place it near the Instrument cluster nor on the Instrument panel surface. If there is any leakage from the air freshener onto these areas (Instrument cluster, instrument panel or air ventilator), it may damage these parts. If the liquid from the air freshener does leak onto these areas, wash them with water immediately.
INSTRUMENTS AND CONTROLS (RIGHT-HAND DRIVE)
B250B01O-GAT
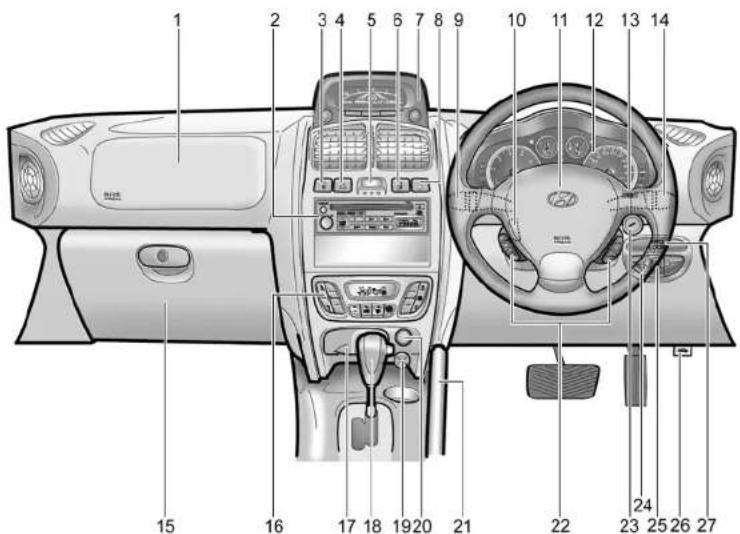
B250A01O-R
-
Passenger's Airbag (If installed)
-
Audio System (If installed)
-
Front Fog Light Switch (If installed)
-
Hazard Warning Light Switch
-
Digital Clock
-
Rear Fog Light Switch (If installed)
-
Multimeter (If installed)
-
Rear Window Defroster Switch (If installed)
-
Windshield Wiper/Washer Switch
-
Steering Wheel Tilt Lever
-
Horn and Driver's Airbag (If installed)
-
Instrument Cluster
-
Trip Odometer Reset Switch/
Trip Computer Switch (If installed)
-
Multi-Function Light Switch
-
Glove Box
-
Heating/Air Conditioning Control Panel (If installed)
-
Ashtray
-
Shift Lever (If installed)
-
Power Outlet
-
Cigarette Lighter
21 Parking Brake Lever
-
Cruise Control Switch (If installed)
-
Ignition Switch
-
Front Windshield Deicer Switch (If installed)
-
Panel Brightness Control Knob
(Rheostat Switch) (If installed)
-
Hood Release Lever
-
4WD Lock Switch (If installed)

CAUTION:
When installing a container of liquid air freshener inside the vehicle, do not place it near the instrument cluster nor on the instrument panel surface. If there is any leakage from the air freshener onto these areas (Instrument cluster, instrument panel or air ventilator), it may damage these parts. If the liquid from the air freshener does leak onto these areas, wash them with water immediately.
B255A02O-GAT
INDICATOR SYMBOLS ON THE INSTRUMENT CLUSTER

Turn Signal Indicator Lights

ABS Service Reminder Indicator (If installed)

Traction Control Indicator Light (If installed)


Traction Control Indicator Lights (If installed)

High Beam Indicator Light

Low Oil Pressure Warning Light

Parking Brake/Brake Fluid Level Warning Light

Charging System Warning Light

Door Ajar Warning Light and Chime (If installed)

Low Fuel Level Warning Light

Tail Gate Open Warning Light

SRS (Airbag) Service Reminder Indicator (SRI)(If installed)

Malfunction Indicator Light (If installed)

Cruise Indicator Light (If installed)

4WD System Warning Light (If installed)

4WD Lock Indicator Light (If installed)

Immobilizer Warning Light (Diesel Engine) (If Installed)

Diesel Preheat Indicator Light

Fuel Filter Warning Light (Diesel Engine)

Engine Oil Level Warning Light (Diesel Engine)(If installed)
FEATURES OF YOUR HYUNDAI
Fuel Recommendations 1-2
Breaking In Your New Hyundai 1-3
Keys....1-5
Immobilizer System 1-5
Door Locks 1-10
Theft-Alarm System.... 1-13
Power Windows.... 1-16
Seats 1-17
Seat Belts 1-24
Child Restraint System 1-32
Supplemental Restraint (AIRBAG) System 1-41
Instrument Cluster and Indicator Lights 1-48
Warning and Indicator Lights 1-52
Trip Computer 1-63
Multimeter 1-66
Multi-function Light Switch 1-68
Windshield Wiper/Washer Switch 1-71
Sunroof 1-81
Mirror 1-86
Hood Release 1-94
Cruise Control....1-98
Heating and Cooling Control 1-101
Stereo Sound System 1-118
Audio System 1-120
Antenna 1-148
1 FEATURES OF YOUR HYUNDAI
2
FUEL RECOMMENDATIONS
BD10A02O-GAT
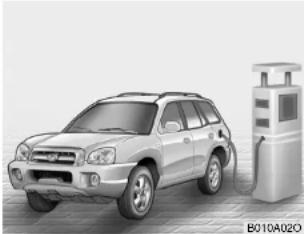
Use Unleaded Gasoline
natural_image
Exterior view of a silver SUV parked next to a charging station (no visible text or symbols)Unleaded gasoline with a Pump Octane Rating of 87 (Research Octane Number 91) or higher must be used in Hyundai vehicle. If leaded gasoline is used, it will cause the catalytic converter to become ineffective and the emission control system to malfunction.
This can also result in increased maintenance expense. To avoid accidental use of leaded fuel, the large nozzle used with leaded gasoline at service stations can not be inserted into fuel tank opening of Hyundai vehicle.
NOTE:
For some countries, Hyundai vehicles are designed to use leaded gasoline. When you are going to use leaded gasoline, ask to Hyundai dealer whether leaded gasoline in your vehicle is available or not.
o Octane rating of leaded gasoline is same with unleaded one.
Use Diesel
Diesel fuel of 52 to 54 cetane is used in Hyundai vehicle. If two types of diesel fuel are available, use summer or winter fuel properly according to the following temperature conditions.
o Above -5°C (23°F) ... Summer type diesel fuel.
o Below -5°C (23°F) ... Winter type diesel fuel.
Watch the fuel level in the tank very carefully: If the engine stops through fuel failure, the circuits must be completely purged to permit restarting.

CAUTION:
Do not let any gasoline or water enter the tank. This would make it necessary to drain it out and to bleed the lines to avoid jamming the injection pump and damaging the engine.
B010B01A-AAT
What About Gasohol?
Gasohol (a mixture of 90% unleaded gasoline and 10% ethanol or grain alcohol) may be used in your Hyundai. However, if your engine develops drive ability problems, the use of 100% unleaded gasoline is recommended. Fuels with unspecified quantities of alcohol, or alcohols other than ethanol, should not be used.
BD10DD1S-AAT
Do not Use Methanol
Fuels containing methanol (wood alcohol) should not be used in your Hyundai. This type of fuel can reduce vehicle performance and damage components of the fuel system.

CAUTION:
Your Hyundai's New Vehicle Limited Warranty may not cover damage to the fuel system and performance problems that are caused by the use of methanol or fuels containing methanol.
B01DE01A-AAT
Gasolines for Cleaner Air
To help contribute to cleaner air, Hyundai recommends that you use gasolines treated with detergent additives, which help prevent deposit formation in the engine. These gasolines will help the engine run cleaner and enhance performance of the Emission Control System.
B010F01A-AAT
Operation in Foreign Countries
If you are going to drive your Hyundai in another country, be sure to:
o Observe all regulations regarding registration and insurance.
o Determine that acceptable fuel is available.
BREAKING IN YOUR NEW HYUNDAI
B020A01S-GAT
During the First 2,000 Km (1,200 Miles) (Gasoline Engine)
No formal 'break-in' procedure is required with your new Hyundai. However, you can contribute to the economical operation and durability of your Hyundai by observing the following recommendations during the first 2,000 km (1,200 miles).
o Don't drive faster than 88 km/h (55 mph).
o While driving, keep your engine speed (rpm, or revolutions per minute) between 2,000 rpm and 4,000 rpm.
o Use moderate acceleration. Don't start, depress the accelerator pedal fully.
o For the first 300 km (200 miles), try to avoid hard stops.
1 FEATURES OF YOUR HYUNDAI
4
o Don't lug the engine (in other words, don't drive so slowly in too high a gear that the engine "bucks": shift to a lower gear).
o Whether going fast or slow, vary your speed from time to time.
o Don't let the engine idle longer than 3 minutes at one time.
o Don't tow a trailer during the first 2,000 km (1,200 miles) of operation.
B020B01FC-GAT
During the First 1,000 Km (600 Miles)(Diesel Engine)
No formal 'break-in' procedure is required with your new Hyundai. However, you can contribute to the economical operation and durability of your Hyundai by observing the following recommendations during the first 1,000 km (600 miles).
o While driving, keep your engine speed (rpm, or revolutions per minute) within 3,000 rpm.
o While driving, keep under three quarters of maximum speed.
o Use moderate acceleration. Don't start, depress the accelerator pedal fully.
o For the first 300 km (200 miles), try to avoid hard stops.
KEYS
B000A01A-AAT
natural_image
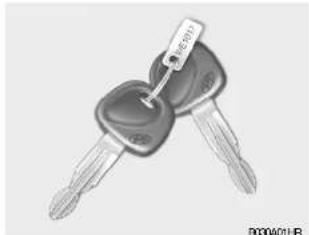
Two keys with a key inserted, no visible text or symbols on the keys or backgroundFor greater convenience, the same key operates all the locks in your Hyundai. However, because the doors can be locked without a key, carrying a spare key is recommended in case you accidentally lock one key inside the car.
B030B01A-AAT
Record Your Key Number
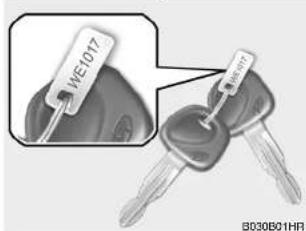
A code number is stamped on the number plate that came with the keys to your Hyundai. This key number plate should not be left with the keys but kept in a safe place, not in the vehicle. The key number should also be recorded in a place where it can be found in an emergency.
If you need additional keys, or if you should lose your keys, your authorized Hyundai dealer can make new keys if you can supply the key number.
FEATURES OF YOUR HYUNDAI
IMMOBILIZER SYSTEM
5
BB0A010-GAT
- For a Gasoline Engine (If installed)
The immobilizer system is an anti-theft device, designed to deter automobile theft.
B880B020-GAT
Keys
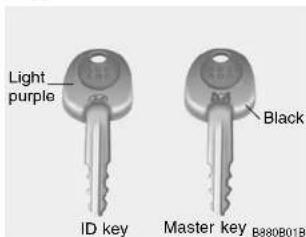
All of the locks fitted to the vehicle are operated by the same key. However, since it is possible to lock the doors without the use of the key, care should be exercised to ensure that the key does not become locked inside the vehicle by mistake.
1 FEATURES OF YOUR HYUNDAI
6
For greater convenience, your Hyundai has two types of keys as shown in the illustration.
1) ID key
Your vehicle is supplied with ID key when the vehicle is first delivered to you.
This key must be used first to register unique ID code in the ICM. This ID code is then recorded onto the master keys. Both sides of the key has a Hyundai logo.
NOTE:
The ID key should remain with car when it is sold for the use of the next owner.
2) Master key
This key is for general use. It will open all locks on your vehicle. One side of the key has the Hyundai logo and the other side has the "M" symbol.
NOTE:
If you make your own duplicate key, you will not be able to cancel the system or start the engine.

CAUTION:
o Don't lose your ID key or forget the password. Always keep your ID key in a place where you remember and record your password. If you don't have both the password and ID key, consult your authorized Hyundai dealer.
When starting the engine, do not use the key with other immobilizer keys around. Otherwise the engine may not start or may stop soon after it starts. Keep each keys separately not to have any malfunction after you receive your new vehicle.
BB0CD1A-GAT
Key Numbers
natural_image
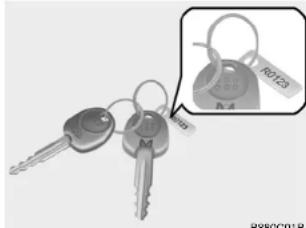
Two key sets with a magnified inset showing a key labeled R0123 and N.A (no text or symbols on keys)The vehicle key number is recorded upon a metal tag attached to the keys when the vehicle is first delivered to you.
The key number should be recorded and kept in a safe place in case the need to order further keys arises. New keys are available from any Hyundai dealer by quoting the relevant key number.
In the interest of security, the metal tag attached to the keys which bears the key number should be removed from the key ring after you receive your new
vehicle. In addition, key numbers cannot be provided by Hyundai for security reasons.
If you need additional keys or if you should lose your keys, your authorized Hyundai dealer can make new keys if you can supply the key number and ID key.
BB80D01E-GAT
Limp home procedures
In case the immobilizer system is out of order, you cannot start the engine without the limp home procedures with ignition key.
The following procedure is how to start the engine with the function of the limp home (0, 1, 2, 3 as a sample password).
NOTE:
You can get the limp home password when the vehicle is first delivered to you. If you do not have the password, consult your authorized Hyundai dealer.
- To set the password, you may turn the ignition key "ON" and then turn it "OFF" according to the digit numbers. For example, turn the ignition key once for digit number "1", and twice for "2", and so on. However, for the digit number "0", you must turn the ignition key for 10 times.
- Wait for 3\~10 seconds.
- You may set the remaining number of digits by following the same procedures 1 and 2.
- If all of four digits have been tried successfully, from this time, you have to start your engine within 30 seconds. If you start your engine after 30 seconds, your engine will not start.
NOTE:
If the engine dies while driving after limp home procedure, you can start your engine within 8 seconds without limp home procedure again.
After doing the limp home procedure, you have to consult with your authorized Hyundai dealer as soon as possible.

CAUTION:
o If you fail to try the limp home procedure with the sequence of three times, you have to wait for about one hour to do the limp home procedure again.
o If you cannot start your engine in spite of limp home procedure, have your vehicle towed by an authorized Hyundai dealer.
1 FEATURES OF YOUR HYUNDAI
8
BB05A01O-GAT
- For a Diesel Engine (If Installed)
The immobilizer system is an anti-theft device, designed to deter automobile theft.
B885B02O-GAT
Keys
natural_image
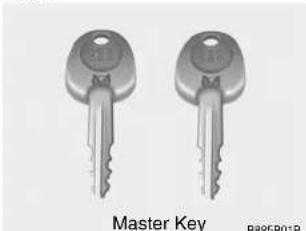
Two identical key illustrations labeled 'Master Key' with no additional text or symbols on the keys themselves.All of the locks fitted to the vehicle are operated by the same key. However, since it is possible to lock the doors without the use of the key, care should be exercised to ensure that the key does not become locked inside the vehicle by mistake.
NOTE:
If you make your own duplicate key, you will not be able to cancel the system or start the engine.

CAUTION:
o The password should be recorded and kept in a safe place in case the need to order further keys arises.
o If you forget the password, consult your authorized Hyundai dealer.
When starting the engine, do not use the key with other immobilizer keys around. Otherwise the engine may not start or may stop soon after it starts.
Keep each keys separately not to have any malfunction after you receive your new vehicle.
BB0C02A-GAT
Key Numbers
natural_image
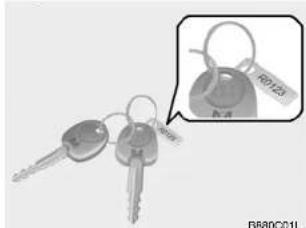
Close-up of two key sets with a magnified inset showing a key labeled 'R0125' (no text or symbols on keys)The vehicle key number is recorded upon a metal tag attached to the keys when the vehicle is first delivered to you.
The key number should be recorded and kept in a safe place in case the need to order further keys arises. New keys are available from any Hyundai dealer by quoting the relevant key number.
In the interest of security, the metal tag attached to the keys which bears the key number should be removed from the key ring after you receive your new vehicle. In addition, key numbers can-
not be provided by Hyundai for security reasons.
If you need additional keys or if you should lose your keys, your authorized Hyundai dealer can make new keys.
B885D02A-GAT
Limp Home Procedures
B885D010
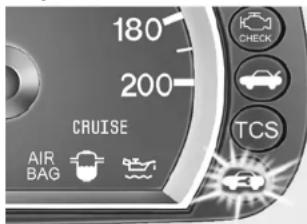
In case the immobilizer warning indicator blinks for five seconds when the ignition key is turned to "ON" position, this indicates that the immobilizer system is out of order. And you cannot start the engine without the limp home procedures with ignition key.
The following procedure is how to start the engine with the function of the limp home (0, 1, 2, 3 as a sample password).
NOTE:
You can get the limp home password when the vehicle is first delivered to you. If you do not have the password, consult your authorized Hyundai dealer.
- To set the password you may turn the ignition key "ON" and then turn it "OFF" according to the digit numbers, then the immobilizer indicator will blink along with the operation of the ignition key. For example, turn the ignition key once for digit number "1", and twice for "2", and so on. However, for the digit number "0", you must turn the ignition key for 10 times.
- Wait for 3–10 seconds.
-
You may set the remaining number of digits by following the same procedures 1 and 2.
-
If all of four digits have been tried successfully, turn the ignition key "ON" and check that the immobilizer indicator illuminates. From this time, you have to start your engine within 30 seconds. If you start your engine after 30 seconds, your engine will not start.
NOTE:
If the engine dies while driving after limp home procedure, you can start your engine within 8 seconds without limp home procedure again.
5. If the immobilizer indicator blinks for five seconds, you have to try the limp home procedure again from the beginning.
After doing the limp home procedure, you have to consult with your authorized Hyundai dealer as soon as possible.
DOOR LOCKS

CAUTION:
- If you fail to try the limp home procedure with the sequence of three times, you have to wait for about one hour to do the limp home procedure again.
o If you cannot start your engine in spite of limp home procedure, have your vehicle towed by an authorized Hyundai dealer.
B030C01Y-AAT
ILLUMINATED IGNITION SWITCH (If installed)
B030C01E
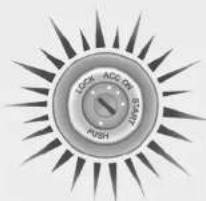
Whenever a door is opened, the ignition switch will be illuminated for your convenience, provided the ignition switch is not in the "ON" position. The light will go off approximately 10 seconds after closing the door or when the ignition switch is turned on.
B040A02Y-AAT

WARNING:
o Unlocked doors can be dangerous. Before you drive away (especially if there are children in the car), be sure that all the doors are securely closed and locked so that the doors cannot be inadvertently opened from the inside. This helps ensure that the doors will not be opened accidentally. Also, when combined with the proper use of seat belts, locking the doors helps keep occupants from being ejected from the car in case of an accident.
o Before opening the door, always look for and avoid oncoming traffic.
o In case of accident, the door is unlocked automatically (If Installed).
B040B01A-AAT
Locking and Unlocking Front Doors with a Key
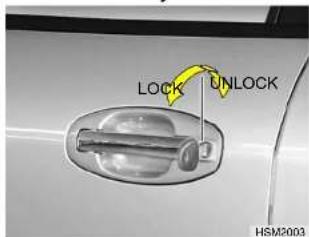
o The door can be locked or unlocked with a key.
o Lock the door by turning the key toward the front of the vehicle and unlock it by turning the key toward the rear.
B040C01O-GAT
Locking from the Outside
natural_image
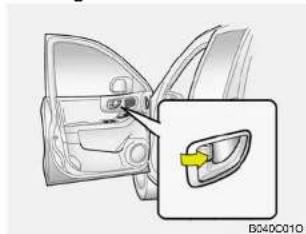
Diagram of a car interior showing the door and side panel with an inset close-up highlighting a yellow component (no text or symbols present)The doors can be locked without a key. To lock the doors, first push the inside lock switch to the 'LOCK' position so that the red mark on the switch is not visible, then close the door.
NOTE:
o If your vehicle is equipped with central door locking system, the door will not lock if the key is left in the ignition switch when the front doors are closed.
When locking the door this way, be careful not to lock the door with the ignition key left in the vehicle.
To reduce the chances of theft, always remove the ignition key, close all windows, and lock all doors and tail gate when leaving your vehicle unattended.
B010D02S-AAT
Locking from the Inside
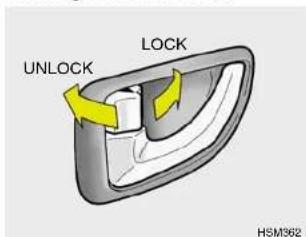
To lock the doors from the inside, simply close the door and push the lock switch to the "LOCK" position. When this is done, neither the outside nor the inside door handles can be used.
1 FEATURES OF YOUR HYUNDAI
12
NOTE:
o When the door is locked, the red mark on the switch is not visible.
o The driver's door can be opened by pulling the inside door handle even if the lock switch is depressed. (If installed)
B04DE04A-AAT
Child-Protector Rear Door Lock
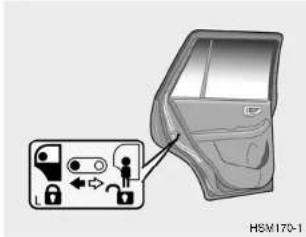
Your Hyundai is equipped with a "child-protector" rear door lock assembly. When the lock mechanism is engaged, the rear door cannot be opened from the inside. Its use is recommended whenever there are small children in the rear seat.
To engage the child-protector feature so that the door cannot be opened from the inside, move the child-protector lever to the " 🔒 " position and close the door. Move the lever to the " 🔒 " position when normal door operation is desired.
If you wish to be able to open the door from the outside, the outside door handle will function normally.
B040G02O-AAT
Central Door Locks (If Installed)
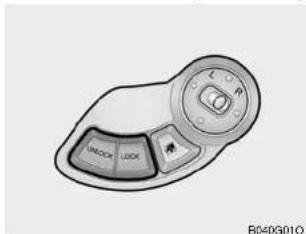
The central door locking switch is located on the driver's arm rest. It is operated by depressing either the "LOCK" or "UNLOCK" of the door lock switch.
THEFT-ALARM SYSTEM
13
NOTE:
When pushing the "LOCK" of the driver's door lock switch, all vehicle doors will lock. If any door is open when the switch is depressed, the door will remain locked when closed.
o When pushing the "UNLOCK" of the switch, all vehicle doors will unlock.
B04CH01L-GAT
Speed Sensing Auto door Lock- ing (If installed)
When the speed of the vehicle keeps above 40KM/H for 2-3 seconds, it will automatically lock all doors for driver and passenger's safety.
B070A01A-AAT
(If installed)
This system is designed to provide protection from unauthorized entry into the car. This system is operated in three stages: the first is the "Armed" stage, the second is the "Alarm" stage, and the third is the "Disarmed" stage. If triggered, the system provides an audible alarm with blinking of the turn signal lights.
B070B010-AAT
Armed Stage
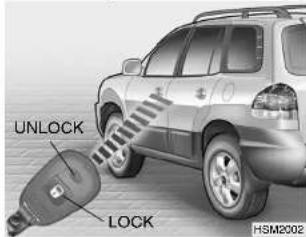
Park the car and stop the engine. Arm the system as described below.
1) Remove the ignition key from the ignition switch.
2) Make sure that the engine hood and tail gate are closed and latched.
3) Lock the doors using the transmitter of the keyless entry system.
After completion of the steps above, the turn signal lights will blink once to indicate that the system is armed.
1 FEATURES OF YOUR HYUNDAI
14
NOTE:
1) If any door, tail gate or engine hood remains open, the system will not be armed.
2) If this happens, rearm the system as previously described.

CAUTION:
Do not arm the system until all passengers have left the car. If the system is armed while a passenger(s) remains in the car, the alarm may be activated when the remaining passenger(s) leaves the car.
B070C01O-GAT
Alarm Stage
The alarm will be activated if any of the following occurs while the car is parked and the system is armed.
1) A front or rear door is opened without using the transmitter.
2) The tail gate is opened without using the transmitter.
3) The engine hood is opened.
The siren will sound and the turn signal lights will blink continuously for 27 seconds (E.C only/ Except E.C: This happens 3 times). To turn off the system, unlock the door or tail gate with the transmitter.

CAUTION:
Avoid trying to start the engine while the system is armed.
B070D01HP-AAT
Disarmed Stage
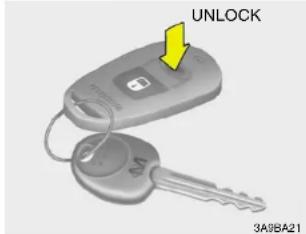
The system will be disarmed when the driver's or passenger's door is unlocked by depressing the "UNLOCK" button on the transmitter.
After completing the step above, the turn signal lights will blink twice to indicate that the system is disarmed.
NOTE:
If any door, tail gate or engine hood is not opened within 30 seconds, the system will be rearmed.

CAUTION:
Only the transmitter can disarm the armed stage. If the transmitter does not disarm the system, it is necessary to take the following steps;
- Unlock the door with the key, which will cause, the alarm to be activated.
- Insert the key in the ignition key cylinder and turn the ignition key to "ON" position.
- Wait for 30 seconds.
After completing the steps above, the system will be disarmed.
B070F01A-GAT
KEYLESS ENTRY SYSTEM (If installed)
Locking doors
- Close all doors.
- Push the 'LOCK' button on the transmitter.
- At the same time all doors lock, the turn signal lights will blink once to indicate that the system is armed.
Unlocking doors
- Push the 'UNLOCK' button on the transmitter.
- At the same time all doors unlock, the turn signal lights will blink twice to indicate that the system is disarmed.
B070E02HP-GAT
Replacing the battery
When the transmitter's battery begins to get weak, it may take several pushes on the button to lock or unlock the doors, and the LED will not light. Replace the battery as soon as possible.
Replacement instructions:
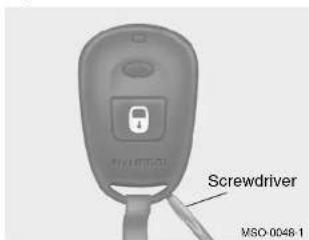
- Carefully separate the case with a blade screwdriver as shown in the illustration.
POWER WINDOWS
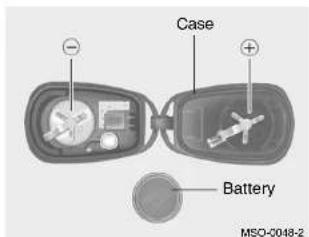
- Remove the old battery from the case and note the polarity. Make sure the polarity of the new battery is the same(+side facing down), then insert it in the transmitter.
B060A03L-AAT
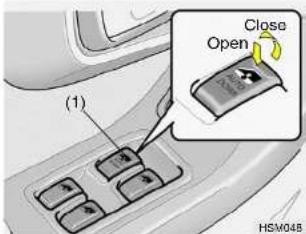
The power windows operate when the ignition key is in the "ON" position. The main switches are located on the driver's armrest and control the front and rear windows on both sides of the vehicle. The windows may be opened by depressing the appropriate window switch and closed by pulling up the switch. To open the window on the driver's side, press the switch(1) halfway down. The window moves as long as the switch is operated. To fully open the driver's window automatically, press the switch fully down. In automatic operation, the window will fully open even if you let go of the switch. To stop at the desired opening, pull up and release the switch.
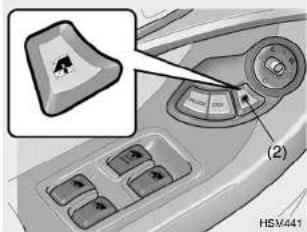
In order to prevent operation of the passenger front and rear windows, a window lock switch(2) is provided on the armrest of the driver's door. To disable the power windows, press the window lock switch. To revert to normal operation, press the window lock switch a second time.
NOTE:
The power windows can be operated for 30 seconds after the ignition key is turned to the "ACC" or "LOCK" positions, or removed from the ignition switch.
If the front doors are opened during this 30 second period, the power windows can no longer be oper-
SEATS
ated without the ignition key turned to the "ON" position.
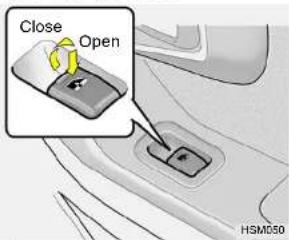
B08DA01A-AAT ADJUSTABLE SEATS

WARNING:
Never attempt to adjust the seat while the vehicle is moving. This could result in loss of control or an accident which may cause death, serious injury, or property damage.
B0B0B02A-AAT
FRONT SEATS
Adjusting Seat Forward and Rearward
natural_image
Illustration of a car seat with directional arrows indicating movement or force (no text or symbols)B0A0B010
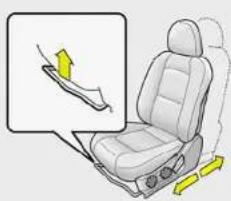
To move the seat toward the front or rear, pull the lock release lever upward. This will release the seat on its track so you can move it forward or rearward to the desired position. When you find the position you want, release the lever and slide the seat forward or rearward on its track until it locks into the desired position and cannot be moved further.

WARNING:
1) Be careful that someone's head, hands and body are not trapped by a closing window.
2) Never try to operate the main switch on the driver's door and the individual door window switch in opposing directions at the same time. If this is done, the window will stop and cannot be opened or closed.
3) Do not leave children alone in the car. Always remove the ignition key for their safety.
1 FEATURES OF YOUR HYUNDAI
18

WARNING:
To ensure the seat is locked securely, attempt to move the seat forward or rearward without using the lock release lever.
B080C01A-AAT
Adjusting Seatback Angle
natural_image
Illustration of a car seatbelt with a yellow directional arrow indicating rotation (no text or symbols)B080C010
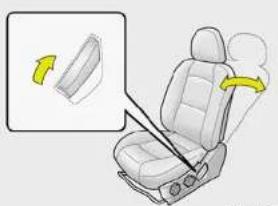
To recline the seatback, lean forward to take your weight off it, then pull up on the recliner control lever at the outside edge of the seat. Now lean back until the desired seatback angle is achieved. To lock the seatback into position, release the recliner control lever.

WARNING:
To minimize risk of severe injury in the event of a collision or a sudden stop, both the driver and passenger seatbacks should always be in an upright position while the vehicle is in motion. The protection provided by the seat belts and airbags in a frontal collision may be reduced significantly when the seatbacks are reclined. There is greater risk that the driver and passenger will slide under the seat belt which may result in serious injury if a crash occurs when the seatbacks are reclined.
The seat belt cannot provide full protection to an occupant if the seatback is reclined.
B080D02JM-GAT
Adjustable Headrests
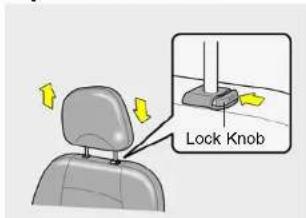
B08DD010
Headrests are designed to help reduce the risk of neck injuries.
To raise the headrest, pull it up. To lower the headrest, push it down while pressing the lock knob. To remove the headrest, raise it as far as it can go then press the lock knob while pulling upward.

WARNING:
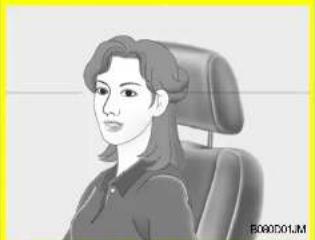
natural_image
Illustration of a person seated in an office chair, no text or symbols visibleo For maximum effectiveness in case of an accident the headrest should be adjusted so the middle of the headrest is at the same height as the top of the occupant's eyes. For this reason, the use of a cushion that holds the body away from the seatback should not be recommended.
Do not operate vehicle with the headrests removed as injury to the occupants may occur in the event of an accident. Headrests may provide protection against neck injuries when properly ad-
justed.
o Do not adjust the headrest height while the vehicle is in motion.
B080E02A-AAT
Lumbar Support Control (Driver's seat only) (If Installed)
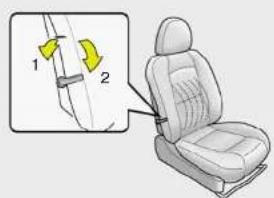
B080E010
To adjust the lumbar support, turn the handle on the inboard side of the seat. To increase the amount of lumbar support, pull the lever forward. To decrease it, push the lever toward the rear.
- Minimum support
- Maximum support
B090F01S-AAT
Seat Cushion Height Adjustment (Driver's Seat Only)
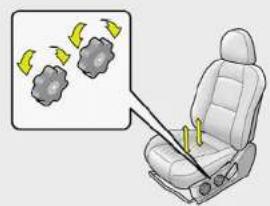
B080F010
To raise or lower the front part of the seat cushion, turn the front knob forward or rearward. To raise or lower the rear part of the seat cushion, turn the rear knob forward or rearward.
1 FEATURES OF YOUR HYUNDAI
20
B000G01FC-AAT
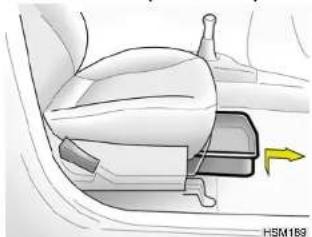
UNDER TRAY (If installed)
natural_image
Diagram of a car seatbelt mechanism with a yellow arrow indicating direction (no text or symbols present)The tray is located under the front passenger seat. It is opened by up and pulling forward.

WARNING:
To avoid the possibility of injury in case of an accident or a sudden stop, the tray should be kept closed when the car is in motion.
B100A01JM-GAT
SEAT WARMER (If installed)
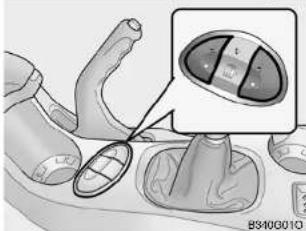
The seat warmer is provided to warm the front seats during cold weather. With the ignition key in the "ON" position, push either of the switches to warm the driver's seat or the passenger's seat.
During mild weather or under conditions where the operation of the seat warmer is not needed, keep the switches in the "OFF" position.
NOTE:
o The seat warmer will not operate if ambient temperature is higher than 28°C ± 3.5°C.
o If the seat warmer doesn't works when ambient temperature is lower than 24°C, it must be checked at authorized dealer.

WARNING:
Be very careful not to injure by low temperature burn or an attack of fever as following occupants; infants, children, old man, drunken man, people who is taken sleeping drug or cold remedy.
B0B5A01O-BAT
REAR SEAT
Adjusting Seatback Angle
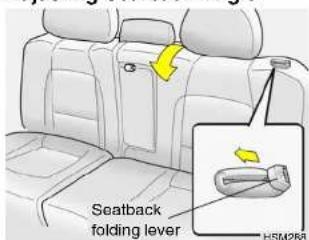
To recline the seatback, push the seatback folding lever toward the head-rest, and release it after the desired seatback angle is achieved.
When you recline the seatback to desired position, always be sure it has locked into position.

CAUTION:
When reclining the seatback, you should adjust the seatback folding lever while standing.
B0B5B02O-AAT
Folding Rear Seatback and Seat Cushion
For greater convenience, the entire seatback and seat cushion may be folded down and up.
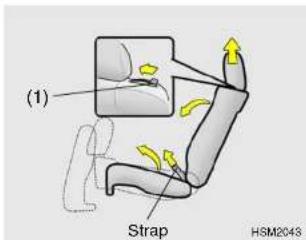
- Remove the headrests.
- Pull strap to fold up the seat cushion.
- Push and hold the seatback folding lever (1) inward, then push down the seatback.
NOTE:
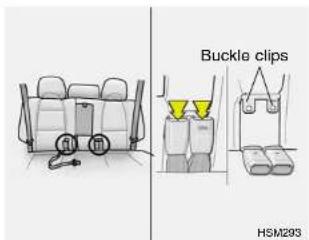
o Before folding the seatback, place the rear seat belt buckles in the buckle clips on the seatback. This will prevent the seat belt buckles from becoming covered by the seat cushion when it is returned to the seating position.
o The rear seat belt buckles must be removed from the buckle clips by pressing release button when in use.
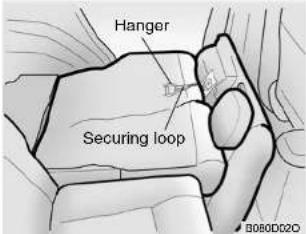
- Hook the securing loop under the seat cushion to the hanger on the backside of the seatback.
- Insert the headrests between the seatback and the seat cushion.
- To return the seatback to its normal position, push the seatback folding lever and reverse the above procedure.
When you return the seatback to its upright position, always be sure it is locked into position by pulling and pushing on the top of the seatback.

WARNING:
When folding down or returning the seatback, always hold the seatback. Otherwise, the seatback could move suddenly and result in unexpected injury.
The purpose of the fold-up rear seat cushion and the fold-down rear seat back is to allow you to carry more objects than could otherwise be accommodated. Never allow passengers to sit on the cargo area while the car is moving. This is not a proper seating position and no seat belts are available for use when the seat back is folded down.
This could result in serious injury or death in case of an accident or a sudden stop. Objects should not extend higher than the top of the front seatbacks. This could allow cargo to slide forward and cause injury or damage during sudden stops.
o Make sure that the headrests are properly fixed in place to minimize the risk of severe injury in case of an accident.
When you return the rear seatback to its upright position after being folded down, be careful not to damage the seatbelt webbing or buckle. In addition, do not allow the seatbelt webbing or buckle to get caught or pinched in the rear seat.
B0B5C02O-GAT
FULL FLAT REARSEAT
(If installed)
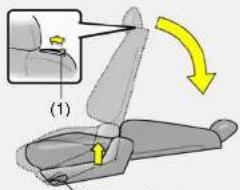
Release lever
HSM250
- Pull the release lever under the seat cushion to unlock the seat cushion.
- Push and hold the seatback folding lever (1) inward, then push down the seatback to reward, and lift up the seat cushion slightly to flat the rearseat completely.
natural_image
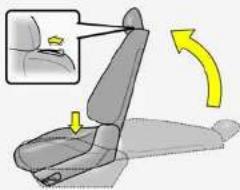
Illustration of a car seatbelt with a yellow directional arrow indicating rotation (no text or symbols)HSM251
- To return the seatback to its upright position, push the seatback folding lever and pull up the seatback.
- After returning the seatback to its upright position, push the seat cushion strongly and make sure it is locked into position by pulling and pushing on the top of the seatback and seat cushion.

WARNING:
When folding down or returning the seatback, always hold the seatback. Otherwise, the seatback could move suddenly and result in unexpected injury.

CAUTION:
The purpose of the full flat seat is to rest while the vehicle is stopped. Never attempt to drive the vehicle while the seat is flat-ted. An improperly secured seat could cause serious injury or death in case of an accident or a sudden stop.
o Park the car in a safe place, then use the flat seat.
o Do not press the seat excessively or pile cargo on top when the seat is flatted.
Please be careful that the seat belt does not get twisted by interference with the upper side structure of the seat belt when you fold down the seatback.
o Keep hands and feet clear of the seat mechanism when making adjustments.
1 FEATURES OF YOUR HYUNDAI
24
SEAT BELTS
B140A01B-GAT
REAR SEAT WARNING
natural_image
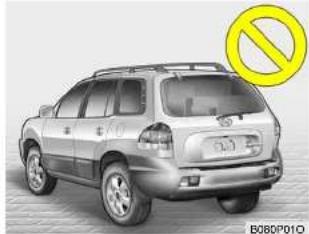
Side view of a silver SUV with a yellow prohibition symbol overlay (no text or symbols on the vehicle itself)For the safety of all passengers, luggage or other cargo should not be piled higher than the top of the seatback.
B150A02A-GAT SEAT BELT PRECAUTIONS
All occupants of the vehicle should wear their seat belts at all times. Indeed, your province's laws may require that some or all occupants of the vehicle use seat belts.
The possibility of injury or the severity of injury in an accident will be decreased if this elementary safety precaution is observed. In addition, follow the other instructions provided in this section.
B150B01Y-GAT
Infant or Small Child
Some countries require the use of child restraint systems for infants and small children. Whether this is required by law or not, it is strongly recommended that a child restraint seat or infant restraint system be used for infants or small children weighing less than 18 kilograms (40 pounds).
NOTE: Small children are best protected in an accident when properly restrained by a child restraint system.
B150C02A-AAT
Larger Children
Children who are too large for child restraint systems should always occupy the rear seat and use the available lap/shoulder belts. The lap portion should be fastened snug on the hips and as low as possible. Check belt fit periodically. A child's squirming could put the belt out of position. Children are afforded the most safety in the event of an accident when they are restrained by a proper restraint system in the rear seat. If a larger child (over age 13) must be seated in the front seat, the child should be securely restrained by the available lap/shoulder belt and the seat should be placed in the rearmost position. Children under the age of 13 should be restrained securely in the rear seat. Never place a child under the age of 13 in the front seat. NEVER place a rear facing child seat in the front seat of a vehicle.
B150001A-AAT
Pregnant Women
The use of a seat belt is recommended for pregnant women to lessen the chance of injury in an accident. When a seat belt is used, the lap belt portion should be placed as low and snugly as possible on the hips, not across the abdomen. For specific recommendations, consult a physician.
B150E01A-AAT
Injured Person
A seat belt should be used when an injured person is being transported. When this is necessary, you should consult a physician for recommendations.
B150F01A-AAT
One Person Per Belt
Two people (including children) should never attempt to use a single seat belt. This could increase the severity of injuries in case of an accident.
B150G01A-AAT
Do Not Lie Down
To reduce the chance of injuries in the event of an accident and to achieve maximum effectiveness of the restraint system, all passengers should be sitting up and the front seats should be in an upright position when the car is moving. A seat belt cannot operate properly if the person is lying down in the rear seat or if the front seat is in a reclined position.

WARNING:
Sitting in a reclined position or lying down when your vehicle is in motion can be dangerous. Even if you buckle up, your seat belts can't do their job when you're reclined. The shoulder belt can't do its job because it won't be against your body. Instead, it will be in front of you. In a crash you could go into it with great force, receiving serious neck or other injuries. The lap belt can't do its job either. In a crash the belt could go up over your abdomen. The belt forces would be applied there, not at your strong pelvic bones. This could cause serious internal injuries. For proper protection when the vehicle is in motion, have the seatback upright. Then sit well back in the seat and wear your seat belt properly.
1 FEATURES OF YOUR HYUNDAI
26
B160401A-AAT
CARE OF SEAT BELTS
Seat belt systems should never be disassembled or modified. In addition, care should be taken to assure that seat belts and belt hardware are not damaged by seat hinges, doors or other abuse.

WARNING:
When you return the rear seatback to its upright position after the rear seatback was folded down, be careful not to damage the seat belt webbing or buckle. Be sure that the webbing or buckle does not get caught or pinched in the rear seat.
B160B01A-AAT
Periodic Inspection
It is recommended that all seat belts be inspected periodically for wear or damage of any kind. Parts of the system that are damaged should be replaced as soon as possible.
B160C01A-AAT
Keep Belts Clean and Dry
Seat belts should be kept clean and dry. If belts become dirty, they can be cleaned by using a mild soap solution and warm water. Bleach, dye, strong detergents or abrasives should not be used because they may damage and weaken the fabric.
B160001A-AAT
When to Replace Seat Belts
The entire seat belt assembly or assemblies should be replaced if the vehicle has been involved in an accident. This should be done even if no damage is visible. Additional questions concerning seat belt operation should be directed to your Hyundai Dealer.
B170A04A-AAT
HEIGHT ADJUSTABLE FRONT SEAT SHOULDER BELT
natural_image
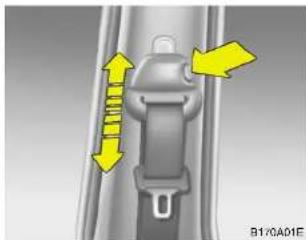
Mechanical component diagram showing a belt buckle with yellow directional arrows indicating motion (no text or symbols)You can adjust the height of the shoulder belt anchor to one of the 4 positions for maximum comfort and safety.
If the height of the adjusting seat belt is too near your neck, you will not be getting the most effective protection. The shoulder portion should be adjusted so that it lies across your chest and midway over your shoulder nearest the door and not your neck.
To adjust the height of the seat belt anchor, lower or raise the height adjuster into an appropriate position. To raise the height adjuster, pull it up. To lower it, push it down while pressing the height adjuster button.
Release the button to lock the anchor into position. Try sliding the height adjuster to make sure that it has locked into the position.

WARNING:
o The height adjuster must be in the locked position when the vehicle is moving.
o The misadjustment of height of the shoulder belt could reduce the effectiveness of the seat belt in a crash.
B180A02A-GAT
SEAT BELTS 3-Point System with Webbing Clamp Locking Retractor (If Installed) To Fasten Your Belt
natural_image
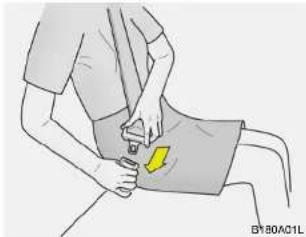
Illustration of a person performing CPR on a lap, showing pressure point and safety symbol (no text or labels)To fasten your seat belt, pull it out of the retractor and insert the metal tab into the buckle. There will be an audible "click" when the tab locks into the buckle.
The seat belt automatically adjusts to the proper length only after the lap belt is adjusted manually so that it fits snugly around your hips. If you lean forward in a slow, easy motion, the belt will extend and let you move around. If there is a sudden stop or impact, however, the belt will lock into position. It will also lock if you try to lean forward too quickly. Check to make sure that the belt is properly locked and that the belt is not twisted.
B180A01Y-GAT
SEAT BELTS 3-Point System with Emergency Locking Retractor (If installed)
To Fasten Your Belt
natural_image
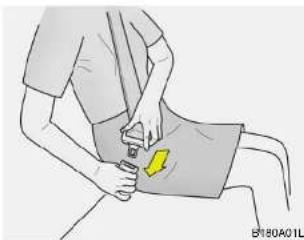
Illustration of a person performing a medical procedure on a lap, with no visible text or symbolsTo fasten your seat belt, pull it out of the retractor and insert the metal tab into the buckle. There will be an audible "click" when the tab locks into the buckle.
1 FEATURES OF YOUR HYUNDAI
28
The seat belt automatically adjusts to the proper length only after the lap belt is adjusted manually so that it fits snugly around your hips. If you lean forward in a slow, easy motion, the belt will extend and let you move around. If there is a sudden stop or impact, however, the belt will lock into position. It will also lock if you try to lean forward too quickly. Check to make sure that the belt is properly locked and that the belt is not twisted.
B200A01S-GAT
Adjusting Your Seat Belt
natural_image
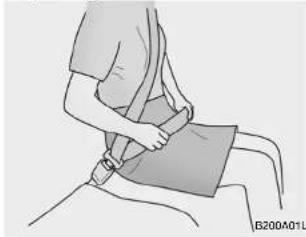
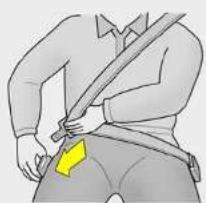
Illustration of a person using a bandage to lift a seat (no text or symbols)You should place the belt as low as possible on your hips, not on your waist. If the belt is located too high on your body, you could slide under it in case of accident or a sudden stop. This could result of death, serious injury or property damage. Both arms should not be under or over the belt. Rather, one should be over and the other under, as shown in the illustration.
Never wear the seat belt under the arm nearest the door.
B210A01A-AAT
To Release the Seat Belt
natural_image
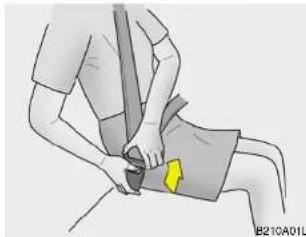
Illustration of a person performing CPR on a patient's seat (no text or symbols visible)The seat belt is released by pressing the release button in the locking buckle. When it is released, the belt should automatically draw back into the retractor.
If this does not happen, check the belt to be sure it is not twisted, then try again.
B220AD1O-AAT
SEAT BELTS (2-Point Static Type) (Rear Seat Center) (It Installed) To Fasten Your Seat Belt
natural_image
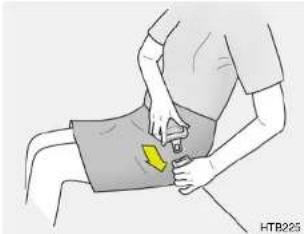
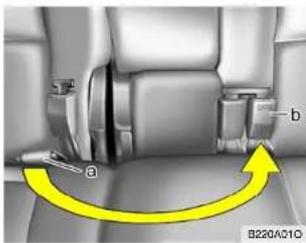
Illustration of a person performing CPR on a patient's abdomen (no text or symbols visible)To fasten a 2-point static type belt, insert the metal tab into the locking buckle. There will be an audible "click" when the tab locks into the buckle. Check to make sure the belt is properly locked and that the belt is not twisted.
natural_image
Interior view of a car seatbelt with labeled parts (a, b) and a yellow curved arrow indicating rotation or movement (no text or symbols beyond labels)
CAUTION:
Before fastening the rear seat center belt, confirm the metal tab (a) and buckle (b) are latched together. If the metal tab is inserted into improper buckle, the seat belt will not lock.
B220B01A-AAT
Adjusting Your Seat Belt
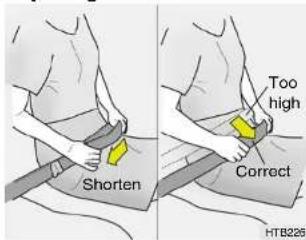
With a 2-point static type seat belt, the length must be adjusted manually so it fits snugly around your body. Fasten the belt and pull on the loose end to tighten. The belt should be placed as low as possible on your hips, not on your waist. If the belt is too high, it could increase the possibility of your being injured in an accident.
1 FEATURES OF YOUR HYUNDAI
30
B220CD1A-AAT
To Release the Seat Belt
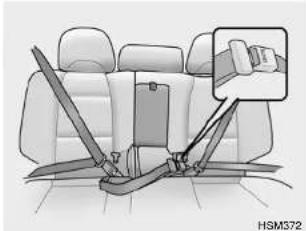
natural_image
Interior view of a car seatbelt with a close-up inset showing the seatbelt (no text or symbols present)When you want to release the seat belt, press the button in the locking buckle.

WARNING:
The center lap belt latching mechanism is different from those for the rear seat shoulder belts. When fastening the rear seat shoulder belts or the center lap belt, make sure they are inserted into the correct buckles to obtain maximum protection from the seat belt system and assure proper operation.
B220D02O-GAT
SEAT BELTS - Rear Seat Center
3-Point System With Emergency
Locking Retractor (If Installed)
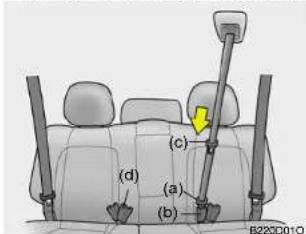
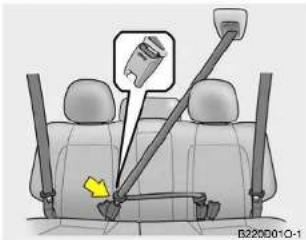
- Pull the seatbelt out of the roof panel.
- Before fastening the rear seat center belt, confirm the metal tab (a) and buckle (b) are latched together.
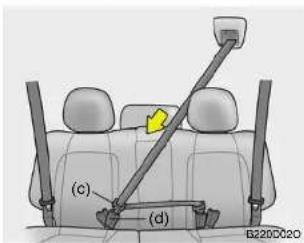
- After confirming that (a) and (b) are latched, pull the seat belt out of the retractor and insert the metal tab (c) into the buckle (d).
natural_image
Illustration of a person wearing a seatbelt and carrying a yellow belt (no text or symbols)B220A02Y-D
There will be an audible "click" when the tab locks in the buckle. The seat belt automatically adjusts to the proper length only after the lap belt is adjusted manually so that it fits snugly around your hips. If you lean forward in a slow, easy motion, the belt will extend and let you move around. If there is a sudden stop or impact, the belt will lock into position. It will also lock if you try to lean forward too quickly.

WARNING:
When using the rear seat center belt, you must lock all metal tabs and buckles. If any metal tab or buckle is not locked, it will increase the chance of injury in the event of collision.
o Never unlock the metal tab (a) and the buckle (b) with the following exceptions.
(1) In case of folding rear seatbacks down.
(2) If transporting an object on the rear seat may cause damage to the rear seat center belt.
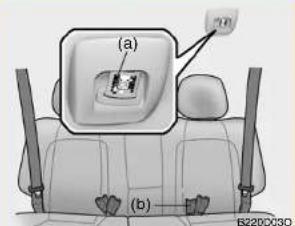
o In case of unlocking metal tab (a) and the buckle (b), place metal (a) in the seat belt clip not to make noise while driving.
o Lock the metal tab (a) and the buckle (b) immediately after folding rear seatbacks up.
To Release the Seat Belt
When you want to release the seat belt, press the button in the locking buckle.

WARNING:
When fastening the outboard seat belts or the center seat belt, make sure they are inserted into the correct buckles to obtain maximum protection from the seat belt system and assure proper operation.
B230A03P-GAT
(If installed)
Children riding in the car should sit in the rear seat and must always be properly restrained to minimize the risk of injury in an accident, sudden stop or sudden maneuver. According to accident statistics, children are safer when properly restrained in the rear seats than in the front seat. Larger children not in a child restraint should use one of the seat belts provided.
You are required by law to use safety restraints for children. If small children ride in your vehicle you must put them in a child restraint system (safety seat). Children could be injured or killed in a crash if their restraints are not properly secured. For small children and babies, a child seat or infant seat must be used. Before buying a particular child restraint system, make sure it fits your car and seat belts, and fits your child. Follow all the instructions provided by the manufacturer when installing the child restraint system.

WARNING:
o A child restraint system must be placed in the rear seat. Never install a child or infant seat on the front passenger's seat. Should an accident occur and cause the passenger side airbag to deploy, it could severely injure or kill an infant or child seated in an Infant or child seat. Thus, only use a child restraint in the rear seat of your vehicle.
o Since a safety belt or child restraint system can become very hot if it is left in a closed vehicle, be sure to check the seat cover and buckles before placing a child there.
When the child restraint system is not in use, store it in the luggage compartment or fasten it with a safety belt so that it will not be thrown forward in the case of a sudden stop or an accident.
Children who are too large to be in a child restraint should sit in the rear seat and be restrained with the available lap/shoulder belts. Never allow children to ride in the front passenger seat.
Always make sure that the shoulder belt portion of the outboard lap/shoulder belt is positioned midway over the shoulder, never across the neck or behind the back. Moving the child closer to the center of the vehicle may help provide a good shoulder belt fit. The lap belt portion of the lap/shoulder belt or the center seat lap belt must always be positioned as low as possible on the child's hips and as snug as possible.
o If the seat belt will not properly fit the child, Hyundai recommends the use of an approved booster seat in the rear seat in order to raise the child's seating height so that the seat belt will properly fit the child.
o Never allow a child to stand up or kneel on the seat.
o Never use an infant carrier or child safety seat that "hooks" over a seatback; it may not provide adequate security in an accident.
Never allow a child to be held in a person's arms while they are in a moving vehicle, as this could result in serious injury to the child in the event of an accident or a sudden stop. Holding a child in a moving vehicle does not provide the child with any means of protection during an accident, even if the person holding the child is wearing a seat belt.
o If the child restaint seat is not anchored properly, the risk of a child being seriously injured or killed in a collision greatly increases.
B230F01A-AAT
Installation on Rear Seat Center Position
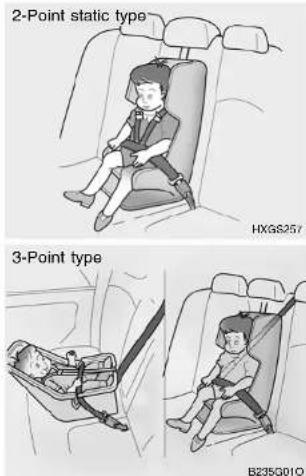
Use the center seat belt for the rear to secure the child restraint system as illustrated. After installation of the child
1 FEATURES OF YOUR HYUNDAI
34
restraint system, rock the child seat back and forth, and side to side to ensure that it is properly secured by the seat belt.
If the child seat moves, readjust the length of the seat belt. Then, if equipped, insert the child restraint tether strap hook into the child restraint hook holder and tighten to secure the seat. Always refer to the child restraint system manufacturer's recommendation before installing the child restraint system in your vehicle.
B230G01A-GAT
Installation on Outboard Rear Seats
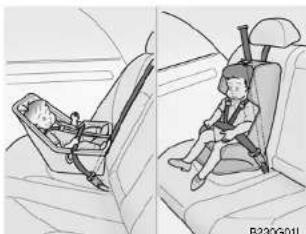
natural_image
Illustration of a car seatbelt with a child seated, showing no text or symbolsTo install a child restraint system in the outboard rear seats, extend the shoulder/lap belt from its retractor. Install the child restraint system, buckle the seat belt and allow the seat belt to take up any slack. Make sure that the lap portion of the belt is tight around the child restraint system and the shoulder portion of the belt is positioned so that it cannot interfere with the child's head or neck. After installation of the child restraint system, try to move it in all directions to be sure the child restraint system is securely installed.
If you need to tighten the belt, pull more webbing toward the retractor. When you unbuckle the seat belt and allow it to retract, the retractor will automatically revert back to its normal seated passenger emergency locking usage condition.
NOTE:
Before installing the child restraint system, read the instructions supplied by the child restraint system manufacturer.
o If the seat belt does not operate as described, have the system checked immediately by your authorized Hyundai dealer.

WARNING:
Do not install any child restraint system in the front passenger seat. Should an accident occur and cause the passenger side airbag to deploy, it could severely injure or kill an infant or child seated in an infant or child seat. Therefore, only use a child restraint system in the rear seat of your vehicle.
B230B02A-GAT
Using a Child Restraint System with "Tether Anchorage" system
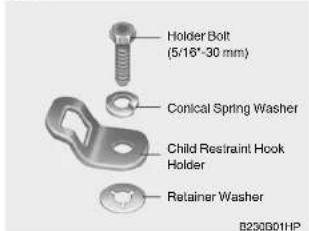
For small children and babies, the use of a child seat or infant seat is strongly recommended. This child seat or infant seat should be of appropriate size for the child and should be installed in accordance with the manufacturer's instructions. It is further recommended that the seat be placed in the vehicle's rear seat since this can make an important contribution to safety. Your vehicle is provided with three child restraint hook holders for installing the child seat or infant seat.
B230C040-GAT
Securing a child Restraint System with "Tether Anchorage" System
Three child restraint hook holders are located on the rear luggage compartment floor.
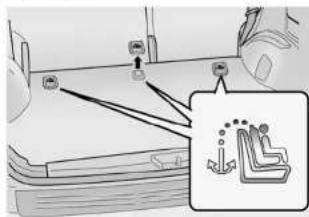
B230B02D
This symbol indicates the location of each user ready tether anchorage.
To install the child restraint seat
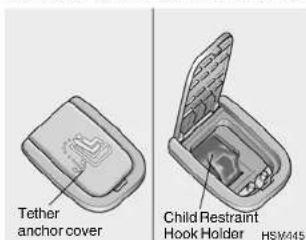
- Open the tether anchor cover on the rear luggage compartment floor.
1 FEATURES OF YOUR HYUNDAI
36
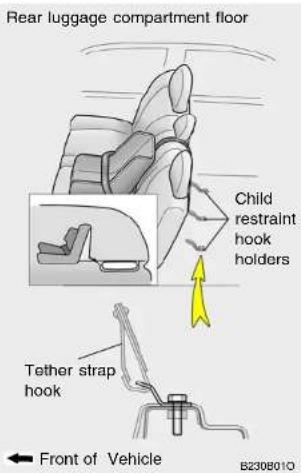
- Route the child restraint seat strap over the seatback. For vehicles with adjustable headrests, route the tether strap under the headrest and between the headrest posts, otherwise route the tether strap over the top of the seatback.
- Connect the tether strap hook to the child restraint hook holder and tighten to secure the seat.

WARNING:
To install the Child Restraint Seat, for safety reasons the Seat should be positioned rearmost with the seatback in a vertical position, not reclined.
B230D04E-GAT
Using a Child Restraint System with "ISOFIX" System and "Tether Anchorage" System
natural_image
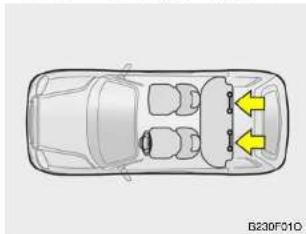
Top-down diagram of a car showing three seats and three directional arrows indicating movement or positioning (no text or symbols)ISOFIX is a standardized method of fitting child seats that eliminates the need to use the standard adult seat belt to secure the seat in the vehicle. This enables a much more secure and positive location with the added benefit of easier and quicker installation.
An ISOFIX-seat can only be installed if it has vehicle-specific approval in accordance with the requirements of ECE-R44. For your Hyundai, the Hyundai ISOFIX GR1 / Hyundai Duo / Römer ISOFIX GR1 and the Römer Duo ISOFIX / Britax Duo ISOFIX is approved according to the requirement ECE-R44. This seat has been tested extensively by Hyundai and is recommended for your Hyundai.
NOTE:
At present, this seat is the only one complying with that provision. In case that other manufacturers will furnish proof of a respective certification, Hyundai is going to evaluate this seat carefully and will give a recommendation provided that seat complies to the law. Please ask your Hyundai dealer in this respect.
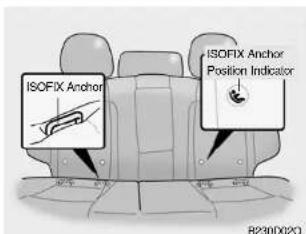
On each side of the rear seat, between the cushion and backrest, are located a pair of ISOFIX anchorage points together with a top tether mounting on the luggage compartment. During the installing, the seat has to be engaged at the anchorage-points in a way you can hear it clicking (check by pulling!) and has to be fixed with the Top Tetherbelt on the belonging point in the luggage compartment. The installing and the use of a child-seat has to be done according to the installing-manual, which is added to the ISOFIX-seat.
NOTE:
An ISOFIX-child-seat can only be installed if the seat has a vehicle-specific approval according to ECE-R44. Before using the ISOFIX-child-seat, which was bought for another car, ask your Hyundai-dealer whether this seat-type is approved and recommended for your Hyundai.
To secure the child restraint seat
natural_image
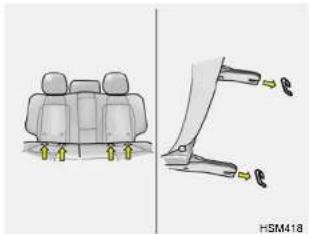
Diagram showing car seat and seat assembly with arrows indicating movement (no text or symbols)- To engage the child restraint seat to the ISOFIX anchor, insert the child restraint seat latch into the ISOFIX anchor. Listen for the audible "click" sound.
1 FEATURES OF YOUR HYUNDAI
38
- Connect the tether strap hook to the child restraint hook holder and tighten to secure the seat. Refer to "Securing a Child Restraint System with the Tether Anchorage System" on page 1-35.

WARNING:
Do not install a child safety seat at the center of the rear seat using the vehicle's outboard rear seat ISOFIX anchors. The ISOFIX anchors are only provided for the left and right outboard rear seating positions. Do not misuse the ISOFIX anchors by attempting to attach a child safety seat in the middle of the rear seat position to the ISOFIX anchors. In a crash, the child seat ISOFIX attachments may not be strong enough to secure the child restraint seat properly in the center of the rear seat and may break, causing serious injury or death.
When using the vehicle's "ISOFIX" system to install a child restraint system in the rear seat, all unused vehicle rear seat belt metal latch plates or tabs must be latched securely in their seat belt buckles and the seat belt webbing must be retracted behind the child restraint to prevent the child from reaching and taking hold of unretracted seat belts. Unlatched metall latch plates or tabs may allow the child to reach the unretracted seat belts which may result in strangulation and a serious injury or death to the child in the child restraint.
Do not mount more than one child restraint to a single tether or to a child restraint lower anchorage point. The improper increased load may cause the anchorage points or tether anchor to break, causing serious injury or death.
o Attach the ISOFIX or ISOFIX-compatible child seat only to the appropriate locations shown.
o Always follow the installation and use instructions provided by the manufacturer of the child restraint.
B230H04A-GAT
Child Seat Restraint Suitability For Seat Position
Use child safety seats that have been officially approved and are appropriate for your children.
When using the child safety seats, refer to the following table.
| Age Group | Seating Position | ||
| Front Passenger | Rear Outboard | Rear Center | |
| 0 : Up to 10 kg(0 ~ 9 months) | X | U | X |
| 0+: Up to 13 kg(0 ~ 2 years) | X | U | X |
| I : 9kg to 18kg(9 months - 4years) | X U, L I UF | ||
| II & III : 15kg to36kg (4 ~ 12years) | X | U | F |
U F
U : Suitable for "universal" category restraints approved for use in this mass group
UF: Suitable for forward-facing "universal" category restraints approved for use in this mass group
L1 : Suitable for "Römer ISOFIX GR1" approved for use in this mass group (Approval No: E1 R44-03301133)
X : Seat position not suitable for children in this mass group
natural_image
Illustration of a car interior with two people inside, one seated and one standing, showing dashboard and seat (no text or symbols)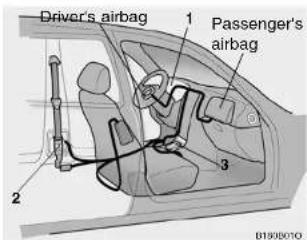
B180B010-GAT
Pre-tensioner Seat Belt (If installed)
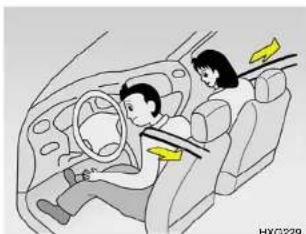
Your Hyundai vehicle is equipped with driver's and front passenger's pretensioner seat belts. The purpose of the pre-tensioner is to make sure that the seat belts fit tightly against the occupant's body in certain frontal collisions.
The pre-tensioner seat belts can be activated with the airbags.
When the vehicle stops suddenly, or if the occupant tries to lean forward too quickly, the seat belt retractor will lock into position. In certain frontal collisions, the pre-tensioner will activate and pull the seat belt into tighter contact against the occupant's body.
When the pre-tensioner activates, if the system senses excessive seat belt tension on the driver or passenger's seat belt, the load limiter inside the pre-tensioner will release some of the pressure on the affected seat belt (If installed).
The seat belt pre-tensioner system consists mainly of the following components. Their locations are shown in the illustration.
- SRS airbag warning light
- Seat belt pre-tensioner assembly
- SRS control module

WARNING:
To obtain maximum benefit from a pre-tensioner seat belt:
- The seat belt must be worn correctly.
- The seat belt must be adjusted to the correct position.
1 FEATURES OF YOUR HYUNDAI
40
NOTE:
Both the driver's and front passenger's pre-tensioner seat belts will be activated in certain frontal collisions. The pre-tensioner seat belts can be activated with the airbags. The pre-tensioners will be activated even if the seat belts are not being worn at the time of the collision.
When the pre-tensioner seat belts are activated, a loud noise may be heard and fine dust, which may appear to be smoke, may be visible in the passenger compartment. These are normal operating conditions and are not hazardous.
Although it is harmless, the fine dust may cause skin irritation and should not be breathed for prolonged periods. Wash your hands and face thoroughly after an accident in which the pretensioner seat belts were activated.

CAUTION:
Because the sensor that activates the SRS airbag is connected with pre-tensioner seat belt, the SRS airbag warning light on the instrument panel will blink for approximately 6 seconds after the ignition key has been turned to the "ON" position or after the engine is started, and then it should turn off.
o If pre-tensioner seat belt is not working properly, this warning light will illuminate even if there is no malfunction of the SRS airbag. If the SRS airbag warning light does not blink for about 6 seconds when the ignition key is turned to "ON" or the engine is started, or if it remains illuminated after blinking for approximately 6 seconds, or if it illuminates while the vehicle is being driven, please have an authorized Hyundai dealer inspect the pretensioner seat belts and SRS airbag system as soon as possible.

WARNING:
o Pre-tensioners are designed to operate only one time. After activation, pre-tensioner seat belts must be replaced. All seat belts, of any type, should always be replaced after they have been worn during a collision.
o The pre-tensioner seat belt assembly mechanisms become hot during activation. Do not touch the pre-tensioner seat belt assemblies for several minutes after they have been activated.
Do not attempt to inspect or replace the pre-tensioner seat belts yourself. This must be done by an authorized Hyundai dealer.
o Do not strike the pre-tensioner seat belt assemblies.
o Do not attempt to service or repair the pre-tensioner seat belt system in any manner.
SUPPLEMENTAL RESTRAINT (AIRBAG) SYSTEM (SRS)
B240A04F-GAT (If installed)
Driver's Airbag
B240A010
Improper handling of the pretensioner seat belt assemblies, and failure to heed the warnings to not strike, modify, inspect, replace, service or repair the pretensioner seat belt assemblies may lead to improper operation or inadvertent activation and serious injury.
o Always wear seat belts when driving or riding in a motor vehicle.
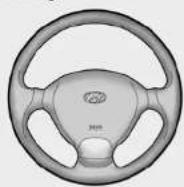
Your Hyundai is equipped with a Supplemental Restraint (Airbag) System. The indications of the system's presence are the letters "SRS AIR BAG" embossed on the airbag pad cover in the steering wheel and the passenger's side front panel pad above the glove box.
The Hyundai SRS consists of airbags installed under the pad covers in the center of the steering wheel and the passenger's side front panel above the glove box. The purpose of the SRS is to provide the vehicle's driver and/or
the front passenger with additional protection than that offered by the seat-belt system alone, in case of a frontal impact of sufficient severity.
NOTE:
Be sure to read information about the SRS on the labels provided in the front of the sun visor and in the glove box.

WARNING:
As its name implies, the SRS is designed to work with, and be supplemental to, the driver's and the passenger's three point seat belt systems and is not a substitute for them. Therefore your seat belts must be worn at all times while the vehicle is in motion. The airbags deploy only in certain frontal impact conditions severe enough to likely cause significant injury to the vehicle occupants.
o The SRS is designed to deploy the airbags only when an impact is sufficiently severe and when the impact angle is less than 30^ from the forward longitudinal axis of the vehicle and will not deploy in side, rear or rollover impacts. Additionally, the airbags will only deploy once. Thus, seat belts must be worn at all times.
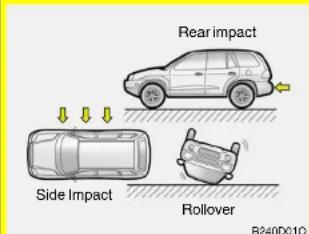
o Front airbags are not intended to deploy In side-impact, rear-impact or rollover crashes. In addition, airbags will not deploy in frontal crashes below the deployment threshold speed.
The driver should sit back as far as possible while still maintaining control of the vehicle. If you are sitting too close to the airbag, it can cause death or serious injury when it inflates.
o No objects should be placed over or near the airbag modules on the steering wheel, instrument panel, and the front passenger's panel above the glove box, because any such object could cause harm if the vehicle is in a crash severe enough to cause the airbags to deploy.
o If the airbags deploy, they must be replaced by an authorized Hyundai dealer.
Do not tamper with or disconnect SRS wiring, or other components of the SRS system. Doing so could result in Injury, due to accidental firing of the airbags or by rendering the SRS inoperative.
Do not install a child restraint system in the front passenger seat position. A child restraint system must never be placed in the front seat. The infant or child could be severely injured or killed by an airbag deployment in case of an accident.
Do not allow children to ride in the front passenger seat. If older children (teenagers and older) must ride in the front seat, make sure they are always properly belted and that the seat is moved back as far as possible.
For maximum safety protection in all types of crashes, all occupants including the driver should always wear their seat belts whether or not an airbag is also provided at their seating position to minimize the risk of severe injury or death in the event of a crash. Do not sit or lean unnecessarily close to the airbag while the vehicle is in motion.
The SRS airbag system must deploy very rapidly to provide protection in a crash. If an occupant is out of position because of not wearing a seat belt, the airbag may forcefully contact the occupant causing serious or fatal injuries.
B24CB03A-GAT
SRS Components and Functions
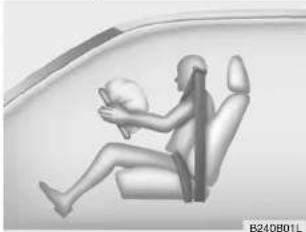
natural_image
Illustration of a person seated in a car seat, holding a cushion (no text or symbols visible)The SRS consists of the following components:
- Driver's Airbag Module
- Passenger's Airbag Module
- SRS Service Reminder
Indicator (SRI) - SRS Control Module (SRSCM)
The SRSCM continually monitors all elements while the ignition is 'ON' to determine if a frontal or near-frontal impact is severe enough to require airbag deployment.
The SRS service reminder indicator (SRI) on the instrument panel will blink for about 6 seconds after the ignition key is turned to the 'ON' position or after the engine is started, after which the SRI should go out.
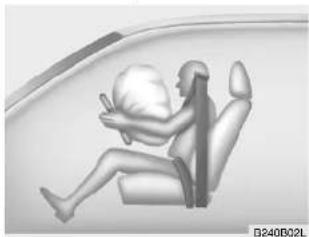
natural_image
3D rendered illustration of a person sitting in a chair holding a ball, no text or symbols presentThe airbag modules are located both in the center of the steering wheel and in the front passenger's panel above the glove box.
When the SRSCM detects a considerable impact to the front of the vehicle, it will automatically deploy the airbags.
1 FEATURES OF YOUR HYUNDAI
44
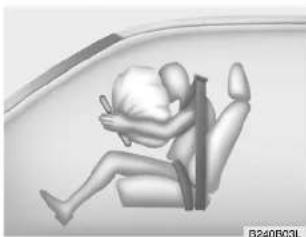
natural_image
3D rendered illustration of a person sitting in a car seat, holding a white object (no text or symbols visible)Upon deployment, tear seams molded directly into the pad covers will separate under pressure from the expansion of the airbags. Further opening of the covers then allows full inflation of the airbags.
A fully inflated airbag in combination with a properly worn seat belt slows the driver's or the passenger's forward motion, thus reducing the risk of head or chest injury.
After complete inflation, the airbag immediately starts deflating, enabling the driver to maintain forward visibility.
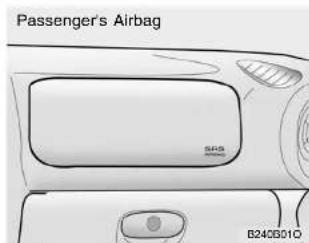
CAUTION: When installing the container of liquid air freshener inside the vehicle, do not place it near the instrument cluster nor on the instrument panel pad surface. If there is any leakage from the air freshener onto these areas (Instrument cluster, instrument panel pad or air ventilator), it may damage these parts. If the liquid from the air freshener does leak onto these areas, wash them with water immediately.
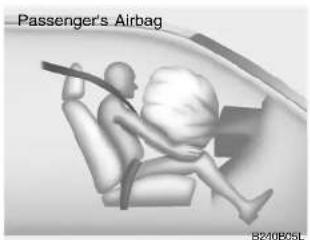
natural_image
3D illustration of a passenger airplane in flight, showing the nose and seat (no text or symbols)WARNING: When the SRS is activated, there may be a loud noise and fine dust will be released through the vehicle. These conditions are normal and are not hazardous. However, the fine dust generated during airbag deployment may cause skin irritation. Wash your hands and face thoroughly with lukewarm water and a mild soap after an accident in which the airbags were deployed.
The SRS can function only when the ignition key is in the "ON" position. If the SRS SRI does not flash, or continuously remains on after flashing for about 6 seconds when the ignition key is turned to the "ON" position or after the engine is started, comes on while driving, the SRS Is not working properly. If this occurs, have your vehicle immediately inspected by your Hyundai dealer.
Before you replace a fuse or disconnect a battery terminal, turn the ignition key to the 'LOCK' position or remove the ignition key. Never remove or replace the air bag related fuse(s) when the ignition key is in the 'ON' position. Failure to heed this warning will cause the SRS SRI to Illuminate.
B990804Y-AAT
Side Impact Airbag (If installed)
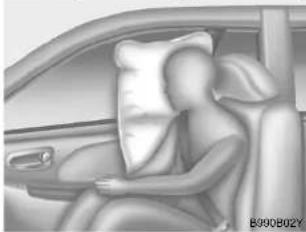
natural_image
Interior view of a car with a person sitting in the back seat, showing no visible text or symbols.Your Hyundai is equipped with a side impact airbag in each front seat. The purpose of the airbag is to provide the vehicle's driver and/or the front passenger with additional protection than that offered by the seat belt alone. The side impact airbags are designed to deploy only during certain side-impact collisions, depending on the crash severity, angle, speed and point of impact. The side impact air bags are not designed to deploy in all side impact situations.
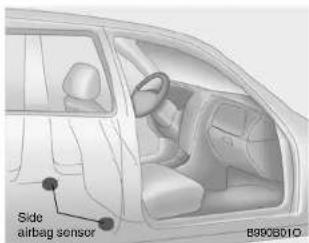

WARNING:
The side impact airbag is supplemental to the driver's and the passenger's seat belt systems and is not a substitute for them. Therefore your seat belts must be worn at all times while the vehicle is in motion. The airbags deploy only in certain side impact conditions severe enough to cause significant injury to the vehicle occupants.
1 FEATURES OF YOUR HYUNDAI
For best protection from the side impact airbag system and to avoid being injured by the deploying side impact airbag, both front seat occupants should slit in an upright position with the seat belt properly fastened. The driver's hands should be placed on the steering wheel at the 9:00 and 3:00 o'clock positions. The passenger's arms and hands should be placed on their laps.
o Do not use any accessory seat covers.
o Use of seat covers could reduce or prevent the effectiveness of the system.
o Do not install any accessories on the side or near the side impact airbag.
o Do not use excessive force on the side of the seat.
Do not place any objects over the airbag or between the airbag and yourself.
Do not place any objects (an umbrella, bag, etc.) between the front door and the front seat. Such objects may become dangerous projectiles and cause injury if the supplemental side impact air bag inflates.
To prevent unexpected deployment of the side impact air bag that may result in personal injury, avoid impact to the side airbag sensor when the ignition key is on.
B240C01HP-GAT
SRS Care
The SRS is virtually maintenance-free and so there are no parts you can safely service by yourself. The entire SRS system must be inspected by an authorized Hyundai dealer 10 years after the date that the vehicle was manufactured.
Any work on the SRS system, such as removing, installing, repairing, or any work on the steering wheel must be performed by a qualified Hyundai technician. Improper handling of the SRS system may result in serious personal injury.
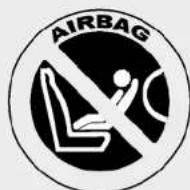
B240001HP

WARNING:
o Extreme Hazard! Do not use a rearward facing child restraint on a seat protected by an airbag in front of it.
o Modification to SRS components or wiring, including the addition of any kind of badges to the pad covers or modifications to the body structure, can adversely affect SRS performance and lead to possible injury.
o For cleaning the airbag pad covers, use only a soft, dry cloth or one which has been moistened with plain water. Solvents or cleaners could adversely affect the airbag covers and proper deployment of the system.
No objects should be placed over or near the airbag modules on the steering wheel, instrument panel, and the front passenger's panel above the glove box, because any such object could cause harm if the vehicle is in a crash severe enough to cause the airbags to inflate.
o If the airbags inflate, they must be replaced by an authorized Hyundai dealer.
Do not tamper with or disconnect SRS wiring, or other components of the SRS system. Doing so could result in injury, due to accidental firing of the airbags or by rendering the SRS inoperative.
o Do not install a child restraint system in the front passenger seat position.
A child restraint system must never be placed in the front seat. The infant or child could be severely injured by an airbag deployment in case of an accident.
If components of the airbag system must be discarded, or if the vehicle must be scrapped, certain safety precautions must be observed. Your Hyundai dealer knows these precautions and can give you the necessary information. Failure to follow these precautions and procedures could increase the risk of personal injury.
o If you sell your vehicle, make certain that this manual is transferred to the new owner.
o If your car was flooded and has soaked carpeting or water on flooring, you shouldn't try to start engine; have the car towed to authorized Hyundai dealer.
Do not replace the bumper or the bumper guard with the one other than the Hyundai genuine parts. Otherwise, It can adversely affect SRS performance and lead to unexpected injury.
1 FEATURES OF YOUR HYUNDAI
48 INSTRUMENT CLUSTER AND INDICATOR LIGHTS
B260A04O-GAT
Gasoline Engine
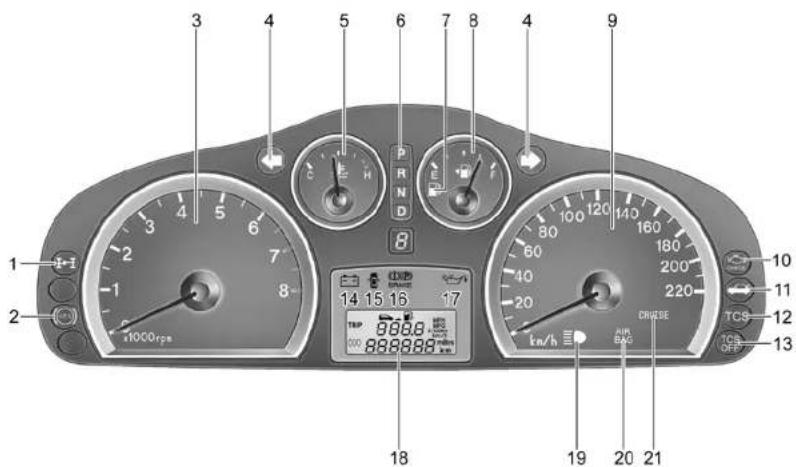
B260A010
-
4WD System Warning Light (If installed)
-
ABS Service Reminder Indicator (If installed)
-
Tachometer
-
Turn Signal Indicator Light
-
Coolant Temperature Gauge
-
Automatic Transaxle Position Indicator Light (If installed)
-
Low Fuel Warning Light
-
Fuel Gauge
-
Speedometer
-
Malfunction Indicator Light (MIL) (If installed)
-
Tail Gate Open Warning Light
-
Traction Control Indicator Light (If installed)
13.Traction Control Off Indicator Light (If installed)
14.Charging System Warning Light
-
Door Ajar Warning Light
-
Parking Brake/Low Brake Fluid Level Warning Light
17.Low Oil Pressure Warning Light
18.Odometer / Trip Odometer / Trip Computer (If installed)
- High Beam Indicator Light
20.Supplemental Restraint (AirBag) System
Service Reminder Indicator (SRI) (If installed)
21.Cruise Indicator Light (If installed)
1 FEATURES OF YOUR HYUNDAI
50
B260B01O-GAT Diesel Engine
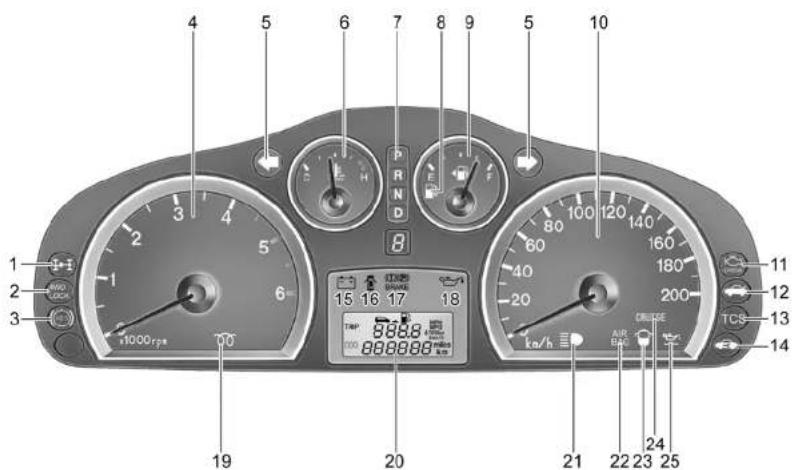
B260B010
-
4WD System Warning Light (If installed)
-
4WD Lock Indicator Light (If installed)
-
ABS Service Reminder Indicator (If installed)
-
Tachometer
-
Turn Signal Indicator Light
-
Coolant Temperature Gauge
-
Automatic Transaxle Position Indicator Light (If installed)
-
Low Fuel Warning Light
-
Fuel Gauge
-
Speedometer
-
Malfunction Indicator Light (MIL) (If installed)
-
Tail Gate Open Warning Light
-
Traction Control Indicator Light (If installed)
-
Immobilizer Warning Light (If installed)
15.Charging System Warning Light
-
Door Ajar Warning Light
-
Parking Brake/Low Brake Fluid Level Warning Light
18.Low Oil Pressure Warning Light
- Diesel Preheat Indicator Light
20.Odometer / Trip Odometer/ Trip Computer (If installed)
21.High Beam Indicator Light
22.Supplemental Restraint (AirBag) System
Service Reminder Indicator (SRI) Light (If installed)
23.Fuel Filter Warning Light
24.Cruise Indicator Light (If installed)
- Engine Oil Level Warning Light (If installed)
1 FEATURES OF YOUR HYUNDAI
52
WARNING AND INDICATOR LIGHTS
B260D01A-AAT
Turn Signal Indicator Lights
The blinking green arrows on the instrument panel show the direction indicated by the turn signals. If the arrow comes on but does not blink, blinks more rapidly than normal, or does not illuminate at all, a malfunction in the turn signal system is indicated. Your dealer should be consulted for repairs.
B260P02Y-GAT
ABS Service Reminder Indicator (If Installed)
When the key is turned to the "ON" position, the Anti-Lock Brake System SRI will come on and then go off in a few seconds. If the ABS SRI remains on, comes on while driving, or does not come on when the key is turned to the "ON" position, this indicates that there may be a problem with the ABS.
If this occurs, have your vehicle checked by your Hyundai dealer as soon as possible. The normal braking system will still be operational, but without the assistance of the anti-lock brake system.

WARNING:
If the both ABS SRI and Parking Brake/Brake fluid level warning lights remain "ON" or come on while driving, there may be a problem with E.B.D (Electronic Brake Force Distribution).
If this occurs, avoid sudden stops and have your vehicle checked by your Hyundai dealer as soon as possible.
B280C010-GAT
TCS Traction Control Indicator Light (If Installed)
The traction control indicator changes operation according to the ignition switch position and whether or not the system is in operation.
It will also illuminate when the ignition key is turned to the "ON" position, but should go out after three seconds. If the TCS indicator stays on, take your car to your authorized Hyundai dealer and have the system checked. See section 2 for more information about the TCS.
B265C01O-AAT

Traction Control Indicator Lights (If Installed)
The traction control indicators change operation according to the ignition switch position and whether the system is in operation or not.
They will illuminate when the ignition key is turned to the "ON" position, but should go out after three seconds. If the TCS or TCS-OFF indicator stays on, take your car to your authorized Hyundai dealer and have the system checked. See section 2 for more information about the TCS.
B260F01A-AAT

High Beam Indicator Light
The high beam indicator light comes on whenever the headlights are switched to the high beam or flash position.
B280G01A-AAT

Low Oil Pressure Warning Light

CAUTION:
If the oil pressure warning light stays on while the engine is running, serious engine damage may result. The oil pressure warning light comes on whenever there is insufficient oil pressure. In normal operation, it should come on when the ignition switch is turned on, then go out when the engine is started.
If the oil pressure warning light stays on while the engine is running, there is a serious malfunction.
If this happens, stop the car as soon as it is safe to do so, turn off the engine and check the oil level. If the oil level is low, fill engine oil to the proper level and start the engine again. If the light stays on with the engine running, turn the engine off Immediately. In any instance
where the oil light stays on when the engine is running, the engine should be checked by an authorized Hyundai dealer before the car is driven again.
B260H02O-GAT

Parking Brake/Low Brake Fluid Level Warning Light

WARNING:
If you suspect brake trouble, have your brakes checked by a Hyundai dealer as soon as possible. Driving your car with a problem in either the brake electrical system or brake hydraulic system is dangerous, and could result in a serious injury or death.
1 FEATURES OF YOUR HYUNDAI
54
Warning Light Operation
The parking brake/brake fluid level warning light should come on when the parking brake is applied and the ignition switch is turned to "ON" or "START". After the engine is started, the light should go out when the parking brake is released.
If the parking brake is not applied, the warning light should come on when the ignition switch is turned to "ON" or "START", then go out when the engine starts. If the light comes on at any other time, you should slow the vehicle and bring it to a complete stop in a safe location off the roadway.
The brake fluid level warning light indicates that the brake fluid level in the brake master cylinder is low and hydraulic brake fluid conforming to DOT 3 or DOT 4 specifications should be added. After adding fluid, if no other trouble is found, the car should be immediately and carefully driven to a Hyundai dealer for inspection. If further trouble is experienced, the vehicle should not be driven at all but taken to a dealer by a professional towing service.
Your Hyundai is equipped with dual-diagonal braking systems. This means you still have braking on two wheels even if one of the dual systems should fail. With only one of the dual systems working, more than normal pedal travel and greater pedal pressure are required to stop the car. Also, the car will not stop in as short a distance with only half of the brake system working. If the brakes fail while you are driving, shift to a lower gear for additional engine braking and stop the car as soon as it is safe to do so.

CAUTION
(Diesel Engine):
The parking brake/low brake fluid warning light should also come on when the vacuum level in brake booster descends to about 275 mmHg or below. The brake system is designed to stop the vehicle with reserve assist if brake pedal is held down. This reserve is greatly reduced each time you release the brake. Without vacuum assist your vehicle can still be stopped by pushing much harder on brake pedal,
however the stopping distance may be much longer. If the light comes on at any other time, you should slow the vehicle and bring it to a complete stop in a safe location off the roadway.
After starting the engine, do not drive the vehicle until the vacuum level is above 275 mmHg below atmosphere and warning light has turned off. If further trouble is experienced, the vehicle should not be driven at all but taken to a dealer by a professional towing service.
B260J01S-GAT

Charging System Warning Light
The charging system warning light should come on when the ignition is turned on, then go out when the engine is running. If the light stays on while the engine is running, there is a malfunction in the electrical charging system. If the light comes on while you are driving, stop, turn off the engine and check under the hood. First, make certain the generator drive belt is in place. If it is, check the tension of the belt.
And then, have the system checked by your Hyundai dealer.

CAUTION:
If the drive belt (generator belt) is loosen, broken, or mission while the vehicle is driving, there may be a serious malfunction, engine could overheat because this belt also drives the water pump.
B260L01O-AAT
Door Ajar Warning Light and Chime (If Installed)
The door ajar warning light warns you that a door is not completely closed. If your vehicle is equipped with the door ajar warning chime, the chime warns you that the driver's side front door is not completely closed.
NOTE:
To remind you not to lock the key inside the car, the warning light comes on whenever the key is in the "LOCK" position and a door is open. The warning chime only sounds whenever the key is in the "LOCK" position and the driver's side front door is open. The chime sounds and the light remains on until the key is removed from the ignition.
B280M01A-AAT
Low Fuel Level Warning Light
The low fuel level warning light comes on when the fuel tank is approaching empty. When it comes on, you should add fuel as soon as possible. Driving with the fuel level warning light on or with the fuel level below "E" can cause the engine to misfire and damage the catalytic converter.
B260B010-AAT

Tail Gate Open Warning Light
This light remains on unless the tail-gate or tail gate window is completely closed and latched.
1 FEATURES OF YOUR HYUNDAI
56
B260B01HP-GAT

SRS (Airbag) Service Reminder Indicator (SRI) (If Installed)
The SRS service reminder indicator (SRI) comes on and flashes for about 6 seconds after the ignition key is turned to the "ON" position or after the engine is started, after which it will go out.
This light also comes on when the SRS is not working properly. If the SRI does not flash, or continuously remains on after flashing for about 6 seconds when you turned the ignition key to the "ON" position or started the engine, or if it comes on while driving, have the SRS inspected by an authorized Hyundai Dealer.
B260N02A-AAT

Malfunction Indicator Light (If Installed)
This light illuminates when there is a malfunction of an exhaust gas related component, and the system is not functioning properly so that the exhaust gas regulation values are not satisfied. This light will also illuminate when the ignition key is turned to the "ON" position, and then it will go out in a few seconds after the engine is started. If it illuminates while driving, or does not illuminate when the ignition key is turned to the "ON" position, take your car to your nearest authorized Hyundai dealer and have the system checked.
B260Q03O-DAT

Cruise Indicator Light (If Installed)
The cruise indicator light in the instrument cluster is illuminated when the cruise control ON/OFF switch is pushed on the steering wheel.
The indicator light does not illuminate when the cruise control ON/OFF switch is pushed again. Information about the use of cruise control is beginning on page 1-98.
B280T01O-GAT

4WD System Warning Light (If installed)
When the key is turned to the "ON" position, the 4WD(Four Wheel Drive) system warning light will come on and then go off in a few seconds.

CAUTION:
If the 4WD system warning light (1) blinks while driving, this indicates that there is a malfunction in the 4WD system. If this occurs, have your vehicle checked by an authorized Hyundai dealer as soon as possible.
B280V010-GAT

4WD Lock Indicator Light (If Installed)
4WD (Four Wheel Drive) lock indicator light in the instrument cluster is illuminated when the 4WD lock switch is pushed.
The purpose of this switch is to increase the drive power when driving on dry road surface, wet pavement snow-covered roads and/or off-road. 4WD lock indicator light is turned off by pushing the switch once again. Information about the use of 4WD lock switch is beginning on page 2-25.

CAUTION:
Do not use 4WD lock switch on dry paved roads or highway, it can cause noise, vibration or damage of 4WD related parts.
B280U01TB-GAT

Immobilizer Warning Light (Diesel Engine) (If Installed)
This indicator light comes on for some seconds after the ignition key is turned to the "ON" position. At this time, you can start the engine. The light goes out after the engine is running. In case this light goes out before you start the engine, you must turn to the "LOCK" position and restart the engine. In case this light blinks for five seconds when the ignition key is turned to "ON" position, this indicates that the immobilizer system is out of order. At this time, refer to the explanation of the Limp home procedure(See page 1-9) or consult to the Hyundai dealer.
1 FEATURES OF YOUR HYUNDAI
58
B260S01B-GAT
Diesel Preheat Indicator Light
The indicator light illuminates amber when the ignition switch is placed at the "ON" position. The engine can be started after the preheat indicator light goes off. The illuminating time varies with the water temperature, air temperature and battery condition.
NOTE:
If the engine were not started within 10 seconds after the preheating is completed, turn the ignition key once more to the "LOCK" position, and then to the "ON" position, in order to preheat again.
B285A01FC-GAT

Fuel Filter Warning Light (Diesel Engine)
This light illuminates when the engine has started and goes off after a few seconds. If it lights up while the engine is running, it indicates that water has accumulated inside the fuel filter. If this happens, remove the water from the fuel filter. (Refer to "6-37 page")
B260K01O-GAT

Engine Oil Level Warning Light (Diesel Engine) (If Installed)
This light is illuminated when the engine oil level should be checked.
If the light comes on while the engine is running, take your vehicle to a level ground and keep the engine turned on for several minutes.
If it remains on, check the oil level. (See page. 6-8)
In case that the engine oil level is below the "L" mark, add engine oil. (See page. 6-9)

CAUTION:
If the light comes on after adding the engine oil, take your vehicle to your nearest authorized Hyundai dealer and have the system checked. The warning light can come on due to road and driving conditions and no necessarily indicates an insufficient amount of engine oil.
Even if this light doesn't come on, the engine oil should be checked and replaced at the intervals specified in the vehicle maintenance schedule in section 5.
INSTRUMENT CLUSTER
59
B270AD1A-GAT
The front disc brake pads have wear indicators that should make a high-pitched squealing or scraping noise when new pads are needed. The sound may come and go or be heard all the time when the vehicle is moving. It may also be heard when the brake pedal is pushed down firmly. Excessive rotor damage will result if the worn pads are not replaced. See your Hyundai dealer immediately.
B270B010-GAT
PARKING START WARNING SOUND (If installed)
If the vehicle is driven at 3km/h(2mph) for more 2\~3 than seconds, the warning chime will sound continuously when the parking brake engaged.
B280E010-GAT
SEAT BELT WARNING SOUND (If installed)
The seat belt warning chime sounds for 6 seconds when the driver's seat belt is not fastend.
B2B0A01A-AAT
FUEL GAUGE
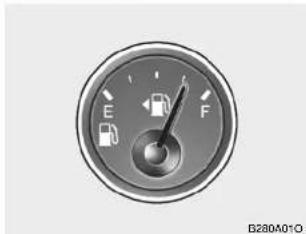
natural_image
Circular industrial fuel meter gauge with E and F indicators (no text or symbols beyond labels)The needle on the gauge indicates the approximate fuel level in the fuel tank. The fuel capacity is given in Section 9.
1 FEATURES OF YOUR HYUNDAI
60
B290A02A-AAT
ENGINE COOLANT TEMPERA-
TURE GAUGE
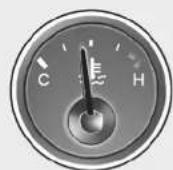
B290A010
The needle on the engine coolant temperature gauge should stay in the normal range. If it moves across the dial to "H" (Hot), pull over and stop as soon as possible and turn off the engine. Then open the hood and, after the engine has cooled, check the coolant level and the water pump drive belt. If you suspect cooling system trouble, have your cooling system checked by Hyundai dealer as soon as possible.
B330A02A-AAT
TACHOMETER
Gasoline Engine
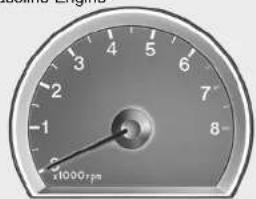
B350A010

WARNING:
Never remove the radiator cap when the engine is hot. The engine coolant is under pressure and could erupt and cause severe burns. Wait until the engine is cool before removing the radiator cap.
Diesel Engine
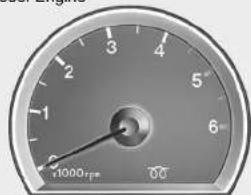
HSM2075
The tachometer registers the speed of your engine in revolutions per minute (rpm).

CAUTION:
The engine should not be raced to such a speed that the needle enters the red zone on the tachometer face. This can cause severe engine damage and may void your warranty.
B300M1Y-GAT
SPEEDOMETER
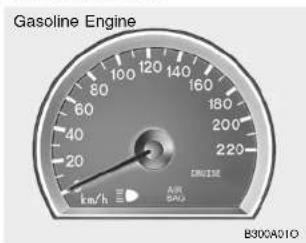
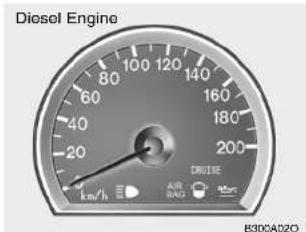
Your Hyundai's speedometer is calibrated in kilometers per hour or miles per hour.
B310B01O-GAT
ODOMETER/TRIP ODOMETER (Without Trip Computer)
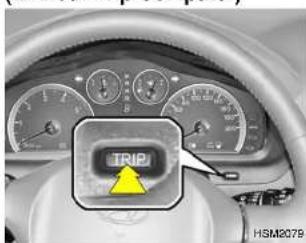
Pushing in the trip switch for less than 1 second when the ignition switch is turned "ON" displays the following sequence:
![1 ODO 12345.6 km 2 TRIP [A] 34.8 km 3 TRIP [B] 8.4 km HSM2080](/content/2026/05/910506/images/2f7f4479a97506930130e8b6cf9eaac0ebb09c9f84a4882c38c89c777ced300b.jpg)
1. Odometer
The odometer records the total driving distance in kilometers or miles, and is useful for keeping a record for maintenance intervals.
It is normal for a new vehicle to have the odometer indicating less than 50 km.
NOTE:
Any alteration of the odometer may void your warranty coverage.
2, 3. Trip Odometer
Trip odometer records the distance of 2 trips in kilometers or miles.
TRIP A: Distance you have traveled from your origination point to a first destination.
TRIP B: Distance from the first destination to the final destination.
When the trip switch is pressed for more than 1 second, trip odometer will reset to 0.
B310C010-GAT
ODOMETER/TRIP ODOMETER
(With Trip Computer)
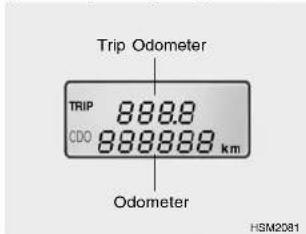
1. Odometer
The odometer records the total driving distance in kilometers or miles, and is useful for keeping a record for maintenance intervals.
It is normal for a new vehicle to have the odometer indicating less than 50 km.
NOTE:
Any alteration of the odometer may void your warranty coverage.
TRIP COMPUTER
63
2. Trip Odometer
o This mode indicates the drive distance travelled since the last drive time reset.
o Refer to the explanation of the trip computer (see page 1-65, Tripmeter).
B400B010-GAT
(If installed)
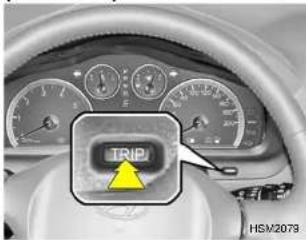
The trip computer is a microcomputer-controlled driver information gauge that displays information related to driving, such as a distance to empty, average fuel consumption, average speed and tripmeter on the LCD.
Trip Computer Switch
o The trip computer switch is used to zero the multi-functional display mode.
o Pushing in the trip computer switch changes the display as follows;
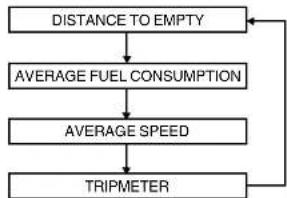
flowchart
graph TD
    A["DISTANCE TO EMPTY"] --> B["AVERAGE FUEL CONSUMPTION"]
    B --> C["AVERAGE SPEED"]
    C --> D["TRIPMETER"]
    D --> A
1 FEATURES OF YOUR HYUNDAI
64
1. Distance to Empty (km or miles)
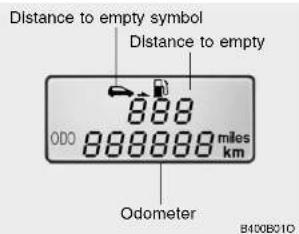
o This mode provides the estimated distance to empty from the current fuel level in the fuel tank.
o The trip computer may not register additional fuel if less than 6 liters of fuel are added to the vehicle.
When the battery has been reinstalled after being discharged or disconnected, drive more than 64km (40 miles) for an accurate distance to empty.
NOTE:
o If the distance to empty is less than 50km (30 miles), the symbol ( ) will blink and the distance to empty "----" digits come on until more fuel is added.
o The distance to empty can differ from the actual tripmeter according to driving conditions.
o The distance to empty can vary according to the driving conditions, driving pattern or vehicle speed.
2. Average Fuel Consumption (L/100km or MPG)
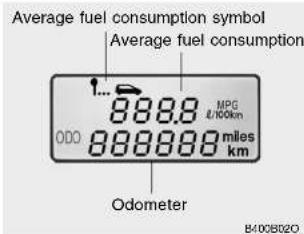
This mode calculates the average fuel consumption from the total fuel used and the distance since the last average consumption reset.
o The total fuel used is calculated from the fuel consumption input.
o For an accurate calculation, drive more than 0.05 km or 10 seconds.
o Average fuel consumption is reset to zero if the battery is disconnected.
To reset the average fuel consumption to zero, press the trip computer switch for more than 1 second.
3. Average Speed (km/h or MPH)
Average speed symbol
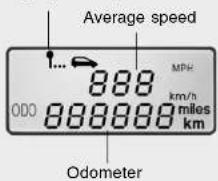
B400B030
This mode indicates the average speed from the starting of the vehicle to the ignition key "OFF". When the ignition key is "OFF", it will initialize to 0 km/h(0mph).
o Average speed is reset to zero if the battery is disconnected.
To reset the average speed to zero, press the trip computer switch for more than 1 second.
4. Tripmeter
This mode indicates the total distance travelled since the last tripmeter reset. Total distance is also reset to zero if the battery is disconnected.
o Pressing the trip computer switch for more than 1 second, when the tripmeter is being displayed, clears the tripmeter to zero.
1 FEATURES OF YOUR HYUNDAI
66
MULTIMETER
B990A02O-GAT
(If installed)
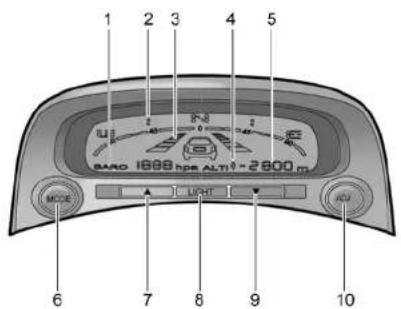
B990B010-GAT
HOW TO ADJUST MULTIMETER Barometer
BARO 100 hpa
HSM2191
Air pressure is displayed in hpa units where measurement range is 600 - 1100 hpa.
HSM2183
- Barometer
- Azimuth compass
- Road display responsive to vehicle speed
-
Relative altimeter
-
Altimeter
- Mode conversion switch
- Up switch
- Light switch
- Down switch
10.Azimuth adjustment switch
Azimuth compass
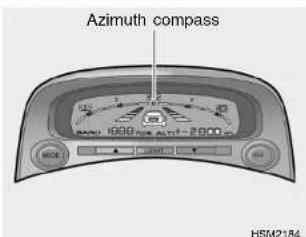
It displays azimuth of vehicle drive direction where its display scope is 180^ and angle of one graduation is 22.5^ .
How to correct azimuth indicator error
1) If you push the ADJ switch and hold less than 5 sec, azimuth indicator will start blink.
2) Slowly rotate the vehicle one turn within 128 sec.
3) After the rotation is finished, the azimuth compass indicator will stop blinking and now correcting error is made.
Road display responsive to vehicle speed.
The road display indicator blinks according to the vehicle speed.
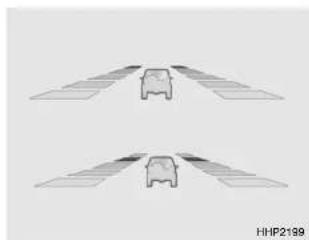
natural_image
Two identical car crosswalk diagrams with no text or symbols, one labeled HHP2199 (no other text or symbols)| Vehicle speed | Lighting cycle |
| below 1.8 km/h | Total Lightening |
| below 40 km/h | 1 sec |
| below 60 km/h | 0.8 sec |
| below 80 km/h | 0.5 sec |
| below 100 km/h | 0.3 sec |
Altimeter
Altitude is displayed in "ALT numeral (m)" mode where measurement range is 200–2,800 m.
Altitude correction (in altitude display mode)
Displayed altitude could vary even at same place because of air pressure variation at sea level (0m point). The user can correct this display error in ±300m range by: pushing "▲" switch and holding it for no more than 0.5 sec for 50 m increase and pushing "▼" switch and holding it for no more than 0.5 sec for a 50m decrease.
1 FEATURES OF YOUR HYUNDAI
68
Relative altimeter
If MODE switch is pushed once more from "Altitude" display mode then "ALTI◆numeral (m)" will be displayed on the display window. ▲will be displayed when the relative altitude is higher and ▼will be displayed when the relative altitude is lower.
o Display range : ± 3,000 m o Altitude correction is same as altimeter correction method.
MULTI-FUNCTION LIGHT SWITCH
B340A01A-AAT COMBINATION TURN SIGNAL, HEADLIGHT AND HIGH-BEAM SWITCH Turn Signal Operation
Pulling down on the lever causes the turn signals on the left side of the car to blink. Pushing upwards on the lever causes the turn signals on the right side of the car to blink. As the turn is completed, the lever will automatically return to the center position and turn off the turn signals at the same time. If either turn signal indicator light blinks more rapidly than usual, goes on but does not blink, or does not go on at all, there is a malfunction in the system. Check for a burned-out fuse or bulb or see your Hyundai dealer.
B340B01A-AAT
Lane Change Signal
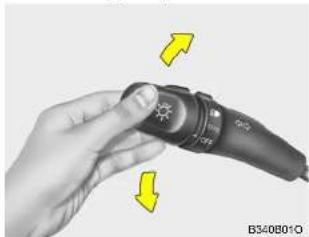
natural_image
Hand holding a handheld device with yellow directional arrows indicating rotation or movement (no text or symbols visible)To indicate a lane change, move the lever up or down to a point where it begins flashing. The lever will automatically return to the center position when released.
B340C03L-AAT
Headlight Switch
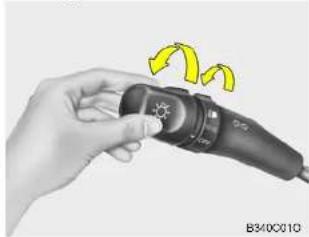
natural_image
Hand holding a black electrical plug with yellow motion arrows indicating rotation (no text or symbols)To operate the headlights, turn the barrel on the end of the multi-function switch. The first position turns on the parking lights, sidelights, tail lights and instrument panel lights. The second position turns on the headlights.
To turn them "ON" again, you must simply turn the ignition key to the "ON" position.
B340F01A-GAT
Daytime Running Lights (If Installed)
Your Hyundai is equipped with daytime running lights. The daytime running lights are used to improve visibility for oncoming traffic. Your vehicle daytime running lights are designed to remain on continuously when the engine is operating even though the headlight switch is in the "OFF" position. However, the daytime running lights will be off while the parking brake is applied.
B340D01A-AAT
High-beam Switch
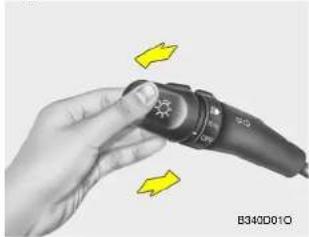
natural_image
Hand holding a handheld device with yellow directional arrows indicating rotation (no text or symbols on device)To turn on the headlight high beams, push the lever forward (away from you). The High Beam Indicator Light will come on at the same time. For low beams, pull the lever back toward you.
NOTE:
The ignition must be in the "ON" position to turn on the headlights.
Parking Light Auto Cut
If you do not turn the parking lights "OFF" after driving, the parking lights will automatically shut "OFF" when the driver's door is opened.
1 FEATURES OF YOUR HYUNDAI
70
B340E01A-AAT
Headlight Flasher
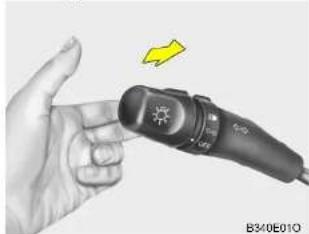
natural_image
Hand holding a medical or diagnostic device with a yellow arrow pointing to it, no visible text or symbols on the device itself.To flash the headlights, pull the switch lever toward you, then release it. The headlights can be flashed even though the headlight switch is in the "OFF" position.
B340G01LZ-GAT
Auto Light (If installed)
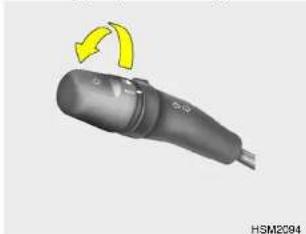
natural_image
Close-up of a black handheld electronic device with yellow directional arrows indicating rotation (no text or symbols on the device itself)To operate the automatic light feature, turn the barrel on the end of the multifunction switch. If you set the multifunction switch to "AUTO", the tail lights and headlights will be turned automatically on or off according to external illumination.
NOTE:
Switch on car light manually in foggy, cloudy and rainy conditions.
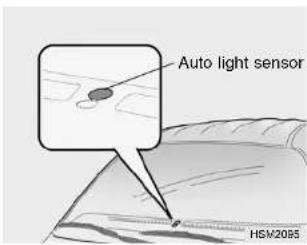
NOTE:
o Never place anything over sensor located on the instrument panel, this will ensure better auto light system control.
o Don't clean the sensor using a window cleaner.
o If your vehicle has window tint or other types of coating on the front windshield, the AUTO light system may not work properly.
WINDSHIELD WIPER AND WASHER SWITCH
B350A01A-AAT
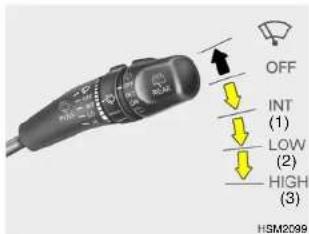
The windshield wiper switch has three positions:
- Intermittent wiper operation
- Low-speed operation
- High-speed operation
NOTE:
To prevent damage to the wiper system, do not attempt to wipe away heavy accumulations of snow or ice. Accumulated snow and ice should be removed manually. If there is light layer of snow or ice, operate the heater in the defrost mode to melt the snow or ice before using the wiper.
B350B010-GAT
Windshield Washer Operation
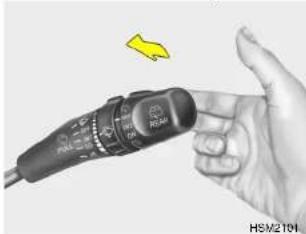
natural_image
Close-up of a hand holding a handheld electronic device with a yellow arrow indicating rotation (no visible text or symbols)To use the windshield washer, pull the wiper/washer lever toward the steering wheel. When the washer lever is operated, the wipers automatically make two passes across the windshield. The washer continues to operate until the lever is released.
NOTE:
o Do not operate the washer more than 15 seconds at a time or when the fluid reservoir is empty.
o In icy or freezing weather, be sure the wiper blades are not frozen to the glass prior to operating the wipers.
FEATURES OF YOUR HYUNDAI
71
o In areas where water freezes in winter, use windshield washer antifreeze.
Mist Wiper Operation
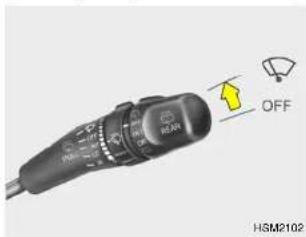
If a single wipe is desired in mist, push the windshield wiper and washer control lever upwards.
1 FEATURES OF YOUR HYUNDAI
72
B350C010-AAT
Adjustable Intermittent Wiper Operation
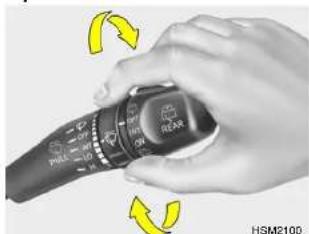
natural_image
Close-up of hands holding a black remote control knob with yellow circular arrows indicating rotation (no text or symbols on the knob itself)To use the intermittent wiper feature, place the wiper switch in the "INT" position. With the switch in this position, the interval between wipes can be varied from approximately 1 to 18 seconds by turning the interval adjuster barrel. This is also varied automatically depending on your road speed.
B39DA01E-AAT
Rear Window Wiper and Washer (If Installed)
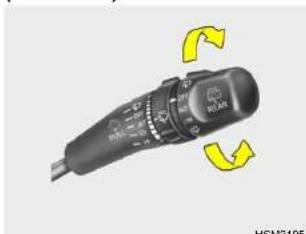
natural_image
Close-up of a black camera control knob with yellow directional arrows indicating rotation (no text or symbols on the knob itself)- The rear window wiper starts to operate three times after the washer fluid sprays onto the rear window.
2.OFF
3.INT: The interval between wipes operates every 5 seconds intermittently.
4.ON : The rear window wiper starts to operate continuously. - The washer fluid will be sprayed onto the rear window and the wiper operates while the rear window wiper barrel is placed in this position.
NOTE:
Do not operate the washer continuously for more than 15 seconds or when the fluid reservoir is empty; this could damage the system. Do not operate the wiper when the window is dry; this can result in scratching as well as premature wiper blade wear.
For the same reason, do not operate the washer when the washer fluid reservoir is empty.
FOG LIGHT SWITCH HAZARD WARNING SYSTEM
FEATURES OF YOUR HYUNDAI
73
B360801A-AAT
FRONT FOG LIGHT SWITCH
(If installed)
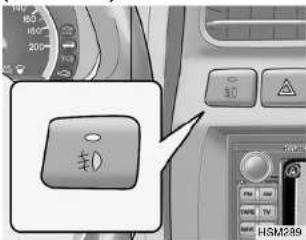
To turn on the front fog lights, push the switch. They will light when the headlight switch is in the second position and the ignition key is in the "ON" position.
B380A01Y-GAT
REAR FOG LIGHT SWITCH
(If installed)
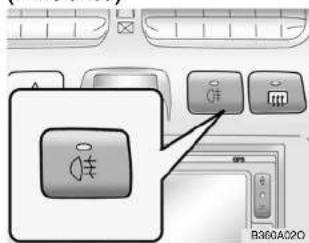
To turn on the rear fog lights, push the switch. They will come on when the headlight switch is in the second position and the key is in the "ON" position.
B370A01A-AAT
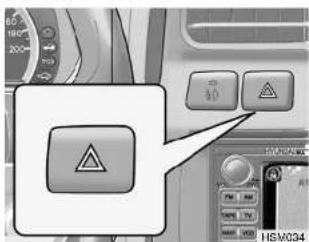
The hazard warning system should be used whenever you find it necessary to stop the car in a hazardous location. When you must make such an emergency stop, always pull off the road as far as possible.
The hazard warning lights are turned on by pushing in the hazard switch. This causes all turn signal lights to blink. The hazard warning lights will operate even though the key is not in the ignition.
To turn the hazard warning lights off, push the switch a second time.
1 FEATURES OF YOUR HYUNDAI
74
REAR WINDOW DEFROSTER SWITCH
B300A01HP-AAT
(If installed)
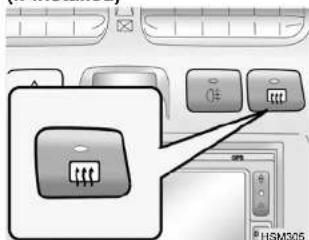
The rear window defroster and heated outside rear view mirrors are turned on by pushing in the switch. At the same time, the rear window defroster indicator light on the switch is turned on. To turn the defroster off, push the switch a second time. The rear window defroster automatically turns itself off after about 20 minutes. To restart the defroster cycle, push in on the switch again after it has turned itself off.

CAUTION:
Do not clean the inner side of the rear window glass with an abrasive type of glass cleaner or use a scraper to remove foreign deposits from the inner surface of the glass as this may cause damage to the defroster elements.
NOTE:
The ignition must be in the "ON" position for the rear window defroster to operate.
DIGITAL CLOCK
B400A01A-AAT
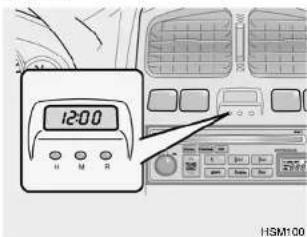
There are three control buttons for the digital clock. Their functions are:
HOUR - Push "H" to advance the hour indicated.
MIN - Push "M" to advance the minute indicated.
RESET - Push "R" to reset minutes to ":00" to facilitate resetting the clock to the correct time. When this is done:
Pressing "R" between 10:30 and 11:29 changes the readout to 11:00.
Pressing "R" between 11:30 and 12:29 changes the readout to 12:00.
DIGITAL CALENDAR
B400B02O-GAT
(With sunroof)(If installed)
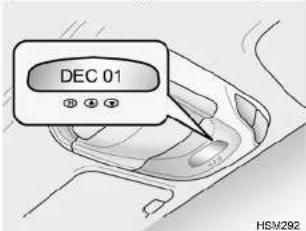
How to adjust the date & the time
- Whenever "M" button is pushed, the "YEAR", "MONTH", "DAY", "HOUR" and "MINUTE" blinks in order.
- Adjust the date & the time by pushing "▲(UP)", "▼(DOWN)" button when the year/month/day/hour/minute each blinks.
- After adjusting the date & the time, push "M" button once more and the adjustment is completed.
NOTE:
When the battery has been reconnected or charged, set the date and time as described above. However, the first display mode is set on DEC 01.
FEATURES OF YOUR HYUNDAI
ELECTRIC AZIMUTH COMPASS
B990C020-GAT
(With sunroof)(If installed)
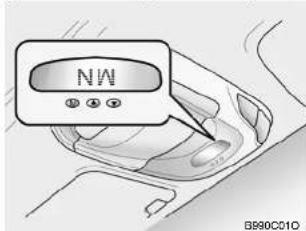
It displays 8 azimuth according to the vehicle's driving direction and the angle of one graduation is 45^ .
The indication is displayed only when the vehicle is in motion.
Heading Display
E : East, W: West.
If new vehicle is first driven or if the battery has been disconnected, correct the azimuth indicator before driving.
1 FEATURES OF YOUR HYUNDAI
76
Correcting Azimuth Indicator
The display before correction mode is set as "C". It is needed to correct the indicator between a current azimuth to terrestrial magnetism sensor and the displayed azimuth in the vehicle position.
How to correct azimuth indicator
- If you push and hold the "M(MODE)" switch for less than 4.5 seconds, the "C" will start blinking.
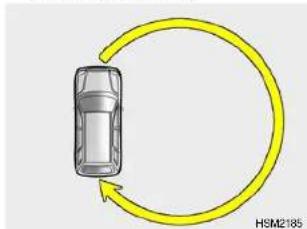
natural_image
Top-down diagram of a car with a yellow circular arrow indicating clockwise motion (no text or symbols)-
Slowly rotate the vehicle one turn(360 degree) within 128 seconds. The rotation could be made at any direction(left or right) in an open space.
-
When the rotation is finished, the current azimuth indicator will appear and the correction mode is completed.
If the indicator continues to blink, rotate the vehicle a bit more until the blinking stops.
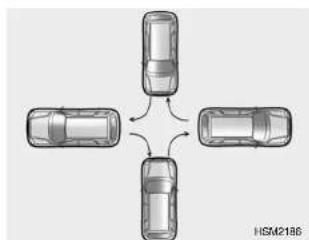
natural_image
Top-down diagram of four cars arranged in a cross pattern with directional arrows (no text or symbols)NOTE:
Rotate the vehicle one turn (90 degree) as shown in the drawing if the vehicle has no place to rotate.
After the correction mode is completed, the compass heading will appear 3 seconds later.
The azimuth compass indicator correction will be cancelled:
- If you press "M (MODE)" switch for more than 0.5 second.
- When the vehicle is not rotated within 128 seconds after the blinking of the indicator.
NOTE:
The azimuth may display abnormally in specific places (tunnel, parking lot in building, underground parking lot, near transformer substation, etc.). It is normal and the azimuth is displayed normally when escaping above mentioned places.
How to correct terrestrial devia- tion.
- Press "M (MODE)" switch for more than 4.5 seconds, then the present terrestrial deviation angle value will be displayed.
- Press " ▲ (UP)" or " ▼ (DOWN)" switch for less than 0.5 second to correct the terrestrial deviation angle within 30 seconds.
For the correct terrestrial deviation angle value for your location, refer to the contour line map included.
If your place is located in between the terrestrial deviation contour line, you can apply any value (up or down value) for your location in the contour line map.
The initial deviation angle is set to 5^ W.
Terrestrial Correction Range: West 30° \~ East 30°.
- To finish the correction, press "M (MODE)" switch for more than 1 second.
NOTE:
The terrestrial deviation setting will be remembered even if the battery has been disconnected.
The terrestrial deviation angle correction will be cancelled:
- If you press "M (MODE)" switch for more than 0.5 second.
- If you don't correct the terrestrial deviation angle within 30 seconds.
The Counter Line Map for Terrestrial Deviation Angle Correction
B990C020
1 FEATURES OF YOUR HYUNDAI
78
FRONT WINDSHIELD DEICER SWITCH
B385A010-AAT (If installed)
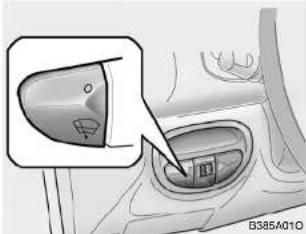
natural_image
Diagram of a car interior showing a highlighted vehicle component and a magnified view (no text or symbols)The front windshield deicer is turned on by pushing in the switch. To turn the deicer off, push the switch a second time. The front windshield deicer automatically turns itself off after about 20 minutes.
This function helps release stuck wind-shield wipers especially in winter time and cold regions.
INSTRUMENT PANEL LIGHT CONTROL (RHEOSTAT)
B410A01A-AAT
(If installed)
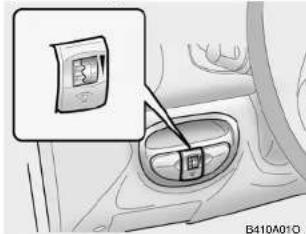
natural_image
Interior view of a car showing a hand holding a small device with a brush, no visible text or symbolsThe instrument panel lights can be made brighter or dimmer by turning the instrument panel light control knob.
CIGARETTE LIGHTER
B420A02A-AAT
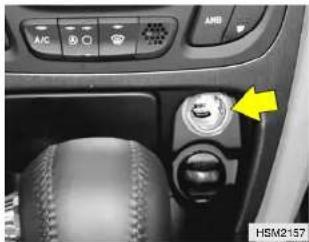
natural_image
Close-up of a car headset with climate control panel and directional indicator (no readable text or symbols)For the cigarette lighter to work, the key must be in the "ACC" position or the "ON" position. To use the cigarette lighter, push it all the way into its socket. When the element has heated, the lighter will pop out to the "ready" position. Do not hold the cigarette lighter pressed in. This can damage the heating element and create a fire hazard. If it is necessary to replace the cigarette lighter, use only a genuine Hyundai replacement or its approved equivalent.

CAUTION:
Do not use electric accessories or equipment other than the Hyundai genuine parts in this socket.
POWER OUTLET
FEATURES OF YOUR HYUNDAI
ASHTRAY
79
B500D100-GAT
(If installed)
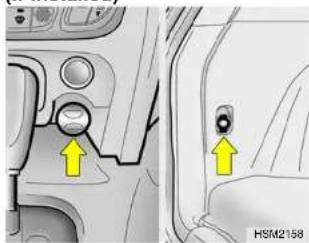
natural_image
Close-up of a car interior showing a valve and door, with yellow arrows pointing to the ports (no text or symbols visible)The power outlet is located on the center facia panel and in the quarter trim.
These supply 12V electric power to operate electric accessories or equipment only when the key is in the "ON" or "ACC" position.
CAUTION:
Use when the engine is running and remove a plug from the power outlet after using the electric appliance. Using when the engine stops or remaining the electric appliance with plugged in for many hours may cause the battery to be discharged.
Do not use the power outlet to connect electric accessories or equipment other than those designed to operate on 12 volts.
Some electronic devices can cause electronic interference when plugged into the power outlet. These devices may cause excessive audio noise and malfunctions in other electronic systems or devices used in your vehicle.
B430A01A-GAT
FRONT ASHTRAY
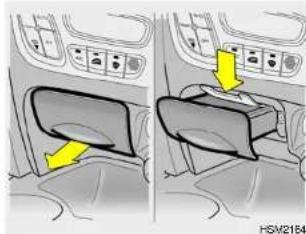
natural_image
Diagram showing two car interior compartments with directional arrows indicating movement or change (no text or symbols present)The front ashtray may be opened by pulling it out by its grip.
To remove the ashtray to empty or clean it, press down on the spring-loaded tab inside the ashtray and pull it all the way out. The ashtray light will only illuminate when the external lights are on.
1 FEATURES OF YOUR HYUNDAI
80
DRINK HOLDER
B440A01E-AAT
REAR ASHTRAY (If Installed)
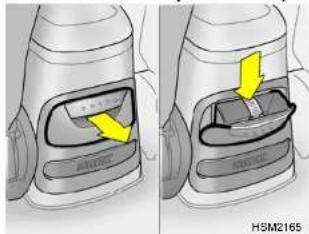
natural_image
Two-panel illustration of a car interior showing a door with yellow arrows pointing to a component, no text or symbols present.The rear ashtray may be opened by pulling it out by its top edge. To remove the ashtray to empty or clean it, press down on the spring-loaded tab inside the ashtray and lift the ashtray upward and pull it all the way out.
B450A02O-AAT
FRONT DRINK HOLDER
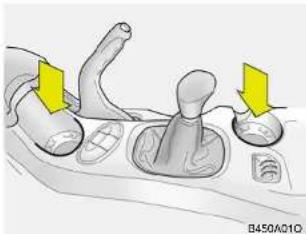
natural_image
Diagram of a car dashboard with two yellow directional arrows indicating movement or control points (no text or symbols present)The drink holder is located on the main console for holding cups or cans.

WARNING:
o Use caution when using the drink holders. A spilled beverage that is very hot can injure you or your passengers. Spilled liquids can damage Interior trim and electrical components.
Do not place objects other than cups or cans in the drink holder. This objects can be thrown out in the event of a sudden stop or an accident, possibly injuring the passengers in the vehicle.
B450B020-AAT
REAR DRINK HOLDER
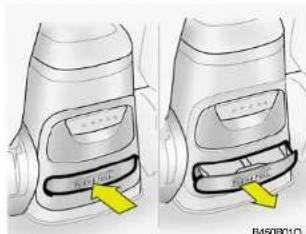
The rear drink holder is located on the rear main console for holding cups or cans. The rear drink holder can be used by pushing and pulling it at its top edge.
SUNROOF
81

CAUTION:
Place the drink holder in its closed position when not in use.

WARNING:
Do not place objects other than cups or cans in the drink holder. This objects can be thrown out in the event of a sudden stop or an accident, possibly injuring the passengers in the vehicle.
B450801JM-AAT
REAR DRINK HOLDER
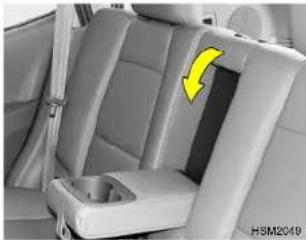
natural_image
Interior view of a car seatbelt with a yellow arrow pointing to the side panel (no text or symbols visible)The rear drink holder is located in the rear seat arm rest for holding cups or cans.
The rear drink holder can be used by pulling the rear seat armrest.

WARNING:
Do not place objects other than cups or cans in the drink holder. This objects can be thrown out in the event of a sudden stop or an accident, possibly injuring the passengers in the vehicle.
B480A01Y-AAT
(If installed)
Sun Shade
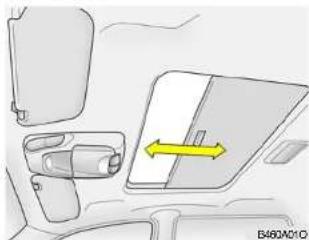
natural_image
Diagram of a car interior showing seatbelt, door panel, and directional arrow (no text or symbols)Your HYUNDAI is equipped with a sliding sunshade which you can manually adjust to let in light with the sunroof closed, or to block sunlight.

WARNING:
Never adjust the sunshade while driving.
1 FEATURES OF YOUR HYUNDAI
82
B4809020-AAT
Opening the Sunroof System
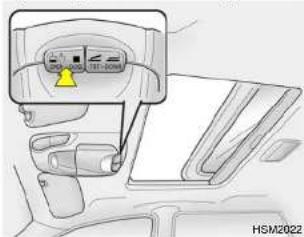
The sunroof can be electrically opened or closed with the ignition key in the "ON" position. The sunroof is moved to its two-third open position by pushing the "Switch," and to stop at the desired position, push in any switches. To open the sunroof fully open position, push and release the "switch again in the first position (two-third open position).
To close, press and hold the " CLOSE" button. Release the button when the sunroof reaches the desired position.
NOTE:
To reduce wind noise while driving, we recommend you to drive at the first open position.

WARNING:
Do not close a sunroof if anyone's hands, arms or body are between the sliding glass and the sunroof sash, as this could result in injury.
o Do not place your head or arms out of the sunroof opening at any time.
While the vehicle is moving, always keep the head, hands and other parts of the body of all occupants away from the roof opening. Otherwise, you could be seriously injured if the vehicle stops suddenly or if the vehicle is involved in an accident.

CAUTION:
o Do not open the sunroof in severely cold temperature or when it is covered with ice or snow.
o Periodically remove any dirt that may have accumulated on the guide rails.
Do not press any sunroof control button longer than necessary. Damage to the motor or system components could occur.
B460C01D-AAT
Tilting the Sunroof System
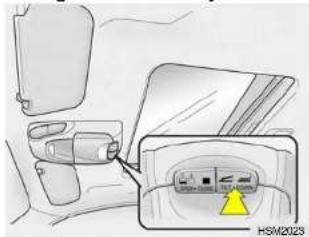
The sunroof is moved to its fully tilt up position by pushing the "TILT" switch and to stop at the desired position, push in any switches.
To tilt down, press and hold the "DOWN" button. Release the button when the sunroof reaches the desired position.
NOTE:
After washing the car or after there is rain, be sure to wipe off any water that is on the sunroof before operating it.
B4800010-GAT
Manual Operation of Sunroof
If the sunroof does not electrically operate:
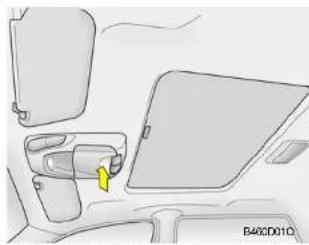
natural_image
Diagram of a car interior showing dashboard, seatbelt, and dashboard door (no text or symbols)- Open the spectacle case.
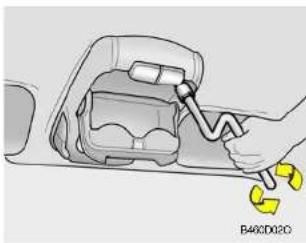
natural_image
Illustration of a hand using a tool to adjust or install a device into a container (no text or symbols visible)- Turn the hexagonal bolts counterclockwise to remove the overhead console with a socket wrench.
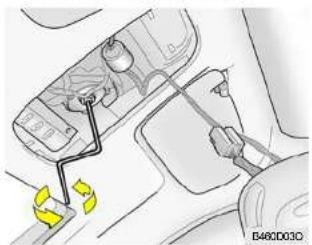
-
Insert the hexagonal head wrench provided with the vehicle into the socket. This wrench can be found in the vehicle's glove box.
-
Turn the wrench clockwise to open or counterclockwise to close.
1 FEATURES OF YOUR HYUNDAI
84
INTERIOR LIGHT
B480001Y-AAT MAP LIGHT
| With sunroof | Without Sunroof |
Push in the map light switch to turn the light on or off. This light produces a spot beam for convenient use as a map light at night or as a personal light for the driver and the passenger.
B490A03Y-AAT INTERIOR LIGHT
The interior courtesy light has three buttons. The three buttons are:
o DOOR
In the "DOOR" position, the interior courtesy light comes on when any door is opened regardless of the ignition key position. The light goes out gradually 6 seconds after the door is closed.
o ON
In the "ON" position, the light stays on at all times.

CAUTION:
Do not leave this button pressed for an extended period of time when the vehicle is not running.
o OFF
In the "OFF" position, the light stays off at all times even though a door is open.
SPECTACLE CASE
B491A020-GAT
With sunroof
Without Sunroof
HSM2169
The spectacle case is located on the front overhead console.
Push the end of the cover to open the spectacle case.

WARNING:
Do not keep objects such as sharp or unsuitable things inside the spectacle case. Such objects can be thrown out in the event of a sudden stop or an accident, possibly injuring the passengers in the vehicle.
GLOVE BOX
B500A01Y-AAT
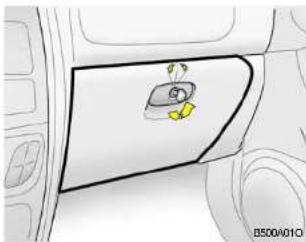
natural_image
Diagram of a car interior showing a door with a yellow object and directional arrows, no text or symbols present.
WARNING:
To avoid the possibility of injury in case of an accident or a sudden stop, the glove box door should be kept closed when the car is in motion.
o To open the glove box, pull on the glove box release lever.
o The glove box door can be locked (and unlocked) with the key.
FEATURES OF YOUR HYUNDAI
85
B500B010-AAT
Illuminated Glove Box
Opening the glove box will automatically turn on the light when the multifunction switch is turned to the first/second position.
1 FEATURES OF YOUR HYUNDAI
86
CENTER CONSOLE BOX
OUTSIDE REARVIEW MIRROR
B506A010-GAT
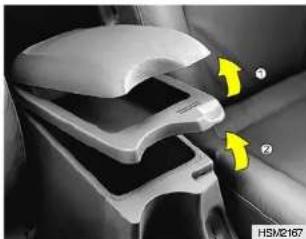
natural_image
Close-up of a car seatbelt buckle with yellow directional arrows indicating movement (no text or symbols)The center console box is used for storing cassette tape or small articles. To use the center console box, lift the cover (1) or open the cover with pressed the button (2).

WARNING:
To avoid the possibility of injury in case of an accident or a sudden stop, the center console box lid should be kept closed when the car is in motion.
B510A01A-AAT
Manual Type
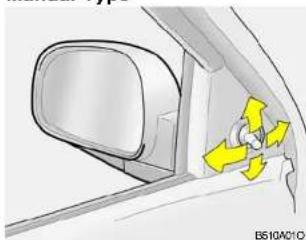
natural_image
Diagram of a car side mirror and rear window with directional arrows indicating flow or movement (no text or symbols)The outside rearview mirrors are equipped with a remote control for your convenience. It is operated by the control lever in the bottom front corner of the window.
Before driving away, always check that your mirrors are positioned so you can see behind you, both to the left and right sides, as well as directly behind your vehicle. When using the mirror, always exercise caution when attempting to judge the distance of vehicles behind or along side of you.

CAUTION:
If the mirror control is jammed with ice, do not attempt to break it free using the control handle or by manipulating the face of the mirror. Use an approved spray de-icer (not radiator antifreeze) to release the frozen mechanism or move the vehicle to a warm place and allow the ice to melt.
B510901Y-AAT
Electric Type (If installed)
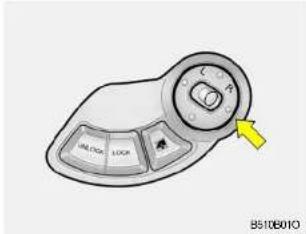
The outside rearview mirrors can be adjusted to your preferred rear vision, both directly behind the vehicle, and to the rear of the left and right sides.
The remote control outside rearview mirror switch controls the adjustments for both right and left outside mirrors.
To adjust the position of either mirror:
- Move the selecting switch to the right or left to activate the adjustable mechanism for the corresponding door mirror.
- Adjust mirror angle by depressing the appropriate perimeter switch as illustrated.
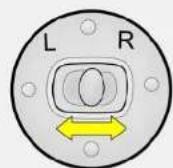
B5108020

CAUTION:
o Do not operate the switch continuously for an unnecessary length of time.
o Scraping ice from the mirror face could cause permanent damage. To remove any ice, use a sponge, soft cloth or approved de-icer.

WARNING:
Be careful when judging the size or distance of any object seen in the passenger side rearview mirror. It is a convex mirror with a curved surface. Any objects seen in this mirror are closer than they appear.
B510D01HP-AAT
OUTSIDE REARVIEW MIRROR HEATER (If Installed)
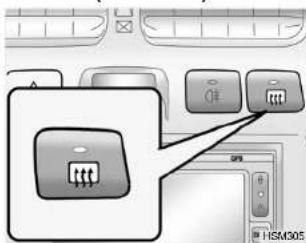
The outside rearview mirror heater is actuated in connection with the rear window defroster. To heat the outside rearview mirror glass, push in the switch for the rear window defroster. The rearview mirror glass will be heated for defrosting or defogging and will give you improved rear vision in inclement weather conditions. Push the switch again to turn the heater off. The outside rearview mirror heater automatically turns itself off after 20 minutes.
1 FEATURES OF YOUR HYUNDAI
88
B510C01A-AAT
FOLDING THE OUTSIDE REAR-
VIEW MIRRORS
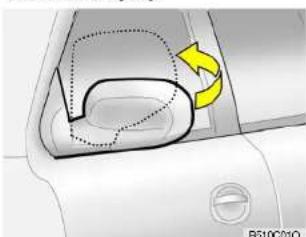
natural_image
Diagram of a car interior showing a curved door and circular vent, with a yellow arrow indicating rotation (no text or symbols)To fold the outside rearview mirrors, push them towards the rear. The outside rearview mirrors can be folded rearward for parking in narrow areas.

WARNING:
Do not adjust or fold the outside rearview mirrors while the vehicle is moving. This could result in loss of control, and an accident causing death, serious injury or property damage.
DAY/NIGHT INSIDE REAR- VIEW MIRROR
B520A01A-AAT
Manual type
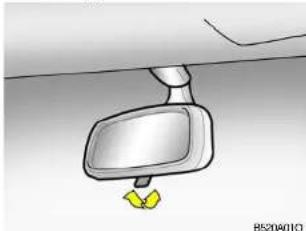
natural_image
Simple line drawing of a car dashboard with a handle and yellow clip (no text or symbols)Your Hyundai is equipped with a day/night inside rearview mirror. The "night" position is selected by flipping the tab at the bottom of the mirror toward you. In the "night" position, the glare of headlights of cars behind you is reduced.
B520B020-GAT
Electric type (If installed)
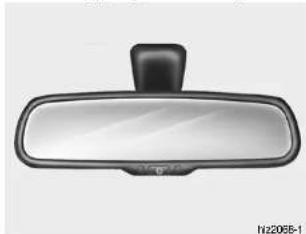
natural_image
Front view of a car rearview mirror (no text or symbols visible)The electric type day/night inside rear-view mirror automatically controls the glare of headlights of the car behind you.
- Pressing the ⏻ button turns the auto-dimming function OFF which is indicated by the green status indicator LED turning off.
- Pressing the button again turns the auto-dimming function ON which is indicated by the green status indicator LED turning on.
NOTE:
The mirror defaults to the "ON" position each time the vehicle is started.
PARKING BRAKE
B530A01A-AAT
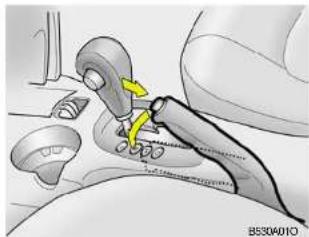
natural_image
Medical illustration of a hand holding a car seatbelt with arrows indicating force or movement (no text or symbols present)Always engage the parking brake before leaving the car. This also turns on the parking brake indicator light when the key is in the "ON" or "START" position. Before driving away, be sure that the parking brake is fully released and the indicator light is off.
o To engage the parking brake, pull the lever up as far as possible.
To release the parking brake, pull up the lever and press the thumb button. Then, while holding the button in, lower the brake lever.
TAIL GATE
B540A01FC-AAT
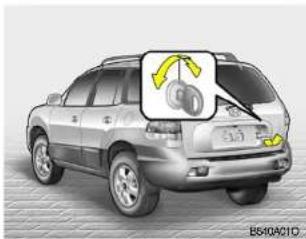
natural_image
Side view of a silver SUV with a highlighted gear icon and directional arrows (no text or symbols)
WARNING:
The tail gate should always be kept completely closed while the vehicle is in motion. If it is left open or ajar, poisonous exhaust gases may enter the car resulting in serious illness or death to the occupants. See additional warnings concerning exhaust gases on page 2-2.
o The tail gate can be locked or unlocked with a key.
FEATURES OF YOUR HYUNDAI
89
o The tail gate is opened by pulling the outside handle up, raising the tail gate manually.
To close, lower the tail gate, then press down on it until it is closed. To be sure the tail gate is fully closed, always try to pull it up again without using the outside handle.
B540B010-AAT
Tail gate Window
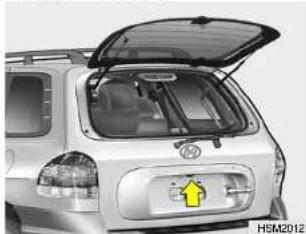
natural_image
Exterior view of a silver SUV trunk with open lid and yellow directional arrow (no text or symbols)When you push the tail gate window release button to open the tail gate window, it will spring up slightly. Raise the tail gate window. The window will raise completely by itself after it has been raised halfway.
1 FEATURES OF YOUR HYUNDAI
90
LUGGAGE COMPARTMENT
To close the tail gate window, lower the tail gate window, and it will close by itself.
To be sure the tail gate window is securely fastened, always try to pull it up again.
NOTE:
The tail gate window lock is operated in connection with the tail gate lock. To open the tail gate window make sure the tailgate is unlocked with a key or the central door locking switch.
B540C01HP-GAT
LUGGAGE COMPARTMENT LIGHT
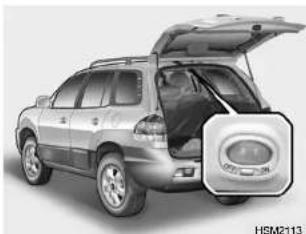
natural_image
Side view of a silver SUV with its open hood, showing engine compartment (no visible text or symbols)Luggage compartment light has a 3-position switch. The three positions are:
o In the "MIDDLE" position, the luggage compartment light comes on when the tail gate is opened, then goes out when it is closed.
o In the "ON" position, the light stays on at all times.
o In the "OFF" position, the light stays off at all times.
B540D020-AAT
LUGGAGE NET
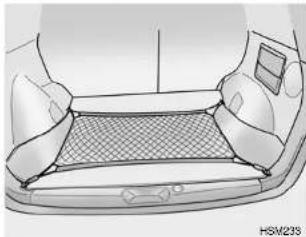
natural_image
Top-down line drawing of a car interior showing the grille and dashboard (no text or symbols)When loading objects in the luggage compartment, use the four rings located in the luggage compartment to attach the luggage net as shown illustration. This will help prevent the objects from sliding.

CAUTION:
To prevent damage to the goods or the vehicle, care should be taken when carrying fragile or bulky objects in the luggage compartment.
CD AUTO CHANGER
91

WARNING:
Avoid eye injury. DO NOT over-stretch. The luggage net ALWAYS keep your face and body out of its recoil path. DO NOT use when the strap has visible signs of wear or damage.
B640A01S-AAT
CARGO SECURITY SCREEN (If installed)
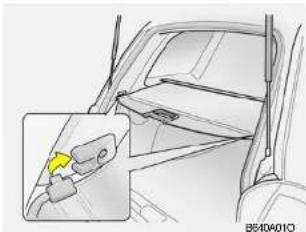
natural_image
Diagram of a car interior showing a seatbelt and door panel, with no visible text or symbolsTo use the security screen, pull it out of the retractor and hook it to the anchors as illustrated.
B650A01S-AAT
Stowage Precautions
- Do not place objects on the cargo security screen. Such objects may be thrown about inside the vehicle and possibly injure vehicle occupants during an accident or when braking.
- For better fuel economy, do not carry unnecessary weight.
- Never allow anyone to ride in the luggage compartment. It is designed for luggage only.
- Try to maintain the balance of the vehicle and locate the weight as far forward as possible.
B450B010-GAT
(If installed)
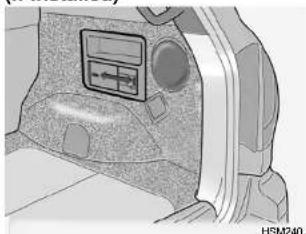
natural_image
Interior view of a vehicle's rear compartment showing dashboard, seatbelt, and camera (no visible text or symbols)The CD Auto Changer is located in the right side of the luggage compartment. This system can store up to 8 CDs. You may select music without changing discs. First, open the CD Auto Changer door, remove the CD "magazine", and insert up to 8 CDs by taking out the magazine. Then, push the magazine into the CD Auto Changer. The CD may be operated with the passenger compartment audio system controls.
1 FEATURES OF YOUR HYUNDAI
92
ROOF RACK
B63DA02O-GAT (If installed)
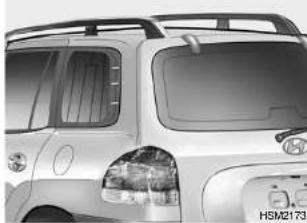
natural_image
Side profile of a white SUV with visible headlights and grille (no text or symbols)If your Hyundai has a roof rack, you can load things on top of your vehicle. Crossrails and fixing components to adapt the roof rack on your vehicle may be obtained from an authorized Hyundai dealer.

CAUTION:
o The following specifications are recommended when loading cargo or luggage.
| ROOF RACK | 34 kg (75 lb) |
| EVENLY DISTRIBUTED |
HIGH-MOUNTED REAR STOP LIGHT
B550A01A-AAT
(If installed)
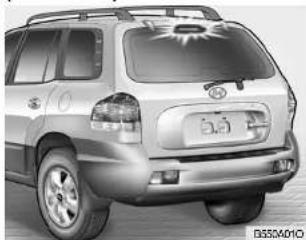
natural_image
Rear view of a silver SUV with a sunburst graphic on the windshield (no visible text or symbols)In addition to the lower-mounted rear stoplights on either side of the car, the high mounted rear stoplight in the center of the rear window also lights when the brakes are applied.
AUTO FUEL CUT SWITCH
B560B01O-GAT
(If installed)
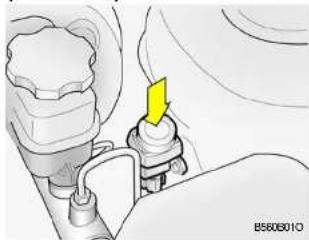
natural_image
Mechanical assembly diagram showing a yellow component inserted into a housing (no text or symbols visible)The auto fuel cut switch is located on the driver's side (Right hand drive-passenger's side) of the engine compartment.
In the event of a collision or sudden impact, the auto fuel cut device cuts off the fuel supply. If this device is activated, it must be reset by pressing in on the top of the switch before the engine can be restarted.

WARNING:
Before resetting the auto fuel cut switch, the fuel line should be checked for fuel leaks.
REMOTE FUEL-FILLER LID RELEASE
0580A03A-AAT
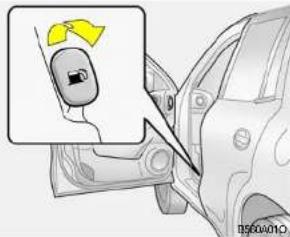
The fuel-filler lid may be opened from inside the vehicle by pulling up on the fuel-filler lid opener located on the front floor area on the left side of the car.
NOTE:
If the fuel-filler lid will not open because ice has formed around it, tap lightly or push on the lid to break the ice and release the lid. Do not pry on the lid. If necessary, spray around the lid with an approved de-icer fluid (do not use radiator anti-freeze), or move the vehicle to a warm place and allow the ice to melt.
FEATURES OF YOUR HYUNDAI
93
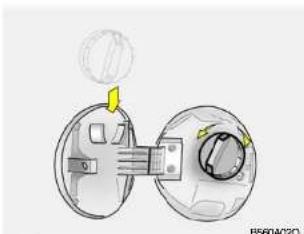
natural_image
Diagram of a device with two circular components and a handle, no visible text or symbols
WARNING:
o Fuel vapors are dangerous. Before refueling, always stop the engine and never allow sparks or open flames near the filler area. If you need to replace the filler cap, use a genuine Hyundai replacement part.
If you open the fuel filler cap during high ambient temperatures, a slight "pressure sound" may be heard. This is normal and not a cause for concern.
Whenever you open the fuel filler cap, turn it slowly.
1 FEATURES OF YOUR HYUNDAI
94
HOOD RELEASE
B570A01HP-GAT
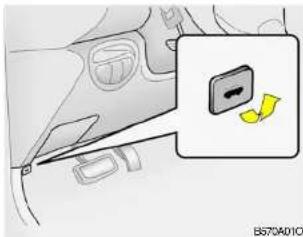
natural_image
Diagram of a car seatbelt switch with a highlighted yellow button (no text or symbols)- Pull the release knob to unlatch the hood.
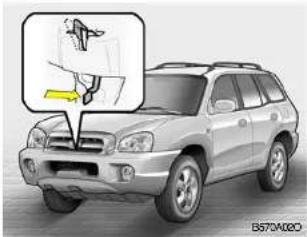
natural_image
Side view of a silver SUV with a hand tool inserted, showing the engine compartment (no text or symbols visible)o Automotive fuels are flammable/explosive materials. When refueling, please note the following guidelines carefully.
- Before touching the fuel nozzle or fuel filler cap, have one's hands in contact with metal parts away from the filler neck to discharge static electricity.
- Do not get back in the vehicle while refueling. Do not operate anything that can produce static electricity. Static electricity discharge can ignite fuel vapors resulting in an explosion.
- When using a portable fuel container, be sure to place the container on the ground while refueling. Static electricity discharge from the container can ignite fuel vapors causing a fire. While starting refueling, contact should be maintained until the filling is complete.
SUN VISOR
95
- Push the secondary latch lever sideways and lift the hood.
- Raise the hood by hand.
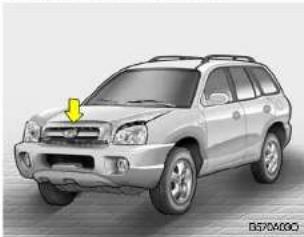
natural_image
Exterior view of a silver SUV (no visible text or symbols)When closing the hood, slowly close the hood and make sure it locks into place.

WARNING:
o Always double check to be sure that the hood is firmly latched before driving away. If it is not latched, the hood could open while the vehicle is being driven, causing a total loss of visibility, which might result in an accident.
Do not move the vehicle with the hood in the raised position, as vision is obstructed and the hood could fall or be damaged.
B580A01B-AAT
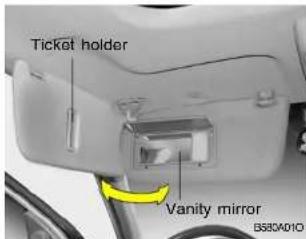
Your Hyundai is equipped with sun visors to give the driver and front passenger either frontal or sideward shade. To reduce glare or to shut out direct rays of the sun, turn the sun visor down. A ticket holder is provided on the front of the sun visor for the driver. Vanity mirrors are provided on the back of the sun visor for the driver and front passenger.
1 FEATURES OF YOUR HYUNDAI
96
NOTE:
The Supplemental Restraint System (SRS) label containing useful information can be found in the front of each sun visor.

WARNING:
Do not place the sun visor in such a manner that it obscures visibility of the roadway, traffic or other objects.
B5E0B010-GAT
Illuminated Vanity Mirror (If installed)
Opening the lid of the vanity mirror will automatically turn on the mirror light when the multi-function switch is turned to the first/second position.
FRONT DOOR EDGE WARN- ING LIGHT
B620A01S-AAT
(If installed)
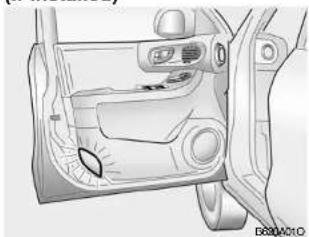
natural_image
Interior view of a car showing the dashboard and steering wheel (no text or symbols visible)A red light comes on when the front door is opened. The purpose of this light is to assist when you get in or out, and also to warn passing vehicles.
HORN
B510A01A-GAT
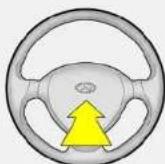
B3104010
Press the center hub of the steering wheel to sound the horn.
REAR SEAT ARM REST
B611A01Y-AAT
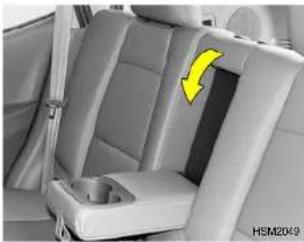
natural_image
Interior view of a car backseat with a yellow arrow indicating the seat area (no text or symbols visible)The rear seat arm rest is located in the center of the rear seatback.
STEERING WHEEL TILT LEVER
B500A02Y-AAT
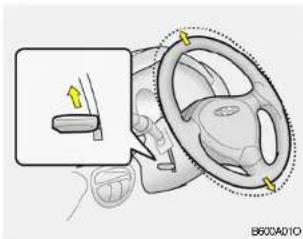
natural_image
Diagram showing a car interior with a steering wheel and directional arrow, no text or symbols presentTo adjust the steering wheel:
- Pull the lever upward and hold it to unlock.
- Raise or lower the steering wheel to the desired position.
- After adjustment, release the lever.

WARNING:
Do not attempt to adjust the steering wheel while driving as this may result in loss of control of the vehicle and serious injury or death.
FEATURES OF YOUR HYUNDAI
HEADLIGHT LEVELING DEVICE SYSTEM
B340G01O-GAT
(If installed)
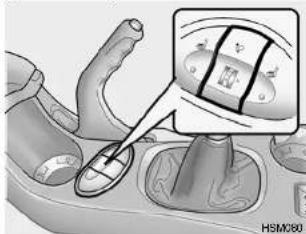
natural_image
Medical illustration showing a hand operating a device in a clinical setting (no text or symbols visible)To adjust the headlight beam level according to the number of the passengers and the loading weight in the luggage area, turn the beam leveling switch. The higher the number of the switch position, the lower the headlight beam level. Always keep the headlight beam at the proper leveling position, or headlights may dazzle other road users.
Listed below are the examples of proper
1 FEATURES OF YOUR HYUNDAI
98
switch settings. For loading conditions other than those listed below, adjust the switch position so that the beam level may be the nearest as the condition obtained according to the list.
| Loading condition | Switch position |
| Driver only | 0 |
| Driver + Front passenger | 0 |
| Driver + Front passenger+ Farthest Rear Seat Full | 1 |
| Full Passengers | 1 |
| Full passengers +Maximum Permissible Loading | 2 |
| Driver + Maximumpermissible loading | 3 |
CRUISE CONTROL
B030A02S-GAT
(If installed)
The cruise control system provides automatic speed control for your comfort when driving on freeways, toll roads, or other noncongested highways. This system is designed to function above approximately 40 km/h (25 mph).
NOTE:
Cruise control is not recommended for city driving, winding roads, slippery roads, heavy rain, or other bad weather conditions.
B880B000-GAT
To Set the Cruise Speed
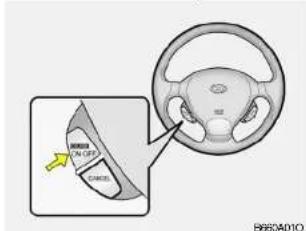
- Push the cruise control ON/OFF button. The "CRUISE" indicator light in the instrument cluster will illuminate. This turns the system on.
- Accelerate to desired cruising speed above 40 km/h(25 mph).
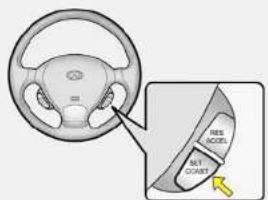
B6608010
- Push the "SET" (COAST) button after you have set the vehicle speed at the desired speed.
- Remove your foot from the accelerator pedal and the desired speed will automatically be maintained.
- To increase speed, temporarily depress the accelerator pedal enough for the vehicle to exceed the preset speed. When you remove your foot from the accelerator pedal, the vehicle will return to the speed you have set.
NOTE:
If the vehicle speed decreases more than 20 km/h (12 mph) below the set speed or decreases below 40 km/h (25 mph), the cruise control system will automatically cancel the set speed.
B660C020-GAT
To cancel the cruise speed
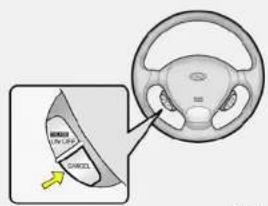
B660C010
To disengage the cruise control system, push the "CANCEL" button. Additionally, the following actions will disengage the system:
o Depress the brake pedal.
o Depress the clutch pedal (Manual transaxle).
o Shift the selector lever to 'N' position (Automatic transaxle).
o Decrease the vehicle speed lower than the memory speed by 20 km/h (12 mph).
o Decrease the vehicle speed approximately to less than 40 km/h (25 mph).
o Release the cruise control ON/OFF button.
B560D01L-GAT
To Resume the Preset Speed
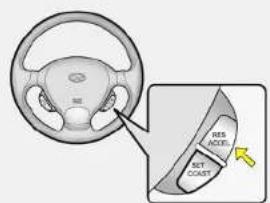
B660D010
The vehicle will automatically resume the speed set prior to cancellation when you push the "RESUME (ACCEL)" button and release it to return (when travelling above 40 km/h).
1 FEATURES OF YOUR HYUNDAI
100
B880E01Y-AAT
To Reset at a Faster Speed
- Push the "RESUME (ACCEL)" button and hold it.
- Accelerate to desired speed and release the "RESUME (ACCEL)" switch. While the control switch is held, the vehicle will gradually gain speed.
B88DF020-AAT
To Reset at a Slower Speed
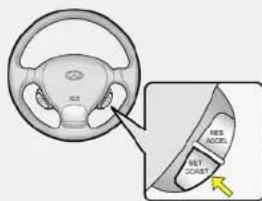
B6808010
- Push the "SET (COAST)" button and hold it. While the control button is pushed, the vehicle speed will gradually decrease.
- When the desired speed is obtained, release the control button.

WARNING:
o Keep the cruise control ON/OFF switch off when not using the cruise control.
o Use the cruise control system only when travelling on open highways in good weather.
Do not use the cruise control when it may not be safe to keep the car at a constant speed, for instance, driving in heavy or varying traffic, or on slippery (rainy, icy or snow-covered) or winding roads or over 6% up-hill or downhill roads.
o Pay particular attention to the driving conditions whenever using the cruise control system.
During cruise-control driving with a manual transaxle vehicle, do not shift into neutral without depressing the clutch pedal, or the engine will be overrevved. If this happens, depress the clutch pedal or release the cruise control ON/OFF switch.
During normal cruise control operation, when the "SET" button is activated or reactivated after applying the brakes, the cruise control will energize after approximately 3 seconds. This delay is normal.
HEATING AND COOLING CONTROL
FEATURES OF YOUR HYUNDAI
101
B710A010-GAT
(If installed)
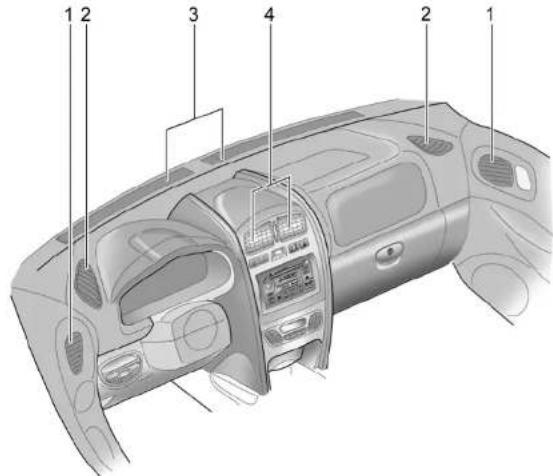
- Side Ventilator
- Side Defroster Nozzle
- Windshield Defroster Nozzle
- Center Ventilator
B710B020-AAT CENTER VENTILATOR
The center ventilators are located in the middle of the dashboard. To change the direction of the air flow, move the knob in the center of the vent up-and-down and side-to-side. The vents are opened when the vent knob is moved to "≡" position. The vents are closed when the vent knob is moved to "≡". Keep these vents clear of any obstructions.
B7100020-AAT SIDE VENTILATOR
The side ventilators are located on each side of the front door. To change the direction of the air flow, move the knob in the center of the vent up-and-down and side-to-side. The vents are opened when the vent knob is moved to "≡" position. The vents are closed when the vent knob is moved to "☒". Keep these vents clear of any obstructions.
HSM2116
1 FEATURES OF YOUR HYUNDAI
102
HEATING AND VENTILA- TION
B870A030-AAT
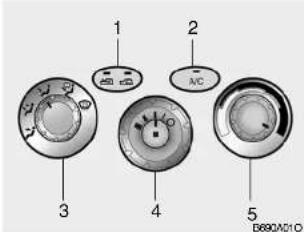
There are three controls and two switches for the heating and cooling system. They are:
- Air intake control switch
- Air conditioning switch
- Air flow control
- Fan speed control
- Temperature control
B670B01A-AAT
Fan Speed Control (Blower Control)
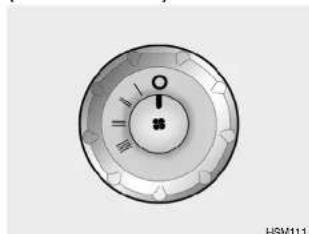
natural_image
Circular mechanical dial with pointer and base (no text or symbols visible)This is used to turn the blower fan on/off and to select the fan speed.
The blower fan speed, and therefore the volume of air delivered from the system, may be controlled manually by setting the blower control between the "1" and "4" position.
B6700090-AAT
Air Intake Control Switch

natural_image
Simple diagram of a device with two ports and two connectors, no text or symbols present.This is used to select fresh outside air or recirculate inside air.
To change the air intake control mode, (Fresh mode, Recirculation mode) push the control button.
FRESH MODE ( ) : The indicator light on the button is illuminated when the air intake control is in fresh mode.
RECIRCULATION MODE (☐): The indicator light on the button is illuminated when the air intake control is in recirculation mode.
With the "Fresh" mode selected, air enters the vehicle from the outside and is heated or cooled according to the function selected.
With the "Recirculation" mode selected, and air from within the passenger compartment will be drawn through the heating system and heated or cooled according to the function selected.
NOTE:
It should be noted that prolonged operation of the heating system in "Recirculation" mode (will give rise to fogging of the windshield and side windows and the air within the passenger compartment will become stale. In addition, prolonged use of the air conditioning with the "Recirculation" mode (selected may result in the air within the passenger compartment becoming excessively dry.
B670001L-GAT
Air Flow Control
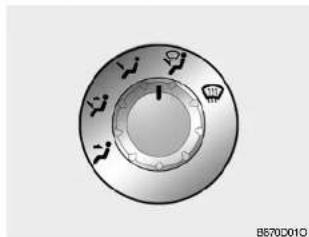
natural_image
Circular mechanical dial with indicator lights and a central knob, no visible text or symbolsThis is used to direct the flow of air. Air can be directed to the floor, dashboard outlets, or windshield. Five symbols are used to represent Face, Bi-Level, Floor, Floor-Defrost and Defrost air position.
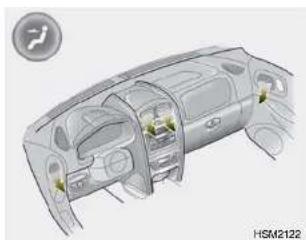
natural_image
Technical illustration of a car interior showing dashboard and steering wheel (no text or symbols)
Face-Level
Selecting the "Face" mode will cause air to be discharged through the face level vents.
1 FEATURES OF YOUR HYUNDAI
104
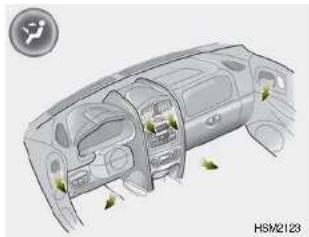
natural_image
Diagram of a car interior showing structural components and airflow direction (no text or symbols)
Bi-Level
Air is discharged through the face vents and the floor vents. This makes it possible to have cooler air from the dashboard vents and warmer air from the floor outlets at the same time.
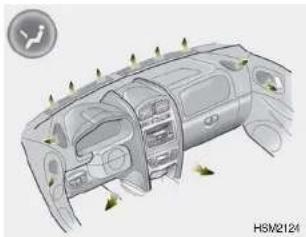
natural_image
Interior view of a car dashboard with airbags and ventilation ducts (no text or symbols visible)
Floor-Level
Air is discharged through the floor vents, windshield defroster nozzle, side defroster nozzle and side ventilator.
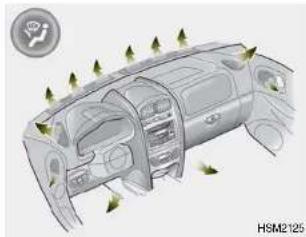
natural_image
Diagram of a car interior showing dashboard, vent, and roof structure with green trees (no text or symbols)
Floor-Defrost Level
Air is discharged through the wind-shield defroster nozzle, the floor vents, side defroster nozzle and side ventilator.
If the "Floor-Defrost" mode is selected, the A/C will turn on automatically and "Fresh" mode will be activated.
HEATING CONTROLS
105
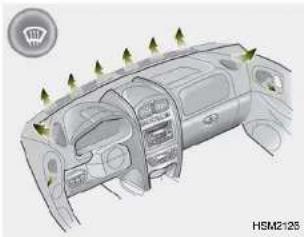
natural_image
Interior view of a car dashboard with air ducts and ventilation grilles (no text or symbols)
Defrost-Level
Air is discharged through the wind-shield defroster nozzle, side defroster nozzle and side ventilator. If the "Defrost" mode is selected, the A/C will turn on automatically and "Fresh" mode will be activated to improve wind-shield defrosting.
B670E02A-AAT
Temperature Control
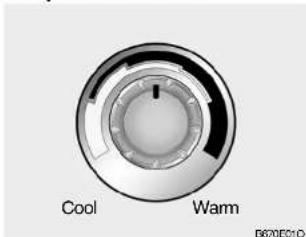
This control is used to adjust the degree of heating or cooling desired.
B890A02S-AAT
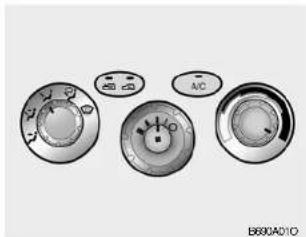
For normal heating operation, set the air intake control switch to the fresh air (☐) position and the air flow control to the floor (↘) position.
For faster heating, the air intake control switch should be set in the recirculate (☐) position.
If the windows fog up, set the air flow control to the defrost ( ) position. (The A/C will turn on automatically and "Fresh" mode will be activated.)
For maximum heat, move the temperature control to "Warm".
1 FEATURES OF YOUR HYUNDAI
106
BI-LEVEL HEATING VENTILATION
B700A02A-AAT
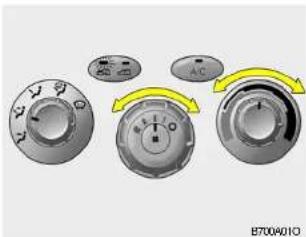
Your Hyundai is equipped with bi-level heating controls. This makes it possible to have cooler air from the dashboard vents and warmer air from the floor outlets at the same time. To use this feature:
o Set the air intake control switch to the fresh air (☐) position.
o Set the air flow control at the bi-level (☑) position.
o Adjust the fan speed control to the desired speed.
o Set the temperature control between "Cool" and "Warm".
B710A01A-AAT
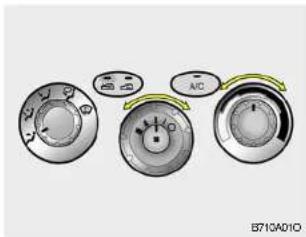
To operate the ventilation system:
o Set the air intake control switch to the fresh air (☐) position.
To direct all intake air to the dashboard vents, set the airflow control to the face (7) position.
o Adjust the fan speed control to the desired speed.
o Set the temperature control between "Cool" and "Warm".
DEFROSTING/DEFOGGING
B720A03FC-AAT
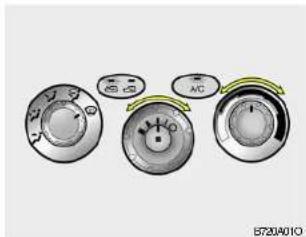
Use the heating/ventilation system to defrost or defog the windshield:
To remove interior fog on the windshield:
o Set the air flow control to the defrost (") position. (The A/C will turn on automatically and "Fresh" mode will be activated.)
o Set the temperature control to the desired position.
o Set the fan speed control between "1" and "4" position.
B720B010
To remove frost or exterior fog on the windshield:
o Set the air flow control to the defrost (⊕) position. (The A/C will turn on automatically and "Fresh" mode will be activated)
o Set the temperature control to warm.
o Set the fan speed control to position "3" or "4".
NOTE:
When the A/C is operated continuously on the floor-defrost level ( W ) or defrost level ( W ), it may cause fog to form on the exterior windshield. If this occurs, set the air flow control to the face level position ( J ) and fan speed control to the low position.
B730A01L-AAT
Operation Tips
To keep dust or unpleasant fumes from entering the car through the ventilation system, temporarily set the air intake control at "Recirculation (☐)". Be sure to return the control to "Fresh (☐)" when the irritation has passed to keep fresh air in the vehicle. This will help keep the driver alert and comfortable.
o Air for the heating/cooling system is drawn in through the grilles just ahead of the windshield. Care should be taken that these are not blocked by leaves, snow, ice or other obstructions.
To prevent interior fog on the windshield, set the air intake control to the fresh air (☑) position, fan speed to the desired position, turn on the air conditioning system, and adjust temperature control to desired temperature.
1 FEATURES OF YOUR HYUNDAI
108
AIR CONDITIONING SYSTEM
B740A01S-AAT
(If installed)
Air Conditioning Switch
The air conditioning is turned on or off by pushing the A/C button on the heating/air conditioning control panel.
B740002A-AAT
Air Conditioning Operation Cooling
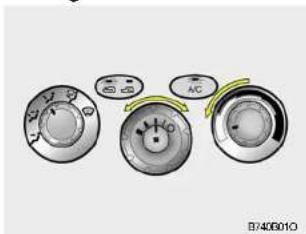
To use the air conditioning to cool the interior:
o Turn on the fan control switch.
o Turn on the air conditioning switch by pushing in on the switch. The air conditioning indicator light should come on at the same time.
o Set the air intake control to "Fresh" mode (☐).
o Set the temperature control to "Cool". ("Cool" provides maximum cooling. The temperature may be moderated by moving the control toward "Warm".)
Adjust the fan control to the desired speed. For greater cooling, turn the fan control to one of the higher speeds or temporarily select the "Recirculation (☐)" position on the air intake control switch.
B740C01A-AAT
De-Humidified Heating
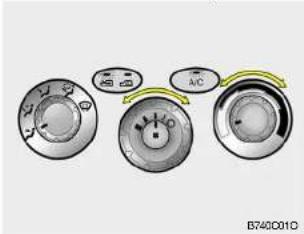
For dehumidified heating:
o Turn on the fan control switch.
o Turn on the air conditioning switch. The air conditioning indicator light should come on at the same time.
o Set the air intake control switch to the fresh air (→) position.
o Set the air flow control to the face (→) position.
o Adjust the fan control to the desired speed.
o For more rapid action, set the fan at one of the higher speeds.
o Adjust the temperature control to provide the desired amount of warmth.
B740D01Y-AAT
Operation Tips
o If the interior of the car is hot when you first get in, open the windows for a few minutes to expel the hot air.
o When you are using the air conditioning system, keep all windows closed to keep hot air out.
When moving slowly, as in heavy traffic, shift to a lower gear. This increases engine speed, which in turn increases the speed of the air conditioning compressor.
o On steep grades, turn the air conditioning off to avoid the possibility of the engine overheating.
During winter months or in periods when the air conditioning is not used regularly, run the air conditioning once every month for a few minutes. This will help circulate the lubricants and keep your system in peak operating condition.
1 FEATURES OF YOUR HYUNDAI
110
AUTOMATIC HEATING AND COOLING CONTROL SYSTEM
B970A01Y-AAT
(If installed)
Your Hyundai is equipped with an automatic heating and cooling control system controlled by simply setting the desired temperature.
B970B01C-GAT
Heating and Cooling Controls
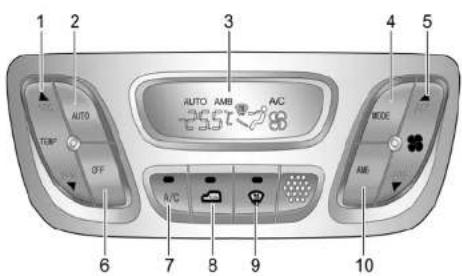
B970B010
- Temperature Control Button
- AUTO (Automatic Control) Switch
- Display Window
- Air Flow Control Switch
-
Blower Fan Control Switch
-
OFF Switch
- Air Conditioning Switch
- Air Intake Control Switch
- Defroster Switch
10.Ambient Temperature Switch
B970C02L-GAT
Automatic Operation
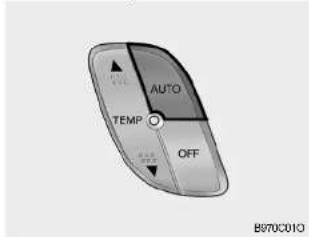
The FATC (Full Automatic Temperature Control) system automatically controls the heating and cooling by doing as follows:
- Push the "AUTO" switch. The indicator light will illuminate confirming that the Face, Floor and/or Bi-Level modes as well as the blower speed and air conditioner will be controlled automatically.
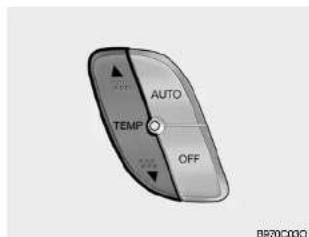
- Push the "TEMP" button to set the desired temperature.
The temperature will increase to the maximum 32^(90^) by pushing on the ▲ button. Each push of the button will cause the temperature to increase by 0.5^(1^) .
The temperature will decrease to the minimum 17^(62^) by pushing on the ▼ button. Each push of the button will cause the temperature to decrease by 0.5^(1^) .
NOTE:
o If the battery has been discharged or disconnected, the temperature mode will reset to Centigrade degree.
This is a normal condition and you can adjust the temperature mode from Centigrade to Fahrenheit as follows;
Press the TEMP down (▼) button 3 seconds or more with the AMB button held down. The display shows that the unit of temperature is adjusted to Centigrade or Fahrenheit (°C → °F or °F → °C).
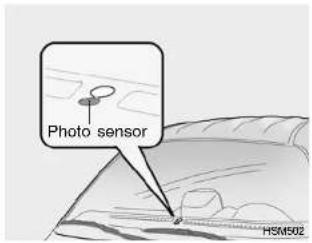
o Never place things on the sensor which is located in the car on the Instrument panel to ensure better control of the heating and cooling system.
1 FEATURES OF YOUR HYUNDAI
112
B995A01Y-GAT
AMBIENT SWITCH
TEMPERATURE
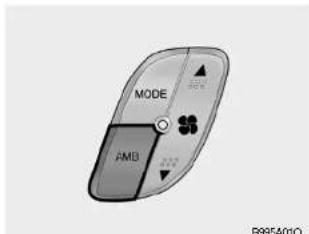
Pressing the "AMB" button displays the ambient temperature on display.
B900A01Y-AAT
MANUAL OPERATION
The heating and cooling system can be controlled manually as well as by pushing buttons other than the "AUTO" button. At this state, the system sequentially works according to the order of buttons selected.
The function of the buttons which are not selected will be controlled automatically.
Press the "AUTO" button in order to convert to automatic control of the system.
B960001Y-AAT
Fan Speed Control
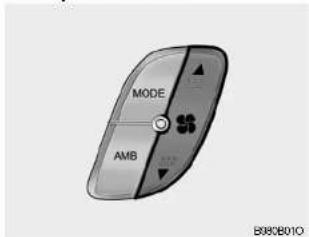
The fan speed can be set to the desired speed by pressing the appropriate fan speed control button. The higher the fan speed is, the more air is delivered. Pressing the "OFF" button turns off the fan.
B67DC02O-AAT
Air Intake Control Switch
This is used to select fresh outside air or recirculate inside air.
To change the air intake control mode, (Fresh mode, Recirculation mode) push the control button.
FRESH MODE ( ): The indicator light on the button goes off when the air intake control is in fresh mode.
RECIRCULATION MODE ( 📄): The indicator light on the button is illuminated when the air intake control is in recirculation mode.
With the "Fresh" mode selected, air enters the vehicle from the outside and is heated or cooled according to the function selected.
With the "Recirculation" mode selected, and air from within the passenger compartment will be drawn through the heating system and heated or cooled according to the function selected.
NOTE:
It should be noted that prolonged operation of the heating in "Recirculation" mode (will give rise to fogging of the windshield and side windows and the air within the passenger compartment will become stale. In addition, prolonged use of the air conditioning with the "Recirculation" mode (selected may result in the air within the passenger compartment becoming excessively dry.
B740A01S-AAT
Air Conditioning Switch
The air conditioning is turned on or off by pushing the A/C button on the heating/air conditioning control panel.
1 FEATURES OF YOUR HYUNDAI
114
B960D01Y-AAT
Heating and Cooling System Off
Press the "OFF" button to stop the operation of the heating and cooling system.
B900E01L-GAT
Air Flow Control
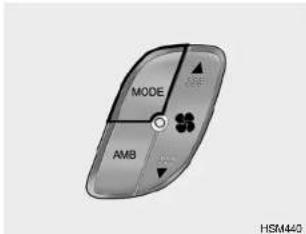
This is used to direct the flow of air. Air can be directed to the floor, dashboard outlets, or windshield. Four symbols are used to represent Face, Bi-Level, Floor and Floor-Defrost position.
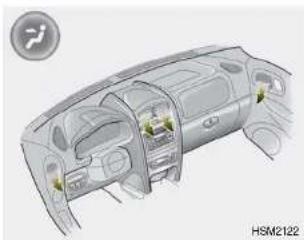
natural_image
Interior view of a car dashboard with visible seats and dashboard, no text or symbols present
Face-Level
When selecting the "Face-Level", the indicator light will come on, causing air to be discharged through the face level vents.
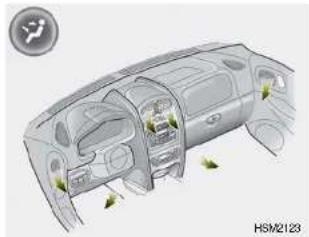
natural_image
Diagram of a car interior showing dashboard, vent, and airway (no text or symbols)
Bi-Level
When selecting the "Bi-Level", the indicator light will come on and the air will be discharged through the face vents and the floor vents. This makes it possible to have cooler air from the dashboard vents and warmer air from the floor outlets at the same time.
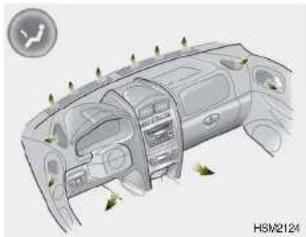
natural_image
Interior view of a car dashboard with airbags and decorative greenery (no text or symbols)
Floor-Level
When selecting the "Floor-Level", the indicator light will come on and the air will be discharged through the floor vents, windshield defrosternozzle, side defroster nozzle and side ventilator.
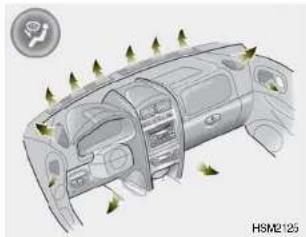
natural_image
Interior view of a car dashboard with airbags and ventilation slots (no text or symbols visible)
Floor-Defrost Level
When selecting the "Floor-Defrost Level", the indicator light will come on and the air will be discharged through the windshield defroster nozzle, the floor vents, side defroster nozzle and side ventilator.
1 FEATURES OF YOUR HYUNDAI
116
B960F01O-GAT
Defrost Switch
When the "Defrost" button is pressed, the "☐" mode will be automatically selected and the air will be discharged through the windshield defroster nozzle, side defroster nozzle and side ventilator. To assist in defrosting, the air conditioning will operate if ambient temperature is higher than 3.5°C and automatically turns off if the ambient temperature drops below 3.5°C.
B740001Y-AAT
Operation Tips
o If the interior of the car is hot when you first get in, open the windows for a few minutes to expel the hot air.
o When you are using the air conditioning system, keep all windows closed to keep hot air out.
When moving slowly, as in heavy traffic, shift to a lower gear. This increases engine speed, which in turn increases the speed of the air conditioning compressor.
o On steep grades, turn the air conditioning off to avoid the possibility of the engine overheating.
During winter months or in periods when the air conditioning is not used regularly, run the air conditioning once every month for a few minutes. This will help circulate the lubricants and keep your system in peak operating condition.
AIR CONDITIONER FILTER
B780A06A-GAT
(FOR EVAPORATOR AND BLOWER UNIT) (If installed)
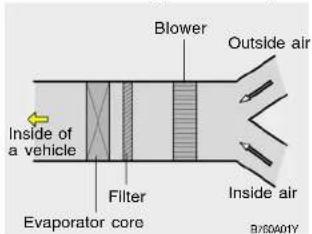
The air conditioner filter is located in front of the evaporator unit behind the glove box.
It operates to decrease the amount of pollutants entering the car.
To replace the air conditioner filter, refer to the page 6-29.

CAUTION:
o Replace the filter every 15,000 km (10,000 miles) or once a year. If the car is being driven in severe conditions such as dusty, rough roads, more frequent air conditioner filter inspections and changes are required.
o When the air flow rate is suddenly decreased, the system should be checked at an authorized dealer.
1 FEATURES OF YOUR HYUNDAI
118
STEREO SOUND SYSTEM
B750A02A-AAT
How Car Audio Works
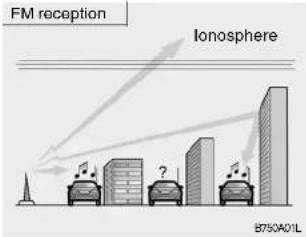
AM and FM radio signals are broadcast from transmitter towers located around your city. They are intercepted by the radio antenna on your car. This signal is then received by the radio and sent to your car speakers.
When a strong radio signal has reached your vehicle, the precise engineering of your audio system ensures the best possible quality reproduction. However, in some cases the signal coming to your vehicle may not be strong and clear. This can be due to factors such as the distance from the radio station, closeness of other strong radio stations or the presence of buildings, bridges or other large obstructions in the area.
AM reception
Ionosphere
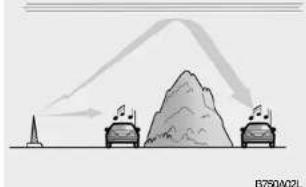
natural_image
Illustration of two cars approaching a mountain peak with directional arrows, no text or symbols presentAM broadcasts can be received at greater distances than FM broadcasts. This is because AM radio waves are transmitted at low frequencies. These long, low frequency radio waves can follow the curvature of the earth rather than travelling straight out into the atmosphere. In addition, they curve around obstructions so that they can provide better signal coverage.
FM radio station
Unobstructed
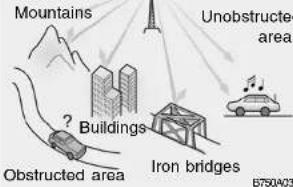
FM broadcasts are transmitted at high frequencies and do not bend to follow the earth's surface. Because of this, FM broadcasts generally begin to fade at short distances from the station. Also, FM signals are easily affected by buildings, mountains, or other obstructions. These can result in certain listening conditions which might lead you to believe a problem exists with your radio. The following conditions are normal and do not indicate radio trouble:
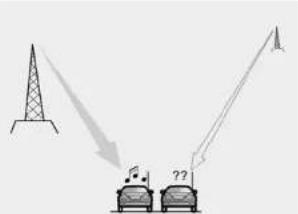
B750404L
o Fading - As your car moves away from the radio station, the signal will weaken and sound will begin to fade. When this occurs, we suggest that you select another stronger station.
o Flutter/Static - Weak FM signals or large obstructions between the transmitter and your radio can disturb the signal causing static or fluttering noises to occur. Reducing the treble level may lessen this effect until the disturbance clears.
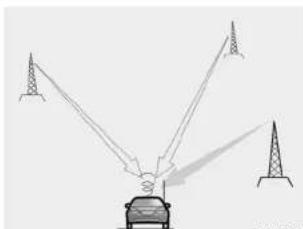
natural_image
Diagram of a car receiving signal transmission from multiple antennas (no text or labels)B750M06L
o Station Swapping - As a FM signal weakens, another more powerful signal near the same frequency may begin to play. This is because your radio is designed to lock onto the clearest signal. If this occurs, select another station with a stronger signal.
o Multi-Path Cancellation - Radio signals being received from several directions can cause distortion or fluttering. This can be caused by a direct and reflected signal from the same station, or by signals from two stations with close frequencies. If this occurs, select another station until the condition has passed.
B750302Y-AAT
Using a cellular phone or a two-way radio
When a cellular phone is used inside the vehicle, noise may be produced from the audio equipment. This does not mean that something is wrong with the audio equipment. In such a case, use the cellular phone at a place as far as possible from the audio equipment.

CAUTION:
When using a communication system such as a cellular phone or a radio inside the vehicle, a separate external antenna must be fitted. When a cellular phone or a radio set is used with an internal antenna alone, it may interfere with the vehicle's electrical system and adversely affect safe operation of the vehicle.

WARNING:
Don't use a cellular phone when you are driving, you must stop at a safe place to use a cellular phone.
1 FEATURES OF YOUR HYUNDAI
120
AUDIO SYSTEM
H240A01C-GAT STEREO RADIO OPERATION (H240) (If Installed)
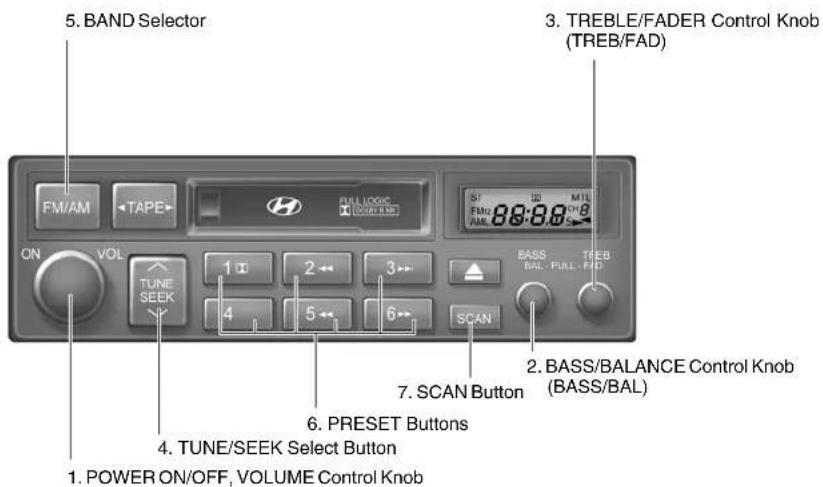
H240A01HP
H240B090-AAT
1. POWER ON-OFF Control Knob
The radio unit may be operated when the ignition key is in the "ACC" or "ON" position. Press the knob to switch the power on. The LCD shows the radio frequency in the radio mode or the tape direction indicator in the tape mode. To switch the power off, press the knob again.
VOLUME Control
Rotate the knob clockwise to increase the volume and turn the knob counterclockwise to reduce the volume.
2. BASS Control Knob
Press to pop the knob out and turn to the left or right for the desired bass tone.
BAL (Balance Control) Knob
Pull the bass control knob further out. Turn the control knob clockwise to emphasize right speaker sound (left speaker sound will be attenuated).
When the control knob is turned counterclockwise, left speaker sound will be emphasized (right speaker sound will be attenuated).
3. TREB (Treble Control) Knob
Press to pop the knob out and turn to the left or right for the desired treble tone.
FAD (Fader Control) Knob
Pull the treble control knob further out. Turn the control knob counterclockwise to emphasize front speaker sound (rear speaker sound will be attenuated). When the control knob is turned clockwise, rear speaker sound will be emphasized (front speaker sound will be attenuated).
4. TUNE (Manual) Select Button
Press the side or side to increase or to decrease the frequency. Press either button and hold down to continuously scroll. Release button once the desired station is reached.
SEEK Operation
(Automatic Channel Selection)
Press the TUNE select button 0.5 sec or more. Releasing it will automatically tune to the next available station with a beep sound.
When the side is pressed longer than 0.5 second, releasing it will automatically tune to the next higher frequency and when the side is pressed longer than 0.5 second, releasing it will automatically tune to the next lower frequency.
5. BAND Selector
Pressing the FMAM button changes the AM, FM1 and FM2 bands. The mode selected is displayed on LCD.
6. PRESET STATION SELECT Buttons
Six (6) stations for AM, FM1 and FM2 respectively can be preset in the electronic memory circuit on this unit.
1 FEATURES OF YOUR HYUNDAI
122
HOW TO PRESET STATIONS
Six AM and twelve FM stations may be programmed into the memory of the radio. Then, by simply pressing the band select button and/or one of the six station select buttons, you may recall any of these stations instantly. To program the stations, follow these steps:
o Press band selector to set the band for AM, FM1, or FM2.
o Select the desired station to be stored by seek or manual tuning.
o Determine the preset station select button you wish to use to access that station.
o Press the station select button for more than two seconds. A select button indicator will show in the display indicating which select button you have depressed. The frequency display will flash after it has been stored into the memory with a beep sound. You should then release the button, and proceed to program the next desired station. A total of 18 stations can be programmed by selecting one AM and two FM stations per button.
When completed, any preset station may be recalled by selecting AM, FM1 or FM2 band and the appropriate station button.
7. SCAN Button
When the scan button is pressed, the frequency will increase and the receivable stations will be tuned in one after another, receiving each station for 5 seconds. To stop scanning, press the scan button again.

CAUTION:
Do not place beverages close to the audio system. The audio system mechanism may be damaged if you spill them.
o Do not impact on the audio system, or the audio system mechanism could be damaged.
H240C010-GAT CASSETTE TAPE PLAYER OPERATION (H240) (If Installed)
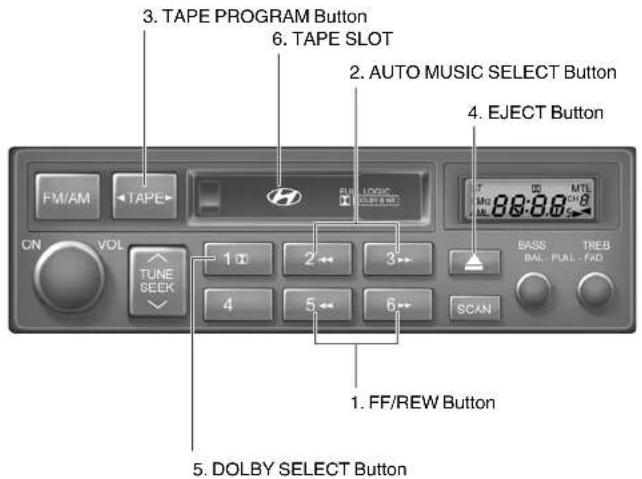
H240C01HP
1 FEATURES OF YOUR HYUNDAI
124
H2400030-AAT
1. FF/REW Button
o The FF (fast forward tape winding) starts when the ▶ button is pressed during PLAY or REW.
o PLAY starts when the ▶button is pressed again during the FF.
o REW (rewinding) starts when the ◀ button is pressed during PLAY or FF.
o PLAY starts when the ◀ button is pressed again during REW.
2. AUTO MUSIC SELECT Button
Press the button to find the starting point of each song in a prerecorded music tape.
The quiet space between songs (must have at least a 4 sec. gap) can be identified by the AUTO MUSIC SELECT button.
o Pressing the ▶ button will play the beginning of the next music segment.
o Pressing the ◀button will start replay at the beginning of the music just listened to.
3. TAPE PROGRAM Button
This allows you to play the reverse side of the tape by merely pressing the program button.
An arrow will appear in the display to show tape direction.
NOTE:
When tape operation is abnormal or ER8 fault code is displayed, Press eject button more than 5 seconds to initialize the deck.
4. EJECT Button
o When the EJECT button is pressed with a cassette loaded, the cassette will eject.
o When the EJECT button is pressed during FF/REW, the cassette will eject.
5. DOLBY SELECT Button
If you get background noise during PLAY, you can reduce this considerably by merely pressing DOLBY SELECT button.
If you want to release, press the button again.

CAUTION:
o Do not insert anything like coins into the player slot as damage to the unit may occur.
Do not place beverages close to the audio system. The playback mechanism may be damaged if you spill them.
o Do not impact on the audio system, or the playback mechanism could be damaged.
H280A01O-AAT
STEREO RADIO OPERATION (H260) (If installed)
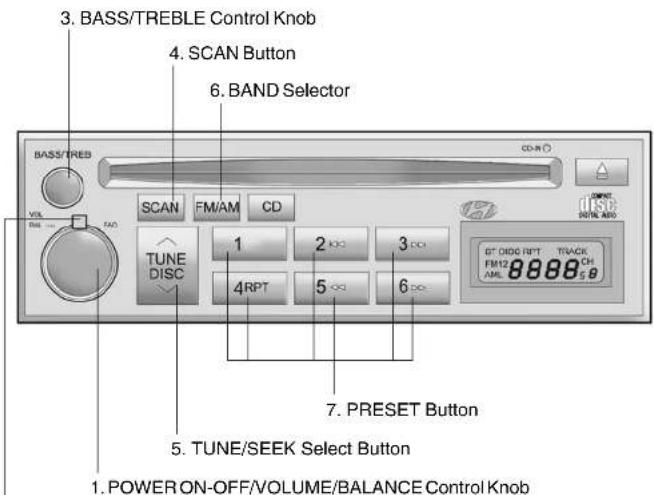
- FADER Control Knob
H260A01A
1 FEATURES OF YOUR HYUNDAI
126
H260B04O-AAT
1. POWER ON-OFF Control Knob
The radio unit may be operated when the ignition key is in the 'ACC' or 'ON' position. Press the knob to switch the power on. The LCD shows the radio frequency in the radio mode or the CD track indicator in the CD mode. To switch the power off, press the knob again.
VOLUME Control
Rotate the knob clockwise to increase the volume and turn the knob counterclockwise to reduce the volume.
BALANCE Control
Pull and turn the control knob clockwise to emphasize right speaker sound (left speaker sound will be attenuated). When the control knob is turned counterclockwise, left speaker sound will be emphasized (right speaker sound will be attenuated).
2. FAD (Fader Control) Knob
Turn the control knob counterclockwise to emphasize front speaker sound (rear speakers sound will be attenuated). When the control knob is turned clockwise, rear speaker sound will be emphasized (front speaker sound will be attenuated).
3. BASS Control Knob
Press to pop the knob out and turn to the left or right for the desired bass tone.
TREB (Treble Control) Knob
Further pull-lock position of popped-up knob. Turn to the left or right for the desired treble tone.
4. SCAN Button
When the scan button is pressed, the frequency will increase and the receivable stations will be tuned in one after another, receiving each station for 5 seconds. To stop scanning, press the scan button again.
5. TUNE (Manual) Select Button
Press the ( ) side or ( ) side to increase or to decrease the frequency. With the button held down for 0.5 sec. or more, the stop signal (broadcasting radio wave) is ignored and channel selection continues.
SEEK Operation
(Automatic Channel Selection)
Press the TUNE select button for 0.5 sec or more. Releasing it will automatically tune to the next available station with a beep sound.
When the ( ) side is pressed longer than 0.5 second, releasing will automatically tune to the next higher frequency and when the ( ) side is pressed longer than 0.5 second, releasing will automatically tune to the next lower frequency.
6. BAND Selector
Pressing the FM/AM button changes the AM, FM1 and FM2 bands. The mode selected is displayed on LCD.
7. PRESET STATION SELECT Button
Six (6) stations for AM, FM1 and FM2 respectively can be preset in the electronic memory circuit on this unit.
HOW TO PRESET STATIONS
Six AM and twelve FM stations may be programmed into the memory of the radio. Then, by simply pressing the band select button and/or one of the six station select buttons, you may recall any of these stations instantly. To program the stations, follow these steps:
o Press band selector to set the band for AM, FM1, and FM2.
o Select the desired station to be stored by seek, scan or manual tuning.
o Determine the preset station select button you wish to use to access that station.
o Press the station select button for more than two seconds. A select button indicator will show in the display indicating which select button you have depressed. The frequency display will flash after it has been stored into the memory.
You should then release the button, and proceed to program the next desired station. A total of 18 stations can be programmed by selecting one AM and two FM stations per button.
When completed, any preset station may be recalled by selecting AM, FM1 or FM2 band and the appropriate station button.

CAUTION:
o Do not place beverages close to the audio system. The audio system mechanism may be damaged if you spill them.
o Do not impact on the audio system, or the audio system mechanism could be damaged.
1 FEATURES OF YOUR HYUNDAI
128
H280B010-AAT COMPACT DISC PLAYER OPERATION (H260) (If installed)
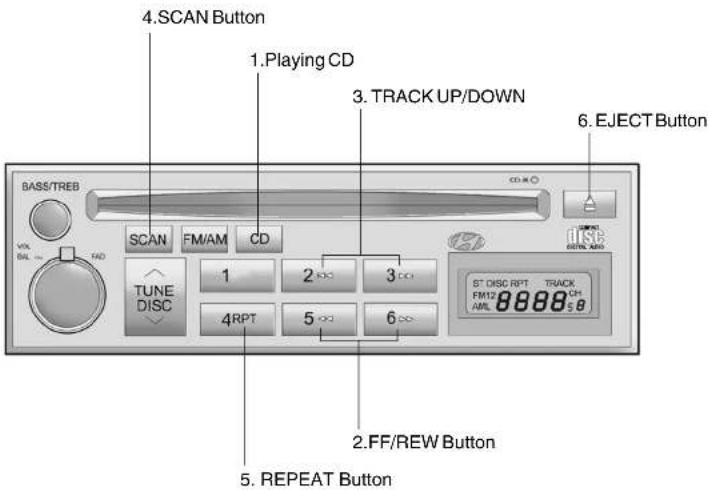
H260AD1A
B2800040-AAT
1. Playing CD
o Insert the CD with the label facing upward.
o Insert the CD to start CD playback, during radio operation.
When a disc is in the CD deck, if you press the CD button, the CD player will begin playing even if the radio is being used.
o The CD player can be used when the ignition switch is in either the "ON" or "ACC" position.
2. FF/REW (▶▶/◀◀)
If you want to fast forward or reverse through the compact disc track, push and hold the FF (▶) or REW (◀) button.
When you release the button, the compact disc player will resume playing.
3. TRACK UP/DOWN
o The desired track on the disc currently being played can be selected using the track number.
o Press ▶once to skip forward to the beginning of the next track. Press ◀once to skip back to the beginning of the track.
4. SCAN Button
o Press the SCAN button to playback the first 10 seconds of each track.
o Press the SCAN button again within 10 sec. when you have reached the desired track.
5. REPEAT Button
To repeat the track you are currently listening to, press the RPT button. To cancel, press again.
o If you do not release RPT operation when the track ends, it will automatically be replayed.
This process will be continued until you push the button again.
6. EJECT Button
When the EJECT button ▲ is pressed with a CD loaded, the CD will eject.
NOTE:
o If the CD does not operate properly or if the ER2 fault code is displayed, use one of two methods to reset the CD deck function.
- Remove the audio fuse for 5 minutes. Then, reinstall the audio fuse.
- Disconnect the negative terminal of the battery and wait 5 minutes. Then reconnect the negative battery terminal.
To assure proper operation of the unit, keep the vehicle interior temperature within a normal range by using the vehicle's air conditioning or heating system.
o When replacing the fuse, replace it with a fuse having the correct capacity.
o The preset station frequencies are all erased when the car battery is disconnected. Therefore, all data will have to be set again if this should occur.
1 FEATURES OF YOUR HYUNDAI
130
Do not add any oil to the rotating parts. Keep magnets, screwdrivers and other metallic objects away from the tape mechanism and head.
o This equipment is designed to be used only in a 12 volt DC battery system with negative ground.
o This unit is made of precision parts.
Do not attempt to disassemble or adjust any parts.
When driving your vehicle, be sure to keep the volume of the unit set low enough to allow you to hear sounds coming from the outside.
o Do not expose this equipment (including the speakers) to water or excessive moisture.

CAUTION:
o Do not insert warped or poor quality discs into the CD player as damage to the unit may occur.
o Do not insert anything like coins into the player slot as damage to the unit may occur.
Do not place beverages close to the audio system. The playback mechanism may be damaged if you spill them.
o Do not impact on the audio system, or the playback mechanism could be damaged.
o Driving on the off-roads or other vibrations may skip your compact disc. Do not use the audio system on off-roads as the discs could be scratched and damaged.
Do not grip or pull out the disc with your hand while the disc is being pulled into the unit by the self loading mechanism. These can cause poor disc scratching to occur or trouble in the compact disc player.
o Avoid using CD-Recordable or CD-Rewritable as the player could not be operated in recording way of the CD maker. When using the compact disc player, genuine CDs are recommended.
B260E01E-AAT
CD AUTO CHANGER (H260) (If installed)
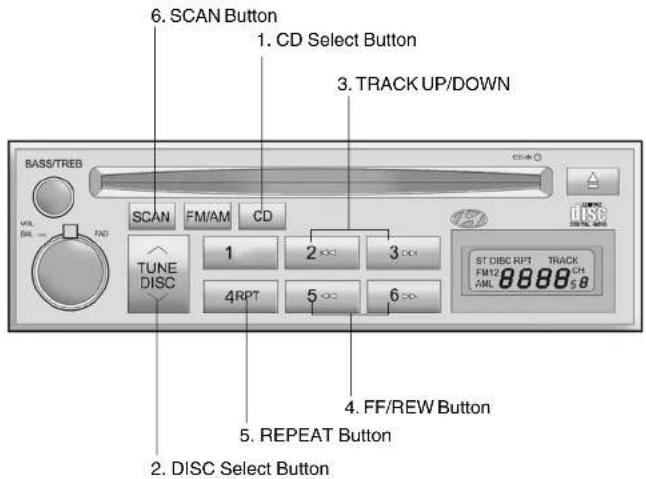
1 FEATURES OF YOUR HYUNDAI
132
B280F03O-AAT
The CD auto changer connected with audio system is located in the right side of the luggage compartment.
o To use the CD auto changer.
- Open the sliding lid of the CD auto changer.
- To eject the compact disc magazine, press the EJECT button located inside the CD auto changer.
- Insert the discs into the magazine.
- Push the magazine into the CD auto changer and close the sliding lid.
o The CD auto changer can be used when the ignition switch is in either "ON" or "ACC" position.
1. CD Select Button
When the CD changer have discs inserted in the magazine, if you press the "CD" button, the CD changer can be used even if the radio is being used. The Hyundai CD changer can hold up to eight discs. The disc number will be lit, and the track number, and elapsed time will be displayed.
2. DISC Select Button
To select the CD you want, push "the" to change the disc number.
3. TRACK UP/DOWN
o The desired track on the disc currently being played can be selected using the track number.
o Press ▶▶ once to skip forward to the beginning of the next track. Press ◀◀ once to skip back to the beginning of the track.
4. FF/REW (▶▶ /◀◀)
If you want to fast forward or reverse through the compact disc track, push and hold in the FF (▶▶) or REW (◀◀) button.
When you release the button, the compact disc player will resume playing.
5. REPEAT
To repeat the music you are listening to, press the RPT button. To cancel, press again.
o If you do not release RPT operation when the track ends, it will automatically be replayed.
This process will be continued until you will be pushed button again. To turn off the repeat, features.
6. SCAN Button
o Press the SCAN button to playback the first 10 seconds of each track.
o Press the SCAN button again within 10 sec. for the desired track.
NOTE:
To assure proper operation of the unit, keep the vehicle interior temperature within a normal range by using the vehicle's air conditioning or heating system.
o When replacing the fuse, replace it with a fuse having the correct capacity.
o This equipment is designed to be used only in a 12 volt DC battery system with negative ground.
o This unit is made of precision parts. Do not attempt to disassemble or adjust any parts.
When driving your vehicle, be sure to keep the volume of the unit set low enough to allow you to hear sounds coming from the outside.

CAUTION:
o Do not insert warped or poor quality discs into the CD changer as damage to the unit may occur.
o Do not insert anything like coins into the CD changer slot as damage to the unit may occur.
Do not place beverages close to the audio system. The playback mechanism may be damaged if you spill them.
o Do not impact on the audio system, or the playback mechanism could be damaged.
o Driving on the off-roads or other vibrations may skip your compact disc. Do not use the audio system on off-roads as the discs could be scratched and damaged.
Do not grip or pull out the disc with your hand while the disc is being pulled into the unit by the self loading mechanism. These can cause poor disc scratching to occur or trouble in the CD changer.
o Avoid using CD-Recordable or CD-Rewritable as the changer could not be operated in recording way of the CD maker. When using the compact disc changer, genuine CDs are recommended.
1 FEATURES OF YOUR HYUNDAI
134
H290A01O-GAT
STEREO RADIO OPERATION (H290) (If installed)
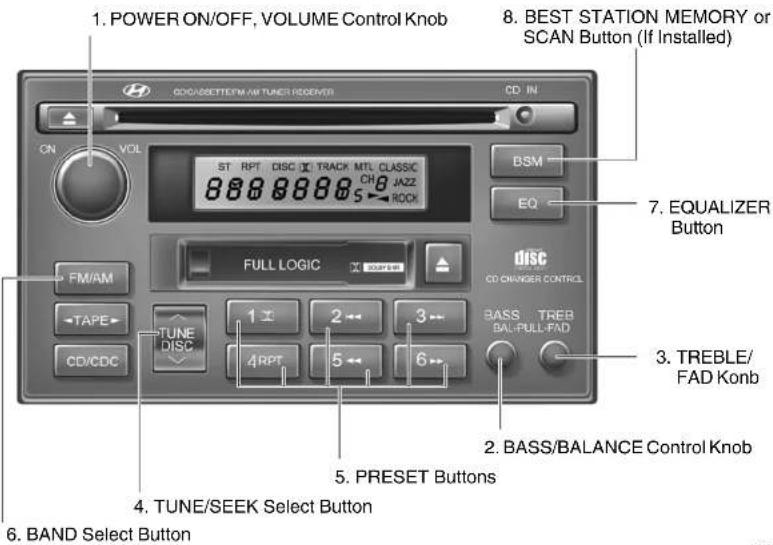
H290A01HP
H290B040-GAT
1. POWER ON-OFF Control Knob
The radio unit may be operated when the ignition key is in the "ACC" or "ON" position. Press the button to switch the power on. The display shows the radio frequency in the radio mode or the tape direction indicator in the tape mode, or CD track in the CD mode. To switch the power off, press the button again.
VOLUME Control
Rotate the knob clockwise to increase the volume and turn the knob counterclockwise to reduce the volume.
2. BASS/BALANCE Control Knob BASS Control Knob
Press to pop the knob out. To increase the bass, rotate the knob clockwise, while to decrease the bass, rotate the knob counterclockwise.
BALANCE Control knob
Further pull the popped-up knob. Rotate the knob clockwise to emphasize right speaker sound (left speaker sound will be attenuated). When the control knob is turned counterclockwise, left speaker sound will be emphasized (right speaker sound will be attenuated).
3. TREBLE/FAD Knob TREBLE Control Knob
Press to pop the knob out and turn to the left or right for the desired treble tone.
FAD (Fader Control) Knob
Further pull the popped-up knob. Turn the control knob counterclockwise to emphasize front speaker sound (rear speakers sound will be attenuated). When the control knob is turned clockwise, rear speaker sound will be emphasized (front speaker sound will be attenuated).
4. TUNE (Manual) Select Button
Press the ( ) side or ( ) side to increase or to decrease the frequency. With the button held down for 0.5 sec. or more, the stop signal (broadcasting radio wave) is ignored and channel selection continues.
SEEK Operation (Automatic Channel Selection)
Press the TUNE select button for 0.5 sec or more. Releasing it will automatically tune to the next available station with a beep sound.
When the ( ) side is pressed longer than 0.5 second, releasing will automatically tune to the next higher frequency and when the ( ) side is pressed longer than 0.5 second, releasing will automatically tune to the next lower frequency.
5. PRESET STATION Select Buttons
Six (6) stations for AM, FM1 and FM2 respectively can be preset in the electronic memory circuit.
1 FEATURES OF YOUR HYUNDAI
136
HOW TO PRESET STATIONS
Six AM and twelve FM stations may be programmed into the memory of the radio. Then, by simply pressing the band select button and/or one of the six station select buttons, you may recall any of these stations instantly. To program the stations, follow these steps:
o Press band selector to set the band for AM, FM1 and FM2.
o Select the desired station to be stored by seek or manual tuning.
o Determine the preset station select button you wish to use to access that station.
o Press the station select button for more than two seconds. A select button indicator will show in the display indicating which select button you have depressed. The frequency display will flash after it has been stored into the memory with a beep sound. You should then release the button, and proceed to program the next desired station. A total of 18 stations can be programmed by selecting one AM and two FM station per button.
When completed, any preset station may be recalled by selecting AM, FM1 or FM2 band and the appropriate station button.
6. BAND Selector
Pressing the FM/AM button changes the AM, FM1 and FM2 bands. The mode selected is shown on the display.
7. EQUALIZER Button
Press the EQ button to select the CLASSIC, JAZZ, ROCK and DEFEAT MODE for the desired tone quality. Each press of the button changes the display as follows;
$$ \text { CLASSIC } \rightarrow \text { JAZZ } \rightarrow \text { ROCK } \rightarrow \text { DEFEAT } $$

8. Best Station Memory Button (BSM) (If installed)
When the BSM button is pressed for two seconds or longer, the six channels from the highest field intensity are selected next and stored in memory. The stations selected are stored in the sequence frequency from the first preset key.
SCAN Button (If installed)
When the scan button is pressed, the frequency will increase and the receivable stations will be tuned in one after another, receiving each station for 5 seconds. To stop scanning, press the scan button again.

CAUTION:
o Do not place beverages close to the audio system. The audio system mechanism may be damaged if you spill them.
o Do not impact on the audio system, or the playback mechanism could be damaged.
FEATURES OF YOUR HYUNDAI
137
H290C010-GAT
CASSETTE TAPE PLAYER OPERATION (H290) (If installed)
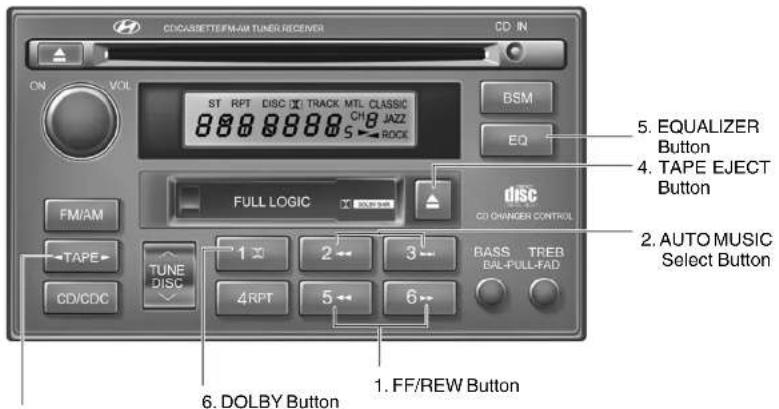
- TAPE PROGRAM Button
H290C01HP
1 FEATURES OF YOUR HYUNDAI
138
H2900020-GAT
1. FF/REW Button
o Fast forward tape winding starts when the FF (▶▶) button is pressed during the PLAY or REW mode.
o Tape play starts when the FF (▶) button is pressed again during the FF mode.
o Tape rewinding starts when the REW (◀◀) button is pressed during the PLAY or FF mode.
o Tape play starts when the REW (◀◀ button pressed again during the REW mode.
2. AUTO MUSIC Select Button
Press the button to find the starting point of each song in a prerecorded music tape. The quiet space between songs (must have at least a 4 sec. gap) can be accepted by the AUTO MUSIC Select button.
o Pressing the ▶ button will play the beginning of the next music segment.
o Pressing the ◀◀ button will start replay at the beginning of the music just listened to.
3. TAPE PROGRAM Button
This allows you to play the reverse side of the tape by merely depressing the program button. An arrow will appear in the display to show tape direction.
4. TAPE EJECT button
o When the ▲button is pressed with the cassette loaded, the cassette is ejected.
o When the ▲ button is pressed during the FF/REW mode, the cassette is ejected.
5. EQ Button
Press the EQ button to select the CLASSIC, JAZZ, ROCK and DEFEAT MODE for the desired tone quality. Each press of the button changes the display as follows;
CLASSIC → JAZZ → ROCK → DEFEAT
6. DOLBY Button
If you get background noise during tape PLAY, you can reduce this considerably by merely pressing the DOLBY button. If you want to cancel the DOLBY feature, press the button again.

CAUTION:
o Do not insert anything like coins into the player slot as damage to the unit may occur.
Do not place beverages close to the audio system. The playback mechanism may be damaged if you spill them.
o Do not impact on the audio system, or the playback mechanism could be damaged.
H290E010-GAT
COMPACT DISC PLAYER OPERATION (H290) (If installed)
- CD EJECT Button
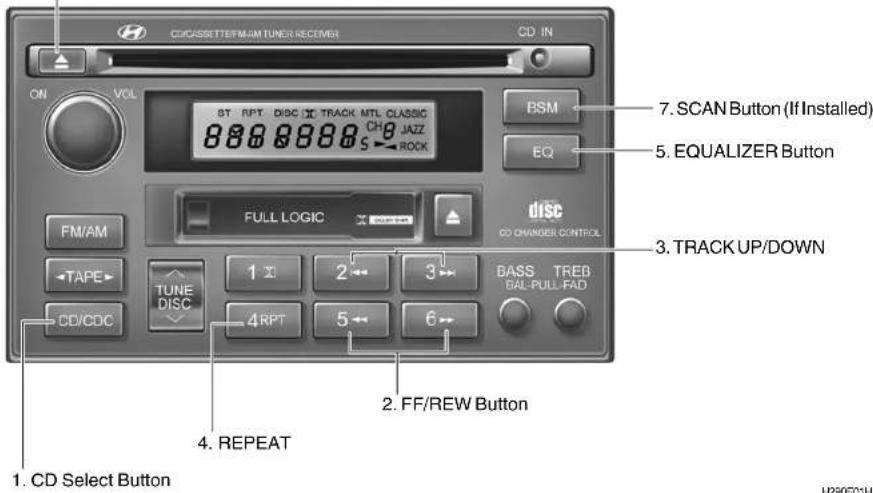
1 FEATURES OF YOUR HYUNDAI
140
H290F030-AAT
1. CD Select Button
o Insert the CD with the label facing upward.
o Insert the CD to start CD playback, during radio operation or cassette tape playing.
When a disc is in the CD deck, if you press the play button the CD player will begin playing even if the radio or cassette player is being used.
o The CD player can be used when the ignition switch is in either the "ON" or "ACC" position.
2. FF/REW (▶▶/◀◀)
If you want to fast forward or reverse through the compact disc track, push and hold in the FF (▶▶) or REW (◀◀) button.
When you release the button, the compact disc player will resume playing.
3. TRACK UP/DOWN
o The desired track on the disc currently being played can be selected using the track number.
o Press ▶▶button once to skip forward to the beginning of the next track. Press ◀◀button once to skip back to the beginning of the track.
4. REPEAT
To repeat the music you are listening to, press the RPT button. To cancel, press again.
o If you do not release RPT operation when the track ends, it will automatically be replayed.
This process will be continued until you push the button again.
5. EQUALIZER Button
Press the EQ button to select the CLASSIC, JAZZ, ROCK and DEFEAT MODE for the desired tone quality. Each press of the button changes the display as follows;
6. CD EJECT Button
When the ▲ button is pressed with the CD loaded, the CD is ejected.
7. SCAN Button
o Press the SCAN button to playback the first 10 seconds of each track.
o Press the SCAN button again within 10 sec. for the desired track.
NOTE:
To assure proper operation of the unit, keep the vehicle interior temperature within a normal range by using the vehicle's air conditioning or heating system.
o When replacing the fuse, replace it with a fuse having the correct capacity.
The preset station frequencies are all erased when the car battery is disconnected. Therefore, all data will have to be set again if this should occur.
CLASSIC → JAZZ → ROCK → DEFEAT
Do not add any oil to the rotating parts. Keep magnets, screwdrivers and other metallic objects away from the tape mechanism and head.
o This equipment is designed to be used only in a 12 volt DC battery system with negative ground.
o This unit is made of precision parts. Do not attempt to disassemble or adjust any parts.
When driving your vehicle, be sure to keep the volume of the unit set low enough to allow you to hear sounds coming from the outside.
o Do not expose this equipment (including the speakers and tape) to water or excessive moisture.

CAUTION:
o Do not insert warped or poor quality discs into the CD player as damage to the unit may occur.
o Do not insert anything like coins into the player slot as damage to the unit may occur.
Do not place beverages close to the audio system. The playback mechanism may be damaged if you spill them.
o Do not impact on the audio system, or the playback mechanism could be damaged.
o Driving on the off-roads or other vibrations may skip your compact disc. Do not use the audio system on off-roads as the discs could be scratched and damaged.
Do not grip or pull out the disc with your hand while the disc is being pulled into the unit by the self loading mechanism. These can cause poor disc scratching to occur or trouble in the compact disc player.
o Avoid using CD-Recordable or CD-Rewritable as the player could not be operated in recording way of the CD maker. When using the compact disc player, genuine CDs are recommended.
1 FEATURES OF YOUR HYUNDAI
142
H290G01C-GAT CD AUTO CHANGER (H290) (If installed)
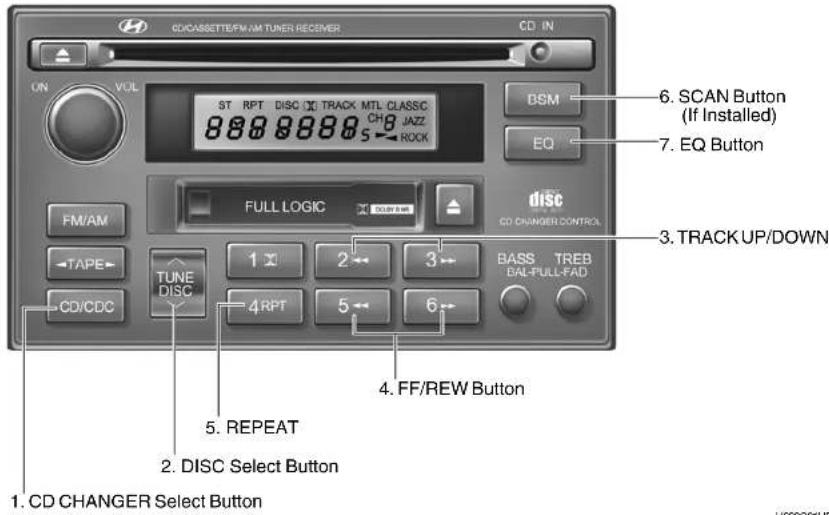
B290H03HP-GAT
The CD auto changer is located in the right side of the luggage compartment.
o To use the CD auto changer.
- Open the sliding lid of the CD auto changer.
- To eject the compact disc magazine, press the EJECT button located inside the CD auto changer.
- Insert the discs into the magazine.
- Push the magazine into the CD auto changer and close the sliding lid.
o The CD auto changer can be used when the ignition switch is in either "ON" or "ACC" position.
1. CD CHANGER Select Button
When the CD changer magazine contains discs, press the "CD/CDC" button and the CD changer can be used even if the radio or cassette player is being used. The Hyundai CD changer can hold up to eight discs. The disc number will be lit, and the track number, and elapsed time will be displayed.
2. DISC Select Button
To select the CD you want, push "to change the disc number.
3. TRACK UP/DOWN
o The desired track on the disc currently being played can be selected using the track number.
o Press ▶ once to skip forward to the beginning of the next track. Press ◀ once to skip back to the beginning of the track.
4. FF/REW (▶▶/◀◀)
If you want to fast forward or reverse through the compact disc track, push and hold in the FF (▶▶) or REW (◀◀) button.
When you release the button, the compact disc player will resume playing.
5. REPEAT
To repeat the track you are listening to, press the RPT button. To cancel, press again.
o If you do not release RPT operation when the track ends, it will automatically be replayed.
This process will be continued until you push the button again.
6. SCAN Button (If Installed)
o Press the SCAN button to playback the first 10 seconds of each track.
o Press the SCAN button again within 10 sec. for the desired track.
7. EQ Button
Press the EQ button to select the CLASSIC, JAZZ, ROCK and DEFEAT MODE for the desired tone quality. Each press of the button changes the display as follows;
$$ \text { CLASSIC } \rightarrow \text { JAZZ } \rightarrow \text { ROCK } \rightarrow \text { DEFEAT } $$
1 FEATURES OF YOUR HYUNDAI
144
NOTE:
o When replacing the fuse, replace it with a fuse having the correct capacity.
o This equipment is designed to be used only in a 12 volt DC battery system with negative ground.
o This unit is made of precision parts. Do not attempt to disassemble or adjust any parts.
When driving your vehicle, be sure to keep the volume of the unit set low enough to allow you to hear sounds coming from the outside.

CAUTION:
o Do not insert warped or poor quality discs into the CD changer as damage to the unit may occur.
o Do not insert anything like coins into the changer slot as damage to the unit may occur.
Do not place beverages close to the audio system. The playback mechanism may be damaged if you spill them.
o Do not impact on the audio system, or the playback mechanism could be damaged.
o Driving on the off-roads or other vibrations may skip your compact disc. Do not use the audio system on off-roads as the discs could be scratched and damaged.
Do not grip or pull out the disc with your hand while the disc is being pulled into the unit by the self loading mechanism. These can cause poor disc scratching to occur or trouble in the compact disc player.
o Avoid using CD-Recordable or CD-Rewritable as the player could not be operated in recording way of the CD maker. When using the compact disc changer, genuine CDs are recommended.
B690A01Y-AAT
AUDIO FAULT CODE
If you see any error indication in the display while using the system in the CD or Tape mode, find the cause in the chart below. If you cannot clear the error indication, take the car to your Hyundai dealer.
| INDICATION | CAUSE | SOLUTION |
| Er2 | CD DECK MECHANICAL ERROR(EJECT ERROR, LOADING ERROR) | After resetting the audio system, push the eject button.If disc is not ejected, consult your Hyundai dealer. |
| Er3 | FOCUS ERRORDATA READ ERROR | Make sure the disc is not scratched or damaged.Press the eject button and pull out the disc.Then insert a normal CD disc. |
| Er6 | DISC ERROR | Check if the disc is inserted correctly in the CD player.Make sure the disc is not scratched or damaged. |
| Er8 | TAPE DECK ERRORTAPE EJECT ERROR | After resetting the audio system, push the eject button.If tape does not eject, consult your Hyundai dealer. |
| HHH | TEMPERATURE IS TOO HIGH | Fault code will reset automatically when the temperature returns to normal. |
| no CD | NO DISC IN MAGAZINENO CD MAGAZINE IN THE AUTO CHANGER | Insert disc in magazine or insert CD magazine in the auto changer. |
1 FEATURES OF YOUR HYUNDAI
146
CARE OF DISCS
B050A02F-AAT
Proper Handling
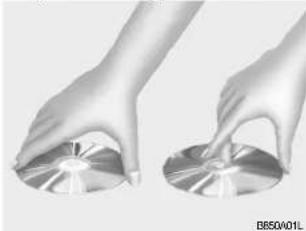
natural_image
Two hands holding a CD or DVD disc, no visible text or symbolsHandle your disc as shown. Do not drop the disc. Hold the disc so you will not leave fingerprints on the surface. If the surface is scratched, it may cause the pickup to skip signal tracks. Do not affix tape, paper, or gummed labels on the disc. Do not write on the disc.
Damaged Disc
Do not attempt to play damaged, warped or cracked discs. These could severely damage the playback mechanism.
Storage
When not in use, place your discs in their individual cases and store them in a cool place away from the sun, heat, and dust.
Do not grip or pull out the disc with your hand while the disc is being pulled into the unit by the self loading mechanism.
Keep Your Discs Clean
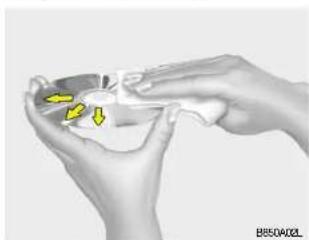
natural_image
Illustration of hands holding a small object with yellow arrows pointing to it, no text or symbols presentFingerprints, dust, or soil on the surface of a disc could cause the pickup to skip signal tracks. Wipe the surface clean with a clean soft cloth. If the surface is heavily soiled, dampen a clean soft cloth in a solution of mild neutral detergent to wipe it clean.
CARE OF CASSETTE TAPES
FEATURES OF YOUR HYUNDAI
147
B880A01A-AAT
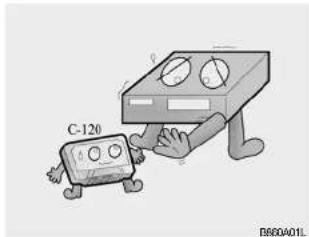
natural_image
Cartoon illustration of a C-120 device being pushed by two anthropomorphic devices (no text or symbols present)Proper care of your cassette tapes will extend the tape life and increase your listening enjoyment. Always protect your tapes and cassette cases from direct sunlight, severely cold and dusty conditions. When not in use, cassettes should always be stored in the original protective cassette case. When the vehicle is very hot or cold, allow the interior temperature to become more comfortable before listening to your cassettes.
o Never leave a cassette inserted in the player when not being played. This could damage the tape player unit and the cassette tape.
We strongly recommend against the use of tapes longer than C-60 (60 minutes total). Tapes such as C-120 or C-180 are very thin and do not perform as well in the automotive environment.
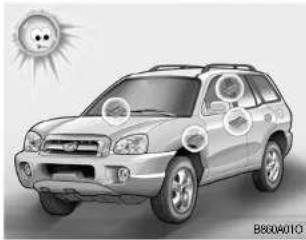
natural_image
Illustration of a car with sun and solar panel, no text or symbols presento Be sure that the cassette label is not loose or peeling off or tape ejection may be difficult.
o Never touch or soil the actual audio tape surfaces.
o Keep all magnetized objects, such as electric motors, speakers or transformers away from your cassette tapes and tape player unit.
o Store cassettes in a cool, dry place with the open side facing down to prevent dust from setting in the cassette body.
o Avoid repeated fast reverse usage to replay one given tune or tape section. This can cause poor tape winding to occur, and eventually cause excessive internal drag and poor audio quality in the cassette. If this occurs, it can sometimes be corrected by fast winding the tape from end to end several times. If this does not correct the problem, do not continue to use the tape in your vehicle.
1 FEATURES OF YOUR HYUNDAI
148
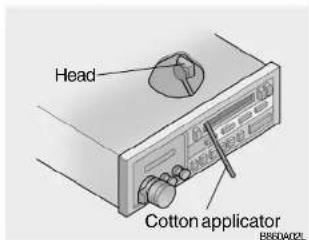
The playback head, capstan and pinch rollers will develop a coating of tape residue that can result in deterioration of sound quality, such as a wavering sound. They should be cleaned monthly using a commercially available head cleaning tape or special solution available from audio specialty shops. Follow the supplier's directions carefully and never oil any part of the tape player unit.
o Always be sure that the tape is tightly wound on its reel before inserting in the player. Rotate a pencil in the drive sprockets to wind up any slack.
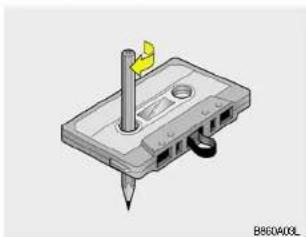
natural_image
3D illustration of a cassette tape with a yellow pin and black adjustment knob (no text or symbols)NOTE:
Look at a tape before you insert it. If the tape is loose, tighten it by turning one of the hubs with a pencil or your finger.
If the label is peeling off, do not put it in the drive mechanism.
Do not leave tapes sitting where they are exposed to hot, warm, or high humidity, such as on top of the dashboard or in the player.
If a tape is exposed to excessively hot or cold, let it reach a moderate temperature before putting it in the player.
ANTENNA
BB70001A-GAT
Manual Antenna
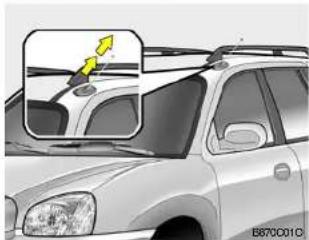
natural_image
Side view of a car with a highlighted vehicle component (no text or symbols visible)Your car uses a manual stainless steel antenna to receive both AM and FM broadcast signals. Pull up the antenna using your fingers, as shown in the drawing.

CAUTION:
Before entering an automatic car wash or a place with a low height clearance such as residential or commercial garage, be sure that the antenna is fully retracted.
B88DC02B-GAT
Glass Antenna (If installed)
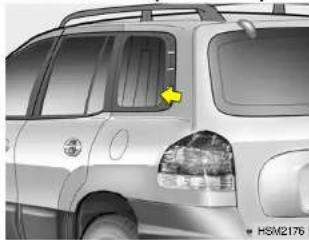
natural_image
Side view of a white SUV with a yellow arrow pointing to the window (no visible text or symbols)When the radio power switch is turned on while the ignition key is in either the "ON" or "ACC" position, your car will receive both AM and FM broadcast signals through the antenna in the rear quarter glass.

CAUTION:
Do not clean the inner side of the rear quarter glass with an abrasive type of glass cleaner or use a scraper to remove foreign deposits from the inner surface of the glass as this may cause damage to the antenna elements.
o Avoid adding metallic coating such as Ni, Cd, and so on. These can disturb receiving AM and FM broadcast signals.
DRIVING YOUR HYUNDAI
Engine Exhaust Can Be Dangerous! 2-2
Before Starting the Engine 2-4
Key Positions.... 2-5
Starting 2-6
Operating the Manual Transaxle 2-8
Operating the Automatic Transaxle 2-10, 2-14
Anti-Lock Brake System (ABS) 2-18
Brake Traction Control System (BTCS) 2-19
Full Traction Control System (FTCS) 2-20
Full-Time 4WD Operation.... 2-22
4WD Lock System 2-25
Limited-Slip Differential 2-26
Good Braking Practices 2-26
Driving for Economy 2-27
Smooth Cornering 2-28
Winter Driving 2-29
Trailer or Vehicle Towing 2-31
C010A020-AAT

WARNING: ENGINE EXHAUST CAN BE DANGEROUS!
Engine exhaust fumes can be extremely dangerous. If, at any time, you smell exhaust fumes inside the vehicle, open the windows immediately.
o Do not inhale exhaust fumes.
Exhaust fumes contain carbon monoxide, a colorless, odorless gas that can cause unconsciousness and death by asphyxiation.
o Be sure the exhaust system does not leak.
The exhaust system should be checked whenever the vehicle is raised to change the oil or for any other purpose. If you hear a change in the sound of the exhaust or if you drive over something that strikes the underneath side of the car, have the exhaust system checked as soon as possible by your Hyundai dealer.
o Do not run the engine in an enclosed area.
Letting the engine idle in your garage, even with the garage door open, is a hazardous practice. Never run the engine in your garage any longer than it takes to start the engine and back the car out.
o Avoid idling the engine for prolonged periods with people inside the car.
If it is necessary to idle the engine for a prolonged period with people inside the car, be sure to do so only in an open area with the air intake set at "Fresh" and fan operating at one of the higher speeds so fresh air is drawn into the interior.
If you must drive with the tailgate open because you are carrying objects that make this necessary:
-
Close all windows.
-
Open side vents
-
Set the air intake control at "Fresh", the air flow control at "Floor" or "Face" and the fan at one of the higher speeds.
To assure proper operation of the ventilation system, be sure the ventilation air intakes located just in front of the windshield are kept clear of snow, ice, leaves or other obstructions.

WARNING:
The 2WD Santa Fe is not designed for off-road use. The 4WD Santa Fe is designed primarily for use on paved roads. However, occasional use in off-highway conditions such as established unpaved roads and non-challenging off-road trails is allowed. The 4WD Santa Fe is not designed for blazing new trails, challenging off-road conditions, or unpaved hill climbing. Exceeding the conditions that were intended for the vehicle's primary design may result in injury or death.
o Utility vehicle has a significantly higher collision rate than other type of vehicles.
o Utility vehicle have higher ground clearance and a narrower track to make them capable of performing in a wide variety of off-road applications. Specific design characteristics give them a higher center of gravity than ordinary cars. An advantage of the higher ground clearance is a better view of the road allowing you to anticipate problem. They are not designed for cornering at the same speeds as conventional 2-wheel drive vehicles any more than low-slung sports cars are designed to perform satisfactorily under off-road conditions. If at all possible, avoid sharp turns or abrupt maneuvers. As with other vehicles of this type, failure to operate this vehicle correctly may result in loss of control or vehicle rollover.
o In a collision crash, an unbelted person is significantly more likely to die than a person wearing a seatbelt.
- Your vehicle is equipped with tires designed to provide for safe ride and handling capability. Do not use a size and type of tire and wheel that is different from the one that is originally installed on your vehicle. It can affect the safety and performance of your vehicle, which could lead to handling failure or rollover and serious injury.
When replacing the tires, be sure to equip all four tires with the tire and wheel of the same size, type, tread, brand and load-carrying capacity. If you nevertheless decide to equip your vehicle with any tire/wheel combination not recommended by Hyundai for off-road driving, you should not use these tires for highway driving.
BEFORE STARTING THE ENGINE
C020A01C-AAT
Before you start the engine, you should always:
- Look around the vehicle to be sure there are no flat tires, puddles of oil, water or other indications of possible trouble.
- After entering the car, check to be sure the parking brake is engaged.
- Check that all windows, and lights are clean.
- Check that the interior and exterior mirrors are clean and in position.
- Check your seat, seatback and headrest to be sure they are in their proper positions.
- Lock all the doors.
- Fasten your seat belt and be sure that all other occupants have fastened theirs.
- Turn off all lights and accessories that are not needed.
-
When you turn the ignition switch to 'ON', check that all appropriate warning lights are operating and that you have sufficient fuel.
-
Check the operation of warning lights and all bulbs when key is in the 'ON' position.

WARNING
(Diesel Engine):
To ensure that sufficient vacuum exists within the brake system during cold weather start-up conditions, it is necessary to run the engine at idle for several seconds after starting the engine.
TO START THE ENGINE
C030AD1A-GAT
COMBINATION IGNITION SWITCH
o If your Hyundai is equipped with a manual transaxle, place the shift lever in neutral and depress the clutch pedal fully.
o If your Hyundai has an automatic transaxle, place the shift lever in 'P' (park).
To start the engine, insert the ignition key and turn it to the "START" position. Release it as soon as the engine starts. Do not hold the key in the "START" position for more than 15 seconds.
NOTE:
For safety, the engine will not start if the shift lever is not in "P" or "N" Position (Automatic Transaxle).
KEY POSITIONS
DRIVING YOUR HYUNDAI
5
C040A01A-AAT

WARNING:
The engine should not be turned off or the key removed from the ignition key cylinder while the vehicle is in motion. The steering wheel is locked by removing the key.
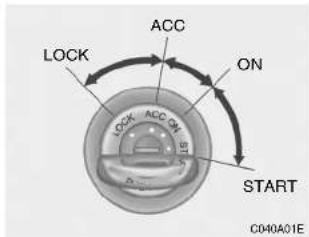
o "START"
The engine is started in this position. It will crank until you release the key.
NOTE:
Do not hold the key in the "START" position for more than 15 seconds.
o "ON"
When the key is in the "ON position, the ignition is on and all accessories may be turned on. If the engine is not running, the key should not be left in the "ON" position. This will discharge the battery and may also damage the ignition system.
o "ACC"
With the key in the "ACC" position, the some electrical accessories (radio, etc.) may be operated.
o "LOCK"
The key can be removed or inserted in this position.
To protect against theft, the steering wheel locks by removing the key.
NOTE:
To unlock the steering wheel, insert the key, and then turn the steering wheel and key simultaneously.
0070C01A-AAT
To remove the ignition key
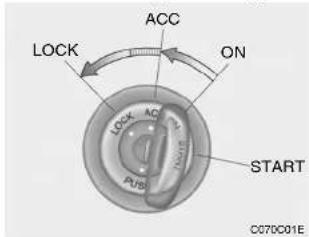
- Turn the ignition key to the "ACC" position.
- Simultaneously push and turn the ignition key counterclockwise from the "ACC" position to the "LOCK" position.
- The key can be removed in the "LOCK" position.
STARTING
C050A01A-AAT
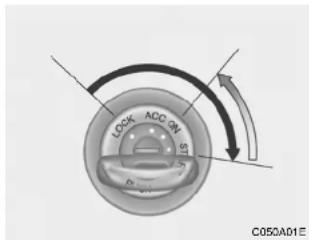

WARNING:
Never run the engine in a closed or poorly ventilated area any longer than is needed to move your car in or out of the area. The carbon monoxide gas emitted is odorless and can cause serious injury or death.
C051A01O-GAT
STARTING FOR THE DIESEL ENGINE
ENGINE COLD
o Turn the ignition key to position "ON" and wait for the pre-heat indicator light to go out.
o Operate the starter until the engine runs.
ENGINE WARM
Operate the starter. If the engine does not respond on the first attempt, wait several seconds and try again using the pre-heat.
C050B02S-GAT
Normal Conditions
The Starting Procedure:
- Insert key, and fasten the seat belt.
- Depress the clutch pedal fully and place the gearshift lever in neutral (manual transaxle) or the selector lever in "P"(park) position (automatic transaxle).
- After turning the ignition key to the "ON" position, make certain all warning lights and gauges are functioning properly before starting the engine.
- On vehicles equipped with the diesel preheat indication light, turn the ignition key to the "ON" position. The diesel-preheat indicator light will first illuminate in amber, and then after a short time, the amber illumination will go off, indicating that preheating is completed.
Amber lamp ON Amber lamp OFF

C050B01HP
NOTE:
If the engine were not started within 10 seconds after the preheating is completed, turn the ignition key once more to the "LOCK" position, and then to the "ON" position, in order to preheat again.

WARNING:
Be sure that the clutch is fully depressed when starting a manual transaxle vehicle. Otherwise there is the potential to cause damage to the vehicle or injury to someone inside or outside the vehicle as a result of the forward or backward movement of the vehicle that will occur if the clutch is not depressed when the vehicle is started.
- Turn the ignition key to the "START" position and release it when the engine starts.
C055B01B-GAT
STARTING AND STOPPING THE ENGINE FOR TURBOCHARGER INTERCOOLER (Diesel Engine)
(1) Do not race the engine or suddenly accelerate the engine immediately after starting it. If the engine is cold, allow the engine to idle for several seconds before it is driven to ensure sufficient lubrication of the turbocharger unit.
(2) After high speed or extended driving, requiring a heavy engine load, the engine should be allowed to idle about 1 minute before turning it off. This idle time will allow the turbocharger to cool prior to shutting the engine off.

WARNING:
Do not turn the engine off immediately after it has been subjected to a heavy load. Doing so may cause severe damage to the engine or turbocharger unit.

DRIVING YOUR HYUNDAI
8
OPERATING THE MANUAL TRANSAXLE
C070A02A-AAT
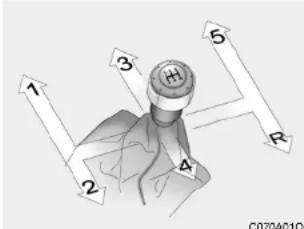
Your Hyundai's manual transaxle has a conventional shift pattern. This shift pattern is imprinted on the shift knob. The transaxle is fully synchronized in all forward gears so shifting to either a higher or a lower gear is easily accomplished.
NOTE:
To shift into reverse, rest the lever in neutral for at least 3 seconds after your car is completely stopped. Then move the lever into the reverse position.
During cold weather, shifting may be difficult until the transaxle lubricant has warmed up. This is normal and not harmful to the transaxle.
o If you've come to a complete stop and it's hard to shift into 1st or R(Reverse), put the shift lever in N(Neutral) position and release the clutch. Press the clutch pedal back down, and then shift into 1st or R(Reverse) gear position.
Do not use the shift lever as a handrest during driving, as this can result in premature wear of the transaxle shift forks.

CAUTION:
When downshifting from fifth gear to fourth gear, caution should be taken not to inadvertently press the gear shift lever sideways in such a manner that second gear is engaged. Such a drastic downshift may cause the engine speed to increase to the point that the tachometer will enter the red-zone. Such over-revving of the engine may possibly cause engine damage.
C070B01A-AAT
Using the Clutch
The clutch should be pressed all the way to the floor before shifting, then released slowly. The clutch pedal should always be used after fully returning to the original position. Do not rest your foot on the clutch pedal while driving. This can cause unnecessary wear. Do not partially engage the clutch to hold the car on an incline. This causes unnecessary wear. Use the parking brake to hold the car on an incline. Do not operate the clutch pedal rapidly and repeatedly.
C070E02A-GAT
RECOMMENDED SHIFT POINTS
| Shift from-to | Recommended |
| 1-2 | 20 km/h (15 mph) |
| 2-3 | 40 km/h (25 mph) |
| 3-4 | 55 km/h (35 mph) |
| 4-5 | 75 km/h (45 mph) |
The shift points as shown chart are recommended for optimum fuel economy and performance.
C070D02O-AAT
Good Driving Practices
o Never take the car out of gear and coast down a hill. This is extremely hazardous. Always leave the car in gear.
Don't "ride" the brakes. This can cause them to overheat and malfunction. Instead, when you are driving down a long hill, slow down and shift to a lower gear. When you do this, engine braking will help slow the car.
o Slow down before shifting to a lower gear. This will help avoid over-revving the engine, which can cause damage.
o Slow down when you encounter cross winds. This gives you much better control of your car.
10
o Be sure the car is completely stopped before you attempt to shift into reverse. The transaxle can be damaged if you do not. To shift into reverse, depress the clutch, move the shift lever to neutral, wait three seconds, then shift to the reverse position.
Exercise extreme caution when driving on a slippery surface. Be especially careful when braking, accelerating or shifting gears. On a slippery surface, an abrupt change in vehicle speed can cause the drive wheels to lose traction and the vehicle to go out of control.

WARNING:
o Avoid high cornering speeds.
o Do not make quick steering wheel movements, such as sharp lane changes or fast, sharp turns.
o Always wear your seat belts. In a collision crash, an unbelted person is significantly more likely to die than a person wearing a seatbelt.
o The risk of rollover is greatly increased if you lose control of your vehicle at highway speeds.
o Loss of control often occurs if two or more wheels drop off the roadway and the driver oversteers to reenter the roadway.
o In the event your vehicle leaves the roadway, do not steer sharply. Instead, slow down before pulling back into the travel lanes.
o Never exceed posted speed limits.
OPERATING THE AUTOMATIC TRANSAXLE (4 Speed A/T)
C090A010-GAT
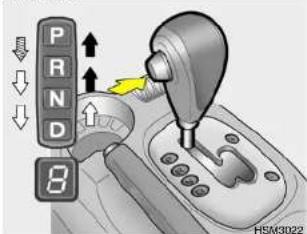
The highly efficient Hyundai automatic transaxle has four forward speeds and one reverse speed. The individual speeds are selected automatically, depending on the position of the speed selector lever. The selector lever has 2 gates; the main gate and the manual gate.
NOTE:
For information on manual gate operation, refer to "Sports Mode".
In the main gate, the selector lever has 4 positions, and is equipped with a button to avoid inadvertent wrong selection.
The first few shifts on a new vehicle, or if the battery has been disconnected, may be somewhat abrupt. This is a normal condition, and the shifting sequence will adjust after shifts are cycled a few times by the T.C.M (Transaxle Control Module).
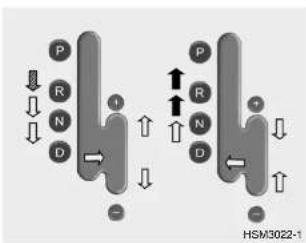
chemical
Diagram of HSM3022-1 protein complex with labeled domains and directional arrows indicating interaction or regulation
CAUTION:
Never shift into "R" or "P" position while the vehicle is moving.
NOTE:
→ Depress the brake pedal and push the button when shifting. → Push the button when shifting. → The selector lever can be shifted freely.
The indicator lights in the instrument cluster are indicate the selector lever position when the ignition is switched "ON". During "D" range operation, green lights indicate the gear currently in use.
C090B02A-AAT
The function of each position is as follows:
o P (Park):
Use to hold the vehicle in place when parked or while starting the engine. Whenever parking the car, apply the parking brake and shift the selector lever to the "P" (Park) position.

CAUTION:
Never place the selector lever in the "P" (Park) position unless the vehicle is fully stopped. Failure to observe this caution will cause severe damage to the transaxle.
C090C01A-AAT
o R (Reverse):
Use for backing up the vehicle. Bring the car to a complete stop before shifting the selector lever to "R" position.
C090D02A-AAT
o N (Neutral):
In the "N" position, the transaxle is in neutral, which means that no gears are engaged. The engine can be started with the shift lever in "N" position, although this is not recommended except if the engine stalls while the car is moving.
C090E01D-AAT
o D (Drive):
Use for normal driving. The transaxle will automatically shift through a four gear sequence.
CD9DF01O-GAT
Sports mode
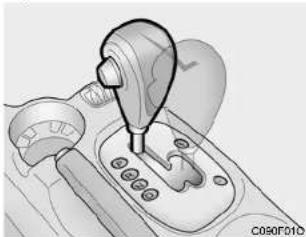
natural_image
Mechanical gear shift lever mechanism (no text or symbols visible)Whether the vehicle is stationary or in motion, sports mode is selected by pushing the selector lever from the "D" position into the manual gate. To return to "D" range operation, push the selector lever back into the main gate. In sports mode, moving the selector lever backwards and forwards can make rapid gearshifts simple. In contrast to a manual transaxle, the sports mode allows gearshifts with the accelerator pedal depressed.
UP (+): Push the lever forward once to shift up one gear.
DOWN (-): Pull the lever backwards once to shift down one gear.
SKIP : By rapidly moving the selector forward or backward twice, it is possible to skip one gear, i.e. 1st to 3rd or 3rd to 1st.

CAUTION:
o In sports mode, the driver must execute shifts in accordance with prevailing road conditions, taking care to keep the engine speed below the red zone.
By rapidly moving the selector lever backwards (-) twice it is possible to skip one gear, i.e., 3rd to 1st, 4th to 2nd. Since sudden engine braking and/or rapid acceleration can cause a loss of traction, however, downshifts must be made carefully in accordance with the vehicle's speed.
NOTE:
o In sports mode, only the four forward gears can be selected. To reverse or park the vehicle, move the selector lever to the "R" or "P" position as required.
o In sports mode, downward shifts are made automatically when the vehicle slows down. When the vehicle stops, 1st gear is automatically selected.
To maintain the required levels of vehicle performance and safety, the system may not execute certain gearshifts when the selector lever is operated.
Before driving away from a stop on a slippery road, push the selector lever toward into the +(UP) position. This causes the transaxle to shift into the 2nd gear which is better for smooth driving away on a slippery road. Push the selector lever to the - (DOWN) side to shift back to 1st gear.
C090H01L-GAT
NOTE:
o For smooth and safe operation, depress the brake pedal when shifting from "Neutral" position or "Park" position to a forward or reverse gear.
o The ignition key must be in the "ON" position and the brake pedal fully depressed in order to move the shift lever from the "P" (Park) position to any of the other positions.
o It is always possible to shift from "R", "N", "D" position to "P" position. The vehicle must be fully stopped to avoid transaxle damage.
C090103L-GAT

CAUTION:
o Shift into "R" and "P" position only when the vehicle has completely stopped.
o Do not accelerate the engine in reverse or any of the forward positions with the brakes applied.
o Always apply the footbrake when shifting from "P" or "N", to "R" or "D" position.
Do not use the "P" (Park) position in place of the parking brake. Always set the parking brake, shift the transaxle into "P" (Park) position and turn off the ignition when you leave the vehicle, even momentarily. Never leave the vehicle unattended while the engine is running.
When accelerating from a stop on a steep hill, the vehicle may have a tendency to roll backwards. Shifting the shift lever into 2nd gear while in Sport mode will help prevent the vehicle from rolling backwards.
- Check the automatic transaxle fluid level regularly, and add fluid as necessary.
o See the maintenance for the proper fluid recommendation.
14
OPERATING THE AUTOMATIC TRANSAXLE (5 Speed A/T)
C0B5AD1C-AAT
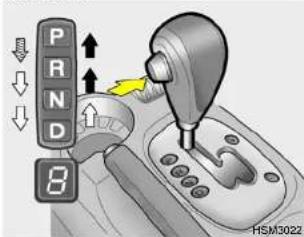
The highly efficient Hyundai automatic transaxle has five forward speeds and one reverse speed. The individual speeds are selected automatically, depending on the position of the speed selector lever. The selector lever has 2 gates; the main gate and the manual gate.
NOTE:
For information on manual gate operation, refer to "Sports Mode".
In the main gate, the selector lever has 4 positions, and is equipped with a button to avoid inadvertent wrong selection.
The first few shifts on a new vehicle, or if the battery has been disconnected may be somewhat abrupt. This is a normal condition, and the shifting sequence will adjust after shifts are cycled a few times by the T.C.M (Transaxle Control Module).
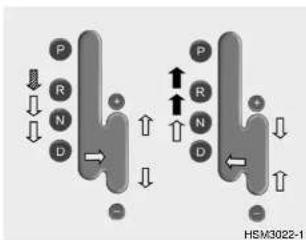
chemical
Diagram of HSM3022-1 protein complex with labeled residues P, R, N, D and charge states
CAUTION:
Never shift into "R" or "P" position while the vehicle is moving.
NOTE:
→ Depress the brake pedal and push the button when shifting.
→ Push the button when shifting.
→ The selector lever can be shifted freely.
The indicator lights in the instrument cluster indicate the selector lever position when the ignition is switched "ON". During "D" range operation, green lights indicate the gear currently in use.
C090B02A-AAT
The function of each position is as follows:
o P (Park):
Use to hold the vehicle in place when parked or while starting the engine. Whenever parking the car, apply the parking brake and shift the selector lever to the "P" (Park) position.

CAUTION:
Never place the selector lever in the "P" (Park) position unless the vehicle is fully stopped. Failure to observe this caution will cause severe damage to the transaxle.
C090C01A-AAT
o R(Reverse):
Use for backing up the vehicle. Bring the car to a complete stop before shifting the selector lever to "R" position.
C090D02A-AAT
o N (Neutral):
In the "N" position, the transaxle is in neutral, which means that no gears are engaged. The engine can be started with the shift lever in "N" position, although this is not recommended except if the engine stalls while the car is moving.
C090E01L-AAT
o D (Drive):
Use for normal driving. This position is used for most city and highway driving, for starting from a full stop to maximum speed. The transaxle will automatically shift through a five gear sequence.
C095F01O-GAT
Sports Mode
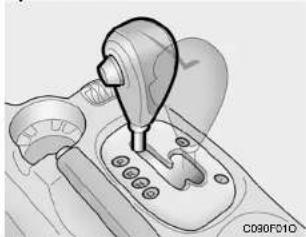
natural_image
Mechanical assembly diagram showing a lever mechanism interacting with a car gear (no text or symbols visible)Whether the vehicle is stationary or in motion, sports mode is selected by pushing the selector lever from the "D" position into the manual gate. To return to "D" range operation, push the selector lever back into the main gate. In sports mode, moving the selector lever backwards and forwards can make rapid gearshifts simple. In contrast to a manual transaxle, the sports mode allows gearshifts with the accelerator pedal depressed.
UP (+) : Push the lever forward once to shift up one gear.
DOWN (-): Pull the lever backward once to shift down one gear.
SKIP : By rapidly moving the selector forwards or backwards twice, it is possible to skip one gear, i.e. 1st to 3rd or 3rd to 1st.

CAUTION:
o In sports mode the driver must execute shifts in accordance with prevailing road conditions, taking care to keep the engine speed below the red zone. For the engine protection, upward shifts are made automatically when the engine rpm reaches the red zone.
- By rapidly moving the selector lever backwards (-) twice, it is possible to skip one gear, i.e., 3rd to 1st, 4th to 2nd or 5th to 3rd. Since sudden engine braking and/or rapid acceleration can cause a loss of traction, however, downshifts must be made carefully in accordance with the vehicle's speed.
NOTE:
o In sports mode, only the five forward gears can be selected. To reverse or park the vehicle, move the selector lever to the "R" or "P" position as required.
o In sports mode, downward shifts are made automatically when the vehicle slows down. When the vehicle stops, 1st gear is automatically selected.
To maintain the required levels of vehicle performance and safety, the system may not execute certain gearshifts when the selector lever is operated.
Before driving away from a stop on a slippery road, push the selector lever forward into the +(UP) position. This causes the transaxle to shift into 2nd gear which is better for smooth driving away on a slippery road. Push the selector lever to the -(DOWN) side to shift back to 1st gear.
C090H01L-GAT
NOTE:
o For smooth and safe operation, depress the brake pedal when shifting from "Neutral" position or "Park" position to a forward or reverse gear.
The ignition key must be in the "ON" position and the brake pedal fully depressed in order to move the shift lever from the "P" (Park) position to any of the other positions.
It is always possible to shift from "R", "N", "D" position to "P" position. The vehicle must be fully stopped to avoid transaxle damage.
C090103L-GAT

CAUTION:
o Shift into "R" and "P" position only when the vehicle has completely stopped.
o Do not accelerate the engine in reverse or any of the forward positions with the brakes applied.
o Always apply the footbrake when shifting from "P" or "N", to "R" or "D" position.
Do not use the "P" (Park) position in place of the parking brake. Always set the parking brake, shift the transaxle into "P" (Park) position and turn off the ignition when you leave the vehicle, even momentarily. Never leave the vehicle unattended while the engine is running.
When accelerating from a stop on a steep hill, the vehicle may have a tendency to roll backwards. Shifting the shift lever into 2nd gear while in Sport mode will help prevent the vehicle from rolling backwards.
o Check the automatic transaxle fluid level regularly, and add fluid as necessary.
o See the maintenance schedule for the proper fluid recommendation.
C090N04O-AAT
GOOD DRIVING PRACTICES
o Never move the gear selector lever from 'P' or 'N' to any other position with the accelerator pedal depressed.
o Never move the gear selector lever into 'P' when the vehicle is in motion.
o Be sure the car is completely stopped before you attempt to shift into 'R'.
o Never take the car out of gear and coast down a hill. This may be extremely hazardous. Always leave the car in gear when moving.
Do not 'ride' the brakes. This can cause them to overheat and malfunction. Instead, when you are driving down a long hill, slow down and shift to a lower gear. When you do this, engine braking will help slow the car.
o Slow down before shifting to a lower gear. Otherwise, the lower gear may not be engaged.
o Always use the parking brake. Do not depend on placing the transaxle in 'P' to keep the car from moving.
o Exercise extreme caution when driving on a slippery surface. Be especially careful when braking, acceler-
ating or shifting gears. On a slippery surface, an abrupt change in vehicle speed can cause the drive wheels to lose traction and the vehicle to go out of control.
o Optimum vehicle performance and economy is obtained by smoothly depressing and releasing the accelerator pedal.

WARNING:
o Avoid high cornering speeds.
o Do not make quick steering wheel movements, such as sharp lane changes or fast, sharp turns.
o Always wear your seat belts. In a collision crash, an unbelted person is significantly more likely to die than a person wearing a seatbelt.
o The risk of rollover is greatly increased if you lose control of your vehicle at highway speeds.
o Loss of control often occurs if two or more wheels drop off the roadway and the driver oversteers to reenter the roadway.
o In the event your vehicle leaves the roadway, do not steer sharply. Instead, slow down before pulling back into the travel lanes.
o Never exceed posted speed limits.
If your vehicle becomes stuck in snow, mud, sand, etc., then you may attempt to rock the vehicle free by moving it forward and backward. Do not attempt this procedure if people or objects are anywhere near the vehicle. During the rocking operation the vehicle may suddenly move forward of backward as it becomes unstuck, causing injury or damage to nearby people or objects.
C120A02A-AAT
(If installed)
The Anti-Lock Brake System (ABS) is designed to prevent wheel lock-up during sudden braking or on hazardous road surfaces. The ABS control module monitors the wheel speed and controls the pressure applied to each brake. Thus, in emergency situations or on slick roads, ABS will increase vehicle control during braking.
NOTE:
During ABS operation, a slight pulsation may be felt in the brake pedal when the brakes are applied. Also, a noise may be heard in the engine compartment while braking. These conditions are normal and indicate that the anti-lock brake system is functioning properly.

WARNING:
ABS will not prevent accidents due to improper or dangerous driving maneuvers. Even though vehicle control is improved during emergency braking, always maintain a safe distance between you and objects ahead. Vehicle speeds should always be reduced during extreme road conditions.
The braking distance for cars equipped with an anti-lock braking system may be longer than for those without it in the following road conditions.
During these conditions the vehicle should be driven at reduced speeds.
o Rough, gravel or snow-covered roads.
o With tire chains installed.
o On roads where the road surface is pitted or has different surface height.
The safety features of an ABS equipped vehicle should not be tested by high speed driving or cornering. This could endanger the safety of yourself or others.
On slippery road surfaces, the traction control system (TCS) limits the drive wheels from spinning excessively, thus helping the car to accelerate. It also provides sufficient driving force and steering performance as the car turns at accelerated speeds.
SLIP Control
Limits the drive wheels from spinning excessively during starting or while making accelerated turns on slippery roads to avoid losing the driving force of the driven wheels.
Driving Hints
TCS does not actively apply brakes. Be sure to decelerate the car sufficiently before entering curves.

CAUTION:
When the TCS indicator blinks, SLIP control function has been activated. It also means that the road is slippery or your car is accelerating excessively. In this situation, gently release foot pressure from the accelerator pedal and maintain moderate speed.

WARNING:
Traction control is a driving aid; all normal precautions for driving in inclement weather and on slippery road surfaces should be observed.
20
C300B01O-GAT
TCS ON Mode
When the TCS is running, the TCS indicator in the instrument cluster will blink.
NOTE:
1) The TCS mode will automatically be turned ON after the engine is turned off and restarted.
2) When the traction control is operating properly, you can feel a slight pulsation in the vehicle. This is only the effect of brake control and indicates nothing unusual.
3) When the engine starts, a click is heard from the engine compartment; however, this is only the sound of traction control being checked.
4) When moving out of the mud or fresh snow, pressing the accelerator pedal may not cause the engine speed to increase due to TCS operation.
C300D020-GAT
Indicator and Warning
The TCS indicator should illuminate when the ignition key is turned to ON or START but should go out after three seconds.
If the indicator does not illuminate, or TCS indicator does not go out after 3 seconds, have it checked by an authorized dealer.
Should there be any unusual conditions in the device while driving, TCS illuminates as a warning.
If TCS illuminates, pull your car to a safe place and stop the engine. Then, start the engine again to check if the TCS indicator goes out.
If the indicator remains lit even after the engine has been started, have your car checked by an authorized Hyundai dealer.
NOTE:
When the TCS indicator illuminates, traction control is automatically deactivated for safety.
FULL TRACTION CONTROL SYSTEM (FTCS)
C310A01O-AAT
(If installed)
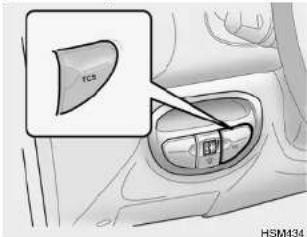
On slippery road surfaces, the traction control system (TCS) limits the drive wheels from spinning excessively, thus helping the car to accelerate. It also provides sufficient driving force and steering performance as the car turns at accelerated speeds.
SLIP Control
Limits the drive wheels from spinning excessively during starting or while making accelerated turns on slippery roads to avoid losing the driving force of the front wheels.
Driving Hints
TCS does not actively apply brakes. Be sure to decelerate the car sufficiently before entering curves.

CAUTION:
When the TCS indicator blinks, SLIP control has been activated. It also means that the road is slippery or your car is accelerating excessively. In this situation, release foot pressure from the accelerator pedal and maintain moderate speed.

WARNING:
Traction control is only a driving aid; all normal precautions for driving in inclement weather and on slippery road surfaces should be observed.
C310B01O-AAT
TCS ON/OFF Mode
When the TCS is running, the TCS indicator in the instrument cluster will blink.
If you turn the system off by pressing the TCS switch, the TCS-OFF indicator will come on and stay on. In the TCS-OFF mode, the SLIP control will be deactivated. Adjust you driving accordingly. To turn the system back on, press the switch again. The TCS-OFF indicator should go off.
NOTE:
1) The TCS mode will automatically be turned ON after the engine is turned off and restarted.
2) When the traction control system is operating properly, you can feel a slight pulsation in the vehicle. This is only the effect of brake control and indicates nothing unusual.
3) When the engine starts, a click is heard from the engine compartment; however, this is only the sound of traction control being checked.
4) When moving out of the mud or fresh snow, pressing the accelerator pedal may not cause the engine speed to increase due to TCS operation.
C310D01O-AAT
Indicators and Warning
The indicators should illuminate when the ignition key is turned to ON or START but should go out after three seconds.
If the indicators do not illuminate, or the TCS or TCS-OFF indicator does not go out after 3 seconds, have it checked by an authorized dealer.
Should there be any unusual conditions in the device while driving, TCS-OFF indicator illuminates as a warning.
If TCS-OFF indicator illuminates, pull your car to a safe place and stop the engine.
Then, start the engine again to check if the TCS-OFF indicator goes out.
If the indicator remains lit even after the engine has been started, have your car checked by an authorized Hyundai dealer.
NOTE:
1) When the TCS-OFF indicator illuminates, traction control is automatically deactivated for safety.
2) This warning function is not provided when the driver selects the TCS-OFF mode.
C350A03O-GAT
(If installed)
Engine power can be delivered to all front and rear wheels for maximum power. Full-time 4WD is useful when good traction is required, such as, when driving on slippery, wet or snow-covered roads and when moving out of mud. These vehicles, however, are not designed for challenging off-road use. Full-time 4WD vehicles are designed primarily to improve traction and performance on paved roads and highways in wet and/or slippery conditions. Occasional off-road use such as established unpaved roads and trails is OK. It is always important when traveling off-highway that the driver carefully reduce their speed to a level that does not exceed the safe operating speed for those conditions. In general, off-road conditions provide less traction and braking effectiveness than on road conditions. These factors must be carefully considered when driving off-road. Keeping the vehicle in contact with the driving surface and under control in these conditions is always the driver's responsibility for the safety of him/herself and his or her passengers.

WARNING:
This vehicle is designed primarily for on road use. Driving the vehicle in challenging off-road conditions for which it was not designed may result in damage to the vehicle. Driving in conditions that exceed the vehicle's intended design or the driver's experience level may result in severe injury or death.
Driving 4WD Safely
(1) Be sure to wear the seat belt.
(2) Do not drive in challenging off-road conditions or areas that exceed the vehicle's basic design intent or the driver's experience level.
(3) Drive at lower speeds in strong crosswinds. Because of your vehicle's high center of gravity, its stability will be affected in cross-winds. Slower speeds ensure better vehicle control.
(4) Check the brake condition after driving in wet or muddy conditions. Press the brake several times as you move slowly until you feel normal braking forces return.
(5) Do not drive the vehicle through water. (i.e. streams, rivers, lakes, etc.)
(6) The stopping distance of the full-time 4WD vehicle differs very little from that of the 2WD vehicle. When driving on a snow-covered road or a slippery, muddy surface, make sure that you keep a sufficient distance between your vehicle and the one ahead of you.
(7) Since the driving torque is always applied to the 4 wheels, the performance of the full-time 4WD vehicle is greatly affected by the condition of the tires. Be sure to equip it with all four tires of the same size and type.
o When replacement of any of the tires or disc wheels is necessary, replace all of them.
o Rotate the tires and check the tire pressure at regular intervals.

WARNING:
Your vehicle is equipped with tires designed to provide for safe ride and handling capability. Do not use a size and type of tire and wheel that is different from the one that is originally installed on your vehicle. It can affect the safety and performance of your vehicle, which could lead to handling failure or rollover and serious injury. When replacing the tires, be sure to equip all four tires with the tire and wheel of the same size, type, tread, brand and load-carrying capacity. If you nevertheless decide to equip your vehicle with any tire/wheel combination not recommended by Hyundai for off-road driving, you should not use these tires for highway driving.
(8) The full-time 4WD vehicle cannot be towed by an ordinary tow truck. Make sure that the vehicle is towed with its four wheels raised off the ground.
o If the vehicle is towed with its only two wheels raised off the ground, the 4WD system could be damaged.
o In unavoidable case, if the vehicle is being towed with all four wheels on the ground, it should be towed only forward direction with rope.
o While towing, check the following items.
- The ignition switch is in "ACC" or "ON".
- Place the shift lever in neutral (For Automatic Transaxle, "N" position).
- Release the parking brake.
NOTE:
To avoid serious damage to your 4WD vehicle, limit towing to 15 km/h (10 mph) and not for more than 1.5 km (1 mile) at ANY TIME.
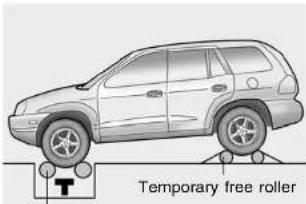
Roll tester(Speedometer)
HSM201
(9) For speedometer test or inspection/maintenance (I/M) program of SANTA FE 4WD, use a four wheel chassis dynamometer.

CAUTION:
Never engage the parking brake while performing these tests.
o In rare cases when it's unavoidable that a 4WD vehicle is to be inspected for speedometer test on 2WD roll tester, strictly follow the procedures next.
- Check the tire pressures recommended for your vehicle.
- Place the front wheels on the roll tester for speedometer test as shown in the illustration.
- Release the parking brake.
- Place the rear wheels on the temporary free roller as shown in the illustration.

WARNING:
Keep away from the front of the vehicle while inspecting. This is very dangerous as the vehicle can jump forward and cause serious injury or death.
(10) When using tire chains, be sure to install the chains on all wheels.
(11) If the front or rear wheels get stuck in the mud, do not spin them recklessly. The 4WD system could be damaged.

CAUTION:
o While the full-time 4WD vehicle is being raised on a jack, never start the engine or cause the tires to rotate.
There is the danger that rotating tires touching the ground could cause the vehicle to go off the jack and to jump forward.
o If one of the front or rear wheels begins to spin in mud, snow, etc., the vehicle can sometimes be driven out by depressing the accelerator pedal further; however, avoid running the engine continuously at high rpm because doing so could damage the 4WD system.
4WD LOCK SYSTEM

WARNING:
o Avoid high cornering speeds.
Do not make quick steering wheel movements, such as sharp lane charges or fast, sharp turns.
o The risk of rollover is greatly increased if you lose control of your vehicle at highway speeds.
o In a collision crash, an unbelted person is significantly more likely to die a person weara seatbelt.
o Loss of control often occurs if two or more wheels drop off the roadway and the driver oversteers to reenter the roadway.
o In the event your vehicle leaves the roadway, do not steer sharply. Instead, slow down before pulling back into the travel lanes.
C380A01O-GAT
(With Electronic Control 4WD)
(If installed)
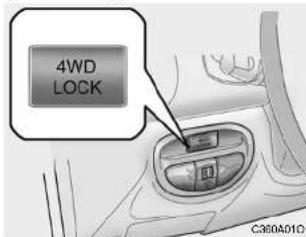
This 4WD system is designed for dividing the power ratio automatically in normal driving conditions.
During off-road or low-friction driving conditions, press the 4WD lock button to drive in full-time 4WD, dividing the power ratio to 50:50 in the front and rear wheels. The 4WD lock indicator light in the instrument cluster is illuminated.
This setup begins to get cancelled when the vehicle speed exceeds 30 km/h, and the function is completely released at a speed of 40 km/h or higher. Conversely, the function is re-
run when the speed again drops to 40 km/h or lower, and is fully established at speeds below 30 km/h.
To release the 4WD lock function, press the 4WD lock button again. The 4WD lock indicator light in the instrument cluster should go off.
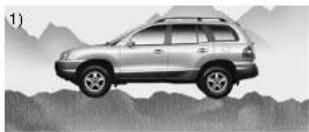
natural_image
Side view of a silver SUV parked on a mountain slope (no visible text or symbols)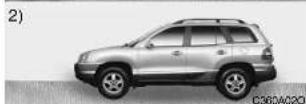
1) Pressing the 4WD lock button on the tough terrain, the driving power is equally distributed to the front and rear.
4WD lock keeps activating when not exceeding 40 km/h.
2) Release the 4WD lock button on the normal driving conditions.
LIMITED-SLIP DIFFERENTIAL
D190A2HP-GAT
(If installed)
A limited-slip differential, if equipped, is for the rear wheel differential only. The features of this limited-slip differential are described below:
Just as with a conventional differential, the wheel on one side is allowed to turn at a different speed from the wheel on the other side when the vehicle is cornering. The difference between the limited-slip differential and a conventional differential is that if the wheel on one side of the vehicle loses traction, a greater amount of torque is applied to the rear wheel on the other side to improve traction.

CAUTION:
o Never start the engine with the gearshift lever placed in the forward or reverse while one of the rear wheels is jacked up and the other in contact with the ground; doing so may cause the vehicle to jump forward.
o Use only recommended oil for LSD in the rear axle. See page 9-4 for the recommended oil descriptions.
GOOD BRAKING PRACTICES
C130A01A-AAT

WARNING:
Nothing should be carried on top of the cargo area cover behind the rear seat. If there were an accident or a sudden stop, such objects could move forward and cause damage to the vehicle or injure the occupants.
o After being parked, check to be sure the parking brake is not engaged and that the parking brake indicator light is out before driving away.
o Driving through water may get the brakes wet. They can also get wet when the car is washed. Wet brakes can be dangerous! Your car will not stop as quickly if the brakes are wet. Wet brakes may cause the car to pull to one side. To dry the brakes, apply the brakes lightly until the braking action returns to normal, taking care to keep the car under control at all times. If the braking action does not return to normal, stop as soon as it is safe to do so and call your Hyundai dealer for assistance.
o Don't coast down hills with the car out of gear. This is extremely hazardous. Keep the car in gear at all times, use the brakes to slow down, then shift to a lower gear so that engine braking will help you maintain a safe speed.
o Don't "ride" the brake pedal. Resting your foot on the brake pedal while driving can be dangerous because it can result in the brakes overheating and losing their effectiveness. It also increases the wear of the brake components.
o If a tire goes flat while you are driving, apply the brakes gently and keep the car pointed straight ahead while you slow down. When you are moving slowly enough for it to be safe to do so, pull off the road and stop in a safe place.
o If your car is equipped with an automatic transaxle, don't let your car creep forward. To avoid creeping forward, keep your foot firmly on the brake pedal when the car is stopped.
o Use caution when parking on a hill. Firmly engage the parking brake and place the gear selector lever in "P" (automatic transaxle) or in first or reverse gear (manual transaxle).
DRIVING FOR ECONOMY
If your car is facing downhill, turn the front wheels into the curb to help keep the car from rolling. If your car is facing uphill, turn the front wheels away from the curb to help keep the car from rolling. If there is no curb or if it is required by other conditions to keep the car from rolling, block the wheels.
Under some conditions your parking brake can freeze in the engaged position. This is most likely to happen when there is an accumulation of snow or ice around or near the rear brakes or if the brakes are wet. If there is a risk that the parking brake may freeze, apply it only temporarily while you put the gear selector lever in "P" (automatic) or in first or reverse gear (manual transaxle) and block the rear wheels so the car cannot roll. Then release the parking brake.
o Do not hold the vehicle on the upgrade with the accelerator pedal. This can cause the transaxle to overheat. Always use the brake pedal or parking brake.
C140A02A-GAT
You can save fuel and get more kilo- meters from your car if you follow these suggestions:
o Drive smoothly. Accelerate at a moderate rate. Don't make "jack-rabbit" starts or full-throttle shifts and maintain a steady cruising speed. Don't race between stoplights. Try to adjust your speed to that of the other traffic so you don't have to change speeds unnecessarily. Avoid heavy traffic whenever possible. Always maintain a safe distance from other vehicles so you can avoid unnecessary braking. This also reduces brake wear.
o Drive at a moderate speed. The faster you drive, the more fuel your car uses. Driving at a moderate speed, especially on the highway, is one of the most effective ways to reduce fuel consumption.
o Don't "ride" the brake or clutch pedal. This can increase fuel consumption and also increase wear on these components. In addition, driving with your foot resting on the brake pedal may cause the brakes to overheat,
which reduces their effectiveness and may lead to more serious consequences.
Take care of your tires. Keep them inflated to the recommended pressure. Incorrect inflation, either too much or too little, results in unnecessary tire wear. Check the tire pressures at least once a month.
o Be sure that the wheels are aligned correctly. Improper alignment can result from hitting curbs or driving too fast over irregular surfaces. Poor alignment causes faster tire wear and may also result in other problems as well as greater fuel consumption.
Keep your car in good condition. For better fuel economy and reduced maintenance costs, maintain your car in accordance with the maintenance schedule in Section 5. If you drive your car in severe conditions, more frequent maintenance is required (see Section 5 for details).
o Keep your car clean. For maximum service, your Hyundai should be kept clean and free of corrosive materials. It is especially important that mud, dirt, ice, etc. not be al-

DRIVING YOUR HYUNDAI
28
SMOOTH CORNERING
lowed to accumulate on the underside of the car. This extra weight can result in increased fuel consumption and also contribute to corrosion.
o Travel lightly. Don't carry unnecessary weight in your car. Weight reduces fuel economy.
o Don't let the engine idle longer than necessary. If you are waiting (and not in traffic), turn off your engine and restart only when you're ready to go.
o Remember, your Hyundai does not require extended warm-up. After the engine has started, allow the engine to run for 10 to 20 seconds prior to placing the vehicle in gear. In very cold weather, however, give your engine a slightly longer warm-up period.
o Don't "lug" or "over-rev" the engine. Lugging is driving too slowly in too high a gear resulting in the engine bucking. If this happens, shift to a lower gear. Over-revving is racing the engine beyond its safe limit. This can be avoided by shifting at the recommended speeds.
o Use your air conditioning sparingly. The air conditioning system is operated by engine power so your fuel economy is reduced when you use it.
C150A01A-AAT
Avoid braking or gear changing in corners, especially when roads are wet. Ideally, corners should always be taken under gentle acceleration. If you follow these suggestions, tire wear will be held to a minimum.
WINTER DRIVING
DRIVING YOUR HYUNDAI
29
C160A01A-AAT
The more severe weather conditions of winter result in greater wear and other problems. To minimize the problems of winter driving, you should follow these suggestions:
C160B01A-GAT
Snowy or Icy Conditions
To drive your vehicle in deep snow, it may be necessary to use snow tires or to install tire chains on your tires. If snow tires are needed, it is necessary to select tires equivalent in size and type of the original equipment tires. Failure to do so may adversely affect the safety and handling of your car. Furthermore, speeding, rapid acceleration, sudden brake applications, and sharp turns are potentially very hazardous practices.
During deceleration, use engine braking to the fullest extent. Sudden brake applications on snowy or icy roads may cause skids to occur. You need to keep sufficient distance between the vehicle in operation in front and your vehicle. Also, apply the brake gently. It should be noted that installing tire chains on the tire will provide a greater driving force, but will not prevent side skids.
NOTE:
Tire chains are not legal in all provinces. Check province laws before fitting tire chains.
C160CD1A-AAT
Use High Quality Ethylene Glycol Coolant
Your Hyundai is delivered with high quality ethylene glycol coolant in the cooling system. It is the only type of coolant that should be used because it helps prevent corrosion in the cooling system, lubricates the water pump and prevents freezing. Be sure to replace or replenish your coolant in accordance with the maintenance schedule in Section 5. Before winter, have your coolant tested to assure that its freezing point is sufficient for the temperatures anticipated during the winter.
C160D01A-AAT
Check Battery and Cables
Winter puts additional burdens on the battery system. Visually inspect the battery and cables as described in Section 6. The level of charge in your battery can be checked by your Hyundai dealer or a service station.
C160E01A-AAT
Change to "Winter Weight" Oil If Necessary
In some climates it is recommended that a lower viscosity "winter weight" oil be used during cold weather. See Section 9 for recommendations. If you aren't sure what weight oil you should use, consult your Hyundai dealer.
C160F01A-AAT
Check Spark Plugs and Ignition System
Inspect your spark plugs as described in Section 6 and replace them if necessary. Also check all ignition wiring and components to be sure they are not cracked, worn or damaged in any way.
C160G01A-GAT
To Keep Locks from Freezing
To keep the locks from freezing, squirt an approved de-icer fluid or glycerine into the key opening. If a lock is covered with ice, squirt it with an approved de-icing fluid to remove the ice. If the lock is frozen internally, you may be able to thaw it out by using a heated key. Handle the heated key with care to avoid injury.
NOTE:
The proper temperature for using the immobilizer key is from -40°C (-40°F) to 80°C(176°F). If you heat the immobilizer key over 80°C to open the frozen lock, it may cause damage to the transponder in its head.
C160HD1A-AAT
Use Approved Anti-Freeze in Window Washer System
To keep the water in the window washer system from freezing, add an approved anti-freeze solution in accordance with instructions on the container. Window washer anti-freeze is available from Hyundai dealers and most auto parts outlets. Do not use engine coolant or other types of anti-freeze as these may damage the finish.
C160I01A-AAT
Don't Let Your Parking Brake Freeze
Under some conditions your parking brake can freeze in the engaged position. This is most likely to happen when there is an accumulation of snow or ice around or near the rear brakes or if the brakes are wet. If there is a risk the parking brake may freeze, apply it only temporarily while you put the gear selector lever in "P" (automatic) or in first or reverse gear (manual transaxle) and block the rear wheels so the car cannot roll. Then release the parking brake.
C160J01A-AAT
Don't Let Ice and Snow Accumulate Underneath
Under some conditions, snow and ice can build up under the fenders and interfere with the steering. When driving in severe winter conditions where this may happen, you should periodically check underneath the car to be sure the movement of the front wheels and the steering components is not obstructed.
C160K01A-AAT
Carry Emergency Equipment
Depending on the severity of the weather where you drive your car, you should carry appropriate emergency equipment. Some of the items you may want to carry include tire chains, tow straps or chains, flashlight, emergency flares, sand, a shovel, jumper cables, a window scraper, gloves, ground cloth, coveralls, a blanket, etc.
USE OF LIGHTSHIGHER SPEED MOTORLINES OR VEHICLE TOWING
31
C170AD1A-AAT
Pre-Trip Inspections
1. Tires:
Adjust the tire inflation pressures to specification. Low tire inflation pressures will result in overheating and possible failure of the tires.
Avoid using worn or damaged tires which may result in reduced traction or tire failure.
C180A01A-AAT
Check your lights regularly for correct operation and always keep them clean. When driving during the day in conditions of poor visibility, it is helpful to drive with headlights on low beam. This enables you to be seen as well as to see.
C190A02A-GAT
If you are considering towing with your car, you should first check with your Province Department of Motor Vehicles to determine their legal requirements. Since laws vary from province to province the requirements for towing trailers, cars, or other types of vehicles or apparatus may differ. Ask your Hyundai dealer for further details before towing.
NOTE:
Never exceed the maximum tire inflation pressure shown on the tires.
2. Fuel, engine coolant and engine oil:
High speed travel consumes more fuel than urban motoring. Do not forget to check both engine coolant and engine oil.
3. Drive belt:
A loose or damaged drive belt may result in overheating of the engine.

CAUTION:
Do not do any towing with your car during its first 2,000 km (1,200 miles) in order to allow the engine to properly break in. Failure to heed this caution may result in serious engine or transaxle damage.
C190B01S-AAT
Trailer Hitches
Select the proper hitch and ball combination, making sure that it's location is compatible with that of the trailer or vehicle being towed.
Use a quality non-equalizing hitch which distributes the tongue load uniformly throughout the chassis.
The hitch should be bolted securely to the car and installed by a qualified technician. DO NOT USE A HITCH DESIGNED FOR TEMPORARY INSTALLATION AND NEVER USE ONE THAT ATTACHES ONLY TO THE BUMPER.
C190C03S-GAT
Trailer Brakes
If your trailer is equipped with a braking system, make sure it conforms to federal and/or local regulations and that it is properly installed and operating correctly.
NOTE:
If you tow a trailer or vehicle, your car will require more frequent maintenance due to the additional load. See "Maintenance Under Severe Usage Conditions" on page 5-7.

CAUTION:
o Never connect a trailer brake system directly to the vehicle brake system.
When towing a trailer on steep grades (in excess of 12%) pay close attention to the engine coolant temperature gauge to ensure the engine does not overheat. If the needle of the coolant temperature gauge moves across the dial towards "H" (HOT), pull over and stop as soon as it is safe to do so, and allow the engine to idle until it cools down. You may proceed once the engine has cooled sufficiently.
C190D01A-GAT
Safety Chains
Should the hitch connection between your car and the trailer or vehicle you are towing fail, the trailer or vehicle could wander dangerously across other lanes of traffic and ultimately collide with another vehicle. To eliminate this potentially dangerous situation, safety chains, attached between your car and the trailer or towed vehicle, are required in most provinces.
C190E05O-GAT
Trailer Weight Limit
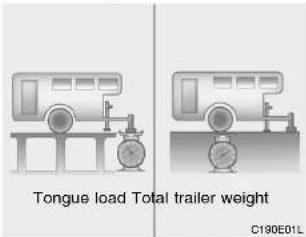
Tongue loads can be increased or decreased by redistributing the load in the trailer.
This can be verified by checking the total weight of the loaded trailer and then checking the load on the tongue.
NOTE:
- Never load the trailer with more weight in the back than in the front. About 60% of the trailer load should be in the front half on the trailer and the remaining 40% in the rear.
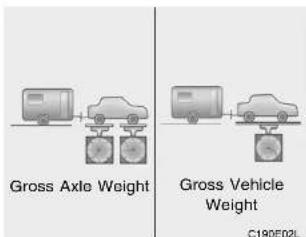
-
The total gross vehicle weight with trailer must not exceed the Gross Vehicle Weight Rating (GVWR) shown on the vehicle identification plate (see page 8-2). The total gross vehicle weight is the combined weight of the vehicle, driver, all passengers and their luggage, cargo, hitch, trailer tongue load and other optional equipment.
-
The front or rear axle weight must not exceed the Gross Axle Weight Rating (GAWR) shown on the vehicle identification plate (see page 8-2). It is possible that your towing package does not exceed the GVWR but exceeds the
GAWR. Improper trailer loading and/or too much luggage in the cargo area can overload the rear axle. Redistribute the load and check the axle weight again.
- The maximum permissible static vertical load on the coupling device is ; Gasoline - 2.0/2.4 : 80kg 2.7 : 92kg
- The maximum permissible overhang of the coupling point is 1,092 mm.

CAUTION:
The following specifications are recommended when towing a trailer. The loaded trailer weight cannot safely exceed the values in the chart below.
kg. (Lbs)
| Maximum Towable Weight | |||
| Engine | Trailer | Tongue | |
| With Brake | 2.0(2WD)* | 2000(4,409) | 80(176) |
| 2.4(4WD) | 1650(3,637) | ||
| 2.4(2WD) | 2000(4,409) | ||
| Diesel WGT(4WD) VGT | 1870(4,122) | ||
| 2000(4,409) | |||
| Diesel (2WD) | 2200(4,850) | 92(203) | |
| 2.7(4WD) | 2300(5,070) | ||
| Without Brake | 2.0(2WD) | 700(1,543)/with ABS:750(1,653) | 28(61.7) |
| 2.4(4WD) | |||
| 2.4(2WD) | |||
| Diesel (4WD) | |||
| Diesel (2WD) | |||
| 2.7(4WD) | |||
*: 225/70 R16 TIRE (If installed)-1900kg (4188)

WARNING:
Improperly loading your car and trailer can seriously affect its steering and braking performance causing a crash which could cause injury or death.
C190F01A-GAT
Trailer or Vehicle Towing Tips
- Before towing, check hitch and safety chain connections as well as proper operation of the trailer running lights, brake lights, and turn signals.
- Always drive your vehicle at a moderate speed (Less than 100 km/h)
- Trailer towing requires more fuel than normal conditions.
- To maintain engine braking efficiency and electrical charging performance, do not use fifth gear (manual transaxle) or overdrive (automatic transaxle).
- Always secure items in the trailer to prevent load shift while driving.
- Check the condition and air pressure of all tires on the trailer and your car. Low tire pressure can seriously affect the handling. Also check the spare tire.
- The vehicle/trailer combination is more affected by crosswind and buffeting. When being passed by a large vehicle, keep a constant speed and steer straight ahead. If there is too much wind buffeting, slow down
to get out of the other vehicle's air turbulence.
- When parking your car and trailer, especially on a hill, be sure to follow all the normal precautions. Turn your front wheel into the curb, set the parking brake firmly, and put the transaxle in 1st or Reverse (manual) or Park (automatic). In addition, place wheel chocks at each of the trailer's tires.
- If the trailer has electric brakes, start your vehicle and trailer moving, and then apply the trailer brake controller by hand to be sure the brakes are working. This lets you check your electrical connection at the same time.
- During your trip, check occasionally to be sure that the load is secure, and that the lights and any trailer brakes are still working.
- Avoid jerky starts, sudden acceleration or sudden stops.
- Avoid sharp turns and rapid lane changes.
-
Avoid holding the brake pedal down too long or too frequently. This could cause the brakes to overheat, resulting in reduced braking efficiency.
-
When going down a hill, shift into a lower gear and use the engine braking effect. When ascending a long grade, downshift the transaxle to a lower gear and reduce speed to reduce chances of engine overloading and/or overheating.
- If you have to stop while going uphill, do not hold the vehicle in place by pressing on the accelerator. This can cause the automatic transaxle to overheat. Use the parking brake or footbrake.
NOTE:
When towing, check transaxle fluid more frequently.

CAUTION:
If overheating should occur when towing, (temperature gauge reads near red zone), taking the following action may reduce or eliminate the problem.
- Turn off the air conditioner.
- Reduce highway speed.
- Select a lower gear when going uphill.
- While in stop and go traffic, place the gear selector in park or neutral and idle the engine at a higher speed.
WHAT TO DO IN AN EMERGENCY
If the Engine Will not Start 3-2
Jump Starting 3-3
If the Engine Overheats 3-4
Spare Tire 3-5
If You Have a Flat Tire 3-7
Changing a Flat Tire 3-7
If Your Vehicle Must Be Towed 3-12
Emergency Towing.... 3-14
If You Lose Your Keys 3-15
3
IF THE ENGINE WILL NOT START
D010A01A-AAT D010B01A-AAT

WARNING:
If the engine will not start, do not push or pull the car to start it. This could result in a collision or cause other damage. In addition, push or pull starting may cause the catalytic converter to be overloaded and create a fire hazard.
If Engine Doesn't Turn Over or Turns Over Slowly
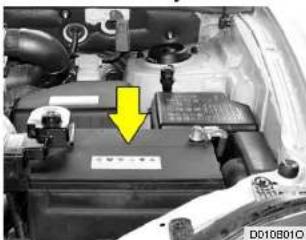
natural_image
Close-up of a car engine bay with a yellow arrow pointing to a battery cover (no visible text or symbols)- If your car has an automatic transaxle, be sure the gear selector lever is in "N" or "P" and the emergency brake is set.
- Check the battery connections to be sure they are clean and tight.
- Turn on the interior light. If the light dims or goes out when you operate the starter, the battery is discharged.
- Check the starter connections to be sure they are securely tightened.
- Do not push or pull the vehicle to start it. See instructions for "Jump Starting" on the following pages.
D010C02A-AAT
If Engine Turns Over Normally but Does Not Start
- Check fuel level.
- With the key in the "OFF" position, check all connectors at ignition coils and spark plugs(For Gasoline Engine) or check all connectors at glow plug and glow plug relay(For Diesel Engine). Reconnect any that may be disconnected or loose.
- Check fuel line in the engine room.
- If engine still refuses to start, call a Hyundai dealer or seek other qualified assistance.
D010D01A-AAT
If Engine Stalls While Driving
- Reduce your speed gradually, keeping a straight line. Move cautiously off the road to a safe place.
- Turn on your emergency flashers.
- Try to start the engine again. If your vehicle will not start, contact a Hyundai dealer or seek other qualified assistance.
JUMP STARTING
WHAT TO DO IN AN EMERGENCY
3
D020A02A-AAT
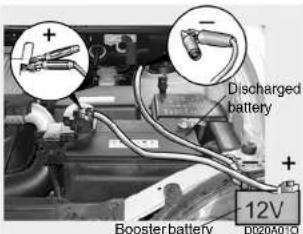
WARNING:
The gas produced by the battery during the jump-start operation is highly explosive. If these instructions are not followed exactly, serious personal injury and damage to the vehicle may occur! If you are not sure how to follow this procedure, seek qualified assistance. Automobile batteries contain sulfuric acid. This Is poisonous and highly corrosive. When jump starting, wear protective glasses and be careful not to get acid on yourself, your clothing or on the car.
If you should accidentally get acid on your skin or in your eyes, immediately remove any contaminated clothing and flush the area with clear water for at least 15 minutes. Then promptly obtain medical attention. If you must be transported to an emergency facility, continue to apply water to the affected area with a sponge or cloth.
o The gas produced by the battery during the jump-start operation is highly explosive. Do not smoke or allow a spark or an open flame in the vicinity.
o The battery being used to provide the jump start must be 12-volts. If you cannot determine that it is a 12-volt battery, do not attempt to use it for the jump start.
To jump start a car with a discharged battery, follow this procedure exactly:
- If the booster battery is installed in another vehicle, be sure the two vehicles are not touching.
- Turn off all unnecessary lights and accessories in both vehicles.
- Attach the clamps of the jumper cable in the exact location shown in the illustration. First, attach one clamp of the jumper cable to the positive (+) post or cable of the discharged battery. Then attach the other end of the same cable to the positive (+) post or cable of the booster battery. Next, using the other cable, attach one clamp to the negative (-) post or cable of the booster battery. Then attach the other end of that cable to a solid metal part of the engine away from the battery. Do not connect the cable to any moving part.
- Start the engine in the car with the booster battery and let it run for a few minutes. This will help to assure that the booster battery is fully charged. During the jumping operation, run the engine in this vehicle at about 2000 rpm.
IF THE ENGINE OVERHEATS
- Start the engine in the car with the discharged battery using the normal starting procedure. After the engine starts, leave the jumper cables connected and let the engine run at fast idle or about 2000 rpm for several minutes.
- Carefully remove the jumper cables in the reverse order of attachment.
If you do not know why your battery became discharged (because the lights were left on, etc.), have the charging system checked by your Hyundai dealer.
D030A02TB-AAT
If your temperature gauge indicates overheating, you experience a loss of power, or hear loud pinging or knocking, the engine is probably too hot. If this happens to you, you should:
- Pull off the road and stop as soon as it is safe to do so.
- Place the gear selector lever in "P" (automatic), or neutral (manual transaxle) and set the parking brake. If the air conditioning is on, turn it off.
- If engine coolant is running out under the car or steam is coming out from the hood, stop the engine. Do not open the hood until the engine coolant has stopped running or the steaming has stopped. If there is no visible loss of coolant and no steam, leave the engine running and check to be sure the engine cooling fan is operating. If the fan is not running, turn the engine off.
- Check to see if the water pump drive belt is missing. If it is not missing, check to see that it is tight. If the drive belt seems to be satisfactory,
check for engine coolant leaking from the radiator, hoses or under the car. (If the air conditioning had been in use, it is normal for cold water to be draining from it when you stop).

WARNING:
While the engine is running, keep hands and clothing away from moving parts such as the fan and drive belts to prevent injury.

WARNING (Diesel only):
Never work on injection system with engine running or within 30 seconds after shutting off engine. High pressure pump, rail, injectors and high pressure pipes are subject to high pressure even after the engine stopped. The fuel jet produced by fuel leaks may cause serious injury, if it touch the body. People using pacemakers should not move than 30cm closer to the ECU or
SPARE TIRE
5
wiring harness within the engine room while engine is running, since the high currents in the Common Rail system produce considerable magnetic fields.
-
If the water pump drive belt is broken or coolant is leaking out, stop the engine immediately and call the nearest Hyundai dealer for assistance.
-
Proceed with caution, keeping alert for further signs of overheating. If overheating happens again, call a Hyundai dealer for assistance.

CAUTION:
Serious loss of coolant indicates there is a leak in the cooling system and this should be checked as soon as possible by a Hyundai dealer.
D040A010-GAT
The following instructions for the FULL SIZE spare tire should be observed:
Check inflation pressure as soon as practical after installing the spare tire, and adjust to the specified pressure. The tire pressure should be periodically checked and maintained at the specified pressure while the tire is stored.

WARNING:
Do not remove the radiator cap when the engine is hot. This can allow coolant to be blown out of the opening and cause serious burns.
- If you cannot find the cause of the overheating, wait until the engine temperature has returned to normal. Then, if coolant has been lost, carefully add coolant to the reservoir (page 6-16) to bring the fluid level in the reservoir up to the halfway mark.
Spare Tire Pressure
| Tire Size | Full Size |
| Inflation Pressure | 207 kPa (30 psi) |
DD40B02B-GAT
Handling the Spare Tire
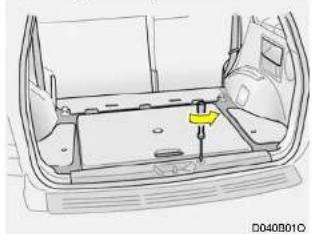
natural_image
Technical line drawing of a vehicle chassis with a yellow sensor mounted on the side panel (no text or symbols)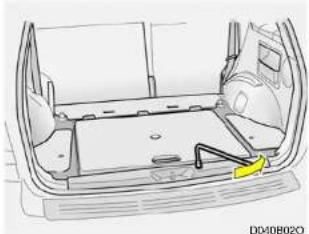
natural_image
Technical line drawing of a vehicle rear panel with a yellow arrow indicating a component (no text or symbols present)- Loosen the mounting bolt with a wheel nut wrench.
To remove the spare tire
- Open the tail gate.
- Remove the mounting bolt cover with a screwdriver or coin.
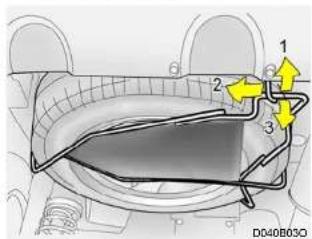
- Lift up the hanger and separate it from the holder, then lower the hanger and remove the spare tire.
To reinstall the spare tire
- Set the spare tire on the center of the hanger, and then raise the hanger and hook it onto the holder.
- Tighten the mounting bolt with the wheel nut wrench.
- Install the mounting bolt cover with a screwdriver.
IF YOU HAVE A FLAT TIRE
CHANGING A FLAT TIRE
WHAT TO DO IN AN EMERGENCY
7
D050A01A-AAT
If a tire goes flat while you are driving:
- Take your foot off the accelerator pedal and let the car slow down while driving straight ahead. Do not apply the brakes immediately or attempt to pull off the road as this may cause a loss of control. When the car has slowed to such a speed that it is safe to do so, brake carefully and pull off the road. Drive off the road as far as possible and park on firm, level ground. If you are on a divided highway, do not park in the median area between the two traffic lanes.
- When the car is stopped, turn on your emergency hazard flashers, set the parking brake and put the transaxle in "P" (automatic) or reverse (manual transaxle).
- Have all passengers get out of the car. Be sure they all get out on the side of the car that is away from traffic.
- Change the tire according to the instructions provided as following.
DD60A01O-AAT
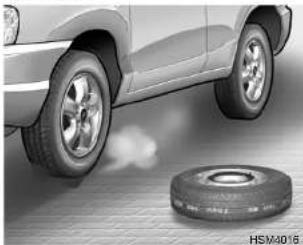
natural_image
Side view of a car with a tire and exhaust pipe nearby (no visible text or symbols)The procedure described on the following pages can be used to rotate tires as well as to change a flat tire. When preparing to change a flat tire, check to be sure the gear selector lever is in "P" (automatic transaxle) or reverse gear (manual transaxle) and that the parking brake is set, then:

WARNING:
Your vehicle is equipped with tires designed to provide for safe ride and handling capability. Do not use a size and type of tire and wheel that is different from the one that is originally installed on your vehicle. It can affect the safety and performance of your vehicle, which could lead to handling failure or rollover and serious injury. When replacing the tires, be sure to equip all four tires with the tire and wheel of the same size, type, tread, brand and load-carrying capacity. If you nevertheless decide to equip your vehicle with any tire/wheel combination not recommended by Hyundai for off-road driving, you should not use these tires for highway driving.
D080B02C-AAT
- Obtain Spare Tire and Tool
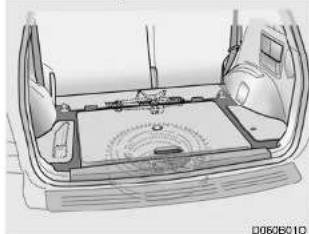
natural_image
Technical line drawing of a car interior showing structural components and dashboard (no text or symbols)Remove the spare tire and remove the jack and tool bag from the luggage compartment.
NOTE:
The spare tire is located underneath the car.
DD60C01A-AAT
- Block the Wheel
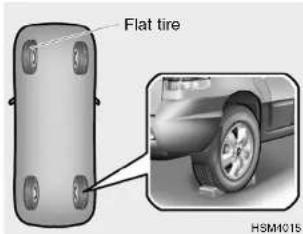
Block the wheel that is diagonally opposite from the flat to keep the vehicle from rolling when the car is raised on the jack.
D060D01A-AAT
- Loosen Wheel Nuts
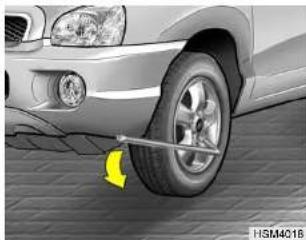
natural_image
Close-up of a car tire mounted on a surface with a yellow arrow indicating the wheel (no text or symbols visible)The wheel nuts should be loosened slightly before raising the car. To loosen the nuts, turn the wrench handle counterclockwise. When doing this, be sure that the socket is seated completely over the nut so it cannot slip off. For maximum leverage, position the wrench so the handle is to the left as shown in the drawing. Then, while holding the wrench near the end of the handle, push down on it with steady pressure. Do not remove the nuts at this time. Just loosen them about one-half turn.
D080ED1A-AAT
- Put the Jack in Place
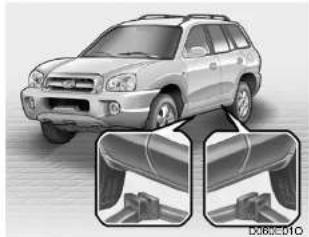
natural_image
Side view of a silver SUV with two inset diagrams showing front and rear views (no text or symbols)The base of the jack should be placed on firm, level ground. The jack should be positioned as shown in the drawing.
D060F02E-AAT
- Raising the Car
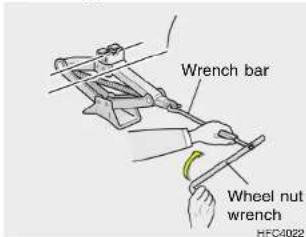
After inserting a wrench bar into the wheel nut wrench, install the wrench bar into the jack as shown in the drawing. To raise the vehicle, turn the wheel nut wrench clockwise. As the jack begins to raise the vehicle, double check that it is properly positioned and will not slip. If the jack is on soft ground or sand, place a board, brick, flat stone or other object under the base of the jack to keep it from sinking.
Raise the car high enough so that the fully inflated spare tire can be installed. To do this, you will need more ground clearance than is required to remove the flat tire.

WARNING:
Do not get under the car when it is supported by the jack! This is very dangerous as the vehicle could fall and cause serious injury or death. No one should stay in the car while the jack is being used.
D080G02Y-AAT
- Changing Wheels
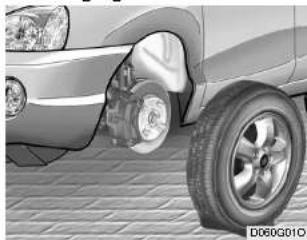
natural_image
Close-up of a car's wheel and suspension components on a textured surface (no visible text or symbols)Loosen the wheel nuts and remove them with your fingers. Slide the wheel off the studs and lay it flat so it cannot roll away. To put the wheel on the hub, pick up the spare tire, line up the holes with the studs and slide the wheel onto them. If this is difficult, tip the wheel slightly and get the top hole in the wheel lined up with the top stud. Then jiggle the wheel back and forth until the wheel can be slid over the other studs.
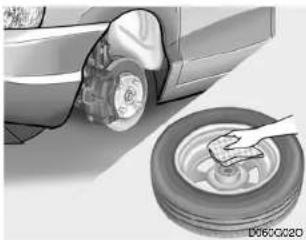
natural_image
Illustration of a car wheel rim and tire assembly with a hand holding a tool, no text or symbols present.
WARNING:
Wheel and wheel covers may have sharp edges. Handle them carefully to avoid possible severe injury.
Before putting the wheel into place, be sure that there is nothing on the hub or wheel (such as mud, tar, gravel, etc.) that interferes with the wheel from fitting solidly against the hub. If there is, remove it. If there is not good contact on the mounting surface between the wheel and hub, the wheel nuts could
loosen and cause the loss of a wheel. Loss of a wheel may result in loss of control of the vehicle. This may cause serious injury or death.
D060H02O-AAT
- Reinstall Wheel Nuts
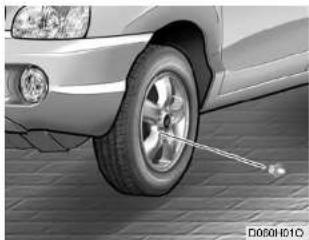
natural_image
Side view of a car tire mounted on pavement, showing tire damage and a small sensor attached (no text or symbols visible)To reinstall the wheel, hold it on the studs, put the wheel nuts on the studs and tighten them finger tight. The nuts should be installed with their small diameter ends directed inward. Jiggle the tire to be sure it is completely seated, then tighten the nuts as much as possible with your fingers again.
D080101E-GAT
- Lower Vehicle and Tighten Nuts
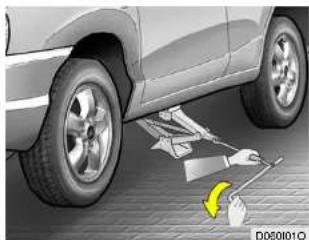
natural_image
Side view of a car tire with a tool and yellow warning symbol on the side (no text or symbols present)Lower the car to the ground by turning the wheel nut wrench counterclockwise.
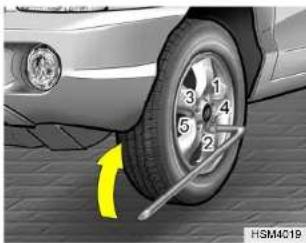
natural_image
Close-up of a car tire with a yellow arrow indicating clockwise motion (no text or symbols)Then position the wrench as shown in the drawing and tighten the wheel nuts. Be sure the socket is seated completely over the nut. Do not stand on the wrench handle or use an extension pipe over the wrench handle.
Go around the wheel tightening every other nut until they are all tight. Then double-check each nut for tightness. After changing wheels, have a technician tighten the wheel nuts to their proper torque as soon as possible.
Wheel nut tightening torque:
Steel wheel & aluminium alloy wheel: 900-1,100 kg.cm (65-80 lb.ft)
D06DJ01O-AAT
AFTER CHANGING WHEELS
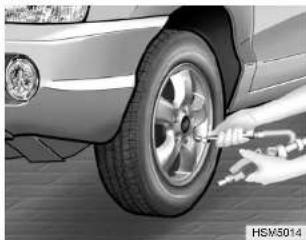
natural_image
Close-up of a car tire being cleaned with a tool, showing mechanical components (no text or symbols visible)If you have a tire gauge, remove the valve cap and check the air pressure. If the pressure is lower than recommended, drive slowly to the nearest service station and inflate to the correct pressure. If it is too high, adjust it until it is correct. Always reinstall the valve cap after checking or adjusting tire pressure. If the cap is not replaced, air may leak from the tire. If you lose a valve cap, buy another and install it as soon as possible.
After you have changed wheels, always secure the flat tire in its place and return the jack and tools to their proper storage locations.

WHAT TO DO IN AN EMERGENCY
12
IF YOUR VEHICLE MUST BE TOWED
D80A01G-GAT If your vehicle has to be towed, it should be done by your Hyundai dealer or a commercial tow truck service. This will help assure that your vehicle is not damaged in towing. Also, professionals are generally aware of local laws governing towing. In any case, rather than risk damage to your car, it is suggested that you show this information to the tow truck operator. Be sure that a safety chain system is used and that all local laws are observed. It is recommended that your vehicle be towed with a wheel lift and dollies or flatbed equipment with all the wheels off the ground.

CAUTION:
o Your vehicle can be damaged if towed incorrectly!
o Be sure the transaxle is in neutral.
When the engine will not start, be sure the steering is unlocked by placing the key in the "ACC" position.
DD00010-GAT
Towing the 2 Wheel Drive Vehicle
1)
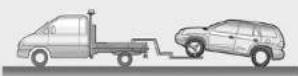
2)
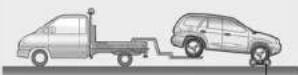
dolly
3)
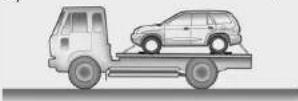
HSM4027
Your vehicle can be towed by wheel lift type truck (1), (2) or flatbed equipment (3).

CAUTION:
When towing the vehicle, take care not to cause damage to the bumper or underbody of the vehicle.
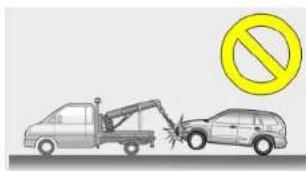
HSM4028
Do not tow with sling type truck as this may cause damage to the bumper or underbody of the vehicle.
1) If the vehicle is being towed with the rear wheels on the ground, be sure the parking brake is released.
NOTE:
Before towing, check the level of the automatic transaxle fluid. If it is below the "HOT" range on the dipstick, add fluid. If you cannot add fluid, a towing dolly must be used.
2) If any of the loaded wheels or suspension components are damaged or the vehicle is being towed with the front wheels on the ground, use a towing dolly under the front wheels. o Manual Transaxle:
If you do not use a towing dolly, place the ignition key in the "ACC" position and put the transaxle in "N (Neutral)".

CAUTION:
Do not tow with the key removed or in the "LOCK" position when towing from the rear without a towing dolly.
o Automatic Transaxle: Be sure to use a towing dolly under the front wheels.

CAUTION:
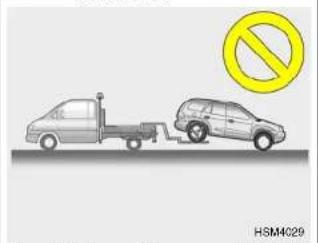
natural_image
Illustration of a flatbed truck and two cars on a road with a yellow prohibition symbol (no text or labels)A vehicle with an automatic transaxle should never be towed from the rear with the front wheels on the ground. This can cause serious damage to the transaxle.
3) It is recommended that your vehicle be towed with all the wheels off the ground.
D000C01O-GAT
Towing the 4 Wheel Drive Vehicle
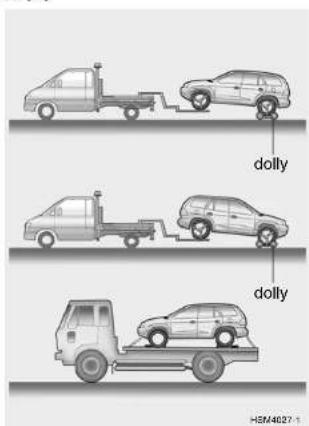
When towing the 4WD vehicle, it must be towed by lifting all 4 wheels or using the towing dolly.

CAUTION:
- The 4WD vehicle should never be towed with the wheels on the ground. This can cause serious damage to the transaxle or the 4WD system.
When towing the vehicle, take care not to cause damage to the bumper or underbody of the vehicle.
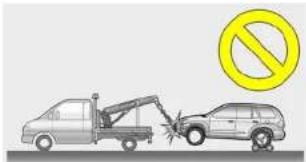
Do not tow with sling type truck as this may cause damage to the bumper or underbody of the vehicle.
DDDD020-GAT
EMERGENCY TOWING
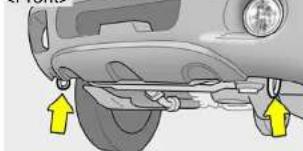
natural_image
Close-up of a car's front wheel and side-mounted sensors, showing yellow arrows indicating mounting points (no text or symbols present)Towing Hooks
HSM430
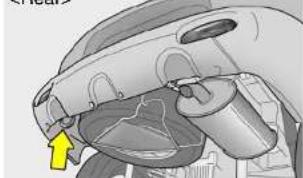
natural_image
Close-up of a car's front wheel and dashboard (no visible text or symbols)Towing Hook
HSM4037
For emergency towing when no commercial tow vehicle is available, attach a tow cable, chain or strap to one of the towing hooks under the front/rear of
your car. Be very careful when attempting this procedure when the vehicle is on any unpaved surface to avoid damage to your vehicle.
Nor should towing be attempted if the wheels, drive train, axles, steering or brakes are damaged. Before towing, be sure the transaxle is in neutral and the key is in "ACC" (with the engine off) or in the "ON" position (with the engine running). A driver must be in the towed car to steer it and operate the brakes.
NOTE:
To avoid serious damage to your 4WD vehicle, limit the towing to 15 km/h (10 mph) and not for more than 1.5 km (1 mile) at ANY TIME.
Before towing, check the level of the automatic transaxle fluid. If it is below the "HOT" range on the dipstick, add fluid. If you cannot add fluid, a towing dolly must be used.
IF YOU LOSE YOUR KEYS

CAUTION:
If the car is being towed with all four wheels on the ground, it can be towed only from the front. Be sure that the transaxle is in neutral. Do not tow at speeds greater than 50 km/h (30 mph) and for more than 25 km (15 miles).
Be sure the steering is unlocked by placing the key in the "ACC" position. A driver must be in the towed vehicle to operate the steering and brakes.
D120A01A-GAT
If you lose your keys, many Hyundai dealers can make you a new key if you have your key number. If you lock the keys inside your car and you cannot obtain a new key, many Hyundai dealers can use special tools to open the door for you.
Information about the key of immobilizer system (if installed) will be found on page 1-5.
CORROSION PREVENTION & APPEARANCE CARE
Corrosion Protection 4-2
To Help Prevent Corrosion.... 4-3
Washing and Waxing 4-4
Cleaning the Interior 4-6
4
CORROSION PREVENTION AND APPEARANCE CARE
2
CORROSION PROTECTION
ED10A01A-AAT
Protecting Your Hyundai from Corrosion
By using the most advanced design and construction practices to combat corrosion, Hyundai produces cars of the highest quality. However, this is only part of the job. To achieve the long-term corrosion resistance your Hyundai can deliver, the owner's cooperation and assistance is also required.
ED10B01A-AAT
Common Causes of Corrosion
The most common causes of corrosion on your car are:
o Road salt, dirt and moisture that is allowed to accumulate underneath the car.
o Removal of paint or protective coatings by stones, gravel, abrasion or minor scrapes and dents which leave unprotected metal exposed to corrosion.
E010C01A-AAT
High-Corrosion Areas
If you live in an area where your car is regularly exposed to corrosive materials, corrosion protection is particularly important. Some of the common causes of accelerated corrosion are road salts, dust control chemicals, ocean air and industrial pollution.
E010001A-AAT
Moisture Breeds Corrosion
Moisture creates the conditions in which corrosion is most likely to occur. For example, corrosion is accelerated by high humidity, particularly when temperatures are just above freezing. In such conditions, the corrosive material is kept in contact with the car surfaces by moisture that is slow to evaporate.
Mud is particularly corrosive because it is slow to dry and holds moisture in contact with the vehicle. Although the mud appears to be dry, it can still retain the moisture and promote corrosion. High temperatures can also accelerate corrosion of parts that are not properly ventilated so the moisture can be dispersed. For all these reasons, it is particularly important to keep your car clean and free of mud or accumulations of other materials. This applies not only to the visible surfaces but particularly to the underside of the car.
TO HELP PREVENT CORROSION
E020A01A-AAT
You can help prevent corrosion from getting started by observing the following:
E020B01A-AAT
Keep Your Car Clean
The best way to prevent corrosion is to keep your car clean and free of corrosive materials. Attention to the underside of the car is particularly important.
If you live in a high-corrosion area — where road salts are used, near the ocean, areas with industrial pollution, acid rain, etc.—, you should take extra care to prevent corrosion. In winter, hose off the underside of your car at least once a month and be sure to clean the underside thoroughly when winter is over.
When cleaning underneath the car, give particular attention to the components under the fenders and other areas that are hidden from view. Do a thorough job; just dampening the accumulated mud rather than wash-
ing it away will accelerate corrosion rather than prevent it. Water under high pressure and steam are particularly effective in removing accumulated mud and corrosive materials.
When cleaning lower door panels, rocker panels and frame members, be sure that drain holes are kept open so that moisture can escape and not be trapped inside to accelerate corrosion.
E020C01A-AAT
Keep Your Garage Dry
Don't park your car in a damp, poorly ventilated garage. This creates a favorable environment for corrosion. This is particularly true if you wash your car in the garage or drive it into the garage when it is still wet or covered with snow, ice or mud. Even a heated garage can contribute to corrosion unless it is well ventilated so moisture is dispersed.
E020D01A-AAT
Keep Paint and Trim in Good Condition
Scratches or chips in the finish should be covered with "touch-up" paint as soon as possible to reduce the possibility of corrosion. If bare metal is showing through, the attention of a qualified body and paint shop is recommended.
E020E01A-AAT
Don't Neglect the Interior
Moisture can collect under the floor mats and carpeting to cause corrosion. Check under the mats periodically to be sure the carpeting is dry. Use particular care if you carry fertilizers, cleaning materials or chemicals in the car.
These should be carried only in proper containers and any spills or leaks should be cleaned up, flushed with clear water and thoroughly dried.
CORROSION PREVENTION AND APPEARANCE CARE
4
WASHING AND WAXING
E000A01A-AAT
Washing Your Hyundai
Never wash your car when the surface is hot from being in the sun. Always wash your car in the shade.
Wash your car frequently. Dirt is abrasive and can scratch the paint if it is not removed. Air pollution or acid rain may damage the paint and trim through chemical action if pollutants are allowed to remain in contact with the surface. If you live near the ocean or in an area where road salts or dust control chemicals are used, you should pay particular attention to the underside of the car. Start by rinsing the car to remove dust and loose dirt. In winter, or if you have driven through mud or muddy water, be sure to thoroughly clean the underside as well. Use a hard direct stream of water to remove accumulations of mud or corrosive materials. Use a good quality car-washing solution and follow the manufacturer's directions on the package.
These are available at your Hyundai dealer or auto parts outlet. Don't use strong household detergents, gasoline, strong solvents or abrasive cleaning powders as these may damage the finish.
Use a clean sponge or cloth, rinse it frequently and don't damage the finish by rubbing too hard. For stubborn spots, dampen them frequently and remove them a little at a time.
To clean whitewall tires, use a stiff brush or soapy steel-wool scouring pad.
To clean plastic wheel covers, use a clean sponge or soft cloth and water.
To clean cast aluminum alloy wheels, use a mild soap or neutral detergent. Do not use abrasive cleaners. Protect the bare-metal surfaces by cleaning, polishing and waxing. Because aluminum is subject to corrosion, be sure to give aluminum alloy wheels special attention in winter. If you drive on salted roads, clean the wheels thoroughly afterwards.
After washing, be sure to rinse thoroughly. If soapy water dries on the finish, streaking will result. When the weather is warm and the humidity low, you may find it necessary to rinse each section immediately after washing to avoid streaking.
After rinsing, dry the car using a damp chamois or soft, absorbent cloth. The reason for drying the car is to remove water from the car so it will dry without water spots. Don't rub, this can damage the finish.
If you find any nicks or scratches in the paint, use touch-up paint to cover them to prevent corrosion. To protect the paintwork of the car against corrosion, you must clean your Hyundai (at least once a month). Give special attention to the removal of salt, mud and other substances on the underside of the splashboards of the car. Make sure that the outlets and the underside of the doors are open. Paint damage can be caused by small accumulation of tar, industrial precipitation, tree resin, insects and bird droppings, when not removed immediately. If water alone is not strong enough to remove the accumulated dirt, use a mild car washing
solution. Be sure to rinse the surface after washing to remove the solution. Never allow the solution to dry on the painted surfaces.
E030B01A-AAT
Spot Cleaning
Don't use gasoline, strong solvents or corrosive cleaning agents. These can damage the finish of the car. To remove road tar, use turpentine on a clean, soft cloth or commercially available bug and tar remover. Be gentle. To remove dead insects or tree sap, use warm water and mild soap or car-washing solution. Soak the spot and rub gently. If the paint has lost its luster, use a commercial car-cleaning polish.
E030C01A-AAT
Polishing and Waxing
Always wash and dry the car before polishing or waxing or using a combination cleaner and wax. Use a good quality commercial product and follow the manufacturer's directions on the container. Polish and wax the bright trim pieces as well as the paint.
E030001A-AAT
When to Wax Again
You should polish and wax the car again when water no longer beads on a clean surface but spreads out over a larger area.
E030E01A-AAT
Maintaining Bumpers
Special precautions must be observed to preserve the appearance of the bumpers on your Hyundai. They are:
o Be careful not to spill battery electrolyte or hydraulic brake fluid on the bumpers. If you do, wash it off immediately with clean water.
o Be gentle when cleaning the bumper surfaces. They are made of soft plastic and the surface can be damaged if mistreated. Do not use abrasive cleaners. Use warm water and mild soap or car-washing solution.
Do not expose the bumpers to high temperatures. For example, if you have your car repainted, do not leave the bumpers on the car if the car is going to be placed in a high-temperature paint booth.
CORROSION PREVENTION AND APPEARANCE CARE
CLEANING THE INTERIOR
E040A01A-AAT
To Clean the Vinyl Upholstery
To clean the vinyl upholstery, first remove loose dirt and dust with a vacuum cleaner. Then apply a solution of mild soap or detergent and water using a clean sponge or soft cloth. Allow this to stay on the surface to loosen the dirt, then wipe with a clean damp sponge or cloth. If all the dirt stains are not removed, repeat this procedure until the upholstery is clean. Do not use gasoline, solvent, paint thinner or other strong cleaners.
E040B01A-AAT
To Clean the Leather Upholstery (If Installed)
In the normal course of use, leather upholstered surfaces will, like any material, pick-up dust and dirt. This dust and dirt must be cleaned off or it may work into the surface of the leather, causing damage.
Fine leather needs care, and should be cleaned when necessary. Washing leather thoroughly with soap and water will keep your leather lustrous, beautiful and ensure you have many years of wear.
Take a piece of cheese cloth and using any mild soap and lukewarm water, work up a good lather. Thoroughly wash the leather. Wipe clean with a slightly damp cloth and dry with soft cloth. Do this as often as the leather becomes soiled.
During tanning operations, sufficient oils are incorporated through processing that none need be applied during the life of the leather. Oil applied to the finished surface will in no way help the leather and may do more harm than good. Varnishes and furniture polishes should never be used under any conditions.
E040C01A-AAT
Cleaning the Carpets
Use a foam-type carpet cleaner. Cleaners of this type are available in aerosol cans in liquid form or powder. Read the instructions and follow them exactly. Using a vacuum cleaner with the appropriate attachment, remove as much dirt from the carpets as possible. Apply the foam following the manufacturer's directions, then rub in overlapping circles. Do not add water. These cleaners work best when the carpet is kept as dry as possible.
CORROSION PREVENTION AND APPEARANCE CARE
ANY QUESTIONS?
7
E040001A-AAT
Cleaning the Seat Belts
To clean the seat belts, use a cloth or sponge with mild soap or detergent and warm water. Do not use strong detergents, dye, bleach or abrasive materials on the seat belts as this may weaken the fabric.
While cleaning the belts, inspect them for excessive wear, cuts, fraying or other signs of damage and replace them if necessary.
E04DE01A-AAT
Cleaning the Windows
You may use any household window cleaner on the windows. However, when cleaning the inside of the rear window be careful not to damage the rear window defroster wiring.
E050A01A-AAT
If you have any questions about the care of your car, consult your Hyundai dealer.
VEHICLE MAINTENANCE REQUIREMENTS
Maintenance Intervals 5-2
Scheduled Maintenance 5-4
Maintenance Under Severe Usage Conditions .... 5-7
Explanation of Scheduled Maintenance Items 5-8
5
5 VEHICLE MAINTENANCE REQUIREMENTS
2
MAINTENANCE INTERVALS
F010A01A-GAT
Service Requirements
To assure that you receive the greatest number of kilometers of satisfying operation from your Hyundai, certain maintenance procedures must be performed. Although careful design and engineering have reduced these to a minimum, those that are required are of the utmost importance.
It is your responsibility to have these maintenance procedures performed to comply with the terms of the warranties covering your new Hyundai. The Service Passport supplied with your new vehicle provides further information about these warranties.
F010B01A-AAT
Maintenance Requirements
The maintenance required for your Hyundai can be divided into three main areas:
o Specified scheduled procedures
o General checks
o Do-it-yourself maintenance
F010C01A-GAT
Specified Scheduled Procedures
These are the procedures such as inspections, adjustments and replacements that are listed in the maintenance charts starting on page 5-4. These procedures must be performed at the intervals shown in the maintenance schedule to assure that your warranty remains in effect. Although it is strongly recommended that they be performed by the factory-trained or distributor-trained technicians at your Hyundai dealer, these procedures may be performed at any qualified service facility.
It is suggested that genuine Hyundai service parts be used for any required repairs or replacements. Other parts of equivalent quality such as engine oil, engine coolant, manual or auto transaxle oil, brake fluid and so on which are not supplied by Hyundai Motor Company or its distributor may be used without affecting your warranty coverage but you should always be sure these are equivalent to the quality of the original Hyundai parts. Your Service Passport provides further information about your warranty coverage.
F010D01A-AAT
General Checks
These are the regular checks you should perform when you drive your Hyundai or you fill the fuel tank. A list of these items will be found on page 6-6.
SCHEDULED MAINTENANCE REQUIREMENTS
F010E01A-AAT
Do-It-Yourself Maintenance
If you are mechanically inclined, own a few tools that are required and want to take the time to do so, you can inspect and service a number of items. For more information about doing it yourself, see Section 6.
F020A01Y-GAT
Inspection should be performed any time a malfunction is experienced or suspected. Receipts for all emission control system services should be retained to demonstrate compliance with conditions of the emissions system warranty.
For severe usage maintenance requirements, see page 5-7 of this section.
F010F01A-GAT
A Few Tips
Whenever you have your Hyundai serviced, keep copies of the service records in your glovebox. This will help ensure that you can document that the required procedures have been performed to keep your warranties in effect. This is especially important when service is not performed by an authorized Hyundai dealer.
SCHEDULED MAINTENANCE
FOODA01A-GAT
The following maintenance services must be performed to assure good vehicle control and performance. Keep receipts for all vehicle services to protect your warranty. Where both kilometrage and time are shown, the frequency of service is determined by whichever occurs first.
F030B04Q-GAT
R :Replace I : Inspect and, after Inspection, clean, adjust, repair or replace of necessary.
| NO. | DESCRIPTION | KILOMETERS X 1000 | 15 | 30 | 45 | 60 | 75 | 90 | 105 | 120 | |
| MONTHS | 12 | 24 | 36 | 48 | 60 | 72 | 84 | 96 | |||
| ENGINE CONTROL SYSTEM MAINTENANCE (GASOLINE) | |||||||||||
| 1 | ENGINE OIL & FILTER | R | R | R | R | R | R | R | R | ||
| 2 | DRIVE BELT | 2.0 I4 / 2.4 I4 (ALTERNATOR, WATER PUMP, P/STR'G) | I | I | I | R | I | I | I | R | |
| 2.7 V6 (AUTO-TENSIONER, ALTERNATOR, P/STR'G, A/CON) | I | I | I | I | I | I | I | R | |||
| 3.5 V6 (ALTERNATOR, P/STR'G, A/CON) | |||||||||||
| 3 | FUEL FILTER (MPI TYPE) | R | R | ||||||||
| 4 | FUEL LINES, FUEL HOSES & CONNECTIONS | I | I | I | I | I | I | I | I | ||
| 5 | TIMING BELT | I | R | ||||||||
| 6 | VAPOR HOSE & FUEL FILLER CAP | I | I | I | I | ||||||
| 7 | CRANKCASE VENTILATION HOSES | I | I | ||||||||
| 8 | AIR CLEANER FILTER | I | R | I | R | I | R | I | R | ||
| 9 | FUEL TANK AIR FILTER | I | I | R | I | I | R | I | I | ||
| 10 | SPARK PLUG | See Note (1) | |||||||||
| 11 | SPARK PLUG (PLATINUM COATED) | See Note (2) | |||||||||
NOTE: (1) Every 40,000 km : "R"
(2) Every 100,000 km : "R"
F0300020-GAT
R :Replace
I: Inspect and, after Inspection, clean, adjust, repair or replace if necessary.
| NO. | DESCRIPTION | KILOMETERS X 1000 | 15 | 30 | 45 | 60 | 75 | 90 | 105 | 120 | |
| MONTHS | 12 | 24 | 36 | 48 | 60 | 72 | 84 | 96 | |||
| ENGINE CONTROL SYSTEM MAINTENANCE (DIESEL) | |||||||||||
| 1 | ENGINE OIL & FILTER See Note (1) | R | R | R | R | R | R | R | R | ||
| 2 | AIR CLEANER FILTER | I | I | R | I | I | R | I | I | ||
| 3 | FUEL FILTER CARTRIDGE | European Community Only | R | R | R | R | |||||
| Except European Community | See Note (2) | ||||||||||
| 4 | TIMING BELT | R | |||||||||
| 5 | DRIVE BELT (FOR P/STR'G PUMP, ALTERNATOR & A/CON) | I | I | R | I | ||||||
| 6 | ALTERNATOR VACUUM PUMP | I | I | I | I | I | I | I | I | ||
| 7 | ALTERNATOR OIL HOSE & VACUUM HOSE | I | I | I | I | I | I | I | I | ||
| 8 | FUEL LINES, FUEL HOSE & CONNECTIONS | I | I | I | I | I | I | I | I | ||
| 9 | VACUUM HOSE (FOR EGR & THROTTLE BODY) | I | I | I | I | I | I | I | I | ||
NOTE: (1) EVERY 500 KM OR BEFORE STARTING A LONG TRIP: "I"
(2) INSPECT EVERY 7,500KM OR 6 MONTHS AND REPLACE EVERY 15,000KM OR 12 MONTHS.
WHEN REPLACING THE FUEL FILTER CARTRIDGE, USE HYUNDAI GENUINE PARTS.
5 VEHICLE MAINTENANCE REQUIREMENTS
6
F030C040-GAT
R : Replace I : Inspect and, after inspection, clean, adjust, repair or replace if necessary
| NO. | DESCRIPTION | KILOMETERS X 1000 | 15 | 30 | 45 | 60 | 75 | 90 | 105 | 120 | |
| MONTHS | 12 | 24 | 36 | 48 | 60 | 72 | 84 | 96 | |||
| GENERAL MAINTENANCE | |||||||||||
| 1 | COOLING SYSTEM | I | I | I | I | I | I | I | I | ||
| 2 | COOLANT | Gasoline Engine | See Note (1) | ||||||||
| Diesel Engine | R | R | R | R | |||||||
| 3 | MANUAL TRANSAXLE OIL | I | I | I | I | I | I | I | I | ||
| 4 | AUTOMATIC TRANSAXLE FLUID | European Community Only | I | I | I | I | I | R | I | I | |
| Except European Community | I | I | I | I | I | I | I | I | |||
| 5 | BRAKE HOSES AND LINES | I | I | I | I | I | I | I | I | ||
| 6 | BRAKE FLUID | I | I | I | I | ||||||
| 7 | REAR BRAKE DRUMS/LININGS, PARKING BRAKE | I | I | I | I | ||||||
| 8 | BRAKE PADS, CALIPERS AND ROTORS | I | I | I | I | I | I | I | I | ||
| 9 | EXHAUST PIPE AND MUFFLER | I | I | I | I | I | I | I | I | ||
| 10 | SUSPENSION MOUNTING BOLTS | I | I | I | I | I | I | I | I | ||
| 11 | STEERING GEAR BOX, LINKAGE & BOOTS / LOWER ARM BALL JOINT | I | I | I | I | I | I | I | I | ||
| 12 | POWER STEERING PUMP AND HOSES | I | I | I | I | I | I | I | I | ||
| 13 | DRIVE SHAFTS AND BOOTS | I | I | I | I | ||||||
| 14 | AIR CONDITIONING REFRIGERANT | I | I | I | I | I | I | I | I | ||
| 15 | AIR CONDITIONER FILTER (FOR EVAPORATOR AND BLOWER UNIT) | R | R | R | R | R | R | R | R | ||
| 16 | TRANSFER CASE OIL (4WD) | See Note (2) | |||||||||
| 17 | REAR AXLE OIL (4WD) | See Note (3) | |||||||||
| 18 | PROPELLAR SHAFT CLEAN, BOLT RETIGHTEN (4WD) | I | I | I | I | ||||||
NOTE : (1) FOR EVERY 24 MONTHS OR 45,000 KM, WHICHEVER OCCURS FIRST : "R"
(2) INSPECT EVERY 40,000 KM AND REPLACE EVERY 100,000 KM
(3) WITH LSD - INSPECT EVERY 40,000 KM AND REPLACE EVERY 80,000 KM
WITHOUT LSD - INSPECT EVERY 40,000 KM
MAINTENANCE UNDER SEVERE USAGE CONDITIONS
7
F040A04D-GAT
The following items must be serviced more frequently on cars normally used under severe driving conditions. Refer to the chart below for the appropriate maintenance intervals.
R : Replace I : Inspect and, after inspection, clean, adjust, repair or replace if necessary
| MAINTENANCE ITEM | MAINTENANCE OPERATION | MAINTENANCE INTERVALS | DRIVING CONDITION | |
| ENGINE OIL AND FILTER | GASOLINE | R | EVERY 7,500 KM OR 8 MONTHS | A, B, C, D, E, F, G, H, I, K |
| DIESEL | A, B, C, F, H, I, J | |||
| AIR CLEANER FILTER | R | MORE FREQUENTLY | C, E | |
| SPARK PLUGS | R | MORE FREQUENTLY | B, H | |
| TIMING BELT | R | EVERY 80,000 KM OR 48 MONTHS | D, E, F, G | |
| BRAKE PADS, CALIPERS AND ROTORS | I | MORE FREQUENTLY | C, D, G, H | |
| REAR BRAKE DRUMS/LININGS/PADS, PARKING BRAKE | I | MORE FREQUENTLY | C, D, G, H | |
| STEERING GEAR BOX, LINKAGE & BOOTS/LOWER ARM BALL JOINT | I | MORE FREQUENTLY | C, D, E, F | |
| DRIVE SHAFTS AND ROOTS | I | EVERY 15,000 KM OR 12 MONTHS | C, D, E, F | |
| MANUAL TRANSAXLE OIL | R | EVERY 100,000 KM | A, C, D, E, F, G, H, I, J | |
| AUTOMATIC TRANSAXLE FLUID | European Community Only | R | EVERY 45,000 KM | A, C, E, F, G, H, I |
| Except European Community | EVERY 40,000 KM | |||
| AIR CONDITIONER FILTER (FOR EVAP. AND BLOWER UNIT) | R | MORE FREQUENTLY | C, E | |
| TRANSFER CASE OIL (4WD) *1 | R | EVERY 40,000 KM | C, E, G, I | |
| REAR AXLE OIL (4WD) *1 | With LSD | R | EVERY 40,000 KM | C, E, G, I |
| Without LSD | EVERY 80,000 KM | |||
*1. Transfer Case Oil and Rear Axle Oil should be changed anytime they have been submerged in water.
SEVERE DRIVING CONDITIONS
A - Repeatedly driving short distance of less than 8km(5miles) in normal temperature or less than 16km(10miles) in freezing temperature
B - Extensive engine idling or low speed driving for long distances
C - Driving on rough, dusty, muddy, unpaved, graveled or salt-spread roads
D - Driving in areas using salt or other corrosive materials or in very cold weather
E - Driving in sandy areas
F - Driving in heavy traffic area over 32°C(90°F)
G - Driving on uphill, downhill, or mountain road
H - Towing a Trailer, or using a camper, or roof rack
I - Driving as a patrol car, taxi, other commercial use or vehicle towing
J - Driving over 170 Km/h(100 MPH)
K - Frequently driving in stop-and-go conditions
5 VEHICLE MAINTENANCE REQUIREMENTS
8
EXPLANATION OF SCHED- ULED MAINTENANCE ITEMS
F080M01A-AAT
o Engine Oil and Filter
The engine oil and filter should be changed at the intervals specified in the maintenance schedule. If the car is being driven in severe conditions, more frequent oil and filter changes are required.
F060B01A-AAT
o Drive Belts
Inspect all drive belts for evidence of cuts, cracks, excessive wear or oil saturation and replace if necessary. Drive belts should be checked periodically for proper tension and adjusted as necessary.
F060C01A-AAT
o Fuel Filter
A clogged filter can limit the speed at which the vehicle may be driven, damage the emission system and cause hard starting. If an excessive amount of foreign matter accumulates in the fuel tank, the filter may require replacement more frequently.
After installing a new filter, run the engine for several minutes, and check for leaks at the connections. Fuel filters should be installed by trained technicians.
F080D01TB-AAT
o Fuel Lines, Fuel Hoses and Connections
Check the fuel lines, fuel hoses and connections for leakage and damage. Have a trained technician replace any damaged or leaking parts immediately.

WARNING (Diesel only):
Never work on injection system with engine running or within 30 seconds after shutting off engine. High pressure pump, rail, injectors and high pressure pipes are subject to high pressure even after the engine stopped. The fuel jet produced by fuel leaks may cause serious injury, if it touch the body. People using pacemakers should not move than 30cm closer to the ECU or wiring harness within the engine room while engine is running, since the high currents in the Common Rail system produce considerable magnetic fields.
VEHICLE MAINTENANCE REQUIREMENTS 5
F080E01A-AAT
o Timing Belt
Inspect all parts related to the timing belt for damage and deformation. Replace any damaged parts immediately.
F060G01A-AAT
o Vapor Hose and Fuel Filler Cap
The vapor hose and fuel filler cap should be inspected at those intervals specified in the maintenance schedule. Make sure that a new vapor hose or fuel filler cap is correctly replaced.
F060F01HP-AAT
o Crankcase Ventilation Hoses
Inspect the surface of hoses for evidence of heat and/or mechanical damage. Hard and brittle rubber, cracking, tears, cuts, abrasions, and excessive swelling indicate deterioration. Particular attention should be paid to examine those hose surfaces nearest to high heat sources, such as the exhaust manifold.
Inspect the hose routing to assure that the hoses do not come in contact with any heat source, sharp edges or moving component which might cause heat damage or mechanical wear. Inspect all hose connections, such as clamps and couplings, to make sure they are secure, and that no leaks are present. Hoses should be replaced immediately if there is any evidence of deterioration or damage.
F080H01A-AAT
o Air Cleaner Filter
A Genuine Hyundai air cleaner filter is recommended when the filter is replaced.
F060J01A-AAT
o Spark Plugs
(For Gasoline Engine)
Make sure to install new spark plugs of the correct heat range.
F070B01A-GAT
o Cooling System
Check the cooling system part, such as radiator, coolant reservoir, hoses and connections for leakage and damage. Replace any damaged parts.
F070C01A-AAT
o Coolant
The coolant should be changed at the intervals specified in the maintenance schedule.
5 VEHICLE MAINTENANCE REQUIREMENTS
10
F070001A-AAT
o Manual Transaxle Oil
Inspect the manual transaxle oil according to the maintenance schedule.
NOTE:
If the oil level is low, check for possible leaks before adding oil. Do not overfill.
F070E05A-AAT
o Automatic Transaxle Fluid
The fluid level should be in the "HOT" range of the dipstick, after the engine and transaxle are at normal operating temperature. Check the automatic transaxle fluid level with the engine running and the transaxle in neutral, with the parking brake properly applied. Use Hyundai Genuine ATF SP-III, DIAMOND ATF SP-III, SK ATF SP-III or other brands approved by Hyundai Motor Co., when adding or changing fluid.
F070F01A-AAT
o Brake Hoses and Lines
Visually check for proper installation, chafing, cracks, deterioration and any leakage. Replace any deteriorated or damaged parts immediately.
F070G02A-AAT
o Brake Fluid
Check brake fluid level in the brake fluid reservoir. The level should be between 'MIN' and 'MAX' marks on the side of the reservoir. Use only hydraulic brake fluid conforming to DOT 3 or DOT 4.
F070H01A-AAT
o Rear Brake Drums / Linings, Parking Brake
Check the rear brake drums and linings for scoring, burning, leaking fluid, broken parts, and excessive wear. Inspect the parking brake system including the parking brake lever and cables. For detailed service procedures, refer to the Shop Manual.
F070J01A-AAT
o Brake Pads, Calipers and Rotors
Check the pads for excessive wear, discs for run out and wear, and calipers for fluid leakage.
F070K01A-AAT
o Exhaust Pipe and Muffler
Visually inspect the exhaust pipes, muffler and hangers for cracks, deterioration, or damage. Start the engine and listen carefully for any exhaust gas leakage. Tighten connections or replace parts as necessary.
F07DL01A-AAT
o Suspension Mounting Bolts
Check the suspension connections for looseness or damage. Retighten to the specified torque.
F070M01A-AAT
o Steering Gear Box, Linkage & Boots/Lower Arm Ball Joint
With the vehicle stopped and engine off, check for excessive free-play in the steering wheel.
Check the linkage for bends or damage. Check the dust boots and ball joints for deterioration, cracks, or damage. Replace any damaged parts.
F070N01A-AAT
o Power Steering Pump, Belt and Hoses
Check the power steering pump and hoses for leakage and damage. Replace any damaged or leaking parts immediately. Inspect the power steering belt for evidence of cuts, cracks, excessive wear, oiliness and proper tension. Replace or adjust it if necessary.
F070P01A-AAT
o Drive Shafts and Boots
Check the drive shafts, boots and clamps for cracks, deterioration, or damage. Replace any damaged parts and, if necessary, repack the grease.
F070Q01A-AAT
o Air Conditioning Refrigerant
Check the air conditioning lines and connections for leakage and damage. Check air conditioning performance according to the relevant shop manual if necessary.
DO-IT-YOURSELF MAINTENANCE
Engine Compartment 6-2
General Checks 6-6
Checking the Engine Oil.... 6-7
Changing the Oil and Filter 6-9
Checking and Changing the Engine Coolant 6-14
Spark Plugs 6-17
Changing the Air Cleaner Filter 6-20
Checking the Transaxle Oil (Manual) 6-23
Checking the Transaxle Fluid (Automatic) 6-24
Checking the Brakes 6-26
Air Conditioning Care 6-27
Changing the Air Conditioner Filter 6-29
Checking Drive Belts 6-32
Checking and Replacing Fuses 6-33
Checking the Battery 6-34
Power Steering Fluid Level 6-36
Removal of Water from the Fuel Filter 6-37
Headlight Aiming Adjustment 6-38
Replacement of Light Bulbs 6-39
Bulb Wattage 6-45
Fuse Panel Description 6-46


DO-IT-YOURSELF MAINTENANCE
2
ENGINE COMPARTMENT
G010A010-GAT
Gasoline Engine (2.0 I4 / 2.4 I4)
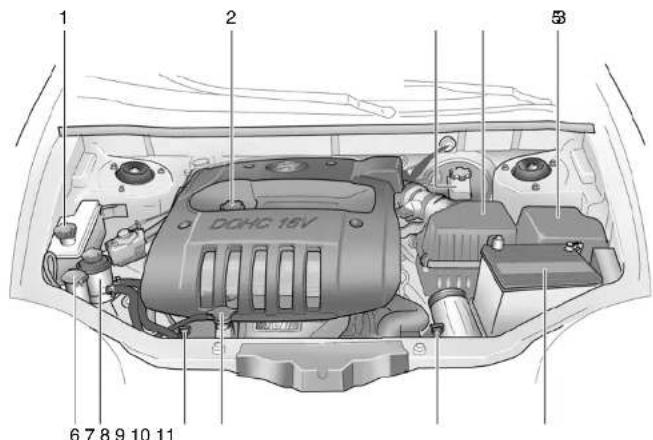
4

CAUTION:
When inspecting or servicing the engine, you should handle tools and other heavy objects carefully so that the plastic cover of the engine is not damaged.
HSM241
- Coolant reservoir cap
- Engine oil filler cap
- Brake fluid reservoir
- Air cleaner
-
Fuse and relay box
-
Windshield washer fluid reservoir
- Power steering fluid reservoir
- Engine oil level dipstick
-
Radiator cap
-
Automatic transaxle fluid level dip-
stick (Vehicle with Automatic
Transaxle)
11.Battery
G010B01O-AAT
Gasoline Engine (2.7 V6)
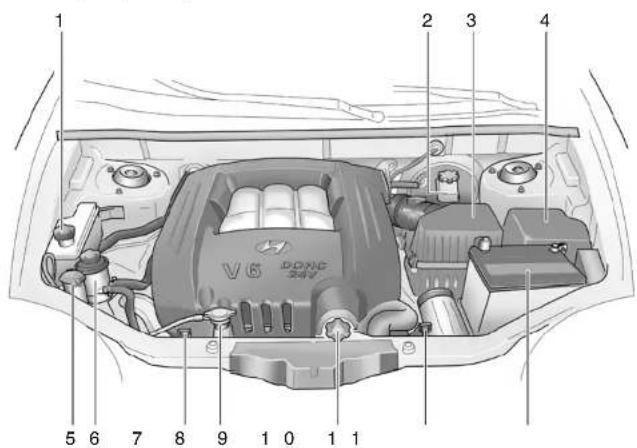

CAUTION:
When inspecting or servicing the engine, you should handle tools and other heavy objects carefully so that the plastic cover of the engine is not damaged.
G01CB010
- Coolant reservoir cap
- Brake fluid reservoir
- Air cleaner
-
Fuse and relay box
-
Windshield washer fluid reservoir
- Power steering fluid reservoir
- Engine oil level dipstick
-
Radiator cap
-
Engine oil filler cap
- Automatic transaxle fluid level dipstick
11.Battery

DO-IT-YOURSELF MAINTENANCE
4
G0100010-GAT
Gasoline Engine (3.5 V6)
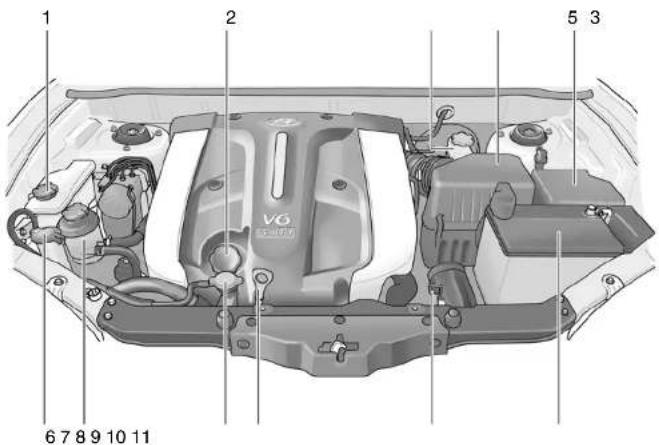
4

CAUTION:
When inspecting or servicing the engine, you should handle tools and other heavy objects carefully so that the plastic cover of the engine is not damaged.
HSM424
- Coolant reservoir cap
- Engine oil filler cap
- Brake fluid reservoir
-
Air cleaner
-
Fuse and relay box
- Windshield washer fluid reservoir
- Power steering fluid reservoir
-
Radiator cap
-
Engine oil level dipstick
- Automatic transaxle fluid level dipstick
11.Battery
G010C010-GAT
Diesel Engine (2.0 CRDi)
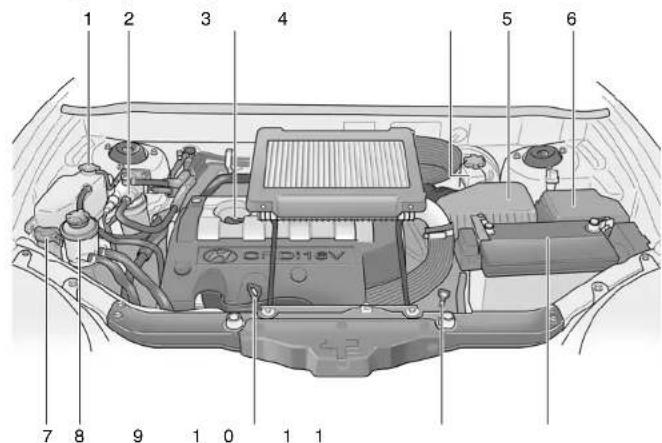
CAUTION: When inspecting or servicing the engine, you should handle tools and other heavy objects carefully so that the plastic cover of the engine is not damaged.
HSM221
- Coolant reservoir & Radiator cap
- Fuel filter
- Engine oil filler cap
-
Brake fluid reservoir
-
Air cleaner
- Fuse and relay box
- Windshield washer fluid reservoir
- Power steering fluid reservoir
-
Engine oil level dipstick
-
Automatic transaxle fluid level dipstick (Vehicle with Automatic Transaxle)
11.Battery
GENERAL CHECKS
G020A02A-AAT
Engine Compartment
The following should be checked regularly:
o Engine oil level and condition
o Transaxle fluid level and condition
o Brake fluid level
o Engine coolant level
o Windshield washer fluid level
o Accessory drive belt condition
o Engine coolant hose condition
o Fluid leaks (on or below components)
o Power steering fluid level
o Battery condition
o Air filter condition
G02CB01A-AAT
Vehicle Exterior
The following should be checked monthly:
o Overall appearance and condition
o Wheel condition and wheel nut torque
o Exhaust system condition
o Light condition and operation
o Windshield glass condition
o Wiper blade condition
o Paint condition and body corrosion
o Fluid leaks
o Door and hood lock condition
o Tire pressure and condition
(including spare tire)
G020C01A-AAT
Vehicle Interior
The following should be checked each time when the vehicle is driven:
o Lights operation
o Windshield wiper operation
o Horn operation
o Defroster, heating system operation (and air conditioning, if installed)
o Steering operation and condition
o Mirror condition and operation
o Turn signal operation
o Accelerator pedal operation
o Brake operation, including parking brake
o Manual transaxle operation, including clutch operation
o Automatic transaxle operation, including "Park" mechanism operation
o Seat control condition and operation
o Seat belt condition and operation
o Sun visor operation
If you notice anything that does not operate correctly or appears to be functioning incorrectly, inspect it carefully and seek assistance from your Hyundai dealer if service is needed.
CHECKING THE ENGINE OIL
DO-IT-YOURSELF MAINTENANCE 6
7
G030A020-GAT
Recommended Oil
Gasoline Engine
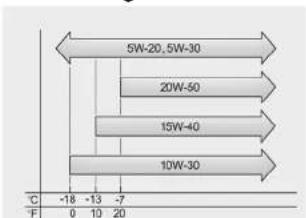
bar
| Category | Value | |---|---| | 5W-20, 5W-30 | -7 | | 20W-50 | -7 | | 15W-40 | -7 | | 10W-30 | -7 |G030B01JM
Engine oil is essential to the performance and service of the engine. It is suggested that you check the oil level at least once a week in normal use and more often if you are on a trip or driving in severe conditions.
The engine oil quality should meet the following classification.
API SJ, SL or ABOVE, ILSAC GF-3 or ABOVE
NOTE:
o For good fuel economy, SAE 5W-20 (5W-30), ILSAC GF-3 engine oil is preferred regardless of regional option and engine variation.
o If SAE 5W-20, ILSAC GF-3 engine oil is not available, secondary recommended engine oil for corresponding temperature range can be used.

G00B010-GAT
Recommended Oil
Diesel Engine
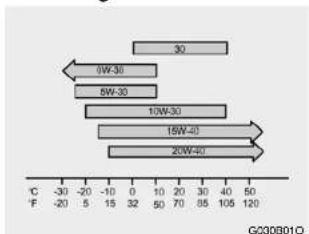
bar
| Temperature Range | Value | | :--- | :--- | | 30 | | | 6W-30 | | | 6W-30 | | | 10W-30 | | | 15W-20 | | | 20W-40 | |Engine oil is essential to the performance and service of the engine. It is suggested that you check the oil level every 500km or before starting a long trip and more often if you are on a trip or driving in severe conditions.
The engine oil quality should meet the following classification:
| EngineClass | W.G.T | V.G.T |
| API Class | CF-4 or ABOVE | CH-4 or ABOVE |
| ACEA Class | B4 or ABOVE | |

DO-IT-YOURSELF MAINTENANCE
8
NOTE:
SAE 0W-30 oil is for extra cold zone and to be restricted by driving condition and dealing area. (Especially, not recommended for sustained high loaded & high speed operation.)
G000C02JM-GAT
To Check the Oil Level
Gasoline Engine (2.0L/2.4L/2.7L)
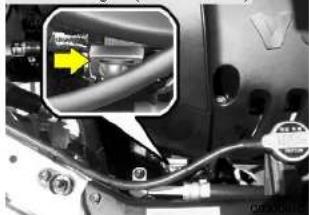
natural_image
Close-up of a car engine component with wiring and a highlighted cable (no visible text or symbols)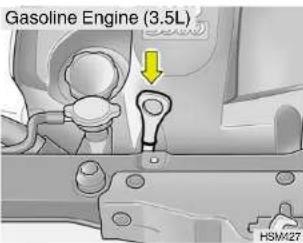
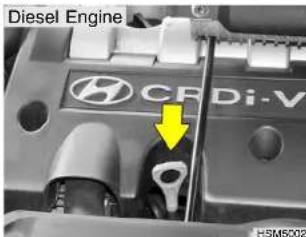
Before checking the oil, warm up the engine to the normal operating temperature and be sure your car is parked on level ground. Turn the engine off.
Wait about five minutes, then remove the dipstick, wipe it off, fully reinsert the dipstick and withdraw it again. Then note the highest level the oil has reached on the dipstick. It should be between the upper ("F") and lower ("L") range.

WARNING:
Be very careful not to touch the radiator hose when checking the engine oil as it may be hot enough to burn you.
G000020-GAT
Adding Oil
Gasoline Engine (2.0L/2.4L)
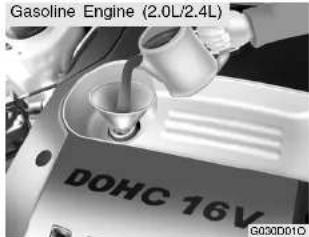
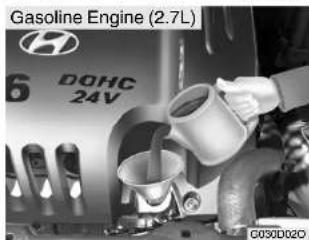
Gasoline Engine (3.5L)
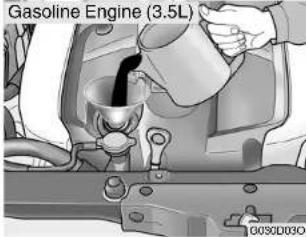
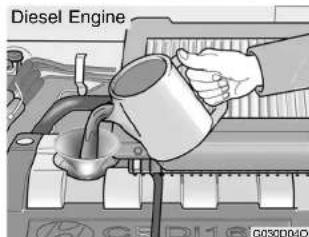
If the oil level is close to or below the "L" mark, add oil until it reaches the "F" mark. To add oil:
- Remove the oil filler cap by turning it counterclockwise.
- Add oil, then check the level again. Do not overfill.
- Replace the cap by turning it clockwise.
The distance between the "F" and "L" marks is equal to about 1 liter (Gasoline Engine)/ 1.6 liter (Diesel Engine) of oil.

CAUTION:
Slowly pour the recommended oil using by a funnel. Do not overfill not to damage engine.

WARNING:
Be very careful not to touch the radiator hose when adding the engine oil as it may be hot enough to burn you.
G350A01A-GAT
ENGINE OIL CONSUMPTION Function of Engine Oil
Engine oil has the primary function of lubricating and cooling the inside of the engine.
Engine oil consumption
It is normal that an engine should consume some engine oil while normal driving. The cause of oil consumption in a normal engine are as follows;
Engine oil is used to lubricate pistons, piston rings and cylinders. A thin film of oil is left on the cylinder wall when a piston moves downwards in the cylinder. High negative pressure generated during engine operation sucks some of the oil into the combustion chamber.
This oil with some oil of the cylinder wall is burned by the high temperature combustion gases during the combustion process.
The engine oil consumption is strongly effected by the viscosity and quality of oil, engine rpm and driving condition etc. The engine oil is more consumed under severe driving conditions such as high speeds and frequent acceleration and deceleration than normal driving condition.
CHANGING THE OIL AND FILTER
G040A05A-GAT
Gasoline Engine/ Diesel Engine : Left hand drive type(Except E.C), Right hand drive type
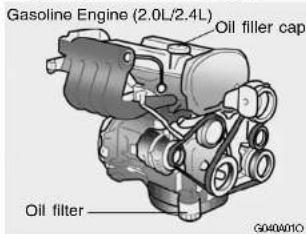
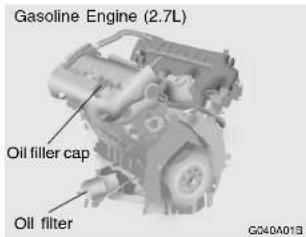
Gasoline Engine (3.5L) Oil filler cap
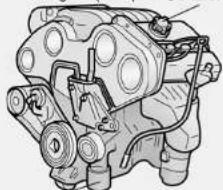
natural_image
Technical line drawing of an internal combustion engine component (no text or labels)Oil filter
G040A02L
Diesel Engine (LHD (Except E.C), RHD)
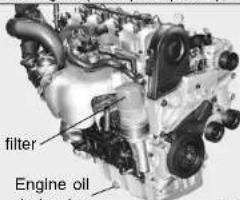
drain plug
HJM5015
The engine oil and filter should be changed at those intervals specified in the maintenance schedule in Section 5. If the car is being driven in severe conditions, more frequent oil and filter changes are required.
The procedure for changing the oil and filter is as follows:
- Park the car on level ground and set the parking brake. Start the engine and let it warm up until the needle on the coolant temperature gauge moves above the lowest mark. Turn the engine off and place the gear selector lever in "P" (automatic) or reverse gear (manual transaxle).
- Open the hood and remove the engine oil filler cap.
- Slide underneath the car and loosen the drain plug by turning it counterclockwise with a wrench of the proper size. Be sure that a drain pan is in position to catch the oil as it drains out, then remove the drain plug.

WARNING:
Be very careful when draining the engine oil as it may be hot enough to burn you!
- When the oil has stopped draining, replace the drain plug using a new gasket and retighten by turning it clockwise.
Oil pan drain plug tightening torque : 3.5 \~ 4.5 kgf.m
- Remove the oil filter by turning it counterclockwise with a oil filter wrench of the proper size. A certain amount of oil will come out when you remove the filter. So be sure to have your drain pan in place underneath it.
- Install a new oil filter in accordance with the instructions on the carton or on the filter itself. Do not over-tighten.
Tightening torque:
Gasoline - 1.2 \~ 1.6 kgf.m
Be sure that the mounting surface on the engine is clean and that the old gasket is removed completely. Lubricate the new gasket on the filter with clean engine oil before installation.
- Remove the engine oil level dipstick.
- Refill the crankcase with the recommended engine oil. Refer to the specification in chapter 9 for engine oil capacity.

CAUTION:
Slowly pour the recommended oil using by a funnel. Do not overfill not to damage engine.
- Start the engine and check to be sure no oil is leaking from the drain plug or oil filter.
10.Shut off the engine and recheck the oil level.
NOTE:
Always dispose of used engine oil in an environmentally acceptable manner. It is suggested that it be placed in a sealed container and taken to a service station for reclamation. Do not pour the oil on the ground or put it in with the household trash.

WARNING:
Used motor oil may cause irritation or cancer of the skin if left in contact with the skin for prolonged periods of time. Wash your hands thoroughly with soap and warm water as soon as possible after handling used oil.
G040B02O-GAT
Diesel Engine: Left hand drive type (E.C only)
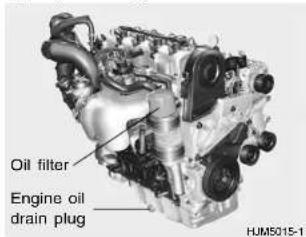
The engine oil and filter should be changed at those intervals specified in the maintenance schedule in Section 5. If the car is being driven in severe conditions, more frequent oil and filter changes are required.
The procedure for changing the oil and filter is as follows:
- Park the car on level ground and set the parking brake. Start the engine and let it warm up until the needle on the coolant temperature gauge moves above the lowest mark. Turn the engine off and place the gear selector lever in "P" (automatic) or reverse gear (manual transaxle).
- Open the hood and remove the engine oil filler cap.
- Slide underneath the car and loosen the oil pan drain plug by turning it counterclockwise oil pan with a wrench of the proper size. Be sure that a drain pan is in position to catch the oil as it drains out, then remove the drain plug.

WARNING:
Be very careful when draining the engine oil as it may be hot enough to burn you!
- When the oil has stopped draining, replace the drain plug using a new gasket and retighten by turning it clockwise.
Oil pan drain plug tightening torque : 3.5 \~ 4.5 kgf.m
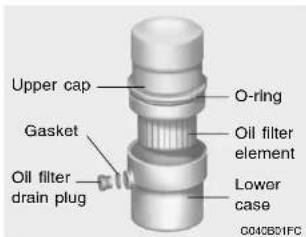
- Loosen the oil filter drain plug by turning it counterclockwise with a wrench of the proper size and drain out some oil in the oil filter. Be sure that a drain pan is in position to catch the oil.
- Loosen the oil filter upper cap with a proper tool from the lower case until an O-ring is seen. Then, drain the oil completely.
-
Pull out the oil filter upper cap with element from the lower case. Using a clean cloth, remove any dirt or oil accumulated around the lower case.
-
Install a new copper gasket of the oil filter drain plug by the side of lower case and retighten by turning it clockwise.
Tightening torque : 0.8\~1.0 kgf.m
- After mounting a new oil filter element and new O-ring to upper cap, install the upper cap to lower case and retighten by turning it clockwise. Do not over-tighten.
Tightening torque : 2.3\~2.5 kgf.m
NOTE:
Be careful not to be the element upside down when mounting the element.
- Remove the engine oil level dipstick.
- Refill the crankcase with the recommended engine oil. Refer to the specification in chapter 9 for engine oil capacity.
CHECKING AND CHANGING THE ENGINE COOLANT
G050A01A-AAT

CAUTION:
Slowly pour the recommended oil using by a funnel. Do not overfill not to damage engine.
- Start the engine and check to be sure no oil is leaking from the drain plug or oil filter.
13.Shut off the engine and recheck the oil level.
NOTE:
o It is recommended that the engine oil and filter should be changed by an authorized Hyundai dealer.
Always dispose of used engine oil in an environmentally acceptable manner. It is suggested that it be placed in a sealed container and taken to a service station for maybe reclamation. Do not pour the oil on the ground or put it into the household trash.

WARNING:
Used motor oil may cause irritation or cancer of the skin if left in contact with the skin for prolonged periods of time. Wash your hands thoroughly with soap and warm water as soon as possible after handling used oil.

WARNING:
Do not remove the radiator cap when the engine is hot. When the engine is hot, the engine coolant is under pressure and may erupt through the opening if the cap is removed. You could be seriously burned if you do not observe this precaution. Do not remove the radiator cap until the radiator is cool to the touch.
G050B01A-AAT
Recommended Engine Coolant
Use a high quality ethylene-glycol coolant in a 50/50 mix with water. The engine coolant should be compatible with aluminum engine parts. Additional corrosion inhibitors or additives should not be used. The cooling system must be maintained with the correct concentration and type of engine coolant to prevent freezing and corrosion. Never allow the concentration of antifreeze to exceed the 60% level or go below the 35% level, or damage to the cooling system may result. For proper concentration when adding or replacing the engine coolant, refer to the following table.
| Ambient temperature °C (°F) | Engine coolant concentration | |
| Antifreeze solution | Water | |
| -15 (5) | 35% | 65% |
| -25 (-13) | 40% | 60% |
| -35 (-31) | 50% | 50% |
| -45 (-49) | 60% | 40% |
G050C01A-AAT
To Check the Coolant Level
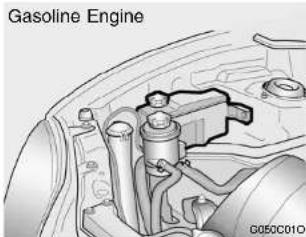
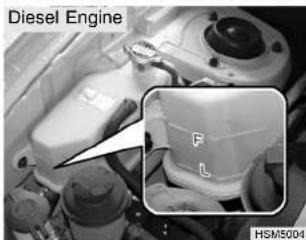
The coolant level can be seen on the side of the plastic coolant reservoir. The level of the coolant should be between the "L" and "F" lines on the reservoir when the engine is cool. If the level is below the "L" mark, add engine coolant to bring it up between "L" and "F". If the level is low, inspect for coolant leaks and recheck the fluid level frequently. If the level drops again, visit your Hyundai dealer for an inspection and diagnosis of the reason.

DO-IT-YOURSELF MAINTENANCE
16
G0500010-AAT
To Change the Coolant
The engine coolant should be changed at those intervals specified in the vehicle maintenance schedule in Section 5.

CAUTION:
Engine coolant can damage the finish of your car. If you spill engine coolant on the car, wash it off thoroughly with clean water.
- Park the car on level ground, set the parking brake and remove the radiator cap when cool.
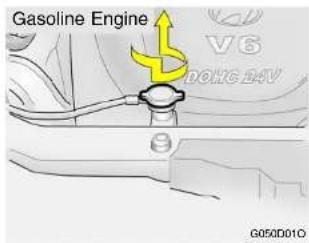
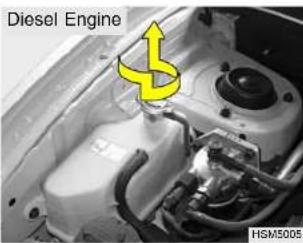
- Turn the radiator cap counterclockwise without pressing down on it, until it stops. This relieves any pressure remaining in the cooling system. And remove the radiator cap by pushing down and turning counterclockwise.

WARNING:
Remove the radiator cap when the radiator is cool.
- Be sure your drain receptacle is in place. Open the drain cock on the radiator. Allow all the engine coolant to drain from the cooling system, then securely close the drain cock.
- Check Section 9 for the capacity of the cooling system in your car. Then, following the manufacturer's directions on the engine coolant container, add the appropriate quantity of coolant to the radiator.
- Fill the radiator with clean demineralized or distilled water. Continue to add clean demineralized or distilled water in small quantities until the fluid level stays up in the radiator neck.
SPARK PLUGS
17
Gasoline Engine
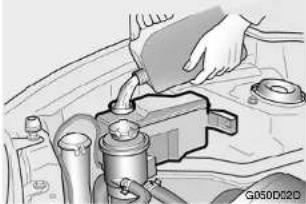
natural_image
Mechanical assembly diagram showing a hand pouring liquid into a container (no text or symbols visible)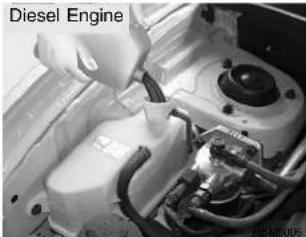
natural_image
Close-up of a hand using a tool to adjust or install the engine compartment of a car (no visible text or symbols)-
Start the engine, top off the radiator with water and then add coolant to the reservoir until the level is between "L" and "F".
-
Replace the radiator and reservoir caps and check to be sure the drain cocks are fully closed and not leaking.

WARNING:
The cooling fan is controlled by engine coolant temperature and may sometimes operate even when the engine is not running. Use extreme caution when working near the blades of the cooling fan so that you are not injured by a rotating fan blade. As the engine coolant temperature decreases, the fan will automatically shut off. This is a normal condition.
G080A02O-GAT
(Gasoline Engine only)
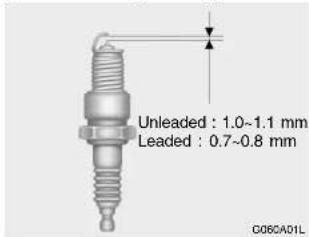
Your engine was originally equipped with platinum-tipped spark plugs (Unleaded Fuel - 2.4L / 2.7L / 3.5L only). Platinum-tipped spark plugs will last longer than conventional type spark plugs and can be identified by blue lines on the ceramic shell.
NOTE:
Do not clean or regap platinum-tipped spark plugs.

DO-IT-YOURSELF MAINTENANCE
18
G060000-GAT
Replacing the Spark Plugs
The spark plugs should be changed at the intervals specified in the vehicle maintenance schedule in Section 5 or whenever engine performance indicates they should be changed. Symptoms that suggest poor spark plug performance include engine misfiring under load, loss of fuel economy, poor acceleration, etc. When spark plugs are replaced, always use spark plugs recommended by Hyundai. The use of other spark plugs can result in loss of performance, radio interference or engine damage.
NOTE:
o When replacing the spark plugs, genuine Hyundai replacement parts are recommended.
o It is recommended that spark plugs for Engine 2.7L, 3.5L should be changed by an authorized Hyundai dealer.
Recommended Spark Plugs:
| TYPE | REMARK | |
| RN9YC4 (CHAMPION)BPR6ES-11 (NGK) | 2.0L | Unleaded |
| RN10PYP4 (CHAMPION)PGR5C-11 (NGK) | 2.4L* | |
| RC10PYPB4(CHAMPION)PFR5N-11 (NGK) | 2.7L *3.5L ^ | |
| RN9YC(CHAMPION)BPR6ES (NGK) | 2.4L | Leaded |
| RC10YC(CHAMPION)BKR5ES (NGK) | 2.7L | |
* Platinum coated.
G080C010-GAT
Changing the Spark Plugs
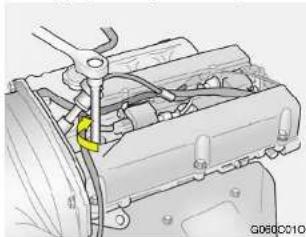
natural_image
Mechanical assembly diagram showing a clamping tool interacting with internal components (no text or symbols visible)You will find it easier to change spark plugs if the engine is cold. Always change one spark plug at a time. This helps avoid getting the wires mixed up.
- Remove the center cover (2.0L, 2.4L) on the engine rocker cover.
-
Using a clean cloth, remove any dirt that has accumulated around the base of the spark plug so it cannot fall into the cylinder when the spark plug is removed.
-
To remove the spark plug cable, pull straight up on the insulated connector, not the cable. Pulling on the cable may damage the carbon core conductor.
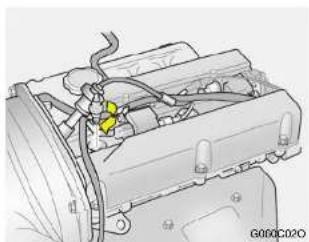
natural_image
Technical diagram of an engine compartment showing internal components and wiring (no text or labels)
WARNING:
It is recommended that the engine be cool or cold when changing the spark plugs. If the engine is hot, you could burn yourself on the insulated connector, the spark plug or the engine itself.
- When preparing to remove the old spark plug, guide the socket down over the spark plug, being careful not to damage the ceramic insulator.
- To remove the old spark plug, turn the wrench handle in a counterclockwise direction.
- To install the new spark plug, guide the socket down over the spark plug, being careful not to damage the ceramic insulator.
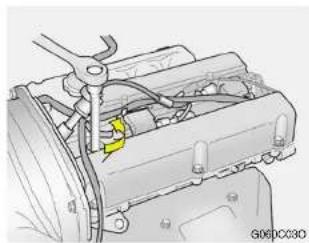
natural_image
Technical diagram of an engine component with visible wiring and a yellow accent (no text or symbols)NOTE:
Spark plugs should be tightened firmly. Over-tightening can damage the threads in the aluminum cylinder head. Also, leaving them too loose can cause the spark plug to get very hot and possibly result in damage to the engine.
- Replace the cable by pushing the insulated connector directly down onto the electrode. Check to be sure it has snapped into place and can't fall off.

DO-IT-YOURSELF MAINTENANCE
20
CHANGING THE AIR CLEANER FILTER
G070A03Y-AAT
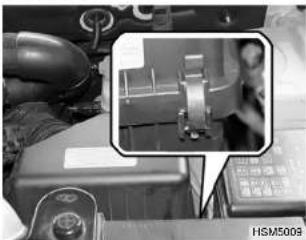
natural_image
Close-up of a mechanical device with a magnified inset showing a close-up of a component (no visible text or symbols)The replacement of air filter is performed in the following manner.
- Unsnap the clips around the cover.
- When this is done, the cover can be lifted off, the old filter removed and the new filter put in its place.
Genuine Hyundai replacement parts are recommended.

CAUTION:
o Operating your vehicle without a proper air cleaner filter in place can result in excessive engine wear.
When removing the air cleaner filter, be careful that dust or dirt does not enter the air intake. These may result in damage to the air cleaner filter.
WINDSHIELD WIPER BLADES
G080A02A-AAT
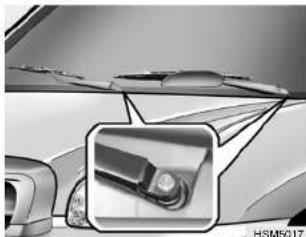
natural_image
Close-up of a car's front wheel and side panel showing a close-up inset (no text or symbols visible)The wiper blades should be carefully inspected from time to time and cleaned to remove accumulations of road film or other debris. To clean the wiper blades and arms, use a clean sponge or cloth with a mild soap or detergent and water. If the wipers continue to streak or smear the glass, replace them with genuine Hyundai replacement parts or their equivalent.

CAUTION:
Do not operate the wipers on dry glass. This can result in more rapid wear of the wiper blades and may scratch the glass.
o Keep the blade rubber out of contact with petroleum products such as engine oil, gasoline, etc.
G0B0B01HR-GAT
Replacing the Wiper Blades
To replace the wiper blades, raise the wiper to the vertical.
To remove the wiper blade
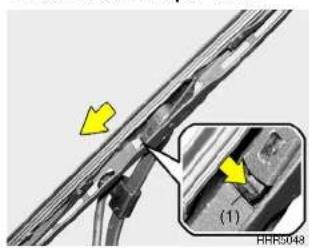
natural_image
Close-up of a mechanical component with yellow arrows indicating direction, no visible text or symbols- Push down the wiper blade with the locking clip (1) pressed to detach it from the wiper arm.
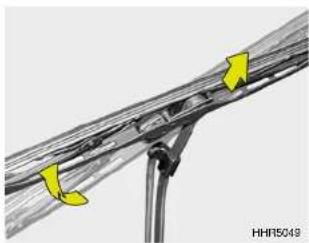
natural_image
Diagram of a mechanical linkage or cable assembly with yellow directional arrows indicating movement (no text or symbols present)- Raise the wiper blade lightly and pull up it.
To install the wiper blade
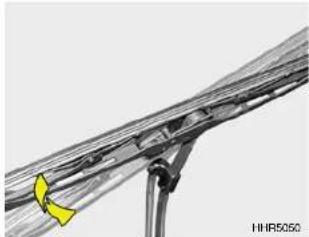
natural_image
Diagram of a mechanical or structural assembly with a yellow arrow indicating a specific component (no text or symbols present)
DO-IT-YOURSELF MAINTENANCE
22
- Put a new wiper blade onto the wiper arm and lower the wiper blade at the level of the wiper arm as shown in the drawing.
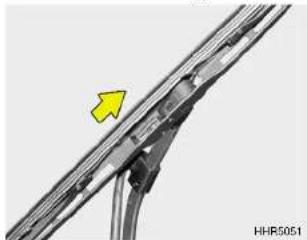
natural_image
Close-up of a metallic mechanical component with a yellow arrow pointing to a detail (no text or symbols visible)- Pull up the wiper blade until you hear an audible "click" to engage in the end of the wiper arm.
NOTE:
Do not allow the wiper arm to fall against the windshield.
FILLING THE WASHER RESERVOIR
G090A020-GAT
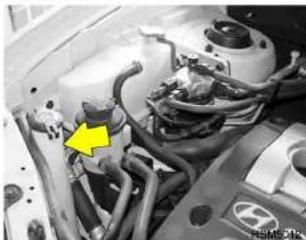
natural_image
Close-up of a car engine bay with visible hoses and a yellow arrow pointing to a component (no text or symbols)The washer fluid reservoir supplies fluid to the windshield washer sys- tem.
A good quality washer fluid should be used to fill the washer reservoir. The fluid level should be checked more frequently during inclement weather or whenever the washer system is in more frequent use.
The capacity of the washer reservoir is 3.4 liters (3.59 U.S. quarts).

CAUTION:
o Radiator antifreeze (engine coolant) should not be used in the washer system because it will damage the car's finish.
o The washer should not be operated if the washer reservoir is empty. This can damage the washer fluid pump.

WARNING:
o Windshield washer fluid agents contain some amounts of alcohol and can be flammable under certain circumstances. Do not allow sparks of flame to contact the washer fluid or the washer fluid reservoir. Damage to the vehicle or its occupants could occur.
o Windshield washer fluid is poisonous to humans and animals. Do not drink windshield washer fluid. Serious injury or death could occur.
CHECKING THE TRANSAXLE OIL (MANUAL)
G10DA02O-GAT
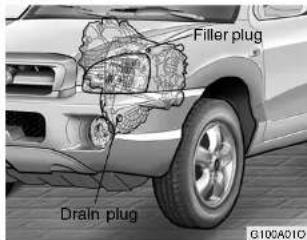
Transaxle lubricant in the manual transaxle should be checked at those intervals specified in the vehicle maintenance schedule in Section 5.
Recommended Oil
Use only HYUNDAI GENUINE PARTS MTF 75W/85 (API GL-4) in the manual transaxle.
Manual Transaxle Oil Capacity
The oil capacity of the manual transaxle is 2.3 liters (2.43 U.S. quarts).
DO-IT-YOURSELF MAINTENANCE 6
23

WARNING:
It is always better to check the transaxle oil level when the engine is cool or cold. If the engine is hot, you should exercise great caution to avoid burning yourself on hot engine or exhaust parts.
G10CB02A-AAT
To Check the Manual Transaxle Fluid Level
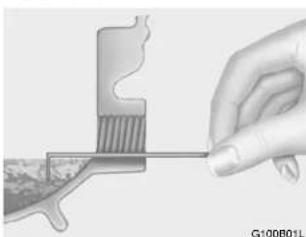
natural_image
Illustration of a hand holding a mechanical component with no visible text or symbolsPark the car on level ground with the engine off.
- Using a wrench of the correct size, loosen the oil filler plug by turning it counterclockwise and remove it with your fingers.
- Use your finger or suitable tool to feel inside the hole. The oil level should be at its bottom edge. If it is not, check for leaks before adding oil. To refill the transaxle or bring the oil level up, add oil slowly until it reaches the proper level. Do not overfill.
- Replace the plug and washer, screw it in with your fingers and then tighten securely with the wrench.

DO-IT-YOURSELF MAINTENANCE
24
CHECKING THE TRANSAXLE FLUID (AUTOMATIC)
G110A01E-AAT
Transaxle fluid in the automatic transaxle should be checked at those intervals specified in the vehicle maintenance schedule in Section 5.
NOTE:
Automatic transaxle fluid is basically red color. As driving distance increases, the fluid color turns darkish red gradually. It is a normal condition and you should not judge the need to replace based upon the changing color.
You must replace the automatic transaxle fluid in accordance with intervals specified in the vehicle maintenance schedule in section 5.
G11CB04A-AAT
Recommended Fluid
Your Hyundai automatic transaxle is specially designed to operate with Hyundai Genuine ATF SP-III, DIA-MOND ATF SP-III, SK ATF SP-III or other brands approved by Hyundai Motor Co., Damage caused by a nonspecified fluid is not covered by your new vehicle limited warranty.
G110C010-GAT
Transaxle Fluid Capacity
The fluid capacity of the automatic transaxle is 8.5 liters (8.9 U.S. quarts).

WARNING:
The transaxle fluid level should be checked when the engine is at normal operating temperature. This means that the engine, radiator, exhaust system etc., are very hot. Exercise great care not to burn yourself during this procedure.
G110D020-GAT
To Check the Transaxle Fluid Level
Park the car on level ground with the parking brake engaged. When the transaxle fluid level is checked, the transaxle fluid should be at normal operating temperature and the engine idling.
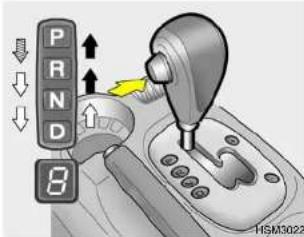
While the engine is idling, apply the brakes and move the gear selector lever from "P" to each of its other positions — "R", "N", "D" — and then return to "N" or "P". With the engine still idling:
- Open the hood, being careful to keep hands, long hair and clothing clear of any moving parts.
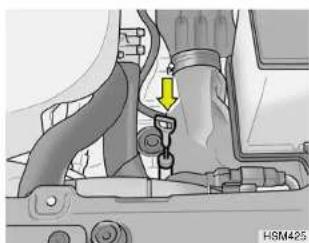
natural_image
Mechanical assembly diagram showing a valve inserted into a housing with a yellow arrow indicating the direction (no text or symbols present)- Remove the transaxle dipstick, wipe it clean, reinsert the dipstick as far as it will go, then remove it again. Now check the fluid level on the dipstick. It should be in the 'HOT' range on the dipstick.
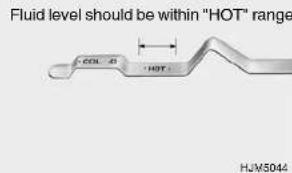
- If the transaxle fluid level is low, use a funnel to add transaxle fluid through the dipstick tube until the level reaches the 'HOT' range. Do not overfill.

WARNING:
The cooling fan is controlled by engine coolant temperature and may sometimes operate even when the engine is not running. Use extreme caution when working near the blades of the cooling fan, so that you are not injured by a rotating fan blade. As the engine coolant temperature decreases, the fan will automatically shut off. This is a normal condition.
CHECKING THE BRAKES
G120AD1A-AAT

WARNING (Diesel only): Never work on injection system with engine running or within 30 seconds after shutting off engine. High pressure pump, rail, injectors and high pressure pipes are subject to high pressure even after the engine stopped. The fuel jet produced by fuel leaks may cause serious injury, if it touch the body. People using pacemakers should not move than 30cm closer to the ECU or wiring harness within the engine room while engine is running, since the high currents in the Common Rail system produce considerable magnetic fields.

CAUTION: Because brakes are essential to the safe operation of the car, it is suggested that they be checked and inspected by your Hyundai dealer. The brakes should be checked and inspected for wear at those intervals specified in the vehicle maintenance schedule in Section 5.
G12CB02A-AAT
Checking the Brake Fluid Level

WARNING:
Use caution when handling brake fluid. It can damage your vision if it gets into your eyes. It will also damage your vehicle's paint if spilled on it and not removed immediately.
G120C02A-AAT
Recommended Brake Fluid
Use only hydraulic brake fluid conforming to DOT 3 or DOT 4 specifications in your braking system. Follow the instructions printed on the container.
G120D01A-AAT
To Check the Fluid Level
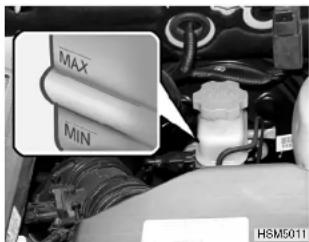
The fluid level in the brake fluid reservoir should be checked periodically. The level should be between the "MIN" and "MAX" marks on the side of the reservoir. If the level is at or below the "MIN" mark, carefully add fluid to bring it up to "MAX". Do not overfill.
AIR CONDITIONING CARE
27
G120E02A-AAT
Adding Brake Fluid

WARNING:
Handle brake fluid carefully. It can damage your vision if it gets into your eyes. Use only DOT 3 or DOT 4 specification fluid from a sealed container. Do not allow the fluid can or reservoir to remain open any longer than required. This will prevent entry of dirt and moisture which can damage the brake system and cause improper operation.
To add brake fluid, first wipe away any dirt then unscrew the fluid reservoir cap. Slowly pour the recommended fluid into the reservoir. Do not overfill. Carefully replace the cap on the reservoir and tighten.
G140AD1A-AAT
Keeping the Condenser Clean
The air conditioning condenser (and engine radiator) should be checked periodically for accumulation of dirt, dead insects, leaves, etc. These can interfere with maximum cooling efficiency. When removing such accumulations, brush or hose them away carefully to avoid bending the cooling fans.
G140B01A-AAT
Checking the Air Conditioning Operation
- Start the engine and let it run at fast idle for several minutes with the air conditioning set at the maximum cold setting.
- If the air coming out of the in-dash vents is not cold, have the air conditioning system inspected by your Hyundai dealer.

CAUTION:
Running the air conditioning system for extended periods of time with a low refrigerant level may damage the compressor.

DO-IT-YOURSELF MAINTENANCE
28
G140C01A-AAT
Lubrication
To lubricate the compressor and the seals in the system, the air conditioning should be run for at least 10 minutes each week. This is particularly important during cool weather when the air conditioning system is not otherwise in use.
G140D01S-GAT
Checking the Compressor Drive Belt
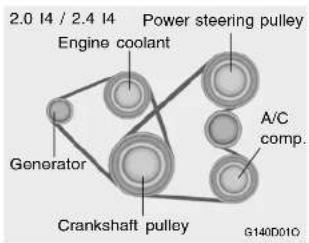
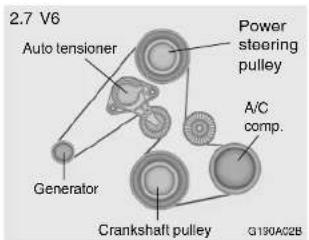
3.5 V6
Power steering pulley Generator
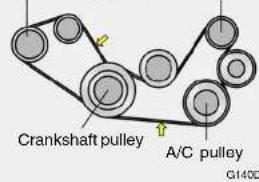
Diesel Engine
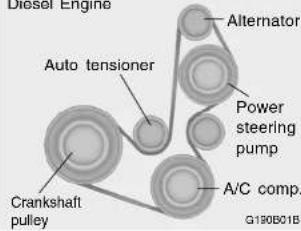
CHANGING THE AIR CONDITIONER FILTER
29
When the air conditioning is being used regularly, the compressor drive belt tension should be checked at least once a month.
To check the drive belt tension, press down on the belt halfway between the engine crankshaft and compressor pulleys. Pressing with your finger, you should not be able to deflect this belt anymore than 8.0 mm. If you have the instruments to check it with a force of 98N (22 lb.), the deflection should be approx. 8.0 mm (0.315 inches). If the belt is too loose, have it adjusted by your Hyundai dealer.
B145A030-GAT
(For Evaporator and Blower Unit) (If Installed)
The air conditioner filter is located in front of the evaporator unit behind the glove box.
It helps to decrease the amount of pollutants entering the car.
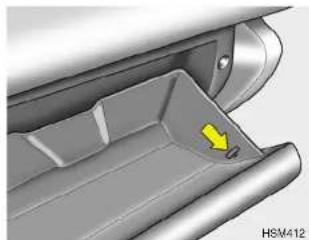
natural_image
Close-up of a mechanical component with a yellow arrow pointing to a small hole (no text or symbols visible)- Open the glove box and take out the damper strap through the hole.
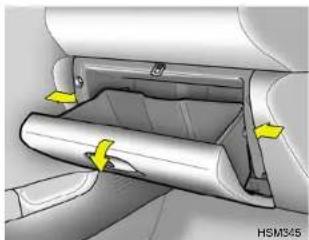
natural_image
Interior view of a car showing a cylindrical device with yellow arrows indicating directional movement (no text or symbols)- Lower the glove box down completely by pushing the both sides of the glove box inward.
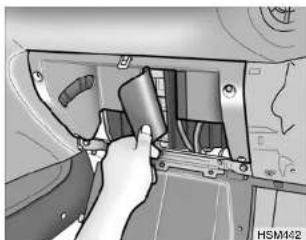
natural_image
Close-up of a hand inserting a component into a vehicle's door panel (no visible text or symbols)- Turn over the wall paper on the air conditioner filter cover.

DO-IT-YOURSELF MAINTENANCE
30
CHECKING THE FREEPLAY
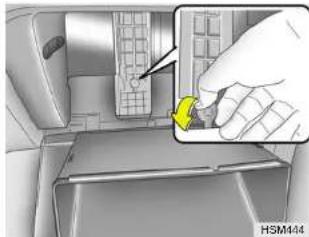
natural_image
Illustration of a hand inserting a yellow object into a computer keyboard (no text or symbols visible)- Turn the knob of the air conditioner filter cover counterclockwise and remove the air conditioner filter cover.
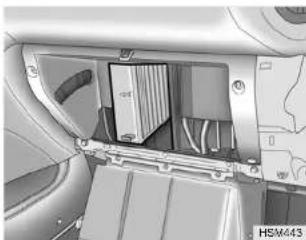
natural_image
Interior view of a car showing the rearview and dashboard compartment with internal compartments (no visible text or symbols)-
Replace two conditioner filters by pulling the knob of the air conditioner filter outward.
-
Installation is the reverse order of disassembly.

CAUTION:
Be sure to install the air conditioner filter in the direction of the arrow sign. Otherwise, it may cause noise or deterioration.
G150A01A-GAT
STEERING WHEEL
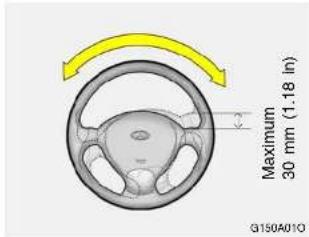
To check the steering wheel freeplay, stop the car with the wheels pointed straight ahead and gently move the steering wheel back and forth. Use very light finger pressure and be sensitive to changes in resistance that mark the limits of the freeplay. If the freeplay is greater than specified, have it inspected by your Hyundai dealer and adjusted or repaired if necessary.
G160A01A-GAT
CLUTCH PEDAL
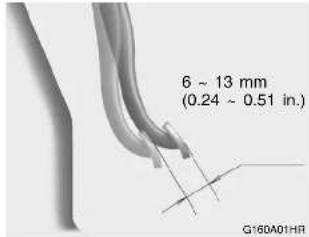
With the engine off, press lightly on the clutch pedal until you feel a change in resistance. This is the clutch pedal freeplay. The freeplay should be within the limits specified in the illustration. If it is not, have it inspected by your Hyundai dealer and adjusted or repaired if necessary.
G170A01A-GAT
BRAKE PEDAL
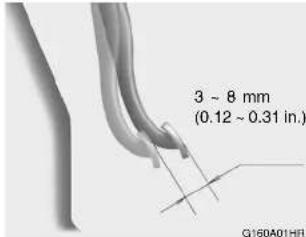
With the engine off, press down on the brake pedal several times to reduce the vacuum in the brake booster. Then, using your hand, press down slowly on the brake pedal until you feel a change in resistance. This is the brake pedal freeplay. The freeplay should be within the limits specified in the illustration. If it is not, have it inspected by your Hyundai dealer and adjusted or repaired if necessary.
CHECKING BRAKE PEDAL CLEARANCE
G1B0A01A-GAT
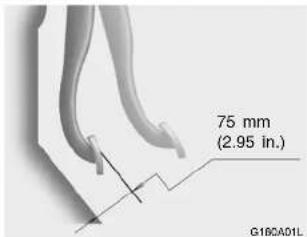
You need a helper to check the brake pedal clearance. With the engine running, have your helper press down on the brake pedal several times and then hold it down with a force of about 490N (50 kg, 110 lbs). The brake pedal clearance is the distance from the top surface of the brake pedal to the asphalt sheeting under the floor mat. If the brake pedal clearance is not within the limits specified in the illustration, have it inspected by your Hyundai dealer and adjusted or repaired if necessary.

DO-IT-YOURSELF MAINTENANCE
32
CHECKING DRIVE BELTS
G190A01A-GAT
GASOLINE ENGINE
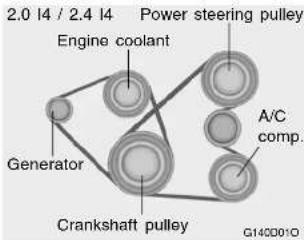
2.7 V6
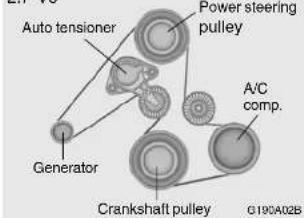
3.5 V6
Power steering pulley Generator
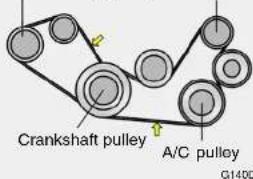
Drive belts should be checked periodically for proper tension and adjusted if necessary. At the same time, belts should be examined for cracks, wear, fraying or other evidence of deterioration and replaced if necessary.
Belt routing should also be checked to be sure there is no interference between the belts and other parts of the engine. After a belt is replaced, the new belt should be adjusted again after two or three weeks to eliminate slack resulting from initial stretching after use.
G190B01TB-GAT
DIESEL ENGINE
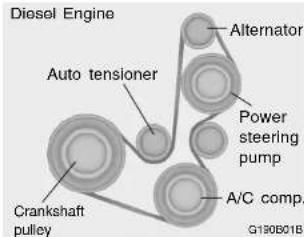
At the scheduled maintenance inspection, belts should be examined for cracks, wear, fraying or other evidence of deterioration and replaced if necessary.
Belt routing should also be checked to be sure there is no interference between the belts and other parts of the engine.
CHECKING AND REPLACING FUSES
G200A01A-AAT
Replacing a Fusible Link
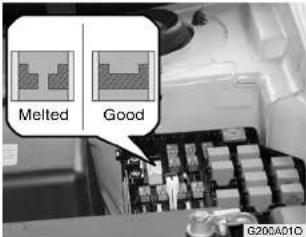
A fusible link will melt if the electrical circuits from the battery are ever overloaded, thus preventing damage to the entire wiring harness. (This could be caused by a short in the system drawing too much current.) If this ever happens, have a Hyundai dealer determine the cause, repair the system and replace the fusible link. The fusible links are located in a relay box for easy inspection.
DO-IT-YOURSELF MAINTENANCE
33

CAUTION:
When replacing a fusible link, never use anything but a new fusible link with the same or lower amperage rating. Never use a piece of wire or a higher-rated fusible link. This could result in serious damage and create a fire hazard.
020CB02HP-AAT
Replacing Accessory Fuses
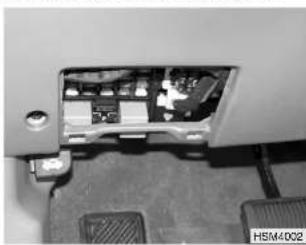
natural_image
Interior view of a vehicle showing internal compartments and footrests (no visible text or symbols)The fuse box for the lights and other electrical accessories will be found low on the dashboard on the driver's side. Inside the box you will find a list showing the circuits protected by each fuse.
If any of your car's lights or other electrical accessories stop working, a blown(open) fuse could be the reason. If the fuse has burned out, you will see that the metal strip inside the fuse has melted through. If you suspect a blown fuse, follow this procedure:
- Turn off the ignition and all other switches.
- Open the fuse box and examine each fuse. Remove each fuse by pulling it toward you (a small "fuse puller" tool is contained in the relay and fuse box of the engine room to simplify this operation).
- Be sure to check all other fuses even if you find one that appears to have burned out.
CHECKING THE BATTERY
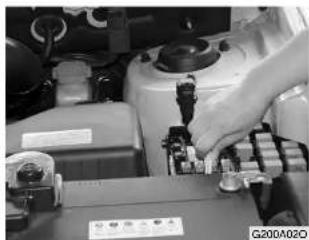
natural_image
Close-up of a hand operating a mechanical device with visible components and a label (no readable text or symbols)- Replace the blown fuse by pressing a new fuse of the same rating into place. The fuse should be a snug fit. If it is not, have the fuse clip repaired or replaced by a Hyundai dealer. If you do not have a spare fuse, you may be able to borrow a fuse of the same or lower rating from an accessory you can temporarily get along without (the radio or cigarette lighter, for example). Always remember to replace the borrowed fuse.
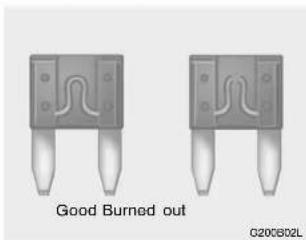
natural_image
Two identical electronic component terminals with no visible text or symbols on the bases, labeled 'Good Burned out' and 'G200B02L' below.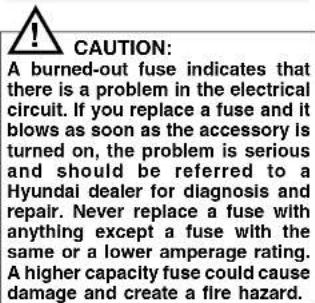
NOTE: See page 6-47 for the fuse panel descriptions.
G210A01A-AAT
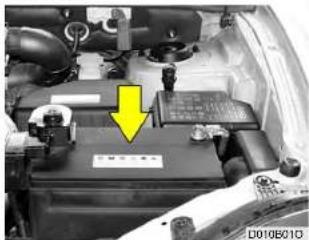
natural_image
Close-up of a car engine bay with a yellow arrow pointing to a component, no visible text or symbols
WARNING:
Batteries can be dangerous! When working with batteries, carefully observe the following precautions to avoid serious injuries.
CHECKING ELECTRIC COOLING FANS
G220A01A-AAT
The fluid in the battery contains a strong solution of sulfuric acid, which is poisonous and highly corrosive. Be careful not to spill it on yourself or the car. If you do spill battery fluid on yourself, immediately do the following:
o If battery fluid is on your skin, flush the affected areas with water for at least 15 minutes and then seek medical assistance.
If battery fluid is in your eyes, rinse out your eyes with water and get medical assistance as soon as possible. While you are being driven to get medical assistance, continue to rinse your eyes by using a sponge or soft cloth saturated with water.
o If you swallow battery fluid, drink a large quantity of water or milk followed by milk of magnesia, eat a raw egg or drink vegetable oil. Get medical assistance as soon as possible.
While batteries are being charged (either by a battery charger or by the vehicle's alternator), they produce explosive gases. Always observe these warnings to prevent injuries from occurring:
o Charge batteries only in a well ventilated area.
o Do not permit flames, sparks or smoking in the area.
o Keep children away from the area.
G21CB01A-AAT
Checking the Battery
Keep the battery clean. Any evidence of corrosion around the battery posts or terminals should be removed using a solution of household baking soda and warm water. After the battery terminals are dry, cover them with a light coating of grease.

WARNING:
The cooling fan is controlled by engine coolant temperature and may sometimes operate even when the engine is not running. Use extreme caution when working near the blades of the cooling fan, so that you are not injured by a rotating fan blade. As the engine coolant temperature decreases the fan will automatically shut off. This is a normal condition.

DO-IT-YOURSELF MAINTENANCE
36
G220B01A-AAT
Checking Engine Cooling Fan
The engine cooling fan should come on automatically if the engine coolant temperature is high.
G220C01A-AAT
Checking Condenser Cooling Fan
The condenser cooling fan should come on automatically whenever the air conditioning is in operation.
POWER STEERING FLUID LEVEL
G230A00A-GAT
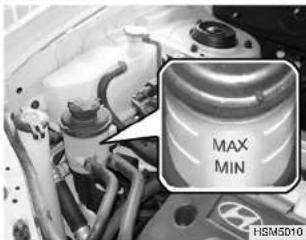
natural_image
Close-up of a car engine bay with visible hoses and a highlighted MAX MIN component (no text or symbols beyond labels)The power steering fluid level should be checked regularly.
To check the power steering fluid level, be sure the ignition is "OFF", then check to make certain that the power steering fluid level is between the "MAX" and "MIN" level markings on the fluid reservoir.
NOTE:
Grinding noise from the power steering pump may be heard immediately after the engine is started in extremely cold conditions (below -20^ ). In this case, if the noise stops during warm up, there is no abnormal function in the system. This is due to a power steering fluid characteristic in extremely cold conditions.
Recommended Fluid
Use PSF-3 type fluid.
NOTE:
Do not start the engine when the power steering oil reservoir is empty.
REMOVAL OF WATER FROM THE FUEL FILTER
G240A01A-AAT
POWER STEERING HOSES
It is suggested that you check the power steering hose connections for fluid leakage at regular intervals. The power steering hoses should be replaced if there is severe surface cracking, pulling, scuffing or worn spots. Deterioration of the hose could cause premature failure.
G300A020-GAT
DIESEL ENGINE
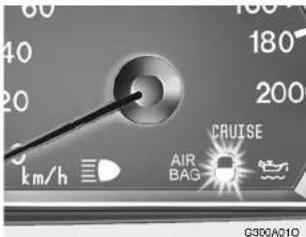
If the fuel filter warning lamp illuminates during driving, it indicates that water has accumulated in the fuel filter. If this occurs, remove the water as described below.
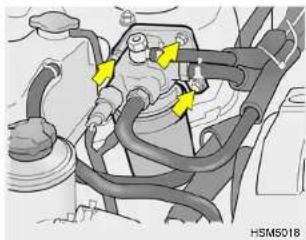
natural_image
Mechanical assembly diagram showing hoses and components with yellow arrows indicating flow direction (no text or labels)- Unscrew the mounting bolt on the fuel filter and raise the fuel filter up.
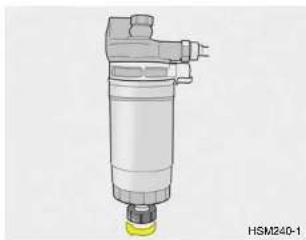
natural_image
3D rendering of a mechanical device with no visible text or symbols
DO-IT-YOURSELF MAINTENANCE
38
- Loosen the drain plug at the bottom of the fuel filter.
- Tighten the drain plug when water no longer comes out.
- Installation is the reverse order of the disassembly.
- Check to be sure that the warning lamp illuminates when the ignition key is turned to 'ON', and that it goes off when the engine is started. If in doubt, consult your nearest authorized HYUNDAI dealer.
NOTE:
It is recommended that water accumulated in the fuel filter should be removed by an authorized Hyundai dealer.

WARNING:
Be sure to carefully wipe away any water drained out in this manner, because the fuel mixed in the water might be ignited and result in a fire.
HEADLIGHT AIMING ADJUSTMENT
G290A020-GAT
Before performing aiming adjustment, make sure of the following.
- Keep all tires inflated to the correct pressure.
- Place the vehicle on level ground and press the front bumper & rear bumper down several times. Place vehicle at a distance of 3,000 mm (118 in.) from the test wall.
- See that the vehicle is unloaded (except for full levels of coolant, engine oil and fuel, and spare tire, jack, and tools). Have the driver or equivalent weight placed in driver's seat.
- Clean the head light lenses and turn on the headlights (low beam).
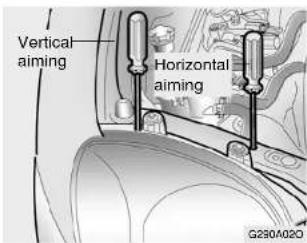
- Open the hood.
- Draw the vertical line (through the center of each headlight) and the horizontal line (through the center of each headlight) on the aiming screen.
And then, draw a parallel line at 30 mm (1.18 in.) under the horizontal line. - Adjust each cut-off line of the low beam to the parallel line with a phillips screwdriver - VERTICAL AIMING.
- Adjust each cut-off line of the low beam to each vertical line with a phillips screwdriver - HORIZON-TAL AIMING.
G290B01D-GAT
Adjustment After Headlight Assembly Replacement
Left-Hand Drive
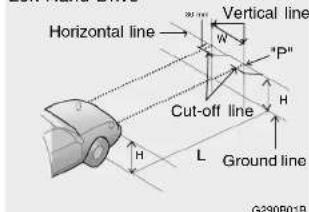
Right-Hand Drive
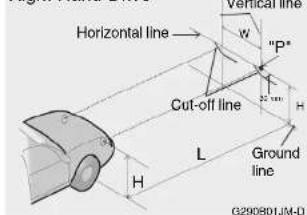
If the vehicle has had front body repair and the headlight assembly has been replaced, the headlight aiming should be checked using an aiming screen as shown in the illustration. Turn on the headlight switch. (Low Beam Position)
- Adjust headlights so that main axis of light is parallel to center line of the body and is aligned with point "P" shown in the illustration.
- Dotted lines in the illustration show the center of headlights.
SPECIFICATION:
"H"
Horizontal center line of headlights from ground :
2WD : 822 mm (32.4 in.)
4WD : 843 mm (33.2 in.)
"W"
Distance between each headlight center :
1,178 mm (46.38 in.)
"L"
Distance between the headlights and the wall that the lights are tested against :
3,000 mm (118.1 in.)
REPLACEMENT OF LIGHT BULBS
G200A02A-GAT
Before attempting to replace a light bulb, be sure the switch is turned to the "OFF" position.
The next paragraph shows how to reach the light bulbs so they may be changed. Be sure to replace the burned-out bulb with one of the same number and wattage rating.
See page 6-46 for the wattage descriptions.

CAUTION:
Keep the lamps out of contact with petroleum products, such as oil, gasoline, etc.
G270A01D-GAT
Headlight and Front Turn Signal Light
- Allow the bulb to cool. Wear eye protection.
- Open the engine hood.
- Always grasp the bulb by its plastic base, avoid touching the glass.
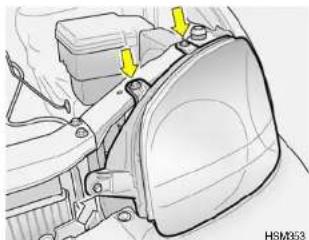
natural_image
Mechanical assembly diagram showing a bracket with yellow arrows indicating features (no text or symbols present)- Using a spanner, remove the head-light assembly mounting bolts.
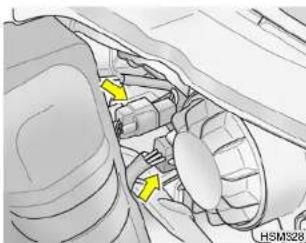
natural_image
Interior view of a vehicle showing engine compartment with yellow arrows indicating parts (no text or symbols)- Disconnect the power cord from the bulb base in the back of the headlight.
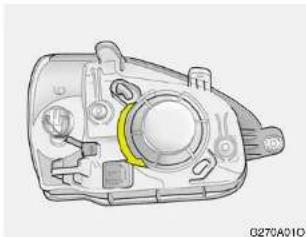
natural_image
Technical illustration of a mechanical component with no visible text or symbols- Turn the plastic cover counterclockwise and remove it.
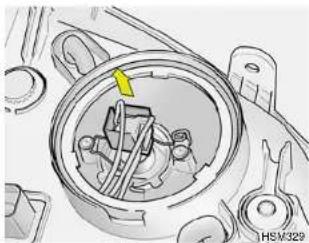
natural_image
Mechanical component diagram showing a circular housing with internal components and a yellow arrow indicating a specific part (no text or symbols present)- Disconnect the connector from the bulb base in the back of the head-light.
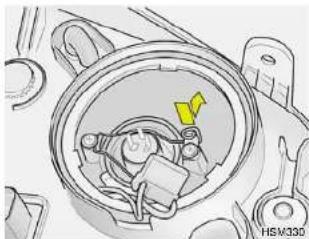
natural_image
Technical diagram of a mechanical component with no visible text or symbols- Push the bulb spring to remove the headlight bulb.
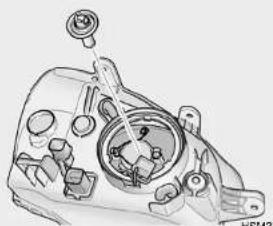
natural_image
Technical line drawing of a mechanical component with no visible text or symbols-
Remove the protective cap from the replacement bulb and install the new bulb by matching the plastic base with the headlight hole. Reattach the bulb spring and reconnect the connector.
-
Use the protective cap and carton to promptly dispose of the old bulb.
-
Check for proper headlight aim.
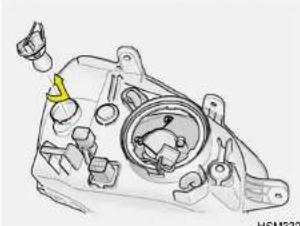
natural_image
Technical illustration of a mechanical assembly with no visible text or symbols- To replace the front turn signal light bulb, take out it from the bulb holder and install the new bulb.
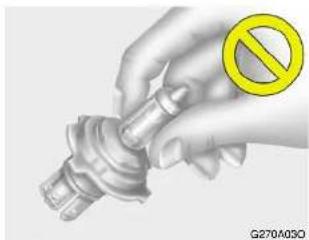
natural_image
Hand holding a mechanical component with a yellow prohibition symbol (no text or labels on the object)
WARNING:
This halogen bulb contains gas under pressure and if impacted could shatter, resulting in flying fragments. Always wear eye protection when servicing the bulb. Protect the bulb against abrasions or scratches and against liquids when lighted. Turn the bulb on only when installing in a headlight. Replace the headlight if damaged or cracked. Keep the bulb out of the reach of children and dispose of the used bulb with care.
G270B02O-GAT
Rear Combination Light
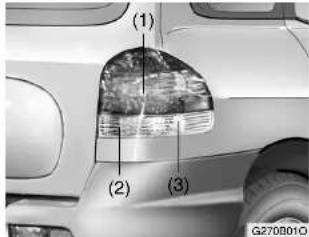
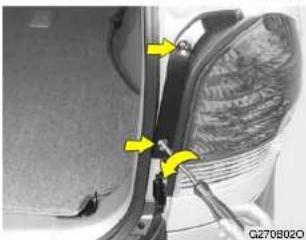
natural_image
Close-up of a car's side panel with yellow arrows indicating adjustment or movement, no visible text or symbols- Open the tail gate.
- Remove the mounting screws of the rear combination light as shown with a phillips screwdriver.
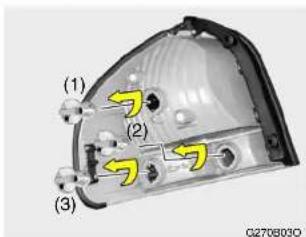
- To replace the rear combination light, take it out from the bulb holder by turning it counterclockwise.
(1) Stop/Tail light
(2) Back-up light
(3) Turn signal light
- Install the new bulb.
G270F02A-GAT
Rear Fog Light (If Installed)
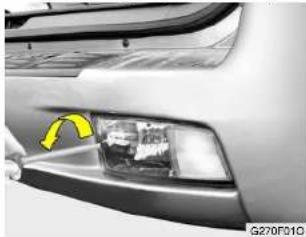
natural_image
Close-up of a car's front bumper with a yellow arrow pointing to the nose area (no visible text or symbols)- Remove the mounting screws of the rear fog light cover with a phillips screwdriver.
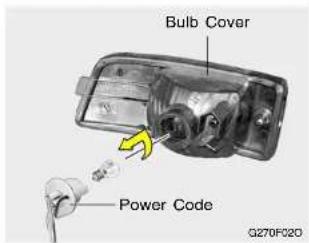
- Disconnect the power code by turning the bulb cover counterclockwise and take the bulb out from the bulb cover by turning it clockwise.
- Replace with a new bulb.
G270C010-GAT
Luggage Compartment Light
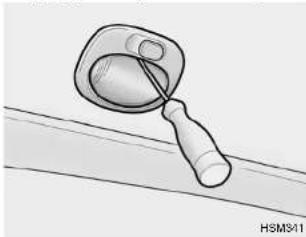
natural_image
Illustration of a magnifying glass resting on a surface, no text or symbols present- Open the tail gate.
- Remove the cover with a flat-head screwdriver.
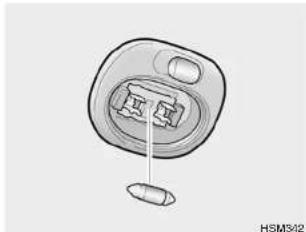
natural_image
Diagram of a device with a bullet and internal components, no text or symbols present- Replace with a new bulb.
G270E01A-GAT
Side Repeater Light (If installed)
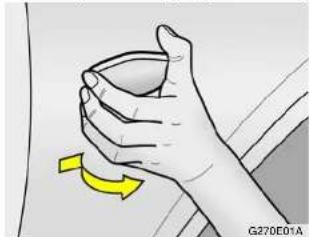
natural_image
Illustration of a hand holding a cup with a yellow arrow indicating rotation (no text or symbols)- Push the cover toward the front of vehicle and remove it.
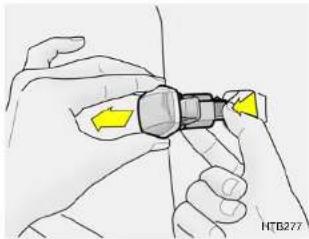
natural_image
Illustration of a hand holding a small mechanical component with yellow arrows indicating direction (no text or symbols)- Disconnect the power code.
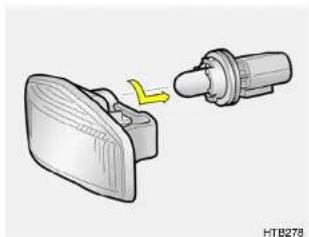
natural_image
Illustration of a mechanical component with a yellow arrow indicating a joint or adjustment (no text or symbols present)- Replace with a new bulb.
G270G01O-GAT
Interior Light
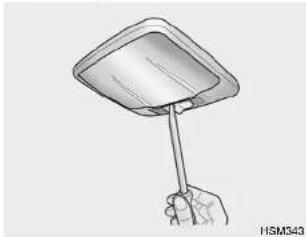
natural_image
Hand holding a square object with a handle, no visible text or symbols- Remove the cover with a flat-head screwdriver.
G270H010-GAT
Glove Box Illuminated Light
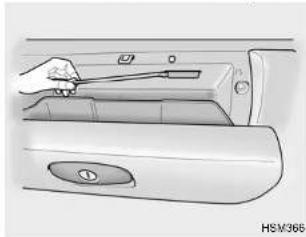
natural_image
Illustration of a hand adjusting a door panel with a handle (no text or symbols visible)-
Open the glove box.
-
Remove the cover with a flat-head screwdriver.
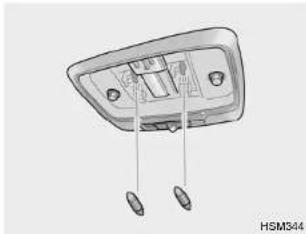
natural_image
Technical diagram of a device interior with two labeled components (no text or symbols present)- Replace with a new bulb.
DO-IT-YOURSELF MAINTENANCE 6
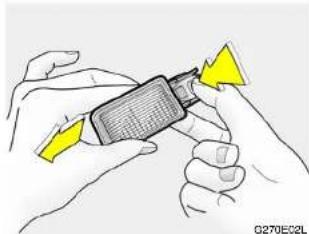
natural_image
Illustration of hands holding a handheld device with yellow directional arrows indicating movement (no text or symbols)- Disconnect the connector.
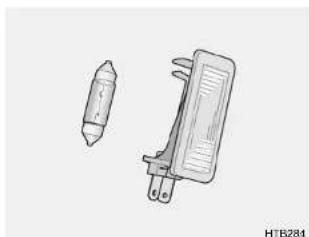
natural_image
Technical line drawing of a mechanical component with a cylindrical part and a clamped part (no text or symbols)- Replace with a new bulb.

DO-IT-YOURSELF MAINTENANCE
46
BULB WATTAGE
G200A000-GAT
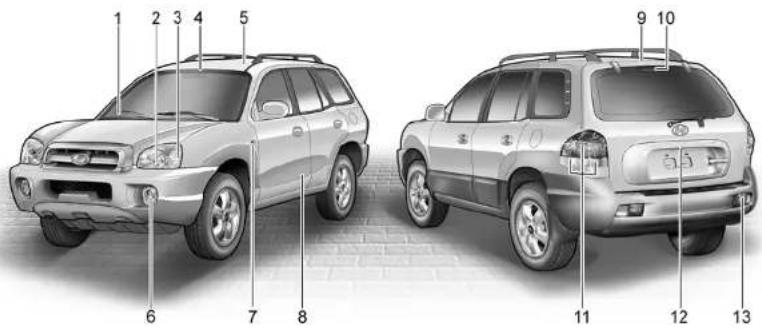
G280A010
| No. | Part Name | Wattage | Socket Type | Wattage | Socket Type | |||
| 1 | Glove Box Illuminated Light | 5 | S8.5/8.5 | 9 | Luggage Compartment Light | 10 | S8.5/8.5 | |
| 2 | Headlight (Low/High) | 55/60 | P43t | 10 | High Mounted Rear Stop Light (If installed) | 16 | W-2 | |
| 3 | Turn Signal Light | 21 | BAU15s | 11 | Rear Combination Light | |||
| 4 | Map Light | With sunroof | 10 | BA9s | Turn Signal Light | 21 | BAU15s | |
| Without sunroof | 5 | BA9s | Stop/Tail Light | 21/5 | BA15d | |||
| 5 | Interior Light | 10 | S8.5/8.5 | Back-up Light | 21 | BA15s | ||
| 6 | Front Fog Light (If installed) | 27 | PG13 | 12 | License Plate Light | 5 | W2.1 x 9.5D | |
| 7 | Side Repeater Light (If installed) | 5 | W2.1 x 9.5D | 13 | Rear Fog Light (If installed) | 21 | BA15s | |
| 8 | Front Door Edge Warning Light (If installed) | 5 | W2.1 x 4.6D | |||||
FUSE PANEL DESCRIPTION
DO-IT-YOURSELF MAINTENANCE
G20DC02O-AAT
Engine Compartment
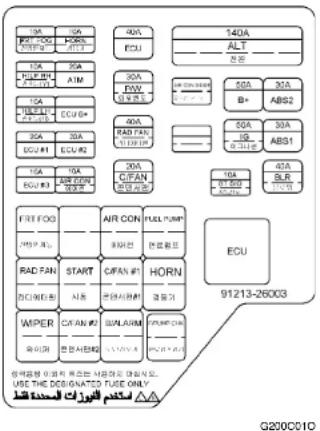
flowchart
graph TD
    A["140A"] --> B["ECU"]
    C["200A"] --> D["FBUX"]
    E["200A"] --> F["ACU"]
    G["200A"] --> H["FCU"]
    I["200A"] --> J["FBUX"]
    K["200A"] --> L["ACU"]
    M["200A"] --> N["FBUX"]
    O["200A"] --> P["ACU"]
    Q["200A"] --> R["FBUX"]
    S["200A"] --> T["ACU"]
    U["200A"] --> V["FBUX"]
    W["200A"] --> X["ACU"]
    Y["200A"] --> Z["FBUX"]
    AA["200A"] --> AB["ACU"]
    AC["200A"] --> AD["FBUX"]
    AE["200A"] --> AF["ACU"]
    AG["200A"] --> AH["FBUX"]
    AI["200A"] --> AJ["ACU"]
    AK["200A"] --> AL["FBUX"]
    AM["200A"] --> AN["ACU"]
    AO["200A"] --> AP["FBUX"]
    AQ["200A"] --> AR["ACU"]
    AS["200A"] --> AT["FBUX"]
    AU["200A"] --> AV["ACU"]
    AW["200A"] --> AX["FBUX"]
    AY["140A"] --> AZ["ALT"]
    BA["200A"] --> BB["B+"]
    BC["200A"] --> BD["BB2"]
    BE["200A"] --> BF["BB1"]
    BG["200A"] --> BH["BB1"]
    BI["200A"] --> BJ["BB1"]
    BK["200A"] --> BL["BB1"]
    BM["200A"] --> BN["BB1"]
| DESCRIPTION | FUSE RATING | PROTECTED COMPONENTS | |
| FUSIBLE LINK | ALT | 140A | Generator |
| B+ | 50A | Tail lamp relay, Fuse 11~17, Power connector | |
| IGN | 50A | Start relay, Ignition switch | |
| BLR | 40A | A/C Fuse, Blower relay | |
| ABS.1 | 30A | ABS control module, Air bleeding connector | |
| ABS.2 | 30A | ABS control module, Air bleeding connector | |
| ECU | 40A | Engine contorl relay | |
| P/W | 30A | Power window relay, Fuse 26 | |
| RAD FAN | 40A | Radiator fan relay | |
| C/FAN | 20A | Condenser fan relay | |
| FUSE | FRT FOG | 15A | Fog lamp relay |
| H/LP(LH) | 10A | Left head lamp, Instrument cluster, DRL control module | |
| H/LP(RH) | 10A | Right head lamp | |
| ECU #1 | 20A | Ignition failure sensor, Oxygen sensor | |
| ECU #2 | 20A | Injector | |
| ECU #3 | 10A | Check engine ind, ECM, PCM | |
| ECU(B+) | 15A | Fuel pump relay, ECM, TCM, Generator, PCM | |
| ATM | 20A | ATM contori relay, 4WD control module | |
| HORN | 10A | Horn relay | |
| A/C | 10A | A/C relay | |
| ST SIG | 10A | PCM, ECM | |
NOTE:
Not all fuse panel descriptions in this manual may be applicable to your vehicle. It is accurate at the time of printing. When you inspect the fuse box on your vehicle, refer to the fuse box label.
G200E010-GAT
Inner Panel
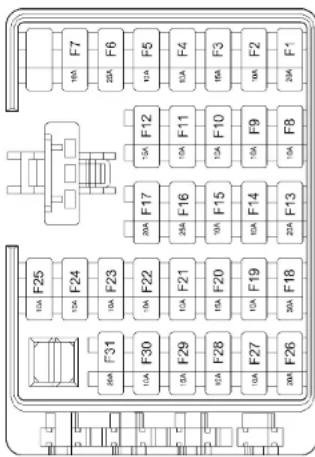
G200E010-A
| FUSE | FUSE RATING | PROTECTED COMPONENTS |
| F1 | 20A | Cigarette lighter & Power outlet |
| F2 | 10A | Audio, Power outside mirror |
| F3 | 15A | Digital clock, Rear power outlet |
| F4 | 10A | Cruise control |
| F5 | 10A | Head lamp relay |
| F6 | 25A | Seat warmer |
| F7 | 10A | Rear wiper motor control |
| F8 | 10A | Rear window defogger, Power outside mirror |
| F9 | 10A | A/C control, Sunroof controller, Electrical chrome mirror |
| F10 | 10A | Rear fog lamp |
| F11 | 10A | Room lamp, Door warning switch, Door lamp, Manual A/C control, Homelink controller |
| F12 | 15A | Digital clock, ETACM, Audio, Siren |
| F13 | 20A | AMP speakers |
| F14 | 10A | Stop lamp, Data link connector, Multipurpose check connector |
| F15 | 10A | Hazard lamp |
| F16 | 25A | Power seat, Rear wiper motor control |
| F17 | 20A | Sunroof controller |
| F18 | 30A | Defogger relay |
| F19 | 10A | Instrument cluster, Pre-excitation resistor, ETACM, Auto light sensor, DRL control module, Generator |
| F20 | 15A | SRS control module |
| F21 | 10A | ECM (V6 2.7L), PCM (I4 with A/T), ECM (I4 with M/T) |
| F22 | 10A | Instrument cluster (Airbag IND) |
| F23 | 10A | ABS control module, G-Sensor, Air bleeding connector, 4WD control module |
| F24 | 10A | Turn signal lamp |
| F25 | 10A | Back-up lamps, TCM, Vehicle speed secscor, ETS control module, Ignition failure sensor |
| F26 | 20A | Door lock/unlock relay, Key lock/unlock relay |
| F27 | 10A | Tail & parking lamp (LH), Turn signal lamp, License lamp |
| F28 | 10A | Tail & parking lamp (RH), Fog lamp relay, Switch illumination |
| F29 | 15A | ETS control module (V6 3.5L), Fail safety relay |
| F30 | 10A | Radiator tan relay, Condenser tan relay |
| F31 | 20A | Front wiper motor, Wiper relay, Washer motor |
Emission Control System 7-2
EGR System 7-3
Catalytic Converter 7-3
7
Your Hyundai is equipped with an emission control system to meet all requirements of the Emission prohibition rules of your province.
There are three emission control systems which are as follows.
(1) Crankcase emission control system
(2) Evaporative emission control system
(3) Exhaust emission control system
In order to assure the proper function of the emission control systems, it is recommended that you have your car inspected and maintained by an authorized Hyundai dealer in accordance with the maintenance schedule in this manual.
HD10B01A-AAT
1. Crankcase Emission Control System
The positive crankcase ventilation (PCV) system is employed to prevent air pollution caused by blow-by gases being emitted from the crankcase. This system supplies fresh filtered air to the crankcase through the air intake hose. Inside the crankcase, which the fresh air mixes with blow-by gases, which then pass through the PCV valve into the induction system.
H010C02Y-GAT
2. Evaporative Emission Control System
The Evaporative Emission Control System is designed to prevent fuel vapors from escaping into the atmosphere.
Canlster
While the engine is inoperative, fuel vapors generated inside the fuel tank are absorbed and stored in the canister. When the engine is running, the fuel vapors absorbed in the canister are drawn into the induction system through the purge control solenoid valve.
Purge Control Solenoid Valve
The purge control solenoid valve is controlled by the ECM (Engine Control Module); when the engine coolant temperature is low, and during idling, it closes, so that evaporated fuel is not taken into the surge tank. After engine warm-up, during ordinary driving, it opens so as to introduce evaporated fuel to the surge tank.
EGR SYSTEM CATALYTIC CONVERTER
3
H010001A-AAT
3. Exhaust Emission Control System
The Exhaust Emission Control System is a highly effective system which controls exhaust emissions while maintaining good vehicle performance.
HD10E01Y-GAT
This system helps control nitrogen oxides by recirculating a part of the exhaust gas into the engine, thereby reducing cylinder combustion temperature.
HQ20A01A-AAT
; For a Gasoline Engine
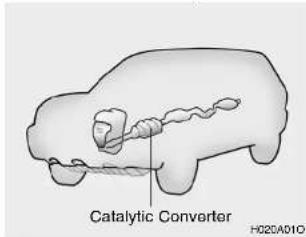
All Hyundai vehicles are equipped with a monolith type three-way catalytic converter to reduce the carbon monoxide, hydrocarbons and nitrogen oxides contained in the exhaust gas. Exhaust gases passing through the catalytic converter may cause it to operate at a very high temperature. The introduction of large amounts of unburned gasoline into the exhaust may cause the catalytic converter to overheat and create a fire hazard. This risk may be reduced by observing the following:

WARNING:
o Use unleaded fuel only.
o Maintain the engine in good operating condition. Extremely high catalytic converter temperatures can result from improper operation of the electrical, ignition or multiport electronic fuel injection.
o If your engine stalls, pings, knocks, or is hard to start, have your Hyundai dealer inspect and repair the problem as soon as possible.
- Avoid driving with a very low fuel level. Running out of gasoline may cause the engine to misfire and result in damage to the catalytic converter.
o Avoid idling the engine for periods longer than 10 minutes.
o The vehicle should not be pushed or pulled to get started. This may cause the catalytic converter to overheat and create a fire hazard.
Do not touch the catalytic converter or any other part of the exhaust system while the catalytic converter is hot. Shut off the engine, wait for at least one hour before touching the catalytic converter or any other part of the exhaust system.
o Remember that your Hyundai dealer is your best source of assistance.
Do not stop your Hyundai over any combustible material such as grass, paper, leaves or rags. These materials might contact the hot catalytic converter and a fire might result.
H020001S-GAT
; For a Diesel Engine
All Hyundai vehicles are equipped with oxidation type catalytic converter to reduce the carbon monoxide, hydrocarbons and particulate contained in the exhaust gas.
CONSUMER INFORMATION
Vehicle Identification Number (VIN) 8-2
Engine Number 8-2
Recommended Inflation Pressures 8-3
Snow Tires 8-4
Tire Chains 8-4
Tire Rotation 8-4
Tire Balancing 8-5
Tire Traction 8-5
When to Replace Tires 8-5
Spare Tire and Tools 8-6


CONSUMER INFORMATION
2
VEHICLE IDENTIFICATION NUMBER (VIN)
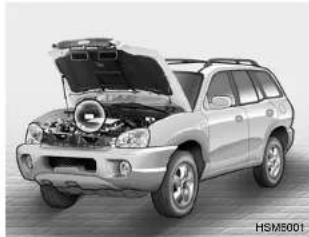
natural_image
Exterior view of a silver SUV with open hood and engine bay (no visible text or symbols)The vehicle identification number (VIN) is the number used in registering your car and in all legal matters pertaining to its ownership, etc. It can be found on the identification plate attached to the engine side of the firewall between the engine and passenger compartment.
ENGINE NUMBER
I010B01S-GATI010A01A-GAT
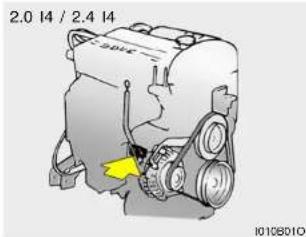
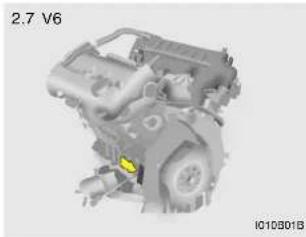
natural_image
Engine component diagram showing internal combustion engine and intake manifold (no text or labels)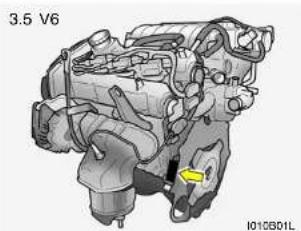
natural_image
Mechanical assembly diagram showing internal components with no visible text or symbols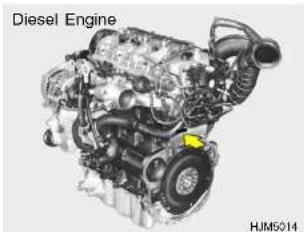
natural_image
Detailed view of a diesel engine assembly (no text or labels visible)The engine number is stamped on the engine block as shown in the drawing.
TIRE
CONSUMER INFORMATION
8
3
1020AD1A-AAT
TIRE INFORMATION
The tires supplied on your new Hyundai are chosen to provide the best performance for normal driving.
1030A01D-AAT
RECOMMENDED INFLATION PRESSURES
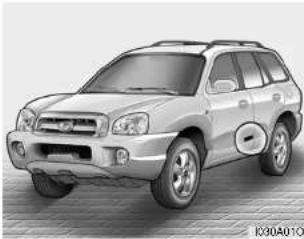
natural_image
Side view of a silver SUV with visible headlights and grille (no text or symbols)The tire label located on the driver's side of the center pillar outer panel gives the tire pressures recommended for your vehicle.
| RIM SIZE | TIRE SIZE | PRESSURE, kPa (PSI) | |||
| NORMAL LOAD | MAXIMUM LOAD | ||||
| FRONT | REAR | FRONT | REAR | ||
| 6.0Jx15 | 215/70R15 | 207(30) | 207(30) | 221(32) | 221(32) |
| 6.5Jx15 | 215/70R15 | 207(30) | 207(30) | 221(32) | 221(32) |
| 6.5Jx16 | 225/70R16 | 207(30) | 207(30) | 221(32) | 221(32) |
These pressures were chosen to provide the most satisfactory combination of ride comfort, tire wear and stability under normal conditions. Tire pressures should be checked at least monthly. Proper tire inflation pressures should be maintained for these reasons:
o Lower-than-recommended tire pressures cause uneven tread wear and poor handling.
o Higher-than-recommended tire pressures increase the chance of damage from impacts and cause uneven tread wear.

CAUTION:
Always observe the following:
Check pressures when the tires are cold. That is, after the car has been parked for at least three hours and hasn't been driven more than 1.6 km or one mile since starting up.
o Check the pressure of your spare tire each time you check the pressure of other tires.
o Never overload your car. Be especially careful about overloading if you equip your car with a luggage rack or car top carrier.
104DA02S-GAT
SNOW TIRES
If you equip your car with snow tires, they should be the same size and have the same load capacity as the original tires. Snow tires should be installed on all four wheels; otherwise, poor handling may result.
Snow tires should carry 28 kPa (4 psi) more air pressure than the pressure recommended for the standard tires on the tire label on the driver's door edge, or up to the maximum pressure shown on the tire sidewall whichever is less.
Do not drive faster than 120 km/h (75 mph) when your car is equipped with snow tires.
1050A02O-GAT
TIRE CHAINS
Tire chains should be installed on the front wheels. If your vehicle is equipped with the 4WD(four wheels drive), be sure to install the chains on all wheels. Be sure that the chains installed in accordance with the manufacturer's instructions.
To minimize tire and chain wear, do not continue to use tire chains when they are no longer needed.

WARNING:
o When driving on roads covered with snow or ice, drive at less than 30 km/h (20 mph).
o Use the SAE "S" class or wire & plastic chains.
o If you have noise caused by chains contacting the body, re-tighten the chain to avoid contact with the vehicle body.
To prevent body damage, re-tighten the chains after driving 0.5 \~ 1 km.
ID60A01Y-GAT
TIRE ROTATION
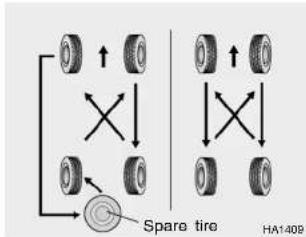
Tires should be rotated every 10,000 km (6,000 miles). If you notice that tires are wearing unevenly between rotations, have the car checked by a Hyundai dealer so the cause may be corrected.
After rotating, adjust the tire pressures and be sure to check wheel nut torque.

WARNING:
Do not mix bias-ply and radial-ply tires under any circumstances. This may cause dangerous handling characteristics that may cause death, serious injury, or property damage.
I070A01A-AAT
TIRE BALANCING
A tire that is out of balance may affect handling and tire wear. The tires on your Hyundai were balanced before the car was delivered but may need balancing again during the years you own the car.
Whenever a tire is dismounted for repair, it should be rebalanced before being reinstalled on the car.
I090A01A-AAT
TIRE TRACTION
Tire traction can be reduced if you drive on worn tires, tires that are improperly inflated or on slippery road surfaces. Tires should be replaced when tread wear indicators appear. To reduce the possibility of losing control, slow down whenever there is rain, snow or ice on the road.
ID90A01HP-GAT
WHEN TO REPLACE TIRES
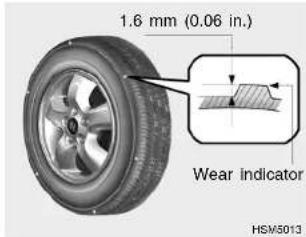
The original tires on your car have tread wear indicators. The tread wear indicators appear when the tread depth is 1.6 mm (0.06 in.). The tire should be replaced when these appear as a solid bar across two or more grooves of the tread. Always replace your tires with those of the recommended size. If you change wheels, the new wheel's rim width and offset must meet Hyundai specifications.
SPARE TIRE AND TOOLS
1100A01FC-AAT
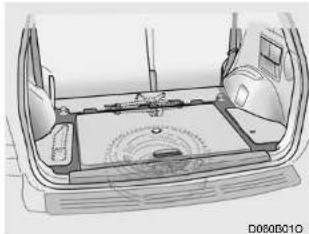
natural_image
Technical line drawing of a car interior showing structural components and a central display area (no text or symbols)Your Hyundai is delivered with the following:
Spare tire and wheel
Wheel nut wrench, Wrench bar,
Spanner, Screwdriver
Jack

WARNING:
- Driving on worn-out tires is dangerous! Worn-out tires can cause loss of braking effectiveness, steering control and traction. When replacing tires, never mix radial and bias-ply tires on the same car. If you replace radial tires with bias-ply tires, they must be installed in sets of four.
- Your vehicle is equipped with tires designed to provide for safe ride and handling capability. Do not use a size and type of tire and wheel that is different from the one that is originally installed on your vehicle. It can affect the safety and performance of your vehicle, which could lead to handling failure or rollover and serious injury.
When replacing the tires, be sure to equip all four tires with the tire and wheel of the same size, type, tread, brand and load-carrying capacity. If you nevertheless decide to equip your vehicle with any tire/wheel combination not recommended by Hyundai for off-road driving, you should not use these tires for highway driving.
VEHICLE SPECIFICATIONS
Measurement 9-2
Engine 9-3
Lubrication Chart 9-4
9

VEHICLE SPECIFICATIONS
2
J01DA02O-GAT
MEASUREMENT
mm (in.)
| Overall length | 4500 (177.1) | |
| Overall width | 1820 (71.5) | |
| Overall height | 2WD | 1655(65.2)/1710(67.3)* |
| 4WD | 1675(65.9)/1730(68.1)* | |
| Wheel base | 2620 (103.1) | |
| Wheel tread | Front | 1540 (60.6) |
| Rear | 1540 (60.6) | |
* With roof rack
J02DA01O-GAT
POWER STEERING
| Type | Rack and pinion |
| Wheel free play | 0 – 30 mm (0 – 1.18 in.) |
| Rack stroke | 142 mm (5.5 in.) |
| Oil pump type | Vane type |
J0604020-GAT
FUEL SYSTEM
| Engine | Fuel tank capacity |
| 2.0L / 2.4L / 2.7L / Diesel Engine | 65 liter |
| 3.5L | 72 liter |
J00DA02O-GAT
TIRE
| Size | Inflation pressure kPa (psi) | |
| Standard | 215/70 R15 | 207 (30) |
| Option | 225/70 R16 | |
| Spare | Full Size |
JD40A040-GAT
ELECTRICAL
| ITEM | GASOLINE | DIESEL | |
| 2.0L / 2.4 L | 2.7L / 3.5 L | ||
| Battery | MF 68 AH | MF 68 AH | MF 90 AH |
| Alternator | 110 A (13.5 V) | 120 A (13.5 V) | 120A (12V) |
J050A02HP-GAT
BRAKE
| Type | Dual hydraulic with brake booster | |
| Front brake type | Ventilated disc | |
| Rearbraketype | E.C only | Disc type |
| Except E.C | Disc type (with ABS) | |
| Drum type (without ABS) | ||
| Parking brake | Cable operated on rear wheel | |
ENGINE
VEHICLE SPECIFICATIONS
3
JD70A000-GAT
| ITEMS | GASOLINE | DIESEL | ||||
| 2.0 l4 | 2.4 l4 | 2.7 V6 | 3.5 V6 | 2.0 CRDi | ||
| Engine Type | 4-Cyl., In-line DOHC | 6-Cyl., V-type DOHC | 4-Cyl., In-line SOHC | |||
| Bore x Stroke (mm) | 85 x 88 | 86.5 x 100 | 86.7 x 75 | 93 x 85.8 | 83 x 92 | |
| Displacement (cc) | 1997 | 2351 | 2656 | 3497 | 1991 | |
| Firing order | 1 - 3 - 4 - 2 | 1 - 2 - 3 - 4 - 5 - 6 | 1 - 2 - 3 - 4 - 5 - 6 | 1 - 3 - 4 - 2 | ||
| Spark plug | Unleaded | CHAMPION : RN9YC4NGK : BPR6ES-11 | CHAMPION : RN10PYP4NGK : PGR5C-11 | CHAMPION : RC10PYPB4NGK : PFR5N-11 | - | |
| Leaded | - | CHAMPION : RN9YCNGK : BPR6ES | CHAMPION : RC10YCNGK : BKR5ES | - | ||
| Spark plug gap | Unleaded | 1.0 - 1.1 mm | - | |||
| Leaded | - | 0.7 - 0.8 mm | - | |||
| Valve clearance(warm engine) | Intake | Auto lash | ||||
| Exhaust | Auto lash | |||||
| Idle speed (rpm) | 800 ± 100 | 750 ± 100 | 700 ± 100 | 800 ± 100 | ||
| Ignition timing | BTDC 10^th ± 5^o | BTDC 8^o ± 5^o | BTDC 12^th ± 5^o | BTDC 10^th ± 5^o | - | |

VEHICLE SPECIFICATIONS
4
LUBRICATION CHART
JOORDOBO-GAT
| Item | Oil & Grease Standard | Q'ty (liller) | ||
| Engine Oil | Gasoline | API SJ, SL or ABOVE, SAE 5W-20, 5W-30ILSAC GF-3 or ABOVE SAE 10W-30 (ABOVE -18°C)SAE 15W-40 (ABOVE -13°C)SAE 20W-50 (ABOVE -7°C) | Drain and refill (With oil filter)2.0L / 2.4L / 3.5L : 4.32.7L : 4.5 | |
| RecommendsShellHELIXMotor oils | Diesel API | CF-4 or ABOVE SAE 30 (W.G.T '3 Engine), SAE 20W-40 (ABOVE -10°C)API CH-4 or ABOVE SAE 15W-40 (ABOVE -15°C)(V.G.T '4 Engine), SAE 10W-30 (-20°C ~ 40°C)ACEA B4 or ABOVE SAE 5W-30 (-25°C ~ 10°C)SAE 0W-30 (BELOW 10°C) *1, *2 | Drain and refill (With oil filter) : 5.9at Oil Pan : 5.4 (MAX)3.8 (MIN) | |
| *1. Restricted by driving condition and area | ||||
| *2. Not recommended for sustained high speed vehicle operation | ||||
| Engine oil consumption | Normal driving condition | MAX. 1L/1500 Km | ||
| Severe driving condition | MAX. 1L/1000 Km | |||
| Transaxle Manual | HYUNDAI GENUINE PARTS MTF 75W/85 (API GL-4) | 2.3 | ||
| Automatic | HYUNDAI GENUINE ATF SP-III, DIAMOND ATF SP-III, SK ATF SP-III or other brands approved by Hyundai Motor Co., | 8.5 | ||
| Transfer case | API GL-5, SAE 80W/90 (SHELL SPIRAX AX Equivalent) | 0.8 | ||
| Rear Axle | API GL-5, SAE 80W/90 (SHELL SPIRAX AX Equivalent) | 1.1 | ||
| Coolant | Ethylene glycol base for aluminum radiator | 7 (Gasoline), 8.7(Diesel) | ||
| Power steering gear | PSF-3 TYPE FLUID | 0.9 (2.0L / 2.4L / 2.7L Diesel Engine), 1 (3.5L) | ||
| Brakes and clutch fluid | DOT 3, DOT 4 or Equivalent | As required | ||
^3) W.G.T : Waste Gate Turbocharger
^4) V.G.T : Variable Geometry Turbocharger
INDEX
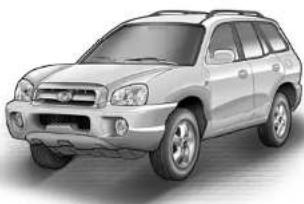
natural_image
Exterior view of a silver SUV (no visible text or symbols)10
A
Air Bag 1-41
Air Cleaner Filter 6-10
Air Conditioner Filter 1-116, 6-29
Air Conditioning
Care 6-27
Operation 1-108,6-27
Switch 1-108
Antenna 1-148
Ashtray 1-79
Audio Fault Code 1-145
Audio System
Cassette tape player operation (H240) 1-123
Cassette tape player operation (H290) 1-137
CD auto changer (H260) 1-131
CD auto changer (H290) 1-142
Compact disc player operation (H260) 1-128
Compact disc player operation (H290)....1-139
Stereo radio operation (H240) 1-120
Stereo radio operation (H260) 1-125
Stereo radio operation (H290) 1-134
B
Battery 6-34
Brake
Anti-lock brake system (ABS) 2-18
Brake traction control system (BTCS) 2-19
Checking the brakes 6-26
Fluid 6-26
Pedal clearance 6-31
Pedal free-play 6-31
Practices 2-17
Breaking-In your New Hyundai 1-3
C
Calendar 1-75
Care of Cassette Tapes 1-147
Care of Discs 1-146
Cargo Security Screen 1-91
Catalytic Converter 7-3
CD Auto Changer 1-91
Child Restraint System 1-32
Child-Protector Rear Door Lock 1-12
Cigarette Lighter 1-78
Clock 1-74
Clutch
Pedal free-play 6-31
Combination Light
Auto light 1-70
Daytime running lights 1-69
Headlight flasher 1-70
Headlight switch 1-69
High-beam switch 1-69
Lane change signal 1-68
Parking light auto cut 1-69
Turn signal operation 1-68
Cooling Fans 6-35
Corrosion protection
Cleaning the interior 4-6
Protecting your Hyundai from corrosion 4-2
Washing and waxing 4-4
Cruise Control 1-98
D
Door
Central door locks.... 1-12
Door locks 1-10
Front door edge warning light 1-96
Locking, unlocking front door with a key 1-11
Drink Holder 1-80
Drive Belts 6-28
Driving for economy 2-27
Smooth cornering 2-28
Winter driving 2-29
Driving
E
Electric Azimuth Compass 1-75
Emission Control System 7-2
Engine
Before starting the engine 2-4
Compartment (2.0 I4 / 2.4 I4) 6-2
Compartment (2.7 V6) 6-3
Compartment (3.5 V6) 6-4
Compartment (Diesel) 6-5
Coolant 6-14
Coolant temperature gauge 1-60
If the engine overheats 3-4
Number 8-2
Oil 6-7
Starting 2-6
Engine Exhaust Can Be Dangerous! 2-2
F
Fog Light
Front 1-73
Rear 1-73
Front Seats
Adjustable headrests.... 1-18
Adjusting seat forward and rearward.... 1-17
Adjusting seatback angle 1-18
Fuel Auto fuel cut switch 1-93
Capacity 9-2
Gauge 1-59
Recommendations 1-2
Fuel Filler Lid
Remote release 1-93
Full-time 4WD Operation 2-22
Fuses 6-33
Fuses panel description 6-47
G
General Checks 6-6
Glove Box 1-85
H
Hazard Warning System.... 1-73
Headlight Aiming Adjustment 6-38
Headlight Leveling Device System 1-97
Heating and Cooling Control 1-101
Heating and Ventilation
Air flow control.... 1-103
Air intake control switch 1-102
Bi-level heating 1-106
Defrosting/Defogging 1-106
Fan speed control (Blower Control) 1-102
Temperature control 1-105
High-Mounted Rear Stop Light 1-92
Hood Release 1-94
Hom 1-96
I Ignition Switch 2-4
Immobilizer System 1-5
Instrument Cluster and Indicator Lights 1-48
Instrument Panel Light Control (Rheostat) 1-78
Interior Light 1-84
J Jump Starting 3-3
K Keys ...... 1-5 If you lose your keys ...... 3-15 Positions ...... 2-5
L
Light Bulbs Replacement....6-39
Light Bulbs Wattage 6-46
Limited-Slip Differential 2-26
Lubrication Chart....9-4
Luggage Compartment Light 1-90
Luggage Net 1-90
M Maintenance Intervals
Explanation of scheduled maintenance items ..... 5-8
Maintenance under severe usage conditions ..... 5-7
Scheduled maintenance 5-4
Service requirements 5-2
Mirrors
Day-night inside rearview mirror 1-88
Outside rearview mirror 1-86
Multimeter 1-66 \~ 1-68
O Odometer/Trip Odometer 1-61
P Parking Brake 1-89 Power Outlet 1-79 Power Steering Fluid Level 6-36
R
Rear Seat
Adjusting seatback angle 1-21
Folding rear seatback and seat cushion ....1-21
Full flat 1-23
Rear Window Defroster Switch 1-74
Roof Rack 1-92
S
Seat
Front seat 1-17
Rear seat 1-21
Seat warmer....1-20
Seat Belts
3-Point system 1-27
2-Point static type 1-29
Pre-tensioner seat belt 1-39
Adjusting your seat belt 1-28, 1-29
Care of seat belts 1-26
Precautions 1-24
Spark Plugs 6-17
Spectacle Case 1-85
Speedometer 1-61
Starting Procedure 2-6
Steering Wheel Free play 6-30
Steering Wheel Tilt Lever 1-97
Stereo Sound System 1-118
Sunroof 1-81
Sun Visor 1-95
T
Tachometer 1-60
Tail Gate 1-89
Tail gate window 1-89
Theft-Alarm system 1-13
Tire
Balancing 8-5
Chains 8-4
Changing a flat tire 3-7
If you have a flat tire 3-7
Information 8-3
Pressure 8-3
Replacement 8-5
Rotation 8-4
Snow tires 8-4
Spare tire 3-5
Traction 8-5
Towing
A trailer (or vehicle) 2-31 \~ 2-35
Emergency 3-14
If your car must be towed 3-12
Traction Control system
Brake traction control system 2-19
Full traction control system 2-20
Transaxle
Automatic 2-10
Automatic transaxle fluid checking 6-24
Manual 2-8
Manual transaxle oil checking 6-23
Trip Computer 1-63
10 INDEX
6
v
Vehicle Identification Number 8-2
Vehicle Specifications 9-2 \~ 9-4
w
Warning and Indicator Lights 1-52 \~ 1-58
Windows
Power 1-16
Windoshield Deicer Switch 1-78
Windshield Wiper and Washer Switch 1-71
Tail gate wiper and washer switch 1-72
Windshield Wiper Blades 6-20
- OWNER'S I.D.
- HYUNDAI
- SANTA FE
- OWNER'S MANUAL
- RESPONSIBILITY FOR MAINTENANCE
- FOREWORD
- HYUNDAI MOTOR COMPANY
- CAUTION:
- CAUTION: MODIFICATIONS TO YOUR HYUNDAI
- TWO-WAY RADIO OR CELLULAR TELEPHONE INSTALLATION
- SAFETY AND VEHICLE DAMAGE WARNING
- WARNING:
- NOTE:
- GUIDE TO HYUNDAI GENUINE PARTS
- What are Hyundai Genuine Parts?
- Why should you use genuine parts?
- How can you tell if you purchasing Hyundai Genuine Parts?
- TABLE OF CONTENTS
- SECTION
- INSTRUMENTS AND CONTROLS (RIGHT-HAND DRIVE)
- INDICATOR SYMBOLS ON THE INSTRUMENT CLUSTER
- FEATURES OF YOUR HYUNDAI
- FUEL RECOMMENDATIONS
- Use Diesel
- What About Gasohol?
- Do not Use Methanol
- Gasolines for Cleaner Air
- Operation in Foreign Countries
- BREAKING IN YOUR NEW HYUNDAI
- During the First 2,000 Km (1,200 Miles) (Gasoline Engine)
- FEATURES OF YOUR HYUNDAI
- During the First 1,000 Km (600 Miles)(Diesel Engine)
- KEYS
- IMMOBILIZER SYSTEM
- 1) ID key
- 2) Master key
- BB0CD1A-GAT
- Key Numbers
- Limp home procedures
- - For a Diesel Engine (If Installed)
- DOOR LOCKS
- ILLUMINATED IGNITION SWITCH (If installed)
- THEFT-ALARM SYSTEM
- Alarm Stage
- KEYLESS ENTRY SYSTEM (If installed)
- Locking doors
- Unlocking doors
- Replacing the battery
- POWER WINDOWS
- SEATS
- FRONT SEATS
- REAR SEAT
- Folding Rear Seatback and Seat Cushion
- FULL FLAT REARSEAT
- SEAT BELTS
- B150A02A-GAT SEAT BELT PRECAUTIONS
- Infant or Small Child
- Larger Children
- Pregnant Women
- Injured Person
- One Person Per Belt
- Do Not Lie Down
- CARE OF SEAT BELTS
- Periodic Inspection
- Keep Belts Clean and Dry
- When to Replace Seat Belts
- HEIGHT ADJUSTABLE FRONT SEAT SHOULDER BELT
- (If installed)
- Child Seat Restraint Suitability For Seat Position
- Pre-tensioner Seat Belt (If installed)
- SUPPLEMENTAL RESTRAINT (AIRBAG) SYSTEM (SRS)
- SRS Care
- WARNING AND INDICATOR LIGHTS
- Turn Signal Indicator Lights
- ABS Service Reminder Indicator (If Installed)
- TCS Traction Control Indicator Light (If Installed)
- Traction Control Indicator Lights (If Installed)
- High Beam Indicator Light
- Warning Light Operation
- CAUTION
- (Diesel Engine):
- Charging System Warning Light
- Door Ajar Warning Light and Chime (If Installed)
- Low Fuel Level Warning Light
- Tail Gate Open Warning Light
- SRS (Airbag) Service Reminder Indicator (SRI) (If Installed)
- Malfunction Indicator Light (If Installed)
- Cruise Indicator Light (If Installed)
- 4WD System Warning Light (If installed)
- 4WD Lock Indicator Light (If Installed)
- Immobilizer Warning Light (Diesel Engine) (If Installed)
- Diesel Preheat Indicator Light
- Fuel Filter Warning Light (Diesel Engine)
- Engine Oil Level Warning Light (Diesel Engine) (If Installed)
- INSTRUMENT CLUSTER
- PARKING START WARNING SOUND (If installed)
- SEAT BELT WARNING SOUND (If installed)
- FUEL GAUGE
- Odometer
- 2, 3. Trip Odometer
- B310C010-GAT
- TRIP COMPUTER
- Trip Odometer
- Trip Computer Switch
- Distance to Empty (km or miles)
- Average Fuel Consumption (L/100km or MPG)
- Average Speed (km/h or MPH)
- Tripmeter
- MULTIMETER
- How to correct azimuth indicator error
- Road display responsive to vehicle speed.
- Altitude correction (in altitude display mode)
- Relative altimeter
- MULTI-FUNCTION LIGHT SWITCH
- Daytime Running Lights (If Installed)
- Parking Light Auto Cut
- WINDSHIELD WIPER AND WASHER SWITCH
- FOG LIGHT SWITCH HAZARD WARNING SYSTEM
- REAR WINDOW DEFROSTER SWITCH
- DIGITAL CLOCK
- DIGITAL CALENDAR
- How to adjust the date & the time
- ELECTRIC AZIMUTH COMPASS
- Correcting Azimuth Indicator
- How to correct azimuth indicator
- The azimuth compass indicator correction will be cancelled:
- How to correct terrestrial devia- tion.
- The terrestrial deviation angle correction will be cancelled:
- FRONT WINDSHIELD DEICER SWITCH
- INSTRUMENT PANEL LIGHT CONTROL (RHEOSTAT)
- CIGARETTE LIGHTER
- POWER OUTLET
- ASHTRAY
- DRINK HOLDER
- SUNROOF
- INTERIOR LIGHT
- o DOOR
- o ON
- o OFF
- SPECTACLE CASE
- GLOVE BOX
- Illuminated Glove Box
- CENTER CONSOLE BOX
- OUTSIDE REARVIEW MIRROR
- To adjust the position of either mirror:
- OUTSIDE REARVIEW MIRROR HEATER (If Installed)
- DAY/NIGHT INSIDE REAR- VIEW MIRROR
- PARKING BRAKE
- TAIL GATE
- Tail gate Window
- LUGGAGE COMPARTMENT
- LUGGAGE COMPARTMENT LIGHT
- LUGGAGE NET
- CD AUTO CHANGER
- Stowage Precautions
- ROOF RACK
- HIGH-MOUNTED REAR STOP LIGHT
- AUTO FUEL CUT SWITCH
- REMOTE FUEL-FILLER LID RELEASE
- HOOD RELEASE
- SUN VISOR
- Illuminated Vanity Mirror (If installed)
- FRONT DOOR EDGE WARN- ING LIGHT
- HORN
- REAR SEAT ARM REST
- STEERING WHEEL TILT LEVER
- HEADLIGHT LEVELING DEVICE SYSTEM
- CRUISE CONTROL
- To Set the Cruise Speed
- B880E01Y-AAT
- To Reset at a Faster Speed
- B88DF020-AAT
- To Reset at a Slower Speed
- HEATING AND COOLING CONTROL
- B710B020-AAT CENTER VENTILATOR
- B7100020-AAT SIDE VENTILATOR
- HEATING AND VENTILA- TION
- HEATING CONTROLS
- Defrost-Level
- BI-LEVEL HEATING VENTILATION
- DEFROSTING/DEFOGGING
- To remove interior fog on the windshield:
- To remove frost or exterior fog on the windshield:
- B730A01L-AAT
- Operation Tips
- AIR CONDITIONING SYSTEM
- AUTOMATIC HEATING AND COOLING CONTROL SYSTEM
- Heating and Cooling Controls
- AIR CONDITIONER FILTER
- STEREO SOUND SYSTEM
- POWER ON-OFF Control Knob
- VOLUME Control
- BASS Control Knob
- BAL (Balance Control) Knob
- TREB (Treble Control) Knob
- FAD (Fader Control) Knob
- TUNE (Manual) Select Button
- SEEK Operation
- (Automatic Channel Selection)
- BAND Selector
- PRESET STATION SELECT Buttons
- HOW TO PRESET STATIONS
- SCAN Button
- H240C010-GAT CASSETTE TAPE PLAYER OPERATION (H240) (If Installed)
- FF/REW Button
- AUTO MUSIC SELECT Button
- TAPE PROGRAM Button
- EJECT Button
- DOLBY SELECT Button
- STEREO RADIO OPERATION (H260) (If installed)
- BALANCE Control
- FAD (Fader Control) Knob
- BASS Control Knob
- TREB (Treble Control) Knob
- SCAN Button
- TUNE (Manual) Select Button
- BAND Selector
- PRESET STATION SELECT Button
- Playing CD
- FF/REW (▶▶/◀◀)
- TRACK UP/DOWN
- REPEAT Button
- EJECT Button
- CD AUTO CHANGER (H260) (If installed)
- CD Select Button
- DISC Select Button
- FF/REW (▶▶ /◀◀)
- REPEAT
- SCAN Button
- STEREO RADIO OPERATION (H290) (If installed)
- BASS/BALANCE Control Knob BASS Control Knob
- BALANCE Control knob
- TREBLE/FAD Knob TREBLE Control Knob
- SEEK Operation (Automatic Channel Selection)
- PRESET STATION Select Buttons
- EQUALIZER Button
- Best Station Memory Button (BSM) (If installed)
- SCAN Button (If installed)
- H2900020-GAT
- TAPE EJECT button
- EQ Button
- DOLBY Button
- COMPACT DISC PLAYER OPERATION (H290) (If installed)
- REPEAT
- EQUALIZER Button
- CD EJECT Button
- CD CHANGER Select Button
- FF/REW (▶▶/◀◀)
- SCAN Button (If Installed)
- EQ Button
- AUDIO FAULT CODE
- CARE OF DISCS
- Damaged Disc
- Storage
- CARE OF CASSETTE TAPES
- ANTENNA
- DRIVING YOUR HYUNDAI
- WARNING: ENGINE EXHAUST CAN BE DANGEROUS!
- BEFORE STARTING THE ENGINE
- WARNING
- TO START THE ENGINE
- COMBINATION IGNITION SWITCH
- KEY POSITIONS
- o "START"
- o "ON"
- o "ACC"
- o "LOCK"
- STARTING
- STARTING FOR THE DIESEL ENGINE
- ENGINE COLD
- ENGINE WARM
- Normal Conditions
- STARTING AND STOPPING THE ENGINE FOR TURBOCHARGER INTERCOOLER (Diesel Engine)
- OPERATING THE MANUAL TRANSAXLE
- Using the Clutch
- RECOMMENDED SHIFT POINTS
- Good Driving Practices
- OPERATING THE AUTOMATIC TRANSAXLE (4 Speed A/T)
- o P (Park):
- o R (Reverse):
- o N (Neutral):
- o D (Drive):
- Sports mode
- C090H01L-GAT
- OPERATING THE AUTOMATIC TRANSAXLE (5 Speed A/T)
- o R(Reverse):
- C090N04O-AAT
- SLIP Control
- Driving Hints
- TCS ON Mode
- Indicator and Warning
- FULL TRACTION CONTROL SYSTEM (FTCS)
- TCS ON/OFF Mode
- Indicators and Warning
- Driving 4WD Safely
- 4WD LOCK SYSTEM
- LIMITED-SLIP DIFFERENTIAL
- GOOD BRAKING PRACTICES
- DRIVING FOR ECONOMY
- SMOOTH CORNERING
- WINTER DRIVING
- Snowy or Icy Conditions
- Use High Quality Ethylene Glycol Coolant
- Check Battery and Cables
- Change to "Winter Weight" Oil If Necessary
- Check Spark Plugs and Ignition System
- To Keep Locks from Freezing
- Use Approved Anti-Freeze in Window Washer System
- Don't Let Your Parking Brake Freeze
- Don't Let Ice and Snow Accumulate Underneath
- Carry Emergency Equipment
- USE OF LIGHTSHIGHER SPEED MOTORLINES OR VEHICLE TOWING
- Pre-Trip Inspections
- Tires:
- Never exceed the maximum tire inflation pressure shown on the tires.
- Fuel, engine coolant and engine oil:
- Drive belt:
- Trailer Hitches
- Trailer Brakes
- Safety Chains
- C190F01A-GAT
- Trailer or Vehicle Towing Tips
- WHAT TO DO IN AN EMERGENCY
- IF THE ENGINE WILL NOT START
- If Engine Doesn't Turn Over or Turns Over Slowly
- If Engine Turns Over Normally but Does Not Start
- If Engine Stalls While Driving
- JUMP STARTING
- IF THE ENGINE OVERHEATS
- WARNING (Diesel only):
- SPARE TIRE
- To remove the spare tire
- To reinstall the spare tire
- IF YOU HAVE A FLAT TIRE
- CHANGING A FLAT TIRE
- Wheel nut tightening torque:
- IF YOUR VEHICLE MUST BE TOWED
- EMERGENCY TOWING
- IF YOU LOSE YOUR KEYS
- CORROSION PREVENTION & APPEARANCE CARE
- CORROSION PREVENTION AND APPEARANCE CARE
- CORROSION PROTECTION
- Protecting Your Hyundai from Corrosion
- Common Causes of Corrosion
- High-Corrosion Areas
- Moisture Breeds Corrosion
- TO HELP PREVENT CORROSION
- Keep Your Car Clean
- Keep Your Garage Dry
- Keep Paint and Trim in Good Condition
- Don't Neglect the Interior
- WASHING AND WAXING
- Washing Your Hyundai
- E030B01A-AAT
- Spot Cleaning
- E030C01A-AAT
- Polishing and Waxing
- E030001A-AAT
- When to Wax Again
- E030E01A-AAT
- Maintaining Bumpers
- CLEANING THE INTERIOR
- To Clean the Vinyl Upholstery
- To Clean the Leather Upholstery (If Installed)
- Cleaning the Carpets
- ANY QUESTIONS?
- Cleaning the Seat Belts
- Cleaning the Windows
- VEHICLE MAINTENANCE REQUIREMENTS
- VEHICLE MAINTENANCE REQUIREMENTS
- MAINTENANCE INTERVALS
- Service Requirements
- Maintenance Requirements
- Specified Scheduled Procedures
- General Checks
- SCHEDULED MAINTENANCE REQUIREMENTS
- Do-It-Yourself Maintenance
- A Few Tips
- SCHEDULED MAINTENANCE
- MAINTENANCE UNDER SEVERE USAGE CONDITIONS
- SEVERE DRIVING CONDITIONS
- EXPLANATION OF SCHED- ULED MAINTENANCE ITEMS
- o Engine Oil and Filter
- o Drive Belts
- o Fuel Filter
- o Fuel Lines, Fuel Hoses and Connections
- VEHICLE MAINTENANCE REQUIREMENTS 5
- o Timing Belt
- o Vapor Hose and Fuel Filler Cap
- o Crankcase Ventilation Hoses
- o Air Cleaner Filter
- o Spark Plugs
- (For Gasoline Engine)
- o Cooling System
- o Coolant
- o Manual Transaxle Oil
- o Automatic Transaxle Fluid
- o Brake Hoses and Lines
- o Brake Fluid
- o Rear Brake Drums / Linings, Parking Brake
- o Brake Pads, Calipers and Rotors
- o Exhaust Pipe and Muffler
- o Suspension Mounting Bolts
- o Steering Gear Box, Linkage & Boots/Lower Arm Ball Joint
- o Power Steering Pump, Belt and Hoses
- o Drive Shafts and Boots
- o Air Conditioning Refrigerant
- ENGINE COMPARTMENT
- Vehicle Exterior
- Vehicle Interior
- CHECKING THE ENGINE OIL
- DO-IT-YOURSELF MAINTENANCE 6
- G00B010-GAT
- To Check the Oil Level
- ENGINE OIL CONSUMPTION Function of Engine Oil
- Engine oil consumption
- CHANGING THE OIL AND FILTER
- Gasoline Engine/ Diesel Engine : Left hand drive type(Except E.C), Right hand drive type
- Oil pan drain plug tightening torque : 3.5 \~ 4.5 kgf.m
- Tightening torque : 0.8\~1.0 kgf.m
- Tightening torque : 2.3\~2.5 kgf.m
- CHECKING AND CHANGING THE ENGINE COOLANT
- Recommended Engine Coolant
- To Check the Coolant Level
- To Change the Coolant
- SPARK PLUGS
- G060000-GAT
- Replacing the Spark Plugs
- G080C010-GAT
- Changing the Spark Plugs
- CHANGING THE AIR CLEANER FILTER
- WINDSHIELD WIPER BLADES
- Replacing the Wiper Blades
- FILLING THE WASHER RESERVOIR
- CHECKING THE TRANSAXLE OIL (MANUAL)
- Recommended Oil
- Manual Transaxle Oil Capacity
- To Check the Manual Transaxle Fluid Level
- CHECKING THE TRANSAXLE FLUID (AUTOMATIC)
- Recommended Fluid
- Transaxle Fluid Capacity
- To Check the Transaxle Fluid Level
- CHECKING THE BRAKES
- AIR CONDITIONING CARE
- Adding Brake Fluid
- Keeping the Condenser Clean
- Checking the Air Conditioning Operation
- Lubrication
- CHANGING THE AIR CONDITIONER FILTER
- (For Evaporator and Blower Unit) (If Installed)
- CHECKING THE FREEPLAY
- CHECKING BRAKE PEDAL CLEARANCE
- CHECKING DRIVE BELTS
- CHECKING AND REPLACING FUSES
- CHECKING THE BATTERY
- CHECKING ELECTRIC COOLING FANS
- Checking Engine Cooling Fan
- Checking Condenser Cooling Fan
- POWER STEERING FLUID LEVEL
- REMOVAL OF WATER FROM THE FUEL FILTER
- POWER STEERING HOSES
- DIESEL ENGINE
- 38
- HEADLIGHT AIMING ADJUSTMENT
- Adjustment After Headlight Assembly Replacement
- SPECIFICATION:
- REPLACEMENT OF LIGHT BULBS
- Headlight and Front Turn Signal Light
- BULB WATTAGE
- FUSE PANEL DESCRIPTION
- Crankcase Emission Control System
- Evaporative Emission Control System
- Canlster
- Purge Control Solenoid Valve
- EGR SYSTEM CATALYTIC CONVERTER
- Exhaust Emission Control System
- ; For a Diesel Engine
- CONSUMER INFORMATION
- TIRE
- TIRE INFORMATION
- RECOMMENDED INFLATION PRESSURES
- 104DA02S-GAT
- SNOW TIRES
- 1050A02O-GAT
- TIRE CHAINS
- ID60A01Y-GAT
- TIRE ROTATION
- TIRE BALANCING
- TIRE TRACTION
- WHEN TO REPLACE TIRES
- SPARE TIRE AND TOOLS
- VEHICLE SPECIFICATIONS
- ENGINE
- LUBRICATION CHART
- 10
- A
- B
- C
- Clutch
- D
- Driving
- E
- F
- G
- R
- S
- T
- Towing
- Transaxle
- INDEX
- v
- w
Brand : HYUNDAI
Model : Santa FE (2000)
Category : Automotive