TI300 - Thermometer Owon - Free user manual and instructions
Find the device manual for free TI300 Owon in PDF.


| Product Type | Handheld Thermal Imaging Camera |
| Brand | Owon |
| Model | TI300 |
| Infrared Resolution | 220 × 160 pixels |
| Temperature Range | -20 °C to +450 °C |
| Accuracy | ±2 °C or ±2% |
| Visible Resolution | 640 × 480 pixels |
| Display | 3.5 inch |
| Field of View | 35° × 26° |
| Image Modes | Outline Fusion, Overlay Fusion, Picture-in-Picture, Thermal, Visible |
| Color Palettes | 8 palettes including Iron, Rainbow, etc. |
| Measurement Functions | Center Spot, Hot Spot, Cold Spot, Zone |
| Battery | 5000 mAh, >4 hours |
| Charging | USB Type-C, 5V/2A |
| Connectivity | WiFi, USB Type-C |
| Lens | 4 mm |
| LED Light | Yes |
| Storage | Built-in >20,000 images, TIFF format |
| Protection | IP54 |
| Dimensions | 230 × 100 × 90 mm |
| Weight | 420 g |
Frequently Asked Questions - TI300 Owon
User questions about TI300 Owon
0 question about this device. Answer the ones you know or ask your own.
Ask a new question about this device
Download the instructions for your Thermometer in PDF format for free! Find your manual TI300 - Owon and take your electronic device back in hand. On this page are published all the documents necessary for the use of your device. TI300 by Owon.
USER MANUAL TI300 Owon
Handheld Thermal Imaging Camera User Manual
Handheld Thermal Imaging Camera User Manual
| Version number | Date Modified | Author | Approved By | Note |
| V1.0 | 202001 | New | ||
| V1.1 | 202111 | Add TI322 | ||
| V1.2 | 202201 | TI322 instead TI321 | ||
| V1.3 | 202302 | TI321 instead TI322 |
Contents
1 OVERVIEW .... 1
1.1 APPEARANCE .... 1
1.2 POWER ON/OFF 6
1.3 QUICK MEASUREMENT 6
1.4 SAVE, DELETE AND VIEW INFRARED THERMAL IMAGE 12
1.5 MAIN PAGE 16
1.6 CONTROL AND TRIGGER KEYS 17
1.7 CHARGE AND EXPORT PICTURES....17
1.7.1 Charge 17
1.7.2 Export Picture 18
2 OPERATION AND SETTINGS 19
2.1.1 Quick Operation 19
2.1.1.1 Quick Switch Color Palettes 19
2.1.1.2 Quickly Switch Image Modes .....19
2.1.2 First Level Menu 20
2.1.3 Second Level Menu 21
2.1.3.1 Measurement 22
2.1.3.2 Image Mode 23
2.1.3.3 Thermal AGC 24
2.1.3.4 Color Palette 24
2.2 SETTINGS 25
2.2.1 Language 25
2.2.2 Emissivity 27
2.2.3 Temperature alarm 27
2.2.3.1 Alarm above threshold 28
2.2.3.2 Alarm below threshold 29
2.2.4 WiFi 29
2.2.4.1 Enable and Disable WiFi 29
2.2.4.2 WiFi Configuration 29
2.2.5 LED 30
2.2.6 More ....30
2.2.6.1 Temperature Unit 31
2.2.6.2 Storage 31
2.2.6.3 Date 32
2.2.6.4 Automatic Power Off 33
2.2.7 Temperature Bar ....34
2.2.8 Brightness 34
2.2.9 Restore factory settings 34
2.2.10 About ....34
3 MAINTENANCE ....36
3.1 BATTERY SERVICE AND REPLACEMENT 36
3.2 CALIBRATION 36
3.3 CLEAN....36
4 SPECIFICATION ....37
5 APPENDIX 38
5.1 EMISSIVITY 38
1 Overview
1.1 Appearance
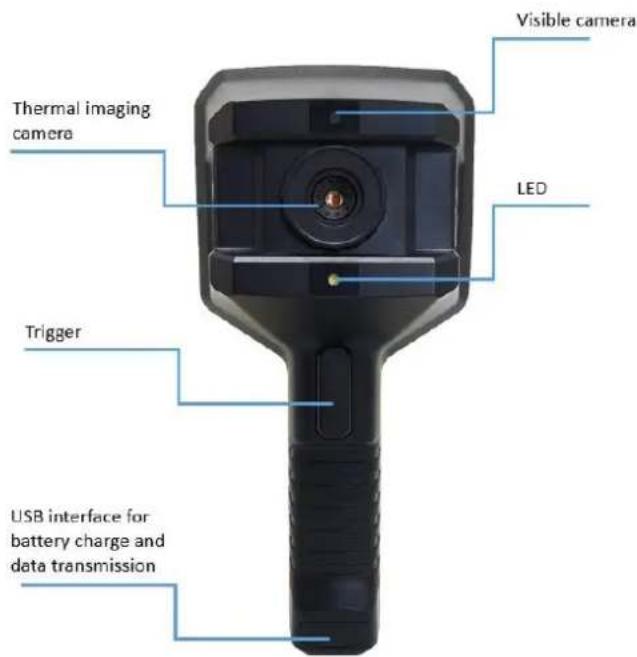
Handheld thermal imaging camera appearance is shown below,
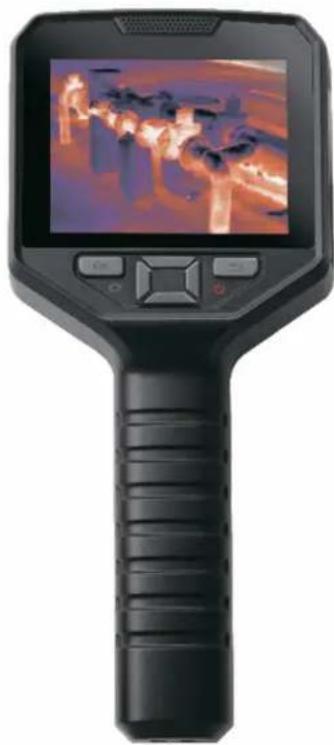
natural_image
Black handheld electronic device with a screen displaying an image of a person in motion (no visible text or symbols)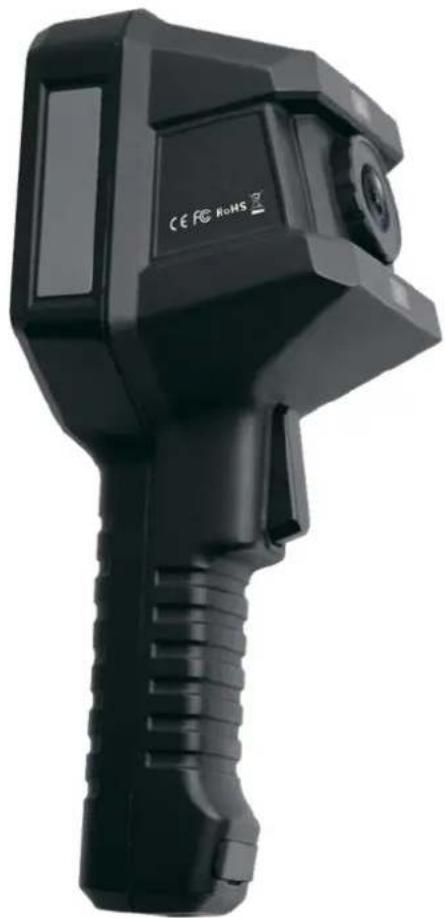
natural_image
Black handheld device with visible internal components and a circular button (no text or symbols on body)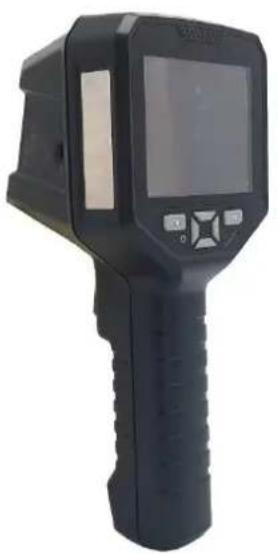
natural_image
Black handheld electronic device with digital display and control buttons (no visible text or symbols)The front of handheld thermal imaging camera has 6 buttons, as shown below,
- OK & Homepage
- Up arrow
- Down arrow
- Left arrow
- Right arrow
- Return & Power
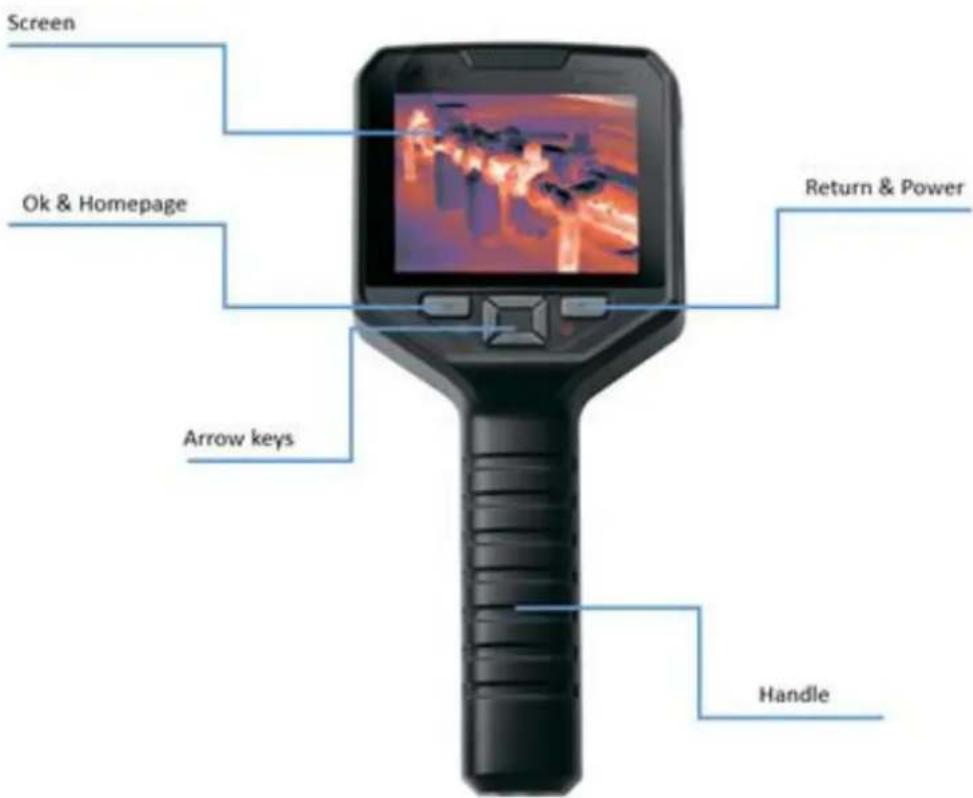
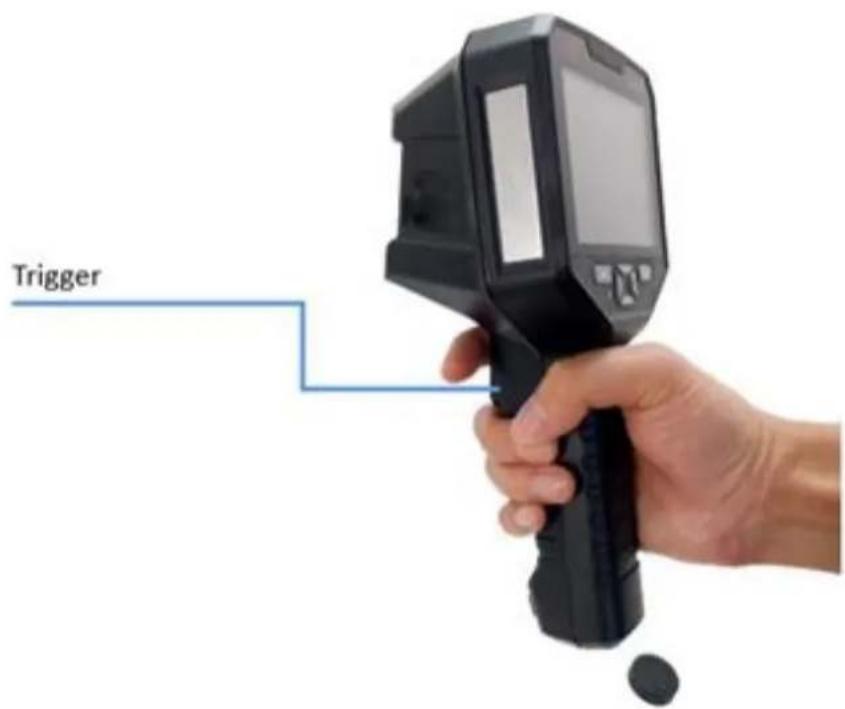
The back of handheld thermal imaging camera has 1 button,
- Trigger
1.2 Power On/Off
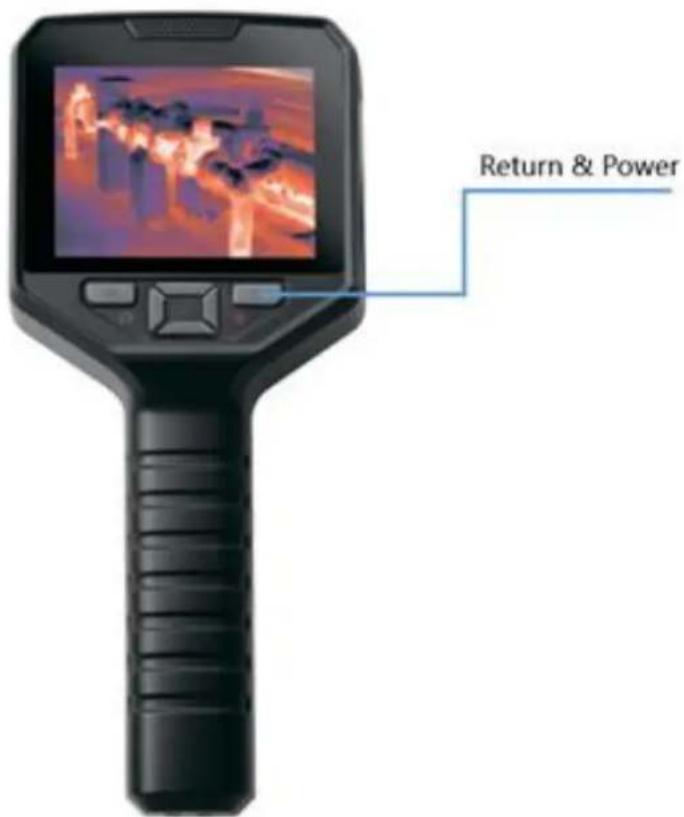
- Press "Return & Power" key >1 second to power on handheld thermal imaging camera, the thermal imaging will display later.
- Press "Return & Power" key >3 seconds to power off handheld thermal imaging camera
- If handheld thermal imaging camera has any abnormal issue, Press "Return & Power" key >8 seconds to force shutdown the camera.
1.3 Quick Measurement
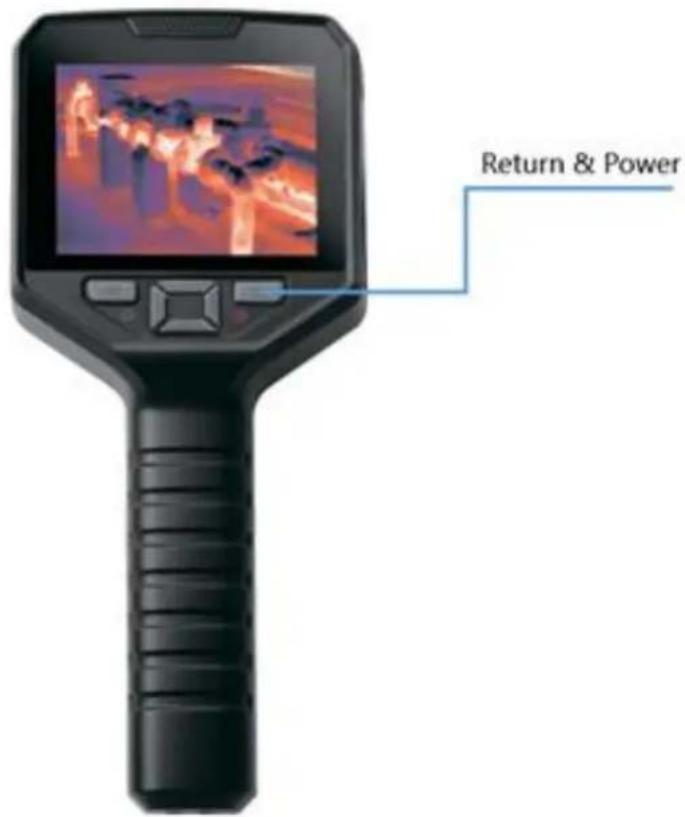
- Power on the thermal imaging camera, press and hold the "Return & Power" reuse key>1 second as shown in the below figure, wait for the thermal imaging camera to start up, and the main page appears.
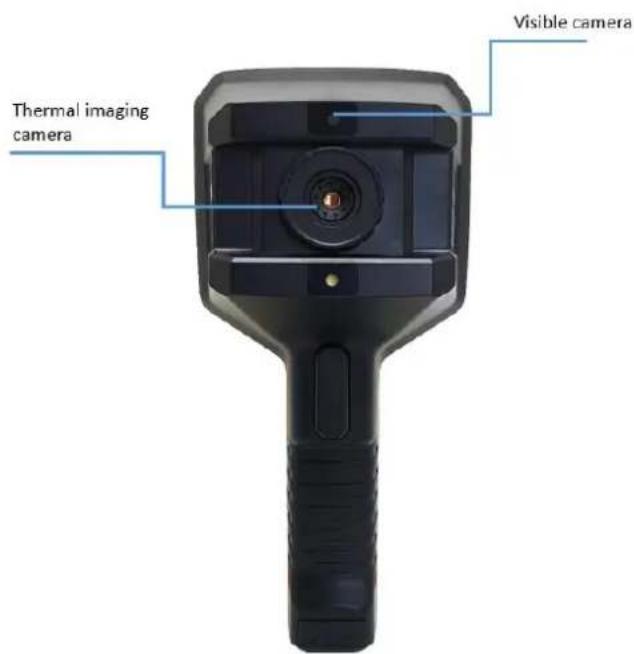
- Point the lens at the measured object as shown in the figure below, and the infrared image of the measured object will be displayed on the screen.
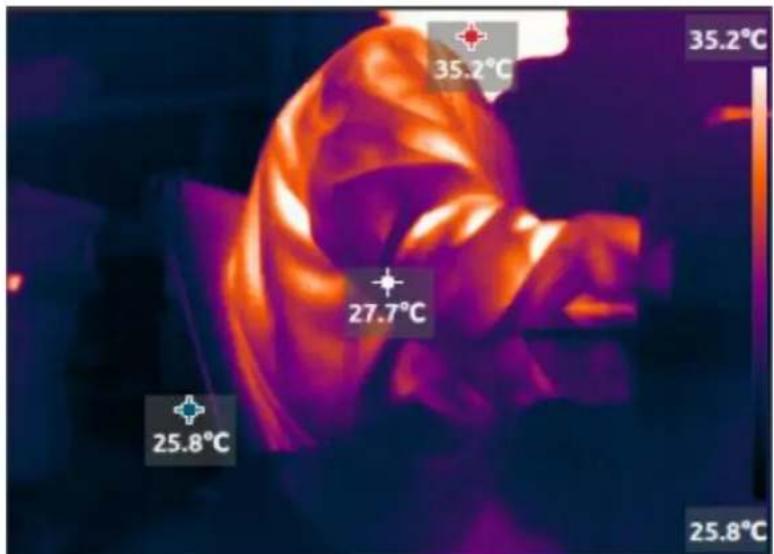
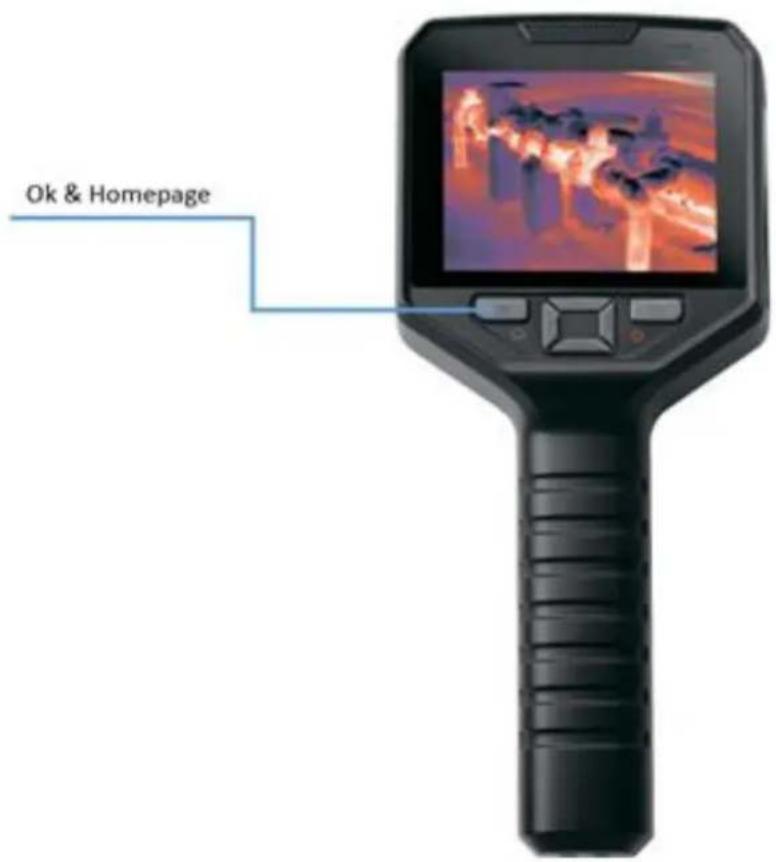
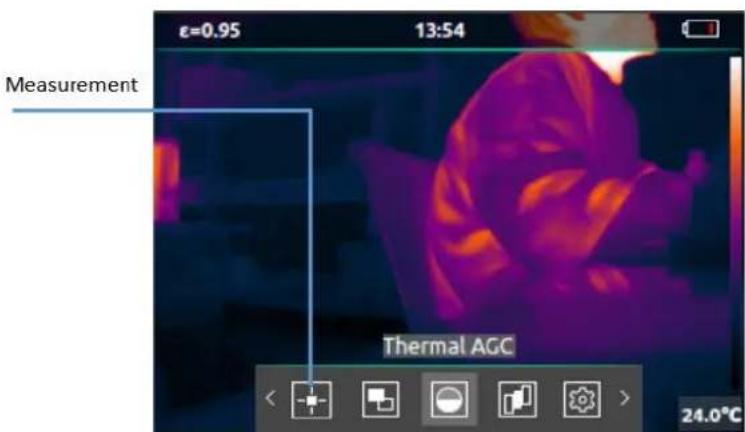
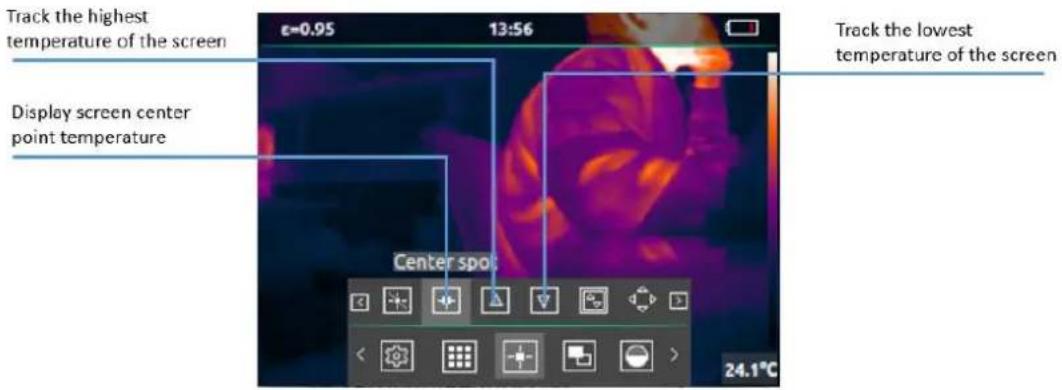
- If the temperature value is not displayed on the screen, press "OK & Homepage", then
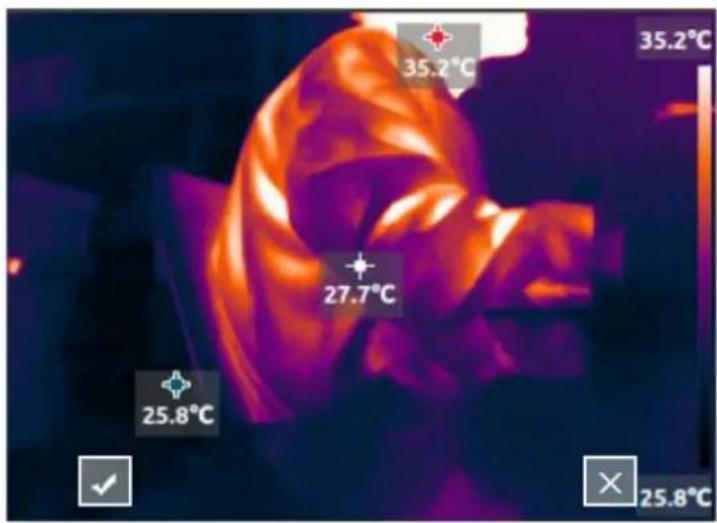
select the "Measurement" icon, and then select "Center Spot", "Hot Spot" and "Cold Spot" in the figure below to display the temperature,
- Press the trigger button will freeze the image as the figure below,
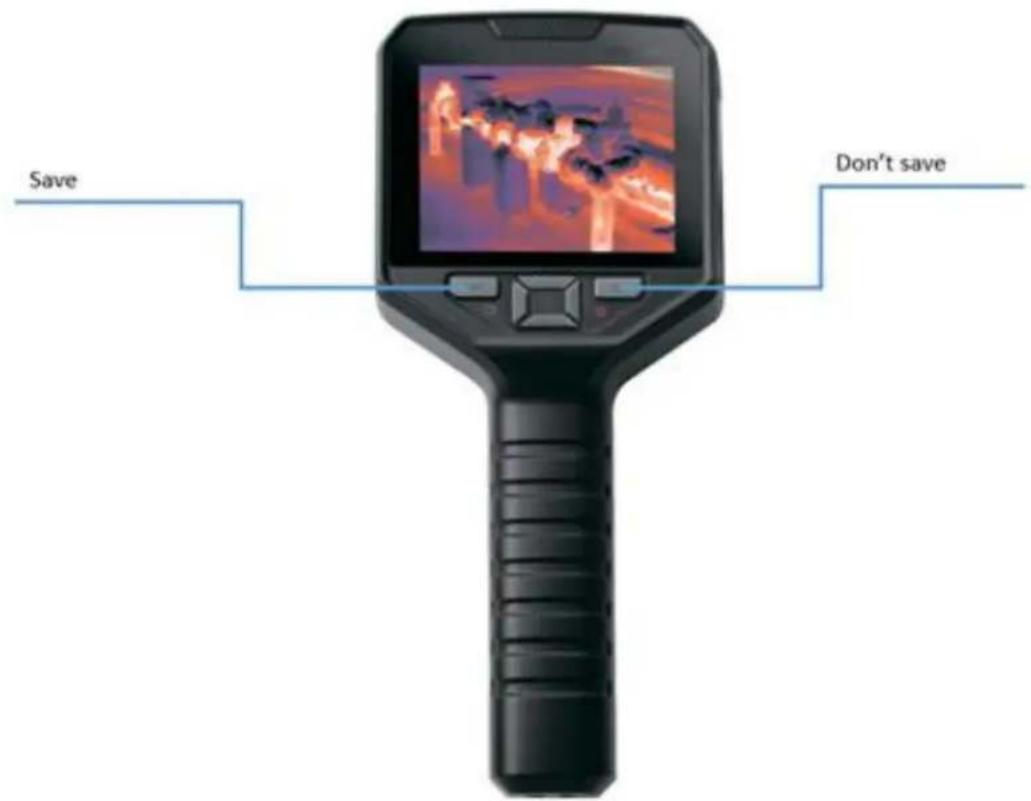
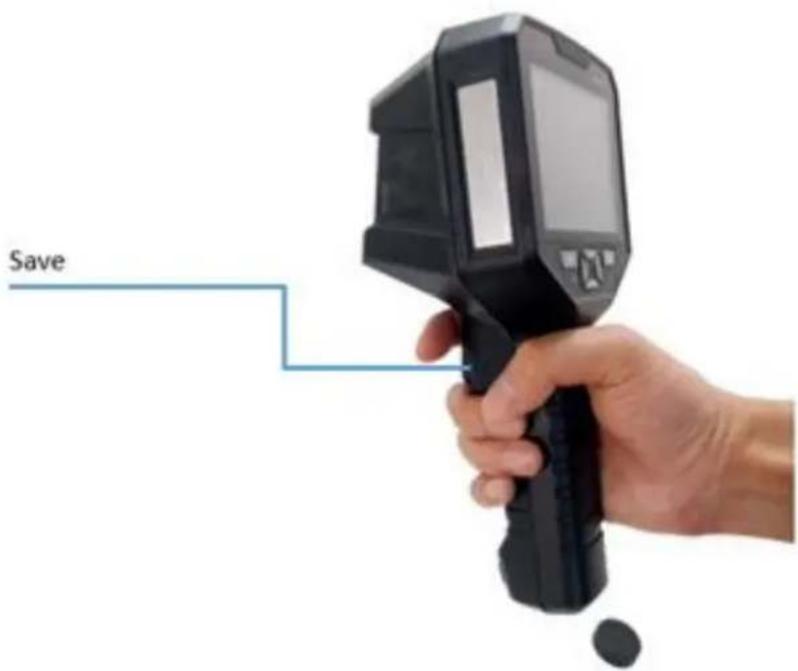
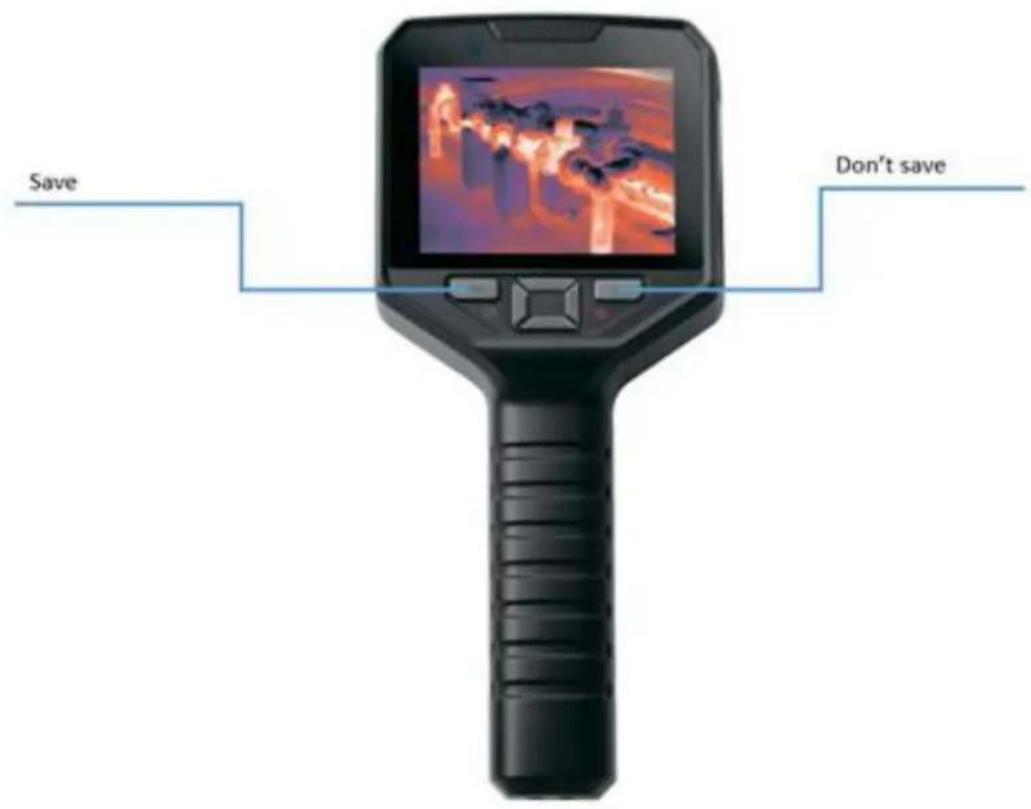
- As shown in the figure below, you can save the thermal image and visible light image by pressing the "trigger button" or "OK & Homepage", and press the "Return & Power" to cancel saving.
1.4 Save, Delete and View Infrared Thermal Image
• Power on the thermal camera.
- Point the lens to the object.
- Press the "trigger" to freeze the thermal image and visible light image, continue to press the "trigger" or "OK & Homepage" to save the thermal image and visible light image, press the "Return & Power" cancel saving.
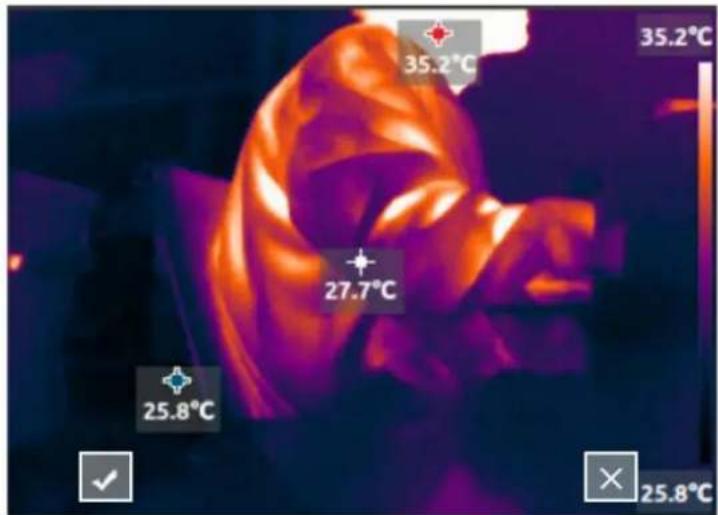
- Press Return will view the saved thermal images and visible images.
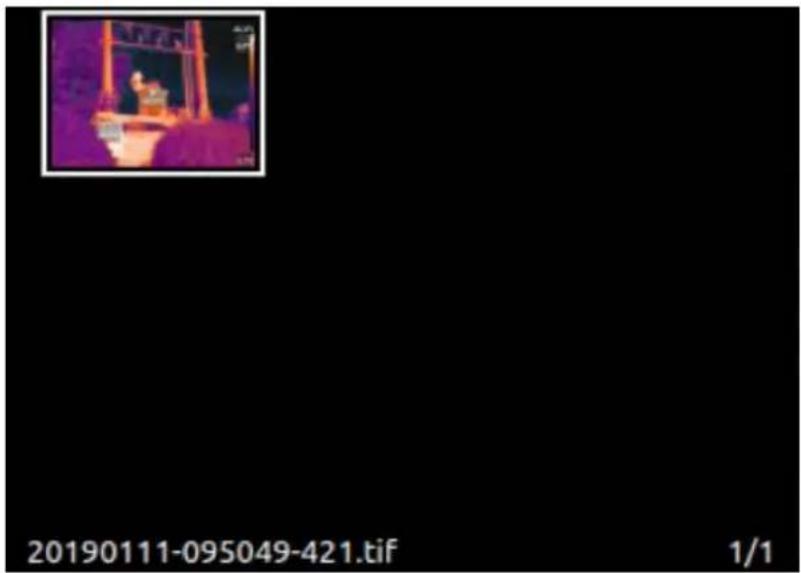
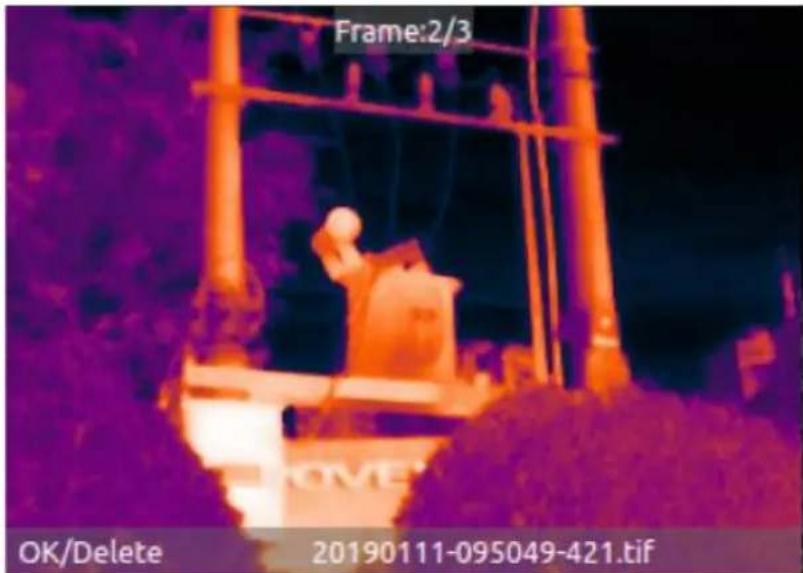
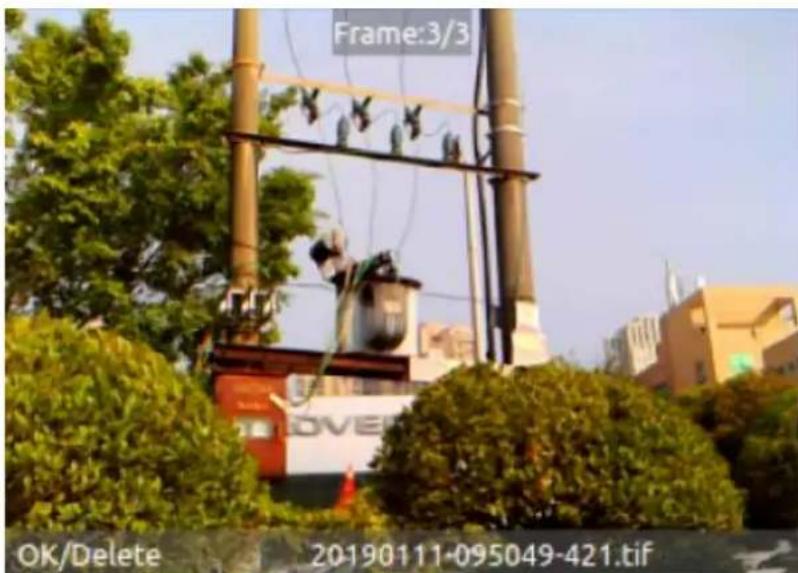
• Every time take pictures will save 3 frames into 1 picture,
○ 1 ^t frame: the image frame of what you see is what you get
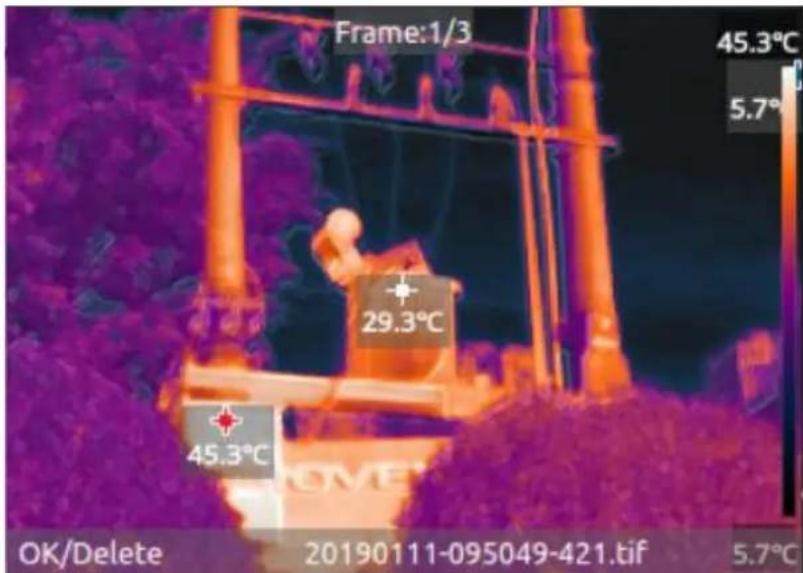
○ 2^d frame: the raw image frame of thermal image
- 3rd frame: the raw image frame of visible light image
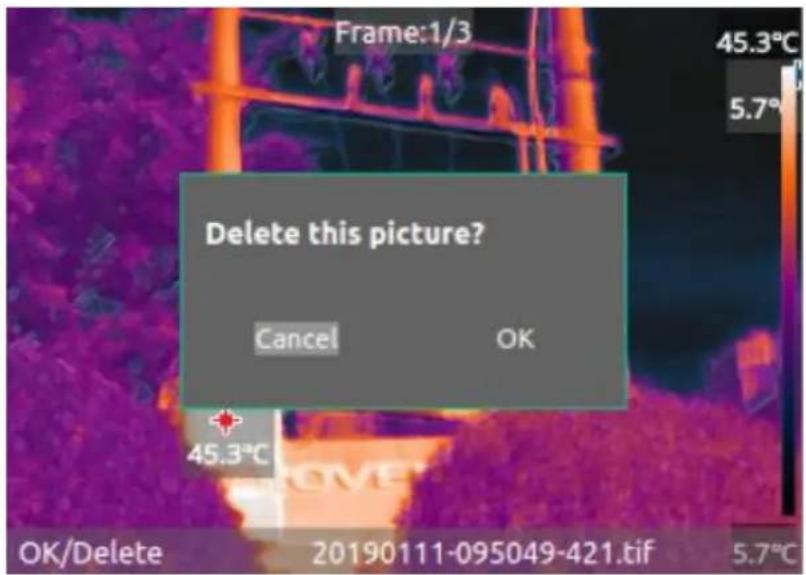
- In the album, press "OK & Homepage" to preview the image in full screen. You can view the 3 frames of each picture by using the up and down arrow keys. The left and right arrow keys select the previous or next picture.
- When previewing the picture in full screen, press "OK & Homepage" to choose deleting the picture, press "Return & Power" to return to the album.
1.5 Main Page
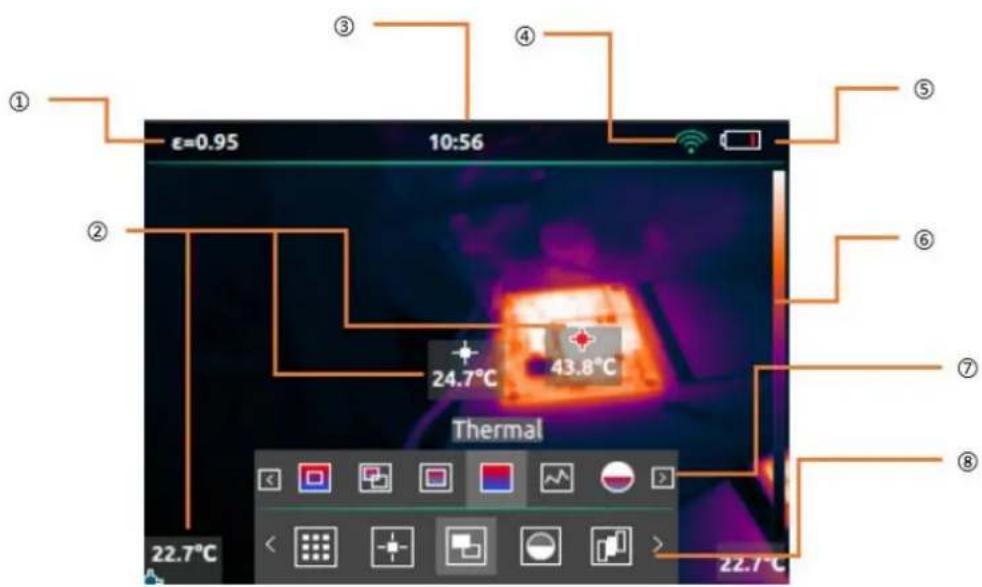
- Current Emissivity
- Hot spot, cold spot and central spot
- Time
- WiFi
-
Battery
-
Color bar
- Second level menu
- First level menu
1.6 Control and trigger keys
According to the below description to operate control and trigger keys,
- "OK & Homepage" is only used as the homepage key to open the menu when the main page interface is turned on, other times as the Ok key.
- Use the arrow keys to select the direction of the scroll menu and settings.
- "Return & Power" short press as the return key, press > 3 seconds to power off the camera. If the camera works abnormally, press "Return & Power"> 8 seconds to force turn off the camera.
- The "trigger key" trigger key is taking picture and storing picture confirmation key.
1.7 Charge and Export Pictures
1.7.1 Charge
Open the charging and data interface silicone plug then can see the USB interface. You can use the accessory's USB data cable to charge the camera at any time. The camera can still be used during the charging process.
The transformer chooses a universal USB interface 5V 2A or larger charger.
If the camera is power on and charging, please return to the homepage and press the "OK & Homepage". You can view the current power in the upper right corner of the screen, and the battery will have a green charging mark inside.
Battery
Charging state
If the camera is power off and charging, the display is always show the current battery level as shown below,
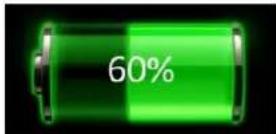
1.7.2 Export Picture
There are several methods to export camera pictures,
- When the thermal imaging camera is power on, connect the camera USB interface to the computer with the accessory's USB cable. A USB drive letter will appear on the computer. You can select the pictures to copy to the computer.
- When the thermal imaging camera is power on, turn on WiFi, and copy the pictures of interest to the computer through the analysis software.
2 Operation and Settings
2.1 Main Page Operation
2.1.1 Quick Operation
2.1.1.1 Quick Switch Color Palettes
When there is no menu on the main page, you can press the left and right arrow keys to quickly switch between 8 types of color palettes. For details about color palettes, see 2.1.3.4 Color palette. (If the main page displaying visible light image, you cannot switch color palette)
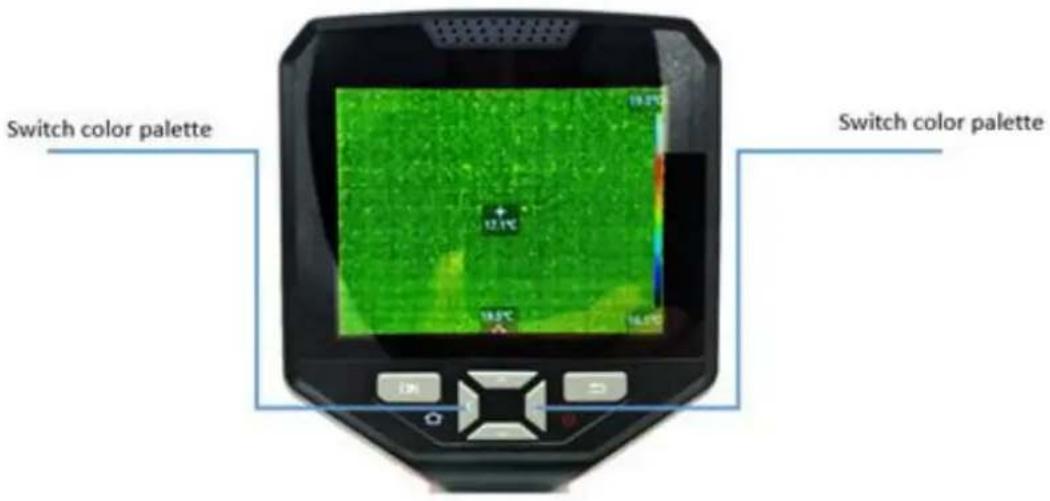
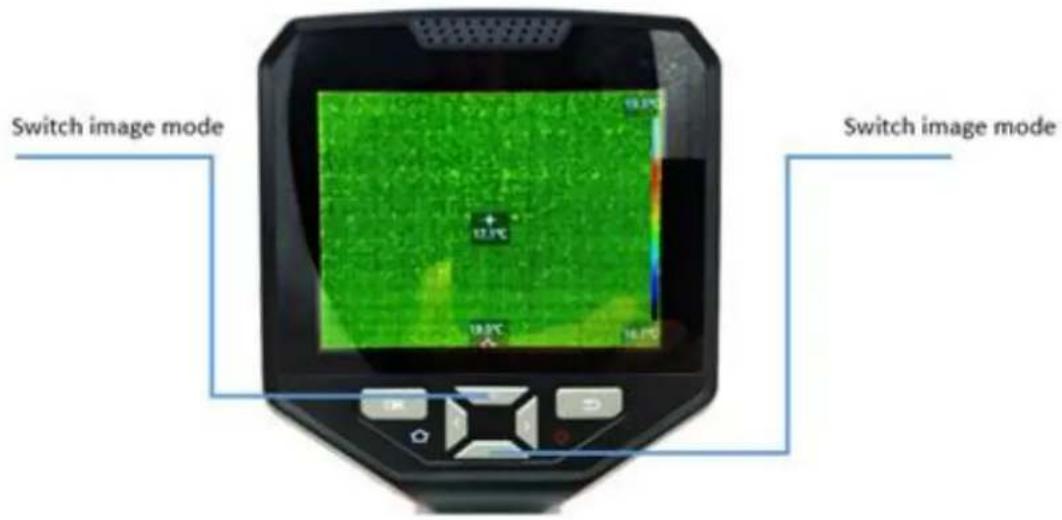
2.1.1.2 Quickly Switch Image Modes
When no menu appears on the main page, you can press the up and down arrow keys to quickly switch between image modes. For details about the image mode, see 2.1.3.2 Image Mode.
2.1.2 First Level Menu
Power on the camera, press the "OK & Homepage" to display the first-level menu and the status bar on the top. In this state, press the "Return & Power" to close the first-level menu and status bar. The icon selected in the menu is the current operable function, and there is a text prompt on the top of icon.
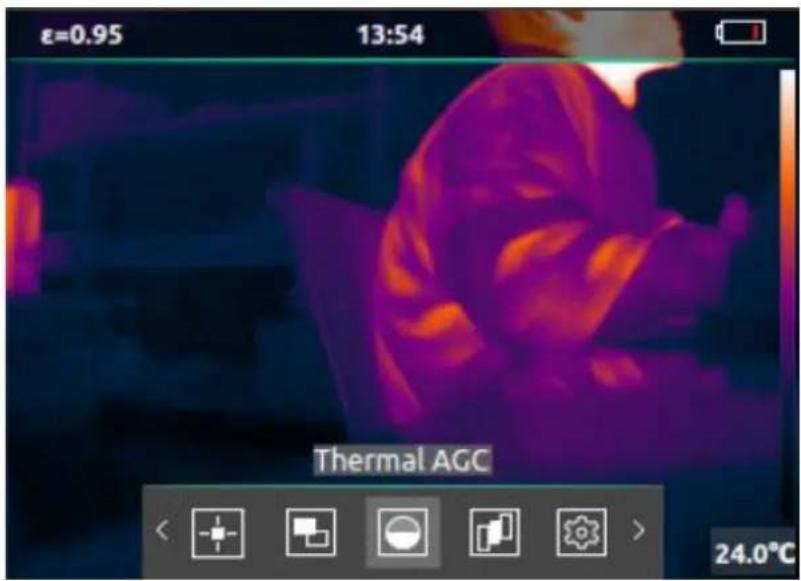
| No. | Function | Icon | Description |
| 1 | Settings |  | Setting up the camera |
| 2 | Album |  | Viewing Pictures |
| 3 | Measurement |  | Temperature measurement options, such as displaying the highest and lowest temperature |
| 4 | Image Mode |  | Select the image display mode, such as picture-in-picture, outline fusion etc. |
| 5 | Thermal AGC |  | Select the effect of the image, such as high contrast, gentle and so on. |
| 6 | Color palette |  | Select the infrared thermal imaging palette, such as iron, white hot, etc. |
2.1.3 Second Level Menu
When the first-level menu is display, press "OK & Homepage" to enter the second-level menu or setting interface, and in the second level menu state or setting interface, press "Return & Power" Return to the first-level menu. The icon selected in the second-level menu is the current operable function, and there is a text prompt on the top of the icon.
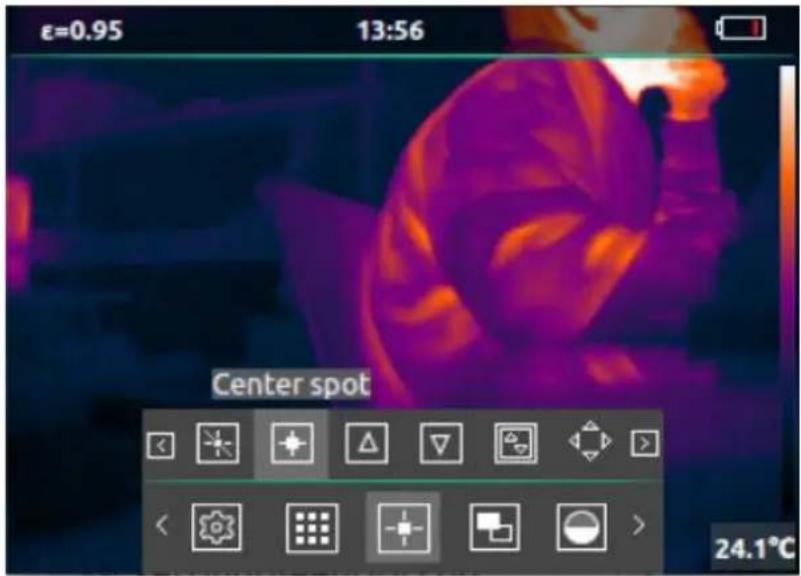
2.1.3.1 Measurement
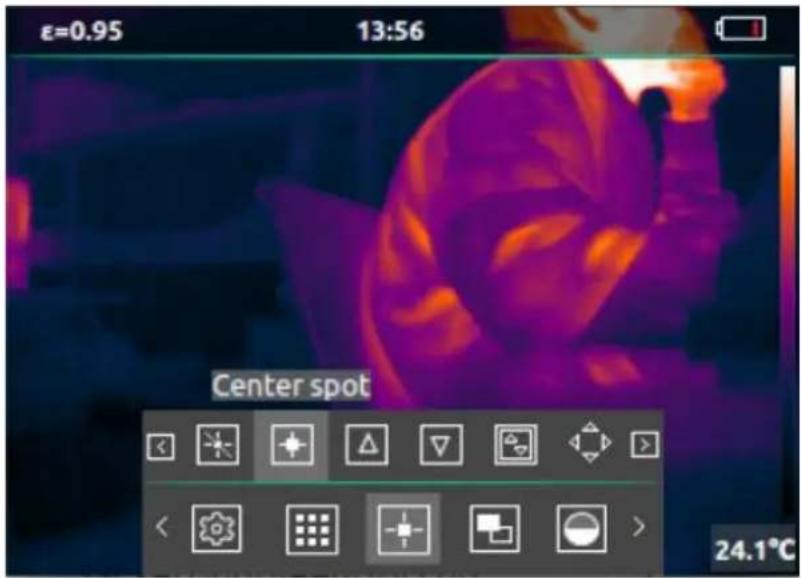
The function is shown below,
| No. | Function | Icon | Description |
| 1 | No measurements |  | Cancel all measurement |
| 2 | Center spot |  | Measure the center point temperature of the thermal imaging camera |
| 3 | Hot spot |  | Track and measure the highest temperature points imaged by the camera |
| 4 | Cold spot |  | Track and measure the lowest temperature point imaged by the camera |
| 5 | Zone |  | Select part of the area for temperature measurement |
| 6 | Edit Zone |  | Zoom in or out the zone. |
2.1.3.2 Image Mode
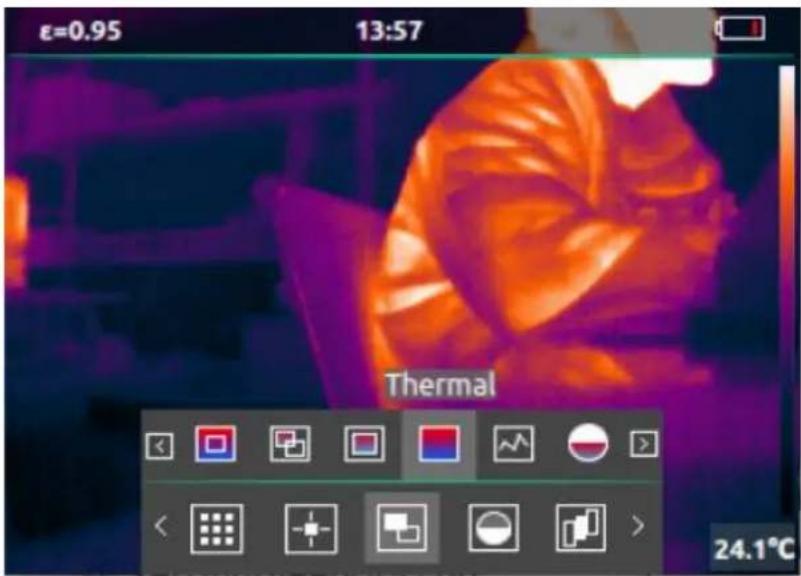
The function is shown below,
| No. | Function | Icon | Description |
| 1 | Outline Fusion |  | Fusion of visible edge lines and infrared therm imaging |
| 2 | Overlay fusion |  | Infrared thermal imaging and visible light overl display |
| 3 | Picture in Picture |  | Infrared thermal imaging as a picture-in-picture display in the center of visible light |
| 4 | Thermal |  | Only display infrared thermal image |
| 5 | Visible |  | Only display visible light |
| 6 | Fusion adjustment |  | Adjust the fusion percentage of overlay fusion |
| 7 | Fusion offset adjustment |  | When the visible light and thermal image is no 100% coincide based on different distance of t object, then you may use this function to adju the visible image to coincide the thermal imag |
2.1.3.3 Thermal AGC
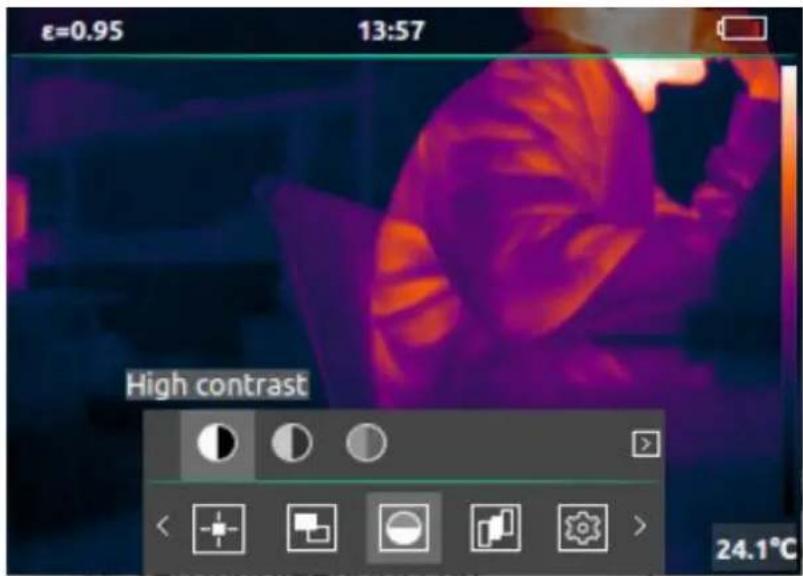
The function is shown below,
| No. | Function | Icon | Description |
| 1 | High contrast |  | Choose high contract mode to view infrared thermal image |
| 2 | Legacy |  | Choose legacy mode to view infrared thermal image |
| 3 | Gentle |  | Choose gentle mode to view infrared thermal image |
2.1.3.4 Color Palette
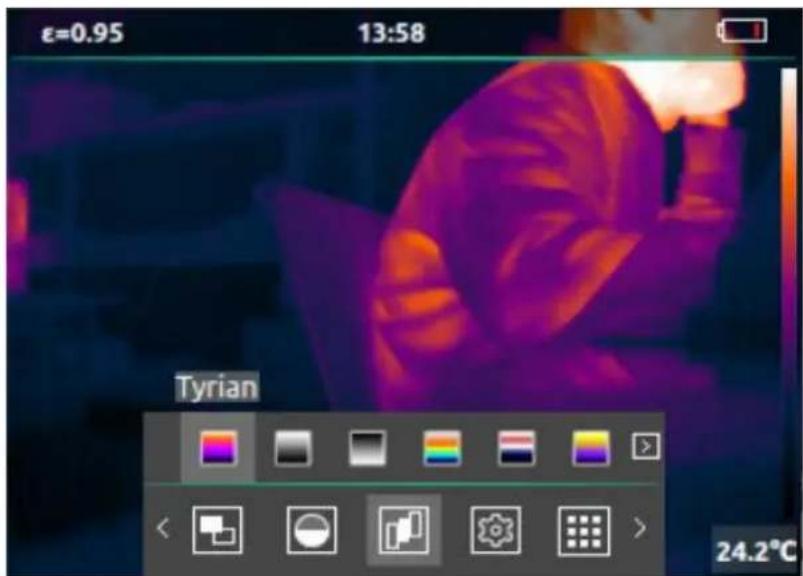
The function is shown below,
| No. | Function | Icon | Description |
| 1 | Tyrian |  | |
| 2 | White Hot |  | |
| 3 | Black Hot |  | |
| 4 | Rainbow |  | |
| 5 | Glory |  | |
| 6 | Iron |  | |
| 7 | Hottest |  | |
| 8 | Coldest |  |
2.2 Settings
The settings interface is shown below,
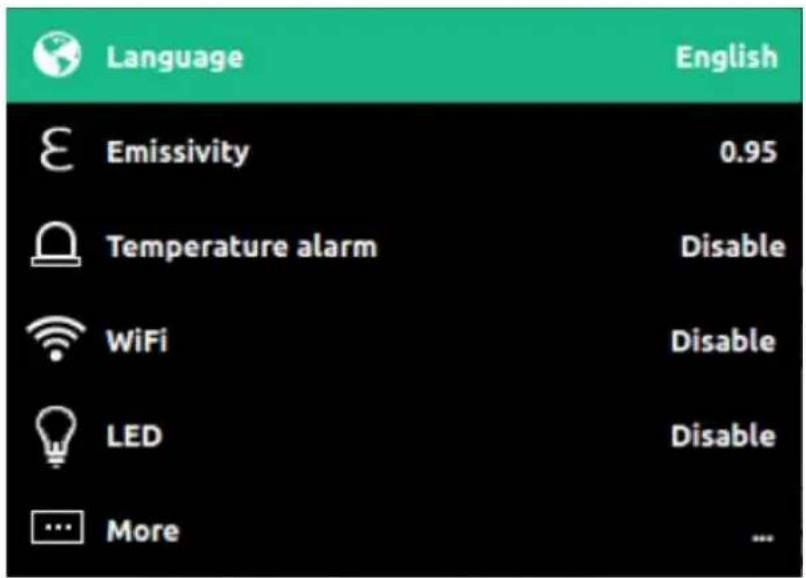
2.2.1 Language
Select the language in the setting interface, click "OK & Homepage" to select the following different languages,
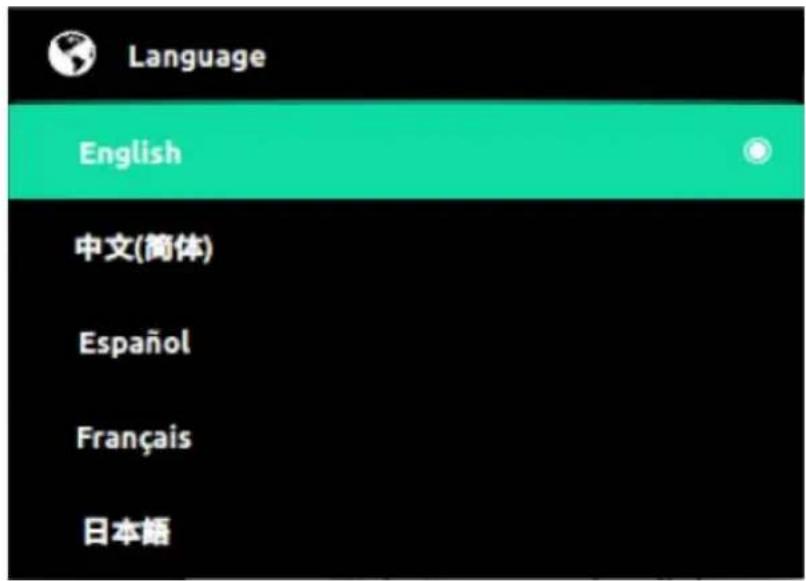
| No. | Language |
| 1 | English |
| 2 | Simplified Chinese |
| 3 | Spanish |
| 4 | French |
| 5 | Japanese |
| 6 | Korean |
| 7 | Russian |
| 8 | Arabic |
| 9 | Traditional Chinese |
2.2.2 Emissivity
Select the emissivity in the setting interface, and press "OK & Homepage" to set different emissivity of the object, or you can manually edit the emissivity.
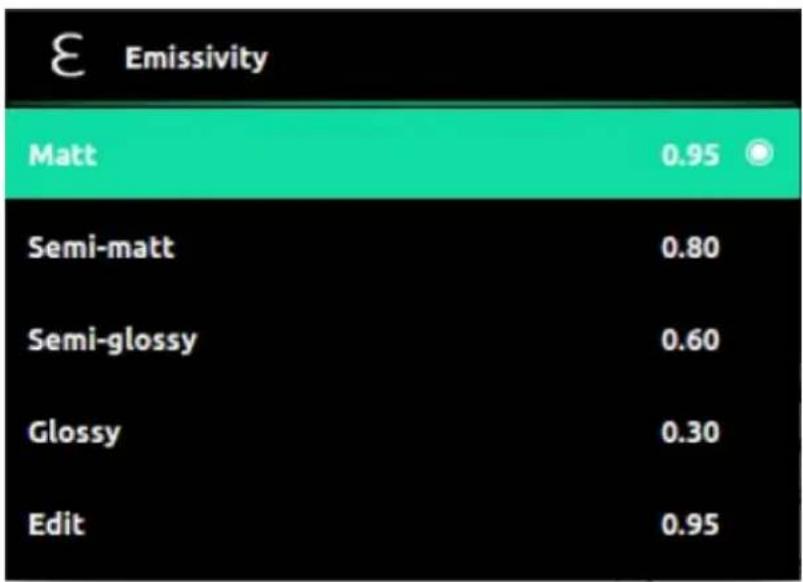
bar
Emissivity | Method | Emissivity | | :--- | :--- | | Matt | 0.95 | | Semi-matt | 0.80 | | Semi-glossy | 0.60 | | Glossy | 0.30 | | Edit | 0.95 || No. | Emissivity | Value |
| 1 | Matt | 0.95 |
| 2 | Semi-matt | 0.80 |
| 3 | Semi-glossy | 0.60 |
| 4 | Glossy | 0.30 |
| 5 | Edit Emissivity | Customization |
2.2.3 Temperature alarm
Select the temperature alarm in the setting interface, and press "OK & Homepage" to alert the temperature above or below the threshold on the screen.
When the temperature in the screen meets above or below one of the thresholds, an alarm will pop up. When the zone temperature measurement is selected, the alarm icon will only be displayed when the temperature in the zone is above or below the threshold temperature.
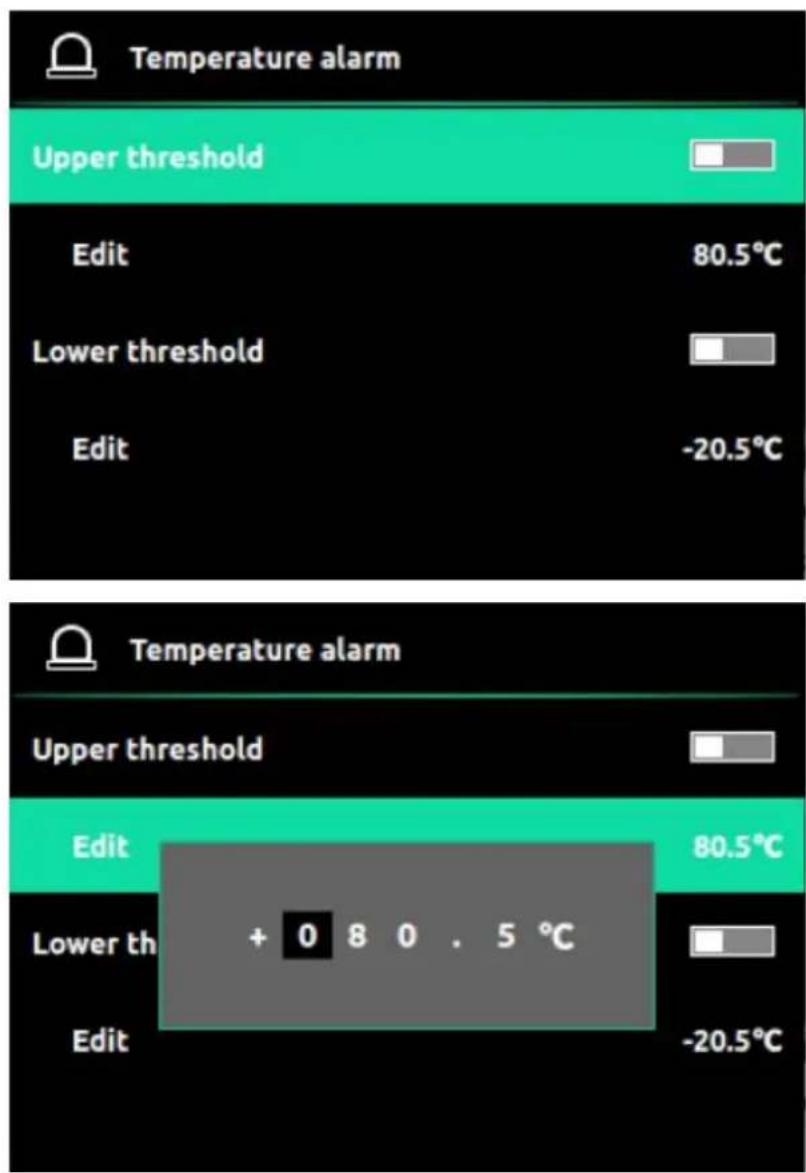
2.2.3.1 Alarm above threshold
Edit the upper limit alarm value, and then turn on the upper limit alarm switch (these two steps are in no particular order). If the temperature value in the screen area is higher than the set threshold temperature, an alarm icon will pop up on the screen. When the temperature value in the screen area is lower than the set threshold temperature, the alarm icon will disappear.
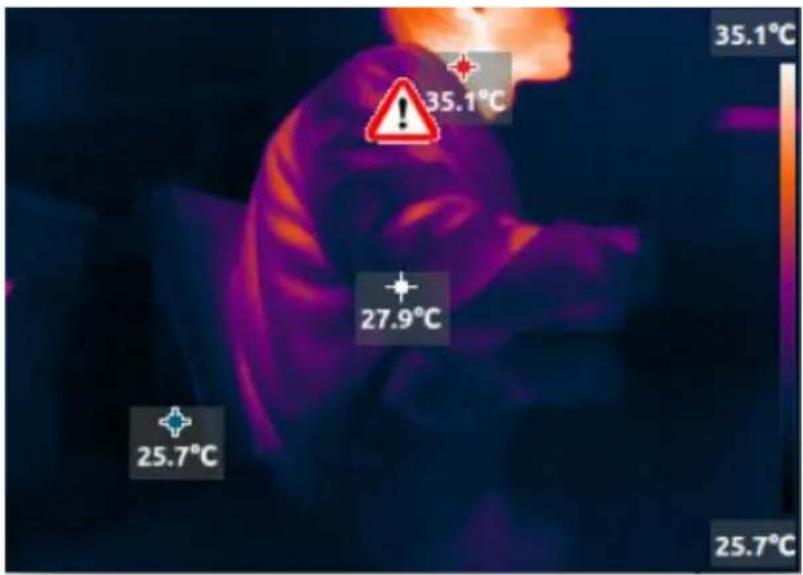
2.2.3.2 Alarm below threshold
Edit the lower limit alarm value, and then turn on the lower limit alarm switch (these two steps are in no particular order). If the temperature value in the screen area is higher than the set threshold temperature, an alarm icon will pop up on the screen. When the temperature value in the screen area is lower than the set threshold temperature, the alarm icon will disappear.
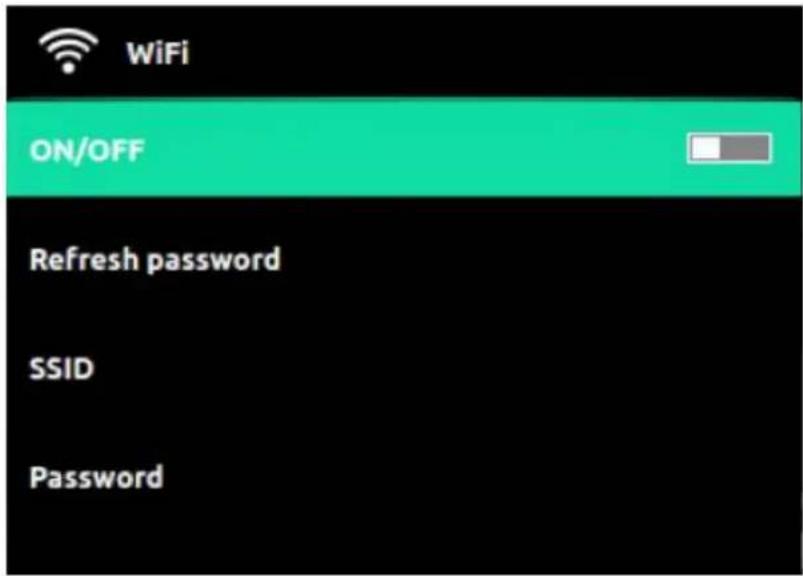
2.2.4 WiFi
2.2.4.1 Enable and Disable WiFi
Select WiFi settings in the settings interface. After turning on the WiFi switch, the WiFi icon will be displayed on the status bar of the home page.

When the WiFi switch is turned off, the WiFi icon in the status bar will not be displayed
2.2.4.2 WiFi Configuration
Select the WiFi setting in the setting interface, and press "OK & Homepage" to set the WiFi. The SSID of the WiFi is the same as the serial number on the side of the handheld thermal imaging camera. The initial password is 12345678. When the WiFi is off, select refresh password to randomly change the WiFi password and display it. When the WiFi is on, the WiFi password cannot be changed. If you forget the WiFi password, you can view the current WiFi password on this interface.
2.2.5 LED
Select the LED in the setting interface, and press "OK & Homepage" to turn the LED on or off.
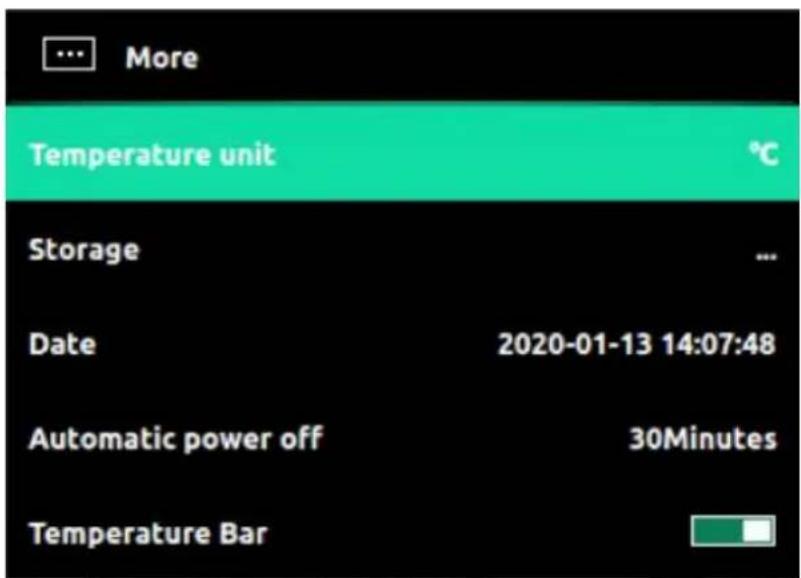
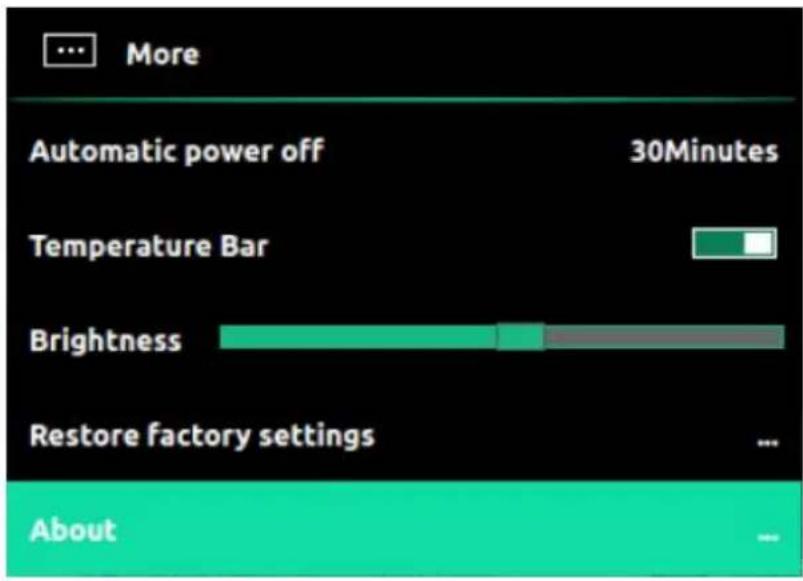
2.2.6 More
Select More in the setting interface, and press "OK & Homepage" to set more settings.
2.2.6.1 Temperature Unit
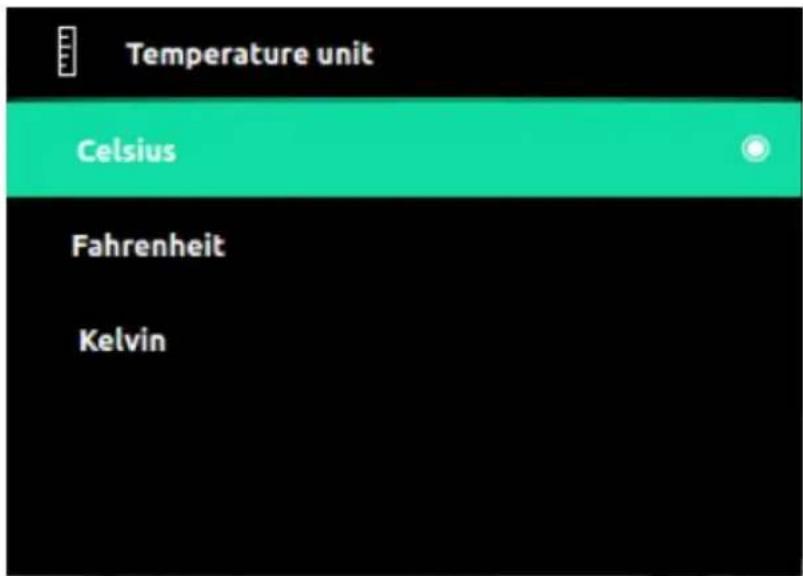
Temperature unit support below,
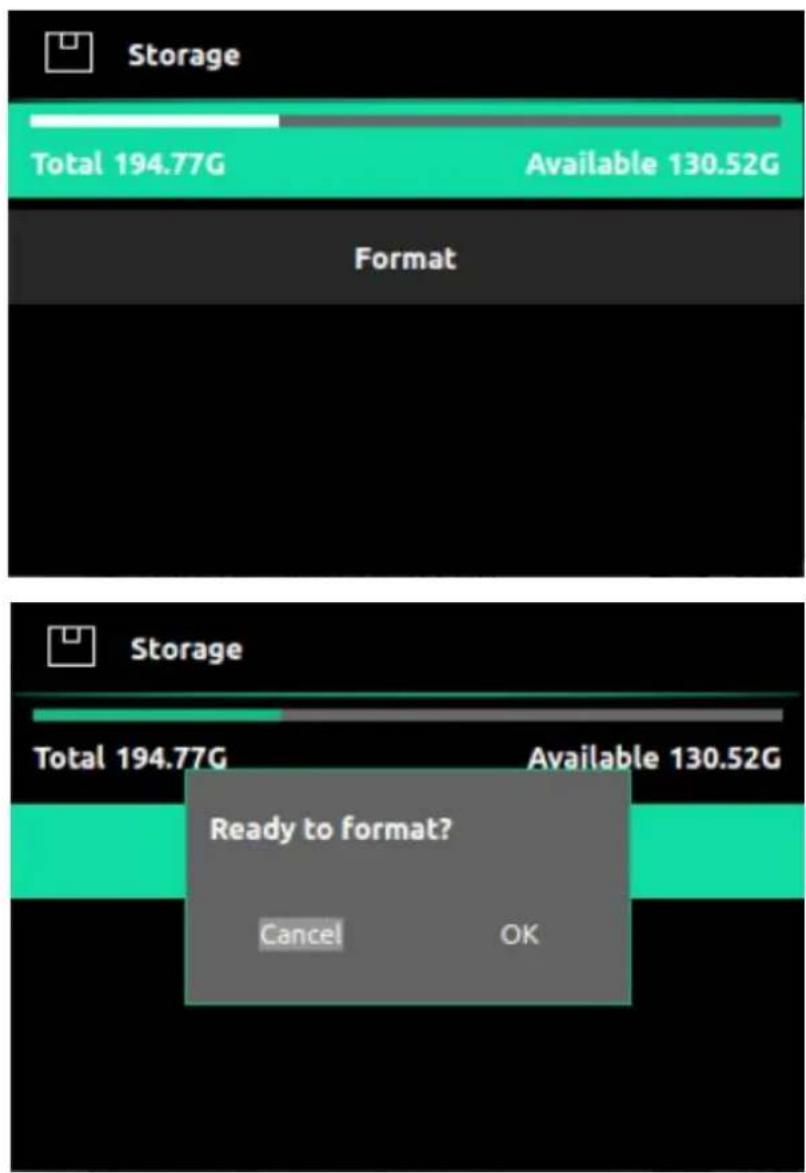
In the storage option, you can view the current and used capacity of the internal storage memory, and you can choose to format the storage memory.
2.2.6.3 Date
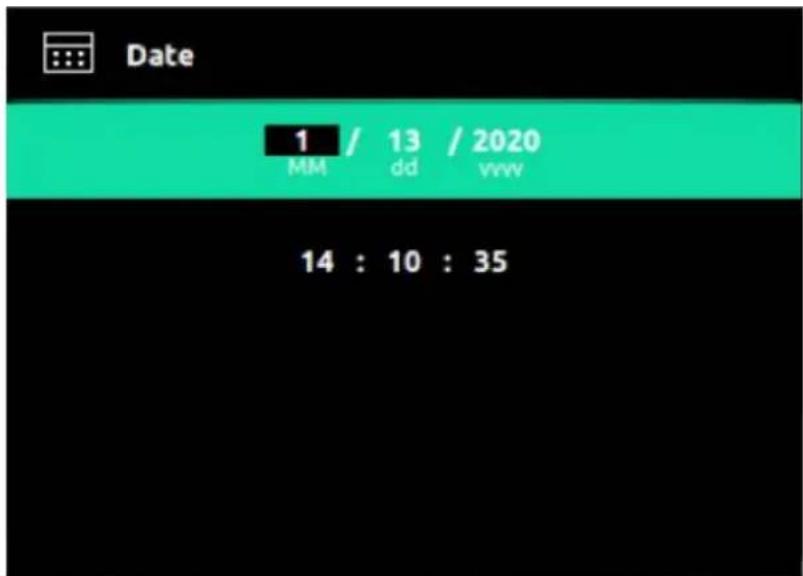
Date setting can set the current date and time.
2.2.6.4 Automatic Power Off
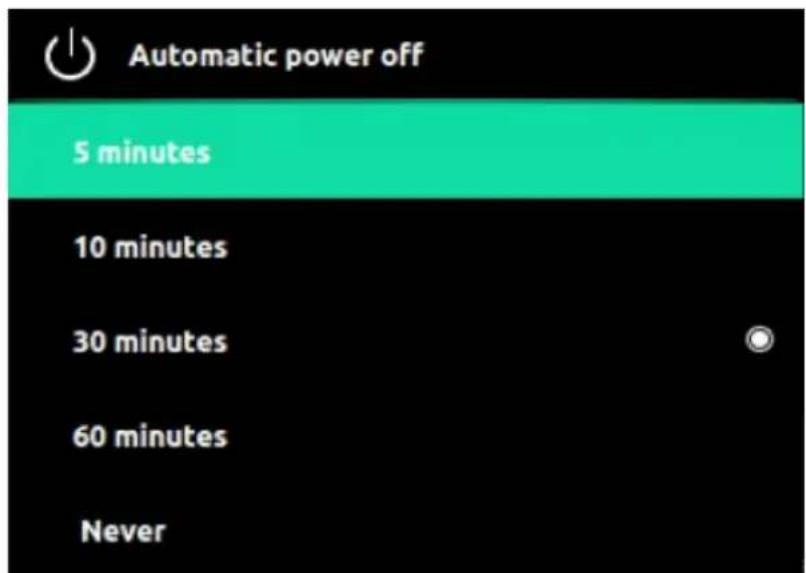
Automatic power off can be selected for the following duration if without operating the camera
- 5 minutes
- 10 minutes
- 30 minutes
- 60 minutes
- Never
2.2.7 Temperature Bar
This option can display or not display temperature bar in the home page.
2.2.8 Brightness
This option can adjust the brightness of the screen.
2.2.9 Restore factory settings
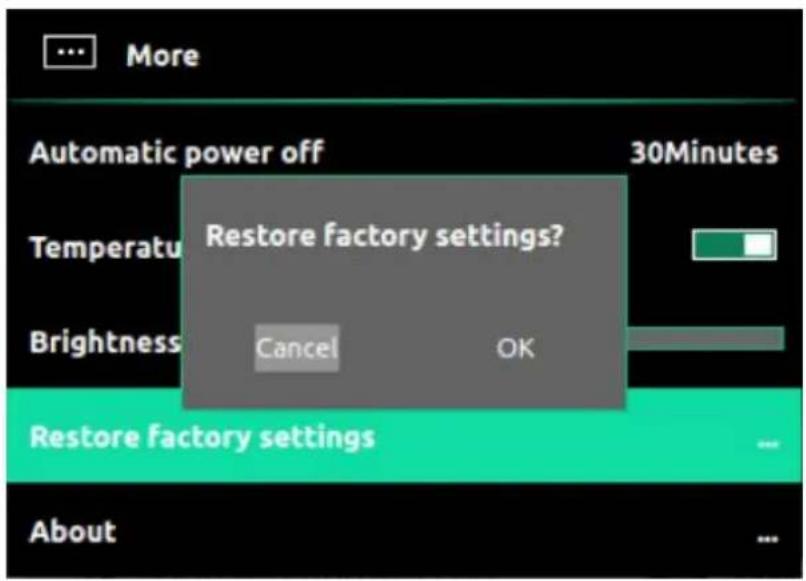
Restore factory settings will perform default factory settings on the handheld thermal imaging camera. Please proceed with caution.
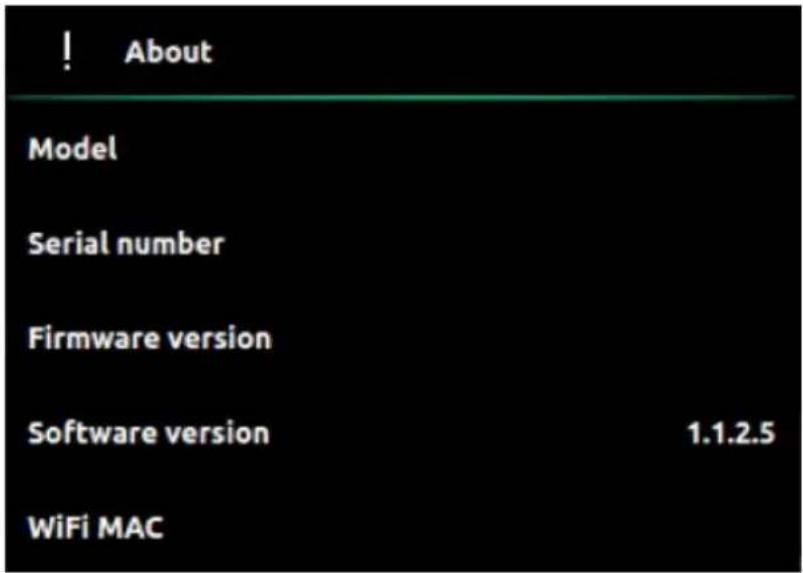
2.2.10 About
In the about option can view the basic information of the thermal imaging camera.
3 Maintenance
3.1 Battery Service and Replacement
If the battery cannot be charged and needs to be replaced, please contact your local distributor for repair and replacement.
3.2 Calibration
The camera is calibrated in the factory. If calibration is required, please contact your local distributor.
3.3 Clean
If necessary, wipe the case with a damp cloth. Use high-quality lens cleaning products to wipe off the dust or stains on the instrument lens and display. Do not use abrasives or solvents to clean the case, lens or display.
4 Specification
The specification of TI series thermal imaging camera as below :
| Parameter | Specification | ||
| TI332 | TI322 | ||
| Infrared Thermal Imaging | Resolution | 320x240 | 220x160 |
| Frequency band | 7.8~14um | 7.8~14um | |
| Frame rate | 9Hz | 9Hz | |
| NETD | 70mK@25°C | 70mK@25°C | |
| Field of view | Horizontal 56°, vertical 42 | Horizontal 35°, vertical 26 | |
| Lens | 4mm | 4mm | |
| Temperature range | -20°C ~ +450°C | -20°C ~ +450°C | |
| Temperature measurement accuracy | ±2°C or ±2% | ±2°C or ±2% | |
| Temperature measurement | Hottest, coldest, central point, zone area temperature measurement | Hottest, coldest, central point, zone area temperatu measurement | |
| Color palette | Tyrian, white hot, black hot, iron, rainbow, glory, Hottest, coldest. | Tyrian, white hot, black hot, iron, rainbow, glory, Hottest, coldest. | |
| Visible | Resolution | 640x480 | 640x480 |
| Frame rate | 25Hz | 25Hz | |
| LED light | Support | Support | |
| Display | Display Size | 3.5 inch | 3.5 inch |
| Image mode | Outline fusion, overlay fusion, picture-in-picture, infrared thermal imaging, visible light | Outline fusion, overlay fusion, picture-in-picture, infrared thermal imaging, visible light | |
| General | Working time | 5000mah battery, >4 hours in 25°C (77°F) | 5000mah battery, >4 hours in 25°C (77°F) |
| Battery Charge | Built-in battery, it is recommended to use +5V & universal USB charger | Built-in battery, it is recommended to use +5V & ≥ universal USB charger | |
| WiFi | Support PC software data transmission | Support PC software data transmission | |
| Operating temperature | -20°C~+60°C | -20°C~+60°C | |
| Storage temperature | -40°C~+80°C | -40°C~+80°C | |
| Waterproof and dustproof | IP54 | IP54 | |
| Camera Dimension | 230mm x 100mm x 90mm | 230mm x 100mm x 90mm | |
| Net weight | 420g | 420g | |
| Package dimension | 325mm x 187mm x 215mm | 325mm x 187mm x 215mm | |
| Gross weight | 1.4kg | 1.4kg | |
| Storage | Capacity | Built-in memory, can store more than 20,000 pictures | Built-in memory, can store more than 20,000 picture |
| Picture storage mode | Simultaneous storage of infrared thermal imaging, visible light and fusion images | Simultaneous storage of infrared thermal imaging, visible light and fusion images | |
| File format | TIFF format, support full frame pictures temperature analysis | TIFF format, support full frame pictures temperature analysis | |
| Image analysis | Windows platform analysis software | Provide professional analysis functions to analyze f pixels temperature analysis | Provide professional analysis functions to analyze fu pixels temperature analysis |
| Android platform analysis software | Provide professional analysis functions to analyze f pixels temperature analysis | Provide professional analysis functions to analyze fu pixels temperature analysis | |
| Interface | Data and charging interface | USB Type-C (Support battery charging and data transmission) | USB Type-C (Support battery charging and data transmission) |
| Analysis system | Analysis software | Analysis system can analyze pictures. | Analysis system can analyze pictures. |
5 Appendix
5.1 Emissivity
The emissivity of common materials is as follows,
| Material | Emissivity | Material | Emissivity |
| Asphalt | 0.90 - 0.98 | Cloth (black) | 0.98 |
| Concrete | 0.94 | Skin (human body) | 0.98 |
| Cement | 0.96 | Leather | 0.75 - 0.80 |
| Sand | 0.9 | Charcoal (powder) | 0.96 |
| Soil | 0.92 - 0.96 | Paint | 0.80 - 0.95 |
| Water | 0.92 - 0.96 | Lacquer (matte) | 0.97 |
| Ice | 0.96 - 0.98 | Rubber (black) | 0.94 |
- Appendix
| Snow | 0.83 | Plastic | 0.85 - 0.95 |
| Glass | 0.90 - 0.95 | Wood | 0.9 |
| Pottery | 0.90 - 0.94 | Paper | 0.70 - 0.94 |
| Marble | 0.94 | Chrome oxide | 0.81 |
| Plaster | 0.80 - 0.90 | Copper oxide | 0.78 |
| Stucco | 0.89 - 0.91 | Iron oxide | 0.78 - 0.82 |
| brick | 0.93 - 0.96 | textile | 0.9 |
- Handheld Thermal Imaging Camera User Manual
- Contents
- OVERVIEW .... 1
- OPERATION AND SETTINGS 19
- SETTINGS 25
- Overview
- Appearance
- Power On/Off
- Quick Measurement
- Save, Delete and View Infrared Thermal Image
- Main Page
- Control and trigger keys
- Charge and Export Pictures
- Charge
- Export Picture
- Operation and Settings
- Main Page Operation
- Quick Operation
- Quick Switch Color Palettes
- Quickly Switch Image Modes
- First Level Menu
- Second Level Menu
- Measurement
- Image Mode
- Thermal AGC
- Color Palette
- Settings
- Language
- Emissivity
- Temperature alarm
- Alarm above threshold
- Alarm below threshold
- WiFi
- Enable and Disable WiFi
- WiFi Configuration
- LED
- More
- Temperature Unit
- Date
- Automatic Power Off
- Temperature Bar
- Brightness
- Restore factory settings
- About
- Maintenance
- Battery Service and Replacement
- Calibration
- Clean
- Specification
- Appendix
- Emissivity
Brand : Owon
Model : TI300
Category : Thermometer