
SL402 - Vacuum Cleaner VOX - Free user manual and instructions
Find the device manual for free SL402 VOX in PDF.


| Product Type | Vacuum Cleaner with Water Filtration |
| Model | SL402 |
| Brand | VOX |
| Voltage | 220-240 V ~ 50-60 Hz |
| Power Consumption | 1400 W (estimated) |
| Weight | 5 kg (estimated) |
| Dimensions (H x W x D) | 40 x 30 x 30 cm (estimated) |
| Dust Container Capacity | 1 L (estimated) |
| Water Tank Capacity | 1.5 L (estimated) |
| Filtration System | Water filtration, motor protection filter, exhaust sponge filter |
| Suction Power Adjustment | Yes (select models only) |
| Blowing Feature | Yes |
| Wet Vacuuming | Yes (with sponge filter attached) |
| Dry Vacuuming | Yes |
| Floor Brush Type | Combination brush for carpets and hard floors (switchable) |
| Accessories Included | Telescopic tube, crevice tool, seat/sofa nozzle, L-pipe, hose |
| Safety Features | Thermal overload protection, float valve for water level autoshut-off |
| Filter Cleaning | Washable sponge filters; replace when damaged |
| Repairability | Use only original spare parts; contact authorized service |
| Environmental Note | Recyclable packaging; filters can be disposed with household waste |
Frequently Asked Questions - SL402 VOX
User questions about SL402 VOX
0 question about this device. Answer the ones you know or ask your own.
Ask a new question about this device
Download the instructions for your Vacuum Cleaner in PDF format for free! Find your manual SL402 - VOX and take your electronic device back in hand. On this page are published all the documents necessary for the use of your device. SL402 by VOX.
USER MANUAL SL402 VOX
Before using your device for the first time, read this original instruction for use and the accompanying safety warnings. Act accordingly. Keep each user manual for later use or for forwarding to future users of the device.
General Information
Proper use
This vacuum cleaner is made for private household use and not for commercial use. The manufacturer assumes no liability for damage caused by improper use or misuse. Only use the vacuum cleaner with original spare parts, accessories or special accessories.
Disposal of Dust Filters
Dust filters are made of environmentally friendly materials. These items can be disposed of in the normal household waste, as long as they do not contain absorbed substances that are prohibited for household waste.
Spare Parts
Only use original accessories and original spare parts. In this way, you guarantee safe and trouble-free operation of the device.
For information on accessories and spare parts, contact your authorized dealer or service.
Scope of Delivery
The scope of delivery of your device is shown on its packaging. When the package is opened, check whether there are any missing parts Inside.
Inform your dealer if accessories are missing or damaged in transport.
WARNINGS
- This appliance can be used by children aged from 8 years and above and persons with reduced physical, sensory or mental capabilities or lack of experience and knowledge if they have been given supervision or instruction concerning use of the appliance in a safe way and understand the hazards involved. The appliance should not be cleaned and maintained by children without supervision.
- Keep packaging films away from children.
- Children under 3 years of age should be kept away from the appliance unless they are constantly supervised.
- The devices should not be used for playing.
- Children older than 3 years old and younger than 8 years old should not plug the device into the electrical socket, should not adjust the device, and should not perform any action regarding the cleaning and maintenance of the device.
- The device must not be used unsupervised.
SAFETY WARNINGS!
- When using an electrical device, precautions should always be taken to prevent fire, electric shock, and personal injury.
- Carefully read the information given to you in the instructions for use. Please keep the instructions for use. If you are going to give the device to a third party, be sure to give the manual along with it.
- Keep the protective bags of the device, accessories and apparatus away from children and babies to prevent the risk of suffocation.
- If you think that there is any problem on the device, case, cable, plug and similar parts, do not operate the device. Contact your nearest authorized Service.
- If the device is faulty, it should be repaired by the authorized Service. Never repair it by yourself.
- Since the device is powered by electricity, there is a danger of electric shock, so never touch the plug with wet hands.
- When you want to pull the plug from the socket, be sure to pull the plug by holding it.
- Do not try to pull by holding the power cord, it may damage the cable.
• Take care not to damage the power cord, and not to come into contact with the heat source or sharp points. - Do not use outdoors. Your machine may be adversely affected by dirt or rain.
- Never immerse your machine in water and protect it from rain or moisture.
- Be sure to use your machine within the voltage range written on the device.
- Never leave your machine unattended while it is plugged in. Do not allow children to play with the appliance without your supervision.
• Always use your device in a safe socket. - Make sure that the plugs not in the socket when attaching or removing accessories, or when cleaning and maintaining the device.
- Do not use the device with an extension cord.
• To prevent the power cord from being damaged, do not pinch, bend or rub it against sharp edges. - Do not hold the tube, hose or any other accessory of the device in your eyes or ears or put it in your mouth.
Troubleshooting
Before sending the product to the Authorized Service, you can use the table below to solve the problems.
WARNING!
Before starting to solve the problem, turn off the device and pull out the mains plug. Never use the damaged product.
| Trouble | Possible Cause | Solution |
| When the machine is not working | It is not plugged in or the machine has not been started. | Plug in or start the machine. |
| There is no current flowing | Connect the vacuum cleaner to another |
Important warning!
When the device overheats, tum off the device and pull out the mains plug. Make sure that the floorsweeper, telescopic suction tube, or vacuum hose are not clogged or that the filter does not need to be changed. After rectifying the fault, cool the device for at least 1 hour, then the device is ready for operation again.
ENVIRONMENTAL PROTECTION

Packaging materials can be recycled. Please send the packaging materials to reusable places instead of throwing them in your household rubbish.
Old appliances contain valuable recycling materials that need to be recycled. For this reason, please dispose of used goods using the designated collection systems.
Electrical and electronic equipment often contain components that can be hazardous to human health and the environment if misused or disposed of incorrectly. These components must be present in order for the device to operate properly. Devices marked with this symbol must not be disposed of with household waste.
USAGE RECOMMENDATIONS
- Never use the device without any filter. This can cause engine damage and reduce the life of the device.
- Always clean all parts as shown in the instructions for use. Do not clean any part with water and/or cleaning agents unless it is specifically indicated in the instructions for use.
• The Vacuum Cleaner is not suitable for:
• Vacuum cleaning of people and animals.
- Sweeping the following:
- Small creatures (eg insects, spiders, etc.)
- Substances that are hazardous to health, have sharp edges, are hot or are on fire.
- Moist or liquid substances
- Easily flammable or explosive substances and gases.
ATTENTION!
- If you are cleaning the washable filters of your device with water, make sure that they are completely dry before putting them back into the device.
- Do not dry the filter in direct sunlight, on a radiator or in a tumble dryer. Replace the washable filter when it cannot be cleaned properly or if it is damaged.
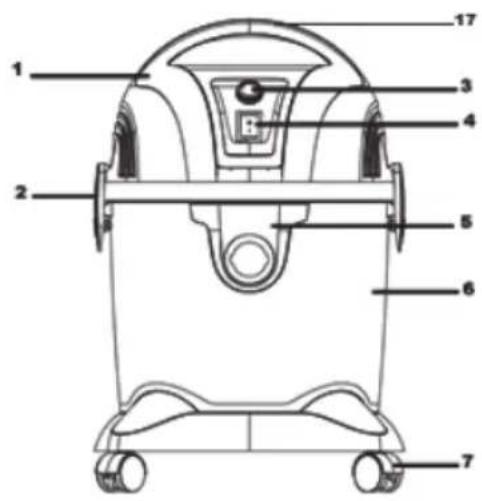
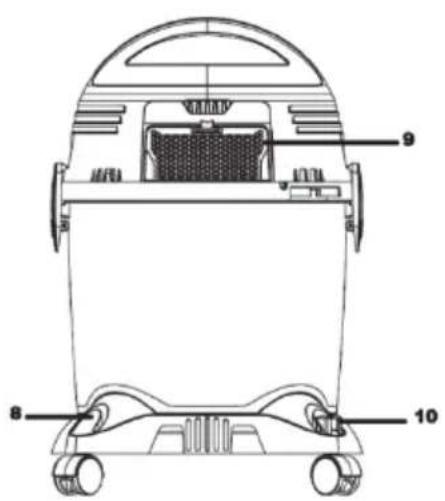
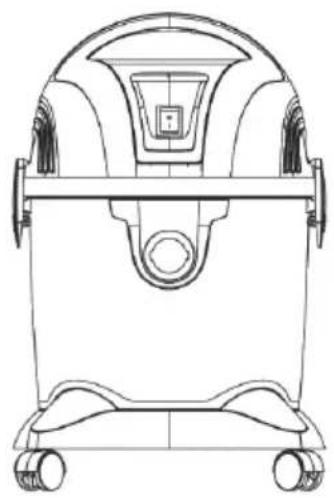
GENERAL VIEW AND DESCRIPTION OF PARTS
VACUUM ADJUSTED MODEL
VACUUM UNADJUSTED MODEL
natural_image
Technical line drawing of a mechanical device with wheels and a central hub (no text or symbols)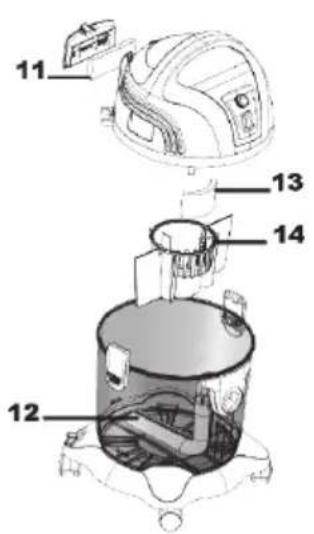
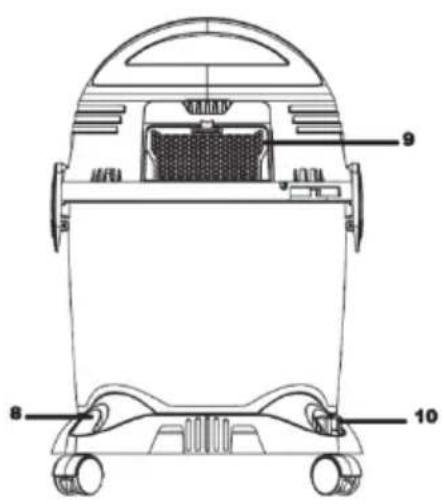
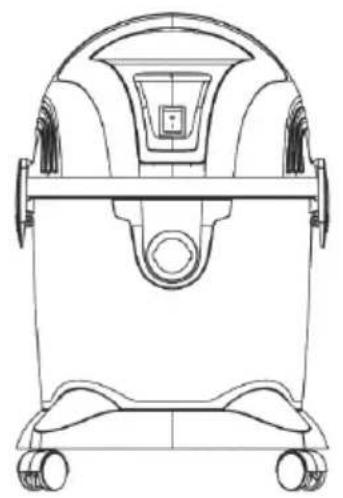
- Motor body
- Pins
- Suction power adjustment button (only for vacuum adjusted model)
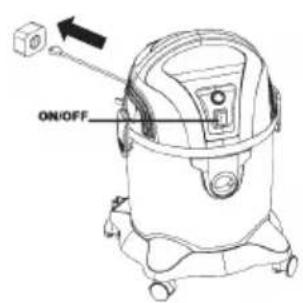
- On/Off button
- Hose end inlet
- Dust container
- Wheel
- Telescopic tube fixing slot
- Exhaust filter cover
- Vertical parking position slot
-
Exhaust filter sponge
-
L pipe
- Indoor unit sponge filter
- Indoor unit
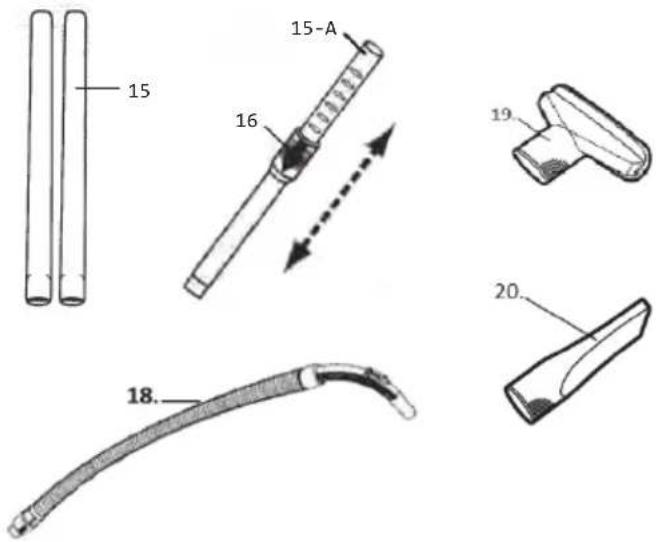
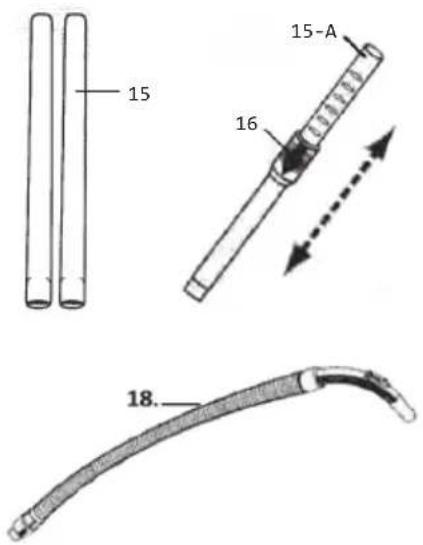
- Plastic Pipe 15-A. Telescopic Tube (Optional)
- Telescopic Tube Adjuster (Optional)
- Handle
- Hose
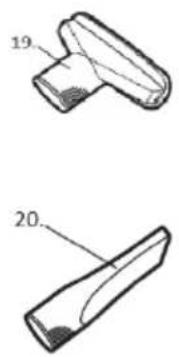
- Seat - sofa apparatus
- Edge - corner device
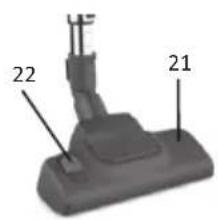
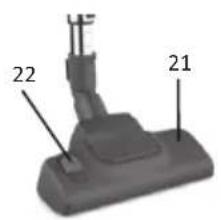
- Sweeper head
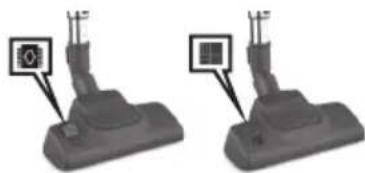
- Sweeper floor change setting
USE OF THE PRODUCT
natural_image
Line drawing of a mechanical device with a circular component and directional arrows indicating motion (no text or symbols)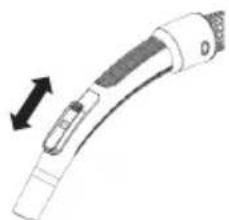
natural_image
Diagram of a handheld device with a black arrow indicating direction (no text or symbols)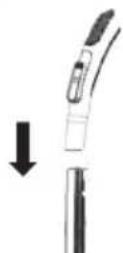

natural_image
Diagram showing a vacuum cleaner with three downward arrows indicating motion or assembly (no text or symbols present)Attaching the Hose
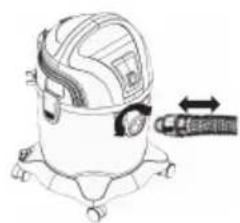
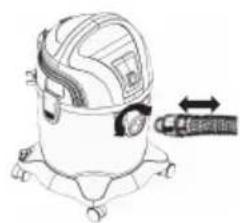
- Push the end from the hose into the hose inlet hole and lock it by turning it to the right.
- Turn the end of the hose to the left and pulì it back out.
Handle Vacuum Power Adjustment
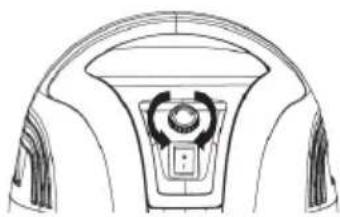
- The vacuum power is adjusted from the vacuum power adjuster:
• Vacuum power adjuster is opened, low vacuum power.
• Vacuum power adjuster is closed, high vacuum power.
Handle and Telescopic Pipe Joining
- Engage the handle and telescopic tube and lock by pressing firmly.
Plastic Pipe
- Insert and join the plastic pipes together.
- Engage the handle and the plastic tube and lock by pressing firmly.
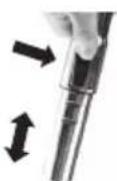
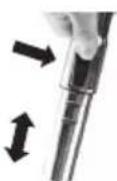
Telescopic Tube Adjuster
- Press the telescopic tube adjustment button and adjust the telescopic tube to the desired lenght.
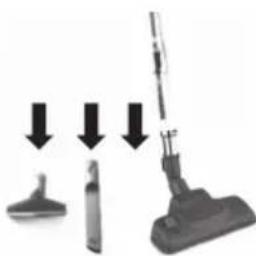
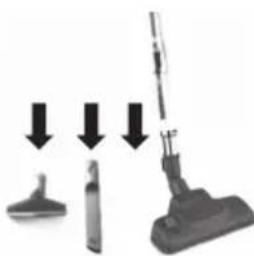
Telescopic Tube and Apparatus Joining
1- Engage the sweeper head, seat - sofa, edge - corner apparatus and telescoping tube, and lock them by pressing firmly.
2- Edge - corner apparatus: For corners, joints and heating radiators etc.
3- Seat-sofa apparatus: For protective cleaning of your seats and sensitive objects, dusting your cushions, etc.
natural_image
Two identical gray electrical connectors with indicator lights, no text or symbols visibleSweeper Floor Change Adjustment
1- Carpets and carpet flooring
2- Hard Floors
natural_image
Technical line drawing of a mechanical device with wheels and a central shaft (no text or symbols)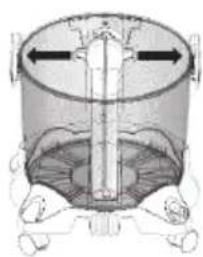
natural_image
Cross-sectional diagram of a cylindrical mechanical component with internal channels and mounting feet (no text or symbols)
natural_image
Technical line drawing of a mechanical component with no visible text or symbolsUse of Device
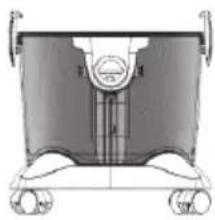
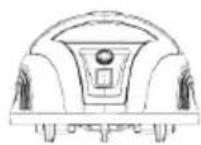
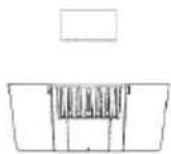
- Open by pulling the latches of the top head and set the top head aside.
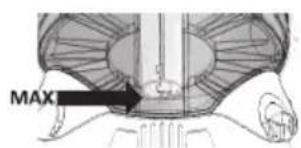
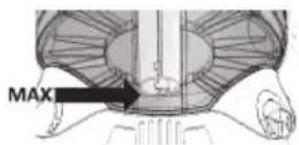
- Put water into the water tank of the device up to the MAX level.
NOTE: The water level should never exceed the "MAX" mark on the tank.
CAUTION: NEVER run your vacuum cleaner without adding water.
Hint: If the water is very dirty, empty and clean the water tank according to the instructions and fill it with water again.
- Replace the top head and lock the latches.
- Insert the power plug into the power outlet.
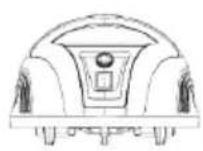
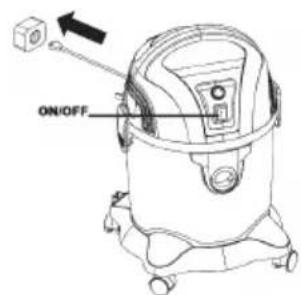
- To turn on the device, press the on/off button on the top of the device.
- To turn off the device, press the on/off button on the top of the device.
Wet Use
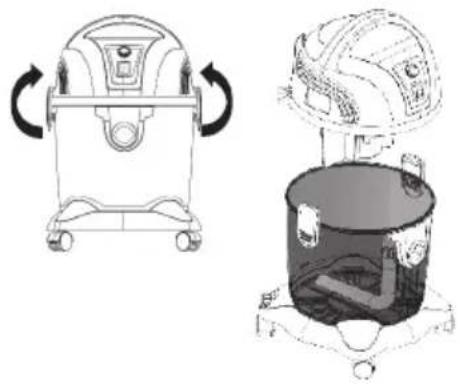
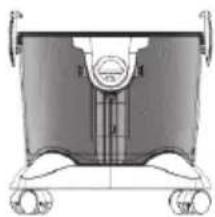
- Open the side latches on the device and lift the motor body from the body by holding the handle.
- The sponge filter must be installed correctly.
- Remove the L pipe by unlatching it.
NOTE: The sponge filter must be atached when vacuuming liquid. - Put the motor body back and lock the latch.
- Plug in the apparatus you want to use and start the device.
- After the wet vacuum, clean and dry the inside of the device and the accessories. Then install the desired filters.
CAUTION: If the float is activated prematurely while vacuuming the liquid (due to excessive foam), turn off the device and unplug it before cleaning.
Float
- When the water tank of the device is full, the float will be activated and the device will turn off.
- Pause the cleaning process.
- Turn off the device and pull out the plug from the socket.
- Take the device to the drain and empty the liquid in the water tank.
NOTE: If the device falls over during vacuuming, the float will turn off the device. - Turn off the device immediately.
- Return the device to the upright position.
- Wait until the motor comes to a complete stop and the float returns to its normal state.
- Turn on the appliance and continue vacuuming.
Vacuum Power Adjustment (for Vacuum Adjusted Model)
natural_image
Top-down line drawing of a car dashboard with steering wheel and gear (no text or symbols)1- You can adjust the suction power with the selection button on the device during the sweeping process. - Use maximum suction power to vacuum very dirty carpets and hard floors. - Use minimum suction power to clean curtains, tablecloths, etc.
Emptying the Dustbin
- Pull the latches of the top head open and set the top head aside.
- Empty the waste water in the chamber.
Hint: We recommend that you clean the dust bin and filter each time you empty the dust bin. It can create a bad smell.
- Put the top head in place and lock the latches.
natural_image
Technical line drawings of two industrial vacuum cleaner units, one with clockwise rotation and the other with internal components (no text or symbols)Motor Protection Filter
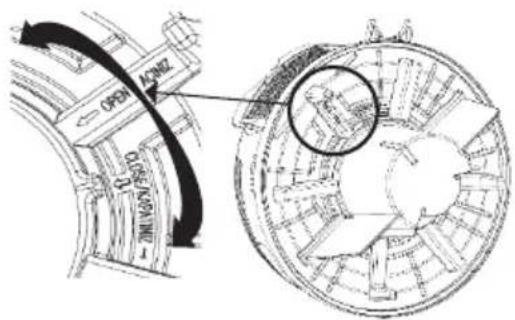
- To separate the slot of the motor protection filter, open the indoor unit by turning it to the left.
- To clean, shake the filter over a trash can.
- Insert the clean filter into the filter holder.
- Lock the indoor unit by turning it to the right.
Blowing Feature
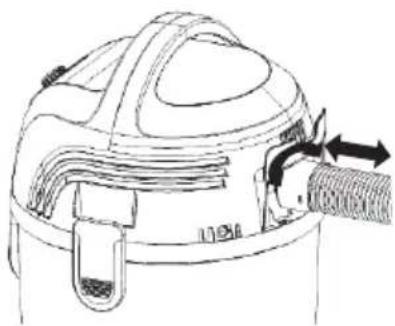
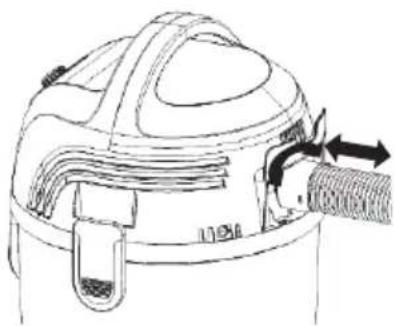
- To use the blowing feature, attach the hose end to the top of your machine and lock it by turning it to the right.
- Turn on your machine from the on/off switch.
- To remove the hose end, pull it by turning it to the left.
natural_image
Line drawing of a medical device with a bulbous top and attached tubing (no text or symbols)Exhaust Filter Cleaning
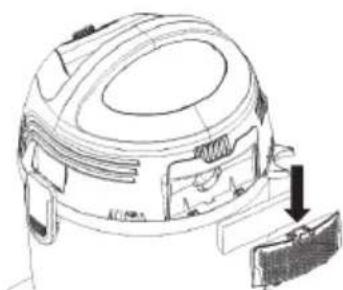
- Open and remove the filter cover by pressing the exhaust filter cover release latch.
- Remove the sponge filter.
- To clean, shake the filter over a trash can.
- Insert the clean filter into the filter holder.
- Close the filter cover.
natural_image
Technical line drawing of a mechanical component with a downward arrow indicating a feature (no text or symbols present)SL 402
SL 405
UPUTSTVO ZA UPOTREBU USISIVAČ SA VODENIM FILTEROM

Pre prve upotrebe uređaja, najpre pročitajte ovo uputstvo za upotrebu i prateća bezbednosna upozorenja. Postupajte u skladu sa uputstvom. Sačuvajte svako uputstvo za upotrebu za kasniju upotrebu ili za prosleđivanje budućim korisnicima uređaja.
Op te informacije
Pravilna upotreba
Ovaj usisivač je napravljen za upotrebu u privatnom domaćinstvu, a ne za komercijalnu upotrebu. Proizvođač ne preuzima nikakvu odgovornost za štetu uzrokovanu nepravilnom ili pogrešnom upotrebom. Koristite usisivač samo sa originalnim rezervnim delovima, priborom ili posebnim priborom.
Odlaganje filtera a pra inu
Filteri za prašinu su napravljeni od ekološki prihvatljivih materijala. Ovi predmeti se mogu odlagati uz uobičajeni kućni otpad, sve dok ne sadrže apsorbovane supstance koje su zabranjene za kućni otpad.
Re ervni delovi
MODEL BEZ PODEŠAVANJA
USISAVANJA
natural_image
Line drawing of a mechanical device with wheels and a central hub (no text or symbols)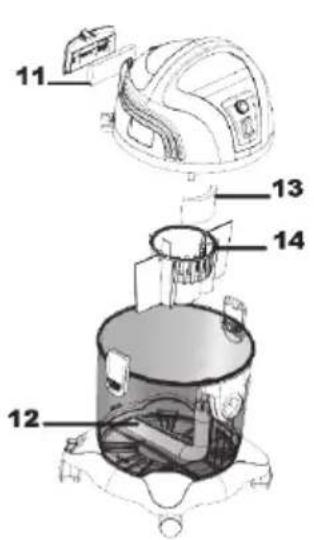
- Telo motora
- Pribadače
- Dugme za podešavanje snage usisavanja (samo za model sa podešavanjem snage usisavanja)
- Dugme za uključivanje/isključivanje
- Ulaz na kraju creva
- Posuda za prašinu
- Točak
- Prorez za pričvršćivanje teleskopske cevi
- Poklopac izduvnog filtera
- Prorez za vertikalni parking položaj
-
Sunder izduvnog filtera
-
L cev
- Sunder filter unutrašnje jedinice
- Unutrašnja jedinica
- Plastična cev 15-A. Teleskopska cev (opciono)
- Teleskopska cev za podešavanje (opciono)
- Ručka
- Crevo
- Dodatak za sedište - sofe
- Dodatak za ivice - ćoškove
- Glava za čistača
- Podešavanje promene poda čistača
UPOTREBA PROIZVODA
natural_image
Line drawing of a mechanical device with a circular component and directional arrows indicating motion (no text or symbols)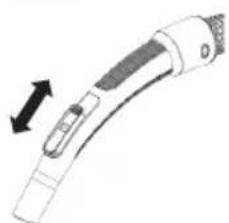
natural_image
Diagram of a handheld device with an arrow indicating direction (no text or symbols present)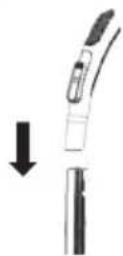

natural_image
Diagram showing a vacuum cleaner with three downward arrows indicating motion or assembly (no text or symbols present)natural_image
Two identical gray electrical connectors with indicator lights, shown from different angles (no text or symbols visible)Podešavanje promene poda čistača
1- Tepisi i podne obloge
2- Tvrdi podovi
natural_image
Technical line drawing of a mechanical device with wheels and a central component (no text or symbols)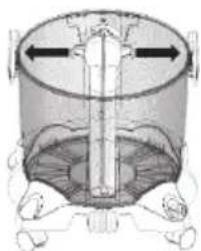
natural_image
Cross-sectional diagram of a cylindrical mechanical component with internal structure and directional arrows (no text or labels)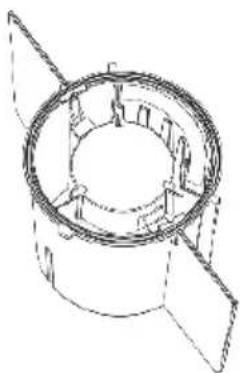
natural_image
Technical line drawing of a mechanical component with concentric rings and a handle (no text or symbols)Korišćenje uređaja
- Otvorite povlačenjem reze gornje glave i ostavite gornju glavu u stranu.
- Stavite vodu u rezervoar za vodu uređaja do nivoa MAX.
NAPOMENA: Nivo vode nikada ne bi trebalo da prelazi oznaku "MAX" na rezervoaru.
OPREZ: NIKADA nemojte pokretati usisivač bez dodavanja vode.
Savet: Ako je voda veoma prljava, ispraznite i očistite rezervoar za vodu prema uputstvima i ponovo ga napunite vodom.
- Vratite gornju glavu i zaključajte reze.
- Utaknite utikač u zidnu utičnicu.
- Da biste uključili uređaj, pritisnite dugme za uključivanje/isključivanje na vrhu uređaja.
- Da biste isključili uređaj, pritisnite dugme za uključivanje/isključivanje na vrhu uređaja.
Mokro usisavanje
- Otvorite bočne reze na uređaju i podignite telo motora sa kućišta držeći ručku.
- Sunder filter mora biti pravilno postavljen.
- Uklonite L cev tako što ćete je otključati.
NAPOMENA: Sunder filter mora biti pričvršćen kada usisavate tečnost.
- Vratite telo motora nazad i zaključajte rezu.
- Uključite aparat koji želite da koristite i pokrenite uređaj.
- Nakon mokrog usisavanja, očistite i osušite unutrašnjost uređaj i pribor. Zatim postavite željene filtere.
natural_image
Technical line drawing of a car interior component (no text or symbols)Podešavanje snage usisavanja (za model sa podešavanjem usisne snage)
1- Možete podesiti snagu usisavanja pomoću dugmeta za izbor na uređaju tokom procesa čišćenja.
- Koristite maksimalnu snagu usisavanja za usisavanje veoma prljavih tepiha i tvrdih podova.
- Koristite minimalnu snagu usisavanja za čišćenje zavesa, stolnjaka itd.
Pražnjenje posude za prašinu
- Povucite reze gornje glave i ostavite gornju glavu na stranu.
- Ispraznite otpadnu vodu u komori.
natural_image
Technical line drawings of two different industrial vacuum cleaner designs, one with clockwise rotation and the other with internal components (no text or symbols)Filter za zaštitu motora
natural_image
Line drawing of a medical device with a bulbous top and attached tubing (no text or symbols)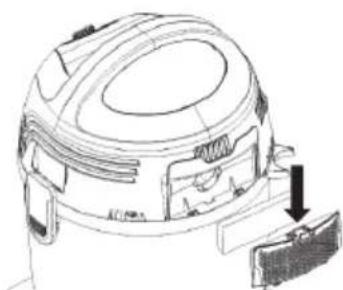
natural_image
Technical line drawing of a mechanical component with a downward arrow indicating a feature (no text or symbols present)- General Information
- Proper use
- Disposal of Dust Filters
- Spare Parts
- Scope of Delivery
- WARNINGS
- SAFETY WARNINGS!
- Troubleshooting
- WARNING!
- Important warning!
- ENVIRONMENTAL PROTECTION
- USAGE RECOMMENDATIONS
- ATTENTION!
- GENERAL VIEW AND DESCRIPTION OF PARTS
- VACUUM ADJUSTED MODEL
- VACUUM UNADJUSTED MODEL
- USE OF THE PRODUCT
- Attaching the Hose
- Handle Vacuum Power Adjustment
- Handle and Telescopic Pipe Joining
- Plastic Pipe
- Telescopic Tube Adjuster
- Telescopic Tube and Apparatus Joining
- Sweeper Floor Change Adjustment
- Use of Device
- Wet Use
- Float
- Vacuum Power Adjustment (for Vacuum Adjusted Model)
- Emptying the Dustbin
- Motor Protection Filter
- Blowing Feature
- Exhaust Filter Cleaning
- Op te informacije
- Pravilna upotreba
- Odlaganje filtera a pra inu
- Re ervni delovi
- UPOTREBA PROIZVODA
- Podešavanje promene poda čistača
- Korišćenje uređaja
- Mokro usisavanje
- Podešavanje snage usisavanja (za model sa podešavanjem usisne snage)
- Pražnjenje posude za prašinu
- Filter za zaštitu motora
Brand : VOX
Model : SL402
Category : Vacuum Cleaner