
RESERATOR 1 - PC Fan ZALMAN - Free user manual and instructions
Find the device manual for free RESERATOR 1 ZALMAN in PDF.


| Product Type | Fanless Water Cooling System (Reserator) |
| Model | RESERATOR 1 |
| Brand | Zalman |
| Dimensions (Reserator) | 150 x 150 x 592 mm (L x W x H) |
| Weight (Reserator) | 6.5 kg |
| Weight (CPU Water Block) | 447 g |
| Heat Dissipation Area | 1.274 m² |
| Coolant Capacity | 2.5 L maximum |
| Integrated Water Pump | 5 W, Qmax 300 l/h, Max lift 0.5 m (Voltage versions: 110-230 V, 50/60 Hz) |
| Reserator Material | Anodized Pure Aluminum |
| CPU Water Block Material | Pure Aluminum Cover, Gold-Plated Pure Copper Base |
| CPU Socket Compatibility | Intel Socket 478; AMD Socket 462, 754, 940 |
| Flow Indicator | In-line component to visually check coolant circulation |
| Noise Level | Fanless operation, noiseless |
| Recommended Coolant | Distilled or tap water |
| Installation Orientation | Upright, on a flat surface, at same level or slightly above PC |
| Safety Features | Leak inspection, overheat protection, air bubble removal procedure |
| Optional Accessories | GPU water block, additional ZM-WB2 Gold, silicone tube, heatpipe HDD cooler, power supply unit |
| Spare Parts Included | Sealing Bolt B, Cable Fitting, Compression Fitting, O-Ring B |
| Warranty | Refer to distributor |
Frequently Asked Questions - RESERATOR 1 ZALMAN
User questions about RESERATOR 1 ZALMAN
0 question about this device. Answer the ones you know or ask your own.
Ask a new question about this device
Download the instructions for your PC Fan in PDF format for free! Find your manual RESERATOR 1 - ZALMAN and take your electronic device back in hand. On this page are published all the documents necessary for the use of your device. RESERATOR 1 by ZALMAN.
USER MANUAL RESERATOR 1 ZALMAN
Visit our website (www.zalman.co.kr) and watch the RESERATOR 1 installation video to facilitate the installation process.
※ Please read this manual thoroughly before installation.
※ The specifications of this product and its components may change without prior notice to improve the performance thereof.
Cautions & Warnings
When Installing
- Make sure that the power source's output voltage and frequency are compatible with the power input requirements of the water pump before installing. (Input voltage and frequency of the water pump can be located on the box and sink cover.)
- Do not place in dusty or humid conditions, under direct sunlight, or near a heat source such as a room heater.
- Do not drop or subject to excessive force.
- Check CPU socket compatibility first.
- Familiarize yourself with this manual.
- Do not mix any contaminant with the coolant when filling, for it may cause product failure.
- Use of a multiple-outlet power strip is recommended, for you can connect or disconnect power to the PC and the Reserator 1's pump simultaneously.
When in Use
- Always turn on the water pump first before using the system.
- If the coolant isn't circulating or the pump is making a strange noise, turn off the pc system immediately.
- Do not place any object on the product.
- Install on a flat surface with no vibration or slant; do not tilt or lay horizontally.
- Use distilled or tap water for coolant, regularly check the amount of coolant, and replenish as needed.
- If a leak is found, turn off the system immediately and examine the problem before using the system again.
- If the system will not be used for an extended period of time, turn off the water pump.
- When moving the system, separate the reserator from the PC case before moving.
- Make sure to not let any air bubbles into the Water Block and tubes while in use.
- Always check that the water pump is properly functioning.
Contents
Cautions & Warnings
Contents
- Features 3
- Specifications 4
- Installation View 5
- Components 6
- Installation 8
- Installing External Water Pump 14
- Separate Reserator and Water Block 17
- FAQ 20
- Exploded View 21
Zalman Noise Prevention System
1. Features
Reserator 1 is designed with an optimal heat dissipation area based on Zalman Tech's HCET (High Capacity Extrusion Technique) and high efficiency cooling technology. As a result, this product achieves excellent cooling performance even with natural convection, making it the world's first fanless, noiseless water-cooling system. The reservoir, radiator, and the water pump are conveniently integrated into one assembly, and the heatsink is anodized to prevent corrosion and rust. In addition, the kit includes the high-performance ZM-WB2 Gold water block which is not susceptible to galvanic corrosion.
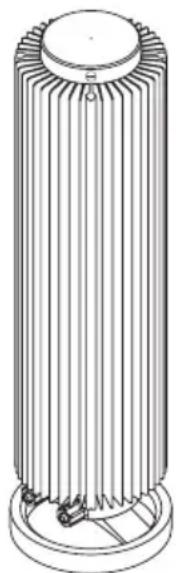
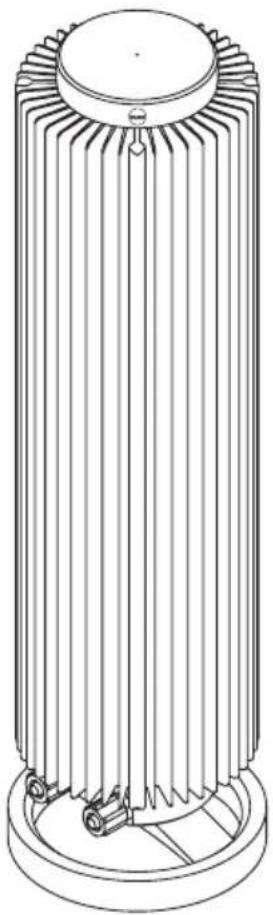
1.1 Reserator (Reservoir + Radiator + Water Pump)
Reserator is a compound word derived from ‘Reservoir’ and ‘Radiator’- it acts as a reservoir while radiating heat. This product works well with natural convection and integrates a water pump inside for convenience.
1.2 CPU Water Block(ZM-WB2 Gold)
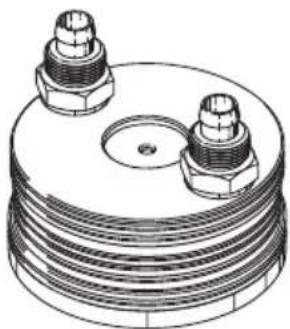
The system includes Zalman's new CPU cooling component, ZM-WB2 Gold, which performs superbly and installs easily.
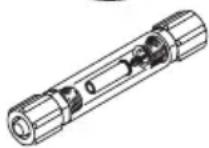
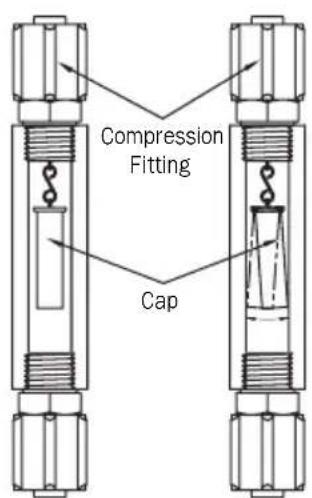
1.3 Flow Indicator
This component is connected in-line with the circulation tube to check the circulation of the coolant. When the coolant is actively circulating, the cap inside the flow indicator shakes rapidly, providing easy indication of the circulation status.
natural_image
Technical line drawing of a cylindrical mechanical component with radial fins and base (no text or symbols)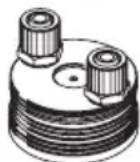
2. Specifications
2.1 Reserator (Reservoir + Radiator + Water Pump)
Dissipation Area : 1.274 m²
Weight : 6.5kg
Dimensions : 150(L) x 150(W) x 592(H) mm
Material : Anodized Pure Aluminum
Coolant Capacity : 2.5 l Maximum
Integrated Water Pump : 5 W, Qmax 300 l/h(A type : 220 V-60 Hz, B type : 230 V-50 Hz, C type : 120 V-60 Hz, D type : 110 V-60 Hz)
Maximum Lift : 0.5 m
2.2 CPU Water Block(ZM-WB2 Gold)
Weight : 447g
Material : Pure Aluminum Cover, Gold-Plated Pure Copper Base
Dimensions : 64 x 31mm
Compatibility : Intel Pentium 4 (Socket 478), AMD Athlon / Duron / Athlon XP (Socket 462),
AMD AMD64 (Athlon 64 / Athlon 64 FX / Opteron) (Socket 754 / 940)
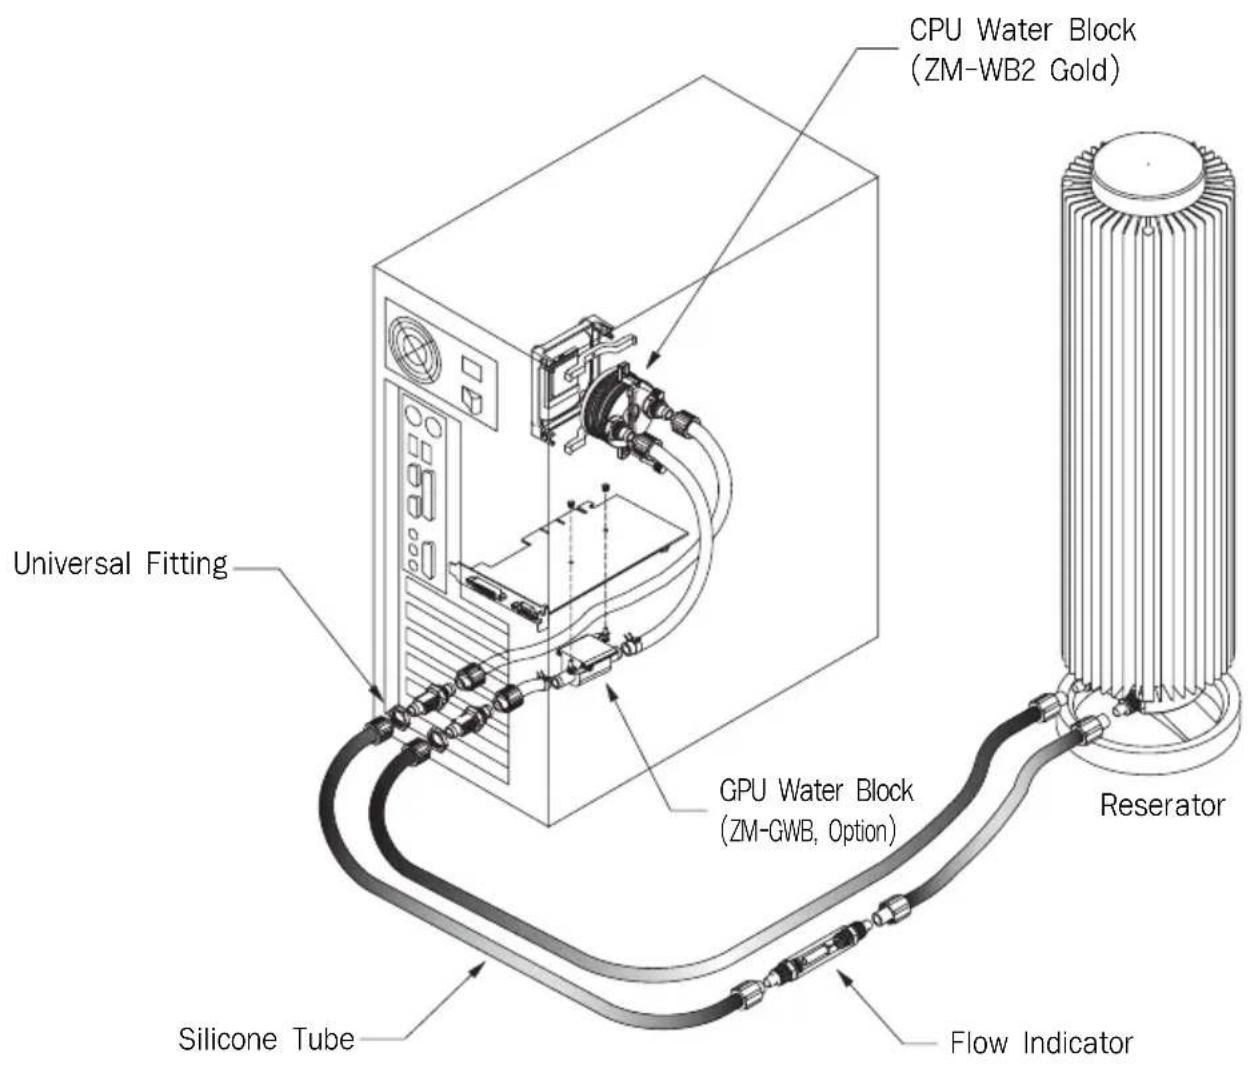
3. Installation View
4. Components
4.1 Reserator 1 Main Assembly 1SET
natural_image
Technical line drawing of a cylindrical industrial component with radial fins and mounting base (no text or symbols)4. 2 CPU Water Block (ZM-WB2 Gold) 1SET
Please refer to the separately provided manual for the ZM-WB2 Gold.
natural_image
Technical line drawing of a cylindrical electronic component with two hexagonal nuts and a central hole (no text or symbols)4.3 Flow Indicator 1EA
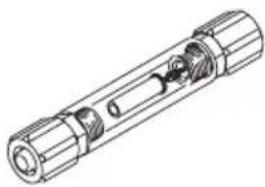
natural_image
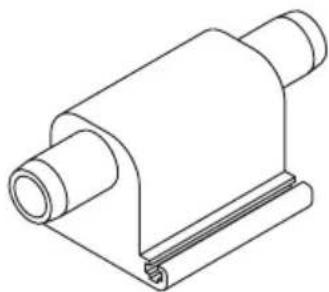
Technical line drawing of a cylindrical mechanical component with internal cavities and mounting holes (no text or symbols)4.4 Universal Fitting 2EA
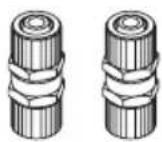
4.5 Silicone Tube 1SET
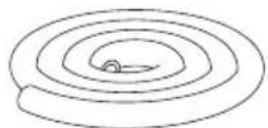
Silicone Tube 1SET
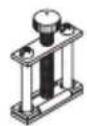
Clamp 4EA
4.6 Spare parts


Sealing Bolt B 1EA Cable Fitting 1EA


Compression Fitting 1EA O-Ring B 1EA
Options
- GPU Water Block
Water block for cooling the GPU on a graphics card. This product is sold separately and available in two versions for compatibility with ATI Radeon and NVIDIA GeForce GPUs.
- ZM-WB2 Gold
Dual CPU users can buy an additional unit of ZM-WB2 Gold for installation on the second CPU.
- Silicone Tube
If the included silicone tube is found to be short or you need to use the tube on another system, additional tubes can be bought separately (base length is 3 m, 12 x 8 mm).
- Heatpipe HDD Cooler
This component cools the heat generated from the hard disk drive and reduces the vibration that is passed on to the system case.
• Power Supply Unit
By implementing heat-sensor circuitry that controls the cooling fan's speed in relation to the temperature within the power supply, emanating noise has been greatly reduced, making this component suitable for noiseless systems.
natural_image
Technical line drawing of a mechanical component with cylindrical and rectangular features (no text or symbols)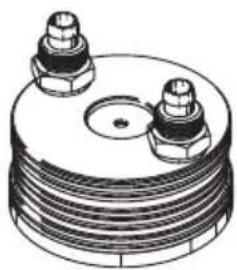
natural_image
Technical illustration of a cylindrical electronic component with two protruding pins (no text or symbols)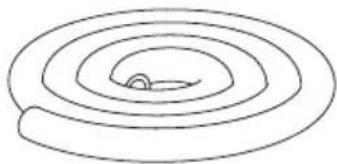
natural_image
Simple line drawing of concentric circular layers with a small oval cutout at the center (no text or symbols)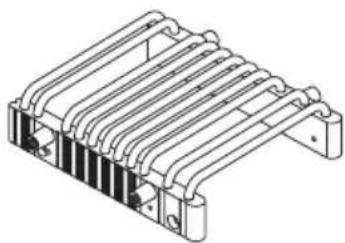
natural_image
Isometric line drawing of a heat exchanger or cooling unit (no text or symbols)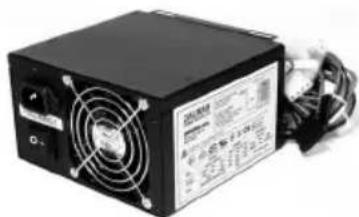
natural_image
Black power supply unit with cooling fan and cable (no visible text or symbols)5. Installation
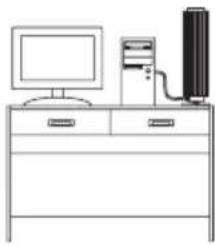
5.1 Determine the Placement of the Reserator 1
The reserator's placement should be determined with regard to the connected PC. Place it upright next to or slightly above the PC. Note that if the Reserator is placed lower than the PC, the silicone tube's internal air pressure may prevent proper initial operation.
natural_image
Simple line drawing of a desktop computer setup with monitor, tower, and keyboard (no text or symbols)(0)
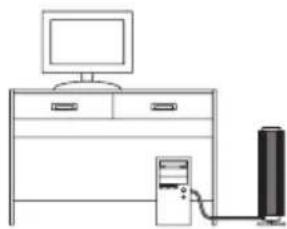
natural_image
Simple line drawing of a desktop computer setup with monitor, tower, and tower tower (no text or symbols)(0)
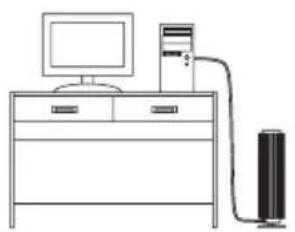
natural_image
Simple line drawing of a desktop computer setup with monitor, tower, and server (no text or symbols)(X)(X)(X)
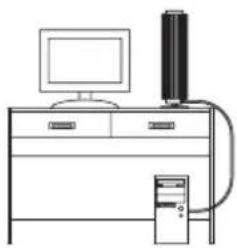
natural_image
Simple line drawing of a desktop computer setup with monitor, tower, and tower tower (no text or symbols)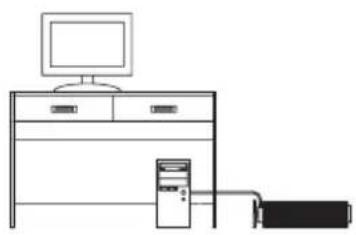
natural_image
Line drawing of a desktop computer setup with monitor, tower, and server (no text or symbols)5.2 Install the CPU Water Block (ZM-WB2 Gold)
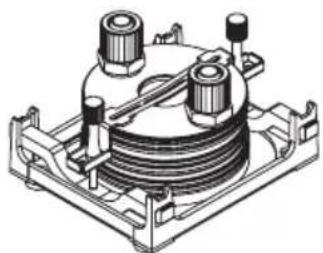
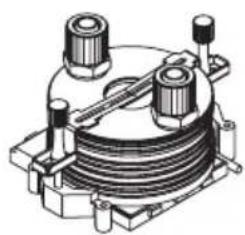
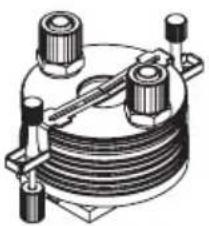
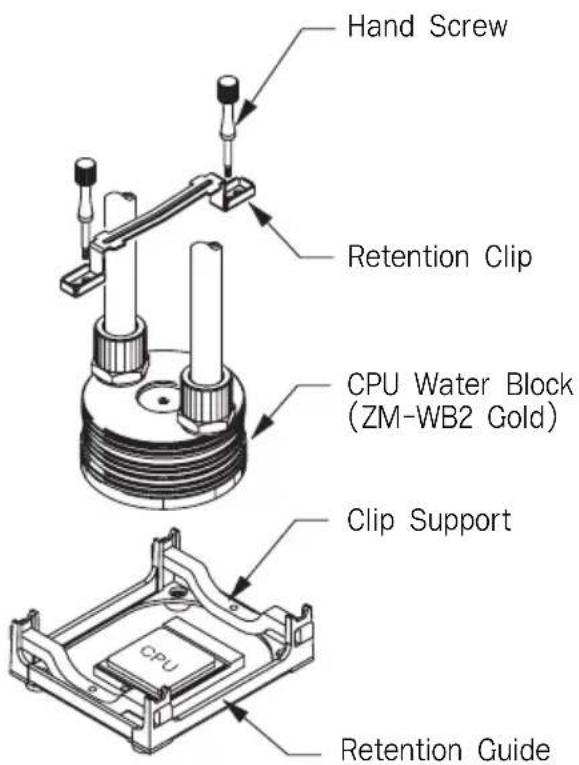
1) Refer to the manual included with ZM-WB2 Gold on how to install.
2) ZM-WB2 Gold can be installed on Socket 478, 462, 754, and 940.
3) If a water block from another manufacturer is to be installed, refer to the manual included with that product on how to install.
4) If interference occurs while installing, stop the installation.
5) Only 13 x 10 mm or 12 x 8 mm silicone tubes can be used with this product.
natural_image
Technical line drawing of a mechanical assembly with springs and housing (no text or symbols)Intel Pentium 4 Socket 478 CPU
natural_image
Mechanical assembly diagram showing a coiled spring with two cylindrical components and mounting tabs (no text or labels)AMD Athlon/Duron/Athlon XP Socket 462 CPU
natural_image
Technical illustration of a mechanical or electrical component with coiled spring and mounting flanges (no text or symbols)AMD AMD64(Athlon 64/Athlon 64 FX/Opteron) Socket 754/940 CPU
5.3 Connect the CPU Water Block with the Universal Fitting
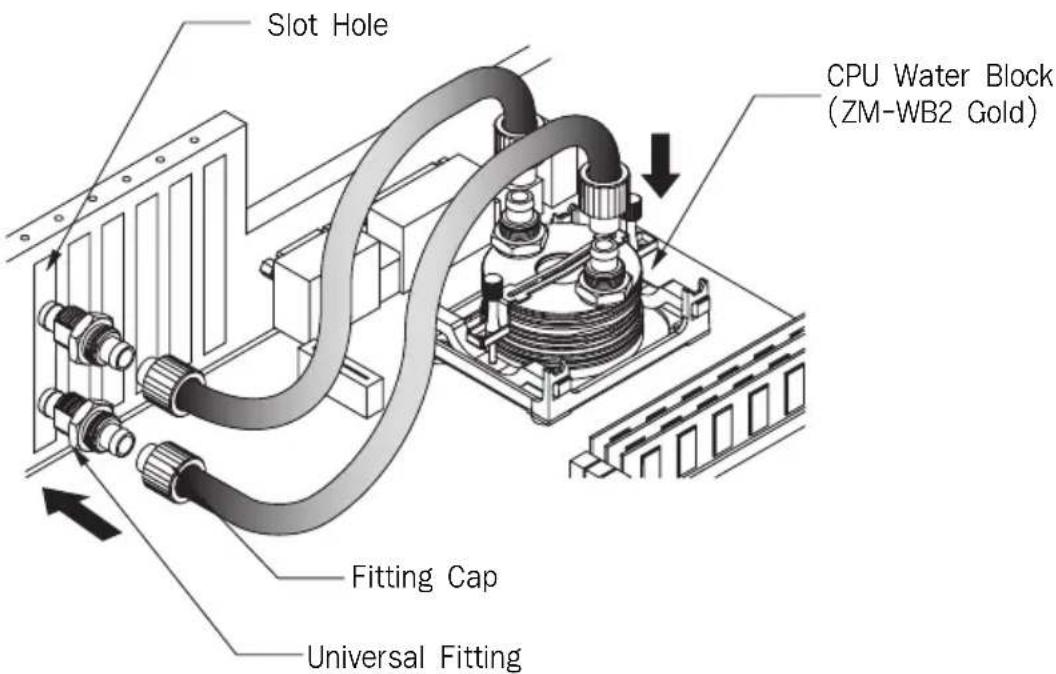
Use the silicone tubes to connect the CPU water block with the universal fitting. Be careful with the tubes so that they are not twisted and not too long to interfere with other components.
If a GPU water block is installed, connect the CPU water block's exit hole with the GPU water block.
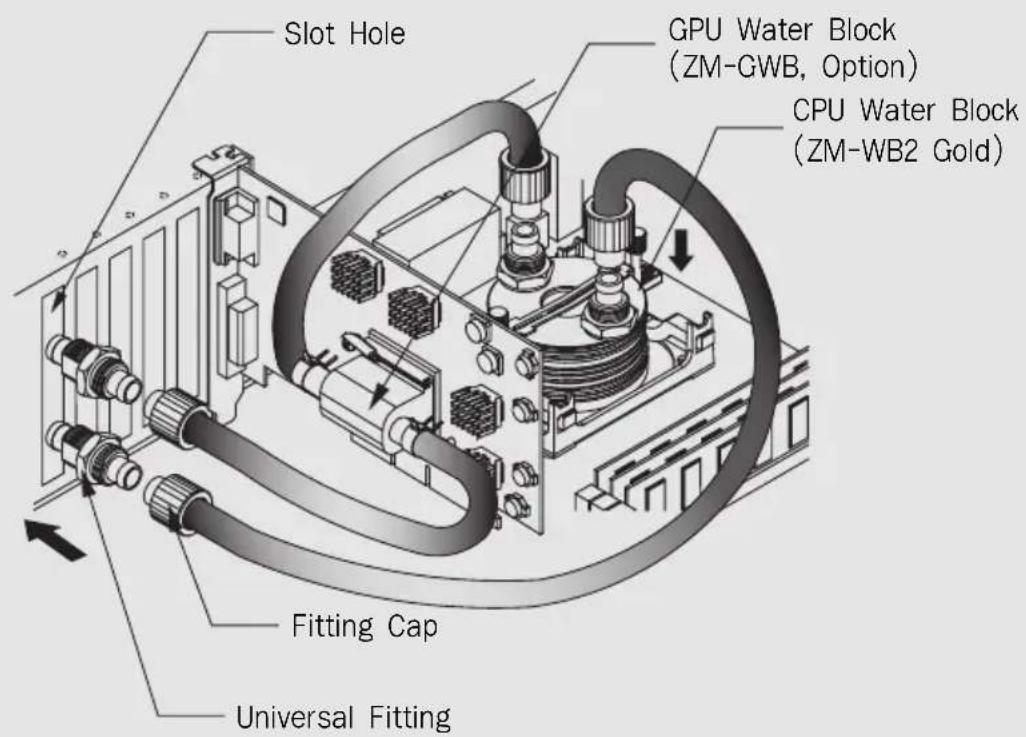
5.4 Fasten the Universal Fitting
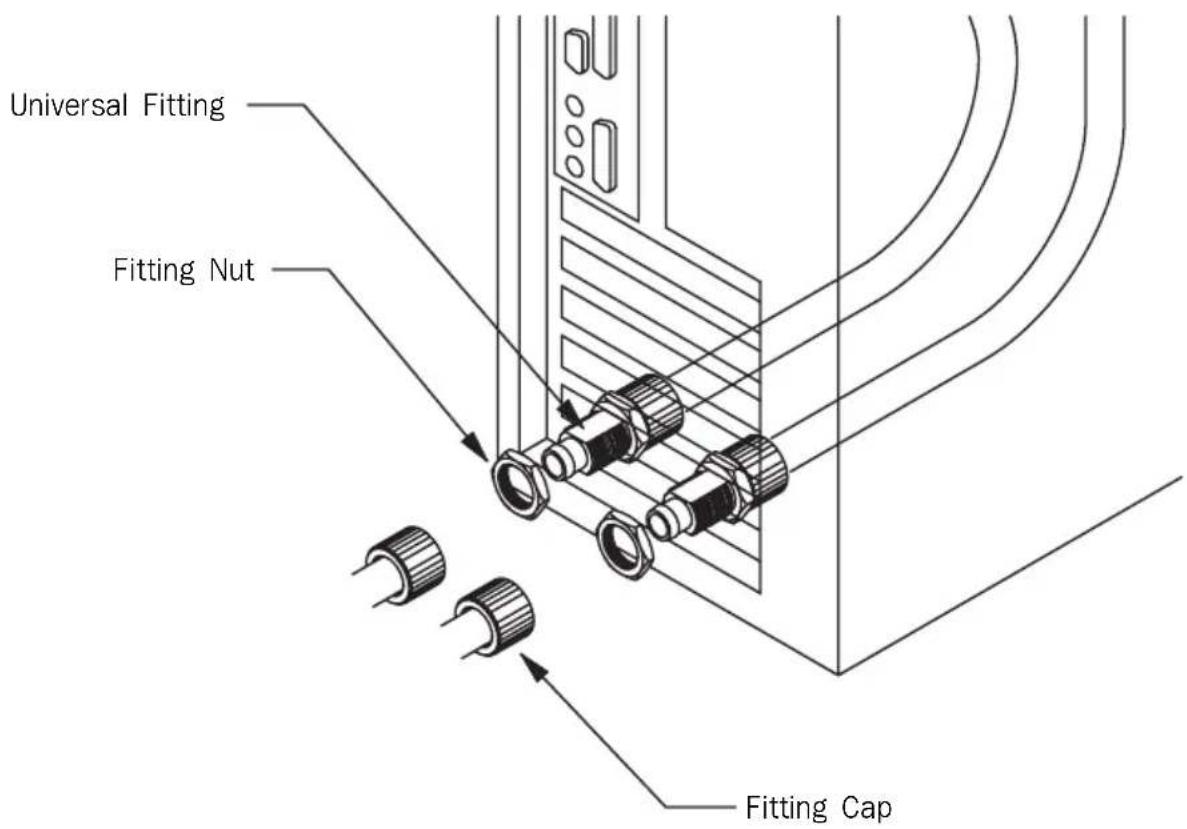
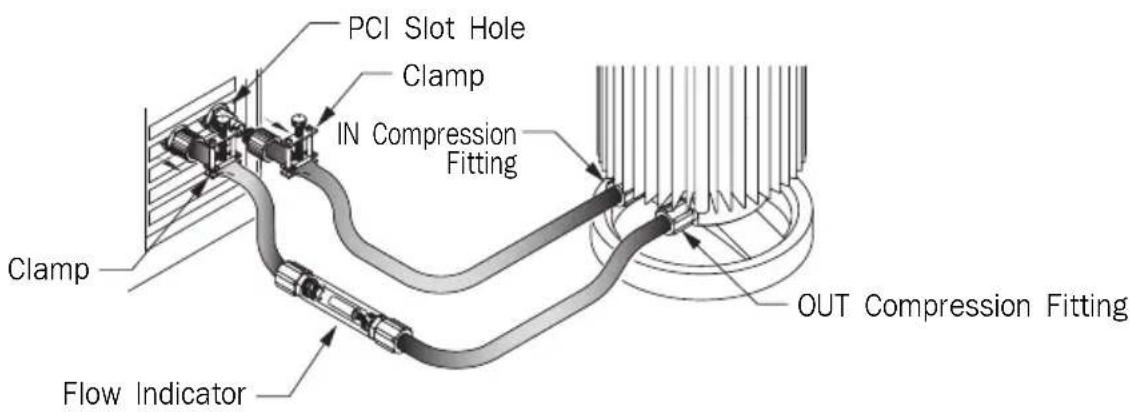
If the universal fitting is to be fastened on the PCI slot hole in the back of the case, separate the fitting cap and the fitting nut from the universal fitting. Then, insert the universal fitting into the PCI slot hole from the inside towards the outside as shown and fasten with fitting nuts.
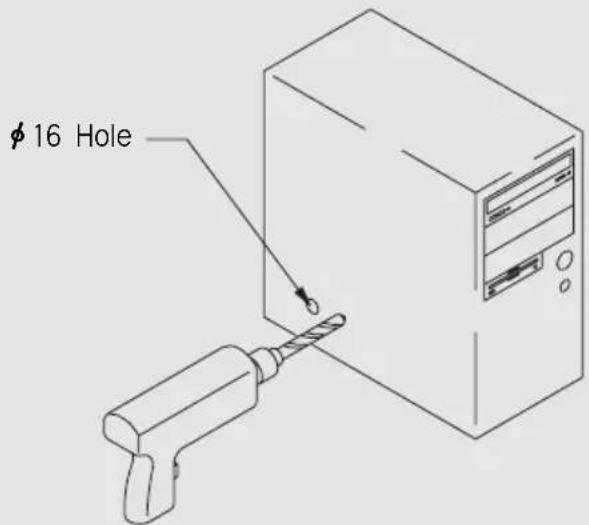
If you want to drill the holes in the side of the case for fastening, each of them should be 16 mm in diameter. The tube holes should be made at the same height as the slot holes at the back of the case.
5.5 Connect the Reserator with the Universal Fitting
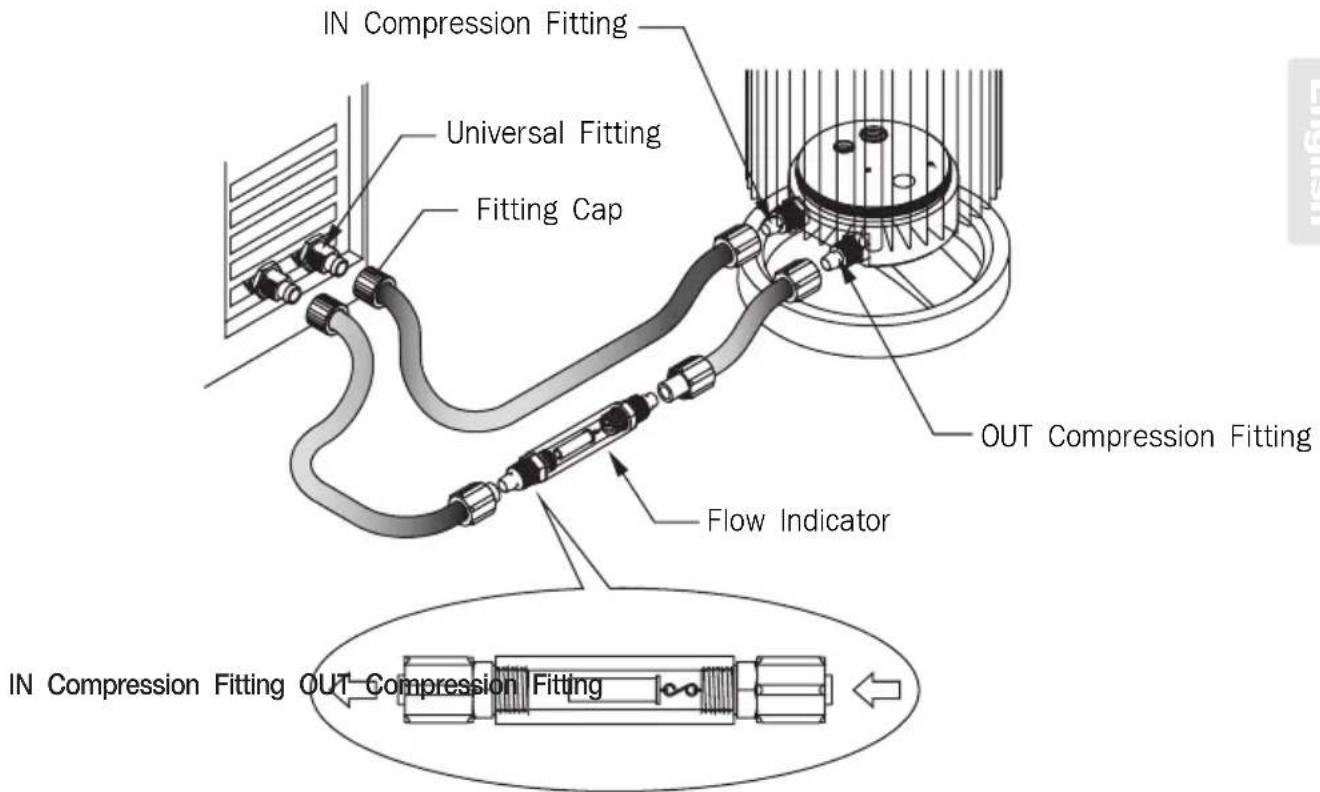
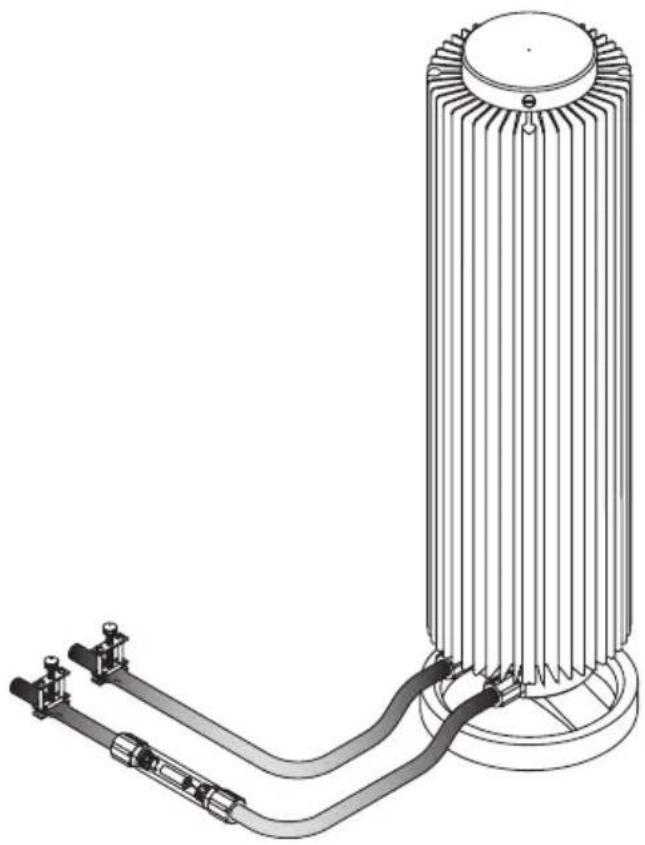
Using silicone tubes, connect the IN / OUT compressing fittings, the flow indicator, and the universal fitting as shown above. The flow indicator is used to check the circulation of the coolant, so it should be placed where it is easily visible.
Note) The flow indicator must be installed in the direction shown.
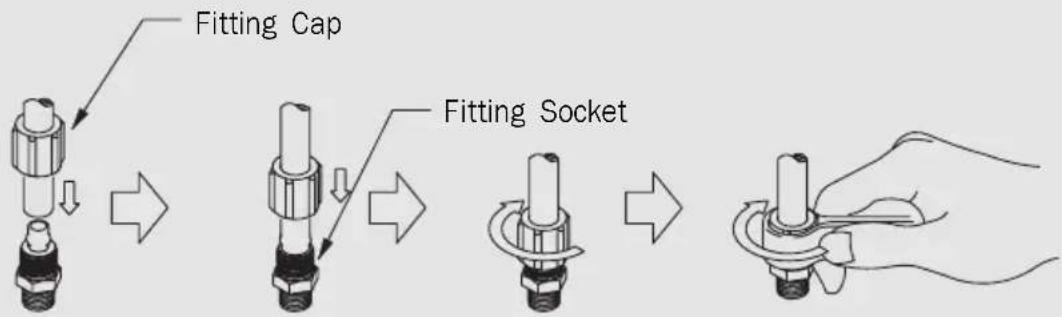
Connecting Fitting and Silicone Tube - The Easy Way
1) Slide the Fitting Cap over the silicone tube
2) Push the silicone tube all the way inside the Fitting socket.
3) Screw on the Fitting Cap until it is completely fastened.
4) Pull the silicone tube slightly with your hands to see if it is loose. Cut about 100 mm of the silicone tube and use it around the Fitting Cap to fasten the cap easily. Be careful not to have the silicone tube fold or twist, as scratches and damage may lead to leaks.
5.6 Confirm Correct Installation
1) Check that the placement of the product confirms to section 5.1.
2) Confirm that the coolant circulation path is correct, as shown below.
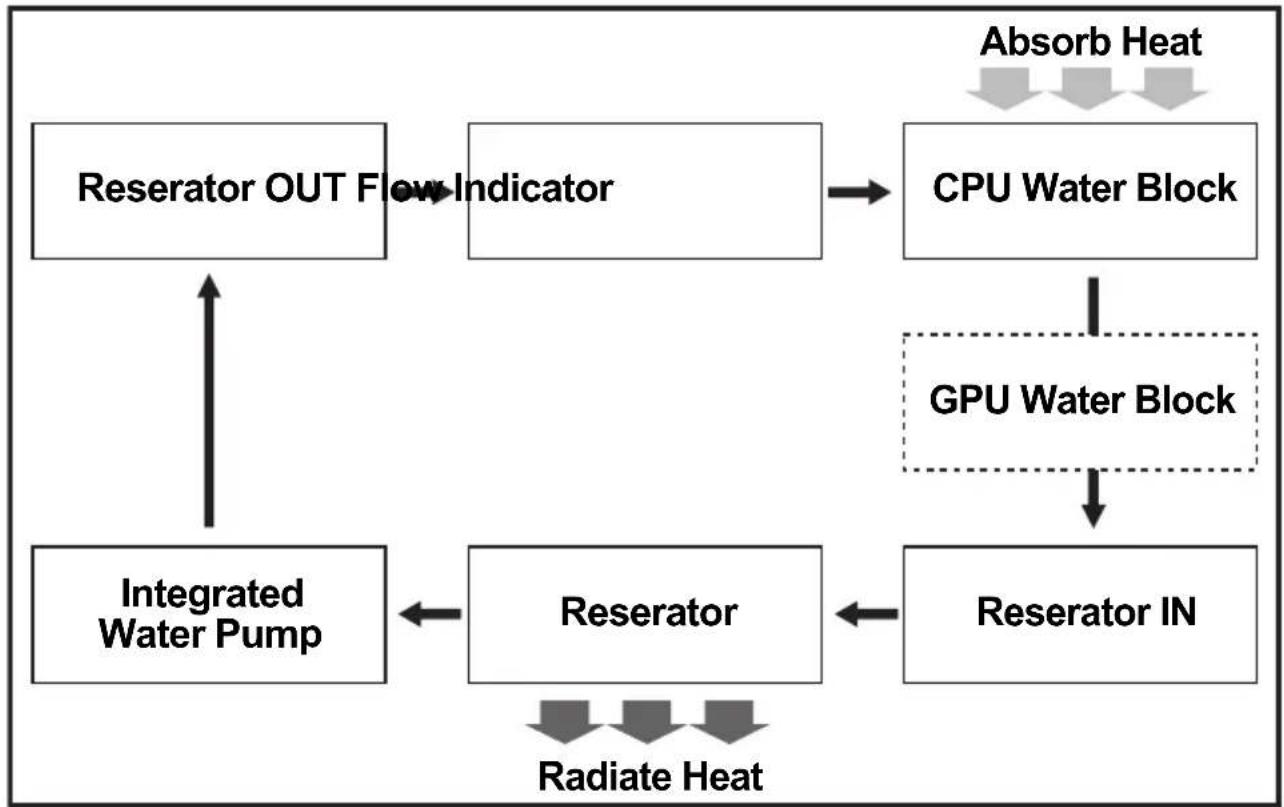
flowchart
graph TD
    A["Reserator OUT Flow Indicator"] --> B["CPU Water Block"]
    B --> C["GPU Water Block"]
    C --> D["Reserator IN"]
    D --> E["Reserator"]
    E --> F["Integrated Water Pump"]
    F --> A
    G["Absorb Heat"] --> B
    H["Radiate Heat"] --> E
3) Lightly tug the silicone tube connected to each of the Compression Fittings and the Universal Fitting to check for loose ends.
5.7 Add Coolant
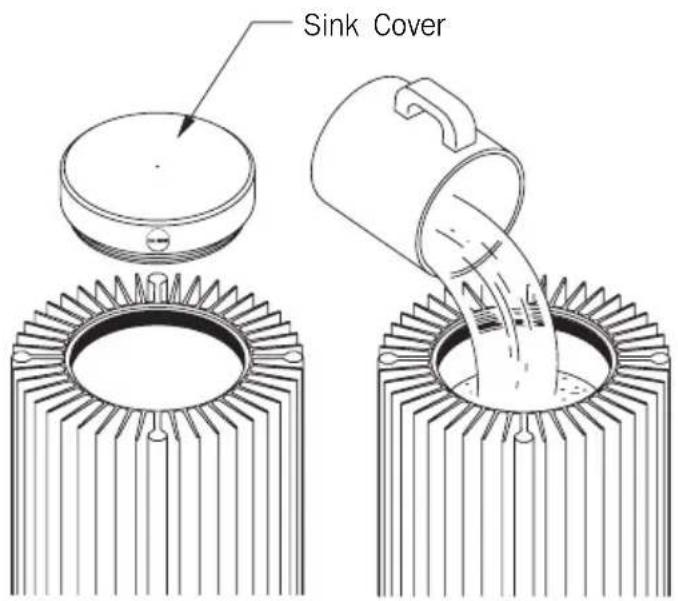
1) Take off the Reserator's cover.
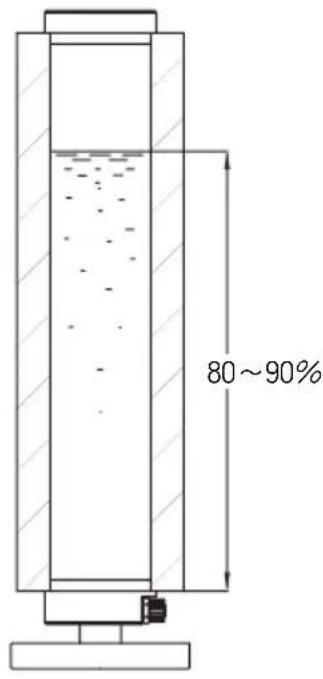
2) Fill the Reserator to 80\~90% of its height. Distilled water is recommended, but tap water can be used instead.
Reserator 1's maximum capacity is 2.5 liters. When adding the coolant, make sure that no contaminant is introduced.
What is a Coolant?
Coolant refers to a circulating fluid that absorbs heat from heat sources such as a CPU and a GPU, and dissipates it at the radiator. Typically recommended coolant used in a water cooling system is distilled water, but tap water can also be used. To prevent galvanic corrosion, special coolants such as antifreeze are sometimes used. (Zalman's ZM-WB2 Gold is gold-plated, so galvanic corrosion does not occur.)
5.8 Leakage Inspection and Test Run
OFF ON
1) Turn off the PC's power completely before starting leakage inspection.
2) Confirm that the coolant is adequately filled. It should be filled to about 80\~90% of the Reserator's capacity.
3) Check each fitting for leaks. If there is a leak, circuitry and other components may short circuit and malfunction, so be careful.
4) Only if there is no leak in any of the fittings and the Fitting Sockets, turn on the water pump. If the coolant does not circulate properly, turn the pump on and off repeatedly to eliminate air bubbles.
5) While the pump is turned on, check the circulation status with the flow indicator. If the coolant is circulating well, the cap inside the flow indicator vibrates rapidly.
6) Leave on for an hour and check for leaks.
7) If there are no leaks, turn on the PC's power and use the system.
6. Installing the External Water Pump
If the integrated water pump is broken or you need a water pump of higher capacity, you can install an external water pump as shown below.
6.1 Separate the Integrated Water Pump
natural_image
Technical line drawing of a cylindrical mechanical component with radial fins and central hub (no text or symbols)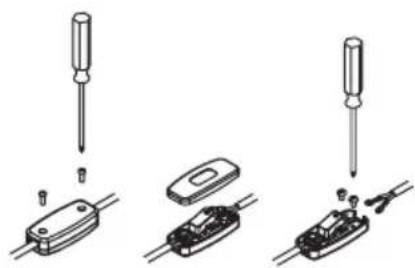
natural_image
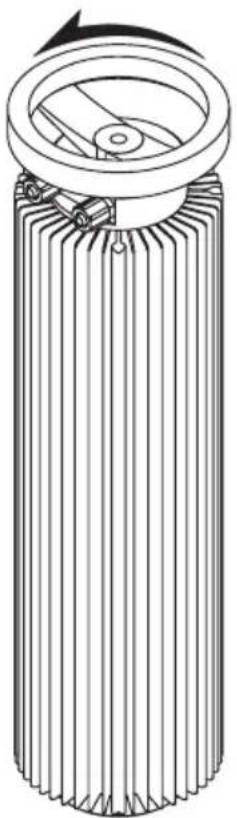
Three-step diagram showing screwdriver installation steps: adding, holding a component, and disassembly into a circuit board (no text or symbols)1) Separate the sink base - take off the sink base from the product as shown.
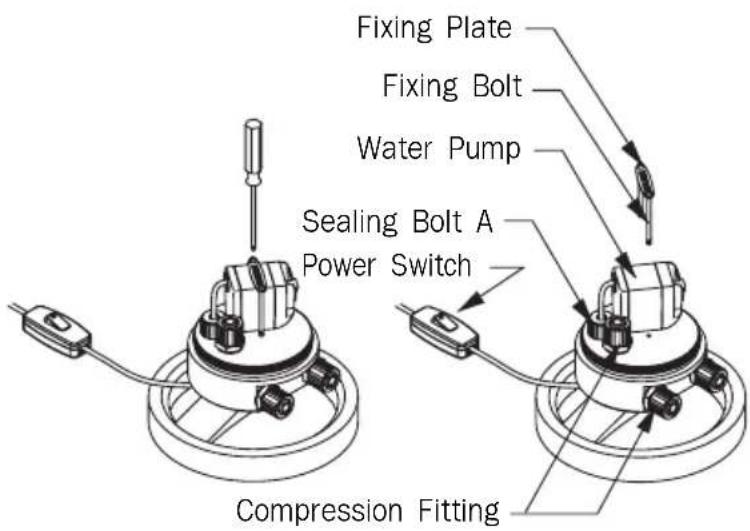
2) Unscrew the fixing bolts on the water pump - Separate the fixing plate and the fixing bolts by unscrewing the fixing bolts on the sink base with a screwdriver.
3) Detach the water pump power switch - separate the power switch from the power cable.
4) Take off the Sealing Bolt A - separate the Sealing Bolt A from the sink base.
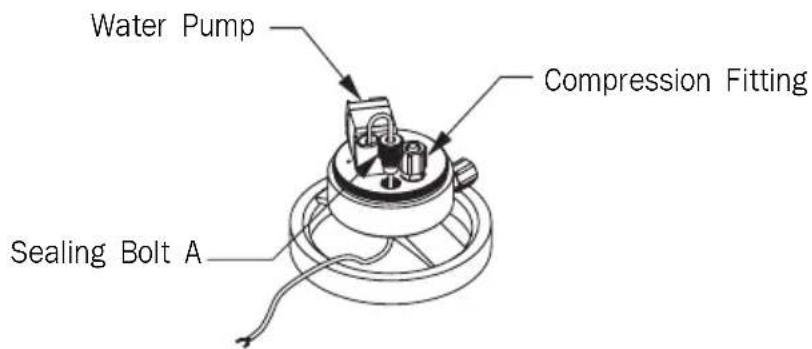
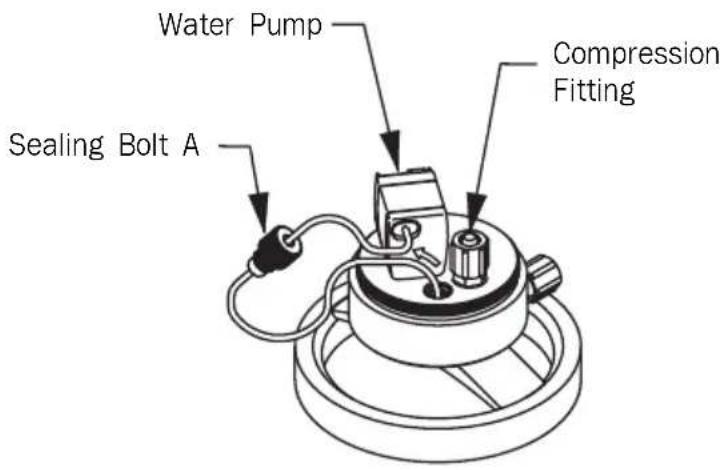
5) Take out the power cable - pull the water pump power cable out through the cable hole.
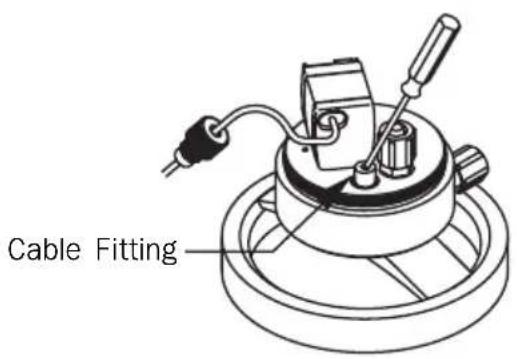
6) Remove the cable fitting - take the cable fitting out of the hole as shown by using a screwdriver or an awl.
7) Remove the integrated water pump - pull the water pump off the sink base as shown.
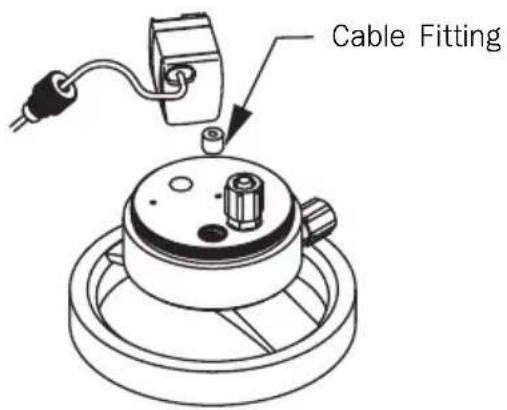
8) Put on the Sealing Bolt B - after removing the cable fitting, screw on the Sealing Bolt B. Fasten until tight. If this is not done properly it may cause leakage.
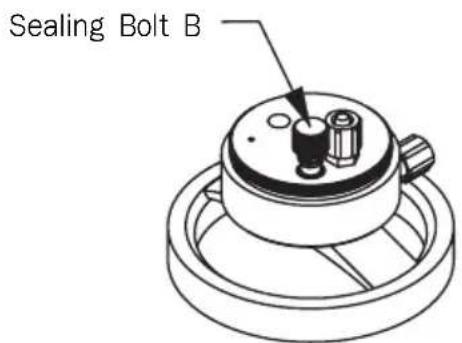
9) Reassemble the sink base - after all the steps are taken, reattach the sink base to the main body firmly. Take proper care in doing this as leakage may result if not done correctly.
6.2 Install the External Water Pump
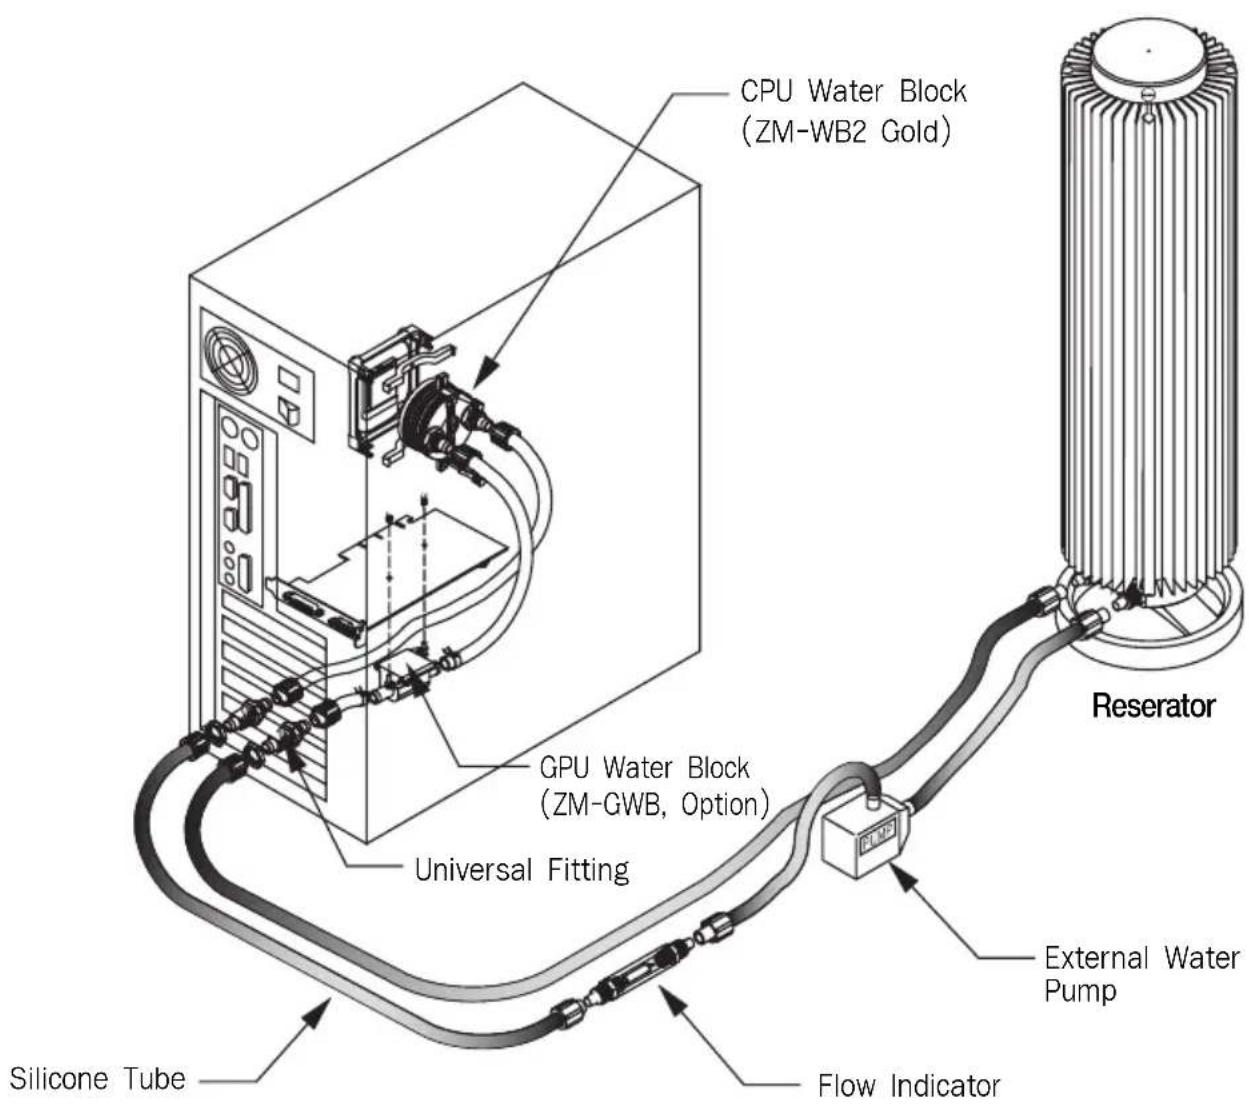
After determining the placement of the external water pump, check the components that create a path as shown above. It is recommended that the installation is done in such a manner.
6.3 Cautions on Choosing and Installing an External Water Pump
1) When installing an external water pump, confirm the coolant entrance and exit holes before connection.
2) Check that the chosen water pump's holes are compatible with the provided silicone tube.
3) Zalman Tech is not responsible for performance degradation or malfunction of a system that arises from using an external water pump.
7. Separate the Reserator and Water Block
When moving this product to another location, or replacing the coolant or the water block, separate the Reserator and the water block from the silicone tubes as shown below.
7.1 Moving the Reserator or Changing the Coolant
1) Turn off the PC's power.
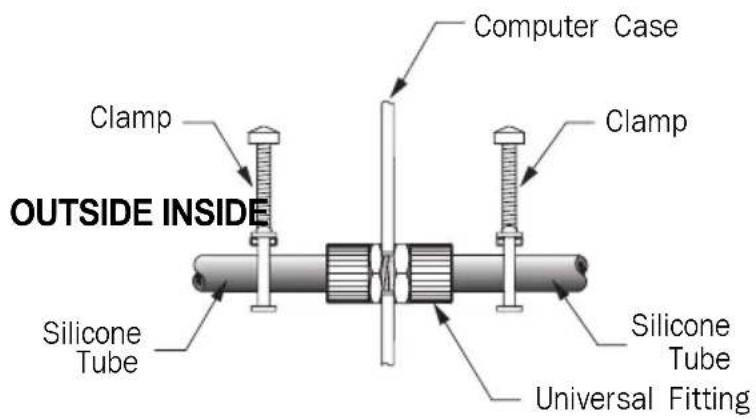
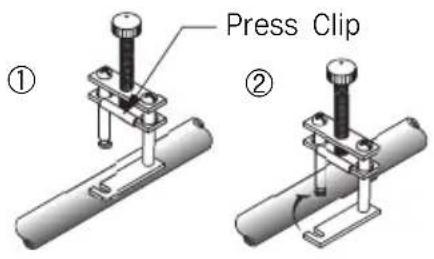
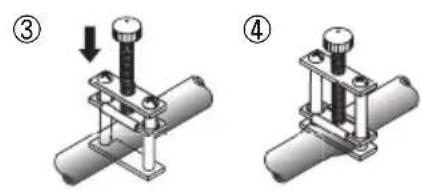
2) Using the tube clamps, as shown in the diagram, insert the tubes in to both sides of the Universal Fitting. If the press clip isn't properly tightened, there may be leaks, so make sure that the silicone tube is placed in the middle of the clamp.
3) Turn clamp screw until it is tight.
4) Unscrew the Universal Fitting Caps on the outside of the case one by one. If you unscrew the Fitting Socket Caps inside the case, residual coolant may spill into the case.
natural_image
Technical line drawing of a cylindrical industrial component connected to a flexible hose and valve (no text or symbols)5) Move the Reserator or change the coolant inside.
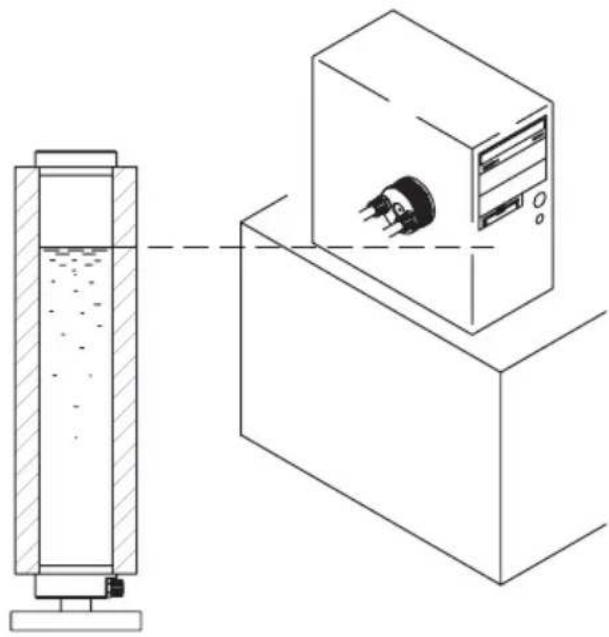
7.2 Replacing the CPU Water Block
1) Turn off the PC's power.
2) Separate the CPU water block from the mainboard.
natural_image
Technical line drawing showing a vertical cylindrical device connected to a computer monitor (no text or symbols present)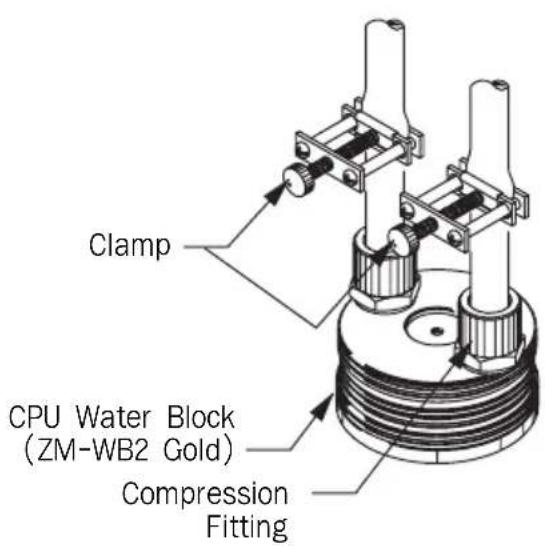
3) To let the residual coolant flow back to the Reserator, place the CPU water block higher than the coolant level of the Reserator.
4) Fasten the Clamp on the entrance and the exit tubes of the CPU water block.
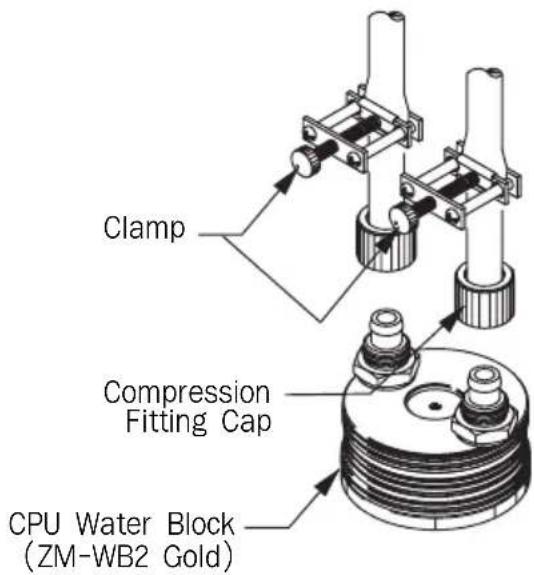
5) Unscrew the Fitting Caps from the CPU water block. Residual coolant inside the tube and the water block may flow out, so clean up using a paper towel or a piece of cloth.
6) Replace the CPU water block.
8. FAQ
8.1 When the Coolant isn't Circulating
(1) Check that the water pump is connected to the power.
(2) Verify that the pump is properly functioning. Remove the Reserator's sink cover and look inside to see if there is movement in the coolant. If there is none, contact the distributor where you purchased the product.
(3) Make sure that the Reserator is installed correctly. It must be placed at the same level as the PC, or slightly higher.
(4) Check if the coolant is flowing in the right direction.
(5) Inspect for any twists or folds in the silicone tubes of the system.
(6) Durning initial operation, the coolant may not properly circulate due to internal air pressure. In this case, repeatedly turn the water pump on and off at a 10-second interval and shake the silicone tubes to help get the air bubbles out. Once they are out of the system the coolant should be circulating properly.
8.2 When There is a Leak at a Compression Fitting or Universal Fitting Socket
(1) Turn off the system.
(2) Make sure the silicone tube is pushed all the way into the end of the Fitting Socket.
(3) Check to see that the tube is cut cleanly and squarely.
(4) Verify that the Fitting Cap has been screwed all the way into the end of the fitting Socket.
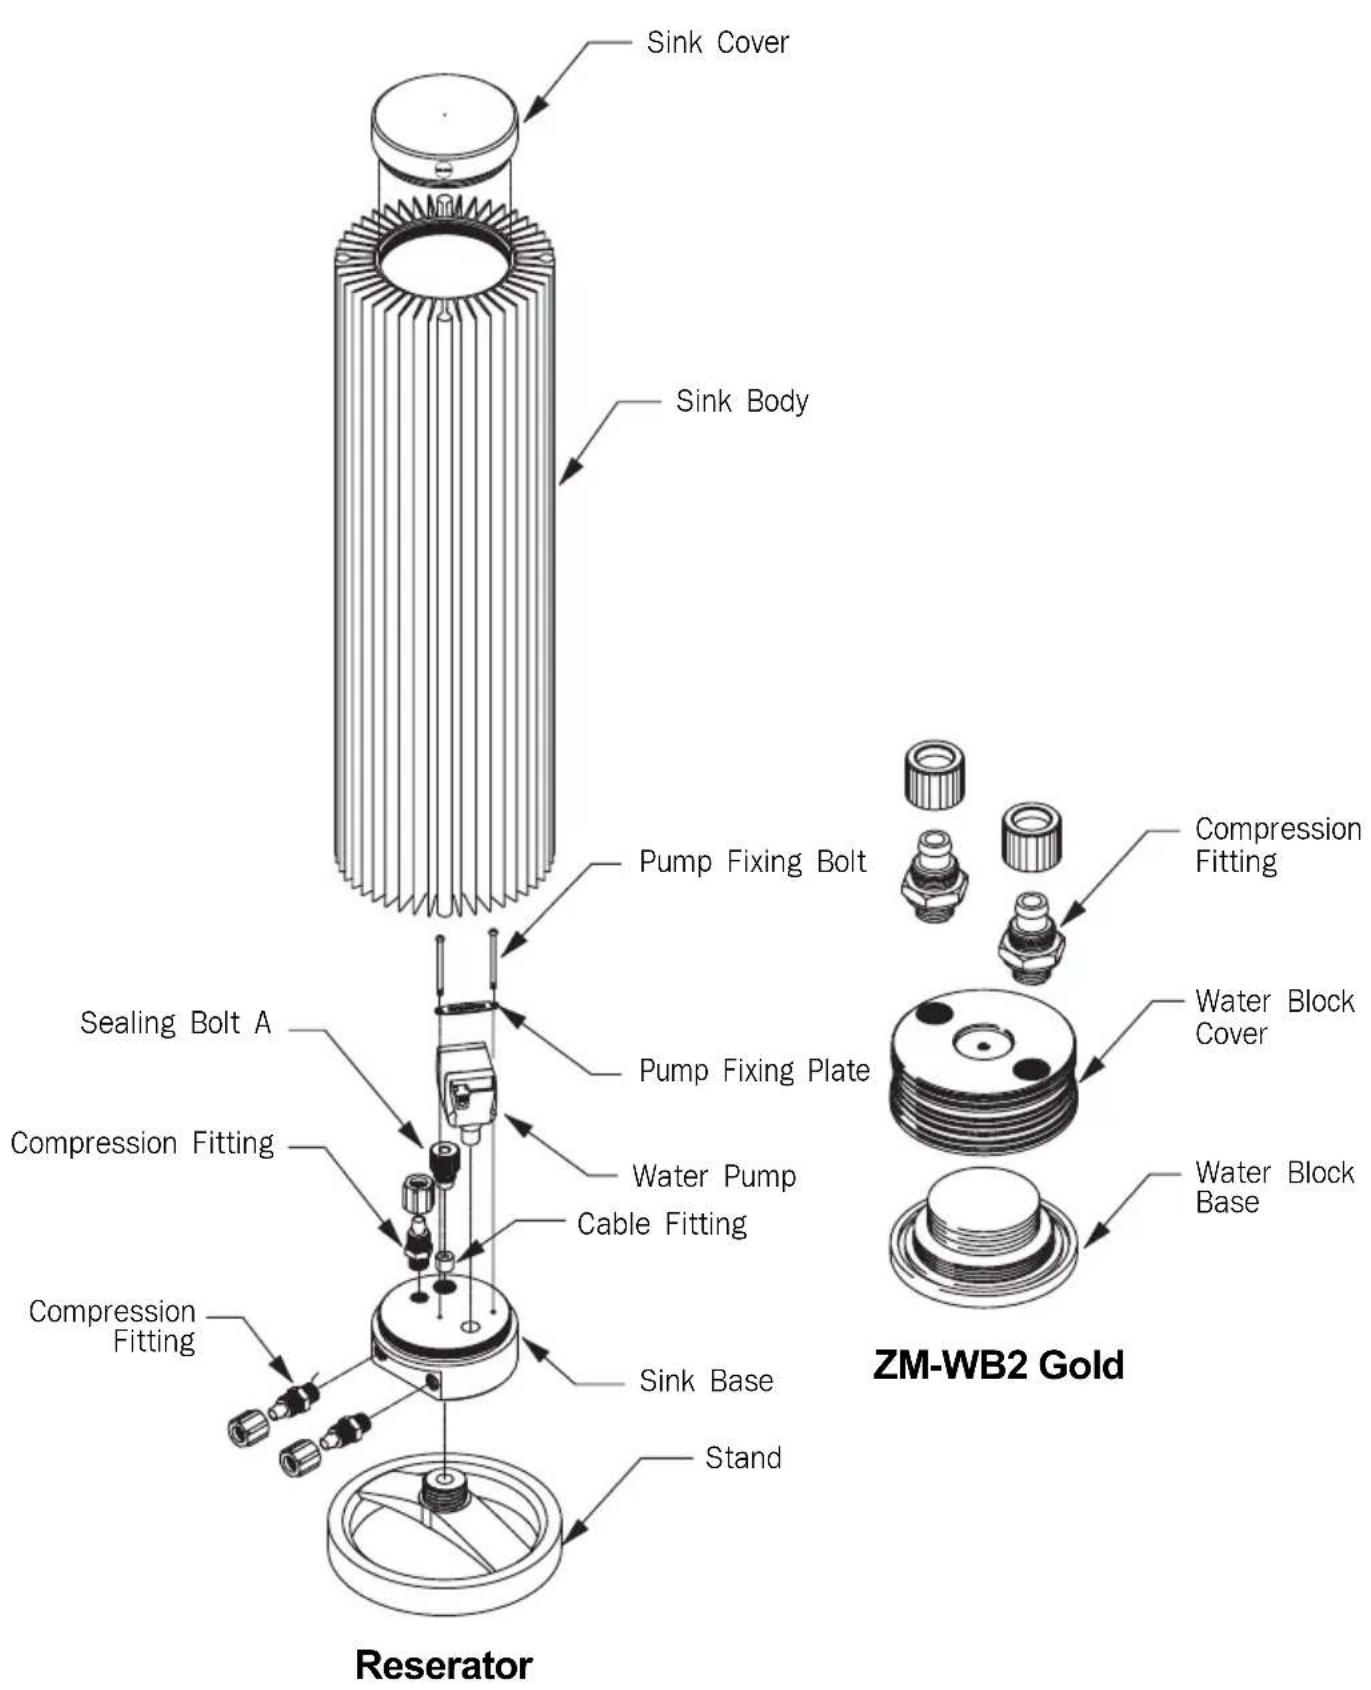
9. Exploded View
Zalman Noise Prevention System
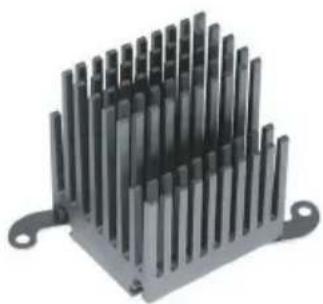
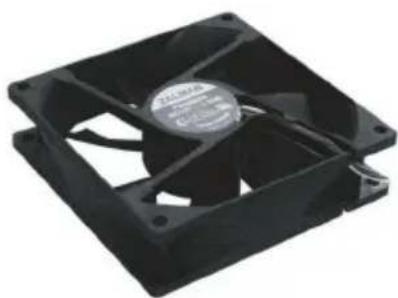
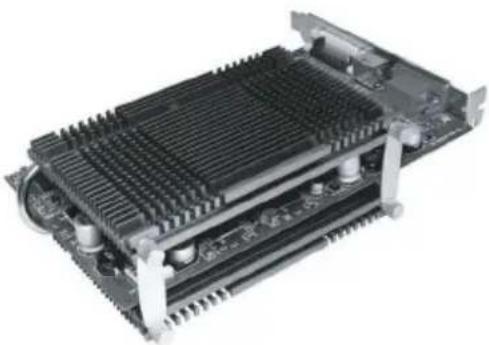
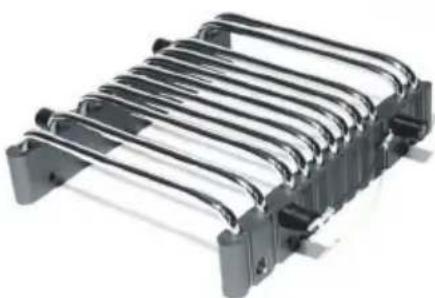
When building a noiseless computer, use Zalman's Noiseless Power Supply, Northbridge Cooler, Case Fan, Video Card Cooler, and HDD Cooler to achieve stable performance and maintain a noiseless environment.
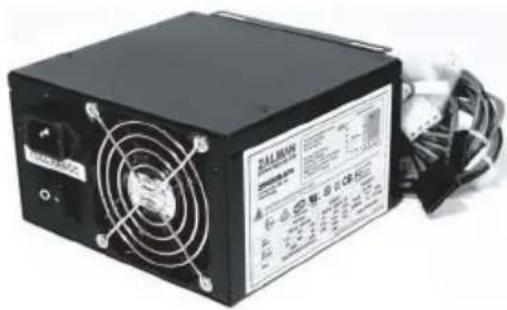
Power Supply ZM400A-APF
natural_image
3D rendering of a mechanical component with vertical fins and mounting brackets (no text or symbols)Northbridge Cooler ZM-NB47J
natural_image
Black CPU fan with visible cooling fins and mounting holes (no text or symbols)Noiseless Fan
natural_image
Close-up of a computer motherboard showing heatsink and cooling elements (no text or symbols visible)VGA Cooler ZM80C-HP
natural_image
Metallic heat exchanger or cooling unit with multiple parallel cooling fins (no text or symbols visible)HDDCooler ZM-2HC2
- Cautions & Warnings
- When Installing
- When in Use
- Contents
- Features
- Reserator (Reservoir + Radiator + Water Pump)
- CPU Water Block(ZM-WB2 Gold)
- Flow Indicator
- Specifications
- Reserator (Reservoir + Radiator + Water Pump)
- CPU Water Block(ZM-WB2 Gold)
- Installation View
- Components
- Reserator 1 Main Assembly 1SET
- 2 CPU Water Block (ZM-WB2 Gold) 1SET
- Flow Indicator 1EA
- Universal Fitting 2EA
- Silicone Tube 1SET
- Spare parts
- Options
- - GPU Water Block
- - ZM-WB2 Gold
- - Silicone Tube
- - Heatpipe HDD Cooler
- • Power Supply Unit
- Installation
- Determine the Placement of the Reserator 1
- Install the CPU Water Block (ZM-WB2 Gold)
- Connect the CPU Water Block with the Universal Fitting
- Fasten the Universal Fitting
- Connect the Reserator with the Universal Fitting
- Connecting Fitting and Silicone Tube - The Easy Way
- Confirm Correct Installation
- Add Coolant
- What is a Coolant?
- Leakage Inspection and Test Run
- Installing the External Water Pump
- Separate the Integrated Water Pump
- Install the External Water Pump
- Cautions on Choosing and Installing an External Water Pump
- Separate the Reserator and Water Block
- Moving the Reserator or Changing the Coolant
- Replacing the CPU Water Block
- FAQ
- When the Coolant isn't Circulating
- When There is a Leak at a Compression Fitting or Universal Fitting Socket
- Exploded View
- Zalman Noise Prevention System
Brand : ZALMAN
Model : RESERATOR 1
Category : PC Fan