
ELT85WB5DE - Television Elements - Free user manual and instructions
Find the device manual for free ELT85WB5DE Elements in PDF.


| Product Type | Smart TV |
| Brand | Elements |
| Model | ELT85WB5DE |
| Screen Size | 85 inches |
| Panel Type | LED |
| Resolution | 3840 x 2160 (4K UHD) |
| Brightness | 260 cd/m² |
| Contrast Ratio | 4000:1 |
| Viewing Angle | 178° (H) / 178° (V) |
| Response Time | 8.0 ms |
| Color Depth | 16.7 million colors |
| Color System | PAL/SECAM |
| Sound Output | 2 x 8W |
| Power Requirement | 100-240V ~ 50/60Hz |
| Power Consumption (Max) | 320 W |
| HDMI Inputs | 3 x HDMI 2.0 |
| USB Ports | 1 x USB (Media playback) |
| Ethernet Port | 1 x RJ45 |
| Digital Audio Output | 1 x Optical |
| CI Slot | 1 x CI IN |
| Remote Control | Magic Remote with pointer |
| Installation Options | Stand or wall mount (not included) |
| Cleaning Instructions | Unplug and wipe with soft dry cloth; no liquids |
Frequently Asked Questions - ELT85WB5DE Elements
User questions about ELT85WB5DE Elements
0 question about this device. Answer the ones you know or ask your own.
Ask a new question about this device
Download the instructions for your Television in PDF format for free! Find your manual ELT85WB5DE - Elements and take your electronic device back in hand. On this page are published all the documents necessary for the use of your device. ELT85WB5DE by Elements.
USER MANUAL ELT85WB5DE Elements
SMART TV USER'S MANUAL
TABLE OF CONTENTS
Installation 01
Important safety precautions 02
Troubleshooting 03
Base installation Instruction 04
Main Unit description 05-06
Remote control 07
Technical Specifications 08
INSTALLATION
- Place the TV in the room where direct light does not strike the screen, the reflection on the picture screen can cause eyestrain. Soft and indirect lighting is recommended for comfortable viewing.
- Allow enough space between the TV and the wall to permit ventilation.
- Avoid excessively warm locations to prevent possible damage to the cabinet or component failure.
- This TV operates on an AC supply provided by the mains voltage of 100-240V.
- Do not install the TV in a location near heat sources such as radiator and direct sunlight.
- Do not cover the ventilation openings.
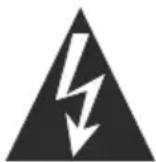
CAUTION
RISK OF ELECTRIC SHOCK DO NOT OPEN

CAUTION: TO REDUCE THE RISK OF AN ELECTRIC SHOCK, DO NOT REMOVE THE COVER (OR BACK).

The lightning flash symbol with an arrowhead inside a triangle alerts the user about an uninsulated dangerous voltage that may cause a risk of electrical shock.

The flash with the symbol of an exclamation point inside a triangle alerts the user about important operating and maintenance instructions related to the product.
WARNING: TO PREVENT FIRE OR SHOCK HAZARD, DO NOT EXPOSE TV TO RAIN OR MOISTURE.
IMPORTANT SAFETY PRECAUTIONS

Do not block or cover the ventilation openings on the TV. If you have a wall mount, please make sure that it is steady.
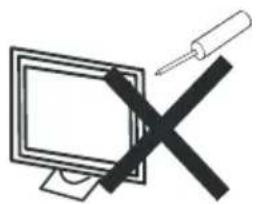
natural_image
Illustration of a computer monitor crossed out by a screwdriver (no text or symbols)Do not remove the back cover.

natural_image
Illustration of a computer monitor with warning symbols and a hand holding a device (no text or labels)Unplug the TV before cleaning it. Do not use solvent or liquid to clean the TV. Please clean it with a soft and dry cloth.

In case of troubleshooting, do not use spare parts other than those suggested by the seller.

Unplug the TV during lightening storms or when it is unused for a long time.

natural_image
Simple line drawing of a computer monitor with a hand holding a cup above it, crossed out by a black X (no text or symbols)Keep away from water and liquids.
TROUBLESHOOTING
No picture & No sound
- Check whether the product is turned on.
•Try another channel. The problem may be with the broadcast. - Check your antenna direction and/or location.
No audio
•The volume is too low: Muted or cancelled.
•Incorrect sound system.
- Press volume key to turn up the volume.
- Press Mute key to cancel Mute mode.
• Change the sound system in the menu.
Sound and noises
•The cable is damaged.
•Incorrect channer preset.
•Improper antenna positioning.
- Check whether the connection of the antenna cable and other cables are correct.
- Reset channels or fine tune the channel.
- Adjust the direction of the antenna.
No or poor color or poor picture
- Adjust color in menu option.
•Try another channel. The problem may be with the broadcast.
•Are the video cables installed properly? - Activate any function to restore the brightness of the picture.
The remote control doesn't work
- Check to see if there is any object between the TV and the remote control causing obstruction.
- Ensure you are pointing the remote control directly at the TV.
- Ensure that the batteries are installed with correct polarity (+ to +, - to -).
- Ensure that the correct remote operating mode is set: TV. VCR etc.
•Install new batteries
Screen cuts short in HDMI PC mode
- When using HDMI input 1080P from a PC, please set the "Aspect Ratio" function to "Full" mode. So the TV can display fully without cutting short.
The TFT LED panel uses a panel consisting of sub pixels which require sophisticated technology to produce. However, there may be few bright or dark pixels on the screen. These pixels will have no impact on the performance of the product.
BASE INSTALLATION INSTRUCTION
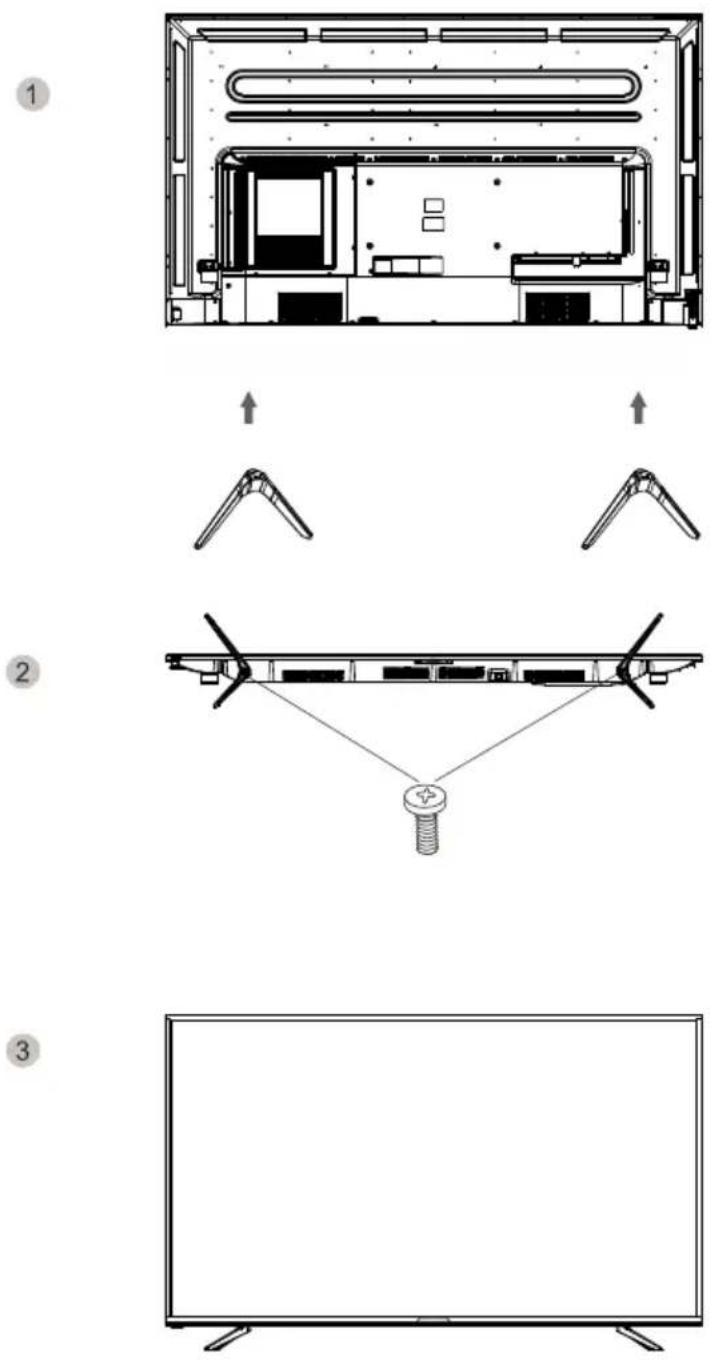
The Stand Base must be securely installed as shown below, unless the TV is wall-mounted.
Place the TV face down on a flat surface, onto a towel or blanket to avoid damaging the screen, align the holes of the base with the holes on the base support pole. Pass the base support pole through the base as shown in the following figure and use screws to fix the base and the TV set.
MAIN UNIT DESCRIPTION
Control Panel Button Functions
INPUT: Press to select the input source
MENU: Press to bring up the main menu to the screen
- VOLUME+: Press to increase or decrease the sound level.
- CHANNEL +: Press to scan through channels. To scan quickly channels, press and hold down either +/-buttons.
STANDBY: Switch ON the LED when at standby mode or vice versa.
To turn the TV power ON
Connect the TV to an Input Voltage: 100-240V AC plug with a frequency of 50/60Hz Connect the adaptor main cord to the wall outlet.
After the TV is plugged, the power indicator will turn red, then use the Standby button on the remote control to turn it on.
If Standby Button is pressed the power indicator will change to blue and it takes a few seconds before the picture appears.
To turn the TV power OFF
Press the Standby Button to make the TV set in Standby Mode, then disconnect the power plug from the wall outlet
Precautions when connecting to other equipment
When using an external equipment with this TV, please read the instruction manual of the external equipment before connecting it to your TV.
MAIN UNIT DESCRIPTION
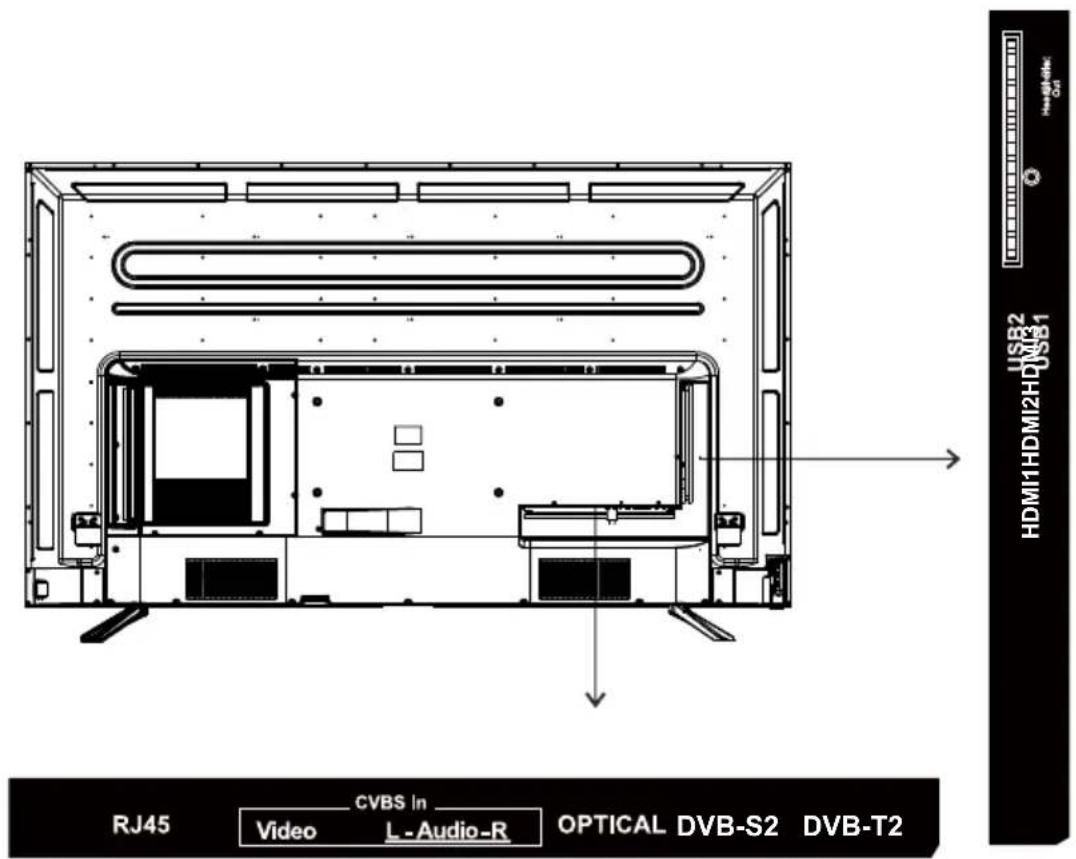
TV Terminal connections
USB: Connect the USB device such as the flash disk to access the TV media function.
RJ45: Connect the Internet.
Video : Connect an AV device that has composite video jacks, such as a VCR or DVD player.
• L: Left audio channel connection.
• R: Right audio channel connection.
EARPHONE: Connect a 3.5mm headphone for personal audio.
HDMI: (High-Definition Multimedia Interface) Provides an uncompressed digital connection. Please enter to the setup menu to turn it on.
ATN(S2)/ATN(T2): Connect to receive the signal from your antenna or cable through a coaxial cable.
OPTICAL: Digital TV sound output.
CI IN: Connect a card to get permission to receive DTV signals.
REMOTE CONTROL

Power (💡): Turns the TV on or off.
( ): You can turn on/off the power of the set-top box.
LIST: Checking the saved programmes.
0#: The QUICK ACCESS edit screen appears.
Number buttons: Choose the channel directly
(...): It displays the additional buttons on the remote control.
(...)#: Audibly describes the contents of the screen.
(Some models may not be supported.)
(◀): It adjusts the volume level.
(2): Select to turn off the sound from the TV.
( )#: Enter the Accessibility menu.
(⊕): You can change the program.
( ♀ ): Check out the recommended contents.
(Recommendation service may not be available depending on the countries you are in.) Push and hold the button while speaking to use the voice recognition function.
(△): Displays the Home menu.
( )#: Displays the list used previously.
( Ⓞ ): Enters the Quick Settings menu.
( )#: Enters the All Settings menu.
(⇐): Move to the previous step.
(⇐)#: Closes the menu.
GUIDE: Check the program.
(☐): Selects an input source.
( )#: Entering into the Home Dashboard.
Navigation buttons: (Up/Down/Left/Right ◀/▶/▲/▼) Navigate the menu.
PLAY (▶): Play while watching media.
PAUSE (Ⅱ): Pause while watching media.
MOVIES: Search Movies. (make sure the Internet connection is normal)
NETFLIX: Access the Netflix interface.
Prime Video: Access the Prime Video interface.
Color Buttons(RED/GREEN/YELLOW/BLUE): Execute the prompt function in specific mode.
USING THE MAGIC REMOTE
- If you shake the Magic Remote left and right or turn its wheel while pointing it at the TV, a pointer will appear on the TV screen.
If you move the remote control to the direction you want, the pointer follows the movement.
-
Move the pointer to the location you want and press the Wheel (OK) button to execute the function.
-
If the pointer has not been used for a certain period of time, it will disappear. When the pointer disappears from the screen, shake the Magic Remote right and left. It will then re-appear. The pointer will disappear if you press the up, down, left or right buttons, and the remote will work as a conventional remote.
- If the pointer is not responding smoothly, you can reset the pointer by moving it to the edge of the screen.
- Use the remote control within the specified range (within 10 metres). The device may not function properly when outside the working distance or when an obstacle blocks the line of sight.
- Depending on the peripherals (wireless router, microwave oven, etc.), communication failures may occur.
- Impacts can cause the Magic Remote to malfunction.
TECHNICAL SPECIFICATIONS
| Panel | Model Description | 32" | 43" | 50" | 55" | 65" | 75" | 85" |
| Panel Type | LED Panel | |||||||
| Diagonal Size | 32 inches | 43 inches | 50 inches | 55 inches | 65 inches | 75 inches | 85 inches | |
| Screen Format | 16:9 | |||||||
| Resolution | 1920 × 10^80 | 3840 x 2160 | ||||||
| Brightness cd/m^2 | 200 | 200 | 230 | 230 | 240 | 280 | 260(±10%) | |
| Contrast | 4000:1 | |||||||
| View Angle | 178(H) / 178(V) | |||||||
| Response Time | 8.0ms | |||||||
| Maximum Color | 16.7M colors | |||||||
| Systems | Color System | PAL/SECAM | ||||||
| Sound System | B/G | |||||||
| Sound Output | L/R Speaker: 2 x 8W | |||||||
| Input/Output Jacks | RF Input | ANT(T2) ANT(S2) | ||||||
| HDMI Input | 480i, 480p, 720p, 1080i, 1080p, 2160p | |||||||
| HDMI1(2.0), HDMI2(2.0), HDMI3(2.0) | ||||||||
| Composite Video Input | 1.0 Vp-p, 75ohms | |||||||
| Sound Input | AV AUDIO: For CVBS / Audio input | |||||||
| 500mV ms, Impedance: 20k ohms | ||||||||
| Digital audio out | Optical Earphone | |||||||
| USB Port | Media Player | |||||||
| Power | Power Requirement | 100-240V ~ 50/60Hz | ||||||
| Rated Power Consumption | 55W | 75W | 108W | 138W | 138W | 230W | 320W | |

If you need to dispose this product in the future, you should know that:
Waste electrical products should not be disposed of with household waste. Please recycle where facilities exist. Check with your Local Authority or retailer for recycling advice.
(Waste Electrical and Electronic Equipment Directive)
NOTE:
- All pictures in this manual are examples, only for reference, actual product may be different from the pictures.

natural_image
Abstract pattern of repeating dot clusters forming a wave-like structure (no text or symbols)If you faced any difficulties please visit: www.kbelements.de


- SMART TV USER'S MANUAL
- TABLE OF CONTENTS
- INSTALLATION
- CAUTION
- IMPORTANT SAFETY PRECAUTIONS
- TROUBLESHOOTING
- No picture & No sound
- No audio
- Sound and noises
- No or poor color or poor picture
- The remote control doesn't work
- Screen cuts short in HDMI PC mode
- BASE INSTALLATION INSTRUCTION
- MAIN UNIT DESCRIPTION
- Control Panel Button Functions
- To turn the TV power ON
- To turn the TV power OFF
- Precautions when connecting to other equipment
- TV Terminal connections
- REMOTE CONTROL
- USING THE MAGIC REMOTE
- TECHNICAL SPECIFICATIONS
- NOTE:
Brand : Elements
Model : ELT85WB5DE
Category : Television