
ELPMB81 - Video projector EPSON - Free user manual and instructions
Find the device manual for free ELPMB81 EPSON in PDF.


| Product Type | Tilt Adaptor for Video Projector |
| Dimensions (W x D x H) | 340 x 180 x 180 mm |
| Packaging Dimensions | 360 x 200 x 200 mm |
| Weight | 6 kg |
| Max Load (Certified) | 250 kg |
| Maximum Projector Weight (Safety) | 45 kg (99 lbs) |
| Material | Steel and Brass |
| Standard VESA | Yes (both sides) |
| Tilt Angle (Pitching & Rolling) | ±10° |
| Rotation (Yaw) | 360° |
| Clamp Diameter | 50 mm |
| Compatible Models (EPSON) | Matrix 22000/22500, KITE 21400, KALIBRO 20900, RAIL 22740 |
| Installation | Requires two qualified people; anchor to center of ceiling studs; avoid electrical wires. |
| Maintenance | Visual inspection before each use; tighten loose hardware; clean with soft dry cloth; lubricate moving parts if applicable. |
| Included Components | M-TILT adapter only |
Frequently Asked Questions - ELPMB81 EPSON
User questions about ELPMB81 EPSON
0 question about this device. Answer the ones you know or ask your own.
Ask a new question about this device
Download the instructions for your Video projector in PDF format for free! Find your manual ELPMB81 - EPSON and take your electronic device back in hand. On this page are published all the documents necessary for the use of your device. ELPMB81 by EPSON.
USER MANUAL ELPMB81 EPSON
User's Guide ELPMB81 Tilt Adaptor V12H006AE0
natural_image
Technical line drawing of a mechanical device with multiple ports and a central hub (no text or symbols)Safety Precautions
DANGER
- Failure to comply with these safety precautions results in death or serious injury;
- ELECTRICAL SHOCK HAZARD! Always turn off, disconnect, and disengage all power sources to the projector before servicing;
• Maximum projector weight limit is 45kg (99 lbs).
WARNING
Failure to comply with these safety precautions may result in serious injury.
- At least two qualified people should perform the installation procedure. Personal injury and/or property damage can result from dropping or mishandling the projector;
- If mounting to ceiling studs, make sure that the mounting screws are anchored into the center of the ceiling studs. Use of an edge-to-edge stud finder is recommended;
- Be aware of the mounting environment. If drilling and/or cutting into the mounting surface, always make sure that there are no electrical wires in the wall;
- Do not install near sources of high heat. Do not install on a structure that is prone to vibration, movement or chance of impact.
General information and compatibility
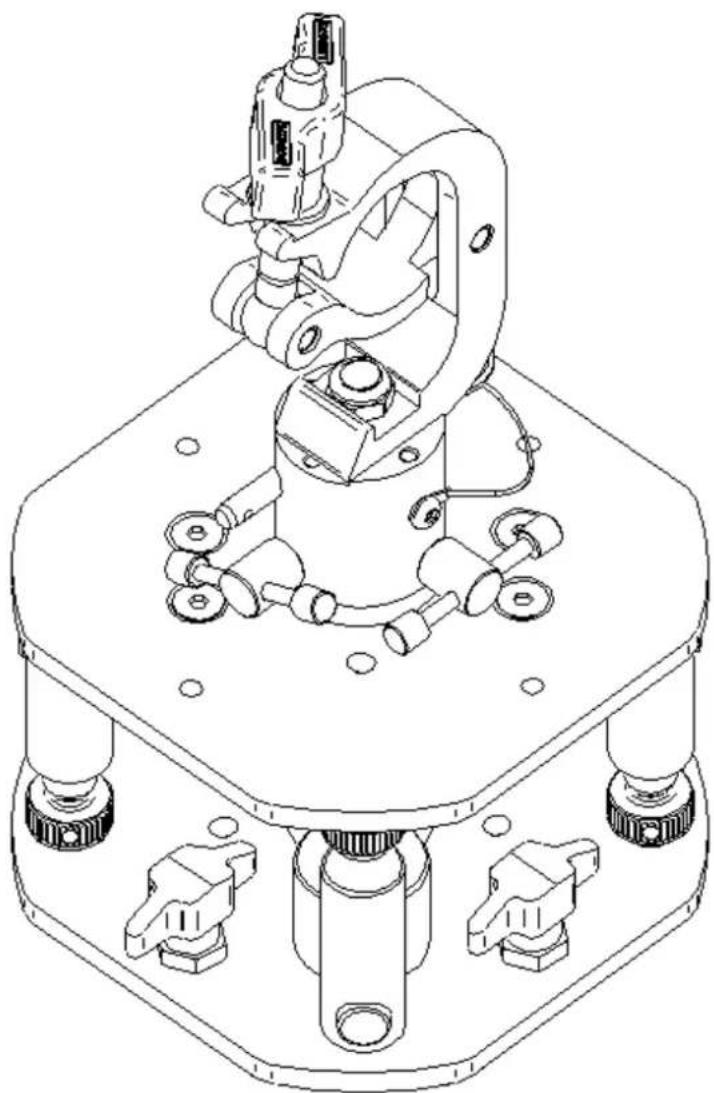
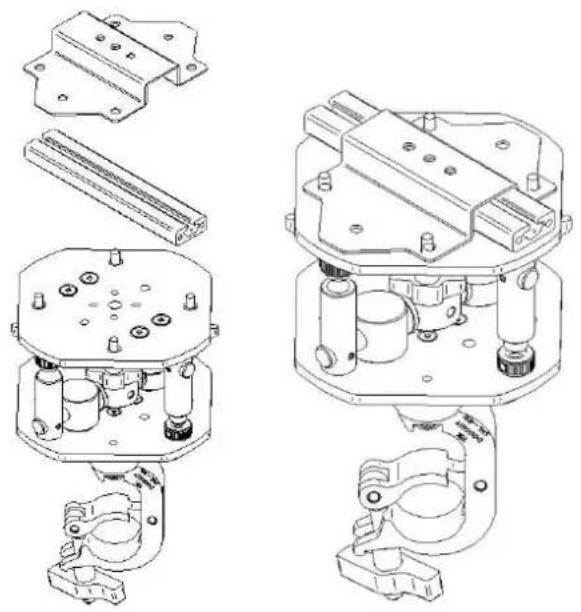
M-tilt is an OPT making it possible to hang Matrix to a truss and provide projection orientation:
- by tilting +/-10° on 2 rotation axes (pitching, rolling);
- by rotating by 360° (yaw).
This item is also equipped with fastening systems to secure the desired position.
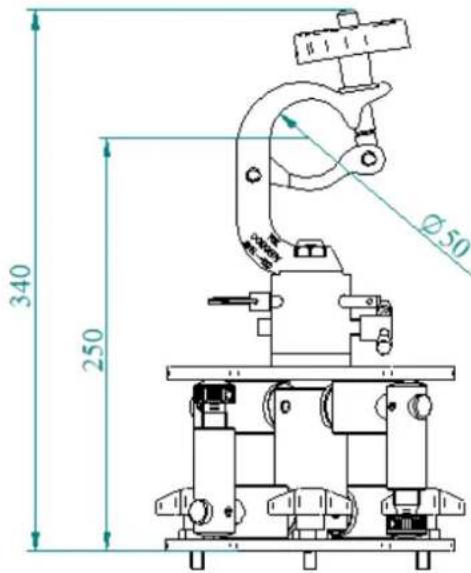
It uses Clamp wit 50mm of diameter.
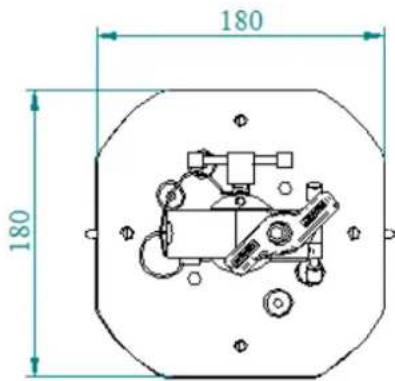
| List of components included | M-TILT (nothing other) |
| Dimensions | 340 x 180 x 180 [mm] |
| Packaging dimensions | 360 x 200 x 200 [mm] |
| Material | Steel and Brass |
| Weight | 6 [kg] |
| Max load | 250 [kg] (certified) |
| Standard VESA | YES (both of side) |
M-TILT has the standard VESA and the unlosable knob (male thread), so you can use with all the optional Euromet with Standard VESA and female thread.
You can use M-TILT with:
- 22000 and 22500 MATRIX;
- 21400 KITE;
- 20900 KALIBRO;
- 22740 RAIL.
Optional Tilt Adaptor (code: ELPMB81 V12H006AT0)
The ELPMB81 Tilt Adaptor is an option that makes it possible to hang the ELPMB84 from a truss and provide projection orientation adjustments:
- by tilting +/-10° on 2 rotation axes (pitching, rolling);
- by rotating 360° (yaw).
This item is also equipped with fastening systems to secure the desired position.
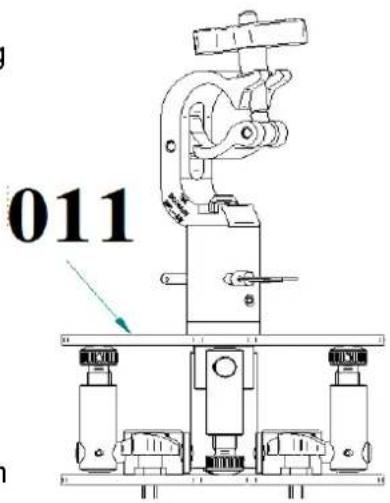
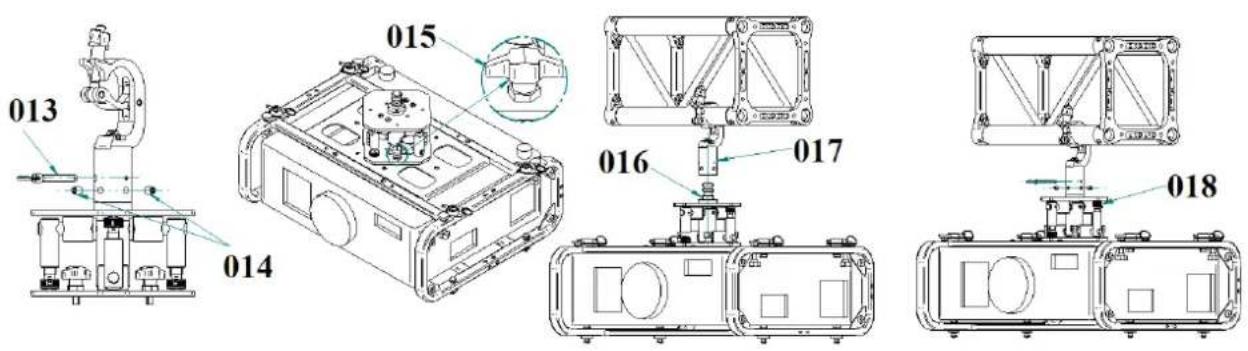
The following paragraph explains how to use the ELPMB81:
- Loosen the 2 grub screws (014) and remove the safety pin (013);
- Remove the ELPMB81 female connector (017) where the clamp has already been fastened and secure it to the truss;
- Place ELPMB84 frame on an even surface with the base plate turned upwards;
- Apply the ELPMB81 Tilt Adaptor to the base plate of the frame and screw the thumb screws (015) into the 4x female M8 threaded holes with 100x100mm distance (tighten the 4 thumb screws manually);
- Insert the male pin (016) into its counterpart (017) again and insert the previously removed safety pin (013) into the specific hole;
- The ELPMB84 frame can now rotate 360° horizontally. Choose the desired position and secure the rotation by tightening the 2 grub screws (014) (in the diagram the grub screws (014) are fully removed from the female insert for an easier understanding, but it is only necessary to loosen them enough as to remove the male insert);
- Once the ELPMB84 frame is secured to the truss, use the 4x ELPMB81 adjustment pins (018) to adjust pitching and rolling. When you have chosen your desired position, you can secure it in place.
natural_image
Technical line drawings of mechanical components, including a bracket, housing, and clamping mechanism (no text or labels)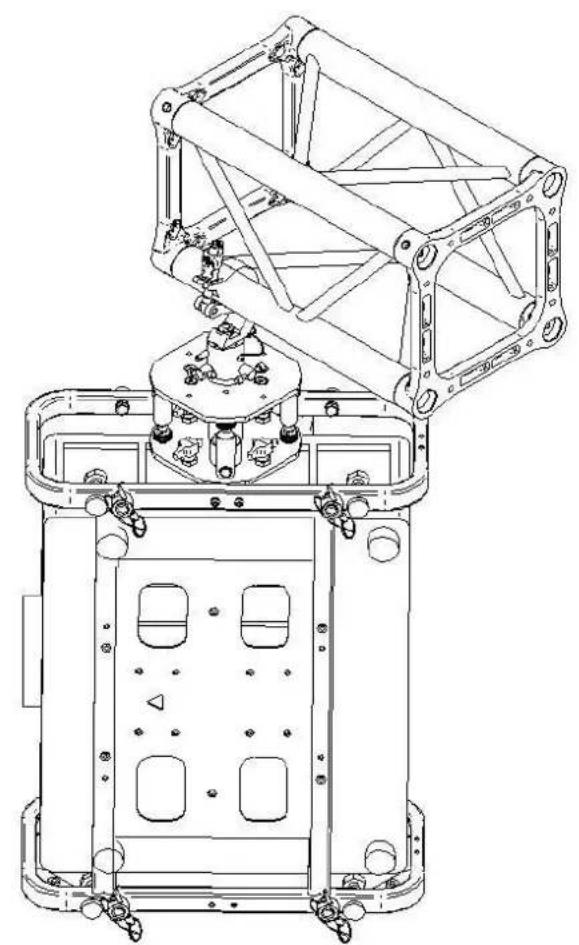
natural_image
Technical line drawing of a mechanical assembly with mounting brackets and internal components (no text or symbols)Maintenance
Do not try to service this product yourself, except as specifically explained in this User's Guide. Refer all other servicing to qualified service personnel.
HARDWARE'S INSPECTION
The ELPMB81 tilt adapter does not require special maintenance, but a visual inspection must be conducted before each installation involving the system.
Please conduct a visual inspection to ensure that all screws are in the correct positions and none are missing.
Tighten any loose hardware as needed to maintain stability and prevent the risk of the projector falling or becoming misaligned.
Ensure that screws, nuts and all components are not bent, damaged, or broken.
Please use the appropriate tool to check that all screws are securely tightened.
If any parts are broken or missing, please contact the seller to obtain the necessary spare parts.
CLEANING
Use a soft, dry cloth to gently wipe down the mount's surfaces, removing any dust or dirt. For stubborn stains or dirt buildup, lightly dampen the cloth with water or a mild, non-abrasive cleaner.
Avoid using harsh chemicals that may damage the mount's finish. Ensure that the mount is completely dry before reattaching the projector to prevent any electrical issues.
LUBRICATION OF MOVING PARTS (IF APPLICABLE):
If the projector mount includes moving parts such as hinges or swivel mechanisms, apply a small amount of lubricant to ensure smooth operation.
Use a lubricant recommended by the manufacturer to prevent damage to the mount's components.
CONCLUSIONS
By following this maintenance plan, you can keep your mount adapter and in optimal condition, prolonging their lifespan and ensuring reliable performance for your presentations or entertainment needs.
Brand : EPSON
Model : ELPMB81
Category : Video projector