
GCS22U - Computer Accessories IOGEAR - Free user manual and instructions
Find the device manual for free GCS22U IOGEAR in PDF.


| Brand | IOGEAR |
| Model | GCS22U |
| Product Type | 2-Port VGA/USB KVM Switch |
| Dimensions (approx.) | 4.0 x 2.5 x 1.0 inches |
| Weight (approx.) | 0.5 lbs |
| Power Source | USB bus-powered from computers |
| Video Interface | VGA (DB-15) |
| Console Ports | 1 x VGA, 1 x USB keyboard, 1 x USB mouse |
| Computer Connections | 2 sets of molded KVM cables (VGA + 2x USB) |
| Supported Resolutions | Up to 1920x1440 (typical VGA) |
| Operating Systems | Windows 7, 8.1, 10; Mac OS 9 or later; Oracle Solaris; Linux; Unix; other USB-supported systems |
| Switching Method | Remote push button |
| Port Indication | Green LED for selected port |
| Installation | Plug and play, no software needed |
| Warranty | 3 Year Limited Warranty |
| Compliance | FCC Class B, California Prop 65 |
| Included in Box | KVM switch, 2 sets of KVM cables, user manual |
Frequently Asked Questions - GCS22U IOGEAR
User questions about GCS22U IOGEAR
0 question about this device. Answer the ones you know or ask your own.
Ask a new question about this device
Download the instructions for your Computer Accessories in PDF format for free! Find your manual GCS22U - IOGEAR and take your electronic device back in hand. On this page are published all the documents necessary for the use of your device. GCS22U by IOGEAR.
USER MANUAL GCS22U IOGEAR
- 1 VGA display
• 1 set of USB keyboard and mouse
Computers
- 1 VGA port
- 2 USB ports
Operating Systems
- Windows ^® 7, Windows ^® 8.1, Windows ^® 10
• Mac OS ^® 9 or greater - Oracle® Solaris
- Linux®, Unix, and other USB supported systems*
*Additional drivers and support may be needed
Overview
2
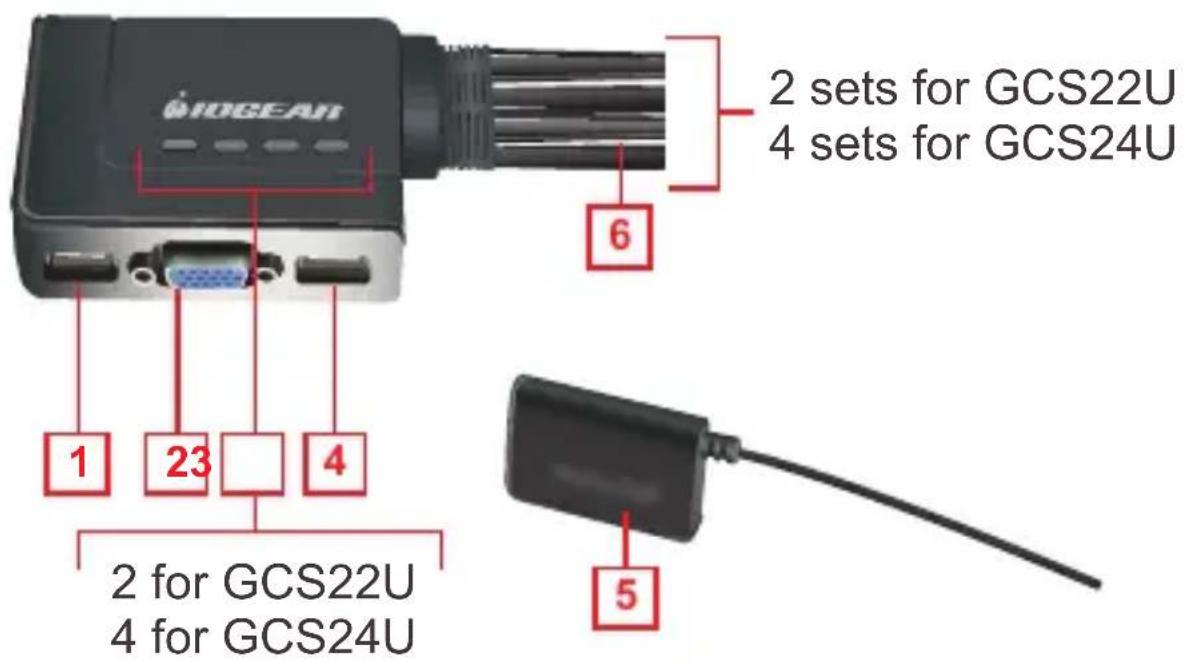
- Console USB Mouse Port
- Console VGA Monitor Port
- LEDs
- Console USB Keyboard Port
- Remote Switch Button
- CPUs KVM Cables
Installation
3
Step 1
Please make sure your computers and monitor are powered OFF before you start.
Step 2
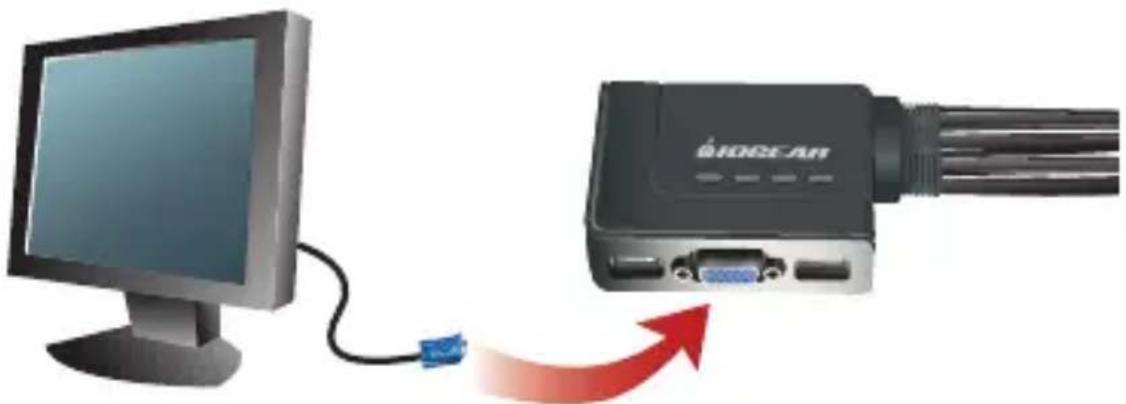
Connect the VGA cable from your monitor to the console VGA monitor port.
natural_image
Illustration of a computer monitor connected to a BORSCAN device via cable, with a red arrow indicating data flow (no text or symbols on the devices themselves)Step 3
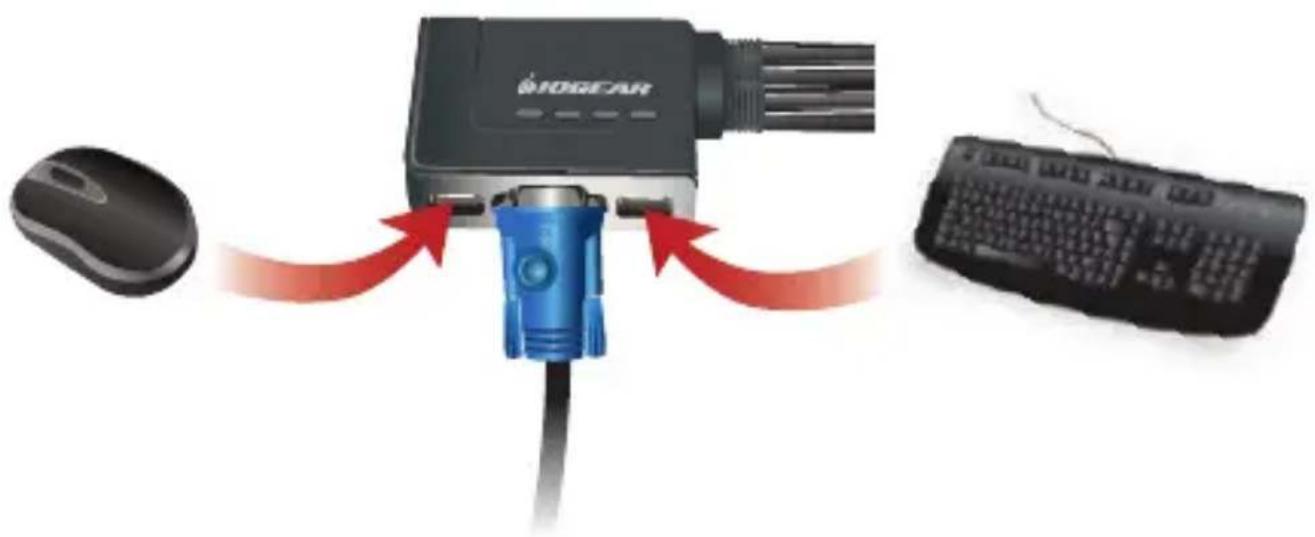
Connect your USB keyboard and mouse to the console USB keyboard port and console USB mouse port.
flowchart
graph TD
    A["IOGEAR"] -->|Red Arrow Down| B["Computer"]
    B --> C["Windows"]
    D["Computer"] -->|Red Arrow Up| B
Step 4
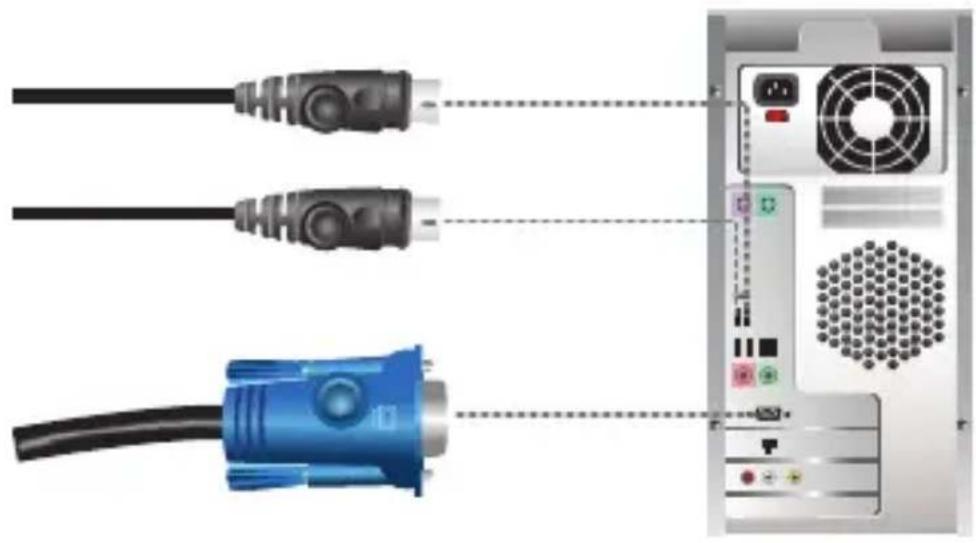
Connect a set of your molded KVM cable to each of your computers – VGA cable to the VGA output and USB cables to open USB ports from your computer.
natural_image
Diagram showing three cables connected to a computer tower, with no visible text or symbolsFinal Step
Turn on your computers.
Port Switching
Simply press the remote port switching button to switch to the next port.
LED Indication
LED will light up in green showing the port that is selected.
Compliance Information
CA Prop 65 WARNING: This product may contain chemicals known to the State of California to cause cancer, birth defects, or other reproductive harm.
Federal Communication Commission Interference Statement
This equipment has been tested and found to comply with the limits for a Class B digital service, pursuant to Part 15 of the FCC rules. These limits are designed to provide reasonable protection against harmful interference in a residential installation. Any changes or modifications made to this equipment may void the user's authority to operate this equipment. This equipment generates, uses, and can radiate radio frequency energy. If not installed and used in accordance with the instructions, may cause harmful interference to radio communications. However, there is no guarantee that interference will not occur in a particular installation. If this equipment does cause harmful interference to radio or television reception, which can be determined by turning the equipment off and on, the user is encouraged to try to correct the interference by one or more of the following measures:
- Reorient or relocate the receiving antenna
- Increase the separation between the equipment and receiver
- Connect the equipment into an outlet on a circuit different from that to which the receiver is connected
- Consult the dealer or an experienced radio/TV technician for help
FCC Caution: Any changes or modifications not expressly approved by the party responsible for compliance could void the user's authority to operate this equipment.
Warranty
Warranty Information
This product carries a 3 Year Limited Warranty. For the terms and conditions of this warranty, please go to http://www.iogear.com/support/warranty
Register online at http://www.iogear.com/register
Important Product Information
Product Model ____
Serial Number ____
Contact
WE'RE HERE TO HELP YOU!
NEED ASSISTANCE SETTING UP THIS PRODUCT?
Make sure you:
- Visit www.iogear.com for more product information
- Visit www.iogear.com/support for live help and product support
IOGEAR
iogear.custhelp.com
support@iogear.com
www.iogear.com
- Computers
- Operating Systems
- Overview
- 2
- Installation
- 3
- Step 1
- Step 2
- Step 3
- Step 4
- Final Step
- Port Switching
- LED Indication
- Compliance Information
- Federal Communication Commission Interference Statement
- Warranty
- Warranty Information
- Contact
- WE'RE HERE TO HELP YOU!
- NEED ASSISTANCE SETTING UP THIS PRODUCT?
- Make sure you:
- IOGEAR
Brand : IOGEAR
Model : GCS22U
Category : Computer Accessories