
Portrait 3D Printer - 3D Printer KODAK - Free user manual and instructions
Find the device manual for free Portrait 3D Printer KODAK in PDF.


| Product Type | Fused Filament Fabrication (FFF) 3D Printer |
| Brand | KODAK |
| Model | Portrait 3D Printer |
| Build Volume | 200 x 200 x 235 mm (7.9 x 7.9 x 9.3") |
| Dimensions (with spool holders) | 455 x 530 x 565 mm |
| Net Weight | 25.4 kg |
| Power Requirements Input | 110/230V Auto Switching, 50-60Hz, 320W max |
| Print Head | Dual extrusion with automatic nozzle lifting, swappable |
| Nozzle Diameter | 0.4 mm |
| Max Nozzle Temperature | 295°C (all-metal Hotend) |
| Build Plate | Heated glass attached by magnets, up to 105°C |
| Calibration and Leveling | Automatic |
| Filament Diameter | 1.75 mm |
| Layer Resolution | 20 - 250 micron (0.4mm nozzle) |
| Display | 5" 800x480 color touchscreen |
| Connectivity | Wi-Fi, LAN, USB drive |
| Monitoring | Live camera and LED status lights (white, blue, green, red) |
| Air Filtration | Filter with activated carbon |
| Operating Ambient Temperature | 10-30°C |
| Operating Sound | 55 dBA |
| Supported Materials | KODAK filaments (ABS, Flex 98, HIPS, Nylon 6, Nylon 12, PETG, PLA+, PLA Tough, PVA) and compatible third-party |
| Supplied Software | KODAK 3D Cloud, KODAK 3D Slicer |
| Box Content | Printer, 2 filament spools (750g each), 2 filament cases, 2 spool holders, glass build surface, power cable, air filter blower, tool set (pliers, tweezers, spatula, unclogging needle, calibration card, greases, Dimafix Pen, cloth cover) |
Frequently Asked Questions - Portrait 3D Printer KODAK
User questions about Portrait 3D Printer KODAK
0 question about this device. Answer the ones you know or ask your own.
Ask a new question about this device
Download the instructions for your 3D Printer in PDF format for free! Find your manual Portrait 3D Printer - KODAK and take your electronic device back in hand. On this page are published all the documents necessary for the use of your device. Portrait 3D Printer by KODAK.
USER MANUAL Portrait 3D Printer KODAK
KODAK Portrait 3D Printer


User Manual
Please read all directions before using the product and retain this guide for reference.
CONTENTS
INTRODUCTION....3
WARNINGS AND SAFETY PRECAUTIONS 3
FEATURES 4
SAFETY INFORMATION 6
BOX CONTENT 7
SETUP 7
USING YOUR 3D PRINTER 9
PRINTING 13
PRINTING USING THE KODAK 3D CLOUD ...... 17
CARE AND MAINTENANCE 21
TROUBLESHOOTING 24
SPECIFICATIONS 25
CERTIFICATIONS 27
CUSTOMER SERVICE 29
INTRODUCTION
Thank you for purchasing the KODAK Portrait 3D Printer. This User Guide is intended to provide you with guidelines to ensure that operation of this product is safe and does not pose risk to the user.
Any use that does not conform to the guidelines described in this User Guide may void the limited warranty.
Every effort has been made to ensure that the contents of this manual are accurate. However Smart International, Inc. reserves the right to make changes without notice.
You can always find the most up-to-date version of this user guide and other instructions at support.smart3d.tech.
This product is covered by a limited one-year warranty. Coverage is subject to limits and exclusions. See warranty for details.
WARNINGS AND SAFETY PRECAUTIONS
Refer to this user guide and take note of all safety precautions before using your 3D printer.
Warning:
- To prevent damage to the 3D Printer which may result in a fire or electrical shock hazard, do not expose the 3D Printer set to rain or excessive moisture.
- For safety, do not place vessels or any container which contain fluid including water, on or near the 3D Printer.
- Do not insert any objects in the ventilation slots.
Location:
- Place the 3D printer on a solid and flat surface capable of sustaining the weight of the 3D printer (about 25 kg or 57 lbs. including filament spools).
- Adequate ventilation is essential to prevent the 3D printer failure. Ensure that the 3D printer is placed in a position to allow a free flow of air. Do not cover ventilation opening on the bottom cover. Do not place the 3D printer in an enclosure or very close to walls or other devices.
- Avoid excessively warm locations or direct sunlight to prevent possible damages to the 3D printer.
- Care should be taken not to expose the set to any unnecessary vibration, moisture, dust or heat.
Service:
- Never attempt to disassemble this product. There are no user serviceable parts.
- Only use the parts provided by the manufacturer.
Front of the 3D printer
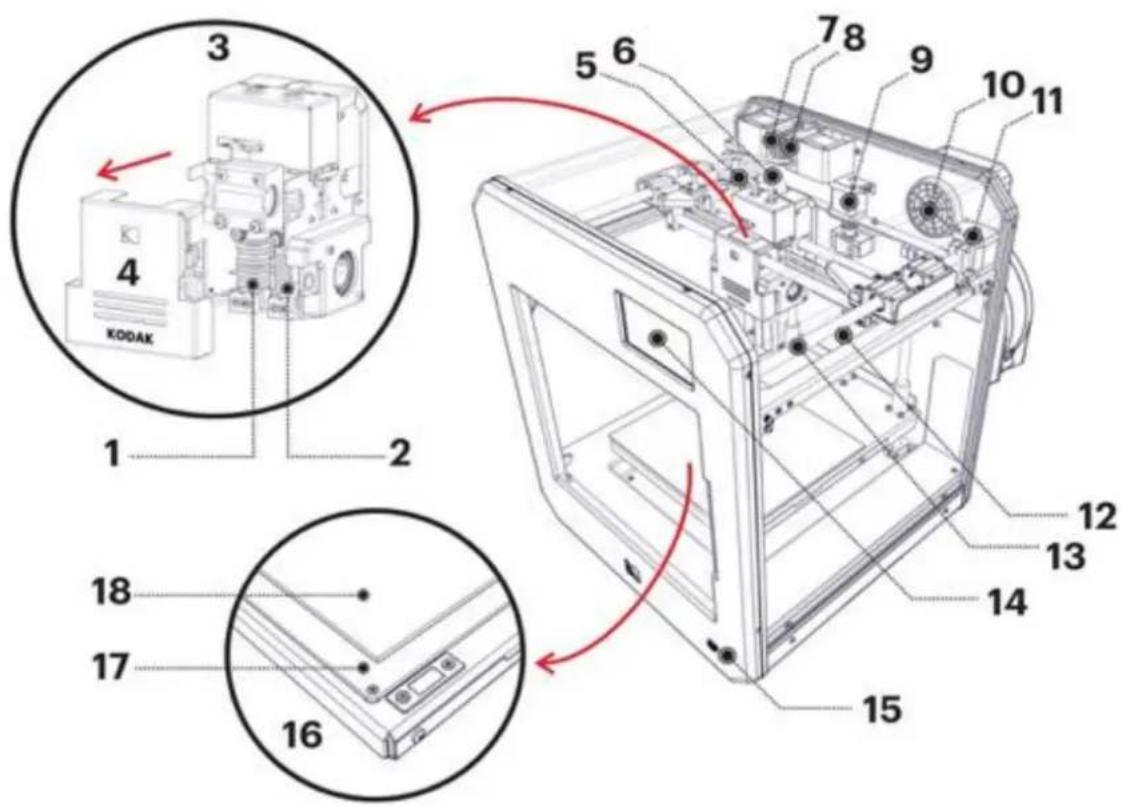
- Nozzle II - PTFE
- Nozzle I - All-metal
- Print head
- Print head cover
- Capricorn bowden tubes
- Print head cabling
- Extruder II
- Extruder I
-
Z-Axis motor
-
Air filter
- XY-Axis motor
- Z Ball screw
- XY Linear guide
- 5" full color screen
- USB-port
- Build platform
- MK3 heatbed
- Build plate
Back of the 3D printer
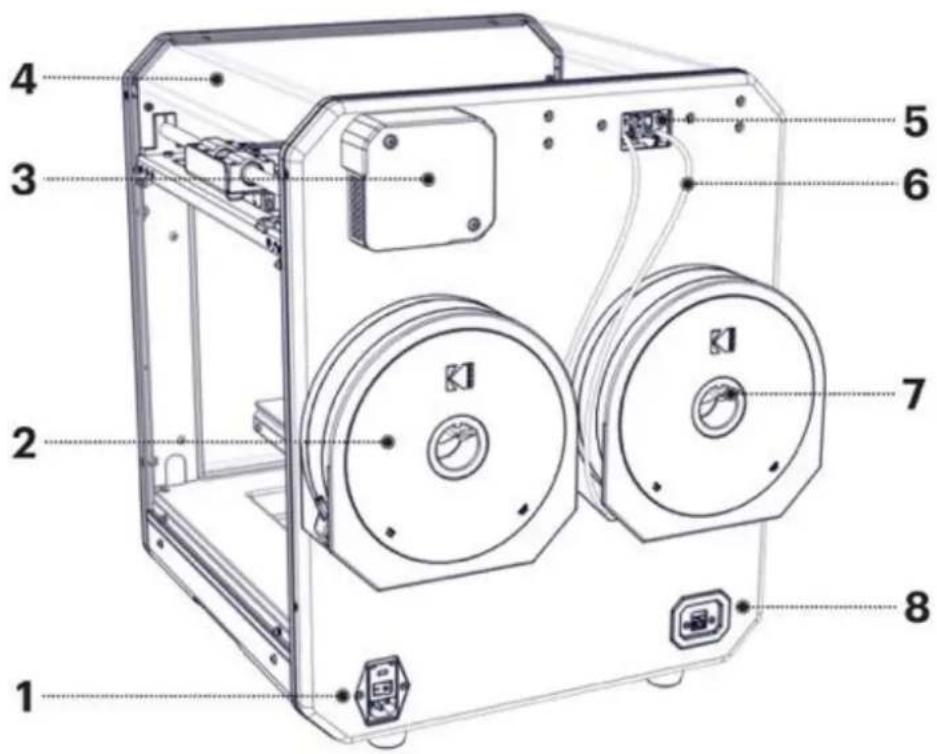
- Power plug and switch
- Filament case
- Air filter blower with Cover
- Removable cover
- Extruders
- Bowden tubes
- Spool holder
- Ethernet connection
SAFETY INFORMATION
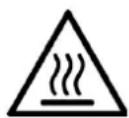
Caution: Hot Surface.
The Hotends and the heatbed can reach temperatures above 100°C. To reduce the risk of injury from a hot component, allow the surface to cool before touching it and always use tweezers to grab the hot melted filament. The display top bar will show you the current temperatures at all times.
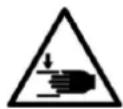
Caution: Moving Parts that can cause injury.
Keep the printer door closed to retain the heat for best print results. Keep hands, hair and loose clothing clear of all moving parts during printing for safety.
This equipment is not suitable for use in locations where children are likely to be present unsupervised.

Caution: Risk of Electric shock.
Connect the power cord to an appropriately rated and properly grounded electrical outlet that is near the product and is easily
accessible.
Do not use this product with extension cords, multioutlet power strips, multioutlet extenders, or UPS devices under 500W capacity.
Ensure that the correct AC plug type is used, according to your location. Do not cut, twist, bind, crush, or place heavy objects on the power cord. Do not subject the power cord to abrasion or stress. Do not pinch the power cord between objects such as furniture and walls. If any of these things happen, a risk of fire or electrical shock results. Inspect the power cord regularly for signs of such problems. Remove the power cord from the electrical outlet before inspecting it.
Do not place or use this product near water or wet locations. Use the printer in a clean and dry environment, between 10° C ( 50° F) and 30° C ( 95° F), with low humidity.
This product is designed, tested, and approved to meet strict global safety standards with the use of specific manufacturer's components. The safety features of some parts may not always be obvious. The manufacturer is not responsible for the use of other replacement parts. Do not modify the printer's design or parts.
Make sure that all external connections (such as Ethernet) are properly installed in their marked plug-in ports.
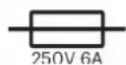
ATTENTION: Inlet power switch uses 250V 6A fuses.
BOX CONTENT
KODAK Portrait 3D Printer
Accessories box containing:
1 750g PLA tough filament spool
1 750g PLA+ filament spool
2 filament cases
2 spool holders
1 glass build surface
1 power cable
1 air filter blower with cover and two screws
Toolbox containing:
1 Needle-nosed pliers
1 Tweezers
1 Metal spatula
1 Unclogging needle
1 Calibration card
1 Magnalube grease
1 Superlube oil
1 Dimafix Pen
1 Cloth dust cover
SETUP
Before using your 3D printer, check that all parts listed in the Box Content section of this manual are present.
Unboxing
STEP 1
Cut the external straps. Lift off the top half of the cardboard box. Remove the accessories box.
STEP 2
Remove the top foam padding and open the plastic protection bag and roll it down. With the help of another person, lift the machine and put it in place. Do not attempt to lift it alone, the printer is heavy (approximately 25.2 kg or 53.8 lbs) and could slip out of your hands and/or cause injury.
STEP 3
Remove protective film, open the printer door, and remove red labels and all six (6) shaft sleeves on axes that immobilize the print gantry during shipping.
STEP 4
Pull out the cardboard piece under the platform. Then lift up the toolkit and slide it out and finally remove bottom cardboard.
Set up for the first time - Quickstart
STEP 1
Connect the power cables from the air filter blower to the connector on the 3D printer.
STEP 2
Affix the air filter blower cover over the air filter blower using the two screws prepositioned in place.
STEP 3
Affix the two spool holder brackets using the screws prepositioned on the back of the 3D printer.
STEP 4
Place the glass build surface over the heatbed using the magnets. The glass is correctly positioned when it does not slide in any direction.
STEP 5
After verifying the print head is free to move and the build chamber is clear of objects, plug the power cord into a power outlet and flip the power switch on the back of the unit to turn on the 3D printer. Note that the platform will lower fully and the print head will move.
STEP 6
Connect your printer to the Internet, using either an Ethernet cable or WiFi, and sign up for a free KODAK 3D Cloud account on cloud.smart3d.tech to gain access to a great deal of market-leading features using the KODAK 3D Cloud.
Filament case instructions

Loading filament
STEP 1
Open the airtight resealable bag containing the filament and take the filament spool out.
STEP 2
Cut the filament end on the spool.
STEP 3
Open the filament case on one side by turning it clockwise.
STEP 4
Thread the filament through the outlet on the filament case and through the white Bowden tube.
STEP 5
Load the filament case with the filament spool making sure the filament does not overlap the spool. The overlapping filament can get entangled and lead to extrusion issues.
STEP 6
Close the filament case counterclockwise.
STEP 7
Hang the loaded filament case on one of the spool holders in the back of your Portrait 3D Printer by fitting the guide in the hole of the filament case into the slot on the spool holder. The sticker on the silica gel compartment on the filament case facing out suggests which side AND extruder to use.
STEP 8
In the back of the Printer, lift the lever on the extruder while feeding the filament until you cannot feed any more.
STEP 9
On the screen, go to Setup » Filaments » Load filament and pick which Material you are going to load. The nozzle will now start to heat up and then the extruder will start to feed more filament into the Printer.
USING YOUR 3D PRINTER
Basic overview of printing
3D objects are usually downloaded from the internet or exported from a 3D design program (CAD) in the ".stl" format, which is basically a very large set of triangles defining the object's surface.
The printer needs a set of instructions on how to print objects, and these are provided in what is known as a ".gcode" file. They are the same type of instructions used in machinery like CNC mills and laser cutters. This is a small sample of gcode:
M104 S0 ; turn off temperature
M140 S0
G28 X0 Z0 ; home X and Z axis
M84 ; disable motors
In order to generate ".gcode" files from the ".stl" files you need to use a slicer program. You process the STL file and make a GCODE file, which you send to the printer as a print job. You can use any properly configured slicer program with your KODAK Portrait 3D printer, but we strongly recommend that you use our KODAK 3D Slicer, which already has all the optimized presets you need.
You can download a KODAK 3D Slicer desktop slicing program from support.smart3d.tech
Better yet, connect your printer to the internet and use our KODAK 3D Cloud to prepare and slice objects there. They will be finely tuned to your printer, without the need to install any software on your workstation.
The KODAK 3D Cloud is found at cloud.smart3d.tech
With KODAK 3D Cloud you have the following functionality available:
- Easily share printers between users;
- Upload files to the cloud and access from anywhere, securely;
- Share files and entire projects with other people and set usage permissions;
- Start a print while away from the printer, monitor its progress and be informed of when it is ready to pick up;
• View, duplicate, edit and resize STL files before slicing; - Easily import and manage design files from multiple 3rd party programs, including SolidWorks, SolidEdge, SpaceClaim, OnShape, Autodesk Fusion 360, Inventor, CATIA and Rhino, with more integrations added periodically;
- Users have access to all iterations of a file so it is easy to reprint models and track success;
- Start jobs from any web browser and with a connected web camera view the print process live;
- Automatically record the print and send an email with an animated GIF once the print is complete;
• View animated GIFs of previous prints and recall the settings used; - Use tools for adding supports, resizing, repairing and positioning objects before sending to print;
- Gcode visualization lets you see how objects will be built layer by layer and prevent sending prints that have a high potential of failure;
-
Slice objects that would possibly crash local slicers by leveraging the power of cloud computing;
-
KODAK specific profiles are pre-tested with recommended settings for optimal printing with KODAK filaments;
- The Cloud also works with gcodes from Cura, Simplify3D and other popular slicers;
- Keep statistics per user, per design and per printer;
- Track filament used, printing data, logs and reasons for print failure to better monitor usage over time.
Print surface
When printing with KODAK 3D Printing filaments using the KODAK printing profiles, you will be able to print directly on the glass print surface. For printing guidelines, go to support.smart3d.tech/printing-guidelines.
A clean glass plate surface is crucial to achieve perfect adhesion. Clean your glass print plate thoroughly after each print:
- Remove the glass build plate and clean it in lukewarm water using a non-abrasive sponge.
- Use detergent and alcohol gel to remove adhesives or grease.
- Dry the glass using a clean microfiber cloth before putting it back in.
Printing Guidelines
You will find a table of suggested print settings for each type of filament at support.smart3d.tech. We strongly recommend that you use the KODAK printing profiles provided through the KODAK 3D Cloud or in the KODAK 3D Slicer application (available for download at support.smart3d.tech), which have the best, tested settings.
Loading the filament
If you wish to load filament, go to the "Filaments" screen (Settings » Filaments » Load), and follow the indications provided onscreen. Push the tip of the filament slightly into the extruder and click "Continue". The extruder should feed the filament towards the nozzle until it starts to come out of the nozzle. Then press "Back".
Be sure to place the filament cases as in the picture:

Unloading the filament
If you wish to unload the current filament, go to the "Filaments" screen (Settings » Filaments » Unload), and follow the indications provided onscreen.
Changing the filament
To change filament, from the "Filaments" screen select "Unload". The printer will unload the current filament by doing a long retraction. Once the filament is fully out of the extruder, remove the spool from the case and put it back in its original bag, sealing it tightly so it stays dry and clean. Put the new filament in the case as described above and hang the filament case or non-KODAK filament spool on the metal brace at the back of the printer. Then select "Load" and follow instructions as above.
Cae LED status lights
When your printer is ON the interior of the printer case should be lit up with a LED light indicating the current work status of the printer:
- WHITE - Idle
- BLUE – Printing in progress
- GREEN – Print job completed
- RED - An error has occurred
These lights can be manually turned off in the manual controls (Setup » Extras » Controls).
PRINTING
Once you have set up the printer, configured your slicer and loaded the filament, you are ready to print!
Select an object to print
Select an object to print from the list of sample objects provided in the printer (Print » Print from local file » Local files) or copy a previously sliced gcode file to a USB pen drive. You can also send prints via Internet using the KODAK 3D Cloud, as explained below.
STEP 1
Click on "Print":

STEP 2
Click on "Print from local file".

STEP 3
Click on "Local files".

STEP 4
Select an object from the list.

STEP 5
This is the "Print Setup" screen, showing you information about the file. Click on "Print" to start printing.

Monitoring the print
During printing you will see the Print Monitor screen:

PRINTING USING THE KODAK 3D CLOUD
If you have access to the internet with your Portrait 3D printer, you should use the KODAK 3D Cloud, for the benefits mentioned earlier. Create your free account, if you do not already have one, at cloud.smart3d.tech. You can now associate the printer to your account, so that you will be the person administering the printer, or you can simply print to a printer shared to you by someone else. The Cloud has tutorials on how to use it, but basically you will upload an STL file, do a "Layout", a "Slice" and a "Build" (Print). Select any printer at your disposal at any location and just print!
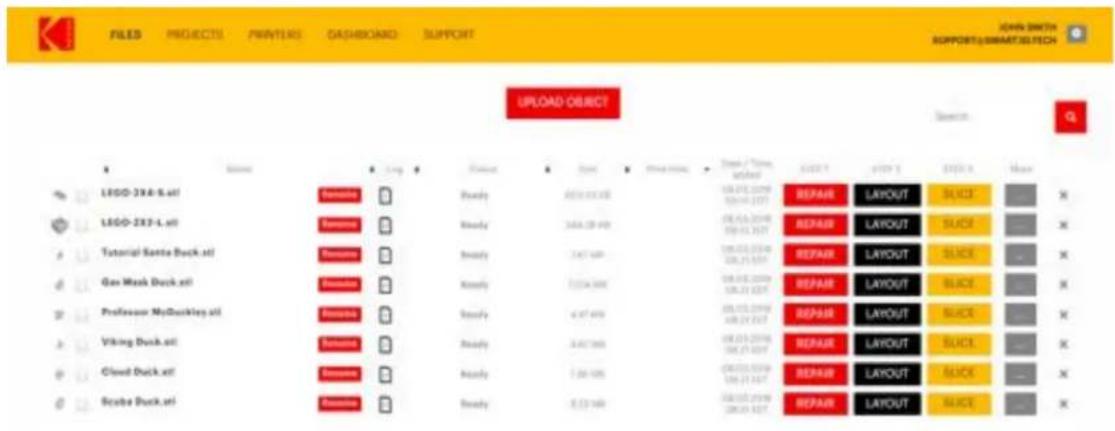

After you upload a file and process it, the Cloud will move it into a "Project", so that the original file, the repaired file, the various gcode files and anything else related to it are kept in a single directory for your convenience:
![FILES PROJECTS PRINTERS DASHBOARD SUPPORT 2006 DIRECTOR SUPPORT@SMARTSELLER UPLOAD-OBJECT LEGO-2X2-L [2] e Name: 100 Status: Date Print name Date T-Week UPLOAD LEGO-2X3-L_48015_repaired.tif Balance Balance Balance Balance Balance REPAIR LAYOUT SLICE REPAIR LAYOUT SLICE 3DPrinterOS Ducks [18] bike pe…](/content/2026/05/901818/images/05840313221aae4ccb735c9ceb59d691728e984fd323fca8130d8b828ea60847.jpg)
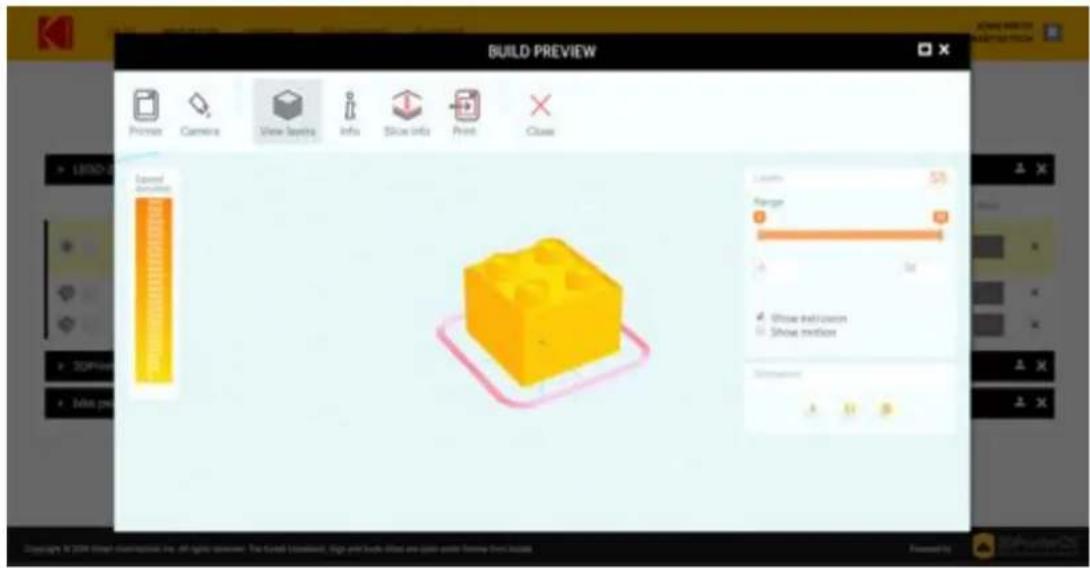
Select a file and click on "Preview":

You can select a printer and print directly, if you have permission and the printer is not busy, or "Queue" the print to be printed later:
You can monitor all your available printers:

Printing Queued print jobs
You can select the next queued job from the Printer Home screen.

Click on "Print from Cloud" and select a job to print.

Settings

Internet: For connecting a printer to a WiFi network (or use Ethernet).
Filaments: To Select filament type(s) and load/unload filament.
Extras: Manual control of hotbed, nozzles and lights, change nozzle diameter, check printer information (IP address, software version, etc.), initiate software update, change sound volume.
Calibration: Calibration of nozzles and bed.
Cloud: To view the Cloud print queue.
Manual printer control
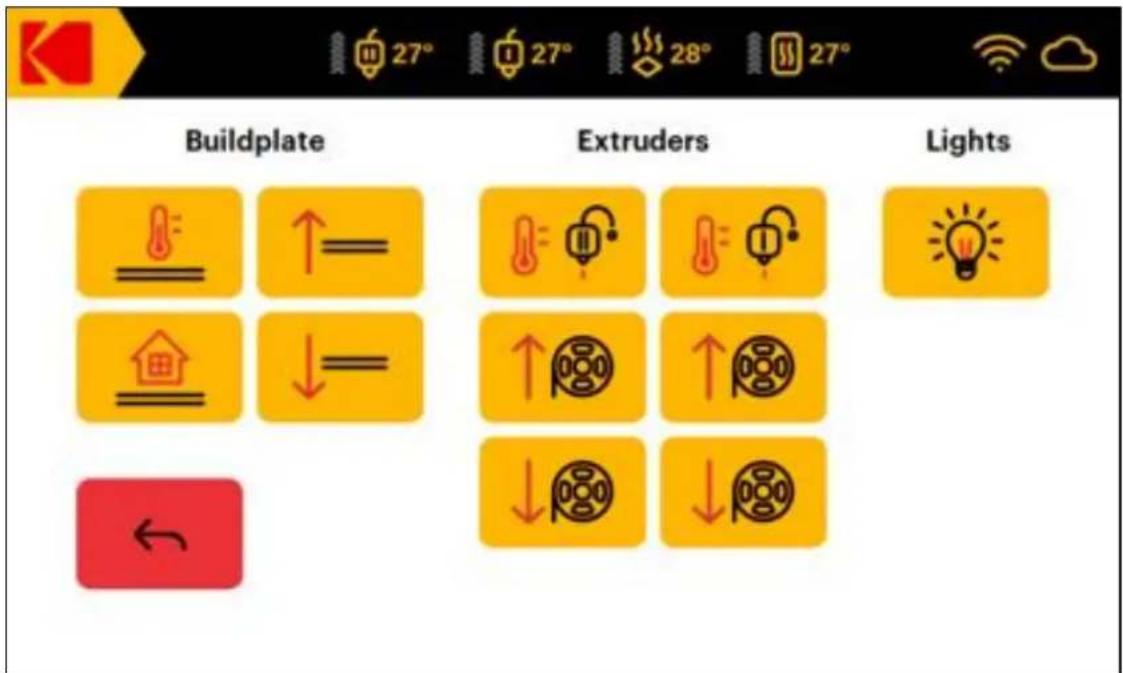
In this screen (Setup » Extras » Controls) you can manually raise and lower the print platform, extrude and retract filament from the left and right extruders or change spools, or control the lights.
CARE AND MAINTENANCE
Updating
To make sure your KODAK Portrait 3D Printer is up-to-date with the latest features we recommend that you periodically check for firmware updates by connecting your printer to the Internet and selecting Setup » Extras » Update.
Printer care
WARNING: Make sure the Hotends and the heatbed are cool before touching them.
- Whenever necessary to clean stray filament around the nozzles, set the temp for both Hotends to 150°C (Setup » Extras » Controls). Wait for the material on the outside of the nozzle to get soft and remove it using the tweezers from your toolkit.
- Lift the build platform using the manual control screen (Setup » Extras » Controls) before switching the printer off in order to be able to clean beneath it.
- Once the Hotends have cooled to at least 50°C, switch off and unplug the printer.
- Wipe the glass walls and roof using a clean dry or slightly moist microfiber cloth.
- Clean the interior of the printer using only dry microfiber cloth or a vacuum cleaner.
- Do not clean the 3D printer with liquid or aerosol cleaners, or any harsh or abrasive chemicals.
Maintenance
- With the build plate lowered fully to the bottom, apply a little of the supplied Magnalube grease onto the lead screw. Apply one drop of the supplied Superlube oil on each of the X, Y and Z axles (not the lead screw) and both print head shafts when needed. Move the print head around manually and then raise the build plate up and down using the manual controls (Settings » Extras » Manual controls) to distribute the oil and grease evenly afterwards.
- Check the filter every six (6) months to see if it needs replacing.
Filament care
- Keep your filament untangled, dry, clean and out of direct sunlight to avoid clogging and/or poor printing results.
Always store your filaments along with a silica gel pack in the filament cases or in the resealable bag. Both the silica gel and the resealable bag are provided with KODAK 3D Printing Filaments.
- ilaments.
Calibrating
Calibrate the distance between the nozzles and the build plate by changing the Z-offset. Start with the Nozzle I first, making sure the calibration card slides in between the nozzle and the build plate with very little resistance, then do the same with Nozzle II.
- Setup » Calibration » Build plate Calibration
Calibrate the build plate tilt to ensure excellent printing conditions using the provided calibration card. The nozzle should be as close to the build plate as possible at each of the 3 points with the calibration card sliding in between without getting stuck.
- Setup » Calibration » Nozzle offset
Calibrate the offset between the two nozzles for dual extrusion.
ATTENTION: After calibrating, we recommend rebooting the Printer to save calibration values. Turn off device and wait 15 seconds before turning it on.
Changing Hotends
Before replacing the Hotends, be aware that our pre-made printing profiles for the KODAK Portrait 3D Printer support 12 volt All Metal and PTFE Hotends with 0.40mm brass nozzles using 1.75mm filaments.
STEP 1
Turn off the printer and disconnect the power cord.
STEP 2
Make sure the Hotends are cool before starting.
STEP 3
Remove the front print head cover to expose the Hotends.
STEP 4
Unplug the Hotend power and the temperature sensor connectors.
STEP 5
Unfasten the Hotend knob using a Philips screwdriver.
STEP 6
Pull the Hotend gently down until you can see the top, press in the locking clamp securing the Bowden tube to the Hotend and then gently pull out the Bowden tube. Now you have disconnected the Hotend.
STEP 7
Now connect the Bowden tube to your new Hotend and secure it with the locking clamp.
STEP 8
Put the Hotend back in place, making sure to press it fully up, and secure it again with the knob, using a screwdriver.
STEP 9
Reconnect the power and temperature sensor cables.
STEP 10
Replace the cover back on the print head, and check that the Hotend wires do not show below the bottom edge of the cover.
STEP 11
If you changed nozzle diameter, make sure to head over to Setup » Extras » Tools and change the diameter.
STEP 12
Check calibration.
Powercycling
Turn off the machine using the power switch in the back and wait 15 seconds before turning the Printer on again.
TROUBLESHOOTING
The best source of tips for solving problems is in our support website at support.smart3d.tech
SPECIFICATIONS
| Technology | Fused Filament Fabrication (FFF) |
| Build volume | 200 x 200 x 235 mm (7.9 x 7.9 x 9.3") |
| Structure | Steel |
| Print head | Dual extrusion with automatic nozzle lifting |
| Print core replacement | Swappable |
| Hotend material | 1 all-metal, 1 PTFE |
| Nozzle diameter | 0.4 mm |
| Nozzle temperature | Up to 295°C (all-metal Hotend); |
| Build plate | Heated glass attached by magnets |
| Build plate temperature | Up to 105°C |
| Calibration and leveling | Automatic |
| Filament diameter | 1.75 mm |
| Layer resolution | 0.4mm nozzle: 20 - 250 micron |
| XYZ accuracy | 12.5, 12.5, 2.5 micron |
| XY motion | Linear bearings, 16mm |
| Z motion | Precision ball screw, 12mm |
| Air filtration | Filter with activated carbon |
| Display | 5" 800x480 color touchscreen |
| Print controller | 32 bit |
| Processing unit | Raspberry Pi 3 |
| UI languages | English, Spanish, French, Italian |
| Connectivity | Wi-Fi, LAN, USB drive |
| Monitoring | Live camera |
| Light signals | Indicating printer status |
| Operating sound | 55 dBA (1 test) |
| Physical dimensions | 455 x 435 x 565 mm |
| Dimensions with spool holders | 455 x 530 x 565 mm |
| Net weight | 25.4 kg |
| Shipping weight | 35.1 kg |
| Shipping box dimensions | 560 x 530 x 730 mm |
| Power requirements Input | 110/230VAuto Switching, 50-60Hz320W max. |
| Power requirements Output | 14 V DC |
| Operating ambient temperature | 10-30 °C |
| Supplied software | KODAK 3D Cloud, KODAK 3D Slicer |
| Supported OS | MacOS, Windows, Linux |
| File types | 3DS, 3MF, AMF, OBJ, and STL |
| Supported materials | KODAK 3D Printing Filaments ABS, Flex 98, HIPS, Nylon 6, Nylon 12, PETG, PLA+, PLA Tough and PVA.Compatible with third-party materials. |
Software disclaimer & Third-party licenses
The KODAK Portrait 3D Printer incorporates the following open source products:
Smoothieware firmware for motion control, authored by Arthur Wolf. Our fork can be found here. Smoothieware is released under the GNU GPL v3.
Node-red: Copyright JS Foundation and other contributors, released under the Apache 2.0 license.
Electromagnetic Compatibility (EMC)
The following Class A statements apply to features designated as electromagnetic compatibility (EMC) Class A in the feature installation information.
For Customers in the U.S.A.
Federal Communications Commission (FCC) Statement

This equipment has been tested and found to comply with the limits for a Class A digital device, pursuant to Part 15 of the FCC Rules.
These limits are designed to provide reasonable protection against harmful interference in a residential installation.
This equipment generates, uses, and can radiate radio frequency energy and, if not installed and used in accordance with the instructions, may cause harmful interference to radio communications. However, there is no guarantee that interference will not occur in a particular installation.
If this equipment does cause harmful interference to radio or television reception, which can be determined by turning the equipment off and on, the user is encouraged to try to correct the interference by one or more of the following measures:
- Reorient or relocate the receiving antenna.
- Increase the separation between the equipment and receiver.
- Connect the equipment into an outlet on a circuit different from that to which the receiver is connected.
- Consult a KODAK-authorized dealer or service representative for help.
- This device complies with part 15 of the FCC Rules. Operation is subject to the following two conditions:
• This device may not cause harmful interference.
- This device must accept any interference received, including interference that may cause undesired operation.
Properly shielded and grounded cables and connectors must be used in order to meet FCC emission limits. Proper cables and connectors are available from authorized dealers. KODAK and Smart International are not responsible for any radio or television interference caused by unauthorized changes or modifications to this equipment. Unauthorized changes or modifications could void the user's authority to operate this equipment.
For Customers in Canada
Industry Canada Compliance Statement CAN ICES-3 (A)/NMB-3(A)
This digital apparatus does not exceed the Class A limits for radio noise emissions from digital apparatus set out in the interference-causing equipment standard entitled: "Digital Apparatus", ICES-003 of the
Canadian Department of Communications. This device complies with Industry Canada license-exempt RSS standard(s). Operation is subject to the following two conditions: (1) this device may not cause interference, and (2) this device must accept any interference, including interference that may cause undesired operation of the device.
For Customers in Europe
European Community Compliance Statement
CE This product is in conformity with the protection requirements of EU Council Directive 2014/30/EU on the approximation of the laws of the Member States relating to electromagnetic compatibility. KODAK or Smart International cannot accept responsibility for any failure to satisfy the protection requirements resulting from a non-recommended modification of the product.
Environmental
Restriction of the use of certain hazardous substances in electrical and electronic equipment (RoHS)

KODAK Portrait 3D Printer does not contain any of the substances in excess of the maximum concentration values ("MCVs") in EU Directive 2002/95/EC, as amended by Commission Decision 2005/618/EC, and/or in the recast RoHS Directive 2011/65/EU, Annex II, unless the substance is in an application that is exempt under the RoHS Directive 2002/95/EC, as amended, and/or under Annex III or Annex IV to the recast RoHS Directive 2011/65/EU. The MCVs are by weight in homogeneous materials. This information represents Smart International's knowledge and belief, which may be based in whole or in part on information provided by third party suppliers to Smart International.
Waste Electrical and Electronic Equipment Statement (WEEE)

This symbol on the Product or on its packaging indicates that KODAK Portrait 3D Printer must not be disposed of with your other household waste. Instead, it is your responsibility to dispose of your waste equipment by handing it over to a designated collection point for the recycling of waste electrical and electronic equipment. The separate collection and recycling of your waste equipment at the time of disposal will help to conserve natural resources and ensure that it is recycled in a manner that protects human health and the environment. For more information about where you can drop off
your waste equipment for recycling, please contact your local city office, your household waste disposal service or the shop where you purchased the product.
California Proposition 65

Proposition 65 requires businesses to provide warnings about significant exposures to chemicals listed by the State of California that cause cancer, birth defects or other reproductive harm. By requiring that this information be provided, Proposition 65 enables consumers to make informed decisions about their exposures to these chemicals.
Proposition 65 also prohibits businesses from knowingly discharging significant amounts of listed chemicals into sources of drinking water.
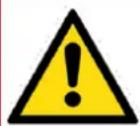
WARNING: This product can expose you to chemicals, including styrene, acrylonitrile and butadiene, which are known to the State of California to cause cancer.
For more information, go to www.P65Warnings.ca.gov.
Electrical Safety
The KODAK Portrait 3D Printer has been tested according to IEC 60950 and IEC 62368-1 applicable to low voltage devices.
The KODAK Portrait 3D printer is an industrial machine, and as such you must read the instructions before using it. It is not intended for use by children under the age of 14 without proper supervision, nor by people with reduced manual, motor and psychomotor skills.
- This device has an automatic voltage switch. Ensure the product is well-grounded. Failure to ground the product may result in electrical shock or susceptibility to electromagnetic interference.
- Avoid overloading an electrical outlet with multiple devices. This device consumes up to 320W, about the same as a powerful desktop PC.
- To prevent short-circuit overloads, overheating and damage use only the power cable supplied with the product. Do not damage, cut or repair the power cable.
- Do not disassemble the product, there are no user serviceable parts inside. If you experience any problems, please contact your local Service Representative. See User Guide / Warranty section below.
CUSTOMER SERVICE
Should you experience any problems with your product, please visit support.smart3d.tech or contact us. We are here to help!
Website: support.smart3d.tech
Email: support@smart3d.tech
WWW.KODAK.COM/GO/3DPRINTING
© 2018 Smart International, Inc. 2035 Sunset Lake Road, Newark, DE 19702, USA.
The KODAK trademark, logo and trade dress are used under license from KODAK.
All information contained in this document is subject to change without notice.
Document Number/ Sequence: PP18V3010
All other products, brand names, company names and logos are trademarks of their respective owners, used merely to identify their respective products, and are not meant to connote any sponsorship, endorsement or approval.
- KODAK PORTRAIT 3D PRINTER
- USER MANUAL
- CONTENTS
- INTRODUCTION
- WARNINGS AND SAFETY PRECAUTIONS
- WARNING
- LOCATION
- SERVICE
- FRONT OF THE 3D PRINTER
- BACK OF THE 3D PRINTER
- SAFETY INFORMATION
- CAUTION: HOT SURFACE
- CAUTION: MOVING PARTS THAT CAN CAUSE INJURY
- CAUTION: RISK OF ELECTRIC SHOCK
- BOX CONTENT
- ACCESSORIES BOX CONTAINING
- TOOLBOX CONTAINING
- SETUP
- UNBOXING
- STEP 1
- STEP 2
- STEP 3
- STEP 4
- SET UP FOR THE FIRST TIME - QUICKSTART
- STEP 5
- STEP 6
- FILAMENT CASE INSTRUCTIONS
- LOADING FILAMENT
- STEP 7
- STEP 8
- STEP 9
- USING YOUR 3D PRINTER
- BASIC OVERVIEW OF PRINTING
- THE KODAK 3D CLOUD IS FOUND AT CLOUD.SMART3D.TECH
- PRINT SURFACE
- PRINTING GUIDELINES
- LOADING THE FILAMENT
- UNLOADING THE FILAMENT
- CHANGING THE FILAMENT
- CAE LED STATUS LIGHTS
- PRINTING
- SELECT AN OBJECT TO PRINT
- MONITORING THE PRINT
- PRINTING USING THE KODAK 3D CLOUD
- PRINTING QUEUED PRINT JOBS
- MANUAL PRINTER CONTROL
- CARE AND MAINTENANCE
- UPDATING
- PRINTER CARE
- MAINTENANCE
- FILAMENT CARE
- CALIBRATING
- SETUP » CALIBRATION » BUILD PLATE CALIBRATION
- SETUP » CALIBRATION » NOZZLE OFFSET
- CHANGING HOTENDS
- STEP 10
- STEP 11
- STEP 12
- POWERCYCLING
- TROUBLESHOOTING
- SOFTWARE DISCLAIMER & THIRD-PARTY LICENSES
- ELECTROMAGNETIC COMPATIBILITY (EMC)
- FEDERAL COMMUNICATIONS COMMISSION (FCC) STATEMENT
- FOR CUSTOMERS IN CANADA
- INDUSTRY CANADA COMPLIANCE STATEMENT CAN ICES-3 (A)/NMB-3(A)
- FOR CUSTOMERS IN EUROPE
- EUROPEAN COMMUNITY COMPLIANCE STATEMENT
- ENVIRONMENTAL
- RESTRICTION OF THE USE OF CERTAIN HAZARDOUS SUBSTANCES IN ELECTRICAL AND ELECTRONIC EQUIPMENT (ROHS)
- WASTE ELECTRICAL AND ELECTRONIC EQUIPMENT STATEMENT (WEEE)
- CALIFORNIA PROPOSITION 65
- ELECTRICAL SAFETY
- CUSTOMER SERVICE
- WWW.KODAK.COM/GO/3DPRINTING
Brand : KODAK
Model : Portrait 3D Printer
Category : 3D Printer