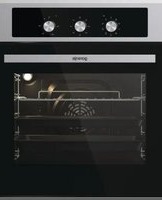
BO6727E03AX - Oven GORENJE - Free user manual and instructions
Find the device manual for free BO6727E03AX GORENJE in PDF.


| Product Type | Built-in Electric Oven |
| Brand | Gorenje |
| Model | BO6727E03AX |
| Dimensions (H x W x D) | 595 x 595 x 530 mm |
| Aperture Dimensions (H x W x D) | 600 x 560 x 560 mm (min depth 560 mm) |
| Weight | Approx. 31.6 kg |
| Voltage / Frequency | 220-240 V~, 50/60 Hz |
| Power Rating | Max 2.9 kW |
| Usable Capacity | 73 liters |
| Energy Rating | See energy label |
| Temperature Range | 50 – 250 °C |
| Oven Functions | Natural convection, defrosting, bottom heater, bottom+top heaters, combined grill, fan+bottom+top, fan+combined grill, central element with fan, ultra-fan+bottom for fast heat-up |
| Timer / Minute Minder | Up to 120 minutes, with audible signal |
| Lighting | Separate oven light; bulb 230 V, 25 W, G9, high temperature (300 °C) |
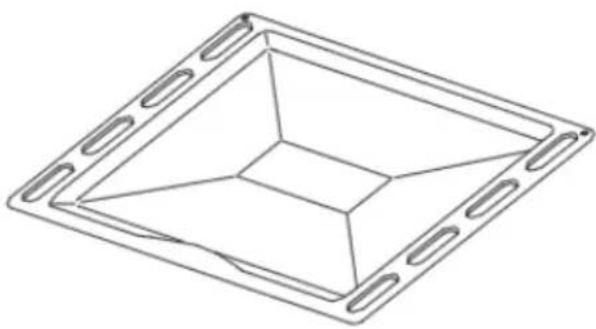
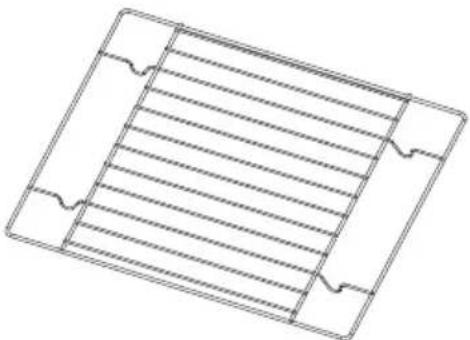
| Accessories Included | Deep tray, baking tray, oven shelf |
| Cleaning | Steam cleaning, removable oven door and inner glass panel |
| Safety Features | Child lock (supervision for children under 8), automatic switch-off not specified, safety switch required in fixed wiring |
| Installation Type | Built-in, requires cutout, rear and one side can be placed next to furniture or wall |
Frequently Asked Questions - BO6727E03AX GORENJE
User questions about BO6727E03AX GORENJE
0 question about this device. Answer the ones you know or ask your own.
Ask a new question about this device
Download the instructions for your Oven in PDF format for free! Find your manual BO6727E03AX - GORENJE and take your electronic device back in hand. On this page are published all the documents necessary for the use of your device. BO6727E03AX by GORENJE.
USER MANUAL BO6727E03AX GORENJE
User and Installation Manual
Built-in Electric Oven

MODEL NO.:
BO6727E03AX
WARNING
- The appliance is not to be used by persons (including children) with reduced physical, sensory or mental capabilities, or lack of experience and knowledge, unless they have been given supervision or instruction. children being supervised not to play with the appliance.
- During use the appliances becomes hot. Care should be taken to avoid touching heating elements inside the oven, for cooking ranges and ovens.
- WARNING: Accessible parts may become hot during use. Young children should be kept away.
- Do not use harsh abrasive cleaners or sharp metal scrapers to clean the oven door glass since they can scratch the surface, which may result in shattering of the glass.
- If during the test of Clause 11, the temperature rise at the centre of the internal bottom surface of a storage drawer exceeds that specified for handles held for short periods in normal use, the instruction shall state that these surfaces can get hot.
- The oven must be switched off before removing the guard and that, after cleaning, the guard must be replaced in accordance with the instructions.
● Details indicating the correct installation of the shelves.
● A steam cleaner is not be used. - Ensure that the appliance is switched off before replacing the lamp to avoid the possibility of electric shock.
- The appliance must not be installed behind a decorative door in order to avoid overheating.
- Disconnection of the appliance after installation, by accessible plug or a switch in the fixed wiring.
- If the supply cord is damaged, it must be replaced by the manufacturer, its service agent or similarly qualified persons in order to avoid a hazard.
- This appliance should be connected to a circuit which incorporates an isolating switch which can accessible by the user after installation providing full disconnection from the power supply. The disconnection may be achieved by incorporating a switch in the fixed wiring in accordance with the wiring rules.
- This appliance can be used by children aged from 8 years and above and persons with reduced physical, sensory or mental capabilities or lack of experience and knowledge if they have been given supervision or instruction concerning use of the appliance in a safe way and understand the hazards involved. children shall not play with the appliance. cleaning and user maintenance shall not be made by children without supervision.
● WARNING: The appliance and its accessible parts become hot during use. - Care should be taken to avoid touching heating elements.
WARNING
● Children less than 8 years of age shall be kept away unless continuously supervised.
- This appliance can be used by children aged from 8 years and above and persons with reduced physical, sensory or mental capabilities or lack of experience and knowledge if they have been given supervision or instruction concerning use of the appliance in a safe way and understand the hazards involved. Children shall not play with the appliance. Cleaning and user maintenance shall not be made by children without supervision.
DEAR CUSTOMER
The oven is exceptionally easy to use and extremely efficient. After reading the instruction manual, operating the oven will be easy.
Before being packaged and leaving the manufacturer, the oven was thoroughly checked with regard to safety and functionality.
Before using the appliance, please read the instruction manual carefully.
By following these instructions carefully you will be able to avoid any problems in using the appliance.
It is important to keep the instruction manual and store it in a safe place so that it can be consulted at any time.
It is necessary to follow the instructions in the manual carefully in order to avoid possible accidents.
Caution!
Do not use the oven until you have read this instruction manual.
The oven is intended for household use only.
The manufacturer reserves the right to introduce changes which do not affect the operation of the appliance.
CONTENTS
SAFETY INSTRUCTIONS....1
3HOW TO
4DESCRIP
6INSTALL
8OPERATION
CLEANING AND MAINTENACE....11
OPERATION IN CASE OF EMERGENCY....14
TECHNICAL DATA....15
SAFETY INSTRUCTIONS
NOTE:
Ensure there is a grounded socket nearby (behind the unit)
A dedicated power circuit is recommended for the unit but not required. Additional electrical appliances on the same circuit may exceed the current(amperage)rating for that circuit. If after the installation of your unit, the circuit breaker trips or the fuse fails on a repeated basis, then a dedicated circuit will likely be required.
!The appliance must be installed only by a qualified person in compliance with the instructions provided. Incorrect installation may cause harm to persons, animals or may damage property.
The manufacturer declines all responsibility for improper installation which may harm persons and animals and damage property.
Important: The power supply to the appliance must be cut off before any adjustments or maintenance work is done on it.
WARNING:
When using this product, basic precautions should always be taken, including the following: Your built-in oven is a classified electrical appliance. As with any electrical appliance and particularly with electric heaters, basic precautions must be followed in order to reduce the risk of fire, burns, electrical shocks and/or other serious injuries or death.
- The appliance becomes hot during operation. Take care not to touch the hot parts inside the oven.
- This appliance is not intended for use by persons (including children) with reduced physical, sensory or mental capabilities, or lack of experience and knowledge, unless they have been given supervision or instruction concerning use of the appliance by a person responsible for their safety. Children should be supervised to ensure that they do not play with the appliance. While in operation direct contact with the cooker may cause burns!
- Ensure that small items of household equipment, including connection leads, do not touch the hot oven or the hob as the insulation material of this equipment is usually not resistant to high temperatures.
- Do not leave the cooker unattended when frying. Oils and fats may catch fire due to overheating or boiling over.
- Do not put pans weighing over 15 Kg on the opened door of the oven and pans over 25 kg on the hob.
- Do not use harsh cleaning agents or sharp metal objects to clean the door as they can scratch the surface, which could then result in the glass cracking.
- Do not use the cooker in the event of a technical fault. Any faults must be fixed by an
● appropriately qualified and authorised person. -
In the event of any incident caused by a technical fault, disconnect the power and report the fault to the service centre to be repaired.
-
The rules and provisions contained in this instruction manual should be strictly observed. Do not allow anybody who is not familiar with the contents of this instruction manual to operate the cooker.
- The cooker should not be cleaned using steam cleaning equipment.
The panels adjacent to the oven must be made of heat-resistant material. - Cabinets with a veneer exterior must be assembled with glues which can withstand temperature of up to 100°C.
- Keep combustible materials, such as: curtains, drapes, furniture, pillows, clothing, linens, bedding, paper, etc., at least 3 feet (0.9 meters) from the front sides and rear of the heater. Do not use this unit in areas where gasoline, paint or other flammable liquids or their associated vapors may be present.
- To reduce the risk of fire, do not place or install this unit in areas where the ventilation or circulation ducts may become blocked.
- The unit's power cord must be connected to a properly grounded and protected,220-240V electrical outlet. Always use ground fault protection where required by the electrical code. To reduce the risk of fire, avoid running the power cord under rugs, carpets, etc. Keep the power cord away from high traffic areas where it may pose as a tripping hazard.
- Avoid the use of an extension cord, which may overheat and cause a fire.
- When transporting or storing the unit, keep it in a dry location, free from dust, excessive vibration or other factors, which may damage the unit.
- Do not operate any oven with a damaged cord or plug or after the heater malfunctions, has been dropped or damaged in any manner. Return the oven to an authorised service centre to be checked.
- If the supply cord is damaged, it must be replaced by a special cord or assembly available from the manufacturer or its service agent.
- Use this oven only as described in this manual. Any other use not recommended by the manufacturer may cause fire, electric shock, or injury to persons.
- This appliance is not intended for use by persons (including children) with reduced physical, sensory or mental capabilities, or lack of experience and knowledge, unless they have been given supervision or instruction concerning use of the appliance by a person responsible for their safety. Children should be supervised to ensure that they do not play with the appliance.
- Never add cold water to food on a hot universal tray or baking tray or directly onto food in a hot oven. The steam created could cause serious burns or scalding and the sudden change in temperature can damage the enamel.
- Do not lift the oven by the handle.
HOW TO SAVE ENERGY

Using energy in a responsible way not only saves money but also helps the environment. So let's save energy! And this is how you can do it:
! Do not uncover the pan too often( a watched pot never boils!)
Do not open the oven door unnecessarily often.
! Switch off the oven in good time and make use of residual heat.
For long cooking times, switch off heating zones 5 to 10 minutes before finishing cooking, This saves up to 20% on energy.
Only use the oven when cooking larger dishes.
Meat of up to 1kg can be prepared more economically in a pan on the cooker hob.
! Make use of residual heat from the oven.
If the cooking time is greater than 40 minutes switch off the oven 10 minutes before the end time.

Important! When using the timer, set appropriately shorter cooking times according to the dish being prepared.
! Make sure the oven door is properly closed.
Heat can leak through spillages on the door seals. Clean up any spillages immediately.
! Do not install the cooker in the direct vicinity of refrigerators/ freezers.
Otherwise energy consumption increases unnecessarily.

UNPACKING

During transportation, protective packaging was used to protect the appliance against any damage. After unpacking, please dispose of all elements of packaging in a
way that will not cause damage to the environment.
All materials used for packaging the appliance are environmentally friendly; they are 100% recyclable and are marked with the appropriate symbol.
Caution! During unpacking, the packaging materials( polythene bags, polystyrene pieces, etc.) should be kept out of reach of children.

DISPOSAL OF THE APPLIANCE
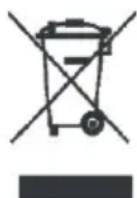
Old appliances should not simply be disposed of with normal household waste, but should be delivered to a collection and recycling centre for electric and electronic equipment. A symbol
shown on the product, the instruction manual or the packaging shows that it is suitable for recycling.
Materials used inside the appliance are recyclable and are labelled with information concerning this. By recycling materials or other parts from used devices you are making a significant contribution to the protection of our environment.
Information on appropriate disposal centres for used devices can be provided by your local authority.
DESCRIPTION OF THE APPLIANCE
![graph TD A["1"] --> B["2"] B --> C["3"] C --> D["4"] D --> E["5"] E --> F["6"] F --> G["COOKING TIME CONTROL PANNEL"] style A fill:#f9f,stroke:#333 style B fill:#ccf,stroke:#333 style C fill:#cfc,stroke:#333 style D fill:#fcc,stroke:#333 style E fill:#cff,stroke:#333 style F fill:#ffc,stroke:#333 st…](/content/2026/05/900608/images/005a9734660738dee430c084382257c5d2f0388657ff3b6c382966914dcb2ad8.jpg)
1 Oven function selection knob
2 Temperature control knob
3 Timer
4 Orange function operation signal light
5 Red temperature regulator signal light
6 Oven door handle
SPECIFICATIONS OF APPLIANCE

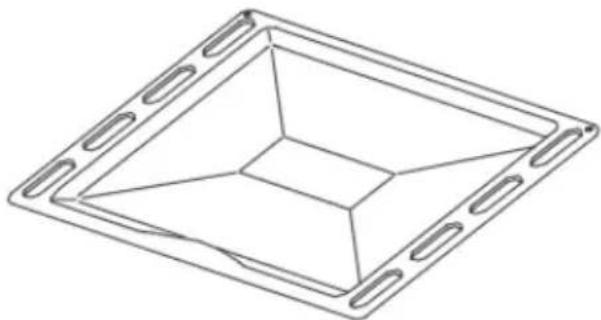
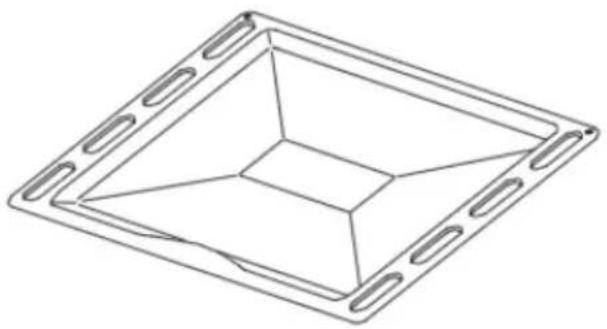
Deep Tary

Baking tray

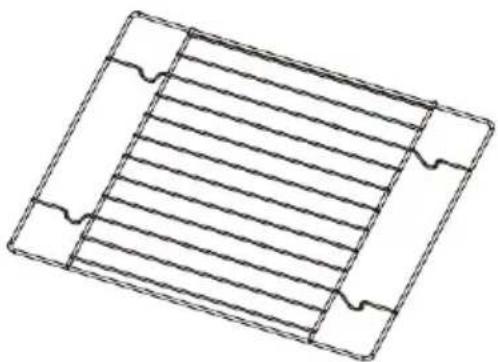
Oven shelf
INSTALLATION
- The kitchen area should be dry and aired and equipped with efficient ventilation. When installing the oven, easy access to all control elements should be ensured.
- This is a built-in oven, and its back wall and one side wall can be placed next to a high piece of furniture or a wall. Coating or veneer used on fitted furniture must be applied with a heat-resistant adhesive (100°C). This prevents surface deformation or detachment of the coating.
Make an opening with the dimensions given in the diagram for the oven to be fitted.
Make sure the mains plug is disconnected and then connect the oven to the mains supply.
Insert the oven completely into the open- ing without allowing the four screws in the places shown in the diagram to fall out.


Product Dimensions Aperture Dimensions
| Height: | 595 mm | 600 mm |
| Width: | 595 mm | 560 mm |
| Depth: | 530 mm | 560 mm (min) |
Electrical connection
Warning!
All electrical work should be carried out by a suitably qualified and authorised eletrician. No alterations or wilful changes in the electricity supply should be carried out.
Fitting guidelines
The oven is manufactured to work with three-phase alternating current(220V-240V/50Hz). The connection diagram is also found on the cover of the connection box. Remember that the connection wire should match the connection type and the power rating of the oven.
The connection cable must be secured in a strain-relief clamp.
Warning!
Remember to connect the safety circuit to the connection box terminal marked with .The connection box terminal marked with ⏚. The electricity supply for the oven must have a safety switch which enables the power to be cut off in case of emergency. The distance between the working contacts of the safety switch must be at least 3 mm.
Before connecting the oven to the power supply it is important to read the information on the data plate and the connection diagram.


CONNECTION DIAGRAM Caution! Voltage of heating elements 220V\~240V
Caution! In the event of any connection the safety wire must be connected to the ⏚ PE terminal
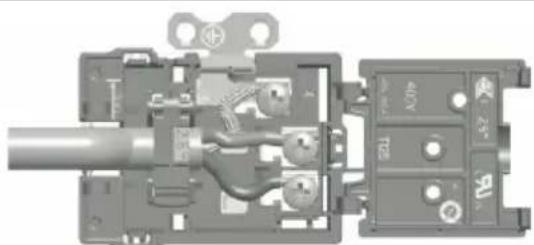
For 220V-240V earthed one phase connect on: Brown wire connect to L and blue wire connect to N, safety wire (Yellowgreen) connect to ⏻

OPERATION
Before first use
- Remove packaging, clean the interior of the oven and the hob.
●Take out and wash the oven fittings with warm water and a little washing-up liquid.
Switch on the ventilation in the room or open a window.
- Heat the oven (to a temperature of 250°C , for approx, 30 min.), remove any stains and wash carefully; the heating zones of the hob should be heated for around 4 min. without a pan.
Important!
The inside of the oven should only be washed with warm water and a small amount of wash-ing-up liquid.
Oven on and off
In order to switch on the oven you need to:
! set required working conditions of the oven, it's temperature and a mode of heating.
! Set the knob to the required position, turning it right.

Oven functions and operation.
Natural convection oven (conventional)
The oven can be warmed up using the bottom and top heaters. Operation of the oven is controlled by the oven function knob-to set a required function you should turn the knob to the selected position.
![graph TD A["0"] --> B["•"] B --> C["+"] C --> D["•"] D --> E["+"] E --> F["•"] F --> G["+"] G --> H["•"] H --> I["+"] I --> J["•"] J --> K["+"] K --> L["•"] L --> M["+"] M --> N["•"] N --> O["+"] O --> P["•"] P --> Q["+"] Q --> R["•"] R --> S["+"] S --> T["•"] T --> U["+"] U --> V["•"] V --> W["+"]…](/content/2026/05/900608/images/b8346473e5edec07ec990104a86be0bae26c2d736fac6488e4df22fa8aa8d0d5.jpg)
as well as the temperature regulator knob -to set a required function you should turn the knob to the selected position.

The oven can be switched off by setting both of these knobs to the position “●”/”○”.
Using the minute minder
The miunte minder can be used independently of an oven cooking function for a time period of up to 120 minutes.
To set the timer .turn the knob fully clockwise until it stops and then turn it back anticlockwise to the required time.
The time period that has been set will expire when the control knob reaches zero, a brief audible signal will sound. The oven is stopped at this time.

Possible knob positions

Separate oven lighting
By setting the knob to this position, the lighting inside the oven is switched on. Use, for example, when washing the oven chamber.

Defrosting
This function allows all frozen foods to be rapidly and delicately thawed thanks to the internal fan.

Bottom heater on
When the knob is set to this position, the oven is heated using only the bottom heater. Use for, e.g. final baking from the bottom.

Bottom and top heaters on
Setting the knob to this position allows the oven to be heated conventionally.

Combined grill
(Grill and the top heater)
When the "combined grill" is active it enables grilling with the grill and with the top heater switched on at the same time. this function allows a higher temperature at the top of the cooking area, which causes more intense browning of the dish and permits larger portions to be grilled.

Fan,bottom and top heaters on
At this knob position the oven executes the cake function. Conventional oven with a fan.

Fan and combined grill on.
When the knob is turned to this position, the oven activates the combined grill and fan function. in practice, this function allows the grilling process to be speeded up and an improvement in the taste of the dish, You should only use the grill with the oven door shut.

Central element with fan on
This cooking mode allows homogenous distribution of the heat inside the oven, making it possible to cook several items of food at the same time.

A crisp underside to pizza bases, quiches and pastry cases can be achieved by activating the intensive hot air setting. No need to preheat the oven when using this setting when cooking from frozen.
In ovens with automatic air circulation, equipped with a fan and an ultra-fan heater, the fast heat-up function may be used-the oven will reach a temperature of 150° C within approximately 4 minutes.
Mode of operation:
! set the oven function to the position of ultra-fan and bottom heater,
! set the temperature regulator knob to the position of 150° C,
! the oven warms up to the temperature of 150°C (or lower if set); the oven reaching the temperature is signalled by the red light of the temperature regulator going off, ! now put the tray with dough into the oven,
! set the oven function knob to the selected heating mode,(see the chapter Baking in the oven-practical hints).
Important!
When the fast oven heat-up function has been selected, the chamber should not contain a baking tray with dough or other elements that do not constitute the oven fittings.
The fast heat-up function is not recom-
mended for use with the programmer set.
Example: Use of the Grill heater
The baking process operates through infrared rays emitted onto the dish or food by the heater
In order to switch on the Grill heater you need to:
! Set the oven knob to the position marked with >>>
! Set the temperature regulator knob to set a required fuction you should turn the knob to the selected position
! Set the minute minder
! Baking the oven for approximately 5 minutes (with the oven door shut)
! Put the food to be baked on the grill grate or baking tray
! Insert the grill grate or baking tray onto the appropriate cooking level
! Close the oven door
! Wait for the baking time to end
! During baking, adjust baking temperature and time if necessary
Caution!
The baking should be used with the oven door shut.
When the oven is baking, accessible parts can become hot.
It is recommended to keep children away from the oven.
CLEANING AND MAINTENANCE
By ensuring proper cleaning and maintenance of your cooker you can have a significant influence on the continuing fault-free operation of your appliance.
Before you start cleaning, the cooker must be switched off and you should ensure that all knobs are set to the “●” / ”0” position. Do not start cleaning until the cooker has completely cooled.
Caution! The sharp blade should always be protected by adjusting the cover (just push it with your thumb). Injuries are possible so be careful when using this instru-ment-keep out of reach of reach of children.
! Appropriate light cleaning or washing products are recommended, such as e.g. any kind of liquids or emulsions for fat removal. In particular, special cleaning products such as COLLO Luneta, Sidol Stahlglanz, Stahl-Fix for washing and cleaning and Cera Fix for maintenance are recommended. If the recommended products are not available, it is advisable to use a solution of warm water with a little washing-up liquid or cleaning products for stainless steel sinks.
Oven
! The oven should be cleaned after every use. When cleaning the oven the lighting should be switched on to enable you to see the surfaces better.
! The oven chamber should only be washed With warm water and small amount of washing-up liquid.
! After cleaning the oven chamber wipe it dry.
Caution!
Do not use cleaning products containing abrasive materials for the cleaning and maintenance of the glass front panel.
! steam cleaning:
-pour 250ml of water(1 glass)into a bowl placed in the oven on the first level from the bottom,
-close the oven door,
-set the temperature knob to 50°C, and the function knob to the bottom heater position,
-heat the oven chamber for approximately 30 minutes,
-open the oven door, wipe the chamber inside with a cloth or sponge and wash using warm water with washing-up liquid.
Caution! Possible moisture or water residues under the cooker can result from steam cleaning.
! After cleaning the oven chamber wipe it dry.
Replacement of the oven light bulb
In order to avoid the possibility of an electric shock ensure that the appliance is switched off before replacing the bulb.
! Set all control knobs to the position"●"/"0" and disconnect the mains plug,
! unscrew and wash the lamp cover and then wipe it dry.
! unscrew the light bulb from the socket, replace the bulb with a new one-a high temperature bulb (300°C) with the following parameters:
-voltage230 V
-power 25 W
-G9
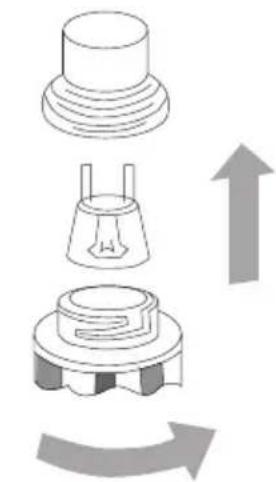
Oven light bulb
! Screw the bulb in, making sure it is properly inserted into the ceramic socket.
! Screw in the lamp cover.
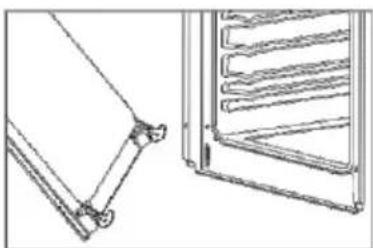
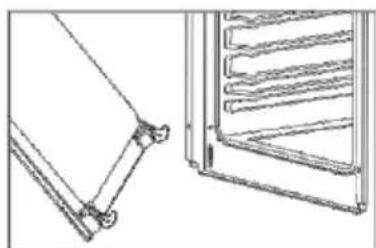
Removing the doors
a. The oven door is fully open

b. The latch hinges completely lifted
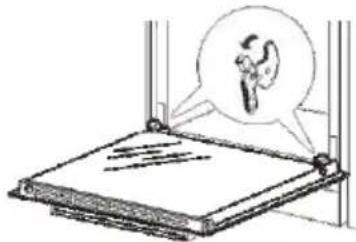
c. Gently close the oven door until you hear the sound of engagement, once they reach clamping position, with both hands holding the door and continue to push, pull up at the same time so that the hinge bolt removed from the oven.


d. After cleaning, the hinge is aligned with the oven door. Latch and push it until it catches. Take care to ensure that the hinge and door a properly aligned to avoid door damage.
If in doubt, contact the service centre - information is listed on the back of this user manual.
e. With the oven door fully opened, push the latch down to it's initial position to complete the oven door installation.
Remove the inner glass panel
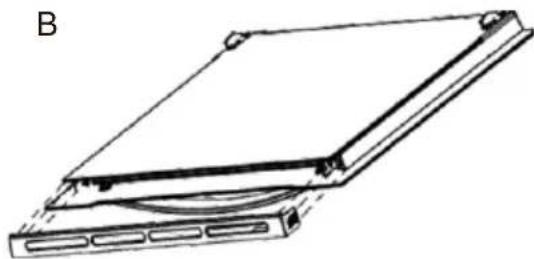
a. Press and hold the two sides of the grid with both hands to pull it out.

Pull out the grid
b. Remove the inner glass.

c. Locate the glass stopper and remove it. Remove the glass for cleaning. To reinstall the inner glass, simply gently place it back onto the door and reinsert the glass stopper to secure the glass in place.

OPERATION IN CASE OF EMERGENCY
In the event of an emergency, you should:
! Switch off all working units of the cooker
! Disconnect the mains plug
! Call the service centre
! Some minor faults can be fixed by referring to the instructions given in the table
| PROBLEM | REASON | ACTION |
| The appliance does not work. | Break in power supply | check the household fuse box, if there is a blown fuse replace it with anew one |
| The oven lighting does not work | The bulb is loose or damaged | Tighten up or replace the blown bulb (see chapter Cleaning and Maintenance) |
TECHNICAL DATA
Voltage rating
Power rating
Cooker dimensions W/D/H
Usable capacity of the oven
Energy rating
Weight
220V-240V\~; 50/60Hz
max. 2.9kw
595/ 530/ 595 mm
73 liters
on the energy label
Approx. 31.6kg
gorenje
DISPOSAL OF THE APPLIANCE

Глибоке деко
Деко для випікання
Поличка печі
ВСТАНОВЛЕННЯ
СХЕМА ПІДКЛЮЧЕННЯ

DISPOSAL OF THE APPLIANCE

Teglia profonda

Teglia

Electrical connection
Attenzione!
Lampadina del forno
! Avvitare
presa in
! Avvitare
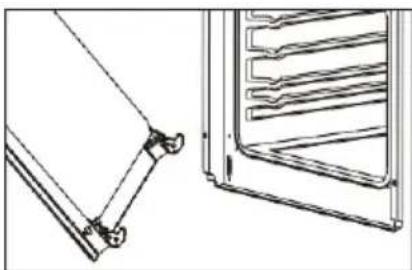
СХЕМА ПОДКЛЮЧЕНИЯ
220-240 B\~

Дълбока тава

Тава за печене
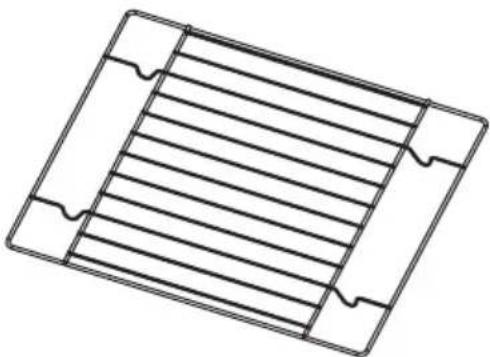
Решетка
МОНТАЖ
Крушка на фурната

Prije uporabe uređaja pažljivo pročitajte ovaj priručnik i sačuvajte ga za buduću uporabu.
UPOZORENJE
Duboka posuda

Pladanj za pečenje
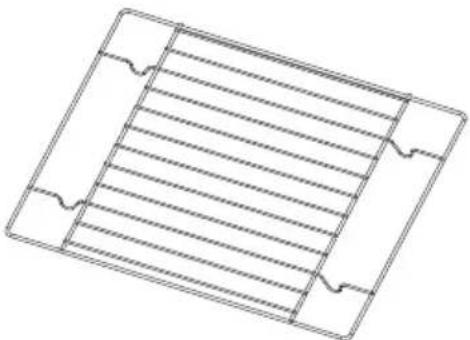
Polica pećnice
UGRADNJA
- Kuhinjski prostor treba biti suh, prozračen i opremljen učinkovitom ventilacijom. Prilikom ugradnje pećnice treba osigurati jednostavan pristup svim kontrolnim elementima.
- Ovo je ugradbena pećnica, a stražnja strana i jedna bočna strana mogu se postaviti uz visoki komad namještaja ili zida. Premaz ili furnir na ugradbenom namještaju mora biti pričvršćen ljepilom otpornim na toplinu (100 °C). To sprječava površinsku deformaciju ili odvajanje premaza.
- Napravite otvor s dimenzijama navedenima na dijagramu za ugradnju pećnice.
- Provjerite je li utikač odspojen i zatim spojite pećnicu na električno napajanje.
- Potpuno umetnite pećnicu u otvor pazeći da četiri vijka na mjestima prikazanima na dijagramu ne ispadnu.


| DIJAGRAM POVEZIVANJAOprez! Napon grijaćih elemenata 220-240 V~Oprez! U slučaju bilo kakvog priključivanja, sigurnosna žica mora biti priključena na 盆 PE terminal | 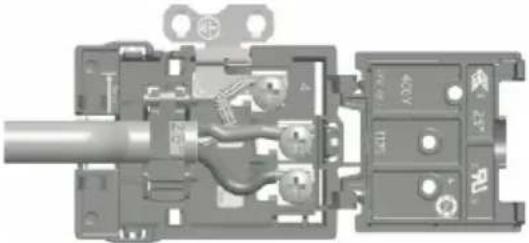 | |
| Za uzemljenu jednu fazu od 220 V – 240 V spojite na: smeđu žicu spojite na L i plavu žicu spojite na N, sigurnosnu žicu (žuto-zelena) spojite na 盆 |  220-240 V~ 220-240 V~ | |
RAD
Prije prve uporabe
- Uklonite ambalažu, očistite unutrašnjost pećnice i ploču za kuhanje.
- Izvadite i operite dijelove iz pećnice toplom vodom, s malo sredstva za pranje posuđa.
- Uključite ventilaciju u prostoriji ili otvorite prozor.
- Zagrijte pećnicu (na temperaturu od 250 °C, oko 30 minuta), uklonite sve mrlje i pažljivo operite; grijaće zone ploče za kuhanje treba zagrijavati oko 4 minute bez posude.
Važno!
Unutrašnjost pećnice smije se prati samo toplom vodom i malom količinom sredstva za pranje posuđa.
Žarulja pećnice
b. Šarke su potpuno podignute
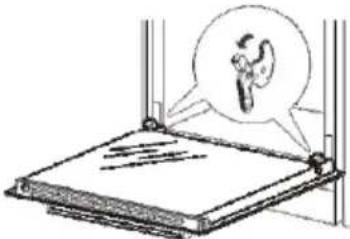
c. Lagano zatvarajte vrata pećnice dok ne čujete klik. Kada šarke dođu u položaj za učvršćivanje, držite vrata objema rukama i nastavite ih gurati prema unutra dok ih istovremeno lagano podižete, kako biste oslobodili šarke iz ležišta u pećnici.


Izvucite rešetku
RAD U SLUČAJU NUŽDE
Pre upotrebe uređaja, pažljivo pročitajte ovo uputstvo i sačuvajte ga za buduću upotrebu
UPOZORENJE
- Uređaj ne smeju koristiti osobe (uključujući decu) sa smanjenim fizičkim, senzornim ili mentalnim sposobnostima ili nedostatkom iskustva i znanja, osim ako su pod nadzorom ili su doble uputstva da se ne igraju uređajem.
- Tokom rada uređaji se zagrevaju. Budite pažljivi kako ne biste dodirnuli grejne elemente u unutrašnjosti rerne, kod ploča za kuvanje i rerni.
- UPOZORENJE: Dostupni delovi mogu postati vrući tokom upotrebe. Malu decu treba držati podalje.
- Za čišćenje staklene površine vrata rerne nemojte koristiti oštra abrazivna sredstva za čišćenje ili oštre metalne strugalice, jer mogu ogrebati površinu, što može da dovede do puknuća stakla.
- Ako tokom testa iz tačke 11 porast temperature u sredini unutrašnje donje fioke za skladištenje premaši temperaturu navedenu za ručke koje se drže kratko vreme u normalnoj upotrebi, u uputstvo se mora navesti da se ove površine mogu zagrejati.
- Rerna mora biti isključena pre uklanjanja štitnika, a nakon čišćenja štitnik se mora zameniti u skladu sa uputstvima.
- Detalji koji ukazuju na ispravnu ugradnju polica.
- Paročistač se ne sme koristiti.
- Uverite se da je uređaj isključen pre zamene sijalice da biste izbegli mogućnost strujnog udara.
- Aparat ne sme biti postavljen iza dekorativnih vrata, da ne bi došlo do pregrejavanja.
- Isključivanje uređaja nakon instalacije, pristupačnim utikačem ili prekidačem u fiksnom ožičenju.
- Ukoliko je priključni kabl oštećen, sme ga zameniti isključivo proizvođač ili njegov ovlašćeni serviser, jer ćete jedino time sprečiti eventualne opasnosti odnosno povrede.
- Ovaj uređaj treba povezati na kolo koje sadrži izolacioni prekidač kojem korisnik može pristupiti nakon instalacije, obezbeđujući tako potpuno isključivanje iz napajanja. Isključivanje se može postići ugradnjom prekidača u fiksno ožičenje u skladu sa pravilima ožičenja.
- Deca starija od osam godina, kao i lica smanjenih psiho-fizičkih ili mentalnih sposobnosti, odnosno lica bez potrebnih iskustava ili znanja, smeju koristiti ovaj uređaj isključivo pod nadzorom lica zaduženih za njihovu bezbednost, koja će im pružiti i potrebnu pomoć i uputstva za rad aparata te ih upozoriti na opasnosti povezane s upotrebom aparata. Pazite da deca ne koriste aparat kao igračku. Deca neka također ne učestvuju u postupcima čišćenja aparata ili obavljanja radova na njegovom održavanju bez odgovarajućeg nadzora.
- UPOZORENJE: Uređaj i njegovi pristupačni delovi postaju vrući tokom upotrebe.
- Treba voditi računa da se ne dodiruju delovi koji se zagrevaju.
UPOZORENJE
BEZBEDNOSNA UPUTSTVA....1
KAKO UŠTEDETI ENERGIJU....3
OPIS UREĐAJA......4
INSTALACIJA 6
RAD 8
ČIŠĆENJE I ODRŽAVANJE 11
U SLUČAJU NUŽDE....14
TEHNIČKI PODACI....15
BEZBEDNOSNA UPUTSTVA
NAPOMENA:
Korišćenje energije na odgovoran načinne samo da štedi novac, već i pomaže životnoj sredini. Pa hajde da uštedimo energiju! Evo kako to možete da uradite:
! Ne otkrivajte posudu prečesto (lonac koji se stalno kontroliše nikada ne ključa!)
Duboka posuda
Pleh za pečenje
Polica rerne
INSTALACIJA
| DIJAGRAM POVEZIVANJAOprez! Napon grejnih elemenata 220V~240VOprez! U slučaju bilo kakvog povezivanja, sigurnosna žica mora biti povezana sa ☑ETerminalom | 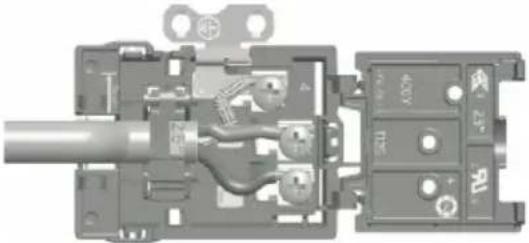 | |
| Za 220V-240V uzemljenu jednofaznu vezu: smeđa žica se povezuje sa L i plava žica se povezuje sa N, sigurnosna žica (žuto-zelena) se povezuje sa ☑ |  220V-240V~ 220V-240V~ | |
RAD
Pre prve upotrebe
- Uklonite ambalažu, očistite unutrašnjost rerne i ploču za kuvanje.
- Izvadite i operite priključke rerne toplom vodom sa malo deterdženta.
- Uključite ventilaciju u prostoriji ili otvorite prozor.
- Zagrevajte rernu (na temperaturu od 250 °C , oko 30 min.), uklonite sve mrlje i pažljivo operite; grejne zone ploče za kuvanje treba zagrevati oko 4 min bez tiganja.
Važno!
kao i dugme regulatora temperature - da biste podesili potrebnu temperaturu, okrenite dugme u željeni položaj.

Rerna se može isključiti podešavanjem oba ova dugmeta u položaj "●"/"○".
Sijalica rerne
b. Šarke zasuna su potpuno podignute

c. Pažljivo zatvorite vrata rerne dok ne čujete zvuk zaklapanja, kada dostignu položaj zaključavanja, držeći vrata sa obe ruke i nastavljajući da gurate, istovremeno povucite prema gore tako da se šarka ukloni iz rerne.


Izvucite rešetku
b. Uklonite unutrašnje staklo.
c. Pronađite graničnik za staklo i uklonite ga. Izvadite staklo radi čišćenja. Da biste ponovo postavili unutrašnje staklo, jednostavno ga lagano vratite na vrata i ponovo umetnite graničnik za staklo kako biste pričvrstili staklo na mesto.
U SLUČAJU NUŽDE
U slučaju nužde, potrebno je da:
! Isključite sve radne jedinice šporeta
! Izvadite utikač iz utičnice
! Pozovite servisni centar
! Neki manji kvarovi mogu se otkloniti prateći uputstva data u tabeli
| PROBLEMRAZLOGREŠENJE | ||
| Uređaj ne radi. Napajanje | je prekinuto | proverite kutiju sa osiguračima, ako je osigurač pregoreo, zamenite ga novim |
| Osvetljenje rerne ne radi | Sijalica nije pričvršćena ili je oštećena | Zategnite ili zamenite sijalicu (pogledajte poglavlje Čišćenje i održavanje) |
TEHNIČKI PODACI
Nazivni napon
Nominalna snaga
Dimenzije šporeta Š/D/V
Iskoristivi kapacitet rerne
Energetski razred
Težina
220V-240 V\~; 50/60 Hz
maks. 2,9 kw
595/ 530/ 595 mm
73 litre
na energetskoj oznaci
Pribl. 31,6 kg
gorenje
Sügav plaat

Küpsetusplaat

Ahjuriul
PAIGALDAMINE
KASUTAMINE HÄDAOLUKORRAS
Hädaolukorras peaksite:
Dzilā paplāte
cepamā plāts

Cepeškrāsns plaukts
UZSTĀDĪŠANA
SAVIENOJUMU DIAGRAMMA
Uzmanību! Sildelementu spriegums 200V\~240

RĪCĪBA ĀRKĀRTAS GADĪJUMĀ
Gili kepimo skarda

kepimo skarda

Orkaitės lentyna
MONTAVIMAS
Orkaitès lemputé
VEIKIMAS SKUBIU ATVEJU
Susidarius avarinei situacijai, reikia:
- USER AND INSTALLATION MANUAL
- BUILT-IN ELECTRIC OVEN
- WARNING
- DEAR CUSTOMER
- CAUTION
- CONTENTS
- SAFETY INSTRUCTIONS....1
- CLEANING AND MAINTENACE....11
- OPERATION IN CASE OF EMERGENCY....14
- TECHNICAL DATA....15
- SAFETY INSTRUCTIONS
- HOW TO SAVE ENERGY
- UNPACKING
- DISPOSAL OF THE APPLIANCE
- SPECIFICATIONS OF APPLIANCE
- INSTALLATION
- PRODUCT DIMENSIONS APERTURE DIMENSIONS
- ELECTRICAL CONNECTION
- FITTING GUIDELINES
- OPERATION
- BEFORE FIRST USE
- IMPORTANT
- OVEN ON AND OFF
- OVEN FUNCTIONS AND OPERATION
- NATURAL CONVECTION OVEN (CONVENTIONAL)
- USING THE MINUTE MINDER
- POSSIBLE KNOB POSITIONS
- SEPARATE OVEN LIGHTING
- DEFROSTING
- BOTTOM HEATER ON
- BOTTOM AND TOP HEATERS ON
- COMBINED GRILL
- (GRILL AND THE TOP HEATER)
- FAN,BOTTOM AND TOP HEATERS ON
- FAN AND COMBINED GRILL ON
- CENTRAL ELEMENT WITH FAN ON
- MODE OF OPERATION
- EXAMPLE: USE OF THE GRILL HEATER
- CLEANING AND MAINTENANCE
- OVEN
- STEAM CLEANING
- REPLACEMENT OF THE OVEN LIGHT BULB
- REMOVING THE DOORS
- REMOVE THE INNER GLASS PANEL
- OPERATION IN CASE OF EMERGENCY
- TECHNICAL DATA
- GORENJE
- ВСТАНОВЛЕННЯ
- СХЕМА ПІДКЛЮЧЕННЯ
- ATTENZIONE
- СХЕМА ПОДКЛЮЧЕНИЯ
- МОНТАЖ
- UPOZORENJE
- UGRADNJA
- RAD
- PRIJE PRVE UPORABE
- VAŽNO
- RAD U SLUČAJU NUŽDE
- BEZBEDNOSNA UPUTSTVA
- NAPOMENA
- INSTALACIJA
- PRE PRVE UPOTREBE
- U SLUČAJU NUŽDE
- TEHNIČKI PODACI
- PAIGALDAMINE
- KASUTAMINE HÄDAOLUKORRAS
- UZSTĀDĪŠANA
- SAVIENOJUMU DIAGRAMMA
- UZMANĪBU! SILDELEMENTU SPRIEGUMS 200V\~240
- RĪCĪBA ĀRKĀRTAS GADĪJUMĀ
- MONTAVIMAS
- VEIKIMAS SKUBIU ATVEJU
Brand : GORENJE
Model : BO6727E03AX
Category : Oven