Q8 Pro - Keyboard Keychron - Free user manual and instructions
Find the device manual for free Q8 Pro Keychron in PDF.


| Product Type | Wireless Mechanical Keyboard |
| Brand | Keychron |
| Model | Q8 Pro |
| Number of Keys | 68 |
| Switch Type | Mechanical |
| Battery Capacity | 4000mAh |
| Charging Time | Approximately 5 hours |
| Charging Port | USB Type-C |
| Bluetooth Operating Distance | Up to 10 meters (open space) |
| Bluetooth Device Name | Keychron Q8 Pro |
| Operating Temperature | -10 to 50°C |
| Modes | Bluetooth / Wired |
| OS Compatibility | Mac/iOS, Windows/Android |
| Layers | 5 (Layer 0-4) |
| Backlight | RGB, adjustable brightness and effects |
| Maximum Bluetooth Devices | 3 simultaneous |
| Included Cable | Type-C to Type-C cable, Type-A to Type-C adapter |
| Included Tools | Switch puller, keycap puller, screwdriver, hex key |
| Software Support | VIA key remapping (caniusevia.com) |
| Warranty | Replacement of defective parts during warranty period |
| Safety Precautions | Keep dry, avoid extreme temperatures |
Frequently Asked Questions - Q8 Pro Keychron
User questions about Q8 Pro Keychron
0 question about this device. Answer the ones you know or ask your own.
Ask a new question about this device
Download the instructions for your Keyboard in PDF format for free! Find your manual Q8 Pro - Keychron and take your electronic device back in hand. On this page are published all the documents necessary for the use of your device. Q8 Pro by Keychron.
USER MANUAL Q8 Pro Keychron
Fully Assembled Version
Keyboard
1x Fully Assembled Keyboard
Including
1x Aluminum Case
1x PCB
1x PC Plate
14x Gaskets (11 Installed and 3 in the Box)
5 Sets x Stabilizers
1 Set x Keycaps (PBT Double-shot)
1 Set x Switches
Cable
1x Type-C to Type-C Cable
1x Type-A to Type-C Adapter
Tools
1x Switch Puller
1x Keycap Puller
1x Screwdriver
1x Hex Key
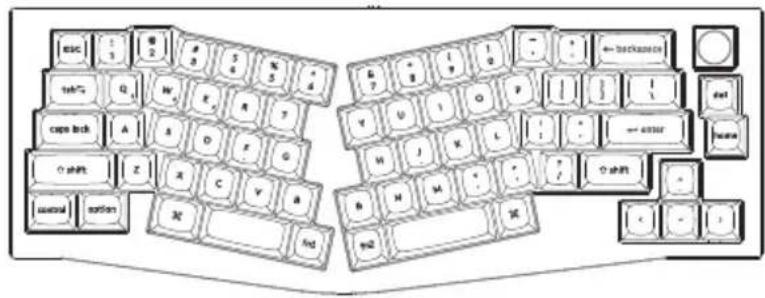
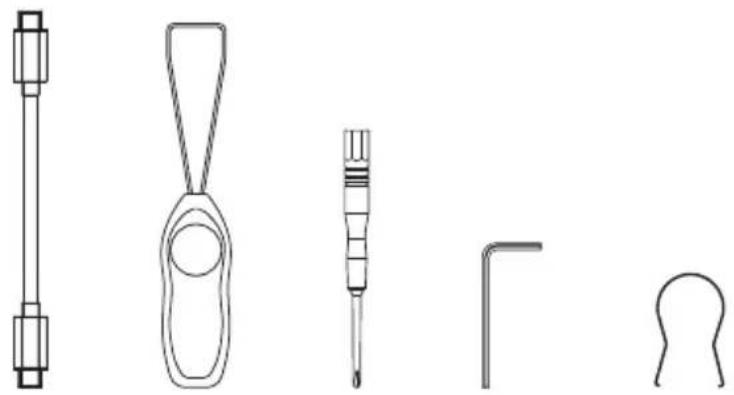
natural_image
Line drawings of five different screwdriver tools (no text or symbols)Barebone Version
Keyboard Kit
1x Keyboard Kit (Without Keycaps & Switches)
Including
1x Aluminum Case
1x PCB
1x PC Plate
14x Gaskets (11 Installed and 3 in the Box)
5 Sets x Stabilizers
Cable
1x Type-C to Type-C Cable
1x Type-A to Type-C Adapter
Tools
1x Switch Puller
1x Keycap Puller
1x Screwdriver
1x Hex Key

flowchart
graph TD
    A["Room 1"] --> B["Room 2"]
    B --> C["Room 3"]
    C --> D["Room 4"]
    D --> E["Room 5"]
    E --> F["Room 6"]
    F --> G["Room 7"]
    G --> H["Room 8"]
    H --> I["Room 9"]
    I --> J["Room 10"]
    J --> K["Room 11"]
    K --> L["Room 12"]
    L --> M["Room 13"]
    M --> N["Room 14"]
    N --> O["Room 15"]
    O --> P["Room 16"]
    P --> Q["Room 17"]
    Q --> R["Room 18"]
    R --> S["Room 19"]
    S --> T["Room 20"]
    T --> U["Room 21"]
    U --> V["Room 22"]
    V --> W["Room 23"]
    W --> X["Room 24"]
    X --> Y["Room 25"]

natural_image
Line drawings of five different screwdriver tools (no text or symbols)Quick Start Guide
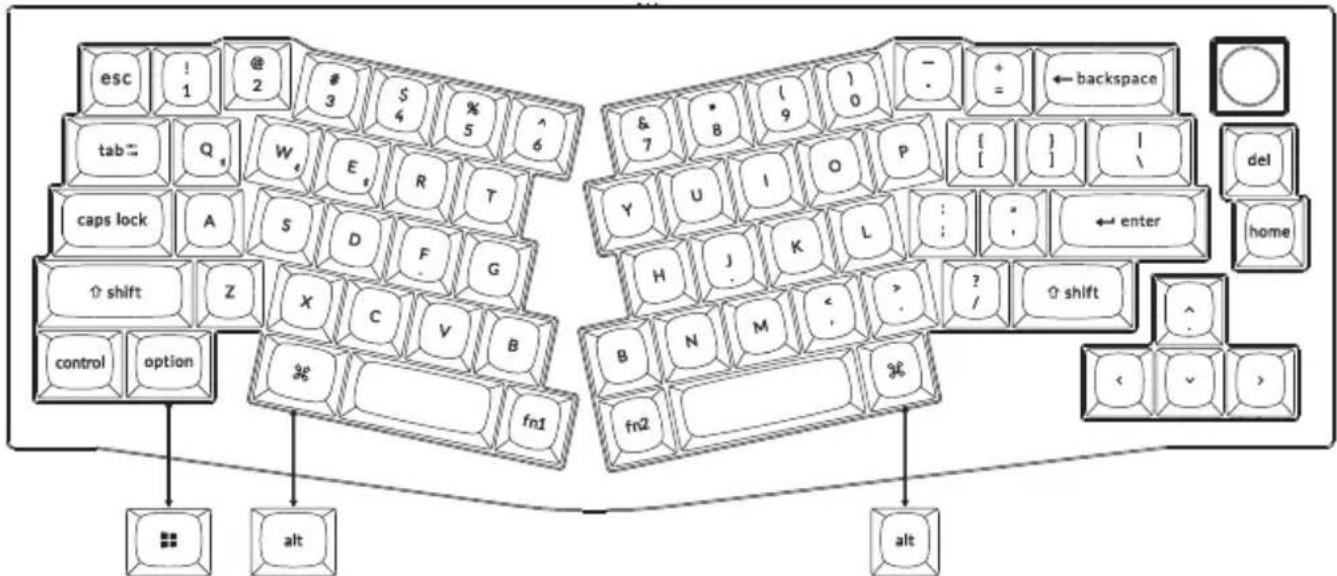
If you are a Windows user, please find the appropriate keycaps in the box, then follow the instructions below to find and replace the following keycaps.
Mac / Windows
flowchart
graph TD
    subgraph Key1
        A["esc"] --> B["1"]
        C["@"] --> D["2"]
        E["#"] --> F["3"]
        G["S"] --> H["4"]
        I["%"] --> J["5"]
        K["^"] --> L["6"]
        M["&"] --> N["7"]
        O["*"] --> P["8"]
        Q["(9)"] --> R["0"]
        S["0"] --> T["1"]
        U["1"] --> V["2"]
        W["1"] --> X["3"]
        Y["Y"] --> Z["U"]
        AA["I"] --> AB["1"]
        AC["O"] --> AD["2"]
        AE["P"] --> AF["3"]
        AG["1"] --> AH["4"]
        AI["1"] --> AJ["5"]
        AK["1"] --> AL["6"]
        AM["← backspace"] --> AN[" "]
    end
    subgraph Key2
        AO["caps lock"] --> AP["A"]
        AQ["S"] --> AR["S"]
        AS["D"] --> AT["S"]
        AU["F"] --> AV["F"]
        AW["G"] --> AX["G"]
        AY["↑ shift"] --> AZ["Z"]
        BA["X"] --> BB["C"]
        BC["V"] --> BD["V"]
        BE["B"] --> BF["B"]
        BG["control"] --> BH["option"]
        BI["alt"] --> BJ["alt"]
    end
    subgraph Key3
        BK["&"] --> BL["7"]
        BM["*"] --> BN["8"]
        BO["(9)"] --> BP["(9)"]
        BQ["P"] --> BR["(1)"]
        BS["1"] --> BT["(1)"]
        BU["1"] --> BV["(1)"]
        BW["← enter"] --> BX["enter"]
        BY["H"] --> BZ["H"]
        CA["J"] --> CB["J"]
        CC["K"] --> CD["K"]
        DD["L"] --> DX["L"]
        DV["..."] --> DW["?"]
        DX["?"] --> BX["enter"]
        BX["×"] --> BYX["?"]
        BYX["?"] --> BZX["B"]
        BYX["×"] --> BZX["?"]
        BYX["×"] --> BZX["?"]
        BYX["×"] --> BZX["?"]
        BYX["×"] --> BZX["?"]
    end
    subgraph Key4
        CA["&"] --> CB["7"]
        CB["8"] --> CC["9"]
        CC["9"] --> BD["1"]
        DC["1"] --> BE["2"]
        BE["2"] --> BZ["X"]
        DC["2"] --> BZ["X"]
        DC["2"] --> BZ["X"]
        DC["2"] --> BZ["X"]
    end
    subgraph Key5
        DB["X"] --> DCB["N"]
        DCB["N"] --> DCZ["M"]
        DCZ["M"] --> DCZ["M"]
        DCZ["M"] --> DCZ["M"]
        DCZ["M"] --> DCZ["M"]
    end
    subgraph Key6
        DBX["X"] --> DCZM["N"]
        DCZM["N"] --> DCZM["M"]
        DCZM["M"] --> DCZM["M"]
    end
    subgraph Key7
        DBY["X"] --> DCZM["M"]
        DCZM["M"] --> DCZM["M"]
    end
    subgraph Key8
        DBZ["X"] --> DCZM["M"]
        DCZM["M"] --> DCZM["M"]
    end
1 Connect Bluetooth


2 Connect Cable

3 The VIA Key Remapping Software
Please visit caniusevia.com to download the latest VIA software to remap the keys. If the VIA software cannot recognize your keyboard, please reach out to our support to get the instruction. (VIA only works when the keyboard is connected by wire to the computer.)

4 The Layers
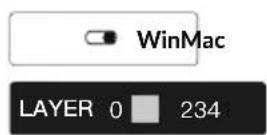
There are five layers of key settings on the keyboard. The layer 0 is for the Mac system.
The layer 1 is for the Windows system.
The layer 2 is for the Mac Multimedia keys.
The layer 3 is for the Windows Multimedia keys.
The layer 4 is for the Function keys.
If your system toggle is switched to Mac, then the layer 0 will be activated.
If your system toggle is switched to Windows, then the layer 1 will be activated.


5 Multimedia Key and Function Key
Multimedia keys
/ / / 10 / 10 / 10 / 10 / 10 / 10 / 10 / 10
Function keys
F1 / F2 / F3 / F4 / F5 / F6 / F7 / F8 / F9 / F10 / F11 / F12
In order to get Multimedia Key, you need to press fn1 and ____ Key. In order to get Function Key, you need to press fn2 and ____ Key.
6 The Backlight
Press fn1 + A to change the lighting effect Press fn1 + caps lock to turn the backlight on/off


flowchart
graph TD
    A["Keyboard 1"] --> D["Input Field"]
    B["Keyboard 2"] --> E["Input Field"]
    C["Keyboard 3"] --> F["Input Field"]
    G["Keyboard 4"] --> H["Input Field"]
    I["Keyboard 5"] --> J["Input Field"]
    K["Keyboard 6"] --> L["Input Field"]
    M["Keyboard 7"] --> N["Input Field"]
    O["Keyboard 8"] --> P["Input Field"]
    Q["Keyboard 9"] --> R["Input Field"]
    S["Keyboard 10"] --> T["Input Field"]
    U["Keyboard 11"] --> V["Input Field"]
    W["Keyboard 12"] --> X["Input Field"]
    Y["Keyboard 13"] --> Z["Input Field"]
    AA["Keyboard 14"] --> AB["Input Field"]
    AC["Keyboard 15"] --> AD["Input Field"]
    AE["Keyboard 16"] --> AF["Input Field"]
    AG["Keyboard 17"] --> AH["Input Field"]
    AI["Keyboard 18"] --> AJ["Input Field"]
    AK["Keyboard 19"] --> AL["Input Field"]
    AM["Keyboard 20"] --> AN["Input Field"]
7 Adjust The Backlight Brightness
Press fn1 + S to increase the backlight brightness Press fn1 + X to decrease the backlight brightness


flowchart
graph TD
    A["Keyboard 1"] --> B["Keyboard 2"]
    C["Keyboard 3"] --> D["Keyboard 4"]
    E["Keyboard 5"] --> F["Keyboard 6"]
    G["Keyboard 7"] --> H["Keyboard 8"]
    I["Keyboard 9"] --> J["Keyboard 10"]
    K["Keyboard 11"] --> L["Keyboard 12"]
    M["Keyboard 13"] --> N["Keyboard 14"]
    O["Keyboard 15"] --> P["Keyboard 16"]
    Q["Keyboard 17"] --> R["Keyboard 18"]
    S["Keyboard 19"] --> T["Keyboard 20"]
    U["Terminal Block"] --> V["Terminal Block"]
8 Warranty
The keyboard is highly customizable and easy to be rebuilt. If anything goes wrong with any of the keyboard components of keyboard during the warranty period, we will only replace the defective parts of the keyboard, not the whole keyboard.

9
Watch The Building Tutorial On Our Website
If you are building the keyboard for the first time, we highly recommend you watch the building tutorial video on our website first, then start building the keyboard yourself.

10
Factory Reset
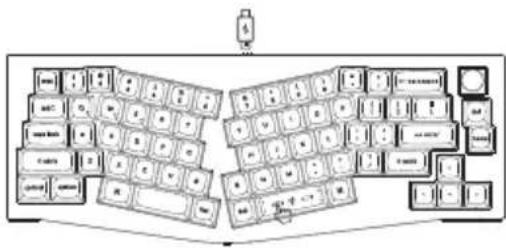
Troubleshooting? Don't know what's going on with the keyboard?
① Plug in the power cable and switch the keyboard to Cable mode.
② Factory reset the keyboard by pressing fn2 + J + Z (for 4 seconds).
③ Download the right firmware and QMK Toolbox from our website.
④ Switch the keyboard to OFF mode and remove the space bar keycap to find the reset button on the PCB.
⑤ Hold the reset key first, then switch the keyboard to Cable mode. Release the reset key, and the keyboard will now enter DFU mode.
⑥ Flash the firmware with the QMK Toolbox.
⑦ Factory reset the keyboard again by pressing fn2 + J + Z (for 4 seconds).
* Step by step guide can be found on our website.
Q8 PRO BLUETOOTH MECHANICAL KEYBOARD SPECIFICATIONS
Number of keys: 68
Switch type: Mechanical
Battery: 4000mAh
Bluetooth working time (RGB): Up to 100 hours (Lowest brightness)
Charging time: Around 5 hours
Charging port: USB Type-C
Mode: Bluetooth / Wired
Bluetooth operating distance: Within 10 meters (open space)
Name of Bluetooth device: Keychron Q8 Pro
Operating environment: -10 to 50°C
Technical specifications can be subjected to change without notice, we apologize for any inconvenience caused.
Q8 PRO BLUETOOTH MECHANICAL KEYBOARD OVERVIEW


① Bluetooth indicator
② BT OFF Cable
(Mode Toggle Switch)
③ Win/Android Mac/iOS (OS Toggle Switch)
④ Charging port
DEFAULT KEY LAYOUT:
LAYER 0: This layer will be activated when your keyboard's system toggle is switched to Mac.

LAYER 1: This layer will be activated when your keyboard's system toggle is switched to Windows.

LWin = Left Windows LAIt = Left Alt RAlIt = Right Alt
LAYER 2: This layer will be activated when your keyboard's system toggle is switched to Mac and press the fn1/MO(2) key.

LAYER 3: This layer will be activated when your keyboard's system toggle is switched to Windows and press the fn1/MO(3) key.

LAYER 4: This layer will be activated when you press the fn2/MO(4) key.

KEY DESCRIPTION
| Key Description | Key Description | ||
| Scr- | Screen Brightness Decrease | RGBMd- | RGB Mode Previous |
| Scr+ | Screen Brightness Increase | Hue+ | Hue Increase |
| Bright- | Backlight Decrease | Hue- | Hue Decrease |
| Bright+ | Backlight Increase | RGB SPI | RGB Speed Increase |
| Prvs | Previous | RGB SPD | RGB Speed Decrease |
| Play | Play/Pause | MO(1) | Layer 1 will be activated when holding this key |
| Next | Next | MO(2) | Layer 2 will be activated when holding this key |
| Mute | Mute | MO(3) | Layer 3 will be activated when holding this key |
| Vol- | Volume Decrease | MO(4) | Layer 4 will be activated when holding this key |
| Vol+ | Volume Increase | BTH1 | Bluetooth Host 1 |
| RGB Toggle | Turn Backlight on/off | BTH2 | Bluetooth Host 2 |
| RGB Mode NextRGBMd+ | BTH3 | Bluetooth Host 3 | |
LED STATUS OVERVIEW
| LED Location Function Status | ||
| Battery indicator | Charging | Charging - Static RedFully charged - Static Green |
| Bluetooth indicator | Bluetooth | Pairing - Slow BlinkingPaired - Light OffSwitching - Fast Blinking |
FUNCTION DESCRIPTION: CHARGING
Plug the cable into a USB port and plug the other end into the keyboard port. Charging Indicator: A red light will stay on while charging; Fully charged in around 5 hours, a green battery indicator will appear.
*The Keychron keyboard is compatible with all USB ports. Please use a 5V 1A adapter or USB 3.0 for the best performance. The Keychron Q8 Pro can be charged in Bluetooth/on/off mode.
**This product supports up to 5V charging voltage and 1A charging current. We are not responsible for any problems caused by improper charging.
BLUETOOTH / WIRED MODE (MODE TOGGLE SWITCH)
WIRED MODE
-
Switch the toggle switch to the Cable option (it only works when a USB cable is plugged in).
-
Connect our cable with your PC and keyboard.
-
Backlighting will be turned on.
*Under Wired Mode, keyboard will not enter into Battery Saver Mode.
BLUETOOTH MODE
- Switch the toggle switch to the Bluetooth option.
- Backlighting will be turned on.
- Hold "fn1+Q" key for 4 seconds to activate Bluetooth pairing (the Bluetooth indicator fast flashes for 3 minutes to detect pairing).
- Search for the Bluetooth device "Keychron Q8 Pro" on your device and connect it (the Bluetooth indicator goes off after successful pairing).
Note: This keyboard supports pairing up to 3 devices simultaneously via key combination "fn1" + "Q" / "fn1" + "W" / "fn1" + "E".
*The Bluetooth indicator will continue to flash for 3 minutes.
**Slow or failed connections may exist due to different Bluetooth versions, please make sure all the settings are correct.
SWITCH BLUETOOTH DEVICES
Short press key combination "fn1" + "Q" / "fn1" + "W" / "fn1" + "E" to switch to other device.
RECONNECT:
- Switch the keyboard to the Bluetooth option to activate the keyboard.
- The Bluetooth indicator flashes for 4 seconds and automatically pairs with the last paired device.
- If the Bluetooth indicator is off, press any button to enter the connection again.
* The keyboard must have been paired with the device to perform this function.
Switch the keyboard to the OFF option.
BACKLIGHT SETTING
- Short press key combination "fn1" + "caps lock" to turn the backlight on/off.
- Short press key combination "fn1" + "A" / "fn1" + "Z" to switch between different types of lighting effects.
OS TOGGLE SWITCH
1 - MAC/iOS
Switch the toggle to Mac/iOS when the keyboard is connected to a Mac or iOS operating system.
2-WINDOWS/ANDROID
Switch the toggle to Windows/Android when the keyboard is connected to a Windows or Android operating system.
*When using the Windows/Android mode, [■][★] keys are used for "Windows" and "Alt" functions.
3 - INPUT METHOD SWITCH
For iOS:
Input method switch: Ctrl + Space
Caps Lock: Caps (Enable General>Keyboards>Hardware Keyboard>Caps Lock Language Switch)
For Android:
Input method switch: Shift + Space
NOTE: Functions of certain multimedia key may be disabled due to compatibility, versions, brands and drivers of Windows/Android OS. We also recommend not to switch OS frequently as it may impact keyboard operations.
TROUBLESHOOTING
If unable to pair keyboard to device, confirm that the device you're trying to pair with is Bluetooth-capable. If so, restart the device and try pairing it with the keyboard again.
Note: On a Windows computer, a new Bluetooth connection will sometimes require additional software updates—a process that may still be ongoing after a message appears indicating a successful completion. Wait at least 20 minutes after pairing to make sure all updates are completed before restarting the computer.
Confirm that the device is configured to accept Bluetooth connections (Windows) and supports an external keyboard (HID profile).
Go to Bluetooth Devices > Open Settings and select the following:
Allow Bluetooth devices to find this computer
Allow Bluetooth devices to connect to this computer
Alert me when a Bluetooth device wants to connect
My keyboard isn't working.
For the computer/smartphone:
Go to your device Bluetooth settings>Select the keyboard and remove/delete/unpair it.
Then restart your device.
For the keyboard:
Turn the keyboard off and back on. Then reconnect it to your device.
Bluetooth connection is interrupted even within 10 meters.
Check if the keyboard is resting on a metal surface that can interfere with the Bluetooth signal.
Third-party input tools are not compatible with the keyboard.
Due to compatibility, versions, brands and drivers of Windows/Android OS, functions of third-party input tools may be affected while using the keyboard. Please make sure your operating system and drivers are up to date.
Certain multimedia keys or function keys do not work.
Functions of certain multimedia keys may be disabled due to compatibility, versions, brands, and drivers of devices.
*Multimedia keys:

Function keys:

Safety Precaution:
Keep the product, accessories and packaging parts out of the reach of children to prevent any accidents and choking hazards.
Always keep the product dry to avoid corrosion.
Do not expose the product to extreme temperatures below -10^(5^) or above 50^(131^) to preserve the lifespan of the keyboard.
Keychron, Inc.
Dover, DE 19901, United States
Find us at:
https://www.keychron.com
Support@keychron.com
f @keychron
@keychron
@keychronMK
Designed by Keychron
Made in China

Keychron
Q8 Pro 蓝牙机械键盘
旋钮版本
完全组装版本
键盘
1x 已组装成品键盘
包含
1x 铝合金金属外壳
1x PCB
1x PC定位板
natural_image
Line drawings of five different screwdriver tools (no text or symbols)套件版本
键盘
1x 键盘本体(不包含键帽、轴体)
包含
1x 铝合金金属外壳
1x PCB
1x PC定位板
natural_image
Floor plan layout with room layouts and furniture placement (no text or labels)
natural_image
Line drawings of five different screwdriver tools (no text or symbols)快速入门指南

7 调整键盘背光亮度

组合fn1+X键,减少键盘背光亮度组合fn1+S键,提高键盘背

flowchart
graph TD
    A["Keyboard 1"] --> D["Terminal Block"]
    B["Keyboard 2"] --> D
    C["Keyboard 3"] --> D
    E["Keyboard 4"] --> D
    F["Keyboard 5"] --> D
    G["Keyboard 6"] --> D
    H["Keyboard 7"] --> D
    I["Keyboard 8"] --> D
    J["Keyboard 9"] --> D
    K["Keyboard 10"] --> D
    L["Terminal Block"] --> M["Terminal Block"]
    N["Terminal Block"] --> O["Terminal Block"]
8 保修
如果键盘出现了故障,不知道怎么办?
① 蓝牙指示灯
② BT OFF Cable
(连接模式切换开关)
③ Win/Android Mac/iOS (OS切换开关)
④ 充电口
Q8 Pro 键盘规格
按键:68键
轴:机械轴
电池:4000mAh
LWin = Left Windows LAIt = Left Alt RAlt = Right Alt
Dover, DE 19901, United States
https://www.keychron.com
通过以下方式与我们联系
Support@keychron.com
f@keychron
@keychron
@keychronMK
Keychron设计
中国制造
中国区总代:渴创技术(深圳)有限公司
- Fully Assembled Version
- Keyboard
- Including
- Cable
- Tools
- Barebone Version
- Keyboard Kit
- Quick Start Guide
- Connect Bluetooth
- Connect Cable
- The VIA Key Remapping Software
- The Layers
- Multimedia Key and Function Key
- The Backlight
- Adjust The Backlight Brightness
- Warranty
- 9
- 10
- Q8 PRO BLUETOOTH MECHANICAL KEYBOARD SPECIFICATIONS
- DEFAULT KEY LAYOUT:
- LED STATUS OVERVIEW
- FUNCTION DESCRIPTION: CHARGING
- BLUETOOTH / WIRED MODE (MODE TOGGLE SWITCH)
- WIRED MODE
- BLUETOOTH MODE
- SWITCH BLUETOOTH DEVICES
- RECONNECT:
- BACKLIGHT SETTING
- OS TOGGLE SWITCH
- - MAC/iOS
- 2-WINDOWS/ANDROID
- - INPUT METHOD SWITCH
- TROUBLESHOOTING
- My keyboard isn't working.
- Bluetooth connection is interrupted even within 10 meters.
- Third-party input tools are not compatible with the keyboard.
- Certain multimedia keys or function keys do not work.
- Safety Precaution:
- Keychron
- Q8 Pro 蓝牙机械键盘
- 完全组装版本
- 键盘
- 包含
- 套件版本
- 快速入门指南
- 调整键盘背光亮度
- 保修
- Q8 Pro 键盘规格
Brand : Keychron
Model : Q8 Pro
Category : Keyboard