A1 - Sports camera Rexing - Free user manual and instructions
Find the device manual for free A1 Rexing in PDF.


| Product Type | Sports camera |
| Model | A1 |
| Brand | Rexing |
| Resolution | Simplex: 2560×1440 @ 30fps; Duplex: 1920×1080 @ 30fps |
| Dimensions | 4" x 1.2" x 1.2" (10.2 x 3.0 x 3.0 cm) |
| Weight | 3.5 oz (99 g) |
| Video Format | .mp4 |
| Memory | Micro SD up to 256GB, Class 10 or above |
| Image Sensor | Dual SONY IMX307 |
| Audio | Built-in microphone |
| Wi-Fi | Yes, with RexingConnect app |
| Remote Control | Included, uses CR2032 battery |
| Battery | Rechargeable via Micro USB (internal, not user-replaceable) |
| Charging Indicator | Red LED on while charging, off when fully charged |
| Power Saving | Auto off after 5 minutes of inactivity |
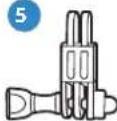
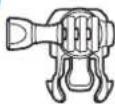
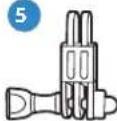
| Mounting | Adhesive mount, mounting buckle, pivot arm, quick release plate |
| Box Contents | Camera, remote, mounts, USB cable, charger, manual |
| Warranty | 18-month limited warranty (1 year standard, extendable via registration) |
| FCC Compliance | Class B digital device, complies with Part 15 |
| Care | Keep dry and clean; avoid extreme temperatures |
Frequently Asked Questions - A1 Rexing
User questions about A1 Rexing
0 question about this device. Answer the ones you know or ask your own.
Ask a new question about this device
Download the instructions for your Sports camera in PDF format for free! Find your manual A1 - Rexing and take your electronic device back in hand. On this page are published all the documents necessary for the use of your device. A1 by Rexing.
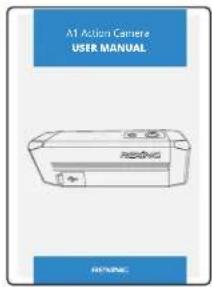
USER MANUAL A1 Rexing
natural_image
Line drawing of a Rexing device casing with two buttons and a USB symbol (no text or labels beyond branding)
Overview
Thank you for choosing REXING! We hope you love your new product as much as we do.
If you need assistance, or have any suggestions to improve it, please contact us. You can reach us via care@rexingusa.com or call us at (203) 800-4466. Our support team will respond you as soon as possible. 日本語のお客様は、ご首問等がございましたら、jpcare@rexingusa.com までもメールでお問合せください。
Always a surprise in Rexing. Check us out here.
https://www.facebook.com/rexingusa/ https://www.instagram.com/rexingdashcam/ https://www.rexingusa.com/support/registration/ https://www.rexingusa.com/support/product-support/
REXING
Facebook Instagram Site
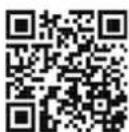
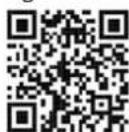
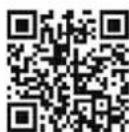
Product Support
REXING

TABLE OF CONTENTS
natural_image
Line drawing of a RPXING printer device with two buttons and a small connector (no text or symbols on the body)2
3
4
5
67
natural_image
Simple line drawing of a USB cable with two connectors (no text or symbols)●
9
01 A1 Action Camera
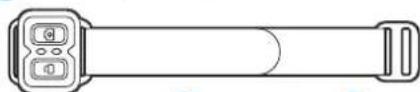
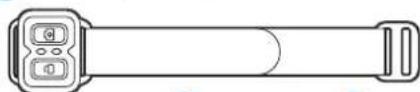
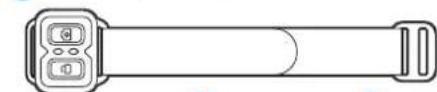
02 Remote Control
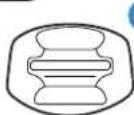
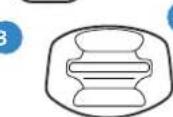
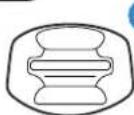
03 Adhesive Mount
04 Mounting Buckle with Thumb Screw
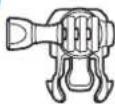
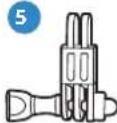
05 Pivot Arm with Thumb Screw
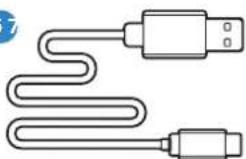
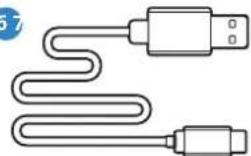
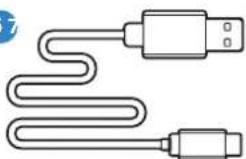
06 USB to Micro USB Cable
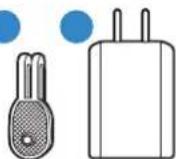
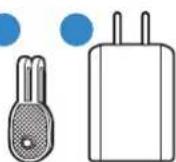
07 Quick Release Plate
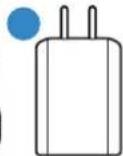
08 Charger
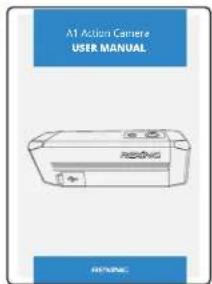
09 User Manual
Definition of Indicator Lights, Keys and Camera Vibration
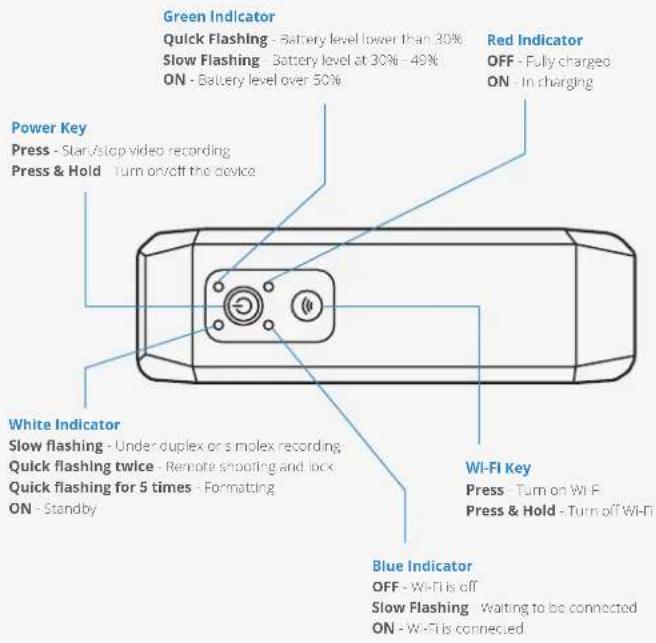
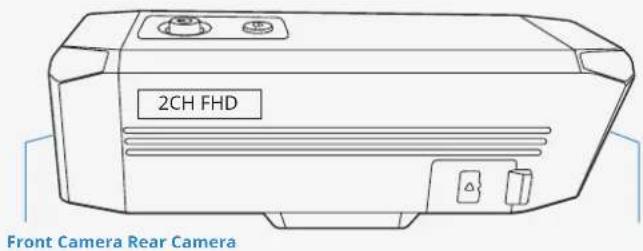
Camera Vibration
Vibrating once
Vibrating for 5 times
Long vibration for 2 times
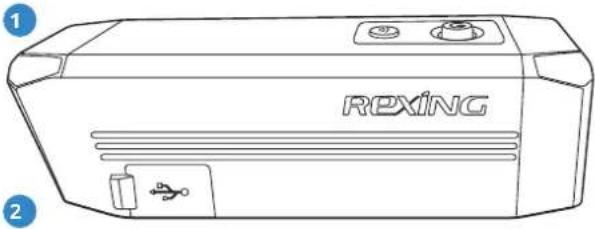
1 The device turns on. To turn on the action camera, release the key once it vibrates.
2 The valid operation: starting/stopping video recording, Wi-Fi, etc. (excluded shutdown and formatting)
3 Remote operation
1 Memory card formatted.
2 Device error.
Power off (including manual, automatic, and low battery shutdown)
Specification
| MODEL | A1 |
| RESOLUTION | Simplex 2560*1440 30fpsDuplex 1920*1080 30fps |
| BODY DIMENSION | 4" x 1.2" x 1.2" |
| WEIGHT | 3.5 oz |
| VIDEO FORMAT | .mp4 |
| MEMORY | Micro SD, up to 256G. Class 10 |
| AUDIO INPUT | Built-in microphone |
| IMAGE SENSOR | SONY IMX307 x 2 |
Installation
Get Started
1 Take out the device and Micro USB cable.
2 Connect the charger and computer with USB cable to charge the recorder.
3 The Red Indicator will be ON while charging and OFF after charging is complete.
4 If the battery runs out of power during use, the device turns off automatically.
Micro SD Card Instructions
1 Open the waterproof cover cap from the Micro SD card slot.
2 Insert a high speed Micro SD card (Class 10 or above) according to the direction indicated on the slot.
3 Close the card slot cover cap.
4 DO NOT insert or remove the Micro SD card when device is turned on.
Installation
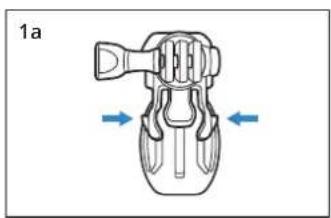
natural_image
Diagram of a mechanical device with directional arrows indicating movement or force (no text or symbols)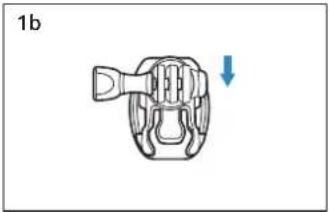
natural_image
Diagram of a mechanical component with a downward arrow indicating motion (no text or symbols)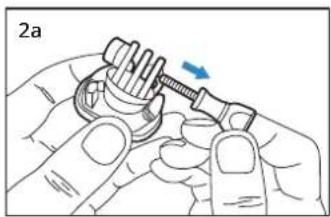
natural_image
Illustration of hands using a mechanical tool to adjust a component (no text or symbols visible)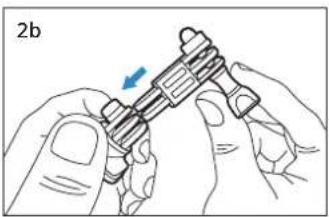
natural_image
Illustration of hands assembling a mechanical component with a blue arrow indicating rotation (no text or symbols)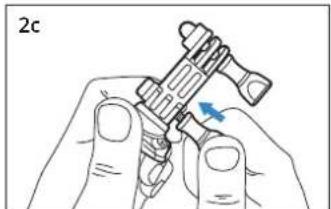
natural_image
Illustration of a hand holding a mechanical component with a blue arrow indicating rotation (no text or symbols)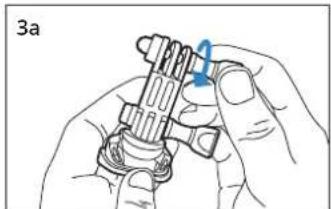
natural_image
Illustration of hands assembling a mechanical component (no text or symbols visible)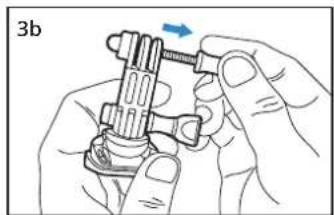
natural_image
Illustration of hands assembling a mechanical component with a blue arrow indicating direction (no text or symbols)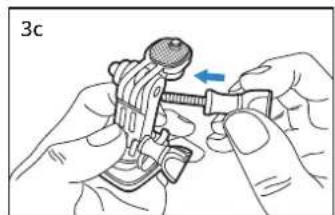
natural_image
Illustration of hands using a mechanical tool to adjust a component (no text or symbols visible)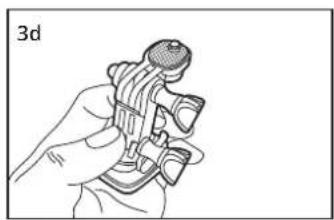
natural_image
Line drawing of a hand holding a mechanical device (no text or symbols)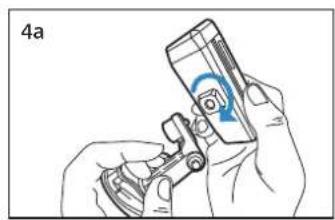
natural_image
Illustration of hands using a handheld device to adjust or install a device (no text or symbols visible)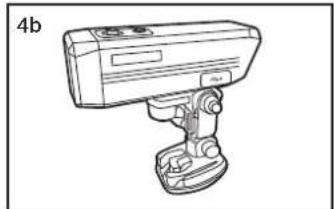
natural_image
Line drawing of a handheld electronic device with a base and top mount (no text or symbols)Basic Operations
Basic Operations
Operation
1 Press the Power Key to turn on the device (the device vibrates once).
2 Once ON, the recorder automatically enters video mode and starts recording (white indicator flashed). Press the Power Key to stop recording (the camera vibrates once).
3 After the recorder is turned on, Wi-Fi will be activated automatically and the blue indicator flashes at the same time. If connection is not established with any cellphone within 1 minute, Wi-Fi will turn off. Upon successful connection with a cellphone, the blue Wi-Fi indicator light turns on (Note: After the Wi-Fi Key is held down for 5 seconds, Wi-Fi will not be turned on automatically at next booting.)
4 Press Power Key again the power key to turn the device off (the camera vibrates twice).
5 Press the Power Key continuously for 5 times, and the card will be formatted. The white indicator will flash 3 times and the camera vibrates 5 times.
6 Power Saving Mode: Even if the camera is ON/recording, it will turn itself off if there is no motion detected for 5 minutes.
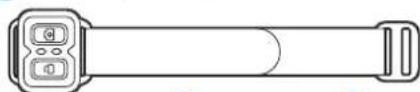
Using the Remote Control
1 The action camera automatically pairs with its remote control after starting.
2 Pressing the Lock Button of the remote control, its red indicator light will flash once and the device's white indicator will flash twice and the video file under recording will be locked and saved.
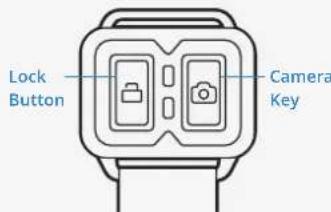
3 Pressing the Camera Key of the remote control, its green light flashes once and the white indicator of the device will flash twice and a picture will be taken.
4 The remote control uses ONE CR2032 battery.
APP Operation
1 Download the RexingConnect APP via the Appstore/Playstore to your cell phone.
2 Search for REXING_xxxxxxxxxxxxx with your phone, Wi-Fi password: 12345678
3 Alter successful connection, it returns to the APP homepage and you are allowed to preview the videos & images in real time.
4 The mode can be changed via the keys: Playback, Record, Camera, and Change View.
5 Click the lower right settings icon to set up the action camera: Wi-Fi Password, Audio Recording, Date Stamp, Loop Recording, G-sensor sensitivity, Video Resolution, Formatting the Memory Cord and Reset Default Settings.
A1
アクションカメラ 取扱説明書
16
REYING
What's in the Box
1
2
3
67
natural_image
Simple line drawing of a USB cable with two connectors (no text or symbols)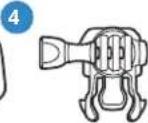
●
5
9
natural_image
Diagram of a mechanical device with directional arrows indicating movement or force (no text or symbols)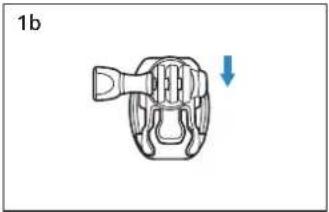
natural_image
Diagram of a mechanical component with a downward arrow indicating motion (no text or symbols)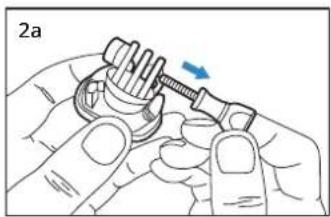
natural_image
Illustration of hands using a mechanical tool to adjust a component (no text or symbols visible)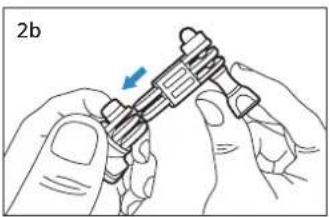
natural_image
Illustration of hands assembling a mechanical component with a blue arrow indicating rotation (no text or symbols)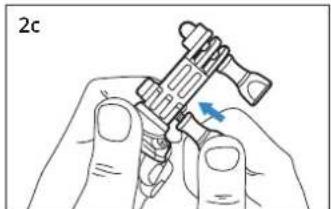
natural_image
Illustration of a hand holding a mechanical component with a blue arrow indicating rotation (no text or symbols)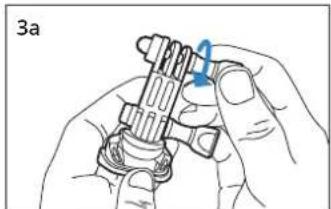
natural_image
Illustration of hands assembling a mechanical component (no text or symbols visible)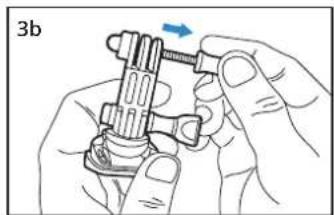
natural_image
Illustration of hands assembling a mechanical component with a blue arrow indicating direction (no text or symbols)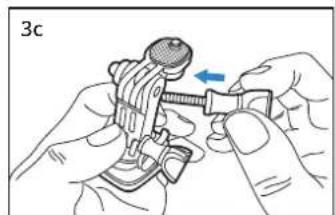
natural_image
Illustration of hands using a mechanical tool to adjust a component (no text or symbols visible)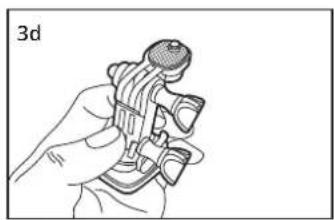
natural_image
Line drawing of a hand holding a mechanical device (no text or symbols)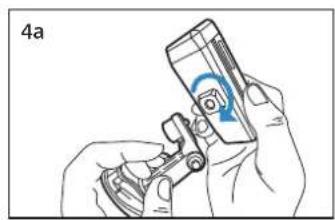
natural_image
Illustration of hands using a handheld device to adjust or install a device (no text or symbols visible)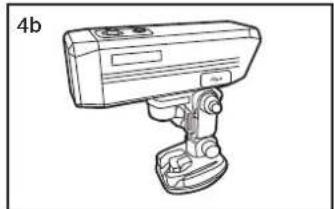
natural_image
Line drawing of a handheld electronic device with a base and top mount (no text or symbols)基本操作
基本操作
使用方法
natural_image
Line drawing of a handheld device with buttons and a screen (no text or symbols)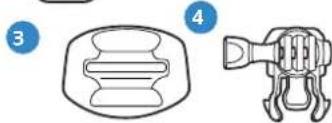
natural_image
Illustration of a medical device with a cross-sectional view and a camera lens (no text or symbols)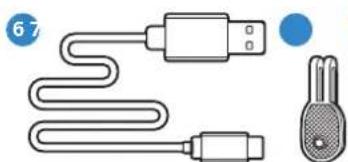
natural_image
Illustration of a USB cable with two connectors and a blue circular marker (no text or symbols)9
natural_image
Diagram of a mechanical device with directional arrows indicating movement or force (no text or symbols)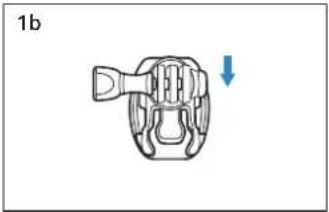
natural_image
Diagram of a mechanical component with a downward arrow indicating motion (no text or symbols)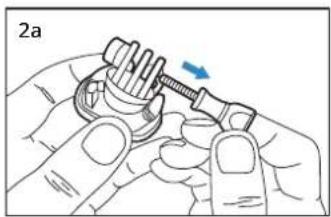
natural_image
Illustration of hands using a mechanical tool to adjust a component (no text or symbols visible)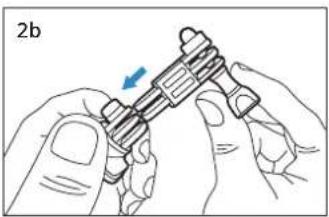
natural_image
Illustration of hands assembling a mechanical component with a blue arrow indicating rotation (no text or symbols)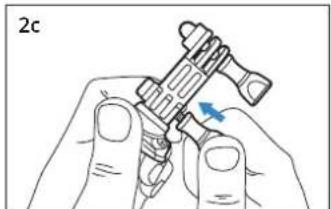
natural_image
Illustration of a hand holding a mechanical component with a blue arrow indicating rotation (no text or symbols)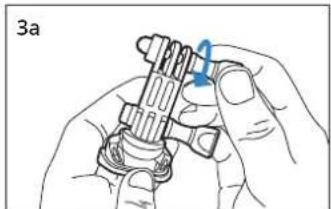
natural_image
Illustration of hands assembling a mechanical component (no text or symbols visible)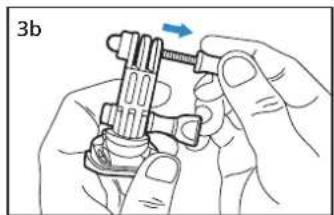
natural_image
Illustration of hands assembling a mechanical component with a blue arrow indicating direction (no text or symbols)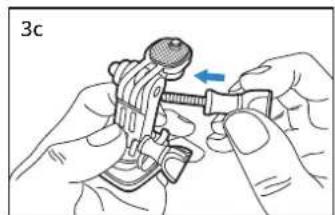
natural_image
Illustration of hands using a mechanical tool to adjust a component (no text or symbols visible)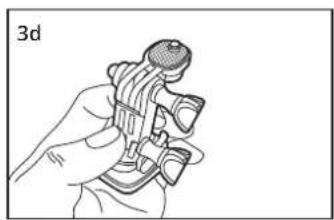
natural_image
Line drawing of a hand holding a mechanical device (no text or symbols)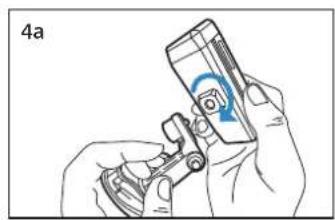
natural_image
Illustration of hands using a handheld device to adjust or install a device (no text or symbols visible)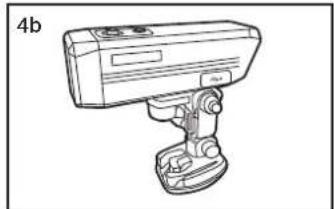
natural_image
Line drawing of a handheld electronic device with a base and top mount (no text or symbols)Operaciones básicas
Operaciones básicas
natural_image
Line drawing of a rectangular electronic device labeled 'REXING' with two buttons and a small plug, shown without any text or symbols beyond the label.2
3
4
5
67
natural_image
Simple line drawing of a USB cable with two connectors (no text or symbols)●
9
natural_image
Diagram of a mechanical device with directional arrows indicating movement or force (no text or symbols)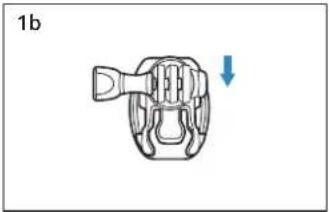
natural_image
Diagram of a mechanical component with a downward arrow indicating motion (no text or symbols)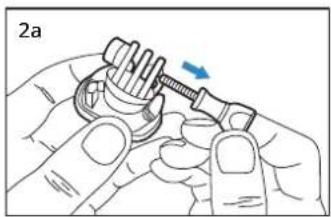
natural_image
Illustration of hands using a mechanical tool to adjust a component (no text or symbols visible)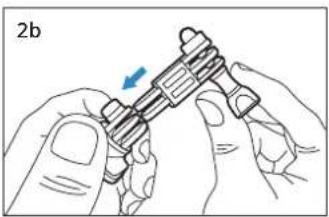
natural_image
Illustration of hands assembling a mechanical component with a blue arrow indicating rotation (no text or symbols)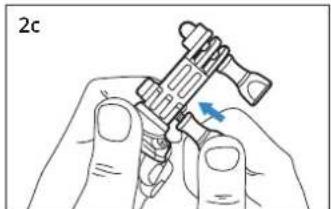
natural_image
Illustration of a hand holding a mechanical component with a blue arrow indicating rotation (no text or symbols)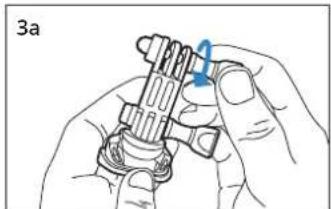
natural_image
Illustration of hands assembling a mechanical component (no text or symbols visible)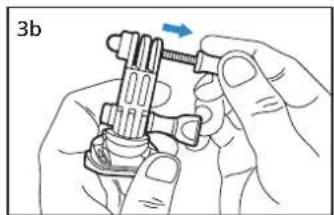
natural_image
Illustration of hands assembling a mechanical component with a blue arrow indicating direction (no text or symbols)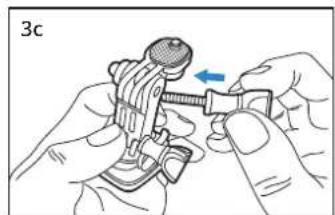
natural_image
Illustration of hands using a mechanical tool to adjust a component (no text or symbols visible)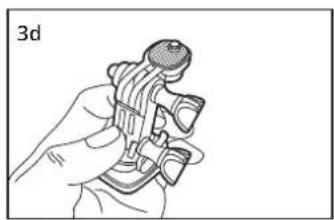
natural_image
Line drawing of a hand holding a mechanical device (no text or symbols)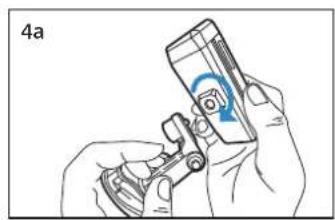
natural_image
Illustration of hands using a handheld device to adjust or install a device (no text or symbols visible)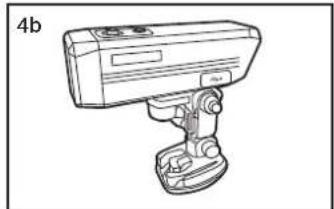
natural_image
Line drawing of a handheld electronic device with a base and top mount (no text or symbols)Grundoperationen
This equipment has been tested and found to comply with the limits for a Class B digital device, pursuant to part 15 of the FCC Rules. These limits are designed to provide reasonable protection against harmful interference in a residential installation. This equipment generates uses and can radiate radio frequency energy and, if not installed and used in accordance with the instructions, may cause harmful interference to radio communications. However, there is no guarantee that interference will not occur in a particular installation, if this equipment does cause harmful interference to radioed television reception, which can be determined by turning the equipment off and on, the user is encouraged to try to correct the interference by one or more of the following measures.
Reorient or relocate the receiving antenna.
Increase the separation between the equipment and receiver.
Connect the equipment into an outlet on a circuit different from that to which the receiver is connected.
Consult the dealer or an experienced radio/TV technician for help.


REXING
Warranty and Disclaimers
Warranty Disclaimers
Up to 18 MONTHS LIMITED WARRANTY
Your product is warranted to be free of defects in materials and workmanship for 1 year after the date of purchase. This warranty does not cover damages caused by misuse, improper handling and installation. Register your B1 at RexingUSA.com to extend the warranty. In the event warranty service is needed, please contact Rexing at care@rexingusa.com
We hare no representations or warranties, either expressed or implied, by or concerning any content of these written materials or software, or for damages resulting from the use of the information contained therein. We reserve the right to alter the features and contents of this publication, hardware or software without obligation or advance notice. Warranty does not extend to any accessories used with the camera. We are not responsible if you use the trail camera for illegal purposes. We shall not be obligated to perform preventative maintenance, installation, reinstallation, or maintenance. The illustrations in this manual are for instructional purposes only and may not represent actual product exactly.
natural_image
Abstract geometric pattern with white rectangular outlines on a solid blue background, no text or symbols present.FCCID: 2AW5W-A1
This device complies with part 15 of the FCC Rules. Operation is subject to the following two conditions: (1) This device may not cause harmful interference, and (2) this device must accept any interference received, including interference that may cause undesired operation.
Changes or modifications not expressly approved by the party responsible for compliance could void the user's authority to operate this equipment.
REXING®
www.rexingusa.com
New York office address:
131 West 33rd St 11C, New York, NY 10001
Connecticut office address:
264 Quarry Rd unit d, Milford, CT 06460
- Overview
- Always a surprise in Rexing. Check us out here.
- REXING
- Definition of Indicator Lights, Keys and Camera Vibration
- Camera Vibration
- Vibrating once
- Vibrating for 5 times
- Long vibration for 2 times
- Specification
- Installation
- Get Started
- Micro SD Card Instructions
- Basic Operations
- Operation
- Using the Remote Control
- APP Operation
- A1
- アクションカメラ 取扱説明書
- What's in the Box
- 基本操作
- 使用方法
- Operaciones básicas
- Grundoperationen
- Warranty and Disclaimers
- Warranty Disclaimers
- Up to 18 MONTHS LIMITED WARRANTY
- FCCID: 2AW5W-A1
Brand : Rexing
Model : A1
Category : Sports camera