
PATGuard 3 - Software Seaward - Free user manual and instructions
Find the device manual for free PATGuard 3 Seaward in PDF.


| Product Type | Portable Appliance Tester (PAT) |
| Brand | Seaward |
| Model | PATGuard 3 |
| Dimensions (mm) | 265 x 115 x 50 |
| Weight (kg) | 0.8 |
| Power Supply | Mains powered, 230V AC 50Hz |
| Display | Backlit LCD screen |
| Main Functions | Earth bond, insulation, polarity, leakage, load tests |
| Test Standards | IEC 62353, EN 60601, IET Code of Practice |
| Memory Capacity | 1000 test results |
| Data Transfer | USB and Bluetooth |
| Protection Class | IP40 |
| Operating Temperature | 0°C to 40°C |
| Safety Features | Fused test leads, overvoltage protection, safety interlock |
| Cleaning Instructions | Wipe with a damp cloth, do not use solvents |
| Spare Parts Availability | Test leads, probes, batteries |
| Repairability | Serviceable by authorized centers only |
| Included Accessories | Test leads, battery charger, USB cable, carry case |
| Warranty | 2 years |
Frequently Asked Questions - PATGuard 3 Seaward
User questions about PATGuard 3 Seaward
0 question about this device. Answer the ones you know or ask your own.
Ask a new question about this device
Download the instructions for your Software in PDF format for free! Find your manual PATGuard 3 - Seaward and take your electronic device back in hand. On this page are published all the documents necessary for the use of your device. PATGuard 3 by Seaward.
USER MANUAL PATGuard 3 Seaward
What's New & Revision History 7
PATGuard 3 Versions ...... 9
Tester Compatibility 11
Getting Started 12
Installing PATGuard 3 13
Installing on a Standalone PC 13
Installing on a Network Server 18
Installing on a Network Workstation 20
Activating PATGuard 3 22
Activate Online 22
Entering Proxy Server Details 28
Activate by Email, Fax 29
Evaluation Period 32
Setup Wizard 33
Setting up a Database 34
Create a New Database 34
Select an Existing Database 35
Upgrading / Importing a Legacy Database 37
Setup Options 37
Company Details 39
User Accounts 40
PAT Options 42
Code Abbreviations 43
Asset Groups 45
Navigating PATGuard 3 48
The Title Bar 49
The Ribbon 50
File Menu 51
Open an Existing File 52
Find 54
Asset View Filter 55
Last Download Only 55
Data Transfer Menu 56
Functions Menu 56
Add Formal Visual Test Pass 57
Add Manual Test Result 58
Create PATGuard Viewer CD 59
Help Menu 62
Style Options 62
The Navigation Pane 65
Customising the Navigation Pane 66
Recycle Bin 69
Main Window 70
Short-cut Keys 74
PATGuard 3 functions 74
Clients 75
Sites 77
Locations 81
PAT Testing 84
Assets 87
Test Results 93
PAT Risk Assessment 96
Universal Risk Assessment 98
Hazards 99
Perform Universal Risk Assessment 103
Site Reports 108
Emergency Lighting 109
Fire Alarm 111
Address Book 114
Adding Internal Personnel 115
Adding External Personnel 119
Reports 121
List of Reports 122
Generating a Report 123
Printing or saving to file 124
Invoicing 127
Repair Management 129
Editing Reports 132
Copying a Report 133
Editing a Report 133
How do I Edit my Reports 134
How to Shrink the Report Text to fit the Column Width 143
Deleting a Report 147
Restoring a Default Report 148
Instruments 149
Adding Test Instruments 150
Entering Calibration Data 156
Adding Test Sequences 158
Data Transfer 160
Downloading from Your Tester 161
Downloading - Apollo Series 162
Downloading - Supernova / Europa 167
Downloading - PrimeTest 350 / 300 171
Downloading - General Instructions 176
Finding the Correct COM port 178
Preview (PAT Data Only) 180
Duplicate Assets 182
Uploading to Your Tester 182
Uploading - Apollo Series 183
Uploading - Supernova / Europa 185
Uploading - PrimeTest 350 / 300 190
Uploading - General Instructions 195
Export to File - PAT or CSV 197
Email File - PAT or CSV 198
Import CSV 198
Backing Up Your Database 200
Auto Scheduler 200
Setting up a Schedule 201
Viewing a Schedule 203
Printing a Task Checklist 203
Uploading a Schedule 204
Time Manager 204
Program Overview 205
How to Open a file 206
How to select data 206
How to test data 207
How to create a bar graph 208
How to save the data 209
How to print data 210
Support 211
Licence FAQs 212
Licence Renewal 221
General FAQs 224
Licence Agreement 227
3 Welcome

PATGUARD
Welcome to the PATGuard 3 Help file. PATGuard 3 is the ultimate way to record, store and report on a range of health and safety requirements including PAT testing, risk assessments and other workplace tests and inspections. You can tag records with images as visual evidence, schedule retest periods and produce professional reports and certificates for total traceability.
PATGuard 3 is compatible with a wide range of portable appliance testers, including the Seaward Apollo Series instruments. For a full list of compatibility refer to the Tester Compatibility page.
About PATGuard
For more information about PATGuard 3, refer to About PATGuard 3 page.
3 How to use the Help file
To navigate the Help file, click on the links that appear throughout the document to find out more information about a particular topic. You can also navigate the Help file using the built-in Table of Contents or by using the Search function.
Accessing the Help file
The Help files can be accessed by selecting Help Topics from the Help Menu.
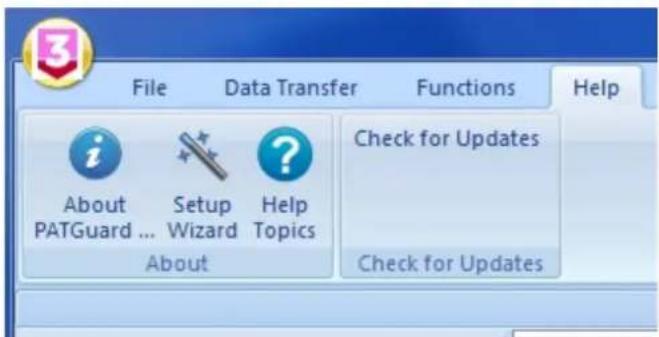
Help Topics - Help Menu
Context-sensitive help
For help on a particular topic, the Help file can also be accessed by pressing the F1 key at any time.
What if I still can't find what I need?
If you have referred to the Help file and are still in need of assistance, please refer to the Support page.

Getting Started
For help on getting started, including Installing and Activating PATGuard 3 and Setting up a Database, please refer to the Getting Started section. For help in navigating around the user interface, please refer to the Navigating PATGuard 3 section.
Setup Wizard
PATGuard 3 contains a Setup Wizard to help you get up and running. For more information, refer to the Setup Wizard page.
About PATGuard 3

About PATGuard 3
The About Screen
• What's New & Revision History
• PATGuard 3 Versions
- Tester Compatibility
PATGuard 3 offers total traceability when it comes to maintaining portable appliance testing records, enabling images taken with Apollo 600 or any camera or phone to be tagged against sites, locations, asset IDs and test results – providing evidence of visual inspection.
Tagged images can be included in the vast range of reports that PATGuard 3 The Health and Safety Edition can create. These are easily stored, printed or emailed.
A Risk-Based Approach
Universal and electrical risk assessment tools are built into PATGuard 3. These tools ensure a risk-based approach is taken to portable appliance testing; automatically determining retest periods proportionate to risk for assets as required by the IET Code of Practice.
The universal risk assessment tool records details of any workplace hazard, calculating risk scores and scheduling corrective actions has never been simpler.
Complete Health and Safety Management
A range of additional health and safety test and inspection certificates are built into PATGuard 3, allowing records for the inspection of emergency lighting and fire alarm systems to be kept and easily managed.
Compatible with Apollo 600
PATGuard 3 is the ultimate companion for Apollo 600, a total safety management tool. When used with Apollo 600 it is simple to upload and download reports, images, test results and risk assessments to and from the instrument via USB connectivity.
Compatible with Apollo 500 or Apollo 400
PATGuard 3 can used with Apollo 500 to upload and download test results to and from the instrument via USB connectivity. PATGuard 3 can used with Apollo 400 to download test results from the instrument via USB connectivity.
As well as being compatible with all Seaward PAT testers, PATGuard 3 is also suited for use with a range of other manufacturer's testers with download capability. For a full list of compatibility refer to the Tester Compatibility page.
For information on the version / revision of PATguard 3 you are running see the About Screen.
The About Screen
3 The About Screen
To view the About Screen, select the About PATGuard... option from the the Help Menu.

About PATGuard - Help Menu
The About Screen displays the version and revision of PATGuard 3 that you are using, along with the Licence Agreement.

About Screen
To view details about your PATGuard 3 licence, select Licence... from the About Screen.
What's New & Revision History
3 What's New
PATGuard 3 has been completely updated to include:
• A built in universal risk assessment tool
- Ability to determine retest periods using electrical risk assessment tool
- Ability to create and print a range of health & safety certificates
- Compatibility with the Apollo 600, a fast and advanced battery/mains powered tester with on-board camera and large data storage for high volume testing to store images against test results (e.g. visual inspection & failed appliances) for full traceability, complete other health and safety tests and inspection records, and / or use a USB flash drive to transfer data to and from the tester.
- Compatibility with the Apollo 500, a fast and advanced battery / mains powered tester with on-board data storage for high volume testing and the ability to upload assets for faster retesting, and / or have the flexibility to customise user and test settings.
- Compatibility with the Apollo 400, a simple, battery/ mains powered tester with on-board data storage and the ability to include asset details against test records (e.g. description, location, site etc.).
Future updates are free to existing registered PATGuard 3 subscribers.
Revision History
To see which revision of PATGuard 3 you are currently running, refer to the About Screen.
Version 3.4
General
- Add Time Manager 3, with ability to read SSS and gar files.
- Comments lines are stored separately in addition to their usual processing - available in the asset list and csv export.
• Auto-scheduler has been updated, remote mode has been removed. - Upload - "Visual Only" check box removed. Upload behaves as if this box is always checked.
• Live-Neutral socket test added to SSS test types.
• Some header labels renamed on Asset List.
• Certificate of Testing considers visual tests when reporting next test date.
Fixes
- When repeatedly downloading the same data, duplicate records were being created.
• Visual next date calculation altered.
• CSV export fixes for Touch Leakage tests. - Removal of non-working (legacy) options in PAT set up for comments lines (Asset Group, Location and Site).
Version 3.3
General
- Apollo 400 compatibility.
• CSV import template contains next test dates
• "Find" function updated
Reports
- Reports added back in from PATGuard 2 to PATGuard 3 - "Asset Barcoded Labels", "Barcode List", "Barcoded Task Checklist", "Concise Test History", "Detailed Test History", "Test Instrument Details", "Client Details", "Personnel Details", "Site Details" and "Test Sequence Details".
• Universal Risk Assessment and Site Reports can now view all site and location assets.
Version 3.2
General
• CSV import function updated
• "Find" function updated
- Custom Reports forgotten after reinstalling PATGuard 3
Version 3.1
General
- Apollo 500 compatibility.
- Customisable main asset view - including test results.
- CSV export of Asset view - including test results.
- CSV data import.
• Full row double click to open Assets, Hazards and Site Reports. - 'Upload Test Sequence' function moved to 'Instrument' tab.
- Asset list shown regardless of tree level selection.
• 'In Service' check box and report.
• 'On Hire' information and report.
Reports
- All reports default to "None" for photos.
Version 3.0
Version 3.0 is the initial release version of PATGuard 3.
PATGuard 3 Versions

PATGuard 3 Versions
PATGuard 3 is only available in an Elite version. The revision you are currently running can be found on the About Screen.
The features of the Elite version are as follows:
| Feature: | PATGuard 3Elite– The Health & Safety Edition |
| ■ Rapid manual data entry | ☑ |
| ■ Legacy database import from older versions of PATGuard | ☑ |
| ■ Download compatible with a wide range of testers | ☑ |
| ■ Download photos from Apollo 600 | ☑ |
| ■ Download risk assessment data from Apollo 600 | ☑ |
| ■ Download completed health & safety certificates from Apollo 600 | ☑ |
| ■ Preview and correct downloaded test results before processing | ☑ |
| ■ Built in universal risk assessment tool | ☑ |
| ■ Determine retest periods using electrical risk assessment tool | ☑ |
| ■ Upload tester configuration data to Seaward PATs | ☑ |
| ■ Upload assets for retest to Seaward PATs | ☑ |
| ■ Tag photos to sites, locations, asset IDs and test results | ☑ |
| ■ Automatic re-test scheduling | ☑ |
| ■ Create a read-only file of test records for clients | ☑ |
| ■ Includes a comprehensive range of test report certificates | ☑ |
| ■ Printable test certificates for each asset | ☑ |
| ■ Set-up wizard | ☑ |
| ■ In-service indicator and report to keep track of assets | ☑ |
| ■ On Hire Indicator and report | ☑ |
| ■ Full test history per asset record | ☑ |
| ■ Repair logging | ☑ |
| ■ Invoice generator | ☑ |
| ■ Create and print a range of health & safety certificates | ☑ |
| ■ CSV import to enable compatibility with existing software and systems (template file included) | ☑ |
| ■ Custom CSV output (including test results) | ☑ |
| ■ Customisable asset view | ☑ |
| ■ Database compatible across PATGuard range | ☑ |
| ■ Network enabled | ☑ |
| ■ Certificate of Testing | ☑ |
| ■ Electrical Test Summary Report | ☑ |
Tester Compatibility
3 Tester Compatibility
Download Compatibility
PATGuard 3 Elite can download data from the following testers:
- Apollo 600
- Apollo 500
- Apollo 400
Europa - Europa Plus
• Europa PAC Plus - Europa XE
- Europa XE Plus
- Supernova
- Supernova Elite
- Supernova Plus
- Supernova XE
• Supernova XE Plus - PrimeTest 300
- PrimeTest 350
- Clare HAL
- Clare HAL Combi
- Clare SafeCheck 8
- Clare SafeTest Luminaire
- Clare SafeTest Manufacturing
- Emona Maestro
- PAT1000
- PAT1000S
- PAT1000X
IT1000 - PAT2000
- PAT2000i
- PAT2000iee
• SEN60204 - Avo PAT4*
- Avo PAT4F*
• Robin SmartPAT 5000
• Robin SmartPAT 5500
• MetrohmMicroPAT+ - Metrel OmegaPAT
- Metrel BetaPAT
- Ethos 9600
- Ethos 9500
- Ethos 9300

* Requires dow nload through the Parallel Port via a Parallel to Serial Adaptor, not available from Seaward. Contact Avo for dow nload cable and adaptor requirements.
Upload Compatibility
PATGuard 3 Elite can upload data to the following testers:
- Apollo 600
- Apollo 500
Europa
Europa Plus
Europa XE
Europa XE Plus - PrimeTest 300
- PrimeTest 350
- Supernova
- Supernova Elite
- Supernova Plus
- Supernova XE
- Supernova XE Plus
- IT1000
- PAT2000i
- PAT2000iee
- Ethos 9500
- Ethos 9600
- Emona Maestro
For specific information about your tester, please refer to your tester instruction manual.
Getting Started

Getting Started
Once you have reviewed the Licence Agreement and are ready to install PATGuard 3, follow the steps below to get started:
Installing PATGuard 3
• Installing on a Standalone PC
• Installing on a Network Server
• Installing on a Network Workstation
Activating PATGuard 3
- Activate Online
○ Entering Proxy Server Details
• Activate by Email or Fax
• Evaluation Period
Setup Wizard
- Setting up a Database
○ Create a New Database
○ Select an Existing Database
○ Import a Legacy Database
- Setup Options
Company Details
○ User Accounts
○ PAT Options
○ Asset Groups
Code Abbreviations
Click on the links above for more information about each option.
If you encounter problems getting started with PATGuard 3, please refer to the Support page.
Installing PATGuard 3
3 Installing PATGuard 3
Once you have reviewed the Licence Agreement and are ready to install PATGuard 3, select an option from below to learn more about installing PATGuard 3 on your system:
Installing PATGuard 3
• Installing on a Standalone PC
• Installing on a Network Server
• Installing on a Network Workstation
Click on the links above for more information about each option.
If you encounter problems installing PATGuard 3, please refer to the Support page.
Installing on a Standalone PC
3 Installing on a Standalone PC
Once you have downloaded PATGuard 3, double-click the downloaded file to install PATGuard 3 on your system. Click Next > on the following screen to start the installation process.

Installation Screen 1
Review the Licence Agreement and click Next > to continue.
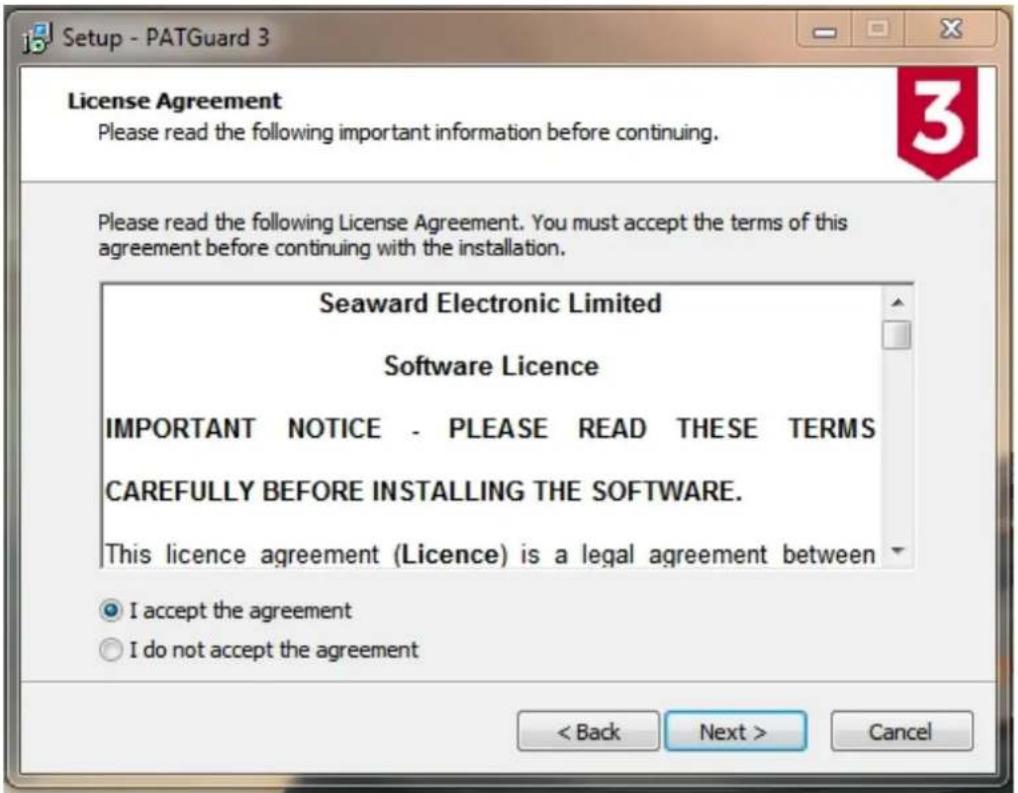
Installation Screen 2
For a standalone PC select Standalone PC and click Next > to continue.

Installation Screen 3
Either leave the installation directory as the default or change it if you wish and click Next > to continue.
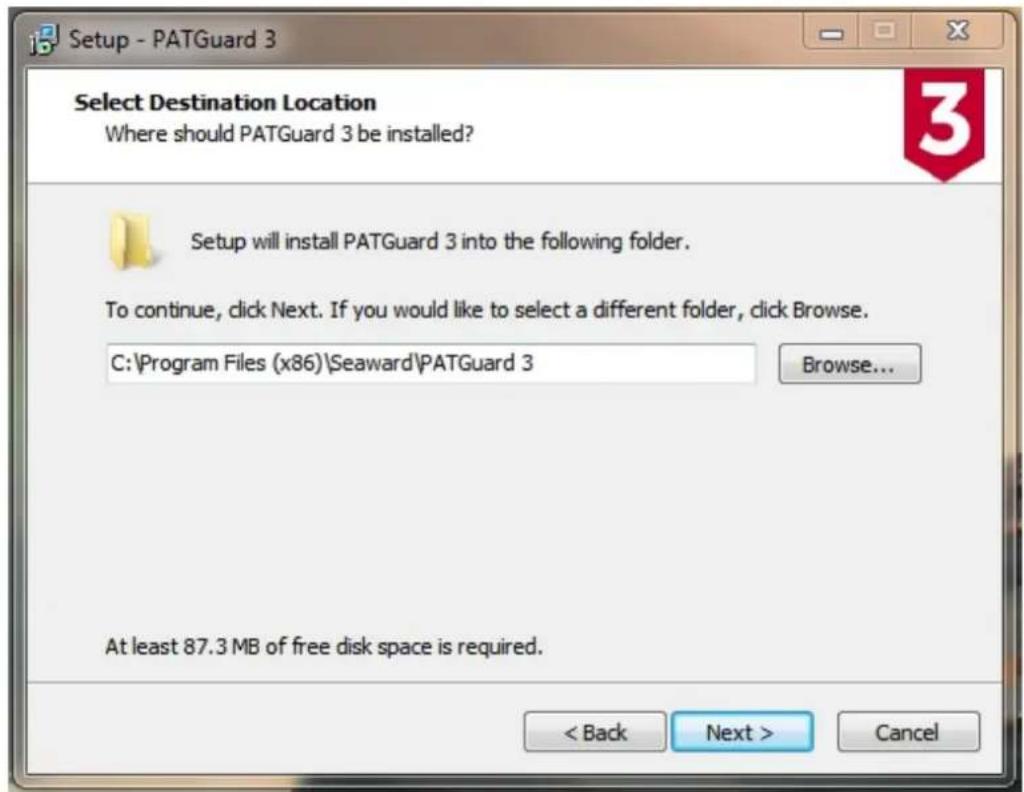
Installation Screen 4
Click Next > to continue.

Installation Screen 5
You will be asked to confirm you options. Click Install to continue.

Installation Screen 6
You will be shown the progress of the installation.

Installation Screen 7
When the installation has finished, click Finish to launch PATGuard 3.
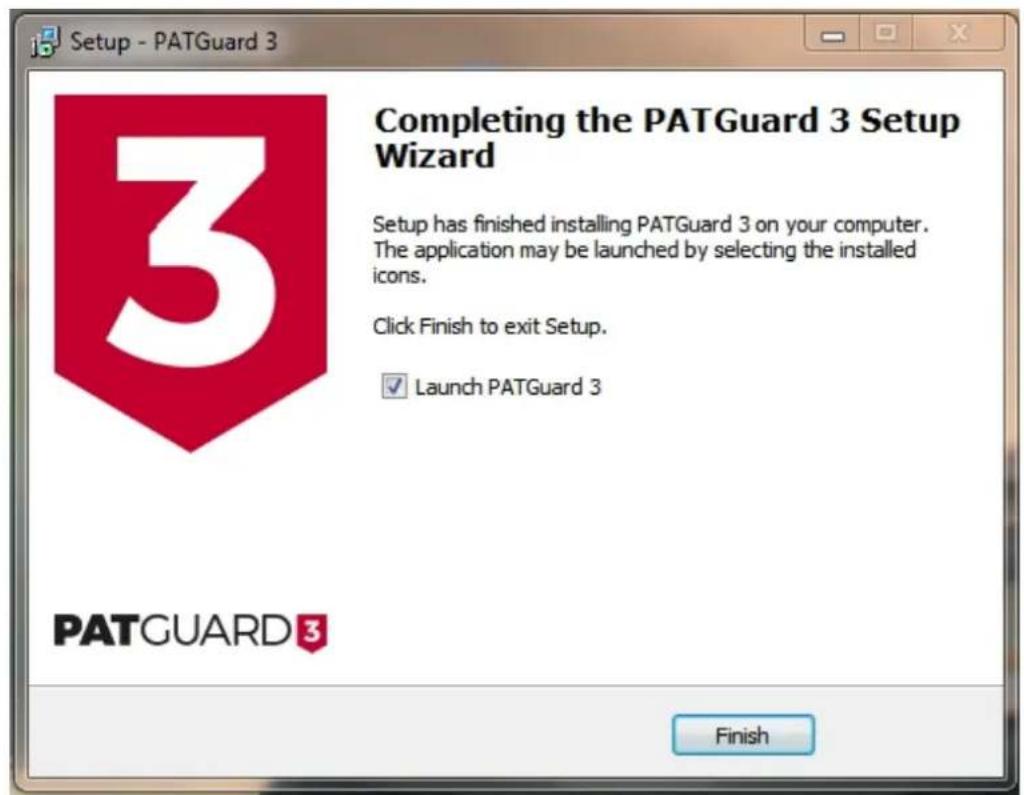
Installation Screen 8
PATGuard 3 will now start and the Login screen appear. Click OK to launch PATGuard 3.
Installing on a PC without internet access
To install on a PC without internet access, you will first need to download the PATGuard 3 installation files on another PC and copy these to a CD or USB memory stick.
If you encounter problems installing PATGuard 3, please refer to the Support page.
Installing on a Network Server

Installing on a Network Server
Once you have downloaded PATGuard 3, double-click the downloaded file to install PATGuard 3 on your system. Click Next > on the following screen to start the installation process.
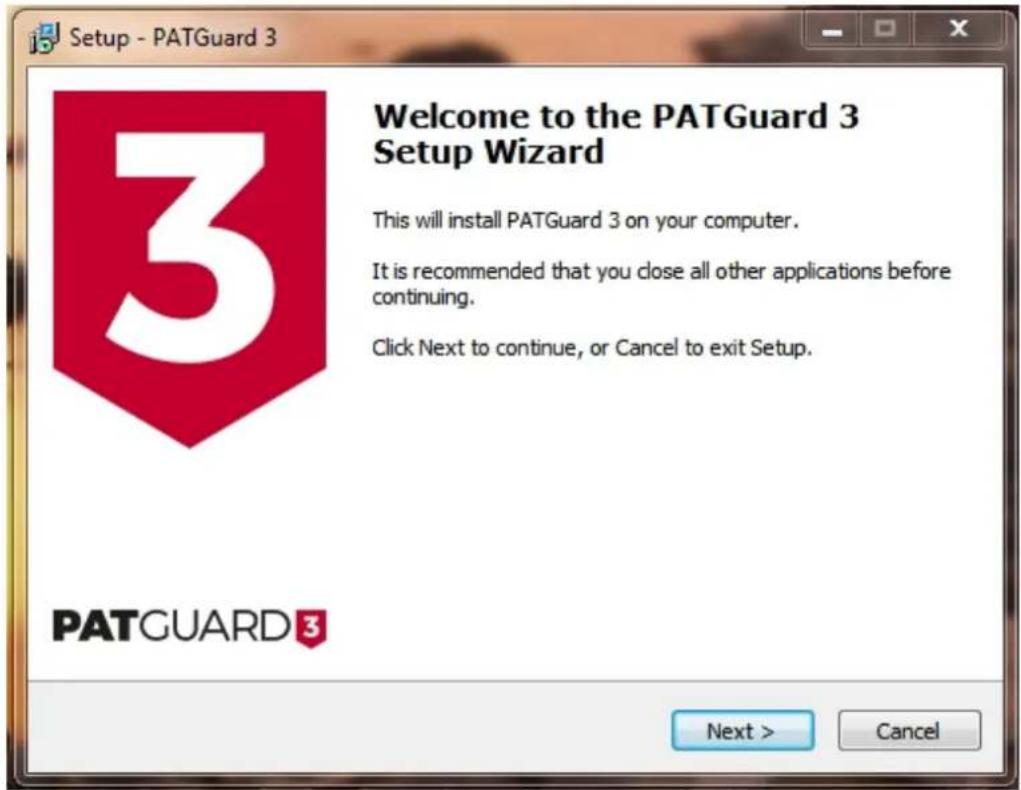
Installation Screen 1
Review the Licence Agreement and click Next > to continue.
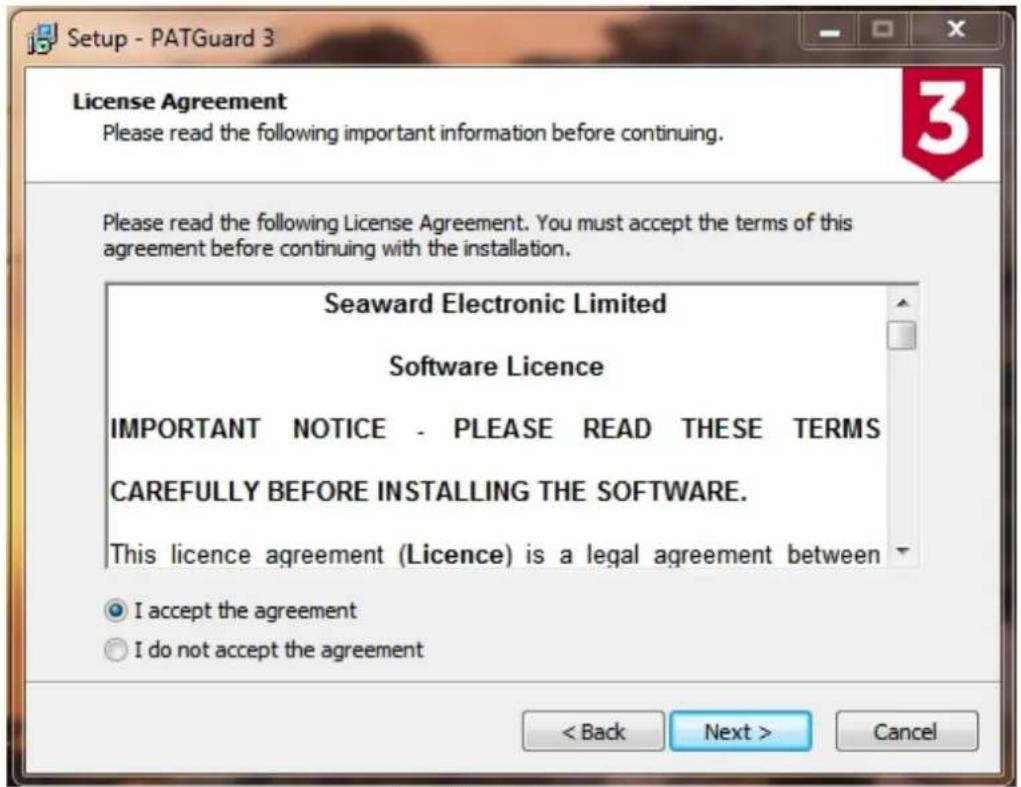
Installation Screen 2
For a network Server select Network Install and click Next > to continue.
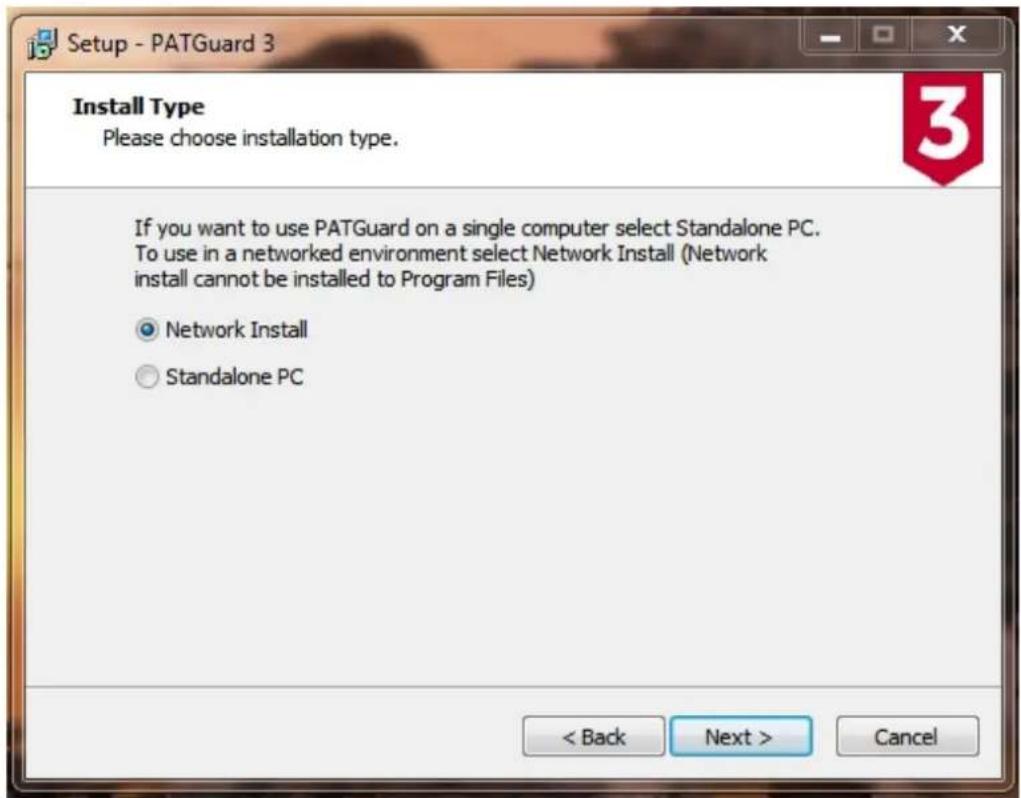
Installation Screen 3
Select an installation location that is accessible to other computers on your network. Click Next > to continue.
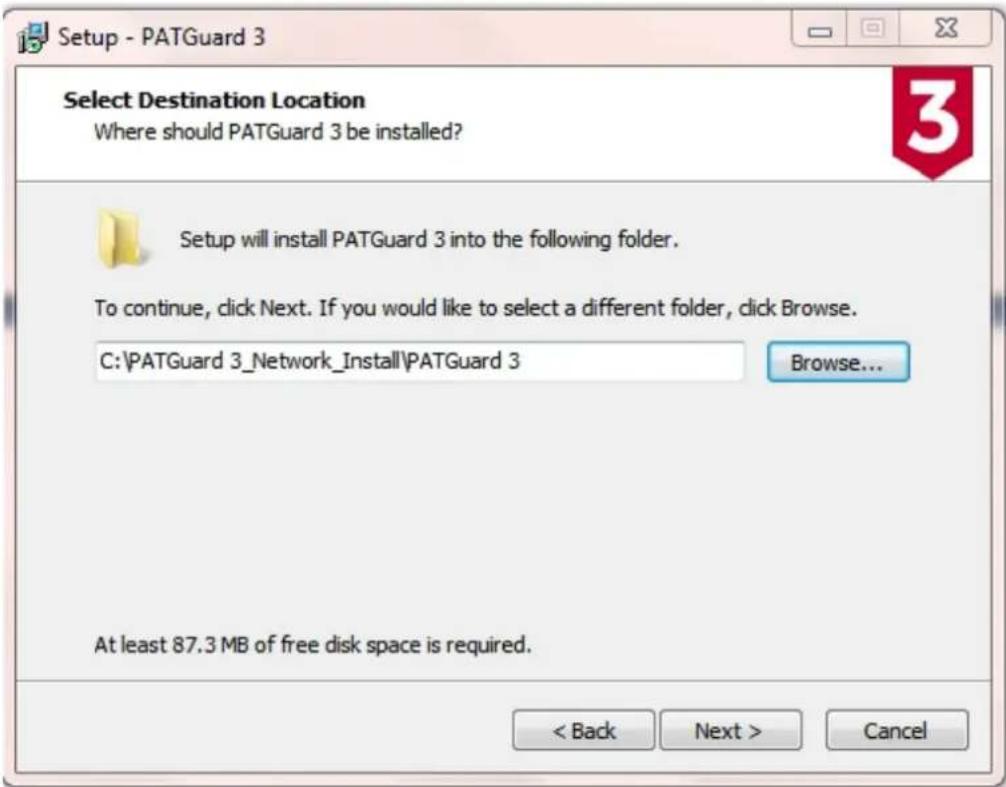
Installation Screen 4
Follow the remaining on-screen instructions to install PATGuard 3 on your network Server.
If you encounter problems installing PATGuard 3, please refer to the Support page.
Installing on a Network Workstation
3 Installing on a Network Workstation
To install PATGuard 3 on a network Workstation, browse to the location specified when you installed on a network Server. Locate and run the file netsetup.exe to install PATGuard 3 on a network Workstation. Click Next > on the following screen to start the installation process.

Installation Screen 1
Review the Licence Agreement and click Next > to continue.

Follow the remaining on-screen instructions to install PATGuard 3 on your network Workstation.
If you encounter problems installing PATGuard 3, please refer to the Support page.
Activating PATGuard 3
3 Activating PATGuard 3
Once you have installed PATGuard 3 you will see the Activation screen. You can choose to either Activate PATGuard 3 or continue using the 30 day Evaluation Period.
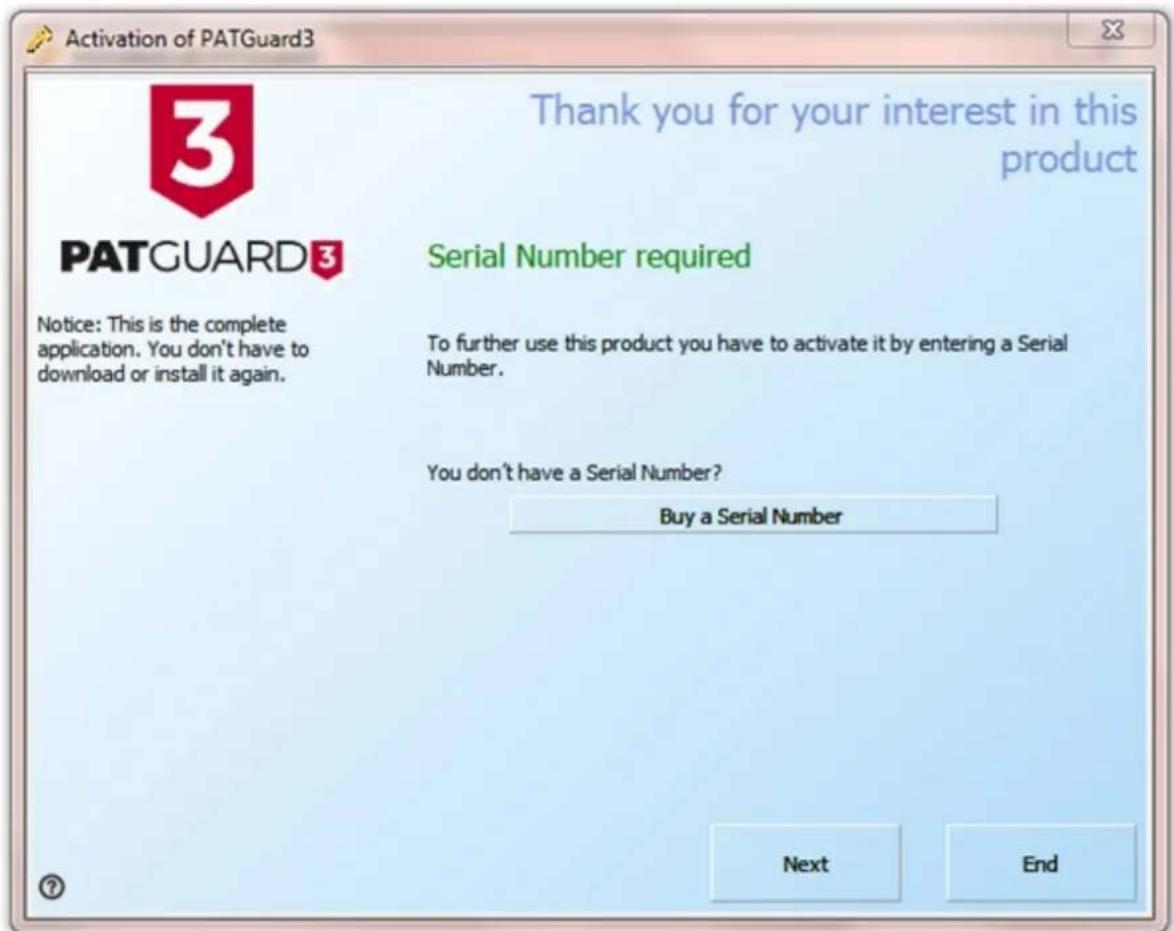
Activation Screen
If you have already purchased PATGuard 3 and wish to activate it now you can choose to:
- Activate Online
• Activate by Email or Fax
You will need to have your serial number available to activate PATGuard 3. If you do not have a serial number, you can select Buy a Serial Number to purchase one.
You can also choose to make use of the 30-day Evaluation Period and activate PATGuard later.
If you encounter problems activating PATGuard 3, please refer to the Support page.
Activate Online
3 Activate Online
To activate PATGuard 3 online, select I have a Serial Number and I want to activate PATGuard 3 and click Next on the Activation screen. You will need to have your serial number available to activate PATGuard 3. If you do not have a serial number, you can select Buy a Serial Number to purchase one.

Activation Screen 1
Select Online Activation on the following screen and click Next.

Activation Screen 2
Enter your details on the following screen and click Next.

Activation Screen 3
PATGuard 3 is now ready to activate PATGuard 3. If you use a proxy server to access the internet you will need to enter these details on the following screen by clicking Change Proxy Settings (only for expert users). See Entering Proxy Server details if required, otherwise click Next.

Activation Screen 4
PATGuard 3 will now connect to the Activation Service.

Activation Screen 5
The following screen will be displayed when Activation is completed successfully. You will not need to enter multiple Activation Keys unless requested to. Click Next or End to close the Activation Screen.
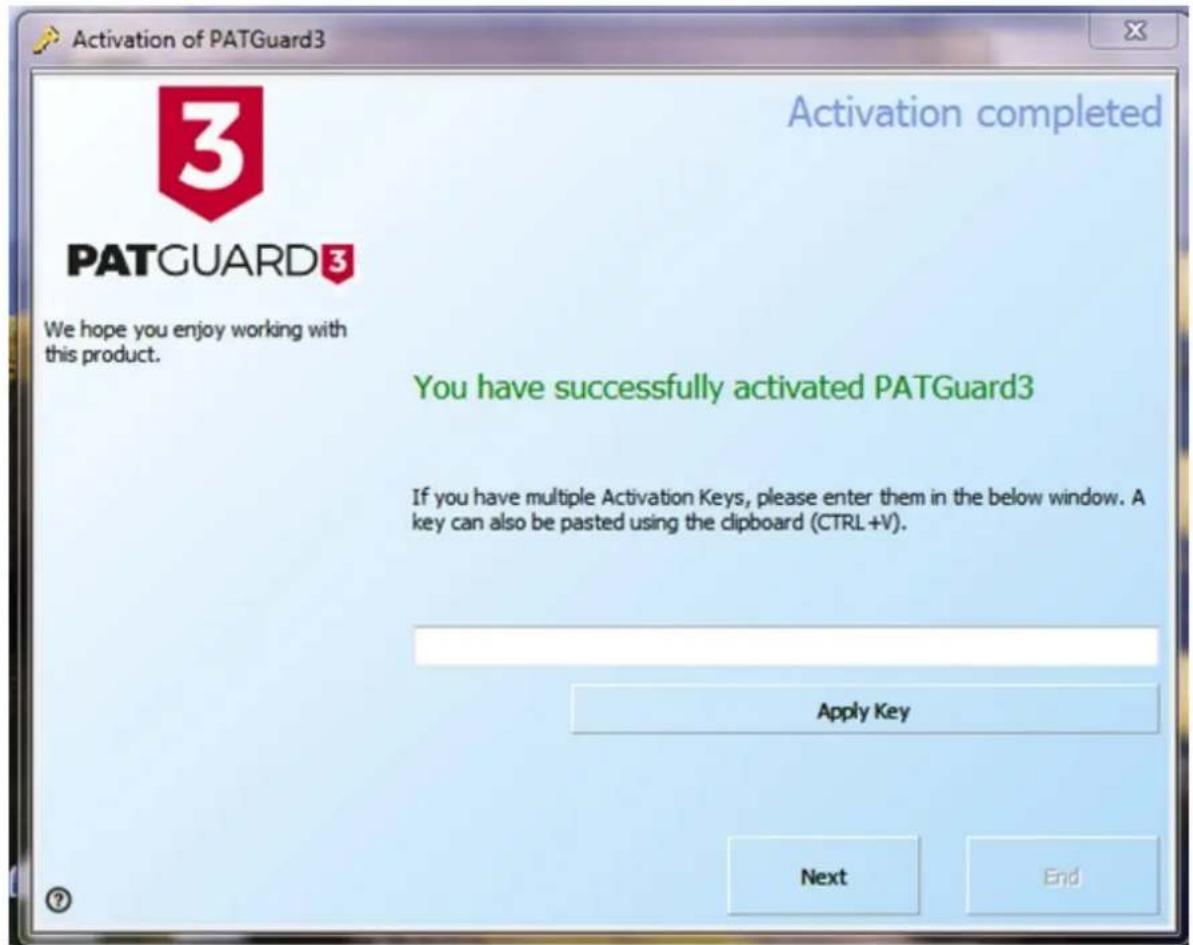
Activation Screen 6
If you encounter problems activating PATGuard 3, please refer to the Support page.
Entering Proxy Server Details
Entering Proxy Server Details
If you use a Proxy Server to access the internet, you will need to enter these details into the activation screen. Select Change Proxy Settings (only for expert users). By default the Proxy Server settings will be the same as those set in Internet Explorer. To change the Proxy Server settings, select Use Proxy Server and enter the details in the Proxy Server and Proxy Port boxes.

Proxy server details
If you encounter problems activating PATGuard 3, please refer to the Support page.
Activate by Email, Fax
3 Activate by Email or Fax
The quickest way to activate PATGuard 3 is to Activate Online. However if you do not have an internet connection, you may choose to Activate by Email or Fax.
To activate PATGuard 3 by Email or Fax select I have a Serial Number and I want to activate PATGuard 3 and click Next on the Activation screen. You will need to have your serial number available to activate PATGuard 3. If you do not have a serial number, you can select Buy a Serial Number or contact Seaward or your Distributor to purchase one.
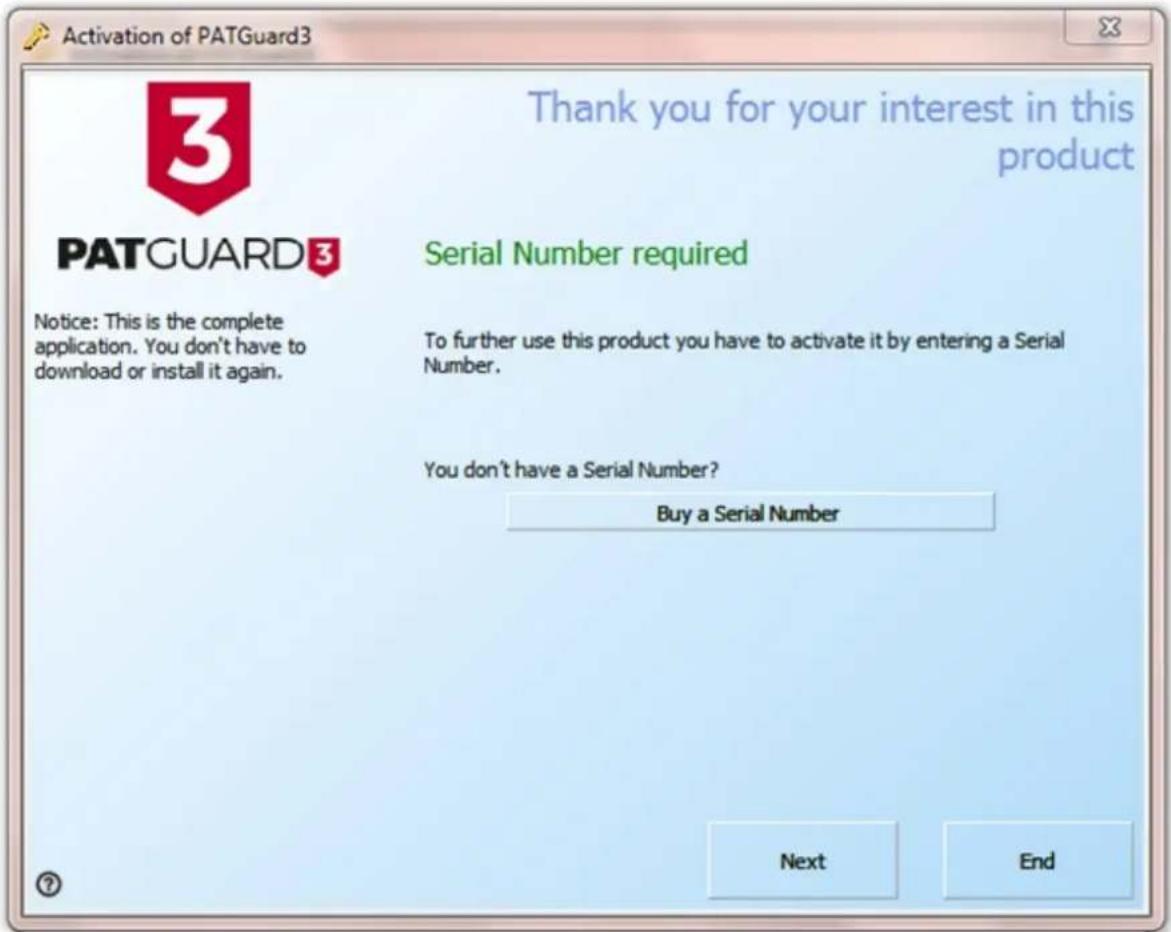
Activation Screen 1
Select E-Mail Activation or Fax Activation on the following screen and click Next.

Activation Screen 2
Enter your details on the following screen and click Next. Note, if you have an electronic version of your Serial Number (for example in an email) it is easier if you cut and paste to enter this.
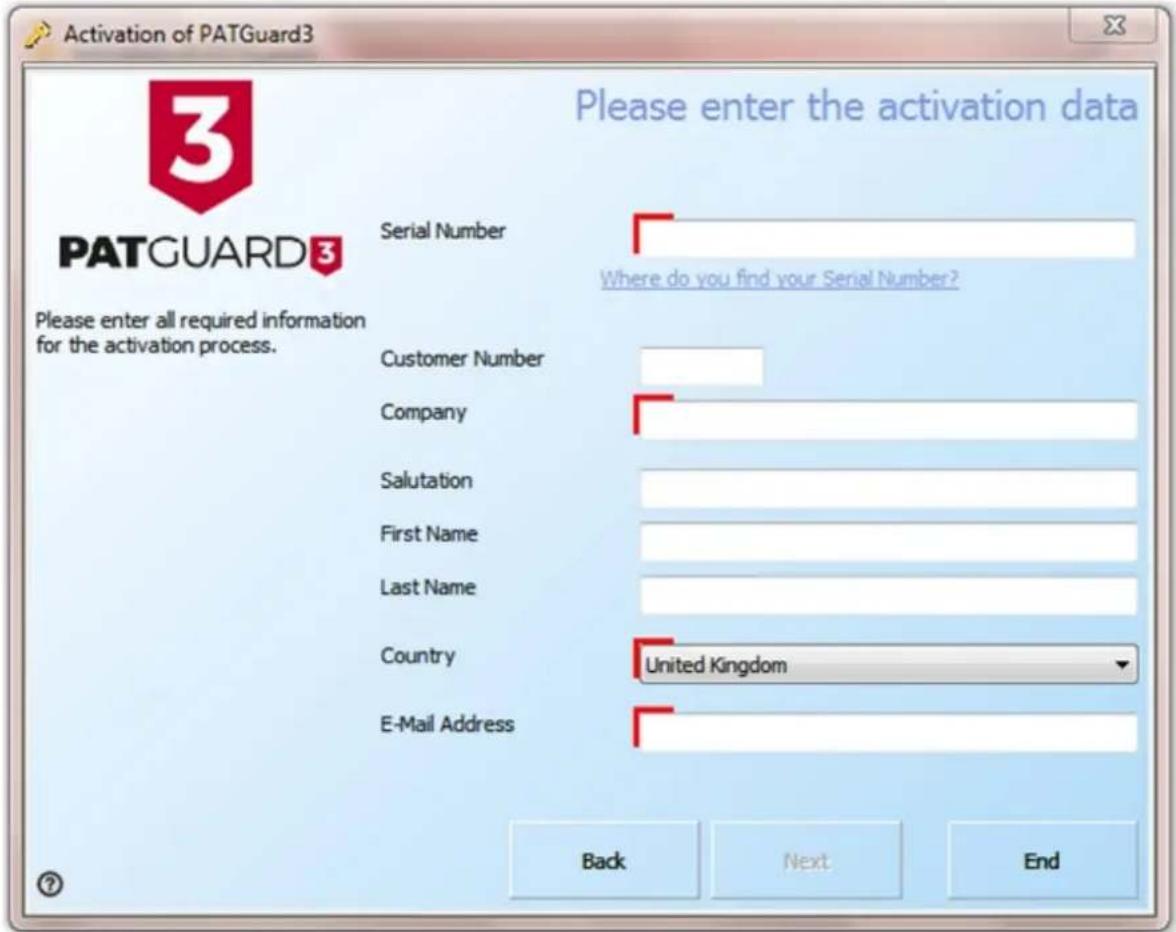
Activation Screen 3
Follow the instructions provided to finish the activation process. Unlike Activating Online, you will be provided with an Activation Key that you will need to enter to complete the process..
If you encounter problems activating PATGuard 3, please refer to the Support page.
Evaluation Period

Evaluation Period
PATGuard 3 can be used as a free trial for a period of 30 days. During the Evaluation Period the activation screen will open when you start PATGuard 3 and will display the number of days left in the Evaluation Period.
Note- The evaluation period is not applicable for Time Manager 3, if you require an evaluation for this product please contact our Customer Care team on customercare@seaward.co.uk.

Activation Screen - Evaluation
Once the evaluation period is over PATGuard 3 will revert to a read-only mode and you will not be able to add to or amend the database until you Activate PATGuard 3.
If you have already purchased PATGuard 3 and wish to activate it now you can choose to:
- Activate Online
• Activate by Email or Fax
If you encounter problems activating PATGuard 3, please refer to the Support page.
Setup Wizard
3 Setup Wizard
The Setup Wizard runs the first time PATGuard 3 starts, and can also be accessed by clicking Setup Wizard in the Help Menu.

Setup Wizard - Help Menu
The Setup Wizard will first guide you through the process of Setting up a Database. It will then take you to the Setup screen to allow you to enter your Company Details, add User Accounts, and configure PAT Options and Asset Groups.
Please continue to the Setting up a Database page.
Setting up a Database
3 Setting up a Database
The first step in the Setup Wizard is Setting up a Database, which will be used to store all of your PATGuard 3 data.

Setup Wizard
The Setup Wizard gives three options for Setting up a Database:
• Create a new database
- Select an existing database
Your choice will depend on whether you already have a PATGuard database that you wish to use or if you wish to start from a blank database.
Click on the links above for more information about each option.
Create a New Database
3 Create a New Database
If you do not have an existing PATGuard database that you want to use, this is the option for you. If it is not, see Select an existing database.

Create a new database - Setup Wizard
Enter New Database Name
After selecting Create a new database and clicking Next, the first step is to browse to the location you wish to store your database and enter a filename for the new PATGuard 3 database in the Enter New Database Name window.

Enter new database name
After clicking Save the Setup Wizard will take you to the Setup options window.
Please continue to the Setup page.
Select an Existing Database
3 Select an Existing Database
If you have an existing PATGuard database that you want to use, this is the option for you. If it is not, see Create a new database.
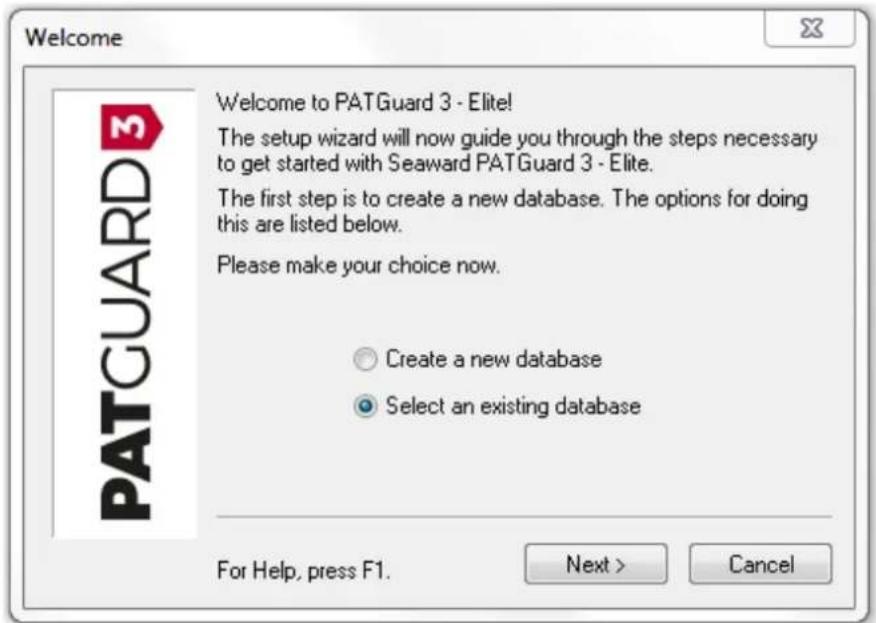
Select an existing database - Setup Wizard
Select existing database
After selecting Select an existing database and clicking Next, the first step is to browse to the location where your existing database is stored.
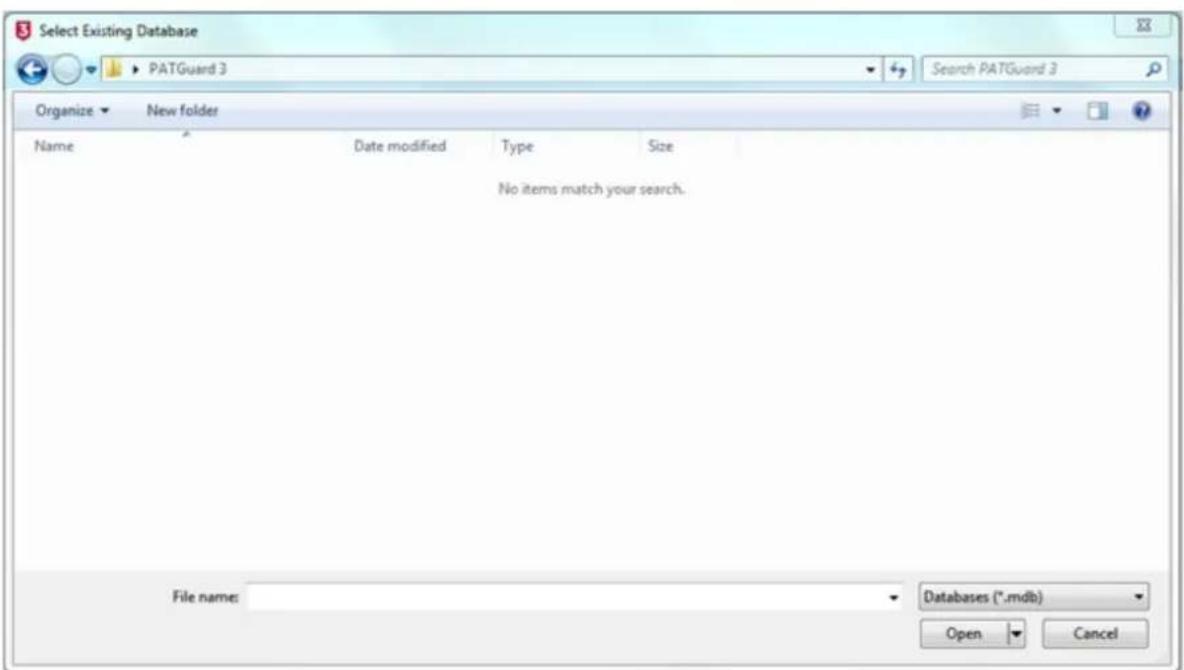
Select Existing Database
After selecting the existing database you wish to use and clicking Open, the Setup Wizard will take you to the Setup options window.
Please continue to the Setup page.
Upgrading / Importing a Legacy Database
3 Upgrading / Importing a Legacy Database
These instructions are generally intended to be used once and will allow the upgrade of an old database into PATGuard 3. How your original database is formatted will determine which method you need to use to import data into PATGuard 3.
Method 1: Upgrading PATGuard 1 or PATGuard 2 Databases
If the database is one .mdb file, such as PATGuard 1 or PATGuard 2, then it should simply open in PATGuard 3.
Note 1; before upgrading an older database, .mdb file, we suggest you make a copy of the file first as after it has been upgraded to PATGuard 3 it cannot be rolled back to a previous version.
Note 2; whilst performing the upgrade you may receive warning messages during the process, accept these and continue.
Method 2: Upgrading an Older PATGuard Database
If the database is one .mdb file, such as PATGuard 1 or PATGuard 2, then see Method 1.
However, if the database is in an older version of PATGuard then this may need to be imported via PATGuard 2 first. The PATGuard 2 Elite program allows data from existing PATS/PATS+, Safety 1st/Safety 1st+, PATSwin and Safety 1st Xpress databases to be imported into the PATGuard 2 Elite program.
Note; Only PATS/PATS+, Safety 1st/Safety1st+ version 5.4 or higher, PATSwin version 2 and Safety 1st Xpress v1.0.7.4 can be imported.
If your database is in the list above, please see page 21 of the manual (link below) for instructions on how to import into PATGuard 2 – if this is successful you will need to import into PATGuard 2 then PATGuard 3 (see Method 1).
http://www.seaward.co.uk/downloads/PATGuard%20Elite%202%20User%20Manual.pdf
For a trial copy of PATGuard 2, please see the following:
http://www.seaward.co.uk/software/PATGuard 2.1 Evaluation.exe
Method 3: Importing an Older PATGuard Database / a Database in Another Format
If your database format does not allow either Method 1 or 2 to be used, then your only other option is to try a spreadsheet CSV import.
For help regarding this see Import CSV.
Setup Options

Setup Options
The Setup Window forms part of the Setup Wizard but can also be accessed by clicking Setup in the File Menu.

File Menu
Setup Window

Setup Window
The Setup Window allows you to configure the main PATGuard 3 options, including:
• Company Details
- User Accounts
PAT Options
○ Code Abbreviations
- Asset Groups
Please click on the links above for more information about each option.
Company Details
3 Company Details
The Company Details tab in the Setup Window allows you to enter your company details, including address information, phone number, email address and VAT and Company registration numbers. These details will appear on any Reports that you generate.
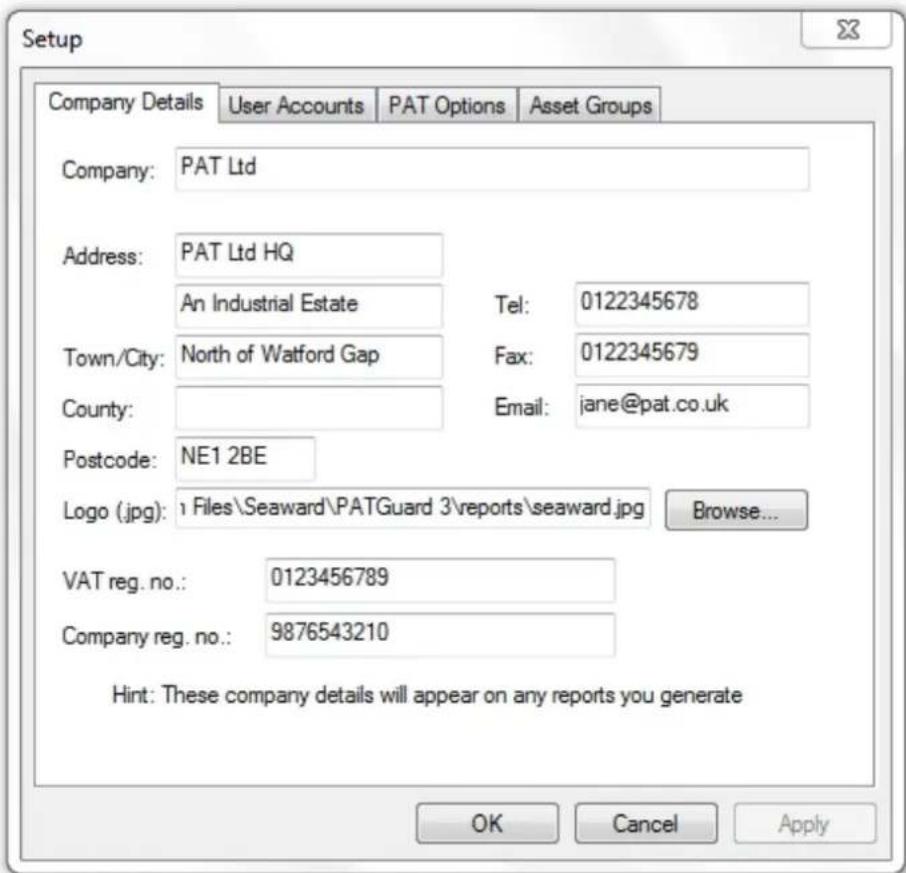
Setup - Company Details
Company Logo
The Company Details tab in the Setup Window also allows you to select a company logo to display on any Reports that you generate. To do this, click the Browse... button and browse to the location of the logo you wish to use.

Setup - Browse for new logo
Once you have selected the image you would like to use, click Open to return to the Company Details tab.
Note; the .jpg file for a new Company Logo needs to be approximately 399 x 77 pixels and approx. 15kB in size (note we recommend trying to keep the image down to about 15k as if the logo is larger than this it will reduce the maximum number of pages that a report can be composed of).
Please continue to the User Accounts page.
User Accounts
3 User Accounts
The User Accounts tab in the Setup Window allows you to Add, Edit and Delete users of PATGuard 3.

Setup - User Accounts
Add new user
To add a new user, click the Add.. button in the User Accounts tab in the Setup Window.
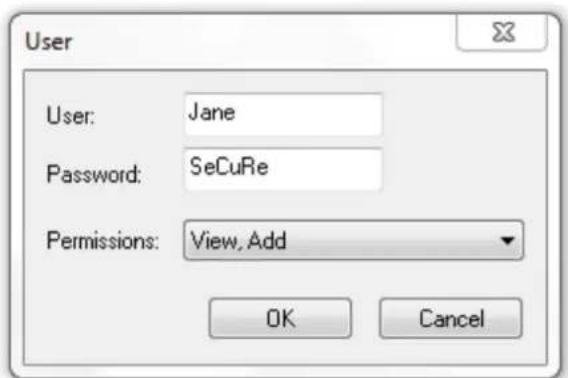
Add New User
Each user has a user name, an optional password and a Permissions level.
Edit a user
To edit a user, select the user name in the User Accounts tab in the Setup Window and click the Edit... button.
Delete a user
To delete a user, select the user name in the User Accounts tab in the Setup Window and click the Delete
button.
Admin user
The default Admin account cannot be renamed, deleted or have the Permissions level changed. It is strongly recommended that a password is set for the Admin account to prevent unauthorised access.
Permissions level
There are five options for the Permissions level for PATGuard 3 that limit access to various aspects of PATGuard 3 functionality.

Permissions Level
The most limited Permissions level is View, which allows a user to look at but not edit the database. The highest permissions level is View, Add, Edit, Delete, Setup, which is the same permissions level as the default Admin user.
Please continue to the PAT Options page.
PAT Options

PAT Options
The PAT Options tab in the Setup Window allows you to set the Tester Output options and to configure Code Abbreviations for use on your tester.
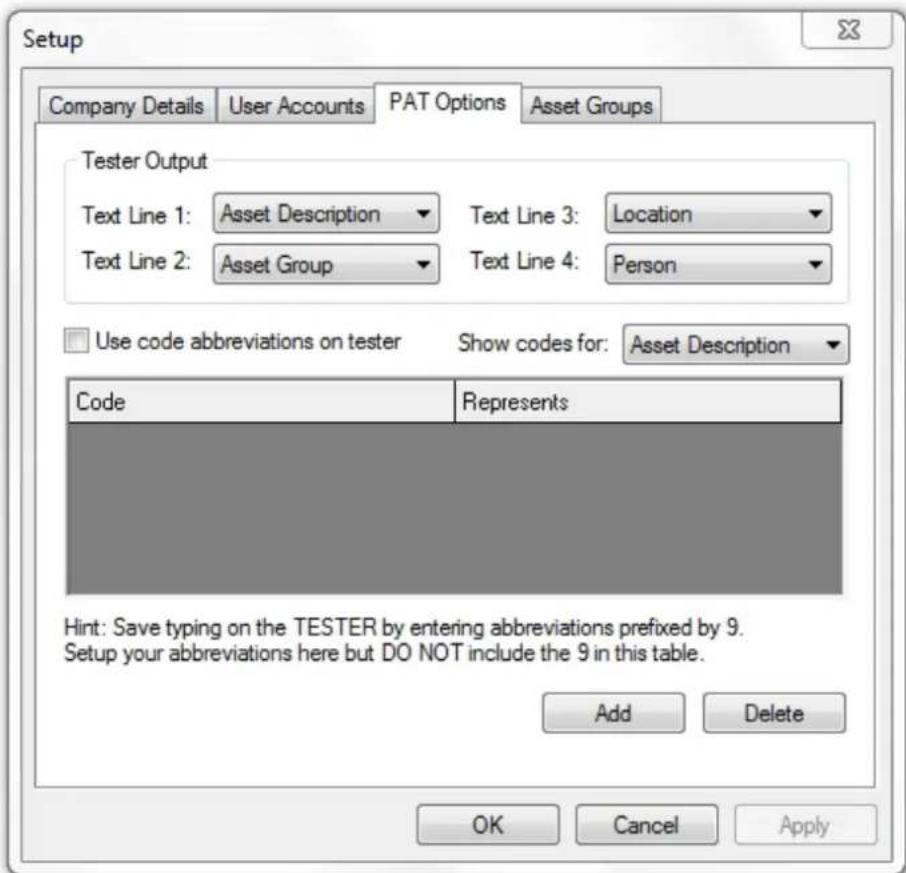
Setup - PAT Options
Tester Output
The Tester Output drop-down boxes are used to configure the interpretation of the data downloaded from your test instrument. With the exception of the Notes option, all fields are mutually exclusive - in other words you cannot set more than one field to Asset Description.
Note that for test instruments that use the .gar file/SSS download format, the Site, Location and Person information in the download will override the options configured in the PAT Options tab.
Please refer to the manual for your test instrument to determine the default Tester Output and other download options.
Code Abbreviations
See the Code Abbreviations page for more information on Code Abbreviations.
Code Abbreviations
3 Code Abbreviations
Code Abbreviations are used to help save time typing on the test instrument. If you wish to use Code Abbreviations on your test instrument, and your test instrument is able to use Code Abbreviations, tick the Use code abbreviations on tester box in the PAT Options tab.
When this option is enabled text prefixed with a 9 (nine) will be checked against the list of Code Abbreviations and, if found, the Code Abbreviation will be expanded. In the example below, 9KET would expand to Kettle, 9TOA to Toaster etc.
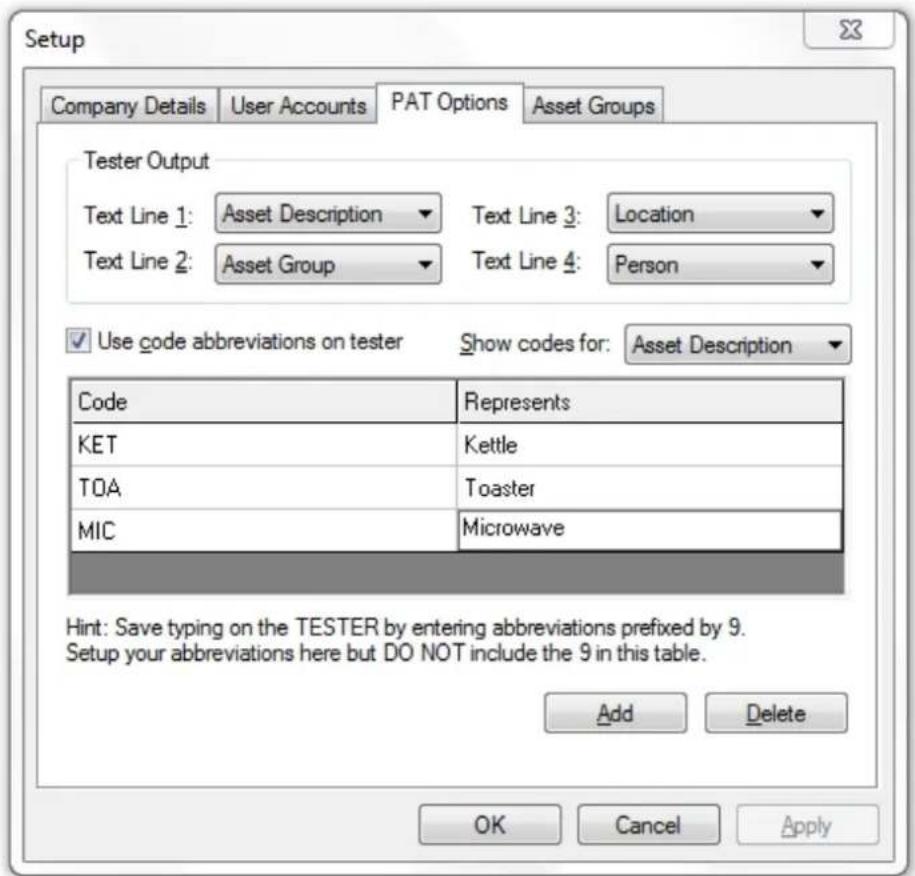
Code Abbreviations
Code Abbreviation Category
Code Abbreviations can be set up for various categories including Asset Description, Location and Person. To display the available categories and the Code Abbreviations for each, click on the Show Codes for: drop-down box.
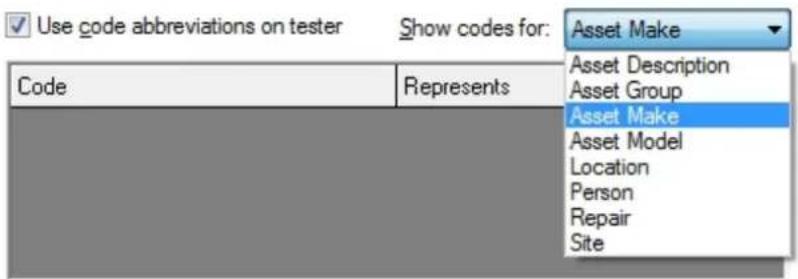
Code Abbreviation Fields
Adding a new Code Abbreviation
To add a new Code Abbreviation, select the Code Abbreviation Category that you would like to add a new Code Abbreviation to. Click the Add button to add a new line.

Add a new Code Abbreviation
In the new line, enter the 3-digit Code you would like to use in the Code column. The 9 should not be included for the Code in the Code Abbreviation table. Enter the full description in the Represents column.
Editing a Code Abbreviation
To edit either the Code Abbreviation or the full description, simply click in the Code Abbreviations table and edit the text accordingly.
Deleting a Code Abbreviation
To delete a Code Abbreviation, select the row containing the Code Abbreviation and hit the Delete button. You will be prompted for confirmation.

Delete Code Abbreviation
Asset Groups
3 Asset Groups
An Asset Group defines the test parameters and retest periods for a class of Assets. By defining Asset Group and assigning Assets to a group you can manage the retest periods and test codes for many Assets at once. In addition to the Pre-defined Asset Groups, Asset Groups can also be Added, Edited or Deleted.
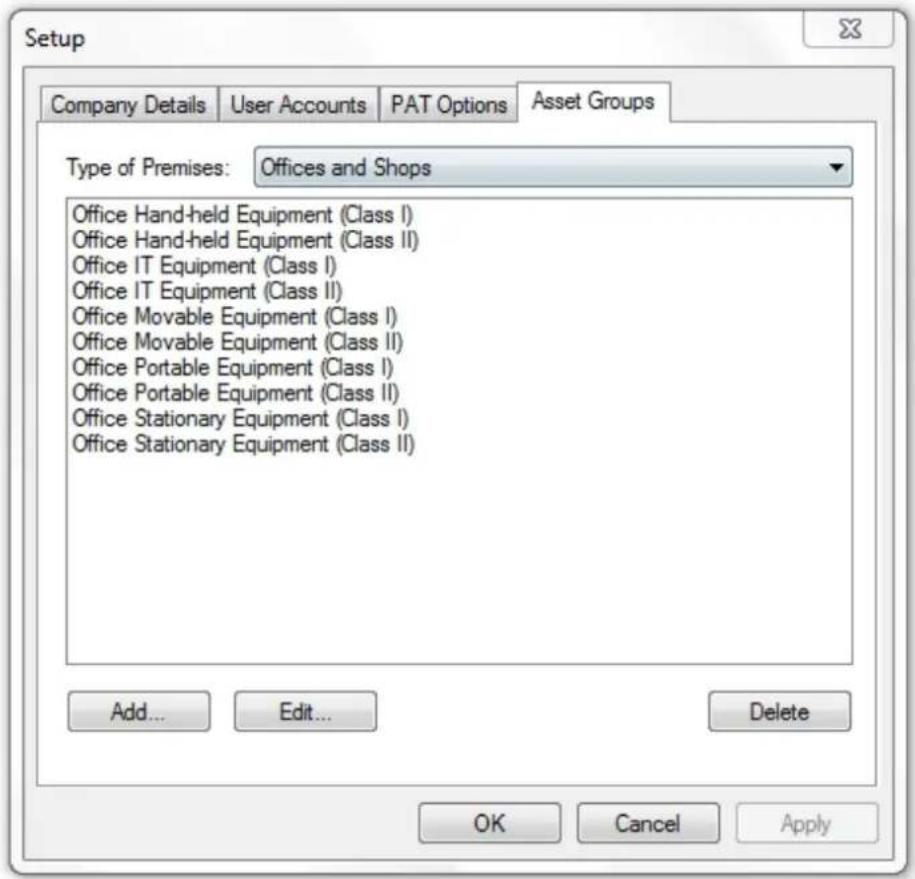
Setup - Asset Groups
Pre-defined Asset Groups
In the UK, the Health and Safety Executive (HSE) and the Institute of Engineering and Technology (IET) define re-test periods in their documentation. These re-test periods are defined in terms of the Type of Premises where the Assets are located, the type of equipment, type of test (visual or full test) and the class of the equipment (class I or class II).
PATGuard 3 contains a set of pre-defined Asset Groups based on this guidance. Other Asset groups which are not premise dependent can be added to Undefined (e.g. Imported Asset Groups or equivalent from another database will be in Undefined).
Type of Premises
PATGuard 3 contains a list of Premises Types, each containing a number of pre-defined Asset Groups. These Asset Groups can be accessed by selecting the Premises Type from the Type of Premises drop-down box.
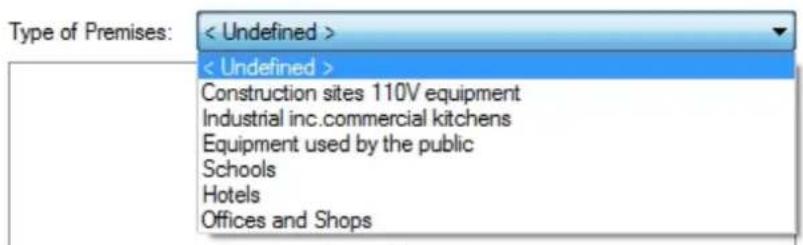
Type of Premises
Adding an Asset Group
To add a new Asset Group, first select the Type of Premises that you want the Asset Group to belong to, or use the < Undefined > premises type, and then click the Add... button to pull up the Asset Group window.
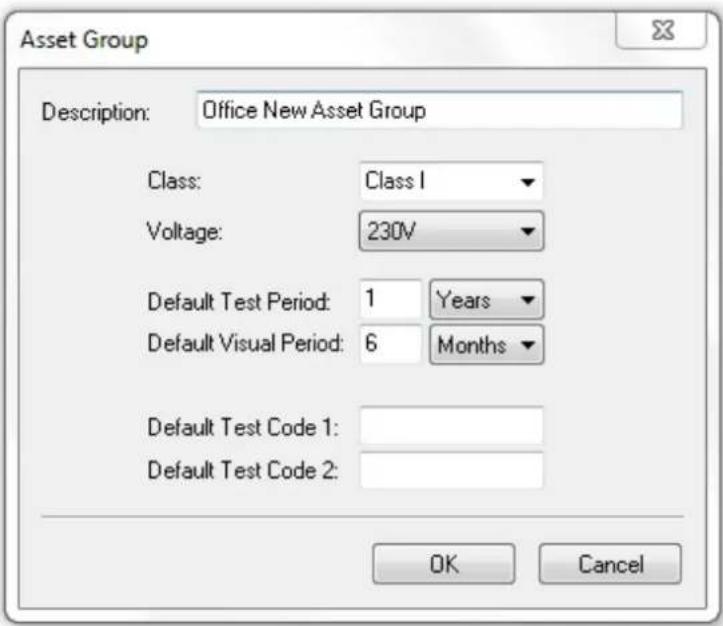
Add Asset Group
Enter the description of the Asset Group and select the applicable Class and Voltage. The Default Test Period and Default Visual Period allow you to set the default test periods for this asset group, which will be used whenever Group Default is selected for Test Period in the Asset Details window.
Default Test Codes can also be entered to instruct your test instrument how to test this group of assets, if your test instrument supports Test Codes. Please refer to your test instrument manual for more information on Test Codes.
Edit an Asset Group
To edit an Asset Group, select the Asset Group name in the Asset Groups tab in the Setup Window and click the Edit... button. This will open the Asset Group window.
Delete an Asset Group
To delete an Asset Group, select the Asset Group name in the Asset Groups tab in the Setup Window and click the Delete button. You will be prompted for confirmation.
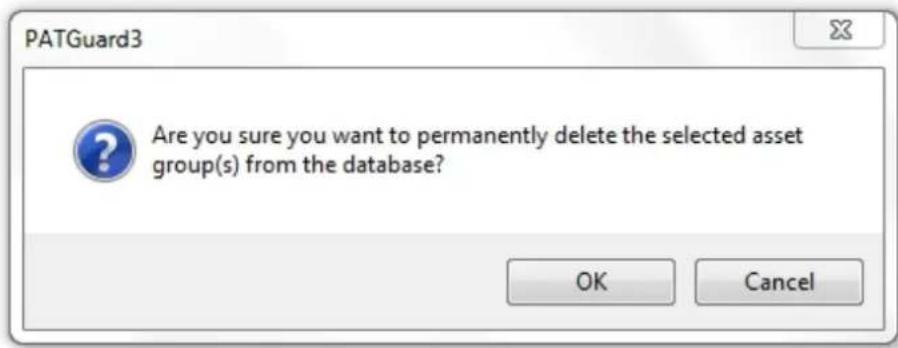
Delete Asset Group
3 Navigating PATGuard 3
• The Title Bar
- The Ribbon
• The Navigating Pane
- Main Window
- Short-cut Keys
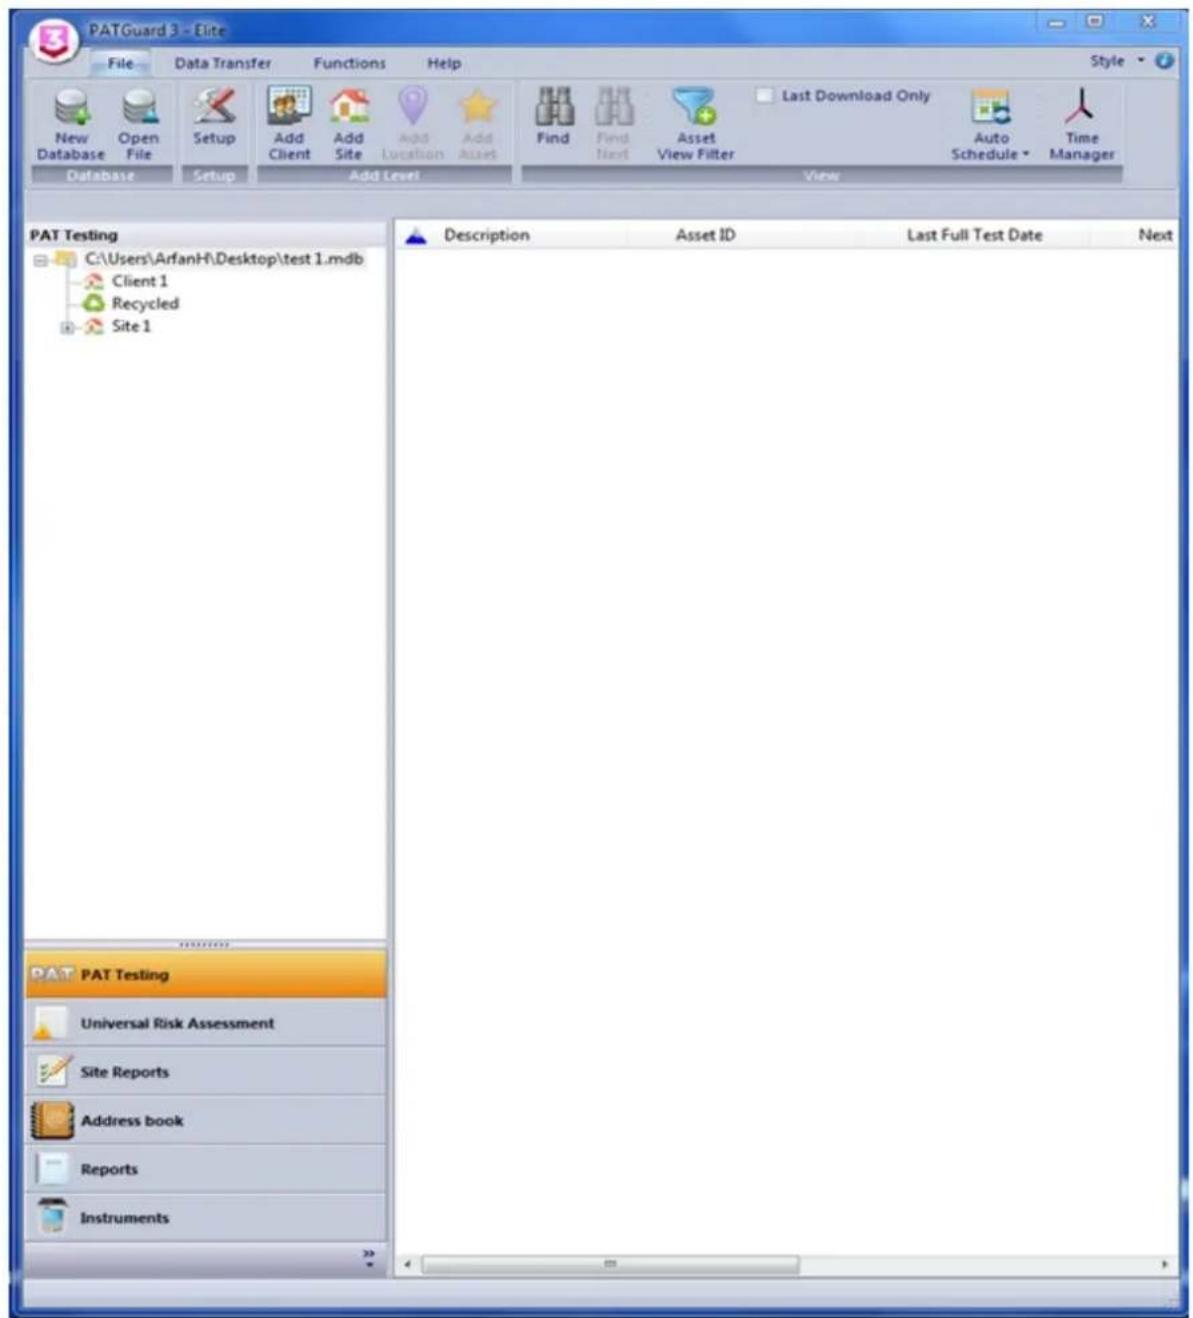
The PATGuard 3 user interface is split into four main areas, the Title Bar, Ribbon, Navigation Pane and Main Window, as shown below. The relative size of the Navigation Pane and Main Window can be adjusted by clicking and dragging the dividing bar with the mouse.
Title Bar

PATGuard 3
The Title Bar
The Title Bar contains the Quick-access Toolbar as well as Minimise, Maximise and Close buttons. For more information, see the Title Bar page.
Ribbon
The Ribbon provides access to the File, Data Transfer, Functions and Help menus along with the Style options.
For more information, see the Ribbon page.
Navigation Pane
The Navigation Pane provides access to the various main PATGuard 3 functions, including PAT Testing, Universal Risk Assessment, Site Reports, the Address Book, Reports and Instruments. The Navigation Pane also contains the database Tree View. The Navigation Pane can be customised to hide some of these features if they are not required.
For more information, see the Navigation Pane page.
Main Window
The contents of the Main Window depend on which PATGuard 3 function is selected. For example, when using the PAT Testing function, the Main Window displays details of the stored assets and test results.
For more information, see the Main Window page.
Short-cut Keys
There are also a number of short-cut keys in PATGuard 3 to help make common tasks quicker.
For more information, see the Short-cut Keys page.
The Title Bar

The Title Bar
The Title Bar is at the top of the PATGuard 3 user interface and contains the Quick-access Toolbar as well as the Minimise, Maximise and Close buttons.
Quick-access Toolbar

Minimise, Maximise and Close
Title Bar
Quick-access Toolbar
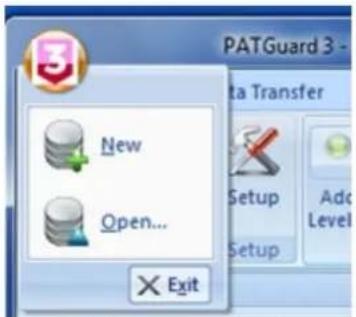
Quick -access Toolbar
The icons on the Quick-access Toolbar provide options to Create a new database or Open an existing file.
Minimise, Maximise and Close buttons

Minimise, Maximise and Close buttons
The minimise and maximise buttons allow the user to minimise and maximise/restore the PATGuard 3 window. The close button closes PATGuard 3.
Context Menu
Right-clicking on the Title Bar brings up the Context Menu:
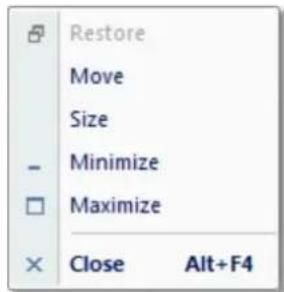
Context Menu
The context menu provides options to move, resize, minimise, maximise/restore and close PATGuard 3.
The Ribbon
3 The Ribbon
The Ribbon provides access to the File, Data Transfer, Functions and Help menus.
The Ribbon also contains the Application Button, the Style Options menu and a link to the About Screen.
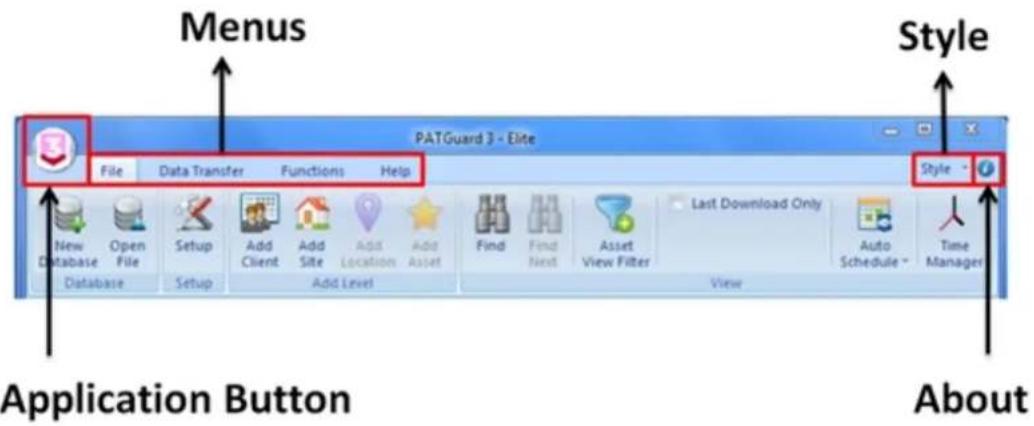
The Ribbon
Application Button

Application Button menu
The Application Button opens a menu with options to Create a new database or Open an existing file. The menu also shows a list of recent documents that are available to open, along with an Exit button.
Minimising and Maximising the Ribbon
The Ribbon can be minimised by double-clicking one of the Menu names (File, Data Transfer, Functions or Help). This will hide the Menu bars unless one of the Menu names is selected, and can be useful on low resolution screens
Double-clicking on a Menu name will maximise the Ribbon.
File Menu

File Menu

File Menu
The File Menu contains the following options:
- New Database
- Open File
-
Setup
-
Add Client
- Add Site
- Add Location
- Add Asset/Add Hazard (depending on context)
Find
Find Next - Asset View Filter
• Last Download Only - Auto Schedule
Click on the links above for more information about each option.
Condensed View
If there is not enough space to display the entire menu, the File Menu - and other Ribbon menus - automatically condense themselves to save space, as shown below:
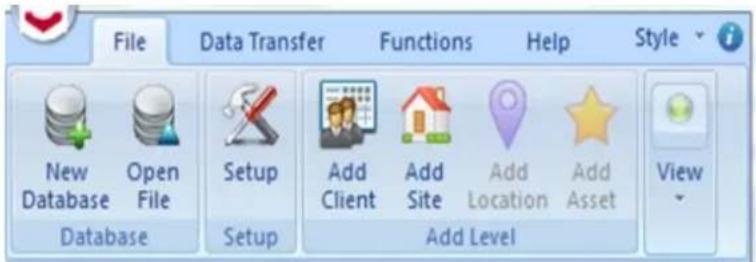
File Menu - condensed view
The hidden options can be accessed, in this case, by clicking on the 'View' button:
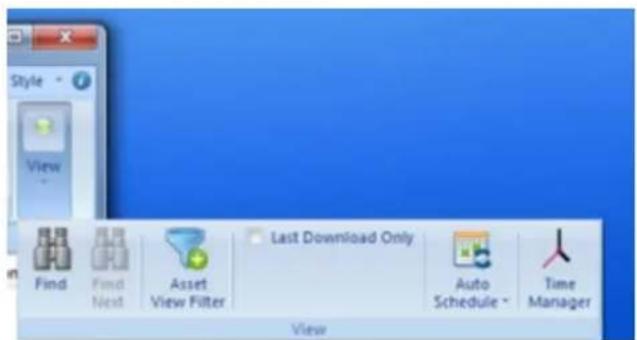
File Menu - condensed view (expanded)
Open an Existing File
3 Open An Existing File
To open an existing file or database, select Open File from the File Menu (or from the Quick-access Toolbar or Application Button).

File Menu - Open
This will open the Open File window, which allows you to browse to the file you wish to open.

Open File window
File Types
The Open File window allows you to open files of different types.

Open File - File Type Options
Opening a Database (.mdb) will close the database that is currently in use and open the selected database.
Opening a Briefcase (.pat) file will import the data in the selected file into the current database.
Note; briefcase /.pat files can only be opened on exactly the same version of PATGuard 3 that they were originally created on.
Opening any of the Downloads options (.sss, .txt, .gar) files will import the data in the selected file into the current database.
Find

Find
To search for assets matching particular criteria, select the Find option from the File Menu.

File Menu - View - Find/Find Next
The fields in the Find window are used to define the search criteria. You can search by Site, Location, Asset ID, Description, Asset Group, Serial Number or Next Check Date.
You must select at least one search criteria but the other fields may be left blank. Click OK to begin the search.

Find Window
The search criteria given must ALL be present in an asset for a match to occur. If a matching asset is found the Tree View will display its location and the asset will be selected in the Asset View.
Find Next
Select the Find Next option in the File Menu to continue the search. If another match occurs, the Tree View will display the location of the next asset and the asset will be selected in the Asset View. You can also find the next match by pressing the F3 key.
If no more matches occur, the following message will be displayed:

Find - No Matching Assets
Asset View Filter
3 Asset View Filter
To filter the Asset View for assets with particular next test dates, select the Asset View Filter option from the File Menu.
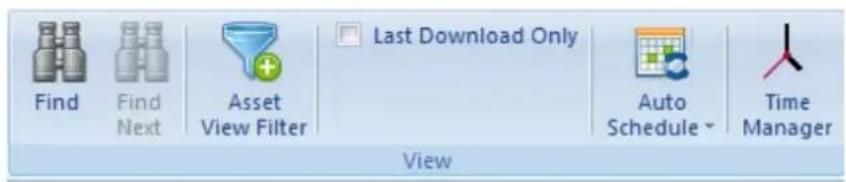
File Menu - View - Asset View Filter
To filter the Asset View by next test date, tick the Filter asset view by next test date box and then change the From and To dates according to your requirements.
Alternatively, to view all assets that have tests overdue, tick the Show all assets that have tests overdue box. This will disable the From and To date boxes.
If you wish to include visual tests, tick the Include Visual Tests in Schedule box.

Asset View Filter window
Clicking OK will apply the Asset View Filter, and only assets matching the filter will be displayed in the Asset View.
Last Download Only
3 Last Download Only
To filter the Asset View so that only assets added or modified by the last download appear, select the Last
Download Only option from the File Menu.

File Menu - View - Asset View Filter
Only the assets added or modified by the last download will appear in the Asset View. Selecting Last Download Only again removes the filter so that all assets can be seen. Newly created assets are differentiated from modified assets by a icon.
Using the Last Download Only function overrides any previously applied Asset View Filter.
Data Transfer Menu
3 Data Transfer Menu
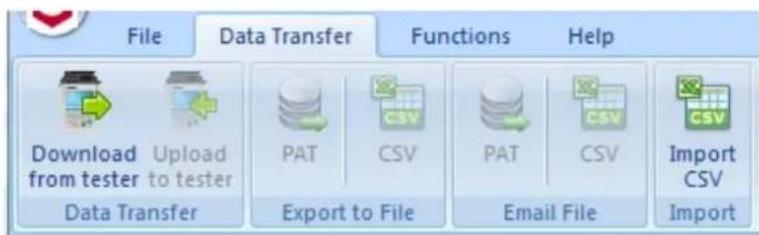
Data Transfer Menu
The Data Transfer Menu contains the following options:
Data Transfer
○ Download from Your Tester
○ Uploading to Your Tester
- Export to File
○ Export to File - PAT
○ Export to File - CSV
- Email File
○ Email File - PAT
○ Email File - CSV
- Import
○ Import CSV
Click on the links above for more information about each option.
Functions Menu
3 Functions Menu

Functions Menu
The Functions Menu contains the following options:
• Auto Scheduler
- Add Formal Test Visual Pass
• Add Manual Test Result
• Emergency Lighting
- Fire Alarm
• Create PATGuard Viewer CD
• PAT Risk Assessment
• Universal Risk Assessment
Click on the links above for more information about each option.
Add Formal Visual Test Pass
3 Add Formal Visual Test Pass
The Add Formal Visual Test Pass feature allows you to add a visual test pass to the Test Results for one or more Assets.
To add a Formal Visual Test Pass to one or more Assets, make sure you are using the PAT Testing function and select the Asset or Assets you wish to add a Formal Visual Test Pass to in the Main Window.
| Description | Asset ID | Last Full Test Date | Next Full Test Date | Last Formal Visual Inspection Date | Next Formal Visual Date |
| Kettle | Kettle | 14/11/2017 | 14/05/2018 | ||
| Laptop | Laptop | 14/11/2017 | 14/05/2018 | ||
| Microwave | Microwave | 14/11/2017 | 14/05/2018 | ||
| Monitor | Monitor | 14/11/2017 | 14/05/2018 | ||
| Toaster | Toaster | 14/11/2017 | 14/05/2018 | ||
| TV | TV | 14/11/2017 | 14/05/2018 |
Selecting multiple Assets in the Main Window
Select Add Formal Visual Test Pass from the Functions Menu.

Functions Menu - Add Formal Visual Test Pass
You will be prompted for confirmation.

Add Formal Visual Test Pass confirmation
Selecting OK will add a visual test pass with the current date to the test results for the selected Asset or Assets.
Add Manual Test Result

Add Manual Test Results
The Add Manual Test Result feature allows a manual test result to be added to an Asset that is already in the database.
To add a Manual Test Result to an Asset, make sure you are using the PAT Testing function and highlight the Asset you wish to Add Manual Test Results to in the Main Window.

Functions Menu - Add Manual Test Results
Selecting the Add Manual Test Result button opens the Asset Details windows and the corresponding Test Details window.
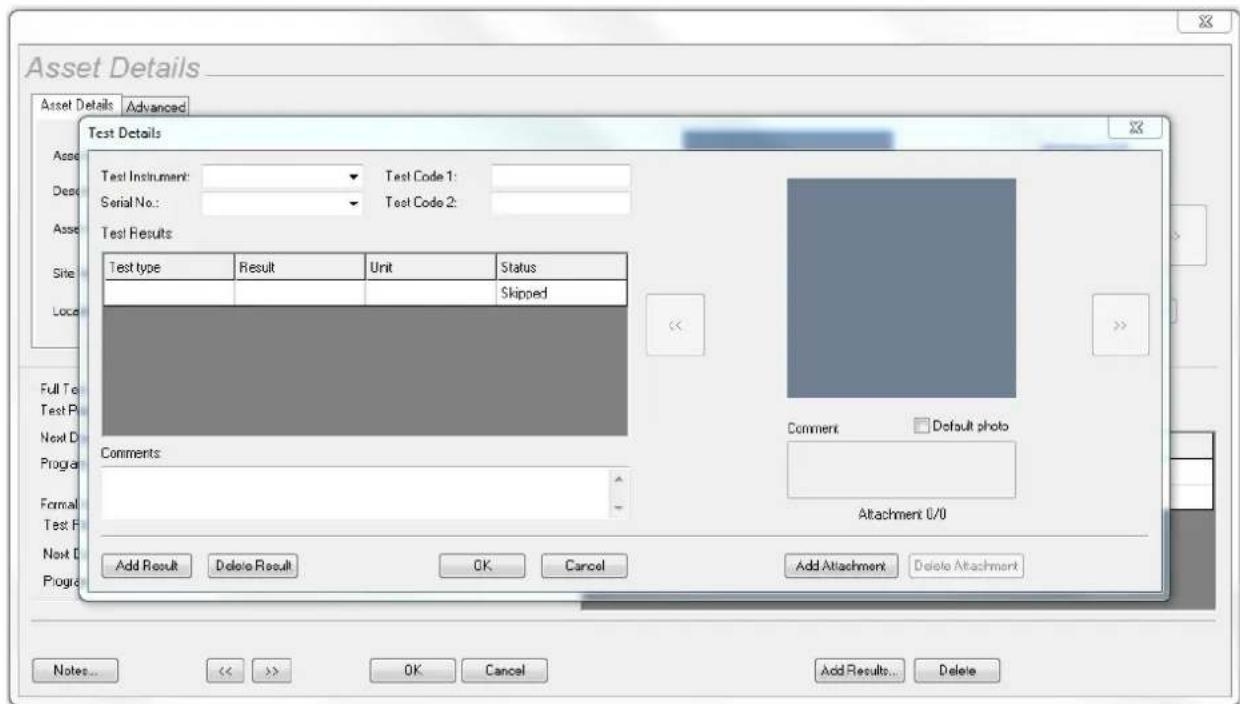
Asset Details and Test Details Window
In the Test Details window, click on the box under Test type and from the dropdown add the test required from the list. The Result and Unit can be added as free text and finally the Status is selected from the dropdown.
Select OK to close the Test Details window and save the manually added data.
The date of this manually added result can be changed by selecting the Date field, immediately after entry, and selecting the relevant date from the dropdown.
Note; the date cannot be changed on old data / previously added manual data - the date change only works on new manual entries.
Selecting OK saves and closes Asset Details window.
Create PATGuard Viewer CD

Create PATGuard Viewer CD
PATGuard Viewer is a 'view' only version of the program that can be freely issued to Clients and others so that they can view the database and print their own Reports.
Not all versions of PATGuard 3 can create a Viewer CD, refer to the PATGuard 3 Versions page for more information.
To create a PATGuard 3 Viewer CD, make sure you are using either the PAT Testing, Universal Risk Assessment or Site Reports function. Select the Client you wish to create a Viewer CD for in the Tree View in the Navigation Pane. Only the data for that Client will be added to the Viewer CD. Alternatively, to include the entire database, select the top level of the database in the Tree View in the Navigation Pane.

flowchart
graph TD
    A["G:\PATGuard3.mdb"] --> B["Client 1"]
    B --> C["Site 2"]
    B --> D["Recycled"]
    B --> E["Site 1"]
Select a Client or the top level of the database
Select the Create Viewer CD option from the Functions Menu.

Functions Menu - Create Viewer CD
This will open the Create Viewer CD Image window, which allows you to set the options for your Viewer CD.
Create Viewer CD Image window
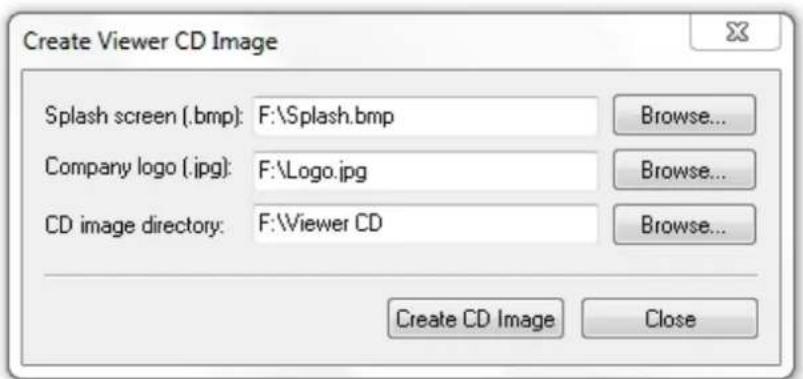
Create Viewer CD Image window
The PATGuard Viewer CD can be customised by changing the Splash Screen and Company Logo. The Splash Screen appears when the PATGuard Viewer is started, and the Company Logo will appear on all Reports generated with PATGuard Viewer.
Changing Splash Screen
To change the Splash Screen, select Browse... next to Splash screen (.bmp) to open the Open Splash Screen window.

Open Splash Screen window
Browse to the location of the Bitmap (.bmp) file that you would like to use as the Splash Screen. Select OK to select the file and return to the Create Viewer CD Image window.
Changing Company Logo
To change the Company Logo, select Browse... next to Company logo (.jpg) to open the Open Company Logo window.

Open Company Logo window
Browse to the location of the JPEG (.jpg) file that you would like to use as the Company Logo. Select OK to select the file and return to the Create Viewer CD Image window.
Setting CD image directory
To set the folder you would like to output the Viewer CD image to, select Browse... next to CD image directory to open the Browse for CD image directory window.

Browse for CD image directory window
Browse to the location of the folder that you would like to output the CD image files to (in the example above, the previously created ViewerCD folder on the Desktop). Select OK to select the file and return to the Create Viewer CD Image window.
NB: The CD image directory should be an empty folder, and never the root directory (e.g. C:) or any other important system folder.
Creating Viewer CD image
After setting the various Viewer CD options, select Create CD Image to generate the Viewer CD files.

Create Viewer CD Image Created confirmation window
Once the Viewer CD files have been successfully generated, copy all of the generated files onto a blank CD or DVD using your normal CD creating software program.
It is a good idea to check the Viewer CD has been created correctly by installing on your own PC before sending to a Client.
Help Menu

Help Menu
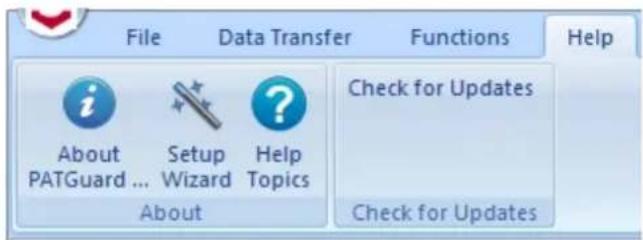
Help Menu
The Help Menu contains the following options:
- About PATGuard 3
- Setup Wizard
- Help Topics
Click on the links above for more information about each option.
Style Options

Style Options
The appearance of PATGuard 3 can be customised using the Style feature, which can be accessed from the
top right corner of the Ribbon. As well as the Default Style there are a number of Optional Styles to choose from. These can be selected using the Style option in the programme.
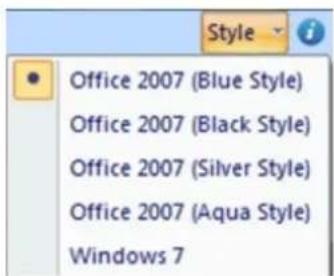
Windows 7 Styles
Default Style
The default style for PATGuard 3 is "Windows 7".

Default "Windows 7" style
Optional Styles
There are four optional styles to choose from; "Office 2007 (Blue Style)", "Office 2007 (Black Style)", "Office 2007 (Silver Style)" and "Office 2007 (Aqua Style)".
Optional styles "Office 2007 (Aqua)", "Office 2007 (Silver)", "Office 2007 (Blue)" and "Office 2007 (Black)"
The Navigation Pane

The Navigation Pane
The Navigation Pane is displayed on the left hand side of the screen. The relative size of the Navigation Pane and Main Window can be adjusted by clicking and dragging the dividing bar with the mouse.
The Navigation Pane is split into two areas. The bottom area of the Navigation Pane provides access to the main PATGuard 3 functions. The functions displayed in the Navigation Pane can be customised to meet your requirements.

PATGuard 3 Functions
Depending on the function selected, the top of the Navigation Pane will display one of the following:
- Tree View
- Instruments View
Tree View
The Tree View allows you to navigate the PATGuard 3 database.

flowchart
graph TD
    A["G:\PATGuard3.mdb"] --> B["Client 1"]
    B --> C["Site 2"]
    B --> D["Recycled"]
    B --> E["Site 1"]
Tree View
The top of the Tree View shows the top level of the database. Underneath this are displayed the configured Clients, Sites and Locations. Parts of the Tree View can be expanded and collapsed using the + and - icons the left of a Client or Site.
The Recycle Bin is also shown in the Tree View.
Instruments View
The Instruments View displays a list of configured instrument types in the Navigation Pane.

Refer to the Instruments section for more information.
Customising the Navigation Pane
3 Customising the Navigation Pane
The Navigation Pane can be customised by hiding, minimising, or rearranging the various PATGuard 3 function buttons to better meet your requirements.
Hiding functions
Depending on how you wish to use PATGuard 3 and the functions that you will make use of, you may wish to hide certain functions from the Navigation Pane. For example, if you do not wish to produce Site Reports you may choose to hide this function.
To do this, select the >> button at the bottom of the Navigation Pane to display the Navigation Pane menu.
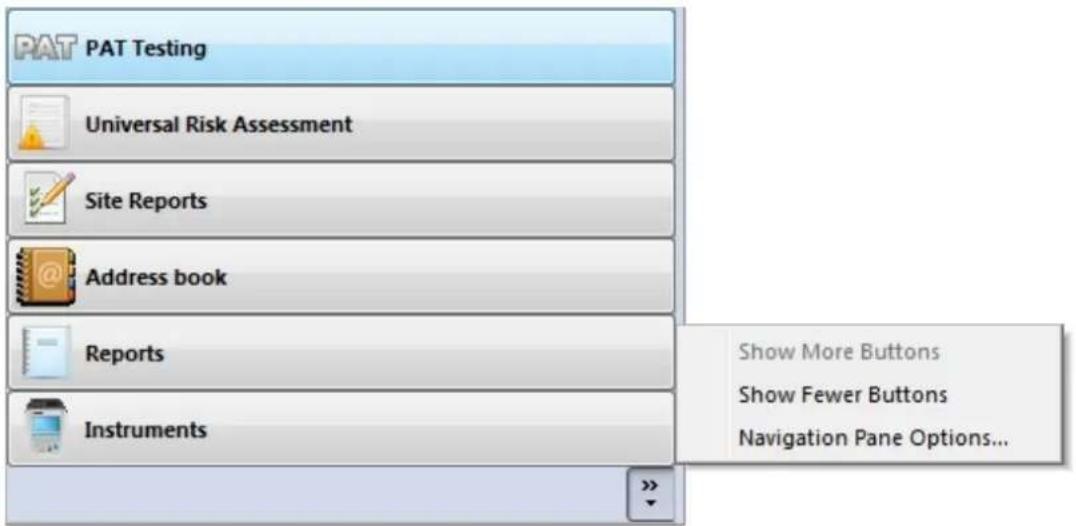
Navigation Pane menu
Select Navigation Pane Options... from the Navigation Pane menu. This will open the Navigation Pane Options window.

Navigation Pane Options window
Toggling the checkbox next to each function in the Navigation Pane Options window will change whether that function is visible or hidden in the Navigation Pane. In the example below, only the PAT Testing and Instruments functions are visible.

Navigation Pane - only two functions visible
Selecting Reset in the Navigation Pane Options window will set all functions to visible in the Navigation Pane.
Minimising functions
Rather than hiding functions, you may wish to simply minimise the functions you use least often. Minimising functions also provides more space for the database Tree View.
To do this, select the >> button at the bottom of the Navigation Pane to display the Navigation Pane menu.

Navigation Pane - Function menu
Select Show Fewer Buttons from the Navigation Pane menu to minimise a function. Functions will be minimised in the order that they appear in the Navigation Pane - in the example above, the Instruments function will be minimised first. To minimise specific functions, rearrange the functions in the Navigation Pane so that the functions you wish to minimise are at the bottom.
In the extreme example below, all of the functions have been minimised.

Navigation Pane - All function minimised
PATGuard 3 will automatically minimise and maximise functions when running on a small screen or in a small window.
Rearranging functions
You may wish to change the order that functions appear in the Navigation Pane, either to put the functions in a specific order or to enable you to minimise particular functions.
To do this, select the >> button at the bottom of the Navigation Pane to display the Navigation Pane menu.

Navigation Pane menu
Select Navigation Pane Options... from the Navigation Pane menu. This will open the Navigation Pane Options window.
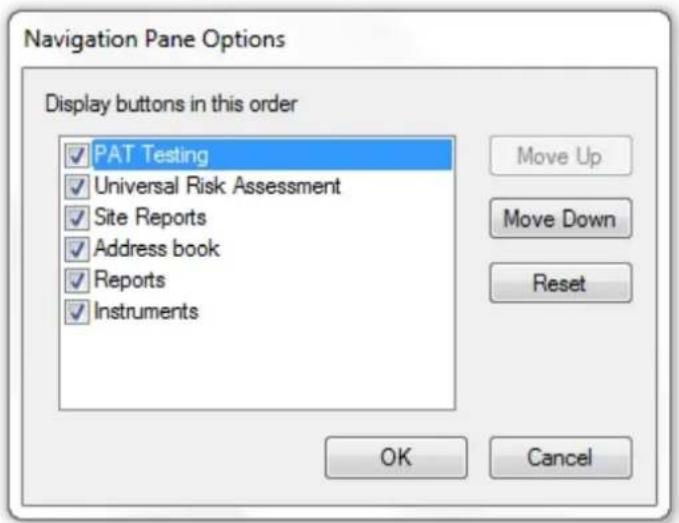
Navigation Pane Options window
Selecting a function and using the Move Up and Move Down buttons in the Navigation Pane Options window will change the order the functions appear in the Navigation Pane.
Selecting Reset in the Navigation Pane Options window will set all functions to the default order in the Navigation Pane.
Recycle Bin
3 Recycle Bin
When Assets, Hazards or Site Reports are deleted they are moved to the Recycle Bin.
Assets, Hazards or Site Reports located in the Recycle Bin can be viewed by selecting Recycled in the Tree View. Deleted items corresponding to the current function will be displayed: Assets will be visible when using the PAT Testing function, Hazards when using the Universal Risk Assessment function and Site Reports when using the Site Reports function.

Recycle Bin
The deleted Assets, Hazards and Site Reports will be displayed in the Main Window.
Restoring Assets or Hazards
Deleted Assets, Hazards and Site Reports can be restored by right-clicking them in the Main Window and selecting Restore.

Restore from Recycle Bin
The asset will be moved from the Recycle Bin back into the main database.
NB: In order for Assets or Hazards to be restored from the Recycle Bin, the Client/Site/Location to which they belong must still exist in the database (or be created manually).
Main Window

The Main Window
The Main Window is displayed on the right hand side of the screen. The relative size of the Navigation Pane and Main Window can be adjusted by clicking and dragging the dividing bar with the mouse.
Depending on which of the main PATGuard 3 functions is selected, the Main window will display one of the following views:
• Asset View - selected using the PAT Testing function
○ Filtering the Asset View
○ Sorting the Asset View
- Hazard View - selected using the Universal Risk Assessment function
- Site Reports View - selected using the Site Reports function
- Personnel View - selected using the Address book function
• Reports View - selected using the Reports function
• Instruments View - selected using the Instrument function
Asset View
The Asset View is shown when the PAT Testing function is selected. The Assets View displays the list of Assets for the Client, Site or Location selected in the Tree View on the Navigation Pane.
| Description | Asset ID | Last Full Test Date | Next Full Test Date | Last Formal Visual Inspection Date | Next Formal Visual Date |
| Kettle | Kettle | 14/11/2017 | 14/05/2018 | ||
| Laptop | Laptop | 14/11/2017 | 14/05/2018 | ||
| Microwave | Microwave | 14/11/2017 | 14/05/2018 | ||
| Monitor | Monitor | 14/11/2017 | 14/05/2018 | ||
| Toaster | Toaster | 14/11/2017 | 14/05/2018 | ||
| TV | TV | 14/11/2017 | 14/05/2018 |
Asset View
The column headers can be selected / deselected by right mouse clicking on any of the column headers to display the dropdown. Any items ticked are displayed in the Main Window.

Main Window - Asset View Selection Dropdown
Filtering the Asset View
The Assets displayed in the Asset View can be filtered using the Asset View Filter and Last Download Only options in the File Menu.
Sorting the Asset View
The Assets displayed in the Asset View can be sorted based on the information in each column of the Asset View. To do this, click on the column heading you wish to sort on. The blue triangle will move to that column to show which column the Assets are being sorted on. To reverse the direction of the sort, click the column heading again. The blue triangle will change direction to indicate the direction of the sort.
In the example below, the Asset View has been sorted on the Description column in reverse alphabetical order.
| Description | Asset ID | Last Full Test Date | Next Full Test Date | Last Formal Visual Inspection Date | Next Formal Visual Date |
| TV | TV | 14/11/2017 | 14/05/2018 | ||
| Toaster | Toaster | 14/11/2017 | 14/05/2018 | ||
| Monitor | Monitor | 14/11/2017 | 14/05/2018 | ||
| Microwave | Microwave | 14/11/2017 | 14/05/2018 | ||
| Laptop | Laptop | 14/11/2017 | 14/05/2018 | ||
| Kettle | Kettle | 14/11/2017 | 14/05/2018 |
Asset View - Sorted
Hazard View
The Hazard View is shown when the Universal Risk Assessments function is selected. The Hazard View displays the list of Hazards for the Client, Site or Location selected in the Tree View on the Navigation Pane.
| Description | HazardID |
| Dangerous Plug | 123 |
| Trip Hazard | 124 |
| Fall Hazard | 125 |
Hazard View
Site Reports View
The Site Reports View is shown when the Site Reports function is selected. The Site Reports View displays the list of Site Reports for the Client, Site or Location selected in the Tree View on the Navigation Pane.
| Report ID | Report Type | Site | Location |
| 1 | Emergency Lighting | Site 2 |
Site Reports View
Personnel View
The Personnel View is shown when the Address Book function is selected. The Personnel View displays the External Personnel for the Client, Site or Location selected in the Tree View on the Navigation Pane. If the top-level of the database is selected, the Personnel View displays the Internal Personnel.

Personnel View
Reports View
The Reports View is shown when the Reports function is selected. The Reports View displays all the potential reports that can be used. Double clicking on one of the report icons brings up a report filter window (not valid for all reports). This is used to select the data, for example, some reports allow the Client, Site or Location to be filtered.

Reports View
Instruments View
The Instruments View is shown when the Instruments function is selected. The Instruments View displays the list of Instruments of the type selected in the Instruments View on the Navigation Pane.

Instruments View
Short-cut Keys

Short-cut Keys
A number of common functions in PATGuard 3 can be accessed using the following short-cut keys:
| New Database | Ctrl + N |
| Open File | Ctrl + O |
| Find | Ctrl + F (in PAT Testing Window) |
| Help | F1 |
| Rename | F2 (Clients / Sites / Locations) |
| Find Next | F3 |
| Delete | Del |
PATGuard 3 functions

PATGuard 3 functions
The main functions of PATGuard 3 are accessible from the Navigation Pane and are as follows:
- PAT Testing
• Universal Risk Assessment - Site Reports
- Address Book
Reports - Instruments
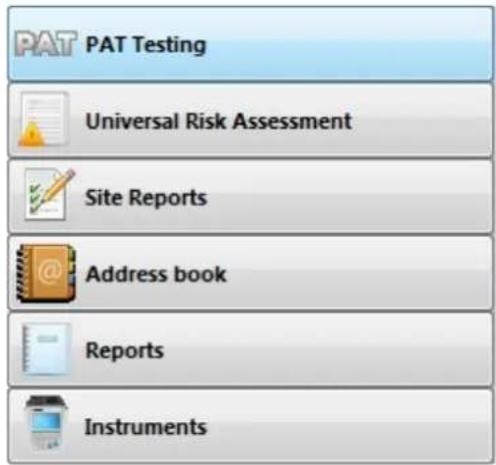
PATGuard 3 functions
There are also a number of features common to one or more of the above functions which are accessible from the File Menu. These are as follows:
- Clients
- Sites
- Locations
Click on the links above for more information about each function.
Clients

Clients
The details of your customers are stored as Clients in the database. Clients can be added from within the PAT Testing, Universal Risk Assessment and Site Reports functions of PATGuard 3. See also Changing Client Details and Deleting Clients.
Adding Clients
To add a client click on the Add Client option in the File Menu, as shown below, to bring up the Client Details window.
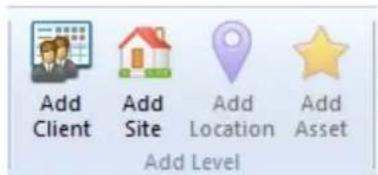
Add Client option
You may find that the Add Client option is greyed out, as shown below.

Add Client option - greyed out
If this is the case, make sure you have the correct function selected, and click on the top level of the database Tree View in the Navigation Pane. You will now be able to add a client to the database.

Top level of database Tree View selected
Client Details Window
Selecting Add Client opens the Client Details window and allows you to view, add or amend the contact details of your customers, including address, telephone and email details, a reference number and any other notes you would like to add about the Client.

Client Details window
Personnel responsible for Client
The Personnel button in the Client Details window displays details of Internal Personnel assigned to the client. In this case two Internal Personnel have been assigned to this Client, one in an Administration role and one in a Technical role.

Personnel assigned to Client
Personnel details are stored in the Address Book. See Adding Internal Personnel for more information on how to add Internal Personnel and assign them to particular Clients.
Changing Client Details
Client details can be changed at any time by double-clicking the Client name in either the database Tree View in the Navigation Pane, or in the Main Window. This will bring up the Client Details window. You can also rename a client by right clicking the client name in the Tree View and selecting Rename, or by pressing F2 whenever the client is selected.
Deleting Clients
Clients can be deleted by selecting them in either the database Tree View in the Navigation Pane, or in the Main Window, and pressing Delete. You can also delete a client by right clicking the client name in the Tree View and selecting Delete. You will be prompted for confirmation.

Delete Client Confirmation
CAUTION: deleting a Client will also delete any locations, assets and results associated with them.
Sites

Sites
The details of addresses where testing is carried out are stored as Sites in the database. Sites can be added from within the PAT Testing, Universal Risk Assessment and Site Reports functions of PATGuard 3. See also Changing Site Details and Deleting Sites.
Depending on your individual requirements, for example whether you are a contractor or perform in-house testing only, sites can be created at the top level of the database or can be associated with a particular Client and appear undemeath that Client in the Tree View in the Navigation Pane. An example of both types of Site is shown below - Site 1 is not associated with a Client, whereas Site 2 is associated with Client 1.

flowchart
graph TD
    A["G:\PATGuard3.mdb"] --> B["Client 1"]
    B --> C["Site 2"]
    B --> D["Recycled"]
    B --> E["Site 1"]
Two types of Site
Adding Sites
To add a Site click on the Add Site option in the File Menu, as shown below, to bring up the Site Details window.

Add Site option
You may find that the Add Site option is greyed out, as shown below.

Add Site option - greyed out
If this is the case, make sure that either the top level of the database or a particular Client is selected within the Tree View in the Navigation Pane. You will now be able to add a Site to the database.
Site Details
The Site Details window allows you to view, add or amend the details of a Site, including the name of the Site, the Client (this will be pre-populated if you created the site under a Client in the Tree View), address and contact details and any other notes you would like to add about the Site.
If the box Site not at client location is not ticked, the fields will automatically contain address and contact details of the Client.

Site Details window
Attaching photos to Site Details
You can also attach photos of the Site to the Site Details. To do this, click the Add Attachment button in the Site Details window. This will open the Open Photo window.
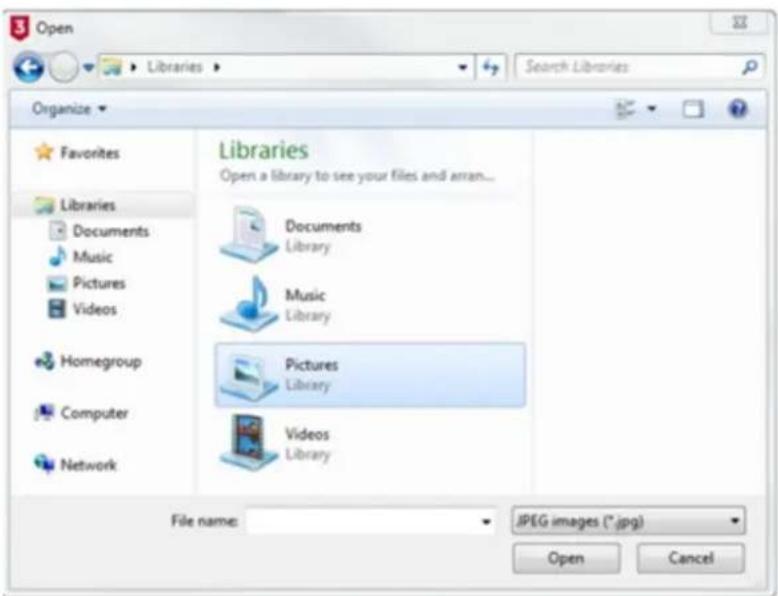
Open Photo window
Browse to find the photo you want to attach and click Open to attach the photo to the Site Details. Multiple photos can be attached to each Site and comments can be added to each photo. To select the default photo for a Site, click the Default photo box in the Site Details window.
You can scroll through the attached photos using the << and >> buttons and delete attached photos using the Delete Attachment button. You will be prompted for confirmation.

Delete Picture Confirmation
Personnel responsible for Site
The Personnel button in the Site Details window displays details of Internal Personnel responsible for the Site. In this case two Internal Personnel have been assigned to this Site, one in an Administration role and one in a Technical role.
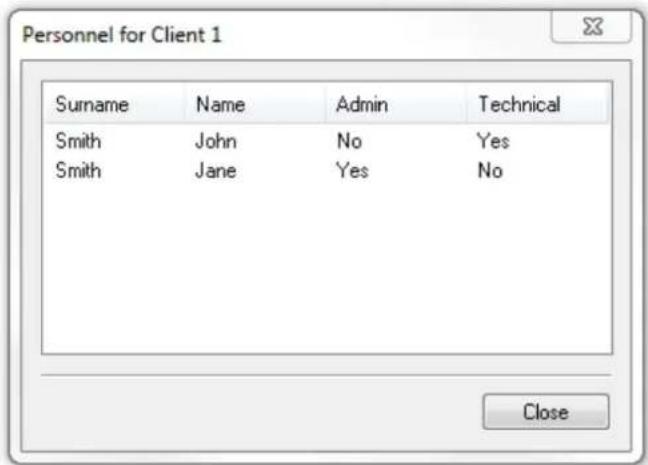
Personnel assigned to Site
Personnel details are stored in the Address Book. See Adding Internal Personnel for more information on how to add Internal Personnel and assign them to particular Site.
Changing Site Details
Site details can be changed at any time by double-clicking the Site name in either the database Tree View in the Navigation Pane or in the Main Window. This will bring up the Site Details window. You can also rename a Site by right clicking the Site name in the Tree View and selecting Rename, or by pressing F2 whenever the site is selected.
Deleting Sites
Sites can be deleted by selecting them in either the database Tree View in the Navigation Pane, or in the Main Window, and pressing Delete. You can also delete a site by right clicking the site name in the Tree View and selecting Delete. You will be prompted for confirmation.

Delete Site Confirmation
CAUTION: deleting a Site will also delete any locations, assets and results associated with it.
Locations
3 Locations
Locations provide a way of dividing Sites into smaller, more manageable sections. Locations can be added from within the PAT Testing, Universal Risk Assessment and Site Reports functions of PATGuard 3. See also Changing Location Details and Deleting Locations.
The exact meaning of a Location can change depending on your individual requirements. If a Site represents a single building, for example, a Location could be a room within that building. If a Site has multiple buildings, a Location could be a specific building on that Site.
Adding Locations
To add a Location, first select the Site that the Location is to be created at in the Tree View in the Navigation Pane.

Select a Site
To add the Location click on the Add Location option in the File Menu, as shown below, to bring up the Location Details window.

Add Location option
You may find that the Add Location option is greyed out, as shown below.

Add Location option - greyed out
If this is the case, make sure you are within a Site that the Location will be added to from within the Tree View in the Navigation Pane.
Location Details
The Location Details window allows you to view, add or amend the details of a Location, including the name and description of a Location, the associated Client and Site (these may already be pre-populated with the details of the Client and Site you selected in the Tree View), and any other notes you would like to add about the Location.
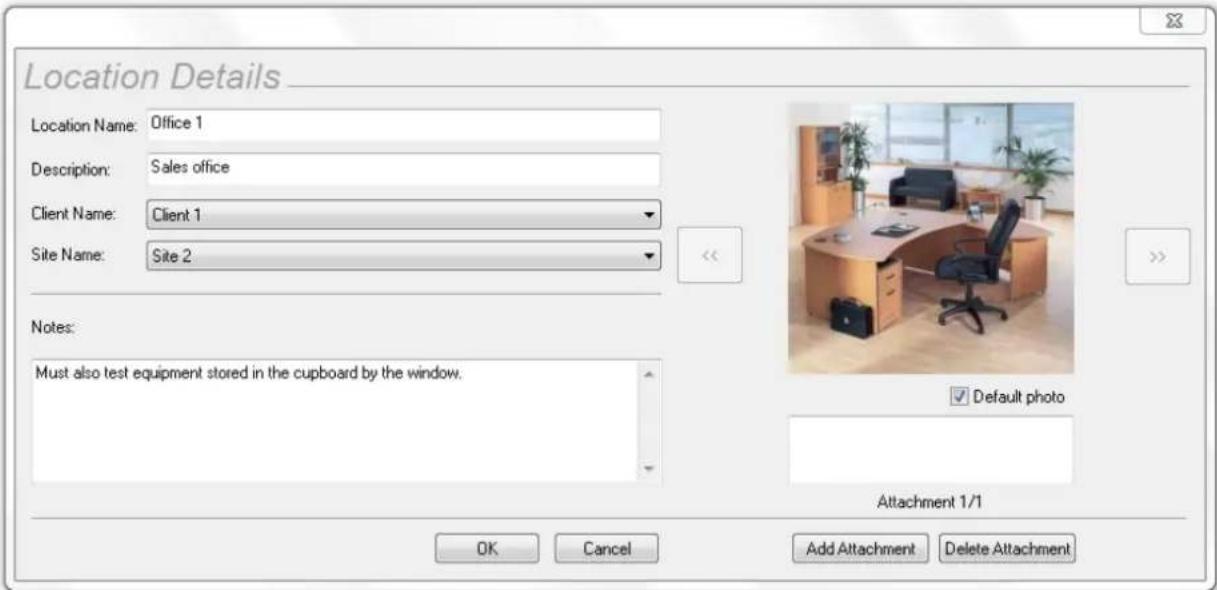
Location Details window
Attaching photos to Location Details
You can also attach photos of the Location to the Location Details. To do this, click the Add Attachment button in the Location Details window. This will open the Open Photo window.

Open Photo window
Browse to find the photo you want to attach and click Open to attach the photo to the Location Details. Multiple photos can be attached to each Location and comments can be added to each photo. To select the default photo for a Location, click the Default photo box in the Location Details window.
You can scroll through the attached photos using the << and >> buttons and delete attached photos using the Delete Attachment button. You will be prompted for confirmation.

Delete Picture Confirmation
Changing Location Details
Location details can be changed at any time by double-clicking the Location name in either the database Tree View in the Navigation Pane or in the Main Window. This will bring up the Location Details window. You can also rename a Location by right clicking the Location name in the Tree View and selecting Rename, or by pressing F2 whenever the site is selected.
Deleting Locations
Locations can be deleted by selecting them in either the database Tree View in the Navigation Pane, or in the Main Window, and pressing Delete. You can also delete a Location by right clicking the site name in the Tree View and selecting Delete. You will be prompted for confirmation.

Delete Location Confirmation
CAUTION: deleting a Location will also delete any assets and results associated with it.
PAT Testing

PAT Testing
The PAT Testing function of PATGuard 3, which is accessible from the Navigation Pane, allows you to view, add and amend details of Assets, manually add Test Results and perform PAT Risk Assessments.
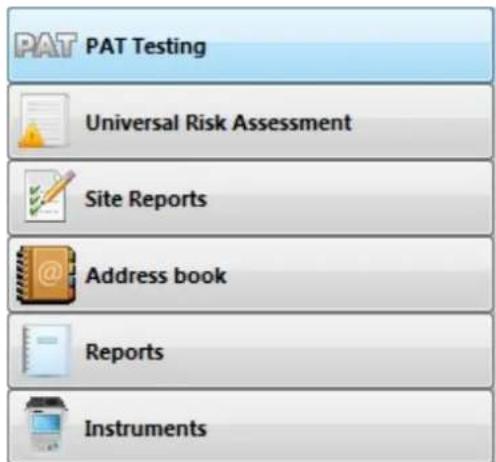
Navigation Pane - PAT Testing
When the PAT Testing function is selected in the Navigation Pane, the Main Window will show the Assets associated with whichever Site or Location is selected in the database Tree View, along with details of the last and next test dates for those Assets. Items due for tests are highlighted in red.
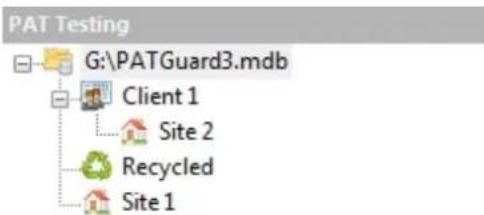
Navigation Pane - Tree View
| Description | Asset ID | Last Full Test Date | Last Full Test Result | Visual result |
| Computer | 00001 | 14/11/2017 | Passed | Pass |
| IEC Lead | 00002 | 14/11/2017 | Passed | Pass |
| Kettle | 00003 | 13/11/2017 | Passed | Pass |
| Microwave | 00004 | 13/11/2017 | Passed | Pass |
Main Window - Asset View
The column headings, in the Main Window, can be selected from a dropdown - right mouse click on any of the headers to display the dropdown.
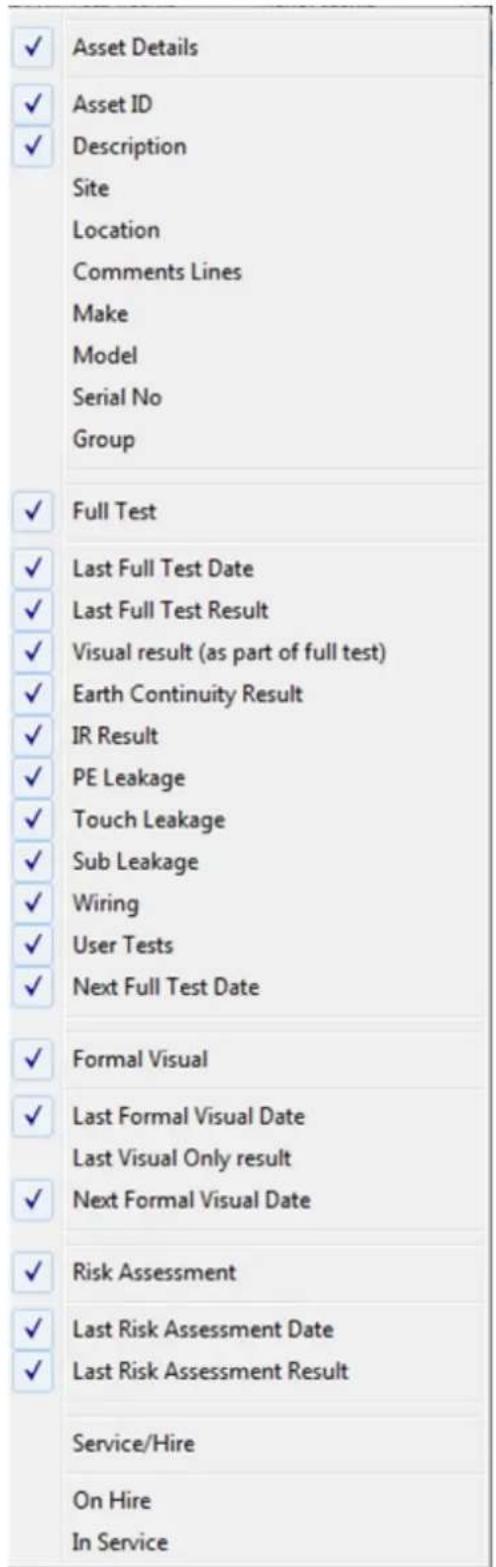
Main Window - Asset View Selection Dropdown
PAT Testing functions
The main PAT Testing functions of PATGuard 3 are as follows:
- Assets
- Test Results
• PAT Risk Assessment
Related activities
There are also a number of other features associated with the PAT Testing functions of PATGuard 3. These are as follows:
- Clients
- Sites
- Locations
Click on the links above for more information about each function.
Assets

Assets
Assets refer to physical items to be tested. PATGuard 3 allows you to add Assets to a particular Site or Location, to manually add test results, and also to add PAT Risk Assessments to those Assets.
Viewing and Filtering Assets
To view the Asset Details for a particular Asset, double-click the Asset in the Main Window.
To review Test Results for an Asset, open the Asset Details window and double click on the Test Result you want to view. See also Changing Asset Details and Deleting Assets.
You can also filter Assets by certain criteria. For more information on filtering Assets, refer to the Find, Asset View Filter and Last Download Only pages.
Manually Adding Assets
To add an Asset, first select the Site or Location that the Asset is to be created at in the Tree View in the Navigation Pane.

flowchart
graph TD
    A["C:\PATGuard3.mdb"] --> B["Client 1"]
    B --> C["Site 2"]
    B --> D["Recycled"]
    B --> E["Site 1"]
Select a Site or Location
Option 1; To add the Asset click on the Add Asset option in the File Menu, as shown below, to bring up the Asset Details window. Test Results can be added using the Add Results button in the Asset Details window.

Add Asset option
Option 2; The Add Manual Test Result feature allows a manual test result to be added to an Asset that is already in the database. This feature automatically opens the Asset Details and Test Results Windows ready for results to be added.
Cloning Assets
A quick way to duplicate an Asset, which is useful if you have multiple similar items to add, is to right click on the Asset in the Main Window and select Clone. This will create a copy of the Asset, but without any Test Results, see Manually Adding Assets for details on how to add Test Results.
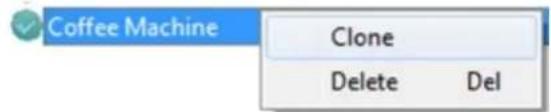
Clone Assets
Asset Details
The Asset Details window allows you to view, add or amend details of the Asset, including Asset ID, Description and Asset Group. The Site and Location will already be populated.

Asset Details window
The Asset Details window can also be viewed by double-clicking the Asset in the Main Window.
Advanced Asset Details
The Advanced Asset Detail tab allows you to add additional information about an Asset, including the Make,
Model and Serial Number.
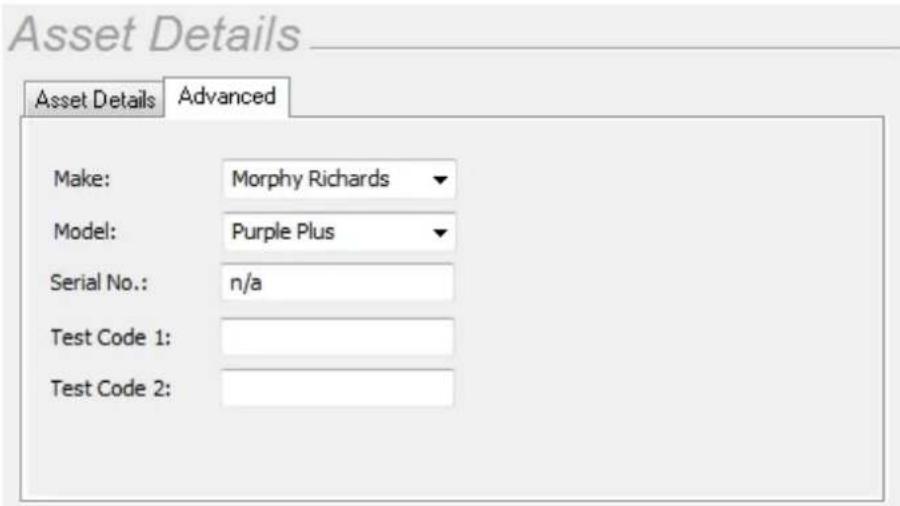
Asset Detail Window - Advanced tab
If your test instrument supports Test Codes, these will be displayed. Please refer to your test instrument manual for more information on Test Codes.
Retest Period
The Retest Period for Full Test and Formal Visual Test can also be set in the Asset Details window.

Asset Detail Window - Retest period
The options for Retest Period include:
• No Re-test - no Retest Period is defined
- User Defined - Retest Period can be manually entered in the Asset Details window and will automatically be calculated from the last test date
- Group Default - the Retest Period will be set based on the Asset Group the Asset belongs to
- As Risk Assessment - the Retest Period will be set based on the results of a PAT Risk Assessment
Asset Notes
You can add notes about an Asset to the Asset Details. To do this, click the Notes... button in the Asset Details window. This will open the Asset Notes window.
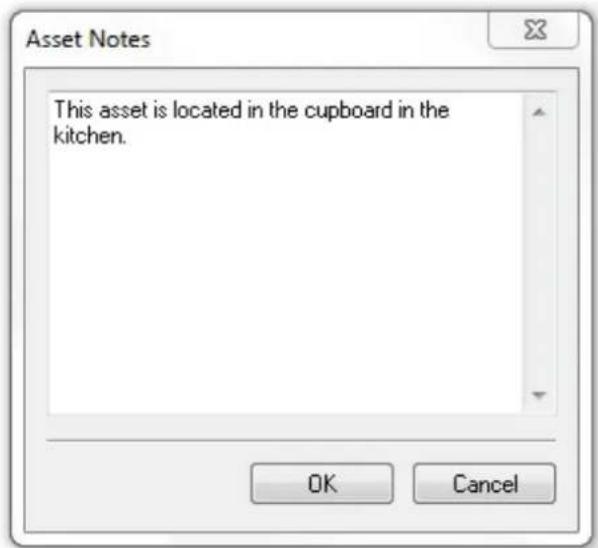
Asset Detail Window - Notes window
The text included in the Asset Notes is the text that appears in Comments Lines of the Main Window - for help in selection / de-selection of the Comments Lines see Asset View.
Manually adding Test Results
To manually add Test Results to an Asset, click on Add Results... in the Asset Details window.
See the Test Results page for more information on manually adding Test Results to an Asset.
Adding a PAT Risk Assessment
To add a PAT Risk Assessment to the Asset, click on Perform Risk Assessment... in the Asset Details window.
See the PAT Risk Assessment page for more information on adding a PAT Risk Assessment to an Asset.
Deleting Test Results or PAT Risk Assessments
To delete Test Results or a PAT Risk Assessment associated with a Asset, select the row containing the test results or PAT Risk Assessment in the Asset Details window and hit the Delete button. You will be prompted for confirmation.

Delete Test Results / PAT Risk Assessment
Attaching photos to Asset Details
You can attach photos of the Asset to the Asset Details. To do this, click the Add Attachment button in the Asset Details window. This will open the Open Photo window.

Open Photo window
Browse to find the photo you want to attach and click Open to attach the photo to the Asset Details. Multiple photos can be attached to each Asset and comments can be added to each photo. To select the default photo for a Asset, click the Default photo box in the Asset Details window.
You can scroll through the attached photos using the << and >> buttons and delete attached photos using the Delete Attachment button. You will be prompted for confirmation.
Delete Picture Confirmation
Changing Asset Details
Asset details can be changed by double-clicking the Asset in the Main Window this will bring up the Asset Details window.
Moving Assets
Assets can be moved using two methods;
Option 1; In the Asset Details tab of the Asset Details window, the Site Name and Location Name can be altered by selection from the corresponding dropdown. Once the relevant Site and Location has been selected the changes are only confirmed after selecting OK to save / close the Asset Details Window.

Asset Detail Window - Asset Details tab
Option 2; You can highlight a single Asset or multiple Assets and Drag and Drop them from the the Main Window to a Site / Location in the Navigation Pane.

Navigation Pane Main Window
Note; the icon of the mouse will change to show if you can move to the Site / Location selected.
Deleting Assets
Assets can be deleted by selecting them in the Main Window, and pressing Delete or by right mouse clicking on the asset and selecting Delete from the menu.
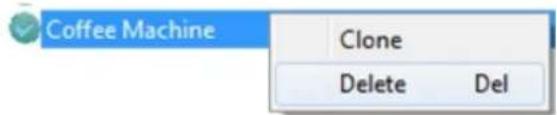
Delete Assets Selection
You will be prompted for confirmation.

Delete Asset Confirmation
Deleted Assets can be restored from the Recycle Bin.
CAUTION: deleting an Asset will also delete any Test Results or PAT Risk Assessments associated with it.
Test Results

Test Results
Test Results are linked to individual Assets and store details of visual inspections, electrical tests and PAT Risk Assessments associated with that Asset.
View Test Results
To view Test Results for an Asset, you firstly need to open the Asset Details window by double-clicking the Asset in the Main Window. The information for this Asset are displayed in this window. See also Changing Asset Details and Deleting Assets.
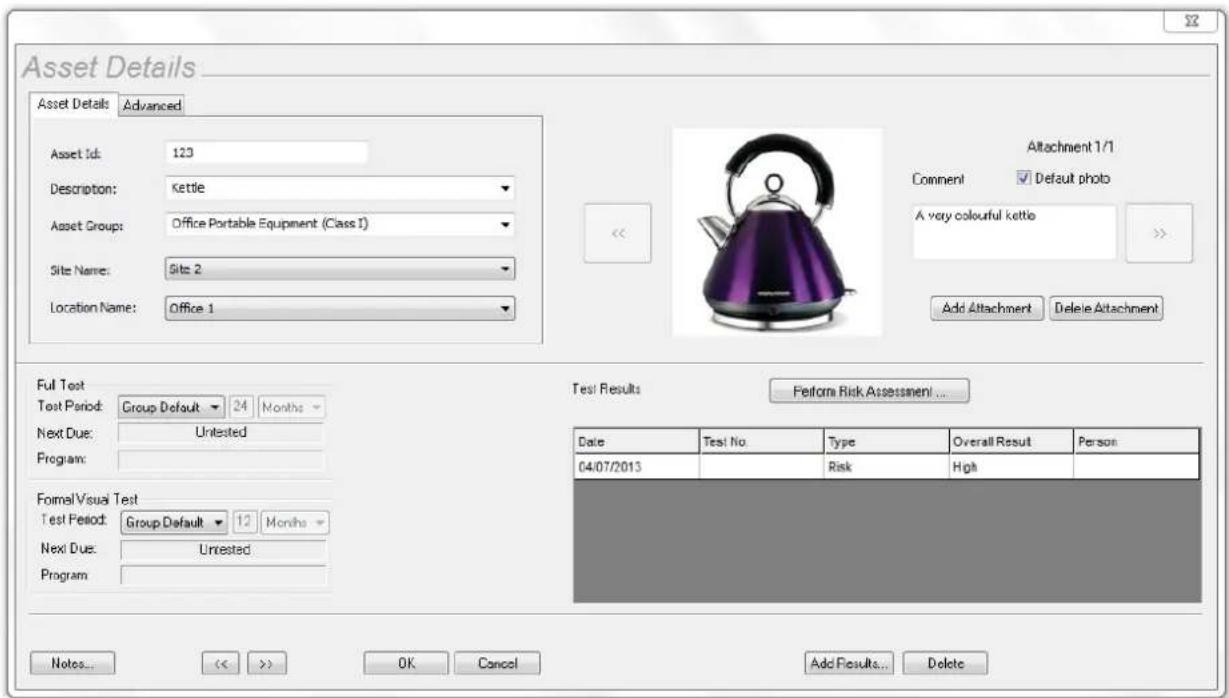
Asset Details window
The Test Results window displayed in the Asset Details can show details of visual inspections, electrical tests and PAT Risk Assessments associated with that Asset. Double-clicking in Test Result section will open the Test Details window or the PAT Risk Assessment window, depending on the type of Test Result.
Manually adding Test Results
Clicking Add Results... in the Asset Details windows will open a blank Test Details window for you to manually enter Test Results. Alternatively, the Add Manual Test Result button can be selected from the Functions Menu.
Test Details window
The Test Details window allows you to view, add or amend details of individual Results for an Asset. For new electrical tests, you can select the Test Instrument used to associate with the Results.

Test Details window
To add a Result, click Add Result in the Test Details window to add a new Result. Select the Test type from the available options and enter the Result and Status (whether the Test was a Pass or Fail, for example). You can also select the units, although this will normally be automatically selected for you. Continue adding results using the Add Result... button until you have entered the complete sequence of tests. If you need to delete a row, select the row and click the Delete Result.
Attaching photos to a Test Result
You can also attach photos of the Asset to the Test Result. To do this, click the Add Attachment button in the Test Details window. This will open the Open Photo window.

Open Photo window
Browse to find the photo you want to attach and click Open to attach the photo to the Test Result. Multiple photos can be attached to each Test Result and Comments can be added to each photo. To select the default photo for a Test Result, click the Default photo box in the Test Details window.
You can scroll through the attached photos using the << and >> buttons and delete attached photos using the Delete Attachment button. You will be prompted for confirmation.

Delete Picture Confirmation
Delete Result
To delete a Test Result, select the row containing the test results or PAT Risk Assessments in the Test Details window and hit the Delete Result... button. You will be prompted for confirmation.
Delete Test Results
PAT Risk Assessment
3 PAT Risk Assessment
PAT Risk Assessments can be performed directed from the Asset Details window by clicking the Perform Risk Assessment... button. They can also be performed by clicking on an Asset in the Main Window and selecting PAT Risk Assessment from the Function Menu, as shown below, to bring up the PAT Risk Assessment window.

PAT Risk Assessment option
PAT Risk Assessment window
The PAT Risk Assessment window allows you to view or complete a PAT Risk Assessment for an Asset. Entering details about the Asset and the environment at the Site or Location will automatically calculate a
recommended Retest Period.

PAT Risk Assessment window
Attaching photos to a PAT Risk Assessment
You can also attach photos of the Asset to the PAT Risk Assessment. To do this, click the Add Attachment button in the PAT Risk Assessment window. This will open the Open Photo window.

Open Photo window
Browse to find the photo you want to attach and click Open to attach the photo to the PAT Risk Assessment. Multiple photos can be attached to each PAT Risk Assessment and comments can be added to each photo. To select the default photo for a PAT Risk Assessment, click the Default photo box in the PAT Risk Assessment window.
You can scroll through the attached photos using the << and >> buttons and delete attached photos using the Delete Attachment button. You will be prompted for confirmation.
Delete Picture Confirmation
Universal Risk Assessment
3 Universal Risk Assessment
The Universal Risk Assessment function of PATGuard 3, which is accessible from the Navigation Pane, allows you to view, add and amend details of Hazards and perform Universal Risk Assessments.

Navigation Pane - Universal Risk Assessment
When the Universal Risk Assessment function is selected in the Navigation Pane, the Main Window will show the Hazards associated with whichever Site or Location is selected in the database Tree View.

Main Window - Hazard View
Universal Risk Assessment functions
The main Universal Risk Assessment functions of PATGuard 3 are as follows:
- Hazards
• Perform Universal Risk Assessment
Related activities
There are also a number of other features associated with the Universal Risk Assessment functions of PATGuard 3. These are as follows:
- Clients
- Sites
- Locations
Click on the links above for more information about each function.
Hazards
3 Hazards
PATGuard 3 allows you to add Hazards to a particular Site or Location, and also to add Universal Risk Assessments to those Hazards.
Manually adding Hazards
To add a Hazard, first select the Universal Risk Assessment function from the Navigation Pane and then select the Site or Location that the Hazard is to be created at in the Tree View of the Navigation Pane. See
also Changing Hazard Details and Deleting Hazards.
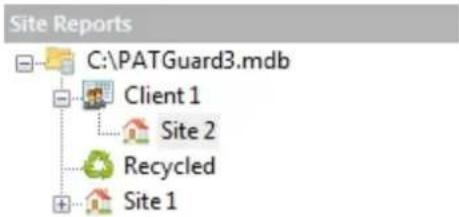
Select a Site or Location
To add the Hazard click on the Add Hazard option in the File Menu, as shown below, to bring up the Hazard Details window.

Add Hazard option
Hazard Details
The Hazard Details window allows you to view, add or amend details of the Hazard, including Hazard ID and Description, and to perform a Universal Risk Assessment for the Hazard. The Site and Location will already be populated.
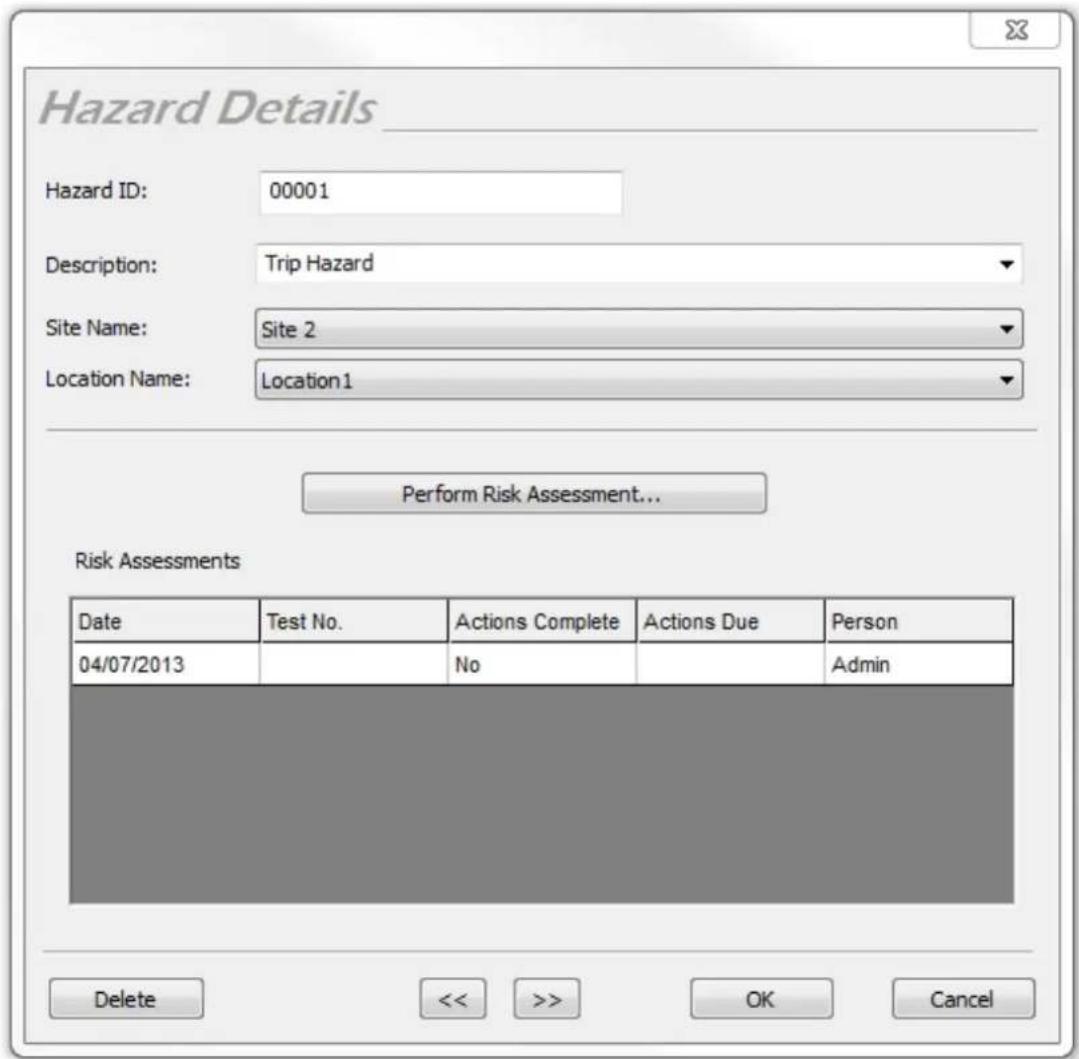
Hazard Details window, including a Universal Risk Assessment
The << and >> buttons can be used to view the previous / next Hazard at that Site or Location.
Adding a Universal Risk Assessment
To add a Universal Risk Assessment to the Hazard, click on Perform Risk Assessment...
See the Perform Universal Risk Assessment page for more information on adding a Universal Risk Assessment to a Hazard.
Deleting a Universal Risk Assessment
To delete a Universal Risk Assessment associated with a Hazard, select the row containing the Universal Risk Assessment and hit the Delete button. The row selected will be highlighted as red and you will be prompted for confirmation.

Delete Universal Risk Assessment
Changing Hazard Details
Hazard details can be changed by making sure the Universal Risk Assessment function is selected in the Navigation Pane and double-clicking the Hazard in the Main Window. This will bring up the Hazard Details window.
Moving Hazards
Hazard can be moved by double-clicking the Hazard in the Main Window. This will bring up the Hazard Details window.
The Site Name and Location Name can be altered by selection from the corresponding dropdown. Once the relevant Site and Location has been selected the changes are only confirmed after selecting OK to save / close the Hazard Details Window.
Deleting Hazards
Hazards can be deleted by selecting them in the Main Window, and pressing Delete. Alternatively, you can right mouse click on the Hazards, in the Main Window, and select Delete.
| Description | HazardID | ||
| Large Plant Pot | HZ0001 | ||
| frayed wire at ceiling height | HZ0002 | Delete | Del |
Delete Hazard Confirmation
You will be prompted for confirmation.

Delete Hazard Confirmation
Deleted Hazards can be restored from the Recycle Bin.
CAUTION: deleting a Hazard will also delete any Universal Risk Assessments associated with it.
Perform Universal Risk Assessment

Perform Universal Risk Assessment
Universal Risk Assessments can be performed directly from the Hazard Details window using the Perform Risk Assessment... button.

Hazard Details - Universal Risk Assessment selection
Universal Risk Assessments can also be performed by clicking on a Hazard in the Main Window and selecting Universal Risk Assessment from the Risk Assessment section of the Function Menu, as shown below, to bring up the Universal Risk Assessment window.

Universal Risk Assessment option
Note; you will need to be in the correct Site / Location, in the Navigation Pane, to be able to select Universal Risk Assessment from the Risk Assessment section of the Function Menu.
Universal Risk Assessment window
When the Universal Risk Assessment is first performed the window it opens shows the Username, Site, Location, Hazard ID and Hazard Description already populated.

Universal Risk Assessment window - new entry
Additional information such as who might be harmed / controls can be added. In addition, a risk assessment can be performed to determine the impact of the hazard, which will advise the risk level.
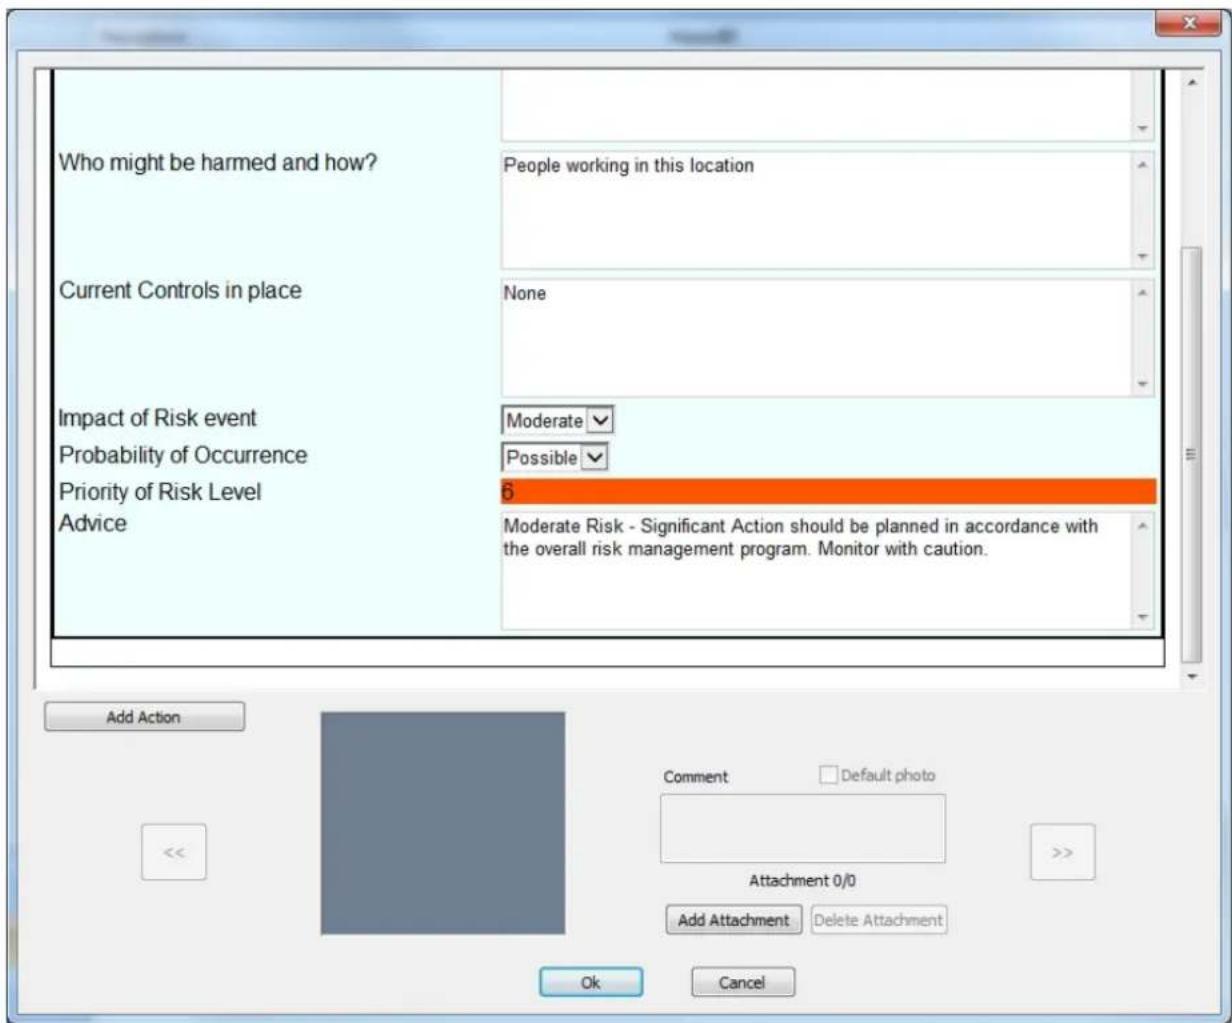
Universal Risk Assessment window - risk calculation
Add Action
From within the Universal Risk Assessment, corrective actions can be added by clicking the Add Action button. This will add an Action to the bottom of the Universal Risk Assessment, as shown below.

Universal Risk Assessment - Add Action
Note; multiple actions can be added to a single Universal Risk Assessment.
Attaching photos to Universal Risk Assessment
You can also attach photos of the Hazard to the Universal Risk Assessment. To do this, click the Add Attachment button in the Universal Risk Assessment window. This will open the Open Photo window.

Open Photo window
Browse to find the photo you want to attach and click Open to attach the photo to the Universal Risk Assessment. Multiple photos can be attached to each Universal Risk Assessment and comments can be added to each photo. To select the default photo for a Universal Risk Assessment, click the Default photo box in the Universal Risk Assessment window.
You can scroll through the attached photos using the << and >> buttons and delete attached photos using the Delete Attachment button. You will be prompted for confirmation.

Delete Picture Confirmation
Printing a Universal Risk Assessment
A print button only appears in the Universal Risk Assessment window once it has been reopened after the initial creation of the assessment.

Universal Risk Assessment window - with Print button
Selecting Print in this window will take you to a standard print options selection window.
Site Reports

Site Reports
The Site Reports function of PATGuard 3, which is accessible from the Navigation Pane, allows you to view, add and amend details of Site Reports relating to particular Sites and Locations.

Navigation Pane - Site Reports
When the Site Reports function is selected in the Navigation Pane, the Main Window will show the Site Reports associated with whichever Site or Location is selected in the database Tree View.
| Report ID | Report Type | Site | Location |
| 10023 | Emergency Lighting | Site 1 | Restaurant |
| 10024 | Fire Alarm | Site 1 | Restaurant |
Main Window - Site Report View
Site Reports functions
The main Site Reports functions of PATGuard 3 include the ability to add, view and amend the following reports:
• Emergency Lighting
- Fire Alarm
Related activities
There are also a number of other activities associated with the Site Reports functions of PATGuard 3. These are as follows:
- Clients
- Sites
- Locations
Click on the links above for more information about each function.
Emergency Lighting

Emergency Lighting
PATGuard 3 allows you to create an Emergency Lighting Site Report for a given Site or Location. See also Editing Emergency Lighting Site Reports and Deleting Emergency Lighting Site Reports.
To add an Emergency Lighting Site Report, first select the Site or Location that you wish to create an Emergency Lighting Site Report for in the Tree View in the Navigation Pane.
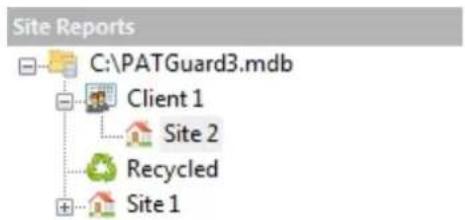
Select a Site or Location
Next click on the Emergency Lighting option in the Functions Menu, as shown below, to bring up the Emergency Lighting Site Report window.
Site Reports - Emergency Lighting
Emergency Lighting Site Report
The Emergency Lighting Site Report window allows you to view or complete an Emergency Lighting assessment for a given Site or Location. Some fields will already be populated with Client or Site details.
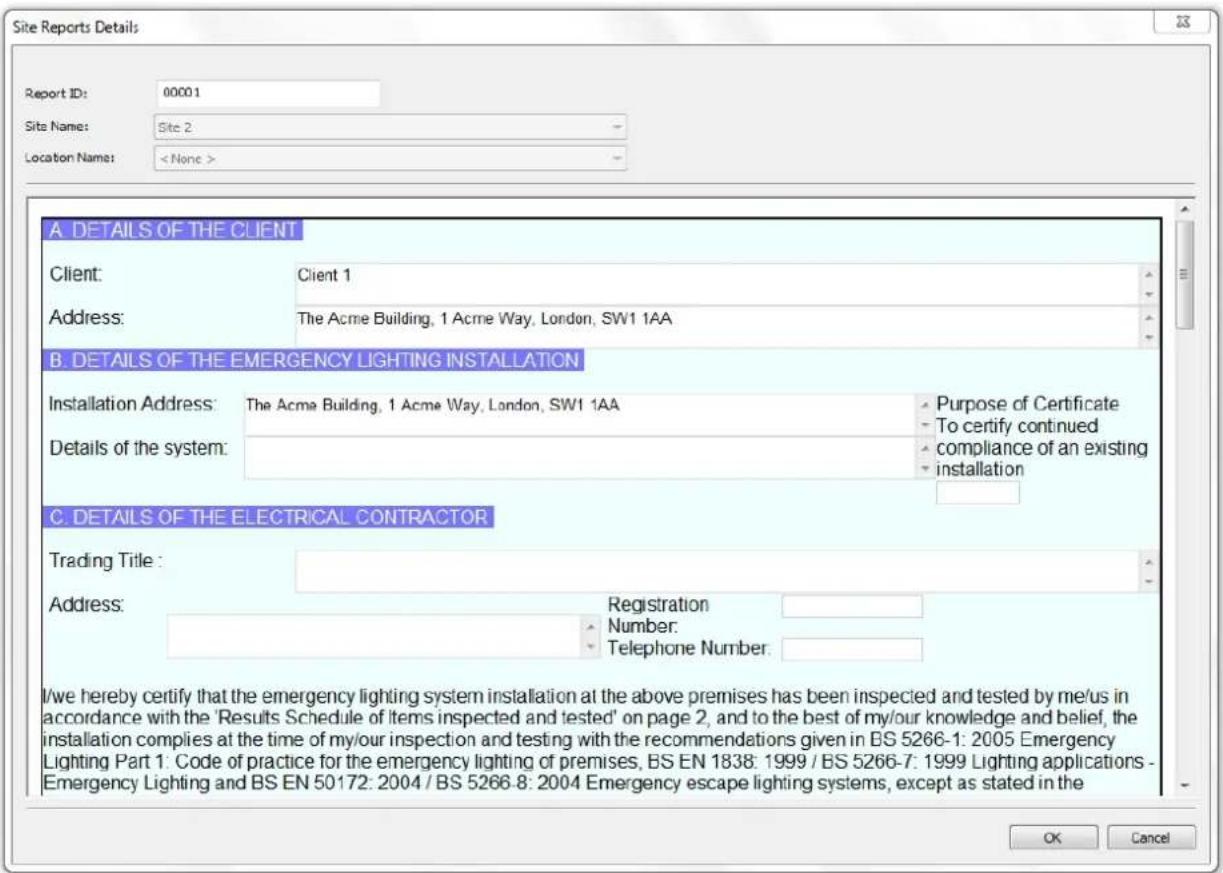
Emergency Lighting Site Report window
Editing an Emergency Lighting Site Report
To edit an Emergency Lighting Site Report, double-click the Emergency Lighting Site Report in the Main Window to bring up the Emergency Lighting Site Report window.
Deleting an Emergency Lighting Site Report
To delete an Emergency Lighting Site Report, select the Emergency Lighting Site Report in the Main Window and hit the Delete button. You will be prompted for confirmation.

Delete Emergency Lighting Site Report
Printing an Emergency Lighting Site Report
A print button only appears in the Site Report window once it has been reopened after the initial creation of the report.

Emergency Lighting Site Report window - with Print button
Selecting Print in this window will take you to a standard print options selection window.
Fire Alarm

Fire Alarm
PATGuard 3 allows you to create a Fire Alarm Site Report for a given Site or Location. See also Editing Fire Alarm Site Reports and Deleting Fire Alarm Site Reports.
To add a Fire Alarm Site Report, first select the Site or Location that you wish to create a Fire Alarm Site Report for in the Tree View in the Navigation Pane.

Select a Site or Location
Next click on the Fire Alarm option in the Functions Menu, as shown below, to bring up the Fire Alarm Site Report window.
Site Reports - Fire Alarm
Fire Alarm Site Report
The Fire Alarm Site Report window allows you to view or complete a Fire Alarm assessment for a given Site or Location. Some fields will already be populated with Client or Site details.

Fire Alarm Site Report window
Editing a Fire Alarm Site Report
To edit a Fire Alarm Site Report, double-click the Fire Alarm Site Report in the Main Window to bring up the Fire Alarm Site Report window.
Deleting a Fire Alarm Site Report
To delete a Fire Alarm Site Report, select the Fire Alarm Site Report in the Main Window and hit the Delete button. You will be prompted for confirmation.

Delete Fire Alarm Site Report
Printing a Fire Alarm Site Report
A print button only appears in the Site Report window once it has been reopened after the initial creation of the report.

Fire Alarm Site Report window - with Print button
Selecting Print in this window will take you to a standard print options selection window.
Address Book
3 Address Book
The Address Book function, which is accessible from the Navigation Pane, allows you to view, add and amend details of Personnel. These Personnel can either be Internal Personnel or External Personnel.

Navigation Pane - Address Book
When the Address Book is selected in the Navigation Pane, the Main Window will show the External Personnel associated with whichever Client, Site or Location is selected in the database Tree View. If the top level of the Database is selected in the Tree View, the Main Window will show the Internal Personnel.

Main Window - Address Book View
Internal Personnel
Internal personnel are staff that you employ or that otherwise work on your behalf. They can be either Technical or Administration staff and can be assigned responsibility for individual clients and sites.
See Adding Internal Personnel for more information.
External Personnel
External personnel are staff associated with a particular Client, Site or Location. They act as a contact for that Client, Site or Location and can receive relevant Reports by email.
See Adding External Personnel for more information.
Adding Internal Personnel
3 Adding Internal Personnel
Internal personnel are staff that you employ or that otherwise work on your behalf. They can be either Technical or Administration staff and can be assigned responsibility for individual Clients and Sites. See also Changing Internal Personnel Details and Deleting Internal Personnel.
Note; when the Address Book is selected in the Navigation Pane, if the top level of the Database is selected in the Tree View, the Main Window will show the Internal Personnel.
To add new Internal Personnel, select the Address Book from the Navigation Pane.

Navigation Pane - Address Book
Select the top level of the database in the Tree View.
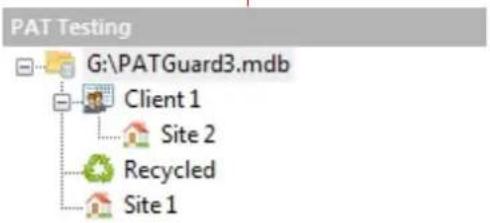
flowchart
graph TD
    A["G:\PATGuard3.mdb"] --> B["Client 1"]
    B --> C["Site 2"]
    B --> D["Recycled"]
    B --> E["Site 1"]
Top level of database Tree View selected
The Main Window will show the names of any Internal Personnel that have already been added. Click on Add Personnel... in the Main Window to add new Internal Personnel.

Main Window - Address Book View
Internal Personnel Details
The Internal Personnel Details window allows you to view, add or amend the details of the Internal Personnel, including address, telephone and email details and whether they are Administration or Technical staff.

Internal Personnel Details
Responsibility for Clients and Sites
The Internal Personnel Details window is also used to assign responsibility for Clients or Sites to a particular staff member. A list of available Clients and Sites appears in the Available Clients/Sites box. To assign responsibility for a particular Client or Site, use the >> button to move the Client or Site to the Responsibilities box. To remove responsibility for a particular Client or Site, use the << button to more the Client or Site back to the Available Clients/Sites box.
In the example below, John Smith is responsible in a Technical role for Client 1 and Site 1, but not Site 2.

Personnel Details Window - Site/Client Responsibility
Changing Internal Personnel Details
Internal Personnel details can be changed by double-clicking the name of the Internal Personnel in the Main Window. This will bring up the Internal Personnel Details window.
Deleting Internal Personnel
Internal Personnel can be deleted by selecting the name of the Internal Personnel in the Main Window and pressing Delete or by right mouse clicking on the Personnel icon to open the following selection;
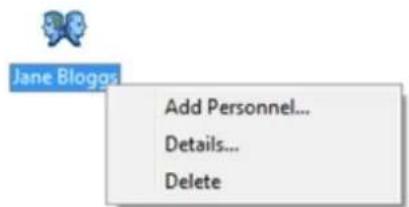
Personnel Selection
Once Delete is selected you will be prompted for confirmation.

Delete Personnel Confirmation
Adding External Personnel
3 Adding External Personnel
External personnel are staff associated with a particular Client, Site or Location. They act as a contact for that Client, Site or Location and can receive relevant Reports by email. See also Changing External Personnel Details and Deleting External Personnel.
Note; when the Address Book is selected in the Navigation Pane, the Main Window will show the External Personnel associated with whichever Client, Site or Location is selected in the database Tree View.
To add new External Personnel, select the Address Book from the Navigation Pane.

Navigation Pane - Address Book
Select the Client, Site or Location that you wish to associate the External Personnel with in the database Tree View.

flowchart
graph TD
    A["Address book"] --> B["G:\PATGuard3.mdb"]
    B --> C["Client 1"]
    C --> D["Site 2"]
    C --> E["Location1"]
    C --> F["Recycled"]
    C --> G["Site 1"]
Client 1 selected in Tree View
The Main Window will show the names of any External Personnel that have already been added for that Client, Site or Location. Click on Add Personnel... in the Main Window to add new External Personnel.


Main Window - Address Book View
External Personnel Details
The External Personnel Details window allows you to view, add or amend the details of the External Personnel, including telephone and email details.

External Personnel Details
Changing External Personnel Details
External Personnel details can be changed by double-clicking the name of the External Personnel in the Main Window. This will bring up the External Personnel Details window.
Deleting External Personnel
External Personnel can be deleted by selecting the name of the External Personnel in the Main Window and pressing Delete or by right mouse clicking on the Personnel icon to open the following selection;

Personnel Selection
Once Delete is selected you will be prompted for confirmation.

Delete Personnel Confirmation
Reports

Reports
The Reports function of PATGuard 3, which is selected from the Navigation Pane, allows you to generate Reports from the information in the PATGuard 3 database, such as Test Reports and Certificates, and also Invoices and Repair Management. For a full list see List of Reports.
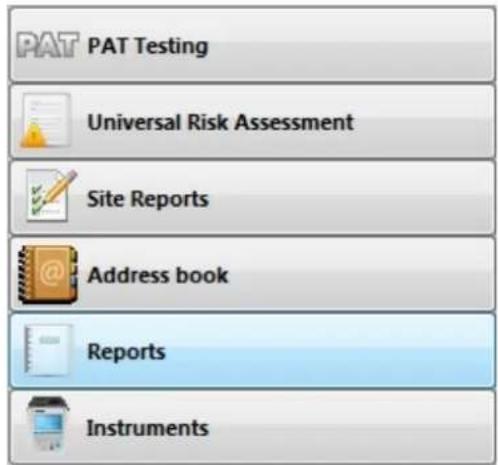
Navigation Pane - Reports
When the Reports function is selected in the Navigation Pane, the Main Window will show the Reports available for selection.

Asset Barcod...

Barcode List

Concise Asset List

Detailed Asset List

In Service On Hire

concise Task Checklist

Concise Latest Te...

Concise Test History

Detailed Latest Te...

Detailed Test History

Electrical Test Su...

Test Certificates

Test Sequen...

Test Instrume...

Certificate of Testing

Invoice

List Charges

Client Details

Personnel Details

Short Code Details

Site Details

Summary of Tests

Test Sequen...

Universal Risk Asses...
Main Window - Available Reports
Reports Functions
There are a number of tasks that can be completed from within the Reports function.
- List of Reports
• Generating a Report
• Printing or saving to file
○ Saving a Report to file
○ Print a Report
○ Emailing a Report
- Invoicing
• Repair Management
• Editing Reports
○ Copying a Report
○ Editing a Report
■ How do I Edit a Report
■ How to Shrink the Report Text to fit the Column Width
○ Deleting a Report
○ Restoring a Default Report
Click on the links above for more information about each function.
List of Reports

List of Reports
PATGuard 3 comes with a number of pre-configured default Reports for different applications:
• Asset Barcoded Labels
- Barcode List
- Concise Asset List
• Detailed Asset List
• In Service On Hire
• Concise Task Checklist
• Concise Latest Test Results
- Concise Test History
• Detailed Latest Test Results
• Detailed Test History
• Electrical Test Summary
• Test Certificates
• Test Sequence Summary
• Test Instrument Details
• Certificate of Testing
- Invoice
- List Charges
- Client Details
- Personnel Details
- Short Code Details
- Site Details
• Summary of Tests
• Test Sequence Details
• Universal Risk Assessment
When the Reports function is selected in the Navigation Pane, the Main Window will show the Reports available for selection.

Asset Barcod...

Barcode List

Concise Asset List

Detailed Asset List

In Service On Concise Task Hire Checklist

Concise Latest Te...

Concise Test History

Detailed Latest Te...

Detailed Test History

Electrical Test Su...

Test Certificates

Test Sequen...

Test Instrume...

Certificate of Testing

Invoice

List Charges Client Details

Client Details

Personnel Details

Short Code Details

Site Details

Summary of Tests

Test Sequen...

Universal Risk Asses...
Main Window - Available Reports
Reports can be copied, edited, deleted and restored as required. See also Generating a Report and Printing or saving to file.
Generating a Report
3 Generating a Report
When the Reports function is selected in the Navigation Pane, the Main Window will show the Reports available for selection.

Asset Barcod...

Barcode List

Concise Asset List

Detailed Asset List

In Service On Hire

Concise Task Checklist

Concise Latest Te...

Concise Test History

Detailed Latest Te...

Detailed Test History

Electrical Test Su...

Test Certificates

Test Sequen...

Test Instrume...

Certificate of Testing

Invoice

List Charges

Client Details

Personnel Details

Short Code Details

Site Details

Summary of Tests

Test Sequen...

Universal Risk Asses...
Main Window - Available Reports
Reports are generated by double-clicking the Report you wish to generate, or by right-clicking on the report and selecting Print... or Print preview...
| Edit... |
| Copy... |
| Delete |
| Restore |
| Print... |
| Print Preview... |
Main Window - Report Generation
The basic process of Generating a Report is the same for each report, although the options you will be asked to select will vary depending on the report type. On first generating a report you will open a filter window - if applicable you can filter using a Client, Site, Location and date range etc.
Reports Example - Certificate of Testing
In this example we will generate a Certificate of Testing. Double-click Certificate of Testing in the Reports View in the Main Window. This will open the Certificate of Testing window. Select the Client, Site and Location you wish to generate Test Certificates for, or use the
Certificate of Testing.

Reports - Certificate of Testing
Once the Test Certificates have been generated the Preview window will open.
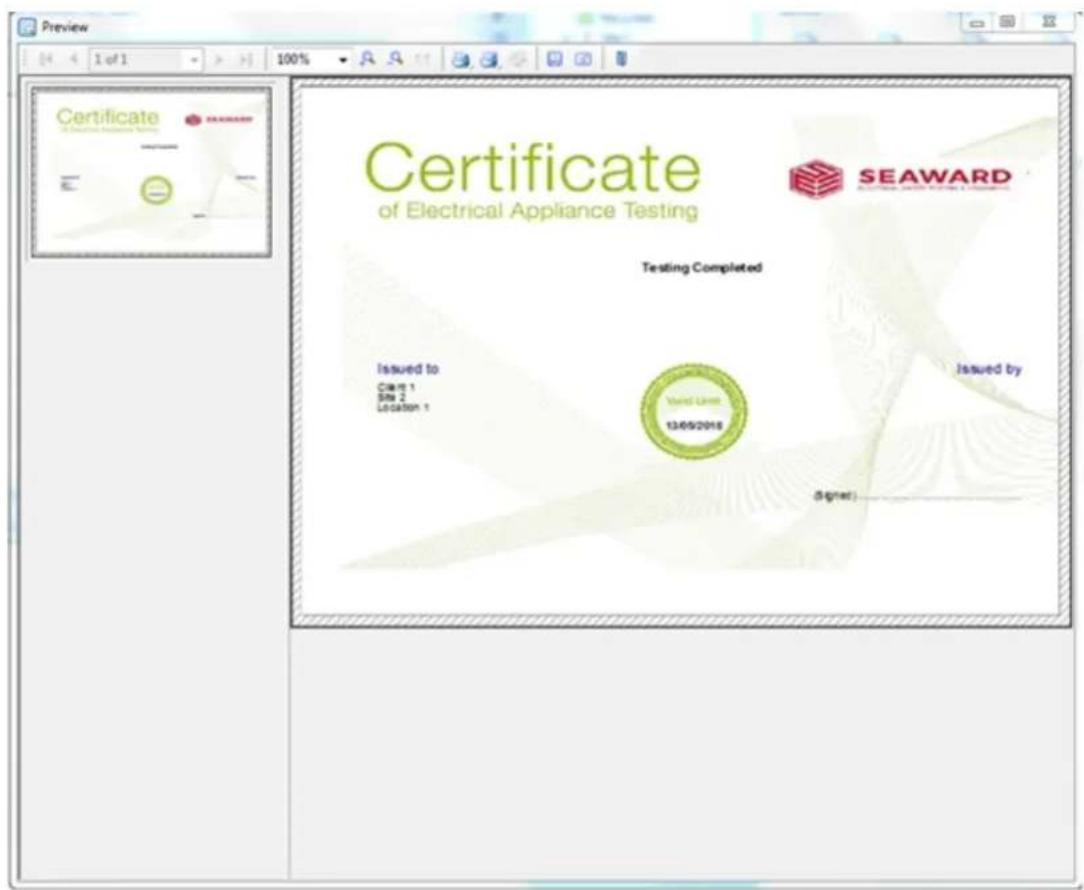
Reports - Certificate of Testing preview
From the Preview window you can Print, Save or Email your report. See also copying, editing, deleting and restoring Reports.
Printing or saving to file
3 Printing or saving to file
After Generating a Report, the Report can be Saved, Printed or Emailed as required from the Reports Preview window.
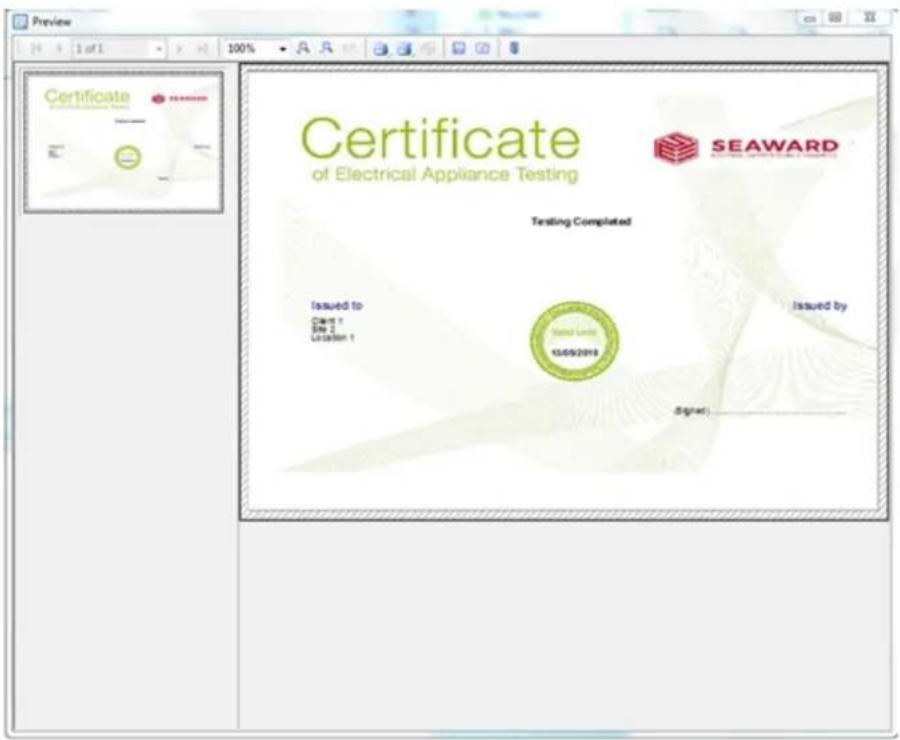
Reports - Certificate of Testing preview
Saving Reports to a file
To save a Report to a file, click the Save icon open the Save As window.

in the menu bar of the the Reports Preview window to

PATGuard 3
Saving a Report
Save in: allows you to change the where the file is saved and change the name of the file in the File name: field.
There are a number of file types that Reports can be saved as, although .pdf and .jpg are the most common. Use the dropdown in Save as type: field to select the file type required.
Some file types have additional features that can be set by selecting Options... The Reports Preview window has its own Help file to guide you through the options. To open the Reports Preview Help file, press F1 while the Reports Preview is open (note; this opens a help file for the List and Label software, which is separate from PATGuard 3).
Printing Reports
To print a Report to your default Windows printer, click the Print Current Page (left hand icon) or
Print all Pages (middle) icon in the menu bar of the Reports Preview window. Depending on the size of the data being printed, you may see the following message:

Printing a Report
Emailing Reports
To email a Report, click the Email (Send To..) icon window to open the Email window.

in the menu bar of the the Reports Preview

Emailing a Report
After selecting the desired Options... (if applicable), click OK to open your default email program and attach the Report to an email.
There are a number of options of file types that Reports can be emailed as, although .pdf and .jpg are the most common. Some file types have additional options that can be set by selecting Options... The Reports Preview window has its own Help file to guide you through the options. To open the Reports Preview Help file, press F1 while the Reports Preview is open.
Invoicing
3 Invoicing
PATGuard 3 allows you to generate Invoices so that the Client can be billed for work undertaken.
To generate an Invoice, make sure the Reports function is selected in the Navigation Pane and in the Main Window select Invoice by either double clicking on the icon or by right-clicking on Invoice selecting Print... or Print preview...

Main Window - Invoice Report Selection
Invoice Window
The Invoice window allows you to select the Client, Site and Location you wish to generate an Invoice for, along with the price per test for various test types, invoice number, order reference, discounting and any other notes that you wish to add. You can also select the types of Charges to be included, including Tests, Risk Assessments and Repairs. Once you have entered the details, click OK to generate the Invoice.

Invoice window
Once the Invoice has been generated, the Reports Preview window will open.

Invoice Preview
From the Preview window you can Print, Save or Email your invoice.
Repair Management
3 Repair Management
PATGuard 3 allows you to manage repairs and keep track of the costs involved.
Setting up Repairs
Repair costs can be entered in the Test Details window.

Test Details window
To add a repair, follow the procedure to Add Test Results Manually. Under Test type enter details of the repairs undertaken. Enter the cost of the repair under Result, and make sure that Status is set to Repair. You can also add any comments associated with the repair.
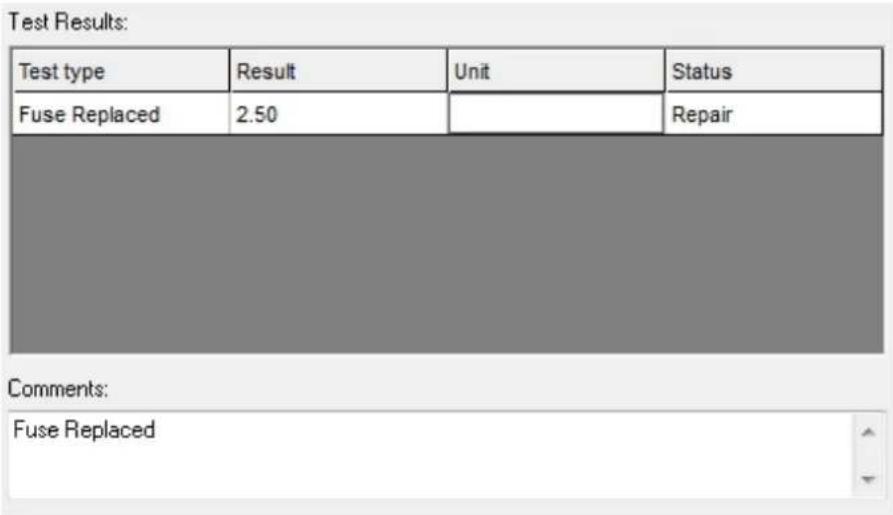
Add Repair
Printing Repair details
To print details of repairs, generate an Invoice in the normal way and ensure that Repairs is ticked.

Generate Invoice
The generated Invoice will display details of the repair and the cost involved so that the Client can be billed.

Generated Invoice
Editing Reports
3 Editing Reports
PATGuard 3 has the facility to edit reports, however, we recommend report editing is only attempted by advanced / confident IT users.
To enable editing, PATGuard 3 uses a programme called The Reports Designer (List & Label), and this allows you to edit a Report to better meet your requirements.
It is recommended that a copy of the original Report is made and this copy is used as a template for your edited version of the report. When the Reports function is selected in the Navigation Pane, the Main Window will show the Reports available for selection.

Asset Barcod...

Barcode List

Concise Asset List

Detailed Asset List

In Service Hire

concise Task Checklist

Concise Latest Te...

Concise Test History

Detailed Latest Te...

Detailed Test History

Electrical Test Su...

Test Certificates

Test Sequen...

Test Instrume...

Certificate of Testing

Invoice

List Charges

Client Details

Personnel Details

Short Code Details

Site Details

Summary of Tests

Test Sequen...

Universal Risk Asses...
Main Window - Available Reports
Reports can be edited, copied, deleted or restored (note only Default Reports can be restored) by right-mouse clicking on the report and selecting the corresponding function;

Main Window - Report Selection
The Reports Designer has its own Help file to guide you through the editing process. To open the Reports Designer Help file, press F1 while the Reports Designer is open or select the ? symbol from the menu bar.
Copying a Report

Copying a Report
To copy a Report, right mouse click on the Report in the Main Window and select Copy... this will open the Copy Report window. Enter a name for the Report and select OK.
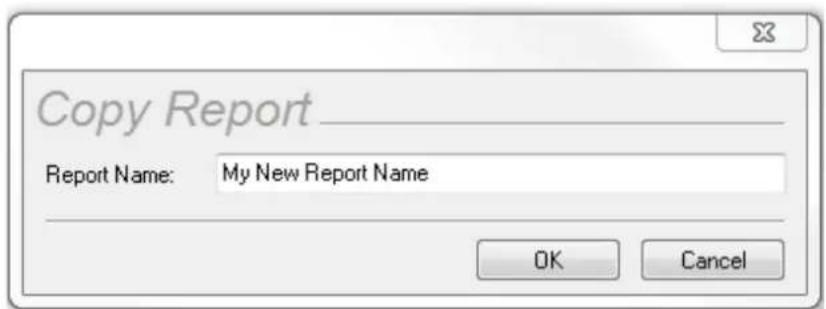
Copy Report window
You will see a window confirming that the Report has been copied successfully.

Copy Report confirmation
The new Report will now appear in the Main Window.
Editing a Report

Editing a Report
To edit a Report, right click on the Report in the Reports View in the Main Window and select Edit... This will open the Reports Designer window.
Note; It is recommended that a copy of the original Report is made and this copy is used as a template for your edited version of the report.

Reports Designer window
The Reports Designer has its own Help file to guide you through the editing process. To open the Reports Designer Help file, press F1 while the Reports Designer is open or select the ? symbol from the menu bar.
For examples of how to use the Report Designer see How do I Edit my Reports and How to Shrink the Report Text to fit the Column Width.
How do I Edit my Reports
3 How do I Edit a Report
To edit a report right mouse click on the report with the details as near to your own requirements as possible.
From the drop menu select copy... and create a copy of the report with a New Name and select OK.
Note 1; the following is an example of how the Concise Task Checklist Report could be customised – to change the Next Test entry to Last Test.
Note 2; the Edit... option will not be available if the PATGuard 3 user does not have Edit permissions. An Admin PATGuard 3 user can check other users' permissions from Setup and in the User Accounts.
Right mouse click on the copied report and from the drop down menu select Edit... this opens the report designer:
![Designer File Edit Project Objects Time Objects Project - (Text) - Company Logo - [Report Container] - (Text) - (Text) - (Text) Concise Task Checklist SEAWARD List of variables Variables Project variables Fields LL ASSETPHOTO ASSETS CLIENT LOCATIONPHOTO LOCATIONS SITE STEPHOTO Barcode_Text Total Object: Report Structure Layers Preview Properties 16 Design Name Separator Ticks True [True] Appearance Default Frame Layout Appearance Condition True [Show] Distance Before 0 [0.0 mm] Page Break Condition False [False] Pagebreak Before False [No] Line Options Data Lines Footer Lines Group Footer Lines Group Header Lines Design 1854.11.7 Select Report Container - 8.3mm, 24.4mm, 200.9mm, 275.3mm x 194.6mm, 251.4mm (Base)](/content/2026/05/898943/images/0b1e785b217cbb17184edee1fcea189811e88d9c85b72e4a3e7d5601e15cdf36.jpg)
Reports Designer window
Put your mouse pointer onto the area or line of the report you want to edit and double left click. This will open the table contents for the line or area selected in the report.
To change the appearance and layout of the fields use the options on the right hand side of the Table Contents window. Once you are finished select OK to return to the main report Designer window.
Changing the Header Line
![Table Contents - ASSETS [[Locations2Assets]] Header Line Data Line Footer Line Group Header Group Footer Line Definition 1 (1) Line "AssetID" "AssetDescription" "NextTest" "NextVisualTest" ... Action Link URL Appearance Background 0 [transparent] Font [Arial] Format none Rotation 0 [0°] Text Format True [Normal Text] Layout Alignment 0 [left] Appearance Condition True [Show] Blank Optimization True [Yes] Fit 1 [wrap] Frame Justified False [No] Vert. Alignment 0 [top] Width 42.0 [42.0 mm] Action Layout... Appearance Cond... OK Cancel](/content/2026/05/898943/images/1f1b18d14ecf5cd84b7c7a81b39173809d402135d91ef5258f350b7bc89a31c0.jpg)
Table Contents window – Header Line
The order of the fields can be changed using the up and down arrows – clicking on any of the current fields, in the Header Line tab, for example "NextTest", shows the current setup. Note, if the three dashes symbol (---) is clicked, this will allow a new field to be added, if required.
Double left clicking on "NextTest", opens the Edit Table window showing the text entry "NextTest" field – "Last Test" can be typed in here.

Edit Table window – For Header Line
![Table Contents - ASSETS [[Locations2Assets]] Header Line Data Line Footer Line Group Header Group Footer Line Definition 1 (1) Line "AssetID" "AssetDescription" "Last Test" "NextVisualTest" ... Action Link URL Appearance Background 0 [transparent] Font [Arial] Format none Rotation 0 [0°] Text Format True [Normal Text] Layout Alignment 0 [left] Appearance Condition True [Show] Blank Optimization True [Yes] Fit 1 [wrap] Frame Justified False [No] Vert. Alignment 0 [top] Width 42.0 [42.0 mm] Layout... Appearance Cond... Action OK Cancel](/content/2026/05/898943/images/8b1719e0e8402ca4b8ba222e136eb6b0a830080c9a221cdce760cb632a780d59.jpg)
Table Contents window – Header Line changed to Last Test
Changing the Data Line
![Table Contents - ASSETS [[Locations2Assets]] Header Line Data Line Footer Line Group Header Group Footer Line Definition 1 Line ASSETS.AssetID ASSETS.AssetDescription ASSETS.NextTest ASSETS.NextVisualTest ... Layout... Appearance Cond. ... Action Link URL Appearance Background 0 [transparent] Font [Arial] Format none Rotation 0 [0°] Text Format True [Normal Text] Layout Alignment 0 [left] Appearance Condition True [Show] Blank Optimization True [Yes] Fit 1 [wrap] Frame Justified False [No] Vert. Alignment 0 [top] Width 42.0 [42.0 mm] Action OK Cancel](/content/2026/05/898943/images/1afab569654e5d7abe269671423d9b204285f44f5206b28ef15d63d08f19f1a1.jpg)
Table Contents window – Data Line
Again clicking on any of the current fields, in the Data Line tab, for example, ASSETS.NextTest, shows the current setup.
Double left clicking on ASSETS.NextTest, opens the Edit Table window showing the text entry ASSETS.NextTest field – ASSETS.NextTest can be typed in here or selected from the available fields.
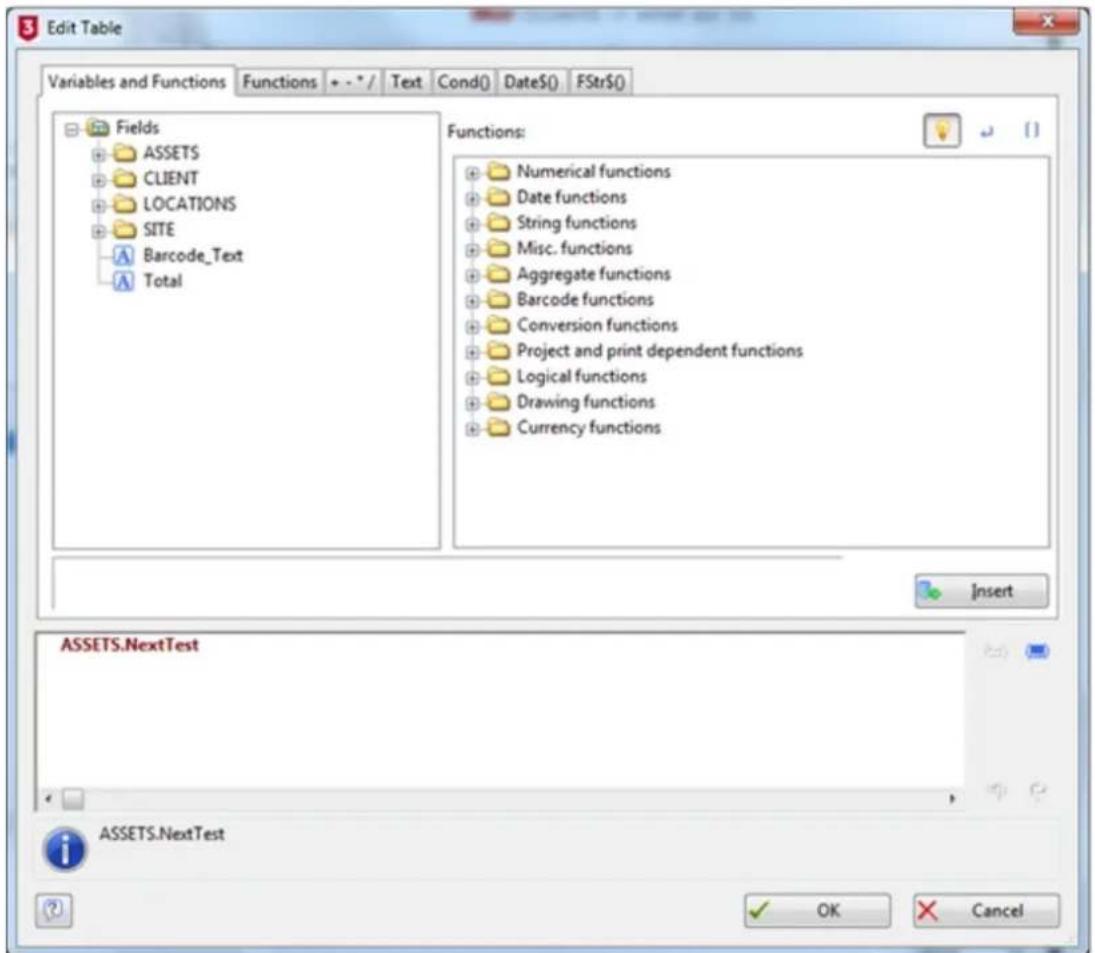
Edit Table window – For Data Line
![Table Contents - ASSETS [[Locations2Assets]] Header Line Data Line Footer Line Group Header Group Footer Line Definition 1 Line ASSETS.AssetID ASSETS.AssetDescription ASSETS.LastVisualTest ASSETS.NextVisualTest ... Layout... Appearance Cond... Action Link URL Appearance Background 0 [transparent] Font [Arial] Format none Rotation 0 [0°] Text Format True [Normal Text] Layout Alignment 0 [left] Appearance Condition True [Show] Blank Optimization True [Yes] Fit 1 [wrap] Frame Justified False [No] Vert. Alignment 0 [top] Width 42.0 [42.0 mm] Action OK Cancel](/content/2026/05/898943/images/cbfb826438d553753c4d6fb0282a45a5a30a246635fbd1ef35cdc0a066b1d728.jpg)
Table Contents window – Data Line changed to ASSETS.LastTest
Changing the Group Header
A similar process needs to be followed to alter the text of the Group Header tab, the final result will be as follows:
![Table Contents - ASSETS [[Locations2Assets]] Header Line Data Line Footer Line Group Header Group Footer Line Definition 1 Line "Asset ID" "Description" "Last Test" "Next Visual" ... Action Link URL Appearance Background 1 [pattern/block color] Font [Arial] Format none Rotation 0 [0°] Text Format True [Normal Text] Layout Alignment 0 [left] Appearance Condition True [Show] Blank Optimization True [Yes] Fit 1 [wrap] Frame Justified False [No] Vert. Alignment 0 [top] Width 42.0 [42.0 mm] Options... Change Cond... Layout... Appearance Cond... Action OK Cancel](/content/2026/05/898943/images/cd578bb03dca4304031d69441f6d735af7404fd453641eb6912c32c6aca85f71.jpg)
Table Contents window – Group Header changed to Last Test
Repeating the Changes in the Report Structure
You may need to add / alter a field to each layer of the report that you want the changes to appear. For example, if you want to add an additional asset variable to the below you would need to repeat the above steps for each of the tables in the Report Structure that relate to assets.
Field widths can be adjusted by dragging the edge of the field with the mouse, alternatively you can drag and drop a field from the right-hand column into the report to the position you require. In either case this may need to be performed in multiple layers of the report template.
![Designer File Edit Project Objects View 2 Report structure Report Container Table: CLIENT Table: SITE [Site2Site] Table: SITEPHOTO [Site2SitePhoto] Table: LOCATIONS [Site2Locations] Table: LOCATIONPHOTO [Locations2Location0] Table: ASSET1[SITE2AssetPhoto] Table: ASSETPHOTO [Assets2AssetPhoto] Table: ASSETS [Site2Assets] Table: ASSETPHOTO [Assets2AssetPhoto] Table: SITE Table: SITEPHOTO [SITE2STEPHOTO] Table: LOCATIONS [SITE2LOCATIONS] Table: LOCATIONPHOTO [LOCATIONS2LOCATION] Table: ASSETS [LOCATIONS2ASSETS] Table: ASSETPHOTO [ASSETS2ASSETPHOTO] Table: ASSETS [SITE2ASSETS] Table: ASSETPHOTO [ASSETS2ASSETPHOTO] Objects Report structure Layers Preview Properties Name Separator Ticks True [True] Appearance Default Frame Layout Appearance Condition True [Show] Distance Before 0 [0.0 mm] Page Break Condition False [False] Pagebreak Before False [No] Line Options Data Lines Footer Lines Group Footer Lines Group Header Lines Design Concise Task Checklist SEAWARD List of variables Variables Project variables BLLFAX Fields LL ASSETPHOTO ASSETS CLIENT LOCATIONPHOTO LOCATIONS SITE SITEPHOTO Barcode_Test Total Report container Report container - 6.3mm, 24.7mm - 200.0mm, 276.2mm = 194.0mm, 251.4mm (Basic)](/content/2026/05/898943/images/e28a547f511d9e879d0002541a0b4d4e13be24f54eb5ba2c973fa01170d1b511.jpg)
Reports Designer window – showing Last Test updated
How to Shrink the Report Text to fit the Column Width
3 How to Shrink the Report Text to fit the Column Width
In some reports if the text may be too long and can go over more than one line. If you wish to prevent this you can shrink the text to fit using these instructions.
In the reports tab right mouse click on the report and select Edit...
As an example, once in the designer in the Report Structure window select Table: ASSETS [[Locations2Assets]] as per the below.
![Designer File Edit Project Objects View 2 Report structure Report Container Table: CLIENT Table: SITE [Client2Site] Table: SITEPHOTO [Site2SitePhoto] Table: LOCATIONS [Site2Locations] Table: LOCATIONPHOTO [Locations2Location] Table: ASSETS [ASP2AssetPHOTO] Table: ASSETS [Site2AssetPHOTO] Table: ASSETS [SITE2AssetPHOTO] Table: ASSETS [SITE2AssetPHOTO] Table: ASSETS [SITE2AssetPHOTO] Table: ASSETS [SITE2AssetPHOTO] Table: ASSETS [SITE2AssetPHOTO] Table: ASSETS [SITE2AssetPHOTO] Table: ASSETS [SITE2AssetPHOTO] Table: ASSETS [SITE2AssetPHOTO] Table: ASSETS [SITE2AssetPHOTO] Table: ASSETS [SITE1AssetPHOTO] Table: ASSETS [SITE1AssetPHOTO] Table: ASSETS [SITE1AssetPHOTO] Table: ASSETS [SITE1AssetPHOTO] Table: ASSETS [SITE1AssetPHOTO] Table: ASSETS [SITE1AssetPHOTO] Table: ASSETS [SITE1AssetPHOTO] Table: ASSETS [SITE1AssetPHOTO] Table: ASSETS [SITE1AssetPHOTO] Table: ASSETS [SITE1ASSETS] Table: ASSETS [SITE1ASSETS] Table: ASSETS [SITE1ASSETS] Table: ASSETS [SITE1ASSETS] Properties Layout Appearance Condition True [Show] Distance Before 0 [0.0 mm] Page Break Condition False [False] Pagbnreak Before False [No] Line Options Data Lines Force Sums True [Yes] Keep Together True [Yes] Suppines False [No] Zebra Pattern 0 [Transparent] Pattern 0 Color LL-Color Black End Color LL-Color White Mid-Color LL-Color White Fading-in Factor 30 [50%] Footer Lines Group Footer Lines Group Header Lines Options for the group header lines 50 100 150 200 250 mm ConciseLatest Test Results SEAWARD List of variables Variables Project variables Fields LL ASSETSPHOTO ASSETS CLIENT LOCATIONPHOTO LOCATIONS SITE SITEPHOTO TESTPHOTO Barcode_Test TextPhotoHeader Total Layout Description Date Document Date Modified Address Read Text Print [0] 0 100 150 180 210 240 270 300 330 360 390 420 450 480 510 540 570 600 630 660 690 720 750 780 810 840 870 900 930 960 990 1200 1500 1800 2100 2400 2700 3000 3300 3600 3900 4200 4500 4800 5100 5400 5700 6000 6300 6600 6900 7200 7500 7800 8100 8400 8700 9000 9300 9600 9900 1200 1500 1800 2100 2400 2700 3000 3300 3600 3900 4200 4500 4800 5100 5400 5700 6000 6300 6600 69 255 Layout Description Date Document Date Modified Address Read Text Print [1] SET PHOTO ASSETS DESCRIPTION ASSETS NAME STATEMENT STATEMENT STATEMENT STATEMENT STATEMENT STATEMENT STATEMENT STATEMENT STATEMENT STATEMENT STATEMENT STATEMENT STATEMENT STATEMENT STATEMENT STATEMENT STATEMENT STATEMENT STATEMENT STATEMENT STATEMENT STATEMENT STATEMENT STATEMENT STATEMENT STATEMENT STATEMENT STATEMENT STATEMENT STATEMENT STATEMENT STATEMENT STATEMENT STATEMENT STATEMENT STATEMENT STATEMENT STATEMENT STATEMENT STATEMENT STATEMENT STATEMENT STATEMENT STATEMENT STATEMENT STATEMENT STATEMENT STATEMENT STATEMENT STATEMENT STATEMENTS [2] SET PHOTO ASSETS DESCRIPTION ASSETS NAME STATEMENT STATEMENT STATEMENT STATEMENT STATEMENT STATEMENT STATEMENT STATEMENT STATEMENT STATEMENT STATEMENT STATEMENT STATEMENT STATEMENT STATEMENT STATEMENT STATEMENT STATEMENT STATEMENT STATEMENT STATEMENT STATEMENT STATEMENT STATEMENT STATEMENT STATEMENT STATEMENT STATEMENT STATEMENT STATEMENT STATEMENT STATEMENT STATEMENT STATEMENT STATEMENT STATEMENT STATEMENT STATEMENT STATEMENT STATEMENT STATEMENT STATEMENT STATEMENT State [3] SET PHOTO ASSETS DESCRIPTION ASSETS NAME STATEMENT STATEMENT STATEMENT STATEMENT STATEMENT STATEMENT STATEMENT STATEMENT STATEMENT STATEMENT STATEMENT STATEMENT STATEMENT STATEMENT STATEMENT STATEMENT STATEMENT STATEMENT STATEMENT STATEMENT STATEMENT STATEMENT STATEMENT State [4] SET PHOTO ASSETS DESCRIPTION ASSETS NAME STATEMENT STATEMENT STATEMENT STATEMENT STATEMENT STATEMENT STATEMENT STATEMENT STATEMENT STATEMENT State [5] SET PHOTO ASSETS DESCRIPTION ASSETS NAME STATEMENT State State State State State State State State State State State State State State State State State State State State State State State State State State State State State State State State State State State State State State State State State State State State State State State State State State State State State State State State State State State State State State State State State State State State State State State State State State State State State State State State State State State State State State State State State State State State State State State State State State State State Statesa [6] SET PHOTO ASSETS DESCRIPTION ASSETS NAME STATEMENT NAME STATEMENT NAME STATEMENT NAME STATEMENT NAME STATEMENT NAME STATEMENT NAME STATEMENT NAME STATEMENT NAME STATEMENT NAME STATEMENT NAME STATEMENT NAME STATEMENT NAME STATEMENT NAME STATEMENT NAME STENANCE NAME STENANCE NAME STENANCE NAME STENANCE NAME STENANCE NAME STENANCE NAME STENANCE NAME STENANCE NAME STENANCE NAME STENANCE NAME STENANCE NAME STENANCE NAME STENANCE NAME STENANCE NAME STENANCE NAME STENANCE NAME STENANCE NAME STENANCE NAME STENANCE NAME STENANCE NAME STENANCE NAME STENANCE NAME STENANCE NAME STENANCE NAME STENANCE NAME STENCE NAME STENCE NAME STENCE NAME STENCE NAME STENCE NAME STENCE NAME STENCE NAME STENCE NAME STENCE NAME STENCE NAME STENCE NAME STENCE NAME STENCE NAME STENCE NAME STENCE NAME STENCE NAME STENCE NAME STENCE NAME STENCE NAME STENCE NAME STENCE NAME STENCE NAME STENCE NAME STENCE NAME STENCE NAME STENCA NAME STENCA NAME STENCA NAME STENCA NAME STENCA NAME STENCA NAME STENCA NAME STENCA NAME STENCA NAME STENCA NAME STENCA NAME STENCA NAME STENCA NAME STENCA NAME STENCA NAME STENCA NAME STENCA NAME STENCA NAME STENCA NAME STENCA NAME STENCA NAME STENCA NAME STENCA NAME STENCA NAME STENCA NAME STEN CA NAME STEN CA NAME STEN CA NAME STEN CA NAME STEN CA NAME STEN CA NAME STEN CA NAME STEN CA NAME STEN CA NAME STEN CA NAME STEN CA NAME STEN CA NAME STEN CA NAME STEN CA NAME STEN CA NAME STEN CA NAME STEN CA NAME STEN CA NAME STEN CA NAME STEN CA NAME STEN CA NAME STEN CA NAME STEN CA NAME STEN CA NAME STEN CA NAME STENCA NAME STENCA NAME STENCA NAME STENCA NAME STENCA NAME STENCA NAME STENCA NAMESTENCA NAME STENCA NAMESTENCA NAMESTENCA NAMESTENCA NAMESTENCA NAMESTENCA NAMESTENCA NAMESTENCA NAMESTENCA NAMESTENCA NAMESTENCA NAMESTENCA NAMESTENCA NAMESTENCA NAMESTENCA NAMESTENCA NAMESTENCA NAMESTENCA NAMESTENCA NAMESTENCA NAMESTENCA NAMESTENCA NAMESTENCA NAMESTENCA NAMESTENCA NAMESTENCA NAMECONCISELatest Test Results SEAWARD List of variables Variables Project variables Fields LL ASSETSPHOTO ASSETS CLIENT LOCATIONPHOTO LOCATIONS SITE SITEPHOTO TESTPHOTO Barcode_Test TextPhotoHeader Total](/content/2026/05/898943/images/108e2231db968e56b9e20dfe6516439be745aafeeb428ad3f3ef1436f1b67884.jpg)
Reports Designer window
Double click on the area under the column you wish to shrink in the report preview to open the below window. In the right hand list select Fit.
![Table Contents - ASSETS [[Locations2Assets]] Header Line Data Line Footer Line Group Header Group Footer Line Definition 1 Line ASSETS.AssetID ASSETS.AssetDescription ASSETS.AssetTestUser ASSETS.AssetTestInstrument ASSETS.LastTest ASSETS.AssetRetestPeriod ASSETS.NextTest ASSETS.AssetTestResult ... Error: Table width is too small by 5.4 mm! Layout... Appearance Cond... Background 0 [transparent] Pattern 1 Color RGB(224,224,224) End Color LL.Color.White Mid-Color LL.Color.White Fading-in Factor 50 [50%] Font [Arial] Format none Rotation 0 [0°] Text Format True [Normal Text] Layout Alignment 0 [left] Appearance Condition True [Show] Blank Optimization True [Yes] Fit 1 [wrap] Frame Default True [True] Fit Sets the behavior if the text is too long for one line. OK Cancel](/content/2026/05/898943/images/1944ee554e37fc55f554896ab068175a72904eb69009e6a17f129a0066d6d2d7.jpg)
Table Contents window - Fit selected
Use the dropdown to select '2 [shrink]' and press OK.
![Table Contents - ASSETS [[Locations2Assets]] Header Line Data Line Footer Line Group Header Group Footer Line Definition 1 Line ASSETS.AssetID ASSETS.AssetDescription ASSETS.AssetTestUser ASSETS.AssetTestInstrument ASSETS.LastTest ASSETS.AssetRetestPeriod ASSETS.NextTest ASSETS.AssetTestResult ... Error: Table width is too small by 5.4 mm! Layout... Appearance Cond. ... Background 0 [transparent] Pattern 1 Color RGB(224,224,224) End Color LL.Color.White Mid-Color LL.Color.White Fading-in Factor 50 [50%] Font [Arial] Format none Rotation 0 [0°] Text Format True [Normal Text] Layout Alignment 0 [left] Appearance Condition True [Show] Blank Optimization True [Yes] Fit 1 [wrap] Frame Default True [True] Fit Sets the behavior if the text is too long for one line. OK Cancel](/content/2026/05/898943/images/0af41cd94dfa85296d93b9d4240b0bb32d93f1c7d77d5a2b8e547b2de477795a.jpg)
Table Contents window - [shrink] selected
Back in the designer in the Report Structure window select the line highlighted in the below and repeat the process.
![Designer File Edit Project Objects View Report Structure Report Container Table: CLIENT Table: SITE [Chem2Site] Table: SSTEPHOTO [Site2SitePhoto] Table: LOCATIONS [Site2Locations] Table: LOCATIONPHOTO [Locations2Locatc Table: ASSETS (Locations2Assets)] Table: ASSETPHOTO [Assets2AssetPhoto] Table: TESTPHOTO [ASSETS2TESTPHOTO] Table: ASSETS [Site2Assets] Table: ASSETPHOTO [Assets2AssetPhoto] Table: TESTPHOTO [ASSETS2TESTPHOTO] Table: SITE Table: SITEPHOTO [SITE2STEPHOTO] Table: LOCATIONS [SITE2LOCATIONS] Table: LOCATIONPHOTO [LOCATIONS2LOCATC Table: ASSETS (LOCATIONS2ASSETS) Table: ASSETPHOTO [ASSETS2ASSETPHOTO] Table: TESTPHOTO [ASSETS2TESTPHOTO] Table: ASSETS [STEPHATO] [SATE] Table: ASSETPHOTO [ASSETS2ASSETPHOTO] Objects Report structure Layout Process Properties Appearance Condition True [Show] Distance Before 0 [0.0 mm] Page Break Condition False [False] Pagebreak Before False [No] Line Options Data Lines Force Sums True [Yes] Keep Together True [Yes] Suppress False [No] Zebra Pattern 0 [Transparent] Patterns 8 Color LL Color Black End Color LL Color White Mid-Center LL Color White Folding-in Factor 36 [50%] Footer Lines Group Footer Lines Group Header Lines Options for the group header lines ConsciseLatest Test Results SEAWARD Site name Level 1 Description Date Test Instrument Date Modified Version Date Test Input 0000000000000000000000000000000000000000000000000000000000000000000000000000000000000000000000000000 154 155 255 256 257 258 259 260 261 262 263 264 265 266 267 268 269 270 271 272 273 274 275 276 277 278 279 280 281 282 283 284 285 286 287 288 289 290 291 292 293 294 295 296 297 298 299 300 301 302 303 304 305 306 307 308 309 310 311 312 313 314 315 316 317 318 319 320 321 322 323 324 325 326 327 328 329 330 331 332 333 334 335 336 337 338 339 340 341 342 343 344 345 346 347 348 349 350 351 352 353 354 355 356 357 358 359 360 361 362 363 364 365 366 367 368 369 370 371 372 373 374 375 376 377 378 379 380 381 382 383 384 385 386 387 388 389 390 391 392 393 394 395 396 397 398 399 400](/content/2026/05/898943/images/aa8ade734ded341bea6ab0c5ff3067401941dcbcc7bab6a02e148798041adeb1.jpg)
Reports Designer - first change
Back in the designer in the Report Structure window select the line highlighted in the below and repeat the process.
![Designer File Edit Project Objects View 2 Report Structure Report Container Table: CLIENT Table: SITE [S1Chem2Site] Table: SITEXPHOTO [Site2SitePhoto] Table: LOCATIONS [Site2Locations] Table: LOCATIONPHOTO [Locations2Locality] Table: ASSETS [Location2Assets] Table: ASSETPHOTO [Assets2AssetPhoto] Table: TESTPHOTO [ASSETS2TESTPHOTO] Table: ASSETS [Site2Asset] Table: ASSETPHOTO [Assets2AssetPhoto] Table: TESTPHOTO [ASSETS2TESTPHOTO] Table: SITE Table: SITEXPHOTO [SITE2SITETHOTO] Table: LOCATIONS [SITE2LOCATIONS] Table: LOCATIONPHOTO [LOCATIONS2LOCATH] Table: ASSETS [LOCATIONSHOTO] Table: ASSETPHOTO [ASSETS2ASSETPHOTO] Table: TESTPHOTO [ASSETS2TESTPHOTO] Table: ASSETS [SITE2ASSETS] Table: ASSETPHOTO [ASSETS2ASSETPHOTO] Objects Report structured Layers Preview Properties Layout Appearance Condition True [Show] Distance Before 0 [0.0 mm] Page Break Condition False [False] Pagebreak Before False [No] Linear Options Data Lines Forsys Sums True [Yes] Keep Together True [Yes] Supports False [No] Zebra Pattern 0 [transparent] Patterns 8 Color LL,Color-Black End Color LL,Color-White Mid-Color LL,Color-White Fading-in-Factor 50 [60%] Footer Lines Group Footer Lines Group Header Lines Group Header Lines 77.3.2.8 Select Report Container - 6.3mm, 24.4mm - 200.9mm, 275.8mm x 194.6mm, 251.4mm (Base) ConciseLatest Test Results SEAWARD Object ID Description Line Test Document Table Default History Book Help Result ASSETS 0000000000000000000000000000000000000000000000000000000000000000000000000000000000000000000000000000 ASSETS 155666666666666666666666666666666666666666666666666666666666666666666666666666666666666666666666666 ASSETS 15577777777777777777777777777777777777777777777777777777777777777777 ASSETS 15588888888888888888888888888888888888888888888888888888888888888888 ASSETS 1559999999999999999999999999999999999999999999999999999999999999999999999999999999999999999999999999999 155 155 155 155 155 155 155 155 155 155 155 155 155 155 155 155 155 155 155 155 155 155 155 155 155 154 154 154 154 154 154 154 154 154 154 154 154 154 154 154 154 154 154 154 154 154 154 154 154 154 153 153 153 153 153 153 153 153 153 153 153 153 153 153 153 153 153 153 153 153 153 153 153 153 153 152 152 152 152 152 152 152 152 152 152 152 152 152 152 152 152 152 152 152 152 152 152 152 152 152 151 151 151 151 151 151 151 151 151 151 151 151 151 151 151 151 149.3.3.3.3.3.3.3.3.3.3.3.3.3.3.3.3.3.3.3.3.3.3.3.3.3.3.3.3.3.3.3.3.3.3.3.3.3.3.3.3.3.3.3.3.3.3.3.3.3.3.2.4. ASSETS 24444444444444444444444444444444444444444444444444444444444444444444444444444444444444444444444444444 22. ASSETS 22222222222222222222222222222222222222222222222222222 22. ASSETS 2222222222222222222222222222222222222 22. ASSETS 2222222222222222222222 22. ASSETS 22222222 22. ASSETS 22BAAAABAAABAAABAAABAAABAAABAAABAAABAAABAAABAAABAAABAAABAAABAAABAAABAAABAAABAAABAAABAAABAAABAAABAAABAAABAAABAAABAAABAAABAAABAAABAAABAAABAAABAAABAAABAAABAAABAAABAAABAAABAAABAAABAAABAAABAAABAAABAAABAAABAAABAAABBAA BANCADE Text TestPhotoHeader Total](/content/2026/05/898943/images/eef5b960ae14ba668715e465a5c5dbb68bff67ef1a791215e322838d0cdf6e9a.jpg)
Reports Designer - second change
Finally, in the designer in the Report Structure window select the line highlighted in the below and repeat the process.
![Designer File Edit Project Objects View Report structure Report Container Table: CLIENT Table: SITS [SChem2Site] Table: SITEPHOTO [Site2SitePhoto] Table: LOCATIONS [Site2Locations] Table: LOCATIONPHOTO [Locations2Locate] Table: ASSETS [(Locations2Assets)] Table: ASSETPHOTO [(Assets2AssetPhoto] Table: TESTPHOTO [ASSETS2TESTPHOTO] Table: ASSETS [Site2Asset] Table: ASSETPHOTO [(Assets2AssetPhoto)] Table: TESTPHOTO [(ASSETS2TESTPHOTO]] Table: SITE Table: SITEPHOTO [SITE2STEPHOTO] Table: LOCATIONS [SITE2LOCATIONS] Table: LOCATIONPHOTO [LOCATIONS2LOCATN] Table: ASSETS [(LOCATIONS2ASSETS)] Table: ASSETPHOTO [(ASSETS2ASSETPHOTO] Table: TESTPHOTO [(ASSETS2TESTPHOTO]] Table: ASSETS [(SITE2ASSETS1] Table: ASSETPHOTO [(ASSETS2ASSETPHOTO]] Objects Report structure Layers Process Properties Layout Appearance Condition True [Show] Distance Before 0 [0.0 mm] Page Break Condition False [False] Pagebreak Before False [No] Line Options Data Lines Force Sums True [Yes] Keep Together True [Yes] Suppress False [No] Zebra Pattern 0 [Transparent] Pattern 8 Color LL Copper/Black End Color LL Copper/White Multi-Color LL Copper/White Yading-on Factor 50 [50%] Group Header Lines Group Header Lines Options for the group header lines. 50 100 150 200 250 mm 50 100 150 200 50 100 150 200 50 100 150 200 mm 50 100 150 200 mm 50 100 150 200 mm 50 100 150 200 mm 50 100 150 200 mm 50 100 150 200 mm 50 100 150 20 ConcreteLatest Test Results SEAWARD](/content/2026/05/898943/images/167cfd0c0a917075b90630d344fa46803cae7ecd904ba0648ae2d3ceeec7980a.jpg)
Reports Designer - third change
Select save.
Deleting a Report

Deleting a Report
To delete a Report, right mouse click on the Report in the Main Window and select Delete.
Note; once an edited / bespoke report has been deleted it cannot be restored - you can only Restore a Default Report.
After selecting Delete you will be prompted for confirmation.
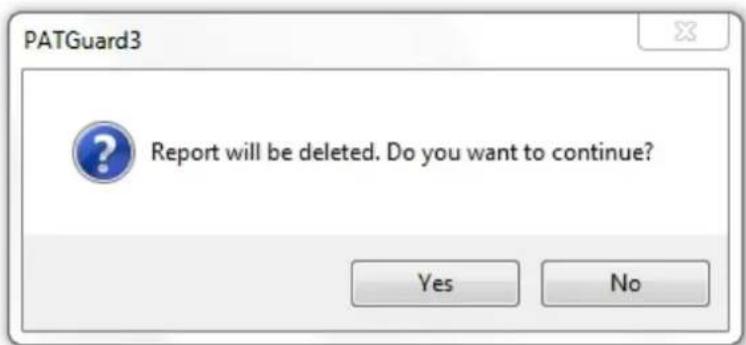
Delete Report window
You will see a window confirming that the Report has been deleted successfully.

Delete Report confirmation
Restoring a Default Report
3 Restoring a Default Report
To restore a Default Report, right mouse click on the Report in the Main Window and select Restore, this will open the Restore Report window. Select the name of the Report you wish to Restore and select OK.

Restore Report
You will be prompted for confirmation.

Restore Report
You will see a window confirming that the Report has been restored successfully.
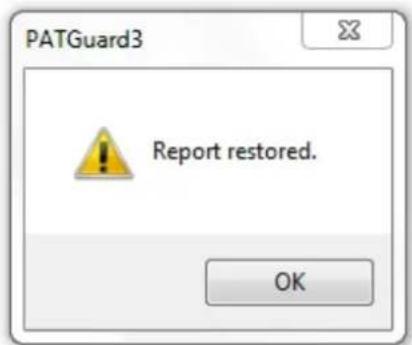
Restore Report
The restored Report will now appear in the Reports View in the Main Window.
Instruments

Instruments
The Instruments function of PATGuard 3, which is accessible from the Navigation Pane, allows you to manage your Test Instruments. See Tester Compatibility for a list of test instruments that are compatible with PATGuard 3.
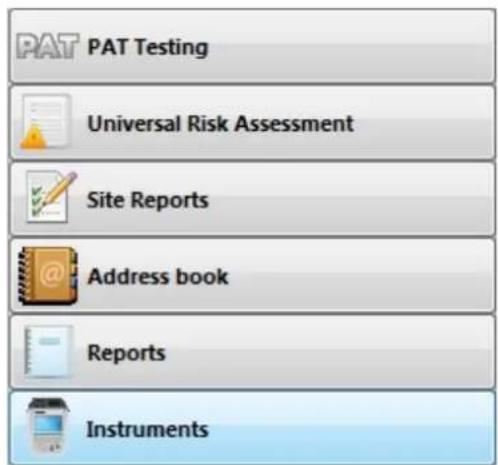
Navigation Pane - Instruments
When the Instruments function is selected in the Navigation Pane, the Tree View will be replaced with a list
of configured Instrument types.
Instruments
All Instruments
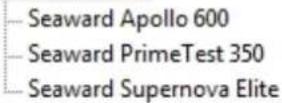
Navigation Pane - Configured Instrument Types
Selecting All Instruments will display all of the configured Instruments in the Main Window. Selecting a particular Instrument type will display all configured Instruments of that type in the Main Window (in the example, a Supernova Elite, PrimeTest 350 and Apollo 600).

Add Test Instrument...

Seaward Superno...

Seaward PrimeTe...

Seaward Apollo 6...
Main Window - All Instruments
Instrument functions
There are a number of tasks that can be completed from within the Instruments function.
- Adding Test Instruments
- Entering Calibration Data
- Adding Test Sequences
There are also a number of other features related to the Instruments function.
• Downloading From Your Tester
○ Downloading - Apollo Series
○ Downloading - Supernova / Europa
○ Downloading - PrimeTest 350 / 300
○ Downloading - General Instructions
○ Finding the Correct COM port
○ Preview (PAT Data Only)
○ Duplicate Assets
• Uploading To Your Tester
○ Uploading - Apollo Series
○ Uploading - Supernova / Europa
○ Uploading - PrimeTest 350 / 300
○ Uploading - General Instructions
Click on the links above for more information about each function.
Adding Test Instruments
3 Adding Test Instruments
PATGuard 3 allows you to store details of your Test Instruments, including Calibration Data, as Instruments in the database.
To add a new Test Instrument, select Instruments from the Navigation Pane. See also Changing Instrument Details and Deleting Instruments.
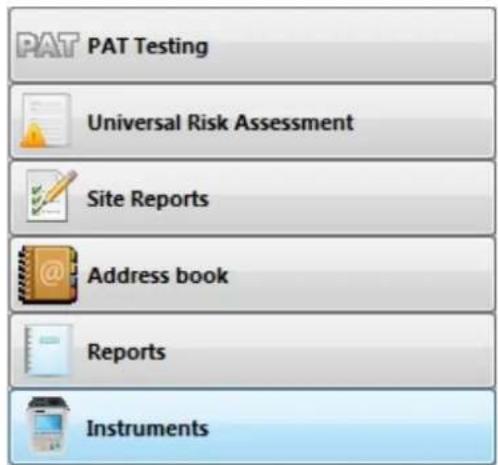
Navigation Pane - Instruments
The Main Window will show the currently configured Test Instruments. On a new install / new database, no instruments will be selected and only Add Test Instrument... will be displayed.

Add Test
Instrument...
Main Window - Add Test Instrument...
Double click on Add Test Instrument... icon or right mouse click on the icon and select Add Test Instrument..., in the Main Window to open the Test Instrument window to add a new Test Instrument.

Add Test Instrument...

Seaward Superno...

Seaward PrimeTe...

Seaward Apollo 6...
Main Window - All Instruments (3 instruments already added)
Test Instrument window
The Test Instrument window allows you to view, add or amend the details of a Test Instrument, including Instrument type, Calibration details and Communications settings.

Test Instrument window
Instrument
The Instrument tab, in the Test Instrument window, allows you to select the Instrument Type and enter the Serial Number. Select the instrument from the dropdown,
Note 1; Manually entered instruments will not work.
Note 2; If your instrument is not selectable in the dropdown, then check Tester Compatibility or you may be able to use the Import CSV function (if your instrument produces data that can be added to a spreadsheet).
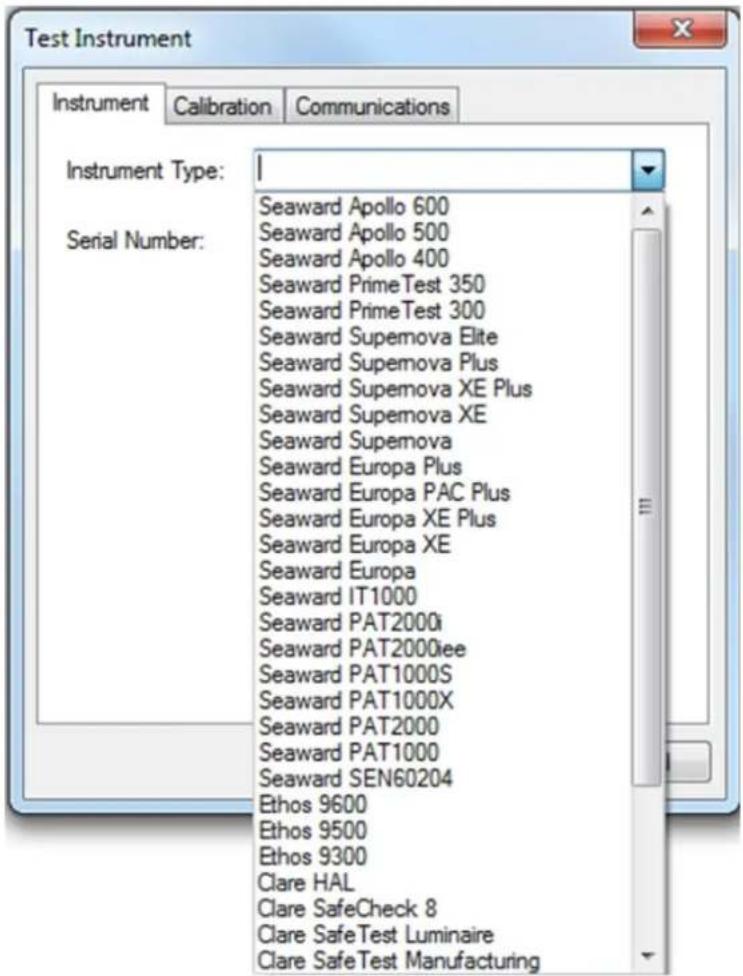
Test Instrument Type - Dropdown Selection
If selecting an instrument that uses USB to download, such as the Apollo Series, the Communications tab is no longer available.

Test Instrument 1 - Instrument tab (USB Download / Apollo Series)
If selecting an instrument that uses a serial RS232 lead, the Communications tab is still available.
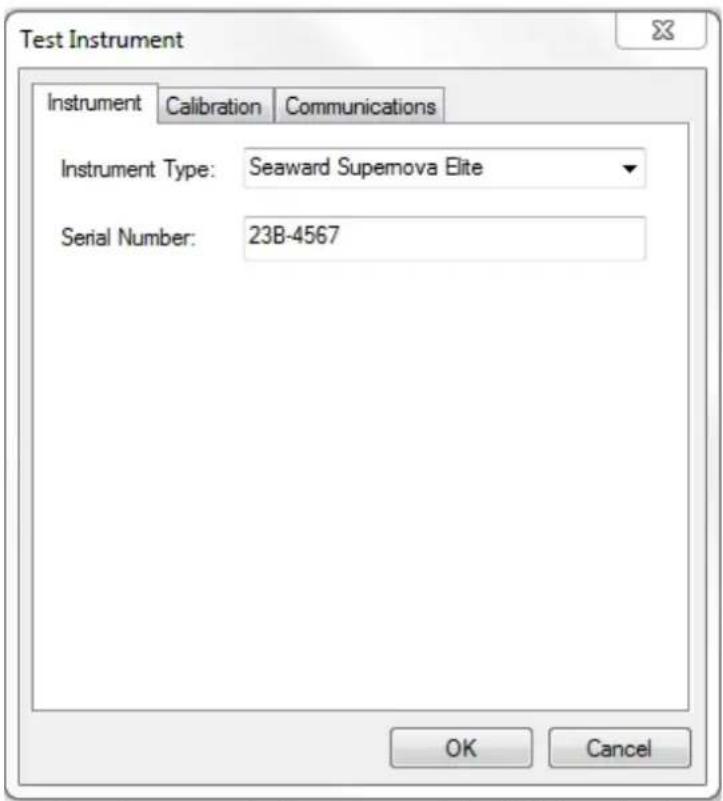
Test Instrument 2 - Instrument tab (RS232 Download)
Calibration
The Calibration tab shows details of the Instrument calibration.
See Entering Calibration Data for more information on adding, editing or deleting Test Certificates for an Instrument.

Test Instrument - Calibration tab
Communications
For instruments that transfer data to and from the PC using serial communications, for example RS232 (not the USB download and Apollo Series), the Communications tab allows you to set the Bits per second, Data bits, Parity and Stop bits settings.
Please refer to Downloading From Your Tester or confirm via your test instrument manual for more information on Communications settings, note the following is just an example:
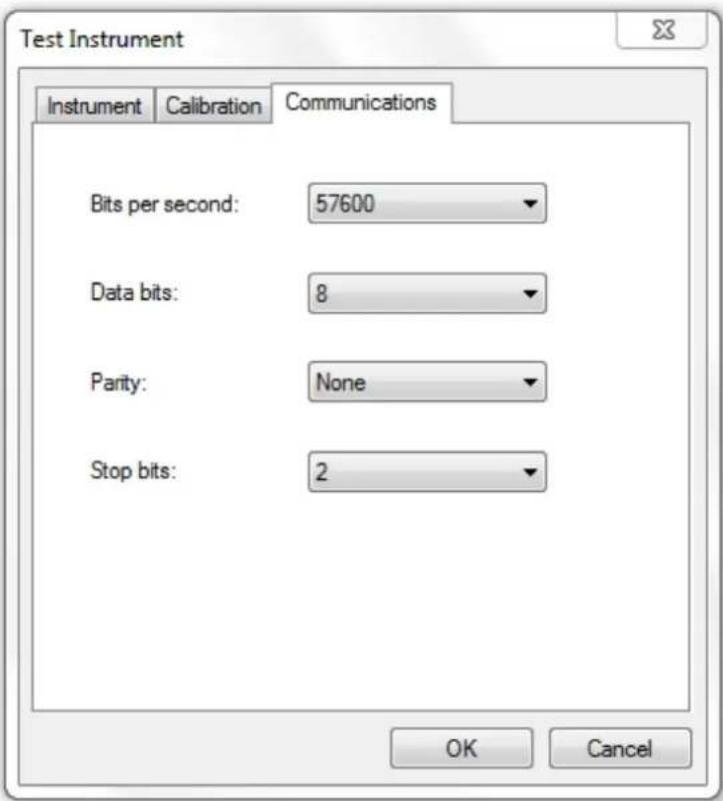
Test Instrument - Communication tab
Changing Instrument Details
Instrument details can be changed at any time by double-clicking the Instrument name in the Main Window or by right-clicking on the Instrument in the Main Window and selecting Details... This will bring up the Test Instrument window.
Deleting Instruments
Instruments can be deleted by selecting them in the Main Window, and pressing Delete. You can also delete an Instrument by right clicking the Instrument in the Main Window and selecting Delete. You will be prompted for confirmation.

Delete Instrument Confirmation
CAUTION: deleting an Instrument will also delete any calibration certificates associated with the Instrument.
Entering Calibration Data
3 Entering calibration data
PATGuard 3 allows you to store details of your Test Instrument Calibration Test Certificates in the database.
To add a Test Certificate, open the Calibration tab of the Test Instrument window. See also Changing Test Certificates and Deleting Test Certificates.

Test Instrument window - Calibration tab
Select Add... to open the Test Certificate window.
Test Certificate window
The Test Certificate window allows you to enter details of a Calibration Test Certificate, including the Test House contact details, the Certificate Number and the Test Date.
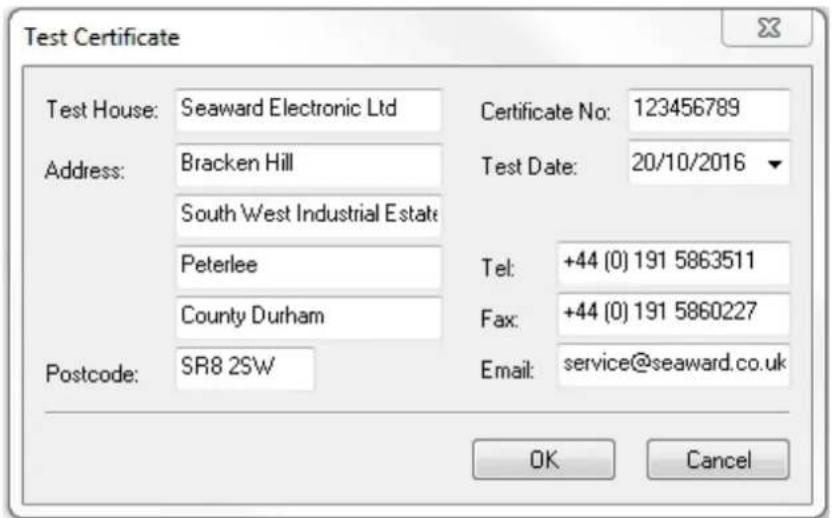
Test Certificate window
Click OK to add the Test Certificate.
Changing Test Certificates
Test Certificate details can be changed at any time by selecting them in the Calibration tab of the Test Instrument window and selecting Edit... This will bring up the Test Certificate window.
Deleting Test Certificates
Calibration Test Certificates can be deleted by selecting them in the Calibration tab of the Test Instrument window and selecting Delete. You will be prompted for confirmation.

Delete Test Certificate Confirmation
Adding Test Sequences
3 Adding Test Sequences
PATGuard 3 allows you to create custom Test Sequences for compatible Test Instruments, such as the Seaward SuperNova Elite or Europa Plus.
Please refer to your test instrument manual for more information on whether you can add custom Test Sequences.
To add a custom Test Sequence, select a compatible Instrument type from the list of configured Instruments in the Navigation Pane. See also Uploading Test Sequences, Changing Test Sequences and Deleting Test Sequences.

Navigation Pane - Select compatible Instrument
When a compatible Instrument type is selected, the option Add Test Sequence will appear in the Main Window.

Add Test Instrument...

Add Test Sequence

Seaward Superno...
Main Window - Add Test Sequence
Double-click Add Test Sequence in the Main Window to open the Test Sequence Details window.
Test Sequence Details window
The Test Sequence Details window allows you to enter details of the Test Sequence including the Test Sequence name, the specifics of the tests to be carried out, and whether the test should Include Visual Inspection and Include Polarity Test.
Note; uploading a Test Sequences can over right sequences already stored on your instrument.
For each of the available tests, in this case Socket, Earth Bond, Insulation, Substitute Leakage, Flash, Leakage, Touch Leakage and RCD Test, select from the list of options for Output, Limit, Test Duration and No. of Tests. For any tests you do not wish to include in the Test Sequence, set Limit to Skip.

Test Sequence Details window
Click OK to add the Test Sequence. The Test Sequence will now appear in the Main Window.

Main Window - New Test Sequence
Uploading Test Sequences
To upload a Test Sequence to your tester, ensure the compatible Instrument is connected to the PC. Right mouse click the Test Sequence name in the Main Window and select Upload Test Sequence.
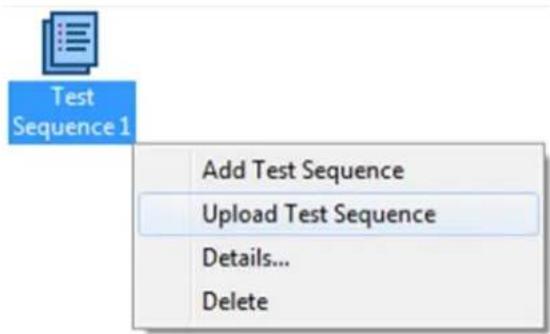
Test Sequence Options
Changing Test Sequences
Test Sequences can be changed at any time by double-clicking the Test Sequence name in the Main Window or by right-clicking on the Test Sequence in the Main Window and selecting Details... This will bring up the Test Sequence Details window.
Deleting Test Sequences
Test Sequences can be deleted by selecting them in the Main Window, and pressing Delete. You can also delete a Test Sequence by right clicking the Test Sequence in the Main Window and selecting Delete. You will be prompted for confirmation.

Delete Test Sequences Confirmation
Data Transfer
3 Data Transfer
The Data Transfer functions of PATGuard 3 are accessible from the Data Transfer Menu and are as follows:

Data Transfer Menu
• Downloading From Your Tester
○ Downloading - Apollo Series
○ Downloading - Supernova / Europa
○ Downloading - PrimeTest 350 / 300
○ Downloading - General Instructions
○ Finding the Correct COM port
○ Preview (PAT Data Only)
○ Duplicate Assets
• Uploading To Your Tester
○ Uploading - Apollo Series
○ Uploading - Supernova / Europa
○ Uploading - PrimeTest 350 / 300
○ Uploading - General Instructions
• Export to File - PAT or CSV
- Email File - PAT or CSV
- Import CSV
• Backing Up Your Database
There are also a number of other features of PATGuard 3 that are related to data transfer:
• Create a New Database
- Open an Existing File
• Upgrading / Importing a Legacy Database
Click on the links above for more information about each option.
Downloading from Your Tester
3 Downloading from Your Tester
Before attempting to download any instrument please make sure you have either created a new database (you can use the Setup Wizard for this) or have an Existing Database Open. In addition, make sure you configure your Test Instrument.
The Data Transfer functions of PATGuard 3 are accessible from the Data Transfer Menu and are as follows:

Data Transfer Menu
Note; results that have already been downloaded to PATGuard 3 and then Uploaded ready for a test cannot be downloaded again.
These assets sit in a different section of the memory and only have information to allow a retest to be performed - they do not contain full test data.
• Downloading - Apollo Series
• Downloading - Supernova / Europa
• Downloading - PrimeTest 350 / 300
• Downloading - General Instructions
• Finding the Correct COM port
• Preview (PAT Data Only)
- Duplicate Assets
Downloading - Apollo Series

Downloading - Apollo Series
Before attempting to download any instrument please make sure you have either created a new database (you can use the Setup Wizard for this) or have an Existing Database Open. In addition, make sure you configure your Test Instrument.
To perform the download from an Apollo Series Instrument to PATGuard 3, the first step is to download the data file on the instrument, before completing the download into PATGuard 3.
Note 1; the Apollo Series download produces a .gar file which is used by PATGuard 3 during the download.
Note 2; make sure you have the latest version of firmware on your Apollo Series instrument.
Downloading the Data File from the Apollo Series Instrument
On the Apollo "Home Screen" select menu/options, function key "F4".

In the menu select "Download" by using the arrow keys or selecting, key number "5".

In the "Download from Apollo" field select "To PATGuard", using the arrow keys to select from the dropdown menu.
(a) In the "using:-" field select "

USB-PC cable" (for the Apollo Series).
or
(b) In the "using:-" field select "

Flash Memory Stick" (Apollo 600 only).
Add or alter the filename in the "Filename" field. Note if you are having problems downloading you could try changing the filename from "ApolloDownload" to a filename of your choice.
(a) Connect the USB lead between the PC and Apollo (for the Apollo Series).
or
(b) You will be prompted to "Insert USB memory stick...." any data on this memory stick will be displayed in the bottom box (Apollo 600 only).
You now have a choice of either downloading all data "F4" or filtering by selecting "F2". (Apollo 500 or 600 only).
Note: If filtering the data, select the filters you wish to apply using the arrow keys and press accept "F4".
The download is complete after the blue bar reaches 100% and either:-
(a) the file appears in an additional Apollo drive (for example Apollo F:) that will now appear on your PC. This can be viewed using "Windows Explorer" (for the Apollo Series).
or
(b) the file appears on the memory stick, remove the memory stick from the Apollo and transfer it to the PC (Apollo 600 only).
Downloading the Apollo Data File to PATGuard 3
Before attempting to download any instrument please make sure you have either created a new database (you can use the Setup Wizard for this) or have an Existing Database Open. In addition, make sure you configure your Test Instrument.
To Download from your instrument select Download from tester from the Data Transfer menu.

Data Transfer - Download from tester
Select the Apollo Series Test Instrument you configured earlier, from the dropdown. Note, if applicable, the COM Port: field will be replaced with a field called Source File:.

Apollo Download window
Select Browse... and search for the directory, which contains the .gar file created when Downloading the data File from the Apollo Series Instrument). The location of the download file depends on how the download was performed, for example either USB-PC Lead or USB Flash Memory Stick.
The download file format for from the Apollo series is a .gar file (for example ApolloDownload.gar) and this file needs to be displayed in the File name: field.
(a) USB-PC Lead - the file appears in an additional Apollo drive, for example APOLLO600 (F:), that will appear on your PC.
Note; this drive only exists when the Apollo instrument remains in the download menu and the blue bar is at 100%.

Open window
(b) USB Flash Memory Stick - the file appears on the memory stick, for example Removable Disk (E:), remove the memory stick from the Apollo and transfer it to the PC (this can only be done with the Apollo 600).

Open window
Select Open, and this will place the .gar file selected the Source File: field, for example (using USB-PC Lead);

Apollo Download window
To download to PATGuard 3, ensure Database is selected in the Download to section and if required select a Client or Site you want the test results to be downloaded to.
Note; Selecting File in Download to allows the location to be selected where the Apollo .gar file can be saved to - this selection does not download data into PATGuard 3.
Select OK to complete the download.
Note, if the Preview (PAT Data Only) box is ticked this will show the PAT data in a spreadsheet on the PC before the download is completed. In this window test results can be edited using the buttons and to complete the download Process needs to be selected.
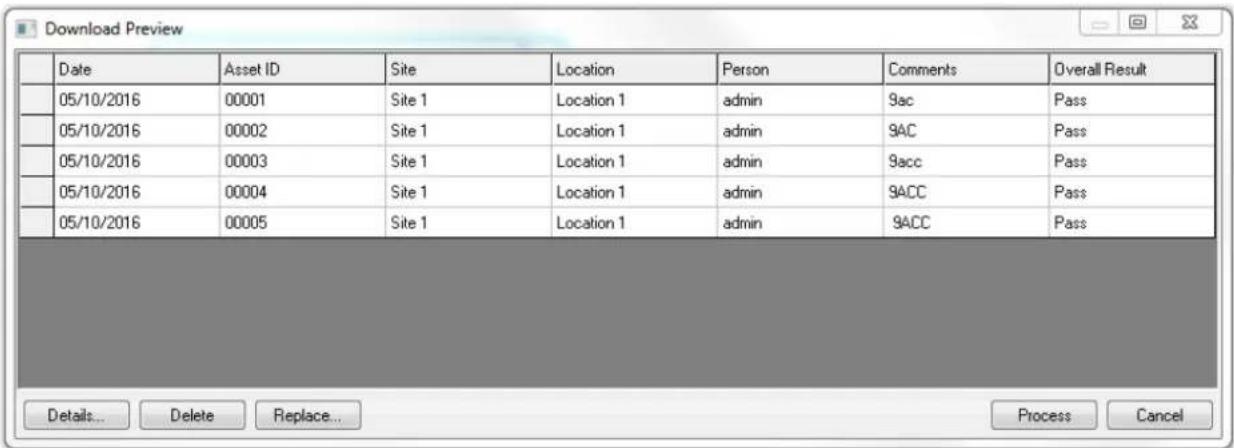
Download Preview window
Downloading - Supernova / Europa
3 Downloading - Supernova / Europa
Before attempting to download any instrument please make sure you have either created a new database (you can use the Setup Wizard for this) or have an Existing Database Open. In addition, make sure you configure your Test Instrument.
The download from a Supernova or Europa to PATGuard 3 requires a serial (RS232) connection.
Option1 - Straight Through RS232 connection
The serial (RS232) cable should be the Seaward supplied serial cable. It will have a white tag, with the information printed. "For use with the following testers, both Up & Download Only, Supernova...". On the other side the Part No. 194A919 or 44B113.
Option2 - Using a USB Adaptor
The Supernova / Europa can be downloaded to a PC with a USB port. This is achieved using the Seaward USB adaptor, which needs to be connected to the original lead of Option 1 - this only works as a two part lead.

natural_image
Close-up of a white and blue DVI connector with gold connectors, connected to a blue USB port (no text or symbols visible)Seaward RS232 to USB Adaptor
The Seaward USB Adaptor requires a driver to be installed on your PC prior to use. The driver software (for Seaward USB Adaptors only) can be found at the following link: http://www.ftdichip.com/Drivers/VCP.htm
Downloading the Supernova / Europa into PATGuard 3
Before attempting to download any instrument please make sure you have either created a new database (you can use the Setup Wizard for this) or have an Existing Database Open. In addition, make sure you configure your Test Instrument.
To Download from your tester select Download from tester from the Data Transfer menu.

Data Transfer - Download from tester
Select the Instrument you configured earlier, from the dropdown
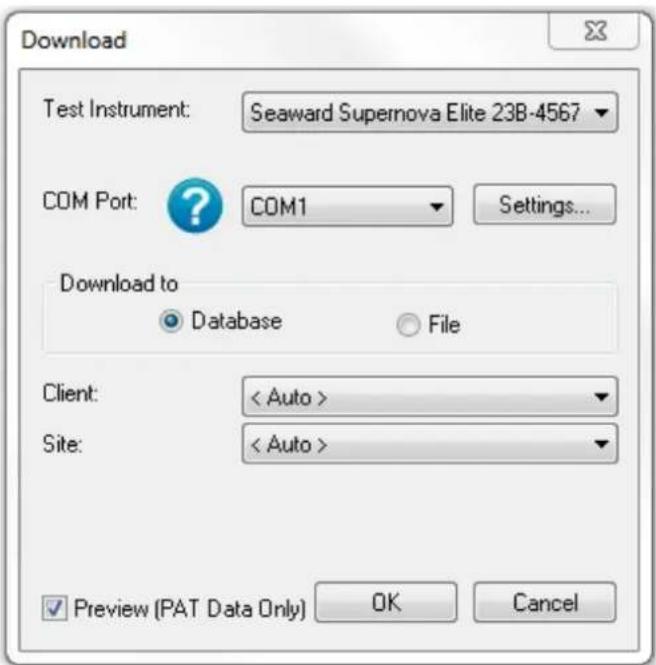
Download window
The details of how to find the correct COM port for your Instrument will vary depending upon the Operating System you are using, for addition help see Finding the correct COM port
Note 1; selecting Settings., displays the Communications setup window (also available in configure your Test Instrument). Changes / updates to the serial settings can be made here.
Note 2; the actual settings in this window must match the settings on the instrument (Bits per second is also known as BAUD RATE on the instrument).

Communications window
To download to PATGuard 3, ensure Database is selected in the Download to section and if required select a Client or Site you want the test results to be downloaded to.
Note; selecting File in Download to allows the Supernova / Europa download file (.gar .sss file) to be saved on the PC - this selection does not download data into PATGuard 3.
Select OK and a Please start transmission now.. message will be displayed.

Communications window
You will now need to configure your tester for the download.
At the main menu, scroll down to "Download Results", and press the green button.
At this point a screen will pop up, ensure your screen is set the same as PATGuard 3 (for an example see below). Changes can be made by highlighting the required function, then pressing the Green Button to scroll through.

Supernova / Europa Download Options Screen
Once your tester is set to the correct parameters select OK, you will then be taken to a search function.
Set the search parameters as required or to download everything from the tester leave the screen as it first appears. Press the soft key directly below the Start Search option on the screen.
A process bar will show up on the screen of the tester, and within PATGuard 3 you should see an indication of data being received, as shown below.

Communications window
Note, if the Preview (PAT Data Only) box is ticked this will show the PAT data in a spreadsheet on the PC before the download is completed. In this window test results can be edited using the buttons and to complete the download Process needs to be selected.
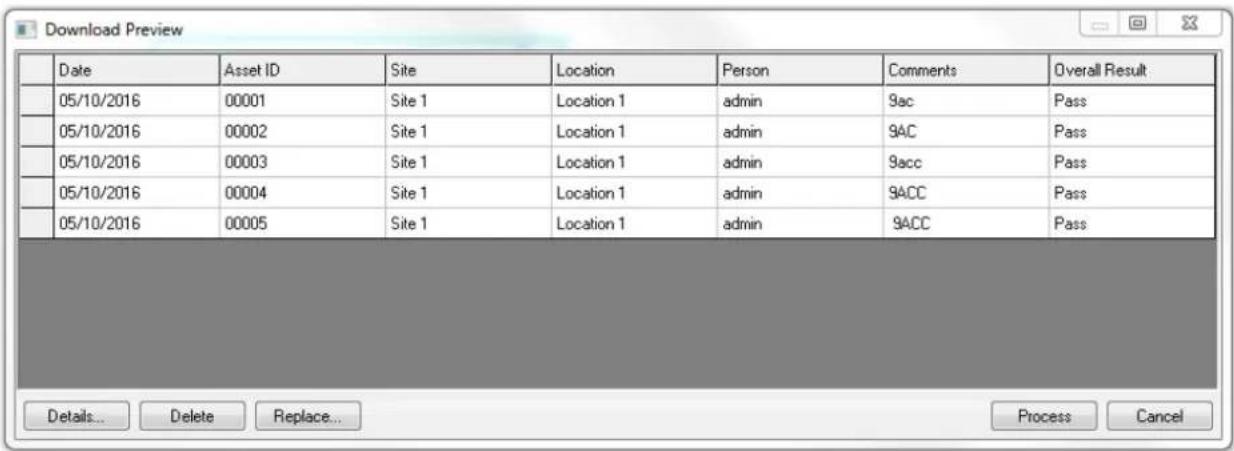
Download Preview window
Downloading - PrimeTest 350 / 300
3 Downloading - PrimeTest 350 / 300
Before attempting to download any instrument please make sure you have either created a new database (you can use the Setup Wizard for this) or have an Existing Database Open. In addition, make sure you configure your Test Instrument.
The download from a PrimeTest 350 to PATGuard 3 can require a serial (RS232) connection.
Option1 - Straight Through RS232 connection
The serial (RS232) cable should be the Seaward supplied serial cable. It will an RS232 socket on one side and an audio type plug on the other which connects to the instrument.
Option2 - Using a USB Adaptor
The PrimeTest 350 can be downloaded to a PC with a USB port. This is achieved using the Seaward USB adaptor, which needs to be connected to the original lead of Option 1 - this only works as a two part lead.
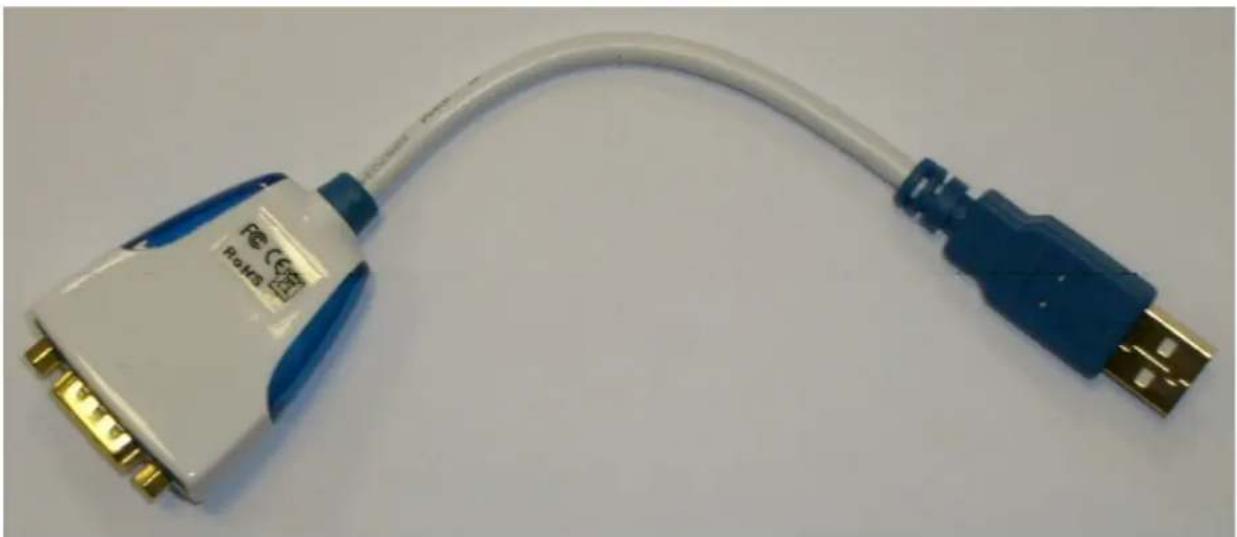
natural_image
Close-up of a white and blue USB connector with gold connectors, shown against a plain background (no text or symbols visible)Seaward RS232 to USB Adaptor
The Seaward USB Adaptor requires a driver to be installed on your PC prior to use. The driver software (for Seaward USB Adaptors only) can be found at the following link: http://www.ftdichip.com/Drivers/VCP.htm
Downloading the PrimeTest 350 / 300 into PATGuard 3
Before attempting to download any instrument please make sure you have either created a new database (you can use the Setup Wizard for this) or have an Existing Database Open. In addition, make sure you configure your Test Instrument.
To Download from your tester select Download from tester from the Data Transfer menu.

Data Transfer - Download from tester
Select the Instrument you configured earlier, from the dropdown
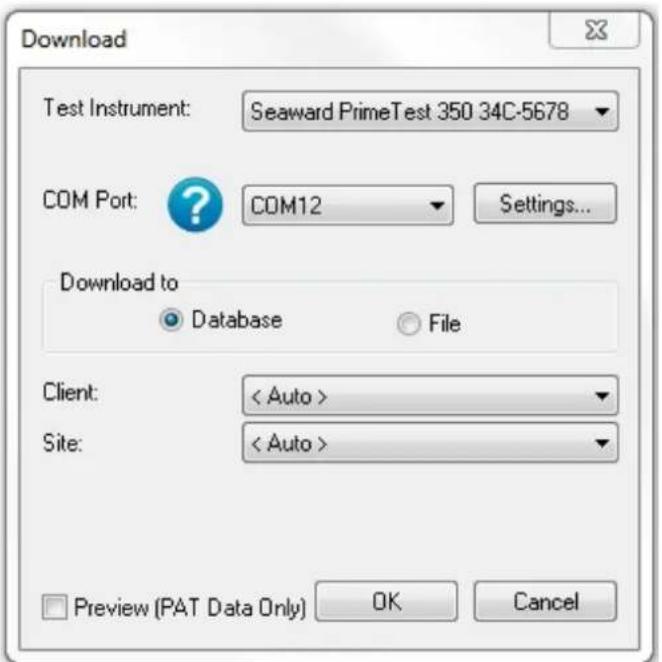
Download window
The details of how to find the correct COM port for your Instrument will vary depending upon the Operating System you are using, for addition help see Finding the correct COM port
Note 1; selecting Settings., displays the Communications setup window (also available in configure your Test Instrument). Changes / updates to the serial settings can be made here.
Note 2; the actual settings in this window must match the settings on the instrument (Bits per second is also known as BAUD RATE on the instrument).

Communications window
To download to PATGuard 3, ensure Database is selected in the Download to section and if required
select a Client or Site you want the test results to be downloaded to.
Note; selecting File in Download to allows the PrimeTest 350 download file (.sss .gar file) to be saved on the PC - this selection does not download data into PATGuard 3.
Select OK and a Please start transmission now.. message will be displayed.

Communications window
You will now need to configure your tester for the download.
At the main menu, scroll down to Data Transfer >, and press F4 to confirm (OK).
Then select Download to PC and confirm by pressing F4.

PrimeTest 350 Screen
On the next screen ensure the transfer characteristics are set.
Format PATGuard SSS.
Computer Either the Computer name if Bluetooth, or RS-232 if using the cable to transfer.
Baud 57600 (this can be altered but the same Baud rate must be set in PATGuard 3).

PrimeTest 350 Download to PC Screen
Once connected the test data can be downloaded using the F4 key.
A process bar will show up on the screen of the tester, and within PATGuard 3 you should see an indication of data being received, as shown below.

Communications window
Note, if the Preview (PAT Data Only) box is ticked this will show the PAT data in a spreadsheet on the PC before the download is completed. In this window test results can be edited using the buttons and to complete the download Process needs to be selected.
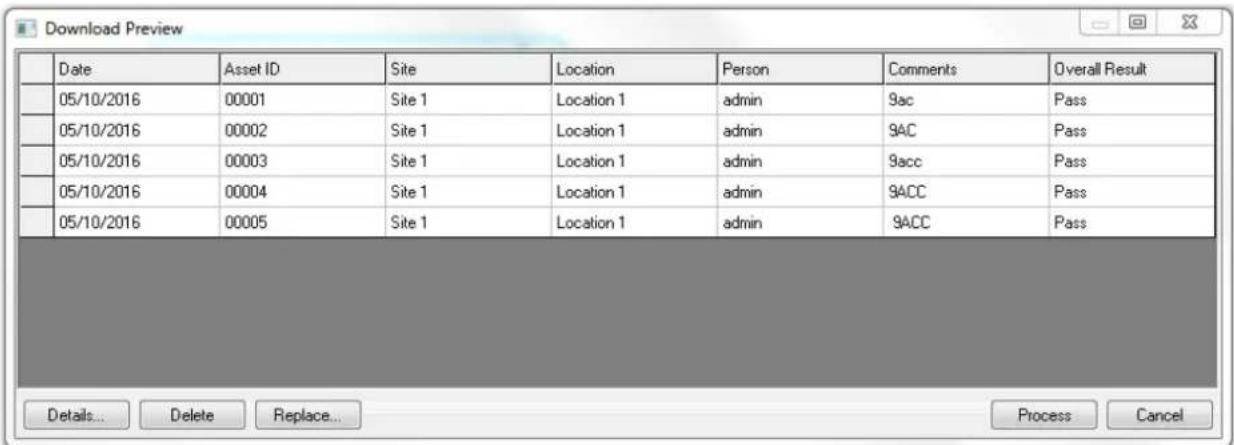
Download Preview window
Downloading - General Instructions

Downloading - General Instructions
Please note; these are General Instructions for instrument download, using an RS232 lead, and not all functions may be available in all cases.
Specific download instructions for the Apollo Series, Supernova / Europa and PrimeTest 350 / 300 are described in other sections.
Before attempting to download any instrument please make sure you have either created a new database (you can use the Setup Wizard for this) or have an Existing Database Open. In addition, make sure you configure your Test Instrument.
To Download from your tester select Download from tester from the Data Transfer menu.

Data Transfer - Download from tester
Select the Instrument you configured earlier, from the dropdown

Download window
The details of how to find the correct COM port for your Instrument will vary depending upon the Operating System you are using, for addition help see Finding the correct COM port
Note 1; selecting Settings., displays the Communications setup window (also available in configure your Test Instrument). Changes / updates to the serial settings can be made here.
Note 2; the actual settings in this window must match the settings on the instrument (Bits per second is also known as BAUD RATE on the instrument).

Communications window
To download to PATGuard 3, ensure Database is selected in the Download to section and if required select a Client or Site you want the test results to be downloaded to.
Note; if available, selecting File in Download to allows the .gar/sss file to be saved on the PC - this selection does not download data into PATGuard 3.
Select OK and a Please start transmission now.. message will be displayed.
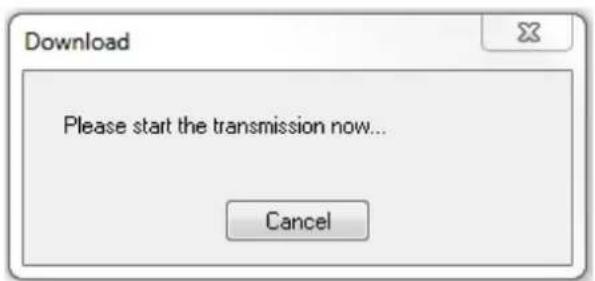
Communications window
You will now need to configure your tester for the download, see your instrument user manual for further help.
A process bar will show up on the screen of the tester, and within PATGuard 3 you should see an indication of data being received, as shown below.

Communications window
Note, if the Preview (PAT Data Only) box is ticked (if applicable to your instrument( this will show the PAT data in a spreadsheet on the PC before the download is completed. In this window test results can be edited using the buttons and to complete the download Process needs to be selected.

Download Preview window
Finding the Correct COM port
3 Finding the Correct COM port
The details of how to find the correct COM port for your Instrument will vary depending upon the Operating System you are using, however the basic principal will work with all Operating Systems.
Firstly, without your Instrument connected, open Device Manager from the Control Panel and expand the Ports (COM & LPT) section to show the currently connected ports.

Device Manager - No Instrument connected
Now connect your Instrument and wait for your computer to recognise it. You should see a new COM port listed in the Device Manager. In this case, the Instrument appears as USB Serial Port (COM10).

Device Manager - Instrument on COM10
In this case, when Downloading or Uploading to this Instrument, COM10 is the correct COM port to use. If you encounter problems communicating with your Instrument, make sure the Communications settings are correct.
Preview (PAT Data Only)

Preview (PAT Data Only)
The download Preview can be selected from the Download window.
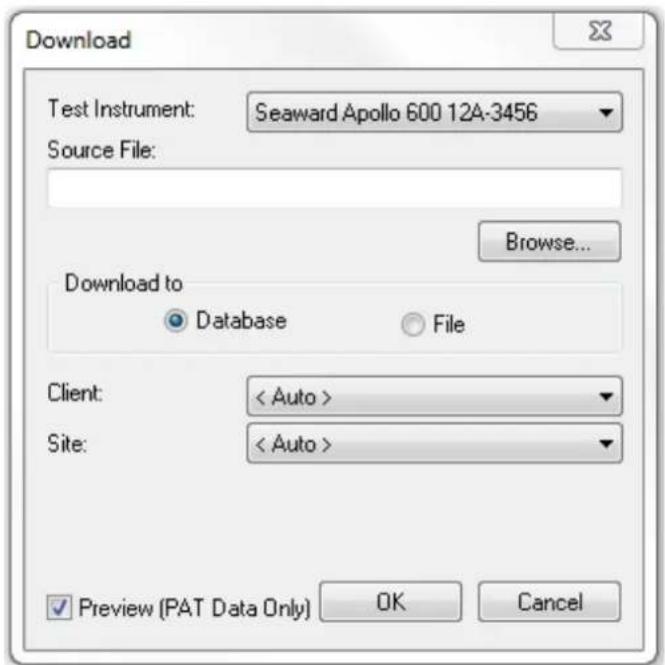
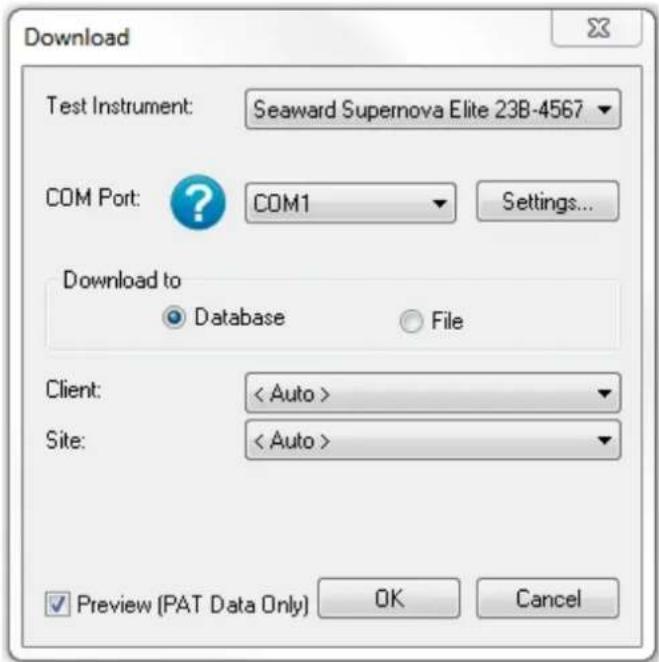
Apollo Series Download window or RS232 Connected Instrument window
Preview allows you to review and edit the downloaded data prior to adding it to the database. You can edit the details of a test, delete a test and replace all occurrences of a site or location name in the data.
Process processes the download data into the current database.
Cancel closes the Preview and does not process the data.

Download Preview window
Duplicate Assets
3 Duplicate Assets
When Downloading from your tester, if duplicate items exist PATGuard 3 will alert you and ask you to confirm what action you would like to take.
During a download if a Test Result with the same Asset ID and Site is detected a Duplicate? waming message is displayed to determine if the second and subsequent Test Results are additional Test Results for the same Asset or a duplicate test.
Selecting Yes to the question Duplicate? will cause the second Test Result to be re-routed to a specially created holding Site (for example Duplicate-xxx) to be deleted or amended by the user. This can also be moved into a new Site / Location.
Selecting No to the question Duplicate? will cause the second Test Result to be appended to the first Test Results Asset record. To view this latest result, and the previous, the Asset Details will need to be viewed.
Note; if downloading to a different Client level the duplicate Asset ID is ignored.
Uploading to Your Tester
3 Uploading to Your Tester
To Upload to your tester, first configure your Test Instrument. Then select Upload from tester from the Data Transfer menu.
The Data Transfer functions of PATGuard 3 are accessible from the Data Transfer Menu and are as follows:
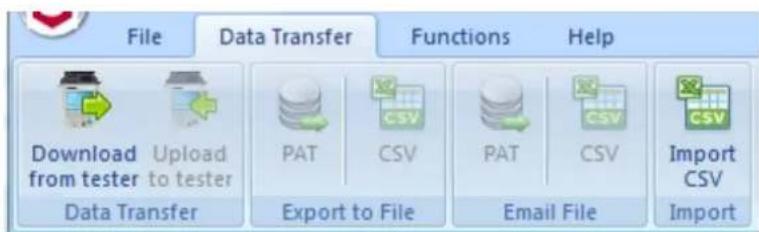
Data Transfer Menu
Note; results that have already been downloaded to PATGuard 3 and then Uploaded ready for a test cannot be downloaded again, unless they have been retested. These assets sit in a different section of the memory and only have information to allow a retest to be performed - they do not contain full test data.
- Uploading - Apollo Series
• Uploading - Supernova / Europa
• Uploading - PrimeTest 350 / 300 - Uploading - General Instructions
Uploading - Apollo Series

Uploading - Apollo Series
To Upload to your Apollo Series tester, first make sure you configure your Test Instrument.
Note 1; Upload is only available with the Apollo 500 and Apollo 600
Note 2; the Apollo Series upload produces a .gar file which is used by PATGuard 3 during the data transfer.
Note 3; make sure you have the latest version of firmware on your Apollo Series instrument.
Before attempting an upload, if you have not already, we suggest you perform a download from your Apollo 500 / Apollo 600 to PATGuard 3, as this will confirm your PATGuard 3 software / database is working correctly.
Preparing the Apollo Series Instrument for Upload
On the Apollo "Home Screen" select menu/options, function key "F4".
In the menu select "Upload" by using the arrow keys or selecting, key number "7".
In the "Upload data into Apollo" field select "From PATGuard 3", using the arrow keys to select from the dropdown menu.
In the "using:-" field select "USB-PC cable". An additional Apollo drive (for example ApolloXXXX) will appear on your PC. (Apollo 500 or 600)
or
In the "using:-" field select "Flash Memory Stick" (Apollo 600 only)
Setting up PATGuard 3 to Upload
In the Data Transfer menu highlight the Client, Site or Location that you want to be uploaded. Then select
Upload from tester.

Data Transfer - Upload to tester
Note; if the Upload to tester icon is greyed out, make sure you have either a Client, Site or Location highlighted.
This will open the Upload window.

Upload Window
Make sure the Apollo Series instrument you wish to upload is selected,
Select the correct drive from the dropdown, this will be either be;
the ApolloXXX: drive (Apollo 500 or Apollo 600)
or
a Flash Memory Stick drive (Apollo 600)
Select a Client, Site or Location, you want to upload (if required) and include the data to be included (where applicable) - press OK.
A message saying – "File Saved Successfully :\ApolloUpload.gar" should appear on the PC

Upload Confirmation Window
Completing the Apollo Series Upload
On the Apollo the message "Save data to Apollo drive, press F3 when done" – select using the function key "F3". The following message will then appear on the Apollo "Valid Data files from PC. Select one of these files and press F4". Select the file containing your uploaded data (/
ApolloUpload.gar), using the arrows keys, and save by selecting "F4" (USB-PC cable, Apollo 500 or 600).
or
After transferring the USB memory stick (you will receive a message if you have not done this), in the field below "Valid data files from USB memory stick. Select one of these files and press F4" - select the file containing your uploaded data (/ApolloUpload.gar), using the arrows keys, and save by selecting "F4" (Flash Memory Stick, Apollo 600 only).
Note: When selecting one from multiple files please ensure the correct file is highlight.
A message saying ".gar file/SSS data uploaded OK" will be shown on the Apollo.
The uploaded data is stored and displayed in a different location to the already tested data: On the Apollo "Home Screen" select menu/options, function key "F4", select "View Data", by selecting number "1" and then the filter button by selecting "F2". In the "Select Tests" section select "Uploaded Data" using the blue arrow keys and accept using the function key "F3". In this new list all the uploaded data will be displayed.
Uploading - Supernova / Europa
3 Uploading - Supernova / Europa
To Upload to your Supernova / Europa, first make sure you configure your Test Instrument.
Before attempting an upload, if you have not already, we suggest you perform a download from your instrument to PATGuard 3, as this will confirm your PATGuard 3 software / database is working correctly.
The PATGuard Upload feature can be used to transfer Asset information to a Supemova / Europa to simplify retesting. Information including the Asset ID, Description, Test Sequence, Site and Location can be uploaded from PATGuard into the instrument.
When an Asset ID is entered on Supernova / Europa Asset Details screen, the assets stored in upload memory are automatically searched for a matching Asset ID. If a match is found the uploaded asset data is retrieved and shown on the instrument display.
Preparing the Supernova / Europa to Receive an Upload
In the Supernova / Europa, select REMOTE MODE from the Main Menu

REMOTE MODE from Main Menu
In REMOTE MODE an ESTABLISHING COMMUNICATION message will be displayed.

REMOTE MODE Menu
Preparing PATGuard 3 for an Upload from the Supernova / Europa
In the Data Transfer menu highlight the Client, Site or Location that you want to be uploaded. Then select Upload from tester.
Data Transfer - Upload to tester
Note; if the Upload to tester icon is greyed out, make sure you have either a Client, Site or Location highlighted.
This will open the Upload window.

Upload Window
Make sure the Instrument you wish to upload is selected, the COM port used and the Client, Site or Location you wish to upload and select OK.
The details of how to find the correct COM port for your Instrument will vary depending upon the Operating System you are using, for addition help see Finding the correct COM port
Note; selecting Settings., displays the Communications setup window (also available in configure your Test Instrument). Changes / updates to the serial settings can be made here.

COM Port Settings Window
Once OK on the PATGuard Upload window is selected a message regarding connection is shown.

Upload Connections Message
A progress bar will appear on the PATGuard screen to show the data transfer.

Upload Progress Bar
When the data is transmitting the progress bar will scroll until it reaches 100%, after this an upload complete message is displayed.

Upload Complete Message
Completing the Upload to the Supernova / Europa
Once the upload has started a READY : SSS COMMAND MODE message will be shown on the instrument.

Upload from PC Menu
The uploaded data is stored in a different memory location than the tested data and cannot be searched.
On the Supernova or Europa the uploaded assets cannot be viewed until they have test data against them. When performing a retest simply go to NEW TEST and press the YES button. You will then need to enter the asset ID (either manually or using your CCD barcode scanner) to bring up the asset information.
Uploading - PrimeTest 350 / 300
3 Uploading - PrimeTest 350 / 300
To Upload to your PrimeTest 350 / 300, first make sure you configure your Test Instrument.
Before attempting an upload, if you have not already, we suggest you perform a download from your PrimeTest 350 / 300 to PATGuard 3, as this will confirm your PATGuard 3 software / database is working correctly.
The PATGuard Upload feature can be used to transfer Asset information to a Seaward PrimeTest 350 to simplify retesting. Information including the Asset ID, Description, Test Sequence, Site and Location can be uploaded from PATGuard into the PrimeTest 350.
When an Asset ID is entered on PrimeTest 350 Asset Details screen, the assets stored in upload memory are automatically searched for a matching Asset ID. If a match is found the uploaded asset data is retrieved and shown on the PrimeTest 350 display.
Preparing the PrimeTest 350 / 300 to Receive an Upload
In the PrimeTest 350 / 300, select Menu (F4), Data Transfer and then Upload from PC

Upload Selection from Main Menu
Check that the correct setting is shown in the Computer field i.e. RS-232 when using a cable connection or the PC name when using Bluetooth. You should see a Connected message on the instrument.
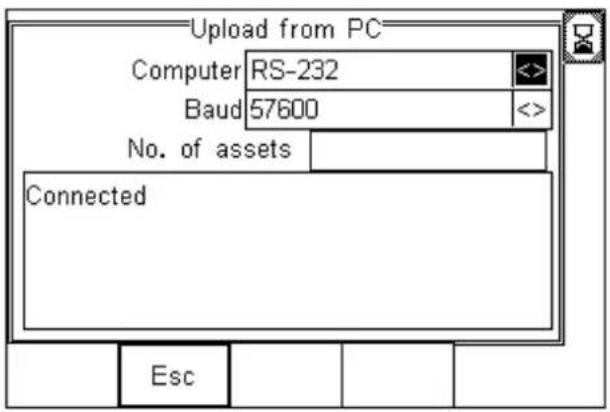
Upload from PC Menu
Preparing PATGuard 3 for an Upload from the PrimeTest 350 / 300
In the Data Transfer menu highlight the Client, Site or Location that you want to be uploaded. Then select Upload from tester.

Data Transfer - Upload to tester
Note; if the Upload to tester icon is greyed out, make sure you have either a Client, Site or Location highlighted.
This will open the Upload window.
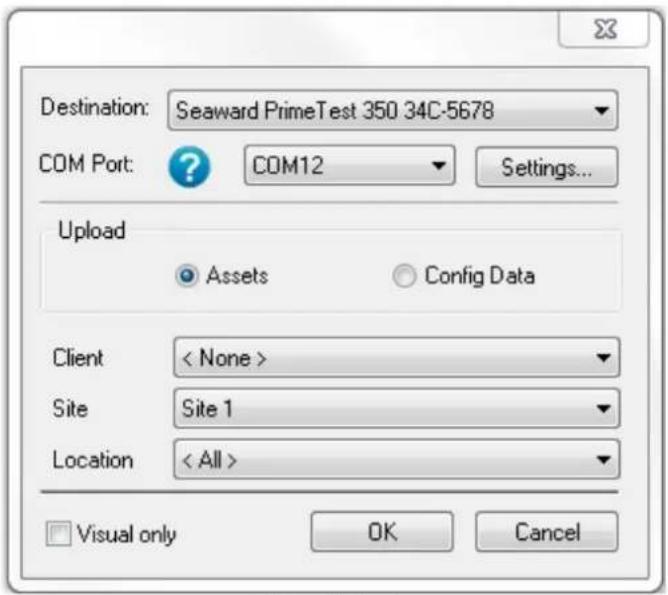
Upload Window
Make sure the Instrument you wish to upload is selected, the COM port used and the Client, Site or Location you wish to upload and select OK.
The details of how to find the correct COM port for your Instrument will vary depending upon the Operating System you are using, for addition help see Finding the correct COM port
Note 1; selecting Settings., displays the Communications setup window (also available in configure your Test Instrument). Changes / updates to the serial settings can be made here.
Note 2; the actual settings in this window must match the settings on the instrument (Bits per second is also known as BAUD RATE on the instrument).

COM Port Settings Window
Once OK on the PATGuard Upload window is selected a message regarding connection is shown.

Upload Connections Message
A progress bar will appear on the PATGuard screen to show the data transfer.

Upload Progress Bar
When the data is transmitting the progress bar will scroll until it reaches 100%.
Completing the Upload to the PrimeTest 350 / 300
The Asset ID numbers will appear on the PrimeTest 350 / 300 display as they arrive until Upload is complete and the End of Data message appears below the last Asset ID.
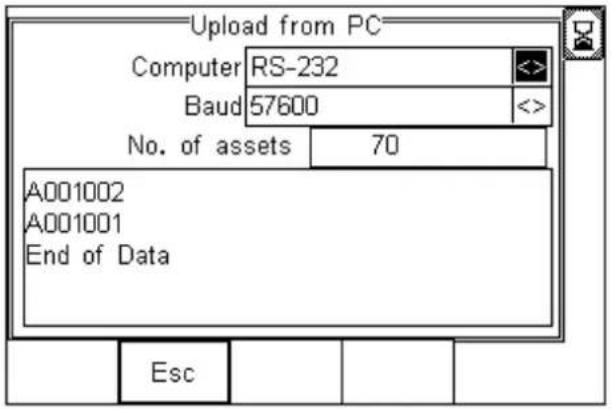
Upload from PC Menu
The total number of Assets uploaded will be shown in the No. of assets field – in this case 70 Assets have been uploaded.
The number of Assets in upload memory can be view be selecting Menu (F4) then Memory Options. In this case there are a total of 189 Assets in the upload memory.

Memory Information Menu
The Assets in upload memory can be viewed using the View Saved Data option on the PrimeTest 350 as follows. Press Menu (F4), View Saved Data, Search (F1) and change the Test Status field to Uploaded as shown.

Memory Search Filter
Press OK (F4) to show all Assets in the upload memory. Uploaded Assets are marked with a "U" on the right hand side of the display.

Uploaded Data on Instrument
Uploading - General Instructions

Uploading - General Instructions
To Upload to your tester, first make sure you configure your Test Instrument.
In the Data Transfer menu highlight the Client, Site or Location that you want to be uploaded. Then select Upload from tester.

Data Transfer - Upload to tester
Note; if the Upload to tester icon is greyed out, make sure you have either a Client, Site or Location highlighted.
This will open the Upload window.

Upload window
Make sure the Instrument you wish to upload is selected, the COM port used and the Client, Site or Location you wish to upload and select OK.
The details of how to find the correct COM port for your Instrument will vary depending upon the Operating System you are using, for addition help see Finding the correct COM port
Note 1; selecting Settings., displays the Communications setup window (also available in configure your Test Instrument). Changes / updates to the serial settings can be made here.
Note 2; the actual settings in this window must match the settings on the instrument (Bits per second is also known as BAUD RATE on the instrument).

COM port settings window
Note; In general the uploaded data is stored in a different memory location than the tested data and
in some cases and can only be searched in newer instruments.
Export to File - PAT or CSV
3 Export to File - PAT or CSV
Data in the PATGuard 3 database can be exported to either a .pat Briefcase file or a .csv Spreadsheet. See also Open an Existing File.
To Export to a File, select the Client, Site or Location you wish to export from the Tree View. Alternatively, to export a single Asset or Hazard, select that Asset or Hazard in the Main Window.
The data to be exported to a CSV file can be filtered by right mouse clicking on the column headers, in the Main Window, and selecting from the dropdown, for more information see Asset View.
Select to File from the Data Transfer menu.
Data Transfer Menu - Export
This will open the Save As window, which allows you to browse to the location you wish to export the file to.

Save As window
Exporting to .pat file
To export to a .pat file, select Briefcase files (*.pat) from the Save as type: drop-down box. .pat files can be used to transfer sections of the database to other PATGuard 3 users - see Open an Existing File. Note, the
other user of PATGuard 3 must be using exactly the same version of PATGuard 3.
Note; briefcase / .pat files can only be exported to exactly the same version of PATGuard 3 that they were originally created on.
Exporting to .csv file
To export to a .csv file, select Spreadsheet (*.csv) from the Save as type: drop-down box. .csv files can be opened and edited in programs such as Microsoft Excel.
Note: .csv exports do not include photos or risk assessments - just the test results and test dates.
Email File - PAT or CSV
3 Email File - PAT or CSV
Data in the PATGuard 3 database can be exported via email to either a .pat Briefcase file or a .csv Spreadsheet. See also Open an Existing File.
To Export to Email, select the Client, Site or Location you wish to export from the Tree View. Alternatively, to export a single Asset or Hazard, select that Asset or Hazard in the Main Window.
The data to be emailed to a CSV file can be filtered by right mouse clicking on the column headers, in the Main Window, and selecting from the dropdown, for more information see Asset View.
Select Email from the Data Transfer menu.

Data Transfer Menu - Email Export
This will open a new email in your default email program with the data you selected attached as a .pat or csv file.
See also Open an existing file for details on how to open a .pat file.
Import CSV
3 Import CSV
You can import data from a spreadsheet (csv) into PATGuard 3. This function is selected by the Import CSV in Data Transfer.
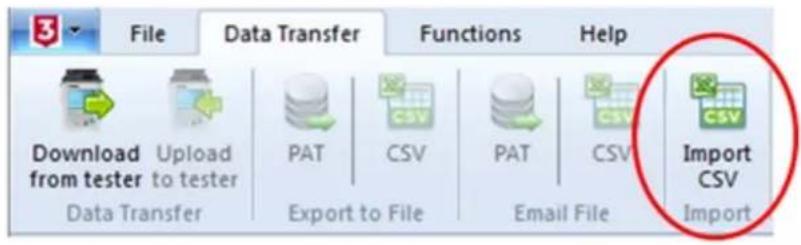
Data Transfer – Import CSV selection
You will need to use the ImportTemplate.csv found in the default directory, C:\Program Files\Seaward\PATGuard 3 to place your spreadsheet data into the correct format.

CSV Import Template - ImportTemplate.csv

ImportTemplate.csv - opened in Microsoft Excel
Note 1; Your PAT data needs to follow the template of this CSV file – you cannot alter the column
headers.
Note 2; Do not allow empty rows, between data rows, as this will produce false assets in PATGuard 3
Note 3; After using the template file, make sure it is saved again in the CSV file format.
In PATGuard 3 select Data Transfer and then Import and then select the ImportTemplate.csv
Your imported data should now be in PATGuard 3, however, if you cannot see all the data try right mouse clicking on the top right hand window and selecting the fields you require.
Backing Up Your Database
3 Backing up your database
To avoid losing data if anything happens to your PC, we recommend regularly backing up your PATGuard 3 database
Making a backup copy of your database
To make a backup of you database:
- Close PATGuard 3 if it is open.
- Open an Explorer window and browse to the location you specified when Setting up your database.
- Right-click on the PATGuard 3 database file to bring up the context menu. Select Copy.
- Browse to the location you wish to backup the database to, for example a memory stick or external hard drive. Right-click to bring up the context menu and select Paste.
You may alternatively choose to burn a copy of your database to a CD or DVD, or use one of the many online backup services to secure your valuable data.
Seaward recommends backing up your database on a regular basis, at least weekly if you use PATGuard 3 on a regular basis.
Restoring your database from a backup copy
To restore a database from a backup copy:
- Copy the backup database to a suitable location on your PC.
- Open the backup database following the procedure in Select an existing database.
Auto Scheduler
3 Auto Scheduler
The Auto Scheduler function of PATGuard 3 is accessible from the Functions Menu and provides a way to schedule testing based on a set of trigger conditions. The main features of the Auto Scheduler are as follows:
- Setting up a Schedule
• Viewing a Schedule
• Printing a Task Checklist
- Uploading a Schedule

Functions Menu - Auto Scheduler
When a database with an Auto Scheduler configuration is closed in PATGuard 3 a check is run on that database by PATGuard e-Scheduler (running in the PATGuard e-Manager program on the system tray). If the trigger conditions are met the configured action is taken. You can check the action taken by double
clicking on the PATGuard e-Manager icon on the system tray to view its message log.
Click on the links above for more information about each option.
Setting up a Schedule
3 Setting up a schedule
To set up an Auto Schedule, switch to the PAT Testing function and select a Client, Site or Location from the Tree View in the Navigation Pane. Select Auto Scheduler from the Functions Menu to open the Auto Scheduler window.

Functions Menu - Auto Scheduler
Auto Scheduler window
The Auto Scheduler window allows you to select the Client Name, Site Name and Location Name that you wish to run an Auto Schedule for.
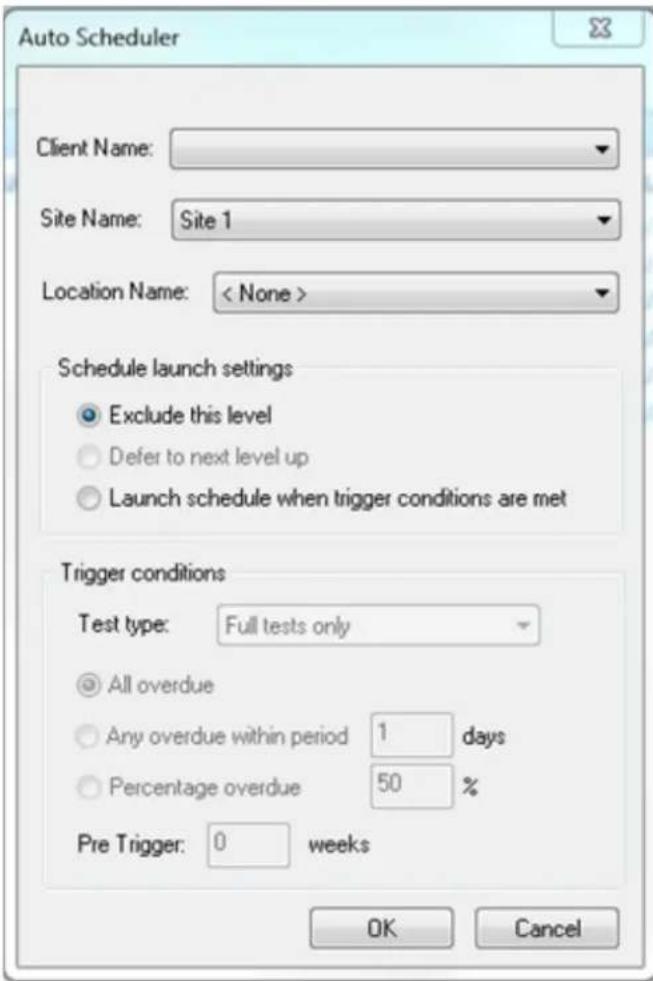
Auto Scheduler window
Schedule launch settings
Exclude this level excludes this part of the database from Auto Schedules. Sub-levels may be included if they have their own Auto Scheduler configuration. For example, it is possible to exclude a Client but have the Auto Scheduler configured for the Sites below that Client.
Defer up to next level takes the Auto Scheduler configuration from the level above. For example, all Locations at a Site could use the Auto Scheduler configuration for the Site.
Launch schedule when trigger conditions are met is used to configure particular Auto Scheduler actions for this level of the database. Only the Local launch should be selected.
Local launch
If a local schedule is triggered then the next time the database is opened a message will be displayed to say that a new schedule is available. The schedule can be viewed, uploaded or printed.
Trigger Conditions
Test type allows you to select whether the trigger should be based on Full tests only or Visual tests only.
If All overdue is selected, a trigger will occur only if all Assets are overdue at this branch of the database.
If Any overdue within period is selected, a trigger will occur if there are any overdue Assets at this branch of the database within the time specified.
If Percentage overdue is selected, a trigger will occur if more than the specified percentage of Assets are overdue at this branch of the database.
Pre Trigger allows you to specify the number of weeks in advance of the trigger becoming true you would like the schedule to be generated (e.g. 4 weeks before all items are overdue).
Viewing a Schedule
3 Viewing a schedule
When a database with an Auto Scheduler configuration is closed in PATGuard 3 a check is run on that database by PATGuard e-Scheduler (running in the PATGuard e-Manager program on the system tray). If the trigger conditions are met the configured action is taken. You can check the action taken by double
clicking on the PATGuard e-Manager icon on the system tray to view its message log.
If a local schedule is triggered then the next time the database is opened in PATGuard 3 a message will be displayed to say that a new schedule is available.

Auto Schedule notification
The schedule can be viewed, printed or uploaded. To view the Auto Schedule, select Display from the Auto Schedule menu on the File menu.

Auto Schedule menu
Printing a Task Checklist
3 Printing a task checklist
A Task Checklist can be printed by selecting Print... from the Auto Schedule menu on the File menu.

Auto Schedule menu
You can also print a Task Checklist by running a Concise Task Checklist Report.
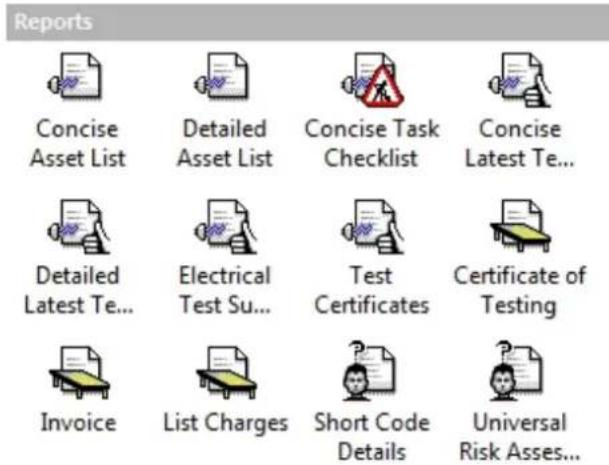
Navigation Pane - Available Reports
Uploading a Schedule
3 Uploading a schedule
To Upload the data associated with an Auto Schedule, select Upload from the Auto Schedule menu on the File menu. You can choose to Upload Full Tests or Upload Visual Tests.
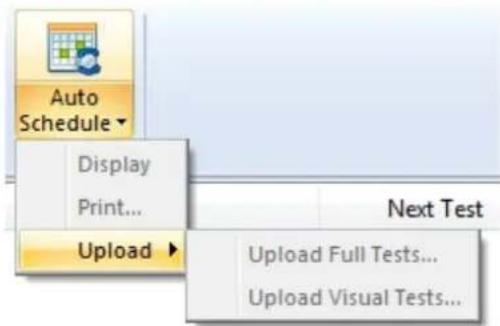
Auto Schedule menu
Note the instrument needs to be configured / ready for upload and this does not work with the Apollo Series instruments.
Time Manager
3 Time Manager
Welcome to PATGuard Time manager, the PAT test time analysis program for use with the Seaward Apollo
Series, Supernova, Europa and PrimeTest 300/350 family of testers. This program will analyse an .gar file/SSS download file from the Apollo series, supernova, Europa and PrimeTest 300/350 type of testers and display test times.
The Time Manager function of PATGuard 3 is accessible from the View menu and provides a way to schedule testing based on a set of trigger conditions. The main features of the Time Manager are as follows:
• Program Overview
• How to open a file
• How to select data
• How to test data
• How to create a bar graph
• How to save the data
• How to print the data
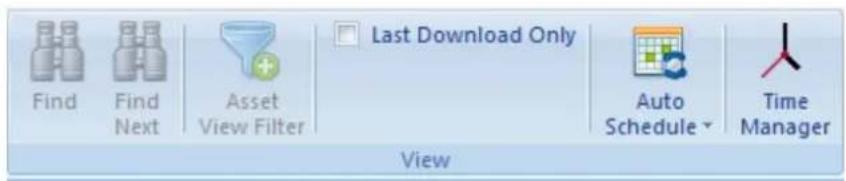
View Menu - Time Manager
Program Overview

Program overview
PATGuard Time Manager will enable the times of individual tests to be analysed and displayed. The program will process an .gar file/ SSS file and display test information relating to dates and times of tests. An .gar file/SSS file contains all information concerning tests stored in the tester's memory. Once tests are stored they cannot be amended ensuring data security and veracity of the information is provided by PATGuard Time Manager.
Note
For added security make sure that the Date and Time are password protected in the tester, if available to stop Dates and Times from being altered prior to testing. (See tester user manual)
To analyse an .gar file/SSS file with PATGuard Time Manager, the three steps below are necessary:
- Select and Open a File
- Choose the appropriate search criteria to narrow or widen the file analysis
- View the test data
Once the test data is displayed, it can be printed and saved into a spreadsheet file or displayed as a bar graph.
Note
Only .gar file/SSS files from Seaward Apollo series, Supernova, Europa or PrimeTest 300/350 type testers can be analysed by PATGuard Time Manager. These files are created from the tester download by
downloading to file in PATGuard or PATGuard Pus. The saved file can then be opened in PATGuard Time Manager to analyse test times.
How to Open a file
3 How to open a file
To analyse the test times of a download .gar file/SSS file, select the open icon or press (Ctrl + O) on your keyboard.
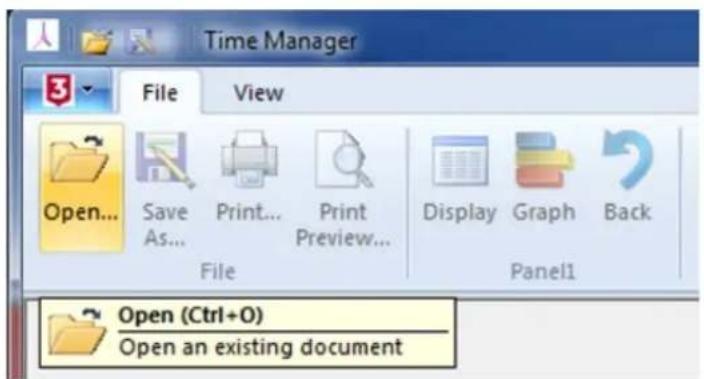

Open Icon -Time Manager
How to select data
3 How to select data
The following select window will be displayed.

Select Window -Time Manager
Note
Not all .gar file/SSS files will contain Tester Model and Serial Number, this will be dependent on the software version of the individual tester from which the .gar file/SSS file was created.
The drop downs for Site, Location, User, Start and End dates will be specific to an individual .gar file/SSS file. Leave the wild card (*) characters to enable all values to be displayed or choose from the drop downs specific data selection criteria. Select Display to view the Test Data contained in the file according to the data selection.
How to test data

How to test data
The following Test Data window will appear.
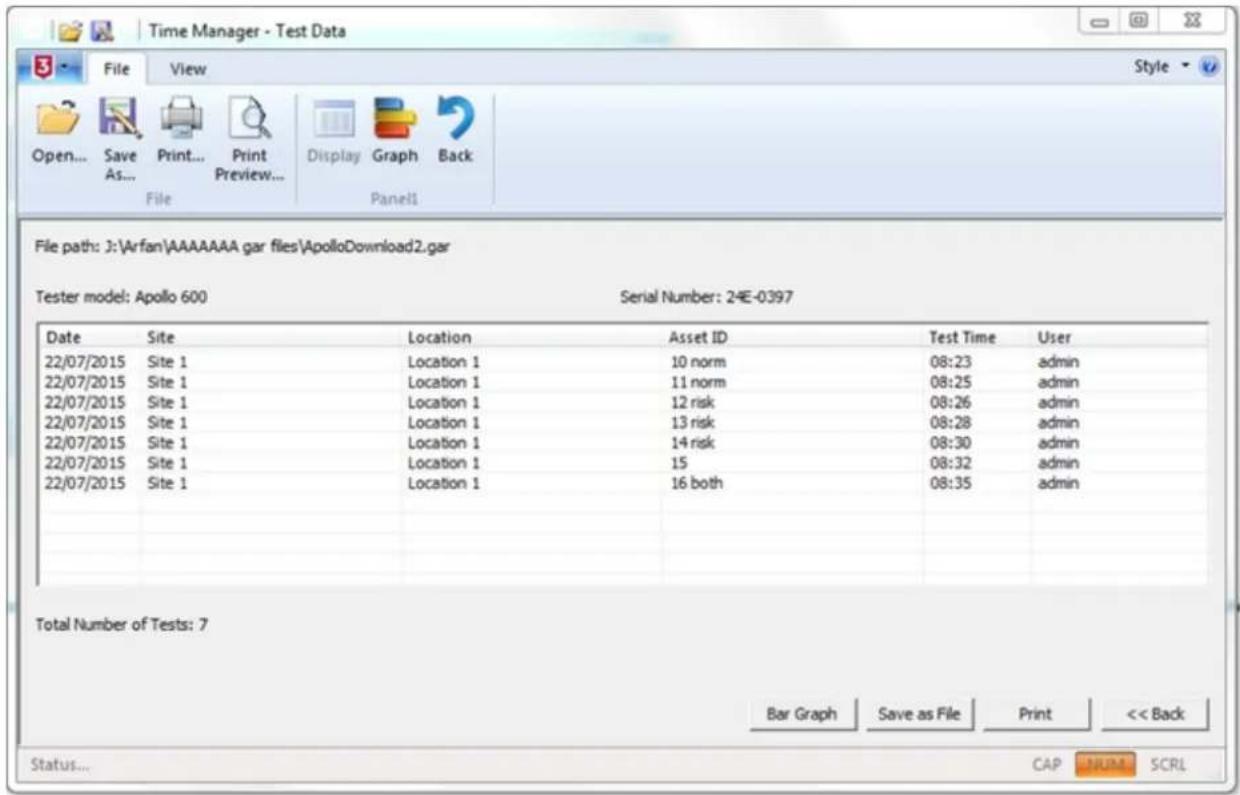
Test Data -Time Manager
This is the Test Data found in the file. Select bar Graph to display the data in a graphical format. The data can also be saved as a spreadsheet file (csv) by selecting Save as File. For a print out of the data select print. Select back to return to the Select dialogue box to choose other data selection criteria.
How to create a bar graph
3 How to create a bar graph
The bar graph will give a clear visual indication of the time the tester was in use by individual users. The graph has a resolution of two minutes i.e. no test action for two minutes or more will show as a break in the bar.

Bar Graph -Time Manager
Select print to obtain a print out of the bar graph. Select back to view the Test Data.
How to save the data
3 How to save the data
The Test Data information can be saved as a spreadsheet file (csv) to enable other data display options or to save the selected data as a record.


Save as icon and window -Time Manager
At the Test Data window select Save as File so the following Save As dialogue box is displayed. Save as File can also be launched from the save as icon or by selecting save as from the file drop down while the test data window is displayed. Choose a path and file name and select save to create the file.
How to print data

How to print the data
To print the Test Data, select the Print button at the test data or bar graph window. Print can also be launched from the print icon or by selecting print from the file drop down while the test data or bar graph window is displayed. All the Test Data displayed will be printed in a format similar to the Test Data or Bar Graph window.
A preview of the printed report is available while the Test Date or Bar Graph window is displayed, by selecting Preview from the File drop down.

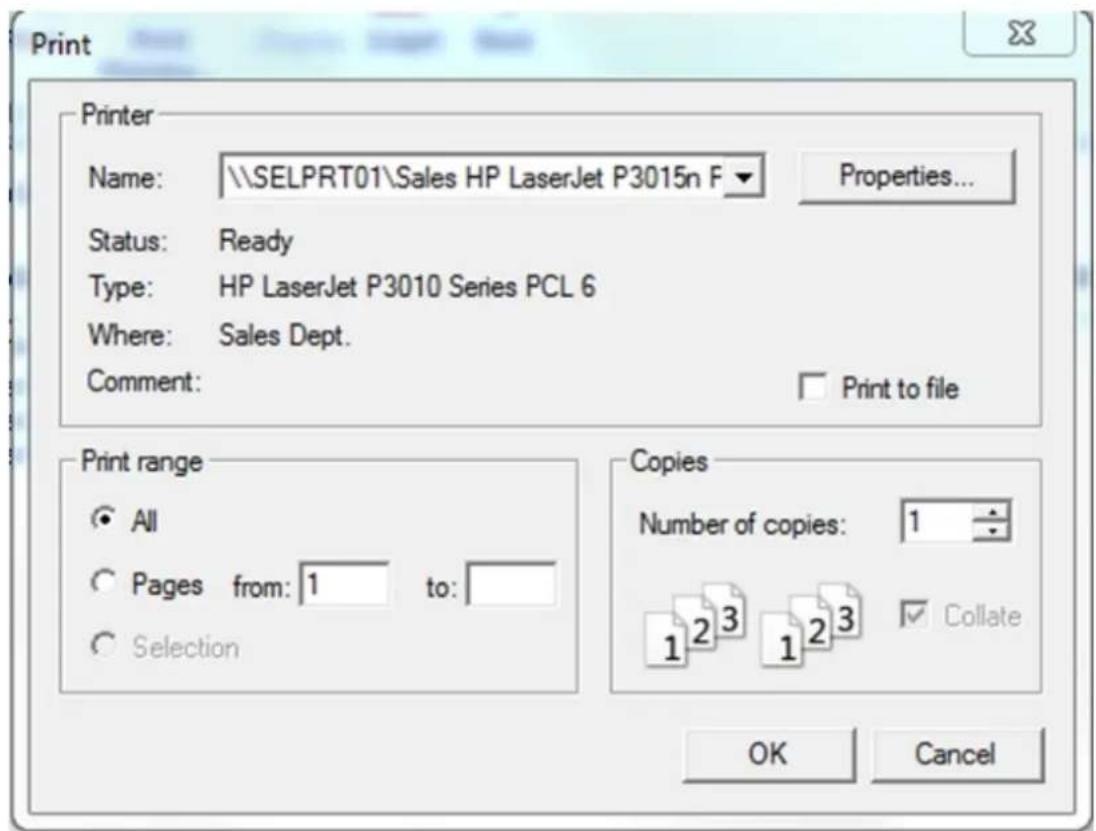
Print window -Time Manager
Support
3 Support
If you are having problems using PATGuard 3 software and cannot find an answer to your question in the Help file then you can contact Seaward.
To keep up to date with the latest PATGuard 3 news, get support from the Seaward team and other PATGuard 3 users, or to make suggestions for how we could improve PATGuard 3, please visit our online forum.
If you require technical support on any other Seaward products please visit our website which holds a bank of information on our testers, software and electrical safety testing in general.
Licensing
For specific queries about the PATGuard 3 licence, please refer to the following sections:
- Licence FAQs
• Licence Renewal - General FAQs
• Licence Agreement
General PAT FAQs
For help with general Portable Appliance Testing please see:
Our Guide to PAT Testing: http://www.seaward.co.uk/userfiles/pat-testing-guide.php
Our Guide to Testing Class 1 and Class 2 equipment: http://www.seaward.co.uk/downloads/3584_pat_posters_2011_layout_2_v2.pdf
Licence FAQs
3 Licence FAQs
How long is left on my licence?
Serial Number Confirmation
How many PCs can the licence be used on?
How do I transfer the licence?
How do I extend my licence?
How do I buy an additional licence?
What happens when my licence expires?
How long is left on my licence?
Select Licence... on the About Screen to open the Licence Viewer. The Licence Viewer will display a list of Modules, including PATGuard 3. Next to the PATGuard 3 Module will be a licence expiry date (31/07/2017 in the example below);

License Viewer screen
Serial Number Confirmation
To obtain your PATGuard 3 serial number:
(Note; the format should be something like xxF6x-xxxxx-0Alax-xxxxx-xxxxx-xxxxx).
This would be either on the card you were issued with or the email confirmation.
However, this can be found on the login page by selecting "Licence Viewer" (PATGuard 3 version 3.3.2 onwards) then expand all tick boxes under "Modules", "PATGuard 3" and your serial number will be displayed
Or
From within the software, select "Help" and "About PATGuard" the version can be seen in this window. Also on this screen, select "Licence" and then expand all tick boxes under "Modules", "PATGuard 3" and your serial number will be displayed
How many PCs can the licence be used on?
Each licence is for one standalone PC or network Server only. If used on a network Server the user will have a 'floating' licence that can be used on any PC on the network that has followed the instructions on the Installing on a network Workstation page.
Install examples for PATGuard 3 - Installation / licensing help
1, Standalone PC Install (requires one licence)
One licence can be purchased and then installed / activated on a single PC. This allows one copy of the software to operate on one PC, using one database at a time.
2, Standalone PC Installs (requires two or more licences – same for multiple standalone PCs)
One full licence plus additional PC licences can be purchased and then installed / activated on each individual PC. This allows each PC to use one copy of the software to operate, using one database each.
3, Network Install - option #1 (requires one licence)
Customer can purchase one licence and then install this version on a network server, after successfully installing on a server the customer can run / install the "Netsetup.exe" file on each "Workstation". This allows one copy of the software to operate at any one time, on one Workstation using one database.
4, Network Install - option #2 (requires one licence and additional network licences)
Customer can purchase one licence and then install this version on a network server, after successfully installing on a server the customer can apply additional licence keys (additional licences) and then run / install the "Netsetup.exe" file on each "Workstation". This allows more than one copy of the software to operate at any one time on multiple Workstations as directed by the number of additional licences, however, only one database can be accessed at any one time (however, multiple databases can be accessed).
How do I transfer the licence?
To transfer your licence to a different PC, select Deactivate Licence from this PC... at the Login screen.

Login screen
Following the on-screen instructions, PATGuard 3 will contact the Activation Service to deactivate your licence. Click End when complete.
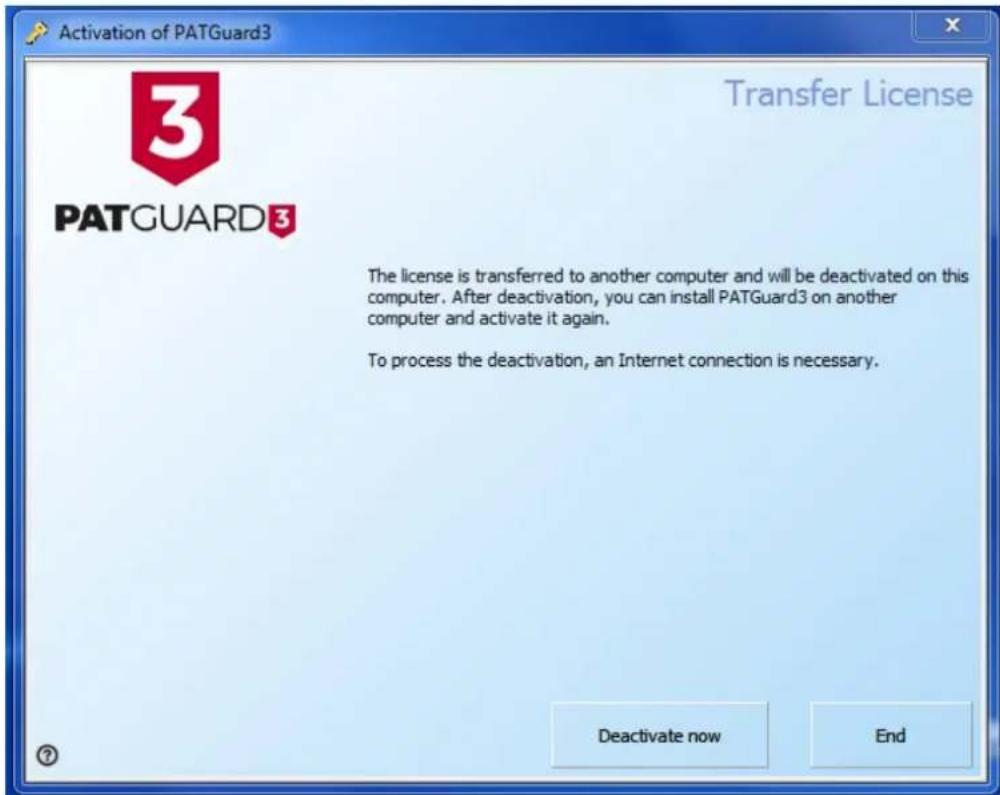
Online Deactivation
To reactivate on the same PC, select Reactivate Existing Serial Number on the login screen and follow the on-screen instructions.

Login screen after deactivation
How do I extend my licence?
During the last 30 days of your licence you will be shown the number of days remaining when you start PATGuard 3 and be given a link to follow to renew your licence. After expiry you will be reminded that the licence has expired - note you will not be able to purchase a renewal key after your licence has expired, please see What happens when my licence expires.
Note: renewal keys are in the following format: _C6_-44K_-0ADa_-5W36S-_P4SN-7_5z_
When you have purchased a new Activation Key, select Apply Renewal Key on the login screen.

Login Screen
Enter your Activation Key on the following screen and select OK.

Activation Key Entry
How do I buy an additional licence?
Additional Licences are only available to customers that already have a valid (not expired) licence. Customers should contact their Distributor or Seaward directly for more information.
What happens when my licence expires?
PATGuard 3 will become read-only until the licence is renewed. You will have view-only access to all data but will not be able to use any of the PATGuard 3 features.
Once your software licence has expired the only way to continue using it is to purchase a new serial number / licence. In order to use this new serial number you will first need to deactivate your old licence and then perform a new activation.
Deactivate your expired licence
Open up PATGuard 3 on your PC and in the login screen select 'Deactivate Licence from this PC...'.

Login screen
Select 'Deactivate now'.

Deactivation screen
You will require an internet connection to complete the deactivation. Click 'Next' to continue the process.
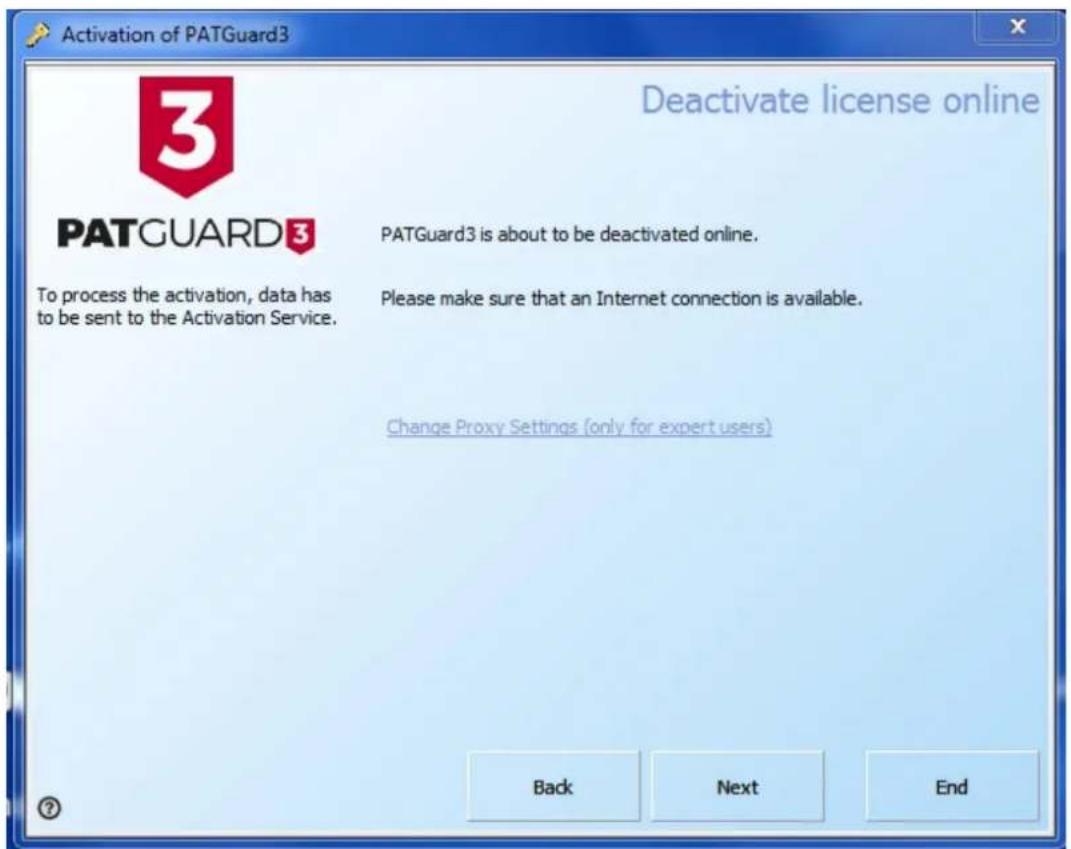
Deactivation screen
Once you have successfully deactivated the licence you will see the below message. Click 'End' to complete the process.

Deactivation screen
Activate your new serial number
You will now be taken back to the PATGuard 3 login screen. In this screen select 'Activate New Serial Number'.
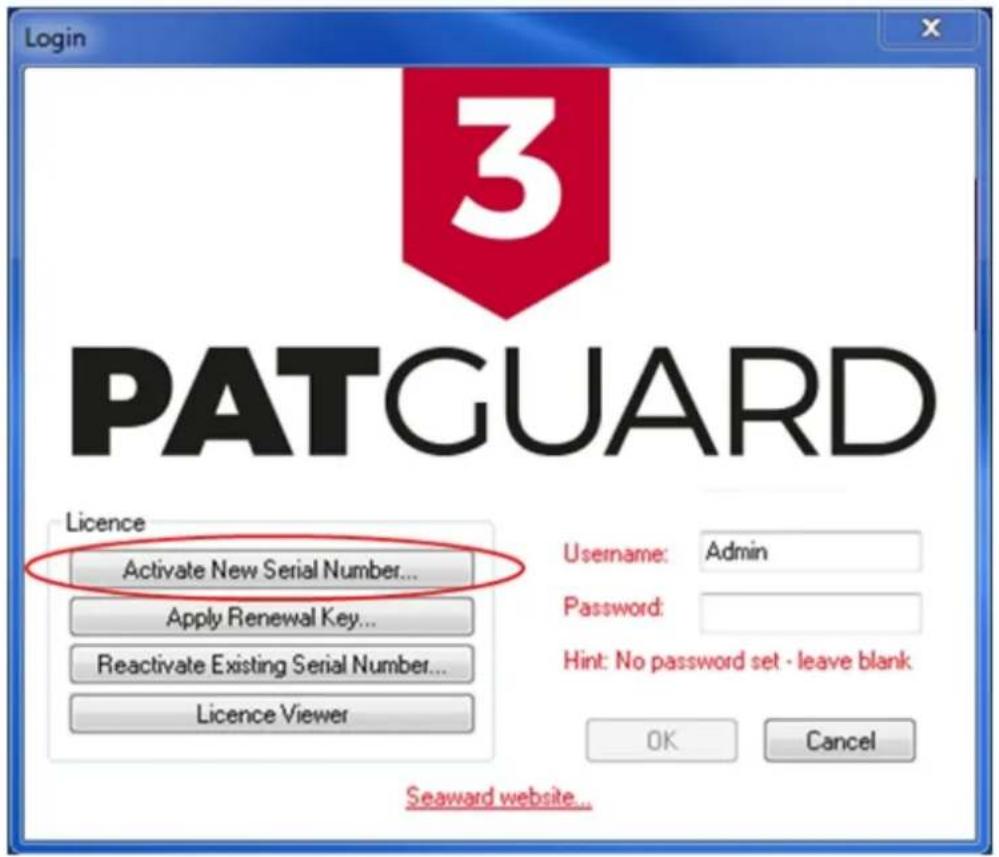
Login screen
You will be advised that a valid serial number is required to complete the action. If you have already purchased a new serial number from your distributor or online or are wishing to purchase your new serial number online then press OK. If you are yet to purchase a new serial number from your distributor then you will require this before you go any further. Press cancel, purchase your serial number and then repeat this process.

Activation warning message
With a valid serial number, select 'I have a Serial Number and I want to activate PATGuard 3' and follow through the activation process.

Reactivation selection screen
Licence Renewal

Licence Renewal
Renewing on a PC with internet access
Renewal keys are in the following format: _C6_-44K_-0ADa_-5W36S-_P4SN-7_5z_ if the key you have is not in this format then this may not be a renewal key and should not be used here - contact Seaward Support for help if you are not sure.
To renew on a PC with internet access, select Apply Renewal Key Renew on the login screen.

Login Screen
Enter your renewal key in the following screen and select OK:

Enter Activation Key
Select Activate now

Activation window
PATGuard 3 will contact the Activation Service to verify your Activation Key:

flowchart
graph LR
    A["Desktop Computer"] --> B["Server"]
    style A fill:#f9f,stroke:#333
    style B fill:#ccf,stroke:#333
Activation in progress
You will receive confirmation that Activation has completed successfully:
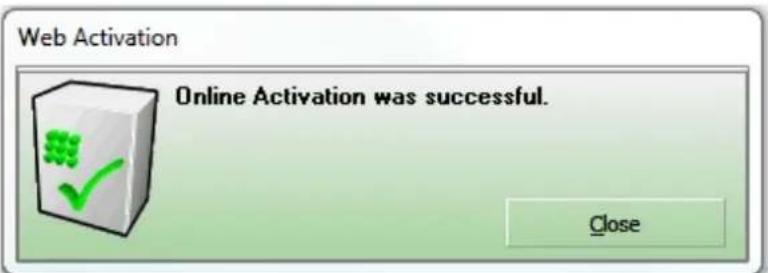
Activation Successful
The activation process will then take you through a process to backup your licence

Activation window
Finally, you will receive confirmation that Activation has completed successfully:

Activation Successful
Renewing on a PC without internet access
To renew on a PC without internet access, please contact Seaward Support.
General FAQs

General FAQs
Merging Databases Short Code Transfer Error while printing – (11) Asset Naming Changing Company Logos Licence Utility Certificate of Testing / Visual Only Tests Regarding Names used on the Apollo and downloading to PATGuard 3
Merging Databases
Before attempting the sequence below we recommend that you back-up all databases and also make sure you are using the latest version of PATGuard 3.
PATGuard 3 Elite has the ability to save a copy of a section of the database as a Briefcase file for other PATGuard database programs to open. PATGuard Elite can also send these files direct to an email program running on your PC.
Creating a pat file
Select a Client, Site or Location. The item selected and all lower level items will be copied. Choose Data Transfer and to File. Selecting File will cause a Save As... dialog box to be displayed. Select the path and File name where the file is to be saved. Briefcase files have a File Type of *.pat. Select Save to create the file.
Opening a pat file
From the File drop down box select Open... Select the path of the file you wish to open. Select the correct File of type. For Briefcase files this will be *.pat. Select the appropriate file. Then select Open. As the data is processed messages may appear if there is a conflict between existing data and the new data.
Note; this whole process must be done on exactly the same version of PATGuard 3.
Short Code Transfer
The short codes are not held in the database but in a dat file that stays with the programme. To use your existing PATGuard 2 short codes, please see the following:
This procedure is to transfer the short codes from an install of PATGuard 2 to PATGuard 3. Note this procedure will delete any company information or short codes that have been already been setup in PATGuard 3.
Ensure you have a copy of PATGuard 3 installed and working.
Make sure both PATGuard 2 and PATGuard 3 are closed.
If you performed a Network install for PATGuard 3 (this involves selecting the Network installation option during installation) then the file will be in the install folder you selected. If not, open Windows Explorer and continue below.
To open Windows Explorer, click Start, point to All Programs, point to Accessories, and then click Windows Explorer.
Windows 8 / 10
First you will need to show hidden files/folders. In Windows Explorer select "View" then select the "Hidden items" checkbox.
If PATGuard 3 was installed to the default location then the file will be in: C:\ProgramData\Seaward\PATGuard 3\appData
Windows 7
First you will need to show hidden files/folders. In Windows Explorer select "Organize" then select "Folder and search options". Select the View tab then in the Advanced Settings section select the "Show hidden files, folders, and drives" circular radio button option. Select Apply then OK.
If PATGuard 3 was installed to the default location then the file will be in: C:\ProgramData\Seaward\PATGuard 3\appData
Windows XP
If PATGuard 3 was installed to the default location then the file will be in:
Documents and Settings\All Users\Application Data\Seaward\PATGuard 3\appData
As a backup, in the above directory, rename the PATGuard3.dat (for example to _PATGuard3.dat or something similar).
Navigate to the PATGuard 2 install directory, the default being:
C:\Program Files\Seaward\PATGuard 2
Make a copy of the PATGuard.dat file and paste this file in to the following folder C:\ProgramData\Seaward\PATGuard 3\appData
In the above folder (C:\ProgramData\Seaward\PATGuard 3\appData) rename the PATGuard.dat to PATGuard3.dat
Reopen PATGuard 3 and the short codes should be in "File", "Setup" under the "PAT Options" tab
Error while printing - (11)
This is generally caused by the user not having a default printer set up on their PC. You need to set up a printer in the Control Panel – if you have an IT department they could do this for you.
Note, you do not need to have the printer connected to the pc, but the programme requires a have a default printer on the system.
Asset Naming
In general, assets are sorted by site location and then alphabetically or numerically depending upon how assets are identified - this method will sort by numbers first and then letters.
To print an asset register only in numerical order you will need to make sure your asset naming culture (identification) will allow this. For example; the asset numerical name should be the same to allow them to sort; 0001, 0002..... 0010 etc.
Changing Company Logos
To change the Company Logo on PATGuard 3 select "Setup" and in the "Company Details" section "Browse" for your new logo.
Note; the .jpg file for a new Company Logo needs to be;
Approx. 399 x 77 pixels and approx. 15kB in size (note we recommend trying to keep the image down to about 15k as if the logo is larger than this it will reduce the maximum number of pages that a report can be composed of).
Licence Utility
We have developed a file LlcUtility.exe as a tool that can be used if you have an issue with network installs and the software locking due to too many users.
The utility can be downloaded from http://www.seaward.co.uk/userfiles/LIC-Utility.zip
To run it you need to launch it from a machine where PATGuard is installed (either netsetup or standalone install, shouldn't matter as long as LicProtector313.dll has been registered with the operating system).

License Utility
Use the file selector button on the top right of the dialog to point at the PATGuard3.lic file on the server. At this point a list of connected users should be shown in the format "User+++Hostname". Selecting one of
these entries in the list and clicking deactivate will remove their entry from the licence file. There is no way of telling if the user is currently active or just a phantom connection left because their connection didn't close cleanly. If the user is currently active then their entry may well reappear within a minute or so if refresh is clicked.
Certificate of Testing / Visual Only Tests
Regarding the Certificate of Testing report and the "Valid Until" date:
The "Valid Until" date in the Certificate of Testing is taken from the data selected in the filter window, for example when filtering by "Client Name:", "Site Name:" or "Location Name:"
An issue can occur with the "Valid Until" date if you if you are performing "Visual" only tests or using the "Custom Inspection Form" on the Apollo 600.
If this is the case, you may need to change the status of the "Test Period". Note to check if this may need to altered see if there is an entry against the "Next Full Test Date" column of the data in PATGuard 3 (large right hand window column – if required you can select this by right mouse clicking on then column headers.
- Double click on an asset in the right hand window (of PATGuard 3) to open the "Asset Details" window
2, In the "Full Test" section the "Test Period" may be displayed as "User Defined" this will need to be changed to "No Re-Test". - The above process will need to be performed with all assets that have "Visual" only data.
Regarding Names used on the Apollo and downloading to PATGuard 3
Regarding names used on the Apollo Series and downloading to PATGuard 3:
In certain circumstances PATGuard 3 will not accept file / Site / Location names that contain Windows reserved names (for example, CON, PRN, AUX, NUL, COM... and LPT...), for more information see the following:
https://msdn.microsoft.com/en-gb/library/windows/desktop/aa365247%28v=vs.85%29.aspx
Licence Agreement
3 Licence Agreement
The licence agreement for PATGuard 3 can also be viewed from the About Screen.
Licence Agreement
Seaward Electronic Limited
Software Licence
IMPORTANT NOTICE - PLEASE READ THESE TERMS CAREFULLY BEFORE INSTALLING THE SOFTWARE.
This licence agreement (Licence) is a legal agreement between you (you or your) and Seaward Electronic
Limited of 18 Bracken Hill, South West Industrial Estate, Peterlee, County Durham, SR8 2SW with company number 01674384 (us, we or our) for:
• PATGuard 3 computer software (Software); and
• related materials and documentation (Documentation).
We licence use of the Software and Documentation to you on the basis of this Licence. We do not sell the Software or Documentation to you. We remain the owners of the Software and Documentation at all times.
This Licence applies to any trial use of the Software and Documentation, and any subsequent purchase of the Software and Documentation.
Important notice to all users
- By trialling, downloading, installing, ordering and using the Software through our website at www.seaward.co.uk (Website) you agree to the terms of this Licence which will bind you (and your employees where relevant). The terms of this Licence include, in particular, limitations on liability in condition 7.
- If you do not agree to the terms of this Licence, we will not license the Software and Documentation to you and you will not be able to continue with the download and installation process.
- Please note that the Seaward Returns Policy does not apply to the purchase of Software and Documentation. You have the right to cancel your transaction without charge and without reason before confirming your purchase of the Software or Documentation. However, you will lose your right to cancel your transaction once you accept this Licence as part of the purchase process. This will not affect any consumer rights in respect of defective downloaded Software or Documentation purchased through our Website.
You should print a copy of these Licence arrangements for future reference.
1. Supply of the Software
1.1 For the steps you need to take to arrange a trial and to place an order for the Software and Documentation through our Website, please visit www.seaward.co.uk/patguard3.
1.2 Our order process allows you to check and amend any errors before submitting your order to us.
Please take the time to read and check your order at each page of the order process.
1.3 After you place an order, you will receive an email from us acknowledging that we have received and accepted your order.
1.4 Our email will also confirm the details of the Software and contain a link from which the Software
and Documentation can be downloaded or provide an authorisation code following your trial of the Software (Order Confirmation). The Contract between us will only be formed when we send you the Order Confirmation.
2. Grant and Scope of Licence
2.1 In consideration of the payment of the licence fee for the Software and Documentation (Fee), we hereby grant to you a non-exclusive, non-transferable licence to download and use the Software and the Documentation on the terms of this Licence only for the duration set out in the Order Confirmation.
2.2 You may:
2.2.1 install and use the Software for your personal purposes (if you are a consumer) or your internal business purposes (if you are a business) only on one computer;
2.2.2 provided it is used on only one computer at any one time, transfer the Software from one computer to another by following the procedure on our Website;
2.2.3 provided you comply with the provisions in condition 3.1, make one (1) copy of the Software for back-up purposes;
2.2.4 receive and use any free supplementary software code or update of the Software incorporating "patches" and corrections of errors as may be provided by us from time to time;
2.2.5 use any Documentation in support of the use permitted under condition 2.2 and make one
(1) copy of the Documentation as reasonably necessary for its lawful use.
2.3 The Software requires the following minimum system requirements for its operation:
2.3.1 1 gigahertz (GHz) or faster 32-bit (x86) or 64-bit (x64) processor;
2.3.2 1 gigabyte (GB) RAM (32-bit) or 2 GB RAM (64-bit);
2.3.3 16 GB available hard disk space (32-bit) or 20 GB (64-bit);
2.3.4 DirectX 9 graphics device with WDDM 1.0 or higher driver;
2.3.5 .Net 4.0.
2.4 You acknowledge and agree that where your systems utilise Microsoft software, the Software can only be supported by us where such Microsoft software and systems continue to be supported by Microsoft.
3. Restrictions
3.1 Except as expressly set out in this Licence or as permitted by any local law, you undertake:
3.1.1 not to copy the Software or Documentation except where such copying is incidental to normal use of the Software or where it is necessary for the purpose of back-up or operational security;
3.1.2 not to sell, rent, lease, sub-license, loan, translate, merge, adapt, vary or modify the Software or Documentation;
3.1.3 not to make alterations to, or modifications of, the whole or any part of the Software nor permit the Software or any part of it to be combined with, or become incorporated in, any other programs;
3.1.4 not to disassemble, de-compile, reverse engineer or create derivative works based on the whole or any part of the Software nor attempt to do any such things except to the extent that (by virtue of section 296A of the Copyright, Designs and Patents Act 1988) such actions cannot be prohibited because they are essential for the purpose of achieving interoperability of the Software with another software program, and provided that the information obtained by you during such activities:
3.1.4.1 is used only for the purpose of achieving inter-operability of the Software with another software program;
3.1.4.2 is not disclosed or communicated without our prior written consent to any third party to whom it is not necessary to disclose or communicate it; and
3.1.4.3 is not used to create any software which is substantially similar to the Software;
3.1.5 to keep all copies of the Software secure and to maintain accurate and up-to-date records of the number and locations of all copies of the Software;
3.1.6 to supervise and control use of the Software and ensure that the Software is used by your employees and representatives (where appropriate) in accordance with the terms of this Licence;
3.1.7 to include our copyright notice on all entire and partial copies of the Software in any form; and
3.1.8 not to provide, or otherwise make available, the Software in any form, in whole or in part
PATGuard 3
(including, but not limited to, program listings, object and source program listings, object code and source code) to any person other than your employees without prior written consent from us.
4. How to Pay
4.1 The Fee for the Software and Documentation shall be as set out on our Website from time to time.
4.2 You shall pay to us the Fee as set out in the Order Confirmation, in advance, by PayPal or by debit and credit card. We accept the following cards: Visa, Visa Credit, Visa Debit, Purchasing Card and MasterCard.
4.3 All sums payable under this Licence are exclusive of VAT or any other relevant local sales taxes, for which you shall be responsible.
4.4 If you fail to pay any amount payable to us under this Licence, we may charge you interest on the overdue amount (payable immediately on demand) from the due date for payment up to the date of actual payment at the rate of 4% per annum above the base rate for the time being of the Bank of England. Such interest shall accrue on a daily basis and shall be compounded quarterly. As an alternative, and at our sole discretion, we may also claim interest under the Late Payment of Commercial Debts (Interest) Act 1998.
5. Intellectual Property Rights
5.1 You acknowledge that all intellectual property rights in the Software and the Documentation throughout the world belong to us (or our licensors), that rights in the Software are licensed (not sold) to you, and that you have no rights in, or to, the Software or the Documentation other than the right to use them in accordance with the terms of this Licence.
5.2 You acknowledge that you have no right to have access to the Software in source code form or in unlocked coding or with comments.
6. Limited Warranty
6.1 We warrant that:
6.1.1 the Software will, when properly used and on an operating system for which it was designed, perform substantially in accordance with the functions described in the Documentation; and
6.1.2 that the Documentation correctly describes the operation of the Software in all material respects
for a period of 90 days from the date of purchase of the Software and confirmation of acceptance of this Licence (Warranty Period).
6.2 If, within the Warranty Period, you notify us in writing of any defect or fault in the Software as a result of which it fails to perform substantially in accordance with the Documentation, we will, at our sole option, either repair or replace the Software.
6.3 The warranty does not apply:
6.3.1 if the defect or fault in the Software results from you having amended the Software;
6.3.2 if the defect or fault in the Software results from you having used the Software in contravention of the terms of this Licence;
6.3.3 if the defect or fault in the Software results from damage to the Software or your computer caused after you have downloaded the Software;
6.3.4 if the defect or fault in the Software results from installation on a system that is no longer supported by Microsoft; or
6.3.5 during any trial of the Software prior to purchase.
6.4 The Software may be used in conjunction with hardware supplied by third parties. Please refer to the manufacturer's guarantee (where relevant) for details.
6.5 If you are a consumer, this warranty is in addition to your legal rights in relation to Software that is faulty or not as described. Advice about your legal rights is available from your local Citizens' Advice Bureau or Trading Standards office.
7. Limitation of Liability
7.1 You acknowledge that the Software has not been developed to meet your individual requirements, and that it is therefore your responsibility to ensure that the facilities and functions of the Software as described in the Documentation meet your requirements.
7.2 If you are a business customer, we only supply the Software and Documentation for internal use by your business, and you agree not to use the Software or Documentation for any re-sale purposes.
7.3 We shall not under any circumstances whatever be liable to you, whether in contract, tort (including negligence), breach of statutory duty, or otherwise, arising under or in connection with the Licence for:
7.3.1 loss of profits, sales, business, or revenue;
7.3.2 business interruption;
7.3.3 loss of anticipated savings;
7.3.4 loss or corruption of data or information;
7.3.5 loss of business opportunity, goodwill or reputation; or
7.3.6 any indirect or consequential loss or damage.
7.4 Other than the losses set out in condition 7.3 (for which we are not liable), our maximum aggregate liability under or in connection with this Licence whether in contract, tort (including negligence) or otherwise, shall in all circumstances be limited to a sum equal to 100% of the Licence Fee. This maximum cap does not apply to condition 7.5.
7.5 Nothing in this Licence shall limit or exclude our liability for:
7.5.1 death or personal injury resulting from our negligence;
7.5.2 fraud or fraudulent misrepresentation;
7.5.3 any other liability that cannot be excluded or limited by English law.
7.6 This Licence sets out the full extent of our obligations and liabilities in respect of the supply of the Software and Documentation. Except as expressly stated in this Licence, there are no conditions, warranties, representations or other terms, express or implied, that are binding on us. Any condition, warranty, representation or other term concerning the supply of the Software and Documentation which might otherwise be implied into, or incorporated in, this Licence whether by statute, common law or otherwise, is excluded to the fullest extent permitted by law.
7.7 If you are a consumer, we are only responsible for loss or damage you suffer that is a foreseeable result of our breach of this Licence or our negligence up to the amount specified in condition 7.4, but we are not responsible for any loss or damage that is not foreseeable. Loss or damage is foreseeable if they were an obvious consequence of our breach or if they were contemplated by you and us at the time we granted you the Licence.
8. Duration and Termination
8.1 Unless terminated earlier in accordance with this condition 9, the Licence shall continue for the duration set out in the Order Confirmation, when it shall automatically terminate.
8.2 We may terminate this Licence immediately by written notice to you if you commit a material or persistent breach of this Licence which you fail to remedy (if remediable) within 14 days after the service of written notice requiring you to do so.
8.3 We may terminate this Licence where the Software has been installed on a system operating
Microsoft software, and that Microsoft software is no longer supported by Microsoft.
8.4 Upon termination for any reason:
8.4.1 all rights granted to you under this Licence shall cease;
8.4.2 you must immediately cease all activities authorised by this Licence;
8.4.3 you must immediately pay to us any sums due to us under this Licence; and
8.4.4 you must immediately delete or remove the Software from all computer equipment in your possession and immediately destroy or return to us (at our option) all copies of the Software then in your possession, custody or control and, in the case of destruction, certify to us that you have done so.
9. Communications Between Us
9.1 If you are a consumer, if you wish to contact us in writing, or if any condition in this Licence requires you to give us notice in writing, you can send this to us by e-mail or by pre-paid post to Seaward Electronic Limited at software@seaward.co.uk. We will confirm receipt of this by contacting you in writing, normally by e-mail.
9.2 If we have to contact you or give you notice in writing, we will do so by e-mail or by pre-paid post to the address you provide to us in your order for the Software.
9.3 If you are a business customer, please note that any notice given by you to us, or by us to you, will be deemed received and properly served immediately when posted on our website, 24 hours after an e-mail is sent, or three days after the date of posting of any letter. In proving the service of any notice, it will be sufficient to prove, in the case of a letter, that such letter was properly addressed, stamped and placed in the post and, in the case of an e-mail, that such e-mail was sent to the specified e-mail address of the addressee.
10. Events Outside Our Control
10.1 We will not be liable or responsible for any failure to perform, or delay in performance of, any of our obligations under this Licence that is caused by an Event Outside Our Control. An Event Outside Our Control is defined below in clause 10.2.
10.2 An Event Outside Our Control means any act or event beyond our reasonable control, including without limitation failure of public or private telecommunications networks.
10.3 If an Event Outside Our Control takes place that affects the performance of our obligations under this Licence:
10.3.1 our obligations under this Licence will be suspended and the time for performance of our obligations will be extended for the duration of the Event Outside Our Control; and
10.3.2 we will use our reasonable endeavours to find a solution by which our obligations under this Licence may be performed despite the Event Outside Our Control.
11. Other Important Terms
11.1 We may transfer our rights and obligations under this Licence to another organisation, but this will not affect your rights or our obligations under this Licence.
11.2 You may only transfer your rights or your obligations under this Licence to another person if we agree in writing.
11.3 If you are a business customer, this Licence and any document expressly referred to in it constitutes the entire agreement between you and us. You acknowledge that you have not relied on any statement, promise or representation made or given by or on behalf of us which is not set out in this Licence or any document expressly referred to in it.
11.4 If we fail to insist that you perform any of your obligations under this Licence, or if we do not enforce our rights against you, or if we delay in doing so, that will not mean that we have waived our rights against you and will not mean that you do not have to comply with those obligations. If we do waive a default by you, we will only do so in writing, and that will not mean that we will automatically waive any later default by you.
11.5 Each of the conditions of this Licence operates separately. If any court or competent authority decides that any of them are unlawful or unenforceable, the remaining conditions will remain in full force and effect.
11.6 If you are a consumer, please note that this Licence, its subject matter and its formation, are governed by English law. You and we both agree to that the courts of England and Wales will have non-exclusive jurisdiction. However, if you are a resident of Northern Ireland you may also bring proceedings in Northern Ireland, and if you are resident of Scotland, you may also bring proceedings in Scotland.
11.7 If you are a business customer, this Licence, its subject matter and its formation (and any non-contractual disputes or claims) are governed by English law. We both agree to the exclusive jurisdiction of the courts of England and Wales.

- Welcome
- PATGUARD
- About PATGuard
- How to use the Help file
- Accessing the Help file
- Context-sensitive help
- What if I still can't find what I need?
- Getting Started
- Setup Wizard
- About PATGuard 3
- A Risk-Based Approach
- Complete Health and Safety Management
- Compatible with Apollo 600
- Compatible with Apollo 500 or Apollo 400
- The About Screen
- The About Screen
- What's New & Revision History
- What's New
- Revision History
- Version 3.4
- General
- Fixes
- Version 3.3
- Reports
- Version 3.2
- Version 3.1
- Version 3.0
- PATGuard 3 Versions
- Tester Compatibility
- Tester Compatibility
- Download Compatibility
- Upload Compatibility
- Installing PATGuard 3
- Activating PATGuard 3
- - Setting up a Database
- - Setup Options
- Installing PATGuard 3
- Installing on a Standalone PC
- Installing on a Standalone PC
- Installing on a Network Server
- Installing on a Network Workstation
- Installing on a Network Workstation
- Activating PATGuard 3
- Activate Online
- Activate Online
- Entering Proxy Server Details
- Activate by Email, Fax
- Activate by Email or Fax
- Evaluation Period
- Setup Wizard
- Setting up a Database
- Setting up a Database
- Create a New Database
- Enter New Database Name
- Select an Existing Database
- Select existing database
- Upgrading / Importing a Legacy Database
- Method 1: Upgrading PATGuard 1 or PATGuard 2 Databases
- Method 2: Upgrading an Older PATGuard Database
- Method 3: Importing an Older PATGuard Database / a Database in Another Format
- Setup Options
- Setup Window
- Company Details
- Company Details
- Company Logo
- User Accounts
- Add new user
- Edit a user
- Delete a user
- Admin user
- Permissions level
- PAT Options
- Tester Output
- Code Abbreviations
- Code Abbreviations
- Code Abbreviation Category
- Adding a new Code Abbreviation
- Editing a Code Abbreviation
- Deleting a Code Abbreviation
- Asset Groups
- Asset Groups
- Pre-defined Asset Groups
- Type of Premises
- Adding an Asset Group
- Edit an Asset Group
- Delete an Asset Group
- Navigating PATGuard 3
- The Title Bar
- Ribbon
- Navigation Pane
- Main Window
- Short-cut Keys
- Quick-access Toolbar
- Minimise, Maximise and Close buttons
- Context Menu
- The Ribbon
- The Ribbon
- Application Button
- Minimising and Maximising the Ribbon
- File Menu
- Condensed View
- Open An Existing File
- File Types
- Find
- Find Next
- Asset View Filter
- Last Download Only
- Data Transfer Menu
- Data Transfer Menu
- Functions Menu
- Functions Menu
- Add Formal Visual Test Pass
- Add Formal Visual Test Pass confirmation
- Add Manual Test Results
- Create PATGuard Viewer CD
- Create Viewer CD Image window
- Changing Splash Screen
- Changing Company Logo
- Setting CD image directory
- Creating Viewer CD image
- Help Menu
- Style Options
- Default Style
- Optional Styles
- The Navigation Pane
- Tree View
- Instruments View
- Customising the Navigation Pane
- Customising the Navigation Pane
- Hiding functions
- Minimising functions
- Rearranging functions
- Recycle Bin
- Recycle Bin
- Restoring Assets or Hazards
- The Main Window
- Asset View
- Filtering the Asset View
- Sorting the Asset View
- Hazard View
- Site Reports View
- Personnel View
- Reports View
- PATGuard 3 functions
- Clients
- Adding Clients
- Client Details Window
- Personnel responsible for Client
- Changing Client Details
- Deleting Clients
- Sites
- Adding Sites
- Site Details
- Attaching photos to Site Details
- Personnel responsible for Site
- Changing Site Details
- Deleting Sites
- Locations
- Locations
- Adding Locations
- Location Details
- Attaching photos to Location Details
- Changing Location Details
- Deleting Locations
- PAT Testing
- PAT Testing functions
- Related activities
- Assets
- Viewing and Filtering Assets
- Manually Adding Assets
- Cloning Assets
- Asset Details
- Advanced Asset Details
- Retest Period
- Asset Notes
- Manually adding Test Results
- Adding a PAT Risk Assessment
- Deleting Test Results or PAT Risk Assessments
- Attaching photos to Asset Details
- Changing Asset Details
- Moving Assets
- Deleting Assets
- Test Results
- View Test Results
- Test Details window
- Attaching photos to a Test Result
- Delete Result
- PAT Risk Assessment
- PAT Risk Assessment
- PAT Risk Assessment window
- Attaching photos to a PAT Risk Assessment
- Universal Risk Assessment
- Universal Risk Assessment
- Universal Risk Assessment functions
- Hazards
- Hazards
- Manually adding Hazards
- Hazard Details
- Adding a Universal Risk Assessment
- Deleting a Universal Risk Assessment
- Changing Hazard Details
- Moving Hazards
- Deleting Hazards
- Perform Universal Risk Assessment
- Universal Risk Assessment window
- Add Action
- Attaching photos to Universal Risk Assessment
- Printing a Universal Risk Assessment
- Site Reports
- Site Reports functions
- Emergency Lighting
- Emergency Lighting Site Report
- Editing an Emergency Lighting Site Report
- Deleting an Emergency Lighting Site Report
- Printing an Emergency Lighting Site Report
- Fire Alarm
- Fire Alarm Site Report
- Editing a Fire Alarm Site Report
- Deleting a Fire Alarm Site Report
- Printing a Fire Alarm Site Report
- Address Book
- Address Book
- Navigation Pane - Address Book
- Internal Personnel
- External Personnel
- Adding Internal Personnel
- Adding Internal Personnel
- Internal Personnel Details
- Responsibility for Clients and Sites
- Changing Internal Personnel Details
- Deleting Internal Personnel
- Adding External Personnel
- Adding External Personnel
- External Personnel Details
- Changing External Personnel Details
- Deleting External Personnel
- Reports Functions
- List of Reports
- Generating a Report
- Generating a Report
- Reports Example - Certificate of Testing
- Saving Reports to a file
- PATGuard 3
- Saving a Report
- Printing Reports
- Emailing Reports
- Invoicing
- Invoicing
- Invoice Window
- Repair Management
- Repair Management
- Setting up Repairs
- Printing Repair details
- Editing Reports
- Editing Reports
- Copying a Report
- Editing a Report
- How do I Edit a Report
- Changing the Header Line
- Changing the Group Header
- Repeating the Changes in the Report Structure
- How to Shrink the Report Text to fit the Column Width
- Deleting a Report
- Restoring a Default Report
- Instruments
- Instrument functions
- Adding Test Instruments
- Adding Test Instruments
- Test Instrument window
- Instrument
- Calibration
- Communications
- Changing Instrument Details
- Deleting Instruments
- Entering Calibration Data
- Entering calibration data
- Test Certificate window
- Changing Test Certificates
- Deleting Test Certificates
- Adding Test Sequences
- Adding Test Sequences
- Test Sequence Details window
- Uploading Test Sequences
- Changing Test Sequences
- Deleting Test Sequences
- Data Transfer
- Data Transfer
- Downloading from Your Tester
- Downloading from Your Tester
- Downloading - Apollo Series
- Downloading the Data File from the Apollo Series Instrument
- Downloading the Apollo Data File to PATGuard 3
- Downloading - Supernova / Europa
- Downloading - Supernova / Europa
- Option1 - Straight Through RS232 connection
- Option2 - Using a USB Adaptor
- Downloading the Supernova / Europa into PATGuard 3
- Downloading - PrimeTest 350 / 300
- Downloading the PrimeTest 350 / 300 into PATGuard 3
- Downloading - General Instructions
- Finding the Correct COM port
- Finding the Correct COM port
- Preview (PAT Data Only)
- Duplicate Assets
- Duplicate Assets
- Uploading to Your Tester
- Uploading to Your Tester
- Uploading - Apollo Series
- Preparing the Apollo Series Instrument for Upload
- Setting up PATGuard 3 to Upload
- Completing the Apollo Series Upload
- Uploading - Supernova / Europa
- Uploading - Supernova / Europa
- Preparing the Supernova / Europa to Receive an Upload
- Preparing PATGuard 3 for an Upload from the Supernova / Europa
- Completing the Upload to the Supernova / Europa
- Uploading - PrimeTest 350 / 300
- Uploading - PrimeTest 350 / 300
- Preparing the PrimeTest 350 / 300 to Receive an Upload
- Preparing PATGuard 3 for an Upload from the PrimeTest 350 / 300
- Completing the Upload to the PrimeTest 350 / 300
- Uploading - General Instructions
- Export to File - PAT or CSV
- Export to File - PAT or CSV
- Exporting to .pat file
- Exporting to .csv file
- Email File - PAT or CSV
- Email File - PAT or CSV
- Import CSV
- Import CSV
- Backing Up Your Database
- Backing up your database
- Making a backup copy of your database
- Restoring your database from a backup copy
- Auto Scheduler
- Auto Scheduler
- Setting up a Schedule
- Setting up a schedule
- Auto Scheduler window
- Schedule launch settings
- Local launch
- Trigger Conditions
- Viewing a Schedule
- Viewing a schedule
- Printing a Task Checklist
- Printing a task checklist
- Uploading a Schedule
- Uploading a schedule
- Time Manager
- Time Manager
- Program Overview
- Note
- How to Open a file
- How to open a file
- How to select data
- How to select data
- How to test data
- How to create a bar graph
- How to create a bar graph
- How to save the data
- How to save the data
- How to print data
- How to print the data
- Support
- Support
- Licensing
- General PAT FAQs
- Licence FAQs
- Licence FAQs
- How long is left on my licence?
- Serial Number Confirmation
- How many PCs can the licence be used on?
- 1, Standalone PC Install (requires one licence)
- 2, Standalone PC Installs (requires two or more licences – same for multiple standalone PCs)
- 3, Network Install - option #1 (requires one licence)
- 4, Network Install - option #2 (requires one licence and additional network licences)
- How do I transfer the licence?
- How do I extend my licence?
- How do I buy an additional licence?
- What happens when my licence expires?
- Licence Renewal
- Renewing on a PC with internet access
- Activation window
- Renewing on a PC without internet access
- General FAQs
- Merging Databases
- Creating a pat file
- Opening a pat file
- Short Code Transfer
- Windows 8 / 10
- Windows 7
- Windows XP
- Error while printing - (11)
- Asset Naming
- Changing Company Logos
- Licence Utility
- Certificate of Testing / Visual Only Tests
- Regarding Names used on the Apollo and downloading to PATGuard 3
- Licence Agreement
- Licence Agreement
- Seaward Electronic Limited
- Software Licence
- IMPORTANT NOTICE - PLEASE READ THESE TERMS CAREFULLY BEFORE INSTALLING THE SOFTWARE.
- Important notice to all users
- Supply of the Software
- Grant and Scope of Licence
- Restrictions
- How to Pay
- Intellectual Property Rights
- Limited Warranty
- Limitation of Liability
- Duration and Termination
- Upon termination for any reason:
- Communications Between Us
- Events Outside Our Control
- Other Important Terms
Brand : Seaward
Model : PATGuard 3
Category : Software