
DWD-M221MB - Washing machine WINIA - Free user manual and instructions
Find the device manual for free DWD-M221MB WINIA in PDF.


| Product Type | Wall-Mounted Front Load Washer |
| Model | DWD-M221MB |
| Brand | Winia |
| Installation | Wall-mounted |
| Dimensions (W x H x D) | 550 x 600 x 302 mm |
| Weight | 16.5 kg |
| Power Supply | 240 V / 50 Hz |
| Power Input | 1500 W |
| Max Laundry Load | 2.0 kg |
| Water Consumption (Standard Course) | 25 L |
| Operating Water Pressure | 98.1 kPa ~ 784 kPa (1 ~ 8 kgf/cm²) |
| Wash Courses | Cold (Daily), Delicate, Baby Care, Drum Clean, Quick Wash, Intensive Wash |
| Additional Rinse | Yes, up to 5 added rinses |
| Child Lock | Yes (Button Lock) |
| Door Lock | Yes |
| Drum Type | Star Drum (concave-convex) |
| Motor | Low noise motor with vibration pad |
| Detergent/Softener Containers | Spoon-shaped, separate compartments |
| Transparent Door | Yes |
| Steam Wash | In Baby Care course (95°C) |
| Quick Wash Duration | 15 minutes |
| Cleaning Programs | Drum Clean cycle, manual cleaning of containers and filters |
| Safety Features | Grounding, child lock, door lock, automatic water shutoff |
| Included Parts | Inlet hose, drain hose, elbows (2), anchor bolts (4), screws (4), cushion pads (4), user manual, installation manual |
| Repairability | Contact service center; do not disassemble without professional |
Frequently Asked Questions - DWD-M221MB WINIA
User questions about DWD-M221MB WINIA
0 question about this device. Answer the ones you know or ask your own.
Ask a new question about this device
Download the instructions for your Washing machine in PDF format for free! Find your manual DWD-M221MB - WINIA and take your electronic device back in hand. On this page are published all the documents necessary for the use of your device. DWD-M221MB by WINIA.
USER MANUAL DWD-M221MB WINIA
natural_image
Front view of a modern smart air conditioner unit with a central logo and control buttons (no readable text or symbols on the device itself)

DWD-M221MB
* mini is the world's first wall-mounted front-load washer developed by WINIADAEWOO.
- As this product undergoes a functional test, a small amount of water may remain in the product.
- Store the user manual in an easily reachable place for later use.
- Please read 'Safety Instructions' carefully before use.
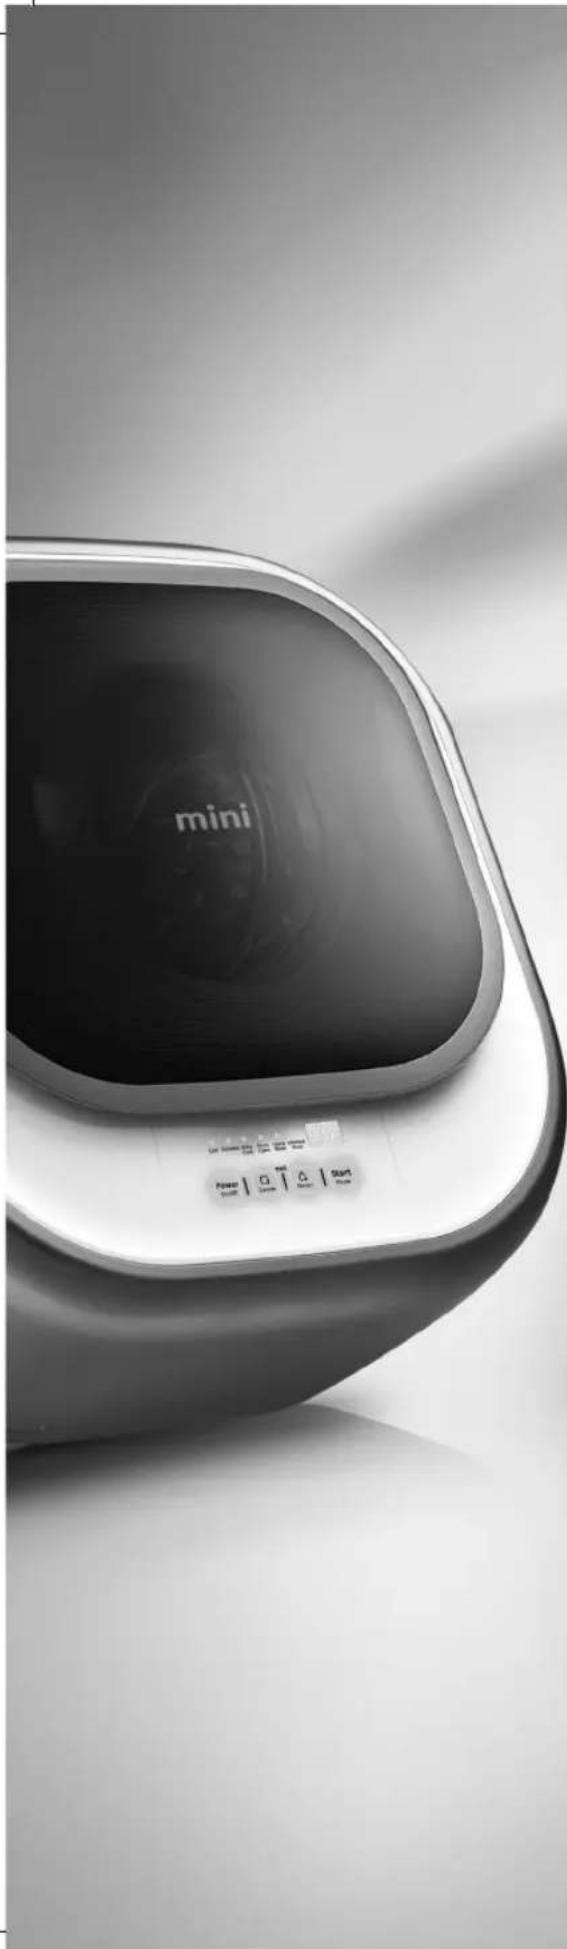
natural_image
Top-down view of a modern smart air conditioner unit with control buttons and 'mini' branding (no readable text beyond branding)

World's First Ever Design
mini is a unique home appliance featuring an innovative design and practical functions.
Wall-Mounted Front-Load Washer
mini is the world's first ever wall-mounted front-load washer, which is installable in bathroom, pantry, kitchen and various locations.
Ultrasmall Design
mini features a cute and adorable design in a stable cubic frame and harmonious colors to help decorate house interiors.
Mini's Practical Function
WINIADAEWOO cutting-edge technologies apply to mini, featuring a variety of essential functions for better everyday lives.
CONTENTS
Preparation
Product Features 4
Safety Instructions....5
Preparation....10
Parts and Components.... 11
Washable Items....12
Non-Washable Items 12
Preparing Clothes for washing 13
Directions on Detergent and Softener Containers....14
Washing Course 15
Use
Buttons and Functions....16
Cold 17
Delicate....18
Baby Care....19
Drum Clean 20
Quick Wash 21
Intensive Wash 22
Q&A on Laundry 23
Cleaning 24
Installation Guide....25
Installation
When malfunctions are suspected 28
Before calling for service 29
Specifications and Wiring Diagram.... 30

Product Features
mini's unique functions for faster and powerful cleaning of various fabrics

natural_image
White square-shaped device with a black screen displaying the word 'mini' (no additional text or symbols visible)Daily Wash
Remove laundry quickly and keep indoor air fresh, washing daily laundry of towels, underwear, shirts, and socks frequently
15 Minute Economic & Quick Wash
Save time by washing in 15 minutes with Normal cycle and Consume only 1/6 of energy that large capacity front-load washer's use
Baby Care
mini washes baby clothes softly with steam and rinses them completely to protect soft and sensitive baby skin
Delicate Cleaning for High Quality Clothes
mini washes delicate blouse, knitwear, underwear and stockings requiring a hand wash smoothly and carefully.
Low Noise Motor
mini's customized low-noise motor reduces noise during wash and the rubber pad prevents vibrations to ensure silent washing.

Spoon-Shaped Detergent Container
mini Containers for detergent and softener are discretely designed to prevent mixture. The spoon-shaped design enables you to apply the proper amount of detergent conveniently.

Star Drum
Star Drum-shaped concave-convex drum prevents damage to fabric to keep clothes fresh.


Transparent Door
Transparent door allows you to view the contents and check laundry process.
Child Protection
'Button Lock' and 'Door Lock' functions are applied in order to prevent kids from touching buttons and opening doors during in operation.

Cleaning Programs
mini features normal, delicate, baby care, drum clean, quick wash and intensive wash for various cleaning purposes and fabrics.

Normal

Delicate

Baby Care

drum
clean

Quick Wash

intensive Wash

Safety Instructions
This appliance is not intended for use by persons (including children) with reduced physical, sensory or metal capabilities, or lack of experience and knowledge, unless they have been given supervision or instruction concerning use of the appliance by a person responsible for their safety.

Warning
Cautionary information on cases that may cause death or severe personal injuries

Caution
Cautionary information on cases that may cause minor personal injuries or damage to products
Warning

natural_image
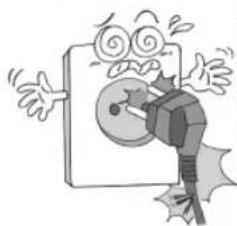
Cartoon illustration of a character holding a key, with expressive eyes and a leaf (no text or symbols)Do not use the washer when the power cord is damaged or loosely plugged in.
Violations may cause electric shock, short circuit, or fire.
Contact a sales store to request the maintenance service.

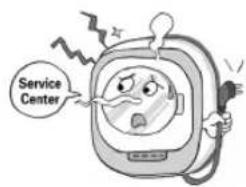
If the washer doesn't run or smokes or unusual smells occur, unplug the washer and contact the service center promptly to prevent accidents.
Violations may cause electric shock, short circuit, or fire.

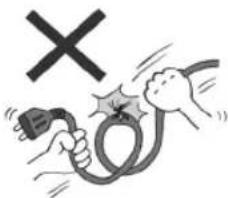
Do not scratch, damage, deform, bend, pull, twist, or tie the power cord. Do not place or insert a heavy item on the cord.
Violations may damage the power cord, raising the risk of fire and electric shock.


natural_image
Cartoon illustration of a hand holding a device with a megaphone and a large 'X' symbol (no text or symbols on the device itself)Do not unplug or plug the cord with wet hands.
Violations may cause electric shock.


natural_image
Cartoon illustration of a smiling computer with a 'OK!' sign and a smiling document, no text or symbols present.Ensure that the power voltage, frequency, and current match the product's specification.
Violations may cause fire and electric shock.


Do not disassemble, repair, or rebuild the washer without the assistance of service engineer.
Violations may cause fire, electric shock, and personal injuries.
Contact a sales store or read the back page of user manual to request the maintenance service.

Safety Instructions
Warning

natural_image
Cartoon illustration of a smiling computer monitor with a phone connected to an electrical outlet, no text or symbols present.Insert the plug with 10A or higher in the outlet directly.
Multiple connections to a single outlet may cause fire due to heat.

natural_image
Cartoon illustration of a smiling child inside a TV with a prohibition symbol above (no text or symbols on the main subject)Unplug the cord and open the window for ventilation without touching any buttons if a gas leak occurs.
Violations may cause a spark and, accordingly, explosion, fire, or burns.

natural_image
Illustration of hands using a handheld device to interact with a surface, no text or symbols presentIf the power cord pin is contaminated with dust or water, wipe the pin clean with a dry cloth before use.
Violations may cause fire.

natural_image
Cartoon illustration of a smiling robot with arms and legs, standing on a ruler with a no-smoking symbol above (no text or labels)Electrical grounding is required for safety.
Technical problems or short circuits may cause electric shocks.
Read user manual or contact the service center with further inquiries on grounding method.

natural_image
Cartoon illustration of a distressed face with sweat drops and a circular symbol above (no text or symbols)Do not expose the washer to rain or wind.
Violations may cause electric shock, fire, technical problems, or deformation.

Do not place gasoline, petroleum, benzol, thinner, or alcohol inside or beside the washer. Do not place laundry containing such materials inside or beside the washer.
Violations may cause explosion or fire.

Unplug the power cord before cleaning or maintenance work.
Violations may cause electric shock or injury.
Do not sprinkle water on the washer. Violations may cause short circuit or electric shock.
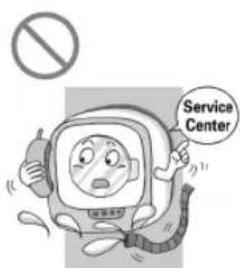
Do not enter the laundry room and contact the service center, if the washer is submerged in water as the water supply hose was dislocated.
Violations may cause electric shock.
natural_image
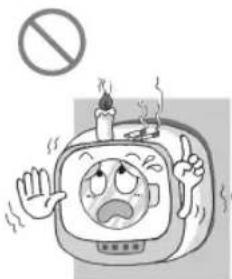
Cartoon illustration of a distressed TV with steam and smoke, no text or symbols presentDo not install the washer near a heater and do not place candles or cigarettes on the washer.
Violations may cause fire or deformation.
Water pressure for proper operation of the equipment is 50kPa \~ 800kPa. Use the supply hose and the water hose connection with SET equipment SET is not reuse old hoses

Safety Instructions
Warning

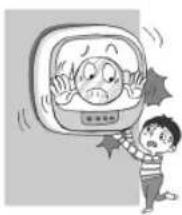
Do not place your hands or metal objects below the washer while the washer is running.
natural_image
Cartoon illustration of a boy reacting to a distressed face on a wall, with another boy looking up at his head (no text or symbols present)Violations may cause personal injuries.

With 'Door Locked', do not open the door by force.
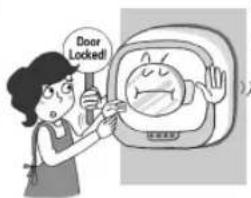
Violations may destroy the door or lock, causing technical problems.

Prohibit children from operate the washer. Do not let children stand on the washer or insert their head into the tub at any time.

natural_image
Illustration of a girl pushing a large door with a face mask (no text or symbols)Violations may cause personal injury, burn, or electric shock.

Prevent children from having their hands jammed in the door and approaching the washer.
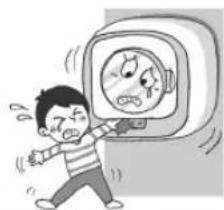
natural_image
Cartoon illustration of a boy reacting to a large wall-mounted device with a face inside (no text or symbols)Violations may cause personal injuries.

Do not insert hands, sticks or metal objects into the tub or touch laundry during operation.
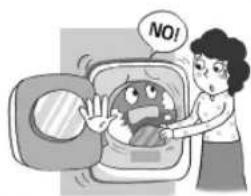
natural_image
Illustration of a woman washing clothes inside a washing machine with a 'NO!' speech bubble (no text on the image itself)Violations may cause personal injuries.

Children or people who are not well-informed of use method must not use the washer.
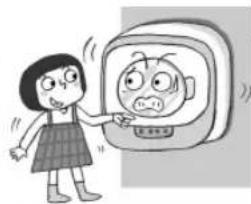
natural_image
Cartoon illustration of a girl pointing at a surprised emoji on a computer monitor (no text or symbols)Violations may cause burn, electric shock, or injury.

Install the washer where the electric outlet is easily accessible. Unplug the power cord if the washer is not to be used for a long time.

natural_image
Illustration of a washing machine with a close-up of its side, connected to a small device (no text or symbols present)Violations may cause electric shock, short circuit, or fire. Hold the plug firmly when unplugging the power cord.

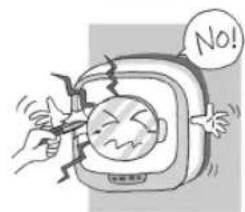
Do not press the button with sharp object.
natural_image
Cartoon illustration of a distressed face inside a TV with hands holding a tool, no text or symbols presentViolations may cause electric shock.

Safety Instructions
Caution

Turn on the tap to check for leaks before use.
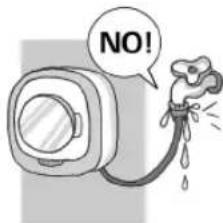
Improper connection may cause leaks.

Prevent pets and animals from entering the washer tub.

natural_image
Cartoon illustration of a cat emerging from a large shell with a crossed-out arrow (no text or symbols)Violations may cause injuries.

Do not operate the washer with the detergent or softener container detached.

Detachment of the detergent or softener container causes water leaks during operation. Please close the detergent and softener containers tight.
Leaks may cause personal injuries.

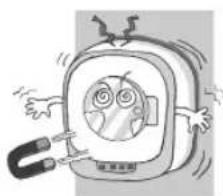
Do not place magnets beside the cap or the washer during operation.
natural_image
Cartoon illustration of a backpack character with a surprised expression and a small object attached (no text or symbols)Violations may cause malfunctioning of 'Door Lock Sensor' and personal injuries accordingly.

Install the washer on a solid wall and even.
Violations may cause abnormal vibrations or noise.

Do not use laundry net for wash.

natural_image
Cartoon illustration of a smiling computer monitor character with arms outstretched (no text or symbols)[Non-Text]

Violations may cause abnormal vibrations, which can lead to damage wall or cause personal injuries.

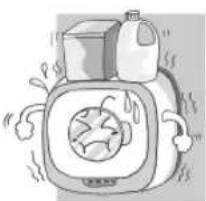
Do not stand on the washer or place a heavy item on it.
Violations may destroy the washer or cause personal injuries.
natural_image
Cartoon illustration of a washing machine with a lid and steam rising (no text or symbols)Prevent children from hanging on the washer. Violations may cause injuries.

Contact the service center and do not operate the washer when it is slanted or out of horizontal.

natural_image
Cartoon illustration of a distressed character inside a computer monitor, surrounded by expressive motion lines (no text or symbols)Violations may cause injuries.

Safety Instructions
Caution


natural_image
Illustration of a hand washing a smiling face on a device (no text or symbols)Remove any detergent residue or contaminants on the washer with a wet soft cloth.
Remaining contaminants may deform plastic parts.

Close the door carefully to prevent laundry from getting jammed in the door.
It may cause damage to clothes or malfunction.

natural_image
Cartoon astronaut character in a spacesuit waving, with motion lines indicating speed (no text or symbols)
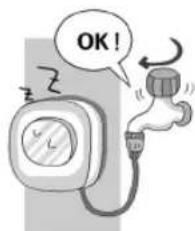
Turn off the tap after use.
It aims to prevent leaks caused by poor inlet hose connections.

Press the Start button after turning off the tap and then slowly turn it on when the water supply resumes or the inlet hose is reconnected (or when resuming the use of washer after a long-term suspension)
The high air pressures built in inlet hose or water pipes may damage the washer, causing leaks or personal injuries.

natural_image
Simple line drawing of a cow with an arrow indicating rotation (no text or symbols)

Do not use the washer to wash non-clothing items. (Footwear, potato, cabbage, kelp, etc.)
Violations may cause abnormal vibrations, damage the washer or cause personal injuries.

Put detergent and softener in detergent and softener containers separately.
Confusion or mixture may prevent laundry from being washed properly.

natural_image
Cartoon illustration of a smiling robot with arms and legs, holding bottles (no text or symbols)

Do not wash waterproof clothes and items such as raincoat, car cover, and sleeping bags.
Violations may cause abnormal vibrations during spin, which may lead to personal injuries.
Violations may cause abnormal vibrations during wash, which may lead to damage the wall, floor, or clothing and cause part abrasion.

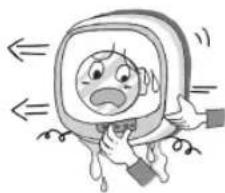
Remove all liquid detergent and fabric softener in the washer when relocating it.
Violations may cause liquid leaks and malfunctions.
natural_image
Cartoon illustration of a distressed face inside a helmet with hands holding the mouth (no text or symbols)
Preparation

natural_image
Exterior view of a modern white appliance with a black screen and 'mini' label (no additional text or symbols visible)1 Connect the drain hose to the drain.
- Check that the drain hose is tightly connected.
- A minor water leak may occur during installation or the initial cycle. The leak is caused not by a malfunction or a mechanical problem but by the remnant for functional test performed at the manufacturing plant.
2 Connect the inlet hose and turn on the tap.
- Check whether any leaks occur around the hose guide or inlet hose connection.
3 Plug in the power cord.
- Check the grounding procedure to prevent electric shocks.

natural_image
Woven basket with woven pattern and light blue cover (no text or symbols)
Caution
- This washer is available for use with cold water only. Do not connect the inlet hose to the hot water tap.
| 10 | mini

Parts and Components


Power Cord

Cold Water Tap (Turn off the tap after cleaning cycle is complete)
Parts
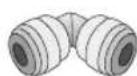
Elbow (2 units)

Drain hose Inlet hoseAnchor bolt (4 units)
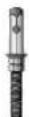

Connector valve inlet


Screw (4 units)

Cushion pad (4 units)

User manual Installation manual


natural_image
Two interlocking gears in grayscale, no text or symbols present
Note
Additional inlet hoses and drain hoses (for extension) are available for purchase at service centers.
Washable Items
Washable Items
- Underwear and socks
- Dress shirts and T-shirts
- Towel, handkerchief, pillow cover, kitchen towel, and dust cloth
-
Baby clothes, nappies, and underwear
-
High-quality clothes such as blouse, knitwear, and wool clothing
- Women's wear such as lingerie and stockings
Non-Washable Items
Leather and silk items
- Product such as pillow and comforter padded with cotton or foamed urethane (sponge)
- All-wool blanket, electric blanket, blanket with a hair length of 10mm or longer, and carpet cover
-
Mat and carpet made of animal hair
-
Wash supplements for commercial sales (laundry ball, dust absorption filter, etc.)
- Rubber, nylon, and plastic items
- Waterproof mat, sheet, or clothing
About Laundry Shrinkage
Laundry shrinkage varies by the wash cycle, type of fabric, weaving and sewing methods, and finishing. Please examine the laundry guides before wash.
- Easily shrinkable items: Cotton shirts, synthetic socks, etc.
- Shrinkage-free items: Polyester blouse, synthetic shirts (shirts), etc.
Preparing Clothes for washing
☐ Waterproof mat or sheet, solid and heavy clothes, doormat, and blanket, and non-permeable fabric products are not suitable for washing, rinsing, or spinning.
- Floating laundry or abnormal vibrations may cause personal injuries or damage to the washer, wall, floor, and clothes.
Remove dust and sand from the laundry before use.
- Removal reduces the risk of malfunction.
Remove coins, hairpins, curtain attachments, and clips from the laundry.
- The metal items may damage clothes and washer or cause malfunctions.
- The metal items may cause dust or trash clogs in the drainage, which leads to mechanical problems with the washer.
Check the laundry guide labels.
- Wash the clothes as specified in the guides. Wash the colored and white clothes separately.
Reverse fluffy clothes before washing. Sort the clothes by fabric type before washing (cotton, jean, synthetic fabrics, etc.)
- Mixture may cause damage to fabrics.
Hand-wash partially contaminated clothes before using the washer.
- Use stain removal detergents or bleaches.
C Tie strings and close zippers.
- It may cause damage to the clothes or the washer.
Do not wash thick or voluminous clothes in the washer. (Jeans, bathing gown, bathroom mat, thick sportswear, etc.)
- As thick clothes are not evenly washed in the tub, vibrations increase during the spin cycle.



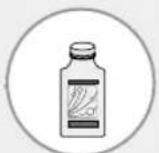


Directions on Detergent and Softener Containers
Spoon-Shaped
Detergent Container
Softener Container
natural_image
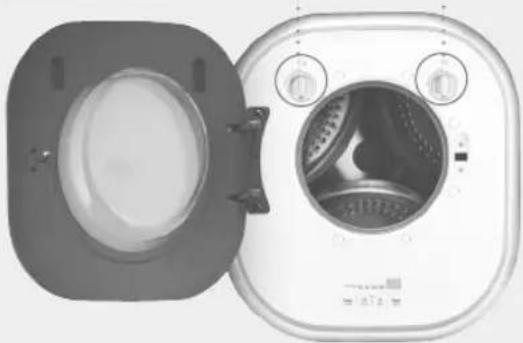
Exterior view of a modern kitchen appliance with open lid and side panel (no visible text or symbols)■ Open :Turn the detergent and softener containers counterclockwise and then pull them.
■ Close : Turn the detergent and softener containers clockwise to close them tight and then run the washer.

Addition of Detergent
Add detergent as recommended to the detergent container.

natural_image
Close-up of a metallic mechanical component with a circular outline (no text or symbols visible)
Caution
Wait! Please read the following instructions before applying detergent.
- Do not add detergent more than once to the detergent container. If the washer is not heavily loaded, a half-full detergent container is sufficient for washing.
- Remove detergent remnants from the door or control panel immediately. Such contamination may cause damage to the washer.
- Wet detergent container may harden the contents. Wipe the container with a dry cloth carefully before adding powder detergent.
- Overloading may cause the following problems and malfunctions.
• Overloaded detergent causes excessive foam, which lengthens the rinse cycle and disturbs the normal rinse and spin cycles.
- Foam may remain on clothes even after rinsing.
- Detergent container is exposed to contamination or detergent remnants. You can keep it clean with weekly cleanings.
- Water may remain in the container after a wash cycle. As it is caused by the process of cleaning detergent and softener containers, it is not the remnant of detergent or softener. Remove water before starting a wash cycle.

Addition of Fabric Softener
- Add softener as recommended to the softener container.
- Fabric softener is automatically discharged during the final rinse cycle.
- Do not leave fabric softener unused for a lon period (12 hours or longer).
- Fabric softener may get hardened and not be discharged.
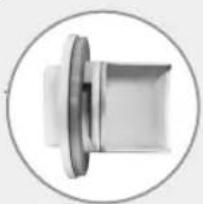
natural_image
Close-up of a mechanical component with a circular outline (no visible text or symbols)
Proper Amounts of Detergent and Fabric Softener
- Add detergent and softener as recommended in the product manuals.
-
Powder detergent: 2/3 of detergent container (11g)
-
Liquid detergent: 2/3 of detergent container (12g)
- Fabric softener: 1/2 of softener container (6g)
- Add concentrated detergent as recommended in the product manual.

Detergent Fabric Softener
Washing Course
| Cold Delicate Baby Care | Quick Wash | Intensive Wash | Load Recommendations | |||
| Cotton shirt (150g) | ●●● | 11 to 12 shirts | ||||
| A pair of socks (50g) | ●●● | 19 to 20 pairs | ||||
| Underwear set (50g) | ●●● | 9 to 10 sets | ||||
| Towel (150g) | ●●● | 8 to 9 sheets | ||||
| Kitchen towel (25g) | ●●●● | 16 to 17 sheets | ||||
| Baby clothes (150g) | ●●●● | 7 to 8 items | ||||
| Diaper (50g) | ● | 9 to 10 sheets | ||||
| Dress shirt (200g) | ● | ● | 4 to 5 shirts | |||
| Swimsuit (100g) | ● | 4 to 5 items | ||||
| Long underwear set (400g) | ● | 3 to 4 sets | ||||
| Knitwear (350g) | ● | 1 to 2 items | ||||
| Handkerchief (10g) | ●●● | 16 to 17 sheets | ||||
| Stockings (80g) | ● | 9 to 10 pairs | ||||
| Pants (600g) | ●●● | 1 to 2 pants | ||||

Note
- Wash your clothes as recommended in the manual.
- Overloading may reduce the washing efficiency or cause abnormal vibrations.
- Apply the recommended Course. Other Course are available for use.
(Fabric deformation may occur because of the type of fabric)
Laundry Weight (Standards)

Baby clothing set Approx. 200g in cotton

Bath towel
Approx. 300g in cotton
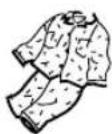
Sleepwear set
Approx. 500g in cotton

Panties
Approx. 50g in cotton

Dress shirt Approx. 150g in synthetic fabrics

Pants
Approx. 600g in cotton

Underwear
Approx. 130g in cotton

Baby towel
Approx. 10g in cotton

Buttons and Functions
Cold
Delicate
Baby
Care
Drum
Clean
Quick
Wash
Intensive
Wash

5
Power
On/Off


Course


Rinse+


Start
Pause

① Power
- Use the Power button to turn the washer on or off.
② Course
- Press the Course button to select a cycle.
- Course lamps indicate the selection.
③ Add Rinse
- Press the Add Rinse button to add a rinse cycle after selecting a wash cycle. (Up to 5 cycles addable)
④ Start/Pause
- Press the button to start the cycle.
- The washer runs and stops alternately when the press is pressed.
- If you press the "Start/Pause" button after turning on the washer, the normal cycle starts.
⑤ Display LED
- LED displays cleaning time and Course information.
⑥ Child Lock (Button Lock)
- Press the Child Lock button to prevent your kids from controlling the washer.
- In Child Lock mode, only the Power button is available for use.
- Press the Course and Rinse button for 3 seconds to lock or unlock the mode.

natural_image
White square-shaped device with a dark screen displaying the text 'nati' (no visible text or symbols on the device body)
Note
- Push the door slightly if the door is not easily opened after the completion of washing.
- If 'Door Lock' is not working due to the overloading of laundry or incomplete door closing, push the door slightly.
- You can open the door of running washer about 5 minutes after a power interruption.
- Please open the door carefully for safety if the washer stops running during a wash or rinse cycle because of a power interruption. (Reset the 'Door Lock' mode if it remains unsafe after power supply resumes)

Cold
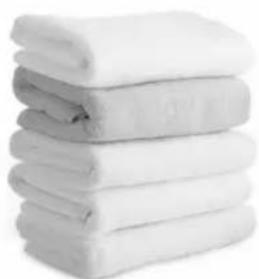
Select the Cold Course for daily laundry (towel, socks, and dress shirts) and other regular items.

1 Open the door and load the washer with clothes. Add detergent and fabric softener into the detergent and softener containers respectively and then close the door.
- Turn detergent and softener containers clockwise to close them tight before use.
2 Press the Power button slightly for a second.
3 Press the Course button to select 'Cold'.
- Cold water, two rinse cycles, and strong spin cycle are selected automatically.
Press the Add Rinse button to change the number of rinse cycles. (Up to 5 rinse cycles are available)
Tip
4 Press the Start/Pause button.
- The wash cycle starts with water supply after the door is locked.
natural_image
Stack of white fabric or towel sheets arranged in a row (no text or symbols visible)
Note
- Press the Start/Pause button and then select other buttons to change the setting while the washer is running.
- If you press the Start/Pause button after turning on the washer, the initial setting applies automatically to the wash cycle.
"Do not pile up your daily laundry of towels, socks, and shirts. Cold Course takes only 29 minutes to complete its entire cycle."
|17| mini

Delicate
Select the Delicate Course for items washable with water such as knitwear, wool clothing, and lingerie.

1 Open the door and load the washer with clothes. Add detergent and fabric softener into the detergent and softener containers respectively and then close the door.
- Turn detergent and softener containers clockwise to close them tight before use. - Do not use bleaches for Delicate Course to prevent decoloration of your laundry.
2 Press the Power button slightly for a second.
3 Press the course button twice to select 'delicate'
- Cold water, two rinse cycles, and medium spin cycle are selected automatically.
Press the Add Rinse button to change the number of rinse cycles. (Up to 5 rinse cycles are available)
Tip
4 Press the Start/Pause button.
- The wash cycle starts with water supply after the door is locked.

natural_image
Two plain gray fabric pieces with a small white tag, no visible text or symbols.
Note
- Do not select the Delicate Course for easily shrinkable or deformable leather or cashmere items.
- Press the Start/Pause button and then select other buttons to change the setting while the washer is running.
"Wash your high-quality knitwear and wool clothing, underwear and stockings without concern. Delicate Course helps wash your laundry gently and safely without causing any fabric damage or discoloration."

Baby Care
Select the Baby Care Course to wash baby clothes, 100% cotton products, and clothing requiring steam wash and bleaching.
Cold
Delicate
Baby Care
Drum Clean
Quick Wash
Intensive Wash

Power
On/Off


Course


Rinse+
Start
Pause

1 Open the door and load the washer with clothes. Add detergent and fabric softener into the detergent and softener containers respectively and then close the door.
- Turn detergent and softener containers clockwise to close them tight before use.
2 Press the Power button slightly for a second.
3 Press the Course button to select 'Baby Care'.
- The water temperature of 95^ C, three rinse cycles, and strong spin cycle are selected automatically.
Press the Add Rinse button to change the number of rinse cycles. (Up to 5 rinse cycles are available)

4 Press the Start/Pause button.
- The wash cycle starts with water supply after the door is locked.

Note
- The water temperature is maintained at 95°C without any changes during the cycle.
- If the steam wash causes excessive bubbles, you can remove them by repeating the process of Drain(spin)→ Water Supply(rinse+spin)→ Start/Pause.
- Do not wash clothes that are not resistant to heat.
- Press the Start/Pause button and then select other buttons to change the setting while the washer is running.
- Three rinse cycles apply automatically for sensitive baby skin.

Caution
- Please check whether the laundry is suitable for steam wash (Pure cotton and 100% cotton baby clothes, diapers, etc.).
- Wash white and bright-colored clothes and dark items separately.
"Select the Baby Care Course to steam wash baby clothes and cotton products. The Course helps clean your laundry hygienically with hot water and three rinse cycles."

natural_image
Black-and-white photo of a white T-shirt with a pair of sneakers, no visible text or symbols
Drum Clean
Select the Drum Clean Course to cleanse the inside of tub.
Cold
Delicate
Baby
Drum
Quick
ntensive
Care
Clean
Wash
Wash

Power
On/Off


Course


Rinse+
Start
Pause

1 Add powder bleaches into the detergent container.
- Add a proper amount of detergent to the detergent container.
2 Press the Power button slightly for a second.
3 Press the Course button to select 'Drum Clean'.
- Cold water, two rinse cycles, and strong spin cycle are selected automatically.
Press the Add Rinse button to change the number of rinse cycles. (Up to 5 rinse cycles are available)
Tip
4 Press the Start/Pause button.
- The Drum Clean cycle starts with water supply after the door is locked.

Note
- All options other than Add Rinse are unavailable.
- Do not load the washer with laundry during the Drum Clean cycle.
- Drum Clean is recommended to be performed on a monthly basis.

natural_image
Close-up of a transparent plastic cup with a 'mini' logo on the side (no additional text or symbols visible)"Use the drum clean cycle regularly. The Drum Clean Course cleanses the drum and ensures cleaner washing."
20 | mini

Quick Wash
Use this feature when a small amount of laundry in a short time.
Cold
Delicate
Baby
Drum
Quick
ntensive
Care
Clean
Wash
Wash
Power
On/Off
23
|

Course

Rinse+
Start
Pause
-
1 The laundry into the drum and close the door.
2 Press the Power button slightly for a second.
3 Press the Course button to select 'Quick Wash'.
- The program automatically sets the cold water, rinse again, dehydrated again.
- If you need to change the number of rinsing, press the "Rinse Add" button (up to 4 times)
4 Press the Start/Pause button.

Note
- If you need to change the setting program during the washing process, press the "Start / Pause" button, the program stops can change the program settings.
"When the laundry is washed with a small amount of relatively clean or wash clothes, please use the program, Washing process can be completed in a short time."
|21| mini
natural_image
Close-up of hands washing clothes inside a washing machine (no visible text or symbols)
Intensive Wash
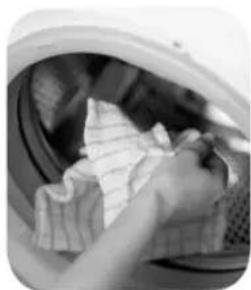
Select the Intensive wash Course to wash highly soiled laundry

1 Add powder bleaches into the detergent container.
- Add a proper amount of detergent to the detergent container.
2 Press the Power button slightly for a second.
3 Press the Course button to select 'Intensive wash'.
- Press the course button to select the level.
- Intensive 1 : Cold, three rinse cycles
- Intensive 2 : 40°C, three rinse cycles
- Intensive 3 : 60°C, two rinse cycles
Press the Add Rinse button to change the number of rinse cycles. (Up to 5 rinse cycles are available)
Tip
4 Press the Start/Pause button.
- The Intensive cycle starts with water supply after the door is locked.
- "Intensive 3" course(Press the Course button twice at 'Intensive Wash') is suitable for cleaning normally soiled loads.

Note
- The cycle time is increased for each cycle.
- Intensive Wash, 6H( Course push 3 times), Water temperature 40°C, Test Load 2.0 kg, 230V, detergent dosing : in 1 litre warm water, use programme is suitable for a normally soiled load and tested in accordance or in conformity with AS/NZS 2040.1.in Capacity : 2kg
"For stained clothes, The intensive wash Course provides outstanding stain removal performance."
|22| mini
natural_image
Stack of folded shirts and a collared shirt, no visible text or symbolsThe following instructions are about the cleaning of washer parts for long-term sanitary use.

Can freezing cause the washer to malfunction?

A small amount of water remains in the inlet hose or drum tub after the completion of washing cycle. The water may freeze at low temperatures. Follow the following instructions in such an event.
- Wrap the inlet hose connection with a hot towel.
- Turn off the tap and detach the inlet hose. Then, put the hose in hot water (less than 50°C).
- Add 2 ℓ of hot water (less than 50°C) into the tub and then wait for about 10 minutes.
- Reconnect the inlet hose and then turn on the tap to check the water supply and drainage.

Caution
- Do not take the above measure when the inlet hose is frozen as it may cause malfunctions.
How can I change the laundry setting while the washer is running?

There are available and unavailable options.
- You can change the wash, rinse, and spin cycles before the completion of the entire wash cycle.
- Press the Start/Pause button to change your setting.

How can I clean the inside of drum tub?

Cleanse the drum tub with washer Drum Cleaners available for retail sales.
- Use the cleaner correctly as instructed in user manual.
- Follow the following instructions to clean the drum tub.
- Add washer Drum Cleaners to the detergent container.
- Select the Drum Clean Course.
- Press the Start/Pause button to start the Drum Clean cycle.

Cleaning
Follow these cleaning instructions for long-term sanitary use of washer.

Warning
- Unplug the power cord before cleaning the washer. Violations may cause electric shocks or personal injuries.
- Do not sprinkle water on the washer. Violations may cause short circuits or electric shocks.

■ Cleaning of Detergent and Softener Containers!
- Turn the detergent and softener containers counterclockwise and pull them. Wash the containers with water.
- Remove the detergent powder in the detergent container before use.
※ If contaminants remain in the detergent and softener containers or the discharge holes for a long time, they may cause malfunctions.

Note
- Water may remain in the container after a wash cycle. As it is caused by the process of cleaning detergent and softener containers, it is not the remnant of detergent or softener.

■ Cleaning of Drum!
- Rust: If rusty water or an easily rustable item such as hair pin is added or water remains in the tub for a long time, it may cause rust.
- Rust Removal: Apply rust removal cream to a soft cloth or sponge and then scrub the rusty part with it. ※ Do not use a steel scrub as it damages the drum tub.
- Detergent Residue: (Dark and spotty) Detergent residues may occur and contaminate the laundry if you use the washer for a long time, add too much detergent, or repeat the wash cycles with detergents incompletely dissolved. Select the Drum Clean course to cleanse the drum tub.

- Cleaning of Washer!
- Clean the washer with a wet cloth.

Caution
- Do not use synthetic detergents, benzol, or thinner. It may damage plastic parts.
- Use chemical cleaners as described in the user manual.

- Cleaning the water filter inlet!
- Clean the filter net when water leaks from the water inlet
- Separate the inlet hose and pull out of the filter net with your fingers or a pair of needle-nose pliers.
- Soak the filter net in water and remove the dirt with a toothbrush
- Insert the filter net back into the inlet filter
- Reconnect the inlet hose and make sure the hose is connected tightly

■ Cleaning the drain filter!
- When you need to clean the drainage filter, please contact to the nearby service center.
- Drainage filter cleaning should be done by service worker or professionally trained personnel.

Caution
- Plesae place a bowl before opening the filter cap. Water could be dropped from the filter.
- Do not try to open the filter cap when product is running in order to avoid scald.
Installation Guide
The washer is recommended to be installed by a professional service engineer.
Before installation After installation
Install the washer without plugging in the power cord.
Perform a test run to identify any water leaks or abnormal noise.
1. Determine the location for installation
- Determine the installation site after discussing the site structure with the customer.

natural_image
Two hands pointing at a surface, possibly part of a table or diagram (no visible text or symbols)※ Breast-high location is convenient for installation. ※ Installation and use are convenient with access to water supply, drainage, and electric outlets.
2. Inspect wall
- Knock on the wall with your hand to check the existence of retaining wall inside.

natural_image
Two black-and-white photos showing a hand inserting a wall-mounted lock into a wall (no text or symbols visible)※ Install the washer on an even wall.
3. Attach installation instruction manual
- Use a level meter for attachment. - Attach a guide and mark the hole spot.

※ Attach the manual in consideration of actual product size.
6. Fix set anchors
- Fix set anchors with an anchor hammer.

natural_image
Person in protective gear handling a tool on tiled floor (no visible text or symbols)※ Redo the fixation if the anchor cap protrudes above the wall surface after fixation.
7. Connect inlet and drain hoses
- Insert the inlet hose until the elbow makes a snapping sound. - Connect the clamp inside the synchronous motor after fixing the drain house to the synchronous motor.

natural_image
Close-up of hands installing or adjusting a pipe fitting inside a vehicle (no visible text or symbols)* Connect hoses properly to prevent leaks. * Insert the inlet/drain hoses into the back holes after connection.
8. Organize hoses
- Place hoses in the hole.

natural_image
Close-up of a metallic cylindrical component with concentric grooves (no visible text or symbols)※ Prevent the hoses from becoming jammed between the wall and washer.
11. Fix the washing machine
- Connect the fixing nut (1EA) after inserting the flat washer (1EA) and spring washer (1EA) and then connecting a regular nut (1EA).
- Fasten the nut with ∅14 spanner.

natural_image
Close-up of a hand adjusting a mechanical component (no visible text or symbols)* Excessive fastening of nut may destroy the product or wall tile.
※ Fixing nut must be fastened tight.
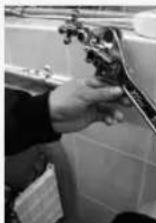
12-1. Install the inlet hose - Regular Tap
① Lock the water supply valve
② Disassemble the water supply valve
③ Install the branching adapter
④ Branch off the inlet hose


natural_image
Close-up of a hand holding a hose and pipe in a kitchen sink (no visible text or symbols)* Wrap the connection of branching adapter and water supply valve with Teflon tape. * Examine whether a water leak occurs after instillation.

Installation Guide
Follow the installation instructions to install the washer more conveniently.
4-1. Drill a hole through tile
- Notch below the marking hole.
- Drill a hole perpendicular to the wall surface.

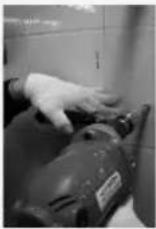
Do not drill a hole on the edge of wall tile.
Do not drill a hole right below the faucet.
4-2. Drill a hole into the retaining wall
- Set the hammer drill perpendicular to the wall surface and then drill a hole into the retaining wall.

natural_image
Close-up of a mechanical tool with threaded end and screw head, mounted on tiled floor (no visible text or symbols)* Follow the instructions on the diameter and depth specifications for the hole.
※ Remove dirt from inside the hole.
5. Insert set anchors (4 holes)
- Insert set anchors into holes.
- Set anchors are included in the product package.

natural_image
Grid of six identical panels with small circular marks, no visible text or symbols※ Insert set anchors to the end of holes.
※ The set anchor bolt must be 75mm long or longer above the wall.
9. Inject chemical anchor and insert cushion pads
- Inject chemical anchor into the fixed set anchors.
- Insert cushion pads on the fixed anchors.
- Attach pads to the wall.

natural_image
Close-up of a metallic door handle attached to a plain wall (no text or symbols visible)
natural_image
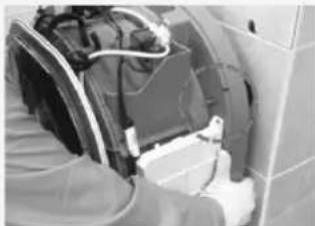
Close-up of hands installing or adjusting a circular component with cylindrical pins (no visible text or symbols)10. Install the washing machine
- Install the washer on the surface of wall so as not to create a large gap.
natural_image
Close-up of a person installing or adjusting a wall-mounted device with visible wiring and components (no text or symbols)12-2. Install the inlet hose - Kitchen sink, shower
① Lock the water supply valve ② Disassemble the water supply valve
③ Install the branching adapter (Install adapters respectively on cold and hot water taps)
④ Branch off the inlet hose
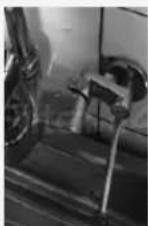
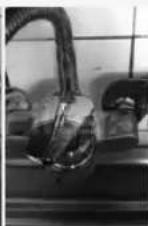
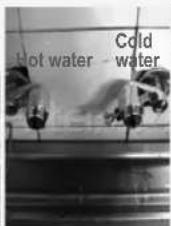


13. Test Operation
- Run a test operation to identify any malfunctions or leaks.

14. Organize inlet and drain hoses and power cord
- Organize inlet and drain hoses and power cord with molding and hose guide.
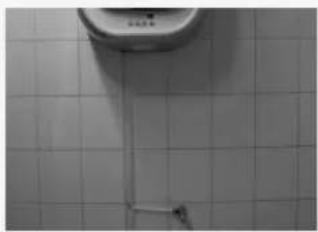
natural_image
Close-up of a tiled floor surface with a small metallic tool inserted, no visible text or symbols※ Wipe the attachment area clean with a dry cloth and then attach the molding and hose guides tightly.
15. Mount the body
- Connect 4 nuts and bolts above and below after mounting the body.

natural_image
Close-up of a person's hand adjusting a car wheel (no visible text or symbols)※ Check whether any cleavages exist on both sides.

Note
Wall Type Depth of Hole Bit diameter of hammer drill Bit diameter of tile hole
| Concrete 45mm | ∅ 13mm | - | |
| Tile | Distance between tile and retaining wall + 45mm | ∅ 14mm |

Warning
▶ Grounding is required to prevent electric shocks. Check the availability of circuit breaker.
- Contact the sales store or service center for further details.
▶ If the power outlet has no grounding terminal:
- Grounding must apply for the safe use of washer.
- Grounding is performed by the service center engineers or qualified personnel only.
- Contact your nearby service center for details.
▶ Grounding is prohibited in the following locations.
- Gas pipe (It has the risk of explosion or fire)
- Phone wire or lightning rod (It is risky when struck by lightning)
- Water pipe (Many water pipes are made of plastic materials)
Exchange of Power Cord
Relocation
If a power cord is broken, you should contact the sales store or service center as a special tool is required.
Contact the service center to relocate the installation. (Additional charge applies)

When malfunctions are suspected
- Some troubles are wrongly considered to be mechanical malfunctions although they are not.
- If any malfunctions are suspected, you may contact the sales store or service center with inquiries.
Problems Causes
| [1] Unpleaser smell for drum.[2] The washer stops running in the middle of a wash cycle.[3] The water supply doesn't start after running the washer. | [1] The smell of excess waste in drainage flows back. You need to clean the drainage regularly.[2] Review the error indications E5, E6, E7, and E8 and then contact the sales store or service center.[3] Check whether the water supply valve is open. |
| [4] The washer drains water while washing clothes.[5] The water supply starts in the middle of a spin cycle.[6] The wash cycle takes too long. | [4] Did you use too much detergent? If the laundry gets excessively foam, the washer drains water even in the middle of a wash cycle.[5] The washer resumes water supply to balance the laundry in the drum in a spin cycle.[6] The low water pressure lengthens the water supply and the entire cleaning cycle as well. |
| [7] Towels are stiff after washing.[8] The washer makes strange noises during a spin cycle.[9] The remaining running time fluctuates. | [7] Towel may get stiff as the front load washer cleans the laundry by utilizing falling pressures. Use fabric softener to reduce the stiffness.[8] Check whether the power cord is properly connected to the washer.[9] The remaining time increases when the laundry is unevenly located in the drum. |
| [10] The remaining running time doesn't change.[11] The washer buzzes when the spin cycle stops. | [10] The washer heats the water to raise the water temperature during a wash. The remaining time may not change for a while in winter as the washer heats the water to a preset temperature.[11] The buzz is caused by the electronic break to suspend the spin cycle. It is not caused by a mechanical problem. |
| [12] A small amount of water is supplied to wash or rinse laundry. (Low water level) | [12] Front load washers consume a small amount of water for washing.- The water surface is not easily identifiable due to the low water level, but this is not caused by a mechanical problem.- The front load washer consumes a small amount of water as it soaks the laundry with water and washes and rinses it by rotating and dropping the clothes. |
| [13] The water supply resumes during a wash or rinse cycle. | [13] The washer resumes water supply after detecting the quantity of water and laundry condition to improve washing efficiency. It may be caused by either of the following reasons.- Laundry was added after starting a wash cycle.- The low water level activates the water supply automatically. |
| [14] The drum is not spinning or it is running slowly for a while after the spin cycle starts. | [14] When detergents were applied excessively or the drain hose is bent upward in the middle so that the water is not properly drained, the spinning speed may decrease. Drain the water and then resume the spin cycle. |

Before calling for service
- Press the button(power) to suspend the operation of washer and then examine the following items.
- Press the button(power) again to resume operation.
| Checkpoints and SolutionsProblem/Dis | ||
| Washer is not operating. | No display | - Is the power cord correctly connected to an electric outlet?- Is the power supply on?- Did you press the Start/Pause button?- Is there a power failure?- Did the circuit breaker cut the power supply? |
| Water supply is unavailable. | IE | - Is the tap turned on?- Is the drainage hose filter clogged with dirt?- Is inlet hose frozen?- Is the water supply cut off? |
| Water drainage is unavailable. | OE | - Did you put down the drain hose properly?- Is the outlet of drain hose closed as it is inserted deep into the drain?- Is the drain hose bent?- Is the drain hose placed too high?- Is the drain clogged with dirt and threads?- Is there excessive dirt inside the drain filter? |
| Washer is not operating. | LE | - Is the door open?- Is the door end closed tightly? |
| Drum is not spinning. | EB | - Contact your local service center. |
| Water is not adjustable. | ES | - Contact your local service center. |
| Other troubles without error displays | - Do not touch or disassemble the inner parts when you have not identified any problems with the checkpoints above. Contact your local service center after unplugging the washer and turning off the faucet. | |

Note
- If LE error is displayed on the LED panel, please open and close the door.
- If LE error continues to take place, please turn off and restart the washer.
| Model DWD-M221MB | |
| Dimensions 550(W) X 600(H) X 302(D) mm | |
| Weight 16.5kg | |
| Water Consumption (Standard course) 25 | |
| Voltage / Frequency 240V / 50Hz | |
| Power Input 1500W | |
| Max. Laundry Load 2.0kg | |
| Operating Water Pressure 98.1kPa~784kPa(1kgf/cm ^2 ~8kgf/cm ^2 ) | |
Product specifications are subject to change without prior notice for the improvement of product quality.
Wiring Diagram


mini
Wall-Mounted Front Load Washer
Please read the user manual before contacting the service center as call-out charges may apply to services on the use or installation of washer.
ABOUT THIS MANUAL
(주)신광씨링
광주광역시 서구 하남대로
502번길 14

- World's First Ever Design
- Wall-Mounted Front-Load Washer
- Ultrasmall Design
- Mini's Practical Function
- CONTENTS
- Preparation
- Use
- Installation
- Product Features
- Daily Wash
- Minute Economic & Quick Wash
- Baby Care
- Delicate Cleaning for High Quality Clothes
- Low Noise Motor
- Spoon-Shaped Detergent Container
- Star Drum
- Transparent Door
- Child Protection
- Cleaning Programs
- Safety Instructions
- Warning
- Caution
- Connect the drain hose to the drain.
- Connect the inlet hose and turn on the tap.
- Plug in the power cord.
- Parts and Components
- Parts
- Washable Items
- Non-Washable Items
- Leather and silk items
- About Laundry Shrinkage
- Preparing Clothes for washing
- Directions on Detergent and Softener Containers
- Addition of Detergent
- Addition of Fabric Softener
- Proper Amounts of Detergent and Fabric Softener
- Washing Course
- Laundry Weight (Standards)
- Buttons and Functions
- Power
- Start
- ① Power
- ② Course
- ③ Add Rinse
- ④ Start/Pause
- ⑤ Display LED
- ⑥ Child Lock (Button Lock)
- Cold
- Delicate
- Drum Clean
- Quick Wash
- Intensive Wash
- Can freezing cause the washer to malfunction?
- How can I change the laundry setting while the washer is running?
- How can I clean the inside of drum tub?
- Cleaning
- ■ Cleaning of Detergent and Softener Containers!
- ■ Cleaning of Drum!
- - Cleaning of Washer!
- - Cleaning the water filter inlet!
- ■ Cleaning the drain filter!
- Installation Guide
- Determine the location for installation
- Inspect wall
- Attach installation instruction manual
- Fix set anchors
- Connect inlet and drain hoses
- Organize hoses
- Fix the washing machine
- 12-1. Install the inlet hose - Regular Tap
- 4-1. Drill a hole through tile
- 4-2. Drill a hole into the retaining wall
- Insert set anchors (4 holes)
- Inject chemical anchor and insert cushion pads
- Install the washing machine
- 12-2. Install the inlet hose - Kitchen sink, shower
- Test Operation
- Organize inlet and drain hoses and power cord
- Mount the body
- Exchange of Power Cord
- When malfunctions are suspected
- Before calling for service
- Wiring Diagram
- ABOUT THIS MANUAL
Brand : WINIA
Model : DWD-M221MB
Category : Washing machine