
DWD-M253CW - Washing machine WINIA - Free user manual and instructions
Find the device manual for free DWD-M253CW WINIA in PDF.


| Product Type | Front-load washing machine |
| Brand | Winia |
| Model | DWD-M253CW |
| Capacity | 7 kg |
| Maximum Spin Speed | 1200 rpm |
| Dimensions (W x D x H) | 60 x 55 x 85 cm |
| Net Weight | 65 kg |
| Power Supply | 220-240 V, 50 Hz |
| Rated Power | 2000 W |
| Energy Efficiency Class | A+++ |
| Water Consumption per Cycle | 49 L |
| Programs | Cotton, Synthetic, Delicate, Quick, Eco, Wool, Spin, Rinse, Drain |
| Display | LED digital display |
| Delay Start | Up to 24 hours |
| Child Lock | Yes |
| Noise Level (Wash/Spin) | 58 dB / 76 dB |
| Material Drum | Stainless steel |
| Door Opening | 180° reversible door |
| Self-Cleaning | Drum clean program |
| Spare Parts Availability | 7 years after production |
| Included Accessories | User manual, inlet hose, drain hose |
Frequently Asked Questions - DWD-M253CW WINIA
User questions about DWD-M253CW WINIA
0 question about this device. Answer the ones you know or ask your own.
Ask a new question about this device
Download the instructions for your Washing machine in PDF format for free! Find your manual DWD-M253CW - WINIA and take your electronic device back in hand. On this page are published all the documents necessary for the use of your device. DWD-M253CW by WINIA.
USER MANUAL DWD-M253CW WINIA
natural_image
Top-down view of a white circular washing machine with black buttons and digital display (no visible text or symbols)
mini
Wall-mounted Drum Washer
DWD-M253CW
※ This is mini, the world's first wall-mounted drum Washerdeveloped by WINIADAEWOO.
- The product has been performance-tested prior to shipping and may contain a small amount of water left over from that testing.
- Keep this user manual at a location where it will be easily accessible for all users of the product.
- Read the Safety Precautions before use and follow all safety-related instructions when using the product.

mini
Wall-mounted Drum Washer
World's First • South Korea's One and Only
Innovative design meets practical functionality to create a unique interior appliance.
Wall-mounted Drum Washer
World's first wall-mounted drum Washer that can be set up in the bathroom, multipurpose room, kitchen, or any other part of the home with ease.
Ultra-Compact Design
A compact and adorable Washer that combines the inherent strength and stability of a cube with colors that can complement any interior.
Practical Functionality
mini is the culmination of WINIADAEWOO' unparalleled technical expertise and offers a complete range of essential features and functions for modern living.
CONTENTS
Getting Ready
Product Features 4
Safety Precautions 5
Getting Ready 10
Parts & Components 11
Washable Items 12
Non-Washable Items 12
Preparing Laundry for Washing 13
Adding Detergent and Fabric Softener 14
Course Selection Guide 15
Using the Washer
Buttons and Functions ....16
Cold 17
Delicate 18
Spin 19
Baby Care 20
Quick Wash 21
Intensive 22
Organic 23
Tub Clean 24
Time Delay....25
Cleaning....26
Checking
Troubleshooting 27
Before Contacting Customer Service 28
Specifications & Wiring Diagram 29
Safe, fast, and clean.
Introducing mini's amazing abilities!

natural_image
Close-up of a white circular device with a black interior and a digital display showing '38' (no readable text or symbols beyond branding)Easy-Breezy Everyday Laundry
With mini, you don't have to let towels, dress shirts, underwear, socks, and other articles that require frequent washing pile up. Keep your home neat and organized with mini's unmatched efficiency and speed.
Baby Clothes
mini's Baby Care course thoroughly disinfects and rinses baby clothes so they are completely free of any trace of residual detergent and therefore safe and gentle on the sensitive skin of babies.
Low-Noise, Low-Vibration
mini uses a custom motor that's quieter than ever and features four dampeners that stop vibration in its track to keep everything as smooth and silent as possible.

Clean in Just 29 Minutes
mini's Cold course washes a load of laundry in just 29 minutes while using only 86% of water and electricity normal drum washers consume.
Delicate Touch
With mini, you can wash pricey delicates made out of fabrics like silk and wool individually, without worrying about discoloration, shrinking, or any other type of damage.
Emerald Drum
mini's Emerald Drum features an embossing pattern in the shape of polished emeralds to prevent damaging clothes and make sure they always look and feel as new as they did the day you bought them.

natural_image
Two views of a mechanical component with hexagonal cutouts and circular features (no text or symbols visible)Specialized Washing Courses
With Cold, Delicate, Spin, Baby Care, Quick Wash, Intensive, Organic and Tub Clean courses, mini has all your laundry needs covered.

Cod

Delicale

Spin

Baby care

Quick Wash

Intensive

Organic

Tub Clean
Children Safety
mini's Button Lock and Door Lock features keep small children safe by preventing them from accidentally operating the
washer or opening its door.

natural_image
Black-and-white photo of a smiling baby crawling on a surface (no text or symbols visible)
Safety Precautions
This appliance is not intended for use by persons (including children) with reduced physical, sensory or metal capabilities, or lack of experience and knowledge, unless they have been given supervision or instruction concerning use of the appliance by a person responsible for their safety.

Warning
Cautionary information on cases that may cause death or severe personal injuries

Caution
Cautionary information on cases that may cause minor personal injuries or damage to products
Warning


natural_image
Cartoon illustration of a person opening a door with expressive eyes and a bandage (no text or symbols)Do not use the washer when the power cord is damaged or loosely plugged in.
Violations may cause electric shock, short circuit, or fire.
Contact a sales store to request the maintenance service.


If the washer doesn't run or smokes or unusual smells occur, unplug the washer and contact the service center promptly to prevent accidents.
Violations may cause electric shock, short circuit, or fire.


Do not scratch, damage, deform, bend, pull, twist, or tie the power cord. Do not place or insert a heavy item on the cord.
Violations may damage the power cord, raising the risk of fire and electric shock.


natural_image
Cartoon illustration of a person holding a device with a large 'X' symbol above, no text or symbols presentDo not unplug or plug the cord with wet hands.
Violations may cause electric shock.


natural_image
Cartoon illustration of a smiling computer with a 'OK!' sign and a smiling document, no text or symbols presentEnsure that the power voltage, frequency, and current match the product's specification.
Violations may cause fire and electric shock.

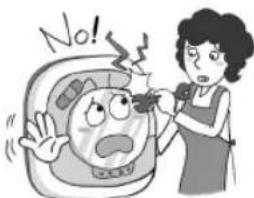
Do not disassemble, repair, or rebuild the washer without the assistance of service engineer.
Violations may cause fire, electric shock, and personal injuries.
Contact a sales store or read the back page of user manual to request the maintenance service.

Safety Precautions
Warning

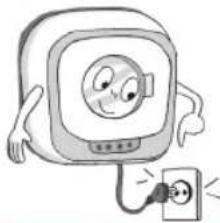
natural_image
Cartoon illustration of a smiling computer monitor with an electrical plug (no text or symbols)Insert the plug with 10A or higher in the outlet directly.
Multiple connections to a single outlet may cause fire due to heat.


natural_image
Cartoon illustration of a smiling television set with a fan, showing motion lines (no text or symbols)Unplug the cord and open the window for ventilation without touching any buttons if a gas leak occurs.
Violations may cause a spark and, accordingly, explosion, fire, or burns.


natural_image
Illustration of hands holding a medical device with tubing (no text or symbols visible)If the power cord pin is contaminated with dust or water, wipe the pin clean with a dry cloth before use.
Violations may cause fire.

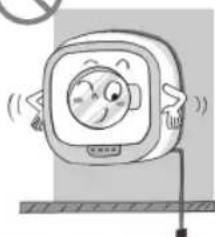
natural_image
Cartoon illustration of a smiling computer monitor with wheels and a smile (no text or symbols)Electrical grounding is required for safety.
Technical problems or short circuits may cause electric shocks.
Read user manual or contact the service center with further inquiries on grounding method.
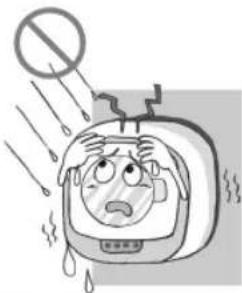
natural_image
Cartoon illustration of a distressed face with falling raindrops and a circular symbol above (no text or symbols)Do not expose the washer to rain or wind.
Violations may cause electric shock, fire, technical problems, or deformation.


natural_image
Cartoon illustration of a person inside a vehicle with a warning sign and hand gesture (no text or symbols)Do not place gasoline, petroleum, benzol, thinner, or alcohol inside or beside the washer. Do not place laundry containing such materials inside or beside the washer.
Violations may cause explosion or fire.

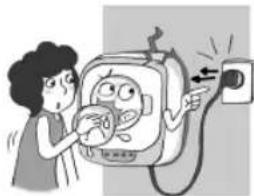
natural_image
Illustration of a person using a washing machine to clean food, with no visible text or symbolsUnplug the power cord before cleaning or maintenance work.
Violations may cause electric shock or injury.
Do not sprinkle water on the washer. Violations may cause short circuit or electric shock.


Do not enter the laundry room and contact the service center, if the washer is submerged in water as the water supply hose was dislocated.
Violations may cause electric shock.


natural_image
Cartoon illustration of a distressed television with steam rising from top, waving hand (no text or symbols)Do not install the washer near a heater and do not place candles or cigarettes on the washer.
Violations may cause fire or deformation.

Water pressure for proper operation of the equipment is 50kPa \~ 800kPa. Use the supply hose and the water hose connection with SET equipment SET is not reuse old hoses

Safety Precautions
Warning


natural_image
Cartoon illustration of a boy reaching toward a smiling face on a wall, with stars nearby (no text or symbols)Do not place your hands or metal objects below the washer while the washer is running.
Violations may cause personal injuries.

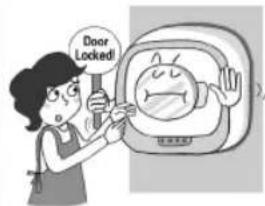
With 'Door Locked', do not open the door by force.
Violations may destroy the door or lock, causing technical problems.


natural_image
Illustration of a girl interacting with a large cartoon face inside a window (no text or symbols)Prohibit children from operate the washer. Do not let children stand on the washer or insert their head into the tub at any time.
Violations may cause personal injury, burn, or electric shock.


natural_image
Cartoon illustration of a boy reacting to a distressed computer wall (no text or symbols)Prevent children from having their hands jammed in the door and approaching the washer.
Violations may cause personal injuries.

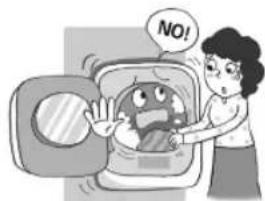
natural_image
Illustration of a woman opening a washing machine with a cartoon face, no text or symbols presentDo not insert hands, sticks or metal objects into the tub or touch laundry during operation.
Violations may cause personal injuries.

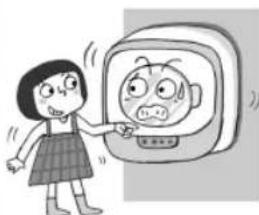
natural_image
Cartoon illustration of a girl pointing at a computer monitor displaying a surprised face (no text or symbols present)Children or people who are not well-informed of use method must not use the washer.
Violations may cause burn, electric shock, or injury.

natural_image
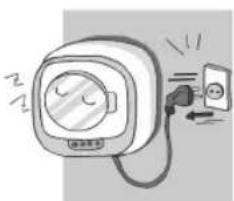
Illustration of a washing machine with a close-up of its side, connected to a wall-mounted device (no text or symbols present)Install the washer where the electric outlet is easily accessible. Unplug the power cord if the washer is not to be used for a long time.
Violations may cause electric shock, short circuit, or fire. Hold the plug firmly when unplugging the power cord.


natural_image
Cartoon illustration of a distressed person reacting to a broken phone, with no visible text or symbolsDo not press the button with sharp object.
Violations may cause electric shock.

Safety Precautions
Caution


Turn on the tap to check for leaks before use.
Improper connection may cause leaks.

Prevent pets and animals from entering the washer tub.
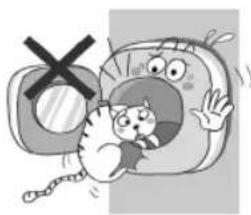
natural_image
Cartoon illustration of a cat emerging from a large bag with a crossed-out 'X' symbol (no text or symbols present)Violations may cause injuries.


Do not operate the washer with the detergent or softener container detached.
Detachment of the detergent or softener container causes water leaks during operation. Please close the detergent and softener containers tight.
Leaks may cause personal injuries.

Do not place magnets beside the cap or the washer during operation.

natural_image
Cartoon illustration of a character inside a backpack with arms and legs, surrounded by motion lines (no text or symbols)Violations may cause malfunctioning of 'Door Lock Sensor' and personal injuries accordingly.


natural_image
Cartoon illustration of a distressed computer monitor character with expressive faces (no text or symbols)Install the washer on a solid wall and even.
Violations may cause abnormal vibrations or noise.

Do not use laundry net for wash.

Violations may cause abnormal vibrations, which can lead to damage wall or cause personal injuries.


natural_image
Cartoon illustration of a washing machine with steam and smoke (no text or symbols)Do not stand on the washer or place a heavy item on it.
Violations may destroy the washer or cause personal injuries.
Prevent children from hanging on the washer. Violations may cause injuries.

Contact the service center and do not operate the washer when it is slanted or out of horizontal.

natural_image
Cartoon illustration of a distressed robot with arms and legs, showing expressive motion (no text or symbols)Violations may cause injuries.

Safety Precautions
Caution

natural_image
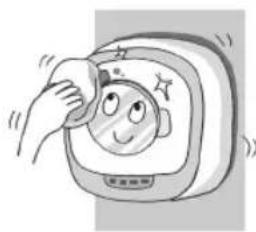
Illustration of a hand washing a smiling face on a computer monitor (no text or symbols)Remove any detergent residue or contaminants on the washer with a wet soft cloth.
Remaining contaminants may deform plastic parts.

Close the door carefully to prevent laundry from getting jammed in the door.

natural_image
Cartoon astronaut character in space suit waving, no text or symbols presentIt may cause damage to clothes or malfunction.

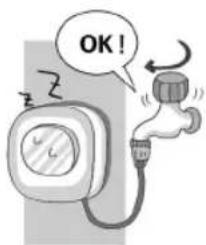
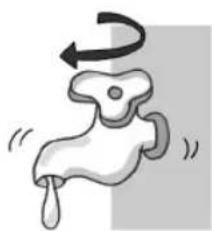
Turn off the tap after use.
It aims to prevent leaks caused by poor inlet hose connections.

Press the Start button after turning off the tap and then slowly turn it on when the water supply resumes or the inlet hose is reconnected (or when resuming the use of washer after a long-term suspension)
natural_image
Simple line drawing of a stylized animal or creature with an arrow indicating rotation (no text or symbols)The high air pressures built in inlet hose or water pipes may damage the washer, causing leaks or personal injuries.

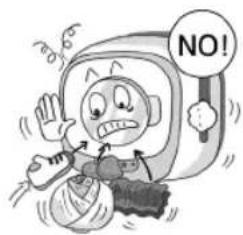
Do not use the washer to wash non-clothing items. (Footwear, potato, cabbage, kelp, etc.)
Violations may cause abnormal vibrations, damage the washer or cause personal injuries.

Put detergent and softener in detergent and softener containers separately.
Confusion or mixture may prevent laundry from being washed properly.

natural_image
Cartoon character with a smiling face and exclamation marks, no text or symbols present
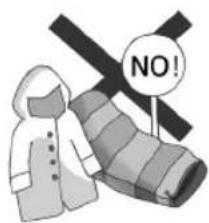
Do not wash waterproof clothes and items such as raincoat, car cover, and sleeping bags.
Violations may cause abnormal vibrations during spin, which may lead to personal injuries.
Violations may cause abnormal vibrations during wash, which may lead to damage the wall, floor, or clothing and cause part abrasion.

Remove all liquid detergent and fabric softener in the washer when relocating it.
Violations may cause liquid leaks and malfunctions.

natural_image
Cartoon illustration of a surprised character with arms and legs, surrounded by motion arrows (no text or symbols)
Getting Ready

natural_image
Technical line drawing of a cylindrical mechanical component with grid lines and central circular feature (no text or symbols)1 Connect the drainage hose to the drain.
• Make sure the drainage hose has been included with your washer.
- A small amount of water may escape from the drainage hose when installing the washer or using it for the first time. This is water leftover from performance testing at the factory and does not represent a malfunction or defect of the product.
• Recommended length of the drainage hose is 2.5m.
2 Connect the water hose and open the tap.
• Make sure there is no leak anywhere along the water hose.
• Recommended length of the water hose is 2.0m.
• Recommended water pressure is 3.0kgf/cm ^4 .
3 Plug in the power cord.
• Make sure the product is grounded to prevent electric shocks.

natural_image
Woven basket with woven pattern and side handles, no visible text or symbolsCaution:
This product uses cold water only. Do not connect the water hose to a hot-water source.

Parts & Components
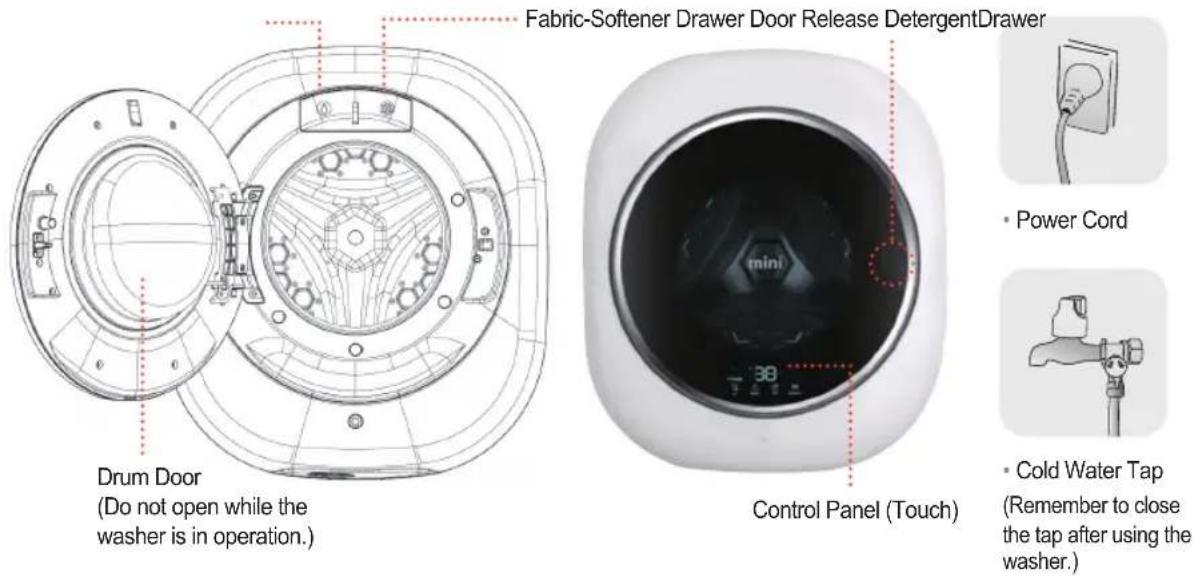
Accessories

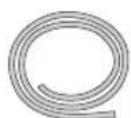
Elbow (X1) Water Hose Anchor Bolt


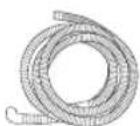
(X4)

Body Screw (X4)

Cushion Pad (X4)
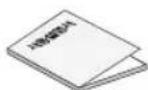
User Manual Power Cord


natural_image
Two interlocking gears in grayscale, no text or symbols presentNote:
- Water-hose and drainage-hose extensions can be purchased at your nearest service center.
- Included accessories may vary depending on the model and specifications.

Washable Items

Washable Items
- Underwear and socks
- Dress shirts and T-shirts
- Towel, handkerchief, pillow cover, kitchen towel, and dust cloth
- Baby clothes, nappies, and underwear

- High-quality clothes such as blouse, knitwear, and wool clothing
- Women's wear such as lingerie and stockings

Non-Washable Items

Leather and silk items
- Product such as pillow and comforter padded with cotton or foamed urethane (sponge)
- All-wool blanket, electric blanket, blanket with a hair length of 10mm or longer, and carpet cover
- Mat and carpet made of animal hair

- Wash supplements for commercial sales (laundry ball, dust absorption filter, etc.)
- Rubber, nylon, and plastic items
- Waterproof mat, sheet, or clothing

About Laundry Shrinkage
Laundry shrinkage varies by the wash cycle, type of fabric, weaving and sewing methods, and finishing. Please examine the laundry guides before wash.
- Easily shrinkable items:
Cotton shirts, synthetic socks, etc.
- Shrinkage-free items:
Polyester blouse, synthetic shirts (shirts), etc.

Preparing Clothes for washing
Waterproof mat or sheet, solid and heavy clothes, doormat, and blanket, and non-permeable fabric products are not suitable for washing, rinsing, or spinning.
- Floating laundry or abnormal vibrations may cause personal injuries or damage to the washer, wall, floor, and clothes.
Remove dust and sand from the laundry before use.
- Removal reduces the risk of malfunction.
Remove coins, hairpins, curtain attachments, and clips from the laundry.
- The metal items may damage clothes and washer or cause malfunctions. - The metal items may cause dust or trash clogs in the drainage, which leads to mechanical problems with the washer.
Check the laundry guide labels.
- Wash the clothes as specified in the guides. Wash the colored and white clothes separately.
Reverse fluffy clothes before washing. Sort the clothes by fabric type before washing (cotton, jean, synthetic fabrics, etc.)
- Mixture may cause damage to fabrics.
Hand-wash partially contaminated clothes before using the washer.
- Use stain removal detergents or bleaches.
Tie strings and close zippers.
- It may cause damage to the clothes or the washer.
Do not wash thick or voluminous clothes in the washer. (Jeans, bathing gown, bathroom mat, thick sportswear, etc.)
- As thick clothes are not evenly washed in the tub, vibrations increase during the spin cycle.




Adding Detergent and Fabric Softener
(Use liquid detergents only. Do not use powdered detergents. May result in a leak and/or malfunction.)
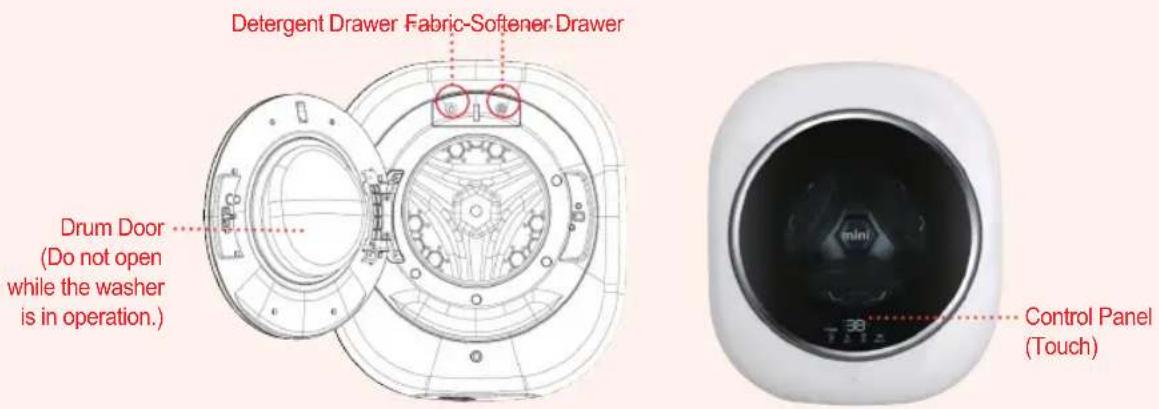
■ Open: Pull the detergent and fabric-softener drawers towards you.
■ Close: Push the drawers straight in until fully closed.
Adding Detergent
- Add an appropriate amount of detergent into the detergent drawer without exceeding the MAX level.

natural_image
Technical line drawing of a rectangular device with internal components and a flame symbol (no text or labels)Wait! Read this before adding the detergent. Do not add detergent to the detergent drawer more
Caution For smaller laundry loads, filling the detergent and fabric-softener drawers halfway up to the MAX levels is sufficient.
- If detergent gets on the door, the control panel, or any other plastic part of the washer, wipe it off right away. If left alone, the detergent can cause damage.
- Using too much detergent can cause the following problems:
• An excessive amount of suds is formed, resulting in much longer or even incomplete rinsing and/or spinning of the laundry load. Even if rinsing is completed, some of the detergent may still remain.
- The detergent drawer can become contaminated or covered in detergent residue. Remove and clean the drawer once a week for cleaner results.
Adding Fabric Softener
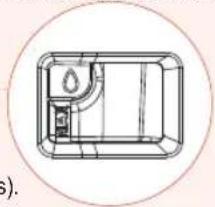
natural_image
Architectural cross-section diagram of a room with a water drop and door (no text or labels)- Add an appropriate amount of fabric softener to the fabric-softener drawer.
• The softener is automatically added to the drum during the final rinsing stage. - Do not add fabric softener and allow it to sit for an extended period of time (longer than 12 hours). The softener can harden and fail to make its way inside the drum.
Appropriate Detergent and Fabric Softener Amounts
• Use the recommended amount.
- Do not exceed the detergent drawer's MAX level.
- Do not exceed the fabric-softener drawer's MAX level.
Using Powdered Detergent - Must use a specially formulated p
Caution Add the detergent directly into the detergent drawer. Do not use a powdered detergent if using the washer's timer feature. (Powdered detergent can damage the clothes.)

Detergent and Fabric Softener Precautions
- Highly concentrated detergents, gel detergents, and other types of liquid detergents that are prone to hardening and are highly viscous do not flow into the drum as easily and should be avoided.
- Highly concentrated fabric softeners may not flow into the drum at all and need to be diluted with water first.
- Detergent and fabric-softener drawers can become contaminated or covered in residue. Remember to remove and clean the drawers regularly.
- If using a detergent that generates a large amount of suds, program in additional rinse cycles.
Course Selection Guide
| Course | Recommended Load Size | Course | Recommended Load Size |
| Cold 2.5kg Quick Wash 1.0kg | |||
| Delicate 1.0kg Spin 2.5kg | |||
| Baby Care 2.5kg Organic 1.5kg | |||
| Intensive 2.5kg Tub Clean - |

Note
- Do not exceed the recommended load size.
- Exceeding the recommended load size may result in an incomplete wash and/or abnormal noise/vibration (recommended load sizes may vary depending on the type of clothing and its brand).
- You are encouraged to use the recommended course for each type of laundry load, but other courses are also available. (Please note that choosing an inappropriate course may cause the clothes to deform.)

Weight Reference


Buttons and Functions

natural_image
Close-up of a white washing machine with black vent, showing brand name 'mini' and control buttons (no readable text beyond labels)
① Power
• Turns the washer on or off.
② Course
• Used to select the desired course.
• The selected course's indicator lights up.
※ Child Safety (Button Lock)
- Use this feature to prevent children from accidentally changing the washer's settings while it is in operation.
- Activating this feature locks out all buttons except Power.
• To activate or deactivate, press and hold Course for longer than 3 seconds.
③ Rinse+
- Select a course and then use this button to program in additional rinse cycles.
(For information on the default and maximum number of rinse cycles of a particular cycle, refer to that cycle's section in this manual.)
④ Time Delay
- Use this button to select the desired duration.
The selected duration is shown on the LED display. The Time Delay button's indicator will also turn on.
⑤ Start/Pause
- Press to start the selected course.
- Press again to pause, once more to resume, and so on.
- Pressing the Power button and then the Start/Pause button automatically initiates the Cold course.
⑥ LED Display
• Displays the selected course and its duration.
⑦ To open the drum door, turn the washer on by pressing the Power button (①) and then press the Door Release button (⑦).
※ If the washer's power cord is not plugged in or the power is out, first plug the cord into an outlet or wait for the power to be restored. Press the Power button (①) and then the Door Release button (⑦) to open the door.

natural_image
Close-up of a white circular object with a dark central area and metallic rim, no visible text or symbols.Note:
- Push the door slightly if the door is not easily opened after the completion of washing.
- If 'Door Lock' is not working due to the overloading of laundry or incomplete door closing, push the door slightly.
- You can open the door of running washer about 5 minutes after a power interruption.
- Please open the door carefully for safety if the washer stops running during a wash or rinse cycle because of a power interruption. (Reset the 'Door Lock' mode if it remains unsafe after power supply resumes)

Cold
Use this course to wash everyday items like towels, socks, and dress shirts and regular laundry.
natural_image
Close-up of a white circular device with a black interior and red circular highlights, labeled 1, 2, and 38 (no readable text or symbols beyond labels)
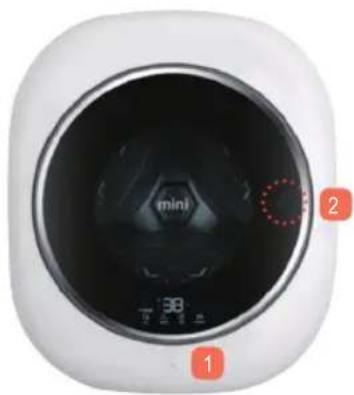
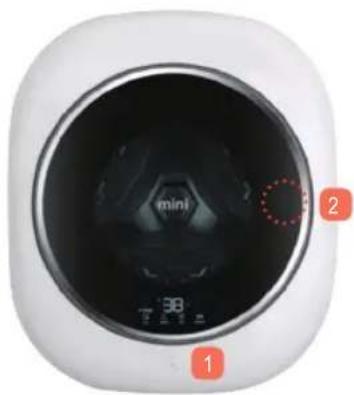
1) Turn on the washer by pressing the Power button (①).
2) Open the drum door.
Press the Door Release button (②) to open the drum door.
3) With the door open, place the laundry inside the washer, add detergent and fabric softener to their respective drawers, and then close the drum door shut.
Make sure to close the detergent and fabric-softener drawers completely before proceeding.
To change the number of rinse cycles after selecting a course, press the Rinse+ button (④).
Each press of the button adds 1 rinse cycle.
※ The maximum number of rinse cycles allowed for Cold course is 7.
4) Repeatedly press the Course button (③) until Cold is selected.
5) Press the Start/Pause button (⑤).
The door will lock, and the washer will start filling with water.

natural_image
Stack of white fabric towels arranged in a row (no text or symbols visible)Note:
- To change the settings while the washer is in operation, first pause it by pressing the Start/Pause button and then make the changes.
- Pressing the Power button and then the Start/Pause button starts the wash cycle using the initial auto-selection settings.
"Don't let dirty towels, socks, and dress shirts pile up anymore. Use the Cold course (29 minutes) or the Quick Wash course (15 minutes) to wash them clean quickly and easily."

Delicate
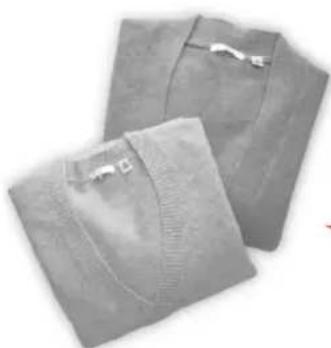
Ideal for washing knits, woolen clothes, lingeries, and other delicates that can be washed in water.

1) Turn on the washer by pressing the Power button (①).
2) Open the drum door.
Press the Door Release button (②) to open the drum door.
3) With the door open, place the laundry inside the washer, add detergent and fabric softener to their respective drawers, and then close the drum door shut.
- Make sure to close the detergent and fabric-softener drawers completely before proceeding.
- Bleach cannot be used with Delicate course. This is to prevent discoloration of clothes.
- Limit the size of the laundry load to 1kg when using the Delicate course.
※ Exceeding the recommended laundry-load size may result in abnormal noise, abnormal vibration, and/or a malfunction.
4) Repeatedly press the Course button (③) until Delicate is selected.
• Water temperature is set to cold, rinse cycles is set to 2, and spin strength is set to low automatically.
To change the number of rinse cycles after selecting a course, press the Rinse+ button (④).
Each press of the button adds 1 rinse cycle.
※ The maximum number of rinse cycles allowed for Delicate course is 7.

5) Press the Start/Pause button (⑤).
The door will lock, and the washer will start filling with water.
natural_image
Two gray fabric pieces with textured surfaces, no visible text or symbolsNote:
- Do not wash items made out of leather or cashmere. They are easy to shrink or deform.
- To change the settings while the washer is in operation, first pause it by pressing the Start/Pause button and then make the changes.
"You don't have to worry about washing your knits, pricey clothes made out of wool, lingerie, stockings, and other delicates.
mini gently washes delicates clean without any damage or discoloration."

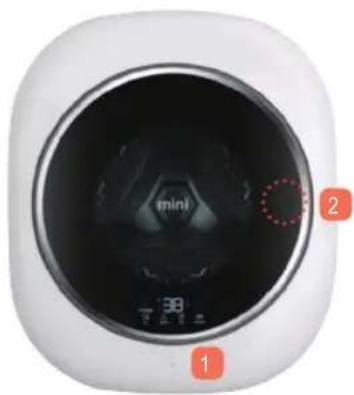
Spin
Use this course to spin your laundry dry without washing or rinsing.
natural_image
Close-up of a white circular device with a black interior and red circular highlights, labeled 1, 2, and 38 (no readable text or symbols beyond labels)
1) Turn on the washer by pressing the Power button (①).
2) Open the drum door.
Press the Door Release button (②) to open the drum door.
3) Once the door opens, place the laundry inside the washer and then close the door.
Make sure to close the detergent and fabric-softener drawers completely before proceeding
4) Repeatedly press the Course button (③) until Spin is selected.
• Water temperature is set to cold, rinse cycles is set to 0, and spin strength is set to high automatically.
To change the number of rinse cycles after selecting a course, press the Rinse+ button (④). Each press of the button adds 1 rinse cycle.
※ The maximum number of rinse cycles allowed for Spin course is 5.
5) Press the Start/Pause button (⑤).
The door will lock and the drum will start to spin.

natural_image
Close-up of hands washing clothes inside a washing machine (no visible text or symbols)Note:
- The drum may sometimes fill with water during the Spin course. This is to help untangle the items inside the drum and is not a malfunction.
"If you want to dry your laundry without washing or rinsing, use the Spin course.
mini is perfect even for spinning small laundry loads dry."

Baby Care
Use this course to wash and disinfect baby clothes, 100% cotton articles, and any other type of garment that needs to be thoroughly sterilized.

natural_image
Close-up of a white circular device with black interior and red control buttons labeled 1, 2, and 38 (no readable text or symbols beyond labels)
1) Turn on the washer by pressing the Power button (①).
2) Open the drum door.
Press the Door Release button (②) to open the drum door.
3) With the door open, place the laundry inside the washer, add detergent and fabric softener to their respective drawers, and then close the drum door shut.
Make sure to close the detergent and fabric-softener drawers completely before proceeding.
4) Repeatedly press the Course button (③) until Baby Care is selected..
• Water temperature is set to cold, rinse cycles is set to 3, and spin strength is set to high automatically.
To change the number of rinse cycles after selecting a course, press the Rinse+ button (④). Each press of the button adds 1 rinse cycle. ※ The maximum number of rinse cycles allowed for Baby Care course is 8.
Tip
5) Press the Start/Pause button (⑤).
The door will lock, and the washer will start filling with water.

natural_image
Black-and-white photo of a white T-shirt with two baby boots (no text or symbols visible)Note:
- Water temperature is set to 87^ C and does not change.
- If an excessive amount of suds form during the Baby Care course, drain → fill → Start/Pause and repeat to eliminate the suds.
- Do not wash items that are vulnerable to heat.
- To change the settings while the washer is in operation, first pause it by pressing the Start/Pause button and then make the changes.
- The number of rinse cycles is automatically set to 3 to protect the sensitive skin of babies.
Caution:
- Make sure that the items you are about to wash (all cotton, 100% cotton baby clothes, diapers, etc.) will not be damaged by the disinfection process.
- Separate whites and bright colored clothes from dark colored clothes that easily lose their color.
"Use this course to disinfect and wash baby clothes and clothes made out of cotton. Baby Care will destroy germs using heat and rinse the items three times for a clean and safe result you can trust in."

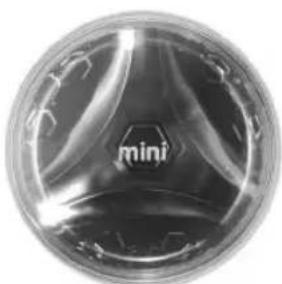
Quick Wash
Use this course for quick washing of small amounts of laundry.

1) Turn on the washer by pressing the Power button (①).
2) Open the drum door.
Press the Door Release button (②) to open the drum door.
3) With the door open, place the laundry inside the washer, add detergent and fabric softener to their respective drawers, and then close the drum door shut.
Make sure to close the detergent and fabric-softener drawers completely before proceeding.
Limit the size of the laundry load to 1kg when using the Quick Wash course.
※ Exceeding the recommended laundry-load size may result in abnormal noise, abnormal vibration, and/or a malfunction.
4) Press the Course button (②) to select Quick Wash.
• Water temperature is set to cold, rinse cycles is set to 1, and spin strength is set to high automatically.
To change the number of rinse cycles after selecting a course, press the Rinse+ button (④).
Each press of the button adds 1 rinse cycle.
※ The maximum number of rinse cycles allowed for Quick Wash course is 5.
Tip
5) Press the Start/Pause button (⑤).
The door will lock, and the washer will start filling with water.
natural_image
Close-up of a transparent plastic container with a central hexagonal logo and the word 'mini' (no additional text or symbols visible)Note:
- To change the settings while the washer is in operation, first pause it by pressing the Start/Pause button and then make the changes.
- Pressing the Power button and then the Start/Pause button starts the wash cycle using the initial auto-selection settings.
Caution:
- If using a detergent that generates a large amount of suds, program in additional rinse cycles.
"When you have a small laundry load and are pressed for time use Quick Wash to wash it clean in just 15 minutes."

Intensive
Use this course to wash heavily soiled clothes.

natural_image
Close-up of a white circular device with black interior and red circular highlights (no readable text or symbols)
1) Turn on the washer by pressing the Power button (①).
2) Open the drum door.
Press the Door Release button (②) to open the drum door.
3) With the drum door open, place the laundry load inside the drum, add the detergent and the fabric softener to their respective drawers, and the close the drum door.
Make sure to close the detergent and fabric-softener drawers completely before proceeding.

To change the number of rinse cycles after selecting a course, press the Rinse+ button (④).
Each press of the button adds 1 rinse cycle.
Water temperatures is set to 40^ C, number of rinse cycles is set to 3, and spin intensity is set to high automatically.
※ The maximum number of rinse cycles allowed for Intensive course is 7.
4) Repeatedly press the Course button (③) until Cold is selected.
5) Press the Start/Pause button (⑤).
The door will lock, and the washer will start filling with water.

natural_image
Stack of white folded towels or towels, no text or symbols visibleNote:
- To change the settings while the washer is in operation, first pause it by pressing the Start/Pause button and then make the changes.
- Pressing the Power button and then the Start/Pause button starts the wash cycle using the initial auto-selection settings.
- Intensive, "Rinse+" 5times, Test Load 2.5kg, 230V, detergent dosing : in 1 litre warm water, Anti-foaming Agent use programme is suitable for soiled load and tested in accordance or in conformity with AS/NZS 2040.1
"Use the Intensive course to wash heavily soiled clothes clean."

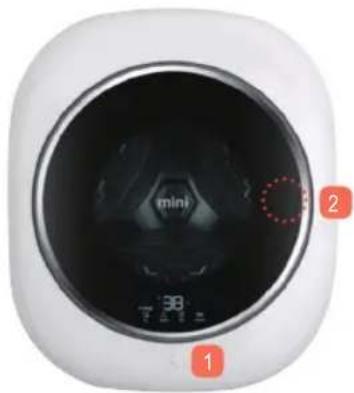
Organic
Select the Organic Course to wash Organic clothes, and clothing requiring steam wash and bleaching.
natural_image
Top-down view of a white appliance with a black vent and red circular annotation (no readable text or symbols)
1) Close the door and load the washer with clothes. Add detergent and fabric softener into the detergent and softener containers respectively and then close the door.
Close detergent and softener containers to close them tight before use.
2) Press the Power button slightly for a second.
3) Press the Course button to select 'Organic'.
The water temperature of 40^ C, three rinse cycles, and Low spin cycle are selected automatically.
Press the Add Rinse button to change the number of rinse cycles.
(Up to 5 rinse cycles are available)

4) Press the Start/Pause button.
The wash cycle starts with water supply after the door is locked.
Note:
- The water temperature is maintained at 40^ C without any changes during the cycle.
- If the steam wash causes excessive bubbles, you can remove them by repeating the process of Drain(spin) → Water Supply(rinse+spin) → Start/Pause.
- Do not wash clothes that are not resistant to heat.
- Press the Start/Pause button and then select other buttons to change the setting while the washer is running.
- Three rinse cycles apply automatically for Organic clothes.
natural_image
Stack of white towels with gray texture, no text or symbols visibleCaution:
- Please check whether the laundry is suitable for steam wash (Organic clothes, etc.)
- Wash white and bright-colored clothes and dark items separately.
"Select the Organic Course to steam wash baby clothes and cotton products. The Course helps clean your laundry hygienically with hot water and three rinse cycles."

Tub Clean
Select this course to wash and clean the washer's drum.
natural_image
Close-up of a white circular device with black interior and red circular highlights, labeled 1, 2, and 38 (no readable text or symbols beyond labels)
1) Turn on the washer by pressing the Power button (①).
2) Open the drum door.
Press the Door Release button (②) to open the drum door.
3) Add powdered bleach into the drum.
Use appropriate amounts of powdered bleach and drum detergent.
※ Do not add powdered bleach or drum detergent into the detergent drawer or the fabric-softener drawer.
※ Adding these products into either of the drawers can cause a malfunction and/or water leak.
4) Repeatedly press the Course button (③) until Normal is selected.
• Water temperature is set to cold, rinse cycles is set to 2, and spin strength is set to high automatically.
To change the number of rinse cycles after selecting a course, press the Rinse+ button (④). Each press of the button adds 1 rinse cycle.
※ The maximum number of rinse cycles allowed for Tub Clean course is 8.
Tip
5) Press the Start/Pause button (⑤).
The door will lock, and the washer will start filling with water.
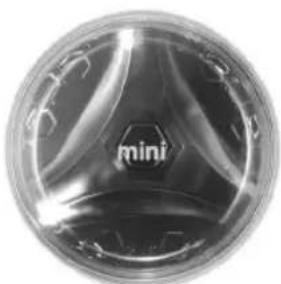
natural_image
Close-up of a transparent plastic dome with a hexagonal hole and 'mini' label (no other text or symbols)Note:
- The only selectable course will be Rinse+.
- Do not, under any circumstance, add laundry to the drum while using the Tub Clean course.
- Run the Tub Clean course once a month.
"Keep the inside of the washer clean to make sure your clothes are washed to their cleanest.
Tub Clean will wash the drum clean for better, cleaner results."

Time Delay
Use this to set the preset function. Determine in how many hours from now you want to start laundry.

natural_image
Top-down view of a white appliance with a black vent and red circular annotation (no readable text or symbols)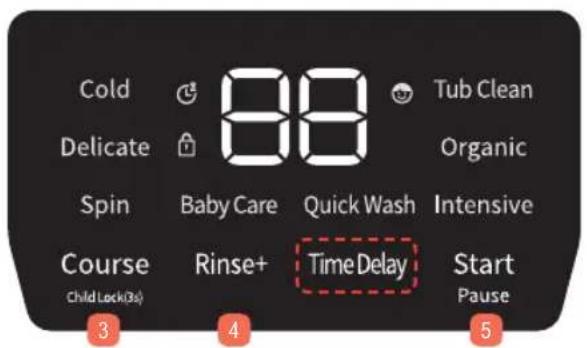
1) Turn on the power by pressing the Power button (①).
2) Open the drum door.
Press the Drum Door Open button (②), and the drum door will open.
3) When the drum door is open, put the laundry in, and close the door.
Completely close the detergent box and the softener box before use. Put the laundry in, and select the desired course.
4) Select the preset time by pressing the Preset button (③). (from one to 18 hours)
5) Press the Start/Pause button (⑤).
After the door is locked and the preset time has elapsed, the laundry will start.
natural_image
Stack of folded white sheets or towels, no text or symbols visibleNote:
- You can set the preset time from one to 18 hours.
- During the preset time, if you press the Start/Pause button, the lamp of the preset course will be turned on.
- The preset time indicates when the preset laundry course will begin. (That is, if you set the preset time to be three hours and press the Start/Pause button, the preset laundry course will start in three hours.)
- You cannot put additional laundry in during the preset time. (In order to add laundry, turn off the power and then turn on again, and put the laundry in.)
"Use this convenient button when you want to start laundry after a certain period of time. You can do the laundry by setting the desired course."
Follow the instructions below to keep your washer clean and working reliably for a long time.

Remember to unplug the power cord before cleaning the washer.
- May result in an electric shock and/or injury.
▶ Do not spray water directly on the product.
- May result in short-circuiting and/or an electric shock.

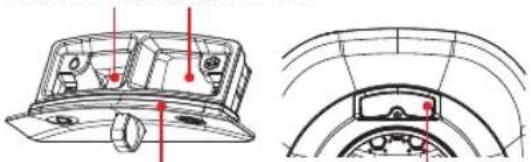
■Cleaning the detergent and fabric-softener drawer
- Insert a finger into the hook at the front of the drawer, pull the drawer out, and then clean it using water.
※ Never use a powdered detergent. (May result in a malfunction and/or leak.)
※ Clean the areas indicated in the diagram.
※ Allowing contaminants and residue to build inside the drawer or around its opening can cause the washer to
Clean the bottom Clean the bottom
natural_image
Technical line drawing of a vehicle dashboard and wheel assembly (no text or symbols)Clean along the edges Clean the rubber seal

■Cleaning the drum
- Rust: Using water containing rust particles, washing metallic objects like hairpins, and filling the drum with water and letting it sit for a long time are all causes of rust formation.
- Rust Removal: Wipe the rust off using a piece of soft cloth or a sponge with a commercially available rust-removal cream. ※ Using a metallic scrubber will further damage the drum.
- Detergent Residue: Prolonged use of the washer without cleaning and use of excessive amounts of detergent cause dark and patchy detergent residue to form inside the drum. This residue can affect the wash quality and even end up staining clothes. Use the Tub Clean course to clean the inside of the drum.

■Cleaning the washer
- Clean the product using a damp piece of cloth.

- Do not use household synthetic detergent, benzene, or paint thinner to clean the product. Doing so will damage the plastic parts.
Caution - If using a chemical cleaning agent, follow all precautions provided by the manufacturer.

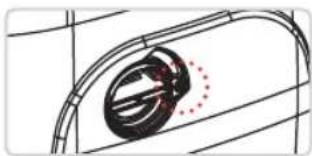
■Cleaning the drainage filter
• The drainage filter needs to be periodically removed and cleaned.
- Unplug the power cord first and make sure the washer is turned off before removing and cleaning the filter.

Some water may leak out from the product. Have a container ready to catch the water and remove the cap filter.
Caution
Removing the filter while the washer is in operation may result in hot water spewing out and causing a burn. Please be careful.
natural_image
Diagram of a mechanical component with a circular feature and dotted line indicating rotation (no text or symbols)① Undo the highlighted screw using a screwdriver.

natural_image
Diagram of two mechanical components with a red arrow indicating motion, no text or symbols present② Grab the cap filter's handle, turn the filter, and pull it towards you to remove it.

natural_image
Diagram of two mechanical components with a curved track and alignment lines (no text or symbols)③ Clean the indicated parts of the cap filter and the filter opening.

Troubleshooting
It's sometimes easy to mistaken an easily remediable issue for a malfunction.
If you are certain the product is malfunctioning, contact your retailer or the service center.
Symptom Cause
| [1] There is a strange odor coming from the drum. | [1] This odor may be caused by a buildup of debris and waste detergent inside the drain.Remember to clean the drain regularly. |
| [2] The washer suddenly stops while washing is in progress. | [2] Refer to error codes E5, E6, E7, and E8 and then contact your retailer or the service center. |
| [3] The drum will not fill with water. | [3] Check to see if the water valve is open. |
| [4] The water drains in the middle of a wash. | [4] Could you have added too much detergent? If there is an excessive amount of suds, the washer will automatically drain itself even during a wash. |
| [5] The drum fills with water during the spin cycle. | [5] If the laundry load is not evenly distributed inside the drum, the washer will fill itself with water to spread the load out and then drain the water back out. |
| [6] It takes a long time to complete a wash. | [6] If the water pressure is too low, it takes longer for the drum to fill with water and consequently longer for the washing to complete. |
| [7] Towels come out stiff. | [7] Because drum washers use gravity to wash clothes, towels washed in one may come out stiff. |
| [8] The washer makes a strange noise during the spin cycle. | If you want your towels soft, please use a fabric softener. |
| [9] The remaining time suddenly goes up. | [8] Make sure the power cord is securely connected to the product. |
| [9] The remaining time goes up if the laundry load is distributed unevenly inside the drum. | |
| [10] The remaining time doesn't change. | [10] The washer fills the drum with cold water and heats it to the configured temperature.In winter, the remaining time may not change until the water heated to the configured temperature. |
| [11] There is a weird noise at the end of the spin cycle. | [11] The noise is caused by the electronic braking system and is not a malfunction. |
| [12] The drum doesn't seem to be filling with enough water during the wash or rinse cycle. (Low-water level) | [12] One of the traits of a drum washer is its ability to do laundry using only a small amount of water.You may not able to see the water level, but this is not a malfunction.Because drum washers soak items in water and tumble them into the air for washing and rinsing, they do not require a lot of water. |
| [13] The drum fills with water again during the wash or rinse cycle. | [13] The washer monitors the amount of water inside the drum and the status of the laundry load and adds extra water into the drum when necessary. Possible causes are as follows:- Additional items have been added to the load.- The water level dropped below the threshold and needed to be replenished. |
| [14] A long time has passed since the spin cycle started, but the drum hasn't moved or is spinning at a slow rate. | [14] If an excessive amount of detergent has been used or there is a problem with the drainage hose, the water might not drain properly from the drum. In this case, the drum will remain stationary or spin at a slow rate until the water has been fully drained and then begin spinning at its normal rate. |
Before Contacting Customer Service
■ Press the button to pause the washer and then go through the following information.
■ To resume operation, press the button again
| Checklist & ActionsSymptom/Displa | ||
 | Nothing displayed | Is the power cord securely plugged in?Is the washer turned on?Did you press the Start/Pause button?Has there been a power outage?Is the fuse blown out or has the circuit breaker been tripped? |
| Not filling with water |  | Is the tap open?Is the water filter clogged?Is the water hose frozen?Has there been a water outage?If able to resolve the issue using the above checklist, please turn the washer off and back on again.(Restarting the washer clears the error message from the display.) |
 |  | Is the drainage hose pointing down?Could you have inserted the drainage hose too deeply inside the drain and ended up blocking it?Is there a bend in the drainage hose?Is the drainage hose positioned too high?Is the drain clogged?Is the drainage filter clogged?If able to resolve the issue using the above checklist, please turn the washer off and back on again.(Restarting the washer clears the error message from the display.) |
 | 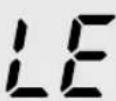 | Is the door open?Is the door securely closed on both ends?If able to resolve the issue using the above checklist, please turn the washer off and back on again.(Restarting the washer clears the error message from the display.) |
 | 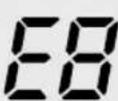 | Contact the service center. |
 |  | Contact the service center. |
| Other issues | If the above checklist does not help resolve the issue, do not touch the internal components and do not attempt to disassemble the product. Instead, unplug the power cord, close the tap, and contact the service center. | |

- If the LE error is shown on the display, open the door and close it again.
If the LE error persists, turn the washer off and back on again to clear it.
Specifications & Wiring Diagram
| Model DWD-M253CW | |
| Net Dimension 550(W) x 600(H) x 324(D) | |
| Net Weight 20.4kg | |
| Standard Water Use (Cold Course) 25l | |
| Power 240V / 50Hz | |
| Standard Load Capacity Wash: 2.5kg | |
| Operational Water Pressure 98.1kPa - 784kPa (1kgf/cm2 - 8kgf/cm2) | |
※ Product specifications may change without notice for quality-improvement purposes.
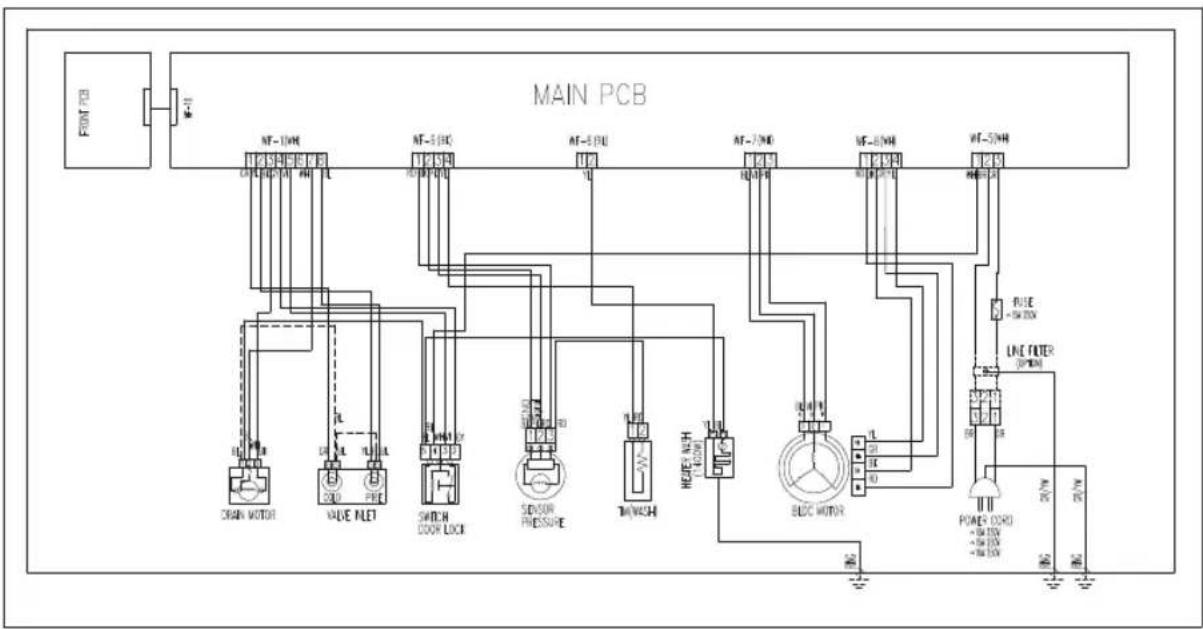
flowchart
graph TD
    A["MAIN PCB"] --> B["FRONT 72"]
    B --> C["MT-10W"]
    B --> D["MT-5HC"]
    B --> E["MT-3PBU"]
    B --> F["MT-2WD"]
    B --> G["MT-1WH"]
    B --> H["MT-1WH"]
    B --> I["MT-1WH"]
    B --> J["MT-1WH"]
    B --> K["MT-1WH"]
    B --> L["MT-1WH"]
    B --> M["MT-1WH"]
    B --> N["MT-1WH"]
    B --> O["MT-1WH"]
    B --> P["MT-1WH"]
    B --> Q["MT-1WH"]
    B --> R["MT-1WH"]
    B --> S["MT-1WH"]
    B --> T["MT-1WH"]
    B --> U["MT-1WH"]
    B --> V["MT-1WH"]
    B --> W["MT-1WH"]
    B --> X["MT-1WH"]
    B --> Y["MT-1WH"]
    B --> Z["MT-1WH"]
    B --> AA["MT-1WH"]
    B --> AB["MT-1WH"]
    B --> AC["MT-1WH"]
    B --> AD["MT-1WH"]
    B --> AE["MT-1WH"]
    B --> AF["MT-1WH"]
    B --> AG["MT-1WH"]
    B --> AH["MT-1WH"]
    B --> AI["MT-1WH"]
    B --> AJ["MT-1WH"]
    B --> AK["MT-1WH"]
    B --> AL["MT-1WH"]
    B --> AM["MT-1WH"]
    B --> AN["MT-1WH"]
    B --> AO["MT-1WH"]
    B --> AP["MT-1WH"]
    B --> AQ["MT-1WH"]
    B --> AR["MT-1WH"]
    B --> AS["MT-1WH"]
    B --> AT["MT-1WH"]
    B --> AU["MT-1WH"]
    B --> AV["MT-1WH"]
    B --> AW["MT-1WH"]
    B --> AX["MT-1WH"]
    B --> AY["MT-1WH"]
    B --> AZ["MT-1WH"]
    B --> BA["MT-1WH"]
    B --> BB["MT-1WH"]
    B --> BC["MT-1WH"]
    B --> BD["MT-1WH"]
    B --> BE["MT-1WH"]
    B --> BF["MT-1WH"]
    B --> BG["MT-1WH"]
    B --> BH["MT-1WH"]
    B --> BI["MT-1WH"]
    B --> BJ["MT-1WH"]
    B --> BK["MT-1WH"]
    B --> BL["MT-1WH"]
    B --> BM["MT-1WH"]
    B --> BN["MT-1WH"]
    B --> BO["MT-1WH"]
    B --> BP["MT-1WH"]
    B --> BQ["MT-1WH"]
    B --> BR["MT-1WH"]
    B --> BS["MT-1WH"]
    B --> BT["MT-1WH"]
    B --> BU["MT-1WH"]
    B --> BV["MT-1WH"]
    B --> BW["MT-1WH"]
    B --> BX["MT-1WH"]
    B --> BY["MT-1WH"]
    B --> BZ["MT-1WH"]
    B --> CA["MT-1WH"]
    B --> CB["MT-1WH"]
    B --> CC["MT-1WH"]
    B --> CD["MT-1WH"]
    B --> CE["MT-1WH"]
    B --> CF["MT-1WH"]
    B --> CG["MT-1WH"]
    B --> CH["MT-1WH"]
    B --> CI["MT-1WH"]
    B --> CJ["MT-1WH"]
    B --> CK["MT-1WH"]
    B --> CL["MT-1WH"]
    B --> CM["MT-1WH"]
    B --> CN["MT-1WH"]
    B --> CO["MT-1WH"]
    B --> CP["MT-1WH"]
    B --> CR["MT-1WH"]
    B --> CS["MT-1WH"]
    B --> CT["MT-1WH"]
    B --> CU["MT-1WH"]
    B --> CV["MT-1WH"]
    B --> CW["MT-1WH"]
    B --> CX["MT-1WH"]
    B --> CY["MT-1WH"]
    B --> CZ["MT-1WH"]

mini
Wall-mounted Drum Washer
The customer may be billed for outcalls concerning problems caused by improper use and/or installation. Please remember to read the user manual.
Service Center 📞400-6666-061

natural_image
Simple gray semicircular shape with white border (no text or symbols)ABOUT THIS MANUAL
(주)신광씨링
광주광역시 서구 하남대로
502번길 14
| 담당 | 이청휘님 | ||
| 브랜드 | WINIA언어영어 | ||
| MODEL | WFWM211C1MA01BCCW | ||
| DWD-M253CW | |||
| BUYER | 호주향 | ||
| MEMO | 총 32p (150×215) | ||
| 17.11.07-17p(표지,표지뒤,2p,3p,4p,12p,15p,16p,17p,18p,19p,20p,21p,22p,23p,24p,28p_1신규작업,2일러스트호환작업1cut)17.11.13-10p(5p,6p,7p,8p,9p,10p,13p,16p,22p,26p)20.08.30-총3p(표지,특징,28)_김정환님20.09.04-총1p(28)_김정환님20.09.09-총1p(28)_김정환님21.04.09-총3p(목차,23.25),사진및일러스트호환:총2cut_고영학님 | |||
NO NEED PRINT

- World's First • South Korea's One and Only
- Wall-mounted Drum Washer
- Ultra-Compact Design
- Practical Functionality
- CONTENTS
- Getting Ready
- Using the Washer
- Checking
- Easy-Breezy Everyday Laundry
- Baby Clothes
- Low-Noise, Low-Vibration
- Clean in Just 29 Minutes
- Delicate Touch
- Emerald Drum
- Specialized Washing Courses
- Children Safety
- Safety Precautions
- Warning
- Caution
- Connect the drainage hose to the drain.
- Connect the water hose and open the tap.
- Plug in the power cord.
- Caution:
- Parts & Components
- Accessories
- Note:
- Washable Items
- Non-Washable Items
- Leather and silk items
- About Laundry Shrinkage
- Preparing Clothes for washing
- Adding Detergent and Fabric Softener
- Adding Detergent
- Wait! Read this before adding the detergent. Do not add detergent to the detergent drawer more
- Adding Fabric Softener
- Appropriate Detergent and Fabric Softener Amounts
- Using Powdered Detergent - Must use a specially formulated p
- Detergent and Fabric Softener Precautions
- Course Selection Guide
- Weight Reference
- Buttons and Functions
- ① Power
- ② Course
- ③ Rinse+
- ④ Time Delay
- ⑤ Start/Pause
- ⑥ LED Display
- ⑦ To open the drum door, turn the washer on by pressing the Power button (①) and then press the Door Release button (⑦).
- Cold
- Delicate
- Spin
- Baby Care
- Quick Wash
- Intensive
- Organic
- Tub Clean
- Time Delay
- ■Cleaning the detergent and fabric-softener drawer
- ■Cleaning the drum
- ■Cleaning the washer
- ■Cleaning the drainage filter
- Troubleshooting
- Before Contacting Customer Service
- Specifications & Wiring Diagram
- ABOUT THIS MANUAL
- NO NEED PRINT
Brand : WINIA
Model : DWD-M253CW
Category : Washing machine